User:The Jacketed Terrapin/Universes by Representation: Difference between revisions
From SmashWiki, the Super Smash Bros. wiki
Jump to navigationJump to search
(At last, all the fighter-based universes are done. Hopefully, it'll be smooth sailing from here on out.) |
Aidanzapunk (talk | contribs) mNo edit summary |
||
| (9 intermediate revisions by 2 users not shown) | |||
| Line 84: | Line 84: | ||
|[[File:SSBU spirit Metal Mario.png|50x50px]][[File:SSBU spirit Boo Mario.png|50x50px]][[File:SSBU spirit Rock Mario.png|50x50px]][[File:SSBU spirit Gold Mario.png|50x50px]][[File:SSBU spirit Fox Luigi.png|50x50px]][[File:SSBU spirit Flying Squirrel Toad.png|50x50px]][[File:SSBU spirit Baby Peach.png|50x50px]][[File:SSBU spirit Cat Princess Peach.png|50x50px]][[File:SSBU spirit Peach (Wedding).png|50x50px]]<br>[[File:SSBU spirit Bowser (Wedding).png|50x50px]][[File:SSBU spirit Toadette.png|50x50px]][[File:SSBU spirit Toadsworth.png|50x50px]][[File:SSBU spirit Mouser.png|50x50px]][[File:SSBU spirit Wart.png|50x50px]][[File:SSBU spirit King Boo.png|50x50px]][[File:SSBU spirit Nipper Plant.png|50x50px]][[File:SSBU spirit Boom Boom.png|50x50px]][[File:SSBU spirit Boom Boom & Pom Pom.png|50x50px]]<br>[[File:SSBU spirit Tatanga.png|50x50px]][[File:SSBU spirit Chargin' Chuck.png|50x50px]][[File:SSBU spirit Wiggler.png|50x50px]][[File:SSBU spirit Dry Bowser.png|50x50px]][[File:SSBU spirit King Bob-omb.png|50x50px]][[File:SSBU spirit Shine Sprite.png|50x50px]][[File:SSBU spirit Piantas.png|50x50px]][[File:SSBU spirit Hungry Luma.png|50x50px]][[File:SSBU spirit Honey Queen.png|50x50px]]<br>[[File:SSBU spirit Sprixie Princesses.png|50x50px]][[File:SSBU spirit Plessie.png|50x50px]][[File:SSBU spirit Cappy.png|50x50px]][[File:SSBU spirit Goo-Goo Buggy.png|50x50px]][[File:SSBU spirit Barrel Train.png|50x50px]][[File:SSBU spirit Bloom Coach.png|50x50px]][[File:SSBU spirit Turbo Yoshi.png|50x50px]][[File:SSBU spirit B Dasher.png|50x50px]][[File:SSBU spirit Standard Kart.png|50x50px]]<br>[[File:SSBU spirit Standard Bike.png|50x50px]][[File:SSBU spirit Cheep Charger.png|50x50px]][[File:SSBU spirit Mach 8.png|50x50px]][[File:SSBU spirit Biddybuggy.png|50x50px]][[File:SSBU spirit Badwagon.png|50x50px]][[File:SSBU spirit City Tripper.png|50x50px]][[File:SSBU spirit Master Cycle.png|50x50px]][[File:SSBU spirit Paper Mario.png|50x50px]][[File:SSBU spirit Paper Bowser.png|50x50px]]<br>[[File:SSBU spirit Paper Bowser (Paper Mario Sticker Star).png|50x50px]][[File:SSBU spirit Kammy Koopa.png|50x50px]][[File:SSBU spirit Vivian.png|50x50px]][[File:SSBU spirit Shadow Queen.png|50x50px]][[File:SSBU spirit Mr. L.png|50x50px]][[File:SSBU spirit Dimentio.png|50x50px]][[File:SSBU spirit Huey.png|50x50px]][[File:SSBU spirit Mallow.png|50x50px]][[File:SSBU spirit Geno.png|50x50px]]<br>[[File:SSBU spirit Prince Peasley.png|50x50px]][[File:SSBU spirit Fawful.png|50x50px]][[File:SSBU spirit Princess Shroob.png|50x50px]][[File:SSBU spirit Starlow.png|50x50px]][[File:SSBU spirit Broque Monsieur.png|50x50px]][[File:SSBU spirit Dreambert.png|50x50px]][[File:SSBU spirit Antasma.png|50x50px]][[File:SSBU spirit Papercraft Mario.png|50x50px]][[File:SSBU spirit Eggplant Man.png|50x50px]]<br>[[File:SSBU spirit Viruses.png|50x50px]][[File:SSBU spirit Wanda.png|50x50px]][[File:SSBU spirit Kid.png|50x50px]][[File:SSBU spirit Professor Elvin Gadd.png|50x50px]][[File:SSBU spirit Poltergust 5000.png|50x50px]][[File:SSBU spirit Polterpup.png|50x50px]][[File:SSBU spirit Perry.png|50x50px]][[File:SSBU spirit Waluigi (Super Mario Strikers).png|50x50px]][[File:SSBU spirit Petey Piranha (Super Mario Strikers).png|50x50px]]<br>[[File:SSBU spirit Mini Mario.png|50x50px]][[File:SSBU spirit Mini Mario & Hammers.png|50x50px]][[File:SSBU spirit MC Ballyhoo & Big Top.png|50x50px]][[File:SSBU spirit Rabbid Peach.png|50x50px]][[File:SSBU spirit Rabbid Mario.png|50x50px]][[File:SSBU spirit Rabbid Kong.png|50x50px]][[File:SSBU spirit Mario (Mario Tennis Aces).png|50x50px]][[File:SSBU spirit Luigi (Mario Tennis Aces).png|50x50px]]<br>[[File:SSBU spirit Dice Block.png|50x50px]][[File:SSBU spirit River Survival.png|50x50px]][[File:SSBU spirit Golden Dash Mushroom.png|50x50px]][[File:SSBU spirit Peachette.png|50x50px]][[File:SSBU spirit Peach (Paper Mario The Origami King).png|50x50px]][[File:SSBU spirit Olivia.png|50x50px]][[File:SSBU spirit King Olly.png|50x50px]]<br>[[File:SSBU spirit Fury Bowser.png|50x50px]][[File:SSBU spirit Giga Cat Mario.png|50x50px]][[File:SSBU spirit Kittens.png|50x50px]][[File:SSBU spirit Mario (Mario Golf Super Rush).png|50x50px]][[File:SSBU spirit Luigi (Mario Golf Super Rush).png|50x50px]][[File:SSBU spirit Peach (Mario Golf Super Rush).png|50x50px]] | |[[File:SSBU spirit Metal Mario.png|50x50px]][[File:SSBU spirit Boo Mario.png|50x50px]][[File:SSBU spirit Rock Mario.png|50x50px]][[File:SSBU spirit Gold Mario.png|50x50px]][[File:SSBU spirit Fox Luigi.png|50x50px]][[File:SSBU spirit Flying Squirrel Toad.png|50x50px]][[File:SSBU spirit Baby Peach.png|50x50px]][[File:SSBU spirit Cat Princess Peach.png|50x50px]][[File:SSBU spirit Peach (Wedding).png|50x50px]]<br>[[File:SSBU spirit Bowser (Wedding).png|50x50px]][[File:SSBU spirit Toadette.png|50x50px]][[File:SSBU spirit Toadsworth.png|50x50px]][[File:SSBU spirit Mouser.png|50x50px]][[File:SSBU spirit Wart.png|50x50px]][[File:SSBU spirit King Boo.png|50x50px]][[File:SSBU spirit Nipper Plant.png|50x50px]][[File:SSBU spirit Boom Boom.png|50x50px]][[File:SSBU spirit Boom Boom & Pom Pom.png|50x50px]]<br>[[File:SSBU spirit Tatanga.png|50x50px]][[File:SSBU spirit Chargin' Chuck.png|50x50px]][[File:SSBU spirit Wiggler.png|50x50px]][[File:SSBU spirit Dry Bowser.png|50x50px]][[File:SSBU spirit King Bob-omb.png|50x50px]][[File:SSBU spirit Shine Sprite.png|50x50px]][[File:SSBU spirit Piantas.png|50x50px]][[File:SSBU spirit Hungry Luma.png|50x50px]][[File:SSBU spirit Honey Queen.png|50x50px]]<br>[[File:SSBU spirit Sprixie Princesses.png|50x50px]][[File:SSBU spirit Plessie.png|50x50px]][[File:SSBU spirit Cappy.png|50x50px]][[File:SSBU spirit Goo-Goo Buggy.png|50x50px]][[File:SSBU spirit Barrel Train.png|50x50px]][[File:SSBU spirit Bloom Coach.png|50x50px]][[File:SSBU spirit Turbo Yoshi.png|50x50px]][[File:SSBU spirit B Dasher.png|50x50px]][[File:SSBU spirit Standard Kart.png|50x50px]]<br>[[File:SSBU spirit Standard Bike.png|50x50px]][[File:SSBU spirit Cheep Charger.png|50x50px]][[File:SSBU spirit Mach 8.png|50x50px]][[File:SSBU spirit Biddybuggy.png|50x50px]][[File:SSBU spirit Badwagon.png|50x50px]][[File:SSBU spirit City Tripper.png|50x50px]][[File:SSBU spirit Master Cycle.png|50x50px]][[File:SSBU spirit Paper Mario.png|50x50px]][[File:SSBU spirit Paper Bowser.png|50x50px]]<br>[[File:SSBU spirit Paper Bowser (Paper Mario Sticker Star).png|50x50px]][[File:SSBU spirit Kammy Koopa.png|50x50px]][[File:SSBU spirit Vivian.png|50x50px]][[File:SSBU spirit Shadow Queen.png|50x50px]][[File:SSBU spirit Mr. L.png|50x50px]][[File:SSBU spirit Dimentio.png|50x50px]][[File:SSBU spirit Huey.png|50x50px]][[File:SSBU spirit Mallow.png|50x50px]][[File:SSBU spirit Geno.png|50x50px]]<br>[[File:SSBU spirit Prince Peasley.png|50x50px]][[File:SSBU spirit Fawful.png|50x50px]][[File:SSBU spirit Princess Shroob.png|50x50px]][[File:SSBU spirit Starlow.png|50x50px]][[File:SSBU spirit Broque Monsieur.png|50x50px]][[File:SSBU spirit Dreambert.png|50x50px]][[File:SSBU spirit Antasma.png|50x50px]][[File:SSBU spirit Papercraft Mario.png|50x50px]][[File:SSBU spirit Eggplant Man.png|50x50px]]<br>[[File:SSBU spirit Viruses.png|50x50px]][[File:SSBU spirit Wanda.png|50x50px]][[File:SSBU spirit Kid.png|50x50px]][[File:SSBU spirit Professor Elvin Gadd.png|50x50px]][[File:SSBU spirit Poltergust 5000.png|50x50px]][[File:SSBU spirit Polterpup.png|50x50px]][[File:SSBU spirit Perry.png|50x50px]][[File:SSBU spirit Waluigi (Super Mario Strikers).png|50x50px]][[File:SSBU spirit Petey Piranha (Super Mario Strikers).png|50x50px]]<br>[[File:SSBU spirit Mini Mario.png|50x50px]][[File:SSBU spirit Mini Mario & Hammers.png|50x50px]][[File:SSBU spirit MC Ballyhoo & Big Top.png|50x50px]][[File:SSBU spirit Rabbid Peach.png|50x50px]][[File:SSBU spirit Rabbid Mario.png|50x50px]][[File:SSBU spirit Rabbid Kong.png|50x50px]][[File:SSBU spirit Mario (Mario Tennis Aces).png|50x50px]][[File:SSBU spirit Luigi (Mario Tennis Aces).png|50x50px]]<br>[[File:SSBU spirit Dice Block.png|50x50px]][[File:SSBU spirit River Survival.png|50x50px]][[File:SSBU spirit Golden Dash Mushroom.png|50x50px]][[File:SSBU spirit Peachette.png|50x50px]][[File:SSBU spirit Peach (Paper Mario The Origami King).png|50x50px]][[File:SSBU spirit Olivia.png|50x50px]][[File:SSBU spirit King Olly.png|50x50px]]<br>[[File:SSBU spirit Fury Bowser.png|50x50px]][[File:SSBU spirit Giga Cat Mario.png|50x50px]][[File:SSBU spirit Kittens.png|50x50px]][[File:SSBU spirit Mario (Mario Golf Super Rush).png|50x50px]][[File:SSBU spirit Luigi (Mario Golf Super Rush).png|50x50px]][[File:SSBU spirit Peach (Mario Golf Super Rush).png|50x50px]] | ||
|[[File:SSBU 1-Up Mushroom Hat.jpg|50px]][[File:SSBU Builder Mario's Hat.jpg|50px]][[File:SSBU Cappy Hat.jpg|50x50px]][[File:SSBU Chomp Hat.jpg|50px]][[File:SSBU Daisy's Crown.jpg|50px]]<br>[[File:SSBU Geno Hat.jpg|50px]][[File:SSBU Luigi's Cap.jpg|50px]][[File:SSBU Mario's Cap.jpg|50px]][[File:SSBU Peach's Crown.jpg|50px]][[File:SSBU Shy Guy Mask.jpg|50px]]<br>[[File:SSBU Spiny Hat.jpg|50px]][[File:SSBU Super Mushroom Hat.jpg|50px]][[File:SSBU Toad Hat.jpg|50px]][[File:SSBU Waluigi's Cap.jpg|50px]]<br>[[File:SSBU Builder Mario's Outfit.jpg|50px]][[File:SSBU Toad Outfit.jpg|50px]][[File:SSBU Toad Outfit Female.jpg|50px]][[File:SSBU Geno Outfit.jpg|50px]] | |[[File:SSBU 1-Up Mushroom Hat.jpg|50px]][[File:SSBU Builder Mario's Hat.jpg|50px]][[File:SSBU Cappy Hat.jpg|50x50px]][[File:SSBU Chomp Hat.jpg|50px]][[File:SSBU Daisy's Crown.jpg|50px]]<br>[[File:SSBU Geno Hat.jpg|50px]][[File:SSBU Luigi's Cap.jpg|50px]][[File:SSBU Mario's Cap.jpg|50px]][[File:SSBU Peach's Crown.jpg|50px]][[File:SSBU Shy Guy Mask.jpg|50px]]<br>[[File:SSBU Spiny Hat.jpg|50px]][[File:SSBU Super Mushroom Hat.jpg|50px]][[File:SSBU Toad Hat.jpg|50px]][[File:SSBU Waluigi's Cap.jpg|50px]]<br>[[File:SSBU Builder Mario's Outfit.jpg|50px]][[File:SSBU Toad Outfit.jpg|50px]][[File:SSBU Toad Outfit Female.jpg|50px]][[File:SSBU Geno Outfit.jpg|50px]] | ||
|•{{SSBUMusicLink|Super Mario Bros.|Ground Theme - Super Mario Bros.}}<br>•{{SSBUMusicLink|Super Mario Bros.|Ground Theme - Super Mario Bros. (64)}}<br>•{{SSBUMusicLink|Super Mario Bros.|Ground Theme - Super Mario Bros. (Melee)}}<br>•{{SSBUMusicLink|Super Mario Bros.|Ground Theme - Super Mario Bros. (Brawl)}}<br>•{{SSBUMusicLink|Super Mario Bros.|Ground Theme (Band Performance) - Super Mario Bros.}}<br>•{{SSBUMusicLink|Super Mario Bros.|Ground Theme / Underground Theme - Super Mario Bros.}}<br>•{{SSBUMusicLink|Super Mario Bros.|Underground Theme - Super Mario Bros.}}<br>•{{SSBUMusicLink|Super Mario Bros.|Underwater Theme - Super Mario Bros.}}<br>•{{SSBUMusicLink|Super Mario Bros.|Super Mario Bros. Medley}}<br>•{{SSBUMusicLink|Super Mario Bros.|Super Mario Bros.: The Lost Levels Medley}}<br>•{{SSBUMusicLink|Super Mario Bros.|Ground Theme - Super Mario Bros. 2 (Remix)}}<br>•{{SSBUMusicLink|Super Mario Bros.|Ground Theme - Super Mario Bros. 2}}<br>•{{SSBUMusicLink|Super Mario Bros.|Rolling Hills A}}<br>•{{SSBUMusicLink|Super Mario Bros.|Boss Theme - Super Mario Bros. 2}}<br>•{{SSBUMusicLink|Super Mario Bros.|Ground Theme - Super Mario Bros. 3 (Melee)}}<br>•{{SSBUMusicLink|Super Mario Bros.|Ground Theme - Super Mario Bros. 3 (Remix)}}<br>•{{SSBUMusicLink|Super Mario Bros.|Super Mario Bros. 3 Medley}}<br>•{{SSBUMusicLink|Super Mario Bros.|Fortress Boss - Super Mario Bros. 3}}<br>•{{SSBUMusicLink|Super Mario Bros.|Airship Theme - Super Mario Bros. 3}}<br>•{{SSBUMusicLink|Super Mario Bros.|King Bowser - Super Mario Bros. 3}}<br>•{{SSBUMusicLink|Super Mario Bros.|Underground Theme - Super Mario Land}}<br>•{{SSBUMusicLink|Super Mario Bros.|Title/Ending - Super Mario World}}<br>•{{SSBUMusicLink|Super Mario Bros.|Ground Theme - Super Mario World}}<br>•{{SSBUMusicLink|Super Mario Bros.|Super Mario World Medley}}<br>•{{SSBUMusicLink|Super Mario Bros.|Castle / Boss Fortress - Super Mario World / SMB 3}}<br>•{{SSBUMusicLink|Super Mario Bros.|Fortress Boss - Super Mario World}}<br>•{{SSBUMusicLink|Super Mario Bros.|Main Theme - Super Mario 64 (Remix)}}<br>•{{SSBUMusicLink|Super Mario Bros.|Main Theme - Super Mario 64}}<br>•{{SSBUMusicLink|Super Mario Bros.|Slide (Remix)}}<br>•{{SSBUMusicLink|Super Mario Bros.|Slide}}<br>•{{SSBUMusicLink|Super Mario Bros.|Delfino Plaza (Remix)}}<br>•{{SSBUMusicLink|Super Mario Bros.|Delfino Plaza}}<br>•{{SSBUMusicLink|Super Mario Bros.|Ricco Harbor}}<br>•{{SSBUMusicLink|Super Mario Bros.|Main Theme - New Super Mario Bros.}}<br>•{{SSBUMusicLink|Super Mario Bros.|Super Mario Galaxy}}<br>•{{SSBUMusicLink|Super Mario Bros.|Egg Planet (Remix)}}<br>•{{SSBUMusicLink|Super Mario Bros.|Egg Planet}}<br>•{{SSBUMusicLink|Super Mario Bros.|Rosalina in the Observatory / Luma's Theme}}<br>•{{SSBUMusicLink|Super Mario Bros.|Gusty Garden Galaxy}}<br>•{{SSBUMusicLink|Super Mario Bros.|Champion Road}}<br>•{{SSBUMusicLink|Super Mario Bros.|Theme of SMG2}}<br>•{{SSBUMusicLink|Super Mario Bros.|The Starship Sails}}<br>•{{SSBUMusicLink|Super Mario Bros.|Sky Station}}<br>•{{SSBUMusicLink|Super Mario Bros.|Melty Monster}}<br>•{{SSBUMusicLink|Super Mario Bros.|Bowser's Galaxy Generator}}<br>•{{SSBUMusicLink|Super Mario Bros.|Fated Battle}}<br>•{{SSBUMusicLink|Super Mario Bros.|Ground Theme / Underwater Theme - Super Mario 3D Land}}<br>•{{SSBUMusicLink|Super Mario Bros.|Athletic Theme - New Super Mario Bros. 2}}<br>•{{SSBUMusicLink|Super Mario Bros.|Ground Theme - New Super Mario Bros. 2}}<br>•{{SSBUMusicLink|Super Mario Bros.|Ground Theme - New Super Mario Bros. U}}<br>•{{SSBUMusicLink|Super Mario Bros.|Super Bell Hill}}<br>•{{SSBUMusicLink|Super Mario Bros.|The Great Tower Showdown 2}}<br>•{{SSBUMusicLink|Super Mario Bros.|Title Theme - Super Mario Maker}}<br>•{{SSBUMusicLink|Super Mario Bros.|Fossil Falls}}<br>•{{SSBUMusicLink|Super Mario Bros.|New Donk City}}<br>•{{SSBUMusicLink|Super Mario Bros.|Jump Up, Super Star!}}<br>•{{SSBUMusicLink|Super Mario Bros.|Steam Gardens}}<br>•{{SSBUMusicLink|Super Mario Bros.|Underground Moon Caverns}}<br>•{{SSBUMusicLink|Super Mario Bros.|Break Free (Lead the Way)}}<br>•{{SSBUMusicLink|Super Mario Bros.|Gritzy Desert}}<br>•{{SSBUMusicLink|Super Mario Bros.|Tough Guy Alert!}}<br>•{{SSBUMusicLink|Super Mario Bros.|The Grand Finale}}<br>•{{SSBUMusicLink|Super Mario Bros.|Paper Mario Medley}}<br>•{{SSBUMusicLink|Super Mario Bros.|Try, Try Again}}<br>•{{SSBUMusicLink|Super Mario Bros.|Time's Running Out!}}<br>•{{SSBUMusicLink|Super Mario Bros.|Mixed-Up Scramble}}<br>•{{SSBUMusicLink|Super Mario Bros.|Attack and Run!}}<br>•{{SSBUMusicLink|Super Mario Bros.|Battle! - Paper Mario: Color Splash}}<br>•{{SSBUMusicLink|Super Mario Bros.|This is Minion Turf!}}<br>•{{SSBUMusicLink|Super Mario Bros.|Pandemonium}}<br>•{{SSBUMusicLink|Super Mario Bros.|Title Theme - Mario Party: Island Tour}}<br>•{{SSBUMusicLink|Super Mario Bros.|Rocket Road}}<br>•{{SSBUMusicLink|Super Mario Bros.|Mario Tennis / Mario Golf}}<br>•{{SSBUMusicLink|Super Mario Bros.|World Tour}}<br>•{{SSBUMusicLink|Super Mario Bros.|Stadium Theme - Mario Tennis: Ultra Smash}}<br>•{{SSBUMusicLink|Super Mario Bros.|Kingdom Stadium: Night}}<br>•{{SSBUMusicLink|Super Mario Bros.|Country Field: away team}}<br>•{{SSBUMusicLink|Super Mario Bros.|Title Theme - Mario Tennis Aces}}<br>•{{SSBUMusicLink|Super Mario Bros.|Stadium Theme - Mario Tennis Aces}}<br>•{{SSBUMusicLink|Super Mario Bros.|Main Theme - Luigi's Mansion}}<br>•{{SSBUMusicLink|Super Mario Bros.|Main Theme - Luigi's Mansion (Brawl)}}<br>•{{SSBUMusicLink|Super Mario Bros.|Luigi's Mansion Series Medley}}<br>•{{SSBUMusicLink|Super Mario Bros.|On the Hunt -Gloomy Manor Ver.- (Instrumental)}}<br>•{{SSBUMusicLink|Super Mario Bros.|Mario Bros.}}<br>•{{SSBUMusicLink|Super Mario Bros.|Fever}}<br>•{{SSBUMusicLink|Super Mario Bros.|Chill (Brawl)}}<br>•{{SSBUMusicLink|Super Mario Bros.|Chill (for 3DS / Wii U)}}<br>•{{SSBUMusicLink|Super Mario Bros.|Mario Paint Medley}}<br>•{{SSBUMusicLink|Super Mario Bros.|Plucky Pass Beginnings}}<br>•{{SSBUMusicLink|Super Mario Bros.|The King of Pyropuff Peak}}<br>•{{SSBUMusicLink|Super Mario Bros.|Title Theme - Mario vs. Donkey Kong: Tipping Stars}}<br>•{{SSBUMusicLink|Super Mario Bros.|Ground Theme - Super Mario series}}<br>•{{SSBUMusicLink| | |•{{SSBUMusicLink|Super Mario Bros.|Ground Theme - Super Mario Bros.}}<br>•{{SSBUMusicLink|Super Mario Bros.|Ground Theme - Super Mario Bros. (64)}}<br>•{{SSBUMusicLink|Super Mario Bros.|Ground Theme - Super Mario Bros. (Melee)}}<br>•{{SSBUMusicLink|Super Mario Bros.|Ground Theme - Super Mario Bros. (Brawl)}}<br>•{{SSBUMusicLink|Super Mario Bros.|Ground Theme (Band Performance) - Super Mario Bros.}}<br>•{{SSBUMusicLink|Super Mario Bros.|Ground Theme / Underground Theme - Super Mario Bros.}}<br>•{{SSBUMusicLink|Super Mario Bros.|Underground Theme - Super Mario Bros.}}<br>•{{SSBUMusicLink|Super Mario Bros.|Underwater Theme - Super Mario Bros.}}<br>•{{SSBUMusicLink|Super Mario Bros.|Super Mario Bros. Medley}}<br>•{{SSBUMusicLink|Super Mario Bros.|Super Mario Bros.: The Lost Levels Medley}}<br>•{{SSBUMusicLink|Super Mario Bros.|Ground Theme - Super Mario Bros. 2 (Remix)}}<br>•{{SSBUMusicLink|Super Mario Bros.|Ground Theme - Super Mario Bros. 2}}<br>•{{SSBUMusicLink|Super Mario Bros.|Rolling Hills A}}<br>•{{SSBUMusicLink|Super Mario Bros.|Boss Theme - Super Mario Bros. 2}}<br>•{{SSBUMusicLink|Super Mario Bros.|Ground Theme - Super Mario Bros. 3 (Melee)}}<br>•{{SSBUMusicLink|Super Mario Bros.|Ground Theme - Super Mario Bros. 3 (Remix)}}<br>•{{SSBUMusicLink|Super Mario Bros.|Super Mario Bros. 3 Medley}}<br>•{{SSBUMusicLink|Super Mario Bros.|Fortress Boss - Super Mario Bros. 3}}<br>•{{SSBUMusicLink|Super Mario Bros.|Airship Theme - Super Mario Bros. 3}}<br>•{{SSBUMusicLink|Super Mario Bros.|King Bowser - Super Mario Bros. 3}}<br>•{{SSBUMusicLink|Super Mario Bros.|Underground Theme - Super Mario Land}}<br>•{{SSBUMusicLink|Super Mario Bros.|Title/Ending - Super Mario World}}<br>•{{SSBUMusicLink|Super Mario Bros.|Ground Theme - Super Mario World}}<br>•{{SSBUMusicLink|Super Mario Bros.|Super Mario World Medley}}<br>•{{SSBUMusicLink|Super Mario Bros.|Castle / Boss Fortress - Super Mario World / SMB 3}}<br>•{{SSBUMusicLink|Super Mario Bros.|Fortress Boss - Super Mario World}}<br>•{{SSBUMusicLink|Super Mario Bros.|Main Theme - Super Mario 64 (Remix)}}<br>•{{SSBUMusicLink|Super Mario Bros.|Main Theme - Super Mario 64}}<br>•{{SSBUMusicLink|Super Mario Bros.|Slide (Remix)}}<br>•{{SSBUMusicLink|Super Mario Bros.|Slide}}<br>•{{SSBUMusicLink|Super Mario Bros.|Delfino Plaza (Remix)}}<br>•{{SSBUMusicLink|Super Mario Bros.|Delfino Plaza}}<br>•{{SSBUMusicLink|Super Mario Bros.|Ricco Harbor}}<br>•{{SSBUMusicLink|Super Mario Bros.|Main Theme - New Super Mario Bros.}}<br>•{{SSBUMusicLink|Super Mario Bros.|Super Mario Galaxy}}<br>•{{SSBUMusicLink|Super Mario Bros.|Egg Planet (Remix)}}<br>•{{SSBUMusicLink|Super Mario Bros.|Egg Planet}}<br>•{{SSBUMusicLink|Super Mario Bros.|Rosalina in the Observatory / Luma's Theme}}<br>•{{SSBUMusicLink|Super Mario Bros.|Gusty Garden Galaxy}}<br>•{{SSBUMusicLink|Super Mario Bros.|Champion Road}}<br>•{{SSBUMusicLink|Super Mario Bros.|Theme of SMG2}}<br>•{{SSBUMusicLink|Super Mario Bros.|The Starship Sails}}<br>•{{SSBUMusicLink|Super Mario Bros.|Sky Station}}<br>•{{SSBUMusicLink|Super Mario Bros.|Melty Monster}}<br>•{{SSBUMusicLink|Super Mario Bros.|Bowser's Galaxy Generator}}<br>•{{SSBUMusicLink|Super Mario Bros.|Fated Battle}}<br>•{{SSBUMusicLink|Super Mario Bros.|Ground Theme / Underwater Theme - Super Mario 3D Land}}<br>•{{SSBUMusicLink|Super Mario Bros.|Athletic Theme - New Super Mario Bros. 2}}<br>•{{SSBUMusicLink|Super Mario Bros.|Ground Theme - New Super Mario Bros. 2}}<br>•{{SSBUMusicLink|Super Mario Bros.|Ground Theme - New Super Mario Bros. U}}<br>•{{SSBUMusicLink|Super Mario Bros.|Super Bell Hill}}<br>•{{SSBUMusicLink|Super Mario Bros.|The Great Tower Showdown 2}}<br>•{{SSBUMusicLink|Super Mario Bros.|Title Theme - Super Mario Maker}}<br>•{{SSBUMusicLink|Super Mario Bros.|Fossil Falls}}<br>•{{SSBUMusicLink|Super Mario Bros.|New Donk City}}<br>•{{SSBUMusicLink|Super Mario Bros.|Jump Up, Super Star!}}<br>•{{SSBUMusicLink|Super Mario Bros.|Steam Gardens}}<br>•{{SSBUMusicLink|Super Mario Bros.|Underground Moon Caverns}}<br>•{{SSBUMusicLink|Super Mario Bros.|Break Free (Lead the Way)}}<br>•{{SSBUMusicLink|Super Mario Bros.|Gritzy Desert}}<br>•{{SSBUMusicLink|Super Mario Bros.|Tough Guy Alert!}}<br>•{{SSBUMusicLink|Super Mario Bros.|The Grand Finale}}<br>•{{SSBUMusicLink|Super Mario Bros.|Paper Mario Medley}}<br>•{{SSBUMusicLink|Super Mario Bros.|Try, Try Again}}<br>•{{SSBUMusicLink|Super Mario Bros.|Time's Running Out!}}<br>•{{SSBUMusicLink|Super Mario Bros.|Mixed-Up Scramble}}<br>•{{SSBUMusicLink|Super Mario Bros.|Attack and Run!}}<br>•{{SSBUMusicLink|Super Mario Bros.|Battle! - Paper Mario: Color Splash}}<br>•{{SSBUMusicLink|Super Mario Bros.|This is Minion Turf!}}<br>•{{SSBUMusicLink|Super Mario Bros.|Pandemonium}}<br>•{{SSBUMusicLink|Super Mario Bros.|Title Theme - Mario Party: Island Tour}}<br>•{{SSBUMusicLink|Super Mario Bros.|Rocket Road}}<br>•{{SSBUMusicLink|Super Mario Bros.|Mario Tennis / Mario Golf}}<br>•{{SSBUMusicLink|Super Mario Bros.|World Tour}}<br>•{{SSBUMusicLink|Super Mario Bros.|Stadium Theme - Mario Tennis: Ultra Smash}}<br>•{{SSBUMusicLink|Super Mario Bros.|Kingdom Stadium: Night}}<br>•{{SSBUMusicLink|Super Mario Bros.|Country Field: away team}}<br>•{{SSBUMusicLink|Super Mario Bros.|Title Theme - Mario Tennis Aces}}<br>•{{SSBUMusicLink|Super Mario Bros.|Stadium Theme - Mario Tennis Aces}}<br>•{{SSBUMusicLink|Super Mario Bros.|Main Theme - Luigi's Mansion}}<br>•{{SSBUMusicLink|Super Mario Bros.|Main Theme - Luigi's Mansion (Brawl)}}<br>•{{SSBUMusicLink|Super Mario Bros.|Luigi's Mansion Series Medley}}<br>•{{SSBUMusicLink|Super Mario Bros.|On the Hunt -Gloomy Manor Ver.- (Instrumental)}}<br>•{{SSBUMusicLink|Super Mario Bros.|Mario Bros.}}<br>•{{SSBUMusicLink|Super Mario Bros.|Fever}}<br>•{{SSBUMusicLink|Super Mario Bros.|Chill (Brawl)}}<br>•{{SSBUMusicLink|Super Mario Bros.|Chill (for 3DS / Wii U)}}<br>•{{SSBUMusicLink|Super Mario Bros.|Mario Paint Medley}}<br>•{{SSBUMusicLink|Super Mario Bros.|Plucky Pass Beginnings}}<br>•{{SSBUMusicLink|Super Mario Bros.|The King of Pyropuff Peak}}<br>•{{SSBUMusicLink|Super Mario Bros.|Title Theme - Mario vs. Donkey Kong: Tipping Stars}}<br>•{{SSBUMusicLink|Super Mario Bros.|Ground Theme - Super Mario series}}<br>•{{SSBUMusicLink|Mario Kart|Mario Circuit - Super Mario Kart}}<br>•{{SSBUMusicLink|Mario Kart|Luigi Raceway - Mario Kart 64}}<br>•{{SSBUMusicLink|Mario Kart|Rainbow Road - Mario Kart: Double Dash!!}}<br>•{{SSBUMusicLink|Mario Kart|Waluigi Pinball - Mario Kart DS}}<br>•{{SSBUMusicLink|Mario Kart|Mushroom Gorge - Mario Kart Wii}}<br>•{{SSBUMusicLink|Mario Kart|Circuit - Mario Kart 7}}<br>•{{SSBUMusicLink|Mario Kart|Rainbow Road - Mario Kart 7}}<br>•{{SSBUMusicLink|Mario Kart|Rainbow Road Medley}}<br>•{{SSBUMusicLink|Mario Kart|Mario Kart Stadium - Mario Kart 8}}<br>•{{SSBUMusicLink|Mario Kart|Mario Circuit - Mario Kart 8}}<br>•{{SSBUMusicLink|Mario Kart|Cloudtop Cruise - Mario Kart 8}}<br>•{{SSBUMusicLink|Mario Kart|Rainbow Road - Mario Kart 8}}<br>•{{SSBUMusicLink|Mario Kart|Excitebike - Mario Kart 8}}<br>•{{SSBUMusicLink|Mario Kart|Dragon Driftway}}<br>•{{SSBUMusicLink|Mario Kart|Ice Ice Output}}<br>•{{SSBUMusicLink|Other|Famicom Medley}} (''Dr. Mario'' portion) | ||
|} | |} | ||
</div> | </div> | ||
| Line 823: | Line 823: | ||
!Stage Cameos | !Stage Cameos | ||
!Trophies | !Trophies | ||
! | !Stickers | ||
!Music | !Music | ||
|- | |- | ||
| Line 1,260: | Line 1,260: | ||
!Fighters | !Fighters | ||
!Fighter Cameos | !Fighter Cameos | ||
! | !Stickers/Spirits | ||
!Music | !Music | ||
|- | |- | ||
| Line 1,302: | Line 1,302: | ||
| | | | ||
| | | | ||
|[[File:Tom Nook Trophy Melee.png|50px]][[File:Totakeke Trophy Melee.png|50px]][[File:Mr. Resetti Trophy Melee.png|50px]] | |||
| | | | ||
| | | | ||
| Line 1,325: | Line 1,325: | ||
|[[File:LloidTrophyWiiU.png|50px|link=Lloid]][[File:TomNookTrophyWiiU.png|50px|link=Tom Nook]][[File:TimmyTommyNookTrophyWiiU.png|50px|link=Timmy & Tommy]] | |[[File:LloidTrophyWiiU.png|50px|link=Lloid]][[File:TomNookTrophyWiiU.png|50px|link=Tom Nook]][[File:TimmyTommyNookTrophyWiiU.png|50px|link=Timmy & Tommy]] | ||
|[[File:SSB4_Icon.png|50px]]<br>[[File:TortimerTrophy3DS.png|50px]] | |[[File:SSB4_Icon.png|50px]]<br>[[File:TortimerTrophy3DS.png|50px]] | ||
----[[File:SSB4-3_Icon.png|50px]]<br>[[File:Kapp'nTrophy3DS.png|50px]][[File:LeilaniTrophy3DS.png|50px]]<br>[[File:GramsTrophy3DS.png|50px]][[File:TortimerIslandTrophy3DS.png|50px|link=Tortimer Island]] | ----[[File:SSB4-3_Icon.png|50px]]<br>[[File:Kapp'nTrophy3DS.png|50px]][[File:LeilaniTrophy3DS.png|50px]][[File:LeilaTrophy3DS.png|50px]]<br>[[File:GramsTrophy3DS.png|50px]][[File:TortimerIslandTrophy3DS.png|50px|link=Tortimer Island]] | ||
----[[File:SSB4-U_Icon.png|50px]]<br>[[File:RoverTrophyWiiU.png|50px]][[File:PhyllisPellyTrophyWiiU.png|50px]][[File:JoanTrophyWiiU.png|50px]][[File:WendellTrophyWiiU.png|50px]][[File:CrazyReddTrophyWiiU.png|50px]]<br>[[File:GracieTrophyWiiU.png|50px]][[File:SaharahTrophyWiiU.png|50px]][[File:KatrinaTrophyWiiU.png|50px]][[File:DonResettiTrophyWiiU.png|50px]][[File:AbleSistersTrophyWiiU.png|50px]]<br>[[File:BlathersTrophyWiiU.png|50px]][[File:WispTrophyWiiU.png|50px]][[File:HarrietTrophyWiiU.png|50px]][[File:CelesteTrophyWiiU.png|50px]][[File:BrewsterTrophyWiiU.png|50px]]<br>[[File:LyleTrophyWiiU.png|50px]][[File:PascalTrophyWiiU.png|50px]][[File:DrShrunkTrophyWiiU.png|50px]][[File:KatieTrophyWiiU.png|50px]][[File:SerenaTrophyWiiU.png|50px]]<br>[[File:FrillardTrophyWiiU.png|50px]][[File:KicksTrophyWiiU.png|50px]][[File:PhineasTrophyWiiU.png|50px]][[File:BusToTheCityTrophyWiiU.png|50px]][[File:TownAndCityTrophyWiiU.png|50px|link=Town and City]]<br>[[File:KKSliderTrophyWiiU.png|50px]][[File:MrResettiTrophyWiiU.png|50px]][[File:PeteTrophy3DS.png|50px]][[File:CopperBookerTrophy3DS.png|50px]][[File:GulliverTrophy3DS.png|50px]]<br>[[File:ChipTrophy3DS.png|50px]][[File:BlancaTrophy3DS.png|50px]][[File:NatTrophy3DS.png|50px]] | ----[[File:SSB4-U_Icon.png|50px]]<br>[[File:RoverTrophyWiiU.png|50px]][[File:PhyllisPellyTrophyWiiU.png|50px]][[File:JoanTrophyWiiU.png|50px]][[File:WendellTrophyWiiU.png|50px]][[File:CrazyReddTrophyWiiU.png|50px]]<br>[[File:GracieTrophyWiiU.png|50px]][[File:SaharahTrophyWiiU.png|50px]][[File:KatrinaTrophyWiiU.png|50px]][[File:DonResettiTrophyWiiU.png|50px]][[File:AbleSistersTrophyWiiU.png|50px]]<br>[[File:BlathersTrophyWiiU.png|50px]][[File:WispTrophyWiiU.png|50px]][[File:HarrietTrophyWiiU.png|50px]][[File:CelesteTrophyWiiU.png|50px]][[File:BrewsterTrophyWiiU.png|50px]]<br>[[File:LyleTrophyWiiU.png|50px]][[File:PascalTrophyWiiU.png|50px]][[File:DrShrunkTrophyWiiU.png|50px]][[File:KatieTrophyWiiU.png|50px]][[File:SerenaTrophyWiiU.png|50px]]<br>[[File:FrillardTrophyWiiU.png|50px]][[File:KicksTrophyWiiU.png|50px]][[File:PhineasTrophyWiiU.png|50px]][[File:BusToTheCityTrophyWiiU.png|50px]][[File:TownAndCityTrophyWiiU.png|50px|link=Town and City]]<br>[[File:KKSliderTrophyWiiU.png|50px]][[File:MrResettiTrophyWiiU.png|50px]][[File:PeteTrophy3DS.png|50px]][[File:CopperBookerTrophy3DS.png|50px]][[File:GulliverTrophy3DS.png|50px]]<br>[[File:ChipTrophy3DS.png|50px]][[File:BlancaTrophy3DS.png|50px]][[File:NatTrophy3DS.png|50px]] | ||
|[[File:SSB4-3_Icon.png|50px]]<br>[[File:KKSliderTrophy3DS.png|50px]][[File:MrResettiTrophy3DS.png|50px]][[File:RoverTrophy3DS.png|50px]][[File:PeteTrophy3DS.png|50px]][[File:PorterTrophy3DS.png|50px]][[File:CopperBookerTrophy3DS.png|50px]]<br>[[File:GulliverTrophy3DS.png|50px]][[File:CrazyReddTrophy3DS.png|50px]][[File:ChipTrophy3DS.png|50px]][[File:JackTrophy3DS.png|50px]][[File:AbleSistersTrophy3DS.png|50px]][[File:BlancaTrophy3DS.png|50px]]<br>[[File:FranklinTrophy3DS.png|50px]][[File:DrShrunkTrophy3DS.png|50px]][[File:KicksTrophy3DS.png|50px]][[File:NatTrophy3DS.png|50px]][[File:ZipperTBunnyTrophy3DS.png|50px]][[File:PaveTrophy3DS.png|50px]]<br>[[File:IsabelleSweaterTrophy3DS.png|50px]][[File:DigbyTrophy3DS.png|50px]][[File:ReeseCyrusTrophy3DS.png|50px]][[File:LeifTrophy3DS.png|50px]][[File:LunaTrophy3DS.png|50px]][[File:SnowmanFamilyTrophy3DS.png|50px]] | |[[File:SSB4-3_Icon.png|50px]]<br>[[File:KKSliderTrophy3DS.png|50px]][[File:MrResettiTrophy3DS.png|50px]][[File:RoverTrophy3DS.png|50px]][[File:PeteTrophy3DS.png|50px]][[File:PorterTrophy3DS.png|50px]][[File:CopperBookerTrophy3DS.png|50px]]<br>[[File:GulliverTrophy3DS.png|50px]][[File:CrazyReddTrophy3DS.png|50px]][[File:ChipTrophy3DS.png|50px]][[File:JackTrophy3DS.png|50px]][[File:AbleSistersTrophy3DS.png|50px]][[File:BlancaTrophy3DS.png|50px]]<br>[[File:FranklinTrophy3DS.png|50px]][[File:DrShrunkTrophy3DS.png|50px]][[File:KicksTrophy3DS.png|50px]][[File:NatTrophy3DS.png|50px]][[File:ZipperTBunnyTrophy3DS.png|50px]][[File:PaveTrophy3DS.png|50px]]<br>[[File:IsabelleSweaterTrophy3DS.png|50px]][[File:DigbyTrophy3DS.png|50px]][[File:ReeseCyrusTrophy3DS.png|50px]][[File:LeifTrophy3DS.png|50px]][[File:LunaTrophy3DS.png|50px]][[File:SnowmanFamilyTrophy3DS.png|50px]] | ||
| Line 1,543: | Line 1,543: | ||
!Stage Cameos | !Stage Cameos | ||
!Trophies | !Trophies | ||
! | !Stickers | ||
!Music | !Music | ||
|- | |- | ||
| Line 1,550: | Line 1,550: | ||
| | | | ||
| | | | ||
|[[File:Ducks Trophy Melee.png|50px]] | |||
| | | | ||
| | | | ||
| Line 1,682: | Line 1,682: | ||
!Fighter Cameos | !Fighter Cameos | ||
!style="min-width:80px;"|Stage Cameos | !style="min-width:80px;"|Stage Cameos | ||
! | !Trophies | ||
!style="min-width:190px;"|Spirits | !style="min-width:190px;"|Spirits | ||
!style="min-width:240px;"|Mii Costumes | !style="min-width:240px;"|Mii Costumes | ||
| Line 1,871: | Line 1,871: | ||
!Fighters | !Fighters | ||
!Stages | !Stages | ||
!Fighter Cameos | |||
!Stage Cameos | !Stage Cameos | ||
!Spirits | !Spirits | ||
| Line 1,876: | Line 1,877: | ||
!Music | !Music | ||
|- | |- | ||
| | |||
| | | | ||
| | | | ||
| Line 1,885: | Line 1,887: | ||
|[[File:Kazuya SSBU.png|100x100px|link=Kazuya (SSBU)]]<br>[[File:Kazuya-Alt 1 SSBU.png|50px|link=Kazuya (SSBU)]] | |[[File:Kazuya SSBU.png|100x100px|link=Kazuya (SSBU)]]<br>[[File:Kazuya-Alt 1 SSBU.png|50px|link=Kazuya (SSBU)]] | ||
|[[File:MishimaDojoIconSSBU.png|70x70px|link=Mishima Dojo]] | |[[File:MishimaDojoIconSSBU.png|70x70px|link=Mishima Dojo]] | ||
|[[File:Nr heihachi.png|50px]] | |||
|[[File:SSBU spirit Heihachi Mishima.png|50px]] | |[[File:SSBU spirit Heihachi Mishima.png|50px]] | ||
|[[File:SSBU spirit Jin Kazama.png|50x50px]][[File:SSBU spirit Devil Jin.png|50x50px]][[File:SSBU spirit Kuma & Panda.png|50x50px]][[File:SSBU spirit Nina Williams.png|50x50px]][[File:SSBU spirit King & Armor King.png|50x50px]]<br>[[File:SSBU spirit Ling Xiaoyu.png|50x50px]][[File:SSBU spirit Paul Phoenix & Marshall Law.png|50x50px]][[File:SSBU spirit Yoshimitsu.png|50x50px]][[File:SSBU spirit Jack-7.png|50x50px]][[File:SSBU spirit Asuka Kazama.png|50x50px]] | |[[File:SSBU spirit Jin Kazama.png|50x50px]][[File:SSBU spirit Devil Jin.png|50x50px]][[File:SSBU spirit Kuma & Panda.png|50x50px]][[File:SSBU spirit Nina Williams.png|50x50px]][[File:SSBU spirit King & Armor King.png|50x50px]]<br>[[File:SSBU spirit Ling Xiaoyu.png|50x50px]][[File:SSBU spirit Paul Phoenix & Marshall Law.png|50x50px]][[File:SSBU spirit Yoshimitsu.png|50x50px]][[File:SSBU spirit Jack-7.png|50x50px]][[File:SSBU spirit Asuka Kazama.png|50x50px]] | ||
| Line 1,912: | Line 1,915: | ||
==Assist Trophy-based universes== | ==Assist Trophy-based universes== | ||
==={{uv|Nintendogs}}=== | ==={{uv|Nintendogs}}=== | ||
<div class="contentbox mw-collapsible mw-collapsed" data-expandtext="Show" data-collapsetext="Hide"> | |||
<div style="overflow-x:auto;"> | <div style="overflow-x:auto;"> | ||
{|class="wikitable sortable" style="text-align:center; border-spacing:0.3em" | {|class="wikitable sortable" style="text-align:center; border-spacing:0.3em" | ||
| Line 1,918: | Line 1,921: | ||
!Stages | !Stages | ||
!Stage Cameos | !Stage Cameos | ||
!Stickers/Spirits | |||
!Music | |||
|- | |||
|[[File:Nintendog - Brawl Trophy.png|100x100px|link=Nintendog]] | |||
| | |||
| | |||
|[[File:Brawl Sticker Miniature Dachshund (Nintendogs).png|50px]][[File:Brawl Sticker Chihuahua (Nintendogs).png|50px]]<br>[[File:Brawl Sticker Shiba Inu (Nintendogs).png|50px]][[File:Brawl Sticker Welsh Corgi (Nintendogs).png|50px]] | |||
| | |||
|- | |||
|[[File:NintendogTrophyWiiU.png|100x100px|link=Nintendog]] | |||
|[[File:SSB4-3_Icon.png|50px]]<br>[[File:LivingRoomIconSSB4-3.png|70x70px|link=Living Room]] | |||
|[[File:SSB4-3_Icon.png|50px]]<br>[[File:ToyPoodleTrophy3DS.png|50px]][[File:ShibaInuTrophy3DS.png|50px]][[File:BeagleTrophy3DS.png|50px]]<br>[[File:JackRussellTerrierTrophy3DS.png|50px]][[File:GoldenRetrieverTrophy3DS.png|50px]][[File:CalicoTrophy3DS.png|50px]] | |||
| | |||
|[[File:SSB4_Icon.png|50px]]<br>•{{SSB4MusicLink|Nintendo|Bathtime Theme}}<br>•{{SSB4MusicLink|Nintendo|Bathtime Theme (Vocal Mix)}} | |||
|- | |||
|[[File:Nintendog Assist Trophy (SSBU).png|100x100px|link=Nintendog]] | |||
|[[File:LivingRoomIconSSBU.png|70x70px|link=Living Room]] | |||
| | |||
|[[File:SSBU spirit French Bulldog.png|50x50px]][[File:SSBU spirit Labrador Retriever.png|50x50px]] | |||
|•{{SSBUMusicLink|Other|Bathtime Theme}}<br>•{{SSBUMusicLink|Other|Bathtime Theme (for 3DS / Wii U)}}<br>•{{SSBUMusicLink|Other|Bathtime Theme (Vocal Mix) (for 3DS / Wii U)}} | |||
|} | |||
</div> | |||
</div> | |||
==={{uv|Excite}}=== | |||
<div class="contentbox mw-collapsible mw-collapsed" data-expandtext="Show" data-collapsetext="Hide"> | |||
<div style="overflow-x:auto;"> | |||
{|class="wikitable sortable" style="text-align:center; border-spacing:0.3em" | |||
!Assist Trophies | |||
!Trophies | !Trophies | ||
!Stickers/Spirits | !Stickers/Spirits | ||
!Music | !Music | ||
|- | |||
| | |||
|[[File:Excite Bike Trophy Melee.png|50px]] | |||
| | |||
| | |||
|- | |||
|[[File:Excitebikes - Brawl Trophy.png|100x100px|link=Excitebike]] | |||
|[[File:Boulder - Brawl Trophy.png|50px]] | |||
|[[File:Brawl Sticker Wolf (Excite Truck).png|50px]][[File:Brawl Sticker Firefly (Excite Truck).png|50px]][[File:Brawl Sticker Boulder (Excite Truck).png|50px]]<br>[[File:Brawl Sticker Rad (Excite Truck).png|50px]][[File:Brawl Sticker Excitebike.png|50px]] | |||
|•{{SSBBMusicLink|Nintendo|Famicom Medley}} (''Excitebike'' portion)<br>•{{SSBBMusicLink|Nintendo|Excite Truck}} | |||
|- | |||
| | |||
|[[File:SSB4_Icon.png|50px]]<br>[[File:ExcitebikeRacerTrophyWiiU.png|50px]] | |||
| | |||
|[[File:SSB4-U_Icon.png|50px]]<br>•{{SSB4MusicLink|Nintendo|Excite Truck}} | |||
|- | |||
| | |||
| | |||
|[[File:SSBU spirit Excitebike.png|50x50px]][[File:SSBU spirit Beetle.png|50x50px]] | |||
|•{{SSBUMusicLink|Mario Kart|Excitebike - Mario Kart 8}}<br>•{{SSBUMusicLink|Other|Excite Truck}} | |||
|} | |} | ||
</div> | </div> | ||
</div>--> | </div> | ||
==={{uv|Devil World}}=== | |||
<div class="contentbox mw-collapsible mw-collapsed" data-expandtext="Show" data-collapsetext="Hide"> | |||
<div style="overflow-x:auto;"> | |||
{|class="wikitable sortable" style="text-align:center; border-spacing:0.3em" | |||
!Assist Trophies | |||
!Trophies | |||
!Stickers/Spirits | |||
!Music | |||
|- | |||
| | |||
|[[File:Tamagon Trophy Melee.png|50px]] | |||
| | |||
| | |||
|- | |||
|[[File:Devil - Brawl Trophy.png|100x100px|link=Devil]] | |||
| | |||
|[[File:Brawl Sticker Tamagon (Devil World).png|50px]] | |||
|•{{SSBBMusicLink|Nintendo|Famicom Medley}} (''Devil World'' portion) | |||
|- | |||
|[[File:DevilTrophyWiiU.png|100x100px|link=Devil]] | |||
| | |||
| | |||
| | |||
|- | |||
|[[File:Devil Assist Trophy (SSBU).png|100x100px|link=Devil]] | |||
| | |||
|[[File:SSBU spirit Tamagon.png|50x50px]] | |||
| | |||
|} | |||
</div> | |||
</div> | |||
==={{uv|SimCity}}=== | |||
<div class="contentbox mw-collapsible mw-collapsed" data-expandtext="Show" data-collapsetext="Hide"> | |||
<div style="overflow-x:auto;"> | |||
{|class="wikitable sortable" style="text-align:center; border-spacing:0.3em" | |||
!Assist Trophies | |||
!Trophies | |||
|- | |||
| | |||
|[[File:Dr. Wright Trophy Melee.png|50px]] | |||
|- | |||
|[[File:Dr. Wright - Brawl Trophy.png|100x100px|link=Dr. Wright]] | |||
| | |||
|- | |||
|[[File:DrWrightTrophyWiiU.png|100x100px|link=Dr. Wright]] | |||
| | |||
|- | |||
|[[File:Dr. Wright Assist Trophy (SSBU).png|100x100px|link=Dr. Wright]] | |||
| | |||
|} | |||
</div> | |||
</div> | |||
==={{uv|The Legendary Starfy}}=== | |||
<div class="contentbox mw-collapsible mw-collapsed" data-expandtext="Show" data-collapsetext="Hide"> | |||
<div style="overflow-x:auto;"> | |||
{|class="wikitable sortable" style="text-align:center; border-spacing:0.3em" | |||
!Assist Trophies | |||
!Trophies | |||
!Stickers/Spirits | |||
|- | |||
|[[File:Stafy - Brawl Trophy.png|100x100px|link=Starfy]] | |||
|[[File:Stapy - Brawl Trophy.png|50px]] | |||
|[[File:Brawl Sticker Yadokarita (Densetsu no Stafy).png|50px]][[File:Brawl Sticker Stafy (Densetsu no Stafy).png|50px]][[File:Brawl Sticker Chonmagyo (Densetsu no Stafy 2).png|50px]][[File:Brawl Sticker Stafy (Densetsu no Stafy 2).png|50px]]<br>[[File:Brawl Sticker Seiuchi-kun (Densetsu no Stafy 3).png|50px]][[File:Brawl Sticker Stapy (Densetsu no Stafy 3).png|50px]][[File:Brawl Sticker Kyorosuke (Densetsu no Stafy 4).png|50px]][[File:Brawl Sticker Materu (Densetsu no Stafy 4).png|50px]] | |||
|- | |||
|[[File:StarfyTrophyWiiU.png|100x100px|link=Starfy]] | |||
| | |||
| | |||
|- | |||
|[[File:Starfy Assist Trophy (SSBU).png|100x100px|link=Starfy]] | |||
| | |||
|[[File:SSBU spirit Starly.png|50x50px]][[File:SSBU spirit Moe.png|50x50px]][[File:SSBU spirit Old Man Lobber.png|50x50px]]<br>[[File:SSBU spirit Mermaid.png|50x50px]][[File:SSBU spirit Mattel.png|50x50px]] | |||
|} | |||
</div> | |||
</div> | |||
==={{uv|Nintendo Wars}}=== | |||
<div class="contentbox mw-collapsible mw-collapsed" data-expandtext="Show" data-collapsetext="Hide"> | |||
<div style="overflow-x:auto;"> | |||
{|class="wikitable sortable" style="text-align:center; border-spacing:0.3em" | |||
!Assist Trophies | |||
!Stickers/Spirits | |||
|- | |||
|[[File:Infantry and Tanks - Brawl Trophy.png|100x100px|link=Infantry and Tanks]] | |||
|[[File:Brawl Sticker Max (Advance Wars).png|50px]][[File:Brawl Sticker Sami (Advance Wars).png|50px]][[File:Brawl Sticker Andy (Advance Wars).png|50px]]<br>[[File:Brawl Sticker Jake (Advance Wars DS).png|50px]][[File:Brawl Sticker Hawke (Advance Wars DS).png|50px]][[File:Brawl Sticker Rachel (Advance Wars DS).png|50px]] | |||
|- | |||
|[[File:InfantryTanksTrophyWiiU.png|100x100px|link=Infantry and Tanks]] | |||
| | |||
|- | |||
| | |||
|[[File:SSBU spirit Tank & Infantry.png|50x50px]][[File:SSBU spirit Andy.png|50x50px]]<br>[[File:SSBU spirit Eagle.png|50x50px]][[File:SSBU spirit Olaf.png|50x50px]] | |||
|} | |||
</div> | |||
</div> | |||
==={{uv|Kururin}}=== | |||
<div class="contentbox mw-collapsible mw-collapsed" data-expandtext="Show" data-collapsetext="Hide"> | |||
<div style="overflow-x:auto;"> | |||
{|class="wikitable sortable" style="text-align:center; border-spacing:0.3em" | |||
!Assist Trophies | |||
!Trophies | |||
!Stickers/Spirits | |||
|- | |||
| | |||
|[[File:Heririn Trophy Melee.png|50px]] | |||
| | |||
|- | |||
|[[File:Helirin - Brawl Trophy.png|100x100px|link=Helirin]] | |||
|[[File:Action Helirins - Brawl Trophy.png|50px]] | |||
|[[File:Brawl Sticker Helibokaan (Kururin Squash!).png|50px]][[File:Brawl Sticker Kururin (Kururin Paradise).png|50px]] | |||
|- | |||
| | |||
| | |||
|[[File:SSBU spirit Helirin.png|50x50px]] | |||
|} | |||
</div> | |||
</div> | |||
==={{uv|Jam with the Band}}=== | |||
<div class="contentbox mw-collapsible mw-collapsed" data-expandtext="Show" data-collapsetext="Hide"> | |||
<div style="overflow-x:auto;"> | |||
{|class="wikitable sortable" style="text-align:center; border-spacing:0.3em" | |||
!Assist Trophies | |||
!Trophies | |||
!Spirits | |||
!Mii Costumes | |||
!Music | |||
|- | |||
|[[File:Barbara - Brawl Trophy.png|100x100px|link=Barbara]] | |||
| | |||
| | |||
| | |||
| | |||
|- | |||
| | |||
|[[File:SSB4-3_Icon.png|50px]]<br>[[File:BarbaraTrophy3DS.png|50px]] | |||
| | |||
|[[File:BarbaraTheBatWig.jpg|100px]] | |||
|[[File:SSB4-U_Icon.png|50px]]<br>•{{SSB4MusicLink|Nintendo|PERFORMANCE}} | |||
|- | |||
| | |||
| | |||
|[[File:SSBU spirit Barbara the Bat.png|50x50px]] | |||
|[[File:SSBU Barbara the Bat Wig.jpg|50px]] | |||
|•{{SSBUMusicLink|Other|PERFORMANCE}} | |||
|} | |||
</div> | |||
</div> | |||
==={{uv|Custom Robo}}=== | |||
<div class="contentbox mw-collapsible mw-collapsed" data-expandtext="Show" data-collapsetext="Hide"> | |||
<div style="overflow-x:auto;"> | |||
{|class="wikitable sortable" style="text-align:center; border-spacing:0.3em" | |||
!Assist Trophies | |||
!Trophies | |||
!Stickers/Spirits | |||
!Mii Costumes | |||
|- | |||
| | |||
|[[File:Ray Mk II Trophy Melee.png|50px]][[File:Bayonette Trophy Melee.png|50px]][[File:Annie Trophy Melee.png|50px]] | |||
| | |||
| | |||
|- | |||
|[[File:Ray Mk III - Brawl Trophy.png|100x100px|link=Ray Mk III]] | |||
|[[File:Custom Robos - Brawl Trophy.png|50px]][[File:Jameson & A.I.R.S. - Brawl Trophy.png|50px]] | |||
|[[File:Brawl Sticker Ray (Custom Robo).png|50px]][[File:Brawl Sticker Annie (Custom Robo V2).png|50px]][[File:Brawl Sticker Robo Cube (Custom Robo BR).png|50px]][[File:Brawl Sticker Seal Head (Custom Robo BR).png|50px]]<br>[[File:Brawl Sticker Rakensen (Custom Robo BR).png|50px]][[File:Brawl Sticker Ray 01 (Custom Robo BR).png|50px]][[File:Brawl Sticker Ray MKIII (Custom Robo Arena).png|50px]] | |||
| | |||
|- | |||
| | |||
| | |||
|[[File:SSBU spirit Ray Mk II.png|50x50px]][[File:SSBU spirit Ray Mk III.png|50x50px]]<br>[[File:SSBU spirit Flare.png|50x50px]][[File:SSBU spirit Bayonette.png|50x50px]] | |||
|[[File:SSBU Ray Mk III Helmet.jpg|50px]]<br>[[File:SSBU Ray Mk III Outfit.jpg|50px]] | |||
|} | |||
</div> | |||
</div> | |||
==={{uv|Golden Sun}}=== | |||
<div class="contentbox mw-collapsible mw-collapsed" data-expandtext="Show" data-collapsetext="Hide"> | |||
<div style="overflow-x:auto;"> | |||
{|class="wikitable sortable" style="text-align:center; border-spacing:0.3em" | |||
!Assist Trophies | |||
!Spirits | |||
!Mii Costumes | |||
!Music | |||
|- | |||
|[[File:Isaac - Brawl Trophy.png|100x100px|link=Isaac]] | |||
| | |||
| | |||
|•{{SSBBMusicLink|Nintendo|Battle Scene / Final Boss (Golden Sun)}} | |||
|- | |||
| | |||
| | |||
| | |||
|[[File:SSB4-U_Icon.png|50px]]<br>•{{SSB4MusicLink|Nintendo|Battle Scene / Final Boss (Golden Sun)}}<br>•{{SSB4MusicLink|Nintendo|Weyard}} | |||
|- | |||
|[[File:Isaac Assist Trophy (SSBU).png|100x100px|link=Isaac]] | |||
|[[File:SSBU spirit Isaac (Dark Dawn).png|50x50px]][[File:SSBU spirit Garet.png|50x50px]][[File:SSBU spirit Ivan.png|50x50px]][[File:SSBU spirit Mia.png|50x50px]]<br>[[File:SSBU spirit Felix.png|50x50px]][[File:SSBU spirit Jenna.png|50x50px]][[File:SSBU spirit Matthew.png|50x50px]] | |||
|[[File:SSBU Isaac Wig.jpg|50px]]<br>[[File:SSBU Isaac's Outfit.jpg|50px]] | |||
|•{{SSBUMusicLink|Other|Battle Scene / Final Boss - Golden Sun}}<br>•{{SSBUMusicLink|Other|Weyard}} | |||
|} | |||
</div> | |||
</div> | |||
==={{uv|Sin and Punishment}}=== | |||
<div class="contentbox mw-collapsible mw-collapsed" data-expandtext="Show" data-collapsetext="Hide"> | |||
<div style="overflow-x:auto;"> | |||
{|class="wikitable sortable" style="text-align:center; border-spacing:0.3em" | |||
!Assist Trophies | |||
!Spirits | |||
!Mii Costumes | |||
|- | |||
|[[File:Saki - Brawl Trophy.png|100x100px|link=Saki Amamiya]] | |||
| | |||
| | |||
|- | |||
|[[File:SakiTrophyWiiU.png|100x100px|link=Saki Amamiya]] | |||
| | |||
| | |||
|- | |||
| | |||
|[[File:SSBU spirit Saki Amamiya.png|50x50px]][[File:SSBU spirit Isa Jo.png|50x50px]] | |||
|[[File:SSBU Saki Amamiya Wig.jpg|50px]]<br>[[File:SSBU Saki Amamiya Outfit.jpg|50px]] | |||
|} | |||
</div> | |||
</div> | |||
==={{uv|Drill Dozer}}=== | |||
<div class="contentbox mw-collapsible mw-collapsed" data-expandtext="Show" data-collapsetext="Hide"> | |||
<div style="overflow-x:auto;"> | |||
{|class="wikitable sortable" style="text-align:center; border-spacing:0.3em" | |||
!Assist Trophies | |||
!Stickers/Spirits | |||
|- | |||
|[[File:Jill - Brawl Trophy.png|100x100px|link=Jill]] | |||
|[[File:Brawl Sticker Jill & Drill Dozer (Drill Dozer).png|50px]][[File:Brawl Sticker Jill (Drill Dozer).png|50px]][[File:Brawl Sticker Grutch (Drill Dozer).png|50px]] | |||
|- | |||
| | |||
|[[File:SSBU spirit Jill & the Drill Dozer.png|50x50px]] | |||
|} | |||
</div> | |||
</div> | |||
==={{uv|Color TV-Game}}=== | |||
<div class="contentbox mw-collapsible mw-collapsed" data-expandtext="Show" data-collapsetext="Hide"> | |||
<div style="overflow-x:auto;"> | |||
{|class="wikitable sortable" style="text-align:center; border-spacing:0.3em" | |||
!Assist Trophies | |||
|- | |||
|[[File:ColorTVGame15TrophyWiiU.png|100x100px|link=Color TV-Game 15]] | |||
|- | |||
|[[File:Color TV-Game 15 Assist Trophy (SSBU).png|100x100px|link=Color TV-Game 15]] | |||
|} | |||
</div> | |||
</div> | |||
==={{uv|Sheriff}}=== | |||
<div class="contentbox mw-collapsible mw-collapsed" data-expandtext="Show" data-collapsetext="Hide"> | |||
<div style="overflow-x:auto;"> | |||
{|class="wikitable sortable" style="text-align:center; border-spacing:0.3em" | |||
!Assist Trophies | |||
!Trophies | |||
|- | |||
| | |||
|[[File:Sheriff Trophy Melee.png|50px]] | |||
|- | |||
|[[File:SheriffTrophyWiiU.png|100x100px|link=Sheriff]] | |||
| | |||
|- | |||
|[[File:Sheriff Assist Trophy (SSBU).png|100x100px|link=Sheriff]] | |||
| | |||
|} | |||
</div> | |||
</div> | |||
==={{uv|The Mysterious Murasame Castle}}=== | |||
<div class="contentbox mw-collapsible mw-collapsed" data-expandtext="Show" data-collapsetext="Hide"> | |||
<div style="overflow-x:auto;"> | |||
{|class="wikitable sortable" style="text-align:center; border-spacing:0.3em" | |||
!Assist Trophies | |||
!Stickers | |||
!Mii Costumes | |||
!Music | |||
|- | |||
| | |||
|[[File:Brawl Sticker Takamaru (Nazo no Murasamejo).png|50px]] | |||
| | |||
|•{{SSBBMusicLink|Nintendo|Douchuumen (Nazo no Murasamejo)}} | |||
|- | |||
|[[File:TakamaruTrophyWiiU.png|100x100px|link=Takamaru]] | |||
| | |||
|[[File:TakamaruWig.jpg|100px]]<br>[[File:TakamaruOutfit.jpg|100px]] | |||
|[[File:SSB4_Icon.png|50px]]<br>•{{SSB4MusicLink|Nintendo|The Mysterious Murasame Castle Medley}} | |||
|- | |||
|[[File:Takamaru Assist Trophy (SSBU).png|100x100px|link=Takamaru]] | |||
| | |||
|[[File:SSBU Takamaru Wig.jpg|50px]]<br>[[File:SSBU Takamaru Outfit.jpg|50px]] | |||
|•{{SSBUMusicLink|Other|The Mysterious Murasame Castle Medley}}<br>•{{SSBUMusicLink|Other|Douchuumen - The Mysterious Murasame Castle}} | |||
|} | |||
</div> | |||
</div> | |||
==={{uv|Kaeru no Tame ni Kane wa Naru}}=== | |||
<div class="contentbox mw-collapsible mw-collapsed" data-expandtext="Show" data-collapsetext="Hide"> | |||
<div style="overflow-x:auto;"> | |||
{|class="wikitable sortable" style="text-align:center; border-spacing:0.3em" | |||
!Assist Trophies | |||
!Stickers/Spirits | |||
|- | |||
| | |||
|[[File:Brawl Sticker Sabure Prince (Kaeru no Tame ni Kane wa Naru).png|50px]] | |||
|- | |||
|[[File:SablePrinceTrophyWiiU.png|100x100px|link=Prince of Sablé]] | |||
| | |||
|- | |||
|[[File:Sablé Prince Assist Trophy (SSBU).png|100x100px|link=Prince of Sablé]]<br>[[File:SSBU spirit Frog & Snake.png|50px|link=Prince of Sablé]] | |||
|[[File:SSBU spirit Prince Richard.png|50x50px]] | |||
|} | |||
</div> | |||
</div> | |||
==={{uv|Brain Age}}=== | |||
<div class="contentbox mw-collapsible mw-collapsed" data-expandtext="Show" data-collapsetext="Hide"> | |||
<div style="overflow-x:auto;"> | |||
{|class="wikitable sortable" style="text-align:center; border-spacing:0.3em" | |||
!Assist Trophies | |||
!Spirits | |||
!Music | |||
|- | |||
| | |||
| | |||
|•{{SSBBMusicLink|Nintendo|Brain Age: Train Your Brain in Minutes a Day}} | |||
|- | |||
|[[File:KawashimaTrophyWiiU.png|100x100px|link=Dr. Kawashima]] | |||
| | |||
|[[File:SSB4-U_Icon.png|50px]]<br>•{{SSB4MusicLink|Nintendo|Brain Age: Train Your Brain in Minutes a Day!}}<br>•{{SSB4MusicLink|Nintendo|Menu (Brain Age 2: More Training in Minutes a Day!)}} | |||
|- | |||
|[[File:Dr. Kawashima Assist Trophy (SSBU).png|100x100px|link=Dr. Kawashima]] | |||
|[[File:SSBU spirit Dr. Kawashima (Concentration Training).png|50x50px]] | |||
|•{{SSBUMusicLink|Other|Brain Age: Train Your Brain in Minutes a Day!}}<br>•{{SSBUMusicLink|Other|Menu - Brain Age 2: More Training in Minutes a Day!}} | |||
|} | |||
</div> | |||
</div> | |||
==={{uv|Dillon's Rolling Western}}=== | |||
<div class="contentbox mw-collapsible mw-collapsed" data-expandtext="Show" data-collapsetext="Hide"> | |||
<div style="overflow-x:auto;"> | |||
{|class="wikitable sortable" style="text-align:center; border-spacing:0.3em" | |||
!Assist Trophies | |||
!Trophies | |||
!Spirits | |||
!Music | |||
|- | |||
|[[File:DillonTrophyWiiU.png|100x100px|link=Dillon]] | |||
|[[File:SSB4-3_Icon.png|50px]]<br>[[File:GalloBooneNomadTrophy3DS.png|50px]] | |||
| | |||
|[[File:SSB4-U_Icon.png|50px]]<br>•{{SSB4MusicLink|Nintendo|Dillon's Rolling Western: The Last Ranger}} | |||
|- | |||
|[[File:Dillon Assist Trophy (SSBU).png|100x100px|link=Dillon]] | |||
| | |||
|[[File:SSBU spirit Russ.png|50x50px]] | |||
|•{{SSBUMusicLink|Other|Dillon's Rolling Western: The Last Ranger}}<br>•{{SSBUMusicLink|Other|Frontier Battle}} | |||
|} | |||
</div> | |||
</div> | |||
==={{uv|Joy Mech Fight}}=== | |||
<div class="contentbox mw-collapsible mw-collapsed" data-expandtext="Show" data-collapsetext="Hide"> | |||
<div style="overflow-x:auto;"> | |||
{|class="wikitable sortable" style="text-align:center; border-spacing:0.3em" | |||
!Assist Trophies | |||
!Stickers | |||
!Music | |||
|- | |||
| | |||
|[[File:Brawl Sticker Sukapon (Joy Mech Fight).png|50px]] | |||
|•{{SSBBMusicLink|Nintendo|Famicom Medley}} (''Joy Mech Fight'' portion) | |||
|- | |||
|[[File:Sukapon Assist Trophy (SSBU).png|100x100px|link=Sukapon]] | |||
| | |||
| | |||
|} | |||
</div> | |||
</div> | |||
==={{uv|Art Academy}}=== | |||
<div class="contentbox mw-collapsible mw-collapsed" data-expandtext="Show" data-collapsetext="Hide"> | |||
<div style="overflow-x:auto;"> | |||
{|class="wikitable sortable" style="text-align:center; border-spacing:0.3em" | |||
!Assist Trophies | |||
!Trophies | |||
!Mii Costumes | |||
!Music | |||
|- | |||
| | |||
|[[File:SSB4-U_Icon.png|50px]]<br>[[File:VinceTrophyWiiU.png|50px]] | |||
| | |||
|[[File:SSB4-U_Icon.png|50px]]<br>•{{SSB4MusicLink|Nintendo|Swan Lesson}} | |||
|- | |||
|[[File:Vince Assist Trophy (SSBU).png|100x100px|link=Vince]] | |||
| | |||
|[[File:SSBU Vince's Hat.jpg|50px]]<br>[[File:SSBU Vince's Outfit.jpg|50px]] | |||
|•{{SSBUMusicLink|Other|Swan Lesson}} | |||
|} | |||
</div> | |||
</div> | |||
==={{uv|Swapnote}}=== | |||
<div class="contentbox mw-collapsible mw-collapsed" data-expandtext="Show" data-collapsetext="Hide"> | |||
<div style="overflow-x:auto;"> | |||
{|class="wikitable sortable" style="text-align:center; border-spacing:0.3em" | |||
!Assist Trophies | |||
|- | |||
|[[File:Nikki Assist Trophy (SSBU).png|100x100px|link=Nikki]] | |||
|} | |||
</div> | |||
</div> | |||
==={{uv|Fatal Frame}}=== | |||
<div class="contentbox mw-collapsible mw-collapsed" data-expandtext="Show" data-collapsetext="Hide"> | |||
<div style="overflow-x:auto;"> | |||
{|class="wikitable sortable" style="text-align:center; border-spacing:0.3em" | |||
!Assist Trophies | |||
!Trophies | |||
!Spirits | |||
|- | |||
| | |||
|[[File:SSB4-3_Icon.png|50px]]<br>[[File:MayaTrophy3DS.png|50px]]<br>[[File:SSB4-U_Icon.png|50px]]<br>[[File:MioMayuAmakuraTrophyWiiU.png|50px]] | |||
| | |||
|- | |||
|[[File:Yuri Assist Trophy (SSBU).png|100x100px|link=Yuri Kozukata]] | |||
| | |||
|[[File:SSBU spirit Mio & Mayu Amakura.png|50x50px]] | |||
|} | |||
</div> | |||
</div> | |||
==={{uv|Nintendo Badge Arcade}}=== | |||
<div class="contentbox mw-collapsible mw-collapsed" data-expandtext="Show" data-collapsetext="Hide"> | |||
<div style="overflow-x:auto;"> | |||
{|class="wikitable sortable" style="text-align:center; border-spacing:0.3em" | |||
!Assist Trophies | |||
!Mii Costumes | |||
!Music | |||
|- | |||
|[[File:Arcade Bunny Assist Trophy (SSBU).png|100x100px|link=Arcade Bunny]] | |||
|[[File:SSBU Arcade Bunny Hat.jpg|50px]] | |||
|•{{SSBUMusicLink|Other|Title Theme - Nintendo Badge Arcade}}<br>•{{SSBUMusicLink|Other|Arcade Bunny's Theme}} | |||
|} | |||
</div> | |||
</div> | |||
==={{uv|Bomberman}}=== | |||
<div class="contentbox mw-collapsible mw-collapsed" data-expandtext="Show" data-collapsetext="Hide"> | |||
<div style="overflow-x:auto;"> | |||
{|class="wikitable sortable" style="text-align:center; border-spacing:0.3em" | |||
!Assist Trophies | |||
!Mii Costumes | |||
|- | |||
|[[File:Bomberman Assist Trophy (SSBU).png|100x100px|link=Bomberman]] | |||
|[[File:SSBU Bomberman Mask.jpg|50px]]<br>[[File:SSBU Bomberman Outfit.jpg|50px]] | |||
|} | |||
</div> | |||
</div> | |||
==={{uv|Virtua Fighter}}=== | |||
<div class="contentbox mw-collapsible mw-collapsed" data-expandtext="Show" data-collapsetext="Hide"> | |||
<div style="overflow-x:auto;"> | |||
{|class="wikitable sortable" style="text-align:center; border-spacing:0.3em" | |||
!Assist Trophies | |||
!Mii Costumes | |||
|- | |||
| | |||
|[[File:AkiraWig.jpg|100px]][[File:JackyWig.jpg|100px]]<br>[[File:AkiraOutfit.jpg|100px]][[File:JackyOutfit.jpg|100px]] | |||
|- | |||
|[[File:Akira Assist Trophy (SSBU).png|100x100px|link=Akira Yuki]] | |||
|[[File:SSBU Akira Wig.jpg|50px]][[File:SSBU Jacky Wig.jpg|50px]]<br>[[File:SSBU Akira Outfit.jpg|50px]][[File:SSBU Jacky Outfit.jpg|50px]] | |||
|} | |||
</div> | |||
</div> | |||
==={{uv|Monster Hunter}}=== | |||
<div class="contentbox mw-collapsible mw-collapsed" data-expandtext="Show" data-collapsetext="Hide"> | |||
<div style="overflow-x:auto;"> | |||
{|class="wikitable sortable" style="text-align:center; border-spacing:0.3em" | |||
!Assist Trophies | |||
!Bosses | |||
!Spirits | |||
!Mii Costumes | |||
!Music | |||
|- | |||
| | |||
| | |||
| | |||
|[[File:Hunter'sHelm.jpg|100px]][[File:RathalosHelm.jpg|100px]]<br>[[File:Hunter'sMail.jpg|100px]][[File:RathalosMail.jpg|100px]] | |||
| | |||
|- | |||
|[[File:Rathalos Assist Trophy (SSBU).png|100x100px|link=Rathalos]] | |||
|[[File:Rathalos SSBU.png|100px|link=Rathalos]] | |||
|[[File:SSBU spirit Palico.png|50x50px]][[File:SSBU spirit Palamute.png|50x50px]]<br>[[File:SSBU spirit Magnamalo.png|50x50px]][[File:SSBU spirit Razewing Ratha.png|50x50px]] | |||
|[[File:SSBU Felyne Hat.jpg|50px]][[File:SSBU Hunters Helm.jpg|50px]][[File:SSBU Hunters Helm Female.jpg|50px]]<br>[[File:SSBU Rathalos Helm.jpg|50px]][[File:SSBU Rathalos Helm Female.jpg|50px]]<br>[[File:SSBU Hunters Mail.jpg|50px]][[File:SSBU Hunters Mail Female.jpg|50px]]<br>[[File:SSBU Rathalos Mail.jpg|50px]][[File:SSBU Rathalos Mail Female.jpg|50px]] | |||
|•{{SSBUMusicLink|Other|Proof of a Hero ~ 4Version}}<br>•{{SSBUMusicLink|Other|Roar/Rathalos}} | |||
|} | |||
</div> | |||
</div> | |||
==={{uv|Shovel Knight}}=== | |||
<div class="contentbox mw-collapsible mw-collapsed" data-expandtext="Show" data-collapsetext="Hide"> | |||
<div style="overflow-x:auto;"> | |||
{|class="wikitable sortable" style="text-align:center; border-spacing:0.3em" | |||
!Assist Trophies | |||
!Spirits | |||
|- | |||
|[[File:Shovel Knight Assist Trophy (SSBU).png|100x100px|link=Shovel Knight]] | |||
|[[File:SSBU spirit Shield Knight.png|50x50px]][[File:SSBU spirit Plague Knight.png|50x50px]]<br>[[File:SSBU spirit King Knight.png|50x50px]][[File:SSBU spirit Specter Knight.png|50x50px]] | |||
|} | |||
</div> | |||
</div> | |||
==Item-based universes== | |||
==={{uv|GoldenEye}}=== | |||
<div class="contentbox mw-collapsible mw-collapsed" data-expandtext="Show" data-collapsetext="Hide"> | |||
<div style="overflow-x:auto;"> | |||
{|class="wikitable sortable" style="text-align:center; border-spacing:0.3em" | |||
!Items | |||
|- | |||
|[[File:MotionSensorBombIconSSB.png|50px|link=Motion-Sensor Bomb]] | |||
|- | |||
|[[File:Motion-Sensor Bomb Trophy Melee.png|50px|link=Motion-Sensor Bomb]] | |||
|} | |||
</div> | |||
</div> | |||
==={{uv|Panel de Pon}}=== | |||
<div class="contentbox mw-collapsible mw-collapsed" data-expandtext="Show" data-collapsetext="Hide"> | |||
<div style="overflow-x:auto;"> | |||
{|class="wikitable sortable" style="text-align:center; border-spacing:0.3em" | |||
!Items | |||
!Stickers/Spirits | |||
!Mii Costumes | |||
!Music | |||
|- | |||
|[[File:Lip's Stick Trophy Melee.png|50px|link=Lip's Stick]] | |||
| | |||
| | |||
| | |||
|- | |||
|[[File:Lip's Stick - Brawl Trophy.png|50px|link=Lip's Stick]] | |||
|[[File:Brawl Sticker Panel (Nintendo Puzzle Collection).png|50px]][[File:Brawl Sticker Jewel Fairy Ruby (Nintendo Puzzle Collection).png|50px]][[File:Brawl Sticker Moon Fairy Seren (Nintendo Puzzle Collection).png|50px]]<br>[[File:Brawl Sticker Water Fairy Elias (Nintendo Puzzle Collection).png|50px]][[File:Brawl Sticker Flower Fairy Lip (Nintendo Puzzle Collection).png|50px]] | |||
| | |||
|•{{SSBBMusicLink|Nintendo|Lip's Theme (Panel de Pon)}} | |||
|- | |||
|[[File:LipsStickTrophyWiiU.png|50px|link=Lip's Stick]] | |||
| | |||
| | |||
|[[File:SSB4-U_Icon.png|50px]]<br>•{{SSB4MusicLink|Nintendo|Lip's Theme (Panel de Pon)}} | |||
|- | |||
|[[File:SSBULipstick.png|50px|link=Lip's Stick]] | |||
|[[File:SSBU spirit Lip.png|50x50px]] | |||
|[[File:SSBU Lip Wig.jpg|50px]]<br>[[File:SSBU Lip Outfit.jpg|50px]] | |||
|•{{SSBUMusicLink|Other|Lip's Theme - Panel de Pon}} | |||
|} | |||
</div> | |||
</div> | |||
==={{uv|Balloon Fight}}=== | |||
<div class="contentbox mw-collapsible mw-collapsed" data-expandtext="Show" data-collapsetext="Hide"> | |||
<div style="overflow-x:auto;"> | |||
{|class="wikitable sortable" style="text-align:center; border-spacing:0.3em" | |||
!Items | |||
!Stages | |||
!Stage Cameos | |||
!Trophies | |||
!Stickers | |||
!Music | |||
|- | |||
|[[File:Flipper Trophy Melee.png|50px|link=Flipper]] | |||
| | |||
| | |||
|[[File:Balloon Fighter Trophy Melee.png|50px]] | |||
| | |||
|•{{SSBMMusicLink|Balloon Fight}} | |||
|- | |||
| | |||
| | |||
| | |||
| | |||
|[[File:Brawl Sticker Balloon Fighter.png|50px]][[File:Brawl Sticker Balloon Fight Enemy.png|50px]] | |||
|•{{SSBBMusicLink|Nintendo|Balloon Trip}} | |||
|- | |||
| | |||
|[[File:SSB4-3_Icon.png|50px]]<br>[[File:BalloonFightIconSSB4-3.png|70x70px|link=Balloon Fight]] | |||
| | |||
| | |||
| | |||
|[[File:SSB4_Icon.png|50px]]<br>•{{SSB4MusicLink|Nintendo|Balloon Fight Medley}}<br>•{{SSB4MusicLink|Nintendo|Balloon Trip}} | |||
|- | |||
| | |||
|[[File:BalloonFightIconSSBU.png|70x70px|link=Balloon Fight]] | |||
|[[File:SSBU spirit Balloon Fighter.png|50x50px]][[File:SSBU spirit Fish.png|50px|link=Fish]] | |||
| | |||
| | |||
|•{{SSBUMusicLink|Other|Balloon Fight Medley}}<br>•{{SSBUMusicLink|Other|Balloon Trip (Brawl)}}<br>•{{SSBUMusicLink|Other|Balloon Trip (for 3DS / Wii U)}} | |||
|} | |||
</div> | |||
</div> | |||
==={{uv|Perfect Dark}}=== | |||
<div class="contentbox mw-collapsible mw-collapsed" data-expandtext="Show" data-collapsetext="Hide"> | |||
<div style="overflow-x:auto;"> | |||
{|class="wikitable sortable" style="text-align:center; border-spacing:0.3em" | |||
!Items | |||
|- | |||
|[[File:Proximity Mine Trophy Melee.png|50px|link=Motion-Sensor Bomb]][[File:Cloaking Device Trophy Melee.png|50px|link=Cloaking Device]] | |||
|} | |||
</div> | |||
</div> | |||
==={{uv|Wrecking Crew}}=== | |||
<div class="contentbox mw-collapsible mw-collapsed" data-expandtext="Show" data-collapsetext="Hide"> | |||
<div style="overflow-x:auto;"> | |||
{|class="wikitable sortable" style="text-align:center; border-spacing:0.3em" | |||
!Items | |||
!Stages | |||
!Trophies | |||
!Spirits | |||
!Music | |||
|- | |||
| | |||
| | |||
|[[File:Eggplant Man Trophy Melee.png|50px]] | |||
| | |||
| | |||
|- | |||
|[[File:Golden Hammer - Brawl Trophy.png|50px|link=Golden Hammer]] | |||
| | |||
| | |||
| | |||
|•{{SSBBMusicLink|Nintendo|Famicom Medley}} (''Wrecking Crew'' portion)<br>•{{SSBBMusicLink|Nintendo|Power-Up Music}} | |||
|- | |||
|[[File:GoldenHammerTrophyWiiU.png|50px|link=Golden Hammer]] | |||
|[[File:SSB4-U_Icon.png|50px]]<br>[[File:WreckingCrewIconSSB4-U.png|70x70px|link=Wrecking Crew]] | |||
| | |||
| | |||
|[[File:SSB4_Icon.png|50px]]<br>•{{SSB4MusicLink|Nintendo|Wrecking Crew Retro Medley}}<br>[[File:SSB4-U_Icon.png|50px]]<br>•{{SSB4MusicLink|Nintendo|Wrecking Crew Medley}} | |||
|- | |||
|[[File:GoldenHammerTrophyWiiU.png|50px|link=Golden Hammer]] | |||
|[[File:WreckingCrewIconSSBU.png|70x70px|link=Wrecking Crew]] | |||
| | |||
|[[File:SSBU spirit Eggplant Man.png|50x50px]] | |||
|•{{SSBUMusicLink|Other|Wrecking Crew Medley}}<br>•{{SSBUMusicLink|Other|Wrecking Crew Medley (for 3DS / Wii U)}}<br>•{{SSBUMusicLink|Other|Wrecking Crew Retro Medley}}<br>•{{SSBUMusicLink|Other|Power-Up Music - Wrecking Crew}} | |||
|} | |||
</div> | |||
</div> | |||
==={{uv|Clu Clu Land}}=== | |||
<div class="contentbox mw-collapsible mw-collapsed" data-expandtext="Show" data-collapsetext="Hide"> | |||
<div style="overflow-x:auto;"> | |||
{|class="wikitable sortable" style="text-align:center; border-spacing:0.3em" | |||
!Items | |||
!Trophies | |||
!Spirits | |||
!Music | |||
|- | |||
| | |||
|[[File:Bubbles Trophy Melee.png|50px]] | |||
| | |||
| | |||
|- | |||
|[[File:Unira - Brawl Trophy.png|50px|link=Unira]] | |||
| | |||
| | |||
|•{{SSBBMusicLink|Nintendo|Clu Clu Land}} | |||
|- | |||
|[[File:UniraTrophyWiiU.png|50px|link=Unira]] | |||
| | |||
| | |||
|[[File:SSB4-U_Icon.png|50px]]<br>•{{SSB4MusicLink|Nintendo|Clu Clu Land}} | |||
|- | |||
|[[File:UniraTrophyWiiU.png|50px|link=Unira]] | |||
| | |||
|[[File:SSBU spirit Bubbles.png|50x50px]] | |||
|•{{SSBUMusicLink|Other|Clu Clu Land}} | |||
|} | |||
</div> | |||
</div> | |||
==={{uv|Steel Diver}}=== | |||
<div class="contentbox mw-collapsible mw-collapsed" data-expandtext="Show" data-collapsetext="Hide"> | |||
<div style="overflow-x:auto;"> | |||
{|class="wikitable sortable" style="text-align:center; border-spacing:0.3em" | |||
!Items | |||
!Trophies | |||
!Spirits | |||
!Music | |||
|- | |||
|[[File:SteelDiverGunTrophyWiiU.png|50px|link=Steel Diver]] | |||
|[[File:SSB4-3_Icon.png|50px]]<br>[[File:SteelDiverTrophy3DS.png|50px]] | |||
| | |||
| | |||
|- | |||
|[[File:SteelDiverGunTrophyWiiU.png|50px|link=Steel Diver]] | |||
| | |||
|[[File:SSBU spirit BlueShark.png|50x50px]] | |||
|•{{SSBUMusicLink|Other|Filled with Hope}} | |||
|} | |||
</div> | |||
</div> | |||
==={{uv|Galaxian}}=== | |||
<div class="contentbox mw-collapsible mw-collapsed" data-expandtext="Show" data-collapsetext="Hide"> | |||
<div style="overflow-x:auto;"> | |||
{|class="wikitable sortable" style="text-align:center; border-spacing:0.3em" | |||
!Items | |||
!Fighter Cameos | |||
!Music | |||
|- | |||
|[[File:BossGalagaTrophyWiiU.png|50px|link=Boss Galaga]] | |||
|[[File:Nr galaxip.png|50px]][[File:Nr galaga.png|50px]][[File:Nr hyper.png|50px]] | |||
|[[File:SSB4-U_Icon.png|50px]]<br>•{{SSB4MusicLink|Namco|Namco Arcade '80s Retro Medley 1}} (''Galaga'' portion) | |||
|- | |||
|[[File:SSBUBossGalaga.png|50px|link=Boss Galaga]] | |||
|[[File:Nr galaxip.png|50px]][[File:Nr galaga.png|50px]][[File:Nr hyper.png|50px]] | |||
|•{{SSBUMusicLink|Pac-Man|Galaga Medley}}<br>•{{SSBUMusicLink|Pac-Man|Namco Arcade '80s Retro Medley 1}} (''Galaga'' portion) | |||
|} | |||
</div> | |||
</div> | |||
==={{uv|Pilotwings}}=== | |||
<div class="contentbox mw-collapsible mw-collapsed" data-expandtext="Show" data-collapsetext="Hide"> | |||
<div style="overflow-x:auto;"> | |||
{|class="wikitable sortable" style="text-align:center; border-spacing:0.3em" | |||
!Items | |||
!Stages | |||
!Stage Cameos | |||
!Trophies | |||
!Stickers | |||
!Music | |||
|- | |||
| | |||
| | |||
| | |||
| | |||
|[[File:Brawl Sticker Instructor (Pilotwings).png|50px]] | |||
| | |||
|- | |||
|[[File:RocketBeltTrophyWiiU.png|50px|link=Rocket Belt]] | |||
|[[File:SSB4-U_Icon.png|50px]]<br>[[File:PilotwingsIconSSB4-U.png|70x70px|link=Pilotwings]] | |||
|[[File:SSB4-U_Icon.png|50px]]<br>[[File:LightPlaneTrophyWiiU.png|50px]][[File:HangGliderTrophyWiiU.png|50px]][[File:PlaneTrophyWiiU.png|50px]] | |||
|[[File:SSB4-U_Icon.png|50px]]<br>[[File:TurboJetTrophyWiiU.png|50px]] | |||
| | |||
|[[File:SSB4-U_Icon.png|50px]]<br>•{{SSB4MusicLink|Nintendo|Light Plane (Remix)}}<br>•{{SSB4MusicLink|Nintendo|Light Plane (Vocal Mix)}}<br>•{{SSB4MusicLink|Nintendo|Light Plane (Original)}}<br>•{{SSB4MusicLink|Nintendo|Turbo Jet}}<br>•{{SSB4MusicLink|Nintendo|Pedal Glider}} | |||
|- | |||
|[[File:RocketBeltTrophyWiiU.png|50px|link=Rocket Belt]] | |||
|[[File:PilotwingsIconSSBU.png|70x70px|link=Pilotwings]] | |||
|[[File:SSBU spirit Plane.png|50px]] | |||
| | |||
| | |||
|•{{SSBUMusicLink|Other|Light Plane (Remix)}}<br>•{{SSBUMusicLink|Other|Light Plane (Original)}}<br>•{{SSBUMusicLink|Other|Light Plane (for 3DS / Wii U)}}<br>•{{SSBUMusicLink|Other|Light Plane (Vocal Mix) (for 3DS / Wii U)}}<br>•{{SSBUMusicLink|Other|Turbo Jet}}<br>•{{SSBUMusicLink|Other|Pedal Glider}} | |||
|} | |||
</div> | |||
</div> | |||
==Stage-based universes== | |||
==={{uv|Electroplankton}}=== | |||
<div class="contentbox mw-collapsible mw-collapsed" data-expandtext="Show" data-collapsetext="Hide"> | |||
<div style="overflow-x:auto;"> | |||
{|class="wikitable sortable" style="text-align:center; border-spacing:0.3em" | |||
!Stages | |||
!Stage Cameos | |||
!Stickers | |||
!Music | |||
|- | |||
|[[File:Icon-hanenbow.gif|link=Hanenbow]] | |||
| | |||
|[[File:Brawl Sticker Nanocarp (Electroplankton).png|50px]][[File:Brawl Sticker Hanenbow (Electroplankton).png|50px]]<br>[[File:Brawl Sticker Electroplankton.png|50px]][[File:Brawl Sticker Volvoice (Electroplankton).png|50px]] | |||
| | |||
|- | |||
|[[File:HanenbowIconSSBU.png|70x70px|link=Hanenbow]] | |||
|[[File:SSBU spirit Hanenbow.png|50px|link=Hanenbow]] | |||
| | |||
|•{{SSBUMusicLink|Other|Electroplankton (Remix)}}<br>•{{SSBUMusicLink|Other|Electroplankton (Original)}} | |||
|} | |||
</div> | |||
</div> | |||
==={{uv|StreetPass Mii Plaza}}=== | |||
<div class="contentbox mw-collapsible mw-collapsed" data-expandtext="Show" data-collapsetext="Hide"> | |||
<div style="overflow-x:auto;"> | |||
{|class="wikitable sortable" style="text-align:center; border-spacing:0.3em" | |||
!Stages | |||
!Enemies | |||
!Stage Cameos | |||
!Trophies | |||
!Spirits | |||
!Mii Costumes | |||
!Music | |||
|- | |||
|[[File:SSB4-3_Icon.png|50px]]<br>[[File:FindMiiIconSSB4-3.png|70x70px|link=Find Mii]] | |||
|[[File:SSB4-3_Icon.png|50px]]<br>[[File:FindMiiGhostsTrophy3DS.png|50px|link=Ghost (Find Mii)]] | |||
|[[File:SSB4-3_Icon.png|50px]]<br>[[File:DarkEmperorTrophy3DS.png|50px|link=Dark Emperor]] | |||
|[[File:SSB4-3_Icon.png|50px]]<br>[[File:IrisArchwellTrophy3DS.png|50px]][[File:ArzodiusTrophy3DS.png|50px]][[File:WentworthTrophy3DS.png|50px]]<br>[[File:FynalleTrophy3DS.png|50px]][[File:SquadLeaderTrophy3DS.png|50px]][[File:GoldBoneTrophy3DS.png|50px]]<br>[[File:MendelBlossomTrophy3DS.png|50px]][[File:ReaperGeneralTrophy3DS.png|50px]][[File:DiamondGolemTrophy3DS.png|50px]] | |||
| | |||
|[[File:BearHat.jpg|100px]][[File:BeehiveWig.jpg|100px]][[File:CatEars.jpg|100px]][[File:ChefHat.jpg|100px]]<br>[[File:ChickenHat.jpg|100px]][[File:CowboyHat.jpg|100px]][[File:CowSkullHat.jpg|100px]][[File:DevilHorns.jpg|100px]]<br>[[File:DogEars.jpg|100px]][[File:FloralHat.jpg|100px]][[File:FootballHelmet.jpg|100px]][[File:FrogHat.jpg|100px]]<br>[[File:Hibiscus.jpg|100px]][[File:HockeyMask.jpg|100px]][[File:LacyHeadband.jpg|100px]][[File:LionHat.jpg|100px]]<br>[[File:MagicHat.jpg|100px]][[File:MasterGardener'sCrown.jpg|100px]][[File:MiiForceHelmet.jpg|100px]][[File:MiniTopHat.jpg|100px]]<br>[[File:PandaHat.jpg|100px]][[File:Prince'sCrown.jpg|100px]][[File:Princess'sCrown.jpg|100px]][[File:RedRibbon.jpg|100px]]<br>[[File:RegalCrown.jpg|100px]][[File:SantaHat.jpg|100px]][[File:SpartanHelmet.jpg|100px]][[File:StrawHat.jpg|100px]]<br>[[File:SwimmingCap.jpg|100px]][[File:TopHat.jpg|100px]][[File:WeddingVeil.jpg|100px]] | |||
|[[File:SSB4_Icon.png|50px]]<br>•{{SSB4MusicLink|Nintendo|Dark Lord}}<br>•{{SSB4MusicLink|Nintendo|Save the World, Heroes!}} | |||
|- | |||
|[[File:FindMiiIconSSBU.png|70x70px|link=Find Mii]] | |||
| | |||
|[[File:SSBU spirit Dark Emperor.png|50px|link=Dark Emperor]] | |||
| | |||
|[[File:SSBU spirit Iris Archwell.png|50x50px]][[File:SSBU spirit Gold Bone.png|50x50px]][[File:SSBU spirit Coraline.png|50x50px]]<br>[[File:SSBU spirit Shinobu.png|50x50px]][[File:SSBU spirit Crispin.png|50x50px]][[File:SSBU spirit Nico Fire.png|50x50px]] | |||
|[[File:SSBU Devil Horns.jpg|50px]][[File:SSBU Floral Hat.jpg|50px]][[File:SSBU Hockey Mask.jpg|50px]][[File:SSBU Lacy Headband.jpg|50px]][[File:SSBU Magic Hat.jpg|50px]]<br>[[File:SSBU Prince's Crown.jpg|50px]][[File:SSBU Princess's Crown.jpg|50px]][[File:SSBU Regal Crown.jpg|50px]][[File:SSBU Top Hat.jpg|50px]] | |||
|•{{SSBUMusicLink|Other|Find Mii / Find Mii II Medley}}<br>•{{SSBUMusicLink|Other|Save the World, Heroes!}}<br>•{{SSBUMusicLink|Other|Dark Lord}} | |||
|} | |||
</div> | |||
</div> | |||
==={{uv|Tomodachi}}=== | |||
<div class="contentbox mw-collapsible mw-collapsed" data-expandtext="Show" data-collapsetext="Hide"> | |||
<div style="overflow-x:auto;"> | |||
{|class="wikitable sortable" style="text-align:center; border-spacing:0.3em" | |||
!Stages | |||
!Stage Cameos | |||
!Trophies | |||
!Music | |||
|- | |||
|[[File:SSB4-3_Icon.png|50px]]<br>[[File:TomodachiLifeIconSSB4-3.png|70x70px|link=Tomodachi Life]] | |||
|[[File:SSB4-3_Icon.png|50px]]<br>[[File:TomodachiLifeTrophy3DS.png|50px|link=Tomodachi Life]] | |||
|[[File:SSB4-3_Icon.png|50px]]<br>[[File:GoldenInteriorTrophy3DS.png|50px]] | |||
|[[File:SSB4_Icon.png|50px]]<br>•{{SSB4MusicLink|Nintendo|Tomodachi Life}} | |||
|- | |||
|[[File:TomodachiLifeIconSSBU.png|70x70px|link=Tomodachi Life]] | |||
| | |||
| | |||
|•{{SSBUMusicLink|Other|Afternoon on the Island}}<br>•{{SSBUMusicLink|Other|Afternoon on the Island (for 3DS / Wii U)}} | |||
|} | |||
</div> | |||
</div> | |||
==={{uv|Wii Sports}}=== | |||
<div class="contentbox mw-collapsible mw-collapsed" data-expandtext="Show" data-collapsetext="Hide"> | |||
<div style="overflow-x:auto;"> | |||
{|class="wikitable sortable" style="text-align:center; border-spacing:0.3em" | |||
!Stages | |||
!Stage Cameos | |||
!Music | |||
|- | |||
| | |||
| | |||
|•{{SSBBMusicLink|Nintendo|Opening Theme (Wii Sports)}} | |||
|- | |||
|[[File:SSB4-U_Icon.png|50px]]<br>[[File:WuhuislandIconSSB4-U.png|70x70px|link=Wuhu Island]] | |||
|[[File:SSB4-U_Icon.png|50px]]<br>[[File:PowerCruisingTrophyWiiU.png|50px]][[File:FrisbeeDogTrophyWiiU.png|50px]][[File:WuhuIslandTrophyWiiU.png|50px|link=Wuhu Island]] | |||
|[[File:SSB4-U_Icon.png|50px]]<br>•{{SSB4MusicLink|Nintendo|Opening Theme / Select (Wii Sports)}}<br>•{{SSB4MusicLink|Nintendo|Wii Sports Series Medley}}<br>•{{SSB4MusicLink|Nintendo|Wii Sports Resort}}<br>•{{SSB4MusicLink|Nintendo|Wii Sports Resort Ver. 2}}<br>•{{SSB4MusicLink|Nintendo|Title Theme (Wii Sports Resort)}} | |||
|- | |||
|[[File:WuhuIslandIconSSBU.png|70x70px|link=Wuhu Island]] | |||
| | |||
|•{{SSBUMusicLink|Other|Title Theme - Wii Sports}}<br>•{{SSBUMusicLink|Other|Wii Sports Series Medley}}<br>•{{SSBUMusicLink|Other|Title Theme - Wii Sports Resort}}<br>•{{SSBUMusicLink|Other|Wii Sports Resort}}<br>•{{SSBUMusicLink|Other|Wii Sports Resort Ver. 2}}<br>•{{SSBUMusicLink|Other|Title Theme - Wii Sports Club}}<br>•{{SSBUMusicLink|Other|Tennis (Training)}}<br>•{{SSBUMusicLink|Other|Baseball (Training)}} | |||
|} | |||
</div> | |||
</div> | |||
==Enemy-based universes== | |||
==={{uv|Dig Dug}}=== | |||
<div class="contentbox mw-collapsible mw-collapsed" data-expandtext="Show" data-collapsetext="Hide"> | |||
<div style="overflow-x:auto;"> | |||
{|class="wikitable sortable" style="text-align:center; border-spacing:0.3em" | |||
!Enemies | |||
!Fighter Cameos | |||
!Music | |||
|- | |||
|[[File:SSB4-3_Icon.png|50px]]<br>[[File:PookaTrophy3DS.png|50px|link=Pooka]] | |||
|[[File:Nr pooka.png|50px]] | |||
|[[File:SSB4-U_Icon.png|50px]]<br>•{{SSB4MusicLink|Namco|Namco Arcade '80s Retro Medley 1}} (''Dig Dug'' portion) | |||
|- | |||
| | |||
|[[File:Nr pooka.png|50px]] | |||
|•{{SSBUMusicLink|Pac-Man|Namco Arcade '80s Retro Medley 1}} (''Dig Dug'' portion) | |||
|} | |||
</div> | |||
</div> | |||
==={{uv|Xevious}}=== | |||
<div class="contentbox mw-collapsible mw-collapsed" data-expandtext="Show" data-collapsetext="Hide"> | |||
<div style="overflow-x:auto;"> | |||
{|class="wikitable sortable" style="text-align:center; border-spacing:0.3em" | |||
!Enemies | |||
!Fighter Cameos | |||
|- | |||
|[[File:SSB4-3_Icon.png|50px]]<br>[[File:BacuraTrophy3DS.png|50px|link=Bacura]] | |||
|[[File:SSB4_Icon.png|50px]]<br>[[File:Nr solvalou.png|50px]]<br>[[File:SSB4-U_Icon.png|50px]]<br>[[File:Nr genesis.png|50px]] | |||
|- | |||
| | |||
|[[File:Nr solvalou.png|50px]][[File:Nr genesis.png|50px]] | |||
|} | |||
</div> | |||
</div> | |||
==={{uv|Rhythm Heaven}}=== | |||
<div class="contentbox mw-collapsible mw-collapsed" data-expandtext="Show" data-collapsetext="Hide"> | |||
<div style="overflow-x:auto;"> | |||
{|class="wikitable sortable" style="text-align:center; border-spacing:0.3em" | |||
!Enemies | |||
!Trophies | |||
!Spirits | |||
!Music | |||
|- | |||
|[[File:SSB4-3_Icon.png|50px]]<br>[[File:SneakySpiritTrophy3DS.png|70x70px|link=Sneaky Spirit]] | |||
|[[File:SSB4-3_Icon.png|50px]]<br>[[File:KarateJoeTrophy3DS.png|50px]][[File:ChorusMenTrophy3DS.png|50px]]<br>[[File:SSB4-U_Icon.png|50px]]<br>[[File:MarshalCamMissRibbonTrophyWiiU.png|50px]][[File:Wrestler&ReporterTrophyWiiU.png|50px]] | |||
| | |||
|[[File:SSB4-U_Icon.png|50px]]<br>•{{SSB4MusicLink|Nintendo|Blue Birds}}<br>•{{SSB4MusicLink|Nintendo|Monkey Watch}} | |||
|- | |||
| | |||
| | |||
|[[File:SSBU spirit Karate Joe.png|50x50px]][[File:SSBU spirit The Wandering Samurai.png|50x50px]][[File:SSBU spirit Wandering Samurai (Rhythm Heaven Fever).png|50x50px]]<br>[[File:SSBU spirit Sick Beats Doctor.png|50x50px]][[File:SSBU spirit The Chorus Kids.png|50x50px]][[File:SSBU spirit Munchy Monk.png|50x50px]]<br>[[File:SSBU spirit Reporter & Wrestler.png|50x50px]][[File:SSBU spirit Baxter & Forthington.png|50x50px]][[File:SSBU spirit Sumo Brothers.png|50x50px]] | |||
|•{{SSBUMusicLink|Other|Blue Birds}}<br>•{{SSBUMusicLink|Other|Monkey Watch}}<br>•{{SSBUMusicLink|Other|Fruit Basket}} | |||
|} | |||
</div> | |||
</div> | |||
==Fighter cameo-based universes== | |||
==={{uvm3|Mappy}}=== | |||
<div class="contentbox mw-collapsible mw-collapsed" data-expandtext="Show" data-collapsetext="Hide"> | |||
<div style="overflow-x:auto;"> | |||
{|class="wikitable sortable" style="text-align:center; border-spacing:0.3em" | |||
!Fighter Cameos | |||
!Music | |||
|- | |||
|[[File:PacManUp1-SSB4.png|50px|link=Pac-Jump]][[File:Nr mappy.png|50px]] | |||
|[[File:SSB4-U_Icon.png|50px]]<br>•{{SSB4MusicLink|Namco|Namco Arcade '80s Retro Medley 1}} (''Mappy'' portion) | |||
|- | |||
|[[File:PAC-MAN SSBU Skill Preview Up Special.png|50px|link=Pac-Jump]][[File:Nr mappy.png|50px]] | |||
|•{{SSBUMusicLink|Pac-Man|Mappy Medley}}<br>•{{SSBUMusicLink|Pac-Man|Namco Arcade '80s Retro Medley 1}} (''Mappy'' portion) | |||
|} | |||
</div> | |||
</div> | |||
==={{uvm3|King & Balloon}}=== | |||
<div class="contentbox mw-collapsible mw-collapsed" data-expandtext="Show" data-collapsetext="Hide"> | |||
<div style="overflow-x:auto;"> | |||
{|class="wikitable sortable" style="text-align:center; border-spacing:0.3em" | |||
!Fighter Cameos | |||
|- | |||
|[[File:SSB4-3_Icon.png|50px]]<br>[[File:Nr king.png|50px]] | |||
|- | |||
|[[File:Nr king.png|50px]] | |||
|} | |||
</div> | |||
</div> | |||
==={{uvm3|Rally-X}}=== | |||
<div class="contentbox mw-collapsible mw-collapsed" data-expandtext="Show" data-collapsetext="Hide"> | |||
<div style="overflow-x:auto;"> | |||
{|class="wikitable sortable" style="text-align:center; border-spacing:0.3em" | |||
!Fighter Cameos | |||
!Music | |||
|- | |||
|[[File:Nr mycar.png|50px]] | |||
|[[File:SSB4-U_Icon.png|50px]]<br>•{{SSB4MusicLink|Namco|Namco Arcade '80s Retro Medley 1}} (''New Rally-X'' portion) | |||
|- | |||
|[[File:Nr mycar.png|50px]] | |||
|•{{SSBUMusicLink|Pac-Man|Namco Arcade '80s Retro Medley 1}} (''New Rally-X'' portion) | |||
|} | |||
</div> | |||
</div> | |||
==={{uvm3|Bosconian}}=== | |||
<div class="contentbox mw-collapsible mw-collapsed" data-expandtext="Show" data-collapsetext="Hide"> | |||
<div style="overflow-x:auto;"> | |||
{|class="wikitable sortable" style="text-align:center; border-spacing:0.3em" | |||
!Fighter Cameos | |||
|- | |||
|[[File:Nr bosconian.png|50px]] | |||
|- | |||
|[[File:Nr bosconian.png|50px]] | |||
|} | |||
</div> | |||
</div> | |||
==={{uvm3|Libble Rabble}}=== | |||
<div class="contentbox mw-collapsible mw-collapsed" data-expandtext="Show" data-collapsetext="Hide"> | |||
<div style="overflow-x:auto;"> | |||
{|class="wikitable sortable" style="text-align:center; border-spacing:0.3em" | |||
!Fighter Cameos | |||
!Music | |||
|- | |||
|[[File:Nr topcup.png|50px]] | |||
|[[File:SSB4-U_Icon.png|50px]]<br>•{{SSB4MusicLink|Namco|Libble Rabble Retro Medley}} | |||
|- | |||
|[[File:Nr topcup.png|50px]] | |||
|•{{SSBUMusicLink|Pac-Man|Libble Rabble Retro Medley}} | |||
|} | |||
</div> | |||
</div> | |||
==={{uvm3|Babylonian Castle Saga}}=== | |||
<div class="contentbox mw-collapsible mw-collapsed" data-expandtext="Show" data-collapsetext="Hide"> | |||
<div style="overflow-x:auto;"> | |||
{|class="wikitable sortable" style="text-align:center; border-spacing:0.3em" | |||
!Fighter Cameos | |||
!Mii Costumes | |||
!Music | |||
|- | |||
|[[File:Nr gil.png|50px]] | |||
|[[File:Gil'sHelmet.jpg|100px]]<br>[[File:Gil'sArmor.jpg|100px]] | |||
|[[File:SSB4-U_Icon.png|50px]]<br>•{{SSB4MusicLink|Namco|Namco Arcade '80s Retro Medley 1}} (''The Tower of Druaga'' portion)<br>•{{SSB4MusicLink|Namco|Namco Arcade '80s Retro Medley 2}} (''The Return of Ishtar'' portion) | |||
|- | |||
|[[File:Nr gil.png|50px]] | |||
|[[File:SSBU Gil Helm.jpg|50px]]<br>[[File:SSBU Gil Armor.jpg|50px]] | |||
|•{{SSBUMusicLink|Pac-Man|Namco Arcade '80s Retro Medley 1}} (''The Tower of Druaga'' portion)<br>•{{SSBUMusicLink|Pac-Man|Namco Arcade '80s Retro Medley 2}} (''The Return of Ishtar'' portion) | |||
|} | |||
</div> | |||
</div> | |||
==={{uvm3|Dragon Buster}}=== | |||
<div class="contentbox mw-collapsible mw-collapsed" data-expandtext="Show" data-collapsetext="Hide"> | |||
<div style="overflow-x:auto;"> | |||
{|class="wikitable sortable" style="text-align:center; border-spacing:0.3em" | |||
!Fighter Cameos | |||
|- | |||
|[[File:Nr clovis.png|50px]] | |||
|- | |||
|[[File:Nr clovis.png|50px]] | |||
|} | |||
</div> | |||
</div> | |||
==={{uvm3|Baraduke}}=== | |||
<div class="contentbox mw-collapsible mw-collapsed" data-expandtext="Show" data-collapsetext="Hide"> | |||
<div style="overflow-x:auto;"> | |||
{|class="wikitable sortable" style="text-align:center; border-spacing:0.3em" | |||
!Fighter Cameos | |||
|- | |||
|[[File:Nr paccet.png|50px]] | |||
|- | |||
|[[File:Nr paccet.png|50px]] | |||
|} | |||
</div> | |||
</div> | |||
==={{uvm3|Sky Kid}}=== | |||
<div class="contentbox mw-collapsible mw-collapsed" data-expandtext="Show" data-collapsetext="Hide"> | |||
<div style="overflow-x:auto;"> | |||
{|class="wikitable sortable" style="text-align:center; border-spacing:0.3em" | |||
!Fighter Cameos | |||
!Music | |||
|- | |||
|[[File:Nr baron.png|50px]] | |||
|[[File:SSB4-U_Icon.png|50px]]<br>•{{SSB4MusicLink|Namco|Sky Kid Retro Medley}} | |||
|- | |||
|[[File:Nr baron.png|50px]] | |||
|•{{SSBUMusicLink|Pac-Man|Sky Kid Retro Medley}} | |||
|} | |||
</div> | |||
</div> | |||
==={{uvm3|Taiko no Tatsujin}}=== | |||
<div class="contentbox mw-collapsible mw-collapsed" data-expandtext="Show" data-collapsetext="Hide"> | |||
<div style="overflow-x:auto;"> | |||
{|class="wikitable sortable" style="text-align:center; border-spacing:0.3em" | |||
!Fighter Cameos | |||
|- | |||
|[[File:Nr don.png|50px]] | |||
|- | |||
|[[File:Nr don.png|50px]] | |||
|} | |||
</div> | |||
</div> | |||
==={{uvm|Wild Gunman}}=== | |||
<div class="contentbox mw-collapsible mw-collapsed" data-expandtext="Show" data-collapsetext="Hide"> | |||
<div style="overflow-x:auto;"> | |||
{|class="wikitable sortable" style="text-align:center; border-spacing:0.3em" | |||
!Fighter Cameos | |||
!Stickers | |||
|- | |||
| | |||
|[[File:Brawl Sticker Wild Gunman.png|50px]] | |||
|- | |||
|[[File:WildGunmenTrophyWiiU.png|50px|link=Wild Gunman]] | |||
| | |||
|- | |||
|[[File:SSBU spirit Wild Gunman.png|50px|link=Wild Gunman]] | |||
| | |||
|} | |||
</div> | |||
</div> | |||
==={{uvm|Hogan's Alley}}=== | |||
<div class="contentbox mw-collapsible mw-collapsed" data-expandtext="Show" data-collapsetext="Hide"> | |||
<div style="overflow-x:auto;"> | |||
{|class="wikitable sortable" style="text-align:center; border-spacing:0.3em" | |||
!Fighter Cameos | |||
|- | |||
|[[File:CanTrophyWiiU.png|50px|link=Trick Shot]] | |||
|- | |||
|[[File:Duck Hunt SSBU Skill Preview Neutral Special.png|50px|link=Trick Shot]][[File:SSBU spirit Gangster, Lady, & Policeman.png|50px|link=NES Zapper Posse]] | |||
|} | |||
</div> | |||
</div> | |||
==={{uvm3|Metro-Cross}}=== | |||
<div class="contentbox mw-collapsible mw-collapsed" data-expandtext="Show" data-collapsetext="Hide"> | |||
<div style="overflow-x:auto;"> | |||
{|class="wikitable sortable" style="text-align:center; border-spacing:0.3em" | |||
!Fighter Cameos | |||
!Music | |||
|- | |||
|[[File:SSB4-U_Icon.png|50px]]<br>[[File:Nr runner.png|50px]] | |||
|[[File:SSB4-U_Icon.png|50px]]<br>•{{SSB4MusicLink|Namco|Metro-Cross Retro Medley}} | |||
|- | |||
|[[File:Nr runner.png|50px]] | |||
|•{{SSBUMusicLink|Pac-Man|Metro-Cross Retro Medley}} | |||
|} | |||
</div> | |||
</div> | |||
==={{uvm3|Valkyrie}}=== | |||
<div class="contentbox mw-collapsible mw-collapsed" data-expandtext="Show" data-collapsetext="Hide"> | |||
<div style="overflow-x:auto;"> | |||
{|class="wikitable sortable" style="text-align:center; border-spacing:0.3em" | |||
!Fighter Cameos | |||
!Music | |||
|- | |||
|[[File:Nr valkyrie.png|50px]] | |||
|[[File:SSB4-U_Icon.png|50px]]<br>•{{SSB4MusicLink|Namco|Namco Arcade '80s Retro Medley 2}} (''The Legend of Valkyrie'' portion) | |||
|- | |||
|[[File:Nr valkyrie.png|50px]] | |||
|•{{SSBUMusicLink|Pac-Man|Namco Arcade '80s Retro Medley 2}} (''The Legend of Valkyrie'' portion) | |||
|} | |||
</div> | |||
</div> | |||
==={{uvm3|Katamari}}=== | |||
<div class="contentbox mw-collapsible mw-collapsed" data-expandtext="Show" data-collapsetext="Hide"> | |||
<div style="overflow-x:auto;"> | |||
{|class="wikitable sortable" style="text-align:center; border-spacing:0.3em" | |||
!Fighter Cameos | |||
|- | |||
|[[File:Nr prince.png|50px]] | |||
|- | |||
|[[File:Nr prince.png|50px]] | |||
|} | |||
</div> | |||
</div> | |||
==Stage cameo-based universes== | |||
==={{uvm3|Art of Fighting}}=== | |||
<div class="contentbox mw-collapsible mw-collapsed" data-expandtext="Show" data-collapsetext="Hide"> | |||
<div style="overflow-x:auto;"> | |||
{|class="wikitable sortable" style="text-align:center; border-spacing:0.3em" | |||
!Stage Cameos | |||
!Mii Costumes | |||
!Music | |||
|- | |||
|[[File:SSBU spirit Ryo Sakazaki.png|50px]][[File:SSBU Yuri Sakazaki.jpeg|50px]][[File:SSBU King.jpeg|50px]] | |||
|[[File:SSBU Ryo Sakazaki Wig.jpg|50px]]<br>[[File:SSBU Ryo Sakazaki Outfit.jpg|50px]] | |||
|•{{SSBUMusicLink|Fatal Fury|ART of FIGHT - Art of Fighting}}<br>•{{SSBUMusicLink|Fatal Fury|Art of Fighting Ver.230000000.0 - FATAL FURY SPECIAL}} | |||
|} | |||
</div> | |||
</div> | |||
==={{uvm3|The King of Fighters}}=== | |||
<div class="contentbox mw-collapsible mw-collapsed" data-expandtext="Show" data-collapsetext="Hide"> | |||
<div style="overflow-x:auto;"> | |||
{|class="wikitable sortable" style="text-align:center; border-spacing:0.3em" | |||
!Stage Cameos | |||
!Mii Costumes | |||
!Music | |||
|- | |||
|[[File:SSBU spirit Kyo Kusanagi.png|50px]][[File:SSBU spirit Iori Yagami.png|50px]][[File:SSBU Goro Daimon.jpeg|50px]]<br>[[File:SSBU Chang Koehan.jpeg|50px]][[File:SSBU Choi Bounge.jpeg|50px]] | |||
|[[File:SSBU Iori Yagami Wig.jpg|50px]]<br>[[File:SSBU Iori Yagami Outfit.jpg|50px]] | |||
|•{{SSBUMusicLink|Fatal Fury|Kuri Kinton Flavor - KOF XIV}}<br>•{{SSBUMusicLink|Fatal Fury|Soy Sauce for Geese - KOF XIV}}<br>•{{SSBUMusicLink|Fatal Fury|176th Street - KOF '99}}<br>•{{SSBUMusicLink|Fatal Fury|Ne! - KOF '94}}<br>•{{SSBUMusicLink|Fatal Fury|DESERT REQUIEM ~Operation02UM~ - KOF 2002 UM}}<br>•{{SSBUMusicLink|Fatal Fury|ESAKA!! - KOF 2002 UM}}<br>•{{SSBUMusicLink|Fatal Fury|Stormy Saxophone 2 - KOF '96}}<br>•{{SSBUMusicLink|Fatal Fury|KD-0079+ - KOF 2002 UM}}<br>•{{SSBUMusicLink|Fatal Fury|W.W.III - KOF XIV}}<br>•{{SSBUMusicLink|Fatal Fury|Terry115 - KOF 2000}}<br>•{{SSBUMusicLink|Fatal Fury|Street Dancer - KOF XI}}<br>•{{SSBUMusicLink|Fatal Fury|New Order - KOF XIV}}<br>•{{SSBUMusicLink|Fatal Fury|Undercover - KOF 2002 UM}}<br>•{{SSBUMusicLink|Fatal Fury|Cutting Edge - KOF 2002 UM}}<br>•{{SSBUMusicLink|Fatal Fury|The Second Joker - KOF XIII}}<br>•{{SSBUMusicLink|Fatal Fury|Esaka Continues... - KOF XIII}}<br>•{{SSBUMusicLink|Fatal Fury|Wild Street - KOF XIII}}<br>•{{SSBUMusicLink|Fatal Fury|Tame a Bad Boy - KOF XIII}}<br>•{{SSBUMusicLink|Fatal Fury|KDD-0063 - KOF XIII}}<br>•{{SSBUMusicLink|Fatal Fury|Yappari ESAKA - KOF XIV}}<br>•{{SSBUMusicLink|Fatal Fury|Departure from South Town - KOF XIV}}<br>•{{SSBUMusicLink|Fatal Fury|IKARI - KOF XIV}} | |||
|} | |||
</div> | |||
</div> | |||
==={{uvm3|Psycho Soldier}}=== | |||
<div class="contentbox mw-collapsible mw-collapsed" data-expandtext="Show" data-collapsetext="Hide"> | |||
<div style="overflow-x:auto;"> | |||
{|class="wikitable sortable" style="text-align:center; border-spacing:0.3em" | |||
!Stage Cameos | |||
!Music | |||
|- | |||
|[[File:SSBU spirit Athena Asamiya.png|50px]] | |||
|•{{SSBUMusicLink|Fatal Fury|Psycho Soldier Theme}}<br>•{{SSBUMusicLink|Fatal Fury|Psycho Soldier Theme (Overseas Version)}} | |||
|} | |||
</div> | |||
</div> | |||
==={{uvm3|Ikari Warriors}}=== | |||
<div class="contentbox mw-collapsible mw-collapsed" data-expandtext="Show" data-collapsetext="Hide"> | |||
<div style="overflow-x:auto;"> | |||
{|class="wikitable sortable" style="text-align:center; border-spacing:0.3em" | |||
!Stage Cameos | |||
!Music | |||
|- | |||
|[[File:SSBU spirit Ralf & Clark.png|50px]] | |||
|•{{SSBUMusicLink|Fatal Fury|IKARI - KOF XIV}} | |||
|} | |||
</div> | |||
</div> | |||
==Collectible-based universes== | |||
==={{uvm|Card Hero}}=== | |||
<div class="contentbox mw-collapsible mw-collapsed" data-expandtext="Show" data-collapsetext="Hide"> | |||
<div style="overflow-x:auto;"> | |||
{|class="wikitable sortable" style="text-align:center; border-spacing:0.3em" | |||
!Trophies | |||
!Stickers/Spirits | |||
|- | |||
|[[File:Maruo Maruhige Trophy Melee.png|50px]] | |||
| | |||
|- | |||
| | |||
|[[File:Brawl Sticker Tameo (Trade & Battle Card Hero).png|50px]][[File:Brawl Sticker Master (Trade & Battle Card Hero).png|50px]][[File:Brawl Sticker Hiroshi (Trade & Battle Card Hero).png|50px]] | |||
|- | |||
| | |||
|[[File:SSBU spirit Maruhige Shop Owner.png|50x50px]][[File:SSBU spirit Satoru.png|50x50px]] | |||
|} | |||
</div> | |||
</div> | |||
==={{uvm|Wave Race}}=== | |||
<div class="contentbox mw-collapsible mw-collapsed" data-expandtext="Show" data-collapsetext="Hide"> | |||
<div style="overflow-x:auto;"> | |||
{|class="wikitable sortable" style="text-align:center; border-spacing:0.3em" | |||
!Trophies | |||
!Stickers/Spirits | |||
|- | |||
|[[File:Ryota Hayami Trophy Melee.png|50px]] | |||
| | |||
|- | |||
| | |||
|[[File:Brawl Sticker Ryota Hayami (Wave Race BS).png|50px]][[File:Brawl Sticker Rob Haywood (Wave Race BS).png|50px]][[File:Brawl Sticker Akari Hayami (Wave Race BS).png|50px]][[File:Brawl Sticker Wave Race Blue Storm.png|50px]] | |||
|- | |||
| | |||
|[[File:SSBU spirit Ryota Hayami.png|50x50px]] | |||
|} | |||
</div> | |||
</div> | |||
==={{uvm|1080°}}=== | |||
<div class="contentbox mw-collapsible mw-collapsed" data-expandtext="Show" data-collapsetext="Hide"> | |||
<div style="overflow-x:auto;"> | |||
{|class="wikitable sortable" style="text-align:center; border-spacing:0.3em" | |||
!Trophies | |||
!Stickers/Spirits | |||
!Music | |||
|- | |||
|[[File:Kensuke Kimachi Trophy Melee.png|50px]] | |||
| | |||
| | |||
|- | |||
| | |||
|[[File:Brawl Sticker Snowman (1080 Avalanche).png|50px]][[File:Brawl Sticker Akari Hayami (1080 Avalanche).png|50px]][[File:Brawl Sticker Ricky Winterborn (1080 Avalanche).png|50px]] | |||
|•{{SSBBMusicLink|Nintendo|Golden Forest (1080° Snowboarding)}} | |||
|- | |||
| | |||
| | |||
|[[File:SSB4-U_Icon.png|50px]]<br>•{{SSB4MusicLink|Nintendo|Golden Forest}} | |||
|- | |||
| | |||
|[[File:SSBU spirit Akari Hayami.png|50x50px]] | |||
|•{{SSBUMusicLink|Other|Golden Forest}} | |||
|} | |||
</div> | |||
</div> | |||
==={{uvm|Doshin the Giant}}=== | |||
<div class="contentbox mw-collapsible mw-collapsed" data-expandtext="Show" data-collapsetext="Hide"> | |||
<div style="overflow-x:auto;"> | |||
{|class="wikitable sortable" style="text-align:center; border-spacing:0.3em" | |||
!Trophies | |||
|- | |||
|[[File:Love Giant Trophy Melee.png|50px]][[File:Hate Giant Trophy Melee.png|50px]] | |||
|} | |||
</div> | |||
</div> | |||
==={{uvm|Cubivore}}=== | |||
<div class="contentbox mw-collapsible mw-collapsed" data-expandtext="Show" data-collapsetext="Hide"> | |||
<div style="overflow-x:auto;"> | |||
{|class="wikitable sortable" style="text-align:center; border-spacing:0.3em" | |||
!Trophies | |||
!Spirits | |||
|- | |||
|[[File:Alpha Trophy Melee.png|50px]] | |||
| | |||
|- | |||
| | |||
|[[File:SSBU spirit Pig.png|50x50px]] | |||
|} | |||
</div> | |||
</div> | |||
==={{uvm|Mach Rider}}=== | |||
<div class="contentbox mw-collapsible mw-collapsed" data-expandtext="Show" data-collapsetext="Hide"> | |||
<div style="overflow-x:auto;"> | |||
{|class="wikitable sortable" style="text-align:center; border-spacing:0.3em" | |||
!Trophies | |||
!Stickers/Spirits | |||
!Music | |||
|- | |||
|[[File:Mach Rider Trophy Melee.png|50px]] | |||
| | |||
|•{{SSBMMusicLink|Mach Rider}} | |||
|- | |||
| | |||
|[[File:Brawl Sticker Mach Rider.png|50px]] | |||
|•{{SSBBMusicLink|Super Smash Bros.|Mach Rider (Melee)}} | |||
|- | |||
| | |||
| | |||
|[[File:SSB4-U_Icon.png|50px]]<br>•{{SSB4MusicLink|Nintendo|Mach Rider}} | |||
|- | |||
| | |||
|[[File:SSBU spirit Mach Rider.png|50x50px]] | |||
|•{{SSBUMusicLink|Other|Mach Rider}} | |||
|} | |||
</div> | |||
</div> | |||
==={{uvm|Shin Onigashima}}=== | |||
<div class="contentbox mw-collapsible mw-collapsed" data-expandtext="Show" data-collapsetext="Hide"> | |||
<div style="overflow-x:auto;"> | |||
{|class="wikitable sortable" style="text-align:center; border-spacing:0.3em" | |||
!Trophies | |||
!Stickers/Spirits | |||
!Music | |||
|- | |||
|[[File:Donbe & Hikari Trophy Melee.png|50px]] | |||
| | |||
| | |||
|- | |||
| | |||
|[[File:Brawl Sticker Donbe (Shin Onigashima).png|50px]] | |||
|•{{SSBBMusicLink|Nintendo|Shin Onigashima}} | |||
|- | |||
| | |||
| | |||
|[[File:SSB4-U_Icon.png|50px]]<br>•{{SSB4MusicLink|Nintendo|Shin Onigashima Medley}} | |||
|- | |||
| | |||
|[[File:SSBU spirit Donbe & Hikari.png|50x50px]][[File:SSBU spirit Donbe & Hikari (Shin Onigashima Kouhen).png|50x50px]] | |||
|•{{SSBUMusicLink|Other|Shin Onigashima Medley}} | |||
|} | |||
</div> | |||
</div> | |||
==={{uvm|Detective Club}}=== | |||
<div class="contentbox mw-collapsible mw-collapsed" data-expandtext="Show" data-collapsetext="Hide"> | |||
<div style="overflow-x:auto;"> | |||
{|class="wikitable sortable" style="text-align:center; border-spacing:0.3em" | |||
!Trophies | |||
!Spirits | |||
!Music | |||
|- | |||
|[[File:Ayumi Tachibana Trophy Melee.png|50px]] | |||
| | |||
| | |||
|- | |||
| | |||
| | |||
|•{{SSBBMusicLink|Nintendo|Famicom Medley}} (''Famicom Detective Club: The Girl Who Stands Behind'' portion) | |||
|- | |||
| | |||
|[[File:SSBU spirit Ayumi Tachibana.png|50x50px]] | |||
| | |||
|} | |||
</div> | |||
</div> | |||
==={{uvm|Famicom Grand Prix}}=== | |||
<div class="contentbox mw-collapsible mw-collapsed" data-expandtext="Show" data-collapsetext="Hide"> | |||
<div style="overflow-x:auto;"> | |||
{|class="wikitable sortable" style="text-align:center; border-spacing:0.3em" | |||
!Trophies | |||
!Stickers/Spirits | |||
!Music | |||
|- | |||
|[[File:Monster Trophy Melee.png|50px]] | |||
| | |||
| | |||
|- | |||
| | |||
|[[File:Brawl Sticker Monster (FGPII 3D Hot Rally).png|50px]] | |||
|•{{SSBBMusicLink|Nintendo|Title (3D Hot Rally)}} | |||
|- | |||
| | |||
| | |||
|[[File:SSB4-U_Icon.png|50px]]<br>•{{SSB4MusicLink|Nintendo|Title (3D Hot Rally)}} | |||
|- | |||
| | |||
|[[File:SSBU spirit MONSTER.png|50x50px]] | |||
|•{{SSBUMusicLink|Other|Title Theme - 3D Hot Rally}} | |||
|} | |||
</div> | |||
</div> | |||
==={{uvm|Magical Starsign}}=== | |||
<div class="contentbox mw-collapsible mw-collapsed" data-expandtext="Show" data-collapsetext="Hide"> | |||
<div style="overflow-x:auto;"> | |||
{|class="wikitable sortable" style="text-align:center; border-spacing:0.3em" | |||
!Trophies | |||
!Stickers/Spirits | |||
|- | |||
|[[File:Mokka - Brawl Trophy.png|50px]][[File:Pyrite - Brawl Trophy.png|50px]][[File:Putty - Brawl Trophy.png|50px]] | |||
|[[File:Brawl Sticker Boy (Magical Vacation).png|50px]][[File:Brawl Sticker Girl (Magical Vacation).png|50px]][[File:Brawl Sticker Kirsh (Magical Vacation).png|50px]][[File:Brawl Sticker Boy (Magical Starsign).png|50px]]<br>[[File:Brawl Sticker HP Pot (Magical Starsign).png|50px]][[File:Brawl Sticker Mokka (Magical Starsign).png|50px]][[File:Brawl Sticker Sparrow (Magical Starsign).png|50px]][[File:Brawl Sticker Putty (Magical Starsign).png|50px]] | |||
|- | |||
| | |||
|[[File:SSBU spirit Magical Vacation Protagonists.png|50x50px]][[File:SSBU spirit Putty.png|50x50px]][[File:SSBU spirit Mokka.png|50x50px]] | |||
|} | |||
</div> | |||
</div> | |||
==={{uvm|Chōsōjū Mecha MG}}=== | |||
<div class="contentbox mw-collapsible mw-collapsed" data-expandtext="Show" data-collapsetext="Hide"> | |||
<div style="overflow-x:auto;"> | |||
{|class="wikitable sortable" style="text-align:center; border-spacing:0.3em" | |||
!Trophies | |||
!Stickers/Spirits | |||
!Music | |||
|- | |||
|[[File:Warrior Mech Gauss - Brawl Trophy.png|50px]][[File:HM Mech Rosa - Brawl Trophy.png|50px]][[File:Musketeer Daltania - Brawl Trophy.png|50px]] | |||
|[[File:Brawl Sticker Warrior Mech Gauss (Chosoju Mecha MG).png|50px]][[File:Brawl Sticker Ningyou Kouchuu Viigaru (Chosoju Mecha MG).png|50px]][[File:Brawl Sticker Musketeer Daltania (Chosoju Mecha MG).png|50px]][[File:Brawl Sticker HM Mech Rosa (Chosoju Mecha MG).png|50px]] | |||
|•{{SSBBMusicLink|Nintendo|Marionation Gear}} | |||
|- | |||
| | |||
| | |||
|[[File:SSB4-U_Icon.png|50px]]<br>•{{SSB4MusicLink|Nintendo|Marionation Gear}} | |||
|- | |||
| | |||
|[[File:SSBU spirit Warrior Mech Gauss.png|50x50px]] | |||
|•{{SSBUMusicLink|Other|Marionation Gear}} | |||
|} | |||
</div> | |||
</div> | |||
==={{uvm|Chibi-Robo!}}=== | |||
<div class="contentbox mw-collapsible mw-collapsed" data-expandtext="Show" data-collapsetext="Hide"> | |||
<div style="overflow-x:auto;"> | |||
{|class="wikitable sortable" style="text-align:center; border-spacing:0.3em" | |||
!Trophies | |||
!Stickers/Spirits | |||
!Mii Costumes | |||
|- | |||
|[[File:Chibi-Robo - Brawl Trophy.png|50px]][[File:Telly Vision - Brawl Trophy.png|50px]] | |||
|[[File:Brawl Sticker Chibi-Robo (Chibi-Robo).png|50px]][[File:Brawl Sticker Running Chibi-Robo (Chibi-Robo).png|50px]][[File:Brawl Sticker Telly (Chibi-Robo).png|50px]]<br>[[File:Brawl Sticker Papa (Chibi-Robo).png|50px]][[File:Brawl Sticker Free Ranger (Chibi-Robo Park Patrol).png|50px]][[File:Brawl Sticker Chibi-Robo (Chibi-Robo Park Patrol).png|50px]] | |||
| | |||
|- | |||
|[[File:SSB4-3_Icon.png|50px]]<br>[[File:ChibiRoboTrophy3DS.png|50px]] | |||
| | |||
| | |||
|- | |||
| | |||
|[[File:SSBU spirit Chibi-Robo.png|50x50px]][[File:SSBU spirit Super Chibi-Robo.png|50x50px]][[File:SSBU spirit Telly.png|50x50px]]<br>[[File:SSBU spirit Drake Redcrest.png|50x50px]][[File:SSBU spirit Chibi-Tot.png|50x50px]] | |||
|[[File:SSBU Chibi-Robo Hat.jpg|50px]]<br>[[File:SSBU Chibi-Robo Outfit.jpg|50px]] | |||
|} | |||
</div> | |||
</div> | |||
==={{uvm|Hotel Dusk}}=== | |||
<div class="contentbox mw-collapsible mw-collapsed" data-expandtext="Show" data-collapsetext="Hide"> | |||
<div style="overflow-x:auto;"> | |||
{|class="wikitable sortable" style="text-align:center; border-spacing:0.3em" | |||
!Trophies | |||
!Stickers/Spirits | |||
|- | |||
|[[File:Kyle Hyde - Brawl Trophy.png|50px]] | |||
|[[File:Brawl Sticker Dunning Smith (Hotel Dusk Room 215).png|50px]][[File:Brawl Sticker Mila (Hotel Dusk Room 215).png|50px]][[File:Brawl Sticker Kyle Hyde (Hotel Dusk Room 215).png|50px]] | |||
|- | |||
| | |||
|[[File:SSBU spirit Kyle Hyde.png|50x50px]] | |||
|} | |||
</div> | |||
</div> | |||
==={{uvm|Trace Memory}}=== | |||
<div class="contentbox mw-collapsible mw-collapsed" data-expandtext="Show" data-collapsetext="Hide"> | |||
<div style="overflow-x:auto;"> | |||
{|class="wikitable sortable" style="text-align:center; border-spacing:0.3em" | |||
!Trophies | |||
!Stickers/Spirits | |||
|- | |||
|[[File:Ashley Robbins - Brawl Trophy.png|50px]] | |||
|[[File:Brawl Sticker Captain (Trace Memory).png|50px]][[File:Brawl Sticker Ashley (Trace Memory).png|50px]]<br>[[File:Brawl Sticker Jessica (Trace Memory).png|50px]][[File:Brawl Sticker Ashley Viewing DTS (Trace Memory).png|50px]] | |||
|- | |||
| | |||
|[[File:SSBU spirit Ashley Robbins.png|50x50px]] | |||
|} | |||
</div> | |||
</div> | |||
==={{uvm|Ouendan|Ouendan/Elite Beat Agents}}=== | |||
<div class="contentbox mw-collapsible mw-collapsed" data-expandtext="Show" data-collapsetext="Hide"> | |||
<div style="overflow-x:auto;"> | |||
{|class="wikitable sortable" style="text-align:center; border-spacing:0.3em" | |||
!Trophies | |||
!Stickers/Spirits | |||
|- | |||
|[[File:Ouendan - Brawl Trophy.png|50px]][[File:Elite Beat Agents - Brawl Trophy.png|50px]] | |||
|[[File:Brawl Sticker Hajime Tanaka (Ouendan 2).png|50px]][[File:Brawl Sticker Ryuta Ippongi (Ouendan 2).png|50px]][[File:Brawl Sticker Hayato Saionji (Ouendan 2).png|50px]][[File:Brawl Sticker Kai Doumeki (Ouendan 2).png|50px]][[File:Brawl Sticker Sayaka Amemiya (Ouendan 2).png|50px]]<br>[[File:Brawl Sticker Commander Kahn (Elite Beat Agents).png|50px]][[File:Brawl Sticker J (Elite Beat Agents).png|50px]][[File:Brawl Sticker Derek (Elite Beat Agents).png|50px]][[File:Brawl Sticker Morris (Elite Beat Agents).png|50px]] | |||
|- | |||
| | |||
|[[File:SSBU spirit Ouendan.png|50x50px]][[File:SSBU spirit Ouendan Cheerleaders.png|50x50px]]<br>[[File:SSBU spirit Elite Beat Agents.png|50x50px]][[File:SSBU spirit Elite Beat Divas.png|50x50px]] | |||
|} | |||
</div> | |||
</div> | |||
==={{uvm|bit Generations}}=== | |||
<div class="contentbox mw-collapsible mw-collapsed" data-expandtext="Show" data-collapsetext="Hide"> | |||
<div style="overflow-x:auto;"> | |||
{|class="wikitable sortable" style="text-align:center; border-spacing:0.3em" | |||
!Stickers | |||
|- | |||
|[[File:Brawl Sticker Orbiter (Digiluxe).png|50px]][[File:Brawl Sticker Chromatron (Digiluxe).png|50px]][[File:Brawl Sticker Boundish (Digiluxe).png|50px]]<br>[[File:Brawl Sticker Digidrive (Digiluxe).png|50px]][[File:Brawl Sticker Rotohex (Digiluxe).png|50px]] | |||
|} | |||
</div> | |||
</div> | |||
==={{uvm|Big Brain Academy}}=== | |||
<div class="contentbox mw-collapsible mw-collapsed" data-expandtext="Show" data-collapsetext="Hide"> | |||
<div style="overflow-x:auto;"> | |||
{|class="wikitable sortable" style="text-align:center; border-spacing:0.3em" | |||
!Stickers/Spirits | |||
!Music | |||
|- | |||
|[[File:Brawl Sticker Dr. Lobe (Big Brain Academy).png|50px]][[File:Brawl Sticker Dr. Lobe (Big Brain Academy WD).png|50px]] | |||
|•{{SSBBMusicLink|Nintendo|Title (Big Brain Academy)}} | |||
|- | |||
| | |||
|[[File:SSB4-U_Icon.png|50px]]<br>•{{SSB4MusicLink|Nintendo|Title (Big Brain Academy)}} | |||
|- | |||
|[[File:SSBU spirit Dr. Lobe.png|50x50px]] | |||
|•{{SSBUMusicLink|Other|Title Theme - Big Brain Academy}} | |||
|} | |||
</div> | |||
</div> | |||
==={{uvm|Sennen Kazoku}}=== | |||
<div class="contentbox mw-collapsible mw-collapsed" data-expandtext="Show" data-collapsetext="Hide"> | |||
<div style="overflow-x:auto;"> | |||
{|class="wikitable sortable" style="text-align:center; border-spacing:0.3em" | |||
!Stickers/Spirits | |||
|- | |||
|[[File:Brawl Sticker Aijou Boom no Ya (Sennen Kazoku).png|50px]][[File:Brawl Sticker Cupit (Sennen Kazoku).png|50px]]<br>[[File:Brawl Sticker Akuma (Sennen Kazoku).png|50px]][[File:Brawl Sticker Kamisama (Sennen Kazoku).png|50px]] | |||
|- | |||
|[[File:SSBU spirit Cupid.png|50x50px]] | |||
|} | |||
</div> | |||
</div> | |||
==={{uvm|Slide Adventure MAGKID}}=== | |||
<div class="contentbox mw-collapsible mw-collapsed" data-expandtext="Show" data-collapsetext="Hide"> | |||
<div style="overflow-x:auto;"> | |||
{|class="wikitable sortable" style="text-align:center; border-spacing:0.3em" | |||
!Stickers/Spirits | |||
|- | |||
|[[File:Brawl Sticker Midori Mushi (Slide Adventure MAGKID).png|50px]][[File:Brawl Sticker Magkid (Slide Adventure MAGKID).png|50px]] | |||
|- | |||
|[[File:SSBU spirit Magkid.png|50x50px]] | |||
|} | |||
</div> | |||
</div> | |||
==={{uvm|Stunt Race FX}}=== | |||
<div class="contentbox mw-collapsible mw-collapsed" data-expandtext="Show" data-collapsetext="Hide"> | |||
<div style="overflow-x:auto;"> | |||
{|class="wikitable sortable" style="text-align:center; border-spacing:0.3em" | |||
!Stickers/Spirits | |||
|- | |||
|[[File:Brawl Sticker F-Type (Wild Trax).png|50px]][[File:Brawl Sticker Tractor Trailer (Wild Trax).png|50px]] | |||
|- | |||
|[[File:SSBU spirit F-Type.png|50x50px]][[File:SSBU spirit Tractor Trailer.png|50x50px]] | |||
|} | |||
</div> | |||
</div> | |||
==={{uvm|English Training}}=== | |||
<div class="contentbox mw-collapsible mw-collapsed" data-expandtext="Show" data-collapsetext="Hide"> | |||
<div style="overflow-x:auto;"> | |||
{|class="wikitable sortable" style="text-align:center; border-spacing:0.3em" | |||
!Stickers | |||
|- | |||
|[[File:Brawl Sticker Dzuke-chan (English Training).png|50px]] | |||
|} | |||
</div> | |||
</div> | |||
==={{uvm|X}}=== | |||
<div class="contentbox mw-collapsible mw-collapsed" data-expandtext="Show" data-collapsetext="Hide"> | |||
<div style="overflow-x:auto;"> | |||
{|class="wikitable sortable" style="text-align:center; border-spacing:0.3em" | |||
!Stickers/Spirits | |||
!Music | |||
|- | |||
|[[File:Brawl Sticker Training Academy Coach (X).png|50px]] | |||
|•{{SSBBMusicLink|Nintendo|Tunnel Scene (X)}} | |||
|- | |||
| | |||
|[[File:SSB4-U_Icon.png|50px]]<br>•{{SSB4MusicLink|Nintendo|Tunnel Scene (X)}}<br>•{{SSB4MusicLink|Nintendo|Tunnel Theme (X-Scape)}} | |||
|- | |||
|[[File:SSBU spirit Commander.png|50x50px]] | |||
|•{{SSBUMusicLink|Other|Tunnel Scene - X}}<br>•{{SSBUMusicLink|Other|Tunnel Theme - X-Scape}} | |||
|} | |||
</div> | |||
</div> | |||
==={{uvm|Ice Hockey}}=== | |||
<div class="contentbox mw-collapsible mw-collapsed" data-expandtext="Show" data-collapsetext="Hide"> | |||
<div style="overflow-x:auto;"> | |||
{|class="wikitable sortable" style="text-align:center; border-spacing:0.3em" | |||
!Stickers/Spirits | |||
|- | |||
|[[File:Brawl Sticker Fat Hockey Player (Ice Hockey).png|50px]] | |||
|- | |||
|[[File:SSBU spirit Hockey Players.png|50x50px]] | |||
|} | |||
</div> | |||
</div> | |||
==={{uvm|Yakuman}}=== | |||
<div class="contentbox mw-collapsible mw-collapsed" data-expandtext="Show" data-collapsetext="Hide"> | |||
<div style="overflow-x:auto;"> | |||
{|class="wikitable sortable" style="text-align:center; border-spacing:0.3em" | |||
!Stickers/Spirits | |||
|- | |||
|[[File:Brawl Sticker Yakuman Player (Yakuman).png|50px]] | |||
|- | |||
|[[File:SSBU spirit Yakuman Player.png|50x50px]] | |||
|} | |||
</div> | |||
</div> | |||
==={{uvm|Shaberu! DS Oryōri Navi}}=== | |||
<div class="contentbox mw-collapsible mw-collapsed" data-expandtext="Show" data-collapsetext="Hide"> | |||
<div style="overflow-x:auto;"> | |||
{|class="wikitable sortable" style="text-align:center; border-spacing:0.3em" | |||
!Stickers/Spirits | |||
!Music | |||
|- | |||
|[[File:Brawl Sticker Chef (Shaberu! DS Cooking Navi).png|50px]] | |||
|•{{SSBBMusicLink|Nintendo|Shaberu! DS Cooking Navi}} | |||
|- | |||
|[[File:SSBU spirit Chef (Personal Trainer Cooking).png|50x50px]] | |||
|•{{SSBUMusicLink|Other|Personal Trainer: Cooking}} | |||
|} | |||
</div> | |||
</div> | |||
==={{uvm|Calciobit}}=== | |||
<div class="contentbox mw-collapsible mw-collapsed" data-expandtext="Show" data-collapsetext="Hide"> | |||
<div style="overflow-x:auto;"> | |||
{|class="wikitable sortable" style="text-align:center; border-spacing:0.3em" | |||
!Trophies | |||
!Spirits | |||
|- | |||
|[[File:SSB4-3_Icon.png|50px]]<br>[[File:FootballPlayersTrophy3DS.png|50px]] | |||
| | |||
|- | |||
| | |||
|[[File:SSBU spirit Pocket Football Player.png|50x50px]] | |||
|} | |||
</div> | |||
</div> | |||
==={{uvm|Freakyforms}}=== | |||
<div class="contentbox mw-collapsible mw-collapsed" data-expandtext="Show" data-collapsetext="Hide"> | |||
<div style="overflow-x:auto;"> | |||
{|class="wikitable sortable" style="text-align:center; border-spacing:0.3em" | |||
!Trophies | |||
!Music | |||
|- | |||
|[[File:SSB4-3_Icon.png|50px]]<br>[[File:KingRoyTrophy3DS.png|50px]] | |||
|[[File:SSB4-U_Icon.png|50px]]<br>•{{SSB4MusicLink|Nintendo|Freakyforms: Your Creations, Alive! Medley}} | |||
|- | |||
| | |||
|•{{SSBUMusicLink|Other|Freakyforms: Your Creations, Alive! Medley}} | |||
|} | |||
</div> | |||
</div> | |||
==={{uvm|Thru}}=== | |||
<div class="contentbox mw-collapsible mw-collapsed" data-expandtext="Show" data-collapsetext="Hide"> | |||
<div style="overflow-x:auto;"> | |||
{|class="wikitable sortable" style="text-align:center; border-spacing:0.3em" | |||
!Trophies | |||
|- | |||
|[[File:SSB4-3_Icon.png|50px]]<br>[[File:KetzalsCorridorsTrophy3DS.png|50px]] | |||
|} | |||
</div> | |||
</div> | |||
==={{uvm|Sakura Samurai}}=== | |||
<div class="contentbox mw-collapsible mw-collapsed" data-expandtext="Show" data-collapsetext="Hide"> | |||
<div style="overflow-x:auto;"> | |||
{|class="wikitable sortable" style="text-align:center; border-spacing:0.3em" | |||
!Trophies | |||
!Spirits | |||
!Music | |||
|- | |||
|[[File:SSB4-3_Icon.png|50px]]<br>[[File:SakuraSamuraiTrophy3DS.png|50px]] | |||
| | |||
|[[File:SSB4-U_Icon.png|50px]]<br>•{{SSB4MusicLink|Nintendo|Boss 1 (Sakura Samurai: Art of the Sword)}} | |||
|- | |||
|[[File:SSBU spirit Sakura Samurai.png|50x50px]] | |||
| | |||
|•{{SSBUMusicLink|Other|Boss 1 - Sakura Samurai: Art of the Sword}} | |||
|} | |||
</div> | |||
</div> | |||
==={{uvm3|Culdcept}}=== | |||
<div class="contentbox mw-collapsible mw-collapsed" data-expandtext="Show" data-collapsetext="Hide"> | |||
<div style="overflow-x:auto;"> | |||
{|class="wikitable sortable" style="text-align:center; border-spacing:0.3em" | |||
!Trophies | |||
!Spirits | |||
!Music | |||
|- | |||
|[[File:SSB4-3_Icon.png|50px]]<br>[[File:GoliganTrophy3DS.png|50px]] | |||
| | |||
|[[File:SSB4-U_Icon.png|50px]]<br>•{{SSB4MusicLink|Nintendo|Culdcept}} | |||
|- | |||
| | |||
|[[File:SSBU spirit Culdra.png|50x50px]][[File:SSBU spirit Goligan.png|50x50px]][[File:SSBU spirit Allen.png|50x50px]] | |||
|•{{SSBUMusicLink|Other|Culdcept}}<br>•{{SSBUMusicLink|Other|Revolt -Striving for Hope-}}<br>•{{SSBUMusicLink|Other|Worthy Rival Battle}} | |||
|} | |||
</div> | |||
</div> | |||
==={{uvm|HarmoKnight}}=== | |||
<div class="contentbox mw-collapsible mw-collapsed" data-expandtext="Show" data-collapsetext="Hide"> | |||
<div style="overflow-x:auto;"> | |||
{|class="wikitable sortable" style="text-align:center; border-spacing:0.3em" | |||
!Trophies | |||
!Spirits | |||
|- | |||
|[[File:SSB4-3_Icon.png|50px]]<br>[[File:TempoTrophy3DS.png|50px]] | |||
| | |||
|- | |||
| | |||
|[[File:SSBU spirit Tempo.png|50x50px]] | |||
|} | |||
</div> | |||
</div> | |||
==={{uvm|Style Savvy}}=== | |||
<div class="contentbox mw-collapsible mw-collapsed" data-expandtext="Show" data-collapsetext="Hide"> | |||
<div style="overflow-x:auto;"> | |||
{|class="wikitable sortable" style="text-align:center; border-spacing:0.3em" | |||
!Trophies | |||
!Spirits | |||
!Music | |||
|- | |||
|[[File:SSB4-3_Icon.png|50px]]<br>[[File:EvieTrophy3DS.png|50px]] | |||
| | |||
|[[File:SSB4-U_Icon.png|50px]]<br>•{{SSB4MusicLink|Nintendo|Style Savvy: Trendsetters}}<br>•{{SSB4MusicLink|Nintendo|Pop Fashion Show}} | |||
|- | |||
| | |||
|[[File:SSBU spirit Shop Assistant.png|50x50px]] | |||
|•{{SSBUMusicLink|Other|Style Savvy: Trendsetters}}<br>•{{SSBUMusicLink|Other|Pop Fashion Show}}<br>•{{SSBUMusicLink|Other|Ring a Ding}} | |||
|} | |||
</div> | |||
</div> | |||
==={{uvm|Pushmo}}=== | |||
<div class="contentbox mw-collapsible mw-collapsed" data-expandtext="Show" data-collapsetext="Hide"> | |||
<div style="overflow-x:auto;"> | |||
{|class="wikitable sortable" style="text-align:center; border-spacing:0.3em" | |||
!Trophies | |||
!Spirits | |||
!Music | |||
|- | |||
|[[File:SSB4-3_Icon.png|50px]]<br>[[File:MalloTrophy3DS.png|50px]] | |||
| | |||
| | |||
|- | |||
| | |||
|[[File:SSBU spirit Mallo.png|50x50px]] | |||
|•{{SSBUMusicLink|Other|Welcome Center}} | |||
|} | |||
</div> | |||
</div> | |||
==={{uvm|Fluidity}}=== | |||
<div class="contentbox mw-collapsible mw-collapsed" data-expandtext="Show" data-collapsetext="Hide"> | |||
<div style="overflow-x:auto;"> | |||
{|class="wikitable sortable" style="text-align:center; border-spacing:0.3em" | |||
!Trophies | |||
!Spirits | |||
|- | |||
|[[File:SSB4-3_Icon.png|50px]]<br>[[File:EddyTrophy3DS.png|50px]] | |||
| | |||
|- | |||
| | |||
|[[File:SSBU spirit Eddy.png|50x50px]] | |||
|} | |||
</div> | |||
</div> | |||
==={{uvm|Nintendoji}}=== | |||
<div class="contentbox mw-collapsible mw-collapsed" data-expandtext="Show" data-collapsetext="Hide"> | |||
<div style="overflow-x:auto;"> | |||
{|class="wikitable sortable" style="text-align:center; border-spacing:0.3em" | |||
!Trophies | |||
!Spirits | |||
|- | |||
|[[File:SSB4-3_Icon.png|50px]]<br>[[File:NintendoujiTrophy3DS.png|50px]] | |||
| | |||
|- | |||
| | |||
|[[File:SSBU spirit Kageshina Kurabe.png|50x50px]] | |||
|} | |||
</div> | |||
</div> | |||
==={{uvm|Rusty's Real Deal Baseball}}=== | |||
<div class="contentbox mw-collapsible mw-collapsed" data-expandtext="Show" data-collapsetext="Hide"> | |||
<div style="overflow-x:auto;"> | |||
{|class="wikitable sortable" style="text-align:center; border-spacing:0.3em" | |||
!Trophies | |||
!Spirits | |||
|- | |||
|[[File:SSB4-3_Icon.png|50px]]<br>[[File:InujiDarumeshiTrophy3DS.png|50px]][[File:RustySluggerTrophy3DS.png|50px]] | |||
| | |||
|- | |||
| | |||
|[[File:SSBU spirit Inuji Darumeshi.png|50x50px]][[File:SSBU spirit Rusty Slugger.png|50x50px]] | |||
|} | |||
</div> | |||
</div> | |||
==={{uvm|Fossil Fighters}}=== | |||
<div class="contentbox mw-collapsible mw-collapsed" data-expandtext="Show" data-collapsetext="Hide"> | |||
<div style="overflow-x:auto;"> | |||
{|class="wikitable sortable" style="text-align:center; border-spacing:0.3em" | |||
!Trophies | |||
!Spirits | |||
!Music | |||
|- | |||
|[[File:SSB4-3_Icon.png|50px]]<br>[[File:FossilFightersTrophy3DS.png|50px]] | |||
| | |||
| | |||
|- | |||
| | |||
|[[File:SSBU spirit T-Rex.png|50x50px]][[File:SSBU spirit Nibbles.png|50x50px]] | |||
|•{{SSBUMusicLink|Other|Battle Start - Fossil Fighters: Frontier}} | |||
|} | |||
</div> | |||
</div> | |||
==={{uvm|Captain Rainbow}}=== | |||
<div class="contentbox mw-collapsible mw-collapsed" data-expandtext="Show" data-collapsetext="Hide"> | |||
<div style="overflow-x:auto;"> | |||
{|class="wikitable sortable" style="text-align:center; border-spacing:0.3em" | |||
!Trophies | |||
!Spirits | |||
!Music | |||
|- | |||
|[[File:SSB4-U_Icon.png|50px]]<br>[[File:CaptainRainbowTrophyWiiU.png|50px]][[File:FatMacTrophyWiiU.png|50px]] | |||
| | |||
|[[File:SSB4-U_Icon.png|50px]]<br>•{{SSB4MusicLink|Nintendo|Tomorrow's Passion}} | |||
|- | |||
| | |||
|[[File:SSBU spirit Nick.png|50x50px]][[File:SSBU spirit Captain Rainbow.png|50x50px]] | |||
|•{{SSBUMusicLink|Other|Tomorrow's Passion}} | |||
|} | |||
</div> | |||
</div> | |||
==={{uvm|Zangeki no Reginleiv}}=== | |||
<div class="contentbox mw-collapsible mw-collapsed" data-expandtext="Show" data-collapsetext="Hide"> | |||
<div style="overflow-x:auto;"> | |||
{|class="wikitable sortable" style="text-align:center; border-spacing:0.3em" | |||
!Trophies | |||
!Spirits | |||
|- | |||
|[[File:SSB4-U_Icon.png|50px]]<br>[[File:FreyTrophyWiiU.png|50px]][[File:FreyaTrophyWiiU.png|50px]] | |||
| | |||
|- | |||
| | |||
|[[File:SSBU spirit Frey & Freya.png|50x50px]] | |||
|} | |||
</div> | |||
</div> | |||
==={{uvm|The Last Story}}=== | |||
<div class="contentbox mw-collapsible mw-collapsed" data-expandtext="Show" data-collapsetext="Hide"> | |||
<div style="overflow-x:auto;"> | |||
{|class="wikitable sortable" style="text-align:center; border-spacing:0.3em" | |||
!Trophies | |||
!Spirits | |||
|- | |||
|[[File:SSB4-U_Icon.png|50px]]<br>[[File:ZaelTrophyWiiU.png|50px]][[File:CalistaTrophyWiiU.png|50px]] | |||
| | |||
|- | |||
| | |||
|[[File:SSBU spirit Zael.png|50x50px]][[File:SSBU spirit Calista.png|50x50px]] | |||
|} | |||
</div> | |||
</div> | |||
==={{uvm|Pandora's Tower}}=== | |||
<div class="contentbox mw-collapsible mw-collapsed" data-expandtext="Show" data-collapsetext="Hide"> | |||
<div style="overflow-x:auto;"> | |||
{|class="wikitable sortable" style="text-align:center; border-spacing:0.3em" | |||
!Trophies | |||
!Spirits | |||
|- | |||
|[[File:SSB4-U_Icon.png|50px]]<br>[[File:ElenaAeronTrophyWiiU.png|50px]] | |||
| | |||
|- | |||
| | |||
|[[File:SSBU spirit Aeron.png|50x50px]][[File:SSBU spirit Elena.png|50x50px]] | |||
|} | |||
</div> | |||
</div> | |||
==={{uvm3|Rayman}}=== | |||
<div class="contentbox mw-collapsible mw-collapsed" data-expandtext="Show" data-collapsetext="Hide"> | |||
<div style="overflow-x:auto;"> | |||
{|class="wikitable sortable" style="text-align:center; border-spacing:0.3em" | |||
!Trophies | |||
!Spirits | |||
|- | |||
|[[File:SSB4-U_Icon.png|50px]]<br>[[File:RaymanTrophyWiiU.png|50px]][[File:GloboxTrophyWiiU.png|50px]][[File:BarbaraTrophyWiiU.png|50px]] | |||
| | |||
|- | |||
| | |||
|[[File:SSBU spirit Rayman.png|50x50px]] | |||
|} | |||
</div> | |||
</div> | |||
===''[[Mii (universe)#Nintendo Land|Nintendo Land]]''=== | |||
<div class="contentbox mw-collapsible mw-collapsed" data-expandtext="Show" data-collapsetext="Hide"> | |||
<div style="overflow-x:auto;"> | |||
{|class="wikitable sortable" style="text-align:center; border-spacing:0.3em" | |||
!Trophies | |||
!Spirits | |||
!Music | |||
|- | |||
|[[File:SSB4-U_Icon.png|50px]]<br>[[File:MonitaTrophyWiiU.png|50px]] | |||
| | |||
|[[File:SSB4-U_Icon.png|50px]]<br>•{{SSB4MusicLink|Nintendo|Nintendo Land Medley}}<br>•{{SSB4MusicLink|Nintendo|Title Theme (Nintendo Land)}} | |||
|- | |||
| | |||
|[[File:SSBU spirit Monita.png|50x50px]] | |||
|•{{SSBUMusicLink|Other|Title Theme - Nintendo Land}}<br>•{{SSBUMusicLink|Other|Nintendo Land Medley}} | |||
|} | |||
</div> | |||
</div> | |||
==={{uvm3|BIT.TRIP}}=== | |||
<div class="contentbox mw-collapsible mw-collapsed" data-expandtext="Show" data-collapsetext="Hide"> | |||
<div style="overflow-x:auto;"> | |||
{|class="wikitable sortable" style="text-align:center; border-spacing:0.3em" | |||
!Trophies | |||
|- | |||
|[[File:SSB4-U_Icon.png|50px]]<br>[[File:CommanderVideoTrophyWiiU.png|50px]] | |||
|} | |||
</div> | |||
</div> | |||
==={{uvm3|The Wonderful 101}}=== | |||
<div class="contentbox mw-collapsible mw-collapsed" data-expandtext="Show" data-collapsetext="Hide"> | |||
<div style="overflow-x:auto;"> | |||
{|class="wikitable sortable" style="text-align:center; border-spacing:0.3em" | |||
!Trophies | |||
!Spirits | |||
!Music | |||
|- | |||
|[[File:SSB4-U_Icon.png|50px]]<br>[[File:WonderRedTrophyWiiU.png|50px]][[File:WonderBlueTrophyWiiU.png|50px]][[File:WonderGreenTrophyWiiU.png|50px]][[File:WonderPinkTrophyWiiU.png|50px]]<br>[[File:WonderYellowTrophyWiiU.png|50px]][[File:WonderWhiteTrophyWiiU.png|50px]][[File:WonderBlackTrophyWiiU.png|50px]] | |||
| | |||
|[[File:SSB4-U_Icon.png|50px]]<br>•{{SSB4MusicLink|Nintendo|ST01: Roll Out, Wonderful 100!}}<br>•{{SSB4MusicLink|Nintendo|Jergingha - Planet Destruction Form}} | |||
|- | |||
| | |||
|[[File:SSBU spirit Wonder-Red.png|50x50px]][[File:SSBU spirit Wonder-Blue.png|50x50px]] | |||
|•{{SSBUMusicLink|Other|ST01: Roll Out, Wonderful 100!}}<br>•{{SSBUMusicLink|Other|Jergingha - Planet Destruction Form}} | |||
|} | |||
</div> | |||
</div> | |||
===''[[Mii (universe)#Wii Music|Wii Music]]''=== | |||
<div class="contentbox mw-collapsible mw-collapsed" data-expandtext="Show" data-collapsetext="Hide"> | |||
<div style="overflow-x:auto;"> | |||
{|class="wikitable sortable" style="text-align:center; border-spacing:0.3em" | |||
!Spirits | |||
|- | |||
|[[File:SSBU spirit Sebastian Tute.png|50x50px]] | |||
|} | |||
</div> | |||
</div> | |||
===''[[Mii (universe)#Wii Party|Wii Party]]''=== | |||
<div class="contentbox mw-collapsible mw-collapsed" data-expandtext="Show" data-collapsetext="Hide"> | |||
<div style="overflow-x:auto;"> | |||
{|class="wikitable sortable" style="text-align:center; border-spacing:0.3em" | |||
!Spirits | |||
!Music | |||
|- | |||
| | |||
|[[File:SSB4-U_Icon.png|50px]]<br>•{{SSB4MusicLink|Nintendo|Final Results (Wii Party U)}} | |||
|- | |||
|[[File:SSBU spirit Party Phil.png|50x50px]] | |||
|•{{SSBUMusicLink|Other|Final Results - Wii Party U}} | |||
|} | |||
</div> | |||
</div> | |||
==={{uvm|Baseball}}=== | |||
<div class="contentbox mw-collapsible mw-collapsed" data-expandtext="Show" data-collapsetext="Hide"> | |||
<div style="overflow-x:auto;"> | |||
{|class="wikitable sortable" style="text-align:center; border-spacing:0.3em" | |||
!Spirits | |||
|- | |||
|[[File:SSBU spirit Pitcher & Batter.png|50x50px]] | |||
|} | |||
</div> | |||
</div> | |||
==={{uvm|Tennis}}=== | |||
<div class="contentbox mw-collapsible mw-collapsed" data-expandtext="Show" data-collapsetext="Hide"> | |||
<div style="overflow-x:auto;"> | |||
{|class="wikitable sortable" style="text-align:center; border-spacing:0.3em" | |||
!Spirits | |||
|- | |||
|[[File:SSBU spirit Tennis Player.png|50x50px]] | |||
|} | |||
</div> | |||
</div> | |||
==={{uvm|Urban Champion}}=== | |||
<div class="contentbox mw-collapsible mw-collapsed" data-expandtext="Show" data-collapsetext="Hide"> | |||
<div style="overflow-x:auto;"> | |||
{|class="wikitable sortable" style="text-align:center; border-spacing:0.3em" | |||
!Spirits | |||
!Music | |||
|- | |||
| | |||
|•{{SSBBMusicLink|Nintendo|Famicom Medley}} (''Urban Champion'' portion) | |||
|- | |||
|[[File:SSBU spirit Urban Champion Fighter.png|50x50px]] | |||
| | |||
|} | |||
</div> | |||
</div> | |||
==={{uvm|Volleyball}}=== | |||
<div class="contentbox mw-collapsible mw-collapsed" data-expandtext="Show" data-collapsetext="Hide"> | |||
<div style="overflow-x:auto;"> | |||
{|class="wikitable sortable" style="text-align:center; border-spacing:0.3em" | |||
!Spirits | |||
|- | |||
|[[File:SSBU spirit Volleyball Player.png|50x50px]] | |||
|} | |||
</div> | |||
</div> | |||
==={{uvm|Yūyūki}}=== | |||
<div class="contentbox mw-collapsible mw-collapsed" data-expandtext="Show" data-collapsetext="Hide"> | |||
<div style="overflow-x:auto;"> | |||
{|class="wikitable sortable" style="text-align:center; border-spacing:0.3em" | |||
!Spirits | |||
!Music | |||
|- | |||
|[[File:SSBU spirit Goku & Chao.png|50x50px]] | |||
|•{{SSBUMusicLink|Other|Yūyūki Medley}} | |||
|} | |||
</div> | |||
</div> | |||
==={{uvm|Mole Mania}}=== | |||
<div class="contentbox mw-collapsible mw-collapsed" data-expandtext="Show" data-collapsetext="Hide"> | |||
<div style="overflow-x:auto;"> | |||
{|class="wikitable sortable" style="text-align:center; border-spacing:0.3em" | |||
!Spirits | |||
|- | |||
|[[File:SSBU spirit Muddy Mole.png|50x50px]] | |||
|} | |||
</div> | |||
</div> | |||
==={{uvm|Battle Clash}}=== | |||
<div class="contentbox mw-collapsible mw-collapsed" data-expandtext="Show" data-collapsetext="Hide"> | |||
<div style="overflow-x:auto;"> | |||
{|class="wikitable sortable" style="text-align:center; border-spacing:0.3em" | |||
!Spirits | |||
|- | |||
|[[File:SSBU spirit ST Falcon.png|50x50px]] | |||
|} | |||
</div> | |||
</div> | |||
==={{uvm|Marvelous}}=== | |||
<div class="contentbox mw-collapsible mw-collapsed" data-expandtext="Show" data-collapsetext="Hide"> | |||
<div style="overflow-x:auto;"> | |||
{|class="wikitable sortable" style="text-align:center; border-spacing:0.3em" | |||
!Spirits | |||
|- | |||
|[[File:SSBU spirit Dion, Max, & Jack.png|50x50px]] | |||
|} | |||
</div> | |||
</div> | |||
==={{uvm|Sutte Hakkun}}=== | |||
<div class="contentbox mw-collapsible mw-collapsed" data-expandtext="Show" data-collapsetext="Hide"> | |||
<div style="overflow-x:auto;"> | |||
{|class="wikitable sortable" style="text-align:center; border-spacing:0.3em" | |||
!Spirits | |||
|- | |||
|[[File:SSBU spirit Hakkun.png|50x50px]] | |||
|} | |||
</div> | |||
</div> | |||
==={{uvm|Hajimari no Mori}}=== | |||
<div class="contentbox mw-collapsible mw-collapsed" data-expandtext="Show" data-collapsetext="Hide"> | |||
<div style="overflow-x:auto;"> | |||
{|class="wikitable sortable" style="text-align:center; border-spacing:0.3em" | |||
!Spirits | |||
|- | |||
|[[File:SSBU spirit Girl from Hajimari no Mori.png|50x50px]] | |||
|} | |||
</div> | |||
</div> | |||
==={{uvm|Teleroboxer}}=== | |||
<div class="contentbox mw-collapsible mw-collapsed" data-expandtext="Show" data-collapsetext="Hide"> | |||
<div style="overflow-x:auto;"> | |||
{|class="wikitable sortable" style="text-align:center; border-spacing:0.3em" | |||
!Spirits | |||
|- | |||
|[[File:SSBU spirit Harry.png|50x50px]] | |||
|} | |||
</div> | |||
</div> | |||
==={{uvm|Napoleon}}=== | |||
<div class="contentbox mw-collapsible mw-collapsed" data-expandtext="Show" data-collapsetext="Hide"> | |||
<div style="overflow-x:auto;"> | |||
{|class="wikitable sortable" style="text-align:center; border-spacing:0.3em" | |||
!Spirits | |||
|- | |||
|[[File:SSBU spirit Alessandro Inzaghi.png|50x50px]] | |||
|} | |||
</div> | |||
</div> | |||
==={{uvm|Tomato Adventure}}=== | |||
<div class="contentbox mw-collapsible mw-collapsed" data-expandtext="Show" data-collapsetext="Hide"> | |||
<div style="overflow-x:auto;"> | |||
{|class="wikitable sortable" style="text-align:center; border-spacing:0.3em" | |||
!Spirits | |||
|- | |||
|[[File:SSBU spirit DeMille.png|50x50px]][[File:SSBU spirit Tomatrio.png|50x50px]] | |||
|} | |||
</div> | |||
</div> | |||
==={{uvm|Chalien}}=== | |||
<div class="contentbox mw-collapsible mw-collapsed" data-expandtext="Show" data-collapsetext="Hide"> | |||
<div style="overflow-x:auto;"> | |||
{|class="wikitable sortable" style="text-align:center; border-spacing:0.3em" | |||
!Spirits | |||
|- | |||
|[[File:SSBU spirit Li'l Blue.png|50x50px]] | |||
|} | |||
</div> | |||
</div> | |||
==={{uvm3|The Tower}}=== | |||
<div class="contentbox mw-collapsible mw-collapsed" data-expandtext="Show" data-collapsetext="Hide"> | |||
<div style="overflow-x:auto;"> | |||
{|class="wikitable sortable" style="text-align:center; border-spacing:0.3em" | |||
!Spirits | |||
|- | |||
|[[File:SSBU spirit Yama.png|50x50px]] | |||
|} | |||
</div> | |||
</div> | |||
==={{uvm|Eternal Darkness}}=== | |||
<div class="contentbox mw-collapsible mw-collapsed" data-expandtext="Show" data-collapsetext="Hide"> | |||
<div style="overflow-x:auto;"> | |||
{|class="wikitable sortable" style="text-align:center; border-spacing:0.3em" | |||
!Spirits | |||
|- | |||
|[[File:SSBU spirit Alexandra Roivas.png|50x50px]] | |||
|} | |||
</div> | |||
</div> | |||
==={{uvm|GiFTPiA}}=== | |||
<div class="contentbox mw-collapsible mw-collapsed" data-expandtext="Show" data-collapsetext="Hide"> | |||
<div style="overflow-x:auto;"> | |||
{|class="wikitable sortable" style="text-align:center; border-spacing:0.3em" | |||
!Spirits | |||
|- | |||
|[[File:SSBU spirit Mappo.png|50x50px]] | |||
|} | |||
</div> | |||
</div> | |||
==={{uvm3|Baten Kaitos}}=== | |||
<div class="contentbox mw-collapsible mw-collapsed" data-expandtext="Show" data-collapsetext="Hide"> | |||
<div style="overflow-x:auto;"> | |||
{|class="wikitable sortable" style="text-align:center; border-spacing:0.3em" | |||
!Spirits | |||
!Music | |||
|- | |||
| | |||
|[[File:SSB4-U_Icon.png|50px]]<br>•{{SSB4MusicLink|Nintendo|The valedictory elegy}} | |||
|- | |||
|[[File:SSBU spirit Sagi.png|50x50px]][[File:SSBU spirit Milly.png|50x50px]] | |||
|•{{SSBUMusicLink|Other|The Valedictory Elegy}} | |||
|} | |||
</div> | |||
</div> | |||
==={{uvm|Project Hacker}}=== | |||
<div class="contentbox mw-collapsible mw-collapsed" data-expandtext="Show" data-collapsetext="Hide"> | |||
<div style="overflow-x:auto;"> | |||
{|class="wikitable sortable" style="text-align:center; border-spacing:0.3em" | |||
!Spirits | |||
|- | |||
|[[File:SSBU spirit Satoru Amatsubo.png|50x50px]] | |||
|} | |||
</div> | |||
</div> | |||
==={{uvm|Kurikin Nano Island Story}}=== | |||
<div class="contentbox mw-collapsible mw-collapsed" data-expandtext="Show" data-collapsetext="Hide"> | |||
<div style="overflow-x:auto;"> | |||
{|class="wikitable sortable" style="text-align:center; border-spacing:0.3em" | |||
!Spirits | |||
|- | |||
|[[File:SSBU spirit Kurikin.png|50x50px]] | |||
|} | |||
</div> | |||
</div> | |||
==={{uvm|Number Battle}}=== | |||
<div class="contentbox mw-collapsible mw-collapsed" data-expandtext="Show" data-collapsetext="Hide"> | |||
<div style="overflow-x:auto;"> | |||
{|class="wikitable sortable" style="text-align:center; border-spacing:0.3em" | |||
!Spirits | |||
|- | |||
|[[File:SSBU spirit Hsien.png|50x50px]] | |||
|} | |||
</div> | |||
</div> | |||
==={{uvm|ASH: Archaic Sealed Heat}}=== | |||
<div class="contentbox mw-collapsible mw-collapsed" data-expandtext="Show" data-collapsetext="Hide"> | |||
<div style="overflow-x:auto;"> | |||
{|class="wikitable sortable" style="text-align:center; border-spacing:0.3em" | |||
!Spirits | |||
|- | |||
|[[File:SSBU spirit Aisya.png|50x50px]] | |||
|} | |||
</div> | |||
</div> | |||
==={{uvm|Make 10: A Journey of Numbers}}=== | |||
<div class="contentbox mw-collapsible mw-collapsed" data-expandtext="Show" data-collapsetext="Hide"> | |||
<div style="overflow-x:auto;"> | |||
{|class="wikitable sortable" style="text-align:center; border-spacing:0.3em" | |||
!Spirits | |||
|- | |||
|[[File:SSBU spirit Num Diddly.png|50x50px]] | |||
|} | |||
</div> | |||
</div> | |||
==={{uvm|Soma Bringer}}=== | |||
<div class="contentbox mw-collapsible mw-collapsed" data-expandtext="Show" data-collapsetext="Hide"> | |||
<div style="overflow-x:auto;"> | |||
{|class="wikitable sortable" style="text-align:center; border-spacing:0.3em" | |||
!Spirits | |||
!Music | |||
|- | |||
| | |||
|[[File:SSB4-U_Icon.png|50px]]<br>•{{SSB4MusicLink|Nintendo|Attack (Soma Bringer)}} | |||
|- | |||
|[[File:SSBU spirit Idea.png|50x50px]][[File:SSBU spirit Welt.png|50x50px]] | |||
|•{{SSBUMusicLink|Other|Attack - Soma Bringer}} | |||
|} | |||
</div> | |||
</div> | |||
==={{uvm3|Glory of Heracles}}=== | |||
<div class="contentbox mw-collapsible mw-collapsed" data-expandtext="Show" data-collapsetext="Hide"> | |||
<div style="overflow-x:auto;"> | |||
{|class="wikitable sortable" style="text-align:center; border-spacing:0.3em" | |||
!Spirits | |||
!Music | |||
|- | |||
| | |||
|[[File:SSB4-U_Icon.png|50px]]<br>•{{SSB4MusicLink|Nintendo|Glory of Heracles}} | |||
|- | |||
|[[File:SSBU spirit Glory of Heracles Hero.png|50x50px]][[File:SSBU spirit Heracles.png|50x50px]] | |||
|•{{SSBUMusicLink|Other|Glory of Heracles}} | |||
|} | |||
</div> | |||
</div> | |||
==={{uvm|Looksley's Line Up}}=== | |||
<div class="contentbox mw-collapsible mw-collapsed" data-expandtext="Show" data-collapsetext="Hide"> | |||
<div style="overflow-x:auto;"> | |||
{|class="wikitable sortable" style="text-align:center; border-spacing:0.3em" | |||
!Spirits | |||
|- | |||
|[[File:SSBU spirit Looksley.png|50x50px]] | |||
|} | |||
</div> | |||
</div> | |||
==={{uvm|Tsukutte Utau: Saru Band}}=== | |||
<div class="contentbox mw-collapsible mw-collapsed" data-expandtext="Show" data-collapsetext="Hide"> | |||
<div style="overflow-x:auto;"> | |||
{|class="wikitable sortable" style="text-align:center; border-spacing:0.3em" | |||
!Spirits | |||
|- | |||
|[[File:SSBU spirit Prince Saruno.png|50x50px]] | |||
|} | |||
</div> | |||
</div> | |||
==={{uvm|Disaster: Day of Crisis}}=== | |||
<div class="contentbox mw-collapsible mw-collapsed" data-expandtext="Show" data-collapsetext="Hide"> | |||
<div style="overflow-x:auto;"> | |||
{|class="wikitable sortable" style="text-align:center; border-spacing:0.3em" | |||
!Spirits | |||
|- | |||
|[[File:SSBU spirit Raymond Bryce.png|50x50px]] | |||
|} | |||
</div> | |||
</div> | |||
==={{uvm|Takt of Magic}}=== | |||
<div class="contentbox mw-collapsible mw-collapsed" data-expandtext="Show" data-collapsetext="Hide"> | |||
<div style="overflow-x:auto;"> | |||
{|class="wikitable sortable" style="text-align:center; border-spacing:0.3em" | |||
!Spirits | |||
|- | |||
|[[File:SSBU spirit Orville.png|50x50px]] | |||
|} | |||
</div> | |||
</div> | |||
==={{uvm|And-Kensaku}}=== | |||
<div class="contentbox mw-collapsible mw-collapsed" data-expandtext="Show" data-collapsetext="Hide"> | |||
<div style="overflow-x:auto;"> | |||
{|class="wikitable sortable" style="text-align:center; border-spacing:0.3em" | |||
!Spirits | |||
|- | |||
|[[File:SSBU spirit Ando Kensaku.png|50x50px]] | |||
|} | |||
</div> | |||
</div> | |||
==={{uvm|FlingSmash}}=== | |||
<div class="contentbox mw-collapsible mw-collapsed" data-expandtext="Show" data-collapsetext="Hide"> | |||
<div style="overflow-x:auto;"> | |||
{|class="wikitable sortable" style="text-align:center; border-spacing:0.3em" | |||
!Spirits | |||
|- | |||
|[[File:SSBU spirit Zip.png|50x50px]] | |||
|} | |||
</div> | |||
</div> | |||
==={{uvm|Kiki Trick}}=== | |||
<div class="contentbox mw-collapsible mw-collapsed" data-expandtext="Show" data-collapsetext="Hide"> | |||
<div style="overflow-x:auto;"> | |||
{|class="wikitable sortable" style="text-align:center; border-spacing:0.3em" | |||
!Spirits | |||
|- | |||
|[[File:SSBU spirit Noise.png|50x50px]] | |||
|} | |||
</div> | |||
</div> | |||
==={{uvm|BoxBoy!}}=== | |||
<div class="contentbox mw-collapsible mw-collapsed" data-expandtext="Show" data-collapsetext="Hide"> | |||
<div style="overflow-x:auto;"> | |||
{|class="wikitable sortable" style="text-align:center; border-spacing:0.3em" | |||
!Spirits | |||
|- | |||
|[[File:SSBU spirit Qbby.png|50x50px]] | |||
|} | |||
</div> | |||
</div> | |||
==={{uvm|Code Name: S.T.E.A.M.}}=== | |||
<div class="contentbox mw-collapsible mw-collapsed" data-expandtext="Show" data-collapsetext="Hide"> | |||
<div style="overflow-x:auto;"> | |||
{|class="wikitable sortable" style="text-align:center; border-spacing:0.3em" | |||
!Spirits | |||
!Music | |||
|- | |||
|[[File:SSBU spirit Henry Fleming.png|50x50px]] | |||
|•{{SSBUMusicLink|Fire Emblem|Code Name: F.E.}}<br>•{{SSBUMusicLink|Fire Emblem|Lords-A Chance Encounter}}<br>•{{SSBUMusicLink|Fire Emblem|Lords-Showdown}}<br>•{{SSBUMusicLink|Other|Trouble Brewing II}} | |||
|} | |||
</div> | |||
</div> | |||
==={{uvm|Ever Oasis}}=== | |||
<div class="contentbox mw-collapsible mw-collapsed" data-expandtext="Show" data-collapsetext="Hide"> | |||
<div style="overflow-x:auto;"> | |||
{|class="wikitable sortable" style="text-align:center; border-spacing:0.3em" | |||
!Spirits | |||
!Music | |||
|- | |||
|[[File:SSBU spirit Tethu.png|50x50px]][[File:SSBU spirit Esna.png|50x50px]] | |||
|•{{SSBUMusicLink|Other|Dawn in the Desert}}<br>•{{SSBUMusicLink|Other|Struggle Against Chaos}} | |||
|} | |||
</div> | |||
</div> | |||
==={{uvm|Sushi Striker}}=== | |||
<div class="contentbox mw-collapsible mw-collapsed" data-expandtext="Show" data-collapsetext="Hide"> | |||
<div style="overflow-x:auto;"> | |||
{|class="wikitable sortable" style="text-align:center; border-spacing:0.3em" | |||
!Spirits | |||
|- | |||
|[[File:SSBU spirit Musashi.png|50x50px]] | |||
|} | |||
</div> | |||
</div> | |||
==={{uvm|Snipperclips}}=== | |||
<div class="contentbox mw-collapsible mw-collapsed" data-expandtext="Show" data-collapsetext="Hide"> | |||
<div style="overflow-x:auto;"> | |||
{|class="wikitable sortable" style="text-align:center; border-spacing:0.3em" | |||
!Spirits | |||
!Music | |||
|- | |||
|[[File:SSBU spirit Clip & Snip.png|50x50px]] | |||
|•{{SSBUMusicLink|Other|Noisy Notebook}} | |||
|} | |||
</div> | |||
</div> | |||
==={{uvm3|Shantae}}=== | |||
<div class="contentbox mw-collapsible mw-collapsed" data-expandtext="Show" data-collapsetext="Hide"> | |||
<div style="overflow-x:auto;"> | |||
{|class="wikitable sortable" style="text-align:center; border-spacing:0.3em" | |||
!Spirits | |||
!Mii Costumes | |||
!Music | |||
|- | |||
|[[File:SSBU spirit Shantae.png|50x50px]][[File:SSBU spirit Risky Boots.png|50x50px]] | |||
|[[File:SSBU Shantae Wig.jpg|50px]]<br>[[File:SSBU Shantae Outfit.jpg|50px]] | |||
|•{{SSBUMusicLink|Other|Burning Town}} | |||
|} | |||
</div> | |||
</div> | |||
==={{uvm|Nintendo Labo}}=== | |||
<div class="contentbox mw-collapsible mw-collapsed" data-expandtext="Show" data-collapsetext="Hide"> | |||
<div style="overflow-x:auto;"> | |||
{|class="wikitable sortable" style="text-align:center; border-spacing:0.3em" | |||
!Spirits | |||
!Mii Costumes | |||
|- | |||
|[[File:SSBU spirit Toy-Con Robot.png|50x50px]][[File:SSBU spirit Toy-Con Car.png|50x50px]]<br>[[File:SSBU spirit Professor Riggs & Plaise & Lerna.png|50x50px]][[File:SSBU spirit Toy-Con VR Goggles.png|50x50px]] | |||
|[[File:SSBU Toy-Con Visor.jpg|50px]]<br>[[File:SSBU Toy-Con Outfit.jpg|50px]] | |||
|} | |||
</div> | |||
</div> | |||
==={{uvm3|Daemon X Machina}}=== | |||
<div class="contentbox mw-collapsible mw-collapsed" data-expandtext="Show" data-collapsetext="Hide"> | |||
<div style="overflow-x:auto;"> | |||
{|class="wikitable sortable" style="text-align:center; border-spacing:0.3em" | |||
!Spirits | |||
|- | |||
|[[File:SSBU spirit Radiant Gleam.png|50x50px]][[File:SSBU spirit Kloster (Grief).png|50x50px]]<br>[[File:SSBU spirit Bullet Walker (Brigadier General).png|50x50px]][[File:SSBU spirit High Line (Guns Empress).png|50x50px]] | |||
|} | |||
</div> | |||
</div> | |||
==={{uvm3|Tetris}}=== | |||
<div class="contentbox mw-collapsible mw-collapsed" data-expandtext="Show" data-collapsetext="Hide"> | |||
<div style="overflow-x:auto;"> | |||
{|class="wikitable sortable" style="text-align:center; border-spacing:0.3em" | |||
!Spirits | |||
!Music | |||
|- | |||
| | |||
|•{{SSBBMusicLink|Nintendo|Tetris: Type A}}<br>•{{SSBBMusicLink|Nintendo|Tetris: Type B}} | |||
|- | |||
| | |||
|[[File:SSB4_Icon.png|50px]]<br>•{{SSB4MusicLink|Nintendo|Tetris: Type A}}<br>[[File:SSB4-U_Icon.png|50px]]<br>•{{SSB4MusicLink|Nintendo|Tetris: Type B}} | |||
|- | |||
|[[File:SSBU spirit I-Tetrimino.png|50x50px]][[File:SSBU spirit T-Tetrimino.png|50x50px]][[File:SSBU spirit S-Tetrimino & Z-Tetrimino.png|50x50px]]<br>[[File:SSBU spirit L-Tetrimino & J-Tetrimino.png|50x50px]][[File:SSBU spirit O-Tetrimino.png|50x50px]] | |||
|•{{SSBUMusicLink|Other|Tetris: Type A}}<br>•{{SSBUMusicLink|Other|Tetris: Type B}} | |||
|} | |||
</div> | |||
</div> | |||
==={{uvm3|Samurai Shodown}}=== | |||
<div class="contentbox mw-collapsible mw-collapsed" data-expandtext="Show" data-collapsetext="Hide"> | |||
<div style="overflow-x:auto;"> | |||
{|class="wikitable sortable" style="text-align:center; border-spacing:0.3em" | |||
!Spirits | |||
!Mii Costumes | |||
!Music | |||
|- | |||
|[[File:SSBU spirit Haohmaru.png|50x50px]][[File:SSBU spirit Nakoruru.png|50x50px]] | |||
|[[File:SSBU Nakoruru Wig.jpg|50px]]<br>[[File:SSBU Nakoruru Outfit.jpg|50px]] | |||
|•{{SSBUMusicLink|Fatal Fury|Tuna - SAMURAI SHODOWN}}<br>•{{SSBUMusicLink|Fatal Fury|Banquet of Nature - SAMURAI SHODOWN}}<br>•{{SSBUMusicLink|Fatal Fury|Gaia - SAMURAI SHODOWN}} | |||
|} | |||
</div> | |||
</div> | |||
==={{uvm3|Resident Evil}}=== | |||
<div class="contentbox mw-collapsible mw-collapsed" data-expandtext="Show" data-collapsetext="Hide"> | |||
<div style="overflow-x:auto;"> | |||
{|class="wikitable sortable" style="text-align:center; border-spacing:0.3em" | |||
!Spirits | |||
|- | |||
|[[File:SSBU spirit Wesker.png|50x50px]][[File:SSBU spirit Leon.png|50x50px]]<br>[[File:SSBU spirit Chris.png|50x50px]][[File:SSBU spirit Jill.png|50x50px]] | |||
|} | |||
</div> | |||
</div> | |||
==={{uvm|Astral Chain}}=== | |||
<div class="contentbox mw-collapsible mw-collapsed" data-expandtext="Show" data-collapsetext="Hide"> | |||
<div style="overflow-x:auto;"> | |||
{|class="wikitable sortable" style="text-align:center; border-spacing:0.3em" | |||
!Spirits | |||
|- | |||
|[[File:SSBU spirit ASTRAL CHAIN Hero (Female).png|50x50px]][[File:SSBU spirit ASTRAL CHAIN Hero (Male).png|50x50px]]<br>[[File:SSBU spirit Kyle.png|50x50px]][[File:SSBU spirit Lappy.png|50x50px]] | |||
|} | |||
</div> | |||
</div> | |||
==={{uvm3|River City}}=== | |||
<div class="contentbox mw-collapsible mw-collapsed" data-expandtext="Show" data-collapsetext="Hide"> | |||
<div style="overflow-x:auto;"> | |||
{|class="wikitable sortable" style="text-align:center; border-spacing:0.3em" | |||
!Spirits | |||
|- | |||
|[[File:SSBU spirit Kunio.png|50x50px]][[File:SSBU spirit Riki (River City).png|50x50px]]<br>[[File:SSBU spirit Goda.png|50x50px]][[File:SSBU spirit Ryuichi & Ryuji.png|50x50px]] | |||
|} | |||
</div> | |||
</div> | |||
==={{uvm3|Cuphead}}=== | |||
<div class="contentbox mw-collapsible mw-collapsed" data-expandtext="Show" data-collapsetext="Hide"> | |||
<div style="overflow-x:auto;"> | |||
{|class="wikitable sortable" style="text-align:center; border-spacing:0.3em" | |||
!Spirits | |||
!Mii Costumes | |||
!Music | |||
|- | |||
|[[File:SSBU spirit Cuphead.png|50x50px]][[File:SSBU spirit Mugman.png|50x50px]]<br>[[File:SSBU spirit The Devil (Cuphead).png|50x50px]][[File:SSBU spirit King Dice.png|50x50px]] | |||
|[[File:SSBU Cuphead Hat.jpg|50px]]<br>[[File:SSBU Cuphead Outfit.jpg|50px]] | |||
|•{{SSBUMusicLink|Other|Floral Fury}} | |||
|} | |||
</div> | |||
</div> | |||
==={{uvm3|Warframe}}=== | |||
<div class="contentbox mw-collapsible mw-collapsed" data-expandtext="Show" data-collapsetext="Hide"> | |||
<div style="overflow-x:auto;"> | |||
{|class="wikitable sortable" style="text-align:center; border-spacing:0.3em" | |||
!Spirits | |||
|- | |||
|[[File:SSBU spirit Lotus.png|50x50px]][[File:SSBU spirit Natah.png|50x50px]] | |||
|} | |||
</div> | |||
</div> | |||
==={{uvm|Ring Fit Adventure}}=== | |||
<div class="contentbox mw-collapsible mw-collapsed" data-expandtext="Show" data-collapsetext="Hide"> | |||
<div style="overflow-x:auto;"> | |||
{|class="wikitable sortable" style="text-align:center; border-spacing:0.3em" | |||
!Spirits | |||
|- | |||
|[[File:SSBU spirit Ring Fit Trainees.png|50x50px]][[File:SSBU spirit Dragaux.png|50x50px]][[File:SSBU spirit Ring.png|50x50px]] | |||
|} | |||
</div> | |||
</div> | |||
==={{uvm3|Mana}}=== | |||
<div class="contentbox mw-collapsible mw-collapsed" data-expandtext="Show" data-collapsetext="Hide"> | |||
<div style="overflow-x:auto;"> | |||
{|class="wikitable sortable" style="text-align:center; border-spacing:0.3em" | |||
!Spirits | |||
|- | |||
|[[File:SSBU spirit Duran & Angela.png|50x50px]][[File:SSBU spirit Kevin & Charlotte.png|50x50px]][[File:SSBU spirit Hawkeye & Riesz.png|50x50px]] | |||
|} | |||
</div> | |||
</div> | |||
==={{uvm3|Octopath Traveler}}=== | |||
<div class="contentbox mw-collapsible mw-collapsed" data-expandtext="Show" data-collapsetext="Hide"> | |||
<div style="overflow-x:auto;"> | |||
{|class="wikitable sortable" style="text-align:center; border-spacing:0.3em" | |||
!Spirits | |||
|- | |||
|[[File:SSBU spirit Alfyn & Therion.png|50x50px]][[File:SSBU spirit Tressa & Cyrus.png|50x50px]]<br>[[File:SSBU spirit H'aanit & Ophilia.png|50x50px]][[File:SSBU spirit Olberic & Primrose.png|50x50px]] | |||
|} | |||
</div> | |||
</div> | |||
==={{uvm3|Bravely Default}}=== | |||
<div class="contentbox mw-collapsible mw-collapsed" data-expandtext="Show" data-collapsetext="Hide"> | |||
<div style="overflow-x:auto;"> | |||
{|class="wikitable sortable" style="text-align:center; border-spacing:0.3em" | |||
!Spirits | |||
|- | |||
|[[File:SSBU spirit Seth & Gloria.png|50x50px]][[File:SSBU spirit Elvis & Adelle.png|50x50px]] | |||
|} | |||
</div> | |||
</div> | |||
==={{uvm3|Ghosts 'n Goblins}}=== | |||
<div class="contentbox mw-collapsible mw-collapsed" data-expandtext="Show" data-collapsetext="Hide"> | |||
<div style="overflow-x:auto;"> | |||
{|class="wikitable sortable" style="text-align:center; border-spacing:0.3em" | |||
!Spirits | |||
!Mii Costumes | |||
|- | |||
|[[File:SSBU spirit Arthur.png|50x50px]] | |||
|[[File:SSBU Arthurs Helm.jpg|50px]]<br>[[File:SSBU Arthurs Armor.jpg|50px]] | |||
|} | |||
</div> | |||
</div> | |||
==={{uvm3|Sakuna: Of Rice and Ruin}}=== | |||
<div class="contentbox mw-collapsible mw-collapsed" data-expandtext="Show" data-collapsetext="Hide"> | |||
<div style="overflow-x:auto;"> | |||
{|class="wikitable sortable" style="text-align:center; border-spacing:0.3em" | |||
!Spirits | |||
|- | |||
|[[File:SSBU spirit Sakuna.png|50x50px]][[File:SSBU spirit Kokorowa.png|50x50px]][[File:SSBU spirit Tama.png|50x50px]] | |||
|} | |||
</div> | |||
</div> | |||
==={{uvm3|No More Heroes}}=== | |||
<div class="contentbox mw-collapsible mw-collapsed" data-expandtext="Show" data-collapsetext="Hide"> | |||
<div style="overflow-x:auto;"> | |||
{|class="wikitable sortable" style="text-align:center; border-spacing:0.3em" | |||
!Spirits | |||
!Mii Costumes | |||
|- | |||
|[[File:SSBU spirit Travis Touchdown.png|50x50px]][[File:SSBU spirit Full-Armor Travis (Full Green Mode).png|50x50px]][[File:SSBU spirit FU (Jess-Baptiste VI).png|50x50px]] | |||
|[[File:SSBU Travis Wig.jpg|50px]]<br>[[File:SSBU Travis Outfit.jpg|50px]] | |||
|} | |||
</div> | |||
</div> | |||
==Mii Costume-based universes== | |||
==={{uvm3|Goemon}}=== | |||
<div class="contentbox mw-collapsible mw-collapsed" data-expandtext="Show" data-collapsetext="Hide"> | |||
<div style="overflow-x:auto;"> | |||
{|class="wikitable sortable" style="text-align:center; border-spacing:0.3em" | |||
!Mii Costumes | |||
|- | |||
|[[File:SSBU Goemon Wig.jpg|50px]]<br>[[File:SSBU Goemon Outfit.jpg|50px]] | |||
|} | |||
</div> | |||
</div> | |||
==={{uvm3|Undertale}}=== | |||
<div class="contentbox mw-collapsible mw-collapsed" data-expandtext="Show" data-collapsetext="Hide"> | |||
<div style="overflow-x:auto;"> | |||
{|class="wikitable sortable" style="text-align:center; border-spacing:0.3em" | |||
!Mii Costumes | |||
!Music | |||
|- | |||
|[[File:SSBU Sans Mask.jpg|50px]]<br>[[File:SSBU Sans Outfit.jpg|50px]] | |||
|•{{SSBUMusicLink|Other|MEGALOVANIA}} | |||
|} | |||
</div> | |||
</div> | |||
==={{uvm3|Assassin's Creed}}=== | |||
<div class="contentbox mw-collapsible mw-collapsed" data-expandtext="Show" data-collapsetext="Hide"> | |||
<div style="overflow-x:auto;"> | |||
{|class="wikitable sortable" style="text-align:center; border-spacing:0.3em" | |||
!Mii Costumes | |||
|- | |||
|[[File:SSBU Altair Hood.jpg|50px]]<br>[[File:SSBU Altair Outfit.jpg|50px]] | |||
|} | |||
</div> | |||
</div> | |||
==={{uvm3|Rabbids}}=== | |||
<div class="contentbox mw-collapsible mw-collapsed" data-expandtext="Show" data-collapsetext="Hide"> | |||
<div style="overflow-x:auto;"> | |||
{|class="wikitable sortable" style="text-align:center; border-spacing:0.3em" | |||
!Mii Costumes | |||
|- | |||
|[[File:SSBU Rabbids Hat.jpg|50px]] | |||
|} | |||
</div> | |||
</div> | |||
==={{uvm3|Fallout}}=== | |||
<div class="contentbox mw-collapsible mw-collapsed" data-expandtext="Show" data-collapsetext="Hide"> | |||
<div style="overflow-x:auto;"> | |||
{|class="wikitable sortable" style="text-align:center; border-spacing:0.3em" | |||
!Mii Costumes | |||
|- | |||
|[[File:SSBU Vault Boy Mask.jpg|50px]]<br>[[File:SSBU Vault 111 Jumpsuit.jpg|50px]] | |||
|} | |||
</div> | |||
</div> | |||
==={{uvm3|The Elder Scrolls}}=== | |||
<div class="contentbox mw-collapsible mw-collapsed" data-expandtext="Show" data-collapsetext="Hide"> | |||
<div style="overflow-x:auto;"> | |||
{|class="wikitable sortable" style="text-align:center; border-spacing:0.3em" | |||
!Mii Costumes | |||
|- | |||
|[[File:SSBU Dragonborn Helm.jpg|50px]]<br>[[File:SSBU Dragonborn Outfit.jpg|50px]] | |||
|} | |||
</div> | |||
</div> | |||
==={{uvm3|Devil May Cry}}=== | |||
<div class="contentbox mw-collapsible mw-collapsed" data-expandtext="Show" data-collapsetext="Hide"> | |||
<div style="overflow-x:auto;"> | |||
{|class="wikitable sortable" style="text-align:center; border-spacing:0.3em" | |||
!Mii Costumes | |||
|- | |||
|[[File:SSBU Dante Wig.jpg|50px]]<br>[[File:SSBU Dante Outfit.jpg|50px]] | |||
|} | |||
</div> | |||
</div> | |||
==={{uvm3|Doom}}=== | |||
<div class="contentbox mw-collapsible mw-collapsed" data-expandtext="Show" data-collapsetext="Hide"> | |||
<div style="overflow-x:auto;"> | |||
{|class="wikitable sortable" style="text-align:center; border-spacing:0.3em" | |||
!Mii Costumes | |||
|- | |||
|[[File:SSBU Doom Slayer Helmet.jpg|50px]]<br>[[File:SSBU Doom Slayer Armor.jpg|50px]] | |||
|} | |||
</div> | |||
</div> | |||
==Music-based universes== | |||
==={{uvm|Soccer}}=== | |||
<div class="contentbox mw-collapsible mw-collapsed" data-expandtext="Show" data-collapsetext="Hide"> | |||
<div style="overflow-x:auto;"> | |||
{|class="wikitable sortable" style="text-align:center; border-spacing:0.3em" | |||
!Music | |||
|- | |||
|•{{SSBBMusicLink|Nintendo|Famicom Medley}} (''Soccer'' portion) | |||
|} | |||
</div> | |||
</div> | |||
===''[[Mii (universe)#Wii Play|Wii Play]]''=== | |||
<div class="contentbox mw-collapsible mw-collapsed" data-expandtext="Show" data-collapsetext="Hide"> | |||
<div style="overflow-x:auto;"> | |||
{|class="wikitable sortable" style="text-align:center; border-spacing:0.3em" | |||
!Music | |||
|- | |||
|•{{SSBBMusicLink|Nintendo|Charge! (Wii Play)}} | |||
|- | |||
|•{{SSBUMusicLink|Other|Charge! - Wii Play}} | |||
|} | |||
</div> | |||
</div> | |||
==={{uvm3|Dragon Spirit}}=== | |||
<div class="contentbox mw-collapsible mw-collapsed" data-expandtext="Show" data-collapsetext="Hide"> | |||
<div style="overflow-x:auto;"> | |||
{|class="wikitable sortable" style="text-align:center; border-spacing:0.3em" | |||
!Music | |||
|- | |||
|[[File:SSB4-U_Icon.png|50px]]<br>•{{SSB4MusicLink|Namco|Namco Arcade '80s Retro Medley 2}} (''Dragon Spirit'' portion) | |||
|- | |||
|•{{SSBUMusicLink|Pac-Man|Area 1 - Dragon Spirit}}<br>•{{SSBUMusicLink|Pac-Man|Namco Arcade '80s Retro Medley 2}} (''Dragon Spirit'' portion) | |||
|} | |||
</div> | |||
</div> | |||
==={{uvm3|Wonder Momo}}=== | |||
<div class="contentbox mw-collapsible mw-collapsed" data-expandtext="Show" data-collapsetext="Hide"> | |||
<div style="overflow-x:auto;"> | |||
{|class="wikitable sortable" style="text-align:center; border-spacing:0.3em" | |||
!Music | |||
|- | |||
|[[File:SSB4-U_Icon.png|50px]]<br>•{{SSB4MusicLink|Namco|Namco Arcade '80s Retro Medley 2}} (''Wonder Momo'' portion) | |||
|- | |||
|•{{SSBUMusicLink|Pac-Man|Namco Arcade '80s Retro Medley 2}} (''Wonder Momo'' portion) | |||
|} | |||
</div> | |||
</div> | |||
==={{uvm3|Thunder Ceptor}}=== | |||
<div class="contentbox mw-collapsible mw-collapsed" data-expandtext="Show" data-collapsetext="Hide"> | |||
<div style="overflow-x:auto;"> | |||
{|class="wikitable sortable" style="text-align:center; border-spacing:0.3em" | |||
!Music | |||
|- | |||
|[[File:SSB4-U_Icon.png|50px]]<br>•{{SSB4MusicLink|Namco|Namco Arcade '80s Retro Medley 2}} (''Thunder Ceptor'' portion) | |||
|- | |||
|•{{SSBUMusicLink|Pac-Man|Namco Arcade '80s Retro Medley 2}} (''Thunder Ceptor'' portion) | |||
|} | |||
</div> | |||
</div> | |||
==={{uvm3|Yokai Dochuki}}=== | |||
<div class="contentbox mw-collapsible mw-collapsed" data-expandtext="Show" data-collapsetext="Hide"> | |||
<div style="overflow-x:auto;"> | |||
{|class="wikitable sortable" style="text-align:center; border-spacing:0.3em" | |||
!Music | |||
|- | |||
|[[File:SSB4-U_Icon.png|50px]]<br>•{{SSB4MusicLink|Namco|Yokai Dochuki Retro Medley}} | |||
|} | |||
</div> | |||
</div> | |||
==={{uvm3|Bravoman}}=== | |||
<div class="contentbox mw-collapsible mw-collapsed" data-expandtext="Show" data-collapsetext="Hide"> | |||
<div style="overflow-x:auto;"> | |||
{|class="wikitable sortable" style="text-align:center; border-spacing:0.3em" | |||
!Music | |||
|- | |||
|[[File:SSB4-U_Icon.png|50px]]<br>•{{SSB4MusicLink|Namco|Bravoman Retro Medley}} | |||
|} | |||
</div> | |||
</div> | |||
==={{uvm|AR Games}}=== | |||
<div class="contentbox mw-collapsible mw-collapsed" data-expandtext="Show" data-collapsetext="Hide"> | |||
<div style="overflow-x:auto;"> | |||
{|class="wikitable sortable" style="text-align:center; border-spacing:0.3em" | |||
!Music | |||
|- | |||
|[[File:SSB4-U_Icon.png|50px]]<br>•{{SSB4MusicLink|Nintendo|Dragon Battle}} | |||
|- | |||
|•{{SSBUMusicLink|Other|Dragon Battle}} | |||
|} | |||
</div> | |||
</div> | |||
==={{uvm|NES Remix}}=== | |||
<div class="contentbox mw-collapsible mw-collapsed" data-expandtext="Show" data-collapsetext="Hide"> | |||
<div style="overflow-x:auto;"> | |||
{|class="wikitable sortable" style="text-align:center; border-spacing:0.3em" | |||
!Music | |||
|- | |||
|[[File:SSB4-U_Icon.png|50px]]<br>•{{SSB4MusicLink|Nintendo|Title Theme (NES Remix 2)}} | |||
|- | |||
|•{{SSBUMusicLink|Other|Title Theme - NES Remix 2}} | |||
|} | |||
</div> | |||
</div> | |||
===''[[Mii (universe)#Miitopia|Miitopia]]''=== | |||
<div class="contentbox mw-collapsible mw-collapsed" data-expandtext="Show" data-collapsetext="Hide"> | |||
<div style="overflow-x:auto;"> | |||
{|class="wikitable sortable" style="text-align:center; border-spacing:0.3em" | |||
!Music | |||
|- | |||
|•{{SSBUMusicLink|Other|Boss Battle}}<br>•{{SSBUMusicLink|Other|Boss: The Darkest Lord}} | |||
|} | |||
</div> | |||
</div> | |||
==={{uvm|Tank Troopers}}=== | |||
<div class="contentbox mw-collapsible mw-collapsed" data-expandtext="Show" data-collapsetext="Hide"> | |||
<div style="overflow-x:auto;"> | |||
{|class="wikitable sortable" style="text-align:center; border-spacing:0.3em" | |||
!Music | |||
|- | |||
|•{{SSBUMusicLink|Other|Garage}} | |||
|} | |||
</div> | |||
</div> | |||
==={{uvm3|Alpha Mission}}=== | |||
<div class="contentbox mw-collapsible mw-collapsed" data-expandtext="Show" data-collapsetext="Hide"> | |||
<div style="overflow-x:auto;"> | |||
{|class="wikitable sortable" style="text-align:center; border-spacing:0.3em" | |||
!Music | |||
|- | |||
|•{{SSBUMusicLink|Fatal Fury|Theme of SYD - Alpha Mission}} | |||
|} | |||
</div> | |||
</div> | |||
==={{uvm3|Athena}}=== | |||
<div class="contentbox mw-collapsible mw-collapsed" data-expandtext="Show" data-collapsetext="Hide"> | |||
<div style="overflow-x:auto;"> | |||
{|class="wikitable sortable" style="text-align:center; border-spacing:0.3em" | |||
!Music | |||
|- | |||
|•{{SSBUMusicLink|Fatal Fury|Forest World - Athena}} | |||
|} | |||
</div> | |||
</div> | |||
==={{uvm3|Metal Slug}}=== | |||
<div class="contentbox mw-collapsible mw-collapsed" data-expandtext="Show" data-collapsetext="Hide"> | |||
<div style="overflow-x:auto;"> | |||
{|class="wikitable sortable" style="text-align:center; border-spacing:0.3em" | |||
!Music | |||
|- | |||
|•{{SSBUMusicLink|Fatal Fury|Main Theme from Metal Slug - METAL SLUG}}<br>•{{SSBUMusicLink|Fatal Fury|Assault Theme - METAL SLUG 1-3}}<br>•{{SSBUMusicLink|Fatal Fury|Final Attack - METAL SLUG 1-6}}<br>•{{SSBUMusicLink|Fatal Fury|Judgment - METAL SLUG 2}}<br>•{{SSBUMusicLink|Fatal Fury|Blue Water Fangs (The Island of Dr. Moreau) - METAL SLUG 3}} | |||
|} | |||
</div> | |||
</div> | |||
==[[List of minor Nintendo universes#Nintendo hardware|Nintendo hardware and software]] and other non-universe specific stuff== | |||
<div class="contentbox mw-collapsible mw-collapsed" data-expandtext="Show" data-collapsetext="Hide"> | |||
<div style="overflow-x:auto;"> | |||
{|class="wikitable sortable" style="text-align:center; border-spacing:0.3em" | |||
!Items | |||
!Stages | |||
!Trophies | |||
!Spirits | |||
!Music | |||
|- | |||
|[[File:Super Scope Trophy Melee.png|50px|link=Super Scope]] | |||
| | |||
|[[File:Diskun Trophy Melee.png|50px]]|[[File:Gamecube Trophy Melee.png|50px]] | |||
| | |||
| | |||
|- | |||
|[[File:Super Scope - Brawl Trophy.png|50px|link=Super Scope]] | |||
|[[File:Icon-pictochat.gif|link=PictoChat]] | |||
| | |||
| | |||
|•{{SSBBMusicLink|Nintendo|Mii Channel}}<br>•{{SSBBMusicLink|Nintendo|Wii Shop Channel}} | |||
|- | |||
|[[File:SuperScopeTrophyWiiU.png|50px|link=Super Scope]][[File:SpecialFlagTrophyWiiU.png|50px|link=Special Flag]] | |||
|[[File:SSB4-3_Icon.png|50px]]<br>[[File:PictoChat2IconSSB4-3.png|70x70px|link=PictoChat 2]]<br>[[File:SSB4-U_Icon.png|50px]]<br>[[File:MiiverseIconSSB4-U.png|70x70px|link=Miiverse]] | |||
| | |||
| | |||
|[[File:SSB4_Icon.png|50px]]<br>•{{SSB4MusicLink|Nintendo|Mii Plaza}}<br>[[File:SSB4-U_Icon.png|50px]]<br>•{{SSB4MusicLink|Nintendo|Wii Shop Channel}} | |||
|- | |||
|[[File:SSBUSuperScope.png|50px|link=Super Scope]][[File:SpecialFlag.png|50px|link=Special Flag]] | |||
|[[File:PictoChat2IconSSBU.png|70x70px|link=PictoChat2]] | |||
| | |||
|[[File:SSBU spirit Diskun.png|50x50px]] | |||
|•{{SSBUMusicLink|Other|Wii Shop Channel (Remix)}}<br>•{{SSBUMusicLink|Other|Wii Shop Channel (Original)}}<br>•{{SSBUMusicLink|Other|Mii Plaza}}<br>•{{SSBUMusicLink|Other|Mii Channel}} | |||
|} | |||
</div> | |||
</div> | |||
Latest revision as of 14:18, October 31, 2023
WIP
Fighter-based universes[edit]
Mario[edit]


_-_Brawl_Trophy.png)


.png)
.png)
.png)
.png)
.png)
.png)
.png)
.png)
.png)
.png)
.png)
.png)
.png)
.png)
.png)
.png)
.png)
.png)
.png)
.png)
.png)
.png)
.png)
.png)
.png)
.png)
.png)
.png)
.png)
.png)
.png)
.png)
.png)
.png)
.png)
.png)
.png)
.png)
.png)
.png)
.png)
.png)
.png)
.png)
.png)
.png)
.png)
.png)
.png)
.png)
.png)


TrophyWiiU.png)


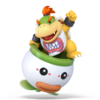


Donkey Kong[edit]


.png)
.png)
.png)
.png)
.png)
.png)
.png)
.png)
.png)
.png)
.png)
.png)
.png)
.png)
.png)
.png)
.png)


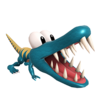


The Legend of Zelda[edit]


_-_Brawl_Trophy.png)
_-_Brawl_Trophy.png)


.png)
.png)
.png)
.png)
.png)
.png)
.png)
.png)
.png)
.png)
.png)
.png)
.png)
.png)
.png)
.png)
.png)
.png)
.png)
.png)
.png)
.png)
.png)
.png)
.png)
.png)
.png)
.png)
.png)
.png)
.png)
.png)
.png)
.png)
.png)
.png)
.png)
.png)
.png)
.png)
.png)
.png)
.png)
.png)
.png)
.png)
.png)
.png)
.png)
.png)
.png)
.png)
.png)
.png)
.png)
.png)


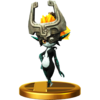
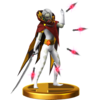


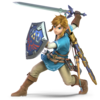
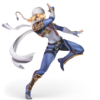


Metroid[edit]


_-_Brawl_Trophy.png)
_-_Brawl_Trophy.png)
_-_Brawl_Trophy.png)
_-_Brawl_Trophy.png)
_-_Brawl_Trophy.png)


_-_Brawl_Trophy.png)
_-_Brawl_Trophy.png)

.png)
.png)
.png)
.png)
.png)
.png)
.png)
.png)
.png)
.png)
.png)
.png)
.png)
.png)
.png)
.png)
.png)


Yoshi[edit]


.png)
.png)
.png)
.png)
.png)
.png)
.png)
.png)
.png)
.png)
.png)
.png)


Kirby[edit]


.png)
.png)
.png)
.png)
.png)
.png)
.png)
.png)
.png)
.png)
.png)
.png)
.png)


Star Fox[edit]


_Trophy_Melee.png)
_Trophy_Melee.png)


_-_Brawl_Trophy.png)
_-_Brawl_Trophy.png)
_-_Brawl_Trophy.png)


_-_Brawl_Trophy.png)
.png)
.png)
.png)
.png)
.png)
.png)
.png)
.png)
.png)
.png)
.png)
.png)
.png)
.png)
.png)
.png)
.png)
.png)
.png)
.png)
.png)
.png)
.png)
.png)
.png)
.png)


Pokémon[edit]


.png)
.png)
.png)
.png)
.png)
.png)
.png)
.png)
.png)
.png)
.png)
.png)
.png)
.png)
.png)
.png)
.png)
.png)
.png)
.png)


.png)


.jpg)
.jpg)
EarthBound[edit]
| Fighters | Assist Trophies | Items | Stages | Enemies/Bosses | Fighter Cameos | Stage Cameos | Trophies | Stickers/Spirits | Mii Costumes | Music |
|---|---|---|---|---|---|---|---|---|---|---|
|
||||||||||
|

|
 
|

|
   .png)
|
•Mother •EarthBound •Mother 2 | |||||
|
|
 |

|
.png) .png) .png) .png) .png) .png) .png) .png) .png) .png) .png) .png) .png) .png) .png) .png) .png) .png) .png) .png) .png) .png) .png)
|
•Mother (Melee) •Mother 2 (Melee) •Porky's Theme •Unfounded Revenge / Smashing Song of Praise •Mother 3 Love Theme •You Call This a Utopia?! •Humoresque of a Little Dog •Snowman | |||||
|
 
|
 
|
 

|
   
|


|
 
|
•Magicant / Eight Melodies (Mother) •Smiles and Tears •Pollyanna (I Believe in You) •Onett •Snowman •Onett Theme / Winters Theme •Porky's Theme •Unfounded Revenge / Smashing Song of Praise •Mother 3 Love Theme | |||
|
|
  
|
   
|
   
|
    
|
 |
  
|
•Pollyanna (I Believe in You) •Humoresque of a Little Dog •Magicant •Magicant (for 3DS / Wii U) •Bein' Friends •Snowman •Onett Theme / Winters Theme •Fourside •Fourside (Melee) •Smiles and Tears •Mother 3 Love Theme •Unfounded Revenge / Smashing Song of Praise •You Call This a Utopia?! •Porky's Theme |
F-Zero[edit]


.png)
.png)
.png)
.png)
.png)
.png)
.png)
.png)
.png)
.png)
.png)
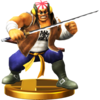


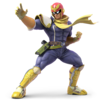
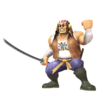


Ice Climber[edit]
| Fighters | Stages | Enemies | Fighter Cameos | Stage Cameos | Trophies | Stickers | Music |
|---|---|---|---|---|---|---|---|

|

|
  
|
•Icicle Mountain | ||||
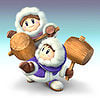
|

|
.png)
|
•Icicle Mountain (Melee) •Ice Climber | ||||

|

|
•Ice Climber •Icicle Mountain | |||||
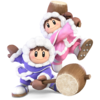
|

|

|

|
•Ice Climber (Melee) •Ice Climber (Brawl) |
Fire Emblem[edit]


.png)
.png)
.png)
.png)
.png)
.png)
.png)
.png)
.png)
.png)
.png)
.png)
.png)
.png)
.png)
.png)
.png)
.png)
.png)
.png)
.png)


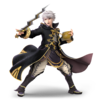
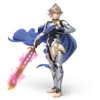
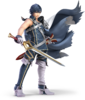


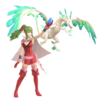


.png)


.png)
.png)


Game & Watch[edit]
| Fighters | Stages | Fighter Cameos | Stage Cameos | Stickers | Music |
|---|---|---|---|---|---|
|

|

|
•Flat Zone | ||
|
.png) .png) |
•Flat Zone (Melee) •Flat Zone 2 | |||
|

|
   

|
•Flat Zone 2 •Flat Zone | ||
|

|
        
|
|
•Flat Zone •Flat Zone 2 |
Kid Icarus[edit]
| Fighters | Assist Trophies | Items | Stages | Enemies | Fighter Cameos | Stage Cameos | Trophies | Stickers/Spirits | Mii Costumes | Music |
|---|---|---|---|---|---|---|---|---|---|---|

|
||||||||||
|
 
|
.png) .png) .png)
|
•Underworld •Skyworld •Title (Kid Icarus) •Kid Icarus Original Medley | |||||||
|
|
    
|
                  
 
|
    
|


|
                  
|
 
|
•Boss Fight 1 (Kid Icarus: Uprising) •Dark Pit's Theme •In the Space-Pirate Ship •Wrath of the Reset Bomb (Remix) •Dark Pit •Wrath of the Reset Bomb (Original) •Title (Kid Icarus) •Underworld •Overworld •Kid Icarus Retro Medley •Magnus's Theme •Hades's Infernal Theme •Thunder Cloud Temple •Destroyed Skyworld •Lightning Chariot Base •Famicom Medley (Kid Icarus portion) | ||
|
|
     
|
  
|
 |
 
|
•Title Theme - Kid Icarus •Kid Icarus Retro Medley •Underworld •Overworld •Boss Fight 1 - Kid Icarus: Uprising •Magnus's Theme •Dark Pit's Theme •In the Space-Pirate Ship •Hades's Infernal Theme •Wrath of the Reset Bomb •Thunder Cloud Temple •Lightning Chariot Base •Destroyed Skyworld •Famicom Medley (Kid Icarus portion) |
Wario[edit]
| Fighters | Assist Trophies | Stages | Fighter Cameos | Stage Cameos | Trophies | Stickers/Spirits | Mii Costumes | Music |
|---|---|---|---|---|---|---|---|---|
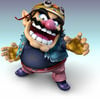
|
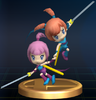
|

|
.png) .png) .png) .png) .png) .png) .png) .png) .png) .png) .png) .png) .png) .png) .png) .png) |
•WarioWare, Inc. •WarioWare, Inc. Medley •Ashley's Song •Ashley's Song (JP) •Mike's Song •Mike's Song (JP) •Mona Pizza's Song •Mona Pizza's Song (JP) | ||||

|
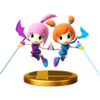 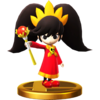
|

|
 
|

|
  
|
•WarioWare, Inc. •Ashley's Song (JP) •Ashley's Song •WarioWare, Inc. Medley •Ashley's Song (JP) Ver. 2 •Ruins (Wario Land: Shake It!) •Gamer | ||
 
|
|
 
|
       
|
  
|
•WarioWare, Inc. •WarioWare, Inc. Medley •Ashley's Song (JP) (Brawl) •Ashley's Song •Ashley's Song (JP) (for 3DS / Wii U) •Mike's Song (JP) •Mike's Song •Mona Pizza's Song (JP) •Mona Pizza's Song •Ruins - Wario Land: Shake It! •Gamer |
Metal Gear[edit]
| Fighters | Assist Trophies | Stages | Fighter Cameos | Stage Cameos | Trophies | Stickers/Spirits | Music |
|---|---|---|---|---|---|---|---|
|
|
 |
  
|
  |
.png) .png) .png) .png) .png) .png) .png) .png) .png) .png) .png) .png) .png) .png) .png) .png) |
•MGS4 ~Theme of Love~ Smash Bros. Brawl Version •Encounter •Theme of Tara •Battle in the Base •Yell "Dead Cell" •Cavern •Snake Eater (Instrumental) •Theme of Solid Snake •Calling to the Night | |
|
|

|
|
•Theme of Tara •Theme of Solid Snake •Cavern •Encounter •Yell "Dead Cell" •Snake Eater •Snake Eater (Instrumental) •Battle in the Base •MGS4 ~Theme of Love~ •Calling to the Night •Main Theme - METAL GEAR SOLID PEACE WALKER |
Sonic the Hedgehog[edit]


.png)
.png)
.png)
.png)
.png)
.png)
.png)
.png)
.png)
.png)
.png)
.png)
.png)
.png)
.png)
.png)
.png)
.png)
.png)
.png)
.png)
.png)
.png)
.png)
.png)
.png)
.png)


Pikmin[edit]


.png)
.png)
.png)
.png)
.png)
.png)
.png)
.png)
.png)
.png)
.png)


R.O.B.[edit]
| Fighters | Fighter Cameos | Stickers/Spirits | Music |
|---|---|---|---|
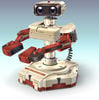
|
•Gyromite | ||
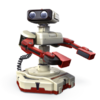 
|
•Stack-Up/Gyromite | ||
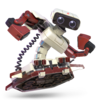 
|
•Stack-Up/Gyromite |
Animal Crossing[edit]


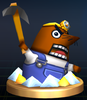


_-_Brawl_Trophy.png)
.png)
.png)
.png)
.png)
.png)
.png)
.png)
.png)
.png)
.png)
.png)
.png)
.png)
.png)
.png)
.png)
.png)
.png)
.png)
.png)
.png)
.png)
.png)
.png)
.png)
.png)
.png)
.png)
.png)
.png)
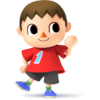

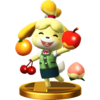


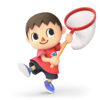
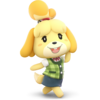


.png)


Mega Man[edit]


Wii Fit[edit]
| Fighters | Stages | Fighter Cameos | Stage Cameos | Trophies | Spirits | Music |
|---|---|---|---|---|---|---|
 
|
        
|
|

|
•Super Hoop •Rhythm Boxing •Wii Fit Plus Medley •Skateboard Arena (Free Mode) •Mischievous Mole-way •Core Luge | ||
|

|
    |
•Main Menu - Wii Fit •Super Hoop •Rhythm Boxing •Advanced Step •Yoga •Skateboard Arena (Free Mode) •Mischievous Mole-way •Wii Fit Plus Medley •Training Menu - Wii Fit U •Core Luge |
Punch-Out!![edit]
| Fighters | Assist Trophies | Stages | Fighter Cameos | Trophies | Spirits | Music |
|---|---|---|---|---|---|---|

|
•Famicom Medley (Punch-Out!! portions) | |||||

|

|
  
     
|
•Jogging/Countdown •Minor Circuit (Original) •Minor Circuit (Remix) •Title (Punch-Out!!) •World Circuit Theme •Famicom Medley (Punch-Out!! portion) | |||
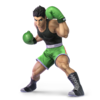
|

|
|
•Minor Circuit (Remix) •Minor Circuit (Original) •Jogging / Countdown •World Circuit Theme •Title Theme - Punch-Out!! (Wii) •Famicom Medley (Punch-Out!! portion) |
Pac-Man[edit]
| Fighters | Assist Trophies | Stages | Fighter Cameos | Stage Cameos | Music |
|---|---|---|---|---|---|
|
|
       
|
       
 
|
•PAC-MAN •PAC-MAN (Club Mix) •PAC-MAN'S PARK / BLOCK TOWN | |

|
|

|
 
|

|
•PAC-MAN •PAC-MAN (Club Mix) •PAC-MAN'S PARK / BLOCK TOWN |
Xenoblade Chronicles[edit]


Duck Hunt[edit]
| Fighters | Stages | Fighter Cameos | Stage Cameos | Trophies | Stickers | Music |
|---|---|---|---|---|---|---|

|
||||||
| •Famicom Medley (Duck Hunt portion) | ||||||
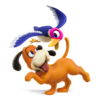
|

|
 
|
•Duck Hunt Medley •Famicom Medley (Duck Hunt portion) | |||
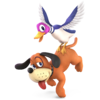
|

|
•Duck Hunt Medley •Duck Hunt Medley (for 3DS / Wii U) •Famicom Medley (Duck Hunt portion) |
Street Fighter[edit]


Final Fantasy[edit]
| Fighters | Stages | Stage Cameos | Spirits | Mii Costumes | Music |
|---|---|---|---|---|---|
|

|
•Let the Battles Begin! •Fight On! | |||
|
 
|

|
    
|
•Opening - Bombing Mission •Let the Battles Begin! •Those Who Fight (AC Version) •Fight On! •Those Who Fight Further (AC Version) •Aerith's Theme •Main Theme of FINAL FANTASY VII •JENOVA •Cosmo Canyon •One-Winged Angel •Advent: One-Winged Angel |
Bayonetta[edit]


Splatoon[edit]
| Fighters | Assist Trophies | Stages | Fighter Cameos | Stage Cameos | Trophies | Spirits | Mii Costumes | Music |
|---|---|---|---|---|---|---|---|---|

|
  
|
|||||||
|
|

|
  .jpg) .jpg)    .jpg) .jpg)      
|
•Splattack! (Remix) •Splattack! (Original) •Ink or Sink •Seaskape •Kraken Up •Metalopod •Split & Splat •Now or Never! •Now or Never! - Splatoon •Now or Never! - Splatoon 2 •Ink Me Up •Now or Never! (Splatfest Version) - Splatoon •Now or Never! (Splatfest Version) - Splatoon 2 •Octoweaponry •I Am Octavio •Calamari Inkantation •Bomb Rush Blush •Inkoming! •Rip Entry •Undertow •Don't Slip •Endolphin Surge •Ebb & Flow •Acid Hues •Muck Warfare •Deluge Dirge |
Castlevania[edit]


Persona[edit]
| Fighters | Stages | Fighter Cameos | Stage Cameos | Spirits | Mii Costumes | Music |
|---|---|---|---|---|---|---|
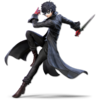 
|

|
  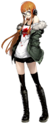
|
    
|
     
|
•Last Surprise •Beneath the Mask •Wake Up, Get Up, Get Out There •Rivers In the Desert •Our Beginning •Reach Out To The Truth •I'll Face Myself •Time To Make History •Mass Destruction •Battle Hymn of the Soul •Aria of the Soul |
Dragon Quest[edit]
| Fighters | Stages | Fighter Cameos | Stage Cameos | Spirits | Mii Costumes | Music |
|---|---|---|---|---|---|---|
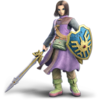   
|

|
 .jpg) .jpg)   .jpg) .jpg)  
|
•Adventure - DRAGON QUEST III •Fighting Spirits - DRAGON QUEST III •Battle for the Glory - DRAGON QUEST IV •Wagon Wheel's March •War Cry •Marching through the Fields •The Hero Goes Forth with a Determination •Unflinchable Courage |
Banjo-Kazooie[edit]
| Fighters | Stages | Fighter Cameos | Stage Cameos | Music |
|---|---|---|---|---|
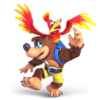
|

|
  
|
    |
•Main Theme - Banjo-Kazooie •Spiral Mountain •Mumbo's Mountain •Treasure Trove Cove •Freezeezy Peak •Gobi's Valley •Mad Monster Mansion •Vs. Klungo •Vs. Mr. Patch •Vs. Lord Woo Fak Fak |
Fatal Fury[edit]


ARMS[edit]
| Fighters | Assist Trophies | Stages | Fighter Cameos | Stage Cameos | Spirits | Mii Costumes | Music |
|---|---|---|---|---|---|---|---|
|
|

|
  |
     |
     
|
•ARMS Grand Prix Official Theme Song •Spring Stadium •Ramen Bowl •Ribbon Ring •Ninja College •Mausoleum •Scrapyard •Cinema Deux •Buster Beach •Snake Park •DNA Lab •Sky Arena •Via Dolce •Temple Grounds •Sparring Ring •[NAME REDACTED] •Vs. Hedlok •ARMS Grand Prix Final Battle |
Minecraft[edit]
| Fighters | Stages | Fighter Cameos | Stage Cameos | Spirits | Mii Costumes | Music |
|---|---|---|---|---|---|---|
   
|

|
 
|
   
|
  |
     
|
•Halland / Dalarna •Earth •Clockwork Crafter •Toys on a Tear •Dance of the Blocks •Glide •The Arch-Illager |
Tekken[edit]


Kingdom Hearts[edit]
| Fighters | Stages | Stage Cameos | Music |
|---|---|---|---|
|

|
       
|
•Night of Fate •Destiny's Force •Shrouding Dark Cloud •Hand in Hand •Blast Away! -Gummi Ship II- •Hollow Bastion •Scherzo Di Notte •Fragments of Sorrow •Destati •Dearly Beloved -Swing Version- |
Assist Trophy-based universes[edit]
Nintendogs[edit]
| Assist Trophies | Stages | Stage Cameos | Stickers/Spirits | Music |
|---|---|---|---|---|
|
.png) .png) .png)
|
|||

|
     
|
•Bathtime Theme •Bathtime Theme (Vocal Mix) | ||
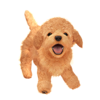
|

|
•Bathtime Theme •Bathtime Theme (for 3DS / Wii U) •Bathtime Theme (Vocal Mix) (for 3DS / Wii U) |
Excite[edit]
| Assist Trophies | Trophies | Stickers/Spirits | Music |
|---|---|---|---|

|
|||
|

|
•Famicom Medley (Excitebike portion) •Excite Truck | |

|
•Excite Truck | ||
| •Excitebike - Mario Kart 8 •Excite Truck |
Devil World[edit]
| Assist Trophies | Trophies | Stickers/Spirits | Music |
|---|---|---|---|

|
|||
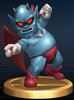
|
•Famicom Medley (Devil World portion) | ||
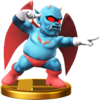
|
|||
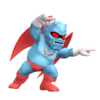
|
SimCity[edit]
| Assist Trophies | Trophies |
|---|---|

| |
|
|

|
|
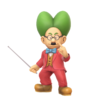
|
The Legendary Starfy[edit]
| Assist Trophies | Trophies | Stickers/Spirits |
|---|---|---|

|

|
.png) .png) .png) .png) .png)
|

|
||

|
Nintendo Wars[edit]
| Assist Trophies | Stickers/Spirits |
|---|---|
|
.png) .png) .png) .png) .png) .png)
|

|
|
Kururin[edit]
| Assist Trophies | Trophies | Stickers/Spirits |
|---|---|---|
|

|
.png)
|
Jam with the Band[edit]
| Assist Trophies | Trophies | Spirits | Mii Costumes | Music |
|---|---|---|---|---|
|
||||

|

|
•PERFORMANCE | ||

|
•PERFORMANCE |
Custom Robo[edit]
| Assist Trophies | Trophies | Stickers/Spirits | Mii Costumes |
|---|---|---|---|
  
|
|||

|
 
|
.png) .png) .png) .png) .png)
|
|
 |
 
|
Golden Sun[edit]
| Assist Trophies | Spirits | Mii Costumes | Music |
|---|---|---|---|
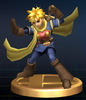
|
•Battle Scene / Final Boss (Golden Sun) | ||
•Battle Scene / Final Boss (Golden Sun) •Weyard | |||
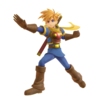
|
 
|
•Battle Scene / Final Boss - Golden Sun •Weyard |
Sin and Punishment[edit]
| Assist Trophies | Spirits | Mii Costumes |
|---|---|---|

|
||
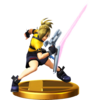
|
||
 
|
Drill Dozer[edit]
| Assist Trophies | Stickers/Spirits |
|---|---|

|
.png) |
Color TV-Game[edit]
| Assist Trophies |
|---|
|
|
Sheriff[edit]
| Assist Trophies | Trophies |
|---|---|

| |
|
|
|
The Mysterious Murasame Castle[edit]
| Assist Trophies | Stickers | Mii Costumes | Music |
|---|---|---|---|
.png)
|
•Douchuumen (Nazo no Murasamejo) | ||
|
 
|
•The Mysterious Murasame Castle Medley | |
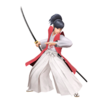
|
 
|
•The Mysterious Murasame Castle Medley •Douchuumen - The Mysterious Murasame Castle |
Kaeru no Tame ni Kane wa Naru[edit]
| Assist Trophies | Stickers/Spirits |
|---|---|
.png)
| |
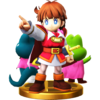
|
|
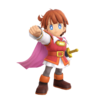 |
Brain Age[edit]

Dillon's Rolling Western[edit]
| Assist Trophies | Trophies | Spirits | Music |
|---|---|---|---|
|

|
•Dillon's Rolling Western: The Last Ranger | |
|
•Dillon's Rolling Western: The Last Ranger •Frontier Battle |
Joy Mech Fight[edit]
| Assist Trophies | Stickers | Music |
|---|---|---|
.png)
|
•Famicom Medley (Joy Mech Fight portion) | |
|
Art Academy[edit]
| Assist Trophies | Trophies | Mii Costumes | Music |
|---|---|---|---|

|
•Swan Lesson | ||
|
 
|
•Swan Lesson |
Swapnote[edit]
| Assist Trophies |
|---|

|
Fatal Frame[edit]
| Assist Trophies | Trophies | Spirits |
|---|---|---|
 
|
||
|
Nintendo Badge Arcade[edit]
| Assist Trophies | Mii Costumes | Music |
|---|---|---|
|

|
•Title Theme - Nintendo Badge Arcade •Arcade Bunny's Theme |
Bomberman[edit]
| Assist Trophies | Mii Costumes |
|---|---|

|
 
|
Virtua Fighter[edit]
| Assist Trophies | Mii Costumes |
|---|---|
   
| |
|
   
|
Monster Hunter[edit]
| Assist Trophies | Bosses | Spirits | Mii Costumes | Music |
|---|---|---|---|---|
   
|
||||
|
|
        
|
•Proof of a Hero ~ 4Version •Roar/Rathalos |
Shovel Knight[edit]
| Assist Trophies | Spirits |
|---|---|
|
Item-based universes[edit]
GoldenEye[edit]
| Items |
|---|

|
Panel de Pon[edit]
| Items | Stickers/Spirits | Mii Costumes | Music |
|---|---|---|---|

|
|||

|
.png) .png) .png) .png) .png)
|
•Lip's Theme (Panel de Pon) | |

|
•Lip's Theme (Panel de Pon) | ||

|
 
|
•Lip's Theme - Panel de Pon |
Balloon Fight[edit]
| Items | Stages | Stage Cameos | Trophies | Stickers | Music |
|---|---|---|---|---|---|

|

|
•Balloon Fight | |||
 
|
•Balloon Trip | ||||
•Balloon Fight Medley •Balloon Trip | |||||

|

|
•Balloon Fight Medley •Balloon Trip (Brawl) •Balloon Trip (for 3DS / Wii U) |
Perfect Dark[edit]
| Items |
|---|
 
|
Wrecking Crew[edit]
| Items | Stages | Trophies | Spirits | Music |
|---|---|---|---|---|

|
||||

|
•Famicom Medley (Wrecking Crew portion) •Power-Up Music | |||

|
•Wrecking Crew Retro Medley •Wrecking Crew Medley | |||
|
|

|
•Wrecking Crew Medley •Wrecking Crew Medley (for 3DS / Wii U) •Wrecking Crew Retro Medley •Power-Up Music - Wrecking Crew |
Clu Clu Land[edit]
| Items | Trophies | Spirits | Music |
|---|---|---|---|

|
|||

|
•Clu Clu Land | ||

|
•Clu Clu Land | ||
|
|
•Clu Clu Land |
Steel Diver[edit]
| Items | Trophies | Spirits | Music |
|---|---|---|---|

|

|
||
|
|
•Filled with Hope |
Galaxian[edit]
| Items | Fighter Cameos | Music |
|---|---|---|

|
  
|
•Namco Arcade '80s Retro Medley 1 (Galaga portion) |

|
|
•Galaga Medley •Namco Arcade '80s Retro Medley 1 (Galaga portion) |
Pilotwings[edit]
| Items | Stages | Stage Cameos | Trophies | Stickers | Music |
|---|---|---|---|---|---|

|
  
|

|
•Light Plane (Remix) •Light Plane (Vocal Mix) •Light Plane (Original) •Turbo Jet •Pedal Glider | ||
|
|

|
•Light Plane (Remix) •Light Plane (Original) •Light Plane (for 3DS / Wii U) •Light Plane (Vocal Mix) (for 3DS / Wii U) •Turbo Jet •Pedal Glider |
Stage-based universes[edit]
Electroplankton[edit]
| Stages | Stage Cameos | Stickers | Music |
|---|---|---|---|
 |
|||

|

|
•Electroplankton (Remix) •Electroplankton (Original) |
StreetPass Mii Plaza[edit]
| Stages | Enemies | Stage Cameos | Trophies | Spirits | Mii Costumes | Music |
|---|---|---|---|---|---|---|

|

|
        
|
                              
|
•Dark Lord •Save the World, Heroes! | ||

|

|
        
|
•Find Mii / Find Mii II Medley •Save the World, Heroes! •Dark Lord |
Tomodachi[edit]
| Stages | Stage Cameos | Trophies | Music |
|---|---|---|---|

|

|
•Tomodachi Life | |

|
•Afternoon on the Island •Afternoon on the Island (for 3DS / Wii U) |
Wii Sports[edit]


Enemy-based universes[edit]
Dig Dug[edit]
| Enemies | Fighter Cameos | Music |
|---|---|---|

|
•Namco Arcade '80s Retro Medley 1 (Dig Dug portion) | |
| •Namco Arcade '80s Retro Medley 1 (Dig Dug portion) |
Xevious[edit]
| Enemies | Fighter Cameos |
|---|---|

|
 |
|
Rhythm Heaven[edit]
| Enemies | Trophies | Spirits | Music |
|---|---|---|---|

|
   
|
•Blue Birds •Monkey Watch | |
| •Blue Birds •Monkey Watch •Fruit Basket |
Fighter cameo-based universes[edit]
Mappy[edit]
| Fighter Cameos | Music |
|---|---|

|
•Namco Arcade '80s Retro Medley 1 (Mappy portion) |
|
|
•Mappy Medley •Namco Arcade '80s Retro Medley 1 (Mappy portion) |
King & Balloon[edit]
| Fighter Cameos |
|---|

|
|
|
Rally-X[edit]
| Fighter Cameos | Music |
|---|---|

|
•Namco Arcade '80s Retro Medley 1 (New Rally-X portion) |
|
|
•Namco Arcade '80s Retro Medley 1 (New Rally-X portion) |
Bosconian[edit]
| Fighter Cameos |
|---|

|
|
|
Libble Rabble[edit]
| Fighter Cameos | Music |
|---|---|

|
•Libble Rabble Retro Medley |
|
|
•Libble Rabble Retro Medley |
Babylonian Castle Saga[edit]
| Fighter Cameos | Mii Costumes | Music |
|---|---|---|

|
 
|
•Namco Arcade '80s Retro Medley 1 (The Tower of Druaga portion) •Namco Arcade '80s Retro Medley 2 (The Return of Ishtar portion) |
|
|
 
|
•Namco Arcade '80s Retro Medley 1 (The Tower of Druaga portion) •Namco Arcade '80s Retro Medley 2 (The Return of Ishtar portion) |
Dragon Buster[edit]
| Fighter Cameos |
|---|

|
|
|
Baraduke[edit]
| Fighter Cameos |
|---|

|
|
|
Sky Kid[edit]
| Fighter Cameos | Music |
|---|---|
•Sky Kid Retro Medley | |
| •Sky Kid Retro Medley |
Taiko no Tatsujin[edit]
| Fighter Cameos |
|---|

|
|
|
Wild Gunman[edit]
| Fighter Cameos | Stickers |
|---|---|

|
|
Hogan's Alley[edit]
| Fighter Cameos |
|---|

|
Metro-Cross[edit]
| Fighter Cameos | Music |
|---|---|
•Metro-Cross Retro Medley | |
| •Metro-Cross Retro Medley |
Valkyrie[edit]
| Fighter Cameos | Music |
|---|---|

|
•Namco Arcade '80s Retro Medley 2 (The Legend of Valkyrie portion) |
|
|
•Namco Arcade '80s Retro Medley 2 (The Legend of Valkyrie portion) |
Katamari[edit]
| Fighter Cameos |
|---|

|
|
|
Stage cameo-based universes[edit]
Art of Fighting[edit]
| Stage Cameos | Mii Costumes | Music |
|---|---|---|
  
|
 
|
•ART of FIGHT - Art of Fighting •Art of Fighting Ver.230000000.0 - FATAL FURY SPECIAL |
The King of Fighters[edit]


Psycho Soldier[edit]
| Stage Cameos | Music |
|---|---|

|
•Psycho Soldier Theme •Psycho Soldier Theme (Overseas Version) |
Ikari Warriors[edit]
| Stage Cameos | Music |
|---|---|
| •IKARI - KOF XIV |
Collectible-based universes[edit]
Card Hero[edit]
| Trophies | Stickers/Spirits |
|---|---|

|
|
.png) .png)
| |
Wave Race[edit]
| Trophies | Stickers/Spirits |
|---|---|

|
|
.png) .png) .png) | |
1080°[edit]
| Trophies | Stickers/Spirits | Music |
|---|---|---|

|
||
.png) .png) .png)
|
•Golden Forest (1080° Snowboarding) | |
•Golden Forest | ||
| •Golden Forest |
Doshin the Giant[edit]
| Trophies |
|---|
 
|
Cubivore[edit]
| Trophies | Spirits |
|---|---|

|
|
Mach Rider[edit]
| Trophies | Stickers/Spirits | Music |
|---|---|---|

|
•Mach Rider | |
| •Mach Rider (Melee) | ||
•Mach Rider | ||
| •Mach Rider |
Shin Onigashima[edit]
| Trophies | Stickers/Spirits | Music |
|---|---|---|

|
||
| •Shin Onigashima | ||
•Shin Onigashima Medley | ||
| •Shin Onigashima Medley |
Detective Club[edit]
| Trophies | Spirits | Music |
|---|---|---|

|
||
| •Famicom Medley (Famicom Detective Club: The Girl Who Stands Behind portion) | ||
Famicom Grand Prix[edit]
| Trophies | Stickers/Spirits | Music |
|---|---|---|

|
||
.png)
|
•Title (3D Hot Rally) | |
•Title (3D Hot Rally) | ||
| •Title Theme - 3D Hot Rally |
Magical Starsign[edit]
| Trophies | Stickers/Spirits |
|---|---|
  
|
.png) .png) .png) .png) .png) .png) .png) .png)
|
Chōsōjū Mecha MG[edit]
| Trophies | Stickers/Spirits | Music |
|---|---|---|
  
|
.png) .png) .png)
|
•Marionation Gear |
•Marionation Gear | ||
| •Marionation Gear |
Chibi-Robo![edit]
| Trophies | Stickers/Spirits | Mii Costumes |
|---|---|---|
 
|
.png) .png) .png) .png) .png)
|
|

|
||
 
|
Hotel Dusk[edit]
| Trophies | Stickers/Spirits |
|---|---|

|
.png) .png) .png)
|
Trace Memory[edit]
| Trophies | Stickers/Spirits |
|---|---|

|
.png) .png) .png) .png)
|
Ouendan/Elite Beat Agents[edit]
| Trophies | Stickers/Spirits |
|---|---|
 
|
.png) .png) .png) .png) .png) .png) .png) .png)
|
bit Generations[edit]
| Stickers |
|---|
.png) .png)
|
Big Brain Academy[edit]
| Stickers/Spirits | Music |
|---|---|
.png) .png)
|
•Title (Big Brain Academy) |
•Title (Big Brain Academy) | |
| •Title Theme - Big Brain Academy |
Sennen Kazoku[edit]
| Stickers/Spirits |
|---|
.png) .png)
|
Slide Adventure MAGKID[edit]
| Stickers/Spirits |
|---|
.png) .png)
|

|
Stunt Race FX[edit]
| Stickers/Spirits |
|---|
English Training[edit]
| Stickers |
|---|
X[edit]
| Stickers/Spirits | Music |
|---|---|
.png)
|
•Tunnel Scene (X) |
•Tunnel Scene (X) •Tunnel Theme (X-Scape) | |
| •Tunnel Scene - X •Tunnel Theme - X-Scape |
Ice Hockey[edit]
| Stickers/Spirits |
|---|
Yakuman[edit]
| Stickers/Spirits |
|---|
[edit]
| Stickers/Spirits | Music |
|---|---|
.png)
|
•Shaberu! DS Cooking Navi |
| •Personal Trainer: Cooking |
Calciobit[edit]
| Trophies | Spirits |
|---|---|

|
|
Freakyforms[edit]

Thru[edit]
| Trophies |
|---|

|
Sakura Samurai[edit]
| Trophies | Spirits | Music |
|---|---|---|

|
•Boss 1 (Sakura Samurai: Art of the Sword) | |
| •Boss 1 - Sakura Samurai: Art of the Sword |
Culdcept[edit]
| Trophies | Spirits | Music |
|---|---|---|

|
•Culdcept | |
| •Culdcept •Revolt -Striving for Hope- •Worthy Rival Battle |
HarmoKnight[edit]
| Trophies | Spirits |
|---|---|

|
|
Style Savvy[edit]
| Trophies | Spirits | Music |
|---|---|---|

|
•Style Savvy: Trendsetters •Pop Fashion Show | |
| •Style Savvy: Trendsetters •Pop Fashion Show •Ring a Ding |
Pushmo[edit]
| Trophies | Spirits | Music |
|---|---|---|

|
||
| •Welcome Center |
Fluidity[edit]
| Trophies | Spirits |
|---|---|

|
|
Nintendoji[edit]
| Trophies | Spirits |
|---|---|

|
|
Rusty's Real Deal Baseball[edit]
| Trophies | Spirits |
|---|---|
 
|
|
Fossil Fighters[edit]
| Trophies | Spirits | Music |
|---|---|---|

|
||
| •Battle Start - Fossil Fighters: Frontier |
Captain Rainbow[edit]
| Trophies | Spirits | Music |
|---|---|---|
 
|
•Tomorrow's Passion | |
| •Tomorrow's Passion |
Zangeki no Reginleiv[edit]
| Trophies | Spirits |
|---|---|
 
|
|
The Last Story[edit]
| Trophies | Spirits |
|---|---|
 
|
|
Pandora's Tower[edit]
| Trophies | Spirits |
|---|---|

|
|
Rayman[edit]
| Trophies | Spirits |
|---|---|
  
|
|
Nintendo Land[edit]
| Trophies | Spirits | Music |
|---|---|---|

|
•Nintendo Land Medley •Title Theme (Nintendo Land) | |
| •Title Theme - Nintendo Land •Nintendo Land Medley |
BIT.TRIP[edit]
| Trophies |
|---|

|
The Wonderful 101[edit]


Wii Music[edit]
| Spirits |
|---|
Wii Party[edit]
| Spirits | Music |
|---|---|
•Final Results (Wii Party U) | |
| •Final Results - Wii Party U |
Baseball[edit]
| Spirits |
|---|
Tennis[edit]
| Spirits |
|---|
Urban Champion[edit]
| Spirits | Music |
|---|---|
| •Famicom Medley (Urban Champion portion) | |
Volleyball[edit]
| Spirits |
|---|
Yūyūki[edit]
| Spirits | Music |
|---|---|
| •Yūyūki Medley |
Mole Mania[edit]
| Spirits |
|---|
Battle Clash[edit]
| Spirits |
|---|
Marvelous[edit]
| Spirits |
|---|
Sutte Hakkun[edit]
| Spirits |
|---|
Hajimari no Mori[edit]
| Spirits |
|---|
Teleroboxer[edit]
| Spirits |
|---|
Napoleon[edit]
| Spirits |
|---|
Tomato Adventure[edit]
| Spirits |
|---|
Chalien[edit]
| Spirits |
|---|
The Tower[edit]
| Spirits |
|---|
Eternal Darkness[edit]
| Spirits |
|---|
GiFTPiA[edit]
| Spirits |
|---|
Baten Kaitos[edit]
| Spirits | Music |
|---|---|
•The valedictory elegy | |
| •The Valedictory Elegy |
Project Hacker[edit]
| Spirits |
|---|
Kurikin Nano Island Story[edit]
| Spirits |
|---|

|
Number Battle[edit]
| Spirits |
|---|
ASH: Archaic Sealed Heat[edit]
| Spirits |
|---|
Make 10: A Journey of Numbers[edit]
| Spirits |
|---|
Soma Bringer[edit]
| Spirits | Music |
|---|---|
•Attack (Soma Bringer) | |
| •Attack - Soma Bringer |
Glory of Heracles[edit]
| Spirits | Music |
|---|---|
•Glory of Heracles | |
| •Glory of Heracles |
Looksley's Line Up[edit]
| Spirits |
|---|
Tsukutte Utau: Saru Band[edit]
| Spirits |
|---|
Disaster: Day of Crisis[edit]
| Spirits |
|---|
Takt of Magic[edit]
| Spirits |
|---|
And-Kensaku[edit]
| Spirits |
|---|
FlingSmash[edit]
| Spirits |
|---|
Kiki Trick[edit]
| Spirits |
|---|
BoxBoy![edit]
| Spirits |
|---|
Code Name: S.T.E.A.M.[edit]
| Spirits | Music |
|---|---|
| •Code Name: F.E. •Lords-A Chance Encounter •Lords-Showdown •Trouble Brewing II |
Ever Oasis[edit]
| Spirits | Music |
|---|---|
| •Dawn in the Desert •Struggle Against Chaos |
Sushi Striker[edit]
| Spirits |
|---|
Snipperclips[edit]
| Spirits | Music |
|---|---|
| •Noisy Notebook |
Shantae[edit]
| Spirits | Mii Costumes | Music |
|---|---|---|
 
|
•Burning Town |
Nintendo Labo[edit]
| Spirits | Mii Costumes |
|---|---|
 |
 
|
Daemon X Machina[edit]
| Spirits |
|---|
Tetris[edit]
| Spirits | Music |
|---|---|
| •Tetris: Type A •Tetris: Type B | |
•Tetris: Type A •Tetris: Type B | |
 
|
•Tetris: Type A •Tetris: Type B |
Samurai Shodown[edit]
| Spirits | Mii Costumes | Music |
|---|---|---|
 
|
•Tuna - SAMURAI SHODOWN •Banquet of Nature - SAMURAI SHODOWN •Gaia - SAMURAI SHODOWN |
Resident Evil[edit]
| Spirits |
|---|
Astral Chain[edit]
| Spirits |
|---|
River City[edit]
| Spirits |
|---|
Cuphead[edit]
| Spirits | Mii Costumes | Music |
|---|---|---|
 
|
•Floral Fury |
Warframe[edit]
| Spirits |
|---|
Ring Fit Adventure[edit]
| Spirits |
|---|
Mana[edit]
| Spirits |
|---|
Octopath Traveler[edit]
| Spirits |
|---|

|
Bravely Default[edit]
| Spirits |
|---|
Ghosts 'n Goblins[edit]
| Spirits | Mii Costumes |
|---|---|

|
 
|
Sakuna: Of Rice and Ruin[edit]
| Spirits |
|---|
No More Heroes[edit]
| Spirits | Mii Costumes |
|---|---|
 
|
Mii Costume-based universes[edit]
Goemon[edit]
| Mii Costumes |
|---|
 
|
Undertale[edit]
| Mii Costumes | Music |
|---|---|
 
|
•MEGALOVANIA |
Assassin's Creed[edit]
| Mii Costumes |
|---|

|
Rabbids[edit]
| Mii Costumes |
|---|

|
Fallout[edit]
| Mii Costumes |
|---|
 
|
The Elder Scrolls[edit]
| Mii Costumes |
|---|
 
|
Devil May Cry[edit]
| Mii Costumes |
|---|
 
|
Doom[edit]
| Mii Costumes |
|---|
 
|
Music-based universes[edit]
Soccer[edit]
| Music |
|---|
| •Famicom Medley (Soccer portion) |
Wii Play[edit]
| Music |
|---|
| •Charge! (Wii Play) |
| •Charge! - Wii Play |
Dragon Spirit[edit]
| Music |
|---|
•Namco Arcade '80s Retro Medley 2 (Dragon Spirit portion) |
| •Area 1 - Dragon Spirit •Namco Arcade '80s Retro Medley 2 (Dragon Spirit portion) |
Wonder Momo[edit]
| Music |
|---|
•Namco Arcade '80s Retro Medley 2 (Wonder Momo portion) |
| •Namco Arcade '80s Retro Medley 2 (Wonder Momo portion) |
Thunder Ceptor[edit]
| Music |
|---|
•Namco Arcade '80s Retro Medley 2 (Thunder Ceptor portion) |
| •Namco Arcade '80s Retro Medley 2 (Thunder Ceptor portion) |
Yokai Dochuki[edit]
| Music |
|---|
•Yokai Dochuki Retro Medley |
Bravoman[edit]
| Music |
|---|
•Bravoman Retro Medley |
AR Games[edit]
| Music |
|---|
•Dragon Battle |
| •Dragon Battle |
NES Remix[edit]
Miitopia[edit]
Tank Troopers[edit]
| Music |
|---|
| •Garage |
Alpha Mission[edit]
| Music |
|---|
| •Theme of SYD - Alpha Mission |
Athena[edit]
| Music |
|---|
| •Forest World - Athena |
Metal Slug[edit]
Nintendo hardware and software and other non-universe specific stuff[edit]
| Items | Stages | Trophies | Spirits | Music |
|---|---|---|---|---|

|
 | |
|
|||

|
•Mii Channel •Wii Shop Channel | |||
 
|
•Mii Plaza •Wii Shop Channel | |||
 |

|
•Wii Shop Channel (Remix) •Wii Shop Channel (Original) •Mii Plaza •Mii Channel |