Palutena (SSBU)
| Palutena in Super Smash Bros. Ultimate | |
|---|---|
 
| |
| Universe | Kid Icarus |
| Other playable appearance | in SSB4 |
| Availability | Unlockable |
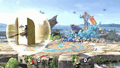
| Final Smash | Black Hole Laser |
| Tier | A+ (16) |
Palutena (パルテナ, Palutena) is a playable character in Super Smash Bros. Ultimate. She was officially revealed on June 12th, 2018 alongside fellow Kid Icarus representatives Pit and Dark Pit, as well as the rest of the veterans. Palutena is classified as Fighter #54.
Brandy Kopp and Aya Hisakawa reprise their roles as the voice of Palutena in the English and Japanese versions of the game. In addition to their portrayals being re-purposed from Super Smash Bros. 4, they also provide new Palutena's Guidance conversations for every veteran not present in SSB4, the downloadable fighters of SSB4, the base roster newcomers of Ultimate, and Piranha Plant.
Palutena is ranked 16th out of 82 on the current tier list, placing her near the top of the A+ tier. This is a drastic improvement over her 44th out of 54 placement in SSB4, and makes her the highest-ranked veteran from Smash 4. Palutena is one of the most improved veterans from the transition to Smash 4 and Ultimate due to the engine of Ultimate complementing her unique strengths. Her aerials are a core part of her neutral due to her high aerial mobility and their effective traits: they both start and extend combos, most notably with her neutral aerial, which is commonly considered one of the best moves in the game due to its overall utility for starting combos, comboing into itself, high active frames and KOing at very high percents. Her back air is great for retreating and mid-range combat due to the invincibility of the shield and priority, while up air is an amazing disjointed multi-hit that functions as a juggle tool and KO option. Her grab game is also impressive due to its above-average reach and her decent set of throws. Overall, this results in her having one of the best advantage states in the game. Her specials also have seen noteworthy improvements: Autoreticle is useful for interrupting midrange approaches or recoveries, Explosive Flame is effective for general zoning and for halting approaches, Warp makes her difficult to edgeguard consistently, and her Reflect Barrier functions as a simultaneous counterattack and reflector that enhances her already strong defense.
Despite these many strengths, Palutena is not without her flaws. While she wields an excellent air game, her ground game is below average in comparison, having slow and unsafe tilts alongside committal smash attacks. She also has trouble securing stocks at high percents due to her KO moves being fairly predictable (Explosive Flame) or easily staled due to overuse (back aerial). Palutena's main combo starters are also unsafe on shield and thus forces her to mix up her gameplan and neutral. Finally, her recovery is completely reliant on Warp, which has no active hitbox and can be consistently two frame punished.
Overall, Palutena is a simple but effective character at all levels of play, with well-rounded abilities and few overwhelming weaknesses. She has often been considered a top-tier contender since the release of the game, and has been one of the most popular characters in competitive play, with results spearheaded by Nairo in the early metagame and a multitude of other Palutena players since, including Jagaimo, Lui$, and Raflow.
How to unlock[edit]
Complete one of the following:
- Play VS. matches, with Palutena being the last character to be unlocked.
- Clear Classic Mode with Kirby or any character in his unlock tree, being the last character unlocked after Lucas.
- Have Palutena join the player's party in World of Light.
Palutena must then be defeated on Palutena's Temple (the Ω form is used in World of Light).
Attributes[edit]
Palutena is a tall middleweight. Her walking speed, dashing speed, air acceleration, and gravity are above-average; her air acceleration, in particular, is the 5th highest in the game. Palutena also has relatively high jumps, although her traction and falling speed are both merely average, while her air speed is below-average. Thanks to her attributes, Palutena's overall mobility is excellent, even though her aerial mobility is a bit slower than her grounded mobility.
Palutena has a dynamic, well-rounded moveset. She has both excellent combo potential and solid zoning tools, allowing her to be effective both offensively and defensively. Her staff counts as a disjointed hitbox, and she has two projectiles in her moveset as part of her special moves, meaning she can apply safe pressure from a distance and force approaching opponents off her. Her projectiles are unique in that they are completely unconventional. Her aerial-based moveset, speed, and versatility mean she can easily overwhelm opponents and quickly rack up damage.
Palutena's ground attacks are generally the weakest part of her moveset, but they can be useful. Her neutral attack possesses decent range, whereas her neutral infinite is a reliable damage-racking option that can also function as a situational KO option at very high percentages while near the edge. Palutena's dash attack is very fast, grants her partial invincibility, and its clean hitbox enables it to function as a situational KO option at very high percentages. Her tilt attacks are somewhat situational due to their lagginess, but have their own individual perks. Forward tilt has long-lasting hitboxes that enable it to intercept approaches and floor recoveries, while its second hit is strong enough to KO at very high percentages while near the edge. Down tilt is a useful 2 frame punish that semi-spikes grounded opponents and launches aerial opponents vertically, thus enabling Palutena to edgeguard reliably afterward. Lastly, up tilt has the fastest startup among her tilts, it can initiate aerial pressure, and it is even a serviceable KO option at very high percentages.
Palutena's grounded offense is further supplemented by her strong grab game: her grabs are quick and have respectable ranges, while each of her throws varies from being decent to useful. Palutena's down throw is a reliable combo starter, since it can combo into each of her aerials, and even has KO confirms at high percentages. Her back throw is her strongest throw, being capable of KOing at around 130% while near the edge. Palutena's forward and up throws are much less useful in comparison, but have their own perks regardless. Forward throw has a KO confirm into Explosive Flame at high percentages, whereas up throw is decent for launching opponents into the air to initiate aerial pressure safely.
Palutena's smash attacks are very strong KO options thanks to their considerable power and very long ranges. Up smash has a very long-lasting hitbox and covers a lot of vertical range directly in front of Palutena; it can be used to KO opponents in the air and even intercept air dodges due to how long the hitbox lasts. Her forward and down smashes are similar, both in their damage output and the fact that they have a wind effect to move opponents away from Palutena if they are just outside of the move’s hitbox.
The strongest part of Palutena's moveset, however, is her air game. Her aerial attacks are each useful regarding comboing or KOing; despite each of her aerials having rather high ending lag, they compensate for this by having very low landing lag and generous autocancel windows, making them very safe on shield. Her neutral aerial is a very fast and safe move, being Palutena's best combo tool by far as it combos into her other aerial attacks (including itself) until fairly high percentages, while also having KO potential at very high percentages. Her up aerial is an extremely good juggling tool capable of KOing while near the top blast zone at around 100% (even on heavyweights), with its fairly large, long-lasting hitbox making it difficult to avoid. Her back aerial, like her dash attack, grants invincibility on Palutena's shield. It has the strongest knockback of any of her aerials, making it one of Palutena's best KO options, especially when used as a reverse aerial rushed follow up from down throw. Her forward aerial, while not quite as strong, is a good combo finisher that is also useful for edgeguarding and can even KO at very high percentages near the horizontal blast zones. Although down aerial is generally considered to be Palutena's least useful aerial, it is a guaranteed meteor smash against airborne opponents.
Additionally, Palutena's special moves are each useful, most prominently for zoning. Explosive Flame, formerly one of her custom moves in Super Smash Bros. 4, is her side special attack and is useful at forcing opponents into the air, as well as for securing KOs while near the upper blast zone at higher percentages. Palutena's neutral special attack, Autoreticle, is not quite as useful as Explosive Flame, yet it is another projectile that can apply long-ranged pressure safely and rack up damage. Her up special move, Warp, is useful for achieving a more favorable stage position; when coupled with its invincibility frames and Palutena's high jumps, Warp is an extremely useful recovery tool. Palutena's down special move, unlike in SSB4, consists of 2 moves: Counter activates against melee attacks, whereas Reflect Barrier activates against reflectable projectiles at either close range or from a distance. Lastly, several of Palutena's moves, such as her tilt attacks and aerial attacks, inflict additional shield damage; as a result, Palutena can pressure opponents consistently and reliably, especially since her forward and back aerials can autocancel with a short hop fast fall.
Despite having considerable strengths, Palutena also has many noticeable weaknesses. Her most glaring problem is her mediocre ground game: barring her dash attack, the remainder of her grounded attacks come out on frame 8 or later, and almost all of her moves either have high startup (smash attacks and down tilt), punishable ending lag (forward, back and down aerials and smash attacks), long durations (her tilt attacks), or all three (forward tilt and special moves). Although Palutena's overall frame data is quite faster than it was in SSB4, she can still be rendered very vulnerable if her attacks miss or if the opponent evades and/or blocks them.
Although some of Palutena's moves have the potential to KO at reasonable percentages, she can still struggle to score KOs due to her options being either somewhat risky or situational. Her smash attacks are very punishable due to their high overall lag, which offsets their impressive power. Explosive Flame and, to a lesser extent, back aerial are also easily punishable if whiffed due to their ending lag. Up aerial relies on Palutena being underneath her opponent. Furthermore, while Palutena's recovery is decent in its distance, Warp leaves her helpless and lacks a hitbox to protect her; when combined with the fact that Palutena is a tall character, her recovery can be exploited easily by opponents who know how to intercept Warp.
Despite this, Palutena is generally considered at worst a high-tier character due to her versatility, well-roundedness, and relatively easy combo game. Her lack of overwhelming weaknesses means that there are few opponents she struggles against.
Changes from Super Smash Bros. 4[edit]
Palutena was previously a lower-tiered character in SSB4 due to a myriad of factors, such as terrible frame data in relation to power and weight (which also resulted in a deficient grounded game), a predictable offensive game with few reliable options, general trouble at KOing, poor disadvantage state, and an infamously dysergic special moveset. Being designed with character customization in mind, custom special moves were able to improve her strengths vastly, but they required character customization to be turned on to be able to use them, unlike the Mii Fighters, resulting in the inability to use them in regular gameplay and limiting her to her default special moveset. Most likely due to the removal of custom moves and her previous poor reputation, Palutena has been significantly rebalanced to work without custom moves during her transition from SSB4 to Ultimate. However, while initially considered to be dramatically buffed during the game's release, game updates have given her some noticeable nerfs that have reduced her viability. Regardless, Palutena is still considered to be significantly buffed overall.
Palutena's most notable improvements are indirect, as she benefits from the gameplay changes to the engine to a far greater degree than most of the cast. The universal increases to mobility have not only improved her already high run speed, but particularly give her much faster air and falling speeds compared to SSB4 (though the former is still below-average), improving her air-to-ground transitioning. The reduced landing lag in all aerials further improves her already impressive aerial game, heightening their spacing and combo potential. The increased shieldstun on attacks makes Palutena's own moves much safer on shield, while the changes to perfect shielding now allow Palutena to more easily retaliate against opposing attacks, while not reducing her own moves' safety on shield due to the aforementioned higher shieldstun and her moves' multi-hit nature, making them risky to perfect shield. The weakening of rage improves Palutena's endurance and now allows her to take advantage of it much easier. The changes to air dodges have significantly improved her juggling and edgeguarding potential, combined with her respectable aerial moves, and the reintroduction of directional air dodging now lets her use one to escape pressure or slightly extend her recovery. Finally, the changes to the Sakurai angle to be lower, while being a buff shared widely around the cast, have turned her back throw into a highly effective KO throw.
In terms of direct changes, Palutena has also received several notable improvements. Some of her standard moves have seen hitbox increases, which increase her melee range and make attacks using her staff much more reliable at connecting. Her sluggish ground moves have been sped up, with her forward and up tilts having faster startup, and almost all of her moves (aside from up and down tilts) receiving less ending lag. Down tilt, particularly, has much better 2 framing potential thanks to its longer range and duration, and sends at a more favorable angle for combos when hitting aerial opponents. Her smash attacks have had their utility further increased; up smash lasts significantly longer, while forward and down smash possess increased power as well as stronger, more reliable windboxes, which, combined with their lower ending lag, make them harder to punish at long range.
Her already capable aerial moveset was also improved. Neutral aerial now always sends in the direction Palutena is facing and deals less knockback; in combination with the reductions to landing lag, this turns the move into a fearsome combo starter and general all-purpose attack. Forward, up, and down aerials deal more damage, with both the former and latter, as well as back aerial, dealing more knockback. Down aerial also lasts for an additional frame, no longer being one of the worst meteor smashes in the game.
Palutena's special moveset has also undergone several drastic enhancements, putting it in line with the rest of the cast. Autoreticle's detection lasts significantly longer, and each projectile has faster startup, deals more damage, and travels faster. Counter and Reflect Barrier have been merged into one move; the former activates when blocking a physical attack, while the latter activates to reflect projectiles. As a whole, the move has a faster startup, lasts longer, and has less ending lag in all aspects; individually, Counter has slightly more knockback (though it remains the weakest counterattack knockback-wise), while Reflect Barrier activates immediately and has a much higher damage multiplier, no longer being the weakest reflector in the game. In place of Reflect Barrier, Palutena's side special is now Explosive Flame; in addition to giving Palutena an additional move, the move has less ending lag, deals more damage and knockback, and can be summoned at two distances, increasing its versatility.
However, while receiving far more buffs, Palutena has also seen some notable nerfs that have changed her playstyle, most notably to her neutral attack and grabs. The former can no longer jab cancel due to its angle being homogenized to connect into the infinite, removing many of its guaranteed set-ups into other moves, such as dash attack, grab, and some of her aerials. For the latter, despite pivot grab's longer range, both standing and dash grab possess less range (especially the former), and all grabs share the same increased startup and ending lag as with the rest of the cast. Her down throw is also less advantageous due to the changes to hitlag on it. She has slightly more knockback, reducing its advantage and combo potential beyond low percents despite its reduced ending lag and more favourable angle. The universal slowdown of shield grabs only exacerbates this, further weakening Palutena's out of shield and grab games, the former of which was the crux of her defense in SSB4. Moreover, her dash attack and back aerial's invincibility frames no longer cover her entire body after startup, instead only covering her arm, making both attacks less effective at contesting approaches.
While she has seen mostly benefits from the revamped game physics, a few changes have also hurt Palutena. Aside from the universal nerfs to grabs, the introduction of dash-canceling is overall detrimental to her, as it allows many characters to pressure her more effectively, while her grounded moves are still slow compared to her aerial moves. The smaller edge sweetspots render Warp much easier to intercept and 2-frame, which, combined with her less floaty air physics and the changes to air dodges, makes her easier to edgeguard. Most egregiously, however, the removal of custom moves means she is no longer able to utilize them to her advantage to improve her special moveset.
In the end, Palutena's buffs have exponentially improved her predictable, inconsistent offense, and her improved aerial mobility, and the revamped gameplay mechanics allow her to take advantage of her streamlined moveset while compensating for most of her nerfs. She now possesses reliable options for most kinds of situations, allowing her to adapt to many kinds of playstyles depending on the opponent. However, her weaker grabs have weakened her defense, and her survivability is slightly lower, which forces her to adapt to opponents' options through a more offensive playstyle. She also retains some of her weaknesses from SSB4, such as slow grounded attacks, trouble at KOing the opponent, predictable out of shield game, somewhat linear approach, and a mediocre disadvantage state, especially offstage. Game updates have also handed Palutena some impactful nerfs, including the aforementioned nerf to her grab; combined with various characters gaining buffs through said updates, the introduction of DLC characters, and general metagame optimizations, her overall viability is slightly worse than at launch. All in all, however, Palutena is drastically better in Ultimate than she was in SSB4, being one of the most buffed characters among the returning cast, and a fairly strong choice in competitive play.
Aesthetics[edit]
 As with all veterans returning from Super Smash Bros. 4, Palutena's model has a more subdued color scheme, now more closely resembling her appearance in Kid Icarus: Uprising. Her chiton and armor feature simple detailing, and her face appears more realistic and expressive.
- Palutena's sidestep now causes a visible warping effect when she disappears.
- Palutena is more emotive as she now smiles consistently rather than frowning.
- Palutena's skirt now has independent physics.
- Palutena's shielding animation is slightly altered.
- The golden doors in Palutena's on-screen appearance now disappear without the transparency effects.
Attributes[edit]
 Like all characters, Palutena's jumpsquat animation takes 3 frames to complete (down from 5).
- Palutena walks slightly faster (1.21 → 1.271).
- Palutena runs faster (1.888 → 2.077).
- Her initial dash speed is much faster (1.5 → 2.035).
- Palutena's air speed is slightly faster (0.91 → 1).
- Palutena's max additional air acceleration is higher (0.1 → 0.105).
- Palutena's falling speed and fast falling speed are higher (1.4 → 1.55 and 2.24 → 2.48 respectively).
- Palutena's gravity is higher (0.105 → 0.12). In combination with her faster falling speed, this improves her vertical mobility, while not affecting her vertical endurance due to gravity no longer affecting vertical knockback between 70 and 110 degrees.
- Forward roll has less ending lag (FAF 31 → 30).
 Forward roll grants less intangibility (frames 4-17 → 4-15).
- Back roll has more startup with less intangibility (frames 4-17 → 5-16), and more ending lag (FAF 31 → 35).
- Spot dodge has less ending lag (FAF 28 → 26).
- Spot dodge grants less intangibility (frames 3-18 → 3-17).
- Air dodge grants more intangibility (frames 3-28 → 3-30).
- Air dodge has significantly more ending lag (FAF 34 → 50).
- Palutena's traction is higher (0.068 → 0.106).
Ground attacks[edit]
- Neutral attack:
- The first hit has an altered animation. Palutena swings her staff downwards instead of jabbing it forward.
- The first hit and neutral infinite's finisher have less ending lag (FAF 26 → 25 (hit 1), 43 → 40 (finisher)).
- The first hit transitions into the neutral infinite faster (frame 15 → 11).
- The first hit has altered angles to keep opponents closer to Palutena (80° → 361°/180°), and has gained a hitstun modifier of 4, allowing it to lock opponents and connect better into the infinite.
- The infinite has a lower hitlag multiplier (1.2× → 0.5×) and SDI multiplier (1× → 0.4×), a different launch angle to keep grounded opponents closer to Palutena (60°/110° → 361°), and a much larger hitbox (3.5 → 6u). This allows it to connect much more effectively, and rack up more damage overall despite each hit dealing slightly less damage (0.8% → 0.6%).
- The first hit has a shorter hitbox duration (frames 8-10 → 8-9).
- The first hit deals less knockback (30 base/60 scaling → 25/20 base/20 scaling), removing its guaranteed jab cancel setups from Smash 4, despite its lower ending lag and additional hitstun.
- The first hit has a higher hitlag multiplier (0.5× → 1.6×).
- The infinite has gained a shieldstun multiplier of 7×. This allows it to lock opponents into their shields between each hit, and thus pressure them more effectively, but also allows them to cancel shieldstun and punish Palutena more easily if they shield 10 hits or more.
- Forward tilt and up tilt have flashier motion effects.
- Forward tilt:
- Forward tilt has less startup (frame 17, 25 → 14, 24).
- The move has a shorter hitbox duration by one frame (frames 17-24/25-39 → 14-23/24-35), but has less ending lag (FAF 68 → 60).
- The first hit no longer has a sourspot (6%/4% → 6%), and the second hit deals higher, consistent damage (6%/4% → 7%), as well as more knockback (43 base/100 scaling → 78/80), increasing its damage as well as making it consistent (8%-12% → 13%), and allowing it to KO at around 130% near the edge.
- The first hit has different angles and knockback that now also vary depending on the frame on which they hit (48° → 90°/45° (early), 285°/100° (mid), 20°/85° (late)), set knockback (43 base/65 scaling → 25/45 set/100 scaling, 25/40/100, 35/30/100). It is now weight-independent, has a lower hitlag multiplier (1× → 0.8×), and can no longer be SDIed (1× → 0×). These changes allow it to connect much more reliably into the second hit, regardless of the opponent's percent.
- The lower staff hitbox is larger for the first hit (2.8u → 3u), and both hitboxes are larger for the second hit (4.1u/2.8u (upper/lower) → 4.8u/3.9u).
- Palutena's right arm is now intangible for the full duration of the hitboxes.
- The second hit launches at a slightly different angle (361° → 40°). Compared to Smash 4, it sends opponents higher at low percents, but sends aerial opponents lower at high percents.
- Up tilt:
- Up tilt has less startup lag (frame 10 → 8) and a shorter total duration (FAF 68 → 56).
- It has lower hitlag multipliers (1× → 0.5× (looping hits), 2× → 1.5× (last hit)), and the looping hits have a faster rehit rate (5 → 3), causing the move to execute noticeably faster.
- The lower looping hit now has higher priority than the upper hit. The lower looping hit uses an altered angle (366° → 130°) with higher set knockback (30 → 50). This improves its consistency on grounded opponents due to no longer sending away from Palutena (80° → 130°).
- The looping portion has a shorter duration (frames 10-38 (looping hits)/40-41 (last hit) → 8-22/24-25). This increases the move's ending lag by four frames, as its total duration was not fully compensated.
- Despite its faster rehit rate, it hits five times instead of six before the last hit. However, the looping hits deal more damage (1.2% → 1.4%), and alongside the last hit's increased damage, the move's total output is still higher (9.7% → 11.5%).
- The last hit deals higher, consistent damage (2.5%/1.5% → 4.5%), with knockback not fully compensated (60 base/195 scaling → 75/136), slightly improving its KO potential.
- All hitboxes are positioned farther upward (Y offset: 16/18/13 → 18/20/15 (looping), 19/13 → 23/17 (final)). This improves its vertical range, but causes it to have a blindspot and makes it harder to hit opponents on the ground.
- Down tilt:
- Down tilt has a longer hitbox duration (frames 14-24 → 14-27), making it even more effective for 2 frame punishes.
- It launches grounded opponents at a lower angle (361° → 35°), improving its edgeguarding and KO abilities near the edge. It also launches aerial opponents at a higher angle (70° → 75°), improving its combo potential when used to catch landings and hit ledge-hanging opponents.
- The aerial hitboxes now have identical size and range with the grounded hitboxes, no longer being smaller.
- In addition to the hitboxes attached to the staff, there are now static hitboxes, improving its range and making it less strict to the staff's spinning animation.
- Dash attack:
- Palutena gains invincibility later and with less coverage (frames 4-15 (head/torso/both arms) → frames 5-6 (head/torso), 5-16 (left arm)).
- It deals more damage (9% → 11% (clean), 5% → 7% (late)), although with its knockback fully compensated (70 base/90 scaling → 71/76 (clean), 60/70 → 61/56 (late)).
- It causes Palutena's shield to glow, indicating its hitbox.
- Dash attack has significantly less ending lag (FAF 52 → 41).
- Forward smash:
- The hitboxes have a longer duration (frame 18-19 → 18-20), with the windboxes having a shorter duration instead (frames 20-31 → 21-31).
- The hitboxes have slightly more knockback scaling (97/96 (clean/late) → 100/102), while the windboxes have more set knockback (40/26 (clean/late) → 60/35), improving the move's KO and gimping potential.
- Forward smash has less ending lag (FAF 67 → 64).
- Up smash:
- It has a longer hitbox duration (frames 18-26 → 18-29) and a new late hit (frames 30-35), now lasting twice as long as before. This improves its ability to punish dodges and landings.
- The mid and high hitboxes deal more knockback (55 base/85 scaling → 58/89 (mid), 55/87 → 62/92 (high)) and are larger (2.5u → 2.8u).
- It uses a magic effect instead of a normal one.
- Up smash has less ending lag (FAF 68 → 64).
- Down smash:
- The clean hit has more base knockback (40 → 52), improving its KO potential.
- Its hitboxes are larger (2.5u → 3.7u (clean), 4u → 6u (late), 8u → 9u (windboxes)). The clean hit extends marginally farther (z-offset 7 to -7 → 7.3 to -7.3).
- The clean hit is positioned marginally higher (y-offset 9 → 9.2). The late hits are positioned lower (y-offset 6/6 (late/windbox) → 4/4), improving their ability to hit below ledge.
- The windbox has more horizontal range (Z offset: 22u → 24u), more set knockback (30 → 55) and a longer duration (frames 20-27 → 20-29), making them more effective for disrupting opponents.
- The clean hit has a higher hitlag multiplier (1× → 1.4×), while the late hit has a lower multiplier (1× → 0.85×).
- Down smash has less ending lag (FAF 72 → 69).
Aerial attacks[edit]
- All aerials have less landing lag (20 frames → 12 (neutral), 12 → 9 (forward), 16 → 10 (back), 24 → 14 (up), 18 → 11 (down).
- Neutral aerial:
- The beginning of the animation is slightly different. Palutena now spins her staff by knocking the lower part of it instead of letting it spin on its own.
- Neutral aerial has lower hitlag multipliers (1× → 0.5× (looping hits), 2× → 1.5× (last hit)), and the looping hits have a faster rehit rate (5 → 4), causing the move to execute noticeably faster.
- It has larger hitboxes (3.4u → 4.2u (looping hits), 11u → 11.5u (last hit)), improving its utility for approaching.
- However, the last hit has a smaller hitbox against aerial opponents (11.5u → 9.8u).
- The looping hits use different knockback on aerial vs. grounded opponents.
- On aerial opponents, between frames 5 and 23, the looping hits now have scalable knockback (20 (set)/100 (scaling) → 0 (base)/100 (scaling)). At lower percents, this leaves them weaker and negative on hit when landing, but at high percents gives them drag-down potential, with the frame advantage being better the higher Palutena's rage and the lower the opponent's weight.
- On grounded opponents, between frames 5 and 23, the hitstun is higher due to higher set knockback (20 → 65). The staff's bottom hitbox on frames 5-6 has even higher set knockback (80) and can send lighter opponents into tumble. In combination with the move's reduced landing lag, this allows combos from a single hit on grounded opponents. The follow-ups depend on the opponent's weight, with even up smash being possible in some cases, though up tilt is the most reliable follow-up.
- On frames 24-27, all the looping hits still use set knockback and are effectively unchanged from Smash 4 due to a new hitstun modifier (-13) negating the higher set knockback (20 → 65), leaving them unsuitable for any drag-down or single-hit combos.
- Due to the looping hits' faster rehit rate, the move hits seven times instead of six. However, its damage values have been redistributed (1.7% (hits 1-5) → 1.4% (hits 1-6), 5% → 5.1% (last hit)), leaving its total damage unchanged.
- The last hit comes out faster (frame 31 → 29).
- However, the move's total duration remains unchanged, increasing its ending lag.
- The last hit always sends opponents in the direction Palutena is facing. Combined with her faster dash speed and the move's lower landing lag, this allows it to combo into itself several times at low percents, greatly improving her damage racking ability.
- The last hit deals less knockback (30 base/180 scaling → 35/155). While this improves its combo potential at low percents, it more drastically hinders its KO potential at high percents.
- Forward aerial:
- Forward aerial deals more damage (9% → 10%) with no compensation on knockback, improving its KO potential near the edge.
- Back aerial:
- Palutena gains invincibility later, with a shorter duration and with less coverage (frames 3-10 (head/torso/both arms) → frame 7 (head/torso), 7-10 (left arm).
- Back aerial's sourspot has been removed, reducing the move's range inside Palutena, though almost negligibly.
- However, the loss of the sourspot means that it's now strong the entire way through.
- It has slightly more knockback scaling (92 → 95), improving its KO potential.
- It causes Palutena's shield to glow, indicating its hitbox.
- Up aerial:
- The move has more startup, with the looping hits having a shorter duration (frames 8-23 → 10-22).
- The looping hits have a lower hitlag multiplier (0.8× → 0.6×) and a faster rehit rate (5 → 3). As a result, the move executes noticeably faster, and hits six times instead of five, increasing its total damage (9% → 10%).
- The last hit comes out faster (frame 25 → 24). However, this is compensated by the multi-hits of up aerial having a shorter duration meaning the amount of startup remains the same.
- However, the move's total duration remains unchanged, increasing its ending lag.
- The side hits of the launching hit send much more vertically (65° → 88°), now having an identical angle to the center hit and removing their vulnerability to LSI. This improves the move's combo and KO potential.
- Up aerial auto-cancels significantly earlier (frame 64 → 42), doing so in a full hop.
- Down aerial:
- Down aerial has a longer hitbox duration (frame 10 → 10-11).
- It deals more damage (9% → 11%) with no compensation on knockback, making it a stronger meteor smash.
- The meteor hitbox is slightly larger (4u → 4.2u), with its lower reach compensated (y-stretch -5.2 → -5).
Throws and other attacks[edit]
- Palutena's animation when holding a Super Scope or Gust Bellows has been altered, as she now holds the item in a manner similar to a rifle.
- Grabs:
- Pivot grab has more range (Z2 offset: -17.4u → -18.9u).
- All grabs have more ending lag (FAF 32 → 40 (standing), 40 → 48 (dash), 40 → 43 (pivot)).
- Standing and dash grab have less range, especially the former (Z2 offset: 11.4u → 9.4u (standing), 13.7u → 13.1u (dash)).
- Dash and pivot grabs have more startup (frame 9 → 10 (dash), 10 → 11 (pivot)).
- Pummel:
- Pummel deals more hitlag (5 frames → 14), but has significantly less startup (frame 8 → 1) and ending lag (FAF 23 → 7), shortening its duration.
- It deals much less damage (3.1% → 1.3%).
- Palutena pummels the opponent by holding her staff vertically instead of horizontally.
- Back throw:
- Due to the Sakurai angle being lower against aerial opponents in Ultimate (45° → 38°), back throw KOs more effectively near edges.
- Down throw:
- Down throw triggers a hitlag effect on both Palutena and the opponent for 7 frames prior to release, rather than inflicting 5 frames of hitlag on the opponent upon release, and has more knockback scaling (25 → 30). This worsens its combo potential beyond low percents.
- However, it has less ending lag to compensate (FAF 50 → 46), and launches at a slightly higher angle (70° → 73°), which combined with Palutena's faster jumpsquat and jump speed slightly improves its combo potential at low percents.
- Edge attack:
- Edge attack deals more damage (7% → 9%).
Special moves[edit]
- Autoreticle:
- Autoreticle's shots are generated faster (frame 29/35/41 → 25/31/37).
- The shots deals more damage (2.9% → 3.5%) and knockback (20 base/42 scaling → 40/41), making them more effective for disrupting approaches. The changes now give the move a chance of tripping opponents.
- The shots have received negative shield damage (0 → -1.7), effectively dealing around half their usual damage to shields.
- The changes to locking remove the projectile's situational utility for starting combos.
- The reticle is red instead of green. Additionally, Palutena illuminates her staff's orb with a blue light instead of a yellow one.
- Explosive Flame:
- Explosive Flame, previously one of Palutena's custom neutral specials, is now her side special. Since Reflect Barrier has been merged into her down special, she has effectively gained an additional move. This provides Palutena with another projectile and long-ranged attack option.
- It can be unleashed at two different distances away from Palutena depending on whether the control stick is tilted or tapped, improving its zoning ability.
- It deals considerably more damage (0.8% → 1.5% (hits 1-6), 4.2% → 5.5% (hit 7); 9% → 14.5% total) without compensation on knockback. This turns it into a much more effective finisher, KOing opponents from ground level at around 135% if all hits connect.
- It has received negative shield damage (0 → -0.7 (hits 1-6), -2.7 (hit 7)), effectively dealing around half its usual damage to shields.
- The looping hits have a lower SDI multiplier (1× → 0.4×).
- The new knockback speed-up effect worsens the move's ability to connect fully at higher percents.
- The last hit has a higher hitlag multiplier (1× → 1.5×), improving its combo potential and safety on shield.
- It has significantly less ending lag (FAF 89 → 72).
- Warp:
- Warp has one more frame of intangibility (frames 16-31 → 16-32).
- It has a more stylish appearance.
- Counter and Reflect Barrier:
- Reflect Barrier has been merged with Counter; By default, Counter activates upon blocking an attack, but if it is a reflectable projectile, Reflect Barrier activates instead, akin to King K. Rool's Gut Check and Joker's Tetrakarn / Makarakarn. This allows her to respond to a larger variety of attacks using only one move, while also freeing up her side special for an additional move.
- The move has less startup with a longer counter window (frames 10-31 → 7-34), less ending lag (FAF 75 → 71), and grants intangibility earlier (frames 10-16 → 6-12).
- Upon activation, Counter has significantly less ending lag (FAF 56 → 37), as does Reflect Barrier compared to the previous side special (FAF 56 → 35), and the latter also has immediate startup (frame 8 → 1).
- Counter has more base knockback (40/20 → 50/30), with only the sweetspot having less knockback scaling (75 → 70), making it more consistent and improving its KO potential near the ledge.
- Projectiles reflected by Reflect Barrier have a much higher damage multiplier (1.17× → 1.4×).
- Reflect Barrier has a shorter duration (frames 9-66 → 1-42), and no longer possesses an offensive hitbox.
- Palutena can no longer directly access Reflect Barrier. As a result, she can no longer use its windbox on command to gimp opponents, or deter projectile use with the barrier's longer duration.
- Palutena closes her eyes instead of showing a angry look upon activating the move. Additionally, she no longer shouts "Counter" until she successfully counters a melee attack. Counter also glows blue instead of yellow.
- Black Hole Laser:
- Black Hole Laser produces a larger black hole and a wider laser, making the attack harder to avoid.
- The final hit has less knockback scaling (135 (trapped)/105 (collateral) → 127/97), reducing its KO potential.
Update history[edit]
Likely due to her dominant status during the early metagame, Palutena was nerfed overall via game updates.
Update 2.0.0 made Warp safer to recover with, and reduced neutral aerial's hitlag, making it harder to SDI. In 3.0.0, she received an universal nerf to her projectiles' shield damage, on par with the rest of the cast, which made Autoreticle and Explosive Flame are less effective for shield pressure when used in conjunction.
Update 7.0.0 granted Palutena a mix of buffs and nerfs, but nerfed her overall; her neutral aerial saw the most nerfs, with its looping hits altered to make them much less effective for drag-down setups and removing its infinite combo on itself on platforms against large characters, and its weaker knockback makes it a much less effective option at high percentages; the latter change did, however, make the move slightly more effective for combos at low to mid percentages. Down throw's increased knockback worsened its combo potential, notably neutering her KO confirm into back aerial. Despite this, her down smash and up tilt's last hit were made stronger.
Update 8.0.0 nerfed her Final Smash by making it easier to avoid due to its slowdown period and range being shortened. 11.0.0, however, brought more significant nerfs to her standard moveset; her dash attack and forward aerial were made less safe by increasing their ending lag and landing lag, respectively. Most notably, however, her standing grab's infamous range was shortened considerably; this noticeably worsened her already mediocre out of shield game, and even makes some mispaced attacks harder to punish.
Overall, these changes have affected Palutena's viability, as she fares worse than she did at Ultimate's launch. However, she still remains a very viable character.
- Reduced hitlag on neutral aerial(1×/2× (hit 1-6/7) → 0.5×/1.5×, allowing it to execute faster.
- Palutena can grab ledges more easily during Warp.
- Autoreticle deals less shield damage (0 → -1.7).
- Explosive Flame deals less shield damage (0 (all) → -0.7 (hits 1-6), -2.7 (hit 7)).
 Removed the Super Warp Glitch.
- Overall shield size has been increased.
- Up tilt's last hit deals more damage (2.5% → 4.5%) with knockback not fully compensated (60 base/195 scaling → 75/136), slightly improving its KO potential.
- Down smash's sweetspot has more base knockback (40 → 52).
- Neutral aerial's last hit deals less knockback (30 base/180 scaling → 35/155). While this slightly improves its combo potential at low percents, it more drastically hinders its KO potential at high percents.
- Neutral aerial's last hit has a smaller hitbox against aerial opponents (11.5u → 9.8u).
- Neutral aerial's penultimate hit inflicts 13 less frames of hitstun, worsening the move's drag-down setups and removing its infinites against certain opponents on platforms (such as Ridley).
- Down throw has more knockback scaling (25 → 30), worsening its combo potential.
- Palutena's shield has been adjusted during her idle animation while holding a small item, causing it to no longer clip through her arm.
- Black Hole Laser:
- Nearby opponents are slowed down for a shorter period at the start of the move.
- Black Hole's windbox is smaller (50u → 45u). Combined with the move's shorter slowdown period, this makes it easier to escape.
- Dash attack has more ending lag (FAF 38 → 41).
- Forward aerial has more landing lag (7 frames → 9).
- Standing grab has considerably less range (Z2 offset: 11.4u → 9.4u).
Moveset[edit]
For a gallery of Palutena's hitboxes, see here.
Note: All numbers are listed as base damage, without the 1v1 multiplier.
| Name | Damage | Description | ||
|---|---|---|---|---|
| Neutral attack | Radiance (輝き) Glimmer (煌めき) Glimmer Finish (煌めきフィニッシュ) |
3% | Thrusts her staff forward to emit a blast of light from its orb. While holding her staff out, she then proceeds to attack with repeated bursts of light, followed swinging her staff upward to emit a final burst of light. The first hit can lock. The final hit does decent knockback, allowing it to function as a situational KO move. However, it is slow for a neutral attack, due to coming out on frame 8. | |
| 0.6% (loop), 3.5% (last) | ||||
| Forward tilt | Circle of Protection (守りの環) | 6% (hit 1), 7% (hit 2) | Telekinetically spins her staff in front of herself. This move can hits twice altogether if the tail of the staff hits the opponent. Its long duration and range allows it to punish sidesteps and backward rolls. The second hit has slightly more range than that of the first. However it comes out on frame 14, and its long duration and high lag makes it very punishable if missed. | |
| Up tilt | Circle of Heaven (天の環) | 1.4% (hits 1-5), 2.5% (hit 6) | Kneels and telekinetically spins her staff overhead. Unlike her forward and down tilts, it has KO potential due to the high knockback scaling on the last hit. It also has the lowest startup lag of her tilts, coming out on frame 8. However, its long duration and noticeable ending lag make it punishable. It also has a blind spot that makes it almost impossible to hit small or crouching characters like Kirby. | |
| Down tilt | Circle of Earth (地の環) | 8.5% (grounded opponents), 5% (aerial opponents) | Kneels and telekinetically spins her staff along the ground in front of her. A good spacing tool, and can even punish sidesteps. Slow startup on frame 14 but a low 12 frames of ending lag and has a long 14 frames duration. If the opponent is hit in the air it will be launched vertically, and it is a semi-spike if it hits opponents on the ground. It is one of the few moves in the game that has a longer duration than ending lag, and because of these attributes combined, it is one of the best moves for edge-guarding and 2 frame punishing opponents. It also has the lowest ending lag of a move in her movest, even less than the first hit of her neutral attack. | |
| Dash attack | Palutena Shield (パルテナシールド) | 11% (clean), 7% (late) | Charges forward with her shield. Its clean hitbox grants partial invincibility to Palutena's body and arm (frames 5 and 6 on her upper body, and frames 7-16 on her arm). Her shield also shines briefly, which indicates the duration of its hitbox. Fast start-up on frame 6, although it is unsafe on shield. The clean hit has decent knockback and KOs around 160%. | |
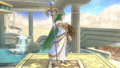
| Forward smash | Palutena God Wing (パルテナゴッドウィング) | 16% (base), 13% (tip) | Conjures a pair of ethereal wings and flaps them forward. It has excellent range, including a huge windbox near the tips of the wings that can push away opponents and potentially gimp recoveries. The tips of the wings are weaker compared to the inner portions. Has quite a bit startup lag at frame 18 (tied with up smash) and very high ending lag with 43 frames, making this move very punishable. Occasionally, Palutena utters "Goddess Wings!" when using this move. Based on the move of the same name used by Palutena in her boss fight in Kid Icarus: Uprising while she is under the control of the Chaos Kin. | |
| Up smash | Pillar of Light (光の柱) | 16%/12%/9% (clean, base/middle/tip), 13%/9%/7% (late) | Raises her staff skyward to generate a cyan beam of light that erupts from the ground in front of herself. Has the second highest vertical range of any up smash in the game, surpassed only by Snake's. The beam has a trio of hitboxes: one at the base, one at the middle, and one at the top. It has a long-lasting 18 frame duration, and unlike her other smash attacks, has a moderate 28 frames of ending lag, making it her most reliable smash attack. However, its long duration and moderate ending lag still make it very punishable if missed or dodged. It also has almost no horizontal range in front of Palutena and without covering her from directly above and behind. It resembles the Palutena Pressure (パルテナプレッシャー), an attack in Kid Icarus: Uprising used by the Chaos Kin-controlled Palutena, and later on by her doppleganger Pseudo-Palutena. | |
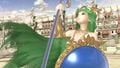
| Down smash | Squat God Wing (スクワットゴッドウィング) | 15% (clean), 13% (late) | Conjures a pair of ethereal wings and flaps them downward on both sides. It has very long range. Its clean hitbox has the highest knockback scaling out of her smash attacks. Much like her forward smash, huge windboxes appear near the tips of her wings and has a sourspot at the tip. Much like her forward smash, Palutena occasionally utters "Goddess Wings!" when using this move. Due to coming out on frame 17 and having extreme ending lag (49 frames), it is very easy to punish. | |
| Neutral aerial | Omnidirectional Circle (四方の環, Four-Directions' Circle) | 1.4% (hits 1-6), 5.1% (hit 7) | Telekinetically spins her staff while it is adjacent to her right arm. Has the lowest amount of startup lag in her moveset, coming out on frame 5. Notorious for its ability to effectively combo into itself and into other aerials, being capable of comboing into itself at low percentages until four times, and especially for its importance to Palutena's gameplan thanks to its low ending and landing lag, making it very spammable. It also can easily set up an edge-guard when fast fallen, and due to its high knockback scaling, it has enough knockback to KO middleweights at around 150% on the edge of Final Destination. All of these traits combined make it one of her best moves and is arguably one of the best moves in the game due to its effectiveness. Auto-cancels in a full hop. | |
| Forward aerial | Palutena Kick (パルテナキック) | 10% | A flying kick. It has long disjointed range and is somewhat disjointed, as the hitbox extends beyond Palutena's leg. It has a generous auto-cancel window, doing so in a short hop fast fall, and its decent knockback allows it to edge-guard reliably at high percentages. Comes out on frame 9, but it has high ending lag and a short hitbox duration. | |
| Back aerial | Shield Bash (シールドバッシュ) | 12% | A backfist with her shield-equipped arm. Much like her dash attack, the clean hitbox grants invincibility around her upper body, and the duration of its hitbox is indicated by a shine. Its invincibility is brief, which is just before the hitbox first comes out (frame 7). Like her forward aerial, it has a generous auto-cancel window, allowing it to autocancel in a short hop fast fall. It has a large hitbox, but is unable to cover Palutena at point-blank range. It also has 40 frames of ending lag, making it very punishable if it is not used close to the ground. | |
| Up aerial | Halo/Nimbus (後光) | 1% (hits 1-5), 5% (hit 6) | Twirls briefly and then emits her halo above herself. Comes out on frame 10, tying it with down aerial for having the slowest start-up of Palutena's aerials. However, it has several hitboxes that grant great coverage above Palutena, and its last hit's respectable power enables it to KO reliably around 110%. Auto-cancels in a full hop. | |
| Down aerial | Purging/Exile Kick (追放キック) | 11% | A downward roundhouse kick. Unlike most meteor smashes, it will always meteor smash midair opponents, thanks to its consistent hitbox. It is also fairly fast for a meteor smash, coming out on frame 10. Conversely, it will obliquely launch grounded opponents (grounded opponents in front of Palutena are launched behind her, and vice versa), which allows it to be used as a punishment option from out of shield when SHFF'd. However, it is unarguably Palutena's worst aerial for a number of reasons. Due to it hitting on frame 10, it is tied with her up aerial for her slowest aerial. It also has the shortest range, duration, and worst auto-cancel window of her aerials (auto-canceling late in a full hop), while its knockback is only average at best for a meteor smash. It also has immense ending lag (47 frames), which is among the laggiest aerials in the game. These traits make it a highly risky, yet only moderately rewarding move, with characters such as Ivysaur, Luigi and Cloud having noticeably better meteor smashes that are similar or even faster in comparison. | |
| Grab | Grab (つかみ) | — | Telekinetically clinches the opponent. Standing grab's range is average, while her pivot grab also has impressive range. However, dash grab has very short range relative to its animation, and all grabs have noticeable ending lag. | |
| Pummel | Grab Petit Shock (つかみプチショック) | 1.3% | A point-blank burst of light. Average power and speed. | |
| Forward throw | Zero-Contact Throw (触れない投げ, No Touching Throw) | 9% | Curls herself slightly and then telekinetically tosses the opponent forward while throwing out her arms. It is Palutena's second-most damaging throw, but its only utility is as an edge-guard set-up. | |
| Back throw | Zero-Contact Reverse Throw (触れない逆投げ, No Touching Inverted Throw) | 10% | Telekinetically lifts the opponent and then performs an inverted version of the Arabesque (a ballet position) to fling the opponent backward. It is Palutena's most damaging throw, and her only throw that KOs at reasonable percentages, doing so at around 130% on middleweights on the edge of Final Destination. It is also useful for setting up an edge-guard. | |
| Up throw | Launch (打ち上げ) | 8% | Telekinetically raises the opponent upward with her left arm, and heaves them upward by thrusting her staff upward. Despite having high base knockback, its average damage output and below-average knockback scaling make it unreliable at KOing without the use of a highly elevated platform, while its ending lag makes it unfavorable as a combo starter. As a result, it is better suited for setting up aerial pressure. | |
| Down throw | Knock Down (叩き落とし, Thrashing Dropper) | 5% | Telekinetically lifts the opponent and slams them onto the ground. It is Palutena's most useful throw, thanks to its high base knockback, very low knockback growth, and diagonal launching angle. These traits make it a potent combo starter at a wide range of percentages, being able to set up neutral aerial strings at low to mid percentages (or just combo into any of her aerials), and can even set up for KO confirms into back aerial at high percentages. As of update 7.0.0, however, the latter combo is noticeably more difficult to perform. | |
| Forward roll Back roll Spot dodge Air dodge |
— | — | ||
| Techs | — | — | ||
| Floor attack (front) Floor getups (front) |
7% | Swings her staff behind herself and then in front of herself before getting up. | ||
| Floor attack (back) Floor getups (back) |
7% | Swings her staff behind herself and then in front of herself before getting up. | ||
| Floor attack (trip) Floor getups (trip) |
5% | Swings her staff in front of herself and then behind herself before getting up. | ||
| Edge attack Edge getups |
9% | Performs a legsweep while climbing up. | ||
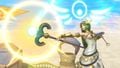
| Neutral special | Autoreticle | 3.5% (per shot) | Illuminates her staff's orb to aim a reticle over the opponent, and then fires three energy blasts at that location. It will only fire the blasts if nothing blocks her target, and if the opponent is within range and not intangible. The shots can lock, although due to the changes on locking, it has even less use to initiate combos. It can be used as a way for stopping direct approaches and to force an approach. It is also able to hit opponents behind Palutena, such as if she is moving when it fires and if the opponent is at the maximum horizontal range toward her. Although situational, it also has very minor recovery potential, thanks to it briefly stalling her descent. However, it has high ending lag, regardless of whether or not it targets anything. Its very minor knockback also makes it poor for spacing. | |
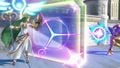
| Side special | Explosive Flame | 1.5% (hits 1-6), 5.5% (hit 7) | Creates a multi-hitting explosion approximately 4 character lengths away from herself. If inputted like a smash attack, the explosion hits approximately 7.5 units away. The ability to change its range makes it a decent spacing and zoning tool, as well as an edge-guarding option. This move has good KO potential, thanks to its loop hits reliably trapping the opponent, and its last hit having impressive knockback. However it is very punishable if missed. However, it is safe on shield due to its minimal ending lag. | |
| Up special | Warp | — | Disappears and then reappears in a chosen direction. It quickly covers both a respectable amount of vertical distance and a decent horizontal distance while rendering Palutena invisible (frames 16-32). It can also be edge-canceled, which grants it defensive and re-positioning potentials. However, it renders Palutena helpless after she reappears (unless it is edge-canceled) and lacks a hitbox to protect her. She also falls faster in this state. | |
| Down special | Counter/Reflect Barrier | 1.3× (countered attack)/1.4× (reflected projectile) | Palutena uses her shield to retaliate against an opponent's attack. If a physical attack connects, Palutena will forcefully thrust her staff forward, creating a blast of light. If a projectile attack connects, she raises her shield to emit a rectangular barrier that reflects the projectile. | |
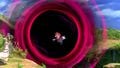
| Final Smash | Black Hole Laser | 2.4% (hits 1-12), 12% (final) | Illuminates her staff's orb and twirls around repeatedly before firing a Black Hole from her staff's orb, after which she quickly retreats off-stage in order to fire a Mega Laser into the Black Hole. The Black Hole does not deal damage, but pulls opponents within a 45 unit radius (about 0.5u smaller than the distance between the platforms of Small Battlefield) into itself and places them in a tumbling state. Conversely, the Mega Laser hits multiple times before concluding with a final hit that launches the opponent and dissipates the Black Hole. | |
Stats[edit]
| Stats | Weight | Dash speed | Walk speed | Traction | Air friction | Air speed | Air acceleration | Gravity | Falling speed | Jumpsquat | Jump height | Double jump height |
|---|---|---|---|---|---|---|---|---|---|---|---|---|
| Value | 91 | 2.035 – Initial dash 2.077 – Run |
1.271 | 0.106 | 0.01 | 1 | 0.01 – Base 0.105 – Additional |
0.12 | 1.55 – Base 2.48 – Fast fall |
3 | 35.9 - Base 17.3 - Short hop |
35.9 |
Announcer call[edit]

English/Japanese/Chinese
On-screen appearance[edit]
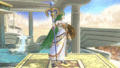
- Walks out of a set of golden doors that are decorated with her halo's design and emit a bright, shining light.
Palutena's on-screen appearance.

Taunts[edit]
- Up taunt: Raises her arms overhead and then brings them down while producing ethereal wings, emitting her halo, and saying "You shall be purified." (浄化してあげましょう, You will be purified.)
- Side taunt: Laughs while using her staff to perform a twirling, inverted version of the Arabesque.
- Down taunt: Lets go of her staff and telekinetically holds it next to herself, then brushes her hair aside while emitting her halo and saying "Ready when you are." (いつでもどうぞ?, Feel free whenever.) before grabbing her staff.
Palutena's up taunt.
Palutena's side taunt.
Palutena's down taunt.


Idle poses[edit]
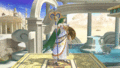
- Taps the ground with the tail of her staff and shield in front of herself, during which she briefly emits her halo.
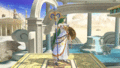
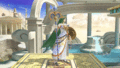
- Looks away while crossing her staff and shield in front of herself, during which she briefly emits her halo.
Palutena's first idle pose.
Palutena's second idle pose.


Crowd cheer[edit]
| Cheer (English) | Cheer (Japanese/Chinese) | Cheer (Italian) | Cheer (Dutch) | Cheer (French) | |
|---|---|---|---|---|---|
| Cheer | |||||
| Description | Pa - lu - te - na! | Pa - lu - tena! | Pa - lu - te - na! | Pa - lu - te - na! *claps 2 times* | Pa - lu - te - na! |
| Cheer (German) | Cheer (Spanish) | Cheer (Russian) | Cheer (Korean) | |
|---|---|---|---|---|
| Cheer | ||||
| Description | Paaaaalu - te - na! *claps 6 times* | Paaaaalu - te - na! *claps 5 times* | Paaaaalu - tena! | Palu - tena! |
Victory poses[edit]
- Left: Twirls with her staff held out, hovering off the ground. She then raises it in an arc and points it in front of her, saying "No one can hide from the light." ("さ、回収しましょうか?", So, shall we recover?).
- If Pit is present in the match, there is a chance she will instead say "Oh, so sorry about that, Pit." ("やられちゃいましたね?", Were you hurt?). If this quote plays in the Japanese version, Palutena does not look at the camera.
- Up: Enters from the side of the screen hovering. She then briefly spins her staff in front of herself telekinetically, catches it, and stands with it pointed outwards. During the pose, she says "Too bad for you." ("ちょっと大人げなかったかしら?", Was that a bit immature??).
- If Dark Pit was present in the match, there is a chance she will instead say "Poor little Pittoo." ("いつまでも意地っ張りですね~", Forever a nuisance...!).
- Right: Uses her staff to briefly perform the Backwards Showgirl (a pole dancing move) before assuming a seated stance while floating and laughs. In the Japanese version, she says ("本気出しても良いんですよ。", It's all right to fight seriously.).


In competitive play[edit]
Most historically significant players[edit]
See also: Category:Palutena players (SSBU)
 Abadango - Played Palutena alongside a variety of other characters throughout his tournament career, most notably using her in the early metagame. He was considered the best Palutena player in Japan when she was one of his primary characters, as he used solo-Palutena to place 2nd at EGS Cup 3 and primarily Palutena to place 3rd at Sumabato SP 8 and 7th at Maesuma TOP 2. He has since relegated Palutena to a secondary/counterpick character.
 Chag - One of the best Palutena players in the world in the early years of the post-pandemic metagame, and one of Mexico's best players during this time. He is most known for placing 5th at Glitch 8.5 - Konami Code defeating Maister and at Mainstage 2021 defeating Sparg0 and Glutonny, as well as defeating Tweek at Smash Ultimate Summit 4.
 Chase - Although active in the early metagame, he is best known for his performances in the post-online metagame, and has been one of the best Palutena players in North America since 2023, most notably placing 7th at MAJOR UPSET defeating Ouch!? and at Crown the Third defeating Tea and Light.
- Gen - The second-best Palutena player in North America's early metagame, most notably placing 4th at Defend the North 2019 defeating Light and 9th at Glitch 7 - Minus World defeating Salem. He continued to place well in the post-online metagame, including 9th at Let's Make Big Moves 2023 and 9th at Let's Make Moves Miami, but has attended fewer majors than before.
- Jagaimo - The best solo-Palutena player in Japan, initially known in-region for strong placements such as 9th at EVO Japan 2020 and 13th at Umebura SP 7 in the early metagame. He gained further recognition in 2023, becoming one of the best Palutena players during this time thanks to placements such as 5th at DELTA 4 defeating Asimo and at DELTA 5 defeating Shuton, as well as defeating Miya at Kagaribi 9.
- Lui$ - Picked up Palutena in the online metagame and became one of the best Palutena players in the post-pandemic metagame, particularly in its early years, after placing 5th at both Port Priority 6 and Low Tide City 2022 and 7th at both Riptide and Mainstage 2022. Although less consistent since then, he continues to see noteworthy performances from time-to-time, such as winning Gateway Legends 2023, placing 2nd at both Afterburner 2026 and Vars Ultimate Summit 1, and 3rd at Don't Park on the Grass 2024.
- Nairo - The best Palutena player of all time and the only Palutena player to win a major, having won Suplex City Smash, Mainstage, and Let's Make Big Moves. He is also the only Palutena player ever ranked in the top 10, ranking 4th on the Fall 2019 PGRU. He has since retired following controversies surrounding his conduct.
 Raflow - One of the best Palutena players in the world in the post-online metagame, first known for being the first player to eliminate Glutonny's Wario at a European tournament, doing so at Dōjo #7. He has since established himself as one of the best European players in the post-pandemic metagame, having placed 3rd at both Ultimate Fighting Arena 2023 and King Con (defeating MkLeo in the latter event), 5th at Tera, and 17th at GENESIS X defeating Miya, and being the first Palutena player to enter grand finals of a major in the post-pandemic metagame, placing 2nd at SmashMania 2025.
Tier placement and history[edit]
Since the release of Ultimate, Palutena has always had a very positive reception among the Smash community, as many top players noticed her significant buffs from SSB4 early on and agreed on her as a high-tier for much of 2019. However, after Nairo won Mainstage and Let's Make Big Moves, her already strong reception and results further increased, with strengths such as her notorious neutral aerial, KO confirms from her down throw. Her relatively low learning curve is becoming even more apparent, while her few weaknesses are relatively minor. This led nearly all top players to believe she was a top-tier, with many claiming she was among the best in the game, alongside other characters such as Pikachu, Joker, and Peach.
Although she remained a strong character after her nerfs in updates 7.0.0 and 11.0.0, during the online era, her representation briefly stagnated due to her strongest players either dropping her, performing worse, becoming inactive, or in Nairo's case, retiring; this led some players to question whether Palutena was starting to fall off in a similar vein to Inkling. This opinion, however, did not last long, as following the return of offline competitive play, other Palutena players such as Lui$, Chag, and Raflow picked up steam and saw several notable placements at a national level, completely nullifying the stagnation during the COVID-19 pandemic. As a result, opinions on Palutena had remained largely the same. However, players still believe Palutena's nerfs, and the adapting metagame have noticeably pushed her back a few placements, with most players now just viewing her as a solid top tier and not among the best characters in the game, making her ranked 17th on the first tier list, near the bottom of S- tier. She would rise a spot on the second and current tier list to 16th place, although due to the restructuring of the tier list, she is now ranked in A tier. She would see a small drop to 21st due to slightly worse results from her best players, and in the case of Jagaimo, becoming inactive, but due to more tier restructuring, she would be placed near the end of A+ tier.
Classic Mode: A Little Divine Intervention[edit]

Referring to being a goddess herself, Palutena's opponents all come from series where religion and mythology play a key role. The title is the same as a phrase she says in her debut character trailer for Super Smash Bros. 4.
| Round | Opponent | Stage | Music | Notes |
|---|---|---|---|---|
| 1 | Great Plateau Tower | Overworld | ||
| 2 | Midgar | Magnus's Theme | The track used and Cloud as an opponent serve as an allusion to Magnus, who also wields a sword which has almost the same size as its user. | |
| 3 | Dracula's Castle | Destroyed Skyworld | ||
| 4 | Gaur Plain | Thunder Cloud Temple | ||
| 5 | Umbra Clock Tower | Riders Of The Light | ||
| 6 | Palutena's Temple | Underworld | Horde Battle (3 at a time). | |
| Bonus Stage | ||||
| Final | Master Hand | Final Destination | Master Hand (Less than 7.0 intensity) Master Hand / Crazy Hand (Intensity 7.0 or higher) |
On intensity 7.0 and higher, Crazy Hand fights alongside Master Hand. |
Note: Most stages play a track from the Kid Icarus universe, no matter what universe the stage originates from, with the only exception being Umbra Clock Tower.
Credits roll after completing Classic Mode. Completing it as Palutena has Destroyed Skyworld accompany the credits.
Appearances in other Classic Mode routes[edit]
Palutena appears as an opponent in certain other fighters' Classic Mode routes, with them being listed below:
Role in World of Light[edit]

Palutena was among the fighters that were summoned to fight the army of Master Hands.
During the opening cutscene, Palutena was present on the cliffside when Galeem unleashed his beams of light. She attempted to block a beam with Reflect Barrier, which the beam completely pierced, disintegrating her. Her defeat causes Pit and Dark Pit to lose their Power of Flight, making the duo fall victim to the beams as well. They were all placed under Galeem's imprisonment alongside the rest of the fighters, excluding Kirby. A puppet fighter cloned from her is later seen alongside ones cloned from Greninja, King Dedede, Pokémon Trainer and other fighters.
Palutena is the last fighter to be found to be imprisoned by Galeem. In The Final Battle, she is called by Galeem as part of reinforcements after Dark Samus is awakened and Crazy Hand is beaten. She is an obligatory unlock for the true ending, as awaking her leads to a battle with Master Hand that frees him from Galeem's control (both of whom's defeats greatly shifts the balance of power in Dharkon's favor).
Fighter Battle[edit]
| No. | Image | Name | Type | Power | Stage | Music |
|---|---|---|---|---|---|---|
| 54 | |
Palutena | 12,500 | Palutena's Temple (Ω form) | Destroyed Skyworld |
Spirit[edit]
Palutena's fighter spirit can be obtained by completing Classic Mode as Palutena. It is also available periodically for purchase in the shop for 300 Gold, but only after Palutena has been unlocked. Unlocking Palutena in World of Light allows the player to preview the spirit below in the Spirit List under the name "???". As a fighter spirit, it cannot be used in Spirit Battles and is purely aesthetic. Her fighter spirit has an alternate version that replaces it with her artwork in Ultimate.

705. Palutena

In Spirit Battles[edit]
As the main opponent[edit]
| Spirit | Battle parameters | Inspiration | |||||||||
|---|---|---|---|---|---|---|---|---|---|---|---|
| No. | Image | Name | Series | Enemy Fighter(s) | Type | Power | Stage | Rules | Conditions | Music | Character |
| 118 |  |
Wanda | Super Mario Series | •Tiny Palutena •Yoshi •Peach •Mario |
1,500 | Green Greens (Battlefield form) | N/A | •Defeat the main fighter to win •Reinforcements will appear after an enemy is KO'd |
Mario Paint Medley | ||
| 381 | Elline | Kirby Series | •Tiny Palutena |
3,800 | Rainbow Cruise | •Item: Balls | •Take your strongest team into this no-frills battle | Butter Building (Brawl) | |||
| 445 | Alolan Exeggutor | Pokémon Series | •Giant Palutena |
4,300 | Tortimer Island (hazards off) | N/A | •Timed stamina battle (1:00) •The enemy favors up smash attacks •Only certain Pokémon will emerge from Poké Balls (Alolan Exeggutor) |
Battle! (Wild Pokémon) - Pokémon Sun / Pokémon Moon | |||
| 632 | Nyna | Fire Emblem Series | •Palutena •Ganondorf |
4,200 | Temple | N/A | •Defeat the main fighter to win •The enemy tends to avoid conflict •The enemy heals over time |
Shadow Dragon Medley | |||
| 640 | Deirdre | Fire Emblem Series | •Palutena |
3,700 | Temple | •Attack Power ↓ | •You have reduced attack power | Edge of Adversity | |||
| 644 | Lilina | Fire Emblem Series | •Palutena •Roy |
3,500 | Gaur Plain (Battlefield form) | N/A | •The enemy's explosion and fire attacks have increased power •The enemy favors side specials •Reinforcements will appear during the battle |
Beyond Distant Skies - Roy's Departure | |||
| 650 | Ninian | Fire Emblem Series | •Palutena •Roy |
3,400 | Castle Siege (Battlefield form) | N/A | •Defeat the main fighter to win •The enemy can use their Final Smash twice in a row •The enemy's FS Meter charges quickly |
Winning Road - Roy's Hope | |||
| 661 | Elincia | Fire Emblem Series | •Palutena |
3,600 | Skyworld | •Health Recovery •Attack Power ↑ |
•The enemy has increased attack power when the enemy's at high damage •The enemy is healed when the enemy's at high damage •The enemy has increased move speed |
Victory Is Near | |||
| 710 |  |
Medusa | Kid Icarus Series | •Giant Palutena |
4,600 | Find Mii (Ω form) | •Hazard: High Gravity | •The enemy has super armor but moves slower •Stamina battle •Your jumping power decreases after a little while |
Boss Fight 1 - Kid Icarus: Uprising | ||
| 722 |  |
Pseudo-Palutena | Kid Icarus Series | •Palutena |
1,900 | Dracula's Castle | N/A | •Only certain Pokémon will emerge from Poké Balls (Ditto) | Destroyed Skyworld | ||
| 843 | Katrina | Animal Crossing Series | •Palutena |
3,700 | Smashville | •Sudden Damage | •All fighters take serious damage •The enemy favors dash attacks •The enemy has increased move speed |
Plaza / Title Theme - Animal Crossing: City Folk / Animal Crossing: Wild World | |||
| 859 | Serena | Animal Crossing Series | •Palutena |
1,900 | Fountain of Dreams | •Item: Hammer | •The enemy is easily distracted by items | The Roost - Animal Crossing: Wild World | |||
| 957 | Melia | Xenoblade Chronicles Series | •Palutena •Shulk |
4,200 | Gaur Plain (Battlefield form) | •Hazard: Poison Floor | •The floor is poisonous •The enemy's magic attacks have increased power |
Time to Fight! - Xenoblade Chronicles | |||
| 1,172 | Mia | Golden Sun Series | •Palutena |
2,200 | Delfino Plaza (Large Island) | N/A | •Timed battle (1:00) •The enemy shields often •The enemy can heal by shielding attacks |
Battle Scene / Final Boss - Golden Sun | |||
| 1,253 | Elena | Pandora's Tower | •Palutena |
3,600 | Great Plateau Tower | •Item Tidal Wave | •The enemy becomes temporarily invincible after eating •The enemy starts with damage but has increased defense •Certain items will appear in large numbers after a little while |
Midna's Lament | |||
| 1,269 |  |
Culdra | Culdcept Series | •Palutena |
9,200 | Temple | •Magic and PSI Unleashed | •All fighters' magic and PSI attacks have increased power | Culdcept | ||
| 1,366 | Athena Asamiya | Psycho Soldier | •Palutena •Richter |
9,400 | Mushroomy Kingdom (hazards off) | N/A | •The enemy favors special moves •Reinforcements will appear during the battle |
Psycho Soldier Theme (Overseas Version) | |||
| 1,389 | Rhea | Fire Emblem Series | •Palutena •Giant Charizard |
10,300 | Bridge of Eldin (hazards off) | N/A | •Stamina battle •Reinforcements will appear after an enemy is KO'd •The enemy is giant |
The Apex of the World | |||
| 1,423 |  |
H'aanit & Ophilia | OCTOPATH TRAVELER | •Palutena •Wolf •Pit |
9,200 | Summit (Battlefield form) | •Health Recovery | •The enemy's ranged weapons have increased power •The enemy can unleash powerful critical hits at random •The enemy is healed significantly when the enemy's at high damage |
Battle Start - Fossil Fighters: Frontier | Ophilia | |
As a minion[edit]
| Spirit | Battle parameters | Inspiration | |||||||||
|---|---|---|---|---|---|---|---|---|---|---|---|
| No. | Image | Name | Series | Enemy Fighter(s) | Type | Power | Stage | Rules | Conditions | Music | Character |
| 972 | Mòrag | Xenoblade Chronicles Series | •Lucina •Palutena |
2,400 | Gaur Plain (Battlefield form) | •Hazard: Lava Floor | •Defeat the main fighter to win •The floor is lava |
Battle!! - Xenoblade Chronicles 2 | Brighid | ||
| Mor Ardain - Roaming the Wastes -[SB 1] | |||||||||||
| 1,052 |  |
Trevor C. Belmont | Castlevania Series | •Simon •Palutena •Sheik |
13,000 | Dracula's Castle | •Assist Trophy Enemies (Alucard) | •Hostile assist trophies will appear when the enemy's at high damage •Reinforcements will appear during the battle |
Beginning | Sypha Belnades | |
| 1,168 | Isaac | Golden Sun Series | •Mii Swordfighter •Palutena •Robin •Roy |
8,900 | Wuhu Island (Swaying Bridge) | •Assist Trophy Enemies (Isaac) | •The enemy's magic attacks have increased power •Hostile assist trophies will appear •Reinforcements will appear during the battle |
Battle Scene / Final Boss - Golden Sun | Mia | ||
- ^ This alternative occurs when the corresponding DLC has been purchased and downloaded.
Alternate costumes[edit]

| |||||||

|

|

|

|

|

|

|

|
Gallery[edit]

Palutena's fighter card.

Palutena's unlock notice.

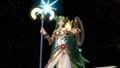
Palutena's first official artwork for Ultimate, shown in E3 2018.
Idling on Coliseum.
Palutena summoning Explosive Flame on Skyloft.
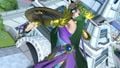
Palutena reflecting Samus's Charge Shot on Temple.
Palutena on Lylat Cruise.
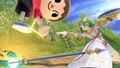
Palutena using her down tilt near an aerial Villager on Gaur Plain.
Palutena in her cyan alternate costume on Prism Tower.
Palutena catching Mario in the Black Hole item on Gaur Plain.


Fighter Showcase Video[edit]
Trivia[edit]
- Palutena is the only character to have two previously separate special moves (Counter and Reflect Barrier) consolidated into a single special move slot.
- Palutena's artwork was one of three to have been updated on the official site, alongside Falco and Shulk. Compared to her original artwork, her halo was added, her chiton now covers up more of her thigh, her hair became a brighter green, her lips were shrunk, and her eyes were enlarged. Overall, these changes make it more consistent with the official artwork from both Kid Icarus: Uprising and Super Smash Bros. 4 (especially the latter), as well as her in-game model.
- Due to age rating issues, the slit in her chiton was changed to cover up more of her thigh beginning in update 1.0.6 for the Japanese version of SSB4. This change was retained in Super Smash Bros. Ultimate and in all international versions.
- While her official artwork depicts the top of the chiton's slit as fused, it appears to be stitched together on her in-game model.
- As Palutena's Fighter Spirit artwork uses an unaltered illustration from Kid Icarus: Uprising, it still shows her chiton revealing most of her thigh. This is most likely an oversight, as the spirits for Camilla from Fire Emblem Fates and Mythra from Xenoblade Chronicles 2 had modified artwork to be less provocative.
- Palutena is one of the last characters to unlock. She is the last unlockable character in Kirby's Classic Mode column, she is the final opponent in the timed encounters, and in World of Light, she is in the Final Battle map.
- An interview with Masahiro Sakurai revealed that Palutena and Bayonetta were under consideration to survive Galeem's attack in the World of Light opening. Still, it was ultimately turned down in favor of Kirby. Sakurai stated that this was due to Palutena and Bayonetta's playstyles being very complex for beginners, and that other characters from their respective universes were also turned into spirits, saying that Palutena couldn't do anything to escape, as all other Kid Icarus deities, like Hades, were also turned into spirits.
- Both Palutena and Bayonetta are on the Final Battle map, appearing as the final pair of fighters to be encountered. This implies that Galeem (and eventually Dharkon) knew how threatening Palutena and Bayonetta were (Palutena being a goddess and Bayonetta's slaughter of two gods) to his plans, and thus kept them as a last resort.
- Despite using Hades as an example, his spirit does not appear in World of Light at all.
- Before update 8.0.0, Palutena's unique voice clip when winning against Pit ("Oh, so sorry about that, Pit.") was missing in the Sound Test. She shares this distinction with Fox, Wolf, Simon, and Lucina.
- Palutena is the only Kid Icarus character to not fight alongside a CPU ally in the final round of her route.
- Oddly, Palutena does not vanish when performing a directional air dodge despite the sound effects playing. She shares this oddity with Rosalina & Luma and Greninja.
- Oddly, Palutena's internal files of voice clips for her smash attacks use the same 3-number codes (e.g. "003" in the case of "Goddess wings!" voice clip) used for special moves, Final Smashes, and on-screen appearances of characters whose voice clips are ported from Super Smash Bros. Brawl (including partial ones like Sonic), as well as few other characters such as Kirby, Ness, King Dedede, Lucario, Robin, and Rosalina & Luma, instead of using the "attack" descriptor that smash attacks usually share with neutral attack, tilt attacks, dash attack, aerial attacks, and floor attacks. This was also present in SSB4. Daisy shares a similar, albeit not entirely the same, oddity with her on-screen appearance and Daisy Bomber.
- In King Dedede's case, this does not apply to voice clips for Dede-Rush; and in Robin's case, this only applies to the voice clip used when his tomes are broken.
|
| |
|---|---|
| Fighters | Pit (SSBB · SSB4 · SSBU) · Palutena (SSB4 · SSBU) · Dark Pit (SSB4 · SSBU) |
| Assist Trophies | Magnus · Phosphora |
| Stages | Skyworld · Reset Bomb Forest · Palutena's Temple |
| Items | Back Shield · Daybreak · Killer Eye · Ore Club · X Bomb · Staff |
| Enemies | Boom Stomper · Bumpety Bomb · Clubberskull · Daphne · Flage · Lethinium · Lurchthorn · Mahva · Megonta · Mimicutie · Monoeye · Nutski · Orne · Reaper & Reapette · Skuttler · Souflee · Zuree |
| Other | Centurion · Viridi |
| Trophies, Stickers and Spirits | Trophies (SSBB · SSB4) · Stickers · Spirits |
| Music | Brawl · SSB4 · Ultimate |
| Masterpiece | Kid Icarus |
| Related content | Drill |