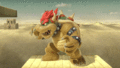
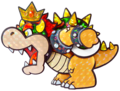
Bowser (SSBU)
| Bowser in Super Smash Bros. Ultimate | |
|---|---|
 
| |
| Universe | Mario |
| Other playable appearances | in Melee in Brawl in SSB4 |
| Availability | Unlockable |
| Final Smash | Giga Bowser Punch |
| Tier | C- (67) |
Bowser (クッパ, Koopa) is a playable character in Super Smash Bros. Ultimate. He was suggested to appear in the then unnamed Ultimate in its first teaser trailer at the end of the March 8th, 2018 Nintendo Direct, and officially announced in Ultimate's E3 2018 trailer As opposed to being a starter character like in previous Smash games, Bowser is now an unlockable character. Bowser is classified as Fighter #14.
Bowser retains the realistic roar voice clips that he had in Super Smash Bros. 4, rather than using his voice actor from the Mario series, Kenny James.
Bowser is ranked 67th out of 82 on the tier list, placing him close to the middle of the C- tier. This is a significant drop from his placement in SSB4, where he was ranked 24th out of 54. Bowser's greatest strength is his endurance, as he is the heaviest character in the game and has armor on several of his moves, as well as passive armor in the form of Tough Guy. Despite his heavyweight status, Bowser also boasts above-average mobility, complemented with fast air and dashing speeds. In addition, Bowser possesses a plethora of powerful moves that are not only among the most damaging of their kind, but also have great KOing potential. Finally, Bowser's specials all have great utility: Whirling Fortress is an effective out-of-shield option, Fire Breath is an effective edgeguarding tool; Flying Slam is the fastest command grab in the game and has impressive KO potential, and Bowser Bomb can break shields.
Countering Bowser's strengths, however, are several noticeable weaknesses. As his frame data is overall sluggish, Bowser is susceptible to pressure and is especially vulnerable to combos, as his large size, high gravity, and fast falling speed makes it difficult for him to land safely. He also lacks many options to land, as his best moves in this situation have high frame data. In addition, Bowser's overall slow frame data means he struggles at approaching, especially against characters with great range, disjoints, and speed, and Bowser's lack of a traditional projectile leaves him susceptible to characters with strong projectile games. Finally, Bowser's defensive options are also underwhelming, as he has short rolls and slow and long techs, while he lacks any other effective out-of-shield options outside of Whirling Fortress.
Overall, Bowser is a strong, tanky character who can quickly dish out damage and KO at early percentages; however, Bowser himself is also vulnerable to being overwhelmed by characters who have faster frame data and strong combo games. Though he initially had great representation courtesy of players such as Hero and LeoN, his playerbase gradually declined as his weaknesses became more apparent, especially in the more recent metagames.
How to unlock[edit]
Complete one of the following:
- Play VS. matches, with Bowser being the 3rd character to be unlocked.
- Clear Classic Mode with Donkey Kong or anyone in his unlock tree, being the 1st character unlocked.
- Defeat Giga Bowser in World of Light.
With the exception of the third method, Bowser must then be defeated on Mushroom Kingdom U.
Attributes[edit]
Bowser, as per tradition, is a super heavyweight and the heaviest character in the game. This is reflected by some of his attributes, which fit in the mold of his archetype: he has a slow walking speed (16th slowest in the game), very quick falling and fast-falling speeds (tied with Bayonetta for the 19th fastest), slow air acceleration, high gravity, and immensely powerful attacks. However, Bowser sports otherwise excellent mobility, as his air speed is well above average (tied with Sheik, Duck Hunt, Lucas, Cloud, and Mega Man as the 20th fastest in the game), his initial dash is extremely quick, and he also boasts a surprisingly fast dashing speed (the 22nd fastest in the game) that surpasses most of his fellow heavyweights, even outrunning characters such as Marth, Inkling, Toon Link, and Pichu. Due to his above average dashing speed and initial dash, Bowser sports a respectable dash-dance.
Unsurprisingly, Bowser's most notable trait is his impressive endurance, being among the best in the game. His extreme weight makes him very difficult to launch and KO, while his fast falling speed and high gravity make it trivial to stay grounded. Bolstering his endurance is his varied forms of armor; Bowser has damage-based percentage armor on the startup of all his tilts and smash attacks. Bowser also has an attribute called "Tough Guy," which is constantly active, knockback-based armor that allows Bowser to withstand a handful of weak attacks, like rapid jabs and weak projectiles. This lets him tank and approach effectively while at low percents, and allows him to simply break through any rapid jab with a powerful attack, acting as a hard punish. Supplementing Bowser's endurance is the immense damage and power his moveset provides, as all of his moves deal serious damage, and most of them have KO potential. Rage further helps Bowser, as he can easily take advantage of being at KO percentage to easily turn the tables on the opponent should they make one single error.
Bowser's grounded game has numerous merits, thanks to the combination of his damage-based armor, the damage and power it boasts, and its speed all around. All of his tilt attacks render his limbs intangible during their active hitboxes, which makes them pseudo-disjointed, while some of his smash attacks give his body parts invincibility. These traits further aid Bowser in spacing or beating out attacks, which can lead to very hard punishes. Forward tilt is decently fast and powerful, able to KO before 150% and even earlier at the edge. It can be angled and, when angled down, can 2-frame punish most recovery moves. Up tilt has very good coverage all around Bowser and is not only his most powerful tilt attack but one of the strongest up tilts in the game, killing middleweights below 125%. Forward smash, while being his slowest smash attack, is the second strongest in the game (killing at around 60% from center stage uncharged) and renders his legs invincible, allowing it to outprioritize other moves. Up smash is fast relative to its power (coming out on frame 16 while being the strongest up smash in the game when sweetspotted), has invincibility on the entire shell, and a hitbox on landing that provides safety, making it an excellent anti-air option. Down smash is Bowser's fastest smash attack, coming out on frame 12, being especially fast for its power as well (being able to KO around 70% at the edge of a stage) and hits both sides, making it an ideal punish option out of a perfect shield, despite its very high ending lag.
His aerial moveset also has useful options. Forward aerial is considered his best one, as it has relatively average landing lag alongside above average damage and knockback (which allows it to KO below 115% from the edge), great range with good coverage above and below him (comparable to swordfighters with similar "frontal slash" moves), and can combo on landing. Back aerial deals great damage and has extremely high knockback scaling (killing at around 100% from center stage and as early as 60% by the edge), and is very fast for an aerial of its caliber. Both aerials autocancel in a short hop, making them good coverage options at the edge, and their power also makes them terrific edgeguarding options. Neutral aerial deals very serious damage if all of its hits connect (although this is difficult to accomplish), being the second most damaging aerial attack in the entire game, and using it while landing gives it combo potential and KO setups at high percentages. Finally, up aerial renders Bowser's head intangible and is a fairly useful vertical kill move due to its serious damage output and knockback, although it is typically situational due to its short range.
Bowser's grab game is also versatile, thanks to its combination of damage and utility. While his grab is rather slow, it is among the longest-reaching non-tether grabs in the game. His forward and back throws serve a similar purpose as kill throws; both are among the strongest in the game. Up throw is a useful combo throw which can lead to extremely damaging combos at low to medium-high percentages. Finally, his down throw is the third most damaging throw in the entire game, but due to its lack of KO potential, it is mostly used to refresh other moves and put the opponent in an unfavorable position offstage.
His special moveset commands a balance of both raw damage racking and kill options, all of which are versatile. On one hand, in terms of damage racking, Fire Breath is Bowser's "projectile" move, spewing flames that peter over time but recharge when the move is not in use. The flames deal absurd damage and shieldstun, and unlike other projectiles, don't deal negative shield damage, so the move will always deal full damage to shields. When angled correctly, it can also hit ledge-hanging characters and even 2-frame punish many recoveries, making it a good edgeguarding tool, although it can be countered if Bowser is too close to the ledge. At maximum range, the flames don't cause opponents to flinch, which allows Bowser a very dangerous damage racking option that won't break an opponent's dazed state (similar to Piranha Plant's Poison Breath or Fox's Blaster), allowing him to KO opponents as early as 0% if he successfully breaks their shield. His up special, Whirling Fortress, is Bowser's fastest attack at frame 6 on the ground; combined with its multi-hit nature and considerable horizontal mobility, this makes it an effective "get-off-me" move and out of shield option. In the air, it is Bowser's primary recovery move, traveling a decent vertical distance and massive horizontal distance, and has decent KO potential to boot. On the other hand, in terms of kill options, Flying Slam is the fastest command grab in the game (and tied with Whirling Fortress as Bowser's fastest attack at frame 6), and has incredible power if it grabs an opponent, killing around 120%, or earlier if he has rage. Since he leaps a high distance in the air, he can land on platforms, which can put him at a much more advantageous position and KO opponents even earlier. It can also be B-reversed, allowing Bowser to bypass shields unexpectedly, even in midair. Bowser Bomb deals fantastic vertical knockback and can even meteor smash at the start of its descent; it also deals extreme shield damage, allowing it to break a full shield if properly landed. These two moves, combined with Bowser's fantastic damage output, allow him to play mindgames with the opponent's shield.
Thanks to his great damage output, once Bowser has gained the advantage, his abundance of options for racking up damage allows him to put the opponent at a gradually worse position before sealing a stock. Unlike previous incarnations, Bowser also doesn't waver in terms of mobility, which means that, if the opponent is at a disadvantage, he can close in on the distance to his opponent, read their options, and maintain the advantage. His consistent shield breaking prowess, with several moves at his disposal being able to heavily dent shields, means that if the opponent chooses the incorrect defensive option, they can be put in an even worse position, since his moveset is also full of kill options, most notably his forward smash.
However, despite his potent strengths, Bowser is not without some flaws. Despite his excellent options to rack up damage, his frame data is somewhat sluggish, which means that faster opponents can outpace Bowser's attacks, and he is susceptible to being punished if his attacks are whiffed, shielded, or dodged. This ties in with Bowser's biggest weakness, which is his poor disadvantage state. Bowser's combination of extremely high weight, large hurtboxes, fast falling speed, and high gravity makes him especially susceptible to combos, and as such, characters like Captain Falcon, Mario, Pikachu, and Ryu can easily punish and combo him for large amounts of damage if he makes a single mistake. His below-average frame data and frame 4 air dodge also result in an inability to effectively break out of combos. Although Bowser has great range, he relies on melee-based attacks for it, so characters with weapons that grant them disjointed reach (like Marth, Cloud, and Shulk) can prove to be difficult for him to overcome, especially if they're able to space their moves efficiently. As Bowser lacks a true projectile (due to Fire Breath's range being short and strict to Bowser's frame), he can also have difficulty at approaching characters with strong zoning games, like Min Min, Samus, and Toon Link, especially since their melee range also tends to be comparable to his. The latter two methods of pressure also give Bowser trouble in properly approaching.
Despite his high gravity and fast falling speed, he has difficulty landing, as his most notable options for landing, down aerial and Bowser Bomb, are laggy and predictable due to being stall-then-fall moves. Landing with his other aerials, although seemingly not an issue thanks to his forward aerial's range and knockback, can also prove a liability due to none of them being particularly safe on shield. His rolls are also short-distance, and his techs are slow and have low durations, which makes him prone to tech-chasing. Bowser's recovery, while serviceable and much better than most of the other super heavies, tends to be mediocre in practice, as it is rather slow and doesn't offer Bowser as much protection as other recovery moves would; as a result, he is particularly vulnerable to being edgeguarded, especially by counters or moves that can 2-frame. His out-of-shield game, despite being consistent, is nevertheless predictable due to Whirling Fortress being his most viable option out of shield; all other options can be punished or do not have the proper range to punish well-spaced moves. Moreover, his damage-based armor (on his grounded attacks) and universal knockback-based armor (from his signature Tough Guy ability) fail to compensate for all of this, as they do not compensate for his lack of medium-ranged and zoning or counterzoning options. Altogether, despite his great mobility and excellent tools to punish melee-focused options, making him not as susceptible as his fellow super heavyweight contemporaries, Bowser's defensive game remains just as poor overall compared to them, due to his being so susceptible to pressure.
Other weaknesses include a few of Bowser's moves either lacking proper utility or being largely outclassed by his other moves. Neutral attack is Bowser's third fastest attack overall, the first hit can lock (although this is best suited for bulkier characters), and the second hit can beat spotdodge attempts; however, it is largely outclassed by his Whirling Fortress, since the latter is faster and can be used out of shield. His down tilt, while being equally fast as forward tilt while dealing more damage, has less utility for 2-framing due to its weaker knockback, and it is much more punishable, especially on shield. Up aerial, while powerful and relatively quick, has poor range and moderate endlag and landing lag, meaning that up tilt is normally considered a superior vertical KO option. Down aerial, while being Bowser's second strongest aerial and the third strongest meteor smash in the game when hit cleanly, has numerous weaknesses, including its slow startup, stall-then-fall nature, and extreme ending and landing lag. This means that its offstage utility is severely hampered when compared to other down aerials of its nature, such as those of Mr. Game & Watch and Sonic. While forward throw still has some utility due to its strong knockback, it lacks the damage output of his down throw and the quick release of his back throw, making it somewhat outclassed in terms of KO power and damage. Lastly, while his down special, Bowser Bomb, deals immense damage and is infamous for instantly breaking shields, its slow aerial startup and extreme endlag make it unsuitable for landing, and it is agreed to be his most situational special move as a result.
In the end, Bowser can be considered to be the "all-rounder" of super heavyweights. While his playstyle remains largely bait-and-punish oriented compared to previous incarnations of him, his attributes make him more of a "lightning bruiser" in this regard. Bowser has among the most raw damage output, the highest KO power, and best shield-breaking capabilities of any character, while still retaining great range and movement speed, meaning that once he gains the upper hand, it can be practically impossible to break his pressure if he continuously reacts properly. With hard-hitting and relatively laggy moves like his, Bowser is anything but a character who strings together long combos; rather, he usually just needs four or five good hits to rack up high amounts of damage, and eventually score KOs. Even some of Bowser's moves that have little KO potential still have some kind of utility, so even in areas where Bowser cannot outright KO, he can continue to dish out immense damage in a short amount of time, and his moveset contains very well-rounded and versatile options to achieve this. However, his moveset is so lopsided for netting damage and easy KOs that he outright lacks options to properly approach or to combat heavy pressure. This means that, if Bowser makes one wrong move, he can be easily pressured as much as he can do to the opponent, and his lack of safe and fast moves, lack of zoning and counterzoning options, and unreliable mid-ranged options can leave him zoned out and comboed easily by his opponent, leaving him with little to no room to breathe.
Changes from Super Smash Bros. 4[edit]
Bowser has received a mixture of buffs and nerfs in his transition from SSB4 to Ultimate, though while he has received a comparatively higher amount of improvements, some of his biggest strengths from the previous game have been toned down or outright removed, and the new engine changes pronounce his weaknesses more than his strengths. As a result, Bowser has been nerfed overall.
Bowser has seen several buffs to his character attributes, power, and to his side special move, Flying Slam. Both Bowser's grounded and aerial mobility have improved (along with the rest of the cast), sporting a faster jumpsquat as well as faster dashing, air, and falling speeds, noticeably improving his ground-to-air transitioning and making him more adept at punishing, while also allowing him to land and escape juggles with less difficulty than before, especially in the case of the former. Bowser is even heavier, and he also received an increase on his defensive game through a higher amplification of damage-based armor on his tilts and smash attacks, which tones down one of the issues his Tough Guy armor had in SSB4, improving it in general and making his already excellent endurance even better.
Bowser's already high power was further strengthened in the transition as well (most notably on moves such as his tilt attacks, down throw, Fire Breath, and Whirling Fortress), which supplements his higher weight and improved adeptness at punishing. As for Flying Slam, it has significantly faster startup overall, now being on par with the fastest standing grabs in the game, such as Mario's, and making it the fastest command grab in the game, which heavily improves his options against shielding opponents.
However, despite his lower amount of nerfs, the hindrances to Bowser's grab game have been very detrimental to him. Much like Donkey Kong, Bowser's infamous up throw, previously a fearsome combo starter with a myriad of follow-ups and KO setups, has lost its combo potential past mid to high percentages due to its increased knockback and ending lag, removing its KO setups, and requiring precise execution to combo past mid percent. Additionally, his pivot grab, notorious for its huge range in SSB4, has shorter range. The universal nerfing of grabs further compounds these hindrances, as it's now harder for Bowser to make use of his otherwise respectable grab game.
Aside from the nerfs to grabs, the universal changes both help and hinder Bowser, but halt him more overall. On one hand, the ability to use any attack out of a run further enhances his ground game, as it gives him more reliable ways to punish the opponent due to his powerful, heavy-armored tilts and smash attacks. On the other hand, the universally decreased landing lag has improved Bowser's poor landing options, giving him less trouble at landing than before, which complements his now fast falling speed and streamlined jumpsquat; however, it also allows several characters to combo him with much more ease (comparable to in Melee), especially due to his larger weight and faster falling speed. The changes to air dodges, while making him slightly less susceptible to horizontal combos and general juggling since he can use one to escape, they also make him more vulnerable to edgeguarding. In bulk, these changes have improved Bowser's offense at the notable cost of his already poor disadvantage state and decent defensive game, despite the existence of Whirling Fortress as an out of shield option.
Overall, Bowser's moveset has seen a general increase in utility, his survivability and speed were improved much further, and his incredible power was kept intact, but the neutering of his combo throw has removed the ease of his highly damaging and KOing setups, removing much of the oppressive factor he had on the ground and shifting the focus on overall movement and bait-and-punish tactics that push the opponent into the corner. These changes have made his moveset less polarized, with all-around decently effective options for different situations and a renewed affinity for quickly closing the distance between him and his opponent, moving away from his "mighty glacier" playstyle. However, Bowser also still retains flaws such as a heavy susceptibility to general pressure (such as combos, juggling, and tech-chasing), and his changes have failed to completely alleviate it. Combined with several veterans receiving buffs just as significant as his, decidedly unimpactful changes from game updates, general optimizations to the metagame, and the introduction of powerful DLC characters, Bowser performs worse than in SSB4.
Aesthetics[edit]
 Bowser sports a darker and more monotone color scheme overall, similarly to his appearances in previous installments: his skin is yellower akin to his appearance in Brawl, whereas his head's and shell's green color schemes are similar to his appearance in Melee. Due to the different lightning physics used in Ultimate, Bowser's model also features a more subdued color scheme. His claws are darker and more gray in color. In addition, his scales, hair, horns, and spikes exhibit more subtle detailing; and his bands have visible scuffs and scratches. His pupils are also larger, and his spikes are slightly longer and thinner.
- Bowser has been made more expressive than in previous installments, sporting facial expressions that are more prominent, as well as his jaw moving more naturally to match his angry expressions.
- Bowser makes roaring noises during his idle poses instead of remaining silent like in Smash 4.
- Bowser's shielding pose has changed: he turns around more, making it appear as if he's guarding attacks with his shell.
- Bowser's hair has independent physics.
- The particle effects of Bowser's claw attacks have been changed from light blue to yellow.
- The shadow in the interior of Bowser's shell has been removed, no longer obscuring his face whenever he withdraws into his shell, like in Melee and Brawl.
- Up and side taunts have been shortened, the latter also updated to match his upright stance.
- Up taunt has Bowser no longer rear back before roaring.
- Side taunt now has Bowser bite three times instead of five.
- Bowser's victory poses have been updated:
- His left-inputted pose where he roars in victory shows him rearing back and swaying his head before performing the rest of his victory pose. His body also faces more towards the screen during said animation.
- His up-inputted pose where he slashes the air with his claws twice shows him running up to the victory area before doing so.
- His right-inputted is completely new. He breathes fire towards the screen before striking a pose reminiscent of his Smash 4 artwork. It replaces his victory pose from the previous games where he performed Whirling Fortress and struck a pose.
Attributes[edit]
 Like all characters, Bowser's jumpsquat animation takes 3 frames to complete (down from 8), the second largest difference out of all veterans (only behind Snake), greatly improving his ground-to-air transitioning and out of shield game.
- Bowser walks slightly faster (0.858 → 0.901).
- Bowser dashes faster (1.792 → 1.971).
- Bowser's initial dash is significantly faster (1 → 2.255), going from the slowest in the game to being tied for the 6th fastest. This significantly helps him with both his defensive and offensive approach on the ground, whilst also giving him a respectable dash dance.
- Bowser's air speed is faster (1 → 1.155), especially relative to the cast, going from average to being tied for the 19th fastest in the game.
- Bowser’s traction is higher (0.0577 → 0.104), making it easier for him to punish out of shield. Relative to the returning cast, however, it is much lower, going from the 27th highest to only the 56th highest.
- Bowser falls significantly faster (1.39 → 1.77), his falling speed going from the 17th slowest to being tied for the 18th fastest. This greatly improves his vertical endurance and ground-to-air transitioning. The most notable change, however, is that this, when coupled with him receiving less landing lag on his aerials, helps him out with one of his primary weaknesses in Smash 4: his trouble landing safely.
- His fast-falling speed is also faster as a result (2.224 → 2.832), now being faster than his Melee fast-falling speed.
- Bowser’s gravity is higher (0.11 → 0.125). When combined with his increased falling speed, this allows him to land drastically more safely, but makes him more susceptible to combos.
- Bowser is heavier (130 → 135), further improving his already excellent endurance, as well as the effectiveness of his Tough Guy armor.
 However, it also makes him significantly more susceptible to combos, which is further exacerbated by his faster falling speed and higher gravity.
- The universal knockback reduction in rapid jabs allows Tough Guy to resist every single one of them, including the ones it couldn’t resist in Smash 4, such as Captain Falcon's.
- Forward roll has less ending lag (FAF 34 → 33).
- Forward roll grants less intangibility (frames 4-19 → 4-16).
- Back roll has more startup with less intangibility (frames 4-19 → 5-17), and more ending lag (FAF 34 → 38).
- Spot dodge has less startup (frame 4 → 3).
- Air dodge grants more intangibility (frames 4-29 → 4-32).
- Air dodge has significantly more ending lag (FAF 35 → 47), although due to the universal changes, relative to the cast, it has gone from one of the slowest to one of the fastest.
Ground attacks[edit]
- Bowser has damage-based armor during the startup of all his tilt and smash attacks:
- Up tilt: Armor active on frames 8-10; resists up to 4% damage
- Forward tilt and down tilt: 7-9; 4%
- Forward smash: 17-21; 10%
- Up smash: 11-15; 8%
- Down smash: 5-11; 8%
- Neutral attack:
- The first hit transitions faster into the second (frame 12 → 10).
- The second hit deals slightly more damage (6.5% → 7%).
- Both hits have a higher hitlag multiplier (1× → 1.4× (hit 1), 1.8× (hit 2)), giving opponents more time to SDI the first hit and DI the second hit.
- The first hit has more ending lag (FAF 21 → 26), greatly reducing its jab cancel ability.
- The first hit deals less damage (5% → 4%), slightly reducing the move's total damage output despite the second hit dealing more damage (11.5% → 11%).
- The first hit has a shorter hitbox duration, with its arm intangibility reduced as well (frames 7-9 → 7-8).
- The first hit has altered angles (30°/50°/85° → 361°/180°) to keep opponents closer to Bowser, and no longer deals set knockback (45/30/18 set/100 scaling → 40/35/30 base/18 scaling). This allows it to jab lock and connect more reliably into the second hit up to high percents, but less reliably afterward, without increasing its jab cancel ability due to its increased ending lag.
- The first hit has an altered animation, being a sumo-style palm strike instead of a punch.
- Forward tilt:
- The move deals more damage (12% → 13%) with no compensation on knockback. This turns it into one of the strongest forward tilts in the game.
- The move has a slightly altered animation where Bowser bends his arm during the punch. This slightly reduces its range.
- Up tilt:
- It deals more damage (9% → 11%) with no compensation on knockback, allowing it to KO at around 130%, much like in Brawl.
- Bowser's arm is intangible during the move (frames 11-16).
- Down tilt:
- The first hit has received set knockback (20 base/100 scaling → 50/30 set/100 scaling), and its outermost hitbox launches opponents towards Bowser (361° → 130°), while the second hit comes out faster (frame 20 → 15). This allows both hits to link much more reliably.
- However, the move's total duration remains the same, increasing its ending lag.
- Both hits deal drastically less damage (14% → 7% (hit 1), 11% → 8% (hit 2)), still resulting in slightly higher total damage than the first hit alone in Smash 4 (14% → 15%), but significantly reducing it at low percents where the unchanged hits could link, in addition to weakening its shield safety and shield breaking ability. The second hit's knockback was also not fully compensated (12 base/100 scaling → 20/111), drastically weakening its KO potential, especially compared to the first hit in Smash 4.
- The second hit has larger hitboxes (5u/4.5u/4u → 5.6u/5u/4.5u), improving its range.
- Forward smash:
- It now has transcendent priority, and combined with his legs now being invincible (rather than intangible), this makes Bowser's forward smash much more difficult to challenge, in a similar vein to his up smash.
- Up smash:
- It deals slightly more damage (20%/15%/15% → 22%/16%/16%) with no compensation on knockback, and its sourspots launch at a consistent and higher angle (70°/120° → 85°), further improving the move's already impressive KO potential, to the point where the sweetspot is stronger than Ganondorf's up smash and the strongest up smash in the game.
- The landing hit deals twice as much damage (6% → 12%).
- The landing hit has more range behind Bowser (Z offset: 4–-5.5 → 4–-7.5).
- The landing hit has significantly less knockback (80 base/100 scaling → 30/70), hindering its KO potential despite its increased damage.
- However, this improves its combo potential, even granting it a KO setup into his back air.
- Down smash:
- Bowser has a new down smash: a low claw swipe forward with one hand, then another swipe backward with his other hand, similar to Wolf in Brawl. It hits only twice instead of seven times, with one hit at each side.
- The move's new animation gives it much more horizontal range.
- Both hits deal much more individual damage, with the first hit's being the same the total of the previous down smash (2% (hit 1), 1% (hits 2-6), 9% (hit 7) → 16% (hit 1), 15% (hit 2)), and they launch at a lower angle (50° → 40°), with their knockback not fully compensated (40 base/130 scaling → 60/86 (hit 1), 60/92 (hit 2)). This significantly improves its KO potential, with both hits KOing under 100% from center stage, and effectively replaces a highly situational move that was notoriously outclassed by Whirling Fortress.
- The new down smash has more startup, and significantly fewer active frames due to the removal of the looping hits (frame 10, 14-15, 17-18, 20-21, 23-24, 26-27, 31 → 12-13, 28-29). This makes it somewhat less effective for punishing rolls, and makes the first hit less safe on shield.
Aerial attacks[edit]
- All aerials have less landing lag (neutral: 20 frames → 15, forward: 24 → 14, back: 40 → 24, up: 28 → 17, down: 40 → 34).
- Neutral aerial:
- The move auto-cancels earlier (frame 45 → 41).
- Due to its lower landing lag and Bowser's faster jumpsquat, it is a much better landing option and combo starter, leading into aerial attacks even up to high percentages.
- Its hitboxes are smaller (5.5u → 5u).
- Forward aerial:
- The move always launches opponents in front of Bowser now, improving its consistency in edgeguarding and killing.
- However, this removes a confirm the move had in the previous game into Bowser's back aerial if the opponent was sent backwards by it.
- Down aerial:
- The landing hitbox has a longer duration (frames 1-3 → 1-6).
Throws and other attacks[edit]
- Grabs:
- All grabs have a longer hitbox duration (2 frames → 3).
- Standing grab has less startup (frame 9 → 8).
- Standing grab has more ending lag (FAF 39 → 41).
- Dash and pivot grabs have more startup (dash: frame 10 → 11, pivot: frame 11 → 12), with dash grab's total duration increased as well (FAF 48 → 49).
- Dash grab has slightly more range (Z2 offset: 15.5u → 16.2u).
- Pivot grab has less ending lag (FAF 46 → 44).
- Pivot grab has drastically reduced range (Z2 offset: -26.5u → -22u), being stricter to Bowser's arm. However, it is still one of the longest-reaching non-tether pivot grabs in the game.
- Pummel:
- Pummel has less startup (frame 9 → 2), deals more hitlag (5 frames → 15), and has significantly less ending lag (FAF 24 → 8), shortening its duration. This slightly increases the amount of times Bowser can pummel the opponent before throwing them or before they break out.
- Pummel deals much less damage (3.1% → 1.6%). This makes it marginally less reliable for racking up damage.
- Up throw:
- The eighth hit deals more damage (1% → 2%), and it has an additional hit right as the release occurs that deals 4%, almost doubling its total damage output (6.5% → 11.5%).
- The ending hit's knockback will override the throw portion's up until very high percentages. Said hit has greatly altered knockback (25 (base)/180 (scaling) → 85/80) effectively resulting in the move dealing noticeably more knockback at lower percents while not having improved KO potential at high percents, reducing its combo potential significantly, but not entirely.
- The throw releases opponents slower (frame 53 → 57), but has more ending lag (FAF 64 → 75). Although this is somewhat alleviated by Bowser's faster jumpsquat, it completely removes the move's combo potential past mid percentages, along with no longer possessing any guranteed KO setups.
- The last hit deals significantly less knockback to bystanders (80 base/200 scaling → 85/80).
- The last hit launches bystanders vertically instead of being a semi-spike (0° → 80°). Coupled with the previous change, this removes the extreme horizontal KO power it used to have, but allows it to combo them alongside the thrown victim.
- Bowser hops during the final hit.
- Down throw:
- The throw's release deals more damage (2% → 4%) with no compensation on knockback, although it's still rather weak.
- It has faster startup (frame 45, 56 → 35, 37), but with its total duration not reduced, significantly increasing its ending lag, while it remains easy to react to.
- It has a more exaggerated animation.
- Edge attack:
- Edge attack deals more damage (7% → 10%).
Special moves[edit]
- Fire Breath:
- It deals more damage per hit (1.2% → 1.8%).
- It has larger hitboxes (4u → 4.5u).
- The flames are more vibrant in color, a stark contrast to the more realistic-looking flames in SSB4.
- Flying Slam:
- The move has significantly faster startup overall (frame 8 (ground)/17 (aerial) → 6 (both)), especially in the air. This allows Bowser to beat out shielding opponents much more easily when airborne, and in combination with his faster jumpsquat gives it utility as an out of shield option.
- The move can be B-reversed.
- It has a new property that gradually increases its damage the more distance Bowser falls with the grabbed opponent before impacting ground (for example, if he lands on a lower platform from where the move was initiated), still with a minimum of 18% and reaching a maximum of 23.4%. This damage increase fully affects the move's knockback, improving its KO potential if initiated above the stage or if Bowser can control it adequately.
- The inner grabbox is larger (4u → 5u).
- The move has noticeably more ending lag (FAF 43 (grounded), 50 (aerial) → 53), and the aerial version no longer auto-cancels upon landing, making it much easier to punish.
- Upon grabbing an opponent, it has more lag before Bowser jumps (25 frames → 33), giving the opponent more time to influence its movement.
- The outer grabbox is smaller (5u → 4u), but further out (Z offset: 17.5 → 19), increasing its horizontal reach but worsening its vertical reach.
- Bowser spins around more dramatically on the way down when grabbing an opponent, and the move produces an explosion on landing.
- Whirling Fortress (grounded):
- The looping hits use different angles (180° → 160°/165°), deal less knockback (50/70 set/100 scaling → 80/120/50), have a lower hitlag multiplier (1× → 0.7×), use weight-independent knockback, and have gained an additional hitbox above Bowser that meteor smashes opponents into the attack (180° → 240°) with low knockback. This allows it to connect significantly more reliably, with opponents no longer being able to tech out of it, and increases its vertical range.
- The last hit deals more damage (4% → 6%), with knockback compensated (70 base/150 scaling → 50/140).
- The last hit uses weight-independent knockback. This hinders the move's KO potential against lighter targets, but improves it against heavier ones.
- The last hit launches at a lower angle (60° → 55°).
- Whirling Fortress (aerial):
- It has significantly less landing lag (50 frames → 36).
- The first hit and looping hits use the autolink angle (84° → 367°), with the former dealing effectively set knockback (80 base/60 scaling → 50/0), and it has an additional finishing hit at the end (dealing 12 hits, up from 11) with significantly more knockback scaling (20 → 180). This repurposes the move into a more traditional multi-hit move that can rack up damage more safely.
- It deals significantly less damage (10% (hit 1), 3% (hits 2-6), 2% (hits 7-11) → 7% (hit 1), 1% (hits 2-11), 2% (hit 12); 35% total → 19%), no longer being one of the most damaging up special moves in the game.
- The looping hits have smaller hitboxes (6u → 4.3u).
- The last hit launches at a lower angle (84° → 60°).
- Its animation has been altered, with Bowser spinning more at an angle toward the camera.
- Bowser Bomb:
- The grounded version's first hit has different angles (85° → 80°/100°/90°) and deals less set knockback (90 → 60), but uses weight-independent knockback, a lower SDI multiplier (1× → 0.5×), and has gained a hitstun modifier of 8, while the second hit has less startup (frame 38 → 37). This makes the first hit impossible to DI and allows it to connect better into the second hit.
- The first hit uses 4 smaller but extended hitboxes rather than one large unextended one. Overall it has more reach.
- The aerial version has less startup (frame 32 → 31).
- The move meteor smashes at the beginning of its descent (76° → 290°). This grants it utility in edgeguarding, but makes its onstage KO potential less consistent.
- The aforementioned new meteor smash hitbox deals much less knockback (45 base/75 scaling → 13/65), making it significantly less powerful as a result.
- Final Smash:
- Bowser has a new Final Smash called Giga Bowser Punch. Rather than utilizing Giga Bowser's Brawl moveset, he teleports to the background of the stage in giant form, and aims a single punch that does 40% damage. If the opponent's damage percent is at 60% or greater before they are punched, they receive an instant Screen KO, otherwise they receive moderately high knockback.
- Since Giga Bowser Punch causes Bowser to teleport to the background, the Final Smash no longer renders Bowser vulnerable to damage during it.
- Since Giga Bowser Punch consists of a single hit rather than allowing Bowser to hit opponents, this makes its KO power and damage more consistent and allows it to more easily KO several targets, but hinders the damage racking ability Giga Bowser previously had.
- As a result, Giga Bowser Punch deals less damage than Giga Bowser's most damaging option, which was a fully charged down smash (4.2% hits 1-7/18.2% hit 8/47.6% if all hits connect → 40%).
 As a result, the undead glitch on the Stamina Mode, and results screen glitch on the timed team battle have been removed.
Update history[edit]
Aside from glitch fixes, Bowser has been buffed slightly via game updates. Update 2.0.0 strengthened his neutral attack, forward tilt and down smash and improved Whirling Fortress' consistency. Update 3.0.0 further buffed Whirling Fortress by ensuring that its grounded version cannot be teched, which makes it an even more potent out of shield option. Update 4.0.0 removed down aerial stalling, which standardized his down aerial and other stall-then-falls by extension. Most recently, Bowser's shield was enlarged as part of a near-universal buff via update 7.0.0.
As a result of these changes, Bowser fares slightly better than he did at Ultimate's launch.
- Flying Slam's custom acceleration stats for both Bowser and the opponent were slightly altered, replacing the Smash 4 stats that were still in use.
- Bowser's base acceleration per frame during the tug-o-war has increased (0.21 → 0.2235).
- Bowser's reduction per % of the base acceleration during the tug-o-war has decreased (0.00075 → 0.0005).
- Opponent's lowest guaranteed acceleration per frame during the tug-o-war has decreased (0.03 → 0.024).
- Opponent's base acceleration per frame during the tug-o-war has increased (0.19 → 0.22).
- Opponent's reduction per % of the base acceleration during the tug-o-war has decreased (0.00075 → 0.0007).
- Second hit of neutral attack deals more damage (6% → 7%).
- This change affected the combo potential of Jab 2 at low percent, making Jab 2>Dash Grab more strict and removing Jab 2>Dash Attack entirely.
- Forward tilt deals more damage (12% → 13%).
- Down smash deals more knockback.
- Whirling Fortress now connects better.
- Giga Bowser Punch now launches crouching opponents the same as standing opponents.
- Opponents can no longer trip between the looping hits of grounded Whirling Fortress, sometime avoiding the finisher hit entirely as a result.
- The T-Pose glitch involving Superspicy Curry and Screw Attack has been fixed.
- Down aerial no longer has its downward movement disabled when used out of hitstun.
- Flying Slam now releases the opponent after falling for 100 frames without slamming into the ground.
- Overall shield size has been increased by 1.075×.
Moveset[edit]
- Bowser has universal armor against attacks with low knockback, known as Tough Guy. This is most apparent when Bowser has low damage, and it can be amplified by crouching, but not while crawling. Its effectiveness will decrease as Bowser starts taking more damage, and thus more knockback.
- Bowser also has damage-based armor on the start-up of his tilts and smash attacks. Each move has a damage threshold: 4% for tilts, 8% for up and down smash, and 10% for forward smash. Any attack that is below the indicated percent will be armored, but an attack with a larger percent won't.
- For example, Bowser will armor the first 4 hits of Limit Cross Slash (which deal 3% each) during his up tilt, but the 5th hit (which deals 10%) will launch him. However, Bowser's forward smash will be able to armor even the last hit of Limit Cross Slash.
- Bowser can crawl. While it does lower his hurtbox quite a bit, his sheer size means it is not possible for him to crouch under typical projectiles. It has uses at ledge for repositioning before a 2-frame attempt; outside of this, it is almost always impractical.
For a gallery of Bowser's hitboxes, see here.
Note: All numbers are listed as base damage, without the 1v1 multiplier.
| Name | Damage | Description | ||
|---|---|---|---|---|
| Neutral attack | Koopa Palm Strike (クッパ掌打, Koopa Palm Sole/Heel) Koopa Pursuit Attack (クッパ追い打ち) |
4% | Performs a palm thrust, then a straight punch. While somewhat slow for a neutral attack, its low endlag makes it safer on shield than most others. Bowser's arms each have intangibility (frames 7 and 8, and frames 9-11, respectively). Unlike most neutral attacks, Bowser's has enough knockback to become a reliable KO move at high percentages. Based on his defensive punches from Mario & Luigi: Bowser's Inside Story. | |
| 7% | ||||
| Forward tilt | Koopa Backfist (クッパ裏拳) | 13% | Does a backhanded punch forwards. The punch may be angled up or down, but doing so does not affect damage or knockback. Has damage-based armor (frames 7-9) and intangibility on his arm (frames 10-14). The downward-angled version can very reliably 2-frame most recoveries, and can KO most characters at around 90%. Based on the second hit of his Drill Claw from Super Mario RPG: Legend of the Seven Stars | |
| Up tilt | Ceiling Scratch (天井ひっかき) | 11% | Does a 180-degree overhead arcing claw swipe. It comes with wide range and average ending lag, allowing it to 50/50 combo into itself at low percents. At slightly higher percents, it can lead into neutral air and back air. The attack will almost always send the opponent directly above Bowser. It also boasts a respectable amount of kill power, being one of the strongest up tilts in the game and KOing at around 120%. Has damage-based armor (frames 8-10) and makes Bowser's arm intangible (frames 11-16). However, it has noticeable startup lag, coming out on frame 11. | |
| Down tilt | Spoiled Brat Punch (だだっ子パンチ) | 7% (hit 1), 8% (hit 2) |
Does an alternating pair of hooks. Both hits deal 15% in total, only slightly higher than the first hit's damage output in SSB4, being 14%. Down tilt's second hit comes out five frames earlier, and gains the ability to trip opponents. It also grants damage-based armor on the first hit (frames 7-9), and intangibility on his arms for both (frames 10-12, and 10-14, respectively). It can still hit many ledge hangs, although the first hit having set knockback can cause the second hit to whiff if a ledge hang is low enough. | |
| Dash attack | Jumping Kick (ジャンピングキック) | 12% (clean), 10% (late) |
Does a jumping side kick, similar to Meta Knight's dash attack. Good for hitting prone or tumbling opponents and has high base knockback. However, its knockback scaling is poor, preventing it from killing under 200%, along with having high ending lag, making it very punishable. | |
| Forward smash | Megaton Drop Kick (メガトンドロップキック) | 23% (clean feet), 20% (clean body), 17% (late feet), 14% (late body) |
Does a powerful dropkick. Its outstanding damage output threatens shields, being able to inflict significant damage to them. When spaced properly, it can even hit opponents hanging on an edge or lingering just below it. It grants damage-based armor (frames 17-21), and the clean hitboxes render Bowser's feet invincible (20-25), whereas its late hitboxes have anti-rebounding priority. It is tied with Kazuya's forward smash as the third strongest in the game, as it can KO opponents at 56% from center stage. However, due to coming out on frame 22 and having 43 frames of ending lag, it's very punishable if whiffed or shielded. | |
| Up smash | Rising Spike (ライジングスパイク) | 22% (spikes), 16% (sides), 12% (landing) |
Jumps to thrust his shell upwards while spinning. Deals the most damage to opponents who come into contact with Bowser's shell spikes, while other opponents get hit by the sourspots on his head and tail or the landing hitbox instead. The sweetspot KOs at around 80% uncharged, making it the strongest up smash in the game. Grants damage-based armor (frames 11-15) and invincibility on his shell (frames 14-27), making it an excellent anti-air tool that is hard to compete with. | |
| Down smash | Rampage/Savage Scratch (あばれひっかき) | 16% (hit 1), 15% (hit 2) |
Does two grounded claw swipes, hitting opponents in front of him, then behind him. Active on frame 12, making it Bowser’s fastest smash attack. It's also among the strongest down smashes in the game, with KO power comparable to many other characters' forward smashes; the front hit deals slightly more damage than the back hit, though they both do about the same knockback. Grants damage-based armor (frames 5-11), but unlike his other smashes, it possesses no invincibility. It can hit most characters' ledge hangs and is useful for covering rolls, but its extremely high ending lag, even more than on his forward smash, makes it very punishable. | |
| Neutral aerial | Koopa Wheel (クッパホイール) | 6% (hits 1-4) | An aerial cartwheel. While it is difficult to connect all 4 hits, it is incredibly damaging for an aerial, and it can even open up KO confirms on landing, such as into forward aerial, back aerial, and up aerial. This makes it Bowser's best combo starter when landing with it, as even at low percentages it can combo into up tilt and up smash. It comes out on frame 8. However, the hits after the first don't connect very reliably due to their knockback scaling, and the attack has poor range, with the hitboxes for each hit appearing on specific points on Bowser's hands and feet. It also has noticeable landing lag (15 frames) and doesn't auto-cancel in a short hop. | |
| Forward aerial | Jump Scratch (ジャンプひっかき) | 13% (hand), 12% (arm), 11% (body) |
Swipes downward with one claw. It has fairly quick start-up (frame 11), a respectable damage output and knockback, can pseudo-wall of pain with Whirling Fortress as a finisher, and has great range, as it can even hit opponents below him. It can also auto-cancel in a short hop. Altogether, these traits make for arguably Bowser's most versatile aerial. | |
| Back aerial | Rocket Kick (ロケットキック) | 19% | A backwards dropkick. It's incredibly powerful, one of the strongest back aerials in the game, as it can KO around 100% from center-stage and as low as 60% at the edge. It is active on frames 9-11 and can auto-cancel in a short hop, making it somewhat safe when retreating. However, it has the most landing lag out of any back aerial in the game (24 frames), making it risky to use when close to the ground. Despite its kill power and quick startup, its hitbox is lackluster, lacking much vertical range, and Bowser's hurtbox extends beyond the actual hitbox of the move on its first active frame, making it susceptible to failing against disjointed attacks. | |
| Up aerial | Heading (ヘディング) | 15% | An upwards arcing headbutt. Deals great knockback, enough to KO at around 100% near the upper blast line, thus being among the strongest up aerials in the game. Grants intangibility to his head (frames 3-13), which, when combined with its quick startup (frame 9) and its power, makes it an effective juggling tool. However, it can be difficult to properly use because of its mediocre general range. | |
| Down aerial | Scrub Brush (スクラブブラシ) | 16% (spikes), 2% (shockwave) |
A stall-then-fall attack that involves Bowser retreating into his shell while turning upside-down, then propelling himself towards the ground while spinning. The first few active frames being able to meteor smash opponents, in combination with the move's large hitbox and powerful diagonal knockback during the later active frames, make it a moderately effective edgeguarding tool. The move emits a small shockwave on both sides when Bowser lands, which makes the move slightly harder to punish. Should Bowser use the move while he's off stage, it is almost guaranteed to cause a self-destruct due to its high ending lag and his fast falling speed. Bowser will hover in the air for a brief period before the active frames begin, allowing this move to stall his landing. Grants intangibility on his arms and legs in midair (frames 14-60) and upon landing (frames 1-27). Resembles an attack used by Spinies and Buzzy Beetles where they withdraw into their shell and drop from the ceiling. | |
| Grab | Grab (つかみ) | — | Reaches out. Bowser’s grabs have very good reach for being non-tether grabs. but are not the fastest. | |
| Pummel | Grab Headbutt (つかみヘッドバット) | 1.6% | Headbutts the opponent. Slow but strong. | |
| Forward throw | Slingshot (スリングショット) | 12% | Places the opponent in between his horns, then rears his head back and powerfully lunges it forward to launch the opponent. Second strongest forward throw in the game, only after Incineroar's, but despite its great knockback, its relatively long startup (at frame 36) makes it easy to DI on reaction. It starts killing Mario near the edge of Final Destination at around 141% with good DI (in), or around 117% with max rage. | |
| Back throw | Back Throw (バックスルー) | 12% | Throws the opponent backwards in a sideways motion with one arm, akin to Donkey Kong's regular back throw. It has the exact same damage output, angle and knockback values as his forward throw, however, since it's far easier to land a grab at the outermost edge of the stage (i.e. closer to the blast line) when facing toward it, e.g. by rolling to the ledge, back throw reliably kills middleweights below 140%, or 115% with max rage. Moreover, with a significantly faster startup at frame 19, it's harder to react to and DI than forward throw. | |
| Up throw | Fresh Mixer (フレッシュミキサー) | 0.5% (hits 1-7), 2% (hit 8), 4% (hit 9) 2% (throw) |
Throws the opponent slightly upward, withdraws into his shell, and then spins rapidly in order to repeatedly stab them with his shell's spikes. He hops up on the final hit to launch the opponent upwards. Can combo into forward, neutral, and up aerials at low percents. However, it's also one of the few throws in the game that can be SDI'd, specifically on the last hit. | |
| Down throw | Heavy Press (ヘビープレス) | 10% (hit 1), 4% (throw) |
Places the opponent on the ground and body slams them. It deals 14%, making it the third most damaging throw in the entire game only after Steve's down throw with an Anvil and King K. Rool's up throw. Its high base knockback, low knockback scaling, and high ending lag prevent it from having any follow-ups. However, its high damage and base knockback make it a good mix-up and an option to send opponents offstage. | |
| Forward roll Back roll Spot dodge Air dodge |
— | — | ||
| Techs | — | — | ||
| Floor attack (front) Floor getups (front) |
7% | Swipes his claws behind himself and in front of himself while stumbling to his feet. | ||
| Floor attack (back) Floor getups (back) |
7% | Swipes his claws around himself while getting up. | ||
| Floor attack (trip) Floor getups (trip) |
5% | Swipes his claws around himself while getting up. | ||
| Edge attack Edge getups |
10% | Bowser slowly climbs up from the ledge and then swipes at the ground in front of him. It has the longest reach out of any edge attack. | ||
| Neutral special | Fire Breath | 1.8% (loop) | Expels a stream of fire from his mouth. It gradually loses strength and range the longer it is used, but it will slowly regain its strength when not in use. It can be angled up or down, which can potentially intercept recovering opponents, although the flames at the very end of the stream do not cause flinching. It deals notoriously high damage; at close ranges it can potentially deal over 30% in a matter of seconds. | |
| Side special | Flying Slam | 18%-23.4% (throw), 15% (collateral) |
Grabs an opponent and then jumps with them into the air and backflips before belly-to-belly suplexing them onto the ground, causing an aesthetic explosion. Bowser spins around dramatically during the descent. It has a quick frame 6 startup and does strong vertical knockback that can KO at 130%, making it a deadly mixup tool in the air. However, it is very susceptible to DI giving it somewhat mediocre KO power if used too far from the edge of the stage. The move also has a massive 46 frames of endlag on whiff, making it extremely punishable. The suplex can hit other opponents on the descent for similarly powerful knockback. It can be used to dive off-stage with the opponent for a potential sacrificial KO, although this becomes more difficult to do if Bowser has a higher percent, and it is possible to recover if the opponent has a long vertical recovery. The ascent grants intangibility (frames 1-23), and can launch opponents significantly far when falling, although the explosion has no hitbox. The move deals more damage based on fall distance, following the formula 18×(1+0.003d) where d = landing height - grab height, maxing out at 100 units (18×1.3)—roughly the distance from Temple's highest platform to the ground below it.
| |
| Up special | Whirling Fortress | 1% (grounded hits 1-7), 6% (grounded hit 8), 7% (aerial hit 1), 1% (aerial hits 2-11), 2% (aerial hit 12) |
Withdraws into his shell and spins around rapidly, striking multiple times. It starts up on frame 6 and is capable of moving forward or backward while doing so, which makes it an extremely effective out of shield option, launching opponents vertically and easily putting them into disadvantage. In the air, it propels Bowser diagonally upwards, travelling impressive distance vertically and horizontally; the move can cover a greater distance via button mashing near the end of the move. | |
| Down special | Bowser Bomb | 4% (headbutt), 20% (ground pound), 11% (landing) |
A Ground Pound. It deals immense vertical knockback to anyone hit and can KO under 100%, making it a situational, yet potent kill move. On the ground, Bowser performs a weak headbutt that drags opponents into the main attack, which is impossible to avoid if it connects. If performed in the air, Bowser performs the Ground Pound after a brief pause instead of leaping first. Emits a shockwave upon landing and will break full shields if all of its grounded hitboxes connect. It will almost certainly cause a self-destruct if used off-stage due to its ending lag, though it can grab ledges if Bowser is near one. The startup can meteor smash, although it possesses rather weak knockback in comparison to its impressive damage. It resembles the attack he uses during his boss fight in Super Mario Bros. 3. | |
| Final Smash | Giga Bowser Punch | 40% | Bowser transforms into Giga Bowser and teleports into the background, where he becomes impervious to attacks. Red crosshairs will appear on screen to indicate where Giga Bowser will aim his punch, which can be moved around with the control stick; the crosshairs also contains a depleting green gauge around their circumference to indicate how much time is left until the attack will activate automatically, though the attack can be activated manually before the gauge fully depletes. If the opponent's damage percent is 60% or greater before they are punched, they are instantaneously screen KO'd. | |
Stats[edit]
| Stats | Weight | Dash speed | Walk speed | Traction | Air friction | Air speed | Air acceleration | Gravity | Falling speed | Jumpsquat | Jump height | Double jump height | Empty landing lag |
|---|---|---|---|---|---|---|---|---|---|---|---|---|---|
| Value | 135 | 2.255 – Initial dash 1.971 – Run |
0.901 | 0.104 | 0.0075 | 1.155 | 0.01 – Base 0.04 – Additional |
0.125 | 1.77 – Base 2.832 – Fast fall |
3 | 33 - Base 15.7 - Short hop |
32.61 | 6 |
Announcer calls[edit]
English
Japanese/Chinese
French
French (PAL)
German
Italian
Russian
Spanish
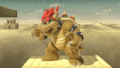
On-screen appearance[edit]
- Emerges from a wall of flames hunched over, before standing upright. Very similar to his battle entrance animation in Super Mario 64, without the wall of flames.
Bowser's on-screen appearance

Taunts[edit]
- Up Taunt: Throws his head back and swivels it in a circle while roaring.
- Side Taunt: Leans forward and furiously bites his jaws three times.
- Down Taunt: Bounces precariously on one leg, similarly to his teetering animation.

Bowser's up taunt.
Bowser's side taunt.
Bowser's down taunt.


Idle poses[edit]
- Sways his head around and back while roaring and exhaling smoke from his mouth.
- Clenches his fists and bashes them together, then bends over and roars.
Bowser's first idle pose.
Bowser's second idle pose.


Crowd cheer[edit]
| Cheer (English) | Cheer (Japanese/Chinese) | Cheer (Italian) | Cheer (Dutch) | Cheer (French) | |
|---|---|---|---|---|---|
| Cheer | |||||
| Description | Bow - ser! | Koo - pa! *claps 3 times* | Bow - ser! | Bow - ser! | Bow - ser! |
| Cheer (German) | Cheer (Spanish) | Cheer (Russian) | Cheer (Korean) | |
|---|---|---|---|---|
| Cheer | ||||
| Description | Bow - ser! | Boooow - ser! | Bow - ser! | Koo - pa! *claps 3 times* |
Victory poses[edit]
- Left: Rears his head back and sways it forward, then stomps and spreads his arms while roaring, ending in a celebratory pose.
- Up: Runs into the scene and slashes down with his claws twice.
- Right: Breathes fire around himself, then assumes a celebratory pose similar to his render from SSB4.


In competitive play[edit]
Most historically significant players[edit]
See also: Category:Bowser players (SSBU)
 Hero - One of the greatest Bowser players of all time, best known for his performances in the early years of the post-pandemic metagame when he was considered a top 50 player, peaking at 22nd on the OrionRank 2022, though ranking among the top 20 on the half-year ranking. His best performance was being the runner-up at Maesuma TOP 8 where he defeated Nietono and eventual-tournament winner Yoshidora, marking the best Bowser performance in this metagame. He also has the most top 8 major performances out of any Bowser player, which includes finishing 3rd at Maesuma TOP 6, 4th at Kagaribi 4, and 5th at Kagaribi 10. Since then, he has been globally ranked in a few other seasons and is one of the few Bowser players to do so in this metagame.
 LeoN - One of the greatest Bowser players of all time, best known for his performances in the early metagame and the months after the pandemic period, where he was considered a top 50 player; he was ranked 20th on the OrionRank 2019 as the only Bowser player to ever rank in the global top 20 on a full-year ranking. He is best known for being the runner-up at Defend the North 2019, where he defeated Marss, Light, and Dabuz, becoming the first Bowser player to make Grand Finals at a major. In addition, he has finished top 8 at several other majors, including 4th at Temple: Hermès Edition and 5th at Suplex City Smash, the latter of which he defeated Nairo.
- Lunamado - Though known for playing a variety of characters, he was known for playing Bowser in the early metagame and was considered the best Bowser player in Japan during this time. He was best known for his performances at Sumabato events, including finishing 4th at Sumabato SP 3 and 5th at Sumabato SP 5, where he defeated Zackray in the latter with Bowser and Luigi; outside of Submabato, he also finished 17th at both Umebura SP 4 and Umebura SP 7. He eventually switched to playing other characters, though he maintains Bowser as a secondary or counterpick.
 Mukuro~ - The best Bowser player in Europe, ranked in Europe for several seasons and was also ranked globally at his peak, at 99th on the OrionRank Ultimate: Eclipse. He was known for being the first Bowser player to win a PGRU-ranked event, doing so at the C tier Calyptus Cup Fusion, and has won several other ranked German events since, including Rise of PPT, where he defeated Larry Lurr and quiK. In addition, he has placed highly at many other sizeable European events, such as 3rd at Smash Contest: DoKomi 2021, 5th at both ICARUS 2023 and NRW Cup - Rise of Germany, and 17th at COLOSSEL 2022.
Tier placement and history[edit]
Despite a negative reception from the E3 build, upon the game's initial release, Bowser was initially viewed as a strong, viable pick due to improvements to his power and mobility, the addition of armor to his tilts and smash attacks, and the universal changes to landing lag and jumpsquats that had toned down his greatest weakness. This was reflected in early tournament performances from LeoN, who achieved several top 8 major performances with Bowser and was ranked high on the Spring 2019 PGRU; Lunamado, who saw strong runs at Sumabato SP 3 and Sumabato SP 5; and DarkThunder, who found great success in Europe including winning Calyptus Cup Fusion, the first C-tier victory for a Bowser player. With other "traditional" heavyweights such as King Dedede seeing a sharp decline during this period, players began taking a greater notice towards Bowser's strengths, specifically how he lacked most weaknesses that plagued the other traditional heavyweights. As such, Bowser was commonly viewed as the best traditional heavyweight character and an upper-mid tier character. This perception was maintained throughout the next few years and during the online metagame, which also saw the meteoric rise of Hero in Japan.
A lack of substantial updates since the early metagame, the rise of oppressive characters such as Diddy Kong and Sonic, and the introduction of other oppressive DLC characters such as Steve and Kazuya hurt Bowser's standing as time went on. This power creep affected Bowser's representation, which slowly declined as time went on. Although Hero, LeoN, and DarkThunder (by then known as Mukuro~) were still able to find some success, their tournament performances declined alongside Bowser's decline in the metagame. This has shifted opinions on Bowser towards a more negative light, with most players believing he was only a mid-tier at best.
This was reflected in Bowser's placement on the first tier list, where he was ranked 50th as an upper-mid tier in the B- tier. Further decline in Bowser's representation, especially with Hero's less consistent performances, led to him dropping on the second tier list to 59th, ranking in the C+ tier and marking one of the largest drops from the first tier list. He also dropped in third and recent SSBU tier list by 4 spots, now being ranked 63rd. However, due to the tier restructuring, Bowser is now listed in the C- tier.
Classic Mode: The Red One. Every Red One![edit]

Bowser's opponents are all wearing attire that is red (and/or use fire-based attacks), which is a reference to his mortal enemy (Mario) wearing red clothing. Bowser also fights Rathalos as the penultimate boss, who is red. The final battle is against Mario, with Metal Mario appearing after Mario is defeated.
| Round | Opponent | Stage | Music | Notes |
|---|---|---|---|---|
| 1 | Find Mii | Airship Theme - Super Mario Bros. 3 | Mii Fighter costumes:
All the enemies wear Mario caps, for Mario's likeness. The stage references Bowser's Castle. | |
| 2 | Suzaku Castle | Ken Stage | ||
| 3 | Norfair | Brinstar (Melee) | ||
| 4 | Giant |
Pokémon Stadium 2 | Victory Road - Pokémon Ruby / Pokémon Sapphire | Giant Charizard's Pokémon Trainer is absent. Items do not appear. |
| 5 | Kongo Jungle | Stickerbush Symphony | ||
| 6 | Rathalos | Forest Hill | Roar/Rathalos | |
| Bonus Stage | ||||
| Final | New Donk City Hall (Ω form) | Ground Theme (Band Performance) - Super Mario Bros. (Against Mario) Metal Battle (Against Metal Mario) |
Functions as a role-reversal to the final round of Mario's Classic Mode route, where he fights Bowser, then Giga Bowser. | |
Credits roll after completing Classic Mode. Completing it as Bowser has King Bowser - Super Mario Bros. 3 accompany the credits.
Appearances in other Classic Mode routes[edit]
Bowser appears as an opponent in certain other fighters' Classic Mode routes, with them being listed below:
Role in World of Light[edit]

Bowser was among the fighters that were summoned to the cliffside to fight the army of Master Hands.
During the opening cutscene, Bowser was present on the cliffside when Galeem unleashed his beams of light. Bowser attempted to fight back against the beams, using his Fire Breath alongside the Pokémon Trainer using his Pokémon to perform Triple Finish. This effort ended up being fruitless, however, as both were vaporized and placed under Galeem's imprisonment alongside the rest of the fighters, except for Kirby. Presumably, it was during this time that he ended up transformed into Giga Bowser and later dispatched to a molten castle to guard it. Eventually, several fighters cornered and fought Bowser in his Giga Bowser form and, upon defeating him, he was freed from Galeem's control.
Bowser is later seen among several other fighters, making their last stand against Galeem and Dharkon. He also shows up in the bad ending where Galeem emerges victorious against Dharkon, witnessing Galeem engulf the world in light.
Unlike most fighters, Bowser does not have a Fighter Battle and is simply unlocked after defeating Giga Bowser within the Molten Fortress in The Light Realm.
Spirits[edit]
Bowser's fighter spirit can be obtained by completing Classic Mode as him. It is also available periodically for purchase in the shop for 300 Gold, but only after Bowser has been unlocked. Unlocking Bowser in World of Light allows the player to preview the first spirit below in the Spirit List under the name "???". As a fighter spirit, it cannot be used in Spirit Battles and is purely aesthetic. His fighter spirit has an alternate version that replaces it with his artwork in Ultimate.
Additionally, Bowser makes an appearance in various primary and support spirits.
7. Bowser

30. Bowser (Wedding)
63. Dry Bowser
95. Paper Bowser
96. Paper Bowser (Paper Mario: Sticker Star)
301. Baby Bowser
1,301. River Survival

1,471. Fury Bowser

.png)
In Spirit Battles[edit]
Conditions in italics aren't listed on the Spirit Battle preview screen.
As the main opponent[edit]
| Spirit | Battle parameters | Inspiration | |||||||||
|---|---|---|---|---|---|---|---|---|---|---|---|
| No. | Image | Name | Series | Enemy Fighter(s) | Type | Power | Stage | Rules | Conditions | Music | Character |
| 30 | .png) |
Bowser (Wedding) | Super Mario Series | •Bowser •Ally: Peach |
9,700 | New Donk City Hall | N/A | •You lose if your CPU ally is KO'd •The enemy favors dash attacks •The enemy has increased attack power |
Underground Moon Caverns | ||
| 62 |  |
Mechakoopa | Super Mario Series | •Tiny Bowser Team |
3,800 | Mushroom Kingdom U (Slide Lift Tower) | N/A | •The enemy starts the battle with a Bob-omb | King Bowser - Super Mario Bros. 3 | ||
| 63 |  |
Dry Bowser | Super Mario Series | •Bowser |
13,500 | Reset Bomb Forest (Battlefield form) | •Defense ↑ •Curry-Filled •Hazard: Lava Floor |
•The floor is lava •The enemy breathes fire after a little while •The enemy has increased defense after a little while |
King Bowser - Super Mario Bros. 3 | ||
| 95 |  |
Paper Bowser | Paper Mario Series | •Bowser |
9,300 | Peach's Castle (Ω form) | •Defense ↑ •Attack Power ↑ •Item: Star Rod |
•The enemy will occasionally be invincible when the enemy's at high damage •The enemy's special moves have increased power •Stamina battle |
Paper Mario Medley | ||
| 219 | Moosh | The Legend of Zelda Series | •Bowser |
1,900 | Garden of Hope (Battlefield form) | N/A | •The enemy favors down specials | Tal Tal Heights | |||
| 301 |  |
Baby Bowser | Yoshi Series | •Giant Bowser •Tiny Bowser |
13,800 | Find Mii (Ω form) | •Hazard: Lava Floor | •The floor is lava •The enemy has super armor and is hard to launch or make flinch •Stamina battle |
King Bowser - Super Mario Bros. 3 | Mega Baby Bowser (Giant Bowser) | |
| 315 |  |
Blargg | Yoshi Series | •Curry Bowser |
3,900 | Castle Siege (Underground Cavern) | N/A | •The enemy breathes fire | Melty Monster | ||
| 428 |  |
Sandshrew | Pokémon Series | •Bowser |
1,800 | Mushroomy Kingdom (Battlefield form) | •Item: Pitfall | •The enemy is easily distracted by items | Main Theme - Pokémon Red & Pokémon Blue (Brawl) | ||
| 450 |  |
Kangaskhan | Pokémon Series | •Bowser •Larry |
3,700 | Windy Hill Zone | N/A | •Defeat the main fighter to win •Reinforcements will appear during the battle |
Main Theme - Pokémon Red & Pokémon Blue (Brawl) | Parent Kangaskhan | |
| 455 |  |
Tauros | Pokémon Series | •Bowser |
3,800 | Gerudo Valley | •Uncontrollable Speed | •The enemy is very fast and can't stop quickly •The enemy can deal damage by dashing into you |
Main Theme - Pokémon Red & Pokémon Blue (Brawl) | ||
| 477 |  |
Heracross | Pokémon Series | •Bowser |
4,400 | Garden of Hope (Battlefield form) | •Attack Power ↑ •Hazard: Sticky Floor |
•The floor is sticky •The enemy's throws have increased power •The enemy has increased attack power when the enemy's at high damage |
Pokémon Gold / Pokémon Silver Medley | ||
| 498 | Groudon | Pokémon Series | •Giant Bowser |
4,700 | Norfair (Battlefield form) | •Hazard: Lava Floor | •The floor is lava •The enemy is giant |
Victory Road - Pokémon Ruby / Pokémon Sapphire | |||
| 550 |  |
Volcanion | Pokémon Series | •Giant Bowser |
9,800 | Norfair (hazards off) | •Sudden Damage •Hazard: Fog |
•The stage is covered in fog •Stamina battle •You'll occasionally take sudden damage |
Battle! (Champion) - Pokémon X / Pokémon Y | ||
| 593 |  |
Pico | F-Zero Series | •Bowser |
3,500 | Mute City SNES (Battlefield form) | N/A | •The enemy starts the battle with an enhanced Ray Gun | Death Wind | ||
| 1,301 |  |
River Survival | Super Mario Series | •Bowser •Kirby •Yoshi •Rosalina & Luma |
5,500 | Kongo Falls (Ω form) | •Bob-omb Festival •Item Tidal Wave •Item: Food |
•Survive until the timer runs out (1:00) •Bob-ombs will rain from the sky after a little while |
Slide | Bowser | |
| 1,452 |  |
Ifrit | FINAL FANTASY Series | •Giant Bowser |
7,500 | Norfair (Ω form) | •Move Speed ↑ •Attack Power ↑ •Hazard: Lava Floor |
•The floor is lava •The enemy has increased attack power after a little while •The enemy has increased move speed after a little while |
Fight On! | ||
| 1,470 | Magnamalo | MONSTER HUNTER Series | •Giant Bowser |
10,500 | Castle Siege (underground cavern) | •Uncontrollable Speed •Defense ↑ •Attack Power ↑ |
•Stamina Battle •The enemy has increased attack power after a little while •The enemy has increased defense after a little while |
Roar/Rathalos | |||
| 1,471 |  |
Fury Bowser | Super Mario Series | •Metal Bowser |
13,800 | Find Mii (Ω form) | •Sudden Final Smash •Curry-Filled |
•The enemy will suddenly have a Final Smash after a little while •The enemy breathes fire after a little while •The enemy is metal |
King Bowser - Super Mario Bros. 3 | ||
As a minion[edit]
| Spirit | Battle parameters | Inspiration | |||||||||
|---|---|---|---|---|---|---|---|---|---|---|---|
| No. | Image | Name | Series | Enemy Fighter(s) | Type | Power | Stage | Rules | Conditions | Music | Character |
| 39 |  |
Lakitu & Spiny | Super Mario Series | •Iggy •Tiny Bowser |
3,400 | Mushroom Kingdom | N/A | •Defeat an army of fighters | Ground Theme - Super Mario Bros. | Spiny | |
| 104 | Geno | Super Mario RPG: Legend of the Seven Stars | •Sheik •Peach •Kirby •Bowser •Mario |
13,700 | Mario Galaxy (Battlefield form) | N/A | •Defeat the main fighter to win •Timed battle (2:30) •The enemy's FS Meter charges quickly |
Rainbow Road Medley | Bowser | ||
| 700 | Turtle Bridge | Game & Watch Series | •Mr. Game & Watch •Squirtle •Morton •Bowser |
1,700 | Flat Zone X (hazards off) | N/A | •The enemy favors back air attacks | Flat Zone | Turtle | ||
| 1,148 | Satoru | Trade & Battle: Card Hero Series | •Shulk •Mewtwo •Ridley •Bowser |
1,700 | Pokémon Stadium 2 | •Move Speed ↓ | •Defeat the main fighter to win •The enemy's melee weapons have increased power •Reinforcements will appear during the battle |
Worthy Rival Battle | Wild Bull | ||
| 1,232 |  |
Nibbles | Fossil Fighters Series | •Yoshi •Charizard •Ridley •Bowser |
1,800 | Arena Ferox | •Item: Pitfall | •Defeat the main fighter to win •Reinforcements will appear during the battle |
Battle Start - Fossil Fighters: Frontier | Munchsaurus | |
| 1,426 |  |
Olivia | Paper Mario Series | •Pikachu •Mario •Tiny Bowser |
3,700 | Paper Mario | •Defense ↑ •Attack Power ↑ •Item: Bob-omb |
•The enemy has increased attack power when the enemy's at high damage •The enemy has increased defense when the enemy's at high damage •The enemy favors air attacks •Reinforcements will appear after an enemy is KO'd |
Battle! - Paper Mario: Color Splash | Bowser | |
Alternate costumes[edit]

| |||||||

|

|

|

|

|

|

|

|
Gallery[edit]

Bowser's fighter card.
Bowser's unlock notice.
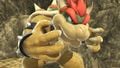
Idling on the Umbra Clock Tower.
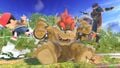
Attacking Ness and Ike with Bowser Bomb on Gaur Plain.
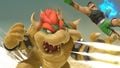
Attacking Little Mac with his down smash on Mushroomy Kingdom.
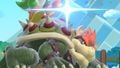
Striking Yoshi with his up smash on Super Mario Maker.
Performing Whirling Fortress with a Spiny Shell on Palutena's Temple.
Coming to a stop next to a Fire Flower on The Great Cave Offensive.
Performing his forward tilt next to Mario and Peach on Princess Peach's Castle.
Struck by Meta Knight on Smashville.
With Simon on Hyrule Castle.

With Toon Link on Bridge of Eldin.


Fighter Showcase Video[edit]
Trivia[edit]
.png)
.png)
to Peach during normal gameplay (left) vs. the
"No Contest" screen (right).
- Super Smash Bros. Ultimate marks Bowser's first unlockable appearance since Super Paper Mario and his first unlockable appearance in a multiplayer title since Mario Hoops 3-on-3.
- The pose Bowser strikes in his official artwork is similar to artwork of him for Super Mario 64 DS, Fortune Street, and Mario Party 10.
- Much like in Smash 4, Bowser was the first Melee newcomer to be confirmed for Ultimate.
- During the segment of the E3 2018 Nintendo Direct focusing on Bowser, Masahiro Sakurai states that the size change made to his Final Smash is an allusion to the boss fight with Baby Bowser at the end of Super Mario World 2: Yoshi's Island.
- Bowser is the only fighter to be fought in a form other than their regular appearance to recruit them in World of Light, specifically as Giga Bowser.
- He is therefore the only unlockable fighter in the series who can be unlocked in such a condition.
- Bowser is one of only four characters to face a metal opponent in Classic Mode, facing Metal Mario upon normal Mario's defeat in the final round. The others are Sonic, who faces a giant metal version of himself in the third round; Kazuya, who faces a metal version of himself upon defeating his normal self in the final round; and Sora, who faces a metal version of himself in the sixth round.
- Bowser is the only character of these four who does not face a metal version of himself, instead facing Mario.
- In World of Light, Bowser is the only villain who is unlockable in The Light Realm. The others are unlocked in The Dark Realm, except for Dark Samus, who is unlocked in The Final Battle, though she is still affiliated with Dharkon.
- King Dedede is also a recurring antagonist in his game series who can be found on The Light Realm, making him and Bowser the only two recurring antagonists found under Galeem's control. Unlike Bowser, King Dedede is more of an anti-hero, although Bowser is an anti-hero in some Mario spin off games like Super Paper Mario and Mario & Luigi: Bowser's Inside Story.
- On the "No Contest" screen, Bowser's model is significantly smaller relative to other characters than it is during normal gameplay.
- There appears to be a visual glitch where Bowser's shell model is not used while under the effects of Superspicy Curry.
- There's also another glitch where if he performs a jump while equipped with a Screw Attack, he will be shown in a t-pose. This glitch has now been patched.
- Bowser's Classic Mode is one of only four to feature a fight against a boss (in this case, Rathalos) outside of the boss round, the others being Mega Man, Hero and Sephiroth, and one of the few whose boss round does not feature a designated boss, instead fighting characters who are otherwise playable (in this case, Mario and Metal Mario).
- Despite also wearing primarily red clothing, King Dedede, Ness, Villager, and Shulk do not appear in Bowser's Classic Mode route.
- Interestingly, performing Bowser's down aerial on a ladder does not cause him to let go and fall to the ground, despite being a stall-then-fall move. He is the only character with this trait.
- Bowser briefly reverts to his hunched-over Super Smash Bros. Melee/Brawl idle pose after his stun animation.