Mii Gunner (SSBU)
| Mii Gunner in Super Smash Bros. Ultimate | |
|---|---|
 
| |
| Universe | Super Smash Bros. |
| Other playable appearance | in SSB4 |
| Availability | Custom |
| Final Smash | Full Blast |
| Tier | C+ (56) |
The Mii Gunner (Mii射撃タイプ, Mii Shooting Type) is a playable character in Super Smash Bros. Ultimate. They were confirmed as a playable character on June 12th, 2018, along with the other Mii Fighter types, Brawler and Swordfighter. Mii Gunner is classified as Fighter #53.
As with the other Mii Fighters, the Miis have 12 voice options, provided by Yūji Kishi, Takashi Ōhara, Ryōtarō Okiayu, Michihiko Hagi, Hideo Ishikawa, Kiyoyuki Yanada, Umeka Shōji, Ayumi Fujimura, Makiko Ōmoto, Minami Takayama, and Kimiko Saitō.
The Mii Gunner is ranked 56th out of 82 on the current tier list, placing them near the top of the C+ tier. This is a major improvement from their Super Smash Bros. 4 iteration, which was 53rd out of 57 on that game's third tier list before ultimately going unranked on the fourth. As with the other Miis, the Gunner can utilize many different special custom moves, providing for some unpredictability. Being the resident zoner of the Miis, Mii Gunner excels at keeping the opponents away and chipping damage. These specials include Charge Blast, a consistent zoning and KO option; Gunner Missile, which spaces enemies and can also provide combo setups; and Bomb Drop, one of the Gunner's best ledge trapping tools which can confirm into other attacks. As mentioned before, Mii Gunner also has a solid ledgetrapping game, with Flame Pillar, Bomb Drop, and forward air being standouts. Finally, their normal moves have good utility, with most of them either possessing excellent knockback (such as up and down tilts) or very high range (such as their forward aerial, up aerial and forward smash).
However, Mii Gunner also has several weaknesses. Being a zoner, the Gunner is one of the least mobile characters overall; combined with being a heavyweight, this makes them susceptible to combos should the enemy breach their defenses. Their recovery, while not bad, is merely average, which means that it can be intercepted by many characters. To add to this recovery issue, each of their up specials have a con: Arm Rocket has no hitbox, Lunar Launch has poor horizontal distance, and Cannon Jump Kick sacrifices recovery utility for strong offensive power. Finally, they have very slow frame data, with their up tilt, down tilt, and Grenade Launch being notable examples of this; combined with their slow mobility, this gives them difficulty with escaping disadvantage.
Overall, Mii Gunner is a straightforward, jack-of-all-trades zoner that has a number of ways to get damage on the opponent while staying away from their range, but their poor mobility, relatively lackluster recovery, and similarity to other zoners leave them outclassed by others of the same archetype (Samus, Mega Man, and Snake), but these setbacks have not stopped players such as Capitancito and Lammers44 from achieving respectable results with the Gunner.
Attributes[edit]
The Mii Gunner has been redesigned to be the slow, yet durable combatant of the three Mii Fighters. They are tied with Link, Yoshi, Captain Falcon, and Min Min in terms of weight, possess an average walking speed, the 5th slowest dashing speed, and the 14th slowest air speed in the game. As with the other two Mii Fighter types, the Gunner has access to 12 different special moves: Charge Blast, Laser Blaze, and Grenade Launch (Neutral Special), Flame Pillar, Stealth Burst, and Gunner Missile (Side Special), Lunar Launch, Cannon Jump Kick, and Arm Rocket (Up Special), and Echo Reflector, Bomb Drop, and Absorbing Vortex (Down Special).
Like the other Mii Fighters, one of the primary strengths of the Mii Gunner is their diverse set of versatile specials. As the long-range and projectile-heavy Mii Fighter, many of their specials excel at neutralizing approaches, racking up damage, edgeguarding, and shield pressure from a distance. Charge Blast is a very good KOing option that is extremely consistent, quick, and powerful when fully charged. Gunner Missile is good at both spacing and keeping enemies out. The Super variant deals a solid bit of damage and knockback, while the Homing variant can wall out approaches and also help the Gunner initiate approaches of their own. Laser Blaze racks up decent damage while also causing flinching, making it a valuable tool similar to Falco's Blaster. Finally, Flame Pillar and Bomb Drop are both good tools for ledgetrapping and setting up kill confirms. A bomb drop at mid-high percentages can reliably confirm into back aerial, while an opponent trapped in Flame Pillar can be combo'd into a fully charged Charge Blast. Additionally, the Mii Gunner can also further solidify their defensive playstyle with the usage of Echo Reflector and Absorbing Vortex, both of which aid in countering other campy or projectile-based characters.
Accompanying the Mii Gunner's vast collection of zoning specials is a very interesting and varying set of normals. While many of the Gunner's normals suffer from mild ending lag, they either possess high KOing power or range. Forward smash and up aerial are both among the longest-ranged moves in the game (the latter of which can secure very early KOs at the top of the blast line and the former being an excellent way of reading rolls and covering landing options). Forward tilt and neutral aerial are good tools to push pressuring opponents off of them. Forward aerial is a very useful move, which not only can edgeguard and space opponents from a distance due to its being a projectile, but it also pushes Mii Gunner (referred to as "gundashing"), which helps mitigate the Mii Gunner's lacking mobility and recovery. Alongside the aforementioned moves are a slew of moves that have respectable KOing power, such as up smash, up tilt, down tilt, down smash, and back aerial.
Lastly, the Mii Gunner has adequate choices for recovery. Except for Cannon Jump Kick, Lunar Launch and Arm Rocket both provide a fantastic amount of distance, especially Arm Rocket, which has far more control both horizontally and vertically. This, combined with their heavy weight, gives the Mii Gunner a decent ability to survive at higher percentages.
Mii Gunner does not come without their flaws. While many of their moves have tremendous range or KOing power, most of them are very laggy. This is especially prominent with their up and down tilts, which both have decent start-up but significant ending lag, while moves that are fast, such as forward tilt and neutral air, have poor range and KO potential. As a result, they struggle to acquire reliable KOs outside of a fully charged Charge Blast. Laser Blaze is a fairly slow and easily interceptable projectile; Grenade Launch travels in a very slow and short-ranged arc that no longer can be charged or controlled; Flame Pillar has relatively substantial lag on both ends and doesn't last as long as other flame-arc moves; and Bomb Drop can be hit back to the Gunner, making it a poor choice to use against opponents with disjoints.
As mentioned before, the Mii Gunner has terrible mobility. Their air speed, dashing speed, and initial dashing speed are among the slowest in the game, making them a very sluggish fighter both on the ground and in the air outside of gundashing. Additionally, their status as a heavyweight makes them very easy to combo despite their decent survivability, and while their recoveries are good, they do not come without their weaknesses. Arm Rocket, despite its fantastic mobility and distance, possesses no damaging hitbox and allows the Mii Gunner to be easily gimped by opponents with attacks that can reverse the Mii Gunner such as Mario and the Mii Swordfighter; Lunar Launch, while in possession of good vertical distance and a relatively powerful projectile, has poor horizontal distance; and Cannon Jump Kick trades recovery potential for offensive power, providing very little distance both horizontally and vertically while also being slow and easily intercepted.
Overall, the Mii Gunner is a jack-of-all-trades amalgamation of various projectile-based fighters. The ability to mix and match several different special moves adds a unique layer of versatility by allowing several different playstyles for the same basic character, making Mii Gunner among the most unpredictable to fight against. However, all of the customizable special moves have fatal flaws to prevent them from being overpowered, and/or are inferior versions of similar moves other fighters possess. Their strengths do marginally outweigh their weaknesses, and as a result, Mii Gunner is a fighter that excels at walling out opponents while struggling up close. Their multitude of projectiles provides them with countless options to keep opponents away, rack up damage, and edgeguard. However, they must be mindful and extremely careful, as one mistake can cause them to take a huge chunk of damage. They are a relatively simple character to pick up with a playstyle similar to Samus and can be a potent zoner, but due to their aforementioned weaknesses, they are considered to be worse at zoning than characters such as Samus, Snake, and the Belmonts.
Changes from Super Smash Bros. 4[edit]
The Mii Gunner has received a mix of buffs and nerfs in their transition from SSB4 to Ultimate, but was buffed overall. Despite the faster pace of Ultimate, many of their moves have seen several improvements that counteract this, and some of their weaknesses have been lowered to some degree.
Like the other Mii Fighters, the Mii Gunner now has set attributes, including high weight (now weighing as much as Captain Falcon, surpassing the largest possible Mii Fighter in SSB4) that significantly increases their survivability in general, especially since the Gunner's below average falling speed has been unaltered. The Gunner retains their general moveset, though with various buffs that noticeably improve their performance. Their inconsistent neutral attack and up aerial now connect better due to faster transition speed, and some of the Gunner's moves have been given more utility due to a reduction of lag (most notable with forward tilt), greatly increased damage, or KO potential. The second hit of down smash now acts individually for each hit instead of leading into one another, making it more useful as a traditional smash attack. Their grab game was also improved; standing grab has vastly more range, all of their throws deal more damage (especially up throw), and down throw is now much more reliable for starting combos until mid percentages. As well, a few of the universal changes are beneficial for the Gunner, with the universal frame 3 jumpsquat and reductions to landing lag giving them faster access to their air game and leaving them less vulnerable against shielded attacks, and the latter change isn't as detrimental due to their decent out of shield game.
Most of the Gunner's zoning-based special moves have been significantly buffed. Many of their strongest projectiles (such as Charge Blast, grenades from Grenade Launch, super missiles from Gunner Missile, and Stealth Burst) deal vastly increased damage or knockback, alleviating some of the Gunner's difficulty to land KOs. Special moves that haven't gained power buffs instead have improved utility: Flame Pillar is now a multi-hit move that can initiate follow-ups; Laser Blaze has no damage falloff, improving its usage in long-distanced camping; Echo Reflector reflects projectiles with more power and far higher speed; Bomb Drop has less ending lag, a longer fuse, and can be manually detonated, improving its use in stage control; and Absorbing Vortex heals for more damage in addition to having an actual hitbox, giving it situational use for combos and disrupting. The Gunner's recovery moves have also been buffed, as Lunar Launch and Cannon Jump Kick travel a longer distance, the latter now has excellent out of shield KO power, and Arm Rocket's trajectory can be altered during travel.
However, the Mii Gunner has received notable nerfs. Their powerful tilts have been slightly toned down, limiting their fastest grounded KO options. Forward aerial, previously a pinnacle of the Gunner's neutral game, had its distance reduced without compensation for landing lag. Albeit vastly buffed, some of the Gunner's specials have also seen downgrades; Grenade Launch's startup was heavily increased, and it can now only fire in one direction and trajectory, while its lowered ending lag does not compensate for its loss in utility, and Gunner Missile's homing missiles now sacrifice homing ability for speed, making them less effective.
Despite their numerous buffs, universal gameplay changes have been detrimental to the Gunner overall. The weakening of rage slightly tones down their KO power at low percentages (though in a few cases, this is compensated by their moves' standalone KO power being increased). The biggest hindrance comes from the universal increase in mobility, which hurts the Gunner more than any other character; unlike the rest of the cast, the Gunner's mobility has been reduced itself, as many of their stats are now significantly below average or even among the worst (notably their run and initial dash speeds, and their air speed), and the roster's generally faster speed favors faster-paced, more aggressive gameplay, allowing the cast to get past the Gunner's zoning tools with varying degrees of ease. This is further pronounced by the nerfs to projectiles' shield damage, as the Gunner's playstyle revolves highly around them, thus hindering the Gunner more than most other characters. The latter two changes thus force them to rely on more precise spacing to compensate for their significantly lowered movement speed and their projectiles' lower threat level.
Overall, the Mii Gunner's changes have further pronounced their caveats and flaws. Their playstyle has been repurposed into a slow-moving, hard-hitting heavyweight projectile fighter, relying on their above average staying power and their special moveset's zoning abilities to rack up damage and force opponents into making a mistake to capitalize on, similar to Samus and Simon; changes to their special moves also allow many more of their combinations to shine through. However, the Gunner's slower attributes further enforce their zoner-centric playstyle, which doesn't tend to fare as favorably as in SSB4 due to the quicker pace of Ultimate. The Gunner must also still contend with weaknesses from the previous game, predominantly a poor melee approach and their moveset's heavy ending lag, and slight difficulty in landing some of their powerful KO options. Besides, it's important to note that game updates have given other returning veterans various buffs, whereas the Gunner has received comparatively less significant changes, as well as the nerfs to projectiles' shield damage, adversely affecting them. In the end, the Gunner is a better character than they were in SSB4; they are considered the second most viable of the three Miis and perform better relative to the cast, though not at the same level as various other returning characters.
Aesthetics[edit]
 Players can customize the Mii Gunner's voice clips from 12 different voices, with 3 different pitches.
- Mii Gunners have had their body proportions adjusted.
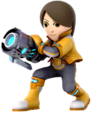
- While still based on the "Guest F" Mii, the default Mii Gunner has an altered appearance. She now has a smile on her face instead of a neutral expression, her eyebrows are angled downwards to give a confident appearance, her hair has been changed from a middle-parting style to one with a side-swept fringe, and her eyes are now brown instead of black.
- The default Mii Gunner's color is now yellow instead of orange.
- The default outfits for the Mii Gunner have significantly more detail, now being a bodysuit with a character-colored high collar jacket, grey inner shirt, gloves with white accents, and boots that appear less futuristic. The Gunner no longer wears an ammo backpack, and their arm cannon has a different appearance.
- The Mii Gunner has a new idle animation involving them standing with their arms spread, with their cannon-less arm clenched in a fist.
Attributes[edit]
 Like all characters, the Mii Gunner's jumpsquat animation takes three frames to complete (down from 6).
- As with all Mii Fighters, the Mii Gunner now has fixed attributes:
- The Mii Gunner now has a set weight of 104, on par with Captain Falcon, Link and Yoshi. This makes the Mii Gunner the heaviest Mii Fighter, and also heavier than the largest possible Mii Fighter in Smash 4. This improves their survivability.
 The Mii Gunner walks slightly slower (1.05 → 1), and is now the 53rd fastest walker (compared to 37-38th fastest in Smash 4).
- The Mii Gunner dashes slightly faster (1.3 → 1.37).
- The Mii Gunner has significantly lower air acceleration (0.07 → 0.043), now being the 60th fastest instead of 22-31rd fastest.
- The Mii Gunner has a lower air speed (1.05 → 0.93), giving them the 67th highest air speed (compared to 25th in Smash 4).
Ground attacks[edit]
- Neutral attack:
- Neutral attack's hits are now a jab with the left hand, followed by a kick, then an explosion from their arm cannon for the final hit.
- The first hit can now be held for a consecutive jab, and is repeated much faster than the previous version.
- Neutral attack's explosive hits now have less of a pause, making it connect consistently even at high percents. The first two hits can now lock.
- Neutral attack's final hit deals slightly more damage (4% → 4.5%). However, the first two hits deal less damage (2% → 1.7%), making its total damage the same.
- Forward tilt:
- All hitboxes of forward tilt deal much more damage (9/7.5/6% (close/mid/far) → 13/10.5/8%).
- Forward tilt has less startup (frame 10 → 7) and ending lag (frame 39 → 33).
- It has altered knockback on all hitboxes (30 (base)/100 (scaling) → 56/56), making it safe on hit at low percents, but weakening its KO potential.
- Up tilt:
- The clean hit has a longer duration (frame 5 → 5-7), allowing the clean hit to hit above Gunner.
- The arm sourspot has been repositioned (X offset: 1 → 3).
- Down tilt:
- The explosion hitbox has been moved further outwards (Z offset: 14 → 17), increasing the move's range and disjoint.
- Dash attack
- Dash attack deals more damage (10 → 11) with knockback scaling not fully compensated (70 → 65), dealing more knockback.
- Dash attack sends at a more horizontal angle (60 → 45) which combined with the above change enables it to KO at useful percentages.
- The inner hitboxes were moved closer towards Mii Gunner, which combined with the new Jostle mechanics removes its blindspot.
- It has an increased shieldstun multiplier (none → 1.5), making it safer on shield.
- Forward smash:
- Forward smash deals significantly more total damage (9.8% → 18.3%) and much more knockback. Previously, it was one of the weakest forward smashes in the game in terms of damage and knockback.
- Forward smash's multi-hits now send perfectly horizontally, and the outermost hitbox now pulls opponents inwards instead of up and away (angles: 80° (far)/10° (near) → 180°/0°), no longer lifting opponents off the ground and potentially allowing them to jump out. Additionally, the far hitbox, which now pulls opponents towards Mii Gunner, has slightly increased set knockback (5 → 7), making it more effective at pulling opponents back towards Mii Gunner. Finally, both the multi-hits and final hit cover a greater horizontal range (Z offset range: 9-35 (multi)/9-38 (final) → 10-37/12-40). All of these changes make the move much harder to escape early, and increase the move's total range.
- The hitboxes are positioned higher (Y offset: 6 → 7.5). While this increases the move's vertical range, it makes it more susceptible to low-profiling, especially the very narrow multi-hits.
- Up smash:
- Up smash's final hit deals more damage (6% → 7%, total damage 16.5% → 17.5%), with knockback mostly compensated (50 (base)/150 (scaling) → 53/139), dealing slightly more knockback overall.
- Up smash's multi-hit hitboxes have had their positions and knockback altered, including the addition of position vectors on certain hitboxes, which allow them to connect much more consistently.
- Down smash:
- The first hit of its down smash no longer drags opponents in behind the Mii Gunner, and both hits now act independently. This hinders the move's usability in situations it previously excelled in (such as by the ledge).
- However, due to the increased damage and knockback from each hit, the move is significantly more useful in general. Opponents can no longer DI out of the second hit as well.
- Both hits' damage have been increased, with the back hit dealing the same damage as the previous down smash's total (front hit: 4% → 11.5%, back hit: 10% → 14%).
- Down smash's second hit KOs significantly earlier due to its damage being the sum of the previous down smash's hits (KOs Mario from the edge of Final Destination at 94% → 66%).
- Down smash has had its range slightly reduced on the first hit, though it still has high range.
- Down smash has an altered animation where Gunner kneels down during the startup animation, and doesn't pirouette around as dramatically.
 Gunner's charging animation wasn't changed, and now visually does not line up with the rest of the startup animation, with Gunner suddenly snapping into her Smash 4 animation when the charge begins, before snapping back into the Ultimate animation.
Aerial attacks[edit]
- All aerials except forward aerial have reduced landing lag (Neutral: 18 → 11, Back: 18 → 11, Up: 22 → 13, Down: 28 → 17).
- Neutral aerial:
- Due to Neutral aerial's reduced landing lag, it can now lead into followups upon landing.
- Neutral aerial does more damage (6% → 10%).
- Neutral aerial has altered knockback (45 base/80 scaling → 65/40).
- Forward aerial:
- Forward aerial does more damage (6/4% (close/far) → 8/6%).
- Forward aerial starts later (frame 10 → 12).
- Forward aerial has significantly decreased range, now only traveling a fourth of Final Destination. This is done through less active frames (10-21 → 12-20). This makes it worse for spacing.
- Forward aerial's late hit launches at a much lower angle (70° → 52°) and has altered knockback (50 (base)/80 (scaling) → 60/62), dealing more knockback overall when combined with the increased damage. While these changes allow forward aerial to send opponents offstage earlier and at a better angle, this more importantly removes virtually all of late forward air's followups, due to it sending opponents much further away from Gunner.
- Back aerial:
- Back aerial now has a late hit that deals 11%, extending the move's duration slightly (9-10 → 9-10/11).
- Back aerial's clean hit deals more damage (12% → 13%).
- Back aerial's clean hit deals more knockback (30 base/88 scaling → 29/96), which, combined with its increased damage, improves its KO potential.
- Up aerial:
- Up aerial has a new animation. The Gunner now "stands" upright while performing the move, rather than laying on their back.
- The move's duration has been shortened, and the final hitbox ends earlier (frame 39 → 34, total frames: 61 → 59). This now allows the move to complete in a short hop, but makes it less effective at trapping air dodges.
- Up aerial now hits 7 times instead of 9 due to its shorter length.
- Up aerial deals more damage total due to the multi-hits dealing more damage (multi-hits: 1% → 1.7%, total damage: 13% → 14.8%).
- The multi-hits also extend further above Gunner (Y2 offset: 45 → 50), matching the extension of the final hit instead of being shorter.
- Up aerial's looping hits can now combo into other moves when landing due to its reduced landing lag.
- Up aerial's final hit deals more knockback (40 base/170 scaling → 50/175) improving its KO potential.
- Down aerial:
- Down aerial has a longer duration with a late hit as well (20 → 20-21/22-25), no longer lasting a single frame.
Throws and other attacks[edit]
- The Mii Gunner's pummel is now a knee strike, rather than an arm cannon bash.
- Pummel is much faster, but weaker (2% → 1.2%).
- The Mii Gunner's grabs all have higher ending lag (standing: frame 28 → 34, dash: 39 → 42, pivot: 34 → 37).
- Dash grab and pivot grab start slower (dash: frame 8 → 9, pivot: 9 → 10).
- Standing grab extends noticeably further forward (Z2 offset: 8.7 → 11.6), increasing its range despite being slightly narrower (radius: 3.3u → 3.2u). Dash grab also extends slightly further (Z2 offset: 10.6 → 11), slightly increasing its range.
- Pivot grab has a slightly smaller radius (3.3u → 3.2u), marginally reducing its range.
- All of the Mii Gunner's throws have been buffed, each dealing much more damage, whereas previously each only did 5%.
- Forward throw:
- Forward throw's first hit deals more damage (2% → 4%, total: 5% → 7%).
- Back throw:
- Back throw's first hit deals much more damage (2% → 7%, total: 5% → 10%).
- The first hit now deals set knockback, allowing it to reliably connect into the second hit.
- The laser is fired at a slightly lower angle (35° → 34°).
- Up throw:
- Up throw's first hit deals much more damage (2% → 7%). The Gunner now fires two lasers instead of one, and the total damage is significantly higher (total: 5% → 13%), making up throw among the most damaging throws in the game. The second shot deals no knockback however, and so does not improve the throw's KO potential and only increases the target's damage.
- Up throw's first hit now deals set knockback, improving the throw's consistency but hindering its KO potential.
- Up throw has lower ending lag (frame 59 → 51). However, it is still too slow to follow up with.
- Down throw:
- Down throw deals more damage (5% → 7%), with knockback scaling partly compensated (50 → 42).
- Down throw launches at a higher angle (100 → 95), improving its followup potential and making it less susceptible to DI.
- Down throw has less ending lag (frame 42 → 40).
- Down throw no longer inflicts hitlag on release, reducing its combo potential despite its slightly reduced ending lag.
- Edge attack deals more damage (7% → 9%).
Special moves[edit]
Neutral specials[edit]
- Charge Blast:
- The Mii Gunner no longer spins around before charging or firing a Charge Blast.
- Charge Blast can be charged and canceled with other actions while in mid-air.
- It deals more damage (3.15%-22% → 4%-26%) with knockback compensated.
- It charges faster (144 frames → 132).
- The minimum speed of the projectile is faster (1.6 → 1.8).
- Laser Blaze:
- Like Falco's lasers, Laser Blaze makes opponents flinch and can lock.
- It deals more and consistent damage (3%-4% → 5%).
- It has less startup (frame 12 → 10) and ending lag (FAF 48 → 42).
- Lasers last longer (22 frames → 24).
- However, they are slower (7 → 6), reducing their range overall.
- Consecutive shots take longer (frame 17 → 22).
- Grenade Launch:
- The Mii Gunner's arm cannon glows with a orange-tinted "fuse" while preparing a grenade.
- Grenade Launch deals much more damage (0.5% → 1.3% (hits 1-5), 6% → 6.5% (hit 6); total: 8.5% → 12.2%) with knockback not compensated.
- It has less ending lag (FAF 56 → 53).
- It can no longer be charged and launches a fixed distance. It travels further than an uncharged Smash 4 Grenade Launch, but less than a fully-charged one.
- It has significantly more startup lag (frame 18 → 35). Coupled with its fixed trajectory, this vastly reduces its flexibility for limiting approaches.
- Mii Gunner cannot turn around while charging it.
Side specials[edit]
- Flame Pillar:
- Flame Pillar hits multiple times with a stronger final hit, similar to Robin's Arcfire, making it better for pressuring shields and allowing it to set up for follow-ups, instead of only acting as a spacing tool.
- It deals more total damage (4% (hit 1), 6% (hit 2) → 2% (hit 1), 2.2% (hits 2-5), 2.7% (hit 6); total: 10% → 13.5%).
- It no longer cancels if the Mii Gunner lands before the projectile can fire.
- It has slightly more ending lag (FAF 59 → 63).
- Stealth Burst:
- The Mii Gunner no longer spins around before firing a Stealth Burst.
- It travels faster and further (Initial speed: 0.7 → 1.3, acceleration: 0.04 → 0.09).
- It no longer leaves Mii Gunner helpless.
- It deals much more damage (10.8%-15.4% → 12.1%-18%) without compensation on knockback.
- Its earliest explosion has less startup lag (frames 42-75 → 36-66).
- It explodes faster after release (8 frames → 3 frames).
- It no longer turns invisible after some travel distance.
- Gunner Missile:
- Both types of missiles have been redesigned: homing missiles are now metallic grey with short neon blue lines along the top of its body (instead of silver with a green top), and super missiles are now fatter with a futuristic rocket design and a neon blue head (instead of silver with neon blue markings going down the missile).
- Both missiles deal more damage (homing: 4.5% → 7.5%, super: 10% → 14.5%).
- It has less startup (frame 29 → 27) and ending lag (FAF 62 → 46).
- Super Missiles deal significantly more knockback, being able to KO at realistic percentages.
- The regular missiles from Gunner Missile travel faster (1.0 → 1.2), but their homing ability have been reduced. This significantly hinders their effectiveness.
- Homing missiles have a shorter duration (104 frames → 96).
Up specials[edit]
- Lunar Launch:
- Lunar Launch launches opponents opposite to where the Mii Gunner is facing. This allows it to stage spike, but makes it more difficult to edgeguard conventionally.
- It deals much more knockback, causing it to KO around 45% earlier.
- It grants much more vertical distance, making it better for recovering.
- It has one more frame of landing lag (frame 18 → 19).
- Cannon Jump Kick:
- Cannon Uppercut has been reworked into Cannon Jump Kick, which still features a launch with the Mii Gunner's arm cannon, but uses a kick instead of a punch to deal damage while firing upwards.
- It has significantly less startup lag (hits 1/2: frame 11/15 → 6/10), making it much more effective as an out of shield option.
- It grants intangibility on frames 5-7 when grounded.
- Its late second hitbox has been significantly shortened in duration, allowing the stronger clean hit to out-prioritize it more often.
- It travels slightly more vertical distance.
- It has less horizontal recovery range than Cannon Uppercut.
- Arm Rocket:
- Arm Rocket can be angled during the flight, similar to Diddy Kong's Rocketbarrel Boost.
- It has significantly less landing lag (34 frames → 14).
Down specials[edit]
- Echo Reflector:
- Echo Reflector has been redesigned. The Mii Gunner now plants their arm cannon downwards into the ground to generate a transparent green barrier with two yellow hexagons rotating around it. This does not change the effects of the move. The Mii Gunner can still turn around during the move, but this is aesthetic.
- It has less ending lag (FAF 40 → 38).
- It stalls Mii Gunner once before landing, with subsequent uses of the move forcing them to fall down.
- Bomb Drop:
- Bomb Drop's bombs are more detailed, having a slight octagonal exterior made of metal and a glowing blue interior, instead of being a simple circular shape with four metal outer reinforcements.
- It can be triggered manually by using the move again; this detonates the bomb currently in play and drops another. This allows a bomb to act as a deterrent while launching a second bomb.
- Its bombs have a much longer fuse (72 frames → 134) and are lighter, bouncing more when hitting the stage. These changes make them much better for stage control.
- It has significantly less ending lag (FAF 63 → 53).
- Its bombs can be knocked away by attacks, making it harm Mii Gunner instead.
- Absorbing Vortex:
- The vortex appears less realistic, looking less like an electric swirl of plasma and more like a cartoony bubble. The Gunner no longer sways their cannon around to generate the vortex, and simply points it up as the cannon glistens.
- Much like Ness' PSI Magnet, Absorbing Vortex has a weak hitbox upon startup, allowing for safer use of the move in general.
- The hitbox is also produced upon absorbing projectiles.
- Its healing multiplier is higher (1.2x → 1.4x).
- It has less ending lag (FAF 29 → 27).
Final Smash[edit]
- Full Blast's main laser now is green in color and the background turns blue during the Final Smash.
- It deals more damage (1.5% (loop), 4% (last) → 1.8%/5%)
- The final hit deals less knockback (65 base/180 scaling → 55/155), dealing slightly less knockback overall despite the aforementioned damage increase.
Update history[edit]
Mii Gunner has received a mixture of buffs and nerfs in balance patches, but was overall buffed. While their forward aerial auto-cancels earlier and their up smash connects more reliably, the nerfs to the shield damage of various projectiles in update 3.0.0 affect Mii Gunner more negatively than most other characters.
Starting with update 3.1.0, Mii Gunner would be given nothing but buffs. Said update and update 4.0.0 would buff their up smash, to help it connect better and stop opponents from launching out before the move was finished. Update 10.1.0 buffed their up throw to connect better. Update 11.0.0 gave their forward smash more range, removing a crippling blind spot. Update 12.0.0 provided small buffs to some of their special moves. The time to fire an additional laser from Laser Blaze was widened, Lunar Launch starts 2 frames faster, Cannon Jump Kick now has more intangibility frames after leaving the ground, and Absorbing Vortex now has 3 frames less of ending lag.
- Palutena's Guidance no longer references their ammo backpacks from Smash 4.
 Fixed a rare glitch where the Mii Gunner that used Full Blast to last stock KO an opponent off stage in stamina matches would unintentionally freeze the opponent vertical movement and animation.
- Forward aerial autocancels earlier (frame 49 → 43).
- Charge Blast deals less shield damage (0 → -2/-6.5 (uncharged/fully charged)).
- Grenade Launch deals less shield damage (0 → -0.7/-3.3 (hits 1-4/5)).
- Flame Pillar deals less shield damage (0 → -1/-1.1/-1.4 (hits 1/2-5/6)).
- Gunner Missile deals less shield damage (-1/-4.5 (Homing/Super) → -4.3/-9.5).
- Bomb Drop deals less shield damage (6 → 1/-0.5 (hit 1/2)).
- Up smash's hits connect more reliably.
- Up smash's hits have adjusted angles and position vectors, allowing them to connect more reliably.
- Certain hitboxes of up smash no longer use set weight, fixing a glitch that caused their position vector to last much longer than usual and launch opponents much farther if the move was interrupted.
- Up throw has received various adjustments that allow the move to connect more reliably:
- The throw sends at a marginally altered angle (90° → 91°) and deals marginally increased knockback (75 base/53 scaling → 76/54).
- The two shots have a larger hitbox (4.0u → 5.6u), allowing them to connect easier from the throw itself.
- Forward smash has more range towards Mii Gunner, removing a blind spot in the move.
- Changed the length of vulnerability when crumpling to be consistent with other fighters.
- The attack window to fire additional lasers from Laser Blaze has been widened.
- Lunar Launch has less startup (frame 12 → 10).
- Cannon Jump Kick has more intangibility (frame 6 → 5-7).
- Absorbing Vortex has less ending lag (FAF 10 → 7 (release), 28 → 25 (total)).
Moveset[edit]
- Mii Gunner can wall jump.
For a gallery of Mii Gunner's hitboxes, see here.
Note: All numbers are listed as base damage, without the 1v1 multiplier.
| Name | Damage | Description | ||
|---|---|---|---|---|
| Neutral attack | Jab (ジャブ) Spin Kick (スピンキック) Short Fire (ショートファイア) |
1.7% | A jab with their left hand, followed by a spin kick, and an explosion from their arm cannon. Holding the attack button will have the Gunner repeat the jab. The first two hits can lock floored opponents. The third hit consists of two hits, one from the cannon and one from the explosion; both hits easily lead into each other, unlike the version in Smash 4. Sets up tech situations at low percents. | |
| 1.8% | ||||
| 1% (cannon), 4.5% (explosion) | ||||
| Forward tilt | Spear Shot (スピアショット) | 13%(close), 10.5% (middle), 8% (far) | Fires a short range energy burst. The burst deals more damage up close. The Mii Gunner's fastest ground move, and is much faster in comparison to the version in Smash 4. However, it is also weak, as it KOs Mario on the edge of Final Destination at around 143%. As such, it is more effective as a spacing or "get-off-me" option. | |
| Up tilt | Explosive Uppercut (エクスプローシブアッパーカット) | 10% (clean), 8% (late) | Uppercuts with their arm cannon, releasing a discharge of flames. A damaging move with very fast startup (frame 5) but very high ending lag, giving it no true followups. Its vertical range covers space right above the Mii Gunner's head and half a character length beside them, making it an effective anti-air attack. The clean hit KOs Mario on Final Destination at 139%. | |
| Down tilt | Earth Fire (アースファイア) | 14% | Fires a burst of flame onto the ground in front of themselves, similarly to Samus's down tilt. Like up tilt, it is fast for its damage (frame 8) and is the Gunner's most damaging tilt, but has such high ending lag that it has no true followups. As a result, it is mostly used to punish grounded openings, in comparison to the anti-air strengths of up tilt. Despite its higher damage, it KOs slightly later than up tilt, doing so only at 141%. | |
| Dash attack | Fire Knuckle (ファイアナックル) | 11% | Performs a swinging punch with the arm cannon, blasting the enemy with flames. Grants a lot of forward momentum overall, allowing it to punish distant foes and cross up shields up close. Starts on frame 10 and has good knockback, KOing Mario from the edge of Final Destination at 115%, but it has punishable ending lag. | |
| Forward smash | Gatling Shot (ガトリングショット) | 1.7% (hits 1 - 6), 7.5% (hit 7) | Unleashes a series of energy bursts in quick succession, followed by a stronger burst. Hits opponents 7 times and has tremendous range, being one of the longest forward smashes in the game. Coupled with its very long hitbox duration, it is overall difficult to challenge, pressures shields well, and is useful for edgeguarding. It is relatively safe on shield at max distance due to its decently low ending lag. However, it is the Gunner's slowest smash attack (frame 17). | |
| Up smash | Barrage Shot (バラージュショット) | 3% (hit 1), 2.5% (hits 2 - 4), 7% (hit 5) | Releases five bursts of fire in an arc above their head, similarly to Samus's up smash. Starts on frame 11 and deals good damage. Due to the Gunner's height, it is more consistent with hitting grounded opponents compared to Samus's up smash. Like in Smash 4, opponents may fall out of the looping hits if they are at an extremely high percent, are hit by the sides of the explosion's hitboxes, or while they are standing on a platform above the Gunner. KOs Mario on Final Destination at 122%. | |
| Down smash | Combination Low Shot (コンビネーションローショット) | 11.5% (front), 14% (behind) | Fires two bursts of flame toward the ground, first in front then behind of themselves. Each flame burst has deceptively high range, though the second one has more knockback and range than the first. The first hit starts on frame 9, making it the Gunner's fastest smash attack. | |
| Neutral aerial | Cannon Swing (キャノンスイング) | 10% | Sweeps their arm cannon downward in an arc around themselves similar to Ike’s. It is the Gunner's fastest aerial (frame 8), and has a high amount of active frames alongside good coverage. At low percents (especially against super heavyweight characters), a neutral aerial on grounded opponents can lead to a neutral combo, forward tilt, dash attack, forward smash, and up smash. However, its high base knockback makes followups almost impossible at mid-percents unless it is a projectile. As a result, it is mostly an aerial "get off me" option, and is useful for landing since it has 11 frames of landing lag. | |
| Forward aerial | Aerial Shot (エアリアルショット) | 8% (close), 6% (far) | Fires a single weak energy shot projectile; the force of the shot pushes the Mii Gunner backward. The recoil of the forward aerial can be used by the Mii Gunner to do a gundash to aid in recovery or for evasion (tilting the stick backwards while shifting back from recoil allows Mii Gunner to effectively keep distance from opponents more than air dodging). Though its range was shortened from Smash 4 (it now travels 1/4 of Final Destination instead of 1/3), it has reduced ending lag, which makes it better for performing combos. If used while close to the ground (the energy projectile hitting the opponent just before the Gunner lands), the Gunner will be able to act almost immediately upon landing. | |
| Back aerial | Back Fire (バックファイア) | 13% (early), 11% (late) | Releases a burst of flames from the arm cannon behind themselves. The Gunner's most reliable aerial finisher, able to KO middleweights from centerstage at around 130%. It is also the Gunner's second fastest aerial (frame 9), though it will miss short characters if performed out of a short hop. | |
| Up aerial | Vertical Gatling Shot (バーティカルガトリングショット) | 1.7% (hits 1 - 6), 4% (hit 7) | Unleashes a series of energy bursts upwards in quick succession, followed by a stronger burst. Acts like the Gunner's forward smash aimed vertically upwards, and its vertical reach is so high it can shark through certain stages.[1] Unlike in Smash 4, it now deals less hits but more damage, and can complete in a short hop, making it less awkward to use. However, the attack still cuts off abruptly if the Gunner lands before the final shot is used. A good juggling tool and KO move if the final hit connects at height, and can limit the aerial options of opponents or force them to air dodge. Up aerial's looping hits can also combo into other moves when landing, such as into up tilt as a KO combo. | |
| Down aerial | Bottom Fire (ボトムファイア) | 10% (cannon), 15% (burst), 12% (late) | The Gunner pauses, then fires a single burst of flame below themselves. The burst itself deals more damage and is a very strong, aerial-only meteor smash. However, the meteor hitbox only lasts for two frames, with the rest of the hitbox being a weaker non-meteor smash. As a result, it is difficult to land, made even more difficult by its frame 20 startup. As such, it is often outclassed by neutral and back aerial in terms of edgeguarding potential. | |
| Grab | Grab (つかみ) | — | The Gunner reaches in front of themselves with their left hand. Although Gunner's dash and pivot grabs are average, their standing grab has great range. | |
| Pummel | Grab Kneebutt (つかみニーバット) | 1.3% | A knee strike. Average power and speed. | |
| Forward throw | Gunner Knuckle (ガンナーナックル) | 4% (punch), 3% (throw) | Punches the enemy away with the arm cannon. | |
| Back throw | Throw & Shot (スルー&ショット) | 7% (throw), 3% (energy pellet) | Tosses the opponent behind themselves, then fires a single energy pellet at the foe. It can KO at extremely high percentages, but the laser can be avoided with DI. | |
| Up throw | Throw & Upper Shot (スルー&アッパーショット) | 7% (throw), 3% (both energy pellets) | Tosses the enemy above themselves, then fires 2 energy pellets at the foe. The Gunner's most damaging throw, dealing 13%, making it among the most damaging throws in the game. It is thus useful for racking up damage, refreshing the staleness of the Gunner's other moves, and comboing at low percents. | |
| Down throw | Gunner Drop (ガンナードロップ) | 7% | Slams the enemy onto the ground, launching them upward. Can start combos into aerials till mid percents, though it quickly loses effectiveness. Unlike in SSB4, down throw is no longer completely identical in function to Marth's equivalent move. | |
| Forward roll Back roll Spot dodge Air dodge |
— | — | ||
| Techs | — | — | ||
| Floor attack (front) Floor getups (front) |
7% | The Gunner quickly fires a flame burst on either side as they stand up. | ||
| Floor attack (back) Floor getups (back) |
7% | Similar to their frontal floor attack. | ||
| Floor attack (trip) Floor getups (trip) |
5% | Shoots a blast of fire in front then behind themselves. | ||
| Edge attack Edge getups |
9% | Swings their arm cannon ahead. | ||
| Neutral special | Default | Charge Blast | 4% (uncharged), 26% (fully charged) | Charges and fires a large energy sphere. The Mii Gunner can charge the blast in midair, and charge cancel by jumping or using an air dodge. Pressing any attack button while charging will fire the sphere. It is the Gunner's strongest projectile special move, with a fully-charged shot being capable of KOing from center-stage at 105%. Uncharged versions can lock floored opponents. |
| Custom 1 | Laser Blaze | 5% | Fires spammable green energy pellets that cause flinching. Similar to Falco's Blaster, but fires at a slightly faster rate and inflicts 1.66x more damage. It does not lose strength while traveling, making it a useful damage racker. The lasers can also lock floored opponents. | |
| Custom 2 | Grenade Launch | 1.3% (hits 1 -5), 6.5% (hit 6) | After a pause, the Mii Gunner fires a grenade from their arm cannon. The grenade travels in an arc and will weakly bounce once on the ground, traveling almost half the distance of Final Destination. The grenade will explode around one second after launch, or detonate on impact with enemies, dealing multiple hits with a final launching hit. The grenade does a lot of damage if it all hits connect (12.2%) and can KO at around 138%. The Mii Gunner can maneuver in the air while preparing to fire the grenade. It is overall a useful move for covering and limiting movement options, or edgeguarding recovering opponents; coupled with its low ending lag, it can start low percent combos or constantly deter approaches. | |
| Side special | Default | Flame Pillar | 2% (hit 1), 2.2% (hits 2 - 5), 2.7% (hit 6) | Fires an energy shot diagonally down that erupts into a pillar of flame that lingers for a few moments. The pillar, similar to Robin's Arcfire, hits multiple times, with the last hit launching opponents away. If used in midair, the projectile's angle is more diagonal and travels further. The pillar will slowly drift downwards if it hits an aerial opponent, allowing it to function as an edgeguard if it hits an enemy near a ledge. It is otherwise a useful deterring tool, and can start combos from careless approaches, although it is less reliable for such a purpose compared to similar moves (like Ness' PK Fire) due to its high ending lag. Can confirm into a Charge Blast, reliably KOing opponents at 80 percent on the ledge. |
| Custom 1 | Stealth Burst | 12.1 - 18% | Fires a small shining energy shot that detonates when the button is released, similarly to Zelda's Din's Fire but only traveling straight. As the name suggests, Stealth Burst is very hard to telegraph due to how small its particle effect is, making it useful for mindgames and edgeguarding. Holding the button gives the shot more distance and power before detonating. Using it in the air will slow the Gunner's fall speed momentarily. All charge levels have KO potential, with no-charge/fully-charged Stealth Bursts KOing at around 133%/110%. However, its hitbox is rather small, especially if uncharged. | |
| Custom 2 | Gunner Missile | 7.5% (homing missile), 14.5% (super missile) | Functions like Samus's Missile: holding the button will fire a homing missile, and inputting like a smash attack fires a super missile. Each missile travels a different distance, with the homing variant traveling more than half of Final Destination, and the super variant traveling almost the stage's full length. The homing missiles have decent homing capabilities, while the super missiles speed up after an initial pause and have good KO potential, able to KO Mario at the edge of Final Destination from 120%. The super missile can combo into Charge Blast if both are fired one after another against an opponent at medium distance. Homing missiles can lock floored opponents. | |
| Up special | Default | Lunar Launch | 7% | The Gunner fires a flaming projectile beneath themselves, launching into the air from the recoil. Grants excellent vertical height but passable horizontal momentum. The projectile itself explodes on contact with solid ground and other opponents, and launches foes in the opposite direction from where the Gunner is facing. The projectile is able to KO at the edge of Final Destination from 130%. |
| Custom 1 | Cannon Jump Kick | 9% (concussive blast), 8% (kick), 6% (late) | Fires a concussive blast, then propels themselves with the arm cannon while kicking into the air. A sweetspotted concussive blast can meteor smash midair opponents. The kick itself is extremely powerful and the clean hit lasts for most of the move; coupled with it starting on frame 6 and granting intangibility on 5-7 while grounded, it is an excellent out of shield option. KOs as early as 115% onstage. However, it is extremely ineffective for recovery, as it covers the lowest vertical distance out of all the Mii Gunner's up specials. | |
| Custom 2 | Arm Rocket | 0% | Propels themselves with a stream of flames from their arm cannon. By holding the Control Stick in a direction, the Mii Gunner can travel more horizontally. During flight, tilting left or right will adjust the Mii's flight angle. Overall, the move acts like an unchargeable version of Rocketbarrel Boost but without any damaging hitboxes. It grants a similar amount of distance as Lunar Launch, though its ability to be maneuvered in curves grants it better recovery angles and makes it the best up special move the Mii Gunner has for horizontal recovery. | |
| Down special | Default | Echo Reflector | 2% (activation), 1.5× damage (reflected projectiles) | Activates an energy shield composed of two yellow hexagons that rotate around the Mii Gunner. Reflects projectiles at 1.5x their original strength. Despite its appearance, projectiles from above will also be reflected. It is similar to Fox's Reflector, however the hitbox at the beginning deals less knockback, and it does not provide brief intangibility, but in return the reflected projectiles deal an extra 0.1x damage. |
| Custom 1 | Bomb Drop | 2% (bomb), 9% (explosion) | Drops a small bomb that bounces off the ground and explodes either upon contact with an enemy, or after a set time (134 frames, or roughly 2.2 seconds). Inputting the move again causes the bomb to automatically detonate while dropping another bomb, making it difficult for opponents to approach the Gunner. It is overall a useful stage control move, as it can block opposing projectiles, trap opponents at ledges, and can even KO at around 170%. However, opponents can knock the bomb away with their own attacks, and the bomb will harm the Mii Gunner while it is knocked around. | |
| Custom 2 | Absorbing Vortex | 4% | Covers themselves with a glowing energy shield that absorbs energy projectiles and converts its damage to healing, similarly to Ness's PSI Magnet. However, unlike Ness, Absorbing Vortex does not have multiple hits, instead only having a single hit upon start-up (7 frames). Heals 1.4x the damage the Gunner would have taken. Upon activation, as well as when absorbing projectiles, any nearby opponents will take slight damage. This hitbox is capable of locking. However, the minimal hitstun of this move invalidates the combo potential. Additionally, Absorbing Vortex reduces falling speed, allowing Gunner to stall in mid air, allowing it to be used as a potential landing mixup. | |
| Final Smash | Full Blast | 1.3% (mini laser loop), 1.8% (big laser loop), 5% (final hit) | The Gunner shoots a strong laser, with two small laser cannons firing smaller lasers that circle the main laser. Can be angled during the move. The middle of the laser does slightly more damage than the mini lasers. It will deal more damage (3.1%) when the mini lasers are lined up with the big lasers as both hitboxes will hit at the same time. Similarly, the final hit will deal 10% if both the mini and big laser's final hit land. | |
Stats[edit]
| Stats | Weight | Dash speed | Walk speed | Traction | Air friction | Air speed | Air acceleration | Gravity | Falling speed | Jumpsquat | Jump height | Double jump height |
|---|---|---|---|---|---|---|---|---|---|---|---|---|
| Value | 104 | 1.63 – Initial dash 1.37 – Run |
1 | 0.076 | 0.012 | 0.93 | 0.01 – Base 0.043 – Additional |
0.098 | 1.45 – Base 2.32 – Fast fall |
3 | 30.9 - Base 14.6 - Short hop |
32.3 |
Announcer call[edit]

English/Japanese/Chinese
On-screen appearance[edit]
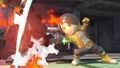
- Emerges from a burst of electricity, then points their arm cannon to the left side of the screen.
Mii Gunner's on-screen appearance

Taunts[edit]
- Up taunt: Using their free hand to hold the arm cannon, they aim it towards the left side of the screen, slightly kneeling down in a "readying" pose. They then proceed to aim to the right, with the arm cannon slightly angled higher. Each time the Gunner points their arm cannon, it makes a clicking noise while emitting a brief flash from the tip. No matter what direction the Gunner faces, they always aim in the same direction. Unlike in Smash 4, the Mii Gunner now shows an angry expression instead of a neutral one.
- Side taunt: They raise their arm cannon in an upward position and cock it while facing forward. A brief flash is emitted from the tip of the arm cannon.
- Down taunt: While kneeling, they thrust their arm cannon onto the ground and proceed to release small bursts of fire.
Mii Gunner's up taunt.
Mii Gunner's side taunt.
Mii Gunner's down taunt.


Idle poses[edit]
- Briefly examines their arm cannon.
- Points their arm cannon to their right, then glances to their left cautiously.
Mii Gunner's first idle pose.

Mii Gunner's second idle pose.


Crowd cheer[edit]
| Cheer (English) | Cheer (Japanese/Chinese) | Cheer (Italian) | Cheer (Dutch) | Cheer (French) | |
|---|---|---|---|---|---|
| Cheer | |||||
| Description | Mii! | Mii! Mii! Mii Mii Mii! | Mi - i! Mi - i! *clap 4 times* | Mii Mii! Een twee drie! | Mii Mii Mii! |
| Cheer (German) | Cheer (Spanish) | Cheer (Russian) | Cheer (Korean) | |
|---|---|---|---|---|
| Cheer | ||||
| Description | Mii Mii Mii! | Mii! Mii! Rah - Rah - Rah! | Mii! -- Mii! -- Mii! | Mii! Mii! Mii Mii Mii! |
Victory poses[edit]
- Left: Rolls in from offscreen, then fires their arm cannon left and right before spinning and firing one final shot.
- Up: Performs their up smash, a cannon shot in front, then a barrage of shots similar to their forward smash.
- Right: Swings arm cannon around twice before firing it while pointing it ahead, simultaneously emitting a burst of flame. Appears similar to the Mii Gunner's neutral attack in Smash 4.


In competitive play[edit]
Most historically significant players[edit]
See also: Category:Mii Gunner players (SSBU)
 Capitancito - The greatest Mii Gunner player of all time and the only who has ranked in the top 100 on a full-year ranking, ranking 70th on the LumiRank 2023. He is best known for his performance at Low Tide City 2023, where he finished 2nd after defeating Maister, ApolloKage, and Skyjay, considered the greatest Mii Gunner performance in Ultimate. In addition, he finished 9th at LVL UP EXPO 2023, the first single-digit major performance from a Mii Gunner player, and finished 17th at LVL UP EXPO 2025 after defeating Tweek. He is Sonix's training partner, and as such has defeated him at several ranked events as well.
 CLAW - A Mii Gunner and Mii Brawler co-main who is considered the best Mii Gunner player in Japan. He is known for defeating Raru's Donkey Kong and Luigi at DSW Champions Cup 2, as well as Umeki at Kagaribi 11. In addition, he finished 33rd at several large Japanese events, including the supermajors UltCore Fourth, Sumabato SP 55, and KOWLOON 15 with Sumabato 15th anniversary, while at smaller events he notably finished 7th at ITSUKUSHIMA 5.
 Lammers44 - One of the best Mii Gunner players in North America, and the best in the United States in the post-pandemic metagame. He is the highest-ranking Mii Gunner player, ranking 57th on the half-year panel ranking UltRank Delta 2025, while ranking among the top 150 on the full-year ranking. He has especially excelled at LumiRank B and C tier events, notably finishing 3rd at Major's Mansion, 4th at Ultimate Apex Series Finale, and 7th at Most Wanted 3. He has defeated players such as Kiyarash and Big D at these events, in addition to NorCal's two best players — Kurama and Lui$ — at other ranked events. At larger events, he was the first Mii Gunner player to place top 8 at a major/supermajor, doing so at Port Priority 9 after defeating players such as Asimo and SHADIC.
Tier placement and history[edit]
Much like the other Mii Fighters, the Mii Gunner was perceived lukewarmly on release due to the improvements to their movesets. While the severe nerfs to their mobility were noted, along with the loss of their more infamous camping tools (most notably a shorter forward aerial, weaker Gunner Missiles, and the nerfs to Grenade Launch), the buffs to their other moves more than made up for it, as it improved the majority of attacks that were lackluster in Smash 4 (such as their forward smash, their up aerial, and their throws). Overall, they were considered a relatively average "zoner"-type character. Despite this, the Gunner was one of the least used characters in competitive play in the early metagame; both the Mii Gunner and Mii Brawler were overshadowed by the extremely positive perception of the Mii Swordfighter, who took in most of the Mii Fighter's representation overall.
As the metagame progressed, Mii Gunner started to see brief yet limited success from players such as Deon and Tsumusuto. The Gunner received even more success following the end of the online era thanks to the efforts of Capitancito, who had taken sets from several top players and consistently placed highly at regional-level tournaments. Despite these results, professionals still agree that the Mii Gunner is significantly outclassed by other zoners with similar playstyles, such as Samus. Overall, Mii Gunner has kept a relatively consistent ranking on the tier list: they have ranked 61st on the first tier list, 58th place on the second, and 59th on the third.
Appearances in Classic Mode routes[edit]
Like the other Mii Fighters, Mii Gunner cannot be used in Classic Mode. However, they can appear as opponents in other fighters' Classic Mode routes, with them being listed below:
Role in World of Light[edit]

Although the Mii Gunner is absent from the World of Light opening cutscene, they were vaporized and later imprisoned alongside the rest of the fighters (except for Kirby) when Galeem unleashed his beams of light.
In the mode itself, the default Mii Gunner can be found on the island that leads to the Forest Hill.
Defeating Mii Gunner automatically adds the default Mii Gunner under the name Mii with a default 1111 moveset to the list of Mii Fighters for all modes where Mii Fighters are usable. This Mii cannot be restored if deleted.
Fighter Battle[edit]
| No. | Image | Name | Type | Power | Stage | Music |
|---|---|---|---|---|---|---|
| 53 | |
Mii Gunner | 7,500 | Tortimer Island | Final Destination - Super Smash Bros. for 3DS / Wii U |
Spirit[edit]
Mii Gunner's fighter spirit is available periodically for purchase in the shop for 300 Gold, but only if the player has a Mii Gunner. Unlocking Mii Gunner in World of Light allows the player to preview the first spirit below in the Spirit List under the name "???". As a fighter spirit, it cannot be used in Spirit Battles and is purely aesthetic. Unlike most fighters, the spirit for the Mii Gunner only uses the default Gunner's artwork from Ultimate.
1,092. Mii Gunner

In Spirit Battles[edit]
Conditions in italic aren't listed on the Spirit Battle preview screen.
As the main opponent[edit]
| Spirit | Battle parameters | Inspiration | |||||||||
|---|---|---|---|---|---|---|---|---|---|---|---|
| No. | Image | Name | Series | Enemy Fighter(s) | Type | Power | Stage | Rules | Conditions | Music | Character |
| 1,140 | Sukapon | Joy Mech Fight | •Mii Gunner |
13,700 | Coliseum | •Attack Power ↑ •Assist Trophy Enemies (Sukapon) |
•Stamina battle •Hostile assist trophies will appear •The enemy has increased attack power after a little while |
Clu Clu Land | Dr. Little Emon | ||
| 1,160 | Ray Mk II | Custom Robo Series | •Mii Gunner |
3,600 | Pokémon Stadium 2 (hazards off) | N/A | •The enemy's ranged weapons have increased power •The enemy favors special moves •The enemy starts the battle with a Rocket Belt |
Marionation Gear | Ray Mk III | ||
| 1,164 | Saki Amamiya | Sin & Punishment Series | •Mii Gunner |
9,200 | Moray Towers (Battlefield form) | N/A | •The enemy's ranged weapons have increased power | Opening Stage | |||
| 1,206 |  |
Chibi-Robo | Chibi-Robo! Series | •Tiny Mii Gunner |
3,500 | Living Room | •Sudden Damage •Assist Trophy Enemies (Nintendog) |
•The enemy's energy attacks have increased power •Hostile assist trophies will appear after a little while •The enemy takes serious damage after a little while |
Noisy Notebook | ||
| 1,299 | Partner Eevee | Pokémon Series | •Mii Gunner |
8,000 | Pokémon Stadium | •Attack Power ↑ •Defense ↑ •Item: Poké Ball |
•The enemy has increased defense •The enemy has increased attack power •Only certain Pokémon will emerge from Poké Balls (Eevee) |
Road to Viridian City - Pokémon Red / Pokémon Blue | Elaine | ||
| 1,347 | Radiant Gleam | DAEMON X MACHINA | •Giant Mii Gunner |
3,800 | Shadow Moses Island (Battlefield form) | •Assist Trophy Enemies (Moon) •Item: Exploding Types |
•Stamina battle •Hostile assist trophies will appear •The enemy starts the battle with a Killing Edge |
Main Theme - METAL GEAR SOLID PEACE WALKER | |||
| 1,398 | Cuphead | Cuphead | •Mega Man •Giant Peach Team |
9,400 | New Pork City (Ω form) | N/A | •Defeat the main fighter to win •The enemy's ranged weapons have increased power •Stamina battle |
Final Results - Wii Party U | |||
| •Mii Gunner •Giant Peach Team |
Floral Fury[SB 1] | ||||||||||
| 1,399 |  |
Mugman | Cuphead | •Mega Man |
9,400 | Garden of Hope (hazards off) | •Sudden Final Smash •Item: Screw Attack |
•The enemy will suddenly have a Final Smash after a little while •The enemy favors neutral specials •The enemy has increased attack power |
Clu Clu Land | Mugman and Cuphead | |
| •Mii Gunner •Mii Gunner |
Floral Fury[SB 1] | ||||||||||
| 1,441 |  |
Barret | FINAL FANTASY Series | •Mii Gunner •Mii Brawler |
3,500 | Midgar (hazards off) | •Item: Exploding Types | •Stamina battle •Reinforcements will appear after an enemy is KO'd •The enemy starts the battle with a Bob-omb |
Opening - Bombing Mission | ||
| •Mii Gunner •Mii Brawler | |||||||||||
As a minion[edit]
| Spirit | Battle parameters | Inspiration | |||||||||
|---|---|---|---|---|---|---|---|---|---|---|---|
| No. | Image | Name | Series | Enemy Fighter(s) | Type | Power | Stage | Rules | Conditions | Music | Character |
| 43 |  |
Shy Guy | Super Mario Series | •Mii Brawler •Tail Mii Gunner •Mii Swordfighter |
1,500 | Mushroom Kingdom II (Battlefield form) | •Item: Throwing Types | •The enemy favors neutral specials •The enemy is easily distracted by items |
Ground Theme - Super Mario Bros. 2 | Fly Guy | |
| 971 | Poppi α | Xenoblade Chronicles Series | •Zero Suit Samus •Daisy •Mii Gunner |
3,800 | Midgar (hazards off) | •Assist Trophy Enemies (Jeff) | •Hostile assist trophies will appear after a little while •Reinforcements will appear after an enemy is KO'd •The enemy starts the battle with a Beam Sword |
Still, Move Forward! | Poppi α | ||
| 1,079 | Sebastian Tute | Wii Music | •Mii Swordfighter •Mii Gunner •Mii Brawler |
8,900 | Tomodachi Life (Battlefield form) | N/A | •Defeat the main fighter to win •Only certain Pokémon will emerge from Poké Balls (Meloetta) •Reinforcements will appear during the battle |
Final Results - Wii Party U | Susie Tute | ||
| 1,080 | Party Phil | Wii Party Series | •Mii Brawler •Mii Swordfighter •Mii Gunner |
8,800 | WarioWare, Inc. (Battlefield form) | •Bob-omb Festival | •Bob-ombs will rain from the sky •Explosion attacks aren't as effective against the enemy |
Final Results - Wii Party U | Mii | ||
| 1,084 | Coraline | StreetPass Mii Plaza Series | •Isabelle •Mii Gunner |
1,800 | Wuhu Island (Speedboat) | N/A | •The enemy favors side specials | Mii Plaza | Mii | ||
| 1,094 |  |
Smash Ball | Super Smash Bros. Series | •Mii Brawler •Mii Gunner •Mii Swordfighter |
9,600 | Final Destination (Battlefield form) | •Sudden Final Smash •Item: Food |
•Survive until the timer runs out (1:30) •The enemy will suddenly have a Final Smash •You'll get a Final Smash |
Final Destination | Mii Gunner | |
| 1,165 | Isa Jo | Sin & Punishment Series | •Shulk •Mii Gunner |
3,600 | Midgar (hazards off) | N/A | •The enemy starts the battle with a Ray Gun •The enemy starts the battle with a Rocket Belt |
Opening Stage | Saki Amamiya | ||
| 1,260 |  |
Nikki | Swapnote Series Nintendo Letter Box Series |
•Mii Brawler •Mii Gunner •Mii Swordfighter |
8,900 | PictoChat 2 (Ω form) | •Assist Trophy Enemies (Nikki) | •Hostile assist trophies will appear | Mii Plaza | Nikki (Gunner) | |
| 1,310 | Ryuji Sakamoto | Persona Series | •Captain Falcon •Giant Mii Gunner |
4,800 | Luigi's Mansion (Battlefield form) | N/A | •Defeat the main fighter to win •The enemy starts the battle with a Home-Run Bat |
Last Surprise | Captain Kidd | ||
| 1,320 | Toy-Con VR Goggles | Nintendo Labo Series | •R.O.B. •Mii Gunner •Mii Gunner |
3,800 | Gamer (Single building layout) | •Assist Trophy Enemies (Yuri Kozukata) •Item: Dragoon Parts |
•Hostile assist trophies will appear after a little while | Garage | Neon Red & Blue Joy-Con controllers | ||
| 1,448 |  |
The Turks & Rufus Shinra | FINAL FANTASY Series | •Robin •Mii Gunner •Mii Brawler •Mii Swordfighter |
7,700 | Fourside (Battlefield form) | •Item: Exploding Types | •Reinforcements will appear after an enemy is KO'd •Reinforcements will appear during the battle •The enemy starts the battle with a Steel Diver |
Those Who Fight (AC Version) | Elena and Tseng | |
| 1,479 |  |
Kuma & Panda | Tekken Series | •Mii Brawler •Mii Gunner |
1,900 | Gaur Plain (Battlefield form) | •Uncontrollable Speed | •The enemy is very fast and can't stop quickly after a little while •Reinforcements will appear during the battle |
Yodeling in Meadow Hill | Panda | |
| 1,480 | Nina Williams | Tekken Series | •Zero Suit Samus •Mii Gunner |
3,700 | Shadow Moses Island (hazards off) | N/A | •Defeat the main fighter to win •Reinforcements will appear during the battle |
Karma | Tekken Force | ||
| 1,482 | Ling Xiaoyu | Tekken Series | •Mii Brawler •Mii Gunner |
3,800 | New Pork City (Battlefield form) | N/A | •Defeat the main fighter to win •Stamina battle •Reinforcements will appear during the battle |
Moonsiders 1st | Panda | ||
Alternate costumes[edit]
Gallery[edit]
Mii Gunner in Mii Fighters' fighter card.
Mii Gunner's unlock notice when obtaining them in World of Light.
Mii Gunner taunting on Battlefield.
Mii Gunner striking Luigi with her jab on Wrecking Crew.
Mii Gunner shielding on Mario Circuit.


Fighter Showcase Video[edit]
Trivia[edit]
- From September 1st to September 7th, 2019, Google search results for the Mii Gunner had risen to an all-time high, presumably because of the September 2019 Nintendo Direct and the accompanying announcement of the Sans costume for the Mii Gunner.[2]
- Out of all the Mii Fighters' special moves, Arm Rocket is the only one that does not deal damage.
- Despite no longer wearing the ammo backpacks, the Palutena's Guidance conversation about Mii Gunner still referenced them before patch 1.2.0.
- Mii Gunner is one of five characters whose unlocking battle in World of Light is not on either Final Destination or an Ω form stage. The other four are Peach, Daisy, Toon Link, and King K. Rool.
- The Mii Gunner is the only Mii that does not possess a counterattack, instead having a reflector.
- The Mii Gunner's pose on the panoramic artwork resembles them charging up the projectile that comes out of their forward aerial.
- In World of Light, Mii Gunner is one of the few fighters who is not affiliated with Dharkon in any way, as all of their encounters as themselves or as a puppet fighter are all associated with Galeem. Toon Link, Ness, Roy, Olimar, Wii Fit Trainer, Little Mac, Squirtle, Ivysaur, and Pokémon Trainer all share this distinction as well.
References[edit]