Mii Brawler (SSBU)
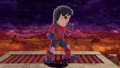
| Mii Brawler in Super Smash Bros. Ultimate | |
|---|---|
 
| |
| Universe | Super Smash Bros. |
| Other playable appearance | in SSB4 |
| Availability | Custom |
| Final Smash | Omega Blitz |
| Tier | A (25) |
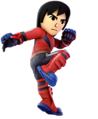
The Mii Brawler (Mii格闘タイプ, Mii Hand-to-Hand Fighting Type) is a playable character in Super Smash Bros. Ultimate. He was confirmed as a playable character on June 12th, 2018 along with the other Mii Fighter types, the Swordfighter, and the Gunner. Mii Brawler is classified as Fighter #51.
As with the other Mii Fighter types, the Mii Brawler has 12 voice options, provided by Yūji Kishi, Takashi Ōhara, Ryōtarō Okiayu, Michihiko Hagi, Hideo Ishikawa, Kiyoyuki Yanada, Umeka Shōji, Ayumi Fujimura, Makiko Ōmoto, Minami Takayama, and Kimiko Saitō.
The Mii Brawler is currently ranked 25th out of 82 on the Ultimate tier list, placing him in the middle of the A tier, making him the highest-ranking Mii Fighter in the game. This is a drastic improvement from his Super Smash Bros. 4 iteration, where he was ranked 55th out of 57 on the game's third tier list before ultimately going unranked on the fourth one. This also makes Ultimate's Mii Brawler the highest ranked Mii Fighter in the series. Mii Brawler possesses high mobility and fast frame data, allowing him to have a strong combo game that can lead into a KO, especially on stages with platforms or short ceilings. Additionally, Custom Moves allow for an extra degree of adaptability and are commonly allowed in tournament play, with some options having very effective strengths, such as Suplex (an extremely damaging command grab) and all three up special moves (Soaring Axe Kick is a surprisingly disjointed and effective out of shield option with a powerful meteor smash, Helicopter Kick has potent combo and KO potential at the sides of a stage, and Thrust Uppercut can net early KOs through platform combos). Overall, this gives the Brawler an effective rushdown combo playstyle.
However, not all of his weaknesses can be mitigated by his specials. Mii Brawler has exceptionally poor range, with only two of his moves (Shot Put and Burning Dropkick) having decent area coverage. His range lacks even compared to other close-range fighters like Pikachu or Wolf, and his combo ability starts falling off at higher percents, making it difficult to close off stocks due to his lack of reliable high-percent Kill confirms. His fast fallspeed limits his edgeguarding, and also leaves him prone to long combos like Fox, and his weight is the lightest out of the Mii Fighters, giving the Brawler the lowest survivability. Finally, his recovery, while customizable and varied, can be rather lacking, as most of his recovery moves grant average distance apart from a few options, such as Feint Jump, and his aforementioned fast falling speed further compounds this issue.
Overall, Mii Brawler is widely considered a well-rounded, close-range fighter with useful tools to deal with any situation. While his representation in the early metagame was very minimal (at one point being tied with Corrin for the worst), numerous buffs have significantly boosted Mii Brawler’s standing in the meta, with players like Rizeasu, KID and Lunamado all being successful, and he is widely considered to be the best of the 3 Mii Fighters.
Attributes[edit]
Being the "up close and personal" Mii Fighter, the Brawler now possesses a good walking/dashing speed (tied with Toon Link and Mewtwo for walk speed and the 25th fastest dash speed) and the ability to wall jump in exchange for now being a middleweight fighter (sharing the same weight as Inkling, Ness, and Lucas) with a fast falling speed, an above-average air speed, and an average air acceleration. As a Mii Fighter, his specials are determinant on the player's choice. Like the other two Mii Fighters, he has access to 12 different specials: Shot Put, Flashing Mach Punch, and Exploding Side Kick for neutral special; Onslaught, Burning Dropkick, and Suplex for side special; Soaring Axe Kick, Helicopter Kick, and Thrust Uppercut for up special; and Head-On Assault, Feint Jump, and Counter Throw for down special.
As with other Mii Fighters, one of the strengths of the Mii Brawler is his diverse set of special moves. Many of his specials help rack up damage, improve his recovery, or possess fantastic KO power. Shot Put is a fantastic tool for edgeguarding due to its arc and strong knockback. Moves such as Burning Dropkick and Feint Jump both aid the Brawler's recovery, providing decent horizontal distance. Suplex serves as a potent mindgame special, as well as an excellent way of racking up damage, dealing about 20% for each successful Suplex landed, even when stale.
Accompanying his varying specials, the Mii Brawler is a fairly nimble fighter with great combo potential. His walking and dashing speeds are above average, and many of his normal attacks have relatively low start-up and ending lag. All of his tilts and aerials (with the exception of down aerial) come out fairly quickly and are safe on shield when properly spaced or timed. Up tilt can lead to airdodge chases at very low percentages and chain into itself at low-mid percentages, while down tilt can combo into the forward aerial and neutral aerial at low percentages and other aerials/special moves at higher percentages. Neutral aerial is an excellent sex kick that boasts a wide range of utility due to its speed and extremely low landing lag, making it a very useful tool for edgeguarding, initiating, continuing, and breaking combos, and approaching. Forward tilt serves as a decent spacing tool due to its no longer having a sour spot and its ability to be angled, while down tilt is a very good combo initiator, capable of comboing into a variety of moves. Dash attack comes out very quickly and stays active for a long time while covering a large distance, making it extremely effective for whiff punishing or catching landing opponents. Additionally, Mii Brawler has a plethora of moves that have high KO potential. Forward smash deals extremely high knockback and can KO at low-mid percentages, and additionally can be confirmed out of a landing neutral air at mid percentages. The initial hit of the up smash is a potent finisher that has very low start-up. Many of his specials can secure early KOs as well, especially Thrust Uppercut and Helicopter Kick. Exploding Side Kick is as strong as Falcon Punch and is safe on shield; Head-On Assault, Suplex, and Soaring Axe Kick can perform sacrificial KOs at low percentages (the first of which also breaks shields); and Counter Throw is among the strongest counters in the game.
In addition to his normals, all of Mii Brawler's throws, except for back throw, serve a purpose beyond positioning. Down throw is the Brawler's strongest throw in most situations, as it confirms into almost any aerial until high percentages, at which point it can be used to confirm into Helicopter Kick or Thrust Uppercut. At extremely high percents (190%+), it will begin to KO opponents off the top of stages with lower-ceiling blast zones. Forward throw also serves as a kill throw, capable of KOing opponents at high yet reasonable percents near ledges, where they may be expecting another KO move like back aerial or up smash, adding to the Brawler's corner pressure. Lastly, while up throw does not KO or combo, it does the most damage of any of Mii Brawler's throws at 11% (13.8% in 1v1s), making it a useful tool for simultaneously dealing a large amount of damage and setting the opponent up for juggling.
Additionally, Mii Brawler has a plethora of excellent defensive tools. Neutral aerial serves as a quick out of shield option with its 6-frame start-up, factoring in the initial jump squat frames. Up smash hits on frame 8 and has Mii Brawler's legs intangible for the first half of its active frames, making it a great anti-air option. Finally, all of Mii Brawler's up specials also serve as great out-of-shield options, with Soaring Axe Kick having excellent range to punish disjointed attacks and retreating aerials, Helicopter Kick coming out as fast as up smash while being reversable, and Thrust Uppercut being Mii Brawler's fastest OOS option at frame 3, allowing it act both as a punish to some of the game's safest moves and a pre-emptive anti-air against landing aerials and jumping opponents.
In terms of recovery, Mii Brawler has some good options. Soaring Axe Kick has great height but suffers horizontally. Burning Dropkick, Helicopter Kick, and Feint Jump provide better horizontal recovery. Feint Jump, much like Zero Suit Samus's Flip Jump, is a good tool that can both mix up and extend Mii Brawler's otherwise lackluster recovery, as well as aid in escaping juggles thanks to its frame 2 invincibility, a frame faster than his airdodge. It can also be used to cancel one's momentum in order to survive at slightly higher percentages. However, if Mii Brawler is hit out of Feint Jump, he will be unable to use it again until he grabs a ledge or lands on stage. Burning Dropkick can be used multiple times, and its decent travel distance can be further improved by B-reversing it in the air. Helicopter Kick travels at a low angle, giving it excellent horizontal recovery potential but weak height. Thrust Uppercut is a fast recovery option, but is perhaps the most restrictive up special Mii Brawler has for recovery.
However, Mii Brawler does not come without his own flaws. In exchange for his decent mobility and speed, his middleweight status does not grant him high survivability. This is further exacerbated by his fast-falling speed and susceptibility to combos. Furthermore, the Mii Brawler lacks tools to force approaches, and has to make hard commitments with moves such as neutral air or dash attack when approaching due to a lack of safe options.
Another issue with the Mii Brawler is a lack of reliable Kill confirms at high percents. At those percentages, many of Mii Brawler's combo setups stop confirming. Many of his KO options are flawed, being extremely laggy (such as forward smash and Onslaught) or having poor range (Down Smash and Up Smash). What few confirming moves Mii Brawler does have at these percentages in landing up aerial or neutral aerial can cause the Brawler to become predictable. Because of this, he must rely on back aerial, out-of-shield options, hard reads, and tech-chasing to secure stocks without assistance from confirms.
Overall, the Mii Brawler is a jack-of-all-trades amalgamation of all hand-to-hand-based fighters. The ability to mix and match several different special moves adds a unique layer of versatility by allowing several different playstyles and game plans for the same basic fighter, making Mii Brawler among the most unpredictable to fight against. Depending on circumstances, the moveset of Mii Brawler can be updated to better combat an opponent, such as using Helicopter Kick for heavier opponents or Soaring Axe Kick versus characters with disjoints. However, all of the customizable special moves have a flaw to prevent them from being overpowered and/or are an inferior version of a similar move other fighters possess, such as Feint Jump to Flip Jump or Head-On Assault to Bowser Bomb. The Brawler's very good frame data, above-average mobility, and a variety of moves that can combo, juggle, and secure KOs are held back by his poor range and limited off-stage presence due to his fast fall speed. While his strengths do overshadow his weaknesses, many players have considered the Mii Brawler to be generally inferior to characters who have a similar fighting archetype, such as Mario and Squirtle.
Changes from Super Smash Bros. 4[edit]
The Mii Brawler has been the most extensively modified of the Mii Fighters. With his height and weight now being fixed, the Mii Brawler now has set attributes, now being a middleweight fast faller with high mobility and effective close combat abilities, making his playstyle along the lines of other combo-oriented "footsies" fighters like Little Mac or Squirtle. The Brawler is also the Mii whose custom moves have been the most extensively modified. As a result of his moveset overhaul, the Mii Brawler has received a large mix of buffs and nerfs in the transition from SSB4 to Ultimate; while he was initially believed to have not been buffed enough to raise his standing on release, game updates would provide substantial buffs for the Brawler, and the changes to game mechanics have been mostly positive for him. Overall, the Mii Brawler was considerably buffed in the transition to Ultimate.
In terms of move changes, aside from some animation changes that set his moves apart from other characters, the Brawler's standard moveset has been noticeably improved. His moves' functionality has not been significantly altered, with quality-of-life changes like forward tilt losing its sourspot, forward aerial being faster, and moves such as his smash attacks and back aerial seeing moderate to high increases in knockback. Similarly to the other Mii Fighters, the Brawler's default special moves have been buffed significantly: Shot Put has less endlag and sends at a lower angle that makes it more useful, Onslaught has increased KO potential overall, Soaring Axe Kick covers slightly more distance and the descending part now has to be manually inputted, and Head-On Assault can now KO and deals increased shield damage. These changes give him a larger abundance of powerful moveset choices, fixing one of the Brawler's former weaknesses and allowing the Brawler to function just as effectively without altered custom moves.
In addition, the Brawler is the Mii Fighter to have the biggest access to entirely new special moves, as each directional input (neutral, side, up, down) has a new special move that replaces another: Ultimate Uppercut was replaced by Flashing Mach Punch, a powerful multi-hit move that renders the Brawler invincible should the move connect; Headache Maker was replaced by Suplex, a damaging command grab; Piston Punch was replaced by Thrust Uppercut, a variant with more recovery potential and combo ability but less KO power; and Foot Flurry was replaced by Counter Throw, a unique counterattack with short counter frames, but low cooldown and a retaliating hit in the form of a command grab. Each of these moves now gives the Brawler a new option to handle several different situations.
The Brawler also benefits significantly from some of the universal changes to the gameplay mechanics. The universally increased mobility has notably improved the Brawler's grounded mobility, as it grants him a more respectable initial dash, as well as his ground-to-air and air-to-ground mobility due to his faster falling speed and gravity. The ability to perform any grounded attack out of a run and the universally lower landing lag also alleviate his notoriously poor grounded approach. These three changes have collectively improved the Brawler's neutral game, which was a major weakness he had in SSB4. The changes to air dodges also allow the Brawler to catch opponents with more ease and potentially juggle them for a longer time, which is further compounded by the Brawler's improved mobility.
However, the Mii Brawler has also received some noteworthy nerfs. The Brawler's set attributes are a double-edged sword, as his lower weight, slower air speed, and higher falling speed and gravity make him easier to combo and KO and render his aerial mobility more polarized, while also removing his neutral and forward aerials' ability to autocancel from a short hop. Additionally, some of the Brawler's best moves have been nerfed: down throw's higher knockback scaling limits follow-ups after mid percents despite the Brawler's streamlined jumpsquat, vastly reducing the KO power of his combo strings, save for Thrust Uppercut. The Brawler's best follow-up options from down throw also have weaker KO potential, since Helicopter Kick has lowered knockback, and Thrust Uppercut's knockback is lower compared to Piston Punch. As a result, the Brawler must now use his tilts and aerial attacks to combo.
Despite Soaring Axe Kick's vastly improved utility and distance, some of the Brawler's other recovery choices have been nerfed in distance, making the Brawler's recovery less reliable than before: Onslaught travels a reduced distance if performed in the air, Burning Dropkick now has a fixed distance and cannot be charged (which also reduces its utility) and Feint Jump travels at a more downward angle, which when combined with the Brawler's increased fall speed and gravity gives the move less distance. The changes to the Brawler's special moves have also removed two of the Brawler's approach options, as the loss of Ultimate Uppercut removes a super armor option in exchange for invincibility when Flashing Mach Punch connects, and the loss of Foot Flurry removes one of his only approaching attacks in exchange for a counterattack in Counter Throw (though due to the Brawler's improved mobility, the loss of these two moves is overall alleviated). Finally, some of the changes to gameplay mechanics adversely affect the Brawler as well. The removal of perfect pivoting removes a useful microspacing tactic, while the changes to air dodges, while improving the Brawler's juggling and edgeguarding ability, also make him easier to edgeguard.
In the end, the changes to the Mii Brawler's moveset have improved his moveset overall and allow more of his special moves to shine due to their new utility, allowing the Brawler to more reliably adapt to a combo-based hit-and-run playstyle, though at the cost of weaker down throw combos and his strongest special moves being put in line with the rest. Of note is that the Brawler still retains some of his former weaknesses from SSB4 despite them being toned down, such as a polarized neutral game due to his poor range and only passable projectile, trouble at landing his most powerful KO options, and a vulnerable recovery. Game updates, however, have provided the Brawler with some notable buffs, compensating for some of his initial nerfs and significantly improving his options in the neutral game. As a result, the Brawler has vastly improved from his appearance in SSB4, and he is widely considered to be the most effective out of the three Miis.
Aesthetics[edit]
 Mii Brawler's name on UIs is now said Mii Brawler across all English and Asian versions of the game, rather than Mii Fighter in the Japanese version.
- Players can customize the Mii Brawler's voice clips from 12 different voices, with 3 different pitches.
- Mii Brawlers have had their body proportions adjusted: they are now much more realistic, compared to the more cartoony proportions they had in Smash 4.
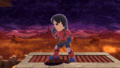
- While still based on the "Guest C" Mii, the default Mii Brawler has an altered appearance. He has slightly darker skin (which is closer to the skin tone of "Guest C"), his hair is longer, and he has a different mouth and eyebrows, giving him a more stern expression instead of a neutral one as he did in Smash 4.
- The default outfit for the Mii Brawler has significantly more detail. They now have a stylized character-colored shirt, blue soles and toes on their boots, black arm-length gloves instead of yellow wrist-length gloves, and extra padding on their forearms, knees, and shins.
Attributes[edit]
 Like all characters, the Mii Brawler's jumpsquat animation takes three frames to complete (down from 5).
- As with the other Mii Fighter types, the Mii Brawler now has fixed attributes:
- Mii Brawler walks faster (1.15 → 1.26).
- Mii Brawler dashes faster (1.72 → 1.92).
- Mii Brawler's initial dash is much faster (1.6 → 1.97).
- Mii Brawler's traction is significantly higher (0.045 → 0.12).
 Mii Brawler has a slower air speed (1.2 → 1.15).
- Mii Brawler falls much faster (1.7 → 1.92). This slightly improves their vertical mobility, but makes them more vulnerable to combos.
- The Mii Brawler's gravity is much higher (0.1 → 0.192). This lets the Brawler reach their maximum falling speed faster, improving their mobility, but reduces their jump height and makes them much more susceptible to combos and meteor smashes.
- The Mii Brawler now has a set weight of 94, down from 100 in Smash 4. This makes their weight on par with Ness, Lucas and Inkling, and makes them the lightest Mii Fighter. The Mii Brawler is now lighter than the lightest possible Mii in Smash 4, hindering their survivability, while still being more vulnerable to combos due to their faster falling speed and gravity.
- Due to their higher falling speed and gravity, the Mii Brawler's short hop and full jump last for a shorter time (short hop: 36 frames → 28, full jump: 55 frames → 41).
- Forward roll grants less intangibility (frames 4-16 → 4-15).
- Back roll has more startup with reduced intangibility (frames 4-16 → 5-16) and increased ending lag (FAF 30 → 35).
- Spot dodge has less ending lag (FAF 27 → 26).
- Spot dodge has more startup with reduced intangibility (frames 2-17 → 3-17).
- Air dodge has increased intangibility (frames 3-27 → 3-29).
- Air dodge has significantly more ending lag (FAF 33 → 45).
Ground attacks[edit]
- Neutral attack:
- Apart from the final hit, all of neutral attack's hits deal less damage (hit 1: 3% → 1.8%, hit 2: 2% → 1%, looping hits: 1% → 0.5%).
- The first hit has two additional hitboxes, but reduced hitbox sizes (2.8u/4.0u → 1.6/1.6/1.8/1.8). This reduces the attack's vertical range.
- The second hit has altered hitbox sizes (4.0u/2.8u/2.8u → 3.0/3.5/3.5).
- The first two hits have increased hitlag (1.0x → 1.8x hit 1/1.2x hit 2).
- The infinite's hitbox is larger (3.5u → 4.0), increasing its vertical range. It also has reduced hitlag (1.0x → 0.6x) and a lower SDI multiplier (1.0x → 0.4x). These changes make it much harder to escape.
- The infinite has modified stretch positionings (Z-axis: 15.5 → 8.0, Z-stretch: 9.0 → 15.5). Overall, the infinite's horizontal range is unchanged.
- The finisher's hitbox is no longer an extended hitbox, but now has has three additional hitboxes. All of them have reduced sizes (4.5u → 3.5/3.5/3.5/3.5). This gives the move around the same range.
- All hits except for the finisher send at lower angles (hit 1: 45˚/80˚ → 361˚/361˚/180˚/361˚, hit 2: 94˚/45˚/45˚ → 361˚/180˚/180˚, infinite: 75˚ → 361˚). This allows the attack to connect significantly better, and allows the two first hits to lock.
- All hits except for the finisher no longer have set knockback (hit 1: 10/15 set/100 scaling → 25/25/20/20 base/25/25/15/15 scaling, hit 2: 25/15/15 set/100 scaling → 25 base/25/20/20 scaling, infinite: 10 set/100 scaling → 7 base/20 scaling).
- Forward tilt:
- All angles no longer have a sourspot on the Mii Brawler's leg that deals less damage.
- All angles have altered knockback (12 base/100 scaling → 34/86). This makes the move safe on hit at low percentages, but slightly hinders its KO power at high ones.
- Dash attack:
- Both the clean and late hits have a new hitbox on the Brawler's leg. This makes the attack more likely to connect.
- The late hit's farthest hitbox has slightly reduced size (3.5u → 3.2), reducing the attack's range.
- Forward smash:
- Forward smash has a slightly different animation: it now leaves an electrical trail on the Mii Brawler's fist (though it does not deal electric damage). The Mii Brawler also no longer flexes their fist during the ending animation; instead, the Brawler pumps their arms downwards.
- The Mii Brawler now steps further forward when using their forward smash, giving it slightly more range.
- The move lasts for one more frame (frame 17 → 17-18).
- The move deals more knockback (30 base/100 scaling → 35/102), improving its already great KO power.
- Up smash:
- The clean hit deals more knockback (32 base/93 scaling → 33/96).
- Down smash:
- Both hits deal more knockback (front: 31 base/80 scaling → 41/85, back: 83 scaling → 88). This improves the move's KO power, especially the front hit.
Aerial attacks[edit]
- All aerials except down aerial have less landing lag (Neutral: 10 → 6, Forward/Back: 14 → 11, Up: 14 → 10).
- Neutral aerial:
- The move has reduced ending lag (FAF: 56 → 46). It is no longer the sex kick with the most ending lag by a significant margin.
- Mii Brawler's leg no longer extends at the start of the move. Due to the hitboxes being attached to the feet, this results in the clean hit having considerably less range. Also, due to Mii Brawler's higher fast speed and gravity, it can no longer auto-cancel in a short hop.
- Forward aerial:
- Forward aerial has a new animation: the Mii Brawler now does two alternating kicks inwards, instead of a spin kick.
- Both hits deal more damage (hit 1: 4% → 5%, hit 2: 5% → 6%).
- The second hit has faster startup (frame 18 → 15), allowing both hits to connect better while rising.
- However, this means the first hit is now more difficult to use the first hit to initiate combos by landing.
- The first hit no longer has set knockback (40/40 set/100 scaling → 39/47 base/10 scaling) or sends at the autolink angle (366˚ → 25˚), making it connect less reliably when falling or moving backwards.
- One of the hitboxes on both hits is larger (hit 1: 3.0u → 3.5, hit 2: 4.0u → 4.3).
- However, both hits' hitboxes have modified positionings (hit 1: 4.2/0.0 X-axis → 4.2/-1.0, hit 2: 4.2/0.0 X-axis → 4.2/-1.3). This decreases the second hit's range very slightly.
- The move auto-cancels earlier (frame 43 → 30). However, the move is still unable to auto-cancel from a short hop due to the Brawler's faster falling speed and gravity.
- Back aerial:
- The move deals more damage (10% → 12%) and has more knockback scaling (100 → 105), significantly improving its KO potential.
- Mii Brawler's leg no longer extends at the start of the move. Due to the hitboxes being attached to the feet, this results in the move having considerably less range.
- Up aerial:
- The move deals more damage (8% → 9%). This makes it safer on hit, improving its combo ability.
- Down aerial:
- The meteor hitbox has significantly more knockback scaling (80 → 95), although it is still weaker than the clean hit on grounded opponents.
Throws and other attacks[edit]
- Pummel deals less damage (3.25% → 1.3%) but is much faster.
- Forward throw:
- It launches at a lower angle (45˚ → 42˚), improving its ability to set up edgeguards and slightly improving its KO potential.
- Back throw:
- The first hit deals more damage (2% → 4%).
- The move has a more fluid animation.
- Up throw:
- It deals more damage (8% → 11%), although it is still incapable of KOing until Sudden Death percentages.
- Down throw:
- The move has more knockback scaling (100 → 120), making followups more difficult at mid percents and completely removing them at high ones. The reduced knockback of Helicopter Kick and the replacement of Piston Punch with Thrust Uppercut also make down throw KO setups only effective at low percents (with the aid of platforms) and mid percents (near the edge).
Special moves[edit]
Neutral specials[edit]
- Shot Put:
- The move has less ending lag after throwing the ball (FAF: 80 → 68).
- The iron ball's clean hit sends at a lower angle (67˚ → 47˚), improving its utility at keeping opponents away and its edgeguarding ability.
- The iron ball deals slightly more damage as it bounces (first bounce: 11% → 11.25%, second bounce: 8% → 8.4%).
- The iron ball appears to be smaller. However, its hitbox remains the same.
- Exploding Side Kick:
- The move now causes Special Zoom when it lands.
- A reversed Exploding Side Kick deals more damage (27%/25% → 28%/26%).
- The aerial Exploding Side Kick's sourspot deals very slightly less damage (19.55% → 19.549999%), though this is unnoticeable in gameplay.
- An aerial reversed Exploding Side Kick deals more damage (22.95%/21.25% → 23.799999%/22.1%).
- The move has increased knockback (grounded/aerial: 35 base/79 scaling → 40/80, reversed/aerial reversed: 35 base/79 scaling → 40/77). This makes the move safer on hit and slightly improves its KO power.
- Both reversed versions have faster startup (frame 58 → 52).
- Exploding Side Kick has significantly lower ending lag (grounded/aerial: FAF 90 → 80, reversed/aerial reversed: FAF 98 → 82), making it much safer on shield.
- The move can be reversed much later (up until frame 48, just before the kick comes out). Coupled with the new dodge mechanics, this makes the move better for punishing a dodge.
Side specials[edit]
- Onslaught:
- Onslaught has a different animation: the Mii Brawler now throws in a mixed barrage of punches and kicks, with the final hit being a backflip kick.
- Onslaught has a new mechanic: Onslaught deals increased knockback as the Mii Brawler's damage accumulates, similarly to and separate from the effects of rage, but this multiplier lowers to 1x when the move is successfully used. It takes approximately 8 seconds until Onslaught's knockback multiplier returns to its increased value; a purple sparkle briefly appears on the Mii Brawler's shoes this happens. Due to this, the move is now capable of KOing at around 100% if not fully stale, and much lower with rage due to both the move's multiplier and rage stacking together.
- Grounded Onslaught's second to last hit is now a meteor smash that drags opponents to the ground (75˚ → 270˚) and has higher knockback, with the opponent not being able to tech the hit, even at low percentages. This allows the entire move to connect consistently at higher percents.
- However, the meteor smash will cause opponents to drop out of the move if they are near an edge, though this can be used to gimp opponents with weak vertical recoveries, and can set up for edgeguards.
- Both versions now hit seven times instead of five. Each hit now deals more and consistent damage (grounded: 1.2% loop hits/1.2% hit 4/4% final hit/8.8% total → 2% hit 1/1.5% hits 2-6/5% hit 7/14.5% total, aerial: 1% loop hits/1% hit 4/4% final hit/8% total → 2% hit 1/1.5% hits 2-6/5% hit 7/14.5% total).
- Both versions' final hit deals reduced knockback (80 base/175 scaling → 58/144). This makes the normal (stale) version KO slightly later.
- Aerial Onslaught's final hit sends at a lower angle (80˚ → 70˚), making it prone to LSI and reducing its KO power at lower percents.
- Burning Dropkick:
- Burning Dropkick can no longer be charged. The Mii Brawler now leaps forward and launches a fixed distance diagonally downwards after a brief pause. It has vastly reduced distance and can now miss entirely if started right next to an opponent, significantly reducing its recovery range, reliability, and utility for mindgames.
- Burning Dropkick deals more damage compared to the previous uncharged version (10% → 13%).
- Burning Dropkick's landing lag can be reduced by using it at the peak of a full hop.
Up specials[edit]
- Soaring Axe Kick:
- Soaring Axe Kick's has faster startup (frame 16 → 10).
- Soaring Axe Kick's first hit is now highlighted by a large blue trail that significantly increases its range.
- Soaring Axe Kick's descending hit is much stronger, now being a capable KO option. It also has more base knockback, making sacrificial KOs significantly more effective especially against ledge-hanging opponents, though it still KOs the Brawler first if used offstage at 0%.
- Soaring Axe Kick gains slightly more height and can now sweetspot the ledge halfway through the ascending hit; previously it could only do so right before the Brawler descended. This significantly improves its safety, as it was notoriously easy to intercept in Smash 4.
- The descending part of the move now has to be initiated manually, similar to Cloud's Climhazzard. This eliminates the descending portion when recovering, which previously caused self destructs.
- Helicopter Kick:
- The trajectory of Helicopter Kick's final hit can now be altered. Holding forward will make its knockback diagonal, while holding back will make its knockback more vertical.
- Helicopter Kick travels significantly higher when used on the ground.
- Helicopter Kick has slightly higher base knockback (60 → 65) and much lower knockback growth (grounded: 155 → 113, aerial: 150 → 108), reducing its knockback overall, especially if aimed upwards. Combined with the removal of small Mii Fighter attributes, this hampers its ability to KO disproportionately early through throw combos anywhere on the stage, now only being effective if near a ledge or close to the side blast zones.
Down specials[edit]
- Head-On Assault:
- Head-On Assault has an altered startup animation, with the Brawler doing a half-backflip instead of a headbutt while rising. It also has a different ending animation; the Brawler simply stands back up again.
- The descending hit no longer buries opponents. Instead, it deals diagonal knockback that can KO at 112%. This removes bury followups, but significantly improves its utility as an attack.
- Head-On Assault's headbutt is now a corkscrewing attack that deals multiple hits very quickly. Each hit deals 1%, and a ground-starting attack can hit at least 3 times.
- The descending hits deal less overall damage if started on the ground (8% → 4%).
- Due to the multiple hits, Head-On Assault deals more damage if it lands on an aerial opponent, and it will always KO the opponent first if it the grounded version leads to a sacrificial KO. However, whoever is KO'd first is still inconsistent if the aerial version is used.
- Head-On Assault deals significantly more shield damage, especialy the landing hit. This allows it to break full shields if all hits land.
- Feint Jump:
- Feint Jump's kick now surrounds itself in a blue aura instead of purple.
- The kick attack used during Feint Jump sends the Brawler flying at a more downward angle.
- Because of this, its recovery potential has been worsened.
- Mii Brawler can hit closer grounded opponents more easily but also can have a harder time hitting opponents from a far distance.
- Feint Jump’s momentum is stopped completely when landing with the kick, removing its notorious ledge-cancel and resulting in high landing lag.
- The Kick can be initiated much earlier and later, now adding more mixups.
- When landing on an opponent during the descent of the flip, the Brawler will now automatically perform a meteor smashing kick that deals 7%.
Final Smash[edit]
- Omega Blitz now has the Brawler stay in one place while throwing a barrage of punches and kicks after dragging the opponent upward, the initial attack is now an upwards-arcing heel kick, and the Final Smash finishes with a downward punch rather than a chop.
- Because of the change of the initial attack, the activation hitbox has extended range.
- Omega Blitz deals more total damage (42% → 47%).
- The final hit deals considerably less knockback (85 base/162 → 63/132), making it noticeably weaker overall despite a marginally improved angle (272˚ → 270˚).
New special moves[edit]
The Mii Brawler has received four new special moves, each replacing one former special move from each category.
- Flashing Mach Punch:
- This neutral special move replaces Ultimate Uppercut. It is a multi-hitting series of five fast punches from a single hand, that extends to a total of 22 consecutive punches if any initial hits connect. The final hit deals good vertical knockback and can KO at around 115%.
- Compared to Ultimate Uppercut, Flashing Mach Punch deals consistent damage (8-22% → 17.9%).
- Flashing Mach Punch does not leave the Mii Brawler helpless, and the first midair use causes them to stall.
- Flashing Mach Punch has KO potential anytime it lands and has the same power on the ground and in the air, whereas Ultimate Uppercut needs to be fully charged and grounded to have KO potential.
- Flashing Mach Punch offers invincibility for the duration of the move if it connects with an opponent, making it harder to interrupt than Ultimate Uppercut.
- Unlike Ultimate Uppercut, Flashing Mach Punch does not offer armor for a few frames before an uncharged punch, or super armor during a fully-charged punch.
- Flashing Mach Punch has punishable ending lag. It also cannot start the looping portion if it hits a shield.
- This neutral special move replaces Ultimate Uppercut. It is a multi-hitting series of five fast punches from a single hand, that extends to a total of 22 consecutive punches if any initial hits connect. The final hit deals good vertical knockback and can KO at around 115%.
- Suplex:
- This side special command grab replaces Headache Maker. The Mii Brawler will dash forward a short distance: if it connects, the Brawler will lift the opponent into the air and do a backwards suplex, slamming the opponent headfirst into the ground.
- Suplex goes through shields since it is a grab.
- Suplex deals high damage for a command grab, and does more total damage than the strongest hit of Headache Maker (13% → 18%).
- Suplex covers slightly more horizontal distance than Headache Maker, though it still travels less than Onslaught.
- Suplex has very low knockback scaling, making it ineffective for KOing.
- Suplex causes helplessness if used in the air, and causes the Brawler to be KO'ed first if used as a Sacrificial KO.
- This side special command grab replaces Headache Maker. The Mii Brawler will dash forward a short distance: if it connects, the Brawler will lift the opponent into the air and do a backwards suplex, slamming the opponent headfirst into the ground.
- Thrust Uppercut:
- This up special move replaces Piston Punch. Unlike the other new moves, it is similar in function to the attack it replaced. It consists of a multi-hitting uppercut, dealing six hits in total. The Mii Brawler switches their hands for the final hit.
- Thrust Uppercut travels higher with a bit of horizontal gain, making it better for recovering than Piston Punch. It can also be angled to travel further horizontally. These factors make Thrust uppercut a better recovery move and combo finisher than Piston Punch.
- Thrust Uppercut has less startup lag (frame 4 → 3).
- Thrust Uppercut deals more damage overall (3% (hit 1)/1% (hits 2-7)/10% (total) → 0.8% (hits 1-5)/9% (hit 6)/13.2% (total)).
- While the final hit of Thrust Uppercut deals much more damage than Piston Punch's final hit (2% → 9%), its knockback scaling was not fully compensated (180 → 71), hindering its KO potential (although this is partially compensated by Thrust Uppercut travelling higher).
- This up special move replaces Piston Punch. Unlike the other new moves, it is similar in function to the attack it replaced. It consists of a multi-hitting uppercut, dealing six hits in total. The Mii Brawler switches their hands for the final hit.
- Counter Throw:
- This down special counterattack replaces Foot Flurry. After being hit, the Mii Brawler will grab the opponent before throwing the victim on the ground behind them.
- Counter Throw removes a niche approach and aerial stalling option, but grants the Brawler a counterattack.
- Unlike other counterattacks, Counter Throw has a very short duration, but very low ending lag, allowing it to be used more flexibly.
- Counter Throw has the second highest damage multiplier of any counterattack by default (1.5×), tied with King K. Rool's Gut Check and surpassed by Joker's Tetrakarn.
- Counter Throw completely fails against projectiles and attacks that hit the Brawler's legs, while any sufficiently disjointed move will cause the retaliating grab to miss.
- This down special counterattack replaces Foot Flurry. After being hit, the Mii Brawler will grab the opponent before throwing the victim on the ground behind them.
Update history[edit]
The Mii Brawler has been significantly buffed from game updates. Update 2.0.0 improved the Brawler's offense by improving his neutral infinite, increasing the damage of up aerial and some special moves, extending up smash's sweetspot duration, and granting neutral and back aerials less landing lag. The landing lag decreases now make back aerial safer on shield, while giving late neutral aerial more followups, some into KO moves. Flashing Mach Punch's increased damage is more rewarding on hit, Exploding Side Kick's reduced ending lag makes it harder to punish, Onslaught's increased speed makes it easier to connect, Soaring Axe Kick is safer, Feint Jump's kick has more knockback, and Head-On Assault deals more shield damage, making it possible to break damaged shields with its landing hit and shockwave.
Patch 3.1.0 gave a mixed bag of changes, with his neutral attack and Flashing Mach Punch connecting more consistently. The Brawler's notoriously high falling and fast falling speeds were also reverted back to his SSB4 values, making him less susceptible to combos and juggles while also allowing forward aerial to autocancel out of a short hop. However, his airdodge and footstool animations were made laggier.
Patch 4.0.0 significantly improved the utility of what was commonly considered his two worst custom moves: Flashing Mach Punch was once again buffed by decreasing its startup and has more invulnerability if it connects, while also increasing the final hit's knockback, while Thrust Uppercut's final hit has more knockback, allowing it to actually KO at reasonable percents. However, the Brawler's infamously fast falling speed from earlier iterations has returned, resulting in the Brawler once again being easier to combo, forward aerial losing its ability to auto-cancel in a short hop, and the Mii Brawler's recovery being worse, but making him harder to juggle in return, as well make his airdodge and footstool animations less laggy.
Patch 5.0.0 gave a nerf to Counter Throw, making the move no longer grab opponents who are invincible/intangible except for Banjo & Kazooie's Wonderwing, due to its peculiar properties against grabs, while patch 6.0.0 reduced the horizontal range of its counterattack grabbox.
Patch 7.0.0 now increased Suplex's grab range, make it easier to grab opponents.
Patch 12.0.0 provided Mii Brawler with some substantial buffs to a few special moves. Flashing Mach Punch now has more range in front, Onslaught deals 4.5% more damage overall, and Head-On Assault deals more shield damage and knockback, now being capable of instantly breaking full shields if all three hits connect.
As a result, the Mii Brawler is significantly better than he was during Ultimate's release.
- Neutral infinite has increased range (3.5u → 4u) and is harder to SDI.
- Up smash's sweetspot has a longer duration, with its sourspot having a shorter duration (frames 8-11/12-14 → 8-12/13-14).
- Neutral aerial has less landing lag (8 frames → 6).
- Back aerial has less landing lag (14 frames → 11).
- Up aerial deals more damage (8% → 9%), with knockback not compensated.
- Flashing Mach Punch deals more damage (15.8% total → 17.9% total).
- Exploding Side Kick has less ending lag (FAF 90/92 (normal/reversed) → 80/82).
- Onslaught travels farther and faster (Horizontal speed multiplier (0.7× → 0.75×).
- Soaring Axe Kick can grab onto ledges more easily.
- Head-On Assault deals more shield damage.
- Feint Jump's kick deals more knockback (35 base/100 scaling → 65/90).
 The glitch involving Lucina that allowed Suplex to lose 2 stocks during a Sacrificial KO in 1v1 matches has been fixed.
- Additionally, it no longer causes Bayonetta to become stuck after Sacrificial KO.
- Shadow glitch from Bowser Jr. was fixed.
- Neutral attack 2 connects into neutral infinite more reliably.
- Neutral infinite finisher has an extra hitbox, giving it more range.
- Flashing Mach Punch's hits connects more reliably.
- Falling speed and fast falling speed reverted back to their SSB4 values. (1.92 → 1.7 (normal); 3.072 → 2.72 (fast fall)).
- Because of this, forward aerial can now auto-cancel in a short hop.
- The Mii Brawler's recovery travel farther as a result, and they are also less vulnerable to meteor smashes and semi-spikes.
- Mii Brawler is harder to combo, but at the cost of easier to juggle.
- Mii Brawler can act later after being footstooled in the air (FAF 31 → 35).
- Mii Brawler's airdodges have more ending lag (FAF 42 → 45 (neutral), 70 → 77 (sideways), 86 → 92 (up), 59 → 65 (down)).
- Counter Throw collision with Alolan Whip no longer causes an already-grabbed opponent to become stuck in grab invulnerability state resulting in a game crash if KOed.
- The Mii Brawler's fall speed and fast falling speed has been reverted back to the pre-3.1.0 values (1.7 → 1.92 (normal), 2.72 → 3.072 (fast fall)).
- All resulting changes from 3.1.0 have been reversed as a result.
- Flashing Mach Punch has less startup lag (frame 15 → 10) with its total duration reduced as well (FAF 60 → 55 (miss), 108 → 94 (hit)).
- Flashing Mach Punch has more invulnerability if it connects (frames 15-37 & 60-73 → 10-69).
- Flashing Mach Punch's final hit has more knockback scaling (103 → 109).
- Thrust Uppercut's final hit has more knockback scaling (58 → 71).
- Counter Throw can no longer grab opponents who are invincible/intangible (excluding Banjo & Kazooie's Wonderwing).
- Counter Throw's grabbox is much less extended horizontally (Z offset: 9u-1u → 9u-7.5u), no longer grabbing opponents behind Mii Brawler.
- Aerial Suplex's grab range has been increased.
- Grounded Suplex's jostle has been altered, allowing it to connect more reliably at close range.
- Changed the length of vulnerability when crumpling to be consistent with other fighters.
- The first, second, and fifth hits of Flashing Mach Punch have more range.
- Onslaught deals more damage (1.5% → 2% (hits 2-6), 5% → 7% (hit 7); 16% total → 20.5%), with knockback scaling partially compensated (170 → 144).
- Head-On Assault's falling hit against grounded opponents deals more shield damage (0 → 5), and has more knockback scaling (48 → 51). The landing hit also has a new hitbox against aerial opponents, which is larger (4u → 4.5u) and deals more knockback (120 base/48 scaling → 122/56).
Moveset[edit]
- Mii Brawler can wall jump.
For a gallery of Mii Brawler's hitboxes, see here.
Note: All numbers are listed as base damage, without the 1v1 multiplier.
| Name | Damage | Description | ||
|---|---|---|---|---|
| Neutral attack | Feint Hook (牽制フック, Curb Hook) Feint Combo (牽制コンボ, Curb Combo) Hundred Rending Punch (百裂パンチ) Hundred Rending Finish (百裂フィニッシュ) |
1.8% | Two quick punches, followed by a series of rapid punches, and ended with a side-kick. It is a useful close-range interceptor on the ground, but as it will only transition into the neutral infinite after the first two hits, it is punishable if shielded. | |
| 1% | ||||
| 0.5% (loop), 2% (final hit) | ||||
| Forward tilt | ↗ | Side/Lateral Kick (側面キック) | 8.5% | A roundhouse kick. The attack can be angled, dealing more damage if done so, and is the Brawler's longest ranged tilt. Unlike the version in SSB4, it no longer has a sourspot, making it useful for creating space. |
| → | 8% | |||
| ↘ | 8.3% | |||
| Up tilt | Jumping Uppercut (跳躍アッパーカット, Bounding Uppercut) | 6% | An uppercut. Sends the opponent upwards and slightly behind the Brawler, which is most noticeable at medium percents. As a result, it can juggle into itself at low percentages, drag the opponent closer for a grounded followup like a tilt, grab or up special, and set up aerial combos at medium percents, including back aerial. The move's hitbox can reach through the lower platforms of Battlefield and can hit prone opponents, but cannot hit opponents behind the Brawler. Additionally, it has low horizontal range, and usually sends too far to combo after 120%. | |
| Down tilt | Ground Surface Kick (地表キック) | 8% | An inverted sweep kick along the ground. Knocks opponents upward, allowing it to combo into tilts, neutral aerial or forward aerial at low percents, and aerials or any up special move at medium percents. | |
| Dash attack | Rush Kick (駆け込みキック, Rushing-In Kick) | 11% (clean), 6% (late) | A flying kick. A risky but useful approach option. | |
| Forward smash | Great Crushing Punch (大撃破パンチ) | 18% | A strong straight punch. The move moves the Brawler slightly forward. Although an electric trail appears at the Brawler's fist, it does not deal electric damage. It deals immense knockback and easily KOs from 75% at the center of Final Destination. However, it has high startup overall and incredibly high ending lag (hits on frame 17 and ends on frame 67), and its hitbox only lasts for two frames, so it is mainly used as a punish after a jab lock. | |
| Up smash | Cartwheel Kick (大回転キック, Great Rotating Kick) | 14% (clean), 10% (late) | A flip kick. Its high speed (frame 8) makes it a good anti-air and grounded combo finisher at low percents, while boasting enough knockback KO at around 120%. However, the late hit (after the Brawler completes 3/4 of the backflip) has significantly lower knockback growth and only KOs at around 170%. Like up tilt, its hitbox can reach through the lower platforms of Battlefield. | |
| Down smash | Great Front and Back Smash (大前後スマッシュ) | 13% | Punches forwards and kicks backward simultaneously. Like up smash, it boasts a quick startup (active on frame 9), with the lowest ending lag of all the Brawler's smash attacks (FAF 43). Both sides deal the same damage, with the kick dealing more knockback, KOing 10% earlier. However, both hits have very poor range. | |
| Neutral aerial | Flying/Jumping Kick (飛びキック) | 10% (clean), 5% (late) | A sex kick, similar to Mario's neutral aerial. Its extremely high ending lag has been reduced from SSB4, and the move can autocancel from a full hop. Due to its startup (frame 3) and low landing lag (frame 6), it is a useful combo breaker and starter, and the clean hit can act as a niche KO option at the sides of the stage at around 130%. As of the 2.0.0 patch, neutral aerial's landing lag is low enough for the weak hit to true combo into a multitude of moves, including neutral attack, Thrust Uppercut and Head-On Assault at low percents, or a forward smash or Helicopter Kick at mid percents. The strong hit is able to combo into down tilt, up tilt, neutral attack, and Suplex until mid percents and effectively sets up a tech situation at mid percents. | |
| Forward aerial | Flying Double Kick (飛び二連キック, Jumping Two-Stage Kick) | 5% (hit 1), 6% (hit 2) | Two alternating inward kicks. The first kick has a few niche combos, but as the kicks transition much faster than in SSB4, it is much more difficult to drag opponents to the ground with the first hit. Additionally, the move's hitboxes are on the Brawler's legs and the angle has been altered, which can cause it to whiff, and very often not connect from the first hit. | |
| Back aerial | Flying/Jumping Back Kick (飛び後ろキック) | 12% | A swinging back kick. Very fast (frame 7) and is the Brawler's most reliable KO option in midair. It has a small chance of tripping grounded opponents at low percents. However, its hitbox is very brief. Autocancels from a short hop, which allows it to wall out opponents. | |
| Up aerial | Flying/Jumping Up Kick (飛び上キック) | 9% | A spinning crescent kick. Autocancels from a short hop delayed fastfall, has the second-lowest ending lag of all the Brawler's aerials (frame 10), and has a wide hitbox; the front hitbox is capable of hitting tall characters out of a short hop (such as Marth). As a result, it is an excellent combo initiator or extender, as a falling up aerial can start grounded combos at low percents, or juggle into itself, Flashing Mach Punch, or any up special move at mid to high percents. | |
| Down aerial | Flying/Jumping Hammer Knuckle (飛びハンマーナックル) | 13% (clean), 12% (late) | Swings both fists beneath himself in a double axe handle. The clean hit is a powerful meteor smash, and sends grounded opponents diagonally upwards as a fairly strong kill move. However, it is the Brawler's slowest aerial in terms of startup lag, ending lag, and landing lag. Autocancels from a full hop and double jump fast fall. | |
| Grab | Grab (つかみ) | — | The Brawler reaches in front of himself. | |
| Pummel | Grab Headbutt (つかみヘッドバット) | 1.3% | A headbutt. Average power and speed. | |
| Forward throw | Backfist Throw (裏拳投げ) | 9% | Launches the opponent away with a backhand. It is the Brawler's KO throw, though it does so poorly, KOing at around 144% at the edge of Final Destination. | |
| Back throw | Kick Throw (キック投げ) | 4% (kick), 5% (throw) | Kicks the opponent behind himself. | |
| Up throw | Launching Palm Throw (突き上げ掌底投げ, Thrusting Lift Palm Heel/Sole Throw) | 11% | Knocks the enemy up with a palm strike. It is the Brawler's most damaging throw and can initiate aerial juggles. However, it only has true followup potential at low percents into up-air or Thrust Uppercut due to its ending lag. | |
| Down throw | Karate Chop Throw (空手チョップ投げ, Empty-Hand Chop Throw) | 2% (chop), 4% (throw) | Karate chops the opponent into the ground. This is the Brawler's combo throw, which can extend into aerials, up special moves, or multiple landing up aerials. Due to the changes to the Brawler's physics and the move's increased knockback growth, it has lost its infamous KO setups from Smash 4 and quickly loses combo potential at high percents. Despite this, its combos into special moves are still formidable, as it is effective at the ledge: Helicopter Kick can still KO at around 60% if directed forward, Thrust Uppercut can kill at early percents on platforms from a down throw, and Soaring Axe Kick can act as a sacrificial KO so long as the Brawler has a stock lead. It can also be used as a last-resort KO option, as it does so starting at 200%. | |
| Forward roll Back roll Spot dodge Air dodge |
— | — | ||
| Techs | — | — | ||
| Floor attack (front) Floor getups (front) |
7% | Gets up while kicking both sides. | ||
| Floor attack (back) Floor getups (back) |
7% | Same as front floor attack. | ||
| Floor attack (trip) Floor getups (trip) |
5% | Gets up while kicking both sides. | ||
| Edge attack Edge getups |
9% | A low backhanded karate chop. | ||
| Neutral special | Default | Shot Put | 15% (no bounce), 11.25% (first bounce), 8.4% (second bounce) | A shot is thrown into the air as an arcing projectile. Bounces twice upon landing, dealing less damage with each bounce; if it misses, the shot travels a set distance before disappearing. Very damaging and strong for an unchargeable projectile, which makes for a useful edgeguarding tool. The move also has a surprisingly generous B-reverse window, allowing it to be used as a landing mixup. |
| Custom 1 | Flashing Mach Punch | 0.4% (hits 1-21), 9.5% (hit 22); 17.9% if all hits connect | The Brawler performs five fast punches with a single hand. If any of these punches land, the move will extend into a flurry of consecutive punches before ending with an uppercut, with a maximum of 22 hits. The last hit deals good vertical knockback, KOing middleweights at around 115%. If the move lands on an opponent, the Brawler gains invincibility for the duration of the move, making the move hard to interrupt. Although it has respectably fast startup (frame 10), it has noticeable ending lag that makes it easy to punish if whiffed. If the first few hits are shielded or hit opponents under the effects of armor, it will not transition to the looping portion of the move. The move doesn't lose power if used in the air, and the first use will stall the Brawler's descent. Subsequent uses will have the Brawler fall while punching, which can act as a niche landing option to catch approaching opponents. By inputting this move during Brawler's jumpsquat, it is possible to not stall during the first aerial usage, allowing Flashing Mach Punch to be used as an out of shield option and mix-up tool. | |
| Custom 2 | Exploding Side Kick | 23% (leg), 25% (foot), 26% (reversed, leg), 28% (reversed, foot), 19.5% (aerial, leg), 21.25% (aerial, foot), 22.1% (reversed aerial, leg), 23.75% (reversed aerial, foot) | Stands on one leg and charges his other leg in flame, before unleashing a powerful burning kick. Functions like Falcon Punch. The move can be reversed once anytime during the move; the window to do so is extremely lenient compared to other moves of its kind (9-30), allowing the Brawler to turn around right before the kick itself. The Brawler gains super armor just before the kick, even if started in midair, allowing it to function as a hard punish. For its power, it has surprisingly low ending lag, which was further reduced in the 2.0.0 patch; the move is safe on shield as a result. | |
| Side special | Default | Onslaught | 2% (hit 1), 2.0% (hits 2-6), 1.5% (hit 7), 7% (hit 8) | Charges forward with his knee out. If the knee connects against an opponent, the Brawler will perform a series of blows (a knee strike, a kick with the opposite leg, a backhanded punch, a swinging fist punch with the opposite arm, a double-hitting axe kick, and a double axe handle) and conclude by a backflip kick. If whiffed, there is noticeable endlag, which also occurs if it is shielded or parried. In the air, even after attacking, Onslaught leaves the Brawler helpless. It has excellent KO potential (although the aerial variant is significantly worse at this), as it can KO grounded opponents as early as 95%. It deals weight-independent knockback, meaning KO potential is affected by fall speed rather than weight, notably shown by the fact that Bowser dies earlier than Fox, despite being much heavier. Onslaught's knockback also increases as the Brawler's damage accumulates, similarly to and separate from the effects of rage, but this multiplier lowers to 1x when the move is successfully used. Onslaught will go back to full power after approximately 8 seconds, indicated by a brief purple flash on the Brawler's shoes. Despite its in-game description, accumulated damage doesn't affect the damage of the move. |
| Custom 1 | Burning Dropkick | 13% | Extends both legs in front of himself, charging forward to deliver a dropkick while covered with flames. Unlike the previous iteration of this move, it is no longer chargeable, dealing set damage and knockback. Furthermore, it now covers a set, albeit vastly reduced distance, and can now miss entirely if started right next to an opponent. As a result, it has lost a majority of its utility from SSB4, though it is still an effective approach option due to its quick startup, and can KO at high percents. Additionally, it is still a significantly better recovery option than Onslaught and Suplex due to greater distance and not inducing helplessness after the animation is complete. It can be B-reversed for slightly more distance. | |
| Custom 2 | Suplex | 18%, 3% (collateral grab), 4.5% (collateral descent), 15% (collateral slam) | A command grab in which the Brawler dashes forward a short distance with his arms out in a grabbing motion. If it connects, the Brawler will jump into the air, lifting the opponent with him, and do a backward suplex, slamming the opponent headfirst into the ground. The Brawler gains 14% heavy armor when grabbing an opponent, and any opponents nearby for the grab and slam will take collateral damage. The move has extremely low knockback scaling, but can be used to effectively rack up damage and set up juggle situations. If used in midair, the move causes helplessness (although it has vastly reduced total frames); it can grab foes near an edge and drag them off as a sacrificial KO, though it will always KO the Brawler first. In addition, Suplex makes for a poor horizontal recovery option, as it travels less distance than Onslaught and halts the Brawler's momentum completely upon ending in midair. | |
| Up special | Default | Soaring Axe Kick | 4% (hit 1), 3% (air hit 2), 6% (ground hit 2), 4% (shockwave) | Performs an upward flip kick. Similar to Cloud's Climhazzard, a second press of the special move button will have the flip kick transition into an axe kick that meteor smashes aerial opponents. The move will snap to ledges during the rising portion, and can also snap during the downward kick after a bit of travel time. Both hits transition quickly, and the landing hit has enough knockback to KO at around 120% near the edge of Final Destination. The meteor smash is notably powerful, as it deals high, weight independent set knockback, allowing it to KO non-floaties before the Brawler (with the exception of Town and City). The move is also extremely disjointed, notably outranging Lucina's forward smash, making it an extremely useful out of shield option. It grants the most height out of all his up specials, making it the most effective recovery tool. |
| Custom 1 | Helicopter Kick | 3% (hit 1, ground), 1.5% (hit 1, air), 1.5% (hits 2 - 5), 6% (hit 6) | Performs a flurry of spinning kicks while traveling diagonally upward, similar to Fox's forward aerial. Travels much higher if initiated from the ground. The trajectory of Helicopter Kick's final hit can be altered: holding forward will make its knockback diagonal while holding back will make its knockback more vertical, allowing the Brawler to choose how to launch the opponent. Allows for long horizontal recovery, but lacks vertical lift. While it is an excellent combo finisher out of aerials or a throw, its knockback has been heavily reduced from Smash 4, though it can still KO extremely early near the sides of the stage. | |
| Custom 2 | Thrust Uppercut | 0.8% (hits 1-5), 9% (hit 6) | The Brawler rises upwards with a multi-hitting uppercut, at a slight diagonal trajectory. Similar to Mario's Super Jump Punch. The uppercut is followed by a second uppercut with the opposite fist. By angling during the ascent, it is possible to travel further horizontally, though the move has deceptively low recovery distance due to the move's animation. It has very fast startup (frame 3), and renders the Brawler's arm intangible from frames 3 to 7. Like Helicopter Kick, Thrust Uppercut is a reliable combo finisher due to its speed, though its trajectory is more suitable for ending vertical combos. However, it is much weaker than its predecessor, (Piston Punch), which was capable of KOing out of a down throw from 65%. As of update 4.0.0, it boasts commendable kill power on platforms, often killing from a down throw below 50%. | |
| Down special | Default | Head-On Assault | 6% (flip kick), 1% (multi-hits), 14% (landing), 16% (aerial hit, grounded opponents only) | Leaps up with a backflip kick with both of his legs, before plummeting downward with a corkscrewing headbutt. On the ground, the initial leap sends the opponent into the main headbutt, while the aerial version has the Brawler simply perform the headbutt. In both versions of the move, the descending headbutt hits multiple times, and acts as a meteor smash. If the grounded version is used as a sacrificial KO, the opponent will be KO'd first. The grounded hit has moderate strength, being able to KO below 130% with bad or no DI, although proper DI makes the move unable to KO below 140%. It is extremely risky due to its overall lag. If performed in midair while facing a ledge, the Brawler will be able to sweetspot said ledge, allowing it to be used as an edgeguarding tool (although only when facing the ledge). The move does a very high amount of shield damage, being able to break full shields, although opponents can simply roll out of the rising hit before the falling hit hits their shield. |
| Custom 1 | Feint Jump | 10% (diving kick), 7% (meteor smashing kick) | Flips off the ground and, when the special button is pressed again, performs a dive-kick while surrounded by a blue aura. The startup offers three frames of intangibility, starting from frame 2. Similar to Zero Suit Samus's Flip Jump, by landing on an opponent mid-air during the jump, the Brawler will automatically perform a kick which meteor smashes foes. The angle they are launched, however, is more diagonal, similar to that of Ryu's down air. The direction they are sent is opposite of the direction of the flip (i.e flipping to the right will diagonally meteor smash the opponent to the left, and vice versa). Both the jump and the kick can be reversed if the player taps in the other direction upon startup. Also similarly to Flip Jump, the Brawler will perform a wall jump when pressing up on the Control Stick or the Jump button while touching a wall, with the maximum number being 5 times. | |
| Custom 2 | Counter Throw | 1.5× (minimum 14%), 9% (collateral hit) | The Brawler enters a defensive stance, bringing his arms close to his face. Upon being hit, the Brawler will counterattack by grabbing the opponent and slamming them on the ground behind himself. The slam will lightly damage nearby opponents. Unlike other counters, Counter Throw has a short duration, but low ending lag, allowing it to be used more flexibly. It has a damage multiplier of 1.5×, tying it with Slip Counter and Gut Check for the second-highest damage multiplier out of any counterattack in Ultimate, surpassed only by Tetrakarn. However, unlike other counters, Counter Throw completely fails against projectiles and attacks that hit his legs (i.e. attacks from underneath the Brawler), and moves with sufficiently disjointed hitboxes will cause the retaliating grab to miss. As a result, the counterattack can be rather inconsistent. | |
| Final Smash | Omega Blitz | 56.4% | Knocks the target into the air with an upwards-arching heel kick, and then proceeds to strike them with a maelstrom of punches and kicks before smashing them back downwards with a downward straight punch. Testing with spirits suggests around 55% of the damage dealt is from punches, including the final hit, and 45% is from kicks. Oddly, the starter kick is classified as a punch and gets bonuses from spirits affecting punches rather than kicks. | |
Stats[edit]
| Stats | Weight | Dash speed | Walk speed | Traction | Air friction | Air speed | Air acceleration | Gravity | Falling speed | Jumpsquat | Jump height | Double jump height | Empty landing lag |
|---|---|---|---|---|---|---|---|---|---|---|---|---|---|
| Value | 94 | 1.87 – Initial dash 1.92 – Run |
1.26 | 0.12 | 0.015 | 1.15 | 0.01 – Base 0.058 – Additional |
0.169 | 1.92 – Base 3.072 – Fast fall |
3 | 35 - Base 17 - Short hop |
35.5 | 4 |
Announcer call[edit]

English/Japanese/Chinese
On-screen appearance[edit]
- Lands with an explosion, performs two fast alternating punches followed by a spin kick, and makes a pose similar to his side taunt.

Mii Brawler's on-screen appearance

Taunts[edit]
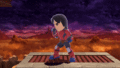
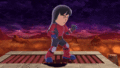
- Up taunt: Does a backflip, then performs a crane pose upon landing.
- Side taunt: Moves his fists in front of him in an "X" motion and assumes an altered crane pose, before punching downwards and swinging his open hand outward, performing a knife-hand block stance.
- Down taunt: Forms a grounded stance, then punches twice towards the screen using alternating arms.
Mii Brawler's up taunt.
Mii Brawler's side taunt.
Mii Brawler's down taunt.


Idle poses[edit]
- Quickly performs four fighting stances.
- Unclenches his fists and hops on the spot, as if poised for battle.
Mii Brawler's first idle pose.
Mii Brawler's second idle pose.


Crowd cheer[edit]
| Cheer (English) | Cheer (Japanese/Chinese) | Cheer (Italian) | Cheer (Dutch) | Cheer (French) | |
|---|---|---|---|---|---|
| Cheer | |||||
| Description | Mii! | Mii! Mii! Mii Mii Mii! | Mi - i! Mi - i! *clap 4 times* | Mii Mii! Een twee drie! | Mii Mii Mii! |
| Cheer (German) | Cheer (Spanish) | Cheer (Russian) | Cheer (Korean) | |
|---|---|---|---|---|
| Cheer | ||||
| Description | Mii Mii Mii! | Mii! Mii! Rah - Rah - Rah! | Mii! -- Mii! -- Mii! | Mii! Mii! Mii Mii Mii! |
Victory poses[edit]
- Left: Performs a straight punch, followed by a backhanded punch and a high kick combo, then poses with his leg outstretched.
- Up: Punches many times in quick succession toward the screen (similar to his neutral jab infinite), then poses with his arm outstretched.
- Right: Cartwheels into the foreground, does a roundhouse kick, and poses with the same leg outstretched.


In competitive play[edit]
Most historically significant players[edit]
See also: Category:Mii Brawler players (SSBU)
 KID - The best Mii Brawler player in the post-pandemic metagame, and the first to consistently solo-main the Brawler at the highest level of competitive play. He has some of the best major performances from a Mii Brawler player, including placing 5th at King Con defeating Marss and MKBigBoss, which marks the Mii Brawler's best performance at a major; 9th at GSM; and 13th at King Of Fields 95 3. Outside of majors, he is known for defeating MkLeo at Sunrise 2023, placing 5th overall. He was the first Mii Brawler player to rank globally, doing so on the LumiRank 2024.1, and the first to appear in the top 100, ranking 87th in the first half of 2025.
 Lunamado - One of the best Mii Brawler players in the post-pandemic metagame, playing the character alongside others and having switched to the character from Bowser. He is infamous for his victory over Light at Kagaribi 13, an event where he also defeated MASA and ultimately placed 25th. In addition, he primarily used Mii Brawler to place 7th at OH-BAI-TOH-RI 2 and 9th at DELTA 9, used only Mii Brawler to place 25th at both Maesuma'GRAND WARS and Sumabato SP 47, and defeated Asimo at Maesuma TOP 15 "FINAL". He was ranked 116th in the first half of 2025.
- Rizeasu - Known for using a variety of characters including the Mii Brawler, using the character the most in 2020. He was the best Mii Brawler player in the world during this time and was best known for winning Maesuma TOP 4, defeating Tea and Kuro along the way; this victory was the largest tournament won by a Mii Brawler player. Outside of this performance, he also used Mii Brawler to place 5th at Maesuma TOP 2, defeating Yoshidora and T along the way. He has since relegated the Mii Brawler into a less frequent pick, with his best-known performance with Mii Brawler since 2020 being his 7th-place finish at Kagaribi 6.
Tier placement and history[edit]
Early metagame opinions on the Mii Brawler were lackluster: many players quickly noticed the severe nerfs to his strongest and infamous abilities from Smash 4, most notably the heavy nerfs to down throw (which could KO opponents at extremely low percents through the use of Helicopter Kick and Piston Punch). In addition, he received nerfs to his core moves (the smaller hitboxes of neutral and back aerials, and the loss of the autolink angle for forward aerial), and suffered from laggy and/or short-ranged moves, a poor approach, an ironic lack of safe KO moves, and a high vulnerability to combos and gimping. Due to this, he was quickly considered the weakest of the three Mii Fighters; though he could rack up damage very quickly, he was unable to safely secure stocks.
Overtime, this latter weakness was addressed through several buffs to his moveset. The most notable buffs were to Thrust Uppercut, which gained some notoriety for being able to confirm from some moves, most notably down throw, and KO at early percents on some stages. The pandemic period and the early post-pandemic metagame saw the Brawler's popularity improve, in part due to his usage as a secondary or pocket character, especially from Rizeasu, who has won or come close to winning several events with Mii Brawler, as well as other players who have picked up the character on occasion, such as Bloom4Eva. However, solo-Mii Brawler players were still rare during this time, aside from KID. Nevertheless, Mii Brawler's combo game and notable secondary results led him to be considered the best Mii Fighter by far, leading him to rank among the upper half of the cast, at 37th on the first tier list, as a high tier, and 36th on the second, in the B+ tier.
Mii Brawler's popularity skyrocketed following the second tier list: his representation in the metagame surpassed 1% by the end of 2024 and continued to rise in the following year, entering the top 20 by the end of that year. This period featured the rise of many Mii Brawler players, including solo-mains such as Apple Reviewer, Osh9, Yeast, and Yopi, and players who primarily mained Mii Brawler alongside other co-mains or secondaries such as Lunamado. Alongside KID, who became the first Mii Brawler player to rank among the top 100, these players showcased Mii Brawler's strong combo game and ability to KO early thanks to Thrust Uppercut, allowing them to find strong results at the national level. This improved Mii Brawler's standing on the following 2 tier lists: he was ranked 31st on the third tier list to 31st in the A- tier, before further rising to 25th on the fourth and current list, in the middle of the A tier.
Appearances in Classic Mode routes[edit]
Like the other Mii Fighters, Mii Brawler cannot be used in Classic Mode. However, they can appear as opponents in other fighters' Classic Mode routes, with them being listed below:
Role in World of Light[edit]

Although the Mii Brawler does not appear in the World of Light opening cutscene, he was vaporized and later imprisoned alongside the rest of the fighters (excluding Kirby) when Galeem unleashed his beams of light.
The default Mii Brawler was one of the many fighters that fell under Dharkon's control upon Galeem's first defeat. He can be found in the Sacred Land sub-area after completing an optional time puzzle on the Triforce of Wisdom, which is hinted by an Owl Statue located in the Triforce of Power's section left path, by setting the time to 4:40.
Defeating the Mii Brawler automatically adds the default Mii Brawler under the name "Mii" with a default 1111 moveset to the list of Mii Fighters for all modes where Mii Fighters are usable. This Mii cannot be restored if deleted.
Fighter Battle[edit]
| No. | Image | Name | Type | Power | Stage | Music |
|---|---|---|---|---|---|---|
| 51 | |
Mii Brawler | 10,000 | Final Destination | Final Destination - Super Smash Bros. for 3DS / Wii U |
Spirit[edit]
The Mii Brawler's fighter spirit is available periodically for purchase in the shop for 300 Gold, but only if the player has a Mii Brawler. Unlocking the Mii Brawler in World of Light allows the player to preview the first spirit below in the Spirit List under the name "???". As a fighter spirit, it cannot be used in Spirit Battles and is purely aesthetic. Unlike most fighters, the spirit for Mii Brawler only uses the official artwork from Ultimate.
1,090. Mii Brawler

In Spirit Battles[edit]
Conditions in italic are not listed on the Spirit Battle preview screen.
As the main opponent[edit]
| Spirit | Battle parameters | Inspiration | |||||||||
|---|---|---|---|---|---|---|---|---|---|---|---|
| No. | Image | Name | Series | Enemy Fighter(s) | Type | Power | Stage | Rules | Conditions | Music | Character |
| 31 | Toad | Super Mario Series | •Mii Brawler |
3,600 | Princess Peach's Castle | •Item: Mushrooms | •The enemy favors side specials | Plucky Pass Beginnings | |||
| 43 |  |
Shy Guy | Super Mario Series | •Mii Brawler •Tail Mii Gunner •Mii Swordfighter |
1,500 | Mushroom Kingdom II (Battlefield form) | •Item: Throwing Types | •The enemy favors neutral specials •The enemy is easily distracted by items |
Ground Theme - Super Mario Bros. 2 | ||
| 205 | Skull Kid | The Legend of Zelda Series | •Mii Brawler •Tiny Meta Knight |
4,000 | Distant Planet (hazards off) | •Assist Trophy Enemies (Skull Kid (Invisibility Effect)) •Hazard: Fog |
•Defeat the main fighter to win •The stage is covered in fog •Hostile assist trophies will appear |
Saria's Song / Middle Boss Battle | Skull Kid with Majora's Mask | ||
| 570 |  |
Flying Man | EarthBound Series | •Mii Brawler Team •Ness |
9,100 | Magicant (hazards off) | N/A | •Defeat the main fighter to win •Stamina battle |
Magicant | ||
| 969 | Nia | Xenoblade Chronicles Series | •Mii Brawler •Incineroar |
9,100 | Gaur Plain (hazards off) | N/A | •Stamina battle •The enemy heals over time |
Battle!! - Xenoblade Chronicles 2 | |||
| Gormott[SB 1] | |||||||||||
| 1,041 | Cap'n Cuttlefish | Splatoon Series | •Mii Brawler |
3,300 | Mushroom Kingdom U (Rock-Candy Mines) | •Item: Ray Gun | •The enemy's ranged weapons have increased power •The enemy has increased move speed |
Calamari Inkantation | |||
| 1,070 | The Creature & Flea Man | Castlevania Series | •Giant Mii Brawler •Diddy Kong |
4,500 | Dracula's Castle (Battlefield form) | •Hazard: Zap Floor | •The floor is electrified •The enemy is giant |
Out of Time | The Creature | ||
| 1,080 | Party Phil | Wii Party Series | •Mii Brawler •Mii Swordfighter •Mii Gunner |
8,800 | WarioWare, Inc. (Battlefield form) | •Bob-omb Festival | •Bob-ombs will rain from the sky •Explosion attacks aren't as effective against the enemy |
Final Results - Wii Party U | |||
| 1,083 |  |
Gold Bone | StreetPass Mii Plaza Series | •Gold Mii Brawler |
3,800 | Lylat Cruise | •Hazard: Low Gravity •Item: Super Scope |
•Gravity is reduced | Tunnel Scene - X | ||
| 1,094 |  |
Smash Ball | Super Smash Bros. Series | •Mii Brawler •Mii Gunner •Mii Swordfighter |
9,600 | Final Destination (Battlefield form) | •Sudden Final Smash •Item: Food |
•Survive until the timer runs out (1:30) •The enemy will suddenly have a Final Smash •You'll get a Final Smash |
Final Destination | Mii Brawler | |
| 1,260 |  |
Nikki | Swapnote Series Nintendo Letter Box Series |
•Mii Brawler •Mii Gunner •Mii Swordfighter |
8,900 | PictoChat 2 (Ω form) | •Assist Trophy Enemies (Nikki) | •Hostile assist trophies will appear | Mii Plaza | Nikki (Brawler) | |
| 1,287 |  |
Spring Man | ARMS | •Mii Brawler |
9,300 | Boxing Ring | N/A | •The enemy's punches and elbow strikes have increased power •The enemy has increased jump power |
Title Theme - Wii Sports Club | ||
| 1,288 |  |
Ribbon Girl | ARMS | •Mii Brawler |
3,600 | Spring Stadium (Battlefield form) | N/A | •The enemy has an extra midair jump | Ribbon Ring | ||
| 1,291 |  |
Ninjara | ARMS | •Greninja |
3,600 | Suzaku Castle | •Item: Boomerang | •The enemy has increased move speed | Ninja College | ||
| •Mii Brawler | |||||||||||
| 1,302 |  |
Golden Dash Mushroom | Super Mario Series | •Gold Mii Brawler |
10,000 | Figure-8 Circuit (Ω form) | •Attack Power ↑ •Uncontrollable Speed •Item: Mario Kart |
•The enemy has super armor and is hard to launch or make flinch •The enemy is very fast and can't stop quickly •The enemy has increased attack power |
Mario Circuit - Mario Kart 8 | ||
| 1,317 |  |
Toy-Con Robot | Nintendo Labo Series | •Mii Brawler •Mii Brawler |
10,000 | New Donk City Hall (Battlefield form) | N/A | •Defeat the main fighter to win •The enemy has increased attack power |
Marionation Gear | Player (Toy-Con Outfit) | |
| 1,360 | Geese Howard | FATAL FURY Series | •Mii Brawler |
13,700 | Fourside (Ω form) | •Jump Power ↓ | •The enemy's throws have increased power •Stamina battle •All fighters have reduced jump power |
Soy Sauce for Geese - FATAL FURY SPECIAL | Young Geese Howard | ||
| 1,361 | Ryo Sakazaki | Art of Fighting Series | •Mii Brawler |
9,500 | Suzaku Castle (Ω form) | •Jump Power ↓ | •Stamina battle •The enemy will charge up a powerful Final Smash •All fighters have reduced jump power |
ART of FIGHT - Art of Fighting | |||
| •Mii Brawler | |||||||||||
| 1,394 | Kunio | River City Series | •Mii Brawler |
9,500 | Moray Towers | •Item Tidal Wave •Item: Battering Types |
•The enemy favors neutral specials •The enemy has increased attack power •Certain items will appear in large numbers after a little while |
Mach Rider | |||
| 1,431 | Creeper | Minecraft Series | •Mr. Game & Watch Team |
3,500 | Minecraft World (Birch Forest) | •Item: Bomber | •The enemy starts the battle with a Bomber •Explosion attacks aren't as effective against the enemy •Reinforcements will appear after an enemy is KO'd |
Toys on a Tear | |||
| •Mii Brawler | |||||||||||
| 1,437 | Piglin | Minecraft Series | •Gold Alex Team |
4,000 | Reset Bomb Forest (Forest) | N/A | •Timed battle (2:00) •Reinforcements will appear after an enemy is KO'd •The enemy starts the battle with a Killing Edge |
Cavern | |||
| •Gold Mii Brawler Team | |||||||||||
| 1,440 | Tifa | FINAL FANTASY Series | •Mii Brawler |
7,400 | Reset Bomb Forest (Ω form) | •Move Speed ↑ •Attack Power ↑ |
•The enemy has increased attack power after a little while •The enemy has increased move speed after a little while |
Let the Battles Begin! | |||
| •Mii Brawler | |||||||||||
| 1,450 | Chocobo & Moogle | FINAL FANTASY Series | •Mii Brawler •Kirby |
1,600 | Garden of Hope | •Item: Cucco | •Take your strongest team into this no-frills battle •The enemy starts the battle with a Bob-omb |
Flower Field | Chocobo | ||
| •Mii Brawler •Kirby | |||||||||||
| 1,472 |  |
Giga Cat Mario | Super Mario Series | •Giant Mii Brawler •Bowser Jr. |
3,900 | Find Mii (Ω form) | N/A | •Defeat the main fighter to win •The enemy is giant |
The Great Tower Showdown 2 | Mario | |
| 1,476 | Heihachi Mishima | Tekken Series | •Mii Brawler |
13,700 | Mishima Dojo | •Sudden Final Smash | •The enemy will suddenly have a Final Smash when the enemy's at high damage •Stamina battle |
Heihachi Mishima, the King of Iron Fist | |||
| •Mii Brawler | |||||||||||
| 1,479 |  |
Kuma & Panda | Tekken Series | •Mii Brawler •Mii Gunner |
1,900 | Gaur Plain (Battlefield form) | •Uncontrollable Speed | •The enemy is very fast and can't stop quickly after a little while •Reinforcements will appear during the battle |
Yodeling in Meadow Hill | Kuma | |
| 1,482 | Ling Xiaoyu | Tekken Series | •Mii Brawler •Mii Gunner |
3,800 | New Pork City (Battlefield form) | N/A | •Defeat the main fighter to win •Stamina battle •Reinforcements will appear during the battle |
Moonsiders 1st | |||
As a minion[edit]
| Spirit | Battle parameters | Inspiration | |||||||||
|---|---|---|---|---|---|---|---|---|---|---|---|
| No. | Image | Name | Series | Enemy Fighter(s) | Type | Power | Stage | Rules | Conditions | Music | Character |
| 33 | Toadette | Captain Toad: Treasure Tracker Series | •Villager •Mii Brawler |
2,600 | The Great Cave Offensive (Battlefield form) | N/A | •The enemy is easily distracted by items | Plucky Pass Beginnings | Captain Toad | ||
| 1,079 | Sebastian Tute | Wii Music | •Mii Swordfighter •Mii Gunner •Mii Brawler |
8,900 | Tomodachi Life (Battlefield form) | N/A | •Defeat the main fighter to win •Only certain Pokémon will emerge from Poké Balls (Meloetta) •Reinforcements will appear during the battle |
Final Results - Wii Party U | Bob Tute | ||
| 1,082 | Iris Archwell Ella Mentree |
StreetPass Mii Plaza Series | •Villager •Mii Brawler |
3,600 | Luigi's Mansion | •Invisibility | •All fighters are invisible after a little while | On the Hunt -Gloomy Manor Ver.- (Instrumental) | Mii | ||
| 1,298 |  |
Partner Pikachu | Pokémon Series | •Pikachu •Mii Brawler |
8,000 | Saffron City | •Sudden Final Smash •Item: Poké Ball |
•The enemy will suddenly have a Final Smash when the enemy's at high damage •The enemy's electric attacks have increased power •Stamina battle |
Main Theme - Pokémon Red & Pokémon Blue (Melee) | Chase | |
| 1,321 | Peachette | Super Mario Series | •Peach •Mii Brawler •Luigi •Mario |
10,000 | Mushroom Kingdom U (hazards off) | •Easy to Launch •Hazard: Low Gravity |
•All fighters are easy to launch •Timed battle (1:00) •Gravity is reduced |
Ground Theme - New Super Mario Bros. U | Yellow Toad | ||
| 1,441 |  |
Barret | FINAL FANTASY Series | •Mii Gunner •Mii Brawler |
3,500 | Midgar (hazards off) | •Item: Exploding Types | •Stamina battle •Reinforcements will appear after an enemy is KO'd •The enemy starts the battle with a Bob-omb |
Opening - Bombing Mission | Biggs, Wedge, and Jessie | |
| •Mii Gunner •Mii Brawler | |||||||||||
| 1,448 |  |
The Turks & Rufus Shinra | FINAL FANTASY Series | •Robin •Mii Gunner •Mii Brawler •Mii Swordfighter |
7,700 | Fourside (Battlefield form) | •Item: Exploding Types | •Reinforcements will appear after an enemy is KO'd •Reinforcements will appear during the battle •The enemy starts the battle with a Steel Diver |
Those Who Fight (AC Version) | Rude | |
| 1,516 |  |
Noah & Mio | [sic] | •Dark Samus •Mii Brawler •Shulk |
9,300 | Bridge of Eldin (Battlefield form) | N/A | •Stamina battle •Reinforcements will appear after an enemy is KO'd •The enemy starts the battle with a Beam Sword |
Battle!! - Xenoblade Chronicles 2 | Mio | |
Alternate costumes[edit]
Gallery[edit]
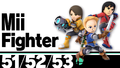
Mii Brawler in Mii Fighters' fighter card.
Mii Brawler's unlock notice when obtaining them in World of Light.
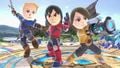
Mii Brawler taunting on Battlefield.

Striking Kirby mid-Stone with his Head-On Assault on Skyworld.
Mii Brawler shielding on Mario Circuit.


Fighter Showcase Video[edit]
Trivia[edit]
- The Brawler is the only type of Mii Fighter to have a non-special move named in one of their tips; namely, his up smash, which is called "Cartwheel Kick".
- The name is somewhat misleading: an actual "cartwheel kick" is a maneuver used in Capoeira, while the Mii Brawler's up smash is actually a bicycle kick.
- Mii Brawler's pose in the panoramic artwork for Ultimate resembles his neutral aerial.
- Many of the Mii Brawler's special moves resemble the attacks of a variety of characters from different fighting games, such as Counter Throw's animation resembling Geese Howard's Jōdan'ateminage counter and Flashing Mach Punch resembling Ryo Sakazaki's Zanretsuken. These similarities are taken further in Mii outfit showcases and Spirit battles, where the Brawler is seen using certain special moves as a homage to his outfits.
- Regardless of whether the costume is purchased or not, Mii Brawler appears in the most spirit battles in DLC spirit boards, with a total of fourteen.
- The Mii Brawler from Adventure Mode is the only Mii Fighter to be given an official name by Nintendo. According to a tweet by NintendoVS, his name is Chris.