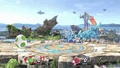
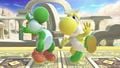
Yoshi (SSBU)
| Yoshi in Super Smash Bros. Ultimate | |
|---|---|
  
| |
| Universe | Yoshi |
| Other playable appearances | in SSB in Melee in Brawl in SSB4 |
| Availability | Starter |
| Final Smash | Stampede! |
| Tier | S- (12) |
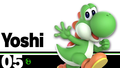
Yoshi (ヨッシー, Yoshi) is a playable character in Super Smash Bros. Ultimate. Initially teased in the then-unnamed Ultimate's announcement trailer, he was revealed for the game along with the rest of the veterans on June 12th, 2018; he and Luigi were the last veterans confirmed, with both appearing at the very end of the trailer. Yoshi is classified as Fighter #05.
As in Super Smash Bros. 4, Ultimate uses all of Kazumi Totaka's voice clips from Yoshi's Story.
Yoshi is ranked 12th out of 82 on the current tier list, placing him at the middle of the S- tier. This is a significant improvement from his 33rd out of 54 placement in Super Smash Bros. 4, and is his best placement in the series. Yoshi is gifted with overall high movement speed, especially his air mobility, allowing him to easily weave around opposing attacks and space effectively. This also grants him fantastic edgeguarding abilities, with Egg Throw and his long-lasting neutral aerial being particularly effective, the latter also being a strong out of shield option. Rounding out his offense is a high damage output, solid combo game, and versatile and powerful aerials, with down air being the most damaging in the game. In addition, he has among the best endurance in Ultimate, as not only is he heavy, but his double jump armor allows him to take potentially fatal attacks. His unique shield also always covers his entire body, protecting him from shield stabbing. Finally, Yoshi has a solid recovery, with Egg Throw and directional air dodges complimenting his aforementioned great air speed and high-reaching armored double jump.
Despite these strengths, Yoshi has several notable flaws. His unimpressive range can cause him to get stuffed out by characters with disjointed hitboxes and struggle against certain zoners. In addition, only half his special moves are considered useful, with Egg Roll being considered one of the worst special moves in the game, and Egg Lay being rather niche. His double jump armor can potentially gimp him if he tanks a move that exceeds his armor's threshold. Yoshi also struggles against juggling, as he is surprisingly floaty for a heavyweight and most of his aerial attacks are ineffective when he is in disadvantage; notably, using his double jump to escape pressure is more detrimental to Yoshi than any other character, as it removes his best recovery option. Finally, Yoshi's grab game is mediocre, with his throws and Egg Lay possessing limited combo or KO potential.
Overall, Yoshi is a strong character in the metagame, particularly in Japan, where he is considered a top 10 fighter. Japan is also home to a slew of top-level Yoshi players such as Yoshidora and Ron. Although less popular outside of Japan, Yoshi maintains a positive reception and strong results from players such as Meme.
Attributes[edit]
Yoshi is a heavyweight fighter with above-average mobility, good frame data, and decent KO potential. He sports a unique shield in the form of a Yoshi Egg, which covers his whole body no matter the damage it has taken; thus, it makes Yoshi immune to shield stabbing.
As stated previously, Yoshi sports excellent mobility: he has the 27th fastest walking speed, the 19th fastest dashing speed (with an above-average initial dash as well), the fastest air speed in the game, and the 14th highest air acceleration. Additionally, Yoshi sports among the highest jumping prowesses in the game; this can especially be owed to his double jump, which is the second-highest in the game, only behind Mewtwo's. Along with this, his double jump possesses a unique form of subtractive knockback armor that is active immediately on frame 1, granting him an excellent combo breaker. However, his traction and gravity are the 23rd and 20th lowest in the game, respectively; further compounding this, his falling and fast-falling speeds are among the bottom 10 in the game (the 7th slowest to be specific). Thus, Yoshi is quite speedy overall, yet at the same time, he's one of the floatiest characters in the game, which is incredibly unorthodox for a heavyweight, arguably more so than any other in the game.
Complementing his high mobility, Yoshi's moveset possesses very good utility. Both hits of neutral attack can connect into each other, and the first hit can also be used to jab lock as well as combo into moves such as down special for a kill confirm; forward tilt serves as a reliable combo starter at low-mid percents, due to its moderate base knockback and vertical launch angle; up tilt is an effective combo starter with low knockback growth, and leads to KO confirms at higher percents; and down tilt is his fastest tilt, sporting good range and serving as a reliable tech chasing option. Lastly, his dash attack has a long duration and good range; this, combined with its decent knockback, makes it good for KOing opponents at later percents and punishing rolls or techs.
Yoshi's smash attacks are also useful in their own right: forward smash has a powerful sweetspot that outprioritizes its slightly weaker sourspot, allowing it to KO at reasonable percents. It also has decent start-up, can be angled, and grants Yoshi intangibility for its duration; up smash has good horizontal and vertical range, reasonable start-up, and a powerful sweetspot, allowing it to KO at percents as low as 120% provided the sweetspot hits; lastly, down smash is extremely quick in both start-up and ending lag which, coupled with its good range, makes it an adept option for punishing rolling opponents.
Although his grounded moveset comes with potent attacks, it is Yoshi's aerial attacks that possess high usefulness and make up his fantastic air game. Neutral aerial is a very fast sex kick with low all-around lag, decent range, and good power, allowing it to either KO at surprisingly early percents, serve as an effective combo breaker, be a tech-chase set-up, and be his primary out of shield option. Forward aerial also possesses a high range and reasonable all-around lag, and comes with impressive damage; its tipper hitbox meteor smashes opponents, allowing for offstage KOs to occur as early as 20%. Back aerial boasts high speed and high power, with its first two hits being effective combo starters and its final hit KOing below 130%.
Up aerial possesses high vertical range and a hitbox that hits behind the opponent, which, in tandem with its impressive damage output and low all-around lag, makes it an effective juggling option. Lastly, down aerial serves as the most damaging aerial in the game; its hits can easily link into each other, with its high vertical knockback allowing it to KO at reasonable percentages near the upper blast zone. His grab game is also relatively decent: his grab release and throws grant invincibility during their animations, pummel is fast and deals average damage, forward and back throws are decent KO options by the ledge, up throw has combo potential into his up air at low percents, and down throw has little ending lag making it his most useful combo throw.
Yoshi's special moves are also very effective tools for the character. Egg Lay is a command grab which traps the opponent in an egg for a short amount of time, allowing it to work as a damage racker, and when B-reversed is an effective surprise trapping option. Egg Roll travels decently fast on the ground and deals effective damage when running into an opponent, Yoshi Bomb gives Yoshi an option to escape juggles if the situation allows for it, can go through soft platforms, does high damage in both the ground and air, and the grounded version deals high shield damage. However, his best special move is easily his Egg Throw, his only but incredibly effective projectile. The trajectory of the move can be changed depending on the angle of the joystick, can bounce on the ground, and allows Yoshi to have an option for zoning.
Although Yoshi's strengths allow him to be effective in many instances, he has some noticeable weaknesses; the main problem being that his recovery is very limited. His double jump and air speed make getting back onstage with him more plausible, but his double jump can only be used once, and if his opponent has a move that breaks his armor limit, then he'll likely be in a difficult situation for getting back onstage. His other recovery options outside of his double jump are very short-ranged and punishable, with Egg Throw only giving vertical distance upon its first three usages and directional air dodges having high ending lag. His reliance on his double jump to recover also impacts his disadvantage state - unlike most other fighters, who can use their midair jump to escape unfavorable positions when landing, the height it grants Yoshi can simply keep him landing for longer, and if he is knocked offstage after using it, then much of his recovery is limited. Because of this, Yoshi players must be especially careful in juggling scenarios, which can be exploited.
His approach can also be very punishable as his moves outside of tilts are noticeably slower, with every one of his aerial attacks outside of his neutral and up aerials having below-average speed, and most of his attacks have short-range that leaves him vulnerable to getting stuffed out by disjointed hitboxes. His grab is also very punishable when missed despite its invincibility and long range, Egg Lay is very limited and has no usage if the opponent is far away, Egg Roll has a very predictable trajectory and is hard for Yoshi to get out of if the attack doesn't work well in his current situation, and Yoshi Bomb is also predictable if used unsafely and has high ending lag when Yoshi hits the ground. Finally, his shield, as useful as it is due to never shrinking when weakened, presents a double-edged sword situation: a weakened shield can still be hit easily, and as such, can break more easily than a normal shield.
Overall, Yoshi is still a very reliable character despite his glaring weaknesses. With his fast speed and useful moveset, he is very capable of performing combos, scoring KOs, and playing an effective neutral game. As a result, opinions on Yoshi have remained high throughout the game's competitive lifespan.
Changes from Super Smash Bros. 4[edit]
Yoshi has been considerably buffed in the transition to Ultimate. Many of his most notorious attributes have been improved, with comparatively very few nerfs to balance out his buffs.
One of Yoshi's biggest buffs was to his previously poor KO power for a heavyweight. All of Yoshi's smash attacks have had their power increased, and forward smash has lost one of its sourspots, making it a more consistent option. Moves like forward tilt and back aerial now lead much more reliably into other moves thanks to their improved combo potential, either improving Yoshi's KO confirms into other moves or outright granting him new ones. Egg Throw now consists of one hit that deals more damage, which puts the opponent into a more disadvantageous position at low percentages, allowing Yoshi to win the neutral game with more ease and also improving his combo game; additionally, Egg Throw grants more diagonal distance during its first three uses.
Yoshi benefits from many of the universal engine changes. All of his aerials have reduced landing lag, which, combined with his vastly improved forward tilt, improves Yoshi's combo and damage-racking potential, especially at low percentages. As with other veterans, Yoshi's already excellent mobility has been further increased, helping his approach. The changes to air dodging strengthen his edge-guarding with both aerials and Egg Throw, and also grant Yoshi a useful, invincible recovery tool, which also drastically improves his notoriously limited recovery in combination with his buffed Egg Throw.
However, Yoshi is not without a few nerfs. His up tilt has less range, no longer hitting opponents up close, which limits its combo potential to hitting opponents above or behind him, and forces Yoshi to use his improved forward tilt in front of himself. Dash attack can no longer cross-up shields, making it more punishable and risky as an approach option. Finally, Yoshi's overall jump height, while still impressive, has nevertheless been lowered, hampering his vertical survivability offstage; further compounding this are the increased ending lag on air dodges and the ability to use one at a time before landing or getting hit, forcing Yoshi to cautiously use his own air dodge in tandem with his recovery options to avoid a guaranteed self-destruct. This also affects his forward aerial, which can no longer autocancel in a short hop due to his lower short hop. Of note is that Yoshi still retains one of his most noticeable flaws from SSB4, that being his grab game, which, while improved, is still lackluster.
Overall, Yoshi's changes have improved his core kit from SSB4, resulting in a lower learning curve; while this does not change his playstyle significantly, this allows Yoshi to better play to his strengths thanks to his moves' improved consistency and utility. Because of this, and a comparatively lower amount of nerfs, Yoshi is a significantly better character than he was in SSB4.
Aesthetics[edit]
 Due to the aesthetic used in Ultimate, Yoshi's model features a more subdued color scheme, but unlike in Melee and Brawl, it retains its chartreuse color from the Mario and Yoshi series used in Smash 64 and SSB4. His irises appear larger while his shoes feature subtle detailing.
- Yoshi has a new alternate costume based on his felted design in Yoshi's Crafted World. It replaces his Black Yoshi costume from SSB4.
- Yoshi now always faces the screen regardless of the direction he turns. Because of this, both his stance and moveset are mirrored.
- Yoshi is more expressive, he scowls when using his aerials and grabbing onto a ledge.
- Idle pose, dashing, falling, and double jump animations have been updated to match Yoshi's upright posture.
 Yoshi no longer reverts to his posture and idle poses from Brawl while holding a small item.
- All of Yoshi's victory poses were slightly altered:
- His left-inputted victory pose now has him performing a Flutter Jump before spinning around once and striking a V sign.
- His up-inputted victory pose now has him strike a new pose, where he stands on one leg while extending his arms out.
- His right-inputted victory pose now has him punch the air twice and strike a pose with his right leg farther back.
Attributes[edit]
 Like all characters, Yoshi's jumpsquat animation takes 3 frames to complete (down from 6).
- Yoshi runs faster (1.86 → 2.046).
- Yoshi's initial dash is significantly faster (1.33 → 1.98).
- Yoshi walks slightly faster (1.15 → 1.208).
- Yoshi's air speed has been increased, now being faster than he was in Brawl (1.28 → 1.344).
- Yoshi has significantly higher traction (0.0426 → 0.095), allowing him to punish out of shield much more easily.
 Yoshi's jump height has been slightly reduced.
- However, the reduction to his short hop height noticeably improves his ability to utilize short hop aerials against grounded opponents.
- Forward roll has less ending lag (FAF 36 → 31).
- Forward roll grants less intangibility (frames 4-21 → 4-15).
- Back roll has more startup and grants less intangibility (frames 4-21 → 5-16).
- Spot dodge has less ending lag (FAF 28 → 27).
- Spot dodge grants less intangibility (frames 3-18 → 3-17).
- Air dodge grants more intangibility (frames 3-28 → 3-30).
- Air dodge has significantly more ending lag (FAF 34 → 59).
- The reintroduction of directional air dodges benefits Yoshi, as due to Egg Throw not causing helplessness, he can get additional distance with a directional air dodge after using it.
- The removal of shield platform dropping benefits Yoshi, as he was the only character unable to perform the technique in Smash 4. When combined with his unique shield rendering him immune to shield stabbing, this effectively gives him the best shield in the game.
- Yoshi's double jump armor has been altered. The armor duration is significantly shorter, but like in Smash 64 and Melee, knockback taken is reduced if the armor is broken by an attack with sufficiently high knockback.
Ground attacks[edit]
- Neutral attack:
- The first hit transitions into the second hit faster (frame 9 → 6).
- Both hits have a higher hitlag multiplier (1× → 1.5× (hit 1), 2× (hit 2)), giving opponents more time to SDI the first hit and DI the second hit.
- The first hit has altered angles (60°/90°/50° → 361°/180°) and knockback (30 base/50 scaling → 40/35/10 base/30/28/20 scaling) to keep opponents close to Yoshi, akin to other neutral attacks. This allows it to connect better into the second hit and jab lock, but removes some of its guaranteed jab cancel setups.
- Due to this change, and the second hit using the Sakurai angle, grounded opponents hit by the move are launched at a lower angle. This allows it to get them offstage more effectively, but makes followups harder.
- At low percents, the outermost hitbox now doesn't have enough hitstun to prevent opponents from shielding the second hit.
- Forward tilt:
- Forward tilt has significantly less ending lag (FAF 39 → 30).
- It launches opponents at higher angles (80°/65°/50° → 88°/85°), and has more base knockback (50 → 60), but less knockback scaling (80 → 75). Combined with the previous change, this turns it into a reliable combo starter, while also improving its KO ability.
- It deals more damage when not angled (7% → 8%).
- The outermost hitbox is slightly larger (2.8u → 3u).
- Its animation has been altered, with Yoshi no longer performing a full spin when swinging his tail. Yoshi also has an angry expression.
- Up tilt:
- Up tilt's hitboxes start from a higher position, making them unable to hit short characters in front of Yoshi.
- Down tilt:
- Down tilt has slightly more base knockback (65 → 67).
- Down tilt's animation is reversed, with Yoshi spinning towards the screen rather than away from it.
- Dash attack:
- Dash attack has less ending lag (FAF 50 → 41).
- It deals more damage (9% → 11% (clean), 6% → 8% (late)).
- It has altered knockback scaling (52 → 45 (clean), 44 (late)). Overall, the clean hit deals less knockback, hindering its KO potential, while the late hit deals around the same knockback.
- The move has noticeably shorter travel distance, worsening its utility as a grounded burst option. It also no longer crosses up shields consistently, making it easier to punish despite its reduced ending lag and higher damage output.
- The late hit has smaller hitboxes (5u/3.5u → 4u/2.5u).
- Forward smash:
- Forward smash has two different hitboxes instead of three, with the sweetspot taking priority over the sourspot and being located closer to Yoshi. This effectively removes its weaker sourspot (that dealt 13%) and makes the sweetspot easier to land.
- It has a longer hitbox duration (frame 14 → 14-16) and grants more intangibility on Yoshi's head (frames 12-14 → 12-16).
- The sweetspot has more knockback scaling (98 → 102).
- Yoshi now sports an angrier expression while headbutting, instead of closing his eyes like in previous games.
- Up smash:
- Up smash deals more knockback (37 base/95 scaling → 38/99).
- Down smash:
- Down smash launches at a lower angle (30° → 26°) and deals more knockback (hit 1:40/42 base/73/57 scaling → 51/46/75/63, hit 2: 40/42 base/81/75 scaling → 51/44/83/75), allowing it to KO around 150% with the first and 130% with the second hit from center stage.
Aerial attacks[edit]
- All aerials have less landing lag (11 frames → 7 (neutral), 17 → 12 (forward), 19 → 11 (back), 14 → 8 (up), 24 → 17 (down)).
- Neutral aerial:
- The clean and mid hits have been moved further away from Yoshi (z offset: 5.5 (clean)/4 (mid) → 7.5/5), improving their range.
- Forward aerial:
- The removal of teching for grounded meteor smashes improves forward aerial's combo potential onstage, compounded further by its reduced landing lag.
- The sourspot has been removed, with the sweetspot and meteor hitboxes being made bigger to compensate (2.4u (sweetspot)/3.5u (meteor) → 4.2u/4u).
- Despite the auto-cancel window remaining unchanged, it no longer auto-cancels in a short hop due to Yoshi's lower short hop duration.
- It has a different animation, with Yoshi no longer flipping after the headbutt.
- Back aerial:
- Back aerial deals more damage (2.5% → 3.5% (hits 1-2), 5% → 5.5% (hit 3), total: 10% → 12.5%) with knockback not compensated on the third hit, increasing its KO potential.
- It has much lower hitlag multipliers (2× → 0.5× (hits 1-2), 1.5× (hit 3)), allowing it to execute faster and making the first two hits harder to SDI.
- The second and third hits have less startup lag (frame 17/25 → 14/18), causing them to connect more reliably.
- However, the move's total duration remains unchanged, giving it more ending lag.
- The move's first two hits deal much less knockback (30/50 base/200/150 scaling → 20 base/100 scaling), and use the autolink angle against grounded opponents as well (361° → 367°) instead of only aerial ones. This allows them to connect more reliably, and combined with the move's lower landing lag, start combos at a wide range of percentages.
- All hitboxes have been moved upwards (Y offset: 2u-4u → 3u-5u (hit 1 and 2), 3u → 5u (hit 3)), increasing the move's range above Yoshi, but reducing it below him.
- Back aerial has a slightly altered animation, with Yoshi striking a new pose at the end of the move.
- Up aerial:
- Up aerial has less ending lag (FAF 39 → 37).
- It auto-cancels earlier (frame 33 → 31).
- It has a new animation where Yoshi raises his tail up from behind without flipping.
- Down aerial:
- Down aerial's looping hits have a lower hitlag multiplier (1.1× → 0.6×), use the autolink angle (270°/260°/280° → 367°), and have consistent knockback scaling (100/80 → 100), allowing them to connect more reliably and making them harder to SDI, despite their higher SDI multiplier (1.5× → 1.8×).
- The landing hit deals more knockback that is no longer set (40 set/100 scaling → 65 base/100 scaling), causing opponents to tumble even at 0%. This allows it to set up edgeguards more effectively, and grants it followups at low percents if the opponent fails to tech.
- The move's initial auto-cancel window has been removed.
- It has smaller hitboxes (6u/4.5u → 5u/3.5u (looping hits), 7u/5u → 6.5u/4.5u (last hit)).
- The looping hits deal less damage (3%/2% → 2.3%/1.8% (hits 1-6), 2.2%/1.5% → 1.9%/1.4% (hits 7-12)), reducing the move's maximum damage output (32.2% → 28%) despite the last hit dealing more damage (1% → 2.8%).
- The last hit's knockback has not been fully compensated for its higher damage output (60 base/200 scaling → 55/179), improving its KO potential.
- The last hit has a higher hitlag multiplier (1.1× → 1.5×).
Throws and other attacks[edit]
- Grabs:
- All grabs have noticeably less ending lag (FAF 56 → 49 (standing), 68 → 57 (dash), 65 → 52 (pivot)), especially compared to the rest of the cast, as all non-extended grabs have conversely had their ending lag increased.
- Dash and pivot grab have more startup lag (frame 11 → 16 (dash), 10 → 17 (pivot)), no longer being faster than his standing grab. His pivot grab in particular has gone from among the fastest to one of the slowest.
- Yoshi's pivot grab animation has been altered; Yoshi pauses for a bit before turning around on one foot.
- Yoshi's grab animation has changed. After grabbing an opponent and holding them in his mouth, his cheeks become swollen and jiggle, as if the fighter inside is trying to break out. He also holds his mouth closed with his hands, and no longer crouches down to the ground.
- Pummel:
- Pummel deals less damage (2% → 1.3%).
- It deals more hitlag (4 frames → 14), but has much less startup (frame 4 → 1) and ending lag (FAF 16 → 7).
- It uses a unique, cartoony chomping sound effect, rather than a standard "kick" sound effect.
- The speed of Yoshi's throws is no longer weight-dependent.
- Forward throw:
- Forward throw deals more damage (7% → 9%) with no compensation on knockback.
- Back throw:
- Back throw deals more damage (7% → 9%) with no compensation on knockback.
- Up throw:
- Up throw has significantly more knockback scaling (43 → 90), allowing it to KO at around 230%, compared to being unable to KO under 500% without rage.
- Down throw:
- Down throw releases opponents 3 frames later (frame 15 → 18), reducing its effective ending lag, and improving its combo potential.
- Edge attack:
- Edge attack deals more damage (7% → 9%).
Special moves[edit]
- Egg Lay:
- Egg Lay has less startup lag (frame 21 → 19), with its total duration equally reduced (FAF 44 → 42).
- Opponents can no longer move left and right in the air while in an egg.
- The aerial version's animation is longer (43 frames → 61), as is the laying animation (37 frames → 52). This increases the amount of time aerial mobility is locked, and Yoshi cannot grab the ledge, if the move is not interrupted.
- Opponents in an egg can shift themselves left and right on the ground by mashing the respective direction and slightly jump if mashing diagonally upwards.
- It has a slightly altered animation, inflating Yoshi's cheeks more as he swallows opponents, similar to his grab.
- Egg Roll:
- Egg Roll deals drastically more damage (4%-≈9% → 10%-≈13.8%).
- Its base knockback and knockback scaling have been reversed (50/70 → 70/50), making it safer on hit at low percents, while still improving its KO potential due to its higher damage output.
- Yoshi always bounces once when using Egg Roll on the ground. This makes the move's execution slower and more predictable.
- Changing direction takes longer.
- Yoshi strikes a new pose before using Egg Roll.
- Egg Throw:
- Yoshi gains slightly more vertical distance on the first Egg Throw, particularly after a jump.
- Eggs have a higher hitlag multiplier (0.3× → 0.6×), giving Yoshi more time to follow up.
- Eggs can bounce on the ground and retain their horizontal momentum before they break, giving Yoshi a new option to stop approaches.
- Eggs deal a single hit to opponents instead of two, with the same total damage (1% (hit 1), 5% (hit 2) → 6%) and no compensation on knockback.
- Egg Throw has more startup (frame 15 → 16) and ending lag (FAF 54 → 56).
- Eggs have received negative shield damage (0 → -3), effectively dealing half their usual damage to shields.
- Yoshi can use either his right arm or left arm to throw eggs, due to his mirrored stance.
- Yoshi Bomb:
- Yoshi Bomb can sweetspot a ledge even if Yoshi is facing away from it.
- Both the grounded and aerial versions allow Yoshi to go through soft platforms if he is high enough above them and the control stick is held down.
- If too close to them, he will always go through.
- Yoshi once again vocalizes when using the grounded version, much like in previous games up until Brawl.
- Yoshi falls more slowly (5 → 4.8).
- Final Smash:
- Yoshi has a new Final Smash called Stampede!. He headbutts in front of him and an army of multicolored Yoshis stampede over the trapped players, similar to his part of the Super Smash Bros. Melee opening.
Update history[edit]
Yoshi received a mix of buffs, nerfs, and a glitch fix via game updates. All of the buffs Yoshi received were homogeneous updates to make Yoshi function more like the rest of the cast. However, the roster-wide increase in shield size in Version 7.0.0 actually nerfed Yoshi due to the impossibility to shield stab, only making it easier to hit without the compensation of being harder to break. Other nerfs include the universal projectile shield damage nerf of Version 3.0.0 affecting Egg Throw and decreasing the push back of forward smash in Version 4.0.0 making making it less safe on certain characters.
Due to changes received being relatively minor, Yoshi's viability has remained virtually unchanged since the launch of Ultimate, and he continues to achieve respectable results in tournaments.
- Shortened the amount of time the player is unable to grab a ledge after using forward aerial (71 frames → 68).
- Yoshi is now granted grab invincibility during his grab release and throw animations.
- Egg Throw deals less shield damage (0 → -3).
- Fixed a glitch where Egg Lay would cause trapped opponents to fast fall while caught during hitstun.
- Yoshi pushes opponents away less while charging his forward smash, no longer causing certain characters' grabs to be unable to reach him from the front.
- Yoshi can now buffer a grab after rolling or spotdodging.
- Yoshi's shield hitbox is bigger. Since it is impossible to shield stab Yoshi, this does not improve his shield's safety, instead making it easier to hit from a distance.
- Yoshi's head and legs are briefly intangible after activating his shield.
Moveset[edit]
- Yoshi can crawl.
- Yoshi uses a Yoshi Egg as his shield instead of a bubble like the rest of the cast. Rather than shrinking, his shield darkens as it weakens, rendering him immune to shield stabbing.
- Yoshi possesses a special type of armor during the entire duration of his double jump that subtracts 120 units of knockback, with Yoshi not flinching at all if the result is negative, or otherwise only receiving the knockback difference.
For a gallery of Yoshi's hitboxes, see here.
Note: All numbers are listed as base damage, without the 1v1 multiplier.
| Name | Damage | Description | ||
|---|---|---|---|---|
| Neutral attack | Kick (けり) Kick Kick (けりけり) |
3% | A front kick followed by a roundhouse kick. The two hits transition relatively fast (both hits being frame 3) and can connect into a jab lock. The first hit's far hitbox does not deal enough hitstun to true combo into the second hit at very low percents. | |
| 4% | ||||
| Forward tilt | Tail Sweep (しっぽはたき, Tail Duster) | 8% | Swings his tail outward. Due to the vertical launch angle, moderate base knockback, and drastically reduced ending lag, it can reliably start combos. It can follow into up smash, neutral, and up aerial at low to mid percents. | |
| Up tilt | Tail Thrust Up (しっぽつきあげ) | 7% | Swings his tail upward, going from front to back. The front hitbox is now placed higher off the ground, making it unreliable at hitting grounded opponents. However, the back hit still hits close to the ground. Yoshi's most effective combo starter due to low knockback growth and can even reach the low platforms of Battlefield, it leads to devastating combo strings at around low to mid percents and KO confirms at higher percents. | |
| Down tilt | Rotating Tail (かいてんしっぽ) | 5% (base), 4.5% (mid), 4% (tip) | Lays on all fours and spins his body around to swing his tail. The attack does the least amount of damage out of all his tilts but has the lowest ending lag out of all of Yoshi's tilts. It can be useful for tech chasing and stage control. | |
| Dash attack | Dash Kick (ダッシュげり) | 11% (early), 8% (late) | A side kick. Its long range and duration can create cross-ups and is capable of punishing rolls or techs. However, its high amount of ending lag can make it very punishable. | |
| Forward smash | Smash Headbutt (スマッシュずつき) | 15.5% (sweetspot), 14% (sourspot) | Rears his head back and performs a headbutt. The sweet spot takes priority over the sour spot and can be made into a fast KO option. It can also be angled and his head is intangible during the attack. It has a high amount of ending lag, however, and makes it punishable. Yoshi's head becomes intangible, starting from frame 12. It comes out on frame 14. | |
| Up smash | Somersault/Loop-the-Loop Kick (ちゅうがえりげり) | 14% (clean), 12% (late) | A bicycle kick. The attack has a clean hitbox and can be a potential KO option. It can hit opponents who are behind Yoshi but has somewhat punishable ending lag. | |
| Down smash | Front and Back Tail (ぜんごしっぽ) | 12% (close), 10% (tip) | Crouches and swings his tail forward at a low angle, and then backward at a low angle. Compared to his other smash attacks, it lacks any real versatility outside of reading ledge rolls or instances where forward and up smash are punishable. However, it's Yoshi's fastest smash attack, coming out on frame 7. It has a sweetspot in the middle of the move, while the sourspot is at the tip of Yoshi's tail and next to his body. | |
| Neutral aerial | Yoshi Kick (ヨッシーキック) | 10% (clean), 7% (mid), 5% (late) | A flying kick. It is a sex kick with very low startup (frame 3) and respectable power when clean. Its low landing lag also allows it to lead reliably into follow-ups at low to mid percents and set up tech chases, depending on which hitbox connects. Its aforementioned startup also makes it a potent out-of-shield option and combo breaker. Overall, it is one of Yoshi's most useful moves. | |
| Forward aerial | Noggin Dunk (かいてんずつき, Rotating Headbutt) | 15% (close), 14% (tip) | Rears his head back and then performs a downward headbutt. Possibly Yoshi's best edge guarding tool, with both hitboxes dealing an impressive amount of damage, knockback, and the tip is a meteor smash, while also having low ending lag. However, it has significant startup lag (16 frames) and can no longer autocancel in a short hop. | |
| Back aerial | Rampaging/Savaging Tail (あばれしっぽ) | 3.5% (hits 1-2), 5.5% (hit 3) | Swings his tail upward, then downward, and then upward. Moderate startup lag, with its first hit coming out at frame 11, but has a solid damage output and good knockback. Grounded opponents receive low vertical knockback from the first two hits, making them effective at starting combos. However, it doesn't autocancel in a short hop, and due to its 35 frames of ending lag, it's punishable. | |
| Up aerial | Rotating Tail (かいてんしっぽ) | 12% | Swings his tail upward. Yoshi's second-fastest aerial attack, having frame 5 startup. It autocancels in a short hop and has good knockback, making it a reliable KO option. It has a large vertical hitbox where the back can even hit grounded opponents, and due to being a very effective juggling option, it is one of Yoshi's most useful moves. | |
| Down aerial | Flutter Kick (ばたあしキック) | 2.3% (hits 1-6), 1.9% (hits 7-12), 2.8% (last hit) | A Flutter Jump-styled series of kicks. Notorious for being the most damaging aerial move in every installment of the Super Smash Bros. series, it deals 28% base damage if all the hits connect. Hits link reliably into each other and the final hit has high base knockback, making the move a powerful vertical KO option when near the top blast zone. It has low ending lag compared to the final hit, but it's tied with forward aerial for the slowest startup of Yoshi's aerials, coming out on frame 16. | |
| Grab | Tongue Catch (舌キャッチ) | — | Extends his tongue to pull the opponent into his mouth. Compared to other fighters, Yoshi's grabs have a lot more range, but a considerable amount of startup and ending lag. | |
| Pummel | Grab Chewing (つかみかみかみ) | 1.3% | Chews the opponent. Average power and speed. | |
| Forward throw | Front Spit Out (まえはきだし) | 9% | Spits the opponent forward. It has slight KO potential near edges and is mainly used for stage control. | |
| Back throw | Back Spit Out (うしろはきだし) | 9% | Turns around and spits the opponent backward. Otherwise, extremely similar to forward throw. | |
| Up throw | Upward Spit Out (うえはきだし) | 5% | Spits the opponent upward. The throw has significantly increased knockback, allowing it to KO at around 230% compared to 500% in previous games. Otherwise, it has limited utility outside of tech chase setups on high platforms. | |
| Down throw | Downward Spit Out (したはきだし) | 4% | Spits the opponent down to the ground. Unlike in SSB4, it has significantly better combo potential due to its lower ending lag and Yoshi's increased jump speed. | |
| Forward roll Back roll Spot dodge Air dodge |
— | — | ||
| Techs | — | — | ||
| Floor attack (front) Floor getups (front) |
7% | Spins around and swings his tail around himself before getting up. | ||
| Floor attack (back) Floor getups (back) |
7% | Performs a backspin (a breakdancing move) to kick outward on each side before getting up with a handspring. | ||
| Floor attack (trip) Floor getups (trip) |
5% | Spins around and swings his tail around himself before getting up. | ||
| Edge attack Edge getups |
9% | Swings his tail inward while climbing up. | ||
| Neutral special | Egg Lay | 7% | Swallows the opponent and traps them in a Yoshi Egg. When the opponent is trapped, they can escape by button mashing. They stay trapped longer the more damage they have. Upon escaping, opponents gain brief intangibility. | |
| Side special | Egg Roll | 10%-13.8% | Encases himself in a large Yoshi Egg after a small hop, then rolls around the stage. Damage dealt is proportional to its momentum. Can jump once during the move. The attack has limited usage due to its predictable movement, slow startup and end lag, and lack of armor or disjoints. It does not deal damage until it first touches the ground. Can stall at the ledge if the control stick is not held towards it, but does no damage when stationary. It can be canceled earlier by hitting the special button. Can move through shields. | |
| Up special | Egg Throw | 6% | Throws a Yoshi Egg that travels on a controllable, parabolic arc. When used in midair, the first three throws cause Fall Breaks that grant Yoshi significant vertical distance based on his current vertical momentum, with the largest possible jump being nearly as high as his double jump. After three uses in midair, it no longer grants upward momentum and Yoshi must land to recover this. A very effective projectile that can now bounce upon hitting the ground, which makes it a more versatile option. The rainbow trail surrounding the Yoshi Egg may be a reference to Yoshi's "Rainbow Swing" Star Swing and his "Rainbow Ball" Star Pitch from Mario Super Sluggers. | |
| Down special | Yoshi Bomb | 4% (hop), 15% (grounded Ground Pound), 12% (aerial Ground Pound), 4% (stars) | A Ground Pound that produces damaging stars upon landing. The attack deals a good amount of damage and has very little startup lag. It's been given more safety since it can now sweet spot ledges, now allowing it to act as a 2 frame punish option. Also can go through soft platforms if the player holds down or is close to the platform on startup. Has increased shield damage; the grounded version can break a full shield if it is not stale and all hits connect on shield. | |
| Final Smash | Stampede! | 1% (dash), 4% (headbutt), 30.428571% (cutscene), 13% (last hit) | Yoshi rushes forward and attacks the opponent with an upward headbutt. If the attack hits, it cuts to a cinematic cutscene that occurs in a rocky gorge. Suddenly, various colored Yoshis are seen stampeding down the gorge, and they attack by trampling the opponent. It is almost identical to a segment seen in the Super Smash Bros. Melee opening movie, which features a similar stampede in a comparable rocky environment before Yoshi himself stops briefly to observe the stampede. The entire Final Smash deals up to 48.428571% damage, but it can only trap up to 3 opponents at a time. The cutsence portion of the Final Smash is intended to deal 30% over 70 frames; however, in practice, there is an additional frame that adds another 0.428571%. The cutscene damage also ignores all damage modifiers, including the 1v1 multiplier. | |
Stats[edit]
| Stats | Weight | Dash speed | Walk speed | Traction | Air friction | Air speed | Air acceleration | Gravity | Falling speed | Jumpsquat | Jump height | Double jump height | Empty landing lag |
|---|---|---|---|---|---|---|---|---|---|---|---|---|---|
| Value | 104 | 1.98 – Initial dash 2.046 – Run |
1.208 | 0.095 | 0.005 | 1.344 | 0.03 – Base 0.068 – Additional |
0.08 | 1.29 – Base 2.064 – Fast fall |
3 | 36.09 - Base 14.43 - Short hop |
51.56 | 4 |
Announcer call[edit]

English/Japanese/Chinese
On-screen appearance[edit]
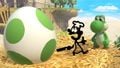
- Breaks out of a Yoshi Egg and strikes a pose while shaking his tail. The color of the Yoshi will determine the color of the spots on the egg. Based on Yoshi hatching from a Yoshi Egg in Super Mario World.
Yoshi's on-screen appearance

Taunts[edit]
- Up taunt: Dances around in a circle, chanting "Yoshi!" as he finishes.
- Side taunt: Chases his tail in circles, then looks back at it as he finishes.
- Down taunt: Faces the screen and jumps up and down whilst chanting. This is similar to his reaction to finding a secret while sniffing in Yoshi's Story.

Yoshi's up taunt.
Yoshi's side taunt.

Yoshi's down taunt.


Idle poses[edit]
- Performs a short dance.
- Looks around.
Yoshi's first idle pose.
Yoshi's second idle pose.


Crowd cheer[edit]
| Cheer (English) | Cheer (Japanese/Chinese) | Cheer (Italian) | Cheer (Dutch) | Cheer (French) | |
|---|---|---|---|---|---|
| Cheer | |||||
| Description | Yo - shi! | Yo - shi! *claps 3 times* | Yoshiiiiii! | Yoshiiiiii! | Yo - shi! |
| Cheer (German) | Cheer (Spanish) | Cheer (Russian) | Cheer (Korean) | |
|---|---|---|---|---|
| Cheer | ||||
| Description | Yo - shiiiiii! | Yo - shi! | Yo - shi! Yo - shi! | Yo - shi! *claps 3 times* |
Victory poses[edit]
- Left: Does a flutter jump, spins once, and gives the V sign. Based on an animation from "Yoshi's Story" when a stage is completed.
- Up: Punches the air twice, spins, and poses while standing on one foot. (Based on his "character chosen" animation from Smash 64 and his second-place win animation from Mario Party 10.)
- Right: Angrily punches a few times, does a roundhouse kick, then turns his back on the screen facing right. A reference to Akuma's pose after the successful use of the Shun Goku Satsu.


In competitive play[edit]
Most historically significant players[edit]
See also: Category:Yoshi players (SSBU)
 Fui - One of the best Yoshi players in Japan in the post-pandemic metagame, coming to prominence after finishing 25th at back-to-back supermajors Umebura SP 9 and Kagaribi 9 and for his performance at WAVE Champions 6 where he finished 2nd after defeating KEN. He was globally ranked for several seasons and is best known for his performances in 2024, which includes finishing 3rd at Seibugeki 17 and 5th at both UltCore Second and Sumabato SP 51, alongside defeating Doramigi at Sumabato and TamaPDaifuku at Seibugeki 16; he was eventually ranked 47th on the LumiRank 2024.2.
 JMafia - One of the best Yoshi players in the United States, coming to prominence in late-2019 after defeating ESAM to place 3rd at Fight For 95 and for finishing 33rd at 2GG: Kongo Saga. He has sporadic yet noteworthy performances since, including having wins over several of Florida's best players at ranked events and placing 9th at both Luminosity Madness and InfinityCON Tally 2021, 17th at both Cirque Du CFL 3 and MomoCon 2022 — defeating Kola in the former tournament with Yoshi and Mii Brawler — and 33rd Let's Make Moves Miami.
- MarK - One of the best Yoshi players in Japan since his breakout in 2025, achieving his first major top 8 by finishing 7th at Seibugeki 18 before finishing top 8 at several other majors afterwards, including 5th at Sumabato SP 57 and IMPACT MAJOR 2. Alongside wins over players such as Sisqui at the former and Shuton at the latter, he was eventually ranked 67th on the UltRank 2025. Since then, he has become one of the best Yoshi players in the world, having won Karisuma SP 23 and placed 3rd at Sumabato SP 66, defeating Yaura in the latter.
 Meme - One of the best Yoshi players in North America, especially in the early metagame where he was also considered one of the best Mexican players and was ranked 79th on the OrionRank 2019. During this time, he won several large Mexican events, including Smash Fest to the Sky and BIT MASTER MTY 9, taking the latter event over Maister. Outside of Mexico, he was known for finishing 9th at Low Tier City 7 defeating Light, 13th at 2GG: SwitchFest 2019 defeating Umeki, and 17th at GENESIS 7 defeating VoiD. Though less active in the post-pandemic metagame, he received renewed attention after placing 7th at Smash Factor X, defeating Maister yet again.
- Ron - The second-greatest Yoshi player of all time and widely considered to be Ultimate's strongest hidden boss due to his location and infrequent attendance, though despite this low attendance, he has been properly ranked across several seasons, peaking at 37th on the LumiRank 2023. He has numerous top 8 major performances throughout his career, such as being the runner-up at Sumabato SP Ultimate, where he defeating Miya and his 3rd-place finish at Sumabato SP 6, where he defeated Shuton. His sole international appearance was at Battle of BC 6, where he defeated MkLeo to finish 9th.
- Rotsuku - One of the best Yoshi players in the early metagame, known in Japan for his performances in the middle of the year, which includes finishing 13th at both Umebura SP 3 and Umebura SP 5, defeating Kuro in the former and Tea in the latter, and finishing 17th at Umebura Japan Major 2019. Internationally, he was known for attending EVO 2019 during this time, where he defeated VoiD and finished 25th. Since that era, he has remained largely inactive outside of weeklies, though he has found some decent success regardless, such as defeating T to place 3rd at Seibugeki 4.
- Suarez - One of the best Yoshi players in the early metagame and the best in the early months of competitive play. He was the first Yoshi player to be globally ranked, at 49th on the Spring 2019 PGRU. He achieved some of the first notable Yoshi results, having placed 9th at Collision 2019, 17th at both Let's Make Moves and MomoCon 2019, and 25th at Pound 2019, in addition to wins over Light at Orion 2019 and Cosmos at Let's Make Moves. He remained one of the best Yoshi players in North America in the post-pandemic metagame, up until his retirement in early-2023, having placed 17th at Glitch - Infinite and Apex 2022, defeating Zomba at the latter.
- Yoshidora - The greatest Yoshi player of all time and one of the best Japanese players in the post-pandemic metagame. He has been ranked in the global top 100 for most of competitive play and was the only Yoshi player to ever rank among the top 10, at 8th on the LumiRank 2023. He is the only Yoshi player to ever win a major, doing so at Maesuma TOP 8, and frequently places top 8 at majors, being the runner-up at both Maesuma TOP 14.5 "in Hyogo" and Maesuma TOP 15 "FINAL" and placing 3rd at both Umebura SP 9 and Battle of BC 6.
Tier placement and history[edit]
Following Ultimate's release, numerous players of all skill levels took an interest in Yoshi due to his overall similarity to how he was in the previous game, making him rather easy to play and learn the game with. Yoshi's new strengths, especially his improved KO power, also reinvigorated his playerbase from the previous game, allowing him to have a sizeable representation in the early metagame, which was spearheaded by players such as Suarez, Meme, and Ron. As such, most players considered Yoshi to be a high-tier character, with his overall representation peaking at 20th by the end of 2019.[1]
However, Yoshi's representation began to take a hit as the metagame progressed. His best players in the early metagame either saw a stagnation in results (Suarez) or became far less active than before (Meme). Furthermore, Yoshi's weaknesses, particularly his linear recovery and weakness to disjoints, became more apparent. These negatives slowly decreased Yoshi's representation in the metagame, with it ultimately hitting 36th by the end of 2022.[2] Nevertheless, Yoshi players still managed to find success, particularly in Japan, thanks to Ron's occasional appearances in tournaments and the rise of Yoshidora, who has placed top 8 at multiple majors since the pandemic period. These strong results would help keep Yoshi's reputation afloat. As a result, Yoshi sat at 20th on the first tier list at the top of the high tier, with some players believing he should be ranked higher. This was especially the case in Japan, where most of Yoshi's best players flourished, and as such, most panelists for this tier list ranked him in the top 10. Japan's higher perception was justified in the following year, as Yoshidora traveled to several international tournaments and ranked in the top 10 for all of 2023. Though Yoshdora's results slightly declined in the following year, many other Yoshi players in Japan remained notable threats in competitive play, including Ron and Fui. As such, Yoshi rose in the following three tier lists, ranking 14th on the second (at the end of the A+ tier), 13th on the third, and 12th on the fourth (both towards the end of the S- tier).
Classic Mode: Jurassic Journey[edit]

Yoshi's opponents resemble older pop culture depictions of Jurassic Period animals. His boss, Rathalos, fits with this theme due to it being a classical draconic wyvern.
| Round | Opponent | Stage | Music | Notes |
|---|---|---|---|---|
| 1 | Distant Planet | World Map - Pikmin 2 | Ivysaur's Pokémon Trainer is absent. | |
| 2 | Giant |
Great Bay | Yoshi's Tale | |
| 3 | Jungle Japes | Wildlands | ||
| 4 | Yoshi's Island (Melee) | Flower Field | Horde Battle (3 at a time). The Koopalings are fought in the same order as Yoshi’s debut game, Super Mario World. | |
| 5 | Garden of Hope | Bandit Valley | Charizard's Pokémon Trainer is absent. | |
| 6 | Giant |
Mushroom Kingdom U | Melty Monster | Likely a reference to a recurring element in the Yoshi's Island series, in which Kamek transforms Baby Bowser into a giant upon the latter's defeat. |
| Bonus Stage | ||||
| Final | Rathalos | Forest Hill | Roar/Rathalos | |
Note: With the exceptions of Rounds 1 and 6, a song from the Yoshi universe is played regardless of the stage.
Credits roll after completing Classic Mode. Completing it as Yoshi has Yoshi's Tale accompany the credits.
Character unlock tree[edit]
Yoshi's Classic Mode character unlock tree includes the following characters in order:
Each character can be unlocked by clearing Yoshi's Classic Mode, or the Classic Mode of any preceding character if all preceding characters have been unlocked. Once all the above characters are unlocked, clearing Classic Mode with any of them will default to Mario's character unlock tree, starting with Sonic.
Appearances in other Classic Mode routes[edit]
Yoshi appears as an opponent in certain other fighters' Classic Mode routes, with them being listed below:
Role in World of Light[edit]

Although Yoshi does not appear in the World of Light opening cutscene, he was vaporized and later imprisoned alongside the rest of the fighters (sans Kirby) when Galeem unleashed his beams of light.
He can be found in a ribbon pathway to be awakened, which can be accessed in a short time after taking Sheik's route.
Fighter Battle[edit]
| No. | Image | Name | Type | Power | Stage | Music |
|---|---|---|---|---|---|---|
| 05 | |
Yoshi | 3,600 | Super Happy Tree (Ω form) | Obstacle Course - Yoshi's Island |
Spirits[edit]
Yoshi's default fighter spirit can be obtained by completing Classic Mode as Yoshi. It is also available periodically for purchase in the shop for 300 Gold. Unlocking Yoshi in World of Light allows the player to preview the second spirit below in the Spirit List under the name "???". As a fighter spirit, it cannot be used in Spirit Battles and is purely aesthetic. His Crafted World outfit has a fighter spirit of its own, available through the shop. Each fighter spirit has an alternate version that replaces them with their artwork in Ultimate.
Additionally, Yoshi makes an appearance in various primary and support spirits.
75. Starship Mario
297. Yoshi
298. Yoshi (Yoshi's Crafted World)
319. Mega Eggdozer
321. Yarn Yoshi
1301. River Survival


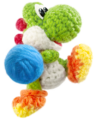
.png)

In Spirit Battles[edit]
As the main opponent[edit]
| Spirit | Battle parameters | Inspiration | |||||||||
|---|---|---|---|---|---|---|---|---|---|---|---|
| No. | Image | Name | Series | Enemy Fighter(s) | Type | Power | Stage | Rules | Conditions | Music | Character |
| 38 |  |
Hammer Bro | Super Mario Series | •Yoshi |
3,400 | Golden Plains (Battlefield form) | •Assist Trophy Enemies (Hammer Bro) | •Hostile assist trophies will appear when the enemy's at high damage •The enemy favors up specials |
Ground Theme - Super Mario Bros. 3 (Remix) | ||
| 60 |  |
Wiggler | Super Mario Series | •Yoshi |
1,600 | Yoshi's Island (Melee) | •Attack Power ↑ •Item: Lip's Stick |
•The enemy becomes powerful when badly damaged | Ground Theme - Super Mario World | ||
| 77 | Plessie | Super Mario Series | •Giant Yoshi |
2,100 | Great Bay | N/A | •The enemy is giant | Slide | |||
| 156 | Rattly | Donkey Kong Series | •Yoshi |
3,400 | Kongo Jungle | N/A | •The enemy loves to jump •The enemy has increased jump power |
Snakey Chantey | |||
| 167 | Kip | Donkey Kong: Barrel Blast | •Tiny Yoshi Team |
1,800 | Yoshi's Story | N/A | •The enemy starts the battle with a Rocket Belt | Boss 2 - DK: Jungle Climber | |||
| 182 |  |
Like Like | The Legend of Zelda Series | •Yoshi |
4,000 | Great Bay (Battlefield form) | •Sudden Damage •Item: Food •Hazard: Sticky Floor |
•The floor is sticky •You'll occasionally take sudden damage after a little while •The enemy favors grabs and throws |
Overworld & Underworld - The Legend of Zelda (for 3DS / Wii U) | ||
| 218 | .png) |
Dimitri (The Legend of Zelda) | The Legend of Zelda Series | •Yoshi •Young Link |
1,700 | Great Bay | N/A | •The enemy favors neutral specials | Tal Tal Heights | ||
| 318 | Spirit Who Loves Surprises | Yoshi Series | •Yoshi Team |
2,000 | Super Happy Tree | •Hazard: Screen Flip | •The screen will suddenly flip after a little while | Yoshi's Story (64) | |||
| 321 |  |
Yarn Yoshi | Yoshi Series | •Yoshi Team |
9,200 | Super Happy Tree | •Easy to Launch | •All fighters are easy to launch | Main Theme - Yoshi's Woolly World (Remix) | ||
| 395 |  |
Leon Powalski | Star Fox Series | •Yoshi •Wolf •Ally: Falco |
3,700 | Venom (Ω form) | N/A | •You lose if your CPU ally is KO'd | Star Wolf's Theme / Sector Z (for 3DS / Wii U) | ||
| 405 |  |
Tricky | Star Fox Series | •Yoshi |
1,600 | Garden of Hope (Battlefield form) | •Earthquake | •Periodic earthquakes will shake the stage | Break: Through the Ice | ||
| 424 | Metapod | Pokémon Series | •Yoshi |
2,500 | Distant Planet (Ω form) | •Defense ↑ •Hazard: Sticky Floor |
•The floor is sticky •Timed battle (1:30) •The enemy has increased defense after a little while |
Road to Viridian City - Pokémon Red / Pokémon Blue | |||
| 459 |  |
Eevee | Pokémon Series | •Yoshi |
1,400 | Yoshi's Island | N/A | •Only certain Pokémon will emerge from Poké Balls (Eevee) •Reinforcements will appear during the battle |
Main Theme - Pokémon Red & Pokémon Blue (Melee) | Vaporeon (blue costume) Jolteon (yellow costume) Flareon (red costume) | |
| 514 |  |
Cresselia | Pokémon Series | •Yoshi |
9,200 | Spear Pillar (Cresselia only) | •Defense ↑ | •The enemy has increased defense after a little while | Battle! (Dialga/Palkia) / Spear Pillar | ||
| 544 | .png) |
Zygarde (50% Forme) | Pokémon Series | •Giant Yoshi Team •Tiny Yoshi |
2,100 | Frigate Orpheon | N/A | •Reinforcements will appear after an enemy is KO'd •The enemy is giant •Defeat an army of fighters |
Battle! (Team Flare) | Zygarde Cell (Tiny Yoshi) | |
| 743 |  |
Pyoro | WarioWare Series | •Yoshi |
3,700 | Balloon Fight (Battlefield form) | •Item: Deku Nut | •The enemy is easily distracted by items | WarioWare, Inc. | ||
| 810 |  |
Bulborb | Pikmin Series | •Giant Yoshi |
4,400 | Distant Planet | •Attack Power ↑ | •Timed stamina battle (1:30) •The enemy has increased attack power •The enemy favors neutral specials |
Main Theme - Pikmin (Original) | ||
| 837 | Gracie | Animal Crossing Series | •Yoshi |
4,100 | Smashville (Battlefield form) | •Item: Transforming Types •Hazard: Slumber Floor |
•The floor is sleep-inducing | Plaza / Title Theme - Animal Crossing: City Folk / Animal Crossing: Wild World | |||
| 1,201 | Pig | Cubivore: Survival of the Fittest | •Yoshi Team |
2,000 | Duck Hunt | •Item Tidal Wave | •The enemy becomes more powerful after eating •Certain items will appear in large numbers after a little while •The enemy is easily distracted by items |
Gourmet Race (Brawl) | |||
| 1,231 | T-Rex | Fossil Fighters Series | •Giant Yoshi |
4,400 | Coliseum (Battlefield form) | •Hazard: Lava Floor | •The floor is lava •The enemy is giant |
Battle Start - Fossil Fighters: Frontier | |||
| 1,232 |  |
Nibbles | Fossil Fighters Series | •Yoshi •Charizard •Ridley •Bowser |
1,800 | Arena Ferox | •Item: Pitfall | •Defeat the main fighter to win •Reinforcements will appear during the battle |
Battle Start - Fossil Fighters: Frontier | ||
| 1,409 | Flick | Animal Crossing Series | •Yoshi |
4,400 | Tortimer Island (hazards off) | •Move Speed ↑ •Attack Power ↑ |
•The enemy has increased attack power when the enemy's at high damage •The enemy has increased move speed when the enemy's at high damage •The enemy is easily distracted by items |
Tortimer Island Medley | |||
As a minion[edit]
| Spirit | Battle parameters | Inspiration | |||||||||
|---|---|---|---|---|---|---|---|---|---|---|---|
| No. | Image | Name | Series | Enemy Fighter(s) | Type | Power | Stage | Rules | Conditions | Music | Character |
| 118 |  |
Wanda | Super Mario Series | •Tiny Palutena •Yoshi •Peach •Mario |
1,500 | Green Greens (Battlefield form) | N/A | •Defeat the main fighter to win •Reinforcements will appear after an enemy is KO'd |
Mario Paint Medley | Yoshi | |
| 128 |  |
MC Ballyhoo & Big Top | Mario Party Series | •Mario •Yoshi •Peach •Luigi |
1,600 | Mario Circuit | •Item Tidal Wave | •Certain items will appear in large numbers after a little while | Pandemonium | Yoshi | |
| 299 | Baby Mario | Yoshi Series | •Tiny Mario •Yoshi Team |
8,800 | Yoshi's Island | N/A | •Defeat the main fighter to win •The enemy shields often |
Yoshi's Island (Brawl) | Yoshis | ||
| 525 |  |
Cobalion, Terrakion, & Virizion | Pokémon Series | •Lucario •Duck Hunt •Yoshi |
9,000 | Kalos Pokémon League | N/A | •The enemy's melee weapons have increased power •The enemy can unleash powerful critical hits at random •The enemy starts the battle with a Beam Sword |
N's Castle | Cobalion | |
| 1,301 |  |
River Survival | Super Mario Series | •Bowser •Kirby •Yoshi •Rosalina & Luma |
5,500 | Kongo Falls (Ω form) | •Bob-omb Festival •Item Tidal Wave •Item: Food |
•Survive until the timer runs out (1:00) •Bob-ombs will rain from the sky after a little while |
Slide | Yoshi | |
Alternate costumes[edit]

| |||||||

|

|

|

|

|

|

|

|
Gallery[edit]
Yoshi's fighter card.
Yoshi's unlock notice when obtaining him in World of Light.
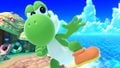
Yoshi about to use his forward aerial attack on Tortimer Island.
Air dodging a shot from Zelda's Super Scope on Mario Galaxy.
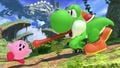
Extending his tongue at a shrunken Kirby on Gaur Plain.
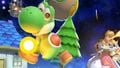
Idling with Mr. Game & Watch on Skyloft.
Green and Yellow Yoshis on Skyworld.
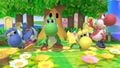
Green, Yellow, Blue, and Red Yoshis on Green Greens.
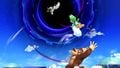
Stuck in a Black Hole with Pit on Big Blue.


Fighter Showcase Video[edit]
Trivia[edit]
- Yoshi is the only "Original 8" member:
- Who was not playable in the E3 demo, and by extension, did not have their Final Smash revealed at E3.
- Who did not appear before Ultimate's title was revealed.
- To not appear in the World of Light trailer.
- To face a boss (namely Rathalos) from a third-party franchise in their Classic Mode route.
- Yoshi has the most stages out of all playable sole series fighters in a single game, with four.
- Yoshi's stock icon in Ultimate bears a strong resemblance to his stock icon from Super Smash Bros. 4.
- Yoshi is the only character to have an alternate costume based on a game (namely Yoshi's Crafted World) after Ultimate was released.
- As a result, this is the second time the Yoshi universe has had, in some way, representation from an upcoming game; Woolly World appeared as a stage in Super Smash Bros. for Wii U before Yoshi's Woolly World released.
- Alongside Mr. Game & Watch, R.O.B., and Bowser Jr., Yoshi is one of four characters with a Spirit Battle where all of their alternate costumes appear in a single Spirit Battle, due to the presence of the Baby Mario spirit.
- Before 4.0.0, when Yoshi charged his forward smash, he pushed opponents so far that it caused some moves to miss him entirely.[3]
- Yoshi's Crafted costume is the only one that does not appear during his Final Smash, although its texture was added to the palette of the Yoshis that appear.[4]
- Yoshi's reverse throwing animation with a heavy item will have him turn his back to the screen for a brief moment. This is due to the animation being a carryover from Smash 4.
References[edit]
|
| |
|---|---|
| Fighter | Yoshi (SSB · SSBM · SSBB · SSB4 · SSBU) |
| Stages | Super Happy Tree · Yoshi's Story · Yoshi's Island (SSBM) · Yoshi's Island (SSBB) · Woolly World |
| Enemies | Shy Guy · Fly Guy |
| Other | Kamek |
| Trophies, Stickers, and Spirits | Trophies (SSBM · SSBB · SSB4) · Stickers · Spirits |
| Music | Brawl · SSB4 · Ultimate |
| Masterpiece | Yoshi |
| Related content | Mario (universe) · Bowser · Birdo · Egg |