Lock
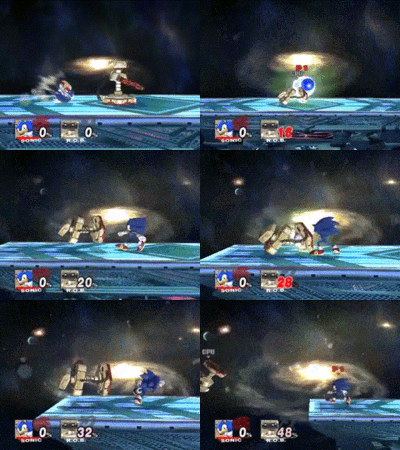
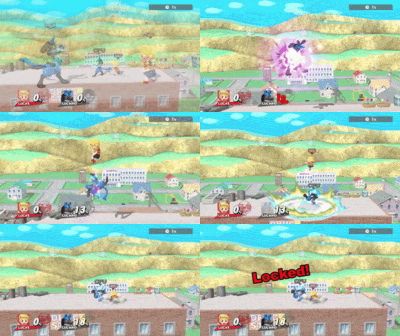
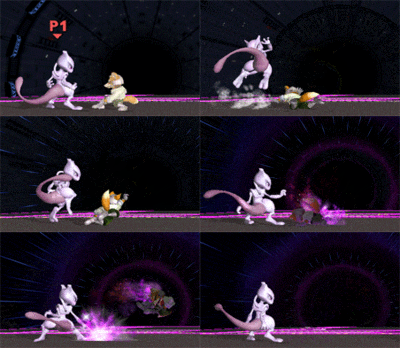
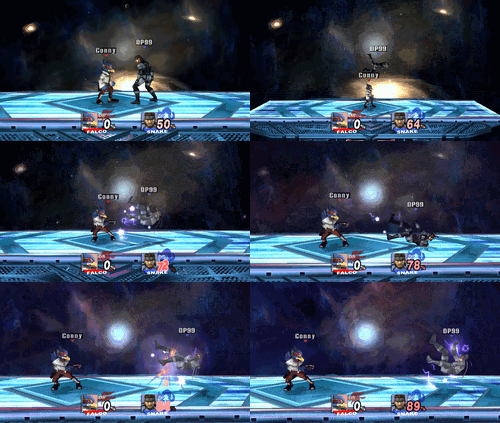
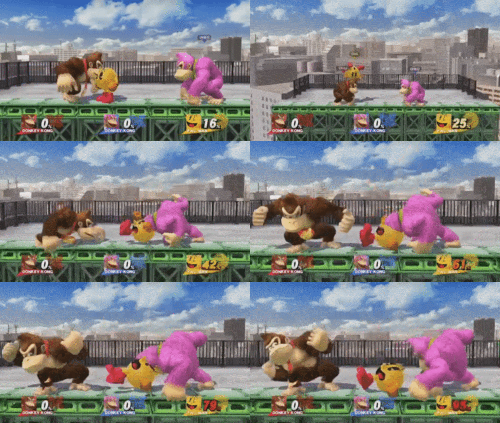
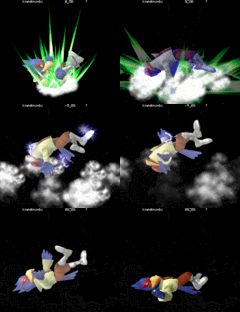
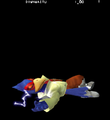
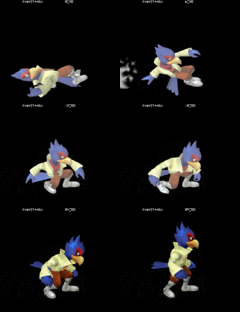
A lock is a technique in Super Smash Bros. Brawl, Super Smash Bros. 4, and Super Smash Bros. Ultimate where a player can use certain low knockback attacks on an opponent who has been knocked down onto the floor in order to stun them which can then lead to a combo into a stronger attack while the opponent is vulnerable. Whenever a player is locked, the character will briefly bounce off the floor while still being in a lying down position. Prior to Ultimate, the opponent would then be forced into their neutral floor getup animation where they would be left wide opponent for a big punish. The opponent is intangible for most of the getup but they are left vulnerable at the end of the getup before they can act. Some moves that lock are fast enough to be repeated, while others cannot be repeated fast enough to keep the opponent in the locked position, or they have knockback scaling that causes the opponent to be launched off the floor at high enough percents. Some moves will move a character across the stage farther than others depending on their launch angle and how much knockback they deal, reducing the player's ability to followup.
Super Smash Bros. Melee first introduced a reset system which was conceptually similar to a lock although it functioned quite differently. Super Smash Bros. Brawl would later introduce locking which would then receive further adjustments in later entries.
The main things which determine whether a move can lock or not come down to the opponent's weight and percent (as well as the player's from Smash 4 onwards due to rage) as well as the attack's knockback and launch angle. Some moves can consistently lock in almost all scenarios while others can only do so in very specific circumstances (assuming the move can even lock at all). In every Smash game, including Smash 64, an instant getup with a grounded flinch will occur in any low-knockback situation a lock or reset cannot.
Basic functionality[edit]
In order to lock an opponent, the player first has to knock down their opponent onto the floor. Once the opponent lands on the floor, they will perform a bound where they cannot act. Once the bound ends, the opponent is able to perform a getup action. In order to get a lock, the player has to hit the opponent during the knockdown bound with an attack which is capable of locking. If the player attacks too early, they will simply hit the opponent while they are still in the air. If they attack late, the attack is avoidable by a getup option and in Brawl and Smash 4, if an attack lands, the opponent will not be forced to getup after the attack, giving them full access to their ground options. Once the player locks the opponent, they can either go for another locking tool which will lock the opponent again if they get hit while they are still in their bound animation or the player can punish the opponent with a stronger attack.
Any type of attack can lock but some attacks are more common locking tools than others. For example, jabs are the most common and practical tools for locking as they are typically fast and have low knockback, making them easy to land and allowing them to work at a wide percent range. Locks are often referred to as jab locks because of this, sometimes even in situations where a jab is not being used to lock. Forward smashes on the flipside are rarely capable of locking and are never the go to locking option even when they can lock due to their slow speed and high knockback.
The main difficulty with getting a lock against a skilled player is that they can simply tech the knockdown which will prevent them from being vulnerable to locks. Skilled opponents can also make sure they can get out of hitstun as quickly as possible as well as utilise DI in order to avoid getting knocked down. As a result, locks can be hard to take advantage of against skilled opponents although there are ways top level players can get locks. Surprise or fast attacks causing a character to fall quickly on the ground can work if the opponent fails to react to the knockdown on time. The main way skilled opponents can set up locks however is by utilising untechable setups where the opponent is forced into a knockdown they cannot tech. In Brawl and Smash 4 for example, footstooling an airborne opponent will put the opponent into a untechable state for a considerable period of time, though the jump from the footstooler can make it impossible to lock the opponent before they can act depending on their character and the distance between the characters and the ground. Some characters have ways in order to combo into a footstall for a lock and numerous characters can fast fall an aerial with lock properties after a footstool in order to get a lock.
In Super Smash Bros. Melee[edit]
Super Smash Bros. Melee has a precursor to the lock system known as resets. Resets are performed in the same way as locks in later games, by landing a weak enough attack during the opponent's bound animation after landing from a knockdown. A reset can also happen when the opponent is hit while lying down on the ground although resets in this scenario can be avoided with getup options. The way resets work however is fairly different to the locks found in later games.
When resetting an opponent in Melee, the opponent only performs a small bounce off the ground where the player only has 12 frames to potentially hit the opponent again for another reset. Due to the short amount of time the player has to hit the opponent again, the player can generally only get one reset before the opponent is forced to get up with exceptions including quick, chainable attacks (like numerous jabs) or multi-hitting moves. Once the opponent gets up, they are vulnerable for an additional 30 frames. Because of this, a player will generally go for a single reset and then set up a powerful punish afterwards.
There are two main properties properties attacks need to have in order to be capable of resetting:
- The attack can only deal a maximum of 7% (with staling accounted for).
- The attack must deal weak enough knockback in order to not put the opponent into tumble (<80 units of knockback). Attacks with 13-30 frames of hitstun put the opponent into a half-reset where after the reset, the opponent is put into their knocked down animation before being forced to stand up.
Whenever an opponent is reset in Melee, they are in an airborne state. If the opponent lands on the ground by the time their reset bound has ended, they will be forced into a neutral getup but if the opponent is in the air by the time their reset bound has ended, they will simply transition into their falling animation where they will have access to all of their aerial actions, as well as landing normally on the ground once they land. This is significant as if the opponent can recover in the air, they will recover much faster and they can even potentially punish the player who got the reset. Additionally, if an attack deals more than 12 frames of hitstun and the opponent is on the ground once the reset ends, they will be in their knocked down animation before their hitstun ends, where they will then be forced to do a neutral getup. While the opponent is knocked down, they can perform any of their getup animations before the game forces them into a neutral getup (with the getup options being bufferable with the C-Stick). This state is known as a half-reset.[1]
The opponent can utilise SDI on the reset in order to get launched higher in the air and potentially recover in the air in order to avoid the forced getup. This even works against downwards/horizontal launching attacks as getting hit grounded acts like an airborne hit, allowing the opponent to SDI upwards. SDI may not always be enough to avoid the forced reset depending on the character and the attack used but it is nevertheless a powerful counterplay tool against resets.
Resets are overall not particularly powerful in Melee as there are not only minimal untechable knockdowns to set up guaranteed resets but there is also a fair amount of counterplay against resets if a player does get reset.
In Super Smash Bros. Brawl[edit]
Super Smash Bros. Brawl heavily revamped the reset system, creating the first iteration of the lock system. One of the main differences with the lock system is that the requirements in order to get a lock are vastly different to the requirements in Melee. The new requirements are:
- The attack has to keep the opponent on the ground. The attack cannot have an upwards launch angle (any launch angle worked in Melee).
- Sakurai angle attacks work but only when they are weak enough to keep the opponent on the ground (<60 units of knockback).
- Meteor Smashes do not work despite keeping opponents on the ground.
- The attack can deal any amount of damage.
The attacks which can lock opponents are quite specific. Attacks which can lock opponents essentially boil down to 0° angle moves and Sakurai angle moves which do not deal too much knockback. Most Sakurai angle attacks can only lock opponents at a certain percent range so it is essential for players to understand which attacks can lock and when they can lock.
Locking opponents works rather differently to Melee and is overall much more powerful. If an attack deals less than 7 frames of hitstun (<20 units of knockback), the opponent is put into a 12 frame reset like in Melee (followed by a 29 frame forced neutral getup) although there are very few attacks which are weak enough for this to occur. If the attack deals 7 frames of hitstun or more, the opponent is put into a 39 frame reset animation before being forced into a neutral getup. This longer reset animation leaves the opponent far more vulnerable to followups, giving the player a lot of time to either perform another reset or to land an extremely powerful punish. There is no limit on how many times a player can be locked which essentially means that if the attack the player is using can lock at any percent, the stage is the only thing which can end a lock. This can make locks extremely devastating in Brawl and in the most extreme cases, they can lead to zero-to-death combos. The main strategy when getting a reset in Brawl is to land as many locks as possible before finishing the opponent off with either your most damaging or highest knockback punish.
The opponent is now considered in a grounded state when being locked and since opponents can only be locked by moves which keep opponents on the ground, this means that the opponent cannot SDI into the air in order to get out of the lock. The "half-resets" from Melee were also removed meaning that every single lock is a fully guaranteed lock. One limitation compared to Melee however is that if the opponent is locked while they are lying down, they will not be forced into a neutral getup, giving players less time to followup.
While all locks are guaranteed, the opponent can still utilise SDI in order to reduce the effectiveness of locks. While the opponent cannot SDI into the air in order to completely prevent a lock, they can SDI away from the opponent in order to make it harder or even impossible for the opponent to followup. This can get opponents out of locks quicker, minimise the amount of damage players can get from a lock and potentially prevent the opponent from losing a stock from a low percent lock, especially if the locking player tries to go for a lock but misses due to the opponent being too far away.
Locks overall are quite powerful in Brawl if a player can successfully get a lock going. Locks are still difficult to setup, even with untechable setups but if a player can get a lock setup and capitalise, it can be devastating.
In Super Smash Bros. 4[edit]
Super Smash Bros. 4 brought back the locking system and made some adjustments. There were a couple changes made to the requirements to locking:
- Meteor Smashes can now lock opponents as long as they deal low enough knockback to not put the opponent into tumble
- Burial moves can now lock opponents. In Brawl, burial moves simply buried the opponent.
The biggest change to the locking system however is that there is now a three hit limit to locks[2]. The player can lock an opponent up to three times but after that, the opponent can no longer be locked. This significantly reduces the damage potential of locks compared to Brawl but despite this, locks still remain a powerful tool, still easily leading to early stocks. Additionally, the universal changes made to Smash 4 benefit locks in a couple of ways. The weakening of hitstun canceling and SDI allow for numerous more combos into a footstool for an untechable knockdown setup and the opponent also cannot utilise SDI as effectively when getting locked, basically making any lock punish unavoidable.
While there is a three lock limit in Smash 4, burial moves ignore the three lock limit, allowing players to infinitely chain together burial moves against floored opponents. While no burial moves are fast enough to lead to multiple locks in a 1V1 setting, they could potentially be used in a doubles setting in order to get 0-death locks.
Locks continued to be a powerful tool in Smash 4 as even with the newly added 3 lock limit, they were still absolutely devastating, leading to powerful combos are early KOs.
In Super Smash Bros. Ultimate[edit]
Super Smash Bros. Ultimate made a couple of key adjustments to locking which make them significantly less powerful than in the previous two games. The requirements for getting a lock are the same as the previous game.
The first notable difference with locking in Ultimate is that there is now only a two hit lock limit and any exceptions from Smash 4 were removed. The second and far more detrimental change however is that the opponent is no longer forced into a neutral getup. After a lock, the opponent is now in a floored state where they have access to all of their getup options, greatly reducing the amount of the player has in order to get a guaranteed punish on the opponent. In a worst case scenario, a player may not have any substantial guaranteed followups, instead having to rely on tech-chasing the opponent. Because of this, locks are not as powerful in Ultimate as the player as far less time to setup a powerful punish. As a result, the strategy when locking an opponent in Ultimate is generally to lock the opponent and then finish them off with a strong punish that is fast enough to hit the opponent before they have access to their getup options. Another thing which tones down locks compared to Smash 4 is that the untechable setups which existed in the previous games can now be teched, making locks even more avoidable and situational.
A notable thing about locks in Ultimate is that jabs are universally capable of locking opponents. While jabs were one of the most common locking tools in previous games, some jabs could not lock (particularly in Brawl and Smash 4) due to having vertical launch angles. In Ultimate however, almost every jab in the game has weak, horizontal knockback, allowing almost every character in the game to lock with their jabs. The only exceptions are characters with unique single hit jabs such as Ganondorf and Roy.
Locks in Ultimate are overall more situational and less powerful compared to the previous games as they are harder to get and they are less rewarding compared to the previous two games. They can still be useful in situations where players can get them but they are no longer a notable part of any character's gameplan or combo game due to the changes to both locks and other game mechanics.
List of locking attacks[edit]
In Brawl[edit]
| Character | Move(s) | Notes |
|---|---|---|
| Bowser | Down tilt | The first hit only works at extremely low percents. The second hit works for slightly longer. |
| Neutral aerial | ||
| Charizard | Neutral attack | Only the front hitbox of the first hit. Works regardless of percent. |
| Neutral aerial | ||
| Back aerial | Sourspot of the second hit. | |
| Donkey Kong | Neutral attack | Only certain hitboxes of the first hit and does not work at higher percents |
| Forward tilt | ||
| Down tilt | ||
| Neutral aerial | ||
| Back aerial | ||
| Giant Punch | Requires to be uncharged to lock. | |
| Diddy Kong | Neutral attack | Only locks at a certain part of the first hit's hitbox behind him making it extremely difficult to connect. Works regardless of percent. |
| Forward tilt | ||
| Forward aerial | ||
| Peanut Popgun | ||
| Fox | Neutral aerial | |
| Forward tilt | ||
| Forward smash | ||
| Up smash | Late hit. | |
| Back aerial | Sourspot only. | |
| Ganondorf | Neutral attack | Only the sweetspot, works at extremely low percents and it cannot lock smaller characters due to jab's high hitbox. |
| Ice Climbers | Ice Shot | It is capable of locking infinitely if the Ice Climbers are desynched properly. |
| Jigglypuff | Neutral attack | Both hits can lock. Is not effective at very high damage. |
| Forward tilt | ||
| Forward smash | ||
| Down smash | ||
| Neutral aerial | ||
| Forward aerial | Late hit. | |
| Back aerial | ||
| King Dedede | Neutral attack | Only the first hit locks. Works regardless of damage. |
| Kirby | Neutral attack | Does not work at very low percents or percents far beyond Sudden Death percents and only the first hit locks. |
| Down tilt | ||
| Neutral aerial | ||
| Forward tilt | ||
| Back aerial | ||
| Inhale | Any copy ability that can lock (except for Link Hero's Bow). | |
| Link | Neutral attack | Only the first hit locks. Does not work at very high damage. |
| Lucas | Down tilt | |
| Luigi | Forward tilt | Angled down, can lock indefinitely |
| Mario | Neutral attack | Only the front hitbox of the first hit locks and all three hits can lock at low percents. The first and second hits lock regardless of percent. |
| Forward tilt | ||
| Forward aerial | Only sourspot works. | |
| Back aerial | ||
| Neutral aerial | ||
| Fireball | ||
| Marth | Neutral attack | Only a specific part of the hitbox and both hits can lock. Does not work at very high percents. |
| Forward tilt | Sourspot only. Doesn't lock beyond low percents. | |
| Meta Knight | Neutral attack | Works best against a wall. Only stops working at percents far above 300%. |
| Forward tilt | Certain hitboxes of the first hit. | |
| Down tilt | ||
| Neutral aerial | ||
| Ness | Neutral attack | Only the first hit locks. Does not work at very high percents. |
| Forward tilt | ||
| Neutral aerial | ||
| Forward aerial | ||
| Back aerial | ||
| Down tilt | Locks against a vertical wall only. | |
| Olimar | Neutral attack | The second hit only works at very low percents. The first hit works regardless of percent. |
| Peach | Neutral attack | Only the second hit. |
| Dash attack | Only the first hit. | |
| Neutral aerial | ||
| Back aerial | ||
| Up aerial | Certain hitboxes. | |
| Pikachu | Neutral attack | Does not work at low percents. |
| Down tilt | ||
| Neutral aerial | ||
| Forward tilt | ||
| Down aerial | ||
| Thunder Jolt | ||
| Quick Attack | Can be repeated with Quick Attack Cancel, known as QAC lock. | |
| R.O.B. | Neutral attack | Only the front hitbox of the first hit. Does not work at very high percents. |
| Forward tilt | ||
| Forward aerial | ||
| Down tilt | Effective against a vertical wall only. | |
| Samus | Neutral attack | The second hit only works at very low percents. The first hit stops working at higher percents. |
| Sheik | Back aerial | |
| Neutral aerial | ||
| Needle Storm | ||
| Chain | ||
| Snake | Neutral attack | Only certain hitboxes and the first and second hits can lock regardless of percent. |
| Sonic | Neutral attack | Both the first and second hits can lock regardless of percent. |
| Squirtle | Neutral attack | Both the first and second hits can lock regardless of percent. |
| Forward tilt | ||
| Forward smash | ||
| Neutral aerial | ||
| Back aerial | ||
| Wolf | Down tilt | |
| Neutral aerial | ||
| Back aerial | ||
| Yoshi | neutral attack | Only the second hit can lock and it stops locking at higher percents. |
| Neutral aerial | ||
| Forward aerial | Only the sourspot is capable of locking. | |
| Zelda | Neutral attack | The first two hits work regardless of percent but the third hit only works at lower percents. Only works on larger characters due to jab's high hitbox. |
| Zero Suit Samus | Dash attack | |
| Forward tilt | ||
| Forward aerial | First hit. | |
| Down aerial | Aerial hit. | |
| Paralyser |
In Smash 4[edit]
| Character | Move(s) | Notes |
|---|---|---|
| Bayonetta | Down smash | First hit |
| Back aerial | ||
| Bullet Climax | ||
| Bowser | Down tilt | |
| Forward smash | Sourspot | |
| Down aerial | ||
| Up throw | ||
| Down throw | ||
| Whirling Fortress | Excluding the last hit | |
| Bowser Jr. | Neutral attack | |
| Forward tilt | ||
| Neutral aerial | Sourspot | |
| Back aerial | Sourspot | |
| Down aerial | Hits 2-6 | |
| Forward throw | ||
| Down throw | ||
| Captain Falcon | Forward tilt | |
| Down smash | Second hit | |
| Forward aerial | Sourspot | |
| Back aerial | Sourspot | |
| Down aerial | ||
| Falcon Punch | ||
| Charizard | Neutral attack | |
| Up smash | Back of the first hit | |
| Neutral aerial | Sourspot | |
| Down aerial | Sweetspot | |
| Cloud | Forward tilt | |
| Back aerial | ||
| Cross Slash | Top part | |
| Corrin | Neutral attack | Rapid jab back hitbox |
| Pummel | ||
| Dark Pit | Forward tilt | |
| Forward aerial | Last hit | |
| Up aerial | Hits 1-4 | |
| Down aerial | Meteor hitbox | |
| Forward throw | ||
| Up throw | ||
| Diddy Kong | Forward tilt | |
| Forward aerial | ||
| Back aerial | ||
| Down aerial | ||
| Donkey Kong | Neutral attack | |
| Forward tilt | ||
| Down tilt | ||
| Neutral aerial | Late hit | |
| Back aerial | ||
| Giant Punch | Up to five swings | |
| Headbutt | ||
| Spinning Kong | Grounded, hits 3-6 | |
| Hand Slap | Aerial, second hit | |
| Dr. Mario | Neutral attack | Hit 3 |
| Forward tilt | ||
| Neutral aerial | ||
| Forward aerial | ||
| Megavitamins | ||
| Duck Hunt | Neutral attack | Rapid jap sourspot |
| Forward tilt | ||
| Neutral aerial | ||
| Down aerial | First hit, sourspot | |
| Falco | Forward tilt | |
| Up tilt | Tip of the back hitbox, first hit | |
| Forward smash | Sourspot | |
| Forward aerial | First three hits | |
| Back aerial | ||
| Down aerial | Sourspot | |
| Blaster | ||
| Fire Bird | ||
| Reflector | ||
| Fox | Forward tilt | |
| Forward smash | ||
| Neutral aerial | ||
| Down aerial | All but the last hit. | |
| Ganondorf | Neutral attack | |
| Forward aerial | ||
| Up aerial | Only sourspot. | |
| Down aerial | ||
| Neutral aerial | Second hit | |
| Greninja | Forward tilt | |
| Back aerial | All but the last hit. | |
| Down aerial | ||
| Ike | Forward tilt | |
| Down aerial | ||
| Forward throw | ||
| Back throw | ||
| Up throw | ||
| Down throw | ||
| Jigglypuff | Dash attack | |
| Forward tilt | ||
| Forward smash | ||
| Down smash | ||
| Neutral aerial | Sweetspot only. | |
| Forward aerial | ||
| Down aerial | All but the last hit. | |
| King Dedede | Neutral attack | |
| Forward tilt | Tip of the hammer, all but the last hit. | |
| Forward aerial | ||
| Down aerial | ||
| Forward throw | ||
| Back throw | ||
| Gordo Throw | Without the Gordo. | |
| Super Dedede Jump | ||
| Kirby | Forward tilt | |
| Down tilt | ||
| Back aerial | ||
| Down aerial | Last hit | |
| Down throw | ||
| Inhale | Any copy ability that can lock (except for Link Hero's Bow). | |
| Stone | If aerial, must be sourspotted. | |
| Link | Neutral attack | |
| Neutral aerial | ||
| Hero's Bow | ||
| Spin Attack | Grounded, only last hitbox. | |
| Little Mac | Down Aerial | |
| Lucario | Neutral aerial | |
| Back aerial | ||
| Aura Sphere | ||
| Lucas | Forward tilt | |
| Down tilt | Sourspot | |
| Down smash | Excluding the first hit | |
| Neutral aerial | Hits 1-4, only while rising through a platform | |
| Forward aerial | Sourspot | |
| Back aerial | ||
| Down aerial | For hits 1-3, sourspot and only while rising through a platform. For hit 4, sweetspot. | |
| Lucina | Down aerial | Meteor hitbox |
| Dolphin Slash | Sourspot | |
| Luigi | Forward tilt | |
| Down tilt | ||
| Forward aerial | ||
| Back aerial | ||
| Down aerial | ||
| Back throw | ||
| Fireball | ||
| Green Missile | ||
| Mario | Neutral attack | |
| Forward tilt | ||
| Neutral aerial | ||
| Forward aerial | ||
| Back aerial | ||
| Down aerial | Landing hit | |
| Fireball | ||
| Marth | Dash attack | Untippered |
| Forward Tilt | Untippered | |
| Forward aerial | Untippered | |
| Down aerial | Meteor hitbox | |
| Shield Breaker | Sourspot | |
| Dolphin Slash | ||
| Mega Man | Neutral attack | |
| Forward tilt | ||
| Forward smash | ||
| Neutral aerial | Late hit | |
| Forward aerial | Late hit | |
| Back aerial | First hit | |
| Down aerial | ||
| Leaf Shield | ||
| Mewtwo | Forward tilt | |
| Up smash | Directly beneath the opponent, excluding the final hit | |
| Back aerial | ||
| Shadow Ball | ||
| Meta Knight | Down tilt | |
| Forward aerial | First two hits | |
| Down throw | ||
| Drill Rush | ||
| Mii Brawler | Forward tilt | |
| Neutral aerial | ||
| Back aerial | ||
| Head-On Assault | ||
| Mii Gunner | Forward tilt | |
| Up smash | Multi-hit from below | |
| Back aerial | ||
| Down aerial | Sourspot | |
| Back throw | ||
| Charge Blast | ||
| Gunner Missile | ||
| Mii Swordfighter | Forward tilt | |
| Back aerial | ||
| Down aerial | Excluding last hit | |
| Down throw | ||
| Ness | Neutral attack | |
| Dash attack | First hit | |
| Forward tilt | ||
| Neutral aerial | ||
| Back aerial | ||
| Down aerial | ||
| Down throw | ||
| PK Thunder | Tail hitbox | |
| Olimar | Neutral attack | |
| Neutral aerial | Top of the first hit | |
| Forward aerial | ||
| Pac-Man | Neutral attack | |
| Forward tilt | ||
| Forward smash | Late hit | |
| Neutral aerial | ||
| Forward aerial | ||
| Back aerial | ||
| Pummel | ||
| Down throw | ||
| Bonus Fruit | Bell, dropped | |
| Palutena | Back aerial | |
| Autoreticle | ||
| Peach | Neutral attack | Second hit |
| Neutral aerial | ||
| Back aerial | ||
| Down throw | ||
| Vegetable | Mr. Saturn | |
| Pikachu | Neutral attack | |
| Forward tilt | ||
| Down tilt | ||
| Neutral aerial | Sweetspot | |
| Forward aerial | Top hitbox | |
| Down aerial | ||
| Thunder Jolt | ||
| Skull Bash | ||
| Pit | Forward aerial | Last hit |
| Up aerial | Hits 1-4 | |
| Down aerial | Meteor hitbox | |
| Forward throw | ||
| Up throw | ||
| R.O.B. | Forward tilt | |
| Down tilt | ||
| Forward aerial | ||
| Up aerial | First 4 hits | |
| Down aerial | Sourspot | |
| Arm Rotor | ||
| Robin | Levin Sword | Thrown |
| All tomes | ||
| Thunder | First stage | |
| Elwind | First hit, meteor hitbox | |
| Rosalina & Luma | Forward tilt | No Luma |
| Neutral aerial | No Luma | |
| Back aerial | Sourspot | |
| Down aerial | No Luma | |
| Roy | Forward tilt | Sourspot |
| Forward smash | Sourspot | |
| Down smash | Sourspot | |
| Back aerial | ||
| Ryu | Neutral aerial | |
| Back aerial | ||
| Pummel | ||
| Hadoken | Standard or input | |
| Samus | Neutral attack | |
| Forward tilt | ||
| Up tilt | ||
| Forward smash | Sourspot | |
| Forward aerial | Top of the first hit | |
| Up aerial | Tip of the first hit | |
| Back aerial | Sourspot | |
| Down aerial | ||
| Homing Missile | ||
| Bomb | ||
| Sheik | Dash attack | Late |
| Up tilt | First hit | |
| Neutral aerial | ||
| Back aerial | ||
| Down aerial | ||
| Bouncing Fish | ||
| Sonic | Neutral attack | |
| Dash attack | First three hits | |
| Down tilt | ||
| Forward aerial | Excluding the last hit | |
| Spring Jump | Projectile | |
| Shulk | Forward tilt | Sourspot if not in Buster |
| Forward aerial | Buster | |
| Back aerial | Sourspot if not in Buster | |
| Down aerial | Buster, second hit | |
| Forward throw | ||
| Back throw | ||
| Up throw | ||
| Down throw | ||
| Back Slash | ||
| Toon Link | Forward tilt | |
| Down tilt | ||
| Neutral aerial | ||
| Down aerial | ||
| Hero's Bow | ||
| Spin Attack | Grounded, excluding the last hit | |
| Villager | Forward tilt | |
| Down smash | ||
| Neutral aerial | ||
| Forward aerial | Sourspot | |
| Back aerial | Sourspot | |
| Down aerial | 3 turnips | |
| Wario | Dash attack | Late |
| Forward tilt | ||
| Forward aerial | ||
| Back aerial | ||
| Down throw | ||
| Wario Bike | Thrown | |
| Wii Fit Trainer | Neutral attack | Hit 3 |
| Forward aerial | Meteor hitbox | |
| Back aerial | ||
| Header | Meteor hitbox | |
| Super Hoop | ||
| Yoshi | Neutral aerial | Sourspot |
| Forward aerial | ||
| Down aerial | Excluding the last hit | |
| Zelda | Neutral attack | First and third hit |
| Forward aerial | Sourspot | |
| Back aerial | Sourspot | |
| Down aerial | ||
| Phantom Slash | Stages one and two | |
| Zero Suit Samus | Forward tilt | |
| Down throw | ||
| Paralyzer |
Videos[edit]
- Jab Lock Tutorial SSB4 (My Smash Corner)
- The jab lock
- Falco's laser lock
- Demonstration of several characters performing locks
- Peach's floating aerial locks
- Jiggylpuff's double jab lock, with footstool setup
- Lucas's down tilt lock
- Pikachu's QAC lock followed with a jab lock
- Falcon punch lock in Smash 4 on Bowser

