Zelda (SSBB)
| Zelda in Super Smash Bros. Brawl | |
|---|---|
 
| |
| Universe | The Legend of Zelda |
| Shares character slot with | Sheik |
| Other playable appearances | in Melee in SSB4 in Ultimate |
| Availability | Starter |
| Final Smash | Light Arrow |
| Tier | F (37) |
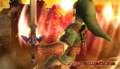
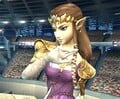
Zelda (ゼルダ, Zelda) is a playable fighter in Super Smash Bros. Brawl. The titular character of The Legend of Zelda universe, Zelda's model from The Legend of Zelda: Twilight Princess is reused in Brawl. Zelda was confirmed as a returning fighter on June 25th, 2007 on the Smash Bros. DOJO!!.
Jun Mizusawa is the voice of Zelda in all regions of Brawl, reprising her role from The Legend of Zelda: Twilight Princess, The Legend of Zelda: Ocarina of Time and Super Smash Bros. Melee; her portrayal is comprised of re-purposed voice clips leftover from the recording sessions for Melee, using returning and previously unused ones.
Zelda is ranked 37th out of 38 on the current Brawl tier list. This is a slight drop compared to her already very low placement in Melee, where she was ranked 24th out of 26 characters, and is roughly tied with her later iteration in Smash 4 as her worst placement in the series. While Zelda possesses some of the most powerful aerials in Brawl, and strong out-of-shield options, Zelda's means to approach and take stocks are among the worst in the game. Zelda is saddled with awful speed in both moves and movement. This, alongside a lightweight status, culminates in a very inconvenient combination of attributes similar to Peach, having the downsides of being slow, lightweight, tall and floaty. To make matters worse, unreliable finishers with poorly placed hitboxes make it difficult for her to KO consistently despite her abundance of powerful attacks, and leaves her with almost no combos (even for Brawl standards). Compounding this, Zelda's sole projectile is of little-to-no use, forcing her to try and approach in spite of her awful mobility. Even Zelda's aforementioned out-of-shield options are hindered by her low traction pushing her out of range. Finally, Zelda's recovery, though far-reaching, is easily edgehogged and/or punished.
As a result of a variety of undesirable traits and no cohesion between her few selling points, Zelda has awful matchups on a near-universal level, virtually non-existent representation, abhorrent results, and is a bad character choice in any competitive setting. No Zelda players even managed to scratch the top 32 of a major within Brawl's lifespan, though valiant efforts by the likes of JuJux and Ven have resulted in at least a couple of solid placings. While Zelda, along with Sheik, is ranked at 16th on the Japanese tier list, this is only because they are grouped as a single fighter.
Attributes[edit]

Zelda is a floaty, lightweight character with poor momentum canceling (making her very easy to KO but difficult to chain throw) with strong, graceful attacks, usually augmented with magic. She has abysmal grounded mobility overall, with her having the 4th slowest walking and dashing speeds. However, she has above-average air speed.
Arguably, Zelda's most defining trait is the high KO power on a large portion of her moveset. Her aerials (except for neutral aerial) are among the absolute strongest in the game, with her forward, back, and up aerials being the strongest in Brawl and her down aerial being the third most powerful meteor smash in the game. Her Lightning Kicks and down aerial are single, powerful blows that cause a lot of damage and knockback if landed properly, but they are extremely weak and have low stun when sourspotted, while her up aerial is likewise the most powerful in the game. On the ground, both her forward and up tilts are among the strongest, with the latter easily KOing most floaty characters under 100%; her forward and up smashes have fast start-up and hit multiple times with large damage output and powerful knockback on the final hit, with the latter being nearly impossible to SDI out of and being able to juggle at lower percentages; and her down smash has almost no start-up lag and is a decently powerful semi-spike, which can be extremely deadly against characters with poor recoveries.
Zelda is also gifted with a solid defensive game. Her rolls and spot dodge are perfectly solid defensive options, although she does possess one of the slower air dodges. She has some powerful out-of-shield options. Her up smash is a frame 6 option which has solid KO power, and it hits on both sides. Her back aerial is a frame 11 Out of Shield option, and while it is difficult to land, it has incredible KO power when sweetspotted. This also applies to her forward aerial, although it is slower, being frame 14 OoS. She also has her down smash as a frame 11 option, which, while much weaker than her back aerial, does hit in front and is still a viable KO move. Zelda's down tilt is a frame 12 option which can lead into follow-ups, especially if the opponent trips or fails to SDI the move. Zelda also has other useful defensive tools. Her Nayru's Love is a reflector with serious damage output, decent knockback, and reasonable startup lag, while also having a projectile in Din's Fire to defend herself to some degree (even though it is extremely situational). Her strong defense is counterbalanced by her very low traction and her very poor mobility on the ground (very slow dash speed and slow falling speed). Her grab is disjointed, but it is very slow (at frame 12), while also having less range than numerous grabs, which come out twice as fast, making it hard to land without set-ups, and it is very difficult to land out of shield.
Zelda's crippling combination of her slow mobility, atrocious endurance, and her tall frame, however, is arguably what makes her one of the worst characters in Brawl. Zelda's tall frame and floatiness make her very easy to juggle, despite her above-average air speed, while her lightweight both give her one of the worst endurances in the game, especially from the upper blast line. Despite her potent defensive game, it is very easy to force her to play offensively because of her very poor approach options, her very slow mobility, and her slow grab. Characters with great camping abilities (most notably Falco) can simply outcamp her with a flurry of projectiles or by simply evading her with their superior mobility, while she cannot rely on her Din's Fire to camp, as it is easily avoidable, and Zelda will not win any projectile wars with it. This means that she gets very few chances to use her strong out-of-shield options to her advantage, and is instead forced to play with her horrible offensive game due to her abysmal approach.
Zelda also struggles with close-range pressure. Her fastest ground option is her down smash at frame 4, and while it is quite fast, it is also quite punishable. She does have a safer alternative with her down tilt, although it is frame 5, which can still lose against characters with superior frame data. Zelda can also have some trouble punishing out of shield, despite her strong options. Her only fast option is her up smash, which does not have particularly impressive range, matching the shortest-ranged grabs. Outside of her up smash, she has no options that are faster than frame 11, which can give her a lot of trouble punishing moves that she cannot reach, as long as they are not too punishable. Zelda especially has trouble punishing shorter characters, as her already unreliable Lightning Kicks are even harder to land against them. When combined with her low traction, this gives Zelda a limited Out of Shield game overall. Zelda does have much better options after a perfect shield, as her down smash and down tilt become frame 5 options, allowing her to reliably punish relatively safe moves. However, these moves are still not fast enough to punish ordinarily safe moves, and Zelda does not gain any faster options to punish opponents from behind.
Another one of Zelda's major flaws is her inconsistency in KOing opponents. As mentioned before, most of Zelda's moveset has high KO potential, but landing them is extremely difficult due to the poorly-placed hitboxes on most of her strongest finishers. Her Lightning Kicks and down aerial are extremely powerful when sweetspotted, but the sweetspot hitboxes are notoriously small, and the sourspots have incredibly low knockback, damage output, and hitstun, making the moves dangerously unsafe and difficult to land. Zelda's down aerial's sweetspot additionally only works against aerial opponents, which only makes it a viable KO option off-stage. Her up aerial is generally impossible to land on an opponent at the same ground level as her and is rather laggy. Her forward smash can be SDI'd out of, her up smash does not have the best horizontal range, and her down smash is rather weak for a smash attack despite its semi-spike properties, while her up tilt is rather slow for a tilt attack and is less effective against heavier characters. Conversely, Zelda's poor frame data and high-knockback attacks give her one of the worst comboing abilities in the game. Zelda is virtually unable to follow up her aerials into each other, despite her above-average air speed, due to the terrible hitbox placements and properties of most of her aerials, while her few combo starters, such as her down tilt, jab, neutral attack, neutral aerial, or dash attack, eventually become predictable for repetitive use. Zelda's neutral attack has slow startup, unfavorable hitbox places, and is susceptible to SDI; her neutral aerial's loop hits give it inconsistent followup potential against grounded opponents; and while her down tilt can rack up a lot of damage by chaining into itself, it is susceptible to SDI, preventing Zelda from getting more than three down tilts at the most against a skilled player. Most of Zelda's combos only last for merely two or three hits at low percentages, which do not rack up a lot of damage under most circumstances. This is aggravated by her poor grab game; her grabs are very slow, and while her back throw can KO at higher percents, her others throws have are quite limited: her forward throw is only really used for setting up edgeguards, her down throw can be used to rack up damage and set up unreliable followups, and her up throw does not reliably lead to followups or KOs.
Lastly, Zelda possesses an extremely situational set of special moves. Din's Fire is long-ranged, has a large hitbox, and deals good damage when fully charged, KOs at high percents, cannot properly be reflected, can be controlled, and can be used for edgeguarding. However, it is predictable and avoidable against skilled players (easy to spot dodge, air dodge, or even trade with), being difficult to camp with against most characters (with few exceptions, like the Ice Climbers and slow characters). Additionally, it is not very effective as an edgeguarding move, as the move sends at a vertical angle, does not KO reliably until around 150% unless near the top blast line, and opponents can easily air dodge or trade with it off-stage. Nayru's Love is a decent duration reflector attack, a solid defensive spacing tool, and has utility in other areas with techniques such as Love Jumping, but suffers from a considerable amount of ending lag. Farore's Wind is a long-distance recovery/attack, but it is very slow, cannot sweetspot ledges until Zelda has reappeared, has weak knockback, and Zelda cannot move horizontally after reappearing for a lengthy amount of time. Opponents can either easily hit Zelda out of it or they can edge hog it, making it a rather poor recovery move overall despite its long distance. Transform enables Zelda to alleviate some of her weaknesses (such as poor mobility) by transforming into Sheik, who is a considerably superior character, but the amount of time it takes to transform into Sheik is extremely long, giving the opponent more than enough time to set up a devastating punish on her.
In the end, Zelda relies on her strong defensive game and potential power to overcome her weaknesses, which is usually hard to do. Zelda is a character who has a hard time approaching her opponents, but once she does, she can be a devastating character. Zelda can be described as a glass cannon: she can pump out a lot of damage if the opponent approaches her, but she will not survive long once she starts getting hit. Transform can also shore up some of Zelda's weaknesses (most notably her terrible mobility and approach) by turning into Sheik, and vice-versa.
Changes from Super Smash Bros. Melee[edit]
Zelda has been given major power buffs from Melee to Brawl, and she benefits from some of the mechanical changes.
However, changes to the mechanics have also mitigated these buffs, worsening her endurance and her already inconsistent KOing ability, and considerably weakening her combo game, making her arguably even worse relative to the cast than in Melee.
Aesthetics[edit]
 Zelda's design is now based on her appearance in The Legend of Zelda: Twilight Princess.
- Zelda has gained two new alternate costumes.
- Zelda has altered animations when dashing, crouching, carrying heavy items, and when tumbling.
- Zelda has three new taunts.
- Zelda now vocalizes when jumping from the ground.
- One of Zelda's heavy knockback scream from Melee is now used as the alternate KO voice clip.
- As on-screen appearances were not present in Melee, Zelda now receives one.
Attributes[edit]
 Zelda walks faster (0.7 → 0.8).
- Zelda dashes faster (1.1 → 1.224), no longer having the slowest dashing speed.
- Air dodge has a longer duration (frames 4-19 → 4-29) no longer being the worst in the game.
- Spot dodge has less startup lag and a longer duration (frames 3-20 → 2-20). It also has less ending lag (FAF 33 → 26).
 Zelda's traction is significantly lower (0.1 → 0.054), especially when comparing with the returning veterans, now going from being tied out with other three characters for the highest traction to now being below-average. This makes it harder for her to punish out of shield and provides almost no benefits due to the removal of wavedashing.
- Zelda has slightly faster air speed (0.95 → 0.987).
- As with the returning veterans, Zelda's falling speed is slower (1.4 → 1.13). Compared to the returning veterans, however, Zelda falls faster.
- Zelda is lighter (90 → 85), now being a lightweight, which when combined with the previous point, worsens her already poor endurance.
- Her lower weight however does allow her to be knocked down by King Dedede's down throw, preventing her from being chain grabbed by it.
- Zelda's gravity is lower (0.073 → 0.067), making her floatier and reaching her maximum falling speed slower. However, this doesn't compensate for her worse endurance than in Melee.
- Zelda's glide toss covers more distance, especially her backwards glide toss.
Ground attacks[edit]
- Neutral attack:
- Neutral attack has less ending lag (FAF 27 → 24).
- The first two hits now uses set knockback instead of base knockback (10 (base) → 0, 0 (set) → 50/43/30/7), allowing it to more reliably connect into the third hit.
- The third hit has increased knockback scaling (100 → 160).
- Forward tilt:
- Forward tilt has a shorter duration (frames 12-15 → 12-14).
- It has more ending lag (FAF 37 → 40).
- Up tilt:
- Up tilt has more ending lag (FAF 40 → 48).
- It has increased KO potential due to the universally decreased falling speeds, but has less combo ability.
- Down tilt:
- Down tilt has a longer duration (frames 5-7 → 5-11).
- It has less ending lag (FAF 30 → 25)
- It has gained a 40% tripping chance, further improving its follow-up potential.
- Dash attack:
- Dash attack's clean hit deals slightly less damage (13% → 12%).
- Dash attack has more ending lag (FAF 36 → 38).
- Forward smash:
- Forward smash deals more damage due to changes to stale move negation (16% → 17%).
- Its looping hits have a lower SDI multiplier (1.0x → 0.5x) making it harder to escape.
- Forward smash's final hit inflicts 1% less damage (14% → 13%) and has altered knockback (50 (base), 98 (scaling) → 30/105), reducing its KO potential slightly.
- Up smash:
- Up smash has larger hitboxes and the multi-hits connect more reliably.
- It deals more damage due to changes to stale move negation (14% → 15%).
- It has more KO potential due to universally decreased falling speeds.
- Its looping hits have a lower SDI multiplier (1.0x → 0.1x) making it harder to escape.
- It has more startup (frame 5 → 6).
- It has more ending lag (FAF 51 → 57).
- It has one less looping hit, hitting eleven times total instead of twelve. This decreases its duration (frame 5/7/9/11/13/15/24/26/28/30/32/34 → 6/8/10/12/14/16/23/25/27/29/31).
- Down smash:
- Down smash has more knockback scaling (90 (front), 80 (back) → 95/85), improving its KO potential.
- It launches at a lower angle (30° → 20°), making it better for gimping characters with poor horizontal recoveries and setting up edgeguards.
- The back hit has less startup lag (frame 13 → 12).
- Both hits have a shorter duration (frames 4-7 (front), 13-16 (back) → 4-6/12-14).
- Down smash has more ending lag (FAF 32 → 40).
- It also has less intangibility (frames 4-16 → 4-14).
- Down smash's front hit deals 1% more damage (11% → 12%), but the back hit deals 1% less (11% → 10%) with its knockback compensated (80 (scaling) → 85).
- Zelda now vocalizes when using down smash.
Aerial attacks[edit]
- Neutral aerial:
- Neutral aerial has larger hitboxes and the multi-hits connect more reliably.
- It has less landing lag (18 frames → 12).
- Its looping hits have a lower SDI multiplier (1.0x → 0x) making it harder to escape.
- Neutral aerial now has 5 hits instead of 6. The multi-hits also now do consistent damage (2%-3% → 2%).
- Neutral aerial has more ending lag (FAF 42 → 51).
- Lightning Kick (forward & back aerial):
- Sweetspotted Lightning Kicks are now takes priority over the sourspots (ID 2 → 0).
- The sweetspots can no longer be SDI'd.
- The sweetspots have an increased hitlag multiplier. This gives opponents more time to DI.
- The sweetspots' size has been significantly reduced (5.2u → 1.7u), being less than a third of the size from Melee (although their increased priority slightly compensates for this).
- The sweetspots are only active for the first frame of the attack, rather than being active for the entire duration of the hitbox.
- Sourspotted Lightning Kicks deal drastically less damage (10% → 4%).
- Lightning kicks have more landing lag (18 frames → 22) which is further exacerbated with the removal of L-canceling.
- Forward aerial:
- Forward aerial's sweetspot had its knockback adjusted (30 (base)/96 (scaling) → 34/95) increasing its KO potential.
- It also has a longer duration (frames 8-11 → 8-12).
- It has more ending lag (FAF 36 → 40), preventing Zelda from performing two forward aerials in a short hop.
- Back aerial:
- Back aerial's sweetspot deals more base knockback (30 → 40).
- It has more ending lag (FAF 33 → 36).
- Up aerial:
- Up aerial deals more damage (13% → 15%).
- Its knockback values have been adjusted (0 (base), 120 (scaling) → 30/110), improving its KO potential to the point where it is now the strongest up aerial in the game.
- It has a much bigger hitbox (5.47u → 8.2u).
- It has less landing lag (25 frames → 22).
- It can no longer auto-cancel out of a short hop due to it having a later auto-cancel window (frame 45 → 56).
- Down aerial:
- Down aerial has gained a clean sweetspot for 1 frame, which is similar to that of her Lightning Kicks, dealing much more damage (7% → 16%) and knockback (5 (base), 85 (scaling) → 50/90) powerfully meteor smashing foes with a slightly different angle (275° → 270°). However, it cannot land on a grounded opponent.
- The sourspotted hit can now trip opponents and has a longer duration (frames 14-17 → 15-24) and less landing lag (24 frames → 21).
- Down aerial has less landing lag (24 frames → 21).
- It has more ending lag (FAF 43 → 45).
- Its late hits deal less damage (8%/7% → 5%/4%) and knockback (100/80 (scaling) → 90/70).
- Down aerial's animation has been altered. Zelda's body is more upright when stomping down with her left arm placed a bit more to her side.
Throws/other attacks[edit]
- Grabs:
- Grab range is longer, now being the 3rd longest non-tether grab in the game.
- Dash grab has less startup lag (frame 12 → 11) and Zelda now lunges forward when using a dash grab giving it more range. Both it and standing grab also have less ending lag (FAF 31 (standing), frame 41 (dash) → 30/40).
- Standing grab and dash grab both have less ending lag (FAF 31 (standing), frame 41 (dash) → 30/40).
- Pummel:
- Pummel has slightly less ending lag (FAF 26 → 25).
- Up throw:
- Due to the slower falling speeds of Brawl, up throw can no longer chaingrab fastfallers.
- Down throw:
- Down throw sends opponents higher due to universally decreased falling speeds, which, when combined with the changes to hitstun, completely removes its comboing capabilities and makes it completely unreliable at setting up follow-ups.
Special moves[edit]
- Nayru's Love:
- Nayru's Love can now be used to perform a "Love jump", increasing its utility.
- It has a higher maximum damage output due to changes to stale move negation (13% → 15%).
- The move has more startup lag on its hitboxes (frame 12 → 13) and invincibility and reflect periods (frame 4 → 5).
- The shard hitboxes now only hit grounded opponents, giving the move significantly less range against aerial opponents.
- All hitboxes now always send opponents towards the direction that Zelda is facing.
- Zelda has a different voice clip when using Nayru's Love.
- Din's Fire:
- The size and power of Din's Fire now increases as it travels further, and it can be controlled easier, detonates quicker, deals more damage (7%-13% → 8%-16%), has less lag, deals drastically more knockback, and is faster to use.
- Zelda no longer vocalizes when detonating Din's Fire.
- Farore's Wind:
- Farore's Wind has an explosive hitbox when Zelda reappears, making it a safer move to use on stage.
- Farore's Wind travels slightly less distance and has more start-up lag (frame 10 → 11).
- Zelda no longer vocalizes when using Farore's Wind.
- Transform:
- Stale-move negation now resets when Transform is used, meaning that if Zelda transforms, all of Sheik's moves will be fresh rather than carrying over the staleness from Zelda's moves. This is especially beneficial, as stale-move negation now affects knockback.
- Due to the game disc no longer automatically loading Sheik and Zelda's data at the same time rather than having it loaded at all times as in Melee, Transform takes much longer to complete and no longer takes a consistent amount of time. This allows the opponent to set up a punish on Sheik for simply performing the move, and makes Transforming into Sheik for a faster, more reliable playstyle a much larger risk.
- Light Arrow:
- Zelda has a Final Smash, Light Arrow. Zelda pulls out the Bow of Light and shoots a Light Arrow. The Light Arrow deals high damage and incredible knockback, and will usually one-hit KO anyone who gets hit by it. Sheik also has Light Arrow has her Final Smash, albeit with slight differences.
Moveset[edit]
For a gallery of Zelda's hitboxes, see here.
For a more detailed information regarding Zelda's moveset and attack hitboxes, see this page.
| Name | Damage | Description | ||
|---|---|---|---|---|
| Neutral attack | Short Flash (ショートフラッシュ) | 2% (hits 1-3) | Zelda sticks her hand out in front of herself and shoots small magical sparks, pushing foes slightly back. Disjointed with decent range. | |
| Forward tilt | Magical Cutter (マジカルカッター) | 13% (hand), 12% (arm), 11% (body) | Zelda steps forward and slashes one arm in front of her, with a trail of sparkles. The attack has moderate knockback. The tip of the attack hits backwards, while the base hits forwards. Can be angled. | |
| Up tilt | Barricader (バリケーダー) | 11% | Zelda waves her arm above her head in an arc with a boost of magic power. This move has very high vertical knockback, and makes an excellent finisher. | |
| Down tilt | Low Kick (ローキック) | 7% (foot), 8% (leg) | Zelda crouches and kicks her foot in front of her, hitting opponents low. The tip of her foot meteor smashes grounded opponents and launches airborne opponents upwards. Can make the opponent trip, allowing for multiple follow-ups. | |
| Dash attack | Quick Palm Shot (クイックパームショット) | 12% (clean body), 9% (clean hands), 8% (late body), 7% (late hands) | Zelda shoves her arms in front of her and pushes foes in front of her away with a boost of magic power. Any foes caught in the sweetspot of the move will shocked and knocked upwards. | |
| Forward smash | Shining Palm Shot (シャイニングパームショット) | 1% (hits 1-4), 13% (hit 5) | Zelda charges magic energy in her right hand and flashes it in front of herself, hitting opponents multiple times before knocking them away. Can pressure shields and deals great knockback. However, it can be SDI'd out of (though it requires good timing). | |
| Up smash | Power Steer (パワースティア) | 1% (hits 1-10), 5% (hit 11) | Zelda charges magic energy in her left hand and waves it above her head twice, hitting opponents multiple times before knocking them away. At low percentages, especially against heavy characters, this can combo several times with itself, and is also easily followed by an up tilt. | |
| Down smash | Compass Turn (コンパスターン) | 12% (hit 1), 10% (hit 2) | Zelda quickly kicks on both sides of herself, knocking opponents away. It is the fastest down smash in the game (tied with R.O.B) with good semi-spike knockback. The leg Zelda strikes with is intangible. | |
| Neutral aerial | Zelda Spin (ゼルダスピン) | 2% (hits 1-4), 5% (hit 5) | Zelda spins in place, slowly trailing sparkles from her hands. Has short range, but is useful for catching opponents in combos. | |
| Forward aerial | Lightning Kick (Front) (稲妻キック(前), Lightning Bolt Kick (Front)) | 20% (clean foot), 4% (clean leg, late) | Zelda quickly kicks in front of herself, dealing great damage and knockback if the opponent is hit at the beginning of the move and just the tip of her boot. Otherwise, the opponent is hit with low damage and knockback. | |
| Back aerial | Lightning Kick (Back) (稲妻キック(後), Lightning Bolt Kick (Back/Rear)) | 20% (clean foot), 4% (clean leg, late) | Identical to Zelda's forward aerial, except the opposite direction and faster, dealing slightly higher knockback than the forward Lightning Kick. | |
| Up aerial | Condense Blast (コンデンスブラスト) | 15% | Zelda brings her arm above her head and releases a fiery explosion above her head, dealing great knockback. Requires precise timing to KO. | |
| Down aerial | Mild Meteor Heel (マイルドメテオヒール) | 16% (clean), 5% (late leg), 4% (late foot) | Zelda stomps her foot below herself, meteoring opponents. The initial hitbox deals a powerful meteor (the 3rd strongest meteor smash in the game, whereas later hitboxes hit opponents with less force, albeit still a meteor. | |
| Grab | Holding (ホールディング) | — | Zelda restrains her opponent in front of her with magical energy. | |
| Pummel | Holding Attack (ホールディングアタック) | 3% | Zelda waves her arms quickly in front of her victim, dealing small magic damage. | |
| Forward throw | Force Move (フォースムーブ) | 12% | Zelda spins her opponent in front of her and throws her opponent away. Deals a good amount of damage. | |
| Back throw | Force Back Move (フォースバックムーブ) | 11% | Zelda spins her opponent, circles them around herself and throws them behind herself. Deals good damage. | |
| Up throw | Force Top Move (フォーストップムーブ) | 11% | Zelda forces her opponent above her and throws them upward. | |
| Down throw | Plasma Beat (プラズマビート) | 2% (hits 1-4), 2% (throw) | Zelda forces her opponent under her and shoots magic from her hands at them, before knocking them behind herself. | |
| Forward roll Back roll Spot dodge Air dodge |
— | — | ||
| Techs | — | — | ||
| Floor attack (front) Floor getups (front) |
6% (hit 1), 8% (hit 2 leg), 6% (hit 2 body) | Zelda performs a spin kick as she gets up. Notable for having unusually high damage on the second hit. | ||
| Floor attack (back) Floor getups (back) |
6% | Essentially the same as the front floor attack. | ||
| Floor attack (trip) Floor getups (trip) |
5% | Zelda performs a sweep kick from the sitting position. | ||
| Edge attack (fast) Edge getups (fast) |
6% | Zelda climbs up and swings her legs in a circular motion, while pulling herself up. | ||
| Edge attack (slow) Edge getups (slow) |
10% (arm), 8% (body) | Zelda raises up slowly, and after a short pause, smacks the enemy with the back of her hand. | ||
| Neutral special | Nayru's Love | 1-2 (hits 1-5), 3-5% (hit 6) | A crystal forms that reflects projectiles, followed by the shards spinning around and slicing nearby opponents. | |
| Side special | Din's Fire | 8-16% | Launches a controllable fireball that charges as it travels until it explodes. Can be directed up or down with the control stick. | |
| Up special | Farore's Wind | 6% | Teleports in a given direction, dealing damage at both ends. | |
| Down special | Transform | 0% | Transforms into Sheik. | |
| Final Smash | Light Arrow | 3% (hit 1), 39% (Light Arrow 1st opponent), 29% (2nd opponent), 21% (3rd opponent) | Zelda pulls out a large magical bow and light arrow which she fires in a straight, horizontal line across the stage. It can strike multiple opponents, decreasing in damage and knockback with each successive target, with the first opponent being hit with enough knockback to one-hit KO Mario from the center of Final Destination. Launches opponents at a 45° angle. | |
Stats[edit]

| Stats | Weight | Dash speed | Walk speed | Traction | Air friction | Air speed | Air acceleration | Gravity | Falling speed | Jumpsquat | Jump height | Double jump height | Empty landing lag |
|---|---|---|---|---|---|---|---|---|---|---|---|---|---|
| Value | 85 | 1.25 – Initial dash 1.224 – Run |
0.8 | 0.054 | 0.006 | 0.987 | 0.01 – Base 0.09 – Additional |
0.067 | 1.13 – Base 1.582 – Fast fall |
6 | 31.56113619 - Base ? - Short hop |
? | 3 |
Announcer call[edit]

English/Japanese
Wii Remote selection sound[edit]
- The Transform sound effect is heard and Zelda shouts.
On-screen appearance[edit]
- Teleports in with magic in her hands.

|
|---|
Taunts[edit]
- Up taunt: Jabs her arm upwards, creating sparkles above her palm.
- Side taunt: Clasps her hands. When she does, a ball of fire appears between her hands, a remodel of one of her victory poses from Melee.
- Down taunt: Leans forward and waves.
| Up taunt | Side taunt | Down taunt |
|---|---|---|

|

|

|
Idle poses[edit]
- Flips her hair back.
- With one hand on her elbow, she puts the other hand on her neck, puts it back down and then taps her other arm with one finger.
- Holds one arm and looks in multiple directions.
 |
 |

|
|---|
Crowd cheer[edit]
| Cheer (English) | Cheer (Japanese) | Cheer (German) | Cheer (Korean) | |
|---|---|---|---|---|
| Cheer | ||||
| Description | Zel - da! | Zel - da! | Zel - da! | |
| Cheer (French) | Cheer (Italian) | Cheer (Spanish) | ||
| Cheer | ||||
| Description | Zel - da ! | Zeeeeel - da! | Zeel - da! | Zel - da! |
Victory poses[edit]
- Up: Turns her head to the left, making an elegant stance.
- Left: Praying, she turns her head upward, similar to her taunt from Melee.
- Right: Conjures bright red magical energy.
| Up | Left | Right |
|---|---|---|

|

|

|
In competitive play[edit]
Most historically significant players[edit]
- See also: Category:Zelda players (SSBB)
 JuJux - Considered to be the best Zelda player in Europe, and one of the best Zelda players in the world. Placed 33rd at Bushido Brawl Impact, which is considered to be her best placement at a major.
 Riot - Although he preferred to play doubles than singles, he was considered the best Zelda player in the world prior to ven throughout the game's competitive lifespan, and was once ranked 15th on the New England Brawl Power Rankings.
- Ven - Was considered the best Zelda player in the world after Brawl's decline, placing 4th at Rise 2017.
Tier placement and history[edit]
Zelda was initially seen as a usable mid-tier character, being ranked 20th on the first tier list; her significant power buffs in Brawl made her a very powerful character who was able to compete decently with the then inexperienced playerbase, who did not utilise much camping and couldn't play the neutral game well. As the metagame progressed, however, it became realized that Zelda's buffs did little to address the very significant problems of her character design; Din's Fire was still a terrible projectile that could not force approaches, while Zelda herself was still very slow and incapable of initiating approaches, and her moveset still consisted nearly entirely of unreliable finishers that made it very difficult for her to rack up damage, as well as gave her difficulty in reliably finishing stocks when the opponent was in KO range, while players started to notice that the changes to Brawl mechanics were unfavorable for her, alongside other direct nerfs. Namely, she lost the chain throws and other combos she had out of her throws, while her Lightning Kicks that she relied so heavily on were made significantly harder to sweetspot and laggier, in addition to their sourspots being drastically weakened and Brawl's severe stale-move negation crippling the KO potential of such heavily used moves with such severe sourspots. As Brawl became more defensive-based, the playerbase's neutral game improved, and camping became more prevalent, Zelda's problems were significantly exacerbated, and it gradually became clear that Zelda was a poorly designed character who could not remotely viably compete.
Zelda's decline started slowly, with her only falling two places on the second tier list, but it picked up on the third tier list with her falling four places, and she then took a nose dive on the fourth tier list to 35th in bottom tier as the fourth worst character. She fell even further to being ranked the second worst character on the fifth tier list, and remained there for the rest of Brawl's competitive life, which is also the largest tier drop any character experienced in Brawl. By the end of Brawl's active life, there were even some players who considered Zelda as the worst character in Brawl and not Ganondorf, though the BBR would not sway in placing Ganon as the worst on their final Brawl tier list. While Zelda did have a few players dedicated to using her, her overall playerbase was very small and made very little impact, so her competitive prospects never improved in Brawl.
While Zelda performs poorly in Brawl singles, she performs slightly better in doubles, where a teammate can alleviate some of her significant flaws and allow Zelda to utilize her strengths better. Riot, for example, routinely placed well in doubles events in his region, compared to his worse and more scarce results in singles.
In Solo Modes[edit]
Classic Mode[edit]
In Classic Mode, Zelda/Sheik can appear as an opponent or ally in Stage 1 along with Link, Ganondorf, and Toon Link on Bridge of Eldin or Pirate Ship (with the latter available if it has been unlocked). Zelda/Sheik can also appear as an opponent in Stage 11, but only if she hasn't appeared in Stage 1.
All-Star Mode[edit]
In All-Star Mode, Zelda/Sheik is fought in Stage 6 alongside Link, Ganondorf, and Toon Link on Bridge of Eldin or Pirate Ship.
Event Matches[edit]
Solo Events[edit]
- Event 2: Landmaster Ignition: As Fox with a Smash Ball, the player must survive against Meta Knight and Sheik. Fox must rely on his Landmaster as his opponents take less knockback from his regular attacks. Sheik may transform into Zelda on harder difficulties.
- Event 17: Super Waterfall Climb: As Zelda, the player must survive on Rumble Falls until the background changes into a waterfall. Two pairs of Ice Climbers with unlimited stock will try to hinder the player's progress.
- Event 22: Monkeys Unite: Diddy Kong allied with a giant Donkey Kong must defeat Sheik and Lucario. Sheik may transform into Zelda on harder difficulties.
- Event 25: The Aura Is With Me: As Lucario at 182% damage, the player must defeat both Sheik and Ness. Sheik may transform into Zelda on harder difficulties.
- Event 31: The Ultimate Bodyguard: Marth must defend Zelda and defeat two Ganondorfs on Castle Siege. Zelda remains in her crouching position until the third background change, where she'll transform into Sheik and assist Marth.
- Event 33: Advent of the Evil King: As Ganondorf, the player must defeat Link, Zelda, and Pit on Temple.
- Event 34: All-Star Battle Melee: Zelda is one of the opponents fought in this event. All opponents are newcomers from Super Smash Bros. Melee.
Co-Op Events[edit]
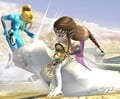
- Co-Op Event 6: Unwanted Suitors: As Zelda and Zero Suit Samus, both players must defeat an invisible Captain Falcon and an invisible Luigi on Port Town Aero Dive.
- Co-Op Event 21: The True All-Star Battle: Two players select a character and take on the entire roster on Battlefield.
Congratulations Screens[edit]
Classic Mode

All-Star Mode


Role in The Subspace Emissary[edit]

In The Subspace Emissary single-player mode, Zelda and Peach have two different storylines, depending on which one is saved from Petey Piranha. At the start, she and Peach are watching a friendly match between Mario and Kirby. After the Halberd appears, she and Peach rush from offstage after the stadium is attacked by Primids and other Subspace enemies. The player can choose out of the four to fight off the Primids. When the Ancient Minister appears and drops a Subspace bomb, Mario is blasted away by a cannonball when he tries to stop it. Zelda and Peach are captured by Petey Piranha. The player, as Kirby, must save either Peach or Zelda by destroying one of their cages.
Storyline 1[edit]
If Zelda is saved, she joins Kirby as they both escape from the stadium on a Warp Star, whilst Peach is captured and turned into a trophy by Wario. They are pursued by the Halberd, and land on top of it. When an Arwing engages the Halberd but gets knocked down, the slipstream from the near miss causes Zelda and Kirby to fall off and make their way to the ground, fighting through hordes of Subspace foes along the way. Later on, Kirby leaves Zelda behind, and Bowser appears from the sky and turns her into a trophy.
The Shadow Bugs (which came along with Bowser) make a clone of Zelda while he takes the real Zelda. The clone proceeds to ambush Link and Yoshi with a Dark Cannon. However, Pit destroys the Dark Cannon and he and Mario fight and defeat her. When the clone is defeated, Link witnesses her trophy disintegrating into Shadow Bugs and, believing it was the real Zelda, proceeds to attack both Mario and Pit with Yoshi’s help. Mario and Pit defeat them and turn them into trophies and then Link and Yoshi fall into a state of unconsciousness as trophies. Kirby then revives them as King Dedede snatches them with his cargo (already hauling Luigi, Ness, and Peach). The five heroes chase after Dedede to his castle which is in ruins after Bowser stormed it and took Peach's trophy. The group then catches up to Bowser at a cliff but he escapes with Peach's trophy and flies to the Halberd where Zelda is already being held.
Storyline 2[edit]
If Peach was saved, Wario appears whilst Zelda is trapped under her wrecked cage. He blasts her with a Dark Cannon and turns her into a trophy, before fleeing the stadium with her. She is later captured by King Dedede when he ambushes Wario and steals his Cargo along with Ness and Luigi. As he passes Link and company, Link spots her on the back of the Cargo, and Pit shoots the Cargo, slowing it down so that they can pursue Dedede.
Dedede puts his own Dedede brooch on her, but when Bowser attacks his castle, he finds her trophy and takes it. However, he is pursued by Mario and Pit, and when Pit fires an arrow at Bowser, the Dedede brooch falls off and is found by Kirby. Bowser escapes in the Koopa Clown Car and takes her trophy up to the waiting Halberd.
Re-merge[edit]
- After this point, the storylines are the same regardless of who was rescued.
At a later part of the story, Zelda and Peach are discovered by Lucario, Meta Knight, and Snake in cages aboard the Battleship Halberd, stuck in their trophy form. Shadow Bugs of the princesses then fight the trio. After being freed, Snake tells both Zelda and Peach to stay in the room that they were being held captive in. Zelda transforms into Sheik, and both she and Peach make their way to the deck of the Halberd, against Snake's orders.
When Fox attacks the Halberd against and nearly hits Peach by accident, Sheik uses Vanish to appear on top of Fox's Arwing. She then breaks the cockpit and Fox ejects, and they both fall to the Halberd. Just as they begin to fight, Peach holds up a hand and yells, "Hi!" Both Fox and Sheik look over, and find Peach has just offered them both tea. Fox, looking confused, looks to Sheik, to find she has already begun to drink. Fox accepts the tea and they do not fight again.
Zelda/Sheik helps Peach, Fox, Lucario, Snake and Falco defeat Duon. She is on the Halberd when Meta Knight lands it and meets up with the two other groups. Sometime between the Halberd's retaking and before the Subspace Bomb detonation at the Isle of Ancients, she returns to Zelda's appearance.
During the fight against Tabuu, Zelda (along with all the other characters) gets turned into a trophy. If she is revived, she, along with Link, revives Ganondorf and points out what happened. She then aids the heroes in defeating Tabuu at the end of the story.
Playable appearances[edit]
If Zelda is rescued in Midair Stadium, after The Lake Shore is completed, she will be removed from the team until Battleship Halberd Exterior.
- Midair Stadium
- Sea of Clouds - If she's rescued in Midair Stadium.
- Battleship Halberd Exterior
- Battleship Halberd Bridge
- Entrance to Subspace
- The Great Maze - If she's rescued in Subspace (Part II).
Trophy form[edit]
Zelda, like Luigi, doesn't have the trophy form pose of her collectible trophy. She instead has her arm in front of her rather than behind, as in her down taunt.
Exclusive stickers[edit]
The following stickers can either only be used by Zelda and Sheik or by a select few including her:
- Acro: [Magic] Attack +15
- Ashley: [Magic] Attack +22
- Boomerang: [Weapon] Attack +4
- Bow: [Magic] Attack +8
- Colin: [Specials: Direct] Attack +4
- Daphnes Nohansen Hyrule: [Electric] Attack +31
- Dark Samus: [Electric] Attack +31
- Darknut: [Slash] attack +13
- Epona & Link: [Arm, Leg] Attack +9
- Fierce Deity Link: [Slash] Attack +21
- Girl [Animal Crossing]: [Magic] Attack +21
- Girl [Magical Vacation]: [Magic] Attack +19
- Happy Mask Salesman: [Leg] Attack +9
- Hylian Shield: [Slash] resistance +10
- Kamek: [Magic] Attack +11
- Kyorusuke: [Magic] Attack +8
- Lantern: [Flame] Resistance +7
- Legend of Outset: [Arm] Attack +26
- Linebeck: [Throwing] Attack +20
- Link [Link to the Past]: [Electric] Resistance +31
- Link [Twilight Princess]: [Slash] Resistance +27
- Link [Wind Waker]: [Flame] Attack +31
- Link with Goron Mask: [Slash] Attack +17
- Link's Grandma: [Arm, Leg] Attack +2
- Lon Lon Milk: Launch Power +18
- Midna & Wolf Link: [Leg] Attack +26
- Moblin: [Slash] Attack +15
- Moon Fairy Seren: [Magic] Attack +16
- Myrrh: [Magic] Attack +15
- Naomi Hunter: [Leg] Attack +5
- Octorok: [Leg] Attack +4
- Peach & Daisy: [Leg] Attack +27
- Piece of Heart: Heart Container Effect +50
- Pinkle: [Magic] Attack +15
- Salvatore: [Electric] Attack +9
- Shahra: [Leg] Attack +7
- Sheik: [Body, Spin] Attack +17
- The Great Fairy: [Magic] Attack +21
- Tingle [Wind Waker]: [Flame] Resistance +24
- Toadette: [Magic] Attack +7
- Young Zelda [Minish Cap]: [Battering] Resistance +16
- Zelda [Link to the Past]: [Magic] Attack +27
- Zelda [Ocarina of Time]: [Flame] Resistance +18
Using stickers[edit]
Almost all of Zelda's moves are magic attacks. A magic sticker covers all of her moves except for her down tilt; down smash; Din's Fire; sourspotted forward, back and down aerials; and all ledge and floor attacks. A leg sticker covers all of those moves, except for Din's Fire and her slow ledge attack, the latter being an arm attack. Din's Fire is boosted by explosive stickers, and along with her up aerial and the second hit of Farore's Wind, flame stickers. Her forward tilt and Nayru's Love, as well as Farore's Wind's first hit, are boosted by slash stickers. Lastly, Zelda also benefits from electric stickers, as these will cover her neutral attack, up tilt, dash attack, up smash, forward smash, neutral aerial, Lightning Kicks, down aerial and down throw.
Trophies[edit]
Zelda's main and Final Smash trophies can be obtained by clearing Classic Mode and All-Star mode respectively with Zelda.

- Zelda
 The princess of Hyrule. In other games, her role changes between titles. In Ocarina of Time, she was hunted by the would-be conqueror, Ganondorf. She deceived him, however, by adopting the persona of Sheik. In Twilight Princess, she surrendered to Zant and was held as his prisoner.
 The Princess of Hyrule. In other games, her role changes between titles. In Ocarina of Time, she was hunted by the would-be conqueror, Ganondorf. She deceived him, however, by adopting the persona of Sheik. In Twilight Princess, she surrendered to Zant and was held as his prisoner.
 : The Legend of Zelda
 : The Legend of Zelda: Twilight Princess
- Light Arrow (Zelda)
- Princess Zelda's Final Smash. She wields a mighty bow of light with which she can attack from afar. Her arrow travels in a straight line and flies through all characters unlucky enough to be in the way. This attack cannot be blocked. The more enemies there are, the higher the chances to get them all with one shot. More is always better!
- : Super Smash Bros. Brawl
Alternate costumes[edit]
.png)
| |||||
Gallery[edit]
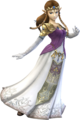
Official Artwork.
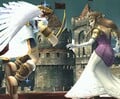
Next to Pit on Castle Siege.
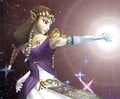
Using her neutral attack on Lylat Cruise.
Posing on Pokémon Stadium 2.
Using her down tilt on Zero Suit Samus on Skyworld.


_-_Brawl_Trophy.png)
Trivia[edit]
- In the Super Smash Bros. Brawl manual, Zelda is referred to as a "queen" even though she is commonly referred to as "princess". This is because her Brawl appearance is based on the Zelda of Twilight Princess, who is queen de facto, but does not officially bear the title as her coronation was prevented by the events of the game.
- The amount of transformation lag can be shortened by pausing the game during the transformation; doing this, however, causes a replay of the match to lag at the point of where the player transformed.
External links[edit]
- Zelda's page at Smash Bros. Dojo!!
- Zelda and Mario in the Subspace Emissary (2:18-2:31)
- Zelda Character Guide on SmashBoards
- Zelda and Sheik's Moves - History Behind Super Smash Bros. Brawl, by CrappyCaptureDevice
| Fighters in Super Smash Bros. Brawl | |
|---|---|
| Veterans | Bowser · Captain Falcon · Donkey Kong · Falco · Fox · Ganondorf · Ice Climbers · Jigglypuff · Kirby · Link · Luigi · Mario · Marth · Mr. Game & Watch · Ness · Peach · Pikachu · Samus · Yoshi · Zelda / Sheik |
| Newcomers | Diddy Kong · Ike · King Dedede · Lucario · Lucas · Meta Knight · Olimar · Pit · Pokémon Trainer (Charizard · Ivysaur · Squirtle) · R.O.B. · Snake · Sonic · Toon Link · Wario · Wolf · (Zero Suit Samus) |