Zelda (SSB4)
| Zelda in Super Smash Bros. 4 | |
|---|---|
 
| |
| Universe | The Legend of Zelda |
| Other playable appearances | in Melee in Brawl in Ultimate |
| Availability | Starter |
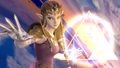
| Final Smash | Light Arrow |
| Tier | G (52-53) |
Zelda (ゼルダ, Zelda) is a playable character in Super Smash Bros. 4. Her return to the series was announced in a Director's Room Miiverse post on December 26th, 2013, which also commemorated The Legend of Zelda: A Link Between Worlds being released in Japan on the same day. She is now completely separated from Sheik, no longer being able to transform mid-match.
Jun Mizusawa reprises her role as Zelda's voice actor, albeit via recycled voice clips from Super Smash Bros. Melee and Super Smash Bros. Brawl.
Zelda is ranked 52nd/53rd out of 54 on the tier list, tying her with Ganondorf and placing her in the G tier. This is similar to her placement in Brawl, where she was ranked 37th out of 38. Zelda has a solid combo game, with her possessing multiple attacks which can set up into other moves. When coupled with her overall high damage output, Zelda is capable of racking up a solid amount of damage at a respectably fast rate. Zelda also boasts an array of KOing options, most notably her forward smash, up smash, sweetspotted Lightning Kicks, up aerial and sweetspotted down aerial. By extension, Farore's Wind is a very potent and powerful KO move, reliably KOing any character below 100% while near the upper blast line, which makes it especially potent from out of shield when it can be applied. She also has a solid grab game, with her back throw being a solid KO option near the ledge and her down throw being a potent combo throw, even at higher percents.
However, Zelda also has a fair amount of detrimental weaknesses. Her mobility is very poor (especially on the ground) and her approach options are risky, making it very difficult for her to approach. While she does have a projectile in Din's Fire, it is very slow and easy to avoid, and if used in the air causes Zelda to go into freefall. When combined with her tall hurtbox and her floatiness, this results in her neutral game being very poor, with opponents easily being able to keep her out, avoid her threat zone and put her into disadvantage where she also struggles. Additionally, her endurance is poor because of her light weight and low falling speed, which can both lead to her getting KOed early. Zelda's KO potential is also inconsistent: her strongest attacks have a combination of multiple traits including slow startup lag, having short durations, having drastically weaker sourspots and/or having punishable amounts of lag. Lastly, she does not have a particularly effective out of shield game, as her best options either have slow frame data or mediocre range.
As a result, Zelda's strong punish game is not enough to make up for her poor mobility, endurance, neutral game, disadvantage state, approach potential and inconsistent moveset, resulting in Zelda struggling against most of the cast, much like she did in the previous two games. Ultimately, this meant that Zelda retained extremely minimal representation in competitive play much like the previous two games and in turn, extremely sparse results. However, Zelda has nevertheless managed to find a few instances of success, especially from Onpu, Rizeasu, and ven.
Attributes[edit]
Zelda is a tall, floaty lightweight with largely slow mobility. Although her traction is average and her air speed is slightly above-average, her walking, dashing and falling speeds; gravity; air acceleration; and jump and double jump are each below-average. As a result of her attributes, Zelda's endurance, neutral game, and approach are sub-par.
Zelda's playstyle is largely defensive, and benefits from her strong out of shield options and punishment potential. By extension, her special moveset supplements her defensive potential, with Farore's Wind being her most effective special move. It is a long-ranged teleport that grants intangibility, giving her a very reliable and, when used wisely, virtually unpredictable recovery option. In addition, Farore's Wind has become one of Zelda's most viable KOing options, especially from out of shield: its disappearing hitbox now launches opponents directly upward, which allows it to combo into its now stronger reappearing hitbox that, when sweetspotted, will KO any character below 100% while near the upper blast line.
Due to losing Transform, Zelda has received a new down special called Phantom Slash. Phantom Slash is a chargeable projectile that boasts both offensive and defensive capabilities: it possesses enough power to KO at reasonable percentages when fully charged, especially when edge-guarding, while the Phantom itself can block Zelda from incoming attacks. While descending from the upper corners of a stage, Zelda can also use it as a fairly effective way to ward off edge-guard attempts from an opponent standing at the edge. Nayru's Love is a reflector that also has loop hitboxes, which grant it offensive and defensive potential like Phantom Slash. Lastly, Din's Fire can be useful for long-ranged edge-guarding, which is further supplemented by its new sweetspot's high knockback growth.
The majority of Zelda's air game is a case of "high-risk, high-reward": her Lightning Kicks and down aerial require considerable precision to hit their sweetspots, yet each of these attacks boasts enough power to easily KO even super heavyweights when they are sweetspotted. By extension, sweetspotted down aerial boasts decent combo potential on grounded opponents, thanks to it being a very powerful meteor smash. Zelda's up aerial is the most damaging up aerial in the game, and while it also requires precision because of its short duration and fairly minimal horizontal range, its lack of sweetspots and sourspots makes it much more consistent at KOing in comparison to her Lightning Kicks and down aerial. Unlike Zelda's aforementioned aerials, neutral aerial is not suited for KOing outright, but has respectable utility: it has a decent damage output and loop hitboxes; can function as a follow-up from down throw at low percentages; can start combos when SHFF'd; and its last hit's very high knockback growth makes it useful for edge-guarding.
Zelda's ground game is very middling in comparison to her air game, but each of her grounded attacks has some degree of utility. Her grab game, in particular, is widely agreed as the best aspect of her ground game. Zelda's grabs have fairly long ranges despite not being tether grabs, and her pummel is among the most damaging in the game despite its moderately slow speed. Forward and back throws are useful for setting up edge-guards, yet each has a certain quirk: the former is among the damaging forward throws in the game, whereas the latter has KO potential while near the edge. Up and down throws possess combo potential, but vary noticeably in effectiveness. Up throw is decent for combos at low percentages, although it is especially useful against heavyweights and fast-fallers. However, it can also be followed up by an air, which can KO fast-fallers, especially with rage. Down throw has greater combo versatility in comparison, most notably in the form of its up aerial combo, which KOs lightweights as early as 92% and super heavyweights as early as 115%.[1] Although DI can occasionally make the setup harder to perform, the effectiveness of its up aerial combo will remain largely intact so long as Zelda utilizes it with proper timing.[1]
Neutral attack, up tilt, and especially down tilt are capable combo starters, thanks to their knockback values, launching angles, and low ending lag. Forward tilt and dash attack are decent for spacing and KOing, thanks to their strong sweetspots, while the latter also has one of the lowest amounts of start-up lag of any dash attack in the game. Zelda's forward and up smashes have impressive power and respectable shield pressuring potential thanks to their multiple hits, while the latter also has surprisingly low start-up lag for a smash attack. Down smash is Zelda's weakest smash attack, though it is nevertheless quite strong and, like neutral aerial, has decent utility. It hits on frame 5, which ties it with Pit, Dark Pit, Mario, Dr. Mario, and Ryu's down smashes as the second fastest smash attacks of any kind in the game. When coupled with its low ending lag and semi-spike angle, down smash can reliably punish rolls and set up edge-guards.
However, Zelda possesses a number of glaring weaknesses. She has the inconvenient combination of being tall, light, and floaty, which collectively make her susceptible to both combos and early KOs. Although Zelda's mobility has improved, it has only done so marginally at best, and thus remains overall sub-par. Despite her power, Zelda's KO potential is inconsistent: in addition to having very short durations, her strongest attacks are burdened with very weak sourspots (dash attack; down smash; Lightning Kicks; and down aerial), punishable amounts of lag (forward tilt; forward/up smashes; up aerial; and Phantom Slash), or both (Din's Fire and Farore's Wind). To further compound this, only up aerial has set-ups (up tilt, down tilt, and down throw) that are largely consistent past medium percentages.[1]
Although Zelda's special moves can help her defensive presence when used wisely, they are nevertheless lacking in pressure. Short-ranged pressure can be problematic because Nayru's Love is rather laggy, while Phantom Slash is situational because of its ending lag, limited durability, poor range at low charges, and its susceptibility to reflection-based attacks. As a result, Zelda is forced to rely on her down smash instead of either of these options much more often than not. Conversely, Din's Fire is very unsuitable for long-ranged pressure because it is still very easy to evade, and is now burdened with a very weak sourspot. Lastly, Farore's Wind can cause Zelda to recover or evade pressure in the wrong direction if she recovers from a stage's slopes. Its high ending lag also makes her unable to move during her free-fall animation until more than a second has passed.
The overwhelming majority of Zelda's custom moves are among the worst in the game, owing to their inability to alleviate her weaknesses. However, Zelda does have two custom moves that are more beneficial than the default versions. Din's Flare deals consistent damage regardless of its charge, travels much faster, and has both a longer range and a faster detonation. However, it is much less maneuverable than Din's Fire. Phantom Breaker can break shields very easily and possesses KO potential like Phantom Slash, although it travels a set distance regardless of its charge, and its slightly lower damage output results in it KOing later than Phantom Slash. Aside from these, Zelda's remaining custom moves are situational at best: Phantom Strike is stronger but has poor range, while Din's Blaze is stronger and easier to control, but is even slower, and Farore's Windfall can meteor smash on the second hit, but completely loses its KO potential even beyond Sudden Death.
Overall, Zelda cannot rely on heavy stage or shield pressure, and thus must rely on either reading and baiting or playing defensively. Both of these playstyles' purpose is to punish opponents with her effective out of shield game to start combos, utilize her down throw's up aerial combo for KOing, or set up an edge-guard before attempting to score a KO. However, her poor approach, mobility, and neutral game hinder her ability to escape rushdowns and pressure, while her heavy reliance on sweetspots makes her akin to a glass cannon.
Changes from Super Smash Bros. Brawl[edit]
Due to her status as the second-lowest-ranked character in Brawl, Zelda received a mix of buffs and nerfs in the transition to SSB4, being buffed overall. However, those buffs weren't enough to improve her standing compared to the rest of the cast. Farore's Wind is the most notable buff that she received; in addition to being a much safer recovery, it is now a risky but potent KO option, especially from out of shield, thanks to various hitbox and knockback adjustments. The removal of meteor canceling greatly improves down aerial's reliability off stage. Zelda's new down special, Phantom Slash, is a fairly strong projectile with a decent amount of utility: it is a capable edge-guarding option, helps her cover almost all edge get-up options, can protect and/or enable her to attack from behind the Phantom itself, and boasts KO potential when fully charged. Din's Fire now has a powerful sweetspot placed in the inner part of the explosion. Zelda's KO potential was also improved outside of the aforementioned attacks thanks to beneficial hitbox changes: her forward tilt and dash attack can now KO at high percentages to compensate for the loss of their combo potential, while her forward and up smashes possess stronger KO potential.
As a result of the removal of hitstun canceling, Zelda's combo game has also noticeably improved: neutral attack's angle adjustments make it a better set-up option at low percentages, up tilt's lower damage output and increased speed make it a reliable combo option, neutral aerial's multihit adjustments make it better at damage racking and follow-ups, and down throw's increased knockback and altered angle make it a reliable combo starter and KO set-up into up aerial and back aerial at high percentages.
However, Zelda also received noticeable nerfs. The most notable is the removal of her ability to Transform into Sheik, which is further compounded by the latter having been significantly buffed in the transition from Brawl to SSB4. Outside of this, most of Zelda's direct nerfs have been applied to her hitbox sizes and frame data: up and down smash have much shorter ranges, with the former in particular having less utility and being slower, while the latter has slightly more startup and has a weaker front hit. Lightning Kicks have weaker sweetspots and are drastically laggier, preventing her from being actionable or auto-canceling in a short hop. This massively worsens their risk and greatly hinders their use in neutral. Din's Fire is much less maneuverable and more inconsistent due to having a sourspot in the outer area of the explosion, making it worse as a zoning tool. While rage can compound her already strong KO power, her low weight prevents her from consistently building up a high amount of rage, and it worsens her already poor endurance. While her combo game is stronger, she is also easier to combo, not only due to the aforementioned removal of hitstun canceling but also because of her faster fall speed and gravity.
Overall, Zelda's much better combo game supplements her stronger out of shield game. However, she is still burdened with a poor approach and neutral game, owing to the buffs to her mobility being marginal at best (especially since many other characters also had their mobility improved to varying degrees), while she also received significant nerfs to some of her key moves in the previous game. While she overall greatly benefits from the changes to Smash 4's mechanics, they were not enough to offset her weaknesses. As a result, she is still considered to be one of the worst characters in the game.
Aesthetics[edit]
 Due to the aesthetic used in SSB4, Zelda's overall color scheme is significantly more vibrant. Her accessories, including her crown, epaulettes, belt, and jewelry, are now a metallic gold, and the jewels on said accessories are now properly modeled as opposed to being meshed onto her model. Her hair is now a bronze color instead of a dark brown. Her dress bodice appears to have a more velvet-like texture than a leather-like texture, and her gloves and skirt now have a more satin-like appearance. Her skirt is also now more flowing and sports a longer train. The tapestry in front of her dress is now indigo with a gold border instead of gray with a green border, similar to the one sported by her Ocarina of Time incarnation's (her design in Melee) dress.
- Zelda's greaves are more pronounced. The Triforce studs on her boots' buckles have also been removed, and the buckles are no longer merged with her soles. These changes are unique to SSB4.
- Zelda has received two new alternate costumes, one of them being based on her appearance in either A Link to the Past or A Link Between Worlds (which would eventually inspire her current design in the next game). Her red alternate costume now depicts her as wearing gloves like her default color (in Brawl, her red costume did not have gloves for some reason, even though her other colors, including her default, still do). Her Ocarina of Time-based alternate costume is now colored purple instead of pink.
- Zelda is significantly more expressive. She now scowls while using most attacks and when hanging from an edge; smiles during one of her victory poses; winces in pain after tripping; appears alarmed while teetering; and winces depressingly while laying prone/supine.
- Most attacks have updated visual and sound effects.
- Sidestep, air dodge and up taunt's animations have changed.
- Zelda vocalizes less frequently while jumping, a trait shared with many other characters except Falco.
- Zelda's previously unused damage yells from Brawl's Sound Test are now heard when taking high knockback.
Attributes[edit]
 Zelda walks faster (0.8 → 0.87).
- Zelda dashes faster (1.224 → 1.3). Her initial dash is notably faster (1.25 → 1.6).
- Zelda's air speed is faster (0.987 → 1.04).
 Zelda's air acceleration is significantly lower (0.1 → 0.065), noticeably hindering her aerial approach and retreat options.
- Zelda falls noticeably faster (1.13 → 1.35), going from the fourth lowest out of 39 characters to only the 13th lowest out of 58 characters. This improves her vertical endurance but makes her more susceptible to combos.
- Her fast-falling speed is significantly faster (1.582 → 2.16), going from the fourth lowest out of 39 characters to only the 13th lowest out of 58 characters.
- Zelda's gravity is greater (0.067 → 0.071), although it is lower relative to the cast, going from the ninth lowest out of 39 characters to the 6th lowest out of 58 characters.
- Zelda's double jump grants much more height (height multiplier: 0.86 → 1x).
- Rolls have less ending lag (FAF 32 → 31).
- Rolls have a shorter duration (frames 4-19 → 4-17).
- Air dodge has less startup (frame 4 → 3) and ending lag (FAF 50 → 34).
- Spot dodge has more startup lag with a shorter duration (frames 2-20 → 3-18) and it has more ending lag (FAF 26 → 28).
- Due to the limitations of the Nintendo 3DS' processing power,[2] Zelda is no longer connected to Sheik via Transform or character selection screen input.[3]
- As transformations took a long time to load in Brawl, this meant Zelda got a much more reliable down special which also functions as an attack.
- However, she can no longer access Sheik's significantly better mobility and combo potential to alleviate her own weaknesses.
- Zelda's item toss is stronger (0.8 → 0.95).
- However, the removal of glide tossing hinders her approach with items.
- None of Zelda's moves use the electric effect anymore. All the moves that previously did (neutral attack, up tilt, dash attack, forward smash (final hit), up smash, neutral aerial (final hit), forward aerial (sweetspot), back aerial (sweetspot), down aerial (clean hit), pummel and down throw) now use the newly introduced magic effect. This reduces their hitlag and allows them to damage Olimar's yellow Pikmin.
Ground attacks[edit]
- Neutral attack:
- Neutral attack deals more damage (2% (hits 1-3)/6% (total) → 3% (hits 1-2)/5% (hit 3)/11% (total)), without full compensation on the final hit's knockback (10 (base), 160 (scaling) → 40/95).
- This reduces its follow-up potential at higher percents.
- Combined with neutral attack's more serious damage, the changes to shields noticeably improve the move's safety on shield, with it now being safe on shield against a majority of the cast.
- The first two hits have altered set knockback on Zelda's hand and magic burst (30 (hand)/7 (burst) → 40/30), and they now send opponents up and toward Zelda (361° → 140°). This makes the move connect more reliably.
- However, these new angles combined with the final hits' higher knockback hinder the move's ability to trip and jab lock.
- The arm hitboxes are larger (2.5u/3u (hits 1-2), 2.5u/3.5u (hit 3) → 3.2u (hits 1-2), 3.6u (hit 3)), and they are now static hitboxes positioned lower at the same height as the burst hitbox, improving their ability to hit grounded opponents.
- However, this also gives them less range above Zelda.
- The first two hits' burst hitbox is smaller (4.5u → 4u).
- The inner body hitbox has been removed, giving the move less range inside Zelda.
- Forward tilt:
- Forward tilt has less startup lag (frame 12 → 10) with a shorter total duration (FAF 40 → 38).
- Forward tilt has a shorter duration (frames 12-14 → 10-11).
- The outer hand sweetspot has been moved farther out (x offset: 3 → 3.5), slightly improving its range.
- However, the inner hand hitbox is no longer also a sweetspot, further reducing the sweetspot's range point-blank. Interestingly, it still uses the same sound effect as the sweetspot, despite behaving identically to the other sourspot.
- The hand hitboxes now launch opponents horizontally (110° → 361°). This improves its KO potential near the side blast zones, but removes its ability to set up juggles, as well as hindering its KO potential near the upper blast zone.
- Forward tilt deals less damage (13% (hand)/12% (arm)/11% (body) → 12% (outer hand)/10% (inner hand/arm)), hindering its KO potential.
- Forward tilt's body hitbox has been removed, reducing the move's range inside of Zelda, despite the arm hitbox being moved closer to her (x offset: 0 → -1).
- The move now entirely uses slash effects, no longer having a hit with a normal effect and punch sound effect..
- Up tilt:
- Up tilt has less startup lag (frame 10 → 7) and much less ending lag (FAF 48 → 30). The hitboxes have a slightly shorter duration (frames 10-24 → 7-18), but are longer relative to the move's total duration.
- Up tilt launches opponents at a higher and inward angle (70° → 100°).
- Up tilt deals less damage (11% → 7.2%) and knockback (65 (base), 105 (scaling) → 45/110), significantly hindering its KO potential.
- However, when combined with the move's greatly increased speed, altered launch angle, and the changes to hitstun canceling and directional influence, this significantly improves the move's combo potential.
- The arm and shoulder hitboxes are smaller (4.5u/4u → 3u/3u).
- The arm hitbox is positioned closer to Zelda (x offset: 2 → 1).
- Down tilt:
- Down tilt now always launches opponents vertically (270° (leg/body/ground foot)/80° (aerial foot) → 80°).
- This allows Zelda to follow up with aerials, especially at mid percents, as well as making the move slightly safer on hit due to it forcing the opponent into the air.
- This means that the move is no longer capable of tripping, significantly hindering its setup potential at lower percents.
- This also significantly hinders the move's ability to lead into itself (especially against floatier characters), as well as hindering its edgeguarding potential.
- Zelda now gets pushed backward after landing multiple down tilts, which, along with the move's altered angle, further hinders its ability to chain into itself.
- Down tilt has a lower extra trip chance (40% → 20%), although its altered launch angle makes it incapable of tripping regardless.
- Down tilt deals less damage (8% (leg)/7% (foot) → 5.5%), and it has increased knockback scaling (80 → 120), hindering its damage-racking potential at lower percents and its follow-up potential at higher percents, especially when combined with its new angle.
- However, this also improves its follow-up potential below higher percents.
- Down tilt now uses one smaller extended hitbox (5u/4.5u/4u/4u → 3.6u) which is positioned closer to Zelda than the previous foot hitbox (y offset: 6.5 → x offset: 6) which overall has less rage than the previous hitboxes. The move has a smaller disjoint and no longer covers Zelda's body.
- Dash attack:
- Dash attack has a shorter duration (frames 6-8 (clean)/9-13 (late) → 6-7/8-10), reducing the move's overall range as its animation was unchanged.
- Dash attack has more ending lag (FAF 38 → 40).
- The clean hit's sweetspot has a higher hitlag multiplier (1x → 1.2x), but still has less hitlag due to losing the electric effect.
- The clean hit's sweetspot is now a static hitbox positioned directly in front of Zelda's hands rather than on her head.
- This makes the sweetspot easier to land on grounded opponents to the sides of Zelda.
- However, it is much smaller (4.8u → 2.2u), which, along with its new position, gives it much less range behind and above Zelda. It also no longer increases the move's total range due to now being completely within the sourspot's range.
- The clean hit's sourspot is smaller (7u → 5u). This reduces its vertical range, but its horizontal range was compensated due to now being an extended hitbox (z offset: 12 → 7.8 to 13.8).
- The late hit is now one extended hitbox instead of consisting of a sweetspot and sourspot.
- The launch angle is now uniformly diagonal (90°/361° (sweetspots/sourspots) → 50°).
- The clean hit's sweetspot has higher base knockback (70 → 85), which improves its KO potential when used near the horizontal blast zone.
- However, this hinders its overall KO potential, especially from center stage or farther from the ledge.
- The clean hit's sourspot has altered knockback (50 (base), 70 (scaling) → 80/50), overall having worse KO potential unless it is used extremely close to the horizontal blast zone.
- However, the higher base knockback now makes it safe on hit at all percents.
- The late hit deals less damage (8% (head)/7% (hands) → 6%). Its knockback was not fully compensated (20 (base), 70 (scaling) → 80/50), which overall hinders its KO potential, especially when used far from the horizontal blast zone.
- It can no longer trip or lock.
- However, the late hit's higher base knockback makes it safe on hit at all percents.
- Forward smash:
- The hitboxes are positioned marginally higher (y offset: 9.07 → 9.1).
- Forward smash has smaller hitboxes (3.5u/3.5u/4.3u/5u → 4.2u/4.5u (hits 1-4), 4.5u/4.5u/5.7u/6.7u → 5.5u/6u (hit 5)), and because the move only has two hitboxes per hit instead of four, it does not reach as far into Zelda (z offset: 3/7/11/16 (8/16 (hits 1-4)/9.5/16 (hit 5)), reducing its range, especially behind Zelda.
- Forward smash's loop hits' angles (30°/45°/60° → 25°/165°) and set knockback (30/40/50/80 → 40/50) have been altered. When combined with the weakening of SDI, this makes forward smash connect more reliably despite the looping hits' higher SDI multiplier (0.5x → 1x).
- The final hit deals more knockback (30 (base), 105 (scaling) → 37/110), improving its KO potential.
- Forward smash has much more ending lag (FAF 40 → 50).
- Up smash:
- Up smash has more startup lag (frame 6 → 9). This particularly hinders Zelda's out of shield game as she is no longer capable of punishing -6 or -7 moves on shield, unless she powershields.
- Up smash only has 7 looping hits instead of 10 (frame 6/8/10/12/14/16, 23/25/27/29 → 9/12/15/18, 25/28/31), reducing the number of active frames. The number of frames between the first hit and the launching hit is unchanged, but at the cost of increased gaps between its hits.
- The first set of looping hits deals more damage (1% → 2%), while the second set deals slightly less (1% → 0.8%). Overall, the move deals slightly more maximum damage despite having fewer hits (15% → 15.4%).
- The looping hits have much smaller hitboxes (5u/5u/5.5u/5.5u → 3.5u/4.2u/3.5u/3.5u).
- The upper loop and side hitboxes are positioned lower (y offset: 21/18 → 18/17). This reduces its vertical range to the point where the looping hits can no longer hit opponents above Zelda on the side Battlefield platforms, while not giving them more range below her due to their smaller size.
- The side hitboxes are positioned closer to Zelda, reducing the move's horizontal range (z offset: 6 → 5).
- Altogether, these changes greatly hinder up smash's use as an Out of Shield option, as its range has been drastically reduced.
- The final hit deals more knockback (20 (base), 210 (scaling) → 24/214), improving its KO potential.
- The loop hits have a higher SDI multiplier (0.1x → 0.5x), but have less knockback (60/50/60/60 (set), 100 (scaling) → 40/105). The upper loop hit now uses an auto-link angle (270° → 366°). Overall, these preserve the looping hits' consistency given the changes in their size and positions.
- The second set of looping hits and the final hit have a higher hitlag multiplier (0.5x, 1x → 1x, 2x), giving them more hitlag despite no longer having an electric effect.
- Up smash has more ending lag (FAF 57 → 64), with the move no longer being able to lead into itself at lower percents.
- Down smash:
- Down smash has more startup lag with a shorter duration (frames 4-6 (front)/12-14 (back) → 5-6/13-14).
- Zelda's right leg is no longer intangible on frames 4-14.
- The front hit has less knockback scaling (95 → 86) hindering its KO potential.
- The back hit has more knockback scaling (85 → 96) improving its KO potential.
- The leg hitboxes no longer semi-spike (20° → 361°), noticeably hindering their edgeguarding and KO potential.
- However, this also allows the leg hitbox to trip opponents, despite the move having a lower trip chance (30% → 20%).
- Down smash has smaller hitboxes (5u/5u/4u → 4.2u/3u). The leg hitbox now uses an extended hitbox, although this does not fully compensate for the removal of the upper leg hitbox.
- Down smash now uses static hitboxes, which do not reach as far as the previous hitboxes (foot hitbox x/y/z offsets: -2/7/0 → 0/3/12.5 (front)/0/3/11 (back)). This gives down smash less range overall, as well as hindering its ability to hit opponents in the z-axis.
- However, this does also give the front hit more consistent horizontal range.
- Down smash has less ending lag (FAF 40 → 38).
Aerial attacks[edit]
- All aerials except down aerial have shorter initial auto-cancel windows (frames 1-5 (neutral)/1-7 (forward)/1-4 (back)/1-13 (up) → 1-3 (neutral/forward)/1-2 (back)/1-4 (up)).
- Neutral aerial:
- Neutral aerial's loop hits no longer deal consistent damage (2% → 2.5% (front)/1.5% (back)). This improves its damage-racking ability if the opponent is in front of Zelda, but worsens it if hit behind her.
- The front hit now has higher priority, effectively increasing the move's damage output on average.
- The loop hits have larger hitboxes compared to the previous hand hitboxes (3u → 4.7u).
- However, the loop hits no longer have a head and body hitbox, giving them less vertical range.
- The loop hits use a uniform auto-link angle (150° (hands)/270° (head)/90° (body) → 366°) and set knockback (75 (hands)/50 (head)/120 (body) → 75) and knockback scaling (100 (hands)/90 (head/body) → 100), making them connect more reliably and improving the move's follow-up potential.
- Neutral aerial has more ending lag (FAF 50 → 51) and a longer animation (49 frames → 57).
- Neutral aerial has more landing lag (12 frames → 19).
- The final hit's head and body hitboxes have lower knockback scaling (120 → 110).
- Lightning Kicks:
- Lightning Kicks' animations have slightly changed. Zelda now leans and faces away from the direction where she kicks, and has her arms positioned differently. These new animations make her hurtbox narrower.
- However, these animations are also longer (49 frames → 62), increasing the amount of time Zelda cannot grab ledges after performing a Lightning Kick.
- The sweetspots have a slightly larger hitbox (1.7u → 1.9u), making them slightly easier to land.
- The changes to shields significantly improve Lightning Kicks' safety and effectiveness on shield, especially the sweetspots, which are no longer burdened against shielding opponents by their extreme hitlag.
- The introduction of frame canceling benefits Lightning Kicks due to their sweetspots' extremely high hitlag, which can give them much less landing lag when they connect if timed and spaced properly.
- Forward aerial:
- Forward aerial has more startup lag (frame 8 → 9).
- Forward aerial has more ending lag (FAF 40 → 53), with Zelda no longer being actionable again in a short hop.
- Forward aerial has slightly more landing lag (22 frames → 23).
- Forward aerial auto-cancels much later (frame 25 → 50), no longer doing so in a short hop.
- Altogether, these changes significantly hinder forward aerial's spacing potential and safety on hit.
- The sweetspot has lower base knockback (35 → 24), hindering its KO potential.
- Back aerial:
- Back aerial has more startup lag (frame 5 → 6).
- Back aerial has much more ending lag (FAF 36 → 53), with Zelda no longer being actionable if it is performed in a short hop. This also removes its ability to be done twice in a short hop.
- Back aerial has more landing lag (22 frames → 25).
- Back aerial auto-cancels much later (frame 26 → 52), no longer doing so in a short hop.
- Back aerial overall has slightly reduced range due to its new animation, with its range now being more in line with forward aerial.
- Altogether, these changes significantly hinder back aerial's spacing potential and safety on hit.
- The sweetspot has lower base knockback (40 → 28), hindering its KO potential.
- Up aerial:
- Up aerial deals more damage (15% → 17%).
- Up aerial has lower knockback scaling (110 → 84), noticeably hindering its KO potential despite its increased damage.
- Up aerial's hitbox is positioned slightly more inward (z offset 1.7u → 0.5u).
- Up aerial has a slightly smaller hitbox (8.199984u → 8u).
- Up aerial has less landing lag (22 frames → 19).
- Down aerial:
- Down aerial now has an initial auto-cancel window during its first three frames.
- The clean hit can now hit grounded opponents, giving the move less startup lag with a longer duration against grounded opponents (frames 15-24 → 14 (clean)/15-24 (late)).
- The clean hit has a larger hitbox (2.5u → 4u).
- The clean hit deals much less knockback (50 (base), 90 (scaling) → 30, 65). This hinders its edge-guarding potential and KO potential despite the removal of meteor cancelling, while not improving its combo potential on stage due to the introduction of teching against grounded meteor smashes.
- Down aerial has less landing lag (21 frames → 18).
Throws/other attacks[edit]
- Grabs:
- Standing and pivot grabs have less start-up lag (frame 12 (standing)/14 (pivot) → 10/11).
- All of Zelda's grabs extend farther out (z offset: 10 (standing)/9 (dash)/-13 (pivot) → z stretch: 13.5u/14.5u/-16.7), giving them more range.
- All grabs have more ending lag (FAF 30 → 38 (standing), FAF 40 → 47 (dash), FAF 36 → 45 (pivot)).
- All grabs have smaller grabboxes (4.8u → 3.8u (standing/pivot)/3u (dash)).
- Dash and pivot grab do not extend as far inside Zelda (z offset: -3 (dash)/-1 (pivot) → 4/-4), removing their ability to grab opponents behind Zelda.
- Forward throw:
- Zelda releases opponents from forward throw earlier (frame 33 → 30). This makes it harder to DI (especially for heavier characters due to the changes to weight-dependent throws), but gives it more ending lag as its total duration was unchanged.
- Back throw:
- Zelda releases opponents from back throw earlier (frame 29 → 27). This makes it harder to DI but gives it more ending lag as its total duration was unchanged.
- Up throw:
- Up throw deals less knockback (80 (base), 50 (scaling) → 50/60) and launches opponents at a slightly lower angle (90° → 88°).
- However, when combined with the changes to hitstun canceling and DI, these changes improve its combo potential.
- Down throw:
- The loop hits deal less damage (2% → 1%), reducing the throw's total damage output (10% → 6%).
- Down throw deals more knockback (80 (base), 42 (scaling) → 85/55), but launches opponents at a higher angle (120° → 100°). When combined with the changes to hitstun canceling and DI, these changes significantly improve its combo potential despite its higher knockback.
Special moves[edit]
- Nayru's Love:
- Nayru's Love has increased intangibility frames (frames 5-12 → 5-15), now coinciding with the hitboxes for 3 frames and improving the move's ability to beat out other moves.
- All hitboxes are positioned slightly higher (y offset 6 → 8).
- The looping hits use 2 medium-sized extended hitboxes (6u/4u) instead of 5 smaller ones (5u/4.8u/4.8u/3.4u/3.4u). They are also positioned closer to Zelda (z offset -13.5/-4/0/4/13.5 → -4 to 4, -10 to 10), overall reducing their horizontal range but improving their vertical range.
- The innermost hitbox (the only one that can hit aerial opponents) is larger (5u → 6u) and is now extended (z offset 0 → -4 to 4), improving the looping hits' ability to hit aerial opponents.
- The innermost hitbox deals more damage (1% → 2%).
- Nayru's Love's loop hits' angles have been altered to send inward (10° → 160°). This makes it significantly more difficult to escape from.
- The loop hits have a continuous duration, improving their hit detection (frame 13/16/19/22/25 → 13-24 (rehit rate 4)).
- The final hit uses 2 medium-sized extended hitboxes (7u/5u) instead of 5 larger ones (6u/7.8u/7u/7.8u/6u). They are also positioned closer to Zelda (z offset -12/-4/0/4/12 → -4 to 4, -11 to 11), reducing both their horizontal and vertical range.
- However, all hitboxes can now hit aerial opponents instead of only the innermost one, significantly improving the final hit's range against aerial opponents.
- The innermost hitbox deals more damage (3% → 5%).
- Due to consisting of four hits instead of six, Nayru's Love deals 4% less maximum damage (15% → 11%).
- However, this is compensated by the damage increase for the innermost hitbox, as well as the looping hitboxes having altered priority, with the 2% hitboxes now having higher priority than the 1% hitboxes.
- Zelda no longer has access to her "Love jump" technique, hindering Nayru's Love's recovery and mixup potential.
- Din's Fire:
- Din's Fire deals less damage (8%-16% → 7%-14% (sweetspot)/3.5%-7% (sourspot)).
- Its travel distance, maneuverability, and explosion's range have been drastically decreased, and it must travel a set distance away from Zelda before it can be detonated. The delay before the explosion is also longer. Lastly, maneuvering it into the stage now makes it stop moving and explode at the same time, instead of exploding. Altogether, these changes significantly hinder its zoning utility.
- Due to consisting of a sweetspot and a sourspot instead of a consistent hitbox, Din's Fire has altered knockback (50 (base)/60 (growth) → 50/97 (sweetspot), 55/40 (sourspot)). This improves its KO potential when fully charged and sweetspotted, but significantly hinders its strength when sourspotted.
- Farore's Wind:
- Farore's Wind's initial hit has decreased start-up lag (frame 11 → 8).
- The aerial first hit has a slightly smaller hitbox (10.56u → 10.5u). The grounded first hit has a smaller hitbox (10.56u → 8u) but is positioned lower and is now an extended hitbox (z offset -4 to 4), improving its horizontal reach, range below Zelda, and its use as an out of shield option, especially with its faster startup.
- Farore's Wind's grounded first hit's knockback (40 (base)/100 (growth) → 118/30) and angle have been altered (80° → 91°), granting it combo potential into its aerial second hit.
- The aerial first hit has slightly increased base knockback (40 → 60), but an unaltered launch angle and knockback scaling, leaving it with a much smaller window to combo compared to the grounded hit.
- Zelda travels farther and covers significantly more height when used with a jump. The move now snaps to the ledge when first used, instead of requiring Zelda to reappear first. Altogether, these changes significantly improve her recovery.
- The disappearance and reappearance occur much faster (frame 34/54 → frame 21/41).
- Farore Wind's second hit has larger hitboxes (9.6u → 10u (grounded), 11u (aerial)). It also has new sourspots that greatly improve the move's range (15u (grounded), 16u (aerial)).
- Farore's Wind's second hit deals more damage (6% → 10% (grounded sweetspot)/7% (grounded sourspot)/12% (aerial sweetspot)/8% (aerial sourspot)). Its second hit has higher knockback, especially for the sweetspots (40 (base)/100 (growth) → 90/90 (grounded/aerial sweetspot), 70/90 (grounded/aerial sourspot)). Lastly, its aerial second hit's angle has been altered to send more vertically (361° → 55°). Altogether, these changes grant it KO potential when sweetspotted, especially when near the side blast zones for the grounded reappearance and near the upper blast line for the aerial reappearance, and improve its safety on hit.
- Farore Wind's second hit now has a slash effect instead of a flame effect.
- Farore Wind's second hit deals more hitlag (1.0x → 1.5x (sweetspots)/1.2x (sourspots)).
- The grounded reappearance has significantly more ending lag (FAF 30 → 41), hindering the move's movement and safety.
- Phantom Slash:
- Zelda has a new down special, Phantom Slash. Phantom Slash is a chargeable attack that summons a Phantom and propels it forward to attack with its sword and/or block incoming attacks.[3] It deals damage at any level of charge and has very high knockback when fully charged, making it capable of zoning, edgeguarding, and KOing. Despite this, Phantom Slash cannot be charge-canceled or held indefinitely.
- The removal of Transform leaves Zelda without an option to adapt to different matchups, as well as an option to reset stale move negation.
- Light Arrow:
- Light Arrow's initial deals 2% less damage (3% → 1%), making Light Arrow slightly weaker overall and removing its one-hit KO potential.
Update history[edit]
Zelda has been buffed via game updates. After updates 1.0.4 and 1.0.6 granted her a mix of buffs and nerfs, she received a consistent number of direct and indirect buffs thereafter, beginning with update 1.0.8. 1.0.8 made up smash and neutral aerial much more difficult to escape, improved up smash's KO potential, and decreased the landing lag of neutral, up and down aerials. Update 1.1.0 improved the set-up and spacing potential of neutral attack, as well as the combo potentials of up tilt and down tilt. It also made Phantom Slash safer and more reliable by decreasing its ending lag and removing its blind spot. The changes to shield mechanics brought about by 1.1.0 and 1.1.1 also indirectly buffed Zelda, as they make her multiple hit attacks and Lightning Kicks safer on shield.
Lastly, update 1.1.5 brought about arguably Zelda's most noteworthy buffs. Neutral attack's damage output was increased yet again, though its utility remained intact thanks to its knockback being altered. Forward tilt and down smash became safer thanks to decreases to their lag, while the former also had its range improved. Neutral and up aerials has their damage outputs increased, while each of her grabs had their ranges increased. Lastly, Nayru's Love became safer thanks to its intangibility being increased.
Overall, Zelda's buffs have improved her KO and combo potential. Due to her mobility, neutral game and endurance remaining unaffected by game updates, however, she still remains at a disadvantage compared to most of the cast.
- Up tilt's ending lag decreased: frame 35 → 33, improving its combo ability.
- Up tilt deals more damage: 6.5% → 7.2%.
- Pivot grab's Z-offset decreased: -4 – -18.7 → -4 – -15.7. This lowers its range.
![]() 1.0.5
1.0.5
- Some attacks' visual effects improved.
 Fixed a glitch where an opponent might very briefly appear behind Zelda after being pivot grabbed.
- Forward smash's loop hits' hitbox sizes decreased: 4.3u/5u → 4.2u/4.5u.
- Forward smash's last hit's hitbox size altered: 6.7u/5.7u → 5.5u/6u.
- Forward smash's loop hits' angles altered: 60°/160° → 25°/165°. These changes make its hits connect together better.
- Back Lightning Kick's visual effects improved.
- All variations of Din's Fire have had their sweetspot's size decreased: 2.7u → 2.1u.
- Phantom Slash's ending lag decreased: frame 54 → 51.
- The Phantom's on-stage duration increased by approximately a quarter of a second.
- The Phantom's respawn time increased: 6 seconds → 10.
- Up smash's last hit's knockback growth increased: 190 → 214; its loop hits' hitbox sizes increased: 3u/3.8u/3u/3u → 3.5u/4.2u/3.5u/3.5u; and its SDI multipliers decreased: 1× → 0.5×. Altogether, these changes improve its KO potential, and make its hits connect together better.
- Neutral aerial's loop hits' damage outputs reversed: 1% (front)/2% (back) → 2%/1%.
- Neutral aerial's loop hits' hitbox sizes increased: 3u → 4.7u.
- Neutral, up and down aerials' landing lag decreased: 22 frames (neutral/up)/21 frames (down) → 19/18.
- Neutral attack deals more damage: 2% (all hits) → 2.5% (hits 1-2)/3% (hit 3); its last hit's knockback altered: 24 (base)/150 (growth) → 35/130; and its heavy position, bone, angles, hitbox sizes, and weight-based knockback have been adjusted on all of its hits. Altogether, these changes improve its combo potential, and make its hits connect together better.
- Up tilt's ending lag decreased: frame 33 → 30.
- Down tilt deals 1% more damage: 4.5% → 5.5%.
- All variations of Phantom Slash have had their ending lag decreased by 5 frames.
- Phantom Slash received a windbox that pulls opponents into the Phantom's sword at low charges, and pushes them away at high charges. This removes its blind spot.
- Neutral aerial's loop hits' angles altered: 150° (hands)/270° (upper body)/90° (lower body) → 366° (all). This makes its hits connect together better.
- Nayru's Passion's start-up: frame 13 (windbox)/frame 27 (hitbox) → 11/22 and ending lag: frame 60 → 55 decreased.
- Nayru's Passion's windbox re-positioned.
- Farore's Squall's hitbox duration increased: 1 frame → 2.
- Farore's Squall's disappearing and traveling windboxes' ending lag decreased: frame 35 (disappearing)/frame 34 (traveling) → 34/29.
- Light Arrow's visual effects modified.
- Jab deals more damage: 8% → 11%. Its knockback was compensated however (35 (base)/130 (growth) → 40/95).
- Forward tilt startup and ending lag decreased: frame 12 (startup)/39 (ending lag) → 10/37. The Z position was also slightly increased to give it more reach: 3u → 3.5u.
- Down smash has less ending lag: 40 frames → 37.
- Neutral air deals more damage: 11% (front)/7% (back) → 15/11%. The knockback was compensated: 160/160/140/140 → 130/130/110/100.
- Up air deals 2% more damage: (15% → 17%), and has a larger hitbox: 7u → 8u. Its knockback was compensated, however (90 → 84).
- Nayru's Love has more intangibility frames: 5-12 → 5-15. This now makes it overlap with the first hitbox's first active frames, making it harder to have another attack cancel it.
- All grabs have more reach: 10.5 (standing)/13.5 (dash)/-15.7 (pivot) → 11.5/14.5/-16.7.
Moveset[edit]
For a gallery of Zelda's hitboxes, see here.
| Name | Damage | Description | ||
|---|---|---|---|---|
| Neutral attack | Short Flash (ショートフラッシュ) | 3% (hits 1-2), 5% (hit 3) | Extends her arm to emit a small blast of magical energy from her hand. It has a respectable damage output, very minimal ending lag, low base knockback and high knockback growth. All of these traits make it a useful set-up into dash attack and dash grab at 0%-35%, and a useful spacing option beginning at 40%. Due to it hitting on frame 11, however, it is the slowest neutral attack in the game. Its hitbox also follows Zelda's palm, which can result in it can missing small and/or crouching opponents. | |
| Forward tilt | Magical Cutter (マジカルカッター) | 12% (hand), 10% (arm) | A magically-infused, outward fanning knifehand strike. It can be angled and its sweetspot, which is located at Zelda's hand, possesses respectable power. Its sweetspot KOs middleweights at 119%/107% (3DS/Wii U) while near the edge of Final Destination. Its sourspot, which is located at Zelda's arm, is also reliable for KOing in spite of it being noticeably weaker. Its sourspot KOs middleweights at 140%/129% (3DS/Wii U) while near the edge of Final Destination. However, it has noticeable ending lag and a narrow hitbox. Due to its body hitbox being removed since Brawl, it also has a very small blind spot near Zelda's torso. | |
| Up tilt | Barricader (バリケーダー) | 7.2% | Waves her arm in an overhead arcing motion while her hand is infused with magical energy. Due to it hitting on frame 7 and having minimal ending lag, it is a reliable combo starter. It can combo into itself, neutral attack, forward tilt, forward smash, Nayru's Love, and Farore's Wind at low percentages; into neutral aerial from low to medium percentages; and up aerial at medium percentages. It is also decent as both a follow-up from down tilt and as an anti-air attack. However, it is no longer a viable KOing option like in Brawl because of its lower damage output and altered knockback values. | |
| Down tilt | Low Kick (ローキック) | 5.5% | A kneeling shin kick. Due to it hitting on frame 5, it is Zelda's fastest tilt attack. When coupled with it launching at 80°, its minimal ending lag and deceptively long-lasting hitbox, it is also her most reliable combo starter. It can combo into itself, neutral attack, forward tilt, up tilt, forward smash, a grab and Farore's Wind at low percentages; into neutral and forward aerials at medium percentages; and into a dashing up smash and up aerial at medium to high percentages. | |
| Dash attack | Quick Palm Shot (クイックパームショット) | 12% (clean base), 9% (clean tip), 6% (late) | A double palm thrust that emits a blast of magical energy from her hands, similarly to Peach's dash attack. Due to it hitting on frame 6, it is one of the fastest dash attacks in the game. To compliment this, its sweetspot's base is strong enough to KO middleweights at 130%/115% (3DS/Wii U) while near the edge of Final Destination. However, it has noticeable ending lag, while its other hitboxes lack KO potential. | |
| Forward smash | Shining Palm Shot (シャイニングパームショット) | 1% (hits 1-4), 13% (hit 5) | A palm thrust that emits a multiple-hitting blast of magical energy. Its last hit's respectable damage output and very high knockback growth make it strong enough to KO middleweights at 93%/83% (3DS/Wii U) while near the edge of Final Destination. Its multiple hits also make it useful for pressuring shields, especially when it is charged. Due to it hitting on frame 16, however, it has the highest start-up lag out Zelda's smash attacks. It also has a punishable amount of ending lag. | |
| Up smash | Power Steer (パワースティア) | 2% (hits 1-4), 0.8% (hits 5-7), 5% (hit 8) | Waves her arm twice in an overhead fanning motion while her hand is infused with magical energy. It hits on frame 9, which is fairly fast for a smash attack. When coupled with its multiple hits and its last hit's extremely high knockback growth, it is useful for both KOing and pressuring shields. Its last hit KOs aerial middleweights at 110%/100% (3DS/Wii U) from anywhere on Final Destination. However, it has minimal horizontal range and a punishable amount of ending lag. | |
| Down smash | Compass Turn (コンパスターン) | 12% (front), 10% (back) | A spinning shin kick. Due to it hitting on frame 5, it is tied with Pit, Dark Pit, Mario, Dr. Mario, and Ryu's down smashes for the second fastest smash attack of any kind in the game, being surpassed only by Meta Knight's buffered down smash. It is also a semi-spike that hits on both sides, which make it very useful for punishing rolls or setting up an edge-guard. Although it is Zelda's weakest smash attack, it is still quite powerful, and has rather low ending lag. Its front hit KOs middleweights at 135%/126% (3DS/Wii U) while near the edge of Final Destination. In comparison, its back hit KOs them at 143%/132% (3DS/Wii U) while near the edge of Final Destination. | |
| Neutral aerial | Zelda Spin (ゼルダスピン) | 2.5% (hits 1-4 front), 1.5% (hits 1-4 back), 5% (hit 5) | Spins with her arms outstretched and infused with magical energy. Due to it hitting on frame 6, it is tied with back aerial for the lowest amount of start-up lag out of Zelda's aerials. It has a decent amount of utility: it can be used as a follow-up from down throw; as a combo starter when SHFF'd; or as an edge-guarding option and autocancels in a short hop. | |
| Forward aerial | Lightning Kick (Front) (稲妻キック(前), Lightning Bolt Kick (Front)) | 20% (clean foot), 4% (clean leg, late) | A magically-infused flying kick. Its sweetspot is at the tip of her foot, and has both an outstanding damage output and high knockback growth. Its sweetspot KOs middleweights at 74%/66% (3DS/Wii U) while near the edge of Final Destination. Its sweetspot is easier to land if it hits the opponent at the beginning of the move. However, its sourspots lack KO potential and are very unsafe because of their extremely low damage outputs and average knockback growth. Its considerable ending lag also makes it punishable at low percentages, even if it is sweetspotted. | |
| Back aerial | Lightning Kick (Back) (稲妻キック(後), Lightning Bolt Kick (Back/Rear)) | 20% (clean foot), 4% (clean leg, late) | A magically-infused flying kick. It functions almost identically to forward aerial, with the only differences being that it hits on frame 6 (which ties it with neutral aerial for the lowest amount of start-up lag out of Zelda's aerials) and its sweetspot has slightly more base knockback and knockback growth. Its sweetspot KOs middleweights at 71%/62% (3DS/Wii U) while near the edge of Final Destination. However, it has the highest amount of landing lag out of Zelda's aerials. | |
| Up aerial | Condense Blast (コンデンスブラスト) | 17% | Leans back and turns slightly to extend her arm in order to emit a magical explosion from her index and middle fingers. It is the most damaging up aerial in the game, and when coupled with its consistent hitbox, it is Zelda's most reliable aerial KOing option. It KOs middleweights at 90%/79% (3DS/Wii U) while near the upper blast line of Final Destination. It can also clip through the bottom of a stage's edge. However, it hits on frame 14, which makes it tied with down aerial for the highest amount of start-up lag out of Zelda's aerials. It also has punishable ending lag, a short duration, and fairly short horizontal range. It autocancels in a full hop, but only 2 frames after the animation ends. | |
| Down aerial | Meteor Heel (マイルドメテオヒール, Mild Meteor Heel) | 16% (clean), 5% (late leg), 4% (late foot) | A magically-infused stomp. All of its hitboxes are meteor smashes, with its sweetspot being the most powerful among them. Its sourspot, though significantly weaker, lasts deceptively long, allowing it to potentially gimp fighters with poor recoveries. It also has the lowest landing lag out of Zelda's aerials, which enables its sweetspot to start combos on grounded opponents quite reliably. However, it hits on frame 14, which ties it with up aerial for the highest amount of start-up lag out of Zelda's aerials, although it is decently fast for a meteor smash, and can autocancel in a short hop. | |
| Grab | Holding (ホールディング) | — | Restrains the opponent with magic. Zelda's grabs have long ranges, but noticeable start-up lag. | |
| Pummel | Holding Attack (ホールディングアタック) | 3% | A blast of magical energy. Moderately slow, but one of the most damaging pummels in the game. | |
| Forward throw | Force Move (フォースムーブ) | 12% | Magically spins the opponent in front of herself and then throws them away. It is Zelda's most damaging throw, and one of the most damaging forward throws in the game. It is also useful for setting up edge-guards, but lacks KO potential because of its low knockback growth. | |
| Back throw | Force Back Move (フォースバックムーブ) | 11% | Magically spins the opponent and turns around with them in tow before throwing them away. It is Zelda's only throw with KO potential, although it is also useful for setting up an edge-guard. It KOs middleweights at 158%/145% (3DS/Wii U) while near the edge of Final Destination. | |
| Up throw | Force Top Move (フォーストップムーブ) | 11% | Magically spins the opponent overhead and then throws them upward. It is one of the most damaging up throws in the game, and has decent combo potential, especially against heavyweights and fast-fallers. It can combo into neutral aerial at low percentages; up aerial at medium percentages; and Farore's Wind at high percentages. However, each of these combos are heavily dependent on the opponent's DI. | |
| Down throw | Plasma Beat (プラズマビート) | 1% (hits 1-4), 2% (throw) | Magically shoves the opponent underneath herself and then blasts them with fiery, magical energy from her hands. It launches at 100°, which allows it to combo into neutral aerial, up aerial and, if timed precisely, back aerial. Its neutral and back aerial combos are easily avoidable with DI, especially past low percentages. In comparison, its up aerial combo is more consistent, especially if Zelda utilizes it with proper timing. Its up aerial combo also boasts the ability to KO any character at high percentages. However, this combo will lose its effectiveness while Zelda has a high level of rage. | |
| Forward roll Back roll Spot dodge Air dodge |
— | — | ||
| Techs | — | — | ||
| Floor attack (front) Floor getups (front) |
7% | Kicks in front of herself and then behind herself. | ||
| Floor attack (back) Floor getups (back) |
7% | Kicks in front of herself and then behind herself. | ||
| Floor attack (trip) Floor getups (trip) |
5% | Kicks around herself. | ||
| Edge attack Edge getups |
7% | Performs a kick while climbing up. | ||
| Neutral special | Default | Nayru's Love | 2% (hits 1-3), 5% (hit 4), 1.25× (reflected projectiles) | Creates a crystalline barrier around herself. The barrier deals damage and reflects projectiles with 25% more power and speed than they originally had. It also grants intangibility on frames 5-15. However, it has moderate start-up and considerable ending lag. |
| Custom 1 | Nayru's Rejection | 1% (loop), 5% (last), 1.2× (reflected projectiles) | Reverses opponents and pushes them away, in addition to having more intangibility. However, it deals less damage (despite the in-game description saying it doesn’t hit opponents), and has both a lower reflection multiplier and more start-up lag. | |
| Custom 2 | Nayru's Passion | 15% | Vacuums opponents before exploding, which deals more damage and high knockback. However, it cannot reflect. | |
| Side special | Default | Din's Fire | 7%-14% (sweetspot), 3.5%-7% (sourspot) | Launches a magical fireball. It can be aimed up or down, and releasing the button causes it to explode. The longer the button is held down, the farther the fireball will travel, and it will automatically detonate when it reaches its maximum distance. Its sweetspot is quite powerful, especially when fully charged. Fully charged sweetspotted Din's Fire KOs middleweights at 107%/97% (3DS/Wii U) while near the edge of Final Destination. However, it is very predictable, its sourspot is very weak regardless of its charge, and using it in midair will render Zelda helpless upon concluding. |
| Custom 1 | Din's Flare | 14% (sweetspot), 7% (sourspot) | The sweetspot and sourspot's damage outputs are consistent, regardless of its how long the special button is held. The fireball also travels faster, and has increased range. However, its travel path can barely be adjusted vertically. | |
| Custom 2 | Din's Blaze | 7.6%-18% (sweetspot), 3.8%-9% (sourspot) | The fireball has a larger explosion and significantly better vertical maneuverability. However, it travels much slower and hangs in the air for a moment before detonating, although this gives it mindgame potential. | |
| Up special | Default | Farore's Wind | 6% (hit 1), 10% (grounded hit 2 near), 7% (grounded hit 2 far), 12% (aerial hit 2 near), 8% (aerial hit 2 far) | Warps to a given direction. It deals damage upon contact while disappearing and while reappearing, and grants intangibility on frames 21-39. When used just after a ground jump, Zelda will propel upwards before teleporting. Its grounded disappearance has very high base knockback, very low knockback growth and launches at 91°, all of which enable it to combo easily into its reappearance when it is aimed upward. In comparison, its reappearance has a sweetspot near Zelda that has a decent damage output, high base knockback and high knockback growth, all of which make it very reliable at KOing, especially near the upper blast line. Its sweetspotted reappearance KOs middleweights at 78%/66% (3DS/Wii U) while near the upper blast line of Final Destination. In comparison, it KOs them at 87%/74% (3DS/Wii U) while near the edge of Final Destination. However, it has high ending lag upon concluding in the air, to the point that Zelda cannot move around for more than a second. Its reappearance also has a sourspot that, although safe, lacks KO potential because of its lower damage output and average base knockback. |
| Custom 1 | Farore's Squall | — | Comes out much faster and has a large windbox with set knockback at its beginning that pushes opponents away, which make it useful for escaping pressure from an opponent. It also travels slightly farther, even more so with a ground jump, and its slower speed allows for better maneuverability. However, it deals no damage; takes much longer to start up; and telegraphs where Zelda is traveling because of its magical particles. It launches opponents upward slightly upon reappearing. | |
| Custom 2 | Farore's Windfall | 4% (hit 1), 7% (hit 2) | The teleport can only travel directly upward, but its second hit meteor smashes opponents. It also has slightly better horizontal control over Zelda's descent. However, it lacks KO potential and gains no extra height when combined with a jump. | |
| Down special | Default | Phantom Slash | 6% (uncharged), 14% (charged), 11% (fully charged hit 1), 13% (fully charged hit 2) | Conjures a Phantom and propels it forward. It is a chargeable projectile, as holding the special button longer increases the distance it covers and alters its attack. The Phantom will automatically lunge roughly a second after reaching full charge. When fully charged, it becomes a two-hit attack, with its second hit being strong enough to KO middleweights at 111% while near the edge of Final Destination in Super Smash Bros. for Nintendo 3DS. In addition to functioning as a projectile, the Phantom is also considered a physical entity, and is thus able to either slow down opponents that try to move through it (except for the Zelda that conjured it), or block some non-penetrating hits because of its set amount of health on all charges (which also applies to its custom variations). However, the Phantom is also susceptible to reflection, Pocket and Gravitational Pull. Due to the Phantom's set amount of health, Phantom Slash will be rendered unusable for 9 seconds once the Phantom is destroyed. During the Phantom's inactivity, Zelda's hand will be surrounded by a purple wisp that will disappear as soon as the Phantom becomes reusable. If Zelda is KO'd during this period, the wisp will disappear, although the Phantom will remain unusable. |
| Custom 1 | Phantom Breaker | 5% (uncharged), 12% (charged), 9% (fully charged hit 1), 11% (fully charged hit 2) | Propels a Phantom at a set distance, which is approximately the distance of Phantom Slash at its second charge. It deals more shield damage, but slightly less damage to opponents themselves. | |
| Custom 2 | Phantom Strike | 8% (uncharged), 20% (charged), 14% (fully charged hit 1), 14%-16% (fully charged hit 2) | Deals more damage and reaches its full charge twice as fast as Phantom Slash. However, it has much shorter range because the Phantom is conjured directly in front of Zelda, instead of being propelled forward. | |
| Final Smash | Light Arrow | 1% (hit 1), 39% (first opponent), 29% (second opponent), 21% (third opponent) 17% (fourth opponent), 13% (fifth opponent), 9% (sixth opponent), 7% (seventh opponent) | Wields her bow and fires a Light Arrow forward. Although it no longer has one-hit KO potential like in Brawl, it is still one of the strongest Final Smashes in the game, especially when hitting its first opponent. It KOs middleweights at 2% while near the edge of Final Destination in the 3DS version. | |
Stats[edit]
| Stats | Weight | Dash speed | Walk speed | Traction | Air friction | Air speed | Air acceleration | Gravity | Falling speed | Jumpsquat | Jump height | Double jump height | Empty landing lag |
|---|---|---|---|---|---|---|---|---|---|---|---|---|---|
| Value | 85 | 1.6 – Initial dash 1.3 – Run |
0.87 | 0.054 | 0.006 | 1.04 | 0.01 – Base 0.055 – Additional |
0.071 | 1.35 – Base 2.16 – Fast fall |
6 | 31.552761 - Base 15.239396 - Short hop |
31.552761 | 4 |
Announcer call[edit]

English/Japanese/Chinese
On-screen appearance[edit]
- Teleports onto the stage with magic glowing between her hands and emanating from the ground around her.

|
|---|
Taunts[edit]
- Up taunt: Holds one arm straight up while assuming an elegant pose and having her hand infused with magic.
- Side taunt: Turns toward the screen, puts her hands together in front of her torso, and then conjures Din's Fire between them.
- Down taunt: Leans forward and waves while smiling.
| Up taunt | Side taunt | Down taunt |
|---|---|---|

|

|

|
Idle poses[edit]
- Strokes the back of her hair.
- Loosely holds one arm and then looks around.
- With one hand on her elbow, she puts one hand on her neck, puts it back down and then taps her arm with one finger.
 |
 |

|
|---|
Crowd cheer[edit]
| Cheer (English) | Cheer (Japanese) | Cheer (Spanish) | |
|---|---|---|---|
| Cheer | |||
| Description | Zel - da! | Zel - da! | Zeeeeel - da! |
| Cheer (French) | Cheer (German) | Cheer (Italian) | |
| Cheer | |||
| Description | Zel - da ! | Zel - da! | Zeeeeel - da! |
Victory poses[edit]
- Clasps her hands together, which are briefly infused with magic, as if praying. She then turns her head upward and looks toward the sky.
- Turns her head to the left and loosely holds one arm with the other to pose in an elegant stance. At the end of the animation, she will smile while either
 looking into the distance, or
  looking at the camera.
 - Puts her hands together in front of her torso, conjures Din's Fire between them, and stares at it. It appears almost identical to her side taunt.
 |
 |

|
|---|
In competitive play[edit]
Official Custom Moveset Project[edit]
| Character | Custom sets available | ||||
|---|---|---|---|---|---|
| 1213 | 1313 | 1212 | 1312 | 1223 | |
| 1323 | 3212 | 3312 | 2213 | 2312 | |
Most historically significant players[edit]
See also: Category:Zelda players (SSB4)
 Onpu - The best solo-Zelda player in Japan, finding great success at Umebura events such as placing 17th at both Umebura 27 and Umebura Tokaigi Qualifier 1, defeating Lea in the former and Atelier in the latter, and 33rd at Umebura Japan Major 2017. Internationally, he is best known for placing 49th at Frostbite 2018.
- Rizeasu - Known for playing a variety of characters in tournament, with one of his most common choices being Zelda. He is considered the greatest Zelda player of all time and has piloted the character to great success despite her reputation for being one of the game's worst characters. This included placing 2nd at Sumabato Tokaigi Qualifier 2 and 7th at Sumabato 28 with primarily Zelda and defeating HIKARU with only Zelda at the latter event. He is ranked 68th on the PGR 100 as one of the few Smash 4 players ever ranked on a global ranking with a bottom 3 character.
 ven - One of the greatest Zelda players of all time and by far the best in North America. He is one of the first notable Zelda players in competitive play thanks to his performances at DVDA events, particularly placing 7th at DVDA 7. Throughout competitive-Smash 4 he was also one of the highest-placing Zelda players at majors, most notably being the only one to place top 32 by placing 25th at Smash Masters League: Battle for Vegas; in addition, he has placed 49th at several majors, including 2GGC: Nairo Saga and 2GGC: SCR Saga, and has a win over Zenyou at 2GGT: ZeRo Saga.
Tier placement and history[edit]
Unlike her ancestor in Melee and her own appearance in Brawl, Zelda was immediately viewed as a non-viable character upon SSB4's release. This perception was because of the combination of her key flaws not being properly addressed, and Sheik becoming a standalone character who was buffed significantly in her own transition from Brawl. When coupled by her extremely minimal representation and results in competitive play, as well as players having yet to acknowledge Jigglypuff's status in competitive play, Zelda was ranked 56th on the first tier list, placing her at the bottom of the entire tier list.
Much like a number of other poorly perceived characters, Zelda received a multitude of buffs from game updates. These improvements contributed to her results slowly improving as time passed, most notably thanks to ven. However, Zelda's newfounded buffs were still overshadowed by her inherent flaws, as well as the greater significance of buffs gained by other low-tier and bottom-tier characters. To reflect this, Zelda was ranked 55th on the second and third tier lists and rose to 52nd/53rd on the fourth, tying her with Ganondorf as the second lowest ranking character on the entire list; with the restructuring of tier lists, however, the latter ranking placed her as a low-tier character.
For the rest of competitive-Smash 4, players generally agreed that this placement was accurate; however, several players have argued that the character was underrated, in part due to her having slightly greater representation in 2024 thanks to ven, Onpu, and Rizeasu. ESAM, in particular, ranked her higher on his own personal tier list.[4]
In Solo Modes[edit]
All-Star Mode[edit]
In All-Star Mode, Zelda is fought in Stage 2 in the 3DS version or Stage 6 in the Wii U version alongside Link, Samus, Peach, Bowser, R.O.B., and Duck Hunt.
Event Matches[edit]
Solo Events[edit]
- All-Star Battle: Melee: Zelda is one of the opponents fought in this event. All of the opponents debuted in Melee.
- Identity Crisis: As Sheik, the player must defeat Samus. After defeating her, the player must defeat Zero Suit Samus. Zelda can appear if Sheik is KO'd.
- Princess Punch-Up!: Zelda and Link must defeat Peach and Mario.
- The Demon King and the Goddess: As Ganondorf, the player must initially defeat Link and Zelda. After the two are defeated or some time has passed, a giant Palutena appears and the player must defeat her as well.
- Unwavering Chivalry: As Meta Knight, the player must defeat Marth without defeating Peach or Zelda. Defeating either of the princesses results in a failure.
Co-op Events[edit]
- Peach in Peril: Zelda is one of the opponents Bowser and Bowser Jr. must defeat without KOing Peach.
- The Ultimate Battle: Two players choose a character and must defeat everyone on the roster.
Congratulations Screens[edit]
3DS[edit]
Classic Mode

All-Star Mode


Wii U[edit]
Classic Mode
All-Star Mode


Trophies[edit]
Zelda's default trophy is obtained by clearing Classic Mode as Zelda. Her alternate trophy is obtained by clearing All-Star Mode as Zelda in the 3DS version or purchasing it in the Trophy Shop for 1000G in the Wii U version (the latter can only appear after clearing Classic or All-Star as Zelda). The Light Arrow (Zelda) trophy is obtained only in the Wii U version by clearing All-Star Mode as Zelda.


- Zelda
 This is the namesake of the Legend of Zelda games. Her appearance may change, but she always plays an important role. In Smash Bros., she's quick on the draw when it comes to magic, though a bit slow when moving. She has a new move that summons a Phantom to her aid.
- This tough princess is namesake of the Legend of Zelda games. Her appearance may change, but she always plays an important role. In Smash Bros., she's quick on the draw when it comes to magic, though she moves a bit slowly. You can charge her brand-new special Phantom Slash by holding down the button.
 : The Legend of Zelda (08/1987)
 : The Legend of Zelda: Twilight Princess (11/2006)
 This is the Zelda they're talking about in the titles of all the Legend of Zelda games. Though her appearance can change from game to game, her importance in the story usually doesn't. In this game, she's a bit slow, but her impressive magic skills make up for it. Power up her brand new special, Phantom Slash, by holding down the button.
- : The Legend of Zelda (11/1987)
- : The Legend of Zelda: Twilight Princess (12/2006)


- Zelda (Alt.)
- Zelda's forward air attack, Lightning Kick, is a valiant kick with a magically charged tip. Striking with just the glowing spot will deal heavy damage and launch your opponent. Din's Fire, her explosive side special, can be guided up and down and has a greater blast if the button is held.
- Zelda's front air attack, Lightning Kick, is a valiant kick with a magically charged tip. Striking with just the glowing spot will deal heavy damage and launch your opponent. Din's Fire, her explosive side special, can be guided up and down and has a greater blast if the button is held.
- : The Legend of Zelda (08/1987)
- : The Legend of Zelda: Twilight Princess (11/2006)
- Zelda's forward air attack, Lightning Kick, is a single-footed, electrically charged strike. Hit your opponent with just the glowing spot to deal heavy damage and launch them. Her Din's Fire side special can be guided up and down, and makes a bigger blast the longer you hold the button. It'll explode as soon as you let go.
- : The Legend of Zelda (11/1987)
- : The Legend of Zelda: Twilight Princess (12/2006)

- Light Arrow (Zelda)
- In many of the Legend of Zelda games, the sacred Light Arrows are required to defeat the final boss. In this game, Zelda fires one straight across the screen for her Final Smash. If it passes through multiple foes, the ones hit first will take the most damage. The Light Arrow has a lot of launching power, making it great for getting KOs!
- In many of the Legend of Zelda games, the sacred Light Arrows are required to defeat the final boss. In this game, Zelda fires one straight across the screen for her Final Smash. If it passes through multiple foes, the ones hit first will take more damage. The Light Arrow has a lot of launching power, making it great for getting KOs!
Alternate costumes[edit]
.png)
| |||||||

|

|

|

|

|

|

|

|
Gallery[edit]
Zelda in the Nintendo Direct from April 8th, 2014.
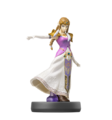
Zelda's amiibo.
The Pic of the Day revealing Zelda.
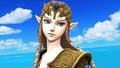
A head shot of Zelda in Super Smash Bros. for Wii U.
Zelda and Link in Super Smash Bros. for Nintendo 3DS.
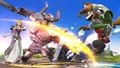
Using Phantom Slash, her new down special, on Fox.
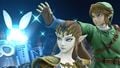
Alongside Link as he uses his side taunt.
Zelda on Skyloft.
Alongside Donkey Kong.
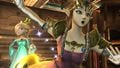
Zelda teetering as Rosalina & Luma look on.
Zelda's pose when charging Phantom Slash.
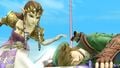
Zelda looking at a prone Link.
Zelda looking at Link and Peach from a distance.
Using her forward tilt.
Zelda facing Toon Link.
Using Farore's Wind alongside Samus, who is in her Morph Ball form.

Using her side taunt.
Using her neutral aerial.
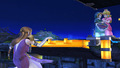
Zelda hanging on the edge of Battlefield while Link and Peach are in the background.
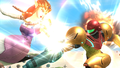
Using her neutral aerial on Samus.
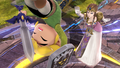
Using her down taunt as Toon Link is being launched.
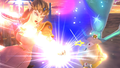
Using her neutral aerial against Rosalina's neutral aerial.
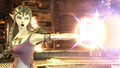
Using her neutral attack.
Preparing to use Phantom Slash while Donkey Kong and Samus are in the background.
Using her forward tilt on Link.
Preparing to use her forward tilt against Marth's forward smash.
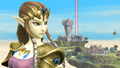
One of Zelda's idle poses.
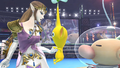
Alongside Olimar and a Yellow Pikmin.
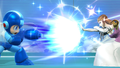
Using her forward smash against Mega Man's forward smash.

Alongside Peach and Rosalina on Mario Galaxy.
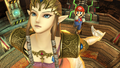
Zelda jumping away from Mario.

Zelda's idle stance.
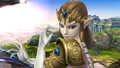
Zelda's pose when using Din's Fire.
Zelda laying prone alongside a Purple Pikmin.

Another one of Zelda's idle poses.

The end of her forward tilt in Super Smash Bros. for Nintendo 3DS.
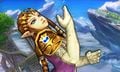
Posing in Super Smash Bros. for Nintendo 3DS.
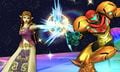
Using her neutral attack on Samus.
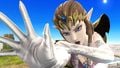
Using her forward smash.
Taunting alongside King Dedede and Peach.
Alongside a stunned King Dedede.
Fighting Rosalina on Reset Bomb Forest as Viridi appears in the background.
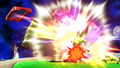
Using Din's Fire on Toon Link.
Using Phantom Slash against Yoshi's forward tilt.
Alongside Sheik.
Zelda being attacked by a Polar Bear in Smash Run.
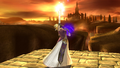
Zelda taunting at the Bridge of Eldin.


Trivia[edit]
- Zelda's dress behaves differently in both versions of SSB4. In Super Smash Bros. for Nintendo 3DS, her dress flows less freely by having set forms in accordance with the attacks she performs. Conversely, her dress flows more freely in Super Smash Bros. for Wii U, with certain wind-based physics on certain stages affecting it, and her legs clipping through it in different ways.
- Zelda's alt. trophy in Super Smash Bros. for Nintendo 3DS appears very similar to her ancestor's All-Star Mode trophy in Super Smash Bros. Melee.
- In Super Smash Bros. for Wii U, one of the tips about Phantom Slash refers to the Phantom using masculine pronouns: "If the Phantom takes 13% damage or more, he'll be destroyed. After that, you'll have to wait six seconds before summoning him again."
- Zelda was revealed at the same time The Legend of Zelda: A Link Between Worlds was released; interestingly, that game would eventually inspire her current design as of Ultimate.
- Zelda is the only playable character in SSB4 to have an alternate costume that inspired her default design in a subsequent Super Smash Bros. game. In this case, her incarnation from A Link Between Worlds (with some design elements of her incarnation from A Link to the Past) succeeded her Twilight Princess incarnation in Ultimate.
- Her Twilight Princess incarnation would become the basis of an alternate costume in Ultimate.
- Due to this, SSB4 is the only game where Zelda retains her design from a previous game.
- Kirby's Zelda hat resembles Young Zelda's headdress from Melee, despite Zelda's Ocarina of Time incarnation being retired. SSB4 marks the third and final time this was used as Kirby's Zelda hat.
- SSB4 marks the final appearance of Zelda as a starter character.
- SSB4 marks the final time Jun Mizusawa voices Zelda, who had voiced her since Melee.
- Originally, Zelda was still going to turn into Sheik in this game and vice versa, but the two characters were split apart instead due to the limitations of the Nintendo 3DS. A similar issue was also the case for Samus and Zero Suit Samus when their Final Smash was concerned, and Pokémon Trainer, who was dropped in favor of his Charizard operating on its own.
- Coincidentally, despite being released before SSB4, a figurine of Twilight Princess Zelda (as well as the figurine of her possessed form) by First 4 Figures is colored more like her appearance in this game than in the source game. For example, the tapestry on her dress is colored differently, being purple instead of gray.
- for Wii U is the only Smash game where Zelda's Ocarina of Time design (which based her design in Melee) is not directly referenced. On the other hand, for Nintendo 3DS features a trophy based on her appearance in that game.
References[edit]
| Fighters in Super Smash Bros. 4 | |
|---|---|
| Veterans | Bowser · Captain Falcon · Charizard · Diddy Kong · Donkey Kong · Dr. Mario · Falco · Fox · Ganondorf · Ike · Jigglypuff · King Dedede · Kirby · Link · Lucario · Lucas · Luigi · Mario · Marth · Meta Knight · Mewtwo · Mr. Game & Watch · Ness · Olimar · Peach · Pikachu · Pit · R.O.B. · Roy · Samus · Sheik · Sonic · Toon Link · Wario · Yoshi · Zelda · Zero Suit Samus |
| Newcomers | Bayonetta · Bowser Jr. · Cloud · Corrin · Dark Pit · Duck Hunt · Greninja · Little Mac · Lucina · Mega Man · Mii Fighter (Mii Brawler · Mii Gunner · Mii Swordfighter) · Pac-Man · Palutena · Robin · Rosalina & Luma · Ryu · Shulk · Villager · Wii Fit Trainer |