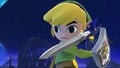
Toon Link (SSB4)
| Toon Link in Super Smash Bros. 4 | |
|---|---|
 
| |
| Universe | The Legend of Zelda |
| Other playable appearances | in Brawl in Ultimate |
| Availability | Starter |
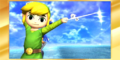
| Final Smash | Triforce Slash |
| Tier | C (23) |
Toon Link (トゥーンリンク, Toon Link) is a playable character in Super Smash Bros. 4. His return to the series was announced in a Director's Room Miiverse post on September 26th, 2013, which also commemorated The Legend of Zelda: The Wind Waker HD being released in Japan on the same day.
As in Super Smash Bros. Brawl, Sachi Matsumoto reprises her role as Toon Link's voice actor, albeit via recycled voice clips from The Legend of Zelda: The Wind Waker.
Toon Link is ranked 23rd out of 54 on the tier list, placing him in the C tier. This is a slight drop from his mid-tier placement in Brawl, where he was ranked 13th out of 38th. Due to the SSB4 tier list structure however, Toon Link is actually rendered as a high-tier character.
Toon Link has multiple projectiles, which grant him a powerful zoning game and enable him to follow up into different moves; Bomb, in particular, is his most notable set-up for combos and KOs. Toon Link's Hookshot has also been improved: his grabs now have much less ending lag and longer durations; his back throw is now among the strongest throws in the game; and his tether recovery has much more range.
Although Toon Link's ground game is potent, the overwhelming majority of his overall damage output has decreased. This is most obvious with his smash attacks, as their KO potentials have worsened in spite of their compensated knockback. Toon Link's air game also has unimpressive combo potential in spite of his floatiness, since his aerial attacks' high ending lag prevents them from partaking in long combos. Lastly, reflection-based moves are very detrimental for Toon Link; in addition to turning his projectiles against him, they also significantly hinder his Bomb-based combo game.
Overall, Toon Link's strengths outweigh his weaknesses, and have in turn rendered him as a viable character in competitive play. Toon Link has achieved decent representation and respectable results internationally at the regional and even national level, though most his consistently impressive results are primarily from Japan, thanks to the efforts of professionals such as Sigma and Ri-ma.
Attributes[edit]
The majority of Toon Link's attributes noticeably differ from those of his alternate timeline counterpart. Toon Link is a middleweight, yet boasts above-average dashing speed and air acceleration, as well as the ability to wall jump. However, his falling and fast falling speeds are both slow, while his gravity is low. Although they differ on the majority of their attributes, Toon Link and Link both have above-average walking speeds and slow air speeds. Like Link, he also wields his respective version of the Master Sword and possesses two shields, instead of just one. The Master Sword grants Toon Link disjointed range, while the Hero's Shield blocks opposing projectiles if he is standing still or walking. Overall, Toon Link's attributes render him as a fairly quick, yet fairly floaty character.
As a zoning-oriented character, Toon Link possesses several projectiles. His Hero's Bow, Boomerang, and Bomb enable him to not only force approaches, but also camp effectively. In addition to these strengths, Boomerang and Bomb boast combo potential, with the latter being his most varied and useful combo starter. Thanks to its explosion no longer damaging Toon Link upon contact with an opponent, Bomb now grants him several follow-ups at varying percentages. With precise usage, it can be followed by his up smash or forward aerial, even at high percentages, both of which are among his most viable KOing options.
Bomb's combo potential is further supplemented by jump-canceling and its status as an item, with the latter trait ensuring that its combo potential is never susceptible to rage or stale-move negation. Although it is not as versatile in comparison, Boomerang is nevertheless useful for Toon Link's combo game, as it can combo into his up tilt, grab, and various other moves depending on its positioning.
Although Toon Link's combo game overall revolves around Bomb, he also possesses non-projectile combo starters. Up tilt is the most effective of these: it can combo into itself, up smash, and Spin Attack at low percentages; a short hopped neutral aerial, short hopped back aerial, and short hopped Spin Attack at low to medium percentages; and forward aerial and up aerial at medium to high percentages. Aside from up tilt, grab aerial can be used as a long-ranged set-up, similarly to Bomb, regardless of the opponent's damage, while neutral attack can be jab canceled reliably.
Unlike in Brawl, Toon Link's Hookshot now possesses a respectable level of utility. Thanks to its longer range, the Hookshot has become an even more effective tether recovery and has lost its dubious distinction as the shortest-ranged tether grab. By extension, Toon Link's grab game has also benefited in a few ways. Each of his grabs has longer durations, significantly lower ending lag, and is now capable of grabbing airborne opponents. Toon Link's throws can supplement his projectiles, as he can use them to launch an opponent into the trajectory of a previously thrown Boomerang or Bomb, such as an up throw into a descending Bomb. Aside from this, his up throw can also combo into a short-hopped up aerial at low percentages.
Toon Link's back throw, however, is unarguably the most notable improvement to his Hookshot-oriented moves. The removal of its initial hitbox in favor of a single, slightly more damaging throw hitbox has resulted in it now having a consistent, albeit unchanged, damage output. When this is coupled with the increase to its knockback values, Toon Link's back throw has not only become one of his most viable KOing options, but also one of the strongest throws of all kinds in the game.
However, Toon Link has some weaknesses. Although his overall damage output is still above-average, it has nevertheless decreased since Brawl. His smash attacks have been the most adversely affected; although they had their knockback values increased, such improvements were not sufficient to fully compensate for their worsened KO potentials. Despite its potency, Toon Link's combo game is heavily reliant on Bomb, up tilt, and grab aerial, as the rest of his close-ranged attacks cannot reliably combo most of the time. His throws' aforementioned combo potentials with Boomerang and Bomb are also very situational, since he needs to have precise timing and positioning for said combos to be performed properly. To compound this, Toon Link's grabs still have considerable start-up and ending lag, although such a flaw is typical of tether grabs.
In addition to these new flaws, Toon Link has retained some from Brawl. His floatiness makes him particularly susceptible to strong vertical attacks and renders his recovery quite predictable in spite of its improvements. Unlike other floaty characters, however, Toon Link cannot use his floatiness to perform long aerial combos because of his aerials' considerable ending lag. This is most evident with back aerial, which is much less effective at combos than it was in Brawl because of its much higher ending lag. By extension, Toon Link's frame data in regard to start-up and landing lag is below-average. Lastly, Toon Link's disjointed range is somewhat offset by his short size, similarly to Meta Knight. As such, Toon Link must rely on his zoning potential to set up and capitalize on openings.
Regarding custom moves, Toon Link has several useful ones at his disposal. Fire Arrow is incredibly useful for spacing, as it allows him to greatly hinder an opponent's approach. It is also capable of functioning as a jab lock at any percentage, or act as a set-up into several attacks, particularly his aerials. Floating Boomerang deals a considerable amount of hitstun, which makes it a useful combo option to catch opponents off guard when used correctly. Flying Spin Attack boasts impressive KO potential near the upper blast line, and has an even more reliable edge sweetspot. Lastly, Short-Fused Bomb is useful for ranged punishment, starting combos, and even KOing.
Ultimately, Toon Link's lowered overall damage output necessitates using his useful projectiles and combo game to continually rack up damage before he can attempt to score KOs with his smash attacks, forward aerial, clean up aerial, and back throw. Although his potency has been lowered somewhat since Brawl, Toon Link is still a viable character when his strengths are properly utilized. This is evident by Xorn, Ri-ma, and 3xA achieving respectable placings at regional tournaments, while Hyuga has won several regional tournaments and, like Zan, achieved above-average placings at national tournaments.
Changes from Super Smash Bros. Brawl[edit]
Toon Link received both buffs and nerfs in the transition from Brawl to SSB4, but was overall slightly nerfed. He gained some important buffs to his mobility, Boomerang and Bomb's utility, and, most noticeably, his Hookshot. His grabs have more range and significantly less ending lag; back throw is now one of his most viable KOing options; and Hookshot covers significantly more distance as a tether recovery. Bomb also no longer damages Toon Link on contact with an opponent; when coupled with the changes to hitstun canceling, this makes it very useful for setting up combos. Up tilt and, to a lesser extent, Boomerang's near hitbox also possess improved combo potentials due to the changes to hitstun canceling.
However, Toon Link has also received some noticeable nerfs. Although his overall damage output remains above average, it has nevertheless lowered, which hinders his ability to rack up damage, and it hinders a few of his moves' KO potential. Toon Link's aerial game has also been nerfed. Neutral aerial is weaker, forward aerial can no longer auto-cancel in a short hop, back aerial's excellent combo potential has been significantly toned down as the move is laggier in every regard, and down aerial is much harder to use for spacing and damage racking due being slower and now piercing opponents, which also makes the move much riskier to use off stage. His grab aerial also has increased landing lag, hindering its follow-up potential unless Toon Link's opponent is at very high percents, and if he Z drops an item or a bomb in the air, he will automatically use his grab aerial. Spin Attack's overall recovery distance has slightly decreased, which necessitates using Toon Link's wall jump and tether recovery more often than not. Lastly, many of his moves are no longer semi-spikes, which, along with down aerial's changes, hinders his edge-guarding potential. Despite the improvements his projectiles have received, they have also received some nerfs, both direct and indirect. Quickdrawing has been removed, and the removal of edge momentum shifting has hindered Boomerang's utility. Bombs are also now absorbable, and the aforementioned changes to grab aerial further hinder its utility.
Overall, while Toon Link is still a nimble and difficult-to-hit character with good zoning, his offensive game is worse due to his worse damage output and aerial game, which forces him to play even more campily to survive. Most of his direct buffs do not significantly improve him, while his direct nerfs are more drastic. The changes to Smash 4's mechanics also do not benefit him as much as some other characters. As a result, he is a weaker character than in Brawl, although his potency relative to the cast has not significantly decreased due to Brawl's other higher-tiered characters receiving a similar treatment to varying degrees.
Aesthetics[edit]
 Due to the aesthetic used in SSB4, Toon Link has a sleeker design and his overall color scheme is more vibrant. These changes make him appear much more in line with his appearances in The Legend of Zelda: The Wind Waker and The Legend of Zelda: The Wind Waker HD.
- Toon Link has received two new alternate costumes, one of which is based on the Links in The Legend of Zelda: A Link to the Past and The Legend of Zelda: A Link Between Worlds.
-
 Toon Link is slightly less expressive. He now smiles only during his up taunt, Wind Waker victory pose, and defeated/No Contest animation, instead of also doing so occasionally during certain actions. His irises also no longer shrink when he is hit, launched, or during the ending of down aerial's landing animation. This is presumably to avoid any unnecessary hardware strain.
 -
 Toon Link is slightly more expressive. He now winces in pain upon being screen KO'd; raises his eyebrows in surprise during his side taunt; he winces depressingly while laying prone/supine; and his irises shrink when he is grabbed, hit, or launched. Each of these new expressions is based on the Picto Box's respective "pained", "awestruck", and "distressed" expressions that are available via its selfie feature in The Wind Waker HD.
 - Toon Link's hat now disobeys gravity and usually stays in a limp position while he is falling instead of the tip swaying above the rest of his body, or sways depending on whether he is jumping or falling, with the tip swaying above his body while he is falling.
- Up taunt has updated sound effects.
- Side taunt's visual effects have changed. Toon Link now watches a fairy fly around him before she disappears.[1]
- Whenever the Master Sword is swung, its blade now glows Alice blue, instead of whitish turquoise. This makes it appear almost identical to its appearance in The Wind Waker and The Wind Waker HD when its power to repel evil is fully restored. Additionally, its trail is now white and produces afterimages, instead of being a whitish turquoise blur. Lastly, its swings are now slightly higher-pitched.
- The Hero's Shield is now dark taupe, instead of cordovan. Its metal decals, bolts, and rim are also silver and polished, instead of gray and tarnished.
- Toon Link's previously unused damage yells from Brawl's Sound Test are now heard when taking high knockback.
Attributes[edit]
 Toon Link is heavier (92 → 93).
- Toon Link walks faster (1.22 → 1.2265).
- Toon Link dashes faster (1.65 → 1.7325).
- Toon Link's gravity is higher (0.07 → 0.079). This slightly improves his aerial mobility and somewhat alleviates the drawbacks of his floatiness; however, it also hinders his endurance, makes him more susceptible to combos, and reduces the height of his jumps, especially his double jump.
- Rolls have decreased ending lag (FAF 38 → 28).
 Spot dodge has increased ending lag (FAF 23 → 26).
- Air dodge has decreased startup (frame 4 → 2) and ending lag (FAF 50 → 32).
- Rolls, spot dodge, and air dodge have decreased intangibility frames (frames 4-19 → 4-14 (rolls), frames 2-20 → 2-15 (spot dodge), frames 4-29 → 2-25 (air dodge)).
- Toon Link now raises his Hero's Shield when a projectile or explosion hits it, improving its reliability.
- After using his Hookshot to grab an edge, Toon Link will now swing under an edge with his momentum intact, instead of immediately stopping directly below the edge.
- Using grab aerial while holding a Bomb or any other item results in Toon Link dropping it and using his Hookshot at the same time, instead of simply Z dropping the Bomb. This makes Bomb's advanced techniques, such as the ZAC and iZAC, either significantly more difficult or impossible to perform, and overall hinders Bomb's/grab aerial's versatility.
Ground attacks[edit]
- Neutral attack:
- Neutral attack's first and second hits' hitboxes have been re-positioned. Additionally, its first hit's angles have been altered (361°/80°/80° → 50°/80°/88°). Lastly, neutral attack's last hit has a larger hitbox (3.5u → 4.2u). Altogether, these changes make its hits connect better.
- Neutral attack's last hit deals 1% less damage (5% → 4%), although its base knockback was compensated (30 → 55).
- Neutral attack's last hit's angle has been altered (40° → 48°).
- Forward tilt:
- Forward tilt's semi-spike sweetspot has been re-positioned to the center of the Master Sword's blade, and one of the semi-spike hitboxes has been removed.
- Forward tilt has increased knockback (20 (base), 96/90 (scaling) → 25/102), improving its spacing and KO potential. It also has decreased start-up lag with a longer duration (frames 10-13 → 9-13).
- Forward tilt has increased ending lag (FAF 32 → 34).
- Up tilt:
- Up tilt deals 4% less damage (9% → 5%), without full compensation on its knockback scaling (122/130/124/123 → 140), hindering its KO potential.
- Up tilt has decreased ending lag (FAF 30 → 26). When coupled with the changes to hitstun canceling, these changes significantly improve its combo potential beyond low percents.
- Up tilt has a shorter duration (frames 8-14 → 8-12).
- Down tilt:
- Down tilt deals 2% less damage (9% → 7%), although its base knockback was compensated (20 → 30).
- Down tilt's chance of tripping has increased (40% → 50%).
- Dash attack:
- Dash attack deals 2% less damage (10% (blade)/8% (tip) → 8%/6%) and its angle has been altered (0° → 65°), removing its ability to lock and trip (despite keeping its 30% bonus trip chance) significantly hindering its edge-guarding and setup potential.
- Dash attack deals much more knockback (35 (base), 32 (scaling) → 70/70).
- Forward smash:
- Forward smash has increased vertical range. Its first hit also has altered knockback (30/40 (set), 110 (scaling) → 50/55/62/43 (base)/7) and angles (80°/76°/45°/10° → 75°/55°/45°/40°). Altogether, these changes allow its hits to connect better, at least at lower percentages. The second hit also has increased knockback scaling (106 → 130) and consistent base knockback (32/25/20 → 32), improving its KO potential despite its lower damage.
- The innermost hitbox of the second hit has been removed, and the remaining hitboxes deal less damage (13% → 11%). The outermost hitbox of the first hit has also been positioned closer to Toon Link (Y-offset: 7 → 6).
- The window of time that the attack button can be pressed after forward smash's first hit has been significantly tightened. This decreases the possibility of accidentally using its second hit, but makes it so that the delay between the first and second hits cannot be abused before using the second hit.
- Up smash:
- Up smash deals less damage (15% (clean)/11% (late) → 13%/10%), without full compensation on its knockback (30 (base), 93 (scaling) → 43/94). The move also has a sourspot with the same knockback values as its Brawl counterpart. Up smash also has increased ending lag (FAF 38 → 43).
- Down smash:
- Down smash's second hit deals 4% less damage (11% → 7%), although its knockback was compensated (30 (base), 107 (scaling) → 60/130).
- Down smash's first hit has decreased set knockback (80/120/150 → 60/140). This makes it connect better with its second hit, but significantly hinders its KO potential against aerial opponents.
Aerial attacks[edit]
- Neutral aerial:
- Neutral aerial deals less damage (10% (both) → 8.5% (front)/7% (back)) with no compensation on its knockback.
- Neutral aerial has decreased landing lag (15 frames → 12).
- Neutral aerial has increased ending lag (FAF 40 → 42).
- Neutral aerial's initial auto-cancel window is shorter (frames 1-5 → 1-2) and auto-cancels later (frame 28 → 41).
- Neutral aerial has smaller hitboxes (4.0u/5.0u/5.6u/2.5u → 3.0u/3.6u/4.0u/2.5u) with the outermost hitbox being positioned closer to Toon Link (x-offset: 6 → 5), giving neutral aerial less range.
- Forward aerial:
- Forward aerial has increased knockback (22 (base), 100 (scaling) → 35/98), slightly improving its KO potential.
- Forward aerial has a new animation which is significantly longer than the previous animation (37 frames → 51). While its IASA frames were mostly compensated (FAF 38 → 39), its auto-cancel window remains unchanged, resulting in the move auto-canceling significantly later (frame 38 → 51). As a result, forward aerial can no longer auto-cancel in a short hop.
- Forward aerial has one large static hitbox instead of four smaller ones attached to his body, arm, and sword (4.0/6.0u/6.0u/4.0u → 7.5u).
- The hitbox doesn't cover Toon Link's body as much and is not able to hit opponents above Toon Link, giving forward aerial less range overall.
- Back aerial:
- Back aerial deals 1% more damage (10% → 11%) improving his KO potential.
- Back aerial has increased start-up lag with a shorter duration (frames 6-10 → 7-9), has significantly increased ending lag (FAF 31 → 46), has more landing lag (10 frames → 17), and auto-cancels later (frame 23 → 38). These changes significantly hinder back aerial's combo potential even with the changes to hitstun canceling/DI, and prevent Toon Link from performing two back aerials in a short hop.
- Back aerial has smaller hitboxes overall (3.5u/6.0u/6.0u/3.0u → 4.0u/5.0u/4.0u) with the latter hitbox on Toon Link's body being removed entirely. The hitboxes have also been positioned closer to Toon Link, and they don't hit above and below him as much as before, resulting in back aerial having significantly less range.
- Up aerial:
- The outermost hitbox has been positioned slightly farther (x-offset: 4.5 → 5).
- Late hit deals 1% less damage (12% → 11%).
- Down aerial:
- Down aerial has increased start-up lag (frame 12 (clean)/frame 19 (late) → 17/26). The late hit also has a shorter duration (frames 19-64 → 26-64).
- Because of its increased startup lag, down aerial gains much more height before Toon Link plummets with it.
- Clean down aerial has a longer duration (frames 12-18 → 17-25).
- Down aerial's windbox is larger, improving its safety.
- Down aerial now has consistent base knockback (30/40 (clean), 40/50 (late) → 40). The clean hit's angle has also been altered (270° → 268°).
- Down aerial's late hit deals 1% less damage (13% → 12%).
- Late down aerial has increased knockback scaling (80 → 100). The removal of meteor canceling also improves the clean hit's edgeguarding potential.
- Down aerial now pierces opponents, instead of bouncing on them. While this makes it significantly easier to hit multiple opponents, it significantly hinders its safety, especially off-stage, as well as its combo potential.
- The hitbox around the hilt has been removed entirely, giving down aerial less range despite the remaining hitbox being bigger (5.0u → 5.6u (clean)/5.3 (late).
- Down aerial's landing hitboxes no longer affect his teammates if Team Attack is turned off.
- This prevents Toon Link from unintentionally harming any teammates that are hanging onto a ledge.
- Grab aerial:
- Grab aerial's range is three times longer as a tether recovery, significantly improving its recovery potential, especially when combined with the removal of edgehogging. Its hitbox also has a longer duration (frames 11-16 → 11-20).
- Grab aerial has increased ending (FAF 71 → 75) and as with all grab aerials, it now has 8 frames of landing lag as opposed to auto-canceling on landing.
Throws/other attacks[edit]
- All grabs have increased ranges and can now grab aerial opponents. They also have decreased ending lag (FAF 85 (standing)/FAF 95 (dash/pivot) → 62/72).
- Standing and dash grabs have shorter durations (frames 12-19 (both) → 12-18 (standing), frames 14-21 (dash)). Dash grab also has increased start-up lag (frame 12 → 14).
- Hookshot now flies and retracts in a straight line like the Hookshot in SSB, or goes limp once fully extended.[2] However, this is merely aesthetic.
- Forward throw:
- Forward throw has altered knockback (40 (base), 120 (scaling) → 60/110), improving its spacing potential, but hindering its KO potential.
- Back throw:
- Back throw's throw deals more damage (4% → 7%) and has increased knockback (30 (base), 110 (scaling) → 60/120), significantly improving its KO potential.
- Back throw lacks a collateral hitbox, meaning that back throw can no longer hit bystanders; however, since the throw still deals 7% overall, it also makes the throw significantly stronger overall.
- Due to its angle being altered (150° → 130°), back throw is no longer a semi-spike.
- Up throw:
- Up throw has increased knockback (24 (base), 200 (scaling) → 25/220), and its angle has been altered (90° → 92°), slightly improving its set-up potential.
- Down throw:
- Down throw has increased knockback scaling (60 → 110), and its angle has been altered (100° → 110°). These changes improve its spacing potential, but significantly hinder its combo potential.
 Down throw's first hit now always hits Jigglypuff.
- Edge attack:
- Edge attack deals less damage (8% (quick), 10% (slow) → 7%). It also has the shorter vertical range of Toon Link's 100%+ edge attack from Brawl.
- Edge attack has less startup lag compared to the previous quick edge attack (frame 27 → 21).
Special moves[edit]
- Hero's Bow:
- Hero's Bow charges faster. Charged Hero's Bow also travels farther, improving its zoning potential.
- The removal of Quickdrawing significantly hinders Hero's Bow's utility.
- Boomerang:
- Boomerang travels farther, improving its zoning potential.
- The changes to hitstun canceling improve near Boomerang's combo potential.
- The removal of edge momentum shifting hinders Boomerang's use as an approach and movement option.
- Spin Attack:
- Grounded Spin Attack has a larger horizontal hitbox on each side, improving its range and utility.
- Uncharged Spin Attack's last hit has altered knockback (25 (base), 160 (scaling) → 70/141), improving its KO potential.
- Aerial Spin Attack's first three hits' angles have been altered (92°/75°/38°/70° (hits 1-2)/92°/75°/40°/70° (hit 3) → 366° (all)). This makes its hits connect better. Its last hit also has increased knockback scaling (163 → 170).
- Uncharged and aerial Spin Attack have decreased start-up (frame 11 (both) → 9 (uncharged)/8 (aerial)) and ending lag (FAF 83 → 81).
- Aerial Spin Attack covers slightly less vertical and horizontal distance, hindering its recovery potential.
- Spin Attack's visual effects have changed. It now emits a jagged, whitish harlequin trail, instead of a smooth, whitish turquoise trail. This makes it appear almost identical to the Hurricane Spin.
- The weakening of SDI makes Spin Attack significantly more difficult to escape from.
- Bomb:
- Bomb deals less damage (5% (throw)/6% (smash throw) → 4% (both)).
- Bomb's explosion deals more damage (3% (grounded and aerial throw/smash throw) → 6% (grounded throw)/7% (grounded smash throw)/8% (aerial throw)) and has increased knockback scaling (70 → 80).
- If a Bomb hits the opponent or their shield, the explosion will not affect Toon Link. However, if the opponent grabs a Bomb and throws it back at Toon Link or another opponent, the explosion will not harm them either.
- Bomb's explosion is absorbable.
Update history[edit]
Toon Link has been buffed slightly via game updates. Update 1.0.6 saw his Hero's Shield become capable of blocking Fox and Falco's Blasters, resulting in Toon Link now being capable of properly blocking any characters' projectiles so long as he stands still or walks. Update 1.1.0 buffed his already improved grab game by reverting his pivot and dash grabs' start-up lag to their values from Brawl.
Unlike his alternate timeline counterpart, Toon Link is neither helped nor hindered by the changes to the shield mechanics brought about by updates 1.1.0 and 1.1.1. Lastly, update 1.1.4 improved his forward smash by enabling its first hit to connect better with its second hit.
- The period Toon Link can be at his maximum fall speed before using hard landing lag has been shortened (4 frames → 3).
- Neutral aerial has less landing lag (15 frames → 12).
- Toon Link can no longer throw a bomb with down special to cancel landing lag (outside of special moves which already could not be canceled).
- This hinders the safety of his aerials and air dodge, hinders the combo potential of his aerials and it prevents Toon Link from canceling hitstun if he lands while in non-tumble hitstun.
- Toon Link can no longer throw a bomb with down special to cancel tumble hitstun.
- This not only makes Toon Link considerably more susceptible to combos, since he can no longer throw a bomb to cancel the hitstun and act sooner but this also considerably hinders his endurance, since he can no longer throw a bomb and then utilise momentum canceling to survive longer.
- Hero's Shield now blocks Blasters, improving its reliability.
- Down smash's first hit's weight-based knockback decreased: 80/150 → 60/120. This makes it connect together better with its second hit, but removes its KO potential against aerial opponents.
- Neutral attack's first and second hits' hitboxes re-positioned, and its last hit's hitbox size increased: 3.5u → 4.2u. These changes make its hits connect together better.
- Dash and pivot grabs' start-up lag decreased: frame 16 (both) → 14 (dash)/15 (pivot), restoring their start-up lag from Brawl.
- Sliding Spin Attack improved. It deals 1% more damage: 10% → 11%; received five additional hitboxes; and its grounded version's knockback growth increased.
- Back aerial landing lag: 22 → 17.
- Forward smash connects better with the second hit with high amounts of rage, damage or how long it is charged.
- Spin Attack and Flying Spin Attack have 2 less frames of startup.
- Trip invincibility and all trip followups except floor attack have one less frame of invincibility.
Technical changelist 1.1.4
| Change | Old value | New value |
|---|---|---|
| Back aerial landing lag | 22 | 17 |
| Spin Attack/Flying Spin Attack start up (uncharged/fully charged) | 11/70 | 9/68 |
| Spin Attack duration (uncharged/fully charged) | 82/141 | 80/139 |
| Trip followup on standing/forward/back | 17/10/10 | 16/9/9 |
| Trip invincibility on hard/soft | 6/6 | 5/5 |
Moveset[edit]
- Toon Link can wall jump.
For a gallery of Toon Link's hitboxes, see here.
| Name | Damage | Description | ||
|---|---|---|---|---|
| Neutral attack | Slash (なぎ払い, Mow-Down) Counter Slash (返し, Return) Stab (突き) |
3% | A downward slash, followed by an outward slash, followed by a thrust. The first two hits can be jab canceled, with allows it to be followed up with tilt attacks, a grab, or Spin Attack. It is based on the final series of strikes that the Hero of Time deals to Ganon in The Legend of Zelda: Ocarina of Time. | |
| 2% | ||||
| 4% | ||||
| Forward tilt | Bamboo Splitter (からたけわり, Chinese Bamboo Splitter) | 9% | A lunging downward slash. It has very high knockback growth, as well as a sweetspot located at the center of the Master Sword's blade that is a semi-spike. Although its sourspot has the same damage output and knockback values, it is much less suited for KOing because of it launching at the Sakurai angle. This is further compounded by its sweetspot's position requiring very precise use in order to be effective. Its lower damage output and extremely low base knockback result in it KOing much later than Link's, yet its much lower start-up and ending lag make it more effective for spacing than his, regardless of whether it is sweetspotted or sourspotted. Its sweetspot KOs middleweights at 142%/129% (3DS/Wii U) while near the edge of Final Destination. It resembles the "vertical slice" from The Legend of Zelda: The Wind Waker. | |
| Up tilt | Half-Moon Slash (半月斬り) | 5% | An overhead arcing slash. It hits on frame 8, has very low base knockback, very high knockback growth and minimal ending lag, and launches at 95°/85°/105° depending on which portion of the Master Sword hits the opponent. Altogether, these traits make it a very reliable combo starter: it can combo into Spin Attack from 0%-10%; into itself and up smash from 0% to low percentages; into a short hopped neutral aerial; short hopped back aerial and short hopped Spin Attack from low to medium percentages; and into forward aerial and up aerial from medium to high percentages. Due to Toon Link swinging the Master Sword on a 180° arc, it is also decent at punishing rolls. | |
| Down tilt | Grass Cutter (草薙ぎ, Grass Mower) | 7% | A kneeling inward slash. It can reliably trip opponents at low percentages, making it an ideal set-up option. It can also be used for edge-guarding, thanks to the Master Sword's blade being capable of reaching below edges. | |
| Dash attack | Running Hack (追い斬り, Chasing Cutter/Slash) | 6% (base), 8% (tip) | A lunging outward slash. Its tip deals slightly more damage than its base, but its 38 frames of ending lag make it very punishable. | |
| Forward smash | Sword Slice (スマッシュ斬り, Smash Cutter) Double Sword Slice (二段スマッシュ斬り, Two-Stage Smash Cutter) |
10% | A lunging downward slash. If the attack button is pressed again, Toon Link performs a lunging outward slash, making it a natural combo. Compared to Link's forward smash, the first hit of Toon Link's version has almost nonexistent knockback growth. This results in it lacking KO potential, yet being more reliable at following into the second hit. The second hit has even less base knockback than the first, but deals slightly more damage and, thanks to its very high knockback growth, actually possesses KO potential. However, its second hit also has a sourspot that KOs marginally later because of its slightly lower base knockback. Its sweetspotted second hit KOs middleweights at 94%/84% (3DS/Wii U) while near the edge of Final Destination. | |
| 11% | ||||
| Up smash | Sky Slash (天空斬り, Aether Cutter/Slash) | 13% (early, clean), 10% (late) | An overhead arcing slash. It has the lowest amount of ending lag out of his smash attacks. Although each of its hitboxes share the same knockback values, its late hitbox's lower damage output results in its KO potential being noticeably lower due to dealing less damage than its early and clean hitboxes. Its early and clean hitboxes KO middleweights at 123%/114% (3DS/Wii U) from anywhere on Final Destination. In comparison, its late hitbox KOs them at 159%/149% (3DS/Wii U) from anywhere on Final Destination. | |
| Down smash | Front and Back Sword Slice (前後足元斬り, Front and Back Underfoot Cutter) | 6% (hit 1 grounded, late hit 2), 7% (hit 1 aerial, clean hit 2) | A kneeling inward slash in front of himself, followed by a kneeling outward slash behind himself. Despite not being a natural combo, its first hit nevertheless combos very well into its second hit. In comparison, its second hit has very high knockback growth, and launches the opponent behind Toon Link. However, its second hit also has a sourspot that deals slightly less damage, and therefore KOs slightly later than the sweetspot. Its sweetspotted second hit KOs middleweights at 132%/121% (3DS/Wii U) while near the edge of Final Destination. | |
| Neutral aerial | Two Part Slash (二段斬り, Two-Stage Cutter/Slash) | 8.5% (front), 7% (back) | An inward slash in front of himself, followed by an outward slash behind himself. Due to it hitting on frame 6, it has the lowest amount of start-up out of his aerials. When coupled with its ability to be auto-canceled with a short hop and its minimal landing lag, it is a viable approach option when SHFF'd. However, its 27 frames of ending lag make it punishable when it is not auto-canceled. It is possible, albeit rare, to land both hits at lower percents, particularly against bigger opponents. | |
| Forward aerial | Slash Up (斬り上げ, Slashing Lift) | 13% | A spinning outward slash. Its respectable damage output and high knockback growth make it one of Toon Link's most viable KOing options. It KOs middleweights at 110%/99% (3DS/Wii U) while near the edge of Final Destination. In addition to its KO potential, it has combo potential: it can function as a set-up into Spin Attack at low percentages; into a grab aerial at slightly higher percentages; and as a follow-up from Bomb. Due to it hitting on frame 14, however, it is punishable. It appears very similar to the rolling Parry Attack. | |
| Back aerial | Backward Slash Up (後方斬り上げ, Backward Slashing Lift) | 11% | Quickly turns around to perform an upward slash behind himself. It hits on frame 7 and has both a decent damage output and very high knockback growth, which make it a quick, yet fairly powerful attack. It KOs middleweights at 117%/109% (3DS/Wii U) while near the upper blast line of Final Destination. It also has the ability to auto-cancel with a short hop. However, it has extremely low base knockback and launches at 60°, which make it best used while near the upper blast line when attempting to score a KO. Otherwise, it KOs middleweights at 151%/142% (3DS/Wii U) while near the edge of Final Destination. Its 36 frames of ending lag also makes it punishable when it is not auto-canceled. | |
| Up aerial | Jump Thrust (上突き, Up Stab) | 14% (clean), 11% (late) | The Up Thrust. Its clean hitbox's respectable damage output and high knockback growth make it one of Toon Link's most viable KOing options. It KOs middleweights at 98%/89% (3DS/Wii U) while near the upper blast line of Final Destination. Its late hitbox deals less damage, which makes it unsuited for KOing in spite of it having the same knockback values as its clean hitbox. When coupled with its much longer duration, however, it is nevertheless useful for juggling. | |
| Down aerial | Sword Plant (下突き急降下, Down Stab Nosedive) | 16% (clean), 12% (late), 5% (landing) | The Down Thrust. Unlike Link's Down Thrust, Toon Link's version is a stall-then-fall, which makes it very risky to use off-stage. Unlike in Brawl, it now pierces an opponent, which makes it a useful edge-guarding option when performed on edges because of its clean hitbox being a meteor smash. Its landing hit also has a windbox that pushes away nearby opponents. Due to it hitting on frame 17, however, it has the highest amount of start-up lag out of Toon Link's aerials. When coupled with its 75 frames of ending lag and 40 frames of landing lag, it is his most punishable attack. Resembles his final strike to Ganondorf's head in The Legend of Zelda: The Wind Waker. | |
| Grab aerial | Midair Hookshot (空中フックショット) | 4% | Fires his Hookshot forward. The Hookshot deals damage, and has both great range and very minimal landing lag. All of these traits make it useful for spacing, starting combos, or functioning as a tether recovery. Although Toon Link can cancel his air dodge at any point via his tether recovery, it will not cancel the landing lag gained from the dodge. | |
| Grab | Hookshot (フックショット) | — | Fires his Hookshot forward. The Hookshot functions as a tether grab. Unlike in Brawl, it is no longer the shortest ranged tether grab in the game, and is capable of grabbing aerial opponents. | |
| Pummel | Grab Hilt Strike (つかみ柄なぐり, Grab Hilt/Grip Punching) | 2.1% | Hits the opponent with the Master Sword's pommel. A fairly fast pummel. | |
| Forward throw | Tackle (タックル) | 3% (hit 1), 4% (throw) | A shoulder tackle. It has very high knockback growth and launches at 45°, which make it suitable setting up an edge-guard attempt, or launching the opponent into the trajectory of a returning Boomerang or a descending Bomb. It can also combo into a dash attack at low percentages, but this combo is only effective if the opponent misses their tech and does not DI away. | |
| Back throw | Circle Throw (巴投げ, Comma Throw) | 7% | The tomoe nage, a Judo throw. Although its damage output has remained unchanged since Brawl, it now consists solely of a throw hitbox, instead of a hitbox and a throw hitbox. When coupled with its very high knockback growth, it is one of Toon Link's most viable KOing options, and one of the strongest throws of any kind in the game. It KOs middleweights at 136%/130% (3DS/Wii U) while near the edge of Final Destination. | |
| Up throw | Throw-Away Slash (投げ捨て斬り) | 5% (hit 1), 2% (throw) | Slightly lifts the opponent up and performs a spinning upward slash. It has extremely low base knockback, extremely high knockback growth and launches at 92°. Altogether, these traits make it useful for launching an opponent into a descending Bomb. It can also combo into a short hopped up aerial at low percentages, although this combo is fairly easily to avoid. Despite having the highest knockback growth out of his throws, it lacks KO potential because of its throw hitbox's very low damage output. | |
| Down throw | Elbow Strike (ヒジ打ち) | 3% (hit 1), 4% (throw) | Pins the opponent to the ground and then performs an elbow drop. It has very high knockback growth and launches at 110°, which allow it potentially combo into back aerial. However, this combo is only usable if the opponent lands on a platform and fails to tech their landing. | |
| Forward roll Back roll Spot dodge Air dodge |
— | — | ||
| Techs | — | — | ||
| Floor attack (front) Floor getups (front) |
7% | Slashes behind himself and then in front of himself while getting up. | ||
| Floor attack (back) Floor getups (back) |
7% | Slashes in front of himself and then behind himself while getting up. | ||
| Floor attack (trip) Floor getups (trip) |
5% | Slashes in front of himself and then behind himself while getting up. | ||
| Edge attack Edge getups |
7% | Performs an outward slash while climbing up. | ||
| Neutral special | Default | Hero's Bow | 4% (uncharged), 12% (fully charged) | Wields his Hero's Bow and fires an arrow forward. If the special button is held, Toon Link charges the arrow by drawing farther back on the Hero's Bow, which increases the arrow's damage output and range. Unlike Link's Hero's Bow, Toon Link's version fires arrows that are floaty, which in turn makes them more consistent for zoning. |
| Custom 1 | Fire Arrow | 2% (uncharged), 6% (charged), 6% (blaze) | Fires a Fire Arrow. The Fire Arrow charges, flies and falls much faster than Hero's Bow's arrow, with its aerial version covering more distance than its grounded version. Once it hits the ground, it creates a smokey blaze that lingers at the point where it landed. If an opponent is near the arrow when it hits the ground, it will inflict a small amount of knockback. The blaze can be used to hinder approaches, or even function as a set-up. However, the Fire Arrow itself deals minimal damage, covers much less distance, and is essentially unusable for spacing because of its virtually nonexistent knockback. It is comparable to Young Link's Fire Bow. | |
| Custom 2 | Piercing Arrow | 1% (uncharged), 6% (charged) | Fires an arrow that flies perfectly straight and pierces opponents. However, it has less range and deals noticeably less damage. | |
| Side special | Default | Boomerang | 8% (near), 5% (mid), 3% (return) | Throws his Boomerang forward. The Boomerang is always tilted vertically during its flight, and always tilted horizontally during its return. It can be thrown at a variety of diagonal angles with the control stick/circle pad, and three main directions with the directional pad. At close range, it can be used as a set-up into another attack. Like Gale Boomerang, if Toon Link fails to catch his Boomerang, he must wait very briefly before he can use it again. Unlike Gale Boomerang, it damages opponents it comes into contact with upon returning, instead of pushing them toward Toon Link. |
| Custom 1 | Floating Boomerang | 4% (all points) | The Boomerang is tilted only vertically during its flight and return, which results in its hitbox being consistently larger than Boomerang's throughout its duration. When Toon Link moves during its return, it will also fly on much steeper angles, making it much easier to catch. It disappears if it hits an opponent on the way back, but can then be re-thrown immediately afterward. However, it deals less damage, flies much slower and can be angled only very narrowly when thrown. Despite the in-game description, the boomerang will still pass through items upon returning. | |
| Custom 2 | High-Speed Boomerang | 3% (near), 2% (mid), 1% (return) | The Boomerang travels quickly and pierces opponents during its flight and return. However, it deals less damage and is tilted only horizontally during its flight and return, which results in its hitbox being consistently smaller than Boomerang's. It also takes slightly longer to throw and returns only in the direction that it was thrown. | |
| Up special | Default | Spin Attack | 1% (uncharged hits 1-9), 3% (uncharged hit 10), 1%-2% (charged hits 1-9), 4%-5% (charged hit 10), 4% (aerial hit 1), 2% (aerial hits 2-4), 4% (aerial hit 5) | A series of spinning, outward slashes. Its grounded version can be charged to deal more damage, whereas its aerial version consists of a series of spinning inward slashes that covers a respectable amount of vertical distance, but minimal horizontal distance. Unlike Link's Spin Attack, Toon Link's grounded version hits multiple times before launching the opponent. While this makes it capable of damage racking and safer for punishing rolls or get-up options, this also results in it being unsuited for KOing. Like Link's Spin Attack, however, Toon Link's aerial version has KO potential; its last hit KOs middleweights at 146%/137% (3DS/Wii U) while near the upper blast line of Final Destination. |
| Custom 1 | Sliding Spin Attack | 11% (uncharged), 12%-16% (partially charged), 17% (fully charged clean), 16% (fully charged late), 2% (aerial hit 1), 1% (aerial hits 2-4), 5% (aerial hit 5) | Charges forward while performing the Spin Attack. The grounded version hits once, comparatively like Link's Spin Attack. When coupled with its decent knockback, its fully charged clean hit KOs middleweights at 91% while near the edge of Final Destination in the 3DS version. It also moves Toon Link forward, which can allow him to use it for punishing when it is spaced properly. However, it has noticeably more start-up, even when minimally charged, and takes slightly longer to charge. The aerial version covers much more horizontal distance, but minimal vertical distance, which make it function similarly to Spinning Kong. If Toon Link is still suffering knockback when he uses the move, its distance is reduced, potentially to the point of travelling almost no distance at all. It is based on the Hurricane Spin. | |
| Custom 2 | Flying Spin Attack | 1% (uncharged hits 1-6), 3% (uncharged hit 7), 4% (uncharged hit 8), 1%-2% (charged hits 1-6), 4% (charged hit 7), 6% (charged hit 8), 4% (aerial hit 1), 2% (aerial hits 2-4), 4% (aerial hit 5) | The Spin Attack concludes with a leaping upward slash, regardless of whether it is used on the ground or in the air. Its last hit is strong enough to KO middleweights at 100% while near the upper blast line of Final Destination in Super Smash Bros. for Nintendo 3DS. The aerial version grants super armor, which can negate bomb recovery if not timed properly, while Toon Link ascends, while its first loop hits make him ascend slowly before the last hit quickly propels him upward. Though the spin covers slightly less vertical distance, the finishing upward slice just about evens it out with the regular Spin Attack. | |
| Down special | Default | Bomb | 4% (grounded and aerial thrown/smash thrown Bomb), 6% (grounded thrown explosion at body/feet), 7% (grounded smash thrown explosion at feet/aerial thrown explosion at body), 8% (aerial thrown explosion at feet) | Pulls out a Bomb. Unlike Link's Bomb, Toon Link's version explodes 4.98 seconds (299 frames) after being pulled out and deals less damage itself. However, its explosion is much larger; deals more damage when smash thrown at the opponent's feet; and has less knockback growth. Thanks to its low base knockback and average knockback growth, it is arguably Toon Link's best combo option. Like Link's Bomb, Toon Link's version can hurt him unless it hits an opponent first, which in turn can be used to remove him from helplessness. |
| Custom 1 | Time Bomb | 0.5%-2% (grounded thrown/smash thrown Bomb), 2%-4% (aerial thrown/smash thrown Bomb), 5% (grounded and aerial thrown/smash thrown explosion) | The Bomb is smaller, has a shorter fuse (~2 seconds) and covers much less distance when thrown or smash thrown. It cannot explode via physical contact, bouncing harmlessly off of opponents instead. Like normal bombs, no more than two can be out at once. Although its damage output and explosion are both minuscule, it has extremely high knockback. This makes it useful for zoning and, unlike Bomb, capable of KOing when its explosion hits an opponent, regardless of whether it is thrown or smash thrown from the ground or the air. This can make bomb recovery more risky though. Its explosion KOs middleweights at 70% while near the edge of Final Destination in the 3DS version. | |
| Custom 2 | Short-Fuse Bomb | 9% (grounded thrown Bomb), 10% (grounded smash thrown Bomb), 11%-12% (grounded thrown/smash thrown explosion at feet), 9%-12% (aerial thrown Bomb), 14% (aerial smash thrown explosion at feet) | The Bomb is larger and has a much shorter fuse (no more than half a second). However, it and its explosion deal noticeably more damage, while its explosion is also very large. Because of this, Toon Link must chuck it almost immediately to avoid taking damage. It has considerable knockback, but not as much as Time Bomb, and is therefore noticeably less effective at KOing. Due to its very short fuse, it has much better bomb recovery potential than Bomb or Time Bomb. However, bomb recovery will not work well in conjunction with Flying Spin Attack’s armor, due to it activating just before the bomb goes off, causing Toon Link to still enter freefall. | |
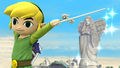
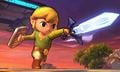
| Final Smash | Triforce Slash | 1% (trapping), 3% (hits 1-14), 2% (hit 15), 15% (final) | Uses the Triforce of Courage to emit a thin beam of light from his left hand to stun an opponent in front of himself. If the beam comes in contact with an opponent, Toon Link dashes forward and performs a barrage of slashes while they are trapped in a Triforce-shaped energy field before concluding with an outward slash that shatters the energy field and launches them. Although its damage output has lowered since Brawl, it is still among the most powerful Final Smashes in the game, as it will KO middleweights at 18% while near the edge of Final Destination in the 3DS version. It can hit multiple opponents, but all non-trapped opponents are launched out the energy field after the penultimate hit. Unlike Link's Triforce Slash, Toon Link's Triforce Slash has much shorter range. | |
Stats[edit]
| Stats | Weight | Dash speed | Walk speed | Traction | Air friction | Air speed | Air acceleration | Gravity | Falling speed | Jumpsquat | Jump height | Double jump height | Empty landing lag |
|---|---|---|---|---|---|---|---|---|---|---|---|---|---|
| Value | 93 | 1.5 – Initial dash 1.7325 – Run |
1.2265 | 0.0547 | 0.01 | 0.94 | 0.01 – Base 0.08 – Additional |
0.079 | 1.28 – Base 2.048 – Fast fall |
5 | 33.799999 - Base 16.320242 - Short hop |
33.799999 | 4 |
Announcer call[edit]

English/Japanese/Chinese
On-screen appearance[edit]
- An explosion appears on-screen and as the smoke fades, Toon Link appears and unsheathes the Master Sword and equips the Hero's Shield.

|
|---|
Taunts[edit]
- Up taunt: Sheathes the Master Sword and places the Hero's Shield on his back as he conducts with the Wind Waker, then strikes a pose and smiles while facing/looking away from the screen.
- Side taunt: Sheathes the Master Sword and places the Hero's Shield on his back as he watches a fairy fly around him. Like Toon Link, the fairy's design is from The Legend of Zelda: The Wind Waker.
- Down taunt: Swings the Master Sword in front of himself while yelling in a panicked tone, ending with him being comically exhausted and catching his breath.
| Up taunt | Side taunt | Down taunt |
|---|---|---|

|

|

|
Idle poses[edit]
- Looks around himself.
- Taps the edge of his boot on the ground.
 |

|
|---|
Crowd cheer[edit]
| Cheer (English) | Cheer (Japanese) | Cheer (Spanish) | |
|---|---|---|---|
| Cheer | |||
| Description | Link Link Link! | Lin - k! | Vi -- va Li-ink! *claps 5 times* |
| Cheer (French) | Cheer (German) | Cheer (Italian) | |
| Cheer | |||
| Description | Allez Link ! *clap 3 times* | Link Link Link! *claps 3 times* | Forza Link! *claps 4 times* |
Victory poses[edit]
- Conducts with the Wind Waker before concluding by striking a pose while smiling.
- Chases a pig, catches it and raises it in the air triumphantly.
- Chases a pig, but fails to catch it, which results in him comically tripping and landing on his bottom, then rubbing it in discomfort.
 |
 |

|
|---|
In competitive play[edit]
Official Custom Moveset Project[edit]
| Character | Custom sets available | ||||
|---|---|---|---|---|---|
| 2111 | 2121 | 2131 | 2113 | 2133 | |
| 2112 | 2211 | 2213 | 3131 | 1113 | |
Most historically significant players[edit]

See also: Category:Toon Link players (SSB4)
 3xA - Placed 7th at 2GGT: FOW Saga, 9th at Noods Noods Noods: Oakland Edition, 25th at 2GGT: Abadango Saga, and 33rd at both EVO 2016 and 2GG: Hyrule Saga with wins over players such as Locus, Captain L, and Stroder. Ranked 5th on the NorCal Smash 4 Power Rankings.
- Biddy - The best Toon Link player in Tri-state. Placed 13th at Smash Sounds, 17th at both Apex 2016 and Smash 'N' Splash 3, 25th at Showdown: Battle Royale 2, and 33rd at Shine 2017 with wins over players such as Shoyo James, 6WX, and K9sbruce. Ranked 8th on the New Jersey Smash 4 Power Rankings.
 Hyuga - The best Toon Link player in the early years of competitive-Smash 4, and the first with consistent success on a global scale, including placing 3rd at Low Tier City 4, 5th at CEO 2016 and 9th at both GENESIS 3 and Pound 2016, notably defeating Nairo at GENESIS 3 and CEO 2016 and double-eliminating ESAM at Low Tier City. At his peak, he was ranked 22nd on the PGR v2. He was banned from most events outside of Mexico after EVO 2016 in light of sexual assault allegations, but remained active in Mexico for the rest of competitive-Smash 4.
 Jdizzle - The best Toon Link player in Australia. Placed 4th at SXC2K16, 9th at Battle Arena Melbourne 9, Expand Gong 3, and Battle Arena Melbourne 10, and 49th at 2GG: Hyrule Saga with wins over players such as Charliedaking, Lui$, and Meru. Ranked 2nd on the Australian Power Rankings.
- L.U.C.Y - Placed 4th at No Fun Allowed 2, 9th at Super Smash Fight Club, 13th at both Austin's Really Feeling It 16 and Clutch City Clash 2, and 25th at DreamHack Austin 2017 with wins over players such as Lima, JaySon, and Jumbolias. Formerly ranked 7th on the Texas Power Rankings.
 Ri-ma - One of the best Toon Link players in Japan. Placed 7th at Sumabato 12, 9th at both Umebura Tokaigi Qualifier and EVO Japan 2018, and 13th at both The Big House 6 and Umebura T.A.T. with wins over players such as Larry Lurr, komorikiri, and Kirihara.
- Sigma - The best Toon Link player after Hyuga's ban. He notably won Sumabato 22 and Sumabato 25, two of the only PGR-ranked events won by a Toon Link player. In addition, he was the highest-placing Toon Link player at a major, placing 4th at Umebura Smash 4 Final after defeating Raito and Rain, and had also defeated ESAM at EVO Japan 2018 and komorikiri at both Sumabato 20 and KSB 2017. He was ranked 75th on the PGR 100 as the only Toon Link player ranked on the list.
- yeti - Co-mained Toon Link alongside Mega Man and was one of the best Toon Link players in the world in 2018, making a name for himself by placing 4th at The Big House 8 using Toon Link to defeat Salem. Outside of that performance, he also placed 25th at 2GGC: SCR Saga primarily playing Toon Link and using the character to defeat K9sbruce, as well as placing 7th at Midwest Mayhem 12 with both Toon Link and Mega Man. Though never ranked on the PGR, he was recognized by the OrionRank 2018, ranking 58th.
- Zan - Placed 7th at 2GGT: KTAR Saga, 9th at 2GGT: FOW Saga, 17th at 2GGT: Abadango Saga, and 33rd at both Super Smash Con 2016 and Super Smash Con 2018 with wins over players such as Larry Lurr, VoiD, and Abadango. Ranked 19th on the SoCal All-Time Smash 4 Power Rankings.
Tier placement and history[edit]
Upon SSB4's release, players had high expectations of Toon Link because of his success in Brawl. While players realized that his power had been toned down since Brawl, the adoption of a new playstyle that is more reliant on his Bomb allowed him to attain roughly the same potency that he possessed in Brawl. Despite having sparse tournament results, Toon Link nevertheless found success thanks to professionals like Hyuga, Zan, Anaky and Sigma achieving very favorable results in their respective regions. Opinions of Toon Link further improved when Hyuga announced his participation in GENESIS 3, where he placed 9th. As a result of his early success, Toon Link was ranked 22nd on the first tier list.
Expectations of Toon Link remained high thanks to Hyuga placing 9th at Pound 2016, 4th at 2GGT: Mexico Saga and 5th at CEO 2016, while Zan and some Japanese players also achieved respectable placings at 2GGaming and local Japanese tournaments, respectively. As such, Toon Link ranked at 17th on the second tier list. However, after Hyuga became inactive after EVO 2016, Toon Link's representation and success at the national level noticeably decreased. While 3xA, Ri-ma and Xorn managed to achieve respectable placings at the regional level in 2016, with Ri-ma also managing to place 13th at the national tournament The Big House 6, Toon Link's tier placement was still considered to be slightly too high. Additionally, despite Hyuga returning to the competitive scene in January 2017 by winning the regional tournament Hail Smash VIII: The Return of the Hero of the Wind, and continuing that success by winning Smash Pendiente 68 a few days later, Toon Link's tier placement nevertheless dropped in subsequent tier lists. He would be ranked 20th on the third tier list, and then 23rd on the fourth tier list.
In Solo Modes[edit]
All-Star Mode[edit]
In All-Star Mode, Toon Link is fought in Stage 6 in the 3DS version or Stage 2 in the Wii U version alongside Roy, Zero Suit Samus, Ike, Lucas, Olimar, Lucario, Villager, and Bowser Jr.
Event Matches[edit]
Solo Events[edit]
- All-Star Battle: Secret: Toon Link is one of the opponents fought in this event. All of the opponents have been unlockable characters in previous Super Smash Bros. games.
- Four Swords Adventures: Toon Link must defeat three other Toon Links in a Stamina Battle.
- It's Past Your Bedtime!: As Jigglypuff, the player must use Sing to put Toon Link, Bowser Jr. and Ness to sleep at the same time.
- The Ultimate Swordsman: As Ike, the player must defeat Toon Link, Link, Marth, Meta Knight, male Robin, female Robin and Shulk. All of the opponents wield swords.
Co-op Events[edit]
- The Ultimate Battle: Two players select a character and must defeat the entire roster.
- Scheming Sorcerer: Toon Link and Yoshi must defeat a male Robin, a female Robin, a metal male Robin and a giant metal female Robin.
Congratulations Screens[edit]
3DS[edit]
Classic Mode
All-Star Mode


Wii U[edit]
Classic Mode
All-Star Mode


Trophies[edit]
Toon Link's default trophy is obtained by clearing Classic Mode as Toon Link. His alternate trophy is obtained by clearing All-Star Mode as Toon Link in the 3DS version or purchasing it in the Trophy Shop for 1000G in the Wii U version (the latter can only appear after clearing Classic or All-Star as Toon Link). The Triforce Slash (Toon Link) trophy is obtained only in the Wii U version by clearing All-Star Mode as Toon Link.


- Toon Link
 This cartoonish version of Link is how he appeared in The Legend of Zelda: Wind Waker[sic] and a few other titles. In Smash Bros., he uses moves much like his older, taller counterpart. His small size gives him extra speed, though, so take advantage of that to send your foes flying.
- This cartoonish version of Link is how he appeared in The Legend of Zelda: The Wind Waker and a few other titles. In Smash Bros., he uses moves much like his older, taller counterpart. His small size gives him extra speed, though, so take advantage of that to send your foes flying.
 : The Legend of Zelda: The Wind Waker (03/2003)
 : The Legend of Zelda: Spirit Tracks (12/2009)
 This cartoonish version of young Link is how he appears in The Legend of Zelda: The Wind Waker and a few other titles. While he shares some moves with his older counterpart, he's a very different fighter. Take advantage of his size and speed to whirl past enemies and bombard them with long-range attacks.
- : The Legend of Zelda: The Wind Waker (05/2003)
- : The Legend of Zelda: Spirit Tracks (12/2009)


- Toon Link (Alt.)
- Toon Link's Bomb move doesn't deal much damage, but the blast radius is pretty big. His bombs can be thrown in all directions, damaging or distracting your foes. Also, his up special Spin Attack keeps him airborne longer than Link's version. For some launching power, use the side smash attack.
- Toon Link's Bomb move doesn't deal much damage, but the blast radius is pretty big. His bombs can be thrown in all directions, damaging or distracting foes. Also, his up special Spin Attack keeps him airborne longer than Link's version. For some launching power, use the side smash attack.
- : The Legend of Zelda: The Wind Waker (03/2003)
- : The Legend of Zelda: Spirit Tracks (12/2009)
- Toon Link's bombs don't do much damage, but their large blast radius makes it easy to hit foes with them. You can also throw them in any direction, making them a great diversionary tactic. His Spin Attack gives him more air-time than Link. His side smash may seem weak, but press the button again for a second hit that'll really send 'em flying!
- : The Legend of Zelda: The Wind Waker (05/2003)
- : The Legend of Zelda: Spirit Tracks (12/2009)

- Triforce Slash (Toon Link)
- For Toon Link's Final Smash, a ray of light emanates from his hand, and whomever the light touches gets trapped in the Triforce. While they're defenseless, Toon Link strikes at foes repeatedly and then launches them a great distance. Just be sure to time the Final Smash well—if the ray of light doesn't touch anyone, nothing happens. At all.
- For Toon Link's Final Smash, a ray of light emanates from his hand, and whoever the light touches gets trapped in the Triforce. While they're defenceless, Toon Link strikes at them repeatedly, then launches them a great distance. Just be sure to time the Final Smash well – if the ray of light doesn't touch anyone, nothing happens. At all.
.
Alternate costumes[edit]
.png)
| |||||||

|

|

|

|

|

|

|

|
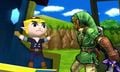
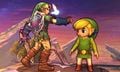
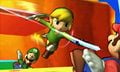
Gallery[edit]
Toon Link during the Nintendo Direct on April 8th, 2014.
Toon Link's amiibo.
The Pic of the Day revealing Toon Link.
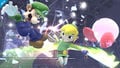
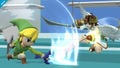
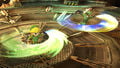
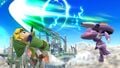
Using Spin Attack on Luigi and Kirby.
Using his up taunt.
Using his forward tilt on Pit.
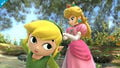
Alongside Peach.
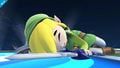
Toon Link laying prone on Wily Castle.
Toon Link beginning to use his forward smash.
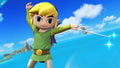
Using Hero's Bow.
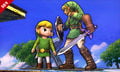
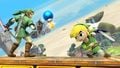
A pre-release picture of Toon Link using his side taunt in Super Smash Bros. for Nintendo 3DS alongside Link.
Toon Link reeling.
Toon Link and Link using their Spin Attacks on the ground.
Toon Link's Spin Attack colliding with Link's.
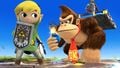
Donkey Kong holding Toon Link's Bomb.
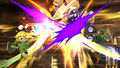
Using Bomb on Link.
A pre-release picture of the Link from The Legend of Zelda: Spirit Tracks appearing as a background character on Spirit Train.
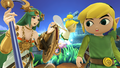
Toon Link and Link taunting.
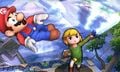
Using his up smash on Mario.
Using his neutral aerial on Luigi and Mario.
Using the third hit of his neutral attack.
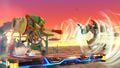
Using his down aerial alongside Yoshi's Yoshi Bomb and Bowser's Bowser Bomb.
Down aerial's ending animation.
Using Bomb in midair.
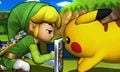
Toon Link and Pikachu staring at each other.
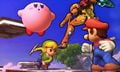
Fighting Mario, Kirby and Samus.
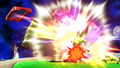
Toon Link being damaged by Zelda's Din's Fire.
Using the Gust Bellows on Samus.
Genesect firing Techno Blast at Toon Link.


Trivia[edit]
- There are technically two Toon Links in SSB4. Aside from the playable one that originated from The Legend of Zelda: The Wind Waker and reappeared in The Legend of Zelda: Phantom Hourglass, there is a non-playable one that originated from The Legend of Zelda: Spirit Tracks who conducts the Spirit Train on the stage of the same name.
- Despite having no apparent connection with the Link from The Wind Waker and Phantom Hourglass, and existing in a different timeline than the Link from The Legend of Zelda: Twilight Princess, the Link from Spirit Tracks will not appear as a conductor if either of the playable Links fight on Spirit Train. Instead, he will be replaced by his mentor, Alfonzo. Before the final release, however, the Link from Spirit Tracks would appear as a conductor regardless of which playable Link fought on Spirit Train.
- If Toon Link eats Superspicy Curry and does not move or attack after it wears off, he will not wield the Master Sword and Hero's Shield until he finally moves or attacks. This animation quirk was carried over from Brawl.
- Despite Toon Link's down aerial no longer bouncing off opponents, his character files still have data for the 8% damage hitbox used in Brawl after a bounce.
- Toon Link's hair is not affected by gravity or wind.
- Toon Link's default fighter trophy in the NTSC version of SSB4 has a slight error. Its first sentence reads "This cartoonish version of Link is how he appeared in The Legend of Zelda: Wind Waker and a few other titles.", which is incorrect, as the game's full title is The Legend of Zelda: The Wind Waker. This was fixed for the PAL region's version.
References[edit]
| Fighters in Super Smash Bros. 4 | |
|---|---|
| Veterans | Bowser · Captain Falcon · Charizard · Diddy Kong · Donkey Kong · Dr. Mario · Falco · Fox · Ganondorf · Ike · Jigglypuff · King Dedede · Kirby · Link · Lucario · Lucas · Luigi · Mario · Marth · Meta Knight · Mewtwo · Mr. Game & Watch · Ness · Olimar · Peach · Pikachu · Pit · R.O.B. · Roy · Samus · Sheik · Sonic · Toon Link · Wario · Yoshi · Zelda · Zero Suit Samus |
| Newcomers | Bayonetta · Bowser Jr. · Cloud · Corrin · Dark Pit · Duck Hunt · Greninja · Little Mac · Lucina · Mega Man · Mii Fighter (Mii Brawler · Mii Gunner · Mii Swordfighter) · Pac-Man · Palutena · Robin · Rosalina & Luma · Ryu · Shulk · Villager · Wii Fit Trainer |