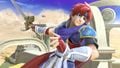
Roy (SSBU)
| Roy in Super Smash Bros. Ultimate | |
|---|---|
 
| |
| Universe | Fire Emblem |
| Other playable appearances | in Melee in SSB4 |
| Availability | Unlockable |
| Final Smash | Critical Hit |
| Tier | A (20) |
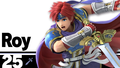
Roy (ロイ, Roy) is a playable character in Super Smash Bros. Ultimate, officially confirmed on June 12th, 2018 and is an unlockable fighter akin to his appearance in Super Smash Bros. Melee. Roy is classified as Fighter #25.
Like Marth, Ultimate is the first game in the Super Smash Bros. series where Roy is not solely voiced in Japanese in all regions. In international releases, Roy is fully voiced in English by Ray Chase, who reprises his role from Fire Emblem Heroes onwards with newly recorded voice clips. Jun Fukuyama's portrayal of Roy from Super Smash Bros. 4 was repurposed for the Japanese version.
Roy is ranked 20th out of 82 on the tier list, placing him in at the top of the A tier. This is a significant improvement from his mid-tier placement in SSB4, where he was ranked 41st out of 54 characters, and his best placement in the series. Roy's primary strength revolve his fast air and dash speeds which, combined with great frame data in his aerial and tilt attacks, gives him a strong combo game and several mix-up options. The mechanic changes in Ultimate also benefit Roy by making it easier for him to approach and land his sweetspot at the hilt, which in turn makes it easier for him to not only rack up damage quickly, but also take stocks at relatively early percentages. Roy possesses some strong KO options with quick start-up such as forward tilt, forward smash and Double-Edge Dance.
However, Roy also has several weaknesses, the most significant being his weak recovery, with a fast falling speed and Blazer giving him poor vertical distance. This leaves him susceptible to gimps and edgeguarding at early percents. Roy's fast falling speed also give him a poor disadvantage state, in which he is easier to combo and juggle than other characters. Finally, Roy's blade is afflicted by a weak sourspot at the tipper, which hinders his combo, spacing game, and overall range. Therefore, he has to get close to his opponent at every time to be able to land the sweetspot, making him more of a rushdown character in practise rather than a traditional disjointed fighter.
Overall, Roy is considered to be one of the best swordfighters in the game, and this has been reflected by his above-average representation in the metagame, which is spearheaded by players such as Kola, Goblin, and Ataru.
How to unlock[edit]
Complete one of the following:
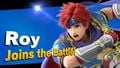
- Play VS. matches, with Roy being the 29th character to be unlocked.
- Clear Classic Mode with Mario or any character in his unlock tree, being the 6th character unlocked after Luigi.
- Have Roy join the player's party in World of Light.
Roy must then be defeated on Castle Siege (the Ω form is used in World of Light).
Attributes[edit]
Roy is a middleweight swordsman, although his main attributes deviate heavily from those of other middleweights. He boasts very fast dashing, air, and falling speeds, but has only slightly above-average walking speed, as well as fairly low air acceleration and jumps. Roy has an attribute unique to him that other swordfighters do not have: his inverse tipper. Contrary to Marth specifically, his Binding Blade does the most damage if attacking near the sword's hilt, although it does weak damage and knockback when otherwise tippered. While this gives Roy effectively bigger sweetspots than those who rely on a tipper to deal maximum damage, it weakens his spacing abilities despite being a swordfighter.
Roy's greatest strength is his KO potential, which is very high when compared to other middleweights, and can even be comparable to the power of some of the harder-hitting heavyweights on the roster, such as Bowser and Incineroar. In conjunction with his overall fast frame data for a swordfighter, he can inflict large amounts of damage in a short amount of time. Neutral attack can catch aggressive approaches due to its speed and deceptively large hitbox, and can efficiently set up into his more powerful normal attacks. His forward tilt, up tilt, and forward smash are all very fast startup-wise, with each being among the strongest attacks of their kind; notably, forward smash can KO under 50% with rage near the edge, even if uncharged. His up smash is an effective anti-air attack due to its quick startup, along with his sword arm gaining intangibility throughout its rather long duration.
Roy's KO potential also extends to his great air game, with quick, powerful, and damaging aerials; his neutral aerial is a useful combo starter, especially when using the first hit by itself on landing, which allows him to add extra damage to his combos and even open up KO setups at high percentages. His forward aerial autocancels in a short hop and is overall very quick, allowing him to even perform a wall of pain. At high percentages, it also boasts KO potential. Back aerial has the rare and deceptive quality of turning Roy around, as well as being rather quick despite its power, KOing at around 130% from center-stage. Up aerial is Roy's fastest aerial startup-wise, and is a reliable juggling move due to its large hitbox and average knockback, and can even KO by itself at high percentages. Lastly, down aerial is a strong meteor smash when sweetspotted and boasts decent KO potential when sweetspotted on-stage.
Roy is also extremely effective at shield pressure and mix-ups. Many of his aerials and his down tilt are safe on shield against shield grabs, allowing him to pressure the opponent's shield until they choose an option to escape, which Roy can then punish. Roy's neutral attack is useful thanks to its KO confirms into his forward, back, and up aerials, as well as its ability to pressure shields and to catch the enemy coming out of shield. Roy's neutral aerial is also very effective as a cross-up attack on characters who lack out-of-shield options that hit behind them. Up aerial can also function as a combo starter and is safe on shield, and leads into different follow-ups dependent on whether the sweetspot or the sourspot connects. Roy can also simply grab opponents for shielding against him; he has simple but efficient throw combos, such as down throw into neutral aerial or up aerial, depending on percent. Roy even possesses some shield break set-ups if the opponent is not careful, rewarding Roy with a Flare Blade punish.
Roy's special moveset maintains his sheer speed and KO power; Flare Blade is known for being one of the strongest single-hitting attacks in the game, with the capability to one-hit KO any fighter in the game when fully charged. Combined with its ability to be reversed and its extremely high knockback, it adds up to be a very potent edge-guarding and ledge trapping tool, and has deceptively low ending lag despite its power to avoid punishment. As a result, Roy is one of the few characters who can reliably close out stocks on shield breaks regardless of the opponent's damage. Double-Edge Dance is a quick and efficient damage-racking series of high-speed sword slashes, along with being a reliable finisher at higher percentages if sweetspotted; it is fast enough for each hit to connect reliably and catch spot dodges. His main recovery move, Blazer, is an excellent out of shield option, due to Roy gaining super armor on startup and having decent knockback growth when grounded. Lastly, his Counter has a short window of active frames compared to other counterattacks, but it makes up for being one of the strongest counters in the game thanks to its 1.35× damage multiplier.
Despite Roy's numerous strengths, he has noticeable weaknesses. His biggest flaw stems from his own inverse tipper attribute; by relying on close-quarters attacks to deal damage, it gives him below-average effective reach compared to other swordfighters due to the Binding Blade's tip dealing weak knockback and damage. Thus, Roy cannot rely on a spacing playstyle despite his status as a swordsman, since his sourspotted attacks are less reliable as combo starters. This forces him to get dangerously close to the opponent for his attacks to properly start combos and deal more damage. This is further worsened by many of his attacks having high ending lag, which makes Roy very punishable if his attacks are simply thrown out without caution. In all, he cannot perform optimally when spacing with the tip of his sword, but cannot afford to make mistakes when at close range without running the risk of massive punishment.
Lastly, Roy's offstage endurance is very poor. His fast-falling speed makes him fairly susceptible to combos, and as none of his moves are generally reliable enough to consistently break combos, many characters with reliable combo moves can rack up large amounts of damage and easily force him off-stage. To add to this issue, Roy's only recovery move, Blazer, is fairly ineffective despite his impressive mobility: although it offers good protection, can be angled, and covers a decent amount of horizontal distance, it covers little vertical distance, does not sweetspot edges until the latter half of its duration, lacks the grounded version's super armor, and is predictable, leaving him prone to gimping, especially against characters with a reliable gimping projectile or counter. When coupled with his fast-falling speed, he is highly susceptible to meteor smashes, and even a sufficiently strong semi-spike can launch him too far away to recover. Multi-hit moves that trade with Blazer's hitboxes can also semi-spike Roy and gimp him. This causes him to have one of the worst recoveries in the game and arguably across the whole series.
Overall, Roy is an unconventional swordsman who falls under the bait-and-punish and rushdown archetypes. The objective of his playstyle is to overwhelm his enemy by closing the distance between them quickly, then to deal large amounts of damage with fast attacks without leaving Roy himself open to punishment while remaining in close-range.
Changes from Super Smash Bros. 4[edit]
Roy was infamous for being a lower-ranked character in previous appearances (especially in his debut appearance in Melee), due to a committal approach and unsafe aerials (especially compared to other fellow swordfighters), and his inverse tipper attribute hindering his spacing abilities. Likely because of this, Roy has been drastically buffed overall in his transition to Ultimate.
Roy's most significant improvements are indirect, as he benefits noticeably from the changes to the universal gameplay mechanics in Ultimate. The improved flexibility of dash canceling and the decreased landing lag on his aerials greatly improve his combo game, aerial offense, rushdown potential, and make his KO power consistent. Complementing this, the universal mobility increase benefits Roy's core strategy of closing the distance on his opponents and landing hits with the hilt of his sword, as well as helping counterbalance his vulnerability to camping. These changes almost fully alleviate the need to approach at dangerously close ranges to deal optimal damage and knockback, which was the main flaw that had plagued him in previous games and was not present in his fellow swordfighters.
Some of Roy's useful buffs are also direct. Moves like his dash attack, forward tilt, forward, back and up aerials, and Double-Edge Dance, have increased power, significantly increasing his options at higher percentages and further toning down his trouble at KOing. Furthermore, KO confirms with his neutral attack, and the first hit of neutral aerial or a sourspotted up aerial has become much more consistent and reliable. A small number of his moves have also had their hitbox placements improved, which is notable in his forward smash and Double-Edge Dance, the former of which can now hit opponents in the lower platforms of Battlefield. Double-Edge Dance has also been sped up greatly, making its hits link into each other much more consistently. His air game in general has directly improved, as forward aerial now auto-cancels in a short hop and has knockback and angle adjustments that make it better for both combos and KOs; neutral, back, and up aerials are stronger (the latter of which can now KO reliably), and down aerial has larger sweetspots. These changes, compounded with his lower landing lag all-around, make Roy's air game one of the most versatile and fearsome of any character.
However, Roy is not without a few nerfs, some of which are significant. Blazer now needs to travel half its maximum distance before it can sweetspot ledges, and its lower knockback hinders its use as a KO option, especially out of shield. He now boasts a less effective grab game, as his forward throw has lost its combo potential altogether, and down throw has fewer follow-ups due to its increased knockback; the universal nerfs to grabs further pronounce these issues, making it riskier and less rewarding for him to grab the opponent. He also retains some of his flaws from past games, such as mediocre offstage survivability, a vulnerability to combos, and an ineffective spacing game.
Overall, Roy's core playstyle remains fundamentally the same as it was in SSB4, but the changes made to the game's engine, his substantial buffs, comparatively few nerfs, and his raw power and speed remaining mostly intact, now make him less polarizing and allows him to comfortably play aggressively up close, though with a few risks added to his playstyle such as a less effective grab game. As a result, Roy is considered to be much better than in any of his previous playable appearances in Melee and SSB4.
Aesthetics[edit]
 As with other previous downloadable fighters in SSB4, Roy's appearance is largely unchanged. Like Marth, his design has the various shades of red on his hair, outfit, armor pieces, and cape adjusted to be more vibrant and analogous with each other, with a notably brighter hue of purple for his cape especially. His armor, belt, gloves, and boots have been given subtle detailing. His eyes are sharper, and his skin tone is slightly tanned.
- Roy's sword, previously referred to as the "Sword of Seals" (translated directly from its Japanese name in the trophy descriptions of Melee and SSB4), is now referred to in Palutena's Guidance as the Binding Blade, matching the English localization as of Fire Emblem Heroes.
- Roy has a new crouching animation, although he shifts to the previous animation when holding a small item, like in SSB4.
- Roy's sweetspotted moves now use a unique heavy sword SFX, similar to Ike's sword. He shares this distinction with Marth.
- Roy's cape has better physics and rigging, allowing for more fluid animations. Additionally, the logo on Roy's cape is now part of his model, rather than being a flat texture.
- Like Marth, Roy's voice clips are fully dubbed in English (voiced by Ray Chase) for non-Japanese versions.
- Roy's side taunt has him saying "I won't lose!"
- All of Roy's victory animations have been slightly altered with new camera angles. In addition, all of his victory lines have been dubbed in English, "That was a fierce battle!", "Failure is not an option!", and "Now the true battle begins!" respectively.
- The Binding Blade and its sheath are no longer present in Roy's Defeated/No Contest animations.
- As with all previous downloadable fighters in SSB4, Roy now has a unique Palutena's Guidance conversation.
- In the Japanese language, Roy's jumping voice clip has been sped up.
- Aside from when his shield breaks, Roy only vocalizes once when stunned, much like the rest of the cast.
Attributes[edit]
 Like all characters, Roy's jumpsquat takes 3 frames to complete (down from 5).
- Roy walks faster (1.15 → 1.208), slightly surpassing his Melee walking speed.
- Roy runs faster (1.95 → 2.145).
- His initial dash is significantly faster (1.4 → 2.2).
- Roy's air speed is faster (1.24 → 1.302).
 Roy's fast-falling speed is slightly slower (2.9 → 2.88).
Ground attacks[edit]
- Neutral attack:
- The sweetspot launches at a higher angle (62° → 69°), and has more base knockback (40 → 55), but less knockback scaling (60 → 40). In combination with Roy's faster jumpsquat, this greatly improves its combo potential, even giving it a KO setup into back aerial at high percents.
- Forward tilt:
- The sweetspot has more knockback scaling (100 → 105), improving its already outstanding KO potential.
- The move has more ending lag (FAF 32 → 34).
- Dash attack:
- Dash attack has less ending lag (FAF 50 → 46).
- It has gained a shieldstun multiplier of 1.25×, which combined with the increased shieldstun for ground attacks makes it safer on shield.
- The sweetspot has more knockback scaling (82 → 85).
- Forward smash:
- The move has one frame less startup (frame 14 → 13), with its total duration reduced as well (FAF 55 → 54).
- The move's hitboxes have been entirely reworked: the sweetspot is smaller (4.2u → 3.3u) and less extended horizontally (Z offset: 8.4u-5.1u → 9.1u-7.7u), the middlespot is larger (3.7u → 4.0u), and both the sourspot and middlespot have horizontally extended hitboxes with slightly altered placements, which fully cover the Binding Blade's trail (middlespot X/Y/Z offset: 0u/0u/1.5u → 2u-14u/1u/1.5u, sourspot X/Y/Z offset: 0u/0u/7.2u → 2u-9.5u/1u/7.5u).
- These changes significantly increase the move's vertical coverage, allowing it to hit opponents on low platforms above Roy, such as the ones in Battlefield.
- However, these changes also make the sweetspot harder to land due to its reduced size and less favorable offset, with the middlespot being easier to land due to having the largest hitbox. The sourspot's higher offset also means it no longer matches the Binding Blade's entire length.
- Both the sweetspot and middlespot have different knockback values (70 base/70 scaling → 60/75). This worsens their KO power at the edge, especially with rage, but improves it anywhere else without the need for rage.
- Up smash:
- The clean first hit launches opponents more towards Roy (101°/116° → 118°/127°), whereas the late first hit and second to four hits have lower set knockback (95/60 → 85/55), allowing them to connect more reliably.
- The late first hit and second to fourth hits have received a -100% trip chance, preventing the move from tripping opponents on platforms and missing its last hit due to the trip's intangibility.
- The clean first hit has lower SDI multipliers (1× → 0×/0.5×), but the late first hit and second to fourth hits have become vulnerable to SDI (0× → 0.3×).
- Down smash:
- The back hit's sourspot is placed farther horizontally (X offset: 0u → -1.6u) and closer to the Binding Blade's tip, increasing its range.
- The back hit's sweetspot stretches a shorter distance vertically and horizontally (Y/Z offset: 4.1u-5.5u/-13u - -7.5u → 4.1u-4.5u/-11u - -8u). This moves the sweetspot farther from the Binding Blade's hilt and closer to Roy's arm, making it harder to land.
Aerial attacks[edit]
- All aerials have less landing lag (11 frames → 9 (neutral), 13 → 8 (forward), 16 → 10 (back), 14 → 8 (up), 23 → 14 (down)).
- Neutral aerial:
- The first hit has more base knockback (30 → 32), while the second hit's sweetspot has more knockback scaling (100 → 105). This improves the move's KO potential, without worsening its combo potential due to its lower landing lag.
- The second hit uses weight-independent knockback, causing it to deal less knockback to lighter targets and more knockback to heavier ones. This worsens the move's KO potential but allows it to combo for longer in the former case, and vice versa in the latter case.
- Forward aerial:
- Forward aerial auto-cancels earlier (frame 33 → 31), allowing it to auto-cancel if performed at the start of a short hop.
- It launches at a slightly higher angle (361° → 42°), and its sweetspot has more knockback scaling (80 → 83), improving its ability to start combos at low percents and KO at high percents.
- Back aerial:
- The sweetspot deals more knockback (30 base/100 scaling → 35/107), allowing it to KO at around 125% from the center of Final Destination.
- Up aerial:
- The sweetspot has much more knockback scaling (80 → 105), making the move more potent for juggling and granting it KO potential at realistic percents, starting at around 160% from ground level (compared to previously being unable to KO until around 220%).
- Down aerial:
- Down aerial auto-cancels earlier (frame 55 → 52), matching its interruptibility.
- The sweetspot has larger hitboxes (3.6u/3.6u → 4.4u/4.4u).
- It has a slightly altered animation, setting the Binding Blade ablaze. Accordingly, it uses a flame effect and SFX rather than slash ones.
- Due to having flame properties, it now sets off explosive items like Link's Remote Bomb.
- Additionally, it can no longer damage Olimar's Red Pikmin.
Throws and other attacks[edit]
- Grabs:
- All grabs have more ending lag (FAF 30 → 37 (standing), 37 → 45 (dash), 35 → 40 (pivot)).
- Dash and pivot grab have more startup (frame 8 → 10 (dash), 9 → 11 (pivot)).
- Pivot grab has less horizontal range (Z2 offset: -13.4u → -12.8u).
- Dash grab has a larger hitbox against grounded opponents (2.6u → 3u) and is placed slightly higher (Y offset: 7u → 7.25u), but doesn't reach as far horizontally (Z2 offset: 9.3u → 9.1u).
- Pummel:
- Pummel deals less damage (2% → 1.3%).
- It deals more hitlag (4 frames → 14), but has much less startup (frame 6 → 1) and ending lag (FAF 16 → 7).
- Forward throw:
- Roy has a new forward throw: an elbow strike to the opponent's chest.
- Due to the new knockback speed-up effect and Double-Edge Dance's slower startup, it has lost almost all of its combo potential, to the point where its only true followup is instant dash attack at extremely low percentages against a small amount of characters.
- Down throw:
- Down throw has one frame less ending lag (FAF 43 → 42), improving its combo potential at low percents in combination with Roy's faster jumpsquat.
- It has much more knockback scaling (60 → 90), worsening its combo potential at mid to high percents.
- Edge attack:
- Edge attack deals more damage (8% → 10%).
Special moves[edit]
- Flare Blade:
- Flare Blade deals more damage (6%-45.83% → 8%-47.83%).
- Flare Blade has less startup (frame 23 → 21).
- However, its total duration remains unchanged, increasing its ending lag.
- It can be reversed during the charge, allowing Roy to catch opponents behind him.
- The charging sound no longer changes in pitch if Roy is giant or tiny.
- A fully charged Flare Blade triggers a Special Zoom on hit.
- Double-Edge Dance:
- As with Dancing Blade, Double-Edge Dance transitions significantly faster into each hit. It can also now be buffered and is much harder to escape from.
- Double-Edge Dance's last forward hit has significantly larger hitboxes (5.175u/4.6u/4.025u → 7.0u/8.0u/7.0u).
- Double-Edge Dance's last forward hit has significantly increased knockback (60 base/130 scaling → 80/123), which when combined with the move's other changes, now make it a viable KO option.
- Double-Edge Dance's first hit has increased startup (frame 6 → 9).
- Double-Edge Dance's last forward hit has increased ending lag (FAF 56 → 59).
- Roy uses a single voice clip when performing down-inputted fourth swing rather than three. The voice clip itself is the same one used whenever he performs his down aerial.
- Blazer:
- Blazer sweetspots edges later (frame 15 → 24), no longer doing so before the last hit comes out.
- The last hit has more base knockback (40 → 75), but less knockback scaling (130 → 93). This makes it safe on hit at low percents, but also weakens its KO potential, especially at farther distances from the top blast line.
- Counter:
- Counter has a longer counter window (frames 8-27 → 8-29).
- The counter grants intangibility earlier (frame 8 → 7).
- It deals more knockback, with the sourspot incurring a less significant knockback loss over the sweetspot (35 base/100/70 scaling → 60/50 base/90/80 scaling).
- The counterbox is bigger (9.2u → 9.7u). It's also positioned lower down (Y offset: 9.3 → 8.2), now fully covering below Roy.
- It has more ending lag on both the counter (FAF 60 → 68) and the attack (FAF 37 → 41).
- Its base damage is lower (9% → 8%).
- It has higher hitlag multipliers (1.7×/1× → 1.9×/1.2×), making it easier to DI.
- Along with an attack grunt, two of Roy's lines during a successful counterattack are dubbed, with him saying either "Now!" or "Gotcha!".
- If a powerful enough attack is countered, the noise from Critical Hit will play if the counterattack successfully lands.
- Critical Hit:
- Critical Hit's finishing hit has less knockback scaling (55 → 47), worsening its already below average power.
- It causes a flaming background to appear once the main hit is unleashed.
- Roy removes the Binding Blade from its sheath once he has finished sheathing it.
Update history[edit]
Roy was buffed slightly via the game updates. Down aerial auto-cancels 3 frames earlier thanks to update 2.0.0. Update 3.0.0 made the multiple hits for Blazer connect more reliably, and gave dash grab more range. Roy's approach and defense also indirectly benefit from the universal nerf of projectiles. Update 3.1.0 and 7.0.0 both buffed Roy's up smash: the former improved the consistency of the multi-hits and the latter gave the move a -100% trip chance, making it so opponents no longer trip out of the move before the final hit can land.
Overall, Roy fares mildly better than he did at the launch of Ultimate.
- Down aerial auto-cancels earlier (frame 55 → 52), matching the move's interruptibility.
- Roy's character model has been adjusted.
- The grounded-only grabbox of dash grab was made bigger (2.6u → 3.0u) and placed higher (Y offsets: 7.0 → 7.25). This notably prevents it from missing a shielding R.O.B..
- Blazer's hits connect more reliably (Hits 2-4 FKB: 120 → 85).
- Up smash's hits connect more reliably.
- Up smash has received a -100% trip chance, preventing it from tripping opponents on platforms and missing its last hit due to the trip's intangibility.
Moveset[edit]
- For simplicity if, for example, Roy's blade does 6% while the tip does 4%, and the attack has no other hitboxes, it is written as 6%/4%.
For a gallery of Roy's hitboxes, see here.
Note: All numbers are listed as base damage, without the 1v1 multiplier.
| Name | Damage | Description | ||
|---|---|---|---|---|
| Neutral attack | Slash (リフトスラッシュ, Lift Slash) | 7.5%/4.8% | A reverse-gripped upward slash. The sweetspot is a great combo starter due to its high launch angle and low knockback scaling; its low ending lag makes it relatively low risk with high reward. It can easily start combos into a grab, tilts, aerials, Double-Edge Dance, Blazer, or most notoriously into a reverse aerial rush back aerial for a highly potent KO confirm. Finally, its sourspot reaches low enough to hit ledge. The combination of these traits makes it widely considered as one of the best neutral attacks in the game. | |
| Forward tilt | Sharp Edge (オーバーバッシュ, Over Bash) | 12.5% (sweetspot), 9% (near), 8% (far) | A reverse-gripped downward slash. Comes out on frame 8 with somewhat low ending lag. For a tilt of its speed, the sweetspot is very strong, capable of KOing at under 130% from center-stage; it is the third strongest forward tilt in the game, only losing to Zelda's and Incineroar's. It has a middlespot that is deceptively weak and only marginally stronger than the sourspot. | |
| Up tilt | Anti-Air Slash (アンチエアスラッシュ) | 12%/7% | A reversed gripped overhead arcing slash starting from Roy's front. Like forward tilt, it has remarkably good speed and power when sweetspotted, capable KOing at around 120%. However, the ending lag is quite high, making whiffs punishable, and it is not as effective for anti-airing compared to most up tilts due to Roy's reverse sweetspot mechanic. | |
| Down tilt | Low Stab (ロースラスト), Low Thrust) | 11%/6.5% | A kneeling thrust. Generally safe on shield, even with the sourspot, and extremely so with the sweetspot (-3), thanks to its good damage and very low ending lag. Its semi-spike angle is great at setting up tech-chases. | |
| Dash attack | Raid Down (レイドダウン) | 13%/9% | An inward horizontal slash across the ground. Very strong for a dash attack, KOing at around 110% near the ledge. However, it has high startup and noticeable ending lag, which makes it unsafe on shield. | |
| Forward smash | Power Slash (パワースマッシュ, Power Smash) | 20% (close), 17% (mid), 12% (far) | Rotates his body to perform a lunging, two-handed downward slash. Despite coming out rather quickly (frame 13), it has extremely high damage and knockback and is one of the strongest forward smashes in the game when sweetspotted, capable of KOing as low as 40% with max rage. Interestingly, it possesses a middlespot that is still quite strong, unlike forward tilt's. However, it has high ending lag and a short duration. It is based on his regular attack as a Great Lord in Fire Emblem: The Binding Blade. | |
| Up smash | Flame Sword (フレイムソード) | 1% (hit 1 early), 2% (hit 1 late, hits 2-4), 10% (hit 5) | An upward thrust, which ignites the Binding Blade's tip and concludes with a small explosion. Notably, it is his only normal to not use the sweetspot-sourspot mechanic. It has a hitbox on startup around Roy's waist that launches opponents into the main thrust, but otherwise lacks horizontal range, making it mediocre for ground combat. As his only normal to grant intangibility to his sword arm throughout the attack, it has above-average disjoint and is a decent anti-air, but it is very unsafe. Has enough power to KO at around 100% uncharged. | |
| Down smash | Whirlwind (ワールウインド) | 15%/10% (front hit), 17%/11% (back hit) | A kneeling outward slash in front of himself and then behind himself. Roy's fastest smash attack when it comes to startup, but has the highest ending lag of the three. The back hit is stronger than the front hit. The front and back hits KO at around 120% and 100% near the ledge, respectively. | |
| Neutral aerial | Double Slash (ダブルスラッシュ) | 6%/4% (hit 1), 8.5%/5% (hit 2), | An inward slash followed by a spinning, outward slash that covers both sides. Deals good damage and is a useful combo extender, and is Roy's main aerial approach tool due to its high amount of active frames. Landing with the first hit can start guaranteed combos at virtually any percent. Interestingly, it is set apart from identical neutral aerials (including Chrom's) in the second hit's weight-independent knockback, KOing all fighters at the same percentage. | |
| Forward aerial | Flag Cut (フラッグカット) | 11%/7% | A downward slash. It comes out on frame 10; it can auto-cancel or even be interrupted in a short hop, and has KO potential at high percentages. With the lowest ending lag of Roy's aerials, it can be used in quick succession, making it possible to perform a wall of pain. | |
| Back aerial | About Face (アッパースイング, Upper Swing) | 12%/9% | Rotates his body to perform an upward slash. Interestingly, it turns Roy around completely, similarly to Marth and Jigglypuff's back aerials. Has great KO potential at high percentages and is also a devastating edgeguarding tool, with a neutral attack into a RAR back air being able to confirm KOs as early as 60%. | |
| Up aerial | Luna Slash (ルナスラッシュ) | 9%/6% | A backflipping, upward arcing slash. With its low landing lag, the sweetspot can chain into itself and juggle effectively, KOing at high percentages. The sourspot is very weak, but sends straight up; while falling, it can lead and even KO confirm into other aerials. | |
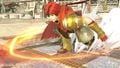
| Down aerial | Half Moon (メテオドロップ, Meteor Drop) | 15%/10% | A two-handed, downward slash between his legs, similarly to Ike's down aerial. It has a flame effect like up smash, but still has a sweetspot-sourspot dichotomy. Meteor smashes aerial opponents when sweetspotted, though it is difficult to hit due to its slim hitbox. As his laggiest aerial, it is also risky to use offstage, possibly causing a self-destruct. The other hitboxes have niche combo ability when landing, including into forward smash at the ledge. | |
| Grab | Grab (つかみ) | — | Reaches out with his free hand. | |
| Pummel | Grab Kneebutt (つかみニーバット) | 1.3% | A knee strike. Average power and speed. | |
| Forward throw | Elbowbutt (エルボーバット) | 5% | An elbow strike with his sword arm. Has high base knockback and is mainly used for sending opponents offstage. | |
| Back throw | Leg Hooker (レッグフッカー) | 5% | Tosses the opponent behind himself. Has extremely low knockback scaling, but it can set up a tech-chase on low platforms toward higher percentages. | |
| Up throw | Casting (キャスティング) | 6% | Heaves the opponent upward with his free hand. Roy's only throw with KO potential, starting around 185%. | |
| Down throw | Slam (グラブドロップ, Grab Drop) | 5% | A one-armed body slam. Roy's only combo throw, and is very reliable into neutral and up aerial at low percents, depending on the opponent's DI. | |
| Forward roll Back roll Spot dodge Air dodge |
— | — | ||
| Techs | — | — | ||
| Floor attack (front) Floor getups (front) |
7% | Gets up while slashing to the left and then to the right. | ||
| Floor attack (back) Floor getups (back) |
7% | Gets into a kneeling position and then slices around himself as he gets up. | ||
| Floor attack (trip) Floor getups (trip) |
5% | Hops briskly to his feet to perform a thrust to the left and a slash to the right. | ||
| Edge attack Edge getups |
8% | Performs an outward slash while climbing up. | ||
| Neutral special | Flare Blade | 8%-47.83%, 50% (fully charged sweetspot), 36% (fully charged sourspot), 10% recoil (fully charged) | Rears back and ignites the Binding Blade before performing a lunging, two-handed downward slash that generates an explosion. Roy can turn while charging the move. Functions similarly to Eruption, as it can be charged for a maximum of around five seconds before unleashing the explosion. It has very high knockback growth even while uncharged, and the ability to quickly increase its damage output via charging. When fully charged, the explosion is very large and will OHKO every character in the game, with the exception of Shulk in the Shield Monado Art. A fully charged Flare Blade is also capable of instantaneously breaking a full shield, similar to a fully charged Shield Breaker, and reaches low enough that it can hit opponents attempting to grab ledges. It also has deceptively low ending lag that allows it to be potentially safe on shield and can be used to bait approaches. | |
| Side special | Double-Edge Dance | Varies | A sequence of sword slashes with several variations based on directional input. There are four slashes total, with each capable of being altered in direction, allowing for eighteen total possible combinations. Standard strikes are trailed red, high strikes are trailed blue, and low strikes are trailed green. Unlike Dancing Blade and Chrom's Double-Edge Dance, the last hit of each variation deals flame damage because of the Binding Blade igniting. The lower-held green strikes deal a fairly large amount of damage and is useful for damaging shields, the upward blue variant is useful for setting up juggle situations, while the final forward-held hit has surprisingly high KO potential when sweetspotted, being even stronger than Limit Cross Slash, and is able to KO opponents near the ledge at lower than 80%. | |
| Up special | Blazer | 5.5% (grounded hit 1), 4.5% (aerial hit 1), 1.1% (grounded hits 2-4), 1% (aerial hits 2-4), 8% (grounded hit 5), 6% (aerial hit 5) | A jumping reverse gripped slash, which ignites the Binding Blade. Hits multiple times and can be angled to a surprisingly large degree, which naturally changes its horizontal and vertical distances. The grounded version deals more damage and knockback, and has brief super armor before Roy leaves the ground, making it Roy's best option out of shield. Roy cannot sweetspot ledges with the move unless he has traveled half of Blazer's maximum distance, making it relatively easy to edgeguard him. | |
| Down special | Counter | 1.35× (minimum 8%) | Parries and then counterattacks against any incoming attacks with an outward slash that ignites the Binding Blade. It has a 1.35× damage multiplier, the third-highest of any counterattack in the game by default, with Counter Throw and Gut Check tied for second (1.5×), Tetrakarn in first (1.6×), and Vision surpassing it while the Buster Monado Art is active. | |
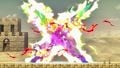
| Final Smash | Critical Hit | 1% (hits 1-10), 35% (hit 11) | Swings the Binding Blade in a circular motion, which ignites its blade, before performing a two-handed, downward slash that generates a powerful explosion. Unlike Marth and Lucina's Critical Hit, Roy's is not a one-hit KO unless performed at the ledge. The circular swing can hit up to four times from the front, though it can hit up to ten times if performed on an opponent behind Roy. It is based on the Binding Blade's ranged attack in The Binding Blade. | |
| Hit | Damage | Description |
|---|---|---|
| First Hit (Neutral) | 3%/2% | Does an outward slash. Deals very little knockback to combo into its other hits. Can jab lock. The tipper lifts opponents off the ground slightly, making it combo into the second hit more consistently. Has less ending lag in the air. |
| Second Hit (Up) | 3%/2% | An upwards lifting slash. Has greater vertical reach than the first hit or the second neutral hit. Lifts opponents slightly off the ground, with the tipper hit pulling them in slightly. |
| Second Hit (Neutral) | 3%/2% | Does an inward slash. Has a shorter hitbox than the first hit, which can lead to it sometimes missing if the first hit is landed from too far away. Deals very little knockback in order to connect more consistently. Can jab lock. |
| Third Hit (Up) | 4%/3% | Does an upwards slash while turning clockwise. Launches opponents slightly up and away, leading into the upward finisher. Combo's well into the last hit forward. |
| Third Hit (Neutral) | 4%/3% | Takes a step forward and does a leaning outward slash. |
| Third Hit (Down) | 4%/3% | Leans in and does a horizontal slash low to the ground. Good for not getting punished, as Roy steps back after he swings. |
| Fourth Hit (Up) | 7%/5% | Twirls counterclockwise and does an flaming upward slash. Launches opponents up, making it useful for starting juggling strings. Has the least ending lag of the three finishers. Fairly low knockback. Has greater vertical reach than any other hit of the move. |
| Fourth Hit (Neutral) | 6%/4% | Turns counterclockwise, steps forward, and does powerful flaming vertical slash downward. This is the strongest finisher in regards to knockback. The hilt by itself is incredibly powerful, KOing middleweights at the ledge around 60% (or even lower with rage), but the hit is much weaker when tippered, only beginning to KO around 140%. |
| Fourth Hit (Down) | 2% (hit 1-4), 5/3% (hit 5) | Does a flurry of five lower stabs. Deals the most damage of the three finishers, wearing down shields well, and can shield poke low shields. Has the highest ending lag and the lowest knockback of the three finishers, mainly should be used as a damage racking option. |
Stats[edit]
| Stats | Weight | Dash speed | Walk speed | Traction | Air friction | Air speed | Air acceleration | Gravity | Falling speed | Jumpsquat | Jump height | Double jump height | Empty landing lag |
|---|---|---|---|---|---|---|---|---|---|---|---|---|---|
| Value | 95 | 2.2 – Initial dash 2.145 – Run |
1.208 | 0.107 | 0.005 | 1.302 | 0.02 – Base 0.03 – Additional |
0.114 | 1.8 – Base 2.88 – Fast fall |
3 | 30.97 - Base 13 - Short hop |
28 | 5 |
Announcer call[edit]

English/Japanese/Chinese
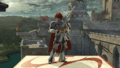
On-screen appearance[edit]
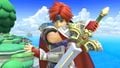
- Warps onto the stage using warp magic while crouching, with the Binding Blade stuck in the ground when he appears. He then pulls it out with a flourish before assuming his idle stance.
Roy's on-screen appearance

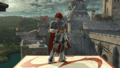
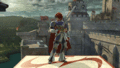
Taunts[edit]
- Up taunt: Triumphantly holds the Binding Blade overhead. Resembles his overworld sprite in The Binding Blade.
- Side taunt: Winds back before striking a pose while holding the Binding Blade in a reverse grip while saying "I won't lose!" (僕 は 負けない!, "I won't lose!")
- Down taunt: Kneels and twirls the Binding Blade behind himself, hollering as he does so.
Roy's up taunt.
Roy's side taunt.
Roy's down taunt.


Idle poses[edit]
- Pumps his fist while smiling.
- Rubs the edge of the Binding Blade's blade.
Roy's first idle pose.
Roy's second idle pose.


Crowd cheer[edit]
| Cheer (English) | Cheer (Japanese/Chinese) | Cheer (Italian) | Cheer (Dutch) | Cheer (French) | |
|---|---|---|---|---|---|
| Cheer | |||||
| Description | Roy's our boy! | Roy! Roy! Roy! | Ro - y! | Roy! Roy! *claps 2 times* Roy! Roy! | Allez Roy! |
| Cheer (German) | Cheer (Spanish) | Cheer (Russian) | Cheer (Korean) | |
|---|---|---|---|---|
| Cheer | ||||
| Description | Roy! *claps 2 times* | Roy! Roy! Roy Roy Roy! | Roy! Roy! *claps 3 times* | Ro - y! *claps 3 times* |
Victory poses[edit]
- Left: Swipes his sword once over his shoulder, then swipes it down and behind him while facing left, saying "Now, the true battle begins..." ("真の戦いは、これからだ", The true fight is after this.). Afterwards, the camera zooms in on his face, focusing on his eyes.
- Up: Spins the Binding Blade one and a half times and then sheaths it in a pose similar to his artwork from previous games, saying "That was a fierce battle." ("苦しい戦いだった", It was a difficult fight.).
- Right: Flourishes his sword and poses with it by his side, saying "Failure is not an option!" ("守るべきもののために、負けられない!", For those whom I must protect, I will not lose!) before the camera dramatically zooms in on Roy's face.


In competitive play[edit]
Most historically significant players[edit]
See also: Category:Roy players (SSBU)
 Ataru - One of the best Roy players in the post-pandemic metagame, peaking at 29th on the LumiRank 2024.2. He first came to prominence at the beginning of the metagame after he defeated Sonix at the Smash World Tour 2021 Championships. He eventually became the best Roy player in Japan after HIKARU's retirement, with his best performances being his 2nd-place finish at Sumabato SP 68, his 4th-place finish at Maesuma TOP 14, his 7th-place finishes at Maesuma TOP 10, UltCore Fourth, and Maesuma'TOP 1, and his win over acola at Maesuma Offline (Shikoku), becoming the first player to eliminate acola outside of Grand Finals at an offline event.
 Flow - The best Roy player in Europe, peaking at 67th on the OrionRank 2019 and having many successful performances in Europe, including placing 5th at both Ultimate WANTED 3 and Ultimate Fighting Arena 2023 and 7th at both Syndicate 2019 and VCA 2021, in addition to defeating Marss at King Con. Internationally, he is best known for defeating ProtoBanham and Jogibu to place 17th at Kagaribi 11, and had also placed 17th at Collision 2023 and 25th at GENESIS X.
 Goblin - The first notable Roy player in competitive play and was the best Roy player in the early metagame, ranking 34th on the OrionRank 2019 and being the only primarily Roy player to rank on both iterations of the PGRU. During this time, he was known for placing 7th at DreamHack Atlanta 2019 and his positive record over Tweek, having defeated him at the aforementioned event and Shine 2019. His best performances, however, took place in the early months of the post-pandemic metagame, where he placed 5th at both Riptide and Let's Make Big Moves 2022 as well as 7th at Low Tide City 2021 and Get On My Level 2022, where he took yet another set over Tweek at the former event. He would also place 7th at CEO 2024, his best tournament placement during that year.
- HIKARU - Picked up Roy in the post-pandemic metagame and was known as the best Roy player in Japan in the metagame's early years, peaking at 38th on the OrionRank 2022 with Roy as his primary character. He is best known for winning Maesuma TOP 5 with solo-Roy and defeating an on-the-rise acola with Roy at Sumabato SP 24, alongside other strong performances where he used Roy as his main character, including placing 2nd at Sumabato SP 32, 3rd at JAPAN 24, and 9th at Kagaribi 9. He retired in mid-2023 and has made a handful of tournament appearances since.
- Mugen - One of the best Roy players in the United States, though primarily known as a hidden boss who primarily competes in Georgia and the Southeast. He first came to prominence in the early years of the post-pandemic metagame, including placing 9th at Glitch - Infinite, 13th at CEO 2021, and 25th at MomoCon 2022, notably defeating Tilde and Leon in the former event. These performances eventually led him to rank 92nd on the OrionRank 2022. Since then, he has also placed 13th at MomoCon 2025, 9th at Let's Make Big Moves 2026 and 17th at Get On My Level: Forever, defeating Sparg0 at the latter event.
- Kola - The greatest Roy player of all time and the only Roy player to ever rank in the top 20, peaking at 13th on the OrionRank 2022, though he notably ranked in the top 10 on that year's half-year ranking. He is the only Roy player to win a major, having won both CEO 2021 and Luminosity Invitational 2: Back to School, and has won several other notable events as well, including SWT: NA East Ultimate Regional Finals, CEO 2024, Code Crimson 3 and Soaked Series Invitational, the latter being considered one of the largest online events of all time.
- tk3 - Co-mains Roy with Chrom and is considered the best Roy player in the early metagame and the pandemic period, peaking at 68th on the OrionRank Ultimate: Eclipse. During these periods, he was regularly the highest-placing Roy player at Japanese majors, placing 4th at Sumabato SP 11, 5th at Kagaribi 3, 9th at Kagaribi 4, and 13th at EVO Japan 2020. In addition, he was known for placing 2nd at Sumabato SP 14, where he defeated Yoshidora and Akakikusu.
Tier placement and history[edit]
When Ultimate was released, Roy looked promising in the metagame due to the universal decreased landing lag on aerials and ability to use tilts out of a dash, which drastically fixed one of his biggest weaknesses. Along with his excellent mobility and some of the strongest KO power in the game, many professionals believed that Roy could potentially be a top-tier character. However, people also noticed that his Echo Fighter, Chrom, despite having less power and a significantly worse recovery than Roy, was more consistent due to his lack of sourspots, making him better at spacing than Roy. Chrom also had a notorious sacrificial KO move from his forward aerial to Soaring Slash. Although the latter was eventually removed, Chrom was still widely agreed to be one of the best characters in the game and was considered to be better than Roy in the early metagame. Despite this, Roy has achieved many noteworthy results thanks to players such as Goblin and Flow, and was still thought to be significantly improved from Smash 4, with many players ranking him as a high-tier or even top-tier character.
Roy's reputation improved dramatically during and after the end of the online metagame. Kola, a rising star before the pandemic, made waves during the online metagame and ultimately placed 1st on the Wi-Fi Warrior Rank v5. He maintained this momentum after offline play returned with consistent top 8 placements at majors, eventually winning CEO 2021. Other Roy players such as Goblin and HIKARU also saw strong results during this period, leading to an increase in Roy's representation, especially in the United States: Roy had the second-highest character usage by the end of 2021,[1] and continued to be a top 10 character representation-wise in the following year.[2] With Chrom's decline as a result of a shrinking playerbase, many players such as Dabuz and Tweek consider Roy to be one of the best, if not the best, Fire Emblem characters in the game. As such, he was ranked 8th on the first tier list as a top-tier character.
Following the release of the first tier list, Roy's representation saw a sudden decline at the top level, attributed to Kola's declining performances and months-long hiatus, Goblin's severe decline, and HIKARU's retirement from competitive Smash. Although Roy remained a popular character overall, on the other hand, few Roy players could match the three's performances, as alice remained rather inconsistent, while Flow did not become more prominent until the latter half of 2023. Finally, Kola's results following his return were better than his results right before his hiatus; however, they were still worse than his results at his peak. This decline led to Roy dropping out of the top 10 in terms of representation by mid-2023, the first time he was outside the top 10 since the early metagame, and this drop, alongside many players questioning how effective Roy's rushdown playstyle was in a slower, campier metagame, led players to believe he was overrated on the first tier list. This view was reflected in the second tier list, where he dropped 11 spots to 19th in the A-tier, tied with Chrom and Ken as the largest drops from the first tier list.
Following the second tier list, however, Kola's results improved in 2024, especially in the second half of the year, where he won his second major. In addition, alice was also to clean up his consistency a bit, though this improvement was, in part, due to alice picking up Kazuya as a co-main. With Roy's improved representation, he rose 4 spots on the third tier list to 15th, now ranking at the top of the A+ tier. The fourth tier list on the other hand wasn't kind to Roy as he would drop 5 spots to 20th, now ranking at the top of the A tier.
Classic Mode: A Journey of Swords[edit]

Roy's opponents consist of entirely sword-fighters, with the exception of the final round.
| Round | Opponent | Stage | Music | Notes |
|---|---|---|---|---|
| 1 | Castle Siege | Beyond Distant Skies - Roy's Departure | Free-for-All | |
| 2 | Halberd | Meta Knight's Revenge | ||
| 3 | Skyloft | Ballad of the Goddess (Original) | ||
| 4 | Gaur Plain | You Will Know Our Names | ||
| 5 | Midgar | Fight On! | ||
| 6 | Coliseum | Winning Road - Roy's Hope | Free-for-All | |
| Bonus Stage | ||||
| Final | Master Hand | Final Destination | Master Hand (Less than 7.0 intensity) Master Hand / Crazy Hand (Intensity 7.0 or higher) |
On intensity 7.0 and higher, Crazy Hand fights alongside Master Hand. |
Credits roll after completing Classic Mode. Completing it as Roy has Winning Road - Roy's Hope accompany the credits.
Appearances in other Classic Mode routes[edit]
Roy appears as an opponent and/or ally in certain other fighters' Classic Mode routes, with them being listed below:
Bold italics denotes appearances as both an opponent and ally.
Role in World of Light[edit]

Although Roy does not appear in the World of Light opening cutscene, he was vaporized and later imprisoned alongside the rest of the fighters (sans Kirby) when Galeem unleashed his beams of light.
Roy appears in The Final Battle as one of the last fighters imprisoned by Galeem. He is one of the few obligatory unlocks. Defeating him leads to a fight with Master Hand and the subsequent reveal of Bayonetta's location.
Fighter Battle[edit]
| No. | Image | Name | Type | Power | Stage | Music |
|---|---|---|---|---|---|---|
| 25 | |
Roy | 12,500 | Castle Siege (Ω form) | Beyond Distant Skies - Roy's Departure |
Spirit[edit]
Roy's fighter spirit can be obtained by completing Classic Mode as Roy. It is also available periodically for purchase in the shop for 300 Gold, but only after Roy has been unlocked. Unlocking Roy in World of Light allows the player to preview the spirit below in the Spirit List under the name "???". As a fighter spirit, it cannot be used in Spirit Battles and is purely aesthetic. His fighter spirit has an alternate version that replaces it with his artwork in Ultimate.
612. Roy (Fire Emblem)
.png)
In Spirit Battles[edit]
As the main opponent[edit]
| Spirit | Battle parameters | Inspiration | |||||||||
|---|---|---|---|---|---|---|---|---|---|---|---|
| No. | Image | Name | Series | Enemy Fighter(s) | Type | Power | Stage | Rules | Conditions | Music | Character |
| 642 | Leif (Fire Emblem) | Fire Emblem Series | •Roy |
9,300 | Castle Siege | N/A | •The enemy can unleash powerful critical hits at random •The enemy heals over time |
Fire Emblem Theme | |||
| 647 | Eliwood | Fire Emblem Series | •Roy |
9,800 | Castle Siege (Battlefield form) | •Easy to Launch •Hazard: Lava Floor |
•The floor is lava •All fighters are easy to launch after a little while •The enemy's explosion and fire attacks have increased power |
Winning Road - Roy's Hope | |||
| 649 | Raven | Fire Emblem Series | •Roy |
1,700 | Coliseum | •Defense ↓ •Attack Power ↑ |
•All fighters have reduced defense •All fighters have increased attack power |
Attack - Fire Emblem | |||
| 1,170 | Garet | Golden Sun Series | •Roy |
2,500 | Temple (Battlefield form) | •Hazard: Lava Floor | •The floor is lava •The enemy starts the battle with a Fire Flower |
Battle Scene / Final Boss - Golden Sun | |||
| 1,204 | Sagi | Baten Kaitos Series | •Roy •Corrin |
1,600 | Gaur Plain (Battlefield form) | •Item: Timer | •Reinforcements will appear during the battle •The enemy is easily distracted by items |
The Valedictory Elegy | |||
| 1,230 | Welt | Soma Bringer | •Roy |
3,600 | Gaur Plain (Battlefield form) | •Defense ↓ | •You have reduced defense •Stamina battle |
Attack - Soma Bringer | |||
| 1,411 |  |
Duran & Angela | Mana Series | •Roy •Zelda •Tiny Bunny Kirby |
9,200 | Gaur Plain (Ω form) | •Item: Ramblin' Evil Mushroom | •Reinforcements will appear after an enemy is KO'd | Filled with Hope | Duran | |
| 1,508 | Axel | Kingdom Hearts Series | •Roy |
4,300 | Kalos Pokémon League (Fire chamber transition) | N/A | •Stamina battle •Fire and explosion attacks aren't as effective against the enemy •The enemy starts the battle with a Hothead |
Destiny's Force | |||
As a minion[edit]
| Spirit | Battle parameters | Inspiration | |||||||||
|---|---|---|---|---|---|---|---|---|---|---|---|
| No. | Image | Name | Series | Enemy Fighter(s) | Type | Power | Stage | Rules | Conditions | Music | Character |
| 644 | Lilina | Fire Emblem Series | •Palutena •Roy |
3,500 | Gaur Plain (Battlefield form) | N/A | •The enemy's explosion and fire attacks have increased power •The enemy favors side specials •Reinforcements will appear during the battle |
Beyond Distant Skies - Roy's Departure | Roy | ||
| 650 | Ninian | Fire Emblem Series | •Palutena •Roy |
3,400 | Castle Siege (Battlefield form) | N/A | •Defeat the main fighter to win •The enemy can use their Final Smash twice in a row •The enemy's FS Meter charges quickly |
Winning Road - Roy's Hope | Nils | ||
| 1,168 | Isaac | Golden Sun Series | •Mii Swordfighter •Palutena •Robin •Roy |
8,900 | Wuhu Island (Swaying Bridge) | •Assist Trophy Enemies (Isaac) | •The enemy's magic attacks have increased power •Hostile assist trophies will appear •Reinforcements will appear during the battle |
Battle Scene / Final Boss - Golden Sun | Garet | ||
Conditions in italic are not listed on the Spirit Battle preview screen.
Alternate costumes[edit]

| |||||||

|

|

|

|

|

|

|

|
Gallery[edit]
Artwork of all playable Fire Emblem characters and Assist Trophies, as posted on the official Japanese Fire Emblem Heroes Twitter account.
Screenshot of all playable Fire Emblem characters on Arena Ferox, as posted on the official Japanese Fire Emblem Twitter account.
Roy's fighter card.
Roy's unlock notice.
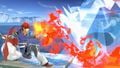
Roy countering on 3D Land.
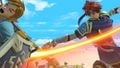
Using Double-Edge Dance on Skyworld.
Attacking Diddy Kong with Counter on The Great Cave Offensive.
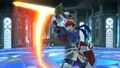
Attacking Link with his neutral aerial on Skyloft.
Taunting with a frozen Wii Fit Trainer on Summit.
Performing his down smash on Coliseum.
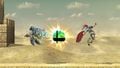
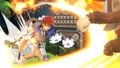
Roy and Meta Knight facing a Fake Smash Ball on Mushroomy Kingdom...
...and then being caught in its blast.

Roy being bitten by a Klaptrap on Pokémon Stadium.
Performing his jab on Kalos Pokémon League.
All playable Fire Emblem veterans (including both variants of Corrin and Robin) on Coliseum.


Fighter Showcase Video[edit]
Trivia[edit]
- Roy's pose in his official artwork resembles his forward tilt.
- Interestingly, Roy also performs his forward tilt in his splash art for Super Smash Bros. 4.
- Roy is the first fighter to be introduced as a clone and later have an Echo Fighter of their own in a later installment.
- Roy is the only fighter with an Echo Fighter to not be in the same Classic Mode unlock tree as their echo; he is in Mario's character tree, while his echo, Chrom, is in Yoshi's unlock tree.
- Despite also wielding a sword, Robin, Young Link, Toon Link, and Mii Swordfighter do not appear in Roy's Classic Mode route.
- Additionally, Ganon does not appear as the boss in Roy's Classic Mode route despite also holding swords.
- Like in SSB4, Roy will revert to Marth's idle animation while holding a small throwable item, although now he also transitions to his SSB4 crouching animation.
- In Roy's character showcase video, he is seen with a new dashing animation, but in the final build of the game, he reuses his dashing animation from SSB4.
- Roy's English star KO voice clip, much like Zelda's in Melee, is infamous among the game's fanbase for being perceived as blood-curdling and realistic, to the point that his voice actor, Ray Chase, acknowledged this perception on Twitter.
- Whenever Roy frees a spirit from its puppet fighter after winning a spirit battle on the Spirit Board or fires a small shooting item such as a Ray Gun from the ground, his sheath appears with his sword inside on the left side of his belt. This is possibly a processing oversight when copying Marth's animation into Roy.
- While this also applies to Marth, Lucina, and Chrom, their sheaths won't disappear due to already being visible in battle.
- This also marks the second time where Roy's sheath is positioned on his side instead of on his back, with the first time being his clapping animation from SSB4.
- Roy is the only male character unlocked in The Final Battle realm in World of Light.
- Additionally, since Roy is found in The Final Battle, he is the only character with an Echo Fighter based on them who cannot be found in The Light Realm, as Samus, Peach, Marth, Pit, Ryu, and Simon can all be found in it, while all Echo Fighters (except Dark Samus) can be found in The Dark Realm.
- This also means that Roy is the only character with an Echo Fighter that can be unlocked in World of Light first, with Chrom being found in the Sacred Land sub-world of The Dark Realm.
- Roy is the only base character in World of Light that has a higher "power level" than his Echo Fighter. Roy has a power level of 12,500, matching the remaining fighters in The Final Battle area, while Chrom's power level is 10,600, being on a similar level as most of the fighters trapped within The Dark Realm.
- Strangely enough, Roy's neutral aerial uses weight-independent knockback on its second hit, causing it to KO all characters at the same percentage[3] regardless of their weight. This is likely an oversight, as the neutral aerials of Marth and Lucina, as well as Roy's Echo Fighter Chrom, have weight-independent knockback on the first hit instead to link more consistently into the second hit, which deals normal knockback affected by weight.
- Echo Fighters notwithstanding, Roy is erroneously misplaced on the back of the NTSC physical case of Ultimate, where every character is meant to be displayed in order of their announcement to the series. This also applies to Luigi, Zelda, Ike, Toon Link, Inkling, Ridley, Palutena, Corrin, and Cloud. In Roy's case, he is positioned just before Diddy Kong, which makes him the only character with an Echo Fighter to not be placed next to them.
- On the Sound Test, Roy's voice clips are ordered differently from those of other non-DLC characters. Normally, blast KO clips are listed after heavy knockback clips, special moves, and Final Smash clips are listed in between normal attack clips and edge hanging clips, and the voice lines for victory poses are listed after taunt lines; in Roy's case, these are grouped after his voice clip while carrying a heavy item in that order.
- The order of all of Roy's voice clips closely matches the abbreviations of their internal codenames with the only exceptions being the voice clips of his special moves (which go by the order of neutral, up, and down special move instead of down, neutral, and up) and Final Smash (which is placed between his special moves and victory lines instead of between his heavy knockback and stunned voice clips). Pikachu shares a similar distinction in its section on the Sound Test.
- In World of Light, Roy is one of the few fighters who is not affiliated with Dharkon in any way, as all of his encounters as himself or as a puppet fighter are all in association with Galeem. Toon Link, Ness, Olimar, Wii Fit Trainer, Little Mac, Squirtle, Ivysaur, Mii Gunner, and Pokémon Trainer all share this distinction as well.
References[edit]
|
| |
|---|---|
| Fighters | Marth (SSBM · SSBB · SSB4 · SSBU) · Roy (SSBM · SSB4 · SSBU) · Ike (SSBB · SSB4 · SSBU) · Lucina (SSB4 · SSBU) · Robin (SSB4 · SSBU) · Corrin (SSB4 · SSBU) · Chrom (SSBU) · Byleth (SSBU) |
| Assist Trophies | Lyn · Black Knight · Tiki |
| Stages | Castle Siege · Arena Ferox · Coliseum · Garreg Mach Monastery |
| Item | Killing Edge |
| Other | Sothis |
| Trophies, Stickers and Spirits | Trophies (SSBM · SSBB · SSB4) · Stickers · Spirits |
| Music | Brawl · SSB4 · Ultimate |
| Masterpieces | Fire Emblem: Shadow Dragon and the Blade of Light · Fire Emblem: Mystery of the Emblem |