Recovery

A recovery is the attempt to return back to the stage after being launched or falling off. Recovery is an essential aspect to the moment to moment gameplay of the Super Smash Bros. series, as making several decisions in quick succession is essential to recovering and stopping the opponent from recovering. Every character has several tools to facilitate a recovery, such as one or more midair jumps and one or more recovery moves (usually an up special move). The ability to effectively recover varies greatly between characters. Some only have one effective but predictable recovery option, while others have an entire suite of options to mix up the opponent. Others still are intentionally bad at recovering as a side effect of their specific playstyle. Due to slower average falling speeds and increased ease of edge sweet spotting, recoveries have only become more potent as the series has progressed.
For many characters, recovery can be augmented by moves other than the standard second jump and up special, such as other special moves that provide boosts to momentum, or a tether recovery. This page documents the maximum recovery potential of each character. In the case that a character has multiple recovery options for maximizing horizontal or vertical movement, both are listed.
List of recoveries in Super Smash Bros.[edit]
| Character | Description |
|---|---|
| Captain Falcon | Falcon Dive does not give much distance and cannot grab foes hanging onto the ledge. If it makes contact in mid-air, it will restore the opponent's midair jump, and Captain Falcon can use the move again. Falcon Punch can be used for some horizontal distance, as well as vertical distance if angled up. |
| Donkey Kong | Spinning Kong is his primary recovery. It provides a short vertical distance but a long horizontal distance. It also provides invincibility frames at the tip of his hands, but the move is incredibly vulnerable from above and below. |
| Fox | Fire Fox is his primary recovery. It can be angled in any direction but is extremely slow to start up, making it easy to edgeguard despite its huge distance. His Reflector slows down his fall speed. |
| Jigglypuff | Jigglypuff's recovery in this game is poor, being easily edge guarded and having the shortest vertical recovery in the game. While possessing five midair jumps, each jump is half the size of the last, and the final two grant minimal vertical distance. However, Jigglypuff's horizontal recovery is the furthest-reaching in the game, due to its fast airspeed, slow falling speed, and the fact that it can use Rising Pound to greatly increase its recovery. |
| Kirby | His recovery consists of five midair jumps (behaving similarly to Jigglypuff's) and the Final Cutter for good vertical and horizontal movement, and can be extended considerably by using his forward aerial after each jump. However, if the player misses the ledge with Final Cutter, Kirby will plummet downward with no chance of recovery.
He can use Inhale to utilize Jigglypuff's Pound recovery, as well as Falcon Punch. |
| Link | Link has a variety of techniques to augment Spin Attack. Link's bomb, if it explodes while he is holding it, can aid his recovery by giving him back his Spin Attack (see bomb recovery). However, his Spin Attack covers very poor vertical and horizontal distance, which combined with its vulnerability makes it arguably the worst recovery in the game. |
| Luigi | In this game, Luigi's recovery is technically greater than Mario's, as he has a higher double jump. However, Luigi has a slower airspeed, though Luigi Cyclone is a more effective option compared to the Mario Tornado because it requires less button-tapping and has slightly better height. As with Mario, Super Jump Punch is his primary recovery, but it is easier to edgeguard on account of the extremely weak sourspot that will be beaten out by any attack. |
| Mario | If the player rapidly presses the special button during the Mario Tornado, he rises up in the air. Super Jump Punch is the primary recovery move and covers a large vertical and horizontal distance. |
| Ness | Ness's recovery is very easily edge guarded since he is limited to his jumps and the very slow PK Thunder. The lightning must be curved into Ness's body at an angle that will push him toward the stage. Simply moving the control stick in a circle is not enough; doing this will launch Ness directly upwards or even backward in some cases. Furthermore, the PK Thunder projectile vanishes upon striking an opponent or a surface, immediately making Ness helpless while providing no recovery whatsoever. Nonetheless, his second jump is the second-highest in the game, PK Thunder itself travels amazing distance, and PSI Magnet can slow his fall speed. |
| Pikachu | Pikachu's main recovery lies in its jump and Quick Attack, which provides enormous recovery and cannot be edgeguarded directly thanks to its massive invincibility. If Thunder is timed properly, it will give Pikachu a small vertical boost, though this is difficult to utilize and will likely KO Pikachu if it misses. |
| Samus | Samus's Bombs can be used for substantial horizontal movement (though only if used after her jump) and she can utilize her Screw Attack to gain some height; Screw Attack also has invincibility which can make the move much harder to edgeguard. |
| Yoshi | Yoshi's recovery is hampered by the fact that his midair jump is his only means of recovery. However, his said jump is the highest in the game and gives him armor, and Yoshi also has the fastest airspeed. Yoshi Bomb can be used for an extremely marginal vertical boost if Yoshi is directly below the ledge. |
List of recoveries in Super Smash Bros. Melee[edit]
In Melee, the presence of directional air dodging slightly improves the recovery potential of every character, but inflicts helplessness making it negligible if the character in question has an up special recovery.
| Character | Description |
|---|---|
| Bowser | Whirling Fortress is his primary recovery. It provides long horizontal distance but little vertical distance and is extremely easy to edgeguard. |
| Captain Falcon | Falcon Kick allows Captain Falcon to regain his second jump in midair. Raptor Boost can be used for some horizontal distance, but it cannot auto sweet-spot a ledge and will put him into a helpless state, making its impact on his overall recovery questionable. Falcon Dive gives more distance and can now grab ledges backward, as well as boasting a larger ledge sweetspot than it does normally while moving forwards. However, it has a very small ledge sweet spot while moving forwards, meaning Captain Falcon can be gimped quite easily when attempting to recover with Falcon Dive.
Because of Falcon Punch's much longer lag time and Captain Falcon's raised falling speed, the move can no longer be used for recovery. |
| Donkey Kong | Spinning Kong no longer has invincibility frames but gives slightly more distance. Headbutt slows down horizontal and vertical momentum. |
| Dr. Mario | Dr. Mario has better airspeed than his clone, but his Super Sheet provides less of a boost compared to Mario's Cape and his Super Jump Punch travels less distance. When combined with Mario's already poor midair jump and the inability to wall jump, this gives Dr. Mario one of the weakest recoveries in all of Melee. |
| Falco | Fire Bird is Falco's primary vertical recovery move. However, it has a high start-up lag and does not provide a great amount of distance. Falco Phantasm provides the most horizontal distance but renders him helpless. His Reflector can be used to slow down his fall speed. Falco can also wall jump. |
| Fox | Fire Fox now charges with a flame hitbox and travels farther. Fox Illusion provides great horizontal distance but inflicts helplessness. Fox can now wall jump. |
| Ganondorf | Dark Dive is Ganondorf's primary recovery move, but does not cover much distance and stage spikes it may cause can be teched. He may use Wizard's Foot to get his midair jump back, allowing for large horizontal recoveries. Gerudo Dragon may be used for some horizontal distance, although it cannot sweet spot the ledge, and leaves him helpless afterward so it's not very useful when recovering. |
| Ice Climbers | Belay covers a vast distance when both Ice Climbers are present, but covers virtually no distance if one is absent. Squall Hammer can also be used to recover; with a solo Ice Climber, it becomes the only viable move, and only grants horizontal distance if used this way. Ice Shot can be used for a short hop in the air. |
| Jigglypuff | Jigglypuff's recovery has been further augmented. All jumps grant more height, giving Jigglypuff among the most versatile recoveries in the game. Having great aerial mobility and multiple recovery options, Jigglypuff is among the most difficult characters to edge guard despite having poor overall protection on its recovery. In addition, Jigglypuff's new neutral special, Rollout, gives horizontal recovery, but this move puts it into a helpless state and can cause an SD, making it situational for recovery. Rising Pound is additionally easier to perform, benefitting its recovery even further. |
| Kirby | Final Cutter gives less vertical distance and is much weaker, but can now grab ledges from behind. Kirby also has lower airspeed, but all of his jumps give more height.
Through Inhale, he may use Rollout, Shadow Ball (recoil), and Toad to aid his recovery. |
| Link | In Melee, the Hookshot grabs onto walls. This can be combined with an air dodge to increase the grabbing range. Link's Spin Attack covers more distance, covers him from above more effectively, and no longer loses height during the move's duration. He can also throw a bomb upwards and Spin Attack into it to perform a bomb jump recovery, rather than waiting for the bomb to explode. |
| Luigi | Luigi has a very gimpable recovery that is difficult to master. He still has the lowest airspeed in the game. Super Jump Punch provides only vertical recovery and its distance has been shortened, while Green Missile provides only horizontal movement. The height gained from Luigi Cyclone was lowered, and the move requires much more button-mashing for Luigi to gain height. Furthermore, Green Missile can misfire, propelling Luigi a great distance horizontally; this makes the move unpredictable and can either help or harm Luigi.
Green Missile has an enormous amount of ending lag if not edge cancelled. |
| Mario | Mario can use the Cape to propel himself forward a bit. Super Jump Punch and Mario Tornado are still viable recovery moves, but both moves travel less distance. Super Jump Punch can be canceled with a wall jump if it is used while hugging a wall and the Control Stick is tilted backward at the apex of the jump. Mario Tornado requires much more button mashing to be effective, and Mario has less airspeed. |
| Marth | Marth's side special, Dancing Blade, slows his fall speed and propels him forward if only the first attack of the combo is used. This does not put him in a helpless state. Dolphin Slash provides decent vertical recovery, but short horizontal recovery. |
| Mewtwo | Mewtwo's huge second jump (when elongated with timed aerial attacks), the highest in the game, slow fall speed, and high air speed allow for long recoveries even before its sizable up special, Teleport. Confusion and the massive recoil of a fully charged Shadow Ball can also help Mewtwo gain some distance once in the air. |
| Mr. Game & Watch | Mr. Game & Watch's recovery is limited to his jump and Fire, though Fire does provide large vertical recovery. |
| Ness | Despite already being an exploitable recovery move, PK Thunder is even more unreliable than in the previous game despite traveling faster; it has shorter distance than it did previously and with drastically greater ending lag to boot, while it is much weaker as an attack and no longer auto-sweetspots the ledge, causing it to be considered a contender for the worst recovery move in the game. However, the tail of the PK Thunder has been made slightly longer, giving Ness slightly more protection during the attack. |
| Peach | To compensate for having a very small double jump, Peach has the ability to float, allowing her to maintain the same vertical position while moving horizontally. She can stall by using Toad, as it allows her to hover for a brief time. In addition, her side special, Peach Bomber, can be used repeatedly to climb up walls. Both of these techniques can be followed by Peach Parasol. Peach Parasol has subpar vertical distance but incredible horizontal distance. A Bob-omb from her down special can propel her great distances but is extremely situational. |
| Pichu | Pichu can use Skull Bash to travel great horizontal distances, and then follow it with Agility. Unfortunately, both of these moves deal recoil damage, making it easier to KO. Pichu can also wall jump, which can aid its recovery in some stages, such as Fountain of Dreams. |
| Pikachu | Skull Bash is now available as a recovery move. It grants very long horizontal distance but can risk SDs if not careful. Quick Attack covers less distance. |
| Roy | Roy's recovery is very similar to Marth's, but due to his faster falling speed, lowered distance and greater lag on side special, and a vertically shorter up special, Roy's recovery is generally inferior. Blazer, however, unlike Marth's Dolphin Slash, can be aimed to go anywhere from diagonally upward to directly vertical to nearly completely horizontal, depending on where the control stick is tilted after the initial up special. |
| Samus | She can now use her grab as a wall grapple and her bomb recovery has been made more useful. Screw Attack gives more distance. |
| Sheik | Sheik's recovery is generally limited to her jump and Vanish, although both travel decent distances, and if a longer recovery is needed, she can Transform into Zelda and take advantage of her lower fall speed to drift toward the stage, or use her longer up special Farore's Wind. Sheik can also wall jump. |
| Yoshi | The newly-added air dodge gives Yoshi a small boost to his recovery after his midair jump. Otherwise, his recovery is largely unchanged from Smash 64. |
| Young Link | Like Link, Young Link can use a bomb recovery, wall grapple, or a Spin Attack. The bomb recovery will help after the Spin Attack. However, he can't throw the bomb straight up and Spin Attack into it, unlike Link. Young Link can also wall jump, but his wall grapple is shorter than Link's grapple. His Spin Attack gives slightly more distance than Link's, but it is overall poor for a character of his weight class. |
| Zelda | Zelda's recovery comes mainly in the form of her long-ranged up special, Farore's Wind. Additionally, she can use Din's Fire to glide horizontally short distances, much like Peach's float. However, these moves cannot be combined, as they each put Zelda into a helpless state. She can utilize Transform to take advantage of Sheik's wall jump, much higher midair jump, and significantly faster airspeed, though Sheik has faster fall speed, much shorter distance on her up special, and lacks a side special recovery option. However, Farore's Wind is limited in direction due to a low number of different angle options, making the move more predictable. It also has noticeable end lag and cannot travel through surfaces, so it must be used with precision. |
List of recoveries in Super Smash Bros. Brawl[edit]
| Character | Description |
|---|---|
| Bowser | He can use Flying Slam to augment his recovery if he hasn't used Whirling Fortress. If Bowser lands after using Whirling Fortress, there will be an extra animation with increased landing lag, but it can be avoided if Bowser recovers low enough. |
| Captain Falcon | Raptor Boost now makes Captain Falcon bounce if it hits the opponent in mid-air, but using Falcon Dive is still a better and safer option because Raptor Boost has a slow start-up and almost any move can hit through it. Falcon Kick no longer lets him recover his midair jump. Falcon Dive, like all types of grabs, no longer grants the opponent their midair jump again. It gives slightly more vertical distance but slightly less horizontal distance. |
| Charizard | Fly provides decent vertical distance and super armor throughout its duration. Charizard has two midair jumps and can glide. |
| Diddy Kong | Rocketbarrel Boost provides massive vertical distance, but must be charged beforehand to maximize its lift, during which Diddy continues to fall. Diddy is very easily edgeguarded while in this animation. Monkey Flip can be used as recovery as well and can be used in conjunction with his midair jump and Rocketbarrel Boost; however, if one presses the attack or special attack button during the move, Diddy Kong cannot use his up special afterward. |
| Donkey Kong | Spinning Kong gains slightly more vertical distance. Like Bowser, there will be an extra animation if Donkey Kong lands from too high up after using Spinning Kong, but again, it can be avoided by recovering low. |
| Falco | Fire Bird provides noticeably less distance, but Falco Phantasm provides significantly more. The Reflector can no longer be used to slow fall speed. |
| Fox | Hitting the jump button while sliding into his forward aerial will cause Fox to jump and perform a forward aerial at the same time, adding height to his jump while moving forward. He can also "shine stall" in mid-air by spamming his reflector, greatly reducing his fall speed. Fire Fox covers considerably less distance, but Fox Illusion covers far more. Fox now jumps higher. |
| Ganondorf | There is now a hitbox at Dark Dive's apex that deals more knockback, but it does not allow the move to be used again. Additionally, the Landing lag glitch makes it hard for him to get-up from the ledge after recovering. His new side special, Flame Choke, can sweet spot the ledge, unlike Gerudo Dragon, but it will make him perform a Sacrificial KO if it connects offstage, making it not always the best choice. He is forced to use either the Flame Choke for horizontal movement or the Dark Dive for vertical recovery, but they can't be used in the same jump. He has also lost the ability to restore his midair jump after using Wizard's Foot. Dark Dive has slightly better vertical recovery. Ganondorf also has a higher airspeed. |
| Ice Climbers | Popo and Nana can now both grab the ledge and even if one climber uses Belay, it will provide a small boost in the air, quite similar to Yoshi's Egg Toss. Belay additionally now functions as a tether if they are close enough to a ledge. The Ice Climbers can now utilize down aerial stall. Squall Hammer is no longer usable for vertical recovery with a lone Ice Climber, though, and provides significantly less height even when both are present. |
| Ike | Ike is limited to either vertical recovery with Aether or horizontal recovery with Quick Draw. Both give good distances in their respective directions, but cannot be combined, limiting Ike's total recovery, which is generally poor and extremely predictable. However, Aether has armor right before he jumps up, giving him some resistance against edgeguarding. |
| Ivysaur | Ivysaur's up aerial and down aerial either propel it downward or upward, respectively. However, up aerial can be used to assist recovery via down air stall. Due to the small size of the vertical boost, it is actually more helpful in getting the more horizontal distance to set up its Vine Whip tether recovery; however, Vine Whip is extremely vulnerable to edgehogging. |
| Jigglypuff | Jigglypuff's Rollout no longer puts it into a helpless state. However, directional air dodge can no longer be used to slightly augment its vertical recovery. |
| King Dedede | While his four midair jumps are the smallest of any character and he has the worst airspeed in the game, he is still capable of huge recoveries due to the massive Super Dedede Jump. Note that this move does not auto-sweet spot the edge unless canceled close enough to the edge; however, it has super armor upon ascent and is a very powerful meteor smash upon descent, making it exceptionally risky to edgeguard. |
| Kirby | His recovery is improved from Melee, as he has increased airspeed (though it is still slow), and gains more horizontal distance with Final Cutter. Additionally, Hammer can be used in the air to aid recovery, as it temporarily stops vertical momentum. Final Cutter now puts Kirby into a helpless state if pushed off a platform during the move.
Through Inhale, he may use Mach Tornado, Rollout, and Toad to aid his recovery. |
| Link | Link's recovery is rather poor due to the reduced range of Spin Attack, fast falling speed, poor midair jump, and slow airspeed. Link's new grab, the Clawshot, functions as a tether, but he cannot latch onto walls. Bomb recovery is less useful since Link can no longer Spin Attack into a bomb. |
| Lucario | ExtremeSpeed is bendable, making it an extremely versatile recovery move. Lucario also possesses a unique trait: the ability to wall cling after using its third jump. This only takes effect if Lucario reaches the wall before ExtremeSpeed ends and is very useful on stages with space to wall jump under the ledge, such as Final Destination. However, because ExtremeSpeed doesn't do hitstun, Lucario is extremely vulnerable to edge-hoggers. Double Team propels Lucario forward if it successfully counters an attack, but its long animation combined with Lucario's fast falling speed makes it risky. |
| Lucas | Lucas has multiple recovery options: the standard PK Thunder, his Rope Snake (which functions as a tether recovery), Zap Jump, Magnet Pull, and wave zap. He can also use his PSI Magnet to stall in the air. Additionally, if holding an item, he can gain a large vertical distance equal to a Zap Jump by throwing the item up and midair jumping at the same time. Using any aerial attack right after his midair jump will also propel him into the air. |
| Luigi | Green Missile and Luigi Cyclone can be combined for large horizontal recovery, and Luigi Cyclone requires less button mashing to be effective. These can also be used in combination with Super Jump Punch since neither puts Luigi into a helpless state, giving Luigi one of the greatest recoveries in the game, though he still may suffer from gimping. Super Jump Punch has significantly increased landing lag.
The misfired Green Missile covers a much shorter distance than before. |
| Mario | Mario's new down special, F.L.U.D.D., is much less effective than Mario Tornado for recovery, only being able to push Mario the opposite direction with recoil when fully charged. He has lost the ability to cancel Super Jump Punch into a wall jump, and Super Jump Punch has increased landing lag. However, F.L.U.D.D. does not require button mashing to be used and Mario has more airspeed. |
| Marth | Shield Breaker can be used to propel Marth forward, but it leaves him open to attacks. Dancing Blade grants significantly less horizontal recovery, but Dolphin Slash gives him the landing lag glitch and covers more horizontal distance. |
| Meta Knight | Meta Knight is gifted with multiple midair jumps and the ability to glide, granting him amazing horizontal recovery potential despite his poor airspeed. In addition, all of his special moves can be used as recovery moves, although all of them put him in a helpless state. The Shuttle Loop is notable in that it allows him to perform a second glide after using it (helpless animation begins after the glide is terminated). Drill Rush boasts considerable horizontal distance and can be aimed to go vertically. Mach Tornado grants large horizontal distance and decent vertical distance, especially when mashed. Dimensional Cape can teleport in any direction and grants intangibility. Meta Knight's huge recovery distance, both horizontally and vertically, resistance to being edge guarded, and variety of available recovery moves make Meta Knight's recovery arguably the best in the game (and to an extent, the entire series). |
| Mr. Game & Watch | Oil Panic can be used to stop downward momentum, and Fire does not put Mr. Game & Watch into a helpless state and instead lets him use a parachute, reducing his falling speed and allowing him to travel long horizontal distances. |
| Ness | PK Thunder has been buffed even more. Now, if the player simply curves the control stick in a complete circle, the move will launch him at an upward diagonal angle that is fit for recovering. |
| Olimar | Olimar is limited to his jumps and Pikmin Chain. Pikmin Chain is a diagonal tether with a range that varies with the number of Pikmin Olimar has with him, making it easily edge-hogged and almost useless if he has no Pikmin with him. Strangely, Pikmin Chain gives more vertical distance if Olimar has no Pikmin than if he has one or two Pikmin. |
| Peach | Peach's vertical recovery has been partially nerfed, as her midair jump now provides almost no vertical gain (the shortest in the game), but her Parasol provides more distance. Her float is unchanged. Peach Bomber can no longer stall her indefinitely up a wall. There is a greater chance for Peach to pull a Bob-omb, though it is still incredibly situational. |
| Pikachu | Pikachu is now able to wall jump, and Pikachu can Quick Attack cancel to prevent ending lag. Quick Attack can no longer be aimed twice in the same direction and doesn't travel as far. |
| Pit | Pit has multiple mid-air jumps, the ability to glide, and his Wings of Icarus, which give him the second-largest vertical recovery in the game. However, if Pit is attacked while using Wings of Icarus, he cannot use the move again until he lands on solid ground. |
| R.O.B. | R.O.B. can use the up special given to him, Robo Burner, multiple times in the air, and the move does not leave him helpless. The total time the jets can fire is the same regardless of whether it is used multiple times or for a single full-length burn. Using it multiple times increases vertical recovery distance. Robo Burner provides the largest vertical recovery in the game. His back aerial propels him forward, and his down aerial stops his momentum. |
| Samus | Like Link, Samus's Grapple Beam now functions as a tether recovery, and cannot attach to walls. Her bomb recovery grants less distance. |
| Sheik | Due to increased Transformation time, it is usually no longer viable to transform into Zelda to recover. However, Sheik's chain can now be used as a tether and she can now wall cling. |
| Snake | If his up special, Cypher, fails to recover, Snake can use his C4 on himself in midair so he can use his up special again (see bomb recovery). Cypher covers a lot of distance, but if Snake is interrupted out of Cypher, he cannot use it again. The move is very easily edge guarded as well, but it does provide armor. Snake's recovery can be easily gimped by the grab release glitch. |
| Sonic | Sonic's primary vertical recovery is provided by his Spring Jump. His other special moves can provide substantial horizontal distance, but they cannot be used after his up special. Many players use his Spin Dash move for horizontal recovery and jump out of it for a bit of vertical recovery, use his Homing Attack for close-range recovery, and Spring Jump as a last resort. Homing Attack can be used repeatedly, but this is reliant on the position of Sonic's opponent, so it is not always the best option. Sonic's recovery can be easily gimped by the grab release glitch. |
| Squirtle | Squirtle can use Withdraw to aid its horizontal recovery, although it is highly situational. Waterfall provides decent distance and is difficult to edgeguard thanks to its hitbox. A fully charged Water Gun can push Squirtle the opposite direction with recoil, though this is rather situational. Squirtle has the ability to wall cling. |
| Toon Link | Like Link, Toon Link can use a bomb recovery, a tether recovery, or a Spin Attack. Toon Link's Spin Attack and midair jump give much greater distance than Link's. Unlike Link, Toon Link can wall jump and utilize a down air stall. |
| Wario | Wario can use his Wario Bike to gain horizontal momentum, along with a third midair jump off the bike. However, it cannot be used again for 6 seconds if he has already used it. Wario Waft can also send Wario rocketing upwards if it is charged. Since his Corkscrew leaves him helpless and gains comparably minimal distance, it should only be used as a last resort. |
| Wolf | Wolf is more limited in recovery options than Falco and Fox. His side special, Wolf Flash, covers less ground than theirs and will still render him helpless, though it gives a fair amount of vertical recovery and can semi-spike or meteor smash at the end of the move. His up special, Fire Wolf, provides him fast directional recovery, but he falls almost straight down after using it, and it has the worst accuracy and smallest ledge sweet spot of the three, though it also has much less startup lag; therefore, it is harder to edgeguard. It covers slightly less distance than Fox's but significantly more than Falco's. Wolf can wall jump to aid recovery. Unlike Fox, Wolf cannot use his Reflector to stall in midair. |
| Yoshi | Yoshi's Egg Throw in Brawl now gives him a slight hop in midair, but his air dodge recovery is no longer existent. |
| Zelda | Farore's Wind still maintains much of the same strengths and weaknesses; despite covering a high distance (albeit slightly less than in Melee), the angles at which it travels are very limited, while completely killing all of Zelda's momentum upon completion (she'll fall straight down a fair distance after use). As such, the move remains predictable and requires precision in order to grab ledges. The move's long startup lag makes it easily edge guarded. If Zelda lands directly on the stage after using Farore's Wind, she now suffers from long ending lag, making the move easily punishable. Transforming into Sheik takes much longer and is not as useful as a result, despite Sheik's new Chain and wall cling recovery. Nayru's Love can now aid recovery slightly. |
| Zero Suit Samus | Zero Suit Samus has two tether recoveries. Plasma Whip can be used for horizontal recovery, and Plasma Wire can be used for vertical recovery. Flip Jump can also provide her with an extra boost to recover with. Flip Jump can help in offensive recovery in the sense that she can meteor smash an opponent by attacking during it and is useful if one is in a situation where a tether recovery will not work. Like other tether recoveries, she is limited to using hers up to 3 times until touching the ground. Plasma Wire will not put her in helplessness. |
List of recoveries in Super Smash Bros. 4[edit]
| Character | Description |
|---|---|
| Bayonetta | Bayonetta's primary recovery is Witch Twist, which sends her a short distance upward. However, unlike most recoveries, she is not left helpless at the end of the move, allowing her to perform a double jump after it, followed by a second Witch Twist. She also can use After Burner Kick, which goes at an upward angle and can be used again if she hits an opponent. Both of these attacks can be used to recover together, but the more attacks she uses while in the air, the longer she has to recover when she lands on the ground. Both attacks also have largely disjointed hitboxes (especially Witch Twist), which can make it difficult to edgeguard her. |
| Bowser | Though Bowser's airspeed was toned down slightly, his double jump gives significantly higher height and Whirling Fortress travels significantly faster and further than it did in Brawl, especially with button mashing. However, Flying Slam no longer gives Bowser any forward momentum, rendering it mostly unusable for recovery.
Custom specials: Dash Slam propels Bowser a fair distance horizontally and does not put him into a special fall. Dash Slash propels Bowser a greater horizontal distance than Dash Slam. Flying Fortress grants Bowser much greater vertical distance while sacrificing a bit of horizontal distance. Sliding Fortress grants Bowser more horizontal distance but slightly less height. |
| Bowser Jr. | Bowser Jr. has both a poor air jump and fast falling speed, which both hinder his recovery. However, Abandon Ship! sends him a great vertical distance, and tilting the control stick can send him a decent distance horizontally at the apex of his launch. In addition, Abandon Ship! doesn't leave Bowser Jr. helpless (although he can only perform a basic hammer swing and air dodge after ejecting) and has a large ledge sweet spot from below ledges. In addition to that, one can jump while using Clown Kart Dash to gain another midair jump, which aids his recovery further. However, if Bowser Jr. is hit with a weak enough hitbox, he will be unable to use Abandon Ship! again.
Custom specials: Koopa Meteor hinders his recovery compared to Abandon Ship!; it gains less height, is a purely vertical jump, and sends Bowser Jr. flying downward at high speed. Meteor Ejection moderately reduces the vertical height gained, hindering his recovery, although to a lesser extent. Koopa Drift gains more horizontal momentum when the spin is initiated. Air Cannon pushes Bowser Jr. back a little due to recoil. |
| Captain Falcon | Captain Falcon's Falcon Dive now travels less horizontal distance but more vertical distance than in Brawl, though it no longer has grab armor. His air speed was also toned down.
Custom specials: Falcon Dash Punch provides him with a horizontal boost, although this has limited usage due to the move's long startup and ending lag. Falcon Strike provides greater vertical distance and slightly more horizontal distance, though Falcon can only use it once due to lacking a grab. Explosive Falcon Dive gives less vertical distance, although it still has a similar horizontal distance and is very powerful. |
| Charizard | Charizard's new side special, Flare Blitz, provides excellent horizontal distance, although it damages Charizard on use, and it bounces back slightly and deals some additional self-damage if the move hits an object or character. It somewhat compensates for the removal of gliding. Fly gives less armor than before but travels more vertical distance.
Custom specials: Dragon Rush isn't interrupted by hitting an enemy, and doesn't cause recoil damage; however, it is weaker and travels less distance, though it is faster. Rising Cyclone significantly reduces the vertical distance granted, to the point where it hardly rises much at all, but it is almost impossible to edgeguard. Fly High grants more vertical distance, but the lack of a hitbox leaves it open for an edgeguard. |
| Cloud | Cloud's recovery is incredibly lacking. Climhazzard only covers a mediocre vertical distance, and virtually no horizontal distance. Additionally, accidentally pressing the special button a second time causes him to plunge downward and not grab the ledge. Climhazzard specifically has code that prevents Cloud from teching a stage spike if hit while using it. Cloud can greatly boost the vertical and horizontal distance of Climhazzard by using it with a full Limit Gauge; however, this is assuming he is in Limit state when offstage in the first place. On the other hand, he can also wall jump and has good air speed and jump height. |
| Corrin | Corrin's main recovery move is Draconic Ascent. The attack can be angled as well: angling it behind Corrin causes him to go straight up, providing as much vertical distance as a grounded jump + double jump, while angling it in front of them will reduce the vertical distance and provide more horizontal distance. Corrin's back aerial will also propel them forward slightly, similarly to R.O.B.'s. Dragon Lunge may also be used to stick to a wall and stall. It can be jumped out of for additional height, and if left or right are input, Corrin swings around and flings his or herself in that direction; it can cover some distance, but there are few occasions where it can actually be used to recover. |
| Dark Pit | As a clone of Pit, Dark Pit has almost identical recovery: three aerial jumps, each smaller than the last, and Power of Flight allowing him to fly straight with extreme distance in any direction. Electroshock Arm provides some forward movement, but will cause him to reel briefly and is generally a poor choice for recovery.
Custom specials: Striking Flight noticeably reduces the distance traveled, and reduces the range of angles for the move, hindering its recovery potential, but Dark Pit is now somewhat protected from edge guards by a hitbox at the start. Breezy Flight significantly reduces the distance traveled, but it is much harder to edgeguard due to the move being executed more quickly, and the addition of a windbox which pushes away potential edge guarders. |
| Diddy Kong | Diddy Kong's recovery appears largely unchanged from Brawl, although he has much more control over the Rocketbarrel and his Monkey Flip has slightly more range.
Custom specials: Flying Monkey Flip provides Diddy Kong with some vertical distance, and if the kick is executed at the right time, slightly more horizontal distance as well. Rocketbarrel Attack hinders Diddy Kong's recovery by slightly increasing the charge time, and reducing the overall distance and control at all charge levels, though it is much riskier to edgeguard. Rocketbarrel Kaboom charges much faster and can be steered more easily, but covers noticeably less distance and explodes more easily on contact with the terrain. |
| Donkey Kong | Donkey Kong's recovery appears largely unchanged from Brawl, aside from Headbutt no longer stalling him in midair.
Custom specials: Chopper Kong provides more vertical distance, but sacrifices horizontal distance (covering as much distance as Mario's unangled Super Jump Punch) and deals no damage whatsoever, leaving him open for edge guards. Kong Cyclone has a shorter duration, marginally reducing the height gained and horizontal movement, but it is almost impossible to edgeguard, both due to the shorter duration and the function of the move, pulling opponents in and damaging them. It also appears to grant some degree of armor. |
| Dr. Mario | Super Sheet no longer gives Dr. Mario any momentum. Dr. Tornado gains significantly less height, but can be moved horizontally and is easier to mash. Dr. Mario can now wall jump, and his jump and airspeed are both higher, while his falling speed is lower.
Custom specials: Super Jump gains significantly more vertical and horizontal distance but lacks a hitbox (being virtually identical to the Chopper Kong custom special). Soaring Tornado provides more vertical distance but travels significantly less horizontal distance. |
| Duck Hunt | Duck Jump is Duck Hunt's primary recovery move, providing a good amount of vertical distance but mediocre horizontal distance. Duck Hunt can be steered to the side as they rise, and Duck Jump can actually cover more horizontal distance than vertical when steered to one side for the duration. The lack of vertical control or hitbox makes it very easy to edgeguard against.
Custom specials: Duck Jump Snag provides less vertical and horizontal distance, hindering their recovery; however, it has a hitbox, which makes them harder to edgeguard. Super Duck Jump provides more vertical distance and has a windbox upon ascension which somewhat protects them from edgeguarding, but the potential horizontal distance is reduced. |
| Falco | Fire Bird's distance was reverted back to Melee. Falco Phantasm also no longer leaves Falco helpless.
Custom specials: Fast Fire Bird doesn't send Falco as far, but charges almost instantly and Falco flies faster, making him harder to edgeguard. Distant Fire Bird sends Falco further; however, it takes longer to charge, potentially making him easier to edgeguard, although this is somewhat mitigated by a more damaging and very large hitbox at the start of the flight, which has good priority. Falco Phase provides slightly less distance, and cancels Falco's momentum at the end, unlike the Phantasm. It also cannot hit opponents, but Falco gains invincibility throughout the move. Falco Charge reduces this distance even further and has slightly increased startup, leaving him open for an edgeguard, but it is much stronger. |
| Fox | Fire Fox's distance was reverted back to Melee. Fox Illusion also no longer leaves Fox helpless. However, his forward aerial has less of a hover effect, making it less effective for horizontal recovery, and he doesn't jump as high. He also cannot stall with Reflector, with the reflector reverting more to its state in Melee.
Custom specials: Fox Burst travels a shorter distance, and has more ending lag, making it actually worsen Fox's recovery than Fire Fox on its own. Wolf Flash travels the same distance, but at a raised angle, slightly reducing the horizontal distance, but effectively reducing the distance Fox falls during the ending lag of the move, aiding his vertical recovery. Flying Fox has no hitbox, potentially leaving him open for an edgeguard, but makes up for this by being much faster. Also, the initial flight is shorter, but Fox gains a much bigger momentum boost at the end to compensate, giving it the same distance overall. Twisting Fox slides along walls instead of pushing into them, and is slightly harder to edgeguard due to the function and size of the hitboxes, but also covers slightly less distance. |
| Ganondorf | Ganondorf's recovery was worsened even further due to his lessened airspeed and the removal of grab armor on Dark Dive and Flame Choke. Flame Choke can now meteor smash the opponent off the stage if he lands on the edge with them.
Custom specials: Dark Vault provides a two-stage jump with higher vertical recovery than Dark Dive, but has no defensive measures during the middle of the move, making it much easier to edgeguard. Dark Fists is moderately better than Dark Vault due to its slight increase to horizontal recovery and also provides armor during the start-up to help combat against edgeguarding. Wizard's Dropkick trades off vertical descent with a horizontal movement that is significantly faster and further than Flame Choke and also doesn't cause helplessness. Flame Wave travels less distance than Flame Choke, hindering his recovery. Flame Chain travels moderately further than Flame Choke, improving its recovery usage. Additionally, it is safer to use for recovery due to it not grabbing opponents and sending Ganondorf plummeting to his death. |
| Greninja | Greninja's overall recovery is formidable; an addition to its high aerial jump, both Shadow Sneak and Hydro Pump give it great distance in almost any direction (but not quite enough distance to recover from the blastzones if uninterrupted). The former is a teleport, which can bypass enemies if charged enough, and Hydro Pump can be angled to perform two dashes in any combination of the eight directions in a similar manner to Quick Attack. Unfortunately, Shadow Sneak slows Greninja's airspeed while charging, has considerable end lag, and if Greninja hits a wall during Hydro Pump, it will bounce off and be unable to use it or any remaining jumps until landing. However, Greninja can still wall cling in this state, and thus wall jump. As a situational recovery option, Greninja's down air gives it a great boost by jumping off of opponents - this should be used carefully, as it can often lead to SDs and removes Greninja's double jump if it connects.
Custom specials: Shadow Dash allows Greninja to more quickly teleport a reasonable distance forward, potentially improving its recovery. High Capacity Pump provides Greninja with significantly more distance, but is slightly slower, potentially making it easier to edgeguard. Single-Shot Pump sends Greninja slightly further than both pumps of the default move combined, but the direction cannot be changed, making it much more predictable. |
| Ike | Quick Draw now gives Ike a small window of time to act out of it before becoming helpless if he hits an opponent with it. Aether can no longer grab edges from behind, significantly hindering its safety against moves like Cape.
Custom specials: Close Combat provides a slightly longer dash than Quick Draw, and passes through enemies, though this means it is guaranteed to render Ike helpless. Aether Drive sends Ike diagonally upwards, covering about as much distance as both Quick Draw and normal Aether, greatly improving his overall horizontal recovery, but considerably hindering his vertical recovery. |
| Jigglypuff | Pound and Rollout grant far less momentum than in previous games.
Custom specials: Sideways Pound provides no distance whatsoever, making it useless for recovery. Pound Blitz covers more distance, improving its recovery potential; however, it is slower than regular Pound, making it easier to punish. Relentless Rollout provides more distance at lower levels of charge and does not cause Jigglypuff to fall to its death if it hits an opponent before reaching the stage, but the move's smaller hitbox and low damage output per hit drastically lowers its priority, making the move very easy to edgeguard. Raging Rollout takes over twice the amount of time to charge, making it unsuitable for recovery. |
| King Dedede | Dedede can now grab ledges during the rising portion of Super Dedede Jump as long as he's facing the stage, significantly improving his recovery's safety. Aside from that, Dedede's recovery appears largely unchanged from Brawl.
Custom specials: Dash Jet Hammer will cause King Dedede to fly forward a long distance when released, but the move's lag time makes it questionable for recovering. Rising Dedede provides slightly more vertical distance but automatically cancels itself, hindering its safety. Quick Dedede Jump is much faster, making it harder to edgeguard; however, it provides less distance and power, hindering his recovery. |
| Kirby | Kirby's recovery appears largely unchanged from Brawl, though it is slightly shorter due to slower airspeed, and his new side special, Hammer Flip, not stalling him in the air.
Through Inhale, he may use Mach Tornado, Rollout, Toad, Monado Arts (jump mode), Shadow Ball (recoil), and could potentially Pocket a recovery-boosting item. Custom specials: Jumping Inhale causes Kirby to jump up and forwards, although the move's long animation will cause his height to be around the same after the move finishes. Hammer Bash stalls Kirby in midair. Upper Cutter covers more height but renders Kirby helpless instead of having him rapidly plunge down with a hitbox. |
| Link | Spin Attack has noticeably improved distance. Bombs explode sooner, making them better for recovering purposes.
Custom specials: Shocking Spin provides noticeably less distance, both horizontally and vertically, similar to Link's Spin Attack from Brawl. Giant Bombs may help the recovery due to the damage and knockback. Whirling Leap improves overall recovery, but deals no damage, making it easier to edgeguard. Meteor Bomb is useless for recovery, due to being a meteor smash, hindering Link's recovery potential. |
| Little Mac | Little Mac's fast falling speed and poor aerial jump work against him, and Rising Uppercut is a purely vertical jump with low height, giving Little Mac overall weak recovery. Jolt Haymaker can aid his horizontal recovery, although it too leaves him helpless, and both moves additionally give subpar distance and have small ledge sweetspots that do not grab ledges until the moves are complete, making him extremely easy to gimp or edgeguard. While Straight Lunge does send Mac forward a good distance when charged sufficiently, it is generally too slow to be of much use recovering, and uncharged versions give little to no distance in the air. Slip Counter can also augment his recovery, should his opponent attempt to attack him in mid-air, as the counter itself propels him forward without causing helplessness. Little Mac can also use his KO Uppercut to aid his recovery because of its windbox, although this is very situational. Little Mac's terrible recovery, both vertically and horizontally, leads to him having what is likely the worst recovery in the game, and by extent, the series.
Custom specials: Both of Little Mac's custom side specials are worse recovery options than Jolt Haymaker, as they both provide poorer horizontal distance. Flaming Straight Lunge can potentially be used for recovery, as it charges much faster than the regular version. Tornado Uppercut improves Mac's vertical recovery somewhat, although it still suffers from having a small ledge sweet spot and is weaker. Rising Smash provides less height than Rising Uppercut but is very powerful. |
| Lucario | Extreme Speed now gains more distance as Lucario's Aura power goes up; at maximum power, its range is nearly double its base range, so much that Lucario can actually risk a self-destruct if not careful. In addition, Lucario will perform a weak attack if he hits an opponent at the end of the dash.
Custom specials: Ride the Wind gives Lucario even more distance and control, improving its recovery potential, but it also moves slower, making it easier to edgeguard. Extreme Speed Attack slightly reduces the move's recovery distance, but adds a hitbox for the full duration of the move, making it harder to edgeguard. Advancing Force Palm also aids Lucario's horizontal recovery. |
| Lucas | The Magnet Pull and wave zap techniques were removed in Smash 4, however, PK Thunder 2's traveling distance has been increased and Rope Snake's range has also increased to be a more reliable tether recovery; it also now has a hitbox, making it less punishable if it misses. |
| Lucina | Being a clone of Marth, Lucina's recovery is nearly identical. Just like Marth's version of Dancing Blade, it gives Lucina minimal horizontal distance. Shield Breaker can travel far further horizontally, but only if it is fully charged. Lucina’s horizontal hitbox is slightly wider than Marth’s when using Shield Breaker thanks to her leg being outstretched, thus making Shield breaker marginally more effective as a recovery. Like Marth, Dolphin Slash is Lucina's primary method of recovering vertically, and while it does gain good height, the horizontal distance is minimal.
Custom specials: Dolphin Jump is a higher leap than Dolphin Slash, but deals no damage. Crescent Slash provides less height but sends Lucina forward a good distance. |
| Luigi | Luigi Cyclone and Super Jump Punch grant much less height, and the former requires more mashing to be effective. It can still allow him to maintain his current height, but will only allow him to do so once, after which it becomes ineffective as a recovery aid. Green Missile also gives him slightly more horizontal distance. The chance for Luigi to misfire his Green Missile has been lowered to 1/10 from 1/8. Super Jump Punch has 5 more frames of landing lag.
Custom specials: Quick Missile greatly improves horizontal distance over Green Missile, although it has tremendous landing lag and will cause him to slide a short distance if he hits the ground while in the animation. Burial Header provides much more vertical distance and has much less landing lag, but the horizontal movement is mitigated due to significantly increased fall speed after he finishes rising. Mach Cyclone rises much higher but sacrifices horizontal movement. Fiery Jump Punch worsens the height Luigi gains but allows for very slight control of the angle of the jump, and the larger sweet spot potentially makes the move harder to edgeguard. Clothesline Cyclone is extremely situational due to the extremely little momentum it gains while mashing. Additionally, its immense ending lag almost guarantees a self-destruct if used offstage. |
| Mario | Mario's airspeed is much faster, and Super Jump Punch provides marginally more vertical distance than it did in Brawl. Cape grants less lift in the air, but Mario has a greater jump height. F.L.U.D.D. is less viable for recovery due to Mario's greater airspeed, but it can still be useful.
Custom specials: Gust Cape is a better recovery tool, and the wind box can push away potential edge guarders. Super Jump grants Mario more distance and control over the jump's angle, but possesses no hitbox and is slower, making him easier to edgeguard. Explosive Punch reduces the move's distance and prevents control of the jump angle, but has larger and much stronger hitboxes, making the move very difficult to edgeguard. Shocking Cape worsens stalling potential but keeps Mario's horizontal momentum. High-Pressured F.L.U.D.D. grants slightly greater horizontal momentum, but Scalding F.L.U.D.D. grants less. |
| Marth | Shield Breaker and Dancing Blade give Marth less horizontal distance, weakening their effectiveness as recovery tools.
Custom specials: Dolphin Jump is a higher leap than Dolphin Slash, but deals no damage. Crescent Slash provides less height but sends Marth forward a good distance. |
| Mega Man | In addition to a wall jump, Mega Man can summon Rush Coil for a big vertical boost, giving good height quickly and without leaving Mega Man helpless. If Mega Man lands on the same Rush again, the height he gains is much greater, though the only way to do this is to use it above ground, meaning it cannot ordinarily be used for recovery. However, if Mega Man is spiked just after using Rush Coil, he will collide with it and get the second jump. In Team Battles, Rush can be dropped off-stage to catch falling teammates, as they will automatically be sprung upwards in a similar manner upon contact. Crash Bomb can be used to recover if Mega Man manages to both stick it to a wall and be near it three seconds later when it explodes. If Mega Man sticks it to a fighter attempting to gimp him, he may be able to have it rub off onto him, making it easier to be hit by the explosion.
Custom specials: Tornado Hold provides less distance than Rush Coil, but will damage enemies below or very near Mega Man, making him harder to edgeguard. Beat carries Mega Man noticeably higher than Rush, and allows for more horizontal movement and control, but takes a brief moment before Mega Man starts rising and travels slower overall, making it easier to edgeguard. |
| Meta Knight | Meta Knight can no longer glide. Mach Tornado covers less distance and can no longer sweet spot the ledge. Dimensional Cape also grants slightly less vertical distance. While Shuttle Loop no longer initiates a glide, it gains far more vertical distance. Though his falling speed has been increased considerably, his airspeed is also much faster.
Custom specials: High-Speed Drill has greater horizontal distance than Drill Rush at the cost of the ability to change the angle. Shieldbreaker Drill doesn't travel as far. Blade Coaster provides Meta Knight with more horizontal distance, but at the cost of height. Lazy Shuttle Loop grants more height than the default version, but the slow loop at the beginning makes the move easier to react to and potentially easier to edgeguard. Shield Piercer provides less distance. Stealth Smasher allows Meta Knight to travel a further distance, but is slower and does not grant intangibility. |
| Mewtwo | Shadow Ball still sends Mewtwo horizontally opposite the direction it was shot at, with the distance now varying depending on how much the move is charged. |
| Mii Brawler | Soaring Axe Kick sends Brawler a fair distance vertically but gives virtually no horizontal distance at all, and automatically soars downward, similar to Final Cutter. Helicopter Kick covers a fair amount of horizontal distance but has a low vertical lift. Piston Punch covers only vertical distance, very similar to Little Mac's recovery.
Onslaught and Burning Drop Kick can also aid horizontal recovery. Headache Maker will cause Brawler to plummet unstoppably. Ultimate Uppercut will also leave Brawler helpless. |
| Mii Gunner | Lunar Launch sends Gunner upwards from an explosion and can be aimed at a slight angle. Cannon Uppercut blasts Gunner a short distance directly upwards with limited horizontal control, but can meteor smash edge guarders. Arm Rocket propels Gunner a good distance in the direction the player aims. Absorbing Vortex slows fall speed as long as the button is held. |
| Mii Swordfighter | Stone Scabbard launches Mii Swordfighter fairly high in the air and allows for slight adjustments to horizontal momentum. However, similar to Soaring Axe Kick, it will send the Mii plummeting down after hitting the peak of the move. Skyward Slash Dash propels them a moderate distance in the direction the player chooses while they slash. Hero's Spin is identical to Link's Spin Attack.
Airborne Assault and Slash Launcher can aid horizontal recovery, although both leave the Swordfighter helpless. Reversal Slash is identical to Mario's Cape. |
| Mr. Game & Watch | Mr. Game & Watch's recovery lost bucket braking, but gained the better recovering technique of Bucket Jumping, which can send him an incredible distance when paired with Fire. Up special also covers more vertical distance, and Mr. Game & Watch has higher airspeed.
Custom specials: Heavy Trampoline doesn't send Mr. Game & Watch as high as Fire, but is stronger. Trampoline Launch provides Mr. Game & Watch with an increased jump height, but he no longer opens his parachute at the end of the jump. |
| Ness | Ness can now immediately re-use PK Thunder if he hits a wall while traveling with it. (In action)
Custom specials: Lasting PK Thunder functions like Lucas' PK Thunder, sending Ness significantly further, and not disappearing if it hits an opponent, vastly improving his recovery. Rolling PK Thunder reduces the distance Ness is sent. |
| Olimar | Pikmin Chain has been replaced with Winged Pikmin, which becomes more effective the fewer Pikmin Olimar is commanding. Even with a full three, the move still gives Olimar respectable horizontal distance and moderate vertical distance. With zero Pikmin, Winged Pikmin gives Olimar one of the best (in terms of distance) recoveries in the game, both horizontally and vertically. It can be acted out of with an air dodge or neutral air, or with at least one Pikmin, any of the other aerials (they can be used without Pikmin, but will not produce a hitbox).
Custom specials: Winged Pikmin Jump is much faster, increases vertical distance, and has a windbox upon startup, but renders Olimar helpless and requires cooldown to gain maximum height. Mighty Winged Pikmin travels a set distance regardless of the amount of Pikmin being carried, but the maximum distance is worsened. |
| Pac-Man | Pac-Man's main recovery tool is Pac-Jump, which must be landed on repeatedly to maximize its effects. This means his recovery can be gimped if one bounce isn't enough to get him back on stage safely. Power Pellet can augment his horizontal recovery and can be steered to go vertically, but has long ending lag and will leave Pac-Man vulnerable if it hits a wall. Fire Hydrant and its variants will give Pac-Man a small vertical hop if he doesn't already have a hydrant out, and Bonus Fruit can also be used to stall him in mid-air for a brief moment.
Custom specials: Distant Power Pellet allows more control over the direction of the trail, although it sends Pac-Man a similar distance overall. Enticing Power Pellet reduces the distance traveled and increases startup, hindering his recovery. Power Pac-Jump sends Pac-Man a height somewhere between the second and third jump on the spring, but due to doing this on the first usage, it makes it much less punishable. Meteor Trampoline worsens Pac-Man's recovery, as the second and third jumps have less height than the first, though it can meteor smash opponents. |
| Palutena | Palutena's main recovery tool is Warp, which can be angled in the eight directions. Because it is a teleport, it can bypass enemies or hazards if aimed correctly.
Custom specials: Angelic Missile launches Palutena forward, similar to Luigi's Green Missile. Jump Glide gives less vertical distance than Warp but allows Palutena to glide for a few seconds, improving her horizontal recovery but making her more suspectable to edgeguarding. Super Speed gives good horizontal recovery, as jumping out of it propels Palutena a huge horizontal distance, so much so that Palutena can potentially escape recovery pressure if she recovers from above; it also gives decent vertical recovery. Lightweight increases her jump height and aerial speed, making her recovery more effective in general, although she becomes easier to launch. Rocket Jump also provides less height than Warp and cannot be angled; however, it powerfully meteor smashes foes if used when they are beneath her. |
| Peach | Peach's vertical recovery has been buffed, as her midair jump provides greater height. Peach Bomber's ending lag has been increased, but has less startup and now stalls Peach on walls once more (albeit not to the same extent as Melee). Her Parasol is faster and covers more height, but will automatically close after eight seconds of floating.
Custom specials: Flying Peach Bomber sends Peach diagonally upward a good distance, but it causes her to descend when the animation is over with a very high ending lag in the air and does not sweet spot the ledge. Flower Bomber travels a much shorter distance than her regular Peach Bomber. Parasol High Jump gives more vertical distance than her regular Parasol. However, she never opens her parasol, leaving herself helpless afterward. It additionally lacks a hitbox. Light Parasol gives a lower initial jump. However, for about 3 seconds she gains additional vertical recovery every time she opens her parasol, before entering helplessness for good. Grumpy Toad removes the default's stalling abilities. |
| Pikachu | Pikachu can now decrease Skull Bash's charge time by smashing the special button. Thunder now meteor smashes at the cloud.
Custom specials: Meteor Quick Attack is slower and covers less distance than Quick Attack, but can meteor smash foes, making attempting to edgeguard it riskier. Quick Feet covers a great distance, but it only dashes once, although the single dash travels a similar distance to both dashes combined. Shocking Skull Bash doesn't send Pikachu as far, but will not be stopped if it hits an opponent. Both custom specials of Thunder prevent Pikachu from mixing up its recovery. |
| Pit | Pit can no longer glide, and Wings of Icarus has been replaced with Power of Flight, which is a single long dash in any direction, which has less distance and control in exchange for safety and speed. Overall, his recovery is considerably worse than in Brawl. Upperdash Arm provides some forward movement, but will cause him to reel briefly and is thus a poor choice for recovery.
Custom specials: Striking Flight noticeably reduces the distance traveled, and reduces the range of angles for the move, hindering its recovery potential, but Pit is now somewhat protected from edge guards by a hitbox at the start. Breezy Flight significantly reduces the distance traveled, but it is much harder to edgeguard due to the move being executed more quickly, and the addition of a windbox which pushes away potential edge guarders. |
| R.O.B. | R.O.B.'s recovery is largely unchanged from Brawl.
Custom specials: Robo Rocket sends R.O.B. flying high upwards, but it can't be used multiple times. While it limits his horizontal distance, it also provides him a faster and potentially less predictable recovery option. Additionally, it does not need to refuel. High-Speed Burner improves R.O.B's mobility in the air but reduces the maximum height achievable. |
| Robin | Robin's main recovery tool is Elwind, which gives Robin great vertical height but a poor horizontal distance. Interestingly, Robin can gain more forward movement than backward movement from Elwind. If Robin's Elwind tome breaks, their recovery becomes almost nonexistent. Charging Thunder grants some momentum, albeit not very useful due to the move's lag.
Custom specials: Soaring Elwind provides little height with the first jump, but great height with the second, although there is a greater delay between the two jumps compared to Elwind. Gliding Elwind's first jump sends Robin diagonally forward a moderate distance, with similar overall height compared to Elwind. |
| Rosalina & Luma | Rosalina's high jumps and slow falling speed are already a boon to her recovery. Launch Star is a simple long dash that can be angled in a roughly 90-degree arc between forward-slightly up and upwards-slightly behind. Gravitational Pull can potentially give Rosalina a recovery-boosting item and stalls her momentum if used right after a jump, although this effect is so minor that it is mostly ineffective for recovery unless jumped.
Custom specials: Launch Star Plus can't be aimed, but sends Rosalina upwards much faster than Launch Star, making it harder to edgeguard. Launch Star Attack reduces the distance traveled but provides Rosalina with a hitbox to damage potential edge guarders. |
| Roy | Due to the removal of movement with Double-Edge Dance, Roy's recovery is now limited to Blazer, which, while it can be angled, covers less distance than Marth and Lucina's Dolphin Slash. |
| Ryu | Ryu's Tatsumaki Senpukyaku can help him gain decent horizontal distance and also reduces Ryu's falling speed. Since this does not cause helplessness, this can be followed with a Shoryuken for vertical recovery. Both special moves can gain more distance if the special button is held longer. A canceled Focus Attack can also propel Ryu forward for more horizontal recovery in case Tatsumaki Senpukyaku has already been used, and Hadoken will stall him if it is used in the air. |
| Samus | Samus's Screw Attack travels more vertical distance, and her Grapple Beam has a longer range. Since her bombs don't stop falling speed as much as in Brawl, it is no longer a practical recovery method.
Custom specials: Screw Rush deals more damage and provides a huge horizontal recovery boost, at the cost of vertical height. Apex Screw Attack is an almost purely vertical leap that only damages at the beginning and end. |
| Sheik | Sheik no longer has access to her Chain, and thus has no tether recovery. Bouncing Fish sends Sheik forwards a good distance, and notably does not render her helpless. Thus, she can perform Bouncing Fish to make up a large horizontal distance, at the cost of some height and then quickly perform Vanish to regain height or cover additional ground. As Zelda and Sheik are now separate characters, Sheik can no longer take advantage of Zelda's longer recovery.
Custom specials: Gale is faster and goes slightly farther, but has no hitbox or wind box for protection. Abyss is slower and reduces the distance traveled, in exchange for the ability to meteor smash opponents. Jellyfish has little utility for recovery, due to sending Sheik flying downwards at a high speed towards the end of the move. Pisces bounces forwards faster and at a lower angle, and if it hits an opponent, it causes her to jump forwards instead of backward, potentially improving recovery. |
| Shulk | Shulk's main recovery tool is Air Slash, which gives him fair vertical distance but minimal horizontal distance. The first slash does not auto-sweet spot immediately unless the special button is pressed near the apex of the first slash, right when Shulk is level with a ledge. The move's second slash will give a slight momentum boost, especially if used as late as possible. Back Slash also gives a slight horizontal distance, although he will be stuck in the move until he lands. Additionally, Back Slash cannot grab ledges, which combined with its very quick descent speed, makes it a poor recovery option. He can also use Monado Arts to alter how he recovers: Jump will give him tremendous height on both regular jumps and increases the height of Air Slash's first slash, while Speed can boost his horizontal movement slightly. The Shield Art will lower his jumps and movement speed significantly, hindering his aerial movement.
Custom specials: Decisive Monado Arts makes accessing the Jump art off-stage for recovery much harder, since the Arts cannot be canceled (on top of lasting longer), and an additional second must pass to initiate an Art. Hyper Monado Arts can make said recovery easier, due to strengthened effects which still last just long enough. Back Slash Leap covers slightly more vertical distance and slightly less horizontal distance. Back Slash Charge covers much more horizontal distance and gives Shulk armor. Advancing Air Slash's second slash boosts Shulk forward, giving him more horizontal recovery potential, but also forces Shulk downwards slightly and doesn't gain as much height. The pause between each slash is also reduced. Dash Vision can propel Shulk forward, but all of his Visions have long end lag in mid-air, causing him to fall if not attacked. |
| Sonic | Sonic can now only use one Homing Attack before landing. Spring Jump grants less height.
Custom specials: Double Spring allows Sonic to use his Spring Jump twice, allowing Sonic to perform recovery mix-ups; however each spring bounces Sonic a much shorter distance. Stomp is useless for recovering due to sending Sonic downwards after the jump. Burying Spin Dash boosts Sonic's vertical recovery noticeably if immediately jumped out of. |
| Toon Link | Toon Link's recovery is largely unchanged from Brawl.
Custom specials: Sliding Spin Attack provides Toon Link amazing horizontal distance but sacrifices a lot of vertical distance, similar to Donkey Kong's up special Spinning Kong. Flying Spin Attack provides extra vertical distance than Spin Attack, but has less horizontal distance, along with armor during the upward slash. Time Bombs explode in 2 seconds rather than 5, making them more useful for recovering at lower percentages but have more knockback, which can cause unintentional self-destructs. Short-Fused Bombs take less than half a second to explode but deal slightly more damage and knockback. They also cannot be used in conjunction with Flying Spin Attack, due to the armor activating just before the bomb can detonate, thus still rendering Toon Link helpless. |
| Villager | Villager has the choice between Lloid Rocket and Balloon Trip for recovery. The former will give them no vertical height but excellent horizontal distance, and will not leave them helpless if they hits an opponent. The latter is an all-around solid recovery move, although it can easily be gimped if opponents pop one or both balloons and lack a damaging hitbox, making it unable to stop edgeguarding opponents.
Custom specials: Liftoff Lloid can be used for a damage-capable vertical recovery, but won't go as high as Balloon Trip could. Extreme Balloon Trip doesn't travel as fast or as far as Balloon Trip but has hitboxes on the exploding balloons. |
| Wario | Wario Waft covers much less height. However, Corkscrew covers more vertical distance and now automatically sweet spots ledges.
Custom specials: Speeding Bike grants more horizontal momentum. Burying Bike gives Wario minimal momentum in the air, sinks faster, and his leap off the bike is shorter. Widescrew has more control than the default Corkscrew but has minimal vertical distance. Corkscrew Leap goes noticeably higher, but has much more startup lag and lacks a hitbox. Rose-Scented Waft charges quicker but doesn't go as high. Quick Waft charges even more than the former but also gains even less height. |
| Wii Fit Trainer | Wii Fit Trainer's overall recovery is solid thanks to high normal jumps and slow fall speed. Super Hoop provides only moderate horizontal distance, but extreme vertical coverage if mashed perfectly, allowing Wii Fit Trainer to recover from near the bottom blast zone with Super Hoop alone. Header can also be used to provide a small boost both vertically and horizontally, which can allow Wii Fit Trainer to mix up the timing of her recovery somewhat. Wii Fit Trainer can also wall jump, giving her a recovery boost on stages with vertical undersides.
Custom specials: Jumbo Hoop swaps vertical reach for horizontal distance, only rising a moderate amount when mashed. Jumbo Hoop has a much larger attack range, deals heavy damage to opponents, lasts longer, and can even break shields. Hoop Hurricane rises even farther than Super Hoop when mashed, and has windboxes that pull opponents into the multi-hit attack, dealing a fair amount of damage. |
| Yoshi | Yoshi's recovery is largely unchanged from Brawl, but the horizontal distance from an Egg Throw was improved, though at the cost of vertical distance.
Custom specials: High Jump allows Yoshi to increase the vertical distance of his recovery, but it does not throw any eggs, making it easier to edgeguard. The move can technically be used for recovery three times, but the forced delay between usages makes Yoshi fall to the point where it won't be able to increase vertical distance after the first use. |
| Zelda | Zelda drifts slightly upward if the player holds the left stick up while activating Farore's Wind. This increases the potential range of the move, but can also lead to angling the move incorrectly if the drift was unintentional. In addition, the move has significantly greater damage and launch potential than it did in Brawl, and gains even more distance if used shortly after a double jump. As Zelda and Sheik are now separate characters, Zelda can no longer take advantage of Sheik's less predictable recovery. Nayru's Love is less effective for recovery.
Custom specials: Farore's Squall is a slower teleport that deals no damage, but has greater range and a windbox that pushes enemies away at the start and end, making edgeguarding more difficult. Farore's Windfall can only teleport straight up, removing what little versatility could be achieved from the other two versions, though it is faster and the emerging hitbox is a meteor smash, albeit with weak knockback. |
| Zero Suit Samus | Zero Suit Samus' new up special, Boost Kick is now a move that sends Zero Suit Samus upwards, like Super Jump Punch, as opposed to her tether recovery from Brawl. In addition to being a more reliable recovery move, it has also gained significant KO power, especially when the Zero Suit Samus player has rage. However, it has less range and height than Plasma Wire and renders Zero Suit Samus helpless after using it. Additionally, Flip Jump now covers much more vertical distance and can now spike opponents without pressing any buttons.
Custom specials: Plasma Dash grants Zero Suit Samus another horizontal recovery option, but it cannot grab ledges, making it situational to use when recovering (though her new grab aerial still allows her to tether). Lateral Kick covers much more horizontal distance, but less vertical distance. Shooting Star Flip Kick is a more vertical flip but the kick sends her much farther. Low Flip's flip covers much more horizontal distance but practically no vertical distance and the lack of intangibility leaves her more vulnerable. |
List of recoveries in Super Smash Bros. Ultimate[edit]
The return of directional air dodging from Melee once again improves the recovery potential of every character, to an even greater extent; directional air dodges no longer halt momentum, and while air dodging now has very high ending lag, it does not inflict helplessness. Most characters also have increased airspeed.
With the exception of the Mii Fighters, character customization does not return from Smash 4, so characters who had custom special moves that improved their recovery no longer have access to them.
| Character | Description |
|---|---|
| Banjo & Kazooie | The duo can perform two midair jumps like Charizard and Ridley. Shock Spring Jump offers decent height that slightly increases when charged, but grants little sideways movement and lacks a hitbox during the ascent. Wonderwing provides good horizontal distance and is invincible against most attacks, however using the move 5 times within a stock will cause the duo to stumble; this stumble animation moves the duo forward in the air, meaning it still can be used to extend their recovery without consuming other resources, but this is somewhat risky due to the move having no hitboxes or protection and somewhat long ending lag when used with no feathers. Neither moves put Banjo & Kazooie into their helpless state, so these moves can be used together along with their midair jumps and air dodge. Finally, the explosions from Rear Egg's grenade eggs can be used to regain the duo's recovery moves, much like Snake's C4. |
| Bayonetta | Witch Twist grants less height, takes longer to sweet spot ledges, and can no longer sweet spot ledges from behind at all. However, the reintroduction of directional air dodges gives Bayonetta an extra, somewhat useful recovery option. |
| Bowser | Whirling Fortress does not travel as far. |
| Bowser Jr. | Clown Kart Dash allows Bowser Jr. to keep his double jump when canceled. However, he can no longer air dodge out of it. |
| Byleth | Sword of the Creator is a very long-ranged tether recovery, but similar to the wall grapples in Melee it can grab onto walls and pull Byleth towards it (but up to a maximum of 3 times consecutively before landing), finally, if the move is used to latch onto opponents, Byleth will be pulled towards his opponents and jump off them. In addition to this, Byleth can also use a smash-inputted Areadbhar to gain some slight horizontal distance before using Sword of the Creator. |
| Captain Falcon | Falcon Dive travels farther and its horizontal recovery is no longer reduced when the move is reversed. Raptor Boost no longer inflicts helplessness if it hits an opponent, increasing its safety. |
| Charizard | Flare Blitz no longer snaps to the ledge until near the end of the move.
Having been reintegrated into Pokémon Trainer, Charizard can now use Pokémon Change in midair to take advantage of the other Pokémon for recovery. |
| Chrom | Soaring Slash is similar to Ike's Aether; Soaring Slash travels higher but Chrom does not throw the sword, making it slightly easier to intercept. Compared to Roy's Blazer, Soaring Slash goes much higher but gains extremely little horizontal distance. |
| Cloud | Climhazzard is no longer untechable, and the downward hit now sweet spots the ledge more reliably. |
| Corrin | Dragon Ascent travels further, but it now stalls at the end of the move. |
| Daisy | Being Peach's Echo Fighter, Daisy's recovery is practically identical: Daisy Parasol only grants protection during the ascent, but gains decent height and can allow Daisy to glide for immense horizontal distance. Daisy Bomber can also extend Daisy's horizontal recovery and deter edge guarders. She can also use her fighter ability, Float, to gain extra horizontal distance. |
| Dark Pit | Like with Pit, Dark Pit's Power of Flight can now grab the ledge when facing backward, but stalls upon completion, and he can now act out of Electroshock Arm if it connects with an opponent. |
| Dark Samus | Being Samus's Echo Fighter, Dark Samus's recovery is practically identical: Screw Attack grants decent height and protection but little horizontal distance. Bomb can be used to extend Dark Samus's horizontal recovery, and she can use her Grapple Beam as a tether recovery. |
| Diddy Kong | Rocketbarrel Boost gains less vertical distance, hampering Diddy Kong's recovery, though its horizontal distance appears unchanged. Monkey Flip also grants less distance. |
| Donkey Kong | Spinning Kong has decreased horizontal distance but increased vertical distance. |
| Dr. Mario | Dr. Tornado has slightly less endlag, making it more useful for recovery. However, Dr. Mario now has slower airspeed. |
| Duck Hunt | Duck Hunt can now act out of Duck Jump after enough time has passed, improving the move's safety. |
| Falco | Falco Phantasm doesn't travel as far and no longer passes through shields, hampering the move's safety. |
| Fox | Like Falco's Falco Phantasm, Fox's Fox Illusion covers less horizontal distance and can no longer pass through shields. Fire Fox's distance has also been reduced. |
| Ganondorf | Dark Dive has Ganondorf leap back much farther out of a throw, which noticeably makes it harder for him to return to the stage. Flame Choke can now be escaped and KO's Ganondorf first if used as a sacrificial KO. |
| Greninja | Hydro Pump can now be ledge canceled and no longer causes Greninja to lose its double jump if hit out of it. The move also now has an arrow pointing in the direction Greninja is moving. |
| Hero | Woosh is Hero's main recovery, a tornado that launches opponents and lifts the Hero a short distance. The move can be charged to become Swoosh and Kaswoosh, each significantly increasing the move's recovery distance as well as the tornado's size. When using Command Selection, Zoom will have the Hero jump extremely high into the air offscreen (provided that there is no ceiling) and back onto the stage, and Acceleratle will increase Hero's movement speed and jump height. All of these moves will use up the Hero's MP meter; he will be unable to use these moves if he doesn't have enough MP, with Woosh only granting a slight vertical boost similar to Robin's Elwind. |
| Ice Climbers | Belay travels slightly farther and is more controllable when used by a solo climber. When used by both climbers, the move travels farther vertically but shorter horizontally, and the partner's hitbox can now be out prioritized. Squall Hammer doesn't travel as high when mashed and no longer snaps to the ledge. |
| Ike | Aether no longer causes Ike's sword to pass through the floors of stages, hindering its safety when used near ledges. |
| Incineroar | Cross Chop grants decent vertical distance but little horizontal distance, though the diagonal trajectory of the descent grants more horizontal recovery than similar moves like Ike's Aether or Chrom's Soaring Slash. Alolan Whip can also be used to extend Incineroar's horizontal recovery, as the move halts its momentum and doesn't cause helplessness. |
| Inkling | Super Jump grants impressive height and solid horizontal distance. The move deals minor damage on startup and on landing, but the flight itself does not deal damage. Splat Roller can slightly extend Inkling's horizontal recovery and gives an extra jump. |
| Isabelle | Balloon Trip is practically identical to Villager's variant of the move; Isabelle travels very high and far, but the move deals no damage, travels shorter than Villager's version of the move, and can be intercepted by popping the balloons. She can also use Fishing Rod as a tether recovery. |
| Ivysaur | Vine Whip can now be used repeatedly and no longer causes helplessness, and can also be angled, though it can no longer be performed out of an air dodge.
Ivysaur also benefits from the new ability to use Pokémon Change in midair, allowing Ivysaur to take advantage of Pokémon Trainer's other Pokémon for recovery. |
| Jigglypuff | Pound has reduced ending lag, increasing the move's effective recovery potential. Jigglypuff can once again steer during Rollout's freefall if it hits an opponent like in Brawl, and can now grab the ledge during this freefall state. |
| Joker | Grappling Hook is Joker's primary recovery move, a diagonal tether recovery with a good distance similar to Ivysaur's Vine Whip. The dodges from his Gun move can be used to gain some horizontal distance before using the Grappling Hook. When Arsène is summoned, the Grappling Hook is replaced with Wings of Rebellion, a very high jump similar to Pit's Power of Flight; this move cannot be angled as sharply, but instead grants intangibility during startup. |
| Kazuya | Alongside a unique double jump that goes further than most, Kazuya's main recovery move is Devil Wings, his up special. In spite of its ending lag, this move does not render him helpless meaning he can perform an airdodge after. Devil Wings can slightly steer him left or right as well as damage nearby opponents. Kazuya can also use Devil Fist as a short ranged horizontal recovery, but its usage is mutually exclusive with Devil Wings. |
| Ken | Being Ryu's Echo Fighter, Ken's recovery is very similar: Shoryuken is his primary recovery move, traveling a decent height but granting little horizontal distance. He can also use Focus Attack and Tatsumaki Senpukyaku to extend his horizontal recovery, and Hadoken can halt his momentum when falling. Compared to Ryu, Ken's Heavy Shoryuken travels a little farther horizontally, but the multi-hit nature and reduced distance of his Tatsumaki Senpukyaku make it less safe to use. |
| King Dedede | Super Dedede Jump now snaps to the ledge when reversed. |
| King K. Rool | Propellerpack travels very high (although not necessarily far horizontally) which is unusual for someone of his weight class, and the damaging propeller grants some protection from meteor smashes and stage spikes. King K. Rool can also use his up aerial as an impromptu double jump in niche situations such as being launched very high and surviving, as K. Rool's recovery is geared towards going low. |
| Kirby | Kirby's recovery is largely unchanged from Smash 4. |
| Link | Remote Bomb can be detonated manually after Z-dropping, making bomb recovery easier. However, the Remote Bomb cannot be detonated if Link is helpless, and Link no longer has a tether recovery due to the loss of his Hookshot. |
| Little Mac | Jolt Haymaker no longer inflicts helplessness, allowing Little Mac to use Rising Uppercut afterward and thus improving his recovery distance overall. However, it can only be used once even if Little Mac is hit out of it, hindering its already poor safety. |
| Lucario | Extreme Speed has less end lag and landing lag and now has a hitbox when it crashes into a surface, but it now stalls at the end and is somewhat more awkward to control. |
| Lucas | PK Thunder, along with many other moves, now has arrows pointing in the direction he will get launched. The window for using PK Thunder again after bouncing off a wall has increased, but the move carries less momentum than before, slightly reducing its distance. Additionally, Lucas's air dodge gives him the highest momentum and longest distance of all air dodges in the game, tied with Ness. |
| Lucina | Lucina's recovery is largely unchanged from Smash 4. |
| Luigi | Luigi Cyclone grants much less height when mashed, eliminating the move's usefulness as a recovery tool aside from stalling tactics. However, Green Missile and Super Jump Punch provide more distance in their respective directions. |
| Mario | Super Jump Punch does not sweet spot the ledge as early as it did in Smash 4, making Mario's recovery less safe overall. |
| Marth | Like his clone Lucina, Marth's recovery is largely unchanged from Smash 4. |
| Mega Man | Mega Man's recovery is largely unchanged from Smash 4. |
| Meta Knight | Shuttle Loop, Dimensional Cape, and Mach Tornado all travel farther than before. |
| Mewtwo | Confusion halts Mewtwo's horizontal momentum, largely eliminating the move's use for recovery. |
| Mii Brawler | Burning Dropkick can no longer be charged, significantly reducing its maximum travel distance. Feint Jump's kick now sends Mii Brawler downwards, reducing its recovery. Soaring Axe Kick travels slightly higher and can now sweet spot the ledge during its ascent; the second hit now has to be initiated manually much like Climhazzard, allowing Mii Brawler to drift farther horizontally for recovery.
Suplex travels farther horizontally than Headache Maker did, but KO's the Mii Brawler first if used as a sacrificial KO. Onslaught has more reach than Suplex, but is much slower to start and doesn't sweetspot the ledge. Thrust Uppercut travels diagonally and can be angled slightly, making it more useful for recovery than Piston Punch. Helicopter Kick travels more horizontally than any of his other up-specials, allowing him to recover from further offstage in exchange for depth. |
| Mii Gunner | Lunar Launch travels much higher, but its aerial drift is reduced from Smash 4. Arm Rocket can now be angled during flight, similar to Diddy Kong's Rocketbarrel Boost.
Cannon Jump Kick's horizontal recovery is even worse than Cannon Uppercut. |
| Mii Swordfighter | Airborne Assault can no longer be charged, but it travels farther than it did in Smash 4 when uncharged and no longer leaves Mii Swordfighter helpless. Stone Scabbard travels higher, grants more horizontal momentum, and can now sweet spot ledges from behind.
Gale Stab now slows down if it hits an opponent, making it slightly less safe to use against active edge guarders than Slash Launcher. |
| Min Min | Outside of her double jump and air dodge, Min Min is limited to using only ARM Hook for her recovery. It is a long ranged tether recovery similar to Ivysaur's Vine Whip, Joker's Grappling Hook, and Byleth's Sword of the Creator. |
| Mr. Game & Watch | Mr. Game & Watch's recovery appears largely unchanged from Smash 4. |
| Mythra | Mythra's main recovery move is Ray of Punishment. It covers a mediocre vertical distance, and causes Mythra to stall at the end. After the move is completed, Mythra can drift horizontally to cover more distance. Additionally, Mythra's air dodge gives her more distance than the majority of fighters, making it a better option than usual.
Photon Edge can be used to recovery horizontally, but it leaves Mythra vulnerable at the ledge due to not sweetspotting it and having to wait a bit before being able to grab it after the move's last hit comes out. The move also leaves her helpless should she recover high. Mythra can also Swap to Pyra in order to use her recovery. |
| Ness | Similar to Lucas, Ness's PK Thunder now has an arrow pointing in the direction he will get launched. PK Thunder itself travels farther and has greater intangibility, and the window for reusing the move after bouncing off a wall has lengthened. Additionally, Ness's air dodge gives him the highest momentum and longest distance of all air dodges in the game, tied with Lucas. |
| Olimar | Winged Pikmin travels less distance with consecutive uses. |
| Pac-Man | Pac-Jump can now be attacked by opponents to reduce its remaining uses, hindering the move's safety. |
| Palutena | Palutena's recovery is largely unchanged from Smash 4. |
| Peach | Toad now halts Peach's movement when used in midair, worsening the move's recovery potential. However, Peach can now control her drift sooner after using Peach Bomber. |
| Pichu | Agility travels farther, and now has an arrow pointing in the direction Pichu will move. |
| Pikachu | Similar to Greninja and Pichu, Pikachu's Quick Attack now has an arrow pointing in the direction it will move. |
| Piranha Plant | Piranhacopter gains respectable height, can be steered left or right to instead cover a far horizontal distance, and provides decent protection to Piranha Plant's sides. |
| Pit | Power of Flight can now grab the ledge even if Pit is facing backward, but the move now stalls on completion, reducing its distance. Upperdash Arm can now be acted out of if it hits an opponent. |
| Pyra | Prominence Revolt has a rising hit, followed by a falling hit, similar to Mii Swordfighter's Stone Scabbard. The move covers an average vertical distance and has almost no horizontal movement. Pyra is able to grab the ledge from deceptively low at the apex of the move. Pyra can also Swap to Mythra in order to use her recovery. |
| R.O.B. | Robo Burner can now be canceled into an air dodge, and now R.O.B's chassis has a gauge showing how much fuel the move has left. |
| Richter | Being Simon's Echo Fighter, Richter's recovery is practically identical: Uppercut grants little distance but decent protection, and he can use forward aerial, up aerial, or back aerial as a tether recovery. |
| Ridley | Like Charizard, Ridley can perform two midair jumps. Wing Blitz is Ridley's primary recovery move, allowing him to fly in four directions, similar to Fire Fox. However, Ridley cannot travel diagonally and the move has a rather long startup. Space Pirate Rush can be used to extend his horizontal recovery and can function as a sacrificial KO if he grabs an opponent. |
| Robin | Elwind travels higher and can now be angled, allowing Robin to travel farther horizontally as well as making their recovery less linear overall. While the move depletes after fewer uses, it recharges more quickly and can now be used even when depleted, granting a small boost upward that doesn't cause helplessness. |
| Rosalina & Luma | Rosalina & Luma's recovery is largely unchanged from Smash 4. |
| Roy | Blazer travels farther, but the first half of the attack no longer sweet spots the ledge. |
| Ryu | Shoryuken does not snap to the ledge as early as before. |
| Samus | Samus's recovery appears largely unchanged from Smash 4. |
| Sephiroth | Sephiroth can aim Blade Dash / Octaslash in any direction. Blade Dash is achieved by tapping the special button, while Octaslash is activated by holding the button. Blade Dash will always immediately snap to the ledge, but has a weak and small hitbox. Octaslash, which takes longer to activate and travels slightly farther than Blade Dash, usually overshoots to above the ledge, but has a large hitbox that hits multiple times. Also, Sephiroth's forward aerial can penetrate the side of a stage and hold him in the air briefly, allowing him to jump afterwards for additional vertical distance or feint his opponents. If Winged Form is active, Sephiroth will acquire an extra midair jump and improved air speed and acceleration, improving his recovery. |
| Sheik | Sheik's recovery appears largely unchanged from Smash 4. |
| Shulk | The ability to select Monado Arts more quickly allows Shulk to access his Jump Art more easily for recovery. However, the Arts themselves were reworked to function like the Hyper Monado Arts custom move from Smash 4; the Jump Art now has a longer cooldown and shorter duration, and makes Shulk even more vulnerable to damage. Speed Art further reduces Shulk's jump height, making the Art even worse for vertical recovery.
Back Slash can now snap to ledges after some time and can be steered by holding left or right. Air Slash now snaps to the ledge on the first swing instead of the second, but is less reliable at ledge snapping overall. |
| Simon | Uppercut gains little height and almost no horizontal distance, but provides good protection to Simon's top and front. Simon can also use his forward aerial, back aerial, and up aerial as a tether recovery, with his up air attack granting less reach than the others. |
| Snake | Cypher can now be destroyed, reducing the safety of Snake's recovery. However, due to the reintroduction of directional air dodges, Snake can use his air dodge to grab the ledge and Cypher's lingering hitbox can cover his air dodge. The recovery is not interrupted if Snake is hit instead. |
| Sora | If Sora's long, floaty jumps are not enough to return, Aerial Sweep can provide even more height while the direction can be influenced left or right during the ascent. If Sora still is unable to return, he can use Sonic Blade immediately after the peak of Aerial Sweep, which can lock on the closest edge. However, Sora will then become helpless, leading to a self destruct if he does not connect with an edge or is not above a floor. |
| Sonic | Spring Jump travels higher, but provides much less intangibility. Homing Attack can be activated much more quickly and is more accurate, possibly improving its recovery potential against reckless edge guarders. |
| Squirtle | While Squirtle's recovery by itself is largely unchanged from Brawl, Pokémon Change can now be used in midair, allowing Squirtle to take advantage of Pokémon Trainer's other Pokémon for recovery. |
| Steve | Elytra gives Steve a short boost in any direction before transitioning into a glide, similar to the technique in Brawl. The move grants excellent horizontal distance but mediocre vertical distance and only features a weak hitbox near the start of the move.
Minecart acts as a horizontal recovery with decent protection, can reverse Steve's orientation midair regardless of whether the cart is actually created, and provides an extra double jump if it does successfully activate. Create Block can also be used near the stage to restore Steve's double jump. Dropping TNT grants Steve a small vertical boost comparable to that of his double jump. Although these three actions require resources to use (with the exception of Minecart reversing his midair orientation), if they are used properly it is possible for Steve to recover from the bottom blast line. |
| Terry | Rising Tackle is Terry's primary vertical recovery option. It grants very short horizontal distance and is hard to sweet spot ledges with, but if ↓ is briefly held before doing the move's input, Terry will become intangible and travel slightly farther than the standard version. Power Wave can be used to halt Terry's momentum. Power Dunk provides some vertical lift and doesn't cause helplessness, but its downward trajectory makes the move impractical for recovering low and the move cannot sweet spot the ledge.
Terry can also use Burning Knuckle or Crack Shoot to recover horizontally; Burning Knuckle provides better protection while Crack Shoot is faster and more difficult to interrupt due to its arcing trajectory. Neither move renders Terry helpless, but only one of these moves can be used when recovering, neither move can be used more than once without landing or getting hit, and neither move can sweet spot the ledge. If Terry is facing away from the ledge, the stick can be held toward the ledge to perform a reverse Crack Shoot; if the move is inputted too quickly, Crack Shoot will be performed away from the ledge, likely resulting in a self destruct. |
| Toon Link | Spin Attack retains more horizontal momentum near the end of the move. |
| Villager | Balloon Trip recharges helium more slowly, and will only spawn one balloon if their helium is too low, making the recovery slower and more vulnerable to edgeguarding. |
| Wario | Wario Bike now has a 6-second cooldown between uses, reducing its safety. |
| Wii Fit Trainer | Super Hoop has a notably reduced maximum vertical distance, although it is now much easier to achieve a perfect mash. |
| Wolf | Fire Wolf grants much less distance, but Wolf Flash can now be slightly angled. |
| Yoshi | Egg Throw's first use grants much more height. |
| Young Link | Spin Attack travels higher, preserves more momentum, and can now be steered left or right. |
| Zelda | Farore's Wind travels a shorter distance, but travels faster and allows Zelda to drift much sooner after the move completes. Din's Fire no longer causes helplessness, slightly improving Zelda's horizontal recovery. |
| Zero Suit Samus | Plasma Whip's tether is slower and shorter in range. |
Super Smash Bros. for Wii U digital manual description[edit]
"Even if you've been launched away from the stage, you can use your jumps and other moves to try to return. Never give up!"
Gallery[edit]
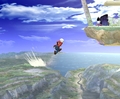
Mario's Super Jump Punch recovery in Brawl.

Olimar's Pikmin Chain recovery in Brawl.
Peach's Peach Parasol recovery in Brawl.
Kirby recovering on Dream Land in Smash 64.
Mario using his various recovery options to recover onto the stage in Melee. (In order of: Midair jump, Super Jump Punch, wall jump, Cape, Mario Tornado, Super Jump Punch) This is a TAS clip from Perfect Control.


Trivia[edit]
- Meta Knight is the only character to have all four of their special moves grant some form of recovery momentum.
- Yoshi's Egg Throw (in SSB64 and Melee) and Jigglypuff's Sing are the only up special moves with no recovery usage.