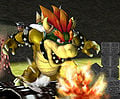
Bowser (SSBM)
| Bowser in Super Smash Bros. Melee | |
|---|---|
 .svg)
| |
| Universe | Mario |
| Other playable appearances | in Brawl in SSB4 in Ultimate |
| Availability | Starter |
| Tier | F (26) (North America) H (24) (Europe) |
Bowser (クッパ, Koopa), is a character in Super Smash Bros. Melee and is available from the start. Announced at E3 2001, Bowser was added to the game because he won the official poll of desired newcomers for a potential second Smash game with 169 votes, by a wide margin over the runner-up, Princess Peach.[1] A stronger form of Bowser, named Giga Bowser, also appears as the true final boss of Adventure Mode.
Similar to Donkey Kong, Bowser has no voice actor; instead, his voice clips consist of realistic monster roars repurposed from the Universal Studios Sound Effects Library. Some of these voice clips were also used for his appearance in Mario Kart 64 and Super Mario 64.
Bowser is ranked dead last on the current Melee tier list — 26th out of 26 characters, in the F tier, alongside Kirby — marking his worst placement in the series. Bowser has some of the strongest attacks, both in raw damage output and KO potential, while a couple of his moves are outstanding for other reasons. His grounded up special, Whirling Fortress, as well as his <100% edge attack, are among the best in the game, and make up the bulk of his optimal playstyle. Additionally, Bowser can survive to very high percents due to his unmatched weight and rather high falling speed.
Two great moves and endurance, however, do not make a viable fighter, especially with such harsh weaknesses. Bowser's most crushing downside is his insanely long jump squat, which is unparalleled in its slowness and makes wavedashing an ineffective tool for movement, while also making it difficult to avoid incoming attacks and telegraph any attempt to go airborne. He suffers due to his large size and above-average falling speed, which makes him extremely easy to combo. His moves are burdened with sluggish frame data, and his approach is among the worst in the game, with laggy aerials, the aforementioned slowest jump squat in the game, and a slow, short-ranged projectile. Even the endurance granted by Bowser's immense weight is largely negated by his recovery, which is predictable, easy to intercept, and lacking in vertical distance.
With much of the cast being able to easily camp, edgeguard, and overwhelm Bowser with their superior mobility and movesets, he has many difficult matchups, miniscule representation, and poor tournament results, with Loadspiller and WarriorKnight being among the only players who have found any success with him in competitive play.
Attributes[edit]
Bowser acts as the game's primary "slow, but powerful" fighter; other equally heavy and powerful characters, such as Ganondorf and Donkey Kong, are of considerably higher speed than Bowser in a variety of ways. Bowser has an average dashing speed, above-average falling speed, below average air speed, below average traction and the slowest initial dash. These characteristics also give Bowser a very slow wavedash, which for him is a situational tool that can often serve better for wavelands.
Bowser's greatest strength is his raw damage output and KO potential. Many of his attacks are the strongest of their kind, and their damage output can reach ludicrous levels; his down tilt, for example has the second highest damage output of any tilt (only behind Ganondorf's up tilt), dealing a potential 22% if both hits connect. As a result of this high damage output, Bowser possesses numerous finishing options, with all of his tilts, smash attacks, forward, back, and up aerials, Koopa Klaw command grab, Whirling Fortress, and Bowser Bomb being KO moves. In addition to their high power, Bowser's attacks also have very large hitboxes, granting a more threatening offensive presence.
In addition to this, Bowser has a surprisingly high amount of tricks that can be used to aggravate opponents. One of Bowser's most versatile moves takes form as his up special, Whirling Fortress. In addition to acting as a combo breaker due to its extremely quick start-up and intangibility frames, it also serves as a very strong out of shield option, and a substitute to Bowser's poor defensive roll. Bowser is also surprisingly proficient at edgeguarding, despite his sluggish movement. He can quickly grab the ledge while using his Whirling Fortress off the side of the stage (known as Fortress Hogging), and can knock recovering enemies back offstage with his <100% ledge attack, which is one of the best ledge attacks in the game, due to its speed and range (although his >100% ledge attack is much worse). Meanwhile, his forward aerial is one of his fastest and farthest-reaching attacks, while his back aerial is a semi-spike, giving him two more useful tools to gimp opponents.
Bowser's great strength comes at the cost of speed, however. Though his dashing speed is decent, he has poor air speed, the slowest walking speed, the slowest jump in the game (a dismal 8-frame jump squat) and an awful wavedash. Fire Breath is also tied with Zelda's Din's Fire and Kirby's Final Cutter for possibly the worst projectile in the game; with high startup and ending lag, short reach for a projectile, and a gradual loss of power, it is almost completely useless outside of edgeguarding very linear recoveries (and even then Bowser already has much better edgeguarding options). His aerial approach is of equally poor quality, due to his aforementioned slow jumping speed and sluggish aerials. These deficiencies give Bowser perhaps the worst neutral game of the entire cast.
Bowser's poor neutral game is exacerbated by poor defensive options; his only good one is the aforementioned Whirling Fortress, as all of his other defensive options are among the worst in the game. With a small shield that invites shield stabbing, as well as slow dodges, Bowser has very few ways to relieve pressure. He also has almost no options against projectiles, due to his massive hurtbox, bad mobility, and lack of an effective projectile or reflector of his own, other than powershielding, which he has generally very slow follow ups from. Many of Bowser’s attacks, despite having large hitboxes, also tend to have surprisingly short range (especially for a character of his size) due to poor hitbox placement. Finally, Bowser's attacks have notoriously sluggish frame data, and are easy to punish. As a result, Bowser has trouble comboing opponents, and his poor approach options and the extreme lag in his moves make him reliant on reads to land his finishers.
While Bowser does have high endurance due to being the heaviest character in the game, it is offset by his extreme susceptibility to getting comboed. Most of the Melee cast can easily combo, juggle, and chain grab him, with very little chance for Bowser to escape, bringing him to KO percent quickly despite how high his KO percent may be. His slow and predictable recovery also hampers his survivability; while Whirling Fortress is a great move, it is a very poor recovery, granting very low vertical distance. This means Bowser must rely on the short vertical distance he gets to go above the ledge, which makes it very predictable. This also makes meteor smashes and spikes extremely threatening to Bowser, as characters with reliable spikes (such as Falco and Marth) can easily gimp him. Bowser's recovery is further hampered by his poor air speed and his lack of alternate recovery options.
Bowser's lack of fast, consecutive, low-knockback moves gives him a very shallow combo game; most of his combos require precise timing and L-cancelling, and even then, these combos are limited to two or three hits, often only working if the opponent DIs poorly, with the finishing hit seldom leading to a KO. Bowser's slow movement on both the ground and in the air also prevent him from easily pursuing foes after they have been knocked back, leading to a playstyle mostly centered on stage control and ledge mechanics, with opponents easily out-maneuvering approaches, and being able to punish Bowser's over-extentions. Moreover, Bowser's best KO options are inherently risky at all levels of play.
Overall, Bowser is a resoundingly ineffective character competitively, with his few advantages, and several crippling weaknesses. His great power is masked by his bad neutral game and frame data, and his high survivability is greatly dampened by his poor defense game and very large size. He also lacks the arsenal of safe moves and movement that high-tier characters have, and therefore often resorts to a stray hit and edgeguarding-centric game plan, with Whirling Fortress often being the only reliable move under pressure. As such, he very rarely sees representation in competitive play, and a multitude of hard reads and punishes are expected from Bowser players to even hold equal footing with viable characters in the cast.
Version history[edit]
Bowser was slightly buffed in the PAL version of Melee. The issue regarding his down throw was fixed, and he is slightly heavier in weight. However, prior to NTSC 1.02, he had access to Flame canceling, resulting in a bit of a nerf to him overall in both the NTSC 1.02 and PAL versions. Overall, while he is mildly less dysfunctional in the PAL release, Bowser is still undeniably a nonviable choice competitively.
NTSC 1.02
 Bowser can no longer perform Flame canceling.
PAL
 Bowser is one unit heavier (117 → 118).
 Down throw is no longer weight dependent.
- As a result, it now properly hits Jigglypuff and Mr. Game & Watch.
Moveset[edit]
For a gallery of Bowser's hitboxes, see here.

| Name | Damage | Description | ||
|---|---|---|---|---|
| Neutral attack | Left Scratch (左ひっかき) Right Scratch (右ひっかき) |
5% | Bowser slashes with his left claw, and then his right claw. Resembles a swiping action he performs in Super Mario 64. Noticeable KO potential at higher percentages, being the third most powerful jab in the game. | |
| 6% | ||||
| Forward tilt | ↗ | Koopa Knuckle (クッパ裏拳, Koopa Backfist) | 13% (fist), 15% (arm) | Bowser leans forward and throws a backhanded punch. Has a bit of start up lag and little range, but it has fairly good knockback for a tilt. In fact, it is the most powerful forward tilt in Melee. Can be aimed up or down. The attack is based on the second hit of his Drill Claw attack in Super Mario RPG: Legend of the Seven Stars. |
| → | 12% (fist), 13% (arm), 14% (body) | |||
| ↘ | 11% (fist), 13% (arm) | |||
| Up tilt | Ceiling Scratch Floor (天井ひっかき, Ceiling Scratch) | 13% | Swats the air above him with his left claw. Has good knockback and can be good for setting up a follow up, though it generally only hits opponents above him. It is the second strongest up tilt in Melee, surpassed by Ganondorf's. | |
| Down tilt | Scratch (よせあつめひっかき, Mish-Mash Scratch) | 13% (hit 1), 10% (hit 2) | Bowser slashes along the ground with his claws. Oddly, despite having two separate hits, they cannot link together past very low percentages and the first hit is stronger. The first hit is one of the stronger down tilts in the game and can KO at higher percentages. | |
| Dash attack | Horn Charge (コンボイタックル, Convoy Tackle) | 11% (clean), 8% (late) | Bowser charges forward. Decent knockback at low percents, but cannot KO at very high percents and can be punishable due to startup and ending lag. | |
| Forward smash | Hammer Head (ブルヘッド, Bull Head) | 24% | Bowser rears back for a short moment and headbutts with force. It deals incredibly high damage and knockback, though suffers from a lot of lag in general. It is the strongest single-hit smash attack in the game and KOs at around 18-38% when fully charged. | |
| Up smash | Shell Shock (ライジングスパイク, Rising Spike) | 20% (leap), 12% (landing) | Bowser thrusts his shell upward from a jump and hits the opponent with the spikes. A powerful attack with a rather long-lasting hitbox. Bowser has a smaller hitbox inside his shell that does 17% damage, but it rarely connects due to overlapping the bigger hitbox. Bowser's himself is intangible the moment he jumps off the ground. | |
| Down smash | Buzzsaw (バズソー) | 2% (hits 1-6), 10% (hit 7) | Bowser spins around in his shell, doing great damage with multiple hits from his spikes. Subpar range, can be DI'd out of, and has noticeable ending lag, but still powerful nonetheless. Combos into itself and up smash on fast-falling characters, as well as other moves. | |
| Neutral aerial | Gyroscope (ジャイロスコープ) | 13% | Bowser spins around in his shell, similarly to down smash. Low knockback, but long duration. | |
| Forward aerial | Jump Slash (ジャンプひっかき, Jump Scratch) | 14% (left claw), 12% (left arm), 11% (right shoulder) | Bowser slashes forward in midair. It has good knockback, range and good damage output throughout, which makes it a rather viable zoning, edgeguarding and KOing option. It is one of his better moves. Despite its name, the move uses the punch SFX and lacks the slash effect. | |
| Back aerial | Spike Stretch (スパイクボンバー, Spike Bomber) | 13% (clean), 9% (late) | Bowser thrusts his shell backwards. It is a viable edgeguarding option due to being a semi-spike. Has sex kick properties. | |
| Up aerial | Horn Toss (ヘディング, Heading) | 17% | Bowser whips his head above him horizontally. It is the slowest, but also the strongest up aerial in the game. It can KO reliably at ~100%+, and even earlier on lighter characters. It can be an effective tool for hard punishes on opponents above him. | |
| Down aerial | Scrub Brush (スクラブブラシ) | 3% (hits 1-9), 2% (landing) | Bowser retreats into his shell and spins while facing upside-down. Does a lot of damage if all hits connect, but has low knockback, the hits don't reliably connect, and can lead to a self-destruct if used offstage due to its long duration and Bowser's weak recovery. It has a landing hitbox. | |
| Grab | Grab (つかみ) | — | Bowser's dash grab reach is much better, so jump-canceled grab's are typically avoided. Bowser also gets a unique advantage on his grab release, being actionable much sooner than normal, which allows for a true re-grab follow up, though an airborne grab release escape evades this. This also applies to his command grab release (though not to re-grabbing with the command grab). | |
| Pummel | Bull Horns (つかみヘッドバット, Grab Headbutt) | 3% | Headbutts the foe. Moderately slow. | |
| Forward throw | Catapult (スリングショット, Slingshot) | 10% | Bowser throws his foe forward. Can act as a potential KO move at high percentages. | |
| Back throw | Reverse Throw (バックスルー, Back Throw) | 10% | Bowser throws his foe backwards. | |
| Up throw | Blender (フレッシュミキサー, Fresh Mixer) | 1% (hits 1-8), 2% (throw) | Bowser throws his foe upward a short distance and on his shell, doing damage to the opponent while spinning. Has set knockback and can chaingrab fastfallers. It can also set up a tech chase scenario on platforms. | |
| Down throw | Bowser Slam (ヘビープレス, Heavy Press) | 12% (hit), 0% (throw) | Bowser throws his foe on the ground and body slams them. It has a hitbox which lasts for one frame and deals a rather high 12%. The throw itself deals no damage. Can set up a tech-chase. In NTSC versions of the game, the throw is weight dependent. This makes the throw not deal any damage against Jigglypuff or Mr. Game & Watch, because they are a certain weight, where the down throw animation plays at a speed where it skips the frame the hitbox comes out on (frame 47). In the PAL version, the throw was made weight independent, so it plays at the same speed, and works properly against the entire cast. It can also set up a tech chase scenario. | |
| Forward roll Back roll Spot dodge Air dodge |
— | — | ||
| Techs | — | — | ||
| Floor attack (front) Floor getups (front) |
6% | Bowser leaps forward to strike with his head, then back to kick behind, and finally gets up into standing position. | ||
| Floor attack (back) Floor getups (back) |
12% | Bowser gets up while swinging his right hand around. | ||
| Edge attack (fast) Edge getups (fast) |
8% | Quickly spins onto the stage, then retreats back a bit. Can knock opponents back off stage and cover a large portion of smaller stages. The best ledge attack in the game. One of his best moves. | ||
| Edge attack (slow) Edge getups (slow) |
10% | Slowly climbs onto the stage and does a quick claw swipe. It is considerably worse than his other edge attack, so it is crucial to be aware when he reaches 100% or higher and does this instead. | ||
| Neutral special | Fire Breath | 2% | Bowser lets out a stream of fire that weakens over time. The move has a lot of start up lag, and is really only useful for edgeguarding to rack damage. However, it can be cancelled by using a technique called a Flame Cancel in versions 1.0 and 1.01. This attack has transcendent priority. | |
| Side special | Koopa Klaw | 12%/10% (slash), 4% (bite capture), 3% (bite pummel), 5% (release), 15% (forward throw), 4% (forward throw collateral), 11% (back throw) | Bowser does a claw swipe. It command grabs enemies that are close, while it hits and launches opponents that are farther away. Foes can escape this move in the same way they can escape grabs: by rolling the control stick. The forward throw awards more damage, while the back throw has higher knockback. The attack hitbox has transcendent priority. The command grab can be an effective combo and KO tool. Can be used off the edge above the blast zone to Bowsercide. | |
| Up special | Whirling Fortress | Ground: 13% (clean), 5% (mid), 3% (late) Air: 10% (startup), 3% (loop early), 2% (loop late) |
Bowser retreats into his shell and spins. A recovery move with very little start up. The attack has great knockback when used on the ground, and in the air, it is good for racking up damage. The attack hits once on the ground, but multiple times in the air. It's horizontal recovery is good, but does not cover much vertical distance. Can be used to grab the ledge quickly when grounded facing either direction. Great out of shield and can trade attacks favorably. One of his best moves. | |
| Down special | Bowser Bomb | 21% (drop), 8% (landing) | If used on the ground, Bowser jumps up into the air, then plummets back down to the ground, damaging anyone who's in the way. If used in the air, the move functions the same, except there is no initial jump. The shockwave on the ground can damage nearby opponents. This move is a stall then fall move. Can be an effective ledge grabbing tool from high above, similar to Yoshi Bomb. | |
Stats[edit]
NTSC
| Stats | Weight | Dash speed | Walk speed | Traction | Air friction | Air speed | Air acceleration | Gravity | Falling speed | Jumpsquat | Jump height | Double jump height | Empty landing lag |
|---|---|---|---|---|---|---|---|---|---|---|---|---|---|
| Value | 117 | 1 – Initial dash 1.5 – Run |
0.65 | 0.06 | 0.01 | 0.8 | 0.02 – Base 0.03 – Additional |
0.13 | 1.9 – Base 2.4 – Fast fall |
8 | 31.57 - Base 10.66 - Short hop |
28.77 | 6 |
PAL
| Stats | Weight | Dash speed | Walk speed | Traction | Air friction | Air speed | Air acceleration | Gravity | Falling speed | Jumpsquat | Jump height | Double jump height | Empty landing lag |
|---|---|---|---|---|---|---|---|---|---|---|---|---|---|
| Value | 118 | 1 – Initial dash 1.5 – Run |
0.65 | 0.06 | 0.01 | 0.8 | 0.02 – Base 0.03 – Additional |
0.13 | 1.9 – Base 2.4 – Fast fall |
8 | 31.57 - Base 10.66 - Short hop |
28.77 | 6 |
Announcer call[edit]
English
Japanese
Taunt[edit]
- Rears his head back and roars.

|
Idle pose[edit]
- Similar to his taunt, only slower. Leans back and roars, exhaling steam from his mouth.

|
|---|
Crowd cheer[edit]
| Cheer (International) | Cheer (Japanese) | |
|---|---|---|
| Cheer | ||
| Description | Bow - ser! Bow - ser! | Kooooo - pa! |
Victory poses[edit]
- Steps forward, builds up a little, and roars.
- Takes two steps forward while swiping with his claws twice.
- Spins around in his shell and comes out roaring.
 |
 |

|
|---|
In competitive play[edit]
Most historically significant players[edit]
- See also: Category:Bowser players (SSBM)
 62-bit Hero - Formerly known as Gimpyfish, the most renowned Bowser player of the MLG era, and primary innovator of the character. Returned to the community through Netplay upon the release of Project Slippi, but has yet to compete on a large scale again.
- Arash - Considered to be one of the best Bowser players during the Golden Age. Placed 9th at MLG San Francisco 2005 and 13th at MOAST 3, the latter being possibly one of the highest Bowser placements seen at a major tournament in Melee, though it is unclear how much Bowser was used, as he also played Jigglypuff. He eventually switched to solo-maining Jigglypuff before retiring in 2007.
- DJ Nintendo - Was considered the best Bowser player in the world and one of the best Bowser players of all time. Placed 13th at MLG Long Island 2007 with solo-Bowser, and used him as a secondary in his placements of 13th at both Apex 2009 and the major Zenith 2013. His set win over Ryan Ford is considered the best win by a Bowser player in the game's competitive life. However, he mostly played other characters, primarily Fox, after the end of the MLG era, and would also later become inactive following sexual misconduct allegations.
- Loadspiller - Originally starting out as an Ice Climbers player, he switched to Bowser during the Slippi metagame, and is now considered one of the best Bowser players in the world in the post-Slippi metagame, alongside WarriorKnight, and remains the undisputed best since 2023. To date, he is the only solo-Bowser player to ever make top 64 at a supermajor, doing so at Tipped Off 15: Connected, placing 49th, scoring a set win over billybopeep. Additionally, he placed 65th at Shine 2023. These runs remain some of the best results by a Bowser player in the post-Slippi era.
- WarriorKnight - One of the primary innovators of Bowser’s metagame and one of the best Bowser players of all time. He placed 17th and 9th at the super-regionals Zenith 2014 and MLG Long Island 2007 respectively, the latter being a disputed major and achieved with solo-Bowser. His placements of 49th at both CEO 2016 and Apex 2022 mark some of the best solo-Bowser placements at major tournaments, with the latter being one of the few top 64 Bowser results seen at a major tournament in the post-Slippi era.
Tier placement and history[edit]
Since the beginning of the metagame, Bowser has always been a bottom-tiered character, ranking at or near the bottom on many revisions, due to his shallow combo tree, severe vulnerability to getting comboed and edgeguarded, poor mobility, and his pitiful matchups against top/high tier characters, which has led to very poor tournament results overall. Even with the innovations of dedicated Bowser players such as 62-bit Hero and WarriorKnight, who propelled Bowser to a level of play that many rarely had ever seen before, Bowser players simply could not reach the ubiquity and consistency needed as a main to be considered as a relevant threat in the top-level environment. Currently, Bowser is last on the tier list and is ranked in the F tier in 26th place. He has negligible representation in tournaments outside of situational matches where he is counterpicked against players unfamiliar with the matchup (e.g. DJ Nintendo vs. Unknown522 at Zenith 2013), as well as a notable doubles placement (scoring an impressive 5th place finish out of 70 teams at the supermajor tournament Collision 2025, as a solo-Bowser teammate) and is unanimously considered a nonviable character choice for top-level play.
In 1-P Mode[edit]
In Classic Mode[edit]
In Classic Mode, Bowser can appear as an ordinary opponent; an opponent alongside Mario, Zelda, Mewtwo or Peach; a giant opponent; a metal opponent; or an ally in the team and giant battles.
In his appearances, he will appear on either Battlefield or Princess Peach's Castle. Unusually, if fought as a giant character, he will appear on Fountain of Dreams.
In Adventure Mode[edit]
In Adventure Mode, Bowser acts as a final boss of sorts, fought on the last stage, Stage 12: Final Destination. In this appearance, he is larger than usual, and as a result, he is more resistant to knockback. When played on Very Easy and Easy difficulties, or if the player has not beaten the mode within 18 minutes, then the game is concluded there. Classic Bowser's trophy falls off the stage, and the player's selected character celebrates with one of their victory poses.

If the player arrives at Final Destination on Normal difficulty or higher, Bowser will appear with his black color scheme instead of his ordinary green color scheme (or his green color scheme if the player plays Bowser with his black color scheme). After he is KO'd and the ordinary cutscene is played, however, the eerie music continues, and another cutscene shows the classic Bowser's trophy returning to Final Destination to face the player's character one last time. The trophy is then struck with lightning, and Bowser turns into Giga Bowser. Giga Bowser then comes to life, opening his mouth. As a last challenge for the player, they must defeat Giga Bowser in order to clear the mode. After he is defeated, a cutscene shows Bowser's trophy falling off the stage again; this time, however, it breaks apart in which appears to be a "floor" in a pitch black background.
In All-Star Mode[edit]
In All-Star Mode, Bowser and his allies are fought on Yoshi's Island, as the remaining Mario stages are already taken by the rest of the four Mario characters in the cast. When fighting Bowser on Yoshi's Island, the stage will always play its alternate track, "Super Mario Bros. 3".
In Event Matches[edit]
Bowser makes the following appearances in the following event matches:
- Event 1: Trouble King: Bowser is the first opponent of the event mode. The player plays as Mario, and Mario and Bowser have a stock of 2 each in an untimed match on the Battlefield stage. KO Bowser twice to win, which is an easy objective because Bowser is lighter than usual and has less competent AI.
- Event 10: All-Star Match 1: Bowser is the last of five opponents the player must fight in this series of staged battles. The player's character battles him on the Rainbow Cruise stage, and their character has a stock of 2 while Bowser has 1. With a timer of four minutes, the player must defeat him and the other four characters one-by-one with the overall time and life the player has: Mario, Donkey Kong, Yoshi, and Peach beforehand.
- Event 17: Bounty Hunters: In this original scenario, the player plays as Samus teamed up with Captain Falcon (with Friendly Fire turned off), and the shared opponent is Bowser on the Jungle Japes stage. With everyone receiving a stock of one and 2:00 as the time limit, the goal is to be the one to KO Bowser. The player fails if Captain Falcon delivers the finishing blow or if Bowser SDs.
- Event 19: Peach's Peril: A scenario designed in homage to the standard plot of traditional Super Mario games of Bowser being after Peach and Mario saving her. The player plays as Mario teamed with Peach, whose AI is set on walking to each end of the stage aimlessly, and they each have a stock of 1 while the enemy Bowser has an infinite stock. Bowser is especially strong and durable in this match, and he will attack either of them in the area on the Final Destination stage. The objective is to last a full minute with both Mario and Peach surviving by the end, and high score is determined by how many times Mario can KO Bowser.
- Event 25: Gargantuans: A scenario designed in homage to old, campy monster movies like Godzilla and King Kong. On the Fourside stage, with unlimited time, the player plays as a giant-sized Bowser (as "Godzilla") with 1 stock against a giant-sized Donkey Kong (as "King Kong") with a stock of two. Two other characters on the match are a tiny Mario and a tiny Peach, who are almost always K.O.'d within seconds of the battle between the two main monsters.
- Event 42: Trouble King 2: This tough event takes place in Poké Floats. The player controls Luigi against a giant Bowser in an untimed match where the two of them have a stock of two each.
- Event 51: The Showdown: In the game's final Event Match, the player has to square off against Giga Bowser, Ganondorf, and Mewtwo on a team. With no time limit, the player is tasked with defeat all three, and everyone is given a stock of three.
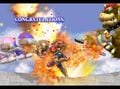
Congratulations Screens[edit]

Classic Mode
Adventure Mode
All-Star Mode


Trophies[edit]
In addition to the normal trophy about Bowser as a character unlocked by completing Classic Mode as him on any difficulty, there are two trophies about him as a fighter, unlocked by completing Adventure Mode and All-Star Mode respectively as him on any difficulty. Each of the trophies can also be unlocked by playing 100, 200, and 300 Vs. matches respectively as Bowser:

- Bowser
- Bowser has a long history of kidnapping Princess Peach to lure his nemesis, Mario, into traps. He leads an enormous group of mischievous creatures, not the least of which are his seven children. With outrageous strength, flammable breath, and more spikes than you can shake a Star Rod at, Bowser is a constant threat.
- Super Mario Bros. (10/85)
.png)
- Bowser SMASH
- In many ways, Bowser is the toughest character around. Not only does he have near-impervious hide, but his great mass makes him almost impossible to hurl offscreen. Of course, his weight also makes him rather slow to maneuver, so when facing him in battle, it's best to press your attack and not give him a chance to counter.
- B: Fire Breath
- Smash B: Koopa Klaw
.png)
- Bowser SMASH
- Bowser's Fire Breath strikes continually, but it grows gradually smaller over time until it's barely smoldering. The Koopa Klaw rakes enemies at a distance and pulls nearby foes in close for a good gnawing. Bowser's Whirling Fortress moves laterally over the ground; it works in midair as a recovery. The Bowser Bomb is powerful and paves the way for more attacks.
- Up & B: Whirling Fortress
- Down & B: Bowser Bomb
Alternate costumes[edit]
.png)
| |||
Glitch[edit]

Bowser's giant hand glitch is a glitch in Super Smash Bros. Melee that temporarily makes Bowser's hand inflate to several times its size, as the name implies. However, the glitch is only visible for a brief second.
Method: First, Bowser must pick up a capsule, then short hop. This also works with any item that can be thrown with the A button. After that, he must immediately perform an air dodge.
- As Bowser lands from the air dodge, his right hand (the one holding the capsule) will quickly grow many times its normal size, then just as quickly shrink back to normal. It grows and shrinks over the space of only a few frames, so it is difficult to pause the game at exactly the right point. If the game is paused when Bowser's hand is giant, inspection reveals that the giant hand is as detailed as Bowser's normal hand. When in its giant state, the hand can also distort platforms.
Gallery[edit]
Official artwork of Bowser.
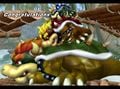
Taunting while holding a Mr. Saturn on Princess Peach's Castle.
Using Whirling Fortress on Fountain of Dreams.
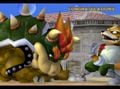
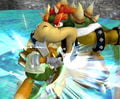
Using his down throw on Kirby on Princess Peach's Castle.
Using Bowser Bomb on Fox on Pokémon Stadium.
Using Koopa Klaw on Fox on Great Bay.
Using Fire Breath on Brinstar.
Knocked back by Captain Falcon's Falcon Kick on Corneria.


Trivia[edit]
- In the Special Movie, Bowser is the only character not to appear with their universe (nor play a song from their own universe nor their own credits theme). He is shown right after Captain Falcon (continuing Captain Falcon's theme song and credits theme).
- Bowser has his own unique landing effect from other characters. This effect is also used for his helpless landing animation.
References[edit]
External links[edit]
| Fighters in Super Smash Bros. Melee | |
|---|---|
| Veterans | Captain Falcon · Donkey Kong · Fox · Jigglypuff · Kirby · Link · Luigi · Mario · Ness · Pikachu · Samus · Yoshi |
| Newcomers | Bowser · Dr. Mario · Falco · Ganondorf · Ice Climbers · Marth · Mewtwo · Mr. Game & Watch · Peach · Pichu · Roy · Young Link · Zelda (Sheik) |