Kirby (SSB)
| Kirby in Super Smash Bros. | |
|---|---|
| |
| Universe | Kirby |
| Other playable appearances | in Melee in Brawl in SSB4 in Ultimate |
| Availability | Starter |
| Tier | S (2) (North America) ? (2) (Japan) |
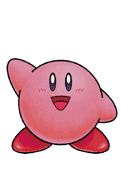
Kirby (カービィ, Kirby) is a starter character in Super Smash Bros. He is known for being a small, lightweight character, with quick, strong, and long-ranged attacks, as well as a great recovery.
Kirby is voiced by Makiko Ohmoto, who would go on to voice the character in most of his subsequent appearances.
Kirby ranks 2nd out of 12 on the current tier list, by far his best placement in the series, as well as the only game where Kirby is ranked higher than mid tier. Kirby has strong, fast attacks that can KO below 100%, and a great edgeguarding game due to his long recovery and powerful aerials, particularly his down air. Kirby also has several methods to wall opponents, with his forward and back aerials having large, disjointed hitboxes and significant combo potential, along with his infamous up tilt, which has vast coverage, high speed, combo potential, and easy shield break setups.
Kirby's primary weakness lies in his recovery. Despite being long-distanced, it can easily be intercepted due to Kirby's poor air speed. Furthermore, Kirby's combination of being lightweight and rather floaty makes him vulnerable to juggling and vertical KOs. Kirby's combo game is also predictable, being primarily reliant on his up tilt and forward aerial, making it easy for opponents to know exactly what to look out for and utilize SDI to escape.
Regardless of these downsides, Kirby's strengths outweigh his weaknesses by a considerable margin, and he has had above-average representation and very strong tournament results, courtesy of Kikoushi, Revan, and many other high-level players.
Attributes[edit]
Kirby is a small, light, and somewhat floaty character. He is relatively difficult to combo horizontally and offstage, though is vulnerable to juggling and many vertical KO techniques (as well as not being too hard to KO horizontally either). His "signature move" is Swallow, which allows him to use an opponent's neutral special move and copy their appearance.
In general, Kirby possesses quick yet powerful moves. Some of his moves are infamous for possessing high range and being able to space well, most notably his up tilt (which covers the range of more than one Kirby both horizontally behind him and vertically), as well as his forward and back aerials. This makes a Kirby playing defensively correctly rather difficult to punish. However, Kirby's defensive ability is hindered slightly by his average to below average movement speed, with average dashing and walking speeds, low air speed, and below average falling speed. Kirby's smashes are powerful, especially his forward smash, which is by far the best forward smash in the game due to being the most powerful, having quick startup (though it has a bit of ending lag), and being an excellent punish or panic option. Kirby's throws are also fairly powerful, with his good grab allowing him to utilize them efficiently.
Kirby's up tilt and forward aerial are especially useful combo moves. The former can easily chain into itself at lower percentages and lead into aerials, a forward smash, or a up smash, while the latter is a great damage racker, being a very fast multi-hit move with the first few hits having set knockback, allowing them to lead into the final hit easily. The move can deal over 20% damage, and if the final hit doesn't land, it sets up a jab that can jab cancel into a grab to rack up further damage.
Kirby has an excellent recovery and offstage game. He has five midair jumps, and his Final Cutter not only extends his vertical recovery even more but allows Kirby to also move to the side while using it by tilting the control stick. While his recovery travels a spectacular distance (only rivaled by Pikachu's recovery), it is somewhat predictable, due to being on the slow side and Kirby's slow air speed. His aerials can be used to edgeguard or guard break easily, especially his down aerial, which is a strong meteor smash that can also drag opponents down at lower percentages. With Kirby's aforementioned excellent vertical recovery, it is also easy to recover from.
Kirby's main weaknesses are his light weight and floatiness, somewhat lack of reliable combo options outside the basic up tilt and forward aerial, and a lack of ways to KO onstage outside forward smash. He is additionally easy to juggle, being vulnerable to vertical combos from Fox, Captain Falcon, and others to a lesser extent.
Differences between game versions[edit]
Kirby was noticeably nerfed in his transition to NTSC-U. Despite his smaller size making him harder to hit, a few of his moves deal less damage making them weaker. His recovery distance is shorter, due to Final Cutter covering less horizontal distance. The only buffs that he received were from his Throws, which at least gave him some benefits. Lastly, the higher presence of SDI makes Kirby's moves easier to escape, while the removal of momentum sliding hurts Kirby's approach, enforcing a slightly more defensive playstyle. Nevertheless, due to Kirby's immense strengths not being toned down too much, he is still one of the best characters in the game.
Attributes[edit]
 Kirby is smaller (0.94 → 0.91). This gives his attacks less range but also makes him harder to hit (granted he has not performed the bigger Kirby glitch).
 Rolls are shorter (without the bigger Kirby glitch) due to Kirby's smaller size.
 The removal of momentum sliding slightly hurts Kirby's approach.
Ground moves[edit]
 Neutral attack's second hit now uses a weak punch sound instead of a medium punch sound.
 Neutral attack's loop hits launch opponents at a slightly lower angle (70° → 65°).
 Neutral attack's loop hits have smaller hitboxes (90u → 50u) and the far hitbox has been moved closer to Kirby (x offset: 200 → 165).
 Up and down smash both deal 2% less damage (18% (up)/20% (down) → 16%/18%) and have decreased base knockback (24 (up)/40 (down) → 20/30).
Aerial attacks[edit]
 Up aerial deals less damage on the clean and mid hits (12% clean/9% mid → 10%/8%).
 Up aerial has a smaller hitbox (150u → 105u).
Throws[edit]
 Forward throw sends at a higher, more diagonal angle (45° → 70°), granting it vertical KO ability but hindering its horizontal KO potential and hindering its ability to set up edgeguards.
 Forward throw has increased base knockback (80 → 100).
 Forward throw has gained a collateral hit when Kirby lands.
 Kirby releases opponents from forward throw later (frame 56 → 58), decreasing its ending lag.
Special attacks[edit]
 Final Cutter gains less height when used on the ground (without the bigger Kirby glitch) due to Kirby's smaller size.
 Stone flashes faster at a lower amount of HP (25 → 18).
 Stone deals 2% less damage (22% → 20%) and has decreased knockback scaling (78 → 70), considerably hindering its KO potential.
 Stone has less HP (50 → 38).
 Aerial Stone cannot be cancelled as early once Kirby starts falling (frame 16 → 20).
Moveset[edit]
For a gallery of Kirby's hitboxes, see here.
| Name | Damage | Description | ||
|---|---|---|---|---|
| Neutral attack | Left Punch (左パンチ) Right Punch (右パンチ) Vulcan Jab (バルカンジャブ) |
3% | Kirby performs two quick jabs, followed by a series of very fast, very weak punches. The first hit comes out on frame 3, making it Kirby's fastest ground move. The two jabs have short range, though the second has better range than most neutral attacks. The third input is the Vulcan Jab carried over from the Fighter ability. The second hit can lead into a down tilt at higher percents. It is overall a situational move it Kirby's kit but it does have its uses.
The rapid jab has noticeably more range in the Japanese version although it is relatively useless in all versions, with Kirby players generally only doing the first one or two hits. | |
| 4% | ||||
| 1% per punch | ||||
| Forward tilt | ↗ | Spinning Kick (スピニングキック) | 11% | Kirby kicks forwards. It comes out quickly, is fairly safe and has deceptively long range (although its range is not too impressive compared to Kirby's other moves). It can be angled for a 1% change in damage either way although the move is not very strong overall and it generally lacks followups. The move is mainly used as a quick poke to keep opponents in front of Kirby out. It is a solid move overall but it is Kirby's least effective tilt. |
| → | 10% | |||
| ↘ | 9% | |||
| Up tilt | Kirby Tail (カービィテイル) | 14% (clean), 10% (late) | Kirby kicks vertically upwards, slightly behind himself. The move starts off hitting behind him with strong damage and vertical knockback and it later hits above him with weaker damage and knockback. The move comes out very quickly on frame 4, has minimal ending lag (only having 17 total frames), has deceptively long range both horizontally and vertically (far surpassing his foot) and it deals high damage and strong vertical knockback. The clean hit KOes Mario on Dream Land at 131% from ground level. All these factors combined make the move highly potent for a multitude of reasons in numerous scenarios.
The move's quick speed and great range make it excellent at stuffing out approaches. The move can easily punish opponents who recklessly approach and the move itself is very difficult (or even impossible in many scenarios) to punish due to its speed and range. Kirby can also approach with the move himself with pivot up tilts and the move is a very strong anti air due to its speed and range. The move also has excellent combo potential. The move has vertical knockback which launches opponents towards Kirby which along with the move's quick speed and long range allows it to easily chain into itself multiple times at lower percents and at higher percents, it can lead into Kirby's aerials. Against fast fallers especially, an up tilt at 0% can easily build up a lot of damage and it can even lead into a KO in one combo in certain scenarios. Even if an up tilt combo does not lead into a KO, it can still easily get the opponent off stage where Kirby has access to his strong edgeguarding tools. Kirby can also use his aerials to lead into an up tilt for a combo. Up tilt also has incredible shield pressuring potential. Its quick speed and high damage give Kirby a large frame advantage after hitting an opponent's shield, which gives him more than enough time to hit them with another up tilt, especially since it has a lot of range. Three up tilts into a forward smash or a back/neutral aerial into two up tilts in a forward smash are simple, guaranteed shield break combos Kirby has against most of the cast (assuming the up tilt is fresh although even a stale up tilt gives Kirby a solid frame advantage on shield). The only real downsides up tilt has are that it has limited range in front of Kirby and at higher percents (and before it becomes strong enough to KO), up tilt loses its combo potential, especially since Kirby has unspectacular vertical air mobility and no vertical juggling options in the air, which does decrease its potency at certain percent ranges. The move is still threatening at higher percents however due to its speed, damage and range and if the opponent crouch cancels the move at these higher percents, it can easily lead into a neutral or back aerial for a KO. Kirby's up tilt is overall considered to arguably be the best attack in the entire game due to its extremely fast speed, deceptively long range and its great damage racking and shield pressuring potential. The move is incredibly versatile, difficult to punish and rewarding to the point where Kirby simply having access to the move without using it can be threatening, since he can throw it out at any time with little risk. | |
| Down tilt | Squish Kick (ローキック, Low Kick) | 9% | Kirby performs a crouching kick. It comes out on frame 4, has incredible horizontal range and it sends opponents at a very low semi-spike angle, making it great for edgeguarding (especially since the low knockback angle makes the move very difficult to ledge DI). It does have the highest ending lag and the least damage out of all of Kirby's tilts though, making it unsafe on shield when used at close range (although Kirby can easily space it to make it safe). The move is still highly solid however, due to its great range and edgeguarding potential. | |
| Dash attack | Head Sliding (ヘッドスライディング) | 10% (clean), 8% (late) | Reminiscent of King Dedede's Head Slide attack in the Kirby series. Kirby falls on his face while advancing forwards, crashing into his opponents. This move is fast and can potentially be used as a followup, though it is often unsafe on shield and it often lacks followup potential. It can be used as a followup in some situations although Kirby generally has better options such as his grab. | |
| Forward smash | Smash Kick (スマッシュキック) | 17% (clean), 12% (late) | Kirby advances forward with a strong kick. This attack is based on the Spin Kick from the Fighter ability. The move starts off with a very powerful kick and as Kirby travels further, the move becomes weaker.
This is the fastest forward smash in the game, coming out on frame 10, in addition to having relatively low ending lag. When combined with its long, advancing range, this makes it very easy to land compared to other forward smashes. It is not only the fastest forward smash but it is also the strongest non-angled forward smash in the game (KO percent wise and excluding Link's forward smash in the European version), KOing Mario at 86% at the center of Dream Land (however, Link's forward smash in the NTSC versions still has slightly higher knockback, and it only KOs later than Link's due to it having a higher knockback angle). Even the late hit has respectable power for a late hit smash attack although it does not KO anywhere near as early. Kirby can combo into forward smash at KO percents with his forward aerial or a single hit of his down aerial, giving him a safe and fairly reliable setup into the move. It is also useful to either break shields or to shield poke in a shield break combo, especially since up tilt can lead into a guaranteed forward smash on shield. The move also grants Kirby frame advantage on shield and with perfect spacing and timing, it even leads into an up tilt frame trap on shield against a majority of the cast (with the up tilt either hitting the shield or hitting the opponent depending on what they do out of shield, which can either lead into an up tilt combo or a shield break combo into a combo/KO depending on the outcome). However, it deals below average damage for a forward smash, has a considerably weaker late hit, cannot be angled, and it has high enough lag high enough for it to be punished quite easily on whiff. These weaknesses, however, do not significantly hinder the move, with its strengths far outweighing its weaknesses, especially compared to other forward smashes. Kirby's forward smash is overall considered to be the best in the game, due to being both the fastest and strongest forward smash in addition to being safe and having a generous hitbox. | |
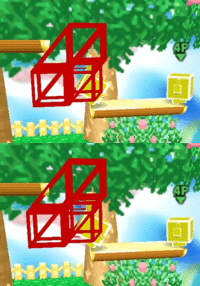
| Up smash | Somersault Kick (サマーソルトキック) | 16% (clean), 18% (NTSC-J clean), 12% (late) | Kirby performs a bicycle kick, which is similar to Fox's but it comes out much slower and has weaker knockback. The move comes out on frame 14 which is very slow for an up smash and its knockback is slightly below average, KOing Mario at 95% on Dream Land at ground level. The move also has a weaker late hit which hits behind Kirby and has weak horizontal knockback. Its ending lag is also fairly high, with the move being unsafe on shield at close range. It can start combos at certain percents but Kirby is always better off using his up tilt as it is faster and weaker, making it much better for starting combos. Up smash serves its purpose as a hard hitting anti-air and it can KO earlier than forward smash in some situations (with Kirby being able to lead into it with a forward aerial or a single hit down aerial in some situations) but it is overall a situational smash attack, especially when considering the potency of Kirby's forward smash. The move can hit opponents on higher platforms (on Dream Land) if the bigger Kirby glitch is used, making it a move which notably benefits from the glitch.
Up smash is noticeably stronger in the Japanese version, dealing 2% more damage and KOing Mario 15% earlier. Kirby can also hit opponents on platforms above him without the bigger Kirby glitch, due to his larger default size. This overall makes up smash less situational in the Japanese version as there are more scenarios where it can KO earlier than forward smash, although forward smash is still the far superior move overall. | |
| Down smash | Propeller Kick (プロペラキック) | 18% (clean), 20% (NTSC-J clean), 10% (late) | Kirby spins with his feet flat on the ground with a long hitbox duration (although the move does become a lot weaker after its first few active frames). It comes out on frame 7, making it Kirby's fastest smash attack and it is also his most damaging smash attack. The move sends opponents at a fairly low angle and it has deceptively long range (especially since Kirby's feet are intangible while he performs it). Its speed and range make it useful for beating cross ups and rolls and it can catch opponents in situations where forward smash might be too slow.
It is Kirby's weakest and laggiest Smash attack however, with the move being unsafe on shield and easily punishable on whiff. Down smash can be useful in the right scenarios but forward smash is the preferred option when it can be used and down tilt is often good enough for edgeguarding purposes. Down smash is much more powerful in the Japanese version, which makes it more rewarding and desirable but it is still Kirby's weakest smash attack in said version, with forward smash still being preferred in a majority of scenarios. | |
| Neutral aerial | Kirby Kick (カービィキック) | 15% (clean), 10% (late), 3% (landing) | Kirby sticks his right foot out. The move starts off with a very powerful hitbox but then becomes much weaker after its first four active frames. It comes out on frame 3, has a long hitbox duration and it has great power, being the second strongest neutral aerial in the game. It also has great range, with the move being noticeably disjointed, making it highly effective at edgeguarding opponents along with its strength and duration. At lower percents, it can combo into a variety of moves, including a forward smash and even an up tilt, while at higher percents, it is effective at getting opponents off stage. The late hit can lead into a variety of followups at quite a wide percent range. The move is useful in a variety of situations, including edgeguarding, KOing, escaping followups, punishing Out of Shield and starting combos/shield pressure. The move does have fairly high ending lag however, so it is not Kirby's safest aerial to use off stage.
The move does have a landing hit with set knockback (when not Z-canceled naturally) although this landing hit will rarely connect if the neutral aerial hits outside of very low percents and it makes the move unsafe on shield on a normal landing. The hitbox can potentially catch opponents trying to approach or recover although it is generally better to Z-cancel the move overall. Neutral aerial is overall a very strong aerial for Kirby, due to its speed, power and range. | |
| Forward aerial | Corkscrew Kick (コークスクリューキック) | 2% (hits-1-7), 6% (hit 8), 20% (total), 3% (landing) | Kirby performs a drill kick with his feet in front of him. It acts like other drill kicks for its first seven hits, being a meteor smash with set knockback, although Kirby performs it horizontally rather than vertically. The move also has an 8th hit which deals stronger horizontal knockback. The move comes out on frame 8, has relatively low ending lag and it has large hitboxes which cover Kirby's entire body, in addition to reaching further than his feet. Kirby can use forward aerial as both a combo starter and a combo extender. The multi hits on their own can easily lead into a variety of followups at any percents, including an up tilt or a forward smash and they can potentially be used to edgeguard on their own due to being meteor smashes. Kirby can also combo into forward aerial with an up tilt, where Kirby can then drag the opponent downwards to lead into a forward smash. The final hit is more powerful and can potentially lead into a forward smash at KO percents (especially when stale), in addition to being useful to edgeguard.
The multi hits do grant frame advantage on shield with a soft Z-cancel landing, which can lead into an up tilt frame trap with a perfect landing, although it is Kirby's weakest aerial on shield. The final hit is more effective on shield however, reliably leading into an up tilt or other followups. Forward aerial can be avoided with SDI although its large hitboxes can make it awkward to SDI out of, and Kirby can mix up how many hits he wants to land if he is near the ground. The move also has a landing hit with set knockback although the move has high landing lag, which makes the landing hit very unsafe if it does not hit, making the player want to Z-cancel the move almost every time. Forward aerial is overall another highly effective aerial for Kirby, due to its strong combo potential (even with the presence of SDI). | |
| Back aerial | Drop Kick (ドロップキック) | 16% (clean), 12% (late) | Kirby kicks behind him with both of his feet. It starts off dealing 16% and solid horizontal knockback during its first four frames and then it receives a weaker late hit which deals 12%.
Back aerial comes out very quickly on frame 6 and it has a long hitbox duration, lasting until frame 26. In addition to this, the move is disjointed (especially during its later frames) and it covers Kirby's entire body. It not only hits really far behind Kirby but it can also hit in front, above and below Kirby, allowing it to easily catch opponents regardless of their position relative to Kirby. This not only makes the move effective for edgeguarding (when combined with its solid power and Kirby's multiple jumps) but it is also a highly effective move to keep opponents out. Characters with short range such as the Mario Bros. can heavily struggle to get around Kirby's back aerial which shuts down their approach. The move also deals high damage and has good KO power. Its KO power is fairly average for a back aerial but it has the advantage of coming out faster than back aerials of equal power, which along with its range, makes it a very effective edgeguarding tool, especially when combined with Kirby's multitude of jumps. The move in general is one of Kirby's strongest edgeguarding tools as Kirby has multiple jumps to abuse the move off stage and its ending lag is fairly low, which makes the move fairly non committal to use off stage, as Kirby can use it numerous times without the risk of getting KOed. It is Kirby's most damaging aerial which makes it his strongest aerial on shield. An advancing back aerial can easily lead into an up tilt on shield, which can then lead into another up tilt into a forward smash for a shield break. If a landing back aerial connects at lower percents, it can easily lead into an up tilt, which can then lead into a highly damaging combo or even a KO. The late hit is considerably weaker but it can lead into followups at a wider percents range, with it even potentially leading into a forward smash for a KO at specific percent ranges. When combined with its speed and range, this makes back aerial a threatening spacing move. The only notable downside back aerial has is that it has high landing lag, which does makes it quite punishable on whiff if Kirby misses the Z-cancel. This can be nullified with Z-canceling however and the move is still safe on shield with a normal landing when fresh. As a sidenote, this is Kirby's only aerial without a landing hitbox. Back aerial is not only considered to be Kirby's best aerial overall but it is also considered to be one of Kirby's top two moves and it is even considered to be one of the best moves in the entire game. This is due to its speed, range, power, safety and strong synergy with Kirby's attributes and moveset which give the move a lot of utility as well as making it a very low risk very high reward move. The move is even considered to be so strong that it flat out invalidates certain characters, similar to his up tilt. | |
| Up aerial | Twinkle Star (ティンクルスター) | 10% (clean), 12% (NTSC-J clean), 8% (mid), 9% (NTSC-J mid), 6% (late), 3% (landing) | Kirby performs a star pose and spins around. This move would become his neutral aerial in later Super Smash Bros. games. The move comes out on frame 10, which is slow for an up aerial and it has an extremely long total duration (79 frames), making it incredibly laggy and unsafe to use it the air. The move's hitbox does last for the entire animation once it comes out however, technically giving the move no ending lag despite its extreme total duration. The move has set knockback which is fairly high at lower percents but it naturally does not scale at all, making the move completely incapable of KOing. The move deals less damage during the later frames of its animation although its knockback remains the same. The move also has a small hitbox (which struggles to cover Kirby's body) which makes it very easy to hit Kirby out of the move which along with its extreme lag, makes it very unsafe and easy to challenge when used in the wrong situations. It can lead into some of Kirby's KO moves against most characters (depending on spacing) although Kirby is still better off using his forward aerial for KO setups or his neutral/back aerials as raw KO moves as they are much more reliable and easier to land. It can also lead into an up tilt against certain characters although this is matchup and spacing specific, and Kirby's other aerials can lead into an up tilt much more reliably, especially at lower percents. Its main use is as a low percent edgeguarding option due to its high knockback although it can be risky due to its high total duration. It can also lead to shield pressure where it can actually be optimal near an edge (where neutral and back aerials would push opponents off the edge), although Kirby's other aerials are generally preferred for shield pressure in a majority of scenarios and even in the aforementioned scenario, a late back aerial or late neutral aerial can also work depending on the timing and positioning.
Up aerial is overall not only Kirby's worst aerial by a significant margin but it is also considered to arguably be the worst aerial in the game due to its slow speed, lack of raw KO power and the fact that it is overshadowed by Kirby's other aerials. Kirby is almost always better off using his other aerials over up aerial, with up aerial having niche uses overall. In the Japanese version, up aerial dealt more damage and had a larger hitbox. This made it marginally more rewarding and harder to intercept but the move still suffered from the same flaws and it was still significantly worse than Kirby's other aerials. Interestingly, the move is coded to have a stronger initial hit which deals 12% (16% in the Japanese version) but due to a timing error, this hitbox is skipped, with the move dealing less damage during its initial frames as a result. | |
| Down aerial | Screwdriver (スクリュードライバー) | 3% (hits 1-10), 30% (total), 3% (landing) | Kirby performs a drill attack with his feet below him. 3% per hit with 10 hits for a total of 30%. The move comes out very quickly on frame 4 and it has a long duration due to it consisting of 10 hits (in addition to also have large, disjointed hitboxes). Each hit meteor smashes opponents but unlike other drill kicks, Kirby's down aerial does not have set knockback. This makes it incredibly powerful offstage as the opponent is getting hit by multiple fairly strong meteor smashes which keep getting stronger, which can guarantee a stock loss at fairly low percents (in addition to dealing a ton of damage potentially). The move can even combo into itself or into Kirby's other aerials in the right circumstances.
It is also quite strong on stage at lower percents as it can deal a lot of damage and lead into followups. Starting from lower mid percents however, the move puts opponents into tumble so if the move is used against aerial opponents and they land on stage, they can tech the move. This heavily decreases the move's total damage output although it can lead into a tech chase when used close to the ground. If only one hit connects against a grounded opponent, Kirby does gain access to guaranteed followups, including a forward smash/up smash at higher percents for a KO. The move also has a landing hit which unlike Kirby's other aerials, hits on both sides. This does give the landing hit some utility as a crossup or as an edgeguarding tool but the move does have very high landing lag, making the landing hit very risky to use. Kirby players will generally want to Z-cancel the move but the landing hit can be used as a mixup in some situations. The move also has strong shield pressuring potential. The whole move traps opponents in shield and can drain over half of the opponent's shield if every hit connects. If Kirby gets a perfectly timed soft landing (with a Z-cancel), the move can lead into a guaranteed up tilt on shield, which can then lead into a shield break. This does require frame perfect timing however (both of the down aerial landing and the up tilt execution) and it is not guaranteed with a hard landing (and it is much harder to land when hitting from the front) but the move is effective on shield regardless on how it is used. The main downside the move has is that as it is a multi hit, it can be escaped with SDI, which does make it less effective at lower percents although due to its great strength, SDI often isn't enough to save the opponent from being KOed at higher percents. Down aerial is overall one of Kirby's best moves, due to its speed, range/duration, damage/power and utility. It is a highly effective and devastating move overall. | |
| Grab | Grab (つかみ) | — | ||
| Forward throw | Air Drop (いずな落とし, Izuna Dropper) | 13% (throw), 7% (NTSC-U/PAL collateral) | Kirby jumps high in the air and brings the target with him, similar to Ninja Kirby's Air Drop in Kirby Super Star, and slams them down from an explosive drop. It is one of the few forward throws which launches opponents upwards, although it lacks followup potential. It has good knockback for a forward throw and if Kirby initiates the throw below a platform, he will land on the upper platform, further aiding its vertical KO potential. It can be used as a sacrificial KO when used at the ledge, as if there is nowhere for Kirby to land, he will continue plummeting until he reaches the lower blastzone. However effective forward throw is as a sacrificial KO depends on Kirby's port priority and whether he has activated the bigger Kirby glitch or not (with the glitch making sacrificial KOes less effective).
In the Japanese version, forward throw launches opponents horizontally. This makes it much better at setting up edgeguards, which the throw cannot easily do in the international versions due to its higher launch angle. The throw does technically have less knockback, along with no collateral hit and more ending lag but its horizontal knockback makes the throw more worthwhile at lower percents, especially against fast fallers. | |
| Back throw | Brain Buster (ブレーンバスター) | 16% | Kirby performs a backward suplex, slamming the opponent behind him. Sends the foe upwards and behind Kirby at an angle. The attack is based on the Backdrop ability from Kirby's Adventure. One of the least effective back throws in the game in terms of KO potential due to its vertical launch angle however, this also makes it a rather effective option for setting up tech chases and generally granting Kirby stage control. | |
| Forward roll Back roll |
— | — | ||
| Techs | — | — | ||
| Floor attack (front) Floor getups (front) |
6% | Kicks on both sides and gets up. | ||
| Floor attack (back) Floor getups (back) |
6% | Kicks on both sides and gets up. | ||
| Edge attack (fast) Edge getups (fast) |
4% | Flips whilst getting back on stage. | ||
| Edge attack (slow) Edge getups (slow) |
4% | Slowly picks himself up and slides forward, like his dash attack. | ||
| Neutral special | Swallow | 6% (swallow), 10% (spit), 17% (spit out characters to bystanders) | If Kirby inhales an opponent, he can either copy their ability (gains their neutral special move and a hat resembling them by pressing the special button; see here for a list of Copy Abilities) or spit the opponent out as a projectile by pressing the attack button, dealing damage to bystanders. | |
| Up special | Final Cutter | 8% (ascent), 2% (descent), 6% (shockwave) | Kirby swings upward with his Final Cutter and falls down. The cutter can deal damage, and it also emits a shockwave when it lands. Used for recovery, along with Kirby's five midair jumps. Meteor smashes anyone below it with powerful set knockback. If an aerial up special is performed by Kirby, his original body size multiplier goes from 0.91 (0.94 in the Japanese version) and it becomes 1.0. This is known as the bigger Kirby glitch, which increases the range of his attacks although it makes him easier to hit and it makes his sacrificial KOes less reliable. | |
| Down special | Stone | 20%, 22% (NTSC-J) | Kirby transforms into a stone. If used in the air, it has a damaging hitbox and Kirby falls down until he reaches the ground. It has solid KO power, although it was much more powerful in the Japanese version. | |
Announcer call[edit]
English/Japanese/Chinese
French
German
On-screen appearance[edit]
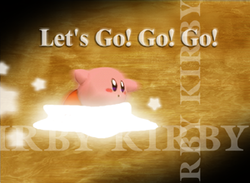
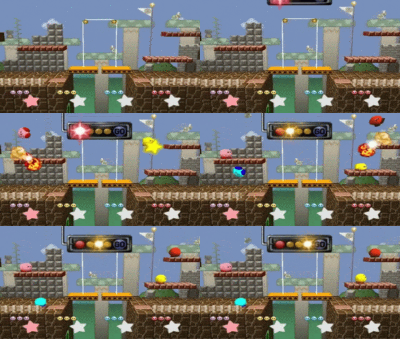
- Crash-lands a Warp Star into the ground, the warp star explodes, and Kirby does multiple 360° flips backward and lands on his feet.
|
|---|
Taunt[edit]
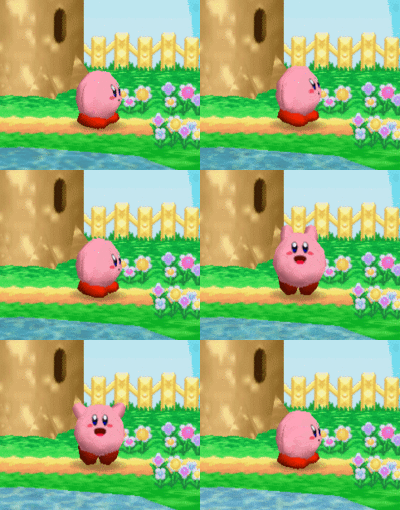
- Turns to his right, puts his feet away and stands on tiptoes, inflates, looks up a little and says "Hi!" in a teasing manner while waving his arms three times in the air. If Kirby has an ability from an opponent while using this move, it gets discarded.
|
|---|
Crowd cheer[edit]
| Cheer (International) | Cheer (Japanese) | |
|---|---|---|
| Cheer | ||
| Description | Kir - by! *claps 3 times* | Kaa - *clap* bii! *clap* |
Victory poses[edit]
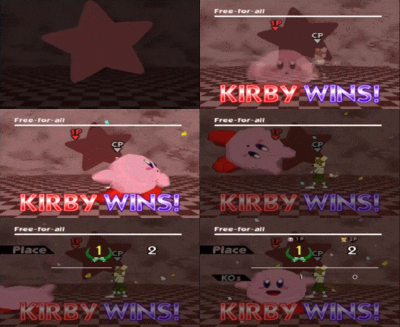
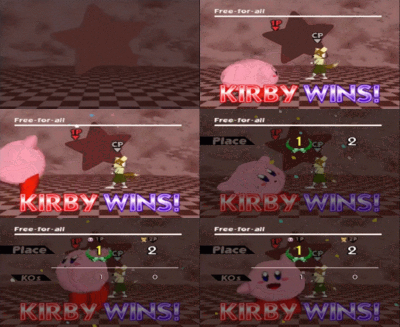
- Does several handstands across screen.
- Slides and dances across screen (a reference to his end-of-level dances in Kirby's Adventure).
 |
|
|---|
In competitive play[edit]
Most historically significant players[edit]
- See also: Category:Kirby players (SSB)
Fukurou - Considered the best solo Kirby player in Japan, and was the best player in the world in 2017. Won almost all of the tournaments he attended in 2017, which included Japan Smash Cup 2017, Snosa III, Kanto 2017, and Super Smash Con 2017.
HAMMERHEART - One of the current best Kirby players in the United States. He notably played 2nd at Snosa 5 with a tournament run beating Isai, LD, and JaimeHR. He has other notable results at recent majors, such as 4th at Apex 2022 and 13th at Super Smash Con 2019. Ranked as high as 9th in the world as a solo Kirby player during the 2019-2020 Smash 64 Power Rankings.
Isai - One of the best Smash 64 players of all time, who is efficient with the entire cast. In more recent years, he has been using Kirby more in between sets as a character switch from Pikachu and also mainly against Yoshi. Won B.E.A.S.T 7, Keystoned V, and Super Smash Con 2023, and placed 3rd at Super Smash Con 2018 with Kirby as one of his characters. Using Kirby, he has beaten the likes of Prince, CTG, and Wizzrobe.
Keisuke - One of the best solo Kirby players in Japan. Placed 3rd at Kansai 2022, 4th at Kansai 2020, and 9th at Kanto 2014 with wins over kysk and Wangera. He is considered to be the third-best solo Kirby in Japan, but has notably beaten Fukurou at Kansai 2016 and Moyashi at Kansai 2022, both in the Kirby ditto.
KeroKeroppi - One of the best Smash 64 players in the United States, more known for his Pikachu, but had a prominent Kirby before phasing the character out in recent years. He has garnered top placements with 2nd at Super Smash Con 2015, 3rd at Get On My Level 2016, and 5th at GENESIS 4 with wins over Wizzrobe, tacos, and Mercy. Was ranked 5th on the 2018 64 League Rankings using Pikachu and Kirby.
Kikoushi - Originally the best Kirby player in the world during the early 2010s. He notably won tournaments such as Kanto 2011 and Apex 2013, the latter in which he beat Isai in grand finals. He placed at least in the top 6 at every tournament he entered until Kansai 2013, and has not been seen attending a tournament since Kansai 2017.
kysk - Primarily plays Kirby alongside Captain Falcon and Pikachu. He was the best player in 2019, and is still considered a top player in the recent metagame. Won GENESIS 6, Kanto 2019, and Super Smash Con 2019 with wins over SuPeRbOoMfAn, Kurabba, and KeroKeroppi with Kirby.
Moyashi - Considered one of the best solo Kirby players in the world. Won multiple tournaments with Kansai Festival 2010, Kanto 2010, and Kansai 2011 with wins over SuPeRbOoMfAN, Kurabba, and JaimeHR.
NaCl - A seasoned solo Kirby player who is now currently a hidden boss in the scene. Has won multiple 64 tournaments held in Texas such as No Fun Allowed 2 and TGC Returns. He has attended a bunch of larger tournaments as well, placing 7th at both Low Tier City 5 and Hitstun 5 with wins over CTG and KD3. He was formerly ranked as high as 27th on the 2019-2020 Smash 64 Power Rankings.
Revan - Considered the best solo Kirby player in Canada. Placed 2nd at B.E.A.S.T 7, where he took a set against Isai. He also placed 2nd Get On My Level 2018 and 7th at Super Smash Con 2016 with wins over Josh Brody and TR3GTheZ. Previously ranked 25th on the 2021-2022 Smash 64 Power Rankings.
SOMBRERO - Considered one of the best Kirby players in Mexico. He placed 5th at Boss Battle 4, where he beat Combo Blaze. He has additionally placed well at notable SoCal events, such as 9th at Snosa 5 and 13th at Snosa IV, garnering wins over Paco and Shihman. He was formerly ranked 40th on the 2019-2020 Smash 64 Power Rankings.
SuPeRbOoMfAn - One of the best Smash 64 players of all time, as well as one of the best Kirby players of all time. He is more known for using Captain Falcon, but also possesses a strong Kirby whom he uses alongside his best characters. Won Super Smash Con 2016, Get On My Level 2018, and Shine 2016 with Kirby as one of his characters, beating the likes of Wizzrobe, tacos, and Lowww.
Tatsuman - The best player in Japan from 2006-2008. He had a notable winning streak playing Kirby, taking tournaments such as Kanto 2006, Kanto 2007, Kanto 2008, and 2nd Kansai. By 2009, his winning streak was over, and he switched to playing Yoshi around 2010.
Tier placement and history[edit]
Kirby has widely been considered a top tier throughout the entire competitive history of Super Smash Bros., only rivaled by Pikachu for best fighter in the game. This placement is largely due to his above-average recovery, quick yet powerful attacks with deceptive range, and being able to easily punish bad recoveries, which happens to be most of the roster. Likewise, he has seen excellent tournament representation and results since the beginning of Smash tournaments, including getting the most wins at Smash Bros. Fighting Battle: Smash Bros. Meijin Deciding Game in 1999. He has been the definitive second-best character in the game for the entire game's lifespan, with the exception of the second tier list, where Fox was considered better than Kirby, but that decision was quickly swapped in the third tier list a year later. Additionally, Kirby has been seen as one of the best secondary characters to use in the recent metagame, due to his favorable matchups against Captain Falcon and Yoshi, the latter being a more prevalent character in tournaments in comparison to the early metagame.
In doubles, Kirby is occasionally banned from being used alongside Pikachu, such as at tournaments such as Battle at the Border. Historically, double Kirby was also banned, much like in Pikachu's case, but this has been rescinded in modern day due to re-evaluations of the team's speed and overall performance in tournaments. As such, tournaments that are recognized by the 64 League Rankings have Kirby himself and the Pikachu/Kirby team legal in doubles, allowing the character to be the most popular team shown at many majors such as Xanadu Origins and the Supernova series. In the case of double Kirby, this team is banned usually, but can vary depending on the format. For example, tournaments such as Battle At The Border '23 had the team legal; however, no Kirby-related teams were seen for top 8 or even most of the tournament. As such, most players often consider double Kirby less of a ban-worthy team in comparison to double Pikachu due to their lack of popularity in recent tournaments.
Techniques[edit]
Final Cutter spike[edit]
Final Cutter can spike opponents on the way down during its initial frames (approximately until the same height from which the Final Cutter was initiated).
Inhale sacrificial KO[edit]
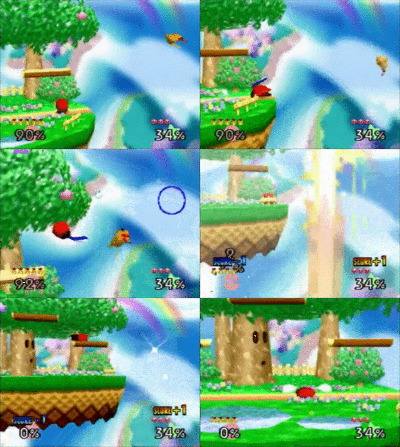
Kirby can use his Swallow move on opponents and fall to the map's bottom blast zone for a sacrificial KO. However, Kirby can "spit out" his opponent under the stage (particularly useful on Dream Land) and then recover. Yoshi is the only character who is practically guaranteed not to be able to recover from this.
Kirby's sliding up-B glitch[edit]
There is a glitch called Kirby's sliding up-B, which is done by dashing, waiting for the dash to finish (which takes about 14 frames), turning instantly, and then using Final Cutter 20 frames after turning. This is similar to Teleporting but is harder and is generally limited to flashy play/TASing. This was discovered by DSGnoll, a Japanese smash 64 player. The video, as popularized by Jpheal, a well known TAS player. In non-Japanese versions, the milder version of Final Cutter's slide travels less far and is not as useful.
Bigger Kirby glitch[edit]
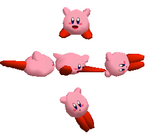
If Kirby uses Final Cutter in midair, he will become slightly bigger. Normally, Kirby has a size modifier of 0.91× (0.94× in the Japanese version), meaning that Kirby's model in game is 91% its original size (94% in the Japanese version). When Kirby uses an aerial Final Cutter however, his model size resets to 1×, making him bigger. This effect remains until Kirby loses a stock and, due to how it functions, it only changes Kirby's size once. This effect is not purely aesthetic; having numerous gameplay effects. These effects include:
- Making his hurtbox larger
- Making various animations travel further (including rolls, dash attack, forward smash and Final Cutter itself)
- Making his hitboxes extend further, both from Kirby's body moving further physically when attacking and from the placement of his hitboxes linearly scaling with his altered model size
With Kirby becoming larger, this naturally means the glitch has its positives and negatives. As it increases the range of Kirby's attacks, this glitch is naturally useful to allow Kirby to land his attacks from further ranges; notably, it allows his up smash to hit opponents standing on the lower platforms of Dream Land (which it cannot do in the international versions). On the other hand, the increased size of Kirby's hurtbox makes him a larger target, making him slightly easier to hit—for example, Kirby cannot crouch under moves such as a fully charged Charge Shot or certain grabs as consistently.
Since using Final Cutter is required for recovery, the bigger Kirby glitch is often unwittingly triggered by players who did not intentionally activate it beforehand, with players not figuring out Kirby's change in size until around 2014. In the Japanese version, the difference between regular Kirby and bigger Kirby is less significant than in the international versions (due to Kirby's larger default size in the Japanese version) although bigger Kirby is the same size in all versions.
In 1P Game[edit]
Kirby appears as an opponent in the seventh stage of the single-player mode. The stage takes place in Dream Land and pits the player against a team of eight Kirbys. Each of the eight Kirbys sports a unique hat (except for one, which will be normal Kirby or one of the four unlockable characters after they've been unlocked) corresponding to each of the eight starter characters in the game. Except for the normal/unlockable character Kirby, they all appear in the selection screen order of the respective character whose power they copied. Keeping this in mind, if the player manages to defeat them in the right order (Mario, DK, Link, Samus, Yoshi, Fox, Pikachu, regular/random unlockable), they will be awarded the Kirby Ranks bonus, worth 25,000 points.
Profile[edit]
The 8-inch high Kirby hails from a distant, peaceful star. Like his simplistic appearance, he is an easily-understood character. True to his instincts, Kirby eats when he gets hungry and sleeps as soon as he grows tired. Nevertheless, Kirby remains a formidable opponent. In addition to his distinct flying and swallowing skills, he also has the ability to copy enemy attacks for ever-changing action.
Alternate costumes[edit]

| ||||
Trivia[edit]
- Kirby's shield stance is similar to his block stance in Kirby Super Star. When it is done with Mirror Kirby, he uses the orb shield just like the shields in the Super Smash Bros. series.
- When Kirby hits a wall, lands on the ground, or does certain moves, small stars are emitted, similar to how they look in the Kirby games, thus giving authenticity to his origin.
- Kirby shares many of his attack animations with Jigglypuff, such as the ducking animation, neutral aerial, and tumbling animation.
- While other characters perform a victory pose when selected on the character selection screen in Smash 64, Kirby uses a unique animation for this, being the only character to do so. This pose would also be used for one of his taunts from Super Smash Bros. Brawl onwards.
- In addition, Smash 64 Kirby is the only character in any Super Smash Bros. title to have only two victory poses.
- Kirby is one of four characters to have a green costume exclusive to Team Battle, the others being Mario, Captain Falcon, and Donkey Kong.
- When Kirby gets hit by an electric attack, his frightened eyes can be seen.
- Kirby has two unused voice clips: one voice clip has Kirby grunting a little, and another voice clip has Kirby shouting.
- Kirby's portrait on the character selection screen greatly resembles his artwork from Kirby's Dream Land 3, albeit without an angry expression.
- When Kirby's shield is broken, he yells his Star KO cry rather than his knockback one. This aspect is shared with Pikachu and Jigglypuff.
| Fighters in Super Smash Bros. | |
|---|---|
| Fighters | Captain Falcon · Donkey Kong · Fox · Jigglypuff · Kirby · Link · Luigi · Mario · Ness · Pikachu · Samus · Yoshi |
|
| |
|---|---|
| Fighters | Kirby (SSB · SSBM · SSBB · SSB4 · SSBU) · Meta Knight (SSBB · SSB4 · SSBU) · King Dedede (SSBB · SSB4 · SSBU) |
| Assist Trophies | Knuckle Joe · Nightmare · Chef Kawasaki |
| Bosses | Giant Kirby · Marx |
| Stages | Dream Land · Fountain of Dreams · Green Greens · Halberd · Dream Land GB · The Great Cave Offensive |
| Items | Maxim Tomato · Star Rod · Parasol · Warp Star · Apple · Dragoon · Superspicy Curry · Bomber |
| Enemies | Bonkers · Bronto Burt · Gordo · Parasol Waddle Dee · Plasma Wisp · Shotzo · Tac · Waddle Dee · Waddle Doo |
| Other | Gourmet Race · Whispy Woods |
| Trophies, Stickers and Spirits | Trophies (SSBM · SSBB · SSB4) · Stickers · Spirits |
| Music | Brawl · SSB4 · Ultimate |
| Masterpieces | Kirby's Dream Land · Kirby's Adventure · Kirby Super Star |
