Diddy Kong (SSBU)
| Diddy Kong in Super Smash Bros. Ultimate | |
|---|---|
 
| |
| Universe | Donkey Kong |
| Other playable appearances | in Brawl in SSB4 |
| Availability | Unlockable |
| Final Smash | Hyper Rocketbarrel |
| Tier | S- (8) |
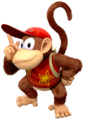
Diddy Kong (ディディーコング, Diddy Kong) is a playable character in Super Smash Bros. Ultimate. He was officially confirmed on June 12th, 2018 alongside Olimar and the rest of the returning roster. Unlike his previous appearances in the Super Smash Bros. series, he is now an unlockable character instead of a starter character. Diddy Kong is classified as Fighter #36.
Diddy Kong once again retains his realistic chimpanzee screeches (sampled once again from the commonly used "Chimpanzee Screeche PE026201" stock sound effect) that were used in both Super Smash Bros. Brawl and Super Smash Bros. 4 instead of being voiced by Katsumi Suzuki.
Diddy Kong is currently ranked 8th out of 82 characters on the Ultimate tier list, ranking him at the very top of S- tier. This is a slight drop from his ranking in Smash 4, where he was tied with Cloud at 2nd/3rd out of 54, which technically makes it his worst placement in the series. Diddy Kong possesses many strengths that are core to his gameplan. He has a strong neutral, with his signature item being the Banana Peel: it offers him an extensive and flexible array of options, such as combos and setups into KOs or edgeguards. His small size generally makes him hard to hit or pin down. Diddy Kong also has good frame data on his moves, allowing him to box out his opponents with ease. He also possesses a command grab in Monkey Flip, which can be used as a burst option and to condition foes to shield.
Despite these strengths, Diddy Kong has some weaknesses. Since his banana peel is an item, opponents can use it against him, allowing for their own combo or KO confirms. Diddy Kong also does not have as many reliable ways to secure stocks at high percents if his opponents are past KO confirm percentages, which is exacerbated by his light stature as he cannot take advantage of rage as effectively. Finally, his recovery is relatively exploitable: if he gets hit during Rocketbarrel Boost, he is put into a significant endlag animation that will likely result in him being KO'd.
Diddy Kong had a rocky start in the early phases of Ultimate, but balance changes and metagame shifts have resulted in Diddy Kong seeing strong tournament results from his mains. His most notable results come from Tweek, who has won several majors with him, and other players such as Aaron, Ryuoh and Nyonoknb.
How to unlock[edit]
Complete one of the following:
- Play VS. matches, with Diddy Kong being the 37th character to be unlocked.
- Clear Classic Mode with Donkey Kong or any character in his unlock tree, being the 7th character unlocked after Greninja.
- Have Diddy Kong join the player's party in World of Light.
With the exception of the third method, Diddy Kong must then be defeated on Kongo Falls. In World of Light, he is fought on the Ω form of Kongo Jungle.
Attributes[edit]
Diddy Kong is a small middleweight with typical attributes for his weight class; he has very fast walk, run, and fall speeds, which allow him to move on the ground very well. In contrast, his air mobility is rather lacking, as his air speed and air acceleration are both below average. Overall, while Diddy outspeeds many characters on the ground, his air game is rather clunky due to his lackluster air attributes.
Similar to other characters of his weight and size, Diddy Kong has very fast frame data, which allows him to throw out a flurry of moves at his opponent while still being able to chase them with his strong grounded mobility. In fact, nearly all of his moves, except his forward smash, down aerial, and special moves, come out before frame 10, with many of them also having low endlag. Thanks to these attributes, Diddy has a strong, flexible combo game, allowing him to use multiple different moves to string into each other and continually pressure his opponent even if they escape his combos, as he has multiple ways to keep them at a disadvantage.
Another important aspect of Diddy's combo game is his excellent selection of combo starters, which lets him start combos reliably both in the air and on the ground and also lets him create mix-ups and play unpredictably. One of his main combo starters is from a grab, as both his down and up throws have low endlag and send at great angles for immediate follow-ups, as down throw can lead into a forward or back aerial, and up throw can lead into any of his aerials except for down aerial. Up throw also has potential KO setups into up aerial, although these are inconsistent and unreliable. His dash attack has a long duration and extremely low endlag and sends the opponent upwards, which lets Diddy follow up with an up, back, or forward aerial. His neutral aerial has a long-lasting hitbox and can lead into another aerial from low to high percents, with the late hit being particularly useful at high percents due to its lower knockback. Diddy's up and down tilts are both excellent combo starters themselves, with the latter having the ability to KO confirm into an up-smash at high percents. Additionally, all of Diddy's aerials except for neutral and up aerial can lead into a grab when landed on grounded opponents, thanks to their low knockback and landing lag.
Diddy's special moveset also comes with several unique options. His neutral special, Peanut Popgun, is a small projectile with low range and knockback when uncharged. It is useful for pestering the opponent in the neutral game and can be charged, giving it extreme power when fully charged, although it has extremely high lag, doesn't shoot at a distance, and its charge cannot be saved like other chargeable projectiles(such as Samus' Charge Shot). He can also cancel charging the move by shielding, dodging, or spotdodging. His side special, Monkey Flip, has Diddy leap forward and will act as a command grab when landed on the opponent or will be a fast kick if the player presses the attack button again during the duration of the move. Due to its fast speed and decent distance, low endlag, and ability to edge-cancel off platforms or the ledge of the stage, it can be used as both a movement option and a way to approach, as its speed can compensate for his poor air mobility. It can also be used for horizontal recovery. His up special, Rocketbarrel Boost, is Diddy's main vertical recovery option. Uncharged, the move has unremarkable distance, but when fully charged, it moves much faster and travels much further. However, this requires Diddy to stay in place while charging the move in the air, leaving him highly vulnerable to gimps or edgeguards. The move also has a unique property in that if the opponent hits Diddy while using the move, the barrels will fly off and will irregularly move around, with the player having a small amount of control over their trajectory before they lose control. This gives him a useful, although niche, stage-controlling option, and the barrels will deal high damage and knockback when landed on an opponent. Lastly, Diddy's down special, Banana Peel, is his most useful special and one of his best moves. It has him pull out a Banana Peel over himself, which can be picked up and thrown by both Diddy and his opponent. If Diddy places it down before the opponent can grab it, then they will be tripped by it if they attempt to pick it up. This lets Diddy land almost any attack he wants on his opponent if he times it before the tripping animation is done, and allows for a plethora of combo options and even KO confirms into his smash attacks. Thanks to its ease of use and low commitment due to him only having to throw it at the opponent for it to work, it is integral to his kit and lets him punish missed attacks, have a strong advantage in the neutral game, create extremely long combos, and take control of the stage. He can also use a held banana as an excellent out-of-shield option when thrown. The only true downside to his Banana Peel is that the opponent can also catch and throw it just like he can, which allows them to use it against Diddy and take away one of his most important tools. Additionally, only one Banana Peel can be used at a time, and it disappears when hit by an opponent or thrown twice.
Despite very strong strengths, Diddy isn't without his weaknesses. His two main flaws are a lackluster disadvantage state and a predictable recovery. Monkey Flip, while fast, can be extremely predictable when used in a disadvantagous position, as it is Diddy's main way of getting out of juggle situations, due to his horrible air mobility. Diddy especially suffers when the opponent can consistently keep him in a disadvantageous state, not allowing the banana to be pulled. This can snowball in some matchups, making it extremely hard to catch up to the opponent if Diddy is not able to get his gameplan started. Diddy's other main weakness, his recovery, is arguably worse, however. Monkey Flip has respectable distance and safety when the kick version is used, but has some endlag and also doesn't allow him to use Rocketbarrel Boost afterwards. Rocketbarrel Boost itself grants Diddy a relatively long-range recovery option, the drawback being that it leaves Diddy wide open for attacks. If Diddy is hit out of the Rocketbarrel Boost with a weak move, he will become helpless and slowly fall to his death, making it easy to gimp him. Diddy Kong also suffers from a lack of range, though this is somewhat offset by his banana, which provides him with a fast and transcendent projectile.
Diddy Kong falls into a quick, bait-and-punish heavy playstyle. He must control the neutral game with his banana and great ground moves, capitalising on his opponents' mistakes by repeatedly getting them offstage or juggling them to rack up damage. Diddy can use his fast and non-committal down tilt to set up for kills at high percent or use his banana to set up for a smash attack, ending the opponent's stock even earlier. However, players must be smart in how they use his Banana Peel, as the opponent could potentially hinder his options by taking it away from him and also exploiting his linear recovery.
Changes from Super Smash Bros. 4[edit]
Diddy Kong was one of the most dominant characters in both of his appearances in Brawl and SSB4, thanks to his useful moves and the ability to produce items. These, namely Banana Peels, grant him an amazing control of the neutral game. Even after receiving nerfs in game updates in SSB4, Diddy continued to be dominant. Most likely owing to his overwhelming success, Diddy Kong was initially nerfed significantly in the transition to Ultimate, though he would later receive significant buffs in various updates to compensate. Ultimately, Diddy is considered to be slightly nerfed overall.
Diddy Kong's neutral game has been toned down due to many of his staple moves being worsened in various ways. Up and down tilts, down smash, forward aerial's late hit, up aerial, and grab all have less range, making it harder for Diddy to take advantage of these moves at their highest range. Banana Peels cannot be grabbed as quickly due to him releasing one at a higher arc, and they have a cooldown before they can be produced again after disappearing. Rocketbarrel Boost travels a drastically shorter distance when fully charged, and the charge time itself was reduced by a third, worsening his already vulnerable recovery when hit very far offstage. Diddy is also lighter, making him easier to KO.
Further exacerbating these nerfs, some of the universal changes hinder Diddy overall. The reduced shieldstun for items and increased lag on grabs weaken his approach and defensive game with Banana Peel; the latter change is compounded by the nerfs to his grabs' range. The faster knockback physics reduce his up throw's combo potential, no longer having reliable combos or KO setups at high percents. He also suffers from the universal increase in jump speed, as he can no longer reliably hit small characters with his back aerial from a rising short hop.
Despite this, Diddy Kong has also received notable buffs to help compensate, some of which have been received through game updates. His neutral attack no longer has an infinite portion, which decreases its damage potential but allows it to connect much more reliably, improving its overall consistency and utility as a close-range option. Some of his moves have more range and/or reduced lag that increases their combo ability, namely neutral aerial (which can now autocancel from a short hop fast fall), forward aerial's clean hit, dash attack, up tilt, down aerial, and down throw, the latter working better as an alternative to his up throw at lower percents. A few of Diddy's moves also have more power, such as his up and down smash attacks.
His special moveset has also been improved in many ways. Monkey Flip has reduced startup lag and much more range, and is barely affected by the changes to jostle mechanics, greatly improving its utility as an offensive tool and making it unpredictable as to whether or not Diddy will cross the opponent up. Peanut Popgun has a faster startup, deals more damage, and charges significantly faster, marginally improving the overcharge portion as a hard punish. Rocketbarrel Boost goes further when uncharged and makes Diddy fall much slower during the charge period, slightly compensating for his worse recovery. Finally, Banana Peels benefit from the item's tweaked natural properties: they now possess transcendent priority, making them unable to trade with attacks and thus riskier to pick up; and they can now be thrown twice at opponents before disappearing (though this does potentially give opponents more opportunities to use the item against Diddy). Finally, in terms of gameplay changes, the universal increase in mobility noticeably benefits Diddy, as his already fast mobility has been further improved, allowing him to keep up with the rest of the cast.
Overall, Diddy Kong's nerfs moderately outweigh his buffs, even accounting for game update changes. Diddy must now take more risks to win the neutral game with his standard moves, and his Banana Peels have been nerfed to be less spammable. However, he has been generally compensated in terms of moveset utility and power, and still possesses an oppressive factor courtesy of his fast frame data and movement speed, and Banana Peels remain a strong tool in the neutral game, which is further noticeable due to their new inability to trade. As a result, Diddy performs similarly effectively as in Brawl and SSB4.
Aesthetics[edit]
 Due to the aesthetic used in Ultimate, Diddy Kong's model features a more subdued color scheme. Like Donkey Kong, his fur is less detailed and appears flatter. The fabric of his hat and shirt has subtle detail, and his facial proportions have been tweaked.
- Diddy Kong faces the foreground at an angle, instead of facing directly forward. In addition, most of his animations are mirrored while some are slightly altered. However, he reverts to his previous idle animation while holding a small item.
- Diddy Kong is more expressive, he appears angry during his up and down throw as well as grabbing onto a ledge.
- Diddy Kong's hat has greater independent physics; it appears to be "looser" around his head, popping off slightly while performing many actions.
- Up taunt has an altered ending animation. Diddy Kong now fixes his hat as it lands crooked on his head.
Attributes[edit]
 Like all characters, Diddy Kong's jumpsquat animation takes 3 frames to complete (down from 4).
- Diddy Kong runs faster (1.824 → 2.006).
- His initial dash is significantly faster (1.7 → 2.09).
- Diddy Kong walks faster (1.25 → 1.313).
- Diddy Kong's air speed is higher (0.88 → 0.924).
- Diddy Kong's traction is much higher (0.0484 → 0.093).
 Diddy Kong is lighter (93 → 90), worsening his endurance.
- Forward roll grants less intangibility (frames 4-15 → 4-14) and has more ending lag (FAF 28 → 29).
- Back roll has more ending lag (FAF 28 → 34).
- Spot dodge has less ending lag (FAF 26 → 24).
- Spot dodge has more startup and grants less intangibility (frame 2-16 → 3-14).
- Air dodge grants more intangibility (frames 2-26 → 2-27).
- Air dodge has significantly more ending lag (FAF 32 → 45).
Ground attacks[edit]
- Neutral attack:
- The first and second hits have significantly less ending lag (FAF 34 → 20 (hit 1), 37 → 21 (hit 2)), no longer being among the slowest to interrupt.
- The first and second hits have altered angles (105°/78°/45° (hit 1), 100°/78°/45° (hit 2) → 361°/180°) and knockback (16/18/24 set/100 scaling → 25/20 base/25/15 scaling (hit 1), 20 base/25/15 scaling (hit 2)) to keep opponents on the ground and closer to Diddy Kong, akin to other neutral attacks. This allows them to connect better and jab lock.
- The first hit transitions into the second hit faster (frame 9 → 6), which transitions into the third hit faster (frame 9 → 7). The third hit also has less startup lag (frame 9 → 5).
- The first hit can be held for a consecutive jab.
- The infinite portion has been removed; the third hit instead launches at a different angle (90°/85°/60° → 361°) and no longer deals set knockback (25/37 set/100 scaling → 60 base/80 scaling).
- This makes the neutral attack much more consistent, no longer risking opponents escaping it before the final hit and punishing Diddy Kong. The third hit also has less ending lag compared to the previous neutral infinite's finisher (FAF 39 → 35).
- However, the move deals much less damage overall as a result, despite all three hits having their damage values increased (1.2% → 2% (hit 1), 1.2% → 1.5% (hit 2), 2% → 4% (hit 3)). The third hit is also weaker compared to the previous neutral infinite's finisher, no longer KOing under 300% from the center of Final Destination.
- All hits have a shorter hitbox duration (2 frames → 1 frame).
- All hits have a higher hitlag multiplier (1× → 1.6× (hit 1), 1.2× (hit 2), 2× (hit 3)).
- The third hit has an altered animation, being a side kick rather than a back kick.
- Forward tilt:
- Forward tilt's arm hitboxes have a longer duration (1 frame → 2 frames), and the hand hitboxes retain full damage for longer before transitioning to sourspots (1 frame → 3 frames), improving the consistency of both the range and damage output of the move.
- The late hit has a longer duration (11-13 → 13-16).
- The hitboxes on Diddy Kong's fists are larger (2.7u → 3.8u).
- It sends opponents at a lower angle (361° → 35°), improving its ability to set up tech chases and edgeguards, and improving its KO potential.
- Forward tilt has more base knockback (10 → 60), but less knockback scaling (100 → 60). This increases its safety on hit at low percents, but reduces its KO potential at high percents, and removes its ability to lock.
- Up tilt:
- Up tilt has less ending lag (FAF 33 → 30), improving its combo potential.
- It has an altered animation where Diddy Kong does not leap as high, decreasing its vertical range. It can no longer hit opponents on the middle platforms in Battlefield.
- Down tilt:
- Down tilt's farthest hitbox is noticeably smaller (4.2u → 3u), reducing its range.
- It is also lower down (Y offset: 2.25 → 1.8).
- Dash attack:
- Dash attack has less startup (frame 9/18/24 → 8/16/22) and ending lag (FAF 46 → 41), improving its combo potential.
- Due to the changes to jostle mechanics, it can no longer whiff if initiated too close to an opponent.
- The first and second hits have lower hitlag multipliers (1× → 0.5× (hit 1), 0.8× (hit 2)) and an additional hitbox, as well as different launch angles for aerial opponents, with the second and hit's also being larger (3.5u → 4u). The second hit also uses different set knockback values (55/40/70 → 45/45/70) and the third hit has a larger hitbox (4.5u → 5.5u), allowing the move to connect more reliably.
- The second and third hits have a longer hitbox duration (1 frame → 2 frames).
- The third hit launches at a slightly higher angle (78° → 83°).
- Diddy Kong sports an angry expression at the third hit.
- Forward smash:
- The first hit uses different angles (90°/60°/30° → 10°/45°/80°/22° (clean), 0° (late)) and set knockback values (28/35/42 → 20/35/25/42 (clean), 20 (late)), as well as weight-independent knockback, allowing it to connect more reliably into the second hit.
- The second hit has one frame less startup (frame 22 → 21).
- However, its total duration remains unchanged, giving it one frame more ending lag.
- Up smash:
- The first and second hits have received various changes to their angles and set knockback, and the second hit uses weight-independent knockback like the first, allowing the move to connect more reliably.
- The third hit deals more knockback (50 base/129 scaling → 55/131).
- Down smash:
- Down smash deals more knockback (40 base/72 scaling → 46/77 (hit 1), 35 base → 38 (hit 2)).
- The second hit has less startup (frame 16 → 12).
- However, it has a shorter hitbox duration (frames 16-18 → frame 12), with its total duration not fully compensated, giving it more ending lag (FAF 53 → 51).
- Both hits have two hitboxes instead of three, which are smaller, significantly reducing its range (4u/4u/5u → 3.9u/3.3u).
- The first hit has slightly more startup (frame 6 → 7).
Aerial attacks[edit]
- All aerials have less landing lag (13 frames → 8 (neutral), 26 → 16 (forward), 12 → 7 (back), 21 → 9 (up), 28 → 17 (down)).
- Neutral aerial:
- Neutral aerial has regained its much faster auto-cancel window from Brawl (frame 59 → 27), allowing it to auto-cancel in a short hop fast fall once again.
- It has noticeably larger hitboxes (2u → 3.5u).
- Forward aerial:
- Forward aerial's early hit has noticeably larger hitboxes (4u → 5u).
- Forward aerial's late hit has much smaller hitboxes (5u → 2.7u).
- It has an altered animation where Diddy Kong does not spin as much.
- Up aerial:
- Up aerial has less ending lag (FAF 39 → 36), matching its ending lag from SSB4 prior to update 1.0.8. This allows it to combo slightly better into itself.
- It deals more damage (6% → 7%) with only base knockback compensated (64 → 57), slightly improving its KO potential.
- Up aerial has an altered animation where Diddy's attacking foot is positioned higher up on frame 4 (with the move's hitbox timing and duration unchanged), noticeably reducing the move's horizontal range in front of Diddy Kong, especially against grounded opponents.
- Down aerial:
- Down aerial has less startup (frame 17 → 15), with its total duration reduced as well (FAF 49 → 47).
- The removal of teching for grounded meteor smashes improves down aerial's combo potential onstage, compounded further by its reduced landing lag.
Throws and other attacks[edit]
- Grabs:
- All grabs have more startup (frame 6 → 7 (standing), 8 → 10 (dash), 9 → 11 (pivot)) and ending lag (FAF 32 → 37 (standing), 39 → 45 (dash), 37 → 40 (pivot)).
- All grabs have less range (Z2 offset: 8.3u → 7.8u (standing), 9.9u → 9.5u (dash), 13.9u → 13.6u (pivot)).
- Diddy Kong uses one hand to grab instead of both. He also has a surprised expression if he misses his grab.
- Pummel:
- Pummel deals more hitlag (4 frames → 11), but has less startup (frame 2 → 1) and significantly less ending lag (FAF 17 → 7), shortening its effective duration.
- It deals less damage (2% → 1%).
- It has an altered animation where Diddy Kong no longer hops off the ground while pummeling.
- Up throw:
- Up throw has less ending lag (FAF 28 → 27).
- However, the faster knockback physics hinder up throw's combo potential at high percents despite this, no longer having a KO setup into up aerial unless initiated at the top platform of Battlefield.
- Down throw:
- Diddy Kong releases opponents from down throw later (frame 19 → 22). While this does make it easier to DI, this also improves its combo potential, as its total duration was unchanged.
- Edge attack:
- Edge attack deals more damage (7% → 9%).
Special moves[edit]
- Peanut Popgun:
- Peanut Popgun has less startup lag (frame 18 → 16) and charges much faster (frame 120 → 94 (full charge), 123 → 97 (explosion)).
- However, its total duration remains unchanged, giving it more ending lag.
- It has gained a melee hitbox that deals 3%, increasing its utility at point blank range by allowing it to rack up more damage and negate reflectors.
- The peanuts deal more damage (3.6%-12% → 4.8%-13.8%).
- Diddy Kong's animation for Peanut Popgun is mirrored, and he can fire with either his left or right hand.
- Peanuts bounce once upon hitting the ground, and float upwards before exploding upon hitting an opponent, although these animations are only aesthetic.
- Monkey Flip:
- Monkey Flip has less startup lag (frame 20 → 18).
- The grab has more horizontal range (Z offset: 3u/2u → 4.5u/4u).
- The jump attack now immobilises the opponent for exactly 20 frames if the move does not cause tumble, regardless of hitstun, increasing the stun time if hitstun is lower than 20 frames, but lowering it if hitstun is between 20 and 32 frames.
- It has more ending lag (FAF 44 → 48).
- The grab's automatic pummel has Diddy Kong repeatedly scratch the opponent instead of simply latching onto them.
- Rocketbarrel Boost:
- Rocketbarrel Boost's clean hit has larger hitboxes (3.5u → 4u).
- The uncharged boost is larger (initial speed: 2.2 → 3.1).
- The additional boost per frame of charge is smaller (0.031 → 0.019).
- Its maximum charge time has been significantly reduced (90 frames → 60), combined with the previous change, this significantly reduces the height of the fully charged version to the point where it barely grants more distance than the uncharged version if used while falling, hindering Diddy Kong's recovery.
- The boost multiplier when used in the air is lower (1.12× → 1.05×), and thus the height gained when using the move in the air isn't increased as much compared to when used on the ground, further reducing the distance it travels in the air.
- Banana Peel:
- The Banana Peel can hit opponents twice before disappearing rather than only once, bouncing off in a high arc on the first hit. This allows Diddy Kong to pick it up and throw it again, but shielding opponents can likewise punish Diddy Kong and steal the Banana Peel, leaving him more disadvantaged. However, it drastically improves the moves combo potential.
- The Banana Peel now has transcendent priority making it phase through other hitboxes. This allows it to be used much more effectively for spacing and edgeguarding, as it can combo into down air when z dropped at the ledge.
- Diddy Kong throws the banana in a higher arc, causing it to take longer for him to pick up.
- The amount of time that must pass before Diddy Kong can generate another banana peel is much higher (12 frames → 85). This makes the move more restrictive, and more importantly prevents Diddy Kong from exploiting the new Banana Peel properties to perform an infinite.
- The move has a snappier animation.
- Final Smash:
- Diddy Kong has a new Final Smash, Hyper Rocketbarrel, which functions differently from Rocketbarrel Barrage. Diddy Kong generates a Special Rocketbarrel Pack, multiplys himself, and flies across the stage in all directions, attacking his trapped opponents. The final hit is where Diddy Kong does a delayed, aimed attack, dealing heavy knockback to opponents he attacked the most. Diddy Kong then lands at the spot he blasted off from.
Update history[edit]
Due to the engine changes and the direct nerfs to his most useful tools in the transition from Smash 4 to Ultimate, which overall significantly hindered his viability, Diddy Kong was buffed significantly via game updates. Update 2.0.0 only brought one, but substantial change to his neutral aerial; the move now autocancels significantly earlier. Update 3.0.0 also granted Diddy Kong with some worthwhile buffs. His dash attack is now faster overall with less startup on all of its hitboxes and the move ends slightly sooner. However, the first hitbox now lasts only one frame instead of two due to a frame speed multiplier being used without proper compensation. On the flipside, his forward tilt gained late hitboxes, overall increasing the move's hitbox duration. His down smash was made stronger, his neutral aerial now has bigger hitboxes and his up aerial deals more damage without fully compensated knockback, making the move much stronger.
Update 3.1.0 was the biggest patch for Diddy Kong, bringing him many plentiful and noteworthy buffs. The second hit of his neutral attack now connects more reliably into the first hit. The final hit of up smash was made stronger and the move now connects much better overall. His up aerial was buffed once more with less startup and ending lag. His down aerial also received similar buffs, with less startup and a shorter overall duration. Peanut Popgun also was graced with considerable buffs, with every charge instead of the max level dealing more damage. The move also charges much faster overall. And finally, his once previously weak recovery, Rocketbarrel Boost, was given two buffs. Diddy Kong now falls slower while charging the move (only applies to the first charge) and the move now flies higher after charging.
After a small buff intangibility buff in update 7.0.0, Diddy Kong was buffed once more in update 8.0.0. His forward tilt now launches opponents at a lower angle, the fist hitboxes were made bigger, and the late hitboxes added in update 3.0.0 now lasts two frames longer, further increasing the move's hitbox duration. The second hit of dash attack now links more reliably into the third hit, with the aforementioned hit now having larger hitboxes. Down smash now has two frames less startup on both hits and a shorter duration overall, making the move end sooner. And finally, the clean hit of his forward aerial has bigger hitboxes.
While Diddy was mostly buffed, he has also received two notable nerfs to his Banana Peel, thanks to update 8.0.0 and once more in update 11.0.0, it now takes longer for Diddy to respawn another Banana. As a result, all of his infinite banana combos are obsolete, though this change is negligible to his gameplay outside of the infinite.
Overall, Diddy Kong was one of the most buffed characters in Ultimate, going from a mid-tier to a high tier, debatably top tier character. While Diddy Kong is still weaker than his Brawl and Smash 4 incarnation, he is still a character that should not be underestimated and continues to receive good placements in tournaments.
- Neutral aerial autocancels earlier (frame 50 → 27). It is now early enough to buffer short hop and fastfall with no landing lag.
 Monkey Flip release glitch has been fixed.
- Dash attack has less startup lag (frame 9/18/24 → 8/16/22) with identical ending lag, shortening its duration (FAF 43 → 41).
- Forward tilt has a new late hit on frames 13-14 that deals less damage (10% → 7%) but increases its duration overall.
- Down smash deals more knockback (Hit 1: 40 base/72 scaling → 46/77; hit 2: 35 base → 38).
- Neutral aerial has more range (2u/2u/2u/2u → 3.5u/3.5u/3.5u/3.5u).
- Up aerial deals more damage (6% → 7%) with base knockback not fully compensated (64 → 57).
- Neutral attack 2 has more range and connects more reliably from neutral attack 1.
- Dash attack's final hit sends at a slightly more vertical angle (78° → 83°).
- Up smash's hits connect more reliably.
- Up smash's final hit deals more knockback (50 base/129 scaling → 55/131).
- Up aerial has less ending (FAF 37 → 36) and landing lag (13 frames → 9).
- Down aerial has less startup lag (frame 17 → 15) with identical ending lag, shortening its duration (FAF 49 → 47).
- Peanut Popgun's peanut projectile deals more damage (with shield damage compensated: 0 → -1) (3.3%-15% → 4.3%-13.8%) and charges faster (max charge: frame 121 → 94, explosion startup: 123 → 97).
- However, they deal less damage at full charge (15% → 13.8%).
- Diddy Kong falls slower while charging Rocketbarrel Boost.
- Rocketbarrel Boost travels more vertical distance when charged.
- Hyper Rocketbarrel's explosion and jet at the start deal more damage (total: 7% → 16%).
- Hyper Rocketbarrel's tackle deals less damage (2.5% → 2%).
- Hyper Rocketbarrel's final tackle deals slightly less overall knockback (135 base/47 scaling → 115/58).
- The glitch that resulted Rocketbarrel Boost to disappear instantaneous when hit by a certain move (ex. Palutena's neutral aerial) during the release has been fixed.
- Diddy Kong's right arm is briefly intangible when activating his shield.
- Forward tilt:
- The move launches at a lower angle (45° → 35°), improving its ability to set up tech-chases and edgeguards.
- The hitboxes on Diddy Kong's fists are larger (2.7u → 3.8u).
- The late hit has a longer duration (frames 13-14 → 13-16).
- Dash attack:
- The second hit has more consistent set knockback (55/40/70 → 45/45/70), allowing it to link more reliably into the third hit.
- The third hit has a larger hitbox (4.5u → 5.5u).
- Down smash:
- The move has less startup (frame 9/14 → 7/12), with its total duration reduced as well (FAF 52 → 50).
- The second hit has a longer duration (frame 14 → frames 12-13).
- Forward aerial's clean hit has larger hitboxes (4u → 5u).
- Rocketbarrel Boost no longer launches Diddy Kong at an unusually high speed if he is hit during the charge frames.
- The time until Diddy Kong can produce another Banana Peel after releasing the previous one has been significantly extended (12 frames → 61), removing his "pyramid scheme" infinite combo.
- Banana Peel takes 24 frames longer to throw after having thrown a previous one. This removes all remaining infinites.
Moveset[edit]
- Diddy Kong can crawl, wall cling, and wall jump.
For a gallery of Diddy Kong's hitboxes, see here.
Note: All numbers are listed as base damage, without the 1v1 multiplier.
| Name | Damage | Description | ||
|---|---|---|---|---|
| Neutral attack | Right Flap (ライトフラップ) Left Flap (レフトフラップ) Foot Push (フットプッシュ) |
2% | Two alternating inward slaps, followed by an outward sidekick. Holding the attack button will have Diddy repeat the first hit. The first 2 hits can lock. | |
| 1.5% | ||||
| 4% | ||||
| Forward tilt | Double Arm (ダブルアーム) | 10% (clean), 7% (late) | Leans to his side and thrusts both of his arms forward in a double punch. It can be angled upwards or downwards. | |
| Up tilt | Overhead Slap (オーバーヘッドスラップ) | 6% | Swats the air above him with a slap in a similar fashion to an uppercut. Hits quite quickly and can combo into most of Diddy's aerial attacks at low to mid percent ranges. It can also kill at around 160%. | |
| Down tilt | Hand Clap (ハンドクラップ) | 5.5% | A low clap in front of himself while crouching. An extremely versatile combo starter, as it can combo into a variety of moves at nearly any realistic percentage, including down tilt to up smash as a KO confirm. | |
| Dash attack | Rolling Slap (ローリングスラップ) | 2% (hits 1 and 2), 3% (hit 3) | Diddy Kong's signature Cartwheel attack from Donkey Kong Country, concluding with a double-handed ground-slap. The final hit has largely vertical knockback and can combo into aerials at low to mid percent ranges. | |
| Forward smash | Slap & Beat (スラップ&ビート) | 5% (hit 1), 11%/9% (hit 2) | Jumps forward while spinning, and performs an open-handed slap followed by a spinning back fist with his opposite arm. The first hit combos into the second, which has good knockback and KO power. However, it is easily punishable if whiffed or on shield. Often only used in combination with his banana peel. | |
| Up smash | Triple Attack (トリプルアタック) | 2.5% (hits 1 and 2), 6% (hit 3) | Leaps upward and performs a stationary cartwheel, attacking upwards with an open-handed slap, a reverse heel kick, and an uppercut. It is the fastest up smash in the game, coming out on frame 5. However, it is somewhat weak, not KOing until around 130%. It is mostly used as a follow-up from down tilt or as a close-range out-of-shield option. | |
| Down smash | Turning Leg (ターニングレッグ) | 12% (hit 1), 15% (hit 2) | A flare, kicking in front and then behind himself. A fast smash attack with respectable power, KOing opponents at around 110% at the ledge. The back hit is stronger than the front hit KOing around 10% sooner. | |
| Neutral aerial | Diddy Roll (ディディーロール) | 6% | An aerial cartwheel, similar to his dash attack. Very high ending lag, so much so that Diddy should avoid using this move offstage. However, it does a low amount of vertical knockback, which makes it an excellent combo starter on landing. It can combo into all of Diddy's aerials (even down aerial, which can KO at around 50% if done by the ledge). Additionally, it has a very generous autocancel window, being able to do so in a short hop fast fall. | |
| Forward aerial | Screw Kick (スクリューキック) | 10% (clean), 8% (late) | A dropkick while spinning. Comes out very fast with a long hitbox duration, generous autocancel window and great range, making it one of Diddy's core spacing tools. It is moderately powerful, KOing at around 145% at the edge. However, it has a bit of ending lag, making it unable to combo into itself unless landing with it. It is often considered one of the best forward aerials in the game due to its combination of speed, range, power and safety. | |
| Back aerial | Quick Backspin (クイックバックスピン) | 9% | A reverse spin kick behind himself. Has very low start-up and ending lag, allowing it to be used twice in one short hop and combo into itself at low to mid percents. It also has decent range and KO power killing at around 130% at the edge, although it is somewhat weak compared to other moves of its type. | |
| Up aerial | Turn Kick (ターンキック) | 7% | An overhead kick in an arc. Tied for the fastest in the game (frame 4 startup) with good coverage above and behind Diddy. However, it possesses a blindspot in front of Diddy, making it unable to hit most characters while rising with the move. Despite its hitbox issues, it is a great juggling tool, as it has above average base knockback, giving it strong combo potential at low percents and KO Potential at higher percents. | |
| Down aerial | Hammer Meteor Knuckle (ハンマーメテオナックル) | 13% (fists), 10% (arms) | Swings both arms downward in a double ax-handle punch. A strong meteor smash and Diddy's strongest aerial overall, though it is also his slowest. It has a large auto-cancel window at the beginning of the attack before the hitbox starts, which makes it a good tool for landing provided that the move is inputted shortly before touching the ground. It can also jab lock opponents at low percent ranges. It also combos into his other aerials on landing. | |
| Grab | Grab (つかみ) | — | Reaches out in front of himself. | |
| Pummel | Grab Headbutt (つかみヘッドバット) | 1% | A headbutt. Fast but weak. | |
| Forward throw | Rock Throw (ロックスルー) | 9% | Tosses his opponent forwards. The throw is based on Diddy Kong's barrel toss animation from Donkey Kong Country. Diddy's second strongest throw, KOing middleweights around 156% at the edge of Final Destination. It also has low ending lag, which allows it to combo into dash attack, forward- and back aerial at very low percentages. | |
| Back throw | Back Rock Throw (バックロックスルー) | 12% | Tosses his opponent backward. Diddy's strongest and most damaging throw, KOing middleweights around 140% at the edge of Final Destination. | |
| Up throw | Grab Kick (グラブキック) | 1% (hit), 4% (throw) | Throws his opponent up and handstand kicks them. It works as a good combo starter at a wide range of percents and can even potentially set up KO confirms into up aerial in specific circumstances. However, it deals low damage and knockback, being unable to kill even at very high percent. | |
| Down throw | Leap Frog (リープフロッグ) | 7% | Throws the opponent onto the ground and hops over them. This is among his best combo starters, as it has extremely low ending lag and low knockback. It can set up into back aerial, forward aerial and up aerial very reliably depending on the opponent's DI, and can continue this string, especially on platforms. It can be used as a kill confirm into back air at the edge at around 110%, and into up aerial for the "Hoo Hah" KO confirm at around 90%-145% depending on weight, rage, and DI. However, the timing is somewhat strict. | |
| Forward roll Back roll Spot dodge Air dodge |
— | — | ||
| Techs | — | — | ||
| Floor attack (front) Floor getups (front) |
7% | Gets up and kicks on both sides. | ||
| Floor attack (back) Floor getups (back) |
7% | Gets up and kicks on both sides. | ||
| Floor attack (trip) Floor getups (trip) |
5% | Gets up and kicks on both sides. | ||
| Edge attack Edge getups |
9% | A spinning tail slap. | ||
| Neutral special | Peanut Popgun | 4.8%-13.8% (peanuts), 3% (close range), 23% (explosion) | Shoots a peanut from his Popgun. A safe projectile attack that is rather useful in neutral. It can also be canceled in the air if the shield button is held before inputting the special button, which is useful for B-reversing to make Diddy's movement harder to predict. The peanuts have the property of items and can be caught and thrown. The peanuts also bounce off of opponents and solid surfaces, but they lose their hitbox afterward. The longer Diddy charges the attack, the farther and quicker the peanut will fly. If Diddy overcharges the attack, however, it will cause a very powerful explosion that leaves him vulnerable but possesses massive knockback, being his most reliable option out of a shield break. | |
| Side special | Monkey Flip | 14% (clean mid-air kick), 12% (mid midair kick), 10% (late midair kick), 1% (grab loop), 3% (grab attack, hit 1), 7% (grab attack, hit 2), 3% (jump attack, hit 1), 8% (jump attack, hit 2) | Performs a back-flipping forward leap that has him cling onto an opponent. Inputting the move as a smash attack increases the distance of the jump. Once he has clung onto the opponent, he will continuously scratch them. During this time, he can perform an action depending on what button is pressed: pressing the attack or special move button will cause Diddy to attack them with a double-handed chop and then leap away, while pressing the jump button will cause him to perform a pseudo footstool jump, which can meteor smash at high percentages. If the attack or special button is pressed during the jump, Diddy will attack with a flying kick instead of latching on to his opponent. However, if Diddy chooses to use the flying kick he will not be able to use his rocketbarrel pack unless he touches the ground first, making it a risky option offstage. This move is very useful in the neutral to pressure shielding opponents alongside Banana Peel. | |
| Up special | Rocketbarrel Boost | 10% (launch explosion), 8% (early collision), 6% (late collision), 18% (collision explosion; detached Rocketbarrel Pack) 3.75%~4.33% (flying Rocketbarrel Pack); 5% (crash recoil) | Charges his rocket barrel pack from Donkey Kong 64 in a powerful attack. Can potentially fly very far and very fast when charged, however hitting a surface, or being hit, will make Diddy lose his rocket barrels before falling a huge distance while being unable to perform any action, often falling too far to survive. Diddy will also take recoil damage for hitting a surface. It travels significantly more horizontal/diagonal distance than it does vertically. | |
| Down special | Banana Peel | 3.8%~5.3% | Tosses a Banana Peel over his shoulder and into the air to have it fall onto the ground. Grounded opponents who touch the peel while on the ground or are hit by the peel when thrown will slip and trip on the floor. An integral part of Diddy's kit, as it allows him to take control of the stage, extend and create combos, set up KOs, easily punish missed attacks from his opponents even if they are spaced properly, and otherwise dominate the neutral game. A held banana also serves as one of the best out of shield options in the game when thrown. Only one banana peel can exist at one time, and it disappears when hit by an opponent or when thrown twice. | |
| Final Smash | Hyper Rocketbarrel | 1% (startup loop), 2% (per collision), 20% (final hit), 15% (collateral final hit), 10% (launch/ending explosion) | Activates his Rocketbarrel Pack and flies up. He then dashes across the screen in multiple directions, doing damage to whoever he touches. After a while, he will lock on to whatever opponent has taken the most damage and unleash one final dash attack that launches the targeted opponent, as well as any other nearby opponents. After this last attack, Diddy descends back to his original position. His Rocketbarrel Pack explodes before he lands, which damages nearby opponents. | |
Stats[edit]
| Stats | Weight | Dash speed | Walk speed | Traction | Air friction | Air speed | Air acceleration | Gravity | Falling speed | Jumpsquat | Jump height | Double jump height | Empty landing lag |
|---|---|---|---|---|---|---|---|---|---|---|---|---|---|
| Value | 90 | 2.09 – Initial dash 2.006 – Run |
1.313 | 0.093 | 0.008 | 0.924 | 0 – Base 0.05 – Additional |
0.125 | 1.75 – Base 2.8 – Fast fall |
3 | 41.21 - Base 19.9 - Short hop |
41.21 | 4 |
Announcer call[edit]

English/Japanese/Chinese
French
French (PAL)
Russian
On-screen appearance[edit]
- Bursts out of a DK Barrel and claps his hands above his head.

Diddy Kong's on-screen appearance

Taunts[edit]
- Up taunt: Tosses his cap in the air and has it land on his head. This is a reference to his victory pose in Donkey Kong Country after he defeats a boss or wins in a Bonus Area.
- Side taunt: Angrily does a fighter's stance while bellowing, asserting his dominance.
- Down taunt: Claps his hands above his head four times, switching feet in the process.
Diddy Kong's up taunt.
Diddy Kong's side taunt.
Diddy Kong's down taunt.


Idle poses[edit]
- Scratches his rear, gets down on all fours, and shakes his fur.
- Joyfully jumps in place twice.

Diddy Kong's first idle pose.
Diddy Kong's second idle pose.


Crowd cheer[edit]
| Cheer (English) | Cheer (Japanese/Chinese) | Cheer (Italian) | Cheer (Dutch) | Cheer (French) | |
|---|---|---|---|---|---|
| Cheer | |||||
| Description | Did - dy Kong! | Diddy Kong! | Diiii - ddy Koooo - ong! *clap 4 times* | Di - ddy! Diddy Kong! | Di - ddy Kong! |
| Cheer (German) | Cheer (Spanish) | Cheer (Russian) | Cheer (Korean) | |
|---|---|---|---|---|
| Cheer | ||||
| Description | Diddy Kong! | Diddy Kong! Cha - cha - cha! | Diddy Kong! *clap 2 times* | Di - ddy Kong! |
Victory poses[edit]
- Left: Shoots 3 times with his Peanut Popguns (first with the right, then with the left, then the right again). Afterwards rolls towards the camera, and fires one more shot from his left Peanut Popgun.
- Up: Rises from the ground with his Rocket Barrels. After doing a spin, he dismounts from them, causing them to fly away. Upon landing, he then faces the screen, dancing with hands on his head and chin.
- Right: Performs an inverted spin kick, followed by a slap, and then he slams both of his hands on the ground, performing a front flip. He ends up balancing on his hand in a breakdance-like pose, clapping his feet together.


In competitive play[edit]
Most historically significant players[edit]
See also: Category:Diddy Kong players (SSBU)
 Aaron - The second-best Diddy Kong player in the world from 2021 to 2023, peaking at 30th on the UltRank 2022. His best performances have been at large regionals and superregionals, which includes winning Almost Pro over Light and Kola, placing 2nd at Riptide 2023 defeating MuteAce, and placing 3rd at Shine 2023. In addition, he has seen exceptional performances at majors, including placing 7th at Get On My Level 2022 and defeating Sparg0 at Super Smash Con 2023.
 chicken - He began co-maining Diddy Kong in the fall of 2020. While inconsistent, he had a number of strong performances at majors, including 5th at Wave 2 and 13th at Kagaribi 3. However, in 2024, he would reach new heights, ranking 51st on LumiRank 2024.2 with sets over Shuton and Maister. He would also see consistency at supermajors, notably placing 9th at Smash Awesome! and 17th at Umebura SP 11.
- Dakpo - One of the earliest notable Diddy Kong players in competitive play and one of the best in North America in the early metagame. He is best known for defeating Glutonny at GENESIS 7 using the "Pyramid Scheme" technique, eventually finishing 25th at the event. He had also placed 2nd at DreamHack Anaheim 2020 and 13th at Low Tier City 7, in addition to a win over Kola at 2GG: Kongo Saga. He remains a notable Diddy Kong player in the post-pandemic metagame, notably placing 3rd at DreamHack Dallas 2023 defeating Lima.
- Etsuji - Although best known for using Lucina in the early metagame, he picked up Diddy Kong in the post-pandemic metagame and was the best Diddy Kong player in Japan from 2021 to mid-2022. Though his tournament activity was limited during this time, he achieved some of the best Diddy Kong performances outside of Tweek, including placing 5th at Maesuma TOP 8 defeating Asimo and ProtoBanham and placing 7th at Kagaribi 5. He retired following Maesuma TOP 8, and has since made sporadic tournament appearances such as placing 17th at Kagaribi 11 defeating Hurt and Doramigi.
- Naocha - One of the best Diddy Kong players in Japan since the mid-2020s. He was initially known for defeating Atelier at Cafeteria Cup and found additional success at smaller events throughout the year, leading him to rank in the top 150 in the first half of 2024. He especially came to prominence in 2025, specifically in the second half of the year, which featured him placing 9th at Sumabato SP 59 and 17th at Sumabato SP 63, alongside several wins over notable Japanese players at ranked events, including multiple over Yaura, Akakikusu, and Mild na H.O. As such, he was ranked 98th on the UltRank 2025, in addition to ranking 75th in that half of the year.
- Nyonoknb - A Smash 4 veteran who did not compete in Ultimate until 2023, when he became one of the best Diddy Kong players in Japan. He regularly placed well KOWLOON events, and as such, had his breakout event at KOWLOON 13, where he placed 2nd after defeating Raki and Rarikkusu. He then followed it up with a string of strong major performances, which included placing 9th at Sumabato SP 52 and 13th at UltCore Fourth, leading him to rank 53rd on the LumiRank 2024.2. Since then, he has also won OH-BAI-TOH-RI 3 and Grand Slum 18, making him the second Diddy Kong to win an A-tier, and also placed 5th at Sumabato SP 57.
- Ryuoh - The second best Diddy Kong player in the world in the latter half of 2024, peaking at 27th on the LumiRank 2024.2, and regularly placing well at Sumabato events, most notably placing 3rd at Sumabato SP 42 and Sumabato SP 43, defeating Asimo and Doramigi in the former and Yoshidora in the latter. At a major level, he is most known for placing 7th at Kowloon 12 with Kagaribi, defeating many notable players such as Raru, KEN, and Snow, the best run from a Diddy Kong player besides Tweek.
- Tweek - One of the greatest Ultimate players, and by far the greatest Diddy Kong player, of all time, picking up the character in the online metagame. He greatly contributed to Diddy Kong's metagame, with his performances spearheading the character's rise in the post-pandemic metagame. He is the only Diddy Kong player to win a major, having won many throughout his career including Smash Ultimate Summit 3, Luminosity Makes BIG Moves 2024, and Get On My Level X.
Tier placement and history[edit]
Upon Ultimate's release, players quickly noticed Diddy Kong's weaknesses, which include his inconsistency in KO'ing at higher percents and his greatly nerfed recovery. As such, many of Diddy Kong's best from Smash 4, most notably MVD and Zinoto, dropped him in favor of other characters. Fortunately, Diddy Kong eventually received buffs to his kit that compensated for his KO issues and improved his recovery, while dedicated players further optimized Diddy Kong's moveset, eventually leading to the discovery of his "Pyramid Scheme" infinite, which allowed Diddy Kong to trap opponents on a platform using Banana Peels. This allowed dedicated players such as Dakpo and Aaron to see some success in tournament, with Dakpo notably defeating Glutonny at GENESIS 7 with the infinite. Even so, Diddy Kong's representation remained average, and although a few top players viewed him as a high-tier, the consensus considered him a mid-tier.
The online metagame further shifted Diddy Kong's metagame in a positive direction. Although a later patch removed the Pyramid Scheme infinite, the same patch granted Diddy Kong additional buffs that improved some of his hitboxes and frame data. In addition, Diddy Kong representation began improving, thanks to Aaron's improving results and Tweek picking the character as his new main, with both players showcasing Diddy Kong's strong control over the neutral game thanks to Banana Peel setups and combos. This momentum continued into the offline metagame, with Tweek winning several major and supermajor events, Aaron becoming a top 100 player, and the rise of other Diddy Kong players, including Etsuji, who dropped Lucina for Diddy Kong in 2021; and Ryuoh, who became Japan's best Diddy Kong player following Etsuji's retirement. As such, Diddy Kong's representation since 2021 has remained above-average, with the character frequently ranking in the top 15 in terms of representation, and he is often considered to be a top-tier character. As such, Diddy Kong rose in each tier list, from 12th to the first, to 9th to the second, then to 8th on the third and remaining there on the fourth, all the while remaining in the S- tier.
Classic Mode: Hey, Little Buddy![edit]

In Diddy Kong's path, he serves as the "little buddy" to the hero of various Nintendo franchises and fights the respective villains or final bosses. In the penultimate stage he finally teams up with his true partner, Donkey Kong, to defeat their nemesis King K. Rool. Donkey Kong is also Diddy Kong's partner for the final fight against Master Hand and Crazy Hand. The title originated from the manual of Donkey Kong Country and was popularized by the Donkey Kong Country TV series; Diddy Kong is also referred to as Donkey Kong's "little buddy" in games such as Brawl and Donkey Kong Country Returns.
| Round | Opponent | Stage | Music | Notes |
|---|---|---|---|---|
| 1 | Princess Peach's Castle | King Bowser - Super Mario Bros. 3 | ||
| 2 | Norfair | Nemesis Ridley | ||
| 3 | Unova Pokémon League (Battlefield form) | Death Mountain | ||
| 4 | Spear Pillar | Battle! (Dialga/Palkia) / Spear Pillar | ||
| 5 | Fountain of Dreams | King Dedede's Theme (Brawl) | ||
| 6 | Jungle Japes | King K. Rool / Ship Deck 2 | ||
| Bonus Stage | ||||
| Final | Master Hand and Crazy Hand | Final Destination | Master Hand / Crazy Hand | |
Credits roll after completing Classic Mode. Completing it as Diddy Kong has Stickerbush Symphony accompany the credits.
Appearances in other Classic Mode routes[edit]
Diddy Kong appears as an opponent and/or ally in certain other fighters' Classic Mode routes, with them being listed below:
Bold italics denotes appearances as both an opponent and ally.
Role in World of Light[edit]

Diddy Kong was among the fighters that were summoned to fight the army of Master Hands.
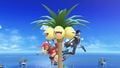
During the opening cutscene, Diddy Kong was present on the cliffside when Galeem unleashed its beams of light. He attempted to fly away with Rosalina & Luma using his Rocketbarrel Pack, but a beam of light hit him and he was vaporized and placed under Galeem's imprisonment along with the other fighters, excluding Kirby.
To find Diddy Kong, the player must access the DK Island sub-area reminiscent of the first Donkey Kong Country game, where he's found right at the end.
Fighter Battle[edit]
| No. | Image | Name | Type | Power | Stage | Music |
|---|---|---|---|---|---|---|
| 36 | |
Diddy Kong | 9,000 | Kongo Jungle (Ω form) | Stickerbush Symphony |
Spirit[edit]
Diddy Kong's fighter spirit can be obtained by completing Classic Mode as Diddy Kong. It is also available periodically for purchase in the shop for 300 Gold, but only after Diddy Kong has been unlocked. Unlocking Diddy Kong in World of Light allows the player to preview the spirit below in the Spirit List under the name "???". As a fighter spirit, it cannot be used in Spirit Battles and is purely aesthetic. His fighter spirit has an alternate version that replaces it with his artwork in Ultimate.
135. Diddy Kong

In Spirit Battles[edit]
As the main opponent[edit]
| Spirit | Battle parameters | Inspiration | |||||||||
|---|---|---|---|---|---|---|---|---|---|---|---|
| No. | Image | Name | Series | Enemy Fighter(s) | Type | Power | Stage | Rules | Conditions | Music | Character |
| 147 |  |
Lanky Kong | Donkey Kong Series | •Diddy Kong Team |
3,900 | Kongo Falls | •Item: Bananas | •The enemy is easily distracted by items •Defeat an army of fighters |
DK Rap | ||
| 148 | Tiny Kong | Donkey Kong Series | •Diddy Kong |
9,500 | Jungle Japes | •Tiny •Hazard: Low Gravity •Hazard: Heavy Wind |
•Dangerously high winds are in effect •Timed battle (1:00) •Gravity is reduced |
DK Rap | |||
| 155 | Squitter | Donkey Kong Series | •Diddy Kong |
3,600 | Jungle Japes | •Move Speed ↓ | •You have reduced move speed | Ice Cave Chant | |||
| 165 |  |
Tiki Tak Tribe | Donkey Kong Series | •Diddy Kong Team |
1,700 | Kongo Falls | N/A | •Take your strongest team into this no-frills battle | Jungle Hijinxs | ||
| 179 |  |
Octorok | The Legend of Zelda Series | •Diddy Kong Team |
1,800 | Great Bay | N/A | •The enemy's neutral special has increased power •The enemy favors neutral specials |
Termina Field | ||
| 207 |  |
Deku Link | The Legend of Zelda Series | •Diddy Kong |
3,700 | Distant Planet (Battlefield form) | •Item Tidal Wave •Item: Lip's Stick |
•The enemy favors neutral specials •Certain items will appear in large numbers after a little while •The enemy is easily distracted by items |
Saria's Theme | ||
| 320 |  |
Ukiki | Yoshi Series | •Diddy Kong Team |
2,000 | Yoshi's Story | •Item: Food | •The enemy becomes more powerful after eating | Obstacle Course - Yoshi's Island | ||
| 397 | Andrew Oikonny | Star Fox Series | •Diddy Kong |
1,700 | Corneria | •Attack Power ↑ | •The enemy has increased attack power when the enemy's at high damage | Star Wolf (Brawl) | |||
| 406 | Dash Bowman | Star Fox Series | •Diddy Kong •Fox |
1,500 | Corneria (Battlefield form) | N/A | •Defeat the main fighter to win •Reinforcements will appear during the battle |
Return to Corneria - Star Fox Zero | |||
| 586 |  |
Salsa | EarthBound Series | •Diddy Kong •Wario |
1,700 | Gerudo Valley (Battlefield form) | •Item: Banana Peel | •The enemy favors special moves | Mother 3 Love Theme | ||
| 861 | Leif (Animal Crossing) | Animal Crossing Series | •Diddy Kong |
3,500 | Yoshi's Island | •Item: Timer | •The enemy is easily distracted by items | Title Theme - Animal Crossing | |||
| 992 | Dee Jay | Street Fighter Series | •Diddy Kong |
1,600 | Wuhu Island (Frisbee Dog Park) | •Jump Power ↓ | •Stamina battle •The enemy favors side specials •All fighters have reduced jump power |
Dee Jay Stage Type B | |||
| 1,139 | Goku & Chao | Famicom Mukashibanashi Series | •Diddy Kong •Villager |
1,600 | Town and City | •Item: Golden Hammer | •Reinforcements will appear during the battle •The enemy is easily distracted by items |
Yūyūki Medley | Goku | ||
| 1,239 |  |
Prince Saruno | Tsukutte Utau: Saru Band | •Diddy Kong Team |
2,000 | New Donk City Hall | •Defense ↑ •Item: Banana Peel |
•The enemy has increased defense after a little while | PERFORMANCE | ||
| 1,338 | Tooty | Banjo-Kazooie Series | •Diddy Kong •Banjo & Kazooie |
3,500 | Spiral Mountain | N/A | •Defeat the main fighter to win •The enemy shields often •Magic attacks aren't as effective against the enemy |
Main Theme - Banjo-Kazooie | |||
| 1,369 |  |
Grookey, Scorbunny, & Sobble | Pokémon Series | •Diddy Kong •Bunny Incineroar •Squirtle |
9,600 | Onett (Battlefield form) | N/A | •The enemy has increased attack power when badly damaged •Reinforcements will appear during the battle •The enemy starts the battle with a Lip's Stick |
Road to Viridian City - Pokémon Red / Pokémon Blue | Grookey | |
As a minion[edit]
| Spirit | Battle parameters | Inspiration | |||||||||
|---|---|---|---|---|---|---|---|---|---|---|---|
| No. | Image | Name | Series | Enemy Fighter(s) | Type | Power | Stage | Rules | Conditions | Music | Character |
| 82 |  |
Barrel Train | Mario Kart Series | •Donkey Kong •Diddy Kong |
3,500 | Spirit Train | •Item: Bullet Bill | •The enemy can deal damage by dashing into you •The enemy has increased attack power •The enemy has increased move speed |
Rainbow Road - Mario Kart: Double Dash!! | Diddy Kong | |
| 141 |  |
Funky Kong | Donkey Kong Series | •Captain Falcon •Diddy Kong •Donkey Kong |
9,000 | Kongo Jungle | •Item: Bullet Bill | •The enemy is easily distracted by items | Funky's Fugue | Diddy Kong | |
| 145 | Dixie Kong | Donkey Kong Series | •Isabelle •Diddy Kong |
9,100 | Jungle Japes | •Item: Banana Peel | •The enemy is easily distracted by items | Swinger Flinger | Diddy Kong | ||
| 912 | Roll Caskett | Mega Man Legends Series | •Isabelle •Diddy Kong |
3,700 | Pilotwings | •Item: Hocotate Bomb | •Take your strongest team into this no-frills battle | Light Plane (for 3DS / Wii U) | Data | ||
| 1,070 | The Creature & Flea Man | Castlevania Series | •Giant Mii Brawler •Diddy Kong |
4,500 | Dracula's Castle (Battlefield form) | •Hazard: Zap Floor | •The floor is electrified •The enemy is giant |
Out of Time | Flea Man | ||
| 1,130 | Donbe & Hikari | Famicom Mukashibanashi Series | •Young Link •Villager •Falco •Diddy Kong •Duck Hunt |
3,500 | Duck Hunt (hazards off) | N/A | •Defeat an army of fighters | Shin Onigashima Medley | Matsunosuke | ||
| 1,396 | Goda | River City Series | •Donkey Kong •Diddy Kong |
2,000 | Onett | •Item: Battering Types | •Defeat the main fighter to win •The enemy's side special has increased power •The enemy favors side specials |
Golden Forest | Godai | ||
Alternate costumes[edit]

| |||||||

|

|

|

|

|

|

|

|
Gallery[edit]
Diddy Kong's fighter card.
Diddy Kong's unlock notice.

Diddy Kong taunting on Kongo Falls.
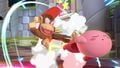
Striking Kirby with Monkey Flip on The Great Cave Offensive.
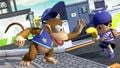
Grabbing towards Ness on Moray Towers.

Charging his Peanut Popgun on Saffron City.
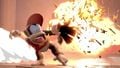
The Peanut Popgun exploding on Spear Pillar.
Tossing a Banana Peel on Great Bay.
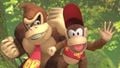
Taunting with Donkey Kong on Distant Planet.
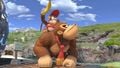
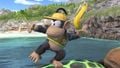
Taunting with Donkey Kong on Great Bay, holding a Banana Gun.
Wall clinging onto Alolan Exeggutor with Bayonetta on Big Blue.
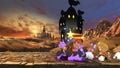
Diddy Kong and Lucas being attacked by Marshadow on the Bridge of Eldin.


Fighter Showcase Video[edit]
Trivia[edit]
- Oddly, Diddy Kong's blog mentions his Final Smash utilizing his popguns, which is an error. His new Final Smash, Hyper Rocketbarrel, no longer utilizes the popguns he wielded like in Rocketbarrel Barrage.
- Diddy Kong and Toon Link are the only characters who gain a CPU ally in every round of their Classic Mode (excluding the Bonus Game).
- Oddly, Diddy Kong's stock icon does not change his fur and skin color to match the costume.
- If Diddy Kong air grabs an Assist Trophy and uses Banana Peel, he will throw the Assist Trophy, and it will be activated, bypassing the otherwise required animation of lifting the item to activate it.[1]
References[edit]
|
| |
|---|---|
| Fighters | Donkey Kong (SSB · SSBM · SSBB · SSB4 · SSBU) · Diddy Kong (SSBB · SSB4 · SSBU) · King K. Rool (SSBU) |
| Assist Trophy | Klaptrap |
| Boss | Giant Donkey Kong |
| Stages | Kongo Jungle · Kongo Falls · Jungle Japes · Rumble Falls · 75m · Jungle Hijinxs |
| Items | Hammer · Barrel Cannon · Peanut · Spring |
| Enemies | Kritter · Tiki Buzz |
| Other | Dixie Kong · DK Barrel · DK Island · Pauline · Stanley · Zinger |
| Trophies, Stickers and Spirits | Trophies (SSBM · SSBB · SSB4) · Stickers · Spirits |
| Music | Brawl · SSB4 · Ultimate |
| Masterpiece | Donkey Kong |
| Related content | Mario (universe) · Banjo · Barrel |