R.O.B. (SSBU)
| R.O.B. in Super Smash Bros. Ultimate | |
|---|---|
_SSBU.png)  
| |
| Universe | R.O.B. |
| Other playable appearances | in Brawl in SSB4 |
| Availability | Unlockable |
| Final Smash | Guided Robo Beam |
| Tier | S+ (5) |
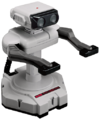
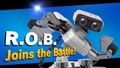
R.O.B. (ロボット, Robot) is a playable character in Super Smash Bros. Ultimate. He was officially revealed on June 12th, 2018 alongside Dr. Mario, Duck Hunt, and the rest of the returning roster. R.O.B. is classified as Fighter #42.
As was the case in Super Smash Bros. 4 the robotic sound effects used for R.O.B. in Super Smash Bros. Brawl were repurposed for Ultimate.
R.O.B. is ranked 5th out of 82 on the tier list, placing him in the middle of the S+ tier. This is a significant improvement from his placement in SSB4, where he was ranked 35th out of 54, and is his best placement in the series to date. Such a high ranking is a result of his ultimately improved and versatile moveset, allowing him to take on almost any playstyle from various stage positions; most notably making him among the best zoners in the game due to being able to patiently chip away at opponents until finding an opportunity to rush them down and close out a stock. His long, non-linear recovery and heavyweight status allow him to survive to incredibly high percents, and his excellence in so many aspects is supplemented by access to one of the best down specials in the form of Gyro, which sees great usage in many scenarios, including a 0-to-death combo into Arm Rotor, which has been retooled into a potent combo finisher.
While sporting a myriad of strengths, R.O.B. is not without weaknesses. He has a large hurtbox, which when combined with his above-average weight and falling speed makes him highly susceptible to combos, which is only exacerbated by a lack of combo breakers. His recovery, despite being extremely flexible, can easily be edgeguarded if he's unable to recover high, since it is tied to a finite resource and possesses no hitboxes. Finally, most of his aerials are quite slow, and his grab has extremely short range relative to his size.
Despite these weaknesses, R.O.B. has seen very strong representation from multiple players such as Zackray, Zomba, Anathema, and MKBigBoss. As a result, he is among the most commonly used characters in tournaments, consistently ranking top 3 for representation in the metagame.
How to unlock[edit]
Complete one of the following:
- Play VS. matches, with R.O.B. being the 31st character to be unlocked.
- Clear Classic Mode with Pikachu or any character in its unlock tree, being the 3rd character unlocked after Shulk.
- Have R.O.B. join the player's party in World of Light.
R.O.B. must then be defeated on Wrecking Crew (the Ω form is used in World of Light).
Attributes[edit]
R.O.B. is the eighteenth-heaviest character in the game, being tied with Snake and Banjo & Kazooie, meaning he's a heavyweight. R.O.B.'s mobility is surprisingly good for a character of his size and weight, having an above-average walking speed, initial dash, and falling speed, is tied with Ike and Bowser Jr. for the 26th-fastest air speed, average dashing speed, gravity, and traction, as well as the 30th-highest air acceleration. He also has the 9th highest jump and 16th highest double jump. This grants him mobility that is either average or above average overall.
Like in Brawl and Smash 4, R.O.B. is a zoning-oriented character with versatile projectiles to keep his opponents at bay. Robo Beam enables him to attack from a considerable distance, and becomes the noticeably stronger Super Robo Beam when it is left idle for 14.3 seconds. While Robo Beam interrupts opponents faster, Super Robo Beam deals more damage and has higher knockback growth. Gyro is an auto-chargeable projectile that becomes an item when fired. Compared to Robo Beam, it has a more favorable angle for disrupting opponents, while also being more manipulable as a projectile and possessing greater KO power. Thanks to R.O.B.'s item throws being among the strongest in the game, Gyro is also especially useful when smash thrown as an item.
Aside from his projectiles, R.O.B.'s grounded game is also excellent. His neutral attack comes out on frame 3 and acts as a quick move at low percentages to escape pressuring situations, and it can also jab lock and combo. Forward tilt is useful for spacing since it comes out on frame 7, can kill at high percents, and can hit many characters' ledge hangs. Up tilt comes out on frame 4, and is great for acting as an anti-air and combos into his up aerial. Down tilt is R.O.B.'s single-best move in his entire kit, as it lowers his hurtbox, has great range, is tied with his jab as his fastest move at frame 3, pressures shields, beats shield grabs, and its total active frames is only 14, meaning it is one of the safest pressuring moves in the game. It also combos into itself at lower percentages, and at higher percentages, it can combo into grab or dash attack, and can send opponents into a jab lock-based scenario for a KO at relatively low percentages. Lastly, dash attack is useful for punishing landings and whiffs, is extremely fast at frame 7, has relatively long range, and can combo into his forward air at low to medium percentages.
R.O.B.'s air game is also great, thanks to the excellent and disjointed ranges of all excluding one of his aerials. Neutral aerial has large, disjointed hitboxes that make it great for covering the opponents' options if lacking the range to deal with them. It is also very hard to punish out of shield due to its damage, total landing lag (7 frames), and range. It is also a reliable combo starter at low to medium percentages when SHFF'd, as well as a useful spacing option and, to a lesser extent, a KOing tool. Up aerial is a great vertical KO move due to its large and long-lasting hitboxes, fast startup, and the last hit’s high knockback. Back and down aerials are R.O.B.'s most damaging aerials when sweetspotted, and they too have large and disjointed hitboxes, much like neutral aerial. However, they also boast their own specific strengths: back aerial has recovery potential thanks to its propelling R.O.B. forward, and it is his only aerial that can KO in neutral due to its incredible knockback and huge hitbox. Meanwhile, his down aerial is a powerful meteor smash that can hit below the ledge and KO very early if done so. It is also active for 6 whole frames, making it difficult to avoid for characters with linear recoveries. Lastly, forward aerial is R.O.B.'s fastest aerial coming out on frame 6, making it very spammable in neutral due to how low committal it is to use, as it is safe on shield. However, its hitbox has a much shorter range and is not disjointed.
R.O.B.'s grab game is also good. His forward and back throw are decent for setting up edgeguards, combos, and 50-50s. The latter can also KO at the ledge at very high percentages. R.O.B.'s up throw is his most useful: it is his most damaging throw, a passable KO move (especially if he lands on a platform), and can even be used for combos at low percentages. His down throw, despite not being a kill move, is one of his best tools for sealing a stock. While it deals poor damage, it buries opponents, allowing for follow-ups into an up tilt, up air, or even up smash. However, with excessive button mashing, the opponent can typically get out before R.O.B. has any chance for a particularly strong follow-up. As such, it is more of a 50-50 rather than a reliable method for taking a stock.
Although R.O.B. possesses a large number of strengths, he does also have a few noteworthy shortcomings. Despite possessing a good chunk of respectable KOing options, landing a KO can often be problematic because his finishers are burdened with either considerable lag and/or unimpressive range. The latter trait is especially noticeable regarding R.O.B.'s arm-based attacks, most of which have short ranges, which further extends to R.O.B.'s grab, which is among the shortest-ranged in Ultimate in comparison to his own size.
In addition to R.O.B.'s issues with his hitboxes, his hurtbox also hinders him, as it is both large and wide, meaning he can get hit by a lot of combos that other characters would have an easier time evading. This also means that he has difficulty dealing with combo-oriented characters. This is further compounded by his above-average falling speed, as well as his aerials' inability to break combos reliably: neutral and down aerials are sluggish in terms of startup, forward and up aerials only hit in front of and above R.O.B., respectively, and back aerial is a mixture of both: it has slow startup and only hits behind him.
Overall, R.O.B. is a non-traditional heavyweight zoner. His relatively quick mobility and overall above-average frame data allow him to pressure unwary opponents easily, and he has little trouble killing if he can gain the advantage. However, R.O.B. players must take high caution, as a single combo can be all it requires to get R.O.B. in an uncomfortable position or potentially even end a stock, thanks to his large size, moderately high weight, above-average falling speed, and lack of options to break free from combos.
Changes from Super Smash Bros. 4[edit]
R.O.B. has been significantly buffed overall in his transition to Ultimate. While R.O.B. has received comparatively few major changes in his transition from the previous game, most of these changes have significantly improved his toolkit, and he benefits from the changes made to the game's engine as well.
Arguably, R.O.B.'s most impactful improvement is to Arm Rotor. Previously and universally regarded as one of the worst attacks in SSB4, it now executes faster, with faster startup lag and less ending lag, and has larger hitboxes with improved angles that connect much better. This not only significantly improves its use as an edgeguarding option, but when combined with the other changes made to his moveset, it has now become one of the most devastating combo finishers in Ultimate, granting R.O.B. potential zero-to-death combos and allowing him to KO opponents at absurdly early percentages.
Several of R.O.B.'s attacks have received quality-of-life changes that improve their utility. Forward smash and back aerial deal more knockback, granting them increased KO potential and toning down one of R.O.B.'s previous weaknesses. Up tilt has had its first hit's hitbox from Brawl restored, increasing its range and reliability. Down smash also launches opponents at a consistent angle, improving its consistency all around. Robo Beam has larger hitboxes and launches at lower angles, making it more effective as an edgeguarding option. Gyro has also been significantly buffed: it can now be returned to the dock once R.O.B. has grabbed it to charge it again and fire it with less startup, as opposed to tossing it once he has grabbed it. It can also now be jump-canceled. These changes grant R.O.B. even more potential combo routes and give him safer options against opponents.
R.O.B. also benefits from Ultimate's universally adjusted mechanics. The universal increase in mobility and the ability to perform an attack out of a run allows him to close out the distance more effectively and compounds his improved up-close game. The universally increased shieldstun for grounded attacks has also been fairly beneficial to R.O.B., as it makes his quick and relatively-ranged down tilt safer on shield. The universal reduction to landing lag noticeably improves R.O.B.'s combo game as well; aside from changes made to his Arm Rotor, they make up aerial's looping hits more viable for starting combos, and neutral aerial's reduced start-up lag, combined with its decreased landing lag, noticeably improves its combo potential and makes it a safer option when landing. Lastly, the changes to air dodges benefit R.O.B., as they allow him to edgeguard his opponents more effectively and perform a directional air dodge out of Robo Burner to gain more distance, improving his already excellent recovery.
However, R.O.B. has received a few nerfs as well, most notably to his grab game. The universal changes to grabs hinder the safety of R.O.B.'s grabs despite his improved standing grab. His up throw has increased endlag, making follow-ups harder at low percentages, and his down throw now buries, allowing for read-based follow-ups at high percentages, but removing any guaranteed set-ups at low to mid percentages, particularly his effective "Beep Boop" combo (down throw to up air).
Overall, R.O.B.'s core playstyle remains fundamentally unchanged from SSB4, but changes to several of his attacks and to the game's engine have now given R.O.B. a far more reliable close quarters option and thus a far deadlier punish game compared to both of his previous appearances. However, R.O.B. still retains a few of the same issues from his previous appearance, such as short melee range, susceptibility to combos and juggling due to his large size and slow aerial options, and a vulnerable recovery, which means he must keep playing patiently and carefully before committing to exploit the opponent's opening. Game updates have also given R.O.B. some slight nerfs. Still, many of these are shared among the cast, keeping his effectiveness virtually intact despite the buffs to returning veterans and the introduction of strong DLC characters. As a result, R.O.B. performs significantly better than he did in previous installments.
Aesthetics[edit]
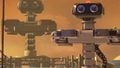
 As with all veterans returning from SSB4, R.O.B.'s model features a more subdued color scheme. His body has a duller matte finish, and his eyes are less reflective. As a result, he more closely resembles the original peripheral.
 R.O.B.'s eye expressions are now seen properly at all times, as in Super Smash Bros. for Nintendo 3DS.
- Up and side taunt's animations have been slightly altered:
- During his up taunt, R.O.B. now slightly lifts his arms while spinning.
- During his side taunt, R.O.B. now emits purple flashing sparkles from his eyes instead of white, and he claps twice.
- R.O.B.'s victory animations have been updated to be more expressive:
- The first one where he spins his arms and rotates his head, and flexes his arms while rotating his head, now has him advance forward slowly on the ground while he rotates his hands before performing the rest of his victory pose.
- The second one where he hovers in the air and spins, then lands and rotates his head while continuously lowering and rising his arm base, now has him advance forward before taking off, and he spins twice in quick succession before landing.
- The third one where he turns his head and flashes the lights in his eyes, now has him spin once before vigorously clapping three times while flashing the lights in his eyes in a more exaggerated manner, then continuously slightly rising his arms and clapping, slowly lowering them after each clap.
Attributes[edit]
 R.O.B.'s character model is smaller. This makes his hurtbox slightly smaller, while keeping his range mostly intact.
- R.O.B.'s prone animation has been altered: he lies on the floor compacted instead of straightened. This makes him harder to hit and lock.
- Like all characters, R.O.B.'s jumpsquat animation takes 3 frames to complete (down from 5).
- Double jump animation has been altered: R.O.B. spins horizontally while jumping.
- R.O.B. walks slightly faster (1.122 → 1.178).
- R.O.B. runs faster (1.568 → 1.725).
- His initial dash speed is much faster (1.3 → 2.002).
- R.O.B.'s running animation has been slightly altered: he crouches slightly while running forward. This makes him harder to hit vertically, but easier to hit horizontally.
- R.O.B.'s air speed is slightly higher (1.08 → 1.134).
- R.O.B.'s traction has been increased (0.06 → 0.105).
 Forward roll grants less intangibility (frames 4-16 → 4-15).
- Back roll has more startup with less intangibility (frames 4-16 → 5-16), and more ending lag (FAF 30 → 35).
- Spot dodge has less ending lag (FAF 27 → 26).
- Air dodge grants more intangibility (frames 3-27 → 3-29).
- Air dodge has more ending lag (FAF 33 → 51).
- The reintroduction of directional air dodges benefits R.O.B. to a larger degree than most other characters, improving his edgeguarding ability without leaving him much more vulnerable to it, due to his flexible aerial game and recovery.
Ground attacks[edit]
- Neutral attack:
- The first hit can be held for a consecutive jab.
- Both hits consist of three hitboxes instead of one, which are smaller (3.5u → 2.5u/2.5u/2.8u (hit 1), 3.4u/3.4u/3.6u (hit 2)), but placed farther horizontally (Z offset: 12.5u-4u → 6.5u/10.2u/14.2u (hit 1), 13u-5u → 6.5u/10.5u/14u-15u (hit 2)). This improves their range, properly covering the tips of R.O.B.'s arms.
- The first hit launches at different angles (100° → 361°/180°) to keep opponents on the ground, and has more base knockback (4 → 18/23), but less knockback scaling (70 → 15), in addition to a hitstun modifier of 5 on the two innermost hitboxes. This allows it to jab lock and connect more reliably into the second hit.
- The second hit has a higher hitlag multiplier (1× → 2×), making it easier to DI.
- Forward tilt:
- Forward tilt deals more damage (5%/6%/8% → 7%/8%/10%).
- It has more base knockback (30 → 48), but less knockback scaling (100 → 77). This makes the move safer on hit at low percentages, while still slightly improving its KO power due to its increased damage.
- Due to the changes to jostle mechanics, the sourspot is harder to land compared to the middlespot and sweetspot, despite having its priority changed to be higher than theirs.
- It uses stationary hitboxes rather than connecting them to R.O.B.'s arm.
- Up tilt:
- R.O.B. no longer faces the screen directly during the move, much like his taunts.
- Dash attack:
- Dash attack has less ending lag (FAF 36 → 32), improving its combo potential in combination with R.O.B.'s faster jumpsquat.
- Forward smash:
- Forward smash has more knockback scaling (100 → 105 (sweetspot)/110 (middlespot, sourspot)), improving its KO potential.
- The sweetspot and middlespot are extended farther horizontally (Z offset: 12u/22u → 14u/24u (non-angled), 11.3u/21.2u → 13.3u/23.2u (angled)), making them easier to land.
- It has an altered charging animation where R.O.B. lifts his arms and doesn't lean forward, better resembling its charging animation from Brawl. This gives R.O.B. a more favorable hurtbox placement while charging the move.
- It starts charging earlier (frame 10 → 7).
- Down smash:
- The first two hits' hitboxes remain static at R.O.B.'s sides, instead of following his arms as he spins, improving the consistency of their range.
- The first two hits have less knockback (30 base/40 scaling → 20/20), allowing them to connect more reliably.
- It starts charging later (frame 2 → 4), making it less likely to be charged on accident and thus delayed.
- The move only hits three times instead of five, reducing its total damage up close despite the first two hits dealing more damage (2% (hits 1-4 base)/1.5% (hits 1-4 tip) → 3.5% (hits 1-2 base)/3% (hits 1-2 tip); 13%/11% total → 12%/11%).
- The first two hits have a shorter duration with gaps between them (frames 7-14 → 7-8, 11-12), no longer using a rehit rate.
Aerial attacks[edit]
- All aerials have less landing lag (12 → 7 frames (neutral), 15 → 9 (forward), 22 → 13 (back, up), 21 → 12 (down).
- Neutral aerial:
- Neutral aerial has less startup with a longer hitbox duration (frames 18-32 → 14-32).
- It deals more damage (8%/6% → 9.5%/7.5%) with knockback not fully compensated (50 base/100/98 scaling → 48/52 base/90/83 scaling), slightly improving its KO potential, while still having increased combo potential due to its lower landing lag.
- The sourspot takes priority over the sweetspot. As a result, the sourspot is easier to land for combos up to higher percents, but the sweetspot requires more precise spacing to be landed.
- Forward aerial:
- Forward aerial has a longer hitbox duration (frames 6-7 → 6-8).
- Back aerial:
- Back aerial deals more damage (12%/10% → 15/13% (clean), 6%/4.5% → 9%/7.5% (late)) with knockback not fully compensated (32 base/100 scaling → 41/35 base/87/83 scaling (clean), 30 base/100 scaling → 35 base/76/74 scaling (late)). This noticeably improves its KO potential, with the clean sweetspot KOing at around 115% from the center of Final Destination.
- The late hit has a longer duration (frames 24-29 → 24-32).
- Up aerial:
- The last hit has less startup with a longer duration (frame 26 → frames 23-24), allowing it to connect better from the previous hits.
- However, the move's total duration remains unchanged, increasing its ending lag.
- Down aerial:
- Down aerial grants more vertical momentum upon on startup (0.1 → 0.7), improving its edgeguarding ability, and allowing R.O.B. to use it closer to the ground without landing before it comes out.
- R.O.B. faces further forward when performing the move.
Throws and other attacks[edit]
- Grabs:
- All grabs have more ending lag (FAF 31 → 38 (standing), FAF 38 → 46 (dash), FAF 37 → 41 (pivot)).
- Standing and pivot grab have less startup (frame 7 → 6 (standing), frame 11 → 10 (pivot)).
- Standing grab has more range (Z2 offset: 10.6u → 11.6u).
- Dash and pivot grab have less range (Z2 offset: 12.7u → 12.2u (dash), -18.1u → -17.3u (pivot).
- Pummel:
- R.O.B. has a new pummel: he headbutts the opponent instead of squeezing them in his grip.
- It deals more hitlag (4 frames → 14), but has less startup (frame 2 → 1) and much less ending lag (FAF 17 → 7), shortening its effective duration by one frame.
- It deals less damage (2% → 1.3%).
- Forward throw:
- R.O.B. has a new forward throw: he throws the opponent overhead with one arm.
- It releases the opponent later (frame 7 → 11) with its total duration unchanged, reducing its ending lag. Compounded with R.O.B.'s faster initial dash, this grants the move combo potential at low percents.
- Back throw:
- It has an altered animation: R.O.B. turns to face the direction in which he threw the opponent, and his arms performs a full spin around.
- Up throw:
- Up throw releases the opponent earlier (frame 65 → 58) with its total duration unchanged, increasing its ending lag. This hinders its combo ability past low percents, although it is somewhat compensated by R.O.B.'s faster jumpsquat.
- Down throw:
- Down throw buries opponents, much like Banjo & Kazooie and King K. Rool's down throws.
- The throw's bury effect allows for more read-based followups, including up tilt and up aerial, and gives R.O.B. more reliable KO setups into up smash and up aerial at high percents, effectively substituting his "Beep Boop" setup from Smash 4.
- It deals half as much damage (10% → 5%).
- It has more ending lag (FAF 66 → 76). Combined with the move's bury effect and lower damage, this significantly hinders its combo potential from low to mid percents, as opponents can mash fast enough to escape before R.O.B. is able to initiate another attack.
Special moves[edit]
- Robo Beam:
- Super Robo Beam deals significantly more damage (10% → 15%).
- Both stages of Robo Beam have larger hitboxes (1.5u → 2u (Robo Beam), 3u → 3.5u (Super Robo Beam)) that are placed farther horizontally (Z offset: 0u → 3u (Robo Beam), 2u (Super Robo Beam)). Super Robo Beam's hitbox also extends backward after its first three active frames (Z offset: 0u → 2u–-16u), covering the beam's tail.
- Both stages launch opponents at lower angles (80° → 60° (Robo Beam), 60° → 45° (Super Robo Beam)), improving their effectiveness for edgeguarding.
- Both stages deal negative shield damage (0 → -2.2 (Robo Beam), -3.7 (Super Robo Beam)).
- Super Robo Beam has much less knockback scaling (70 → 43), hindering its KO potential despite its increased damage, unless it hits near the edge.
- Super Robo Beam's graphic is flashier.
- Arm Rotor:
- The move has less startup (frame 16 → 13) and ending lag (FAF 106-133 → 86-108), improving its safety and utility as a followup option, especially to KO offstage. It also reflects projectiles faster (frame 16 → 13).
- The looping hits use set knockback (20 base/70 scaling → 40/50 set/65/70 scaling), an autolink angle (120°/145°/145°/361° → 367°), and have a much lower hitlag multiplier (0.7× → 0.2×). Additionally, the move in general has slightly larger hitboxes (3.3u/3.3u/4.3u/3.3u → 4.5u/4u/3.3u/3.3u (looping hits), 5.5u → 6u (last hit)), and the last hit extends further inward (Z offset: -4u–14u → -4.5u–14u). These changes allow the move to connect significantly more reliably, make it harder to escape from, and increase its range behind R.O.B., increasing the move's reliability.
- Akin to its Brawl counterpart, Arm Rotor has much less horizontal maneuverability on the ground (speed multiplier: 1x → 0.4x).
- R.O.B doesn't jump forward as far when activating the move (initial speed: 1.5 → 1.2).
- The looping hits deal more damage (1% → 1.5%), but have a slower rehit rate (3 frames → 5), reducing the move's damage output if all hits connect (16%-25% → 10.5%-18%).
- However, it still racks up more damage overall when extended, due to its significantly improved linking ability.
- The reflection doesn't last as long (29 frames → 23).
- The last hit has a lower hitlag multiplier (3.4× → 2.4×).
- The last hit has a less exaggerated animation.
- Robo Burner:
- Robo Burner's fuel has a longer duration (130 frames → 160).
- It can be canceled by a double jump or air dodge, should these options be available. In combination with the aforementioned buff, this further improves R.O.B.'s recovery, allowing him to avoid edgeguards more effectively and get additional distance with a directional air dodge.
- The move has new particle effects.
- R.O.B. has a gauge on his chassis that shows how much fuel he has left. The gauge is split into three pieces, and changes color as each piece is emptied, going from light blue to yellow, then to red.
- Gyro:
- Like other charge-cancelable moves, Gyro can be canceled by spot dodging or jumping.
- If R.O.B. grabs a Gyro he's previously thrown or dropped, it can be returned to its dock and charged again. This allows him to store his Gyro in a similar manner to Pocket, reducing the opportunity for his opponents to use it against him, and allowing him to keep up pressure with it for a longer period of time.
- It deals less damage when thrown as an item (8.9%-11% → 6.7%-7.9% (forward)).
- It deals less shield damage.
- Final Smash:
- R.O.B. has a new Final Smash called Guided Robo Beam, in which he fires multiple small red beams that ricochet and home in on enemies, before firing a larger green beam that enlarges at the last second. This is an improvement over Super Diffusion Beam, as it is much easier to hit opponents.
Update history[edit]
R.O.B. has received a mix of buffs and nerfs via game updates, but has been slightly nerfed overall. The removal of Gyro canceling was significant, as it effectively removed several movement-based options and advanced techniques R.O.B. could perform in previous games. R.O.B. was affected more than most of the other characters during update 3.0.0 with the universal reduction to shield damage for projectiles.
Update 3.1.0 increased the knockback of the far hit of jab 1, which pulls opponents towards R.O.B., with the intention of making it link into jab 2 better. However, this had the unintended consequence of allowing it to combo into his down tilt, which would then combo into the far hit of jab 1 again, allowing for long looping combos. The knockback buff was partially reverted in the very next patch, version 4.0.0, making the loops harder to perform, though still easier than prior to 3.1.0.
Overall, while faring slightly worse than at launch, R.O.B. remains extremely viable in the competitive scene and is regarded as a high-tier character throughout the game's lifespan.
- Removed instant Gyro Cancelling.
- Arm Rotor connects more reliably.
- Robo Beam deals less shield damage (0 → -2.2/-3.7 (normal/Super)).
- Gyro deals less shield damage (0 → -2/-2.5 (thrown/spinning)).
- Neutral attack 1 connects into neutral attack 2 more reliably (hitbox 2 BKB: 18 → 40).
- Neutral attack 2 has more range (hitbox 2 Z offset: 14u → 14u-15u).
- Neutral attack 1's 180° hitbox has less base knockback (40 → 23) and hitstun, no longer being able to lead into a down tilt loop.
- Changed the length of vulnerability when crumpling to be consistent with other fighters.
Moveset[edit]
For a gallery of R.O.B.'s hitboxes, see here.
Note: All numbers are listed as base damage, without the 1v1 multiplier.
| Name | Damage | Description | ||
|---|---|---|---|---|
| Neutral attack | 11 12 |
3% | A pair of alternating hooks. Both of its hits hit on frame 3, which ties it with down tilt as R.O.B.'s fastest attack. Its first hit can be repeated by holding the attacking button, and can also jab lock opponents Its first hit has almost nonexistent base knockback, average knockback growth and launches at 100°, all of which allow it to jab cancel. Its most reliable follow-up is down tilt, thanks to it also hitting on frame 3, although it can also jab cancel reliably into forward tilt, smash attacks, or a grab. The tilt attack follow-ups can be performed up to high percentages, while the smash attack and grab follow-ups can be performed on lightweights and middleweights beginning at 80%-85% and heavyweights beginning at 110%-115%. However, it cannot jab cancel reliably against fast-fallers. Conversely, its second hit has very high knockback growth and launches at 361°, which make it useful for spacing. | |
| 3% | ||||
| Forward tilt | S2 | 7% (body), 8% (arm), 10% (arm's tip) | A lunging hook. Can be angled. Can set up tech-chases at medium percents and the sweetspot on the tip of R.O.B.'s arm KOs at 150% near the ledge. Angled down, it can also hit several ledge-hangers. The tip of R.O.B.'s arm is decent for spacing beginning at 50%. | |
| Up tilt | Hi2 | 3% (hit 1), 5% (hit 2 tip), 6% (hit 2 middle) | Quickly thrusts his arms upward. It combos into itself and up aerial at a wide range of percents. Between 80-110%, it KO confirms into up aerial if initiated with an instant double jump. It is useful as an anti-air and as a platform pressure tool, but has minimal horizontal range. | |
| Down tilt | Lw2 | 5% | Quickly thrusts his arms diagonally downward. It hits on frame 3, which ties it with neutral attack as R.O.B.'s fastest attack. It is widely considered by most of the commuity to be the game's best down tilt and one of the best overall attacks in Ultimate overall, due to its fast startup, low ending lag, good range, safety on shield, shield pressuring ability, chance to trip, and usage as a combo starter and extender. | |
| Dash attack | DashA | 7% | A double forearm club. It combos into forward air at low and medium percents, as well as a Gyro toss if dash attack was performed to pick up the Gyro. | |
| Forward smash | S3 | 15% (base), 11.5% (middle), 6% (tip) | Fires an energetic blast forwards, similar to the uncharged Robo Beam. Although this move has moderate startup lag (frame 19) and is very punishable due to its high ending lag, the strongest hitbox closest to R.O.B.'s eyes deals high knockback, KOing middleweights around 75% near the edge of Final Destination. It can also be angled, allowing it to catch jumps and ledge-based options. It is especially useful as a dash-back whiff-punishing option or as a finisher out of a jab lock. However, its range is merely average at best, it has high ending lag and the blast's tip has extremely minimal KO potential. | |
| Up smash | Hi3 | 3% (hit 1), 14% (hit 2) | Handstands and activates his thrusters to emit a fiery blast upwards. Due to hitting on frame 10, it is somewhat disproportionately quick for a smash attack. It also has deceptive horizontal range on the ground, thanks to R.O.B.'s arms possessing hitboxes that launch opponents into the thrusters' hitboxes, the latter of which are extremely powerful, KOing middleweights around 100% on Final Destination. Using precise timing and spacing, it can be comboed into from a down tilt around 90-100%. It is also a useful out of shield option. However, it has high ending lag and is very punishable. | |
| Down smash | Lw3 | 3.5% (hits 1-2), 5% (hit 3) | Lowers his torso and spins it around rapidly while outstretching his arms to perform a series of discus clotheslines, comparatively like Arm Rotor. It hits on frame 7, which is disproportionately quick for a smash attack. Thanks to it being a semi-spike and its last hit's very high knockback growth, it KOs at middleweights at 129% while near the edge of Final Destination, and is very effective for edge-guarding. However, its base hitboxes launch the opponent behind R.O.B., which means that he must face the opposite side of the edge when attempting to utilize this move in order to properly launch the opponent offstage. Like forward and up smash, it also has high ending lag. | |
| Neutral aerial | AirN | 7.5% (base), 9.5% (tip) | Activates his thrusters and somersaults and emit a fiery blast in a circular motion. Its large hitbox, very minimal landing lag, and ability to auto-cancel with a short hop collectively make it an extremely useful for spacing, approaching and starting combos. The tip hitbox's respectable damage output and knockback enable it to KO middleweights at around 128% while near the left/right blast lines. If SHFF'd, it can reliably combo into forward aerial, Arm Rotor, or up aerial. It is also R.O.B.'s best landing option and is safe on shield. However, due to it hitting on frame 14, it is one of the slowest aerials of its kind, and can be stuffed out by quicker aerials. | |
| Forward aerial | AirF | 7% | A double forearm club. It hits on frame 6, making it R.O.B.'s fastest aerial. It is also ideal for spacing when SHFF'd, has minimal landing lag, and is decent for edge-guarding and leading to a wall of pain. Hitting a landing the move after a fast-fall combos into down tilt and leads to tech-chases. However, it lacks KO potential because of its average damage output and minimal base knockback. It is also R.O.B.'s only aerial that lacks a disjointed hitbox. | |
| Back aerial | Air Boosters | 15% (base), 13% (middle), 9% (late base/middle) | Leans forward and activates his thrusters to emit a fiery blast behind him. It boasts extremely high power and both the clean and late sweetspots out-prioritize the sourspots, but it is burdened with considerable startup lag, coming out on frame 19. Back aerial can also be useable for horizontal recovery, as it slightly propels him forward and does not consume Robo Burner's fuel, and due to it briefly halting R.O.B.'s momentum, it can auto-cancel in a short hop, like his other aerial attacks. It is one of the strongest back aerials in the game, KOing middleweights around 80% at the edge of Final Destination. Can be comboed into from a reverse landing neutral aerial. | |
| Up aerial | AirHi | 1.5% (hits 1-4), 4% (hit 5) | Rapidly rotates his arms upwards. Due to hitting on frame 7, it is R.O.B.'s second-fastest aerial attack in his kit. It is down throw's most reliable follow-up from low to medium percentages. It is also useful for juggling and KOing, as its looping hits maintain the opponent trapped reliably, whereas its last hit's extremely high knockback growth enables it to KO middleweights at 115% while near the upper blast line. It can also auto-cancel with a short hop. | |
| Down aerial | AirLw | 12% (base), 11% (middle), 6% (tip) | Activates his thrusters to emit a fiery blast downward. The middle portion of the blast is a powerful meteor smash, which makes it an extremely potent edge-guarding option, especially after an edge trump if the opponent re-grabs the edge. It auto-cancels in a short hop due to it halting R.O.B.'s momentum for a while. Due to it hitting on frame 20 and having 43 frames of ending lag, it is R.O.B.'s slowest aerial. When coupled with its 12 frames of landing lag, it is punishable if it is not spaced properly and auto-canceled, though not to the same extent as in SSB4. | |
| Grab | Grab (つかみ) | — | Clinches the opponent. All of R.O.B.'s grabs are extremely quick (frame 6), at the expense of very low range for his size. | |
| Pummel | CatchA | 1.3% | A headbutt. Average power and speed. | |
| Forward throw | ThrowF | 8% | R.O.B. holds the opponent in his grip, rotates his arm backward and then flings the opponent forward. It combos into dash attack or forward aerial at low percents. It can be useful for setting up an edge-guard. It can KO middleweights at around 188% at the edge of Final Destination. | |
| Back throw | ThrowB | 10% | Flings the opponent behind him with both of his arms. If fully charged beforehand, Gyro can follow up from a back throw from low to medium percentages. Additionally, it can follow up into dash attack and forward aerial at low percents. Like his forward throw, it is useful for setting up an edge-guard or being a KO option neaar the edge. It can KO middleweights at around 155% by the edge of Final Destination. | |
| Up throw | ThrowHi | 12% | A jumping reverse piledriver. It is also R.O.B.'s strongest throw and the 10th strongest up throw in Ultimate, KOing middleweights at around 160% on Final Destination, and even earlier if R.O.B. has rage and/or lands on a platform. In particular, platforms assist its KO potential considerably: it KOs middleweights at 160% when performed on Battlefield's low platforms, and KOs them at 145% when performed on Battlefield's top platform. Although rare, R.O.B. can also perform up throw for a sacrificial KO if it is performed on a moving platform, as he will continue performing the throw all the way to the lower blast line if there is no platform to stop his descent. In addition to its KO potential, it has combo potential thanks to it launching at 80°, with its follow-ups being an upward-angled forward smash, dashing up smash, forward aerial, and up aerial from 0%-40%. However, its smash attack-combos are most reliable against heavyweights and fast-fallers. | |
| Down throw | ThrowLw | 5% | R.O.B. flips the opponent over and drills them into the ground headfirst, burying them. Depending on the opponent's mashing, R.O.B. can follow up with an up tilt, up aerial, up smash, or down smash. However, this removes the effective "Beep Boop" combo since SSB4. | |
| Forward roll Back roll Spot dodge Air dodge |
— | — | ||
| Techs | — | — | ||
| Floor attack (front) Floor getups (front) |
7% | Punches around himself while getting up. | ||
| Floor attack (back) Floor getups (back) |
7% | Punches in front of himself and then behind himself while getting up. | ||
| Floor attack (trip) Floor getups (trip) |
5% | Spins his torso around to throw a low-angle hook around himself while getting up. | ||
| Edge attack Edge getups |
9% | Swings his base forward and activates his thrusters to emit a fiery blast forward while climbing up. Despite the appearance, it does not possess a flame hitbox. | ||
| Neutral special | Robo Beam | 7% (Uncharged Robo Beam), 11.5% (point-blank Robo Beam), 4.5% (long range Robo Beam), 22% (point-blank Super Robo Beam), 15% (long range Super Robo Beam) | An optical laser with 3 different levels: Uncharged Robo Beam, Robo Beam, and Super Robo Beam. Uncharged Robo Beam is a very small energy blast instead of a laser, and can only damage opponents at point-blank range. However, it can be fired consecutively and has deceptively high knockback growth, which allows it to ward off nearby opponents. Conversely, both Robo Beam and Super Robo Beam can damage opponents from afar and ricochet, but cannot be fired consecutively. Robo Beam and Super Robo Beam also deal noticeably more damage when fired at point-blank range. It is one of R.O.B.'s options for zoning alongside Gyro, with Robo Beam being better for his neutral game, while Super Robo Beam is better for surprising opponents. Landing a Super Robo Beam can situationally combo into a gyro toss, dash attack, or forward air.
The light on R.O.B.'s head indicates the level: a dim, slow-paced pulsating glow indicates an Uncharged Robo Beam; a brighter, moderate-paced pulsating glow indicates Robo Beam; and a bright, rapid-paced pulsating glow indicates Super Robo Beam. | |
| Side special | Arm Rotor | 1.5% (loop), 3% (last) 1.5× (reflected projectiles) |
Rapidly spins his torso around to perform a series of discus clotheslines that concludes with an uppercut. Mashing the special button extends the duration of the move. It can also reflect projectiles and move R.O.B. forward or backward while the control stick is tilted in the respective direction. An infamous combo finisher, possessing extremely high base knockback. It will KO most opponents offstage below 70%, although it struggles to KO onstage due to its poor knockback growth. | |
| Up special | Robo Burner | — | Activates his thrusters in order to fly. It grants impressive vertical and horizontal recovering distance, although R.O.B. has a set amount of fuel, indicated by the gauge in his chassis, to be available in order to perform this move. Fuel is recovered overtime as long as R.O.B. is grounded. This doesn't cause helplessness, allowing R.O.B. to fast fall, air dodge, or attack with an aerial attacks or using one of R.O.B.'s other special moves either through its duration or after its conclusion. R.O.B. is also immune to footstool jumps while using this move, although other characters can still jump off of him regardless. It also grants intangibility on frames 2-4, but only when performed on the ground. | |
| Down special | Gyro | 6.1%-8.7% (uncharged), 7.2%-10.8% (fully charged), 5% (idle Gyro) | Charges a spinning top on his base. R.O.B.'s other zoning option alongside Robo Beam, it can be picked up and thrown as an item after making contact with either the opponent or the stage. However, opponents can perform the same and thus utilize the top against him. Only a single Gyro can be active at a time, and attempting another will result in R.O.B. flailing in confusion. If R.O.B. is holding his Gyro, he will be able to charge it again. Typically, an idle Gyro deals little knockback when touched, albeit enough to harass opponents attempting to get past and even perform a lock. Its sheer versatility as a combo and stage control tool make it one of the best projectiles in the game. When an opponent hits a grounded Gyro they are typically knocked back in the direction R.O.B. was facing when he set the Gyro down. | |
| Final Smash | Guided Robo Beam | 1.2% (homing lasers), 1% (laser loop), 3% (enlarged laser loop) | Re-configures his body into a cannon-like form, and begins to charge energy. During the charge, he fires smaller red lasers that home in on opponents in front of himself. He then unleashes the built-up energy in the form of a green laser, which can be angled up or down. As Guided Robo Beam begins to end, the laser briefly enlarges, becoming wider and more powerful. | |
Stats[edit]
| Stats | Weight | Dash speed | Walk speed | Traction | Air friction | Air speed | Air acceleration | Gravity | Falling speed | Jumpsquat | Jump height | Double jump height |
|---|---|---|---|---|---|---|---|---|---|---|---|---|
| Value | 106 | 2.002 – Initial dash 1.725 – Run |
1.178 | 0.105 | 0.015 | 1.134 | 0.04 – Base 0.045 – Additional |
0.09 | 1.6 – Base 2.56 – Fast fall |
3 | 38 - Base 18.38 - Short hop |
38 |
Announcer call[edit]

English
Japanese/Chinese
On-screen appearance[edit]
- Portions of R.O.B.'s body descend from the sky and assemble together.
R.O.B.'s on-screen appearance

Taunts[edit]
- Up Taunt: Faces the screen and spins his arms and head in alternating directions. Based on his victory animation from Mario Kart DS.
- Side Taunt: Faces the screen and rotates his head around, flashing bright lights from his eyes while clapping.
- Down Taunt: Faces the screen, rotates his arms down, and then moves them back up again, spinning them while he does so.

R.O.B.'s up taunt.
R.O.B.'s side taunt.
R.O.B.'s down taunt.


Idle poses[edit]
- Briefly looks toward the screen.
- Briefly nods off, then shakes his head and wakes up.
R.O.B.'s first idle pose.
R.O.B.'s second idle pose.


Crowd cheer[edit]
| Cheer (English) | Cheer (Japanese/Chinese) | Cheer (Italian) | Cheer (Dutch) | Cheer (French) | |
|---|---|---|---|---|---|
| Cheer | |||||
| Description | R - O - B! | Ro - bot! | Rooooob! | R - O - B! | R - O - B! Rooooob! |
| Cheer (German) | Cheer (Spanish) | Cheer (Russian) | Cheer (Korean) | |
|---|---|---|---|---|
| Cheer | ||||
| Description | R - O - B! | ROB, ROB, y na - die más! | R.O.B.! R.O.B.! *claps 3 times* | R - O - B! |
Victory poses[edit]
- Left: While advancing forward, R.O.B. rotates his hands outward while his arms point out straight. After halting, he spins his arms in alternating directions and rotates his head 360° counterclockwise. Afterward, he adjusts his arms to face upward, continuously raising and lowering them in a flexing gesture. R.O.B.'s head also rotates 360° clockwise after every two times he pumps his arms.
- Up: Uses Robo Burner, spins, and then lands. He then proceeds to continuously lower and raise his arms while rotating his head.
- Right: Turns his head and flashes the lights in his eyes while clapping, similar to his side taunt. He then proceeds to continuously clap, lowering his arms after each clap.


In competitive play[edit]
Most historically significant players[edit]
See also: Category:R.O.B. players (SSBU)
 Anathema - One of the best R.O.B. players in North America in the post-pandemic metagame, peaking at 23rd on the UltRank 2022, although his breakout event took place right before the pandemic, placing 13th at CEO Dreamland 2020 defeating MuteAce and Kuro. He is best known for placing 2nd at Rise 'N Grind, where he won a R.O.B. ditto against Zomba and also defeated Onin and Sisqui. In addition, he has placed top 8 at several other majors, placing 5th at both Port Priority 7 and Rise 'N Grind 2023, as well as 7th at Let's Make Big Moves 2022.
 Kuroponzu - One of the best solo-R.O.B. players in Japan in the post-pandemic metagame. He was initially known for his performances in Japan's online metagame, most notably placing 2nd at the SWT: Japan Ultimate Online Qualifier to qualify for the SWT: East Asia Ultimate Regional Finals. He became an offline regular afterwards, but was not well-known outside of Japan until 2024, when he placed 2nd at Sumabato SP 47, defeating Yoshidora, Asimo, and Raru, being just one game away from winning the entire event; he was eventually ranked 48th on the LumiRank 2024.1 and has been ranked every season since, due to consistent strong performances at Sumabato events, such as 3rd at Sumabato SP 68 and 5th at Sumabato SP 64.
 Longo - The best R.O.B. player in Europe, and has been ranked in Europe for numerous years. He is known for his performances in the early metagame and the first few years of the post-pandemic metagame, including several noteworthy major performances such as 13th at Albion 4 and Ultimate Fighting Arena 2022, and peaked at 137th on the OrionRank 2022. Although less consistent since, he continues to put up strong performances, including defeating Skyjay at King Con and BeastModePaul at GENESIS X.
 MKBigBoss - One of the best R.O.B. players in North America in the post-pandemic metagame, as well as one of the best Mexican players during this time, ranking as high as 48th on the LumiRank Half Year 2025. He has been active since the early metagame, but gained wider recognition after he began traveling in the post-pandemic metagame, achieving several high placements at majors, including 4th at Port Priority 6 and 7th at Let's Make Big Moves 2023. In addition, he is known for his frequent trips to Europe and regularly places top 8 at large European events, including winning Sunrise 2023 and NRW Cup Major 2026 and finishing 3rd at gamescom LAN x CGN Open.
- Raffi-X - One of New England's best players in the early metagame, and also one of the best R.O.B. players in the world during this time; although he had little activity outside of New England until right before the pandemic, he was ultimately ranked 31st on the Fall 2019 PGRU thanks to his 7th-place finish at Shine 2019 and 9th-place finish at Super Smash Con 2019, defeating Dark Wizzy in the former and Dabuz in the latter. He remained active in the online metagame but retired from competitive play in early 2021 amid controversy over his conduct.
- sssr - One of the best solo-R.O.B. players in Japan in the post-pandemic metagame. Although notoriously inconsistent at majors throughout his career, his worst performances were often balanced out by some strong peak performances, most notably placing 7th at Maesuma TOP 14.5 "in Hyogo" and 9th at DELTA 4, as well as defeating Miya at Smash Awesome!. In addition, he has placed highly at many superregionals, including placing 3rd at Wave 3, Shinosuma HEROES 3, and Sumabato SP 36. With these peaks, he has ranked in the top 150 for several years, reaching 98th in LumiRank 2023.
- tameigo - One of the best solo-R.O.B. players in Japan in the post-pandemic metagame, especially since 2024. He was first known for placing 7th at Seibugeki 17, and improved in the following months, placing highly at multiple superregionals and claiming several wins over top Japanese players such as Akakikusu and KEN. He is best known for winning the A tier Seibugeki 19, becoming the third R.O.B. player to win an A tier or higher, as well as his 11-set Losers run at DELTA 11, where he finished 4th defeating players such as Rarikkusu and Mild na H.O. He was eventually ranked 70th on the LumiRank Half Year 2025.
- WaDi - Primarily played R.O.B. in the early metagame and was the second-best R.O.B. player during this time, peaking at 20th on the Fall 2019 PGRU. He is best known for finishing 7th at both CEO 2019 and Glitch 7 - Minus World, defeating Samsora in the former, and also his 9th-place finishes at several majors in the latter half of 2019 (2GG: SwitchFest 2019, The Big House 9 and 2GG: Kongo Saga). He continued to play R.O.B. alongside other characters such as Mewtwo after the early metagame, but became inactive in early 2023 due to sexual misconduct allegations.
- Zackray - Known for playing a variety of characters, with one of his best-known characters being R.O.B. He is considered the second-best R.O.B. player of all time, and was the best in the early metagame, as well as the only R.O.B. player ever ranked in the top 5, peaking at 5th on the OrionRank Ultimate: Eclipse. He was the first R.O.B. player to win a major, doing so at The Big House 9, and has since used R.O.B. to win EGS Cup 3 and Ultimate WANTED 4. Even after picking up the Pits in 2023, he maintains R.O.B. as a secondary or counterpick.
- Zomba - The greatest R.O.B. player of all time, and one of the best players in the United States in the post-pandemic metagame, breaking out onto the scene after placing 4th at Smash World Tour 2021 Championships. Since then, he has been ranked among the top 20 for nearly every season, peaking at 6th on the LumiRank Half Year 2025, and has won Crown the Third and GENESIS X, becoming the only solo-R.O.B. player to win a major. He is also known for frequently using R.O.B.'s back aerial to close out stocks, which has become his signature move, and as such, has been dubbed the "Zombair".
Tier placement and history[edit]
Ever since the game's release, R.O.B. has always been considered a dominating character in Ultimate due to buffs from the previous game, such as possessing better approaching options, more versatile projectiles with Gyro and Robo Beam, even more threatening KO options, and an improved edgeguarding game, leading several to consider him as an excellent zoner with a wide array of utility options. R.O.B. saw immense success in the early metagame from players such as WaDi and Zackray, and continued to have strong representation in the post-online metagame from players such as Anathema and Zomba, which led him to be one of the most represented characters in Ultimate's metagame. As such, R.O.B. is widely considered a top-tier character, and as such, was ranked 6th on the first two tier lists and 5th on the third and fourth tier lists.
In online tournaments, which were the standard during the worldwide COVID-19 pandemic, causing almost all offline tournaments to switch to online, R.O.B. fares even better, due to his already safe aerials and tilts being much more reliable due to lag. Many players, including Epic_Gabriel and Raffi-X, have performed fairly well in Wi-Fi tournaments, including various Ultimate Naifu Wars, The Quarantine Series, and The Box.
Classic Mode: Unreadable Expressions[edit]

R.O.B.'s opponents all wear masks or lack expressive faces. His boss, Galleom, fits in with the theme due to being a robot and lacking an expressive face.
| Round | Opponent | Stage | Music | Notes |
|---|---|---|---|---|
| 1 | Halberd | Pink Ball Activate! | ||
| 2 | Frigate Orpheon | Psycho Bits | ||
| 3 | Flat Zone X | Flat Zone | Horde Battle (2 at a time) | |
| 4 | Boxing Ring | Tunnel Theme - X-Scape | ||
| 5 | Wii Fit Studio (Battlefield form) | Rhythm Boxing | ||
| 6 | Mario Bros. (Battlefield form) | Stack-Up/Gyromite | Horde Battle (3 at a time) The stage references how R.O.B. used Mario Bros. for his unlocking battle in Super Smash Bros. Brawl, as well as for single player modes. The battle references the R.O.B. Squad from the Subspace Emissary. If any of these costumes are being played as, | |
| Bonus Stage | ||||
| Final | Galleom | Base | Boss Battle - Super Smash Bros. Brawl | References Galleom's recurring boss battles in Brawl. |
Credits roll after completing Classic Mode. Completing it as R.O.B. has Stack-Up/Gyromite accompany the credits.
Appearances in other Classic Mode routes[edit]
R.O.B. appears as an opponent or ally in certain other fighters' Classic Mode routes, with them being listed below:
Italics denotes an appearance as an ally.
Role in World of Light[edit]

Although R.O.B. was absent from the World of Light opening cutscene, he was vaporized and later imprisoned alongside the rest of the fighters (excluding Kirby) when Galeem unleashed his beams of light.
R.O.B. was one of the many fighters that fell under Dharkon's control upon Galeem's first defeat. He can be found in the Mysterious Dimension sub-area, as the fighter closest to the entrance, standing in a floating island with scattered mechanical junk. To reach him, the player must first defeat the spirit of Redd as the answer to a trivia question ("Which of these spirits sells furniture?"), allowing access to the island he's in.
Fighter Battle[edit]
| No. | Image | Name | Type | Power | Stage | Music |
|---|---|---|---|---|---|---|
| 42 | |
R.O.B. | 10,500 | Wrecking Crew (Ω form) | Stack-Up/Gyromite |
Spirits[edit]
R.O.B.'s fighter spirit can be obtained by completing Classic Mode as him. It is also available periodically for purchase in the shop for 300 Gold, but only after R.O.B. has been unlocked. Unlocking R.O.B. in World of Light allows the player to preview the first spirit below in the Spirit List under the name "???". As a fighter spirit, it cannot be used in Spirit Battles and is purely aesthetic. His fighter spirit has an alternate version that replaces it with his artwork in Ultimate.
Additionally, R.O.B. makes an appearance in a few support spirits.
822. R.O.B.
823. Stack-Up
824. Gyromite
1,113. Subspace Bomb
1,114. Ancient Minister


In Spirit Battles[edit]
As the main opponent[edit]
| Spirit | Battle parameters | Inspiration | |||||||||
|---|---|---|---|---|---|---|---|---|---|---|---|
| No. | Image | Name | Series | Enemy Fighter(s) | Type | Power | Stage | Rules | Conditions | Music | Character |
| 245 | Guardian | The Legend of Zelda Series | •Giant R.O.B. |
3,800 | Great Plateau Tower (Ω form) | N/A | •The enemy has super armor and is hard to launch or make flinch •Stamina battle •The enemy favors neutral specials |
Nintendo Switch Presentation 2017 Trailer BGM | |||
| 290 |  |
Diggernaut | Metroid Series | •Giant R.O.B. |
3,900 | The Great Cave Offensive (Battlefield form) | •Item: Drill | •The enemy starts the battle with a Drill •The enemy is giant |
Magmoor Caverns - Metroid: Samus Returns | ||
| 388 | ROB 64 | Star Fox Series | •R.O.B. •Falco •Fox |
3,300 | Corneria (Battlefield form) | N/A | •Defeat the main fighter to win •Stamina battle •Reinforcements will appear during the battle |
Area 6 - Star Fox 64 | |||
| 392 |  |
Landmaster | Star Fox Series | •Giant R.O.B. |
4,000 | Venom (Ω form) | N/A | •The enemy's neutral special has increased power •The enemy is giant |
Space Battleground | ||
| 494 | Metagross | Pokémon Series | •Metal R.O.B. |
4,400 | Unova Pokémon League (hazards off) | •Earthquake | •Stamina battle •Periodic earthquakes will shake the stage •The enemy is metal |
Battle! (Steven) | |||
| 511 | Regigigas | Pokémon Series | •Giant R.O.B. |
9,600 | Brinstar Depths (Ω form) | •Move Speed ↑ •Attack Power ↑ |
•Stamina battle •The enemy has increased attack power after a little while •The enemy has increased move speed after a little while |
Battle! (Dialga/Palkia) / Spear Pillar | |||
| 537 |  |
Genesect | Pokémon Series | •R.O.B. Team |
9,300 | Prism Tower | N/A | •The enemy favors neutral specials •Only certain Pokémon will emerge from Poké Balls (Genesect) •The enemy has increased move speed |
N's Castle | ||
| 569 | EVE | EarthBound Series | •Giant R.O.B. |
9,700 | Frigate Orpheon | •Defense ↓ •Attack Power ↓ |
•The enemy's energy attacks have increased power •The enemy has super armor and is hard to launch or make flinch •Stamina battle |
Magicant | |||
| 769 |  |
Metal Gear REX | Metal Gear Solid Series | •Metal R.O.B. |
9,500 | Shadow Moses Island | •Item: Shooting Types | •Stamina battle •The enemy is metal •The enemy starts the battle with a Steel Diver |
Cavern | ||
| 772 | Metal Gear ZEKE | Metal Gear Solid Series | •R.O.B. |
1,900 | Halberd | N/A | •The enemy starts the battle with a Super Scope | Encounter | |||
| 784 |  |
Gamma | Sonic The Hedgehog Series | •R.O.B. |
1,700 | Frigate Orpheon | N/A | •Stamina battle •The enemy's shooting items have increased power •The enemy starts the battle with a Ray Gun |
Open Your Heart | ||
| 792 |  |
Omega | Sonic The Hedgehog Series | •Giant R.O.B. |
2,200 | Green Hill Zone (Battlefield form) | N/A | •Stamina battle •The enemy starts the battle with a Drill •The enemy is giant |
Sonic Heroes | ||
| 824 | Gyromite | R.O.B. Series | •Giant R.O.B. |
3,900 | Living Room | N/A | •The enemy favors down specials •The enemy is giant |
Stack-Up/Gyromite | R.O.B. | ||
| 871 |  |
Auto | Mega Man Series | •R.O.B. |
3,600 | Moray Towers (Ω form) | •Item: Shooting Types | •The enemy starts the battle with a Super Scope | We're Robots (Dr. Wily Stage 2) | ||
| 874 |  |
Wily Capsule | Mega Man Series | •Metal R.O.B. |
9,700 | Wily Castle (Ω form) | •Assist Trophy Enemies (Wily Capsule) | •Stamina battle •Hostile assist trophies will appear •The enemy is metal |
Mega Man 2 Medley | Wily Machine 7 | |
| 904 |  |
Galaxy Man | Mega Man Series | •R.O.B. |
2,100 | Lylat Cruise | •Hazard: Low Gravity •Item: Black Hole |
•Timed battle (1:00) •Gravity is reduced •The enemy starts the battle with a Black Hole |
Flash in the Dark (Dr. Wily Stage 1) | ||
| 1,089 | Monita | Nintendo Land | •R.O.B. |
3,600 | Pokémon Stadium 2 | •Sudden Damage | •All fighters take serious damage | Nintendo Land Medley | |||
| 1,114 |  |
Ancient Minister | Super Smash Bros. Series | •R.O.B. Team |
9,000 | Halberd | •Hazard: Screen Flip | •The screen will suddenly flip •The enemy starts the battle with a Bomber •Explosion attacks aren't as effective against the enemy |
Final Destination - Super Smash Bros. Brawl | R.O.B. Squad (cyan, red, and NES/Famicom costumes) | |
| 1,178 |  |
Mokka | Magical Vacation Series | •R.O.B. |
3,700 | Great Plateau Tower | •Move Speed ↓ | •You have reduced move speed | Attack - Soma Bringer | ||
| 1,203 | Mappo | Giftpia | •R.O.B. |
1,700 | Wuhu Island (Wishing Fountain) | •Attack Power ↑ •Move Speed ↓ |
•Survive until the timer runs out (1:00) •You have reduced move speed after a little while •The enemy has increased attack power after a little while |
Tomorrow's Passion | |||
| 1,210 |  |
Chibi-Tot | Chibi-Robo! Series | •Metal R.O.B. Team |
2,300 | Gamer | •Item: Blocks | •The enemy is metal •The enemy has increased move speed |
Garage | ||
| 1,222 | Warrior Mech Gauss | Chōsōjū Mecha MG | •R.O.B. |
1,800 | Wily Castle | N/A | •The enemy starts the battle with a Killing Edge •The enemy has increased move speed |
Marionation Gear | |||
| 1,248 | Ando Kensaku | And-Kensaku | •R.O.B. •Mr. Game & Watch |
2,000 | PictoChat 2 (Battlefield form) | •Hazard: Zap Floor | •The floor is electrified •The enemy favors side specials |
PictoChat | |||
| 1,320 | Toy-Con VR Goggles | Nintendo Labo Series | •R.O.B. •Mii Gunner •Mii Gunner |
3,800 | Gamer (Single building layout) | •Assist Trophy Enemies (Yuri Kozukata) •Item: Dragoon Parts |
•Hostile assist trophies will appear after a little while | Garage | |||
| 1,333 |  |
Golem | DRAGON QUEST Series | •Giant R.O.B. |
4,400 | Mushroom Kingdom (Battlefield form) | •Sleep Status | •The enemy has super armor but moves slower •The enemy's punches and elbow strikes have increased power •Stamina battle |
Fighting Spirits - DRAGON QUEST III | ||
| 1,352 | T-Tetrimino | Tetris Series | •R.O.B. |
4,400 | Flat Zone X (Battlefield form) | •Assist Trophy Enemies (Hammer Bro) •Hazard: Screen Flip |
•The screen will suddenly flip •Hostile assist trophies will appear •The enemy favors down smash attacks |
Chill (Brawl) | |||
| 1,435 |  |
Villager & Iron Golem | Minecraft Series | •Giant R.O.B. •Steve |
8,700 | Minecraft World (Plains, Day) | •Item: Cucco | •The enemy has super armor and is hard to launch or make flinch •The enemy favors grabs and throws •Reinforcements will appear during the battle |
Earth | Iron Golem | |
| 1,453 | Diminutive Guardian | The Legend of Zelda Series | •Tiny R.O.B. •Giant R.O.B. |
1,600 | Temple (Battlefield form) | N/A | •Defeat the main fighter to win | Ballad of the Goddess (Original) | Guardian (green costume) | ||
| 1,498 |  |
E.M.M.I. | Metroid Series | •Giant R.O.B. |
9,600 | Brinstar Depths (Battlefield form) | •Attack Power ↑ •Move Speed ↑ •Temporary Invincibility |
•The enemy will occasionally be invincible •Stamina battle (player 30 HP) •The enemy has increased move speed |
Lockdown Battle Theme | ||
| 1,518 |  |
The 13 Sentinel Pilots | [sic] | •Giant R.O.B. Team |
9,700 | Fourside (Battlefield form) | •Sudden Final Smash | •The enemy will suddenly have a Final Smash after a little while •Timed stamina battle (1:40) •Reinforcements will appear after an enemy is KO'd |
Marionation Gear | Sentinels | |
As a minion[edit]
| Spirit | Battle parameters | Inspiration | |||||||||
|---|---|---|---|---|---|---|---|---|---|---|---|
| No. | Image | Name | Series | Enemy Fighter(s) | Type | Power | Stage | Rules | Conditions | Music | Character |
| 106 |  |
Fawful | Mario & Luigi Series | •Iggy •R.O.B. |
3,700 | Prism Tower | N/A | •Stamina battle •The enemy starts the battle with a Rocket Belt |
The Grand Finale | Mechawful | |
| 567 |  |
Lloyd | EarthBound Series | •Villager •R.O.B. |
9,200 | Magicant (hazards off) | •Bob-omb Festival | •Defeat the main fighter to win •Bob-ombs will rain from the sky after a little while •Stamina battle |
Bein' Friends | EVE | |
| 599 | Mr. EAD | F-Zero Series | •Giant Wario •Giant R.O.B. |
3,800 | Big Blue | N/A | •Defeat the main fighter to win •The enemy's dash attacks have increased power •The enemy can deal damage by dashing into you |
Brain Cleaner | Great Star (cyan color scheme) | ||
| 736 | Dr. Crygor | WarioWare Series | •Dr. Mario •R.O.B. •Wario |
3,400 | WarioWare, Inc. (hazards off) | N/A | •Defeat the main fighter to win | Mike's Song | Mike | ||
| 752 | Hal Emmerich | Metal Gear Solid Series | •Dr. Mario •Giant Metal R.O.B. |
4,500 | Prism Tower | N/A | •Defeat the main fighter to win •The enemy tends to avoid conflict •The enemy is metal |
Yell "Dead Cell" | Metal Gear REX | ||
| 767 | Paz Ortega Andrade | Metal Gear Solid Series | •Villager •Giant R.O.B. |
3,500 | Gaur Plain (Battlefield form) | •Bob-omb Festival | •Bob-ombs will rain from the sky after a little while •The enemy is giant |
Main Theme - METAL GEAR SOLID PEACE WALKER | Metal Gear ZEKE | ||
| 768 | Strangelove | Metal Gear Solid Series | •Bayonetta •Metal R.O.B. |
1,600 | Midgar (Battlefield form) | N/A | •Defeat the main fighter to win •Reinforcements will appear during the battle •The enemy is metal |
Main Theme - METAL GEAR SOLID PEACE WALKER | Peace Walker | ||
| 913 | Tron Bonne | Mega Man Legends Series | •Wendy •Tiny R.O.B. |
3,600 | Wuhu Island (Talon Rock) | N/A | •Take your strongest team into this no-frills battle | We're Robots (Dr. Wily Stage 2) | Servbots | ||
| 962 | Lin | Xenoblade Chronicles Series | •Daisy •Mega Man •R.O.B. |
1,600 | Shadow Moses Island | N/A | •Defeat the main fighter to win •The enemy starts the battle with a Drill |
Xenoblade Chronicles Medley | Skell | ||
| 1,209 | Drake Redcrest | Chibi-Robo! Series | •Captain Falcon •Tiny Metal R.O.B. |
1,700 | Living Room | N/A | •Defeat the main fighter to win •The enemy's neutral special has increased power •The enemy loves to taunt |
ST01: Roll Out, Wonderful 100! | Chibi-Robo | ||
| 1,340 | Mumbo Jumbo | Banjo-Kazooie Series | •Gold Mii Swordfighter •Giant Gold R.O.B. |
9,500 | Jungle Japes (hazards off) | •Flowery | •Defeat the main fighter to win •You constantly take minor damage •The enemy favors air attacks |
Mumbo's Mountain | Golden Goliath | ||
| 1,349 | .png) |
Bullet Walker (Brigadier General) | DAEMON X MACHINA | •Tiny Ganondorf •Giant R.O.B. |
9,300 | Bridge of Eldin (Battlefield form) | •Move Speed ↑ •Attack Power ↑ •Item: Exploding Types |
•Stamina battle •The enemy has increased attack power •The enemy has increased move speed after a little while |
Battle in the Base | Bullet Walker (Green) Scarlet Sword (Red) Shadow Fang (Blue) | |
| 1,466 |  |
Sophia | Persona Series | •Ness •Metal R.O.B. |
9,500 | New Pork City (Battlefield form) | N/A | •Defeat the main fighter to win •The enemy is metal |
Light Plane (Vocal Mix) (for 3DS / Wii U) | Pithos | |
| Mementos (Battlefield form)[SB 1] | Last Surprise[SB 1] | ||||||||||
| 1,489 |  |
Kokorowa | Sakuna: Of Rice and Ruin | •Zelda •R.O.B. |
3,700 | Suzaku Castle | N/A | •Defeat the main fighter to win •The enemy favors down specials |
Boss 1 - Sakura Samurai: Art of the Sword | Mihashira Capital Automatons | |
| 1,514 | Rauru | The Legend of Zelda Series | •Mewtwo •Zelda •Giant R.O.B. •Robin •Inkling •Charizard •Pit |
13,000 | Temple (Battlefield form) | N/A | •Stamina battle •The enemy favors neutral specials •Reinforcements will appear after an enemy is KO'd |
Calamity Ganon Battle - Second Form | Mineru | ||
Alternate costumes[edit]
As in SSB4, R.O.B.'s default costume switches between the 1st and 2nd costumes listed here depending on the language the game is set to. The Famicom colors are the default if the language is set to Japanese, Korean, or Chinese, while the NES colors are the default color if the language is set to any other language. Newly scanned R.O.B. amiibo default to the language's default color instead of the color of the R.O.B. amiibo, unlike other amiibo variants.

| |||||||

|

|

|

|

|

|

|

|
Gallery[edit]

R.O.B.'s fighter card.
R.O.B.'s unlock notice.
Taunting on Port Town Aero Dive.
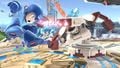
Attacking Mega Man with Robo Beam on Battlefield.
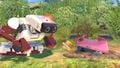
Crouching with a buried Wario on Gaur Plain.
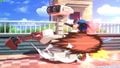
Attacking Marth with his down smash on Tomodachi Life.
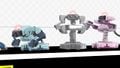
Blue, metal, and pink R.O.B.s with a Bombchu on PictoChat 2.
R.O.B. holding the completed Daybreak.
Taunting on Shadow Moses Island.
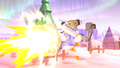
Using his back aerial on Lucas on Magicant.


Fighter Showcase Video[edit]
Trivia[edit]


Japanese, Chinese, and Korean versions (left) vs.
other languages (right), showing the difference
between language versions on R.O.B.'s default
costumes.
- R.O.B.'s stock icon is one of six to show the character's eyes, the others being Kirby, Meta Knight, Sonic, Zombie, and Enderman.
- This is not counting Captain Falcon and Larry, as the eyes depicted for the former are not his actual eyes, and the latter lacks his irises.
- On the official site for Ultimate, each character is accompanied by a background image of a stage from their universe. As R.O.B. is the only character to not have a stage from their home universe, his page is the only one with no stage for the background image.
- When displaying fighters by series on the Western versions of the official Ultimate website, R.O.B.'s stock icon uses his Famicom costume, despite his portrait using his NES costume.
- R.O.B. is one of four characters that have appeared in all games with Final Smashes to have a different Final Smash in each of them; the other three are Pit, Zero Suit Samus, and King Dedede.
- The scripts for Super Diffusion Beam were never removed from the game's code in the transition from Smash 4 to Ultimate. However, like the glide attack scripts from Smash 4, they lie dormant.
- In the Korean version, R.O.B. uses the "Robot" announcer voice-clip from the Japanese version, despite R.O.B.'s name being written the same way as in the English version. This is unlike King Dedede, Simon, and Richter, all of whom use the English announcer voice clip due to the pronunciation. This was not the case in Brawl.
- R.O.B. and the Ice Climbers are the only fighters that cannot receive a spirit series bonus, as there are no primary spirits representing their series.
- Prior to the 10.1.0 update patch, Cloud also shared this distinction.
- Bowser Jr., Yoshi, Mr. Game & Watch, and R.O.B. are the only fighters who used their default costumes in spirit battles through one of the 1297 spirits available when the game first launched. In R.O.B.'s case, it is due to the Ancient Minister spirit.
- Due to certain spirit battles (such as Ancient Minister, Villager & Iron Golem, E.M.M.I., and 13 Sentinel Pilots), R.O.B. is the only character whose color scheme used for a spirit battle changes based on the language version used.
- R.O.B.'s NES color scheme is the only one that bears the NES' base sticker, which reads "Robotic Operating Buddy"; all other palettes bear the Famicom base sticker, which reads "Family Computer Robot". Famicom is short for "Family Computer."
- When R.O.B. is lying on the ground after missing a tech, the switch on his base will be set to "OFF".
- Although R.O.B. is "voiced" in Stamina Mode, he remains silent when he gets KO'd by reaching 0 HP with no stocks remaining. Mr. Game & Watch and the Mii Fighters also share this oddity.
- The names of all of R.O.B.'s normal attacks are based on the internal names of those categories of moves.[1]
References[edit]
|
| |
|---|---|
| Fighter | R.O.B. (SSBB · SSB4 · SSBU) |
| Enemies | R.O.B. Squad (R.O.B. Blaster · R.O.B. Launcher · R.O.B. Sentry) |
| Other | Ancient Minister · Isle of the Ancients |
| Trophies, Stickers, and Spirits | Trophies (SSBB · SSB4) · Spirits |
| Music | Gyromite |