Buried

Being buried is a status condition that can be inflicted by attacks with a bury or plunge effect. It debuted in Super Smash Bros. Melee, and has appeared in every subsequent game. A buried character is embedded in the ground, with the visible part of their body surrounded by churned dirt, and is rendered immobile, unable to take action until the status wears off. Burying generally lasts longer as the target's damage percentage increases, but can be escaped faster via button mashing.
General properties[edit]
Any fighter on the ground hit by an attack with a bury effect will be buried. In Melee, Super Smash Bros. 4 and Super Smash Bros. Ultimate, a character that is lying down cannot be buried, unless they are lying down due to Snake's down throw; however, a character who has tripped can be buried. In Super Smash Bros. Brawl, characters lying down on the ground can be buried. If a fighter cannot be buried, they simply take knockback as usual from the bury attack. In all games, buried characters cannot be grabbed.
In Melee, very few attacks can bury characters, with the only one belonging to a playable character being Donkey Kong's Headbutt. It has since become increasingly more common in later games, with examples of new attacks that can cause it being Villager's down smash, Zero Suit Samus' automatic Flip Jump stomp from Smash 4 onward, Mr. Game & Watch's down smash in Ultimate, and King K. Rool's down throw. The Pitfall item uses a plunge effect, which drops characters through soft platforms if they can be buried, but otherwise behaves identically to the bury effect.
In Ultimate, the support spirit skill Bury Immunity prevents the equipped fighter from being buried.
Appearance[edit]
In Melee and Brawl, a buried character simply remains stuck in one animation frame, with no visual indication of how much time they have left to escape. In Smash 4, however, they shake when button mashing to escape faster. Ultimate, in addition to keeping this visual effect, adds others that better indicate how close a buried character is to escaping; when 30% of the initial bury duration has passed, small portions of dirt splash out of them, and when 60% of the duration has passed, the character flashes yellow with larger and louder portions of dirt splashing out of them. If buried by a throw, the small dirt splashes appear immediately, with the latter effect instead happening when 33.3% of the initial bury duration has passed.
In Ultimate, characters have two buried poses: upright and upside down. Fighters are normally buried upright, but King K. Rool, R.O.B., and Banjo & Kazooie's down throws bury the thrown fighter upside down. The latter pose is also used during Lucas's down throw, although it does not cause the buried condition (in Smash 4, it uses a character's grabbed animation rather than a specific buried pose). Being buried upright or upside down affects the hurtbox placement of the buried character, so a character that is buried upright might not get hit by an attack that would hit them buried upside down, and vice versa.
The boss Rathalos (but not as an Assist Trophy) is affected by Pitfalls, having its own unique buried appearance with a very large amount of churned dirt surrounding it. It cannot be buried by any other attacks, however.
Technical information[edit]
Bury time[edit]
In Melee, the formula for bury frames is 99 + 0.7p - 15h, rounded down. p is the opponent's percent after the burying attack hits, while h is a handicap equal to the victim's current rank disadvantage over the grabber (for example, if the victim is placing 4th and the attacker is placing 1st, it is equal to 3). As a result, players that are currently losing will be buried for less time, and the minimum possible bury time without button mashing can be 99, 84, 69, or 54 frames depending on their rank disadvantage. Button mashing reduces bury time by 6 frames per input.
From Brawl onward, the formula is changed to 10 + 30h + 15(3 - r) + 0.5p + 1.5k, rounded up, with the factors corresponding to the following:
- h and r are both placing factors much like the one used in Melee, but they make bury time even more variable based on the user and victim's stock difference (or points in a time battle). h (handicap) controls stock deficit, being equal to 0.25 if the user is one stock behind the opponent, and 0.375 with two or more stocks behind. On the other hand, r (rank) controls stock leads, being equal to 1.5 if the user is one stock ahead of the opponent, and 1.8 with two or more stocks ahead.
- If both characters' stocks (or points) are equal, both factors are equal to 0, simplifying the formula to
55 + 0.5p + 1.5k. - To summarize, characters bury opponents for 8 more frames with a -1 difference in stocks (or points), 12 more frames with a -2 difference or lower, 18 less frames with a +1 difference, and 22 less frames with a +2 difference or higher.
- In Brawl and Smash 4, h is equal to 0.325 and 0.65, respectively, while r is equal to 1.7 and 2.35, respectively. This causes characters to be buried for 10 more frames with a -1 difference in stocks (or points), 20 more with a -2 difference or lower, 25 less with a +1 difference, and 35 less with a +2 difference or higher.
- If both characters' stocks (or points) are equal, both factors are equal to 0, simplifying the formula to
- p takes the 1v1 multiplier into account in Ultimate.
- k is the numerical knockback amount inflicted by the burying attack, using a weight of 100 for every character.
- Button mashing reduces bury time by 5 frames per input in Brawl, and 8 frames per input in Smash 4 and Ultimate (14.4 for buttons, but they cannot be inputted as quickly as stick inputs).
As a result, in addition to characters' rank in a battle being a more important factor for bury time, attacks also have their bury time influenced by their knockback, rather than simply the opponent's percent.
In Ultimate, characters with burying down throws use different formulas for them:
- Banjo & Kazooie's:
35 + 0.5p - King K. Rool's:
60 + 0.75p(90 + 0.51pprior to update 2.0.0) - R.O.B.'s:
30 + 0.4p
For these formulas, p is the opponent's percent before the damage is dealt, instead of after. Due to knockback and rank not being factors whatsoever, the bury time of these throws is much less variable and thus easier to calculate.
In all games, a character's bury time ending causes them to automatically jump with some additional ending lag, effectively adding some vulnerable time after the bury. This ending lag lasts 16 frames in Melee, 11 frames in Brawl and Smash 4, and 12 frames in Ultimate. However, in Melee, buried characters are given invincibility for 18 frames upon escaping, preventing guaranteed followups; this is not the case in later games, allowing burying moves to be combo starters and even set up various kill confirms.
Knocking characters out of burying[edit]
In Melee, buried characters remain stuck on the ground until the effect wears off or the ground disappears, and attacks do not affect its duration, even if they deal extremely high knockback. From Brawl onward, hitting the character with an attack that deals at least a certain amount of knockback (100 units in Brawl and Smash 4, and 90 units in Ultimate) causes them to escape the bury and be launched as usual. In Brawl and Ultimate, the amount of knockback taken does not get reduced, allowing for reliable, early KO setups on buried characters; however, in Smash 4, it is equal to 0.7× of the knockback that would have been inflicted otherwise, drastically weakening the effectiveness of such setups.
In Ultimate, attacks that hit buried opponents without unburying them have their knockback "stored" and applied when the effect wears off, including neutral attacks and meteor smashes, and even other status conditions such as freezing, allowing even more followups out of a bury if the opponent cannot escape quickly enough.
Bury tech situation storage[edit]

Bury tech situation storage, or BTSS was a glitch and advanced technique that existed in Super Smash Bros. Ultimate until version 13.0.0, where it was patched out.[1] It was caused by interactions between mashing, ASDI, and the buried effect.
To trigger the glitch, after burying an opponent, said opponent needed to be hit by an attack that resulted in a launch angle of 0° or 180° (including the Sakurai angle at lower percentages), while the mashing opponent had their control stick positioned in the upper half of the stick radius. The reason why this happened is due to buries storing knockback and ASDI being triggered on release when the stick is held upwards at the end of the bury. This caused opponents to be forced into a tech situation. Due to ASDI being required, bury throws, still being treated as throws, were unaffected by BTSS; in other words, any bury-causing attack, from Pitfalls to Flip Jump, could cause BTSS to occur.
In terms of attacks that caused the glitch, almost every neutral attack in the game caused it due to their low knockback and Sakurai angles, making it very easy to set up. Since the Sakurai angle is locked to 0° prior to 60 KB, and was (and is) abundant in Ultimate, this made an otherwise rare occurrence very easy to execute. Given the technique required an opponent to use stick mashing, however, the technique was limited in scope; technically, mashing in the lower circumference of the control stick, or simply using the otherwise suboptimal button mashing, could avoid the situation entirely. Therefore, exploitation of the technique was largely restricted to reacting to when the situation occurred. The situations in which this was the case were fruitful, though: It had around a 50% chance of occurring if a player simply mashed wrong.
Opponents being able to miss techs right in front of a player gave them easy access to lock confirms, especially if they could also cover tech options. As a result, BTSS had very high reward should it occur in the right circumstances, and thus players aware of the technique would use it as a knowledge check. Characters such as King K. Rool could also trigger the glitch with moves like K. Rool's down aerial pre-tumble, allowing for exceedingly high damage output that also covered tech options with alternate, reactable combo routes. However, the randomness-based inconsistencies of the technique also made it difficult to implement, on account of requiring quick reaction time. In fact, without having a specific combo route for whether it works or not, BTSS was arguably more of an inconvenience than a benefit.
Gallery[edit]
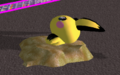
Pichu buried in Melee
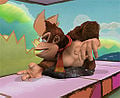
Donkey Kong buried in Brawl
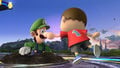
Luigi buried in Super Smash Bros. for Wii U
Wario buried upside down in Ultimate
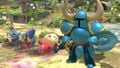
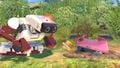
Characters buried by Shovel Knight in Ultimate


Trivia[edit]
- If buried during their extra platform drop frames, Ryu, Ken, and Terry will instantly unbury while sustaining hitlag in a similar manner to the Bounce glitch.