
Simon (SSBU)
| Simon in Super Smash Bros. Ultimate | |
|---|---|
 
| |
| Universe | Castlevania |
| Availability | Unlockable |
| Final Smash | Grand Cross |
| Tier | E (80) |

| “ | Simon Lashes Out! | ” |
| —Introduction tagline | ||
Simon (シモン, Simon) is a playable character in Super Smash Bros. Ultimate. He is the second fighter from Konami after Snake. He was announced as a newcomer during the August 8th, 2018 Super Smash Bros. Direct alongside Richter, Chrom, Dark Samus, and King K. Rool. Simon is classified as Fighter #66.
Keith Silverstein, Simon's English voice actor in Castlevania: Judgment, reprises his role as Simon in English versions of the game. Hideo Ishikawa, who voiced Simon in DreamMix TV World Fighters, also reprises the role in the Japanese version. In the Korean version, Simon uses his English voice clips.
Simon, alongside his Echo Fighter Richter, are ranked 80th out of 82 on the current tier list, placing them at the top of the E tier, and making them the lowest-ranked newcomers. The Belmonts are well known for their strong zoning and keeping opponents away from them thanks to their arsenal of projectiles. They also have their signature whip, making their ability to space good in general. They are good at harassing their opponents in neutral and keeping them in a disadvantage for long periods of time. Their strengths culminate in them at the ledge, with several tools for ledgetrapping, such as Holy Water and forward tilt. Uppercut is an effective out-of-shield option against aggressive players or those who can get in their defense. The Belmonts also have the unique property to angle some of their aerials, namely forward air and back air to hit opponents low to the ground or anti-air them. Overall, the Belmonts are effective at controlling the pace of the match.
However, the Belmonts are equipped with a multitude of crippling weaknesses. Their disadvantage state is among one of the worst in the game due to them having subpar frame data and lacking a viable combo breaker outside of down air, which is predictable. While they have long range, the hitboxes only cover the Vampire Killer itself and are very narrow, so they have poor hitbox placements that make small characters difficult for them to hit. They also suffer from one of the worst recoveries in the game with Uppercut, providing very little horizontal distance and drift and their tether recoveries not having much reach, allowing any character in the game to edgeguard them consistently if sent offstage.
The Belmonts are formidable zoners with tools to constantly keep their distance, but opponents who get past their flurry of projectiles can often take advantage of their poor defensive game, and make it difficult for them to reset to neutral. Thus, they are difficult characters to be consistent with at a high level. While their representation have dropped after the first few years of the game, they have seen some respectable tournament results and representation from players, such as T3 Dom and YoseFu.
How to unlock[edit]
Complete one of the following:
- Play VS. matches, with Simon being the 18th character to be unlocked.
- Clear Classic Mode with Link or any character in his unlock tree, being the 3rd character unlocked after Ice Climbers.
- Have Simon join the player's party in World of Light.
Simon must then be defeated on Dracula's Castle (the Ω form is used in World of Light).
Attributes[edit]
Simon is a heavyweight fighter with a handful of effective projectiles and incredibly long disjointed attacks. In turn, he is burdened with poor mobility, especially in the air, and shares his attributes with his descendant and Echo Fighter, Richter; despite having the 8th-fastest falling and fast falling speed, he has below-average gravity, the 4th slowest walk speed, the 13th-slowest dash and air speed, and is tied with Snake for the lowest air acceleration in the game. He also has the 5th lowest traction, tied with Bowser Jr. and King Dedede.
One of Simon's most notable traits is his notorious projectiles within his special moves. Firstly, Axe is a very strong projectile that can be thrown at three angles, which makes it effective at both edgeguarding and a threatening anti-air option, compounded by its ability to go through solid terrain. The axe can additionally lead into forward aerial, or, at higher percentages, Uppercut for a KO. His side special, the Cross, functions like a boomerang, though unlike other boomerang projectiles, it does not follow Simon, instead going straight and then briefly going backwards on its own if not grabbed by Simon; in addition to this, it sends opponents vertically in the air with low knockback, which is favorable for setups into aerial attacks, the Axe, or an up smash. His up special, Uppercut, is a very fast out of shield option with decent kill power that has multiple setups into it, such as the Cross, or more notably, down aerial. Finally, his down special, Holy Water is a great projectile for ledge-trapping, combo setups or kill setups such as a forward smash, forward tilt, or Uppercut; its flame effect also enables it to detonate Young Link and Toon Link's bombs as well as Link's Remote Bombs.
Simon's other notable trait is his impressive range. His Vampire Killer whip offers the overall second-longest disjointed range out of any fighter in the roster, and it makes his overall kit well-rounded and versatile. In the air, despite his aerial mobility being sluggish, his aerials are effective in their own rights; his up, forward, and back aerials all have impressive range and can be used as tether recoveries, along with the latter two having the unique ability to be angled. His down aerial, while lacking the disjoint of his other aerials, is a notoriously effective combo tool, as it functions much like Greninja's down aerial; it meteor smashes at the beginning, but what makes it versatile is its late hit. On the late hit, both Simon and the opponent will bounce back up at diagonal angles, which opens up many KO confirms, notably into his Uppercut. At low percentages, it can combo into itself multiple times, which can potentially make it a zero-to-death tool if the opponent reacts poorly.
Simon's range is also effective on the ground, as his sluggish frame data is compensated by his attacks having immense range and power at the spiked ball at the end of the whip, to the point where they can be considered safe on shield if spaced, despite their lag. All of his smash attacks are notable examples of this; his forward smash is very powerful when tippered, and when combined with its ability to be angled, this makes it a deadly edgeguarding and ledge-trapping tool. His up smash is very strong when tippered, making it a reliable anti-air tool and a combo finisher and KO confirm out of his Cross. His down smash hits on both sides like most others, and keeps his trademark range while possessing decent power when sweetspotted. His forward tilt possesses decent range and uncharacteristically low ending lag, his dash attack is relatively quick and effective for crossing up shielding opponents, and his down tilt, while not disjointed, is a unique two-hit move that causes him to pseudo-crawl, allowing him to cross up foes or effectively retreat from the corner. Due to Simon's excellent range and his three projectiles, he is very good at keeping the opponent at bay.
Simon also has a good grab game. His grab has below-average range and possesses noticeable lag, but his dash grab gives him a lot of momentum due to his low traction. His throws also have great utility: his forward and back throws have good KO potential despite their rather quick speed, and can be used to set up edgeguards otherwise. His up throw is considered to be his most useful throw, as its decent damage is compounded with its great setup ability, being able to start juggles. His down throw is rather situational and is his least used throw, but nevertheless has combo potential thanks to Simon's range.
Despite all these strengths, Simon has some glaring weaknesses. Perhaps his most infamous shortcoming is his extremely poor recovery, being among the worst in the game, despite having three aerials function as tether recoveries; his very low air movement, combined with Uppercut offering very poor vertical and horizontal momentum, gives him very poor offstage presence. As such, he is very easy to gimp, and overall has a slim chance to return to the ledge, making him easy to KO despite his good endurance due to his almost non-existent offstage game. This is further compounded by Simon's susceptibility to combos due to his heavyweight status, poor aerial attributes, and lack of effective combo breakers within his moveset, preventing him from easily getting out of combos or escaping pressure. Due to his very low traction and slow attacks, he also has a poor out-of-shield game outside of Uppercut.
Despite his zoning and spacing potential, it is overall burdened by his poor frame data, lackluster overall mobility, and narrow attacks. His slow movement makes him vulnerable to pressure and zoning. To make things worse, he only has one aerial move that comes out before frame 10, and that is his frame 8 neutral aerial, while forward, back, and up aerials come out on frame 14 and down aerial on frame 13. While he has his projectiles, they each have noticeable startup and are susceptible to being reflected back, which can be a huge turnabout, especially since the projectiles play a huge role in Simon's neutral game. An opponent can also catch Holy Water mid-flight and use it against Simon, as he can only have one out at a time, allowing his opponents to perform combo setups or kill setups on him.
Simon's poor frame data also gives him a mediocre close-range game, as many of his attacks are unsafe if not spaced properly, which often leaves him heavily susceptible to punishment. While Simon's whip attacks have excellent range, they are also very narrow, and some attacks, such as up tilt, up smash, and up aerial only hit directly above Simon, giving him poor hitbox placements and creating big blindspots that can cause them to miss opponents even if they are directly touching him, which hampers his juggle ability and overall punish game, and gives him a hard time hitting smaller characters. Finally, his moves tend to be rather weak when sourspotted, making spacing crucial if the player plans to score an early KO. With his grab range being below-average and his kill power being noticeable with his tipper mechanic, he must keep his space and fish for tippered tilts and aerials for maximum effect, in a similar vein to Marth.
Overall, Simon is a fighter who excels when he is distanced from his opponent and controlling the main stage: he should use his variety of projectiles to keep opponents at a workable distance to take full advantage of his spectacular range, all while avoiding getting sent offstage due to his poor offstage survivability.
Update history[edit]
Simon was slightly buffed overall in game updates. In 3.0.0, his edge attack received a range increase, but his Cross projectile was nerfed due to it receiving reduced shield damage. 4.0.0 removed his ability to perform the down air stall that he and many other characters with stall-then-fall down aerials could perform.
After a long absence from the game's patches, Simon was given more noteworthy changes and was buffed overall in 9.0.0. His rapid jab received transcendent priority, which prevents it from being cancelled by weak attacks. His dash attack deals more damage and altered knockback, making it KO more often near the ledge but not from center stage. His up tilt also received altered knockback, which makes it safer to hit at low percentages but reduces its KO ability. His up smash has less start-up and ending lag, and also deals more knockback. His down smash also deals more knockback, and his Uppercut has more vertical range.
Overall, Simon's strengths and weaknesses have been largely kept intact, and his standing relative to the cast remains largely the same.

 Edge attack has more range.
 Cross deals less shield damage (0 → -3/-2.5 (throw/return)).
 Down aerial descends immediately when using the move after being launched.
- Rapid jab and its finisher have transcendent priority, preventing them from being canceled out by weak attacks.
- Dash attack:
- The looping hits deal more damage (1.7% → 2%; 12% total → 13.5%).
- The last hit has more base knockback (70 → 80), but less knockback scaling (115 → 105). This improves its KO potential near the edge, but reduces it from across the stage.
- Up tilt has more base knockback (60 → 88), but less knockback scaling (75/100 → 57/82). This increases its safety on hit at low percents, but slightly reduces its KO potential.
- Up smash:
- Up smash has less startup (frame 18 → 16), with its total duration reduced as well (FAF 56 → 54).
- It deals more knockback (61/60 base/88/82 scaling → 64/63/91/85).
- Down smash has more knockback scaling (77 → 82 (front), 82 → 87 (back)).
- Uppercut's hitbox stretches farther vertically (Y offset: 23u—6u → 26u—6u), increasing its range above Simon.
Moveset[edit]
- Simon's whip, the Vampire Killer, possesses a sweetspot at the tip of the chain where the spiked ball is.
- Simon's forward aerial, back aerial, and up aerial all act as tether recoveries, allowing them to be used for recovery but also cancels the attacking part of the move while it is in progress.
- Unlike other disjointed weapons, the Vampire Killer's hitboxes cannot pass through solid terrain; hitting an obstacle will cause the move to deal no damage. This applies to every whip move except neutral attack, up tilt, down smash and neutral aerial.
- Simon can crawl.
For a gallery of Simon's hitboxes, see here.
Note: All numbers are listed as base damage, without the 1v1 multiplier.
| Name | Damage | Description | ||
|---|---|---|---|---|
| Neutral attack | Short Bash (ショートバッシュ Second Bash (セカンドバッシュ) Whip Rush (ウィップラッシュ) Whip Finish (ウィップフィニッシュ) |
2% | Swings the Vampire Killer twice while holding it lengthwise, with his left hand holding its chain. Mashing the attack button quickly will cause Simon to rapidly spin the whip to damage opponents, with a final uppercut that sends opponents away. If not done quickly enough, Simon will cancel the first two hits, ending the attack and leaving him vulnerable. This move is Simon's fastest option up close.
If the attack button is held down instead, Simon will hold out the Vampire Killer, and it can then be manually twirled around. This attack is based on his Whip Twirl from Super Castlevania IV, and it is functionally similar to Sheik's Chain in Melee and Brawl. The chain deals minor damage in this way, but can cancel very weak projectiles that collide with it. The spiked ball of the chain is its sweetspot, which deals more damage and sends opponents away. If pushed off a platform by a windbox while doing this, Simon will continue dangling the whip, and can be moved left and right through the air while simultaneously controlling it. | |
| 2% | ||||
| 1.5% (spiked ball), 1% (chain) | ||||
| 0.5% (loop), 2.5% (end) | ||||
| Forward tilt | Level Swing (レベルスイング) | 12% (spiked ball), 10% (chain), 2% (arm) | Simon's iconic whip strike, first introduced in the original Castlevania. It has high range for its speed, comes out on frame 12 and has low ending lag. This makes it useful for general spacing. However, only the initial whip lash deals damage, and opponents can crouch under it. The tip of the chain deals more damage, and can KO at around 120% at the edge of Final Destination. If the attack button is held, Simon will transition into the Whip Twirl, identical to his neutral attack. | |
| Up tilt | Wide Shake (ワイドシェイク) | 10% (whip), 2% (close) | A quick whip twirl in a lasso-like fashion that covers above his head. Its hitbox is wide and covers above Simon's head, along with his arm. Provides excellent coverage above Simon, granting it good pressuring capabilities against aerial opponents. It can also potentially chain into itself more than once at low percents and can KO at very high percents. However, it has no grounded hitboxes beside him whatsoever, making it risky against grounded opponents. The move also has a very weak hitbox when the chain first comes out, though it has no typical use. | |
| Down tilt | Sliding (スライディング) / Sliding Kick (スライディングキック) | 5% | A slide kick based on Richter Belmont's Slide and Jumping Slide from Castlevania: Symphony of the Night. The first hit is incapable of KOing even at 999%, but if the button is pressed again, Simon does a jumping kick that carries his momentum, comboing from the first hit. The jump deals less damage late, and is capable of jumping off platforms and edges. The first hit allows Simon to slide under projectiles or high hitboxes. The second hit can KO beginning at 140% from the edge of Final Destination. | |
| 7% (clean), 3.5% (late) | ||||
| Dash attack | Tackle (タックル) | 1.7% (hits 1-5), 3.5% (end) | A dashing attack while twirling the Vampire Killer beside himself. Based on Richter Belmont's Blade Dash from Symphony of the Night. The dash covers half of Final Destination. Capable of destroying weak projectiles, but extremely damaged opponents may be knocked out before the final hit. This move is also one of a handful of attacks that can cross-up in Ultimate. | |
| Forward smash | Full Swing (フルスイング) | 18% (spiked ball), 16% (chain), 14% (chain, close) | Simon's iconic whip strike, first introduced in the original Castlevania. Rears back before performing a long-ranged whip crack while taking a step forward. Can be angled. It has tremendous reach, being the second-longest non-projectile forward smash in the game (behind only Min Min), and outperforming Corrin, Mii Gunner, and Shulk. Deals the most damage at the tip of the chain, and less when up close. The sweetspot can KO as early as 57% from the edge of Final Destination, and if fully charged, can KO as early as 30% on lighter characters. It is safe on shield when sweetspotted due to its sheer distance, and deals respectable damage to shields. The rest of the move is punishable on shield due to its high lag overall, and opponents can crouch under the chain. If angled down, the sweetspot can hit ledge hanging opponents. | |
| Up smash | Bat Killer (バットキラー) | 16% (spiked ball), 14% (chain) | A vertical whip crack, similar to the way Simon can crack his whip in Super Castlevania IV. It has immense vertical range, being able to reach as high as the top platform of Battlefield, but its hitbox is strictly vertical, incapable of hitting anyone directly beside Simon or the chain, even if the opponent is practically touching him. The hitbox is also very narrow, making positioning important. Due to its high ending lag, this makes the move suited solely for aerial targets. While the sweetspot will realistically only hit airborne foes, it has extreme power, KOing as early as 67% on Final Destination due to the opponent being far off the ground and closer to the blast line. This also allows for potent punishes from under platforms or projectile setups into up smash, such as a returning Cross. It can combo from up throw at 0-30%, though opponents can DI away from this. | |
| Down smash | Whirlwind (ワールウインド) | 16% (spiked ball), 14% (chain), 12% (chain, close) | Drags the Vampire Killer across the ground from forward to back. Impressive overall range like his other smash attacks, and also deals less damage up close in a similar fashion. Both hits do the same amount of damage, with the first hit being rather fast. The sweetspot KOs as early as 85% from the edge of Final Destination. If not sweet-spotted, the move is punishable. Compared to his other smash attacks, it is Simon's best general-purpose smash attack, being faster and easier to hit than his forward or up smashes; however, it is his weakest and leaves him open to aerial approaches. | |
| Neutral aerial | Round Guard (ラウンドガード) | 1% (hits 1-6), 4% (end) | The aerial Whip Twirl from Super Castlevania IV. Twirls the Vampire Killer around his body. It's his fastest aerial in terms of startup, coming out on frame 8. Lacks the range of his usual moves, but deals multiple hits and can protect Simon from being pursued aerially. Has slightly deceptive range due to the twirling graphic, and only covers one character length around him. It has great combo potential, with the looping hits sending at the autolink angle, allowing a falling neutral aerial to combo into a grab, forward tilt, neutral attack, or several other moves. Can autocancel in a short hop. | |
| Forward aerial | Aerial Swing (エアリアルスイング) | 12% (spiked ball), 10% (chain), 2% (body) | Rears back and performs a long-ranged whip crack, similar to his jumping whip attack in the original Castlevania. It can be angled slightly upward and downward at roughly a 20 degree angle; if angled down, the move can hit grounded opponents. Excellent range, allowing it to hit distant targets easily. However, the hitboxes are slim and have a short duration, while the move has some startup (frame 14), requiring precise use. Has low ending lag, allowing Simon to double jump and perform another aerial if done from a short hop. Also can be used as a tether recovery, which is useful as Simon has no horizontal recovery options otherwise. The sweetspot can KO from 125% at the edge of Final Destination. | |
| Back aerial | Aerial Back Swing (エアリアルバックスイング) | 12% (spiked ball), 10% (chain), 2% (body) | Rears back and performs a long-ranged whip crack behind himself. Nearly identical damage, properties and usage as forward aerial (only lasting for one additional frame, making it very slightly better), and can also be aimed up and down. Like forward aerial, Simon can double jump and perform another aerial if done from a short hop, and it also acts as a tether recovery. Has more knockback growth despite the similar damage, with the sweetspot KOing from 110% at the edge of Final Destination. | |
| Up aerial | Aerial Top Swing (エアリアルトップスイング) | 12% (spiked ball), 10% (chain), 2% (body) | An aerial vertical whip crack, similar to the way Simon can crack his whip in Super Castlevania IV. Rears back and performs a long-ranged whip crack directly above him. Functionally identical to forward and back aerials in all aspects apart from attack direction and the inability to be angled. Like forward and back aerials, Simon can double jump and perform another aerial if done from a short hop, and it also acts as a tether recovery, covering around the same distance as Uppercut. The sweetspot KOs from 100% while in the air. | |
| Down aerial | Jump Kick (ジャンプキック) | 12%, 7% (late) | A stall-then-fall divekick, based on the ability both Simon and Richter can obtain in Castlevania: Harmony of Despair. Goes downward at a diagonal angle, with the first two frames being a meteor smash. Comes out on frame 13, which is rather fast in comparison to other meteor smashes. On hit, Simon will bounce back with a flourish, which can combo into other attacks: the early hit easily combos into forward or back aerials at medium percents, Uppercut at 100% or above as a KO combo, or even into itself at low percents. However, it is dangerous to use offstage, since Simon's recovery is very poor and the duration of the move will most likely lead to a self-destruct if used carelessly. The move's hitbox also does not completely cover Simon's outstretched leg hurtbox, meaning that opponents' attacks can easily trade with it or even completely snuff it out. It is also Simon's only aerial that cannot autocancel in a short hop. | |
| Grab | Grab (つかみ) | — | Reaches out with his left arm. Notably, while Simon can use his whip as a tether recovery, he does not use it to grab opponents; despite this, his grabs are fairly slow for a non-tether grab, additionally hampered by below-average range. These traits make it a poor choice in most situations, especially when considering Simon's already slow mobility. | |
| Pummel | Grab Kneebutt (つかみニーバット) | 1.3% | A knee strike. Average power and speed. | |
| Forward throw | Swing Throw (スイングスルー) | 7% | Spins once and flings the opponent forward. If the opponent misses a tech, it can be followed up with forward smash, forward tilt or dash attack at 0%. Tech rolls can be caught with Axe. Simon's strongest throw, capable of KO'ing from 125% at the edge of Final Destination. | |
| Back throw | Swing Back Throw (スイングバックスルー) | 7% | Flings the opponent backwards with both arms. Has the same combos as forward throw, but it is weaker for KOing due to its lower knockback scaling and slightly higher angle. It KOs from 145% at the edge of Final Destination. | |
| Up throw | Toss & Beat (トス&ビート) | 6% (hit 1), 4% (hit 2) | Heaves the opponent into the air before lashing at them with the Vampire Killer. One of Simon's most useful throws due to its setup ability and damage, being the most damaging throw in his moveset. Can initiate combos at 0% such as into up smash, the later hitboxes of Uppercut, or start aerial juggles. At higher percents, it can set up into up aerial for a KO, though opponents can DI this. | |
| Down throw | Slapdown (スラップダウン) | 8% | A chokeslam. Like forward and back throws, it can follow up with forward smash or forward tilt at 0%, or cover tech rolls with Axe. Can also lead into a second hit of a down tilt at low percents. | |
| Forward roll Back roll Spot dodge Air dodge |
— | — | ||
| Techs | — | — | ||
| Floor attack (front) Floor getups (front) |
7% | Kicks behind, then in front of himself. | ||
| Floor attack (back) Floor getups (back) |
7% | Kicks behind, then in front of himself. | ||
| Floor attack (trip) Floor getups (trip) |
5% | Kicks behind, then in front of himself. | ||
| Edge attack Edge getups |
9% | Kicks forward while getting up. | ||
| Neutral special | Axe | 15% | Throws an axe projectile that travels at a high parabolic arc. The angle can be changed by holding forward or back before throwing. Simon's aerial momentum is stopped once he throws the axe. Extremely high startup lag, with the axe's angle making it ineffective to use conventionally. However, it deals high damage and knockback while also going through solid terrain, giving it powerful edgeguarding capabilities. Its high freeze frames also give it a useful, albeit very limited followup ability. The axe can KO grounded opponents from 140% on Final Destination. | |
| Side special | Cross | 6%, 8% (smash thrown), 5% (returning) | Flings a silver cross projectile that functions similarly to Boomerang, including the ability to be smash-thrown to fly further and deal more damage. Unlike Boomerang, the Cross makes no attempt to return to Simon, and only flies straight forward and back. The Cross reaches the edge of Final Destination if thrown from the middle, and will travel to the other edge if left uncaught. Only one Cross can be out, and Simon can catch it upon returning. This is generally Simon's main stage-control tool to interrupt approaches and initiate combos. Simon may occasionally say "Begone!" | |
| Up special | Uppercut | 2% (hit 1), 1.5% (hit 2-5), 6% (hit 6) | A rising uppercut with the Vampire Killer in hand. Simon's main recovery move, though its poor height and Simon's limited air mobility makes it difficult to use as a recovery. Functions better as an attack, as it starts up quickly, can punish aerial opponents, and combos reliably from down aerial. KOs rather late on the ground, though it can KO much earlier as an aerial combo finisher as early as 120%. However, it has significantly lower range compared to Simon's other attacks. | |
| Down special | Holy Water | 2.9% (flask), 1.3% (flames, hits 1-8) | Drops a flask of Holy Water diagonally downwards. Once it hits the ground or an opponent, the flask bursts and unleashes a pillar of red flames. Only one flask or pillar of flame can exist at one time. If the flask is caught, it will become an item that opponents can use against Simon. It can also be reflected, perfect shielded or hit back to affect the Simon who threw it. Has similar functionality as PK Fire, keeping opponents trapped within the projectile and in position for a followup, and lacks a final stronger hit. Rather infamous for being the setup to a forward smash at ledge. | |
| Final Smash | Grand Cross | 3% (coffin), 35% (crosses), 10% (ending) | Summons a large coffin in front of him, which traps opponents that touch it the moment it appears. If successful, Simon grabs the coffin with the Vampire Killer's chain, swings it in a wide arc and hauls it skywards, then unleashes the devastating Grand Cross technique while flexing, blasting the coffin with magical crosses and sending the victims flying. Extremely powerful, able to KO as early as 25%. | |
Stats[edit]
| Stats | Weight | Dash speed | Walk speed | Traction | Air friction | Air speed | Air acceleration | Gravity | Falling speed | Jumpsquat | Jump height | Double jump height | Empty landing lag |
|---|---|---|---|---|---|---|---|---|---|---|---|---|---|
| Value | 107 | 1.73 – Initial dash 1.52 – Run |
0.76 | 0.085 | 0.02 | 0.94 | 0.01 – Base 0.02 – Additional |
0.085 | 1.85 – Base 2.96 – Fast fall |
3 | 30 - Base 18 - Short hop |
29 | 4 |
Announcer call[edit]

- English
- Japanese/Chinese
On-screen appearance[edit]
- Appears onstage surrounded by rays of light, and cracks the Vampire Killer before coiling it.
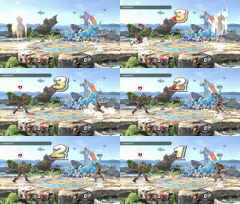 Simon's on-screen appearance

Taunts[edit]
- Up Taunt: Grunts and holds the Vampire Killer in the air, coiled up.
- Side Taunt: Holds the Vampire Killer lengthwise and spins it around himself twice.
- Down Taunt: Cracks the Vampire Killer on the ground next to him, saying "Come!" (来いっ!, Come!). Resembles his animation from one of the intro cutscenes in Super Castlevania IV.
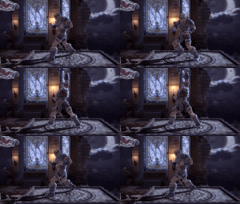 Simon's up taunt.
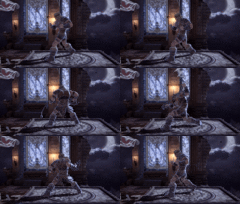 Simon's side taunt.
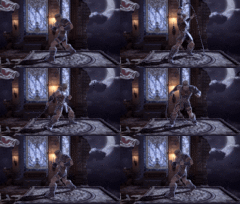 Simon's down taunt.


Idle poses[edit]
- Stands upright with his right hand on his hip. Based on Richter Belmont's pose before his fight in Castlevania: Symphony of the Night.
- Thrusts his hand downwards. Resembles his idle from Castlevania.
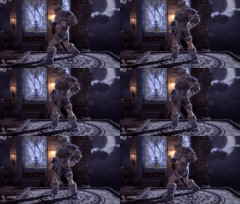 Simon's first idle pose.
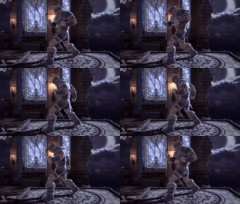 Simon's second idle pose.


Crowd cheer[edit]
| Cheer (English) | Cheer (Japanese/Chinese) | Cheer (Italian) | Cheer (Dutch) | Cheer (French) | |
|---|---|---|---|---|---|
| Cheer | |||||
| Description | Si - mon Bel - mont! | Shi - mo - n! | Si - mon! Si - mon! | Si - mon! | Si - mon! Bel - mont! |
| Cheer (German) | Cheer (Spanish) | Cheer (Russian) | Cheer (Korean) | |
|---|---|---|---|---|
| Cheer | ||||
| Description | Si - mon, jepp! | Si -- mon! | Si - mon! Si - mon! | Si - mon! |
Victory poses[edit]
- Left: Shouts "I vanquish the darkness!" ("闇を打つ!", Strike the darkness!) as he whips the ground around him twice, before holding the Vampire Killer taut. This is a possible reference to Castlevania II: Simon's Quest during the end of nighttime when the game will show a prompt stating "The morning sun has vanquished the horrible night."
- Against non-DLC characters affiliated with darkness (Bayonetta, Dark Pit, Dark Samus, Ganondorf, and Ridley), Simon has an 80% chance to simply say, "To darkness!" ("闇に変わる!", Turn to darkness!).
- Up: Holds the coiled Vampire Killer in the air before lashing it out against the ground while spinning once. The ending pose appears similar to promotional art for Castlevania Chronicles.
- Right: Jumps up to grab a Magic Crystal then whips forward. Simon will then continuously whip and jump as the camera cuts to a side view, referencing a phenomenon when the A and B buttons are held after collecting an orb in the original Castlevania.


In competitive play[edit]
Most historically significant players[edit]
See also: Category:Simon players (SSBU); Category:Richter players (SSBU)
 Noxumbra
 - The best Belmont player in Europe and a top 50 player in Europe the early years of the post-pandemic metagame. His 4th place at Ultimate WANTED 3 is considered one of the best tournament runs of either character, defeating some of Europe's best players at that time including eMass, Mezcaul, and Homika. He is also known for finishing 5th at KRBanger 02, where he defeated eMass and Homika yet again, and for being one of the few Belmont players recognized globally, ranking 123rd on the OrionRank Ultimate: Eclipse.
 Riddles - Although more widely known today for being the best Terry and Kazuya player of all time, Riddles was first known for using Richter, playing the character until around September 2019, and was considered the best Richter player in the early metagame. With Richter, he is best known for placing 13th at Super Smash Con 2019 where he eliminated Dabuz. This performance, alongside his 13th-place finish at Get On My Level 2019, was the best major placement from a Belmont player for many years. He was eventually ranked 47th on the Fall 2019 PGRU; although primarily ranked with Terry, it remains the only time a Belmont main was ranked in the top 50.
 T3 DOM - The best Belmont player in the post-pandemic metagame and the only Belmont player with comparable results to Riddles, ranking in the top 100 in 2021 and 2022 and peaking at 59th in the former season, the only Belmont player to rank in the top 100 in this metagame. He is best known for his performances in 2022, where he defeated Dabuz at Smash Ultimate Summit 5 and placed 13th at Glitch - Infinite, defeating Ned and becoming the only player to tie Riddles' placement during this time, and 17th at Double Down 2022, defeating Jakal along the way.
 TRIGGER
 - The best Belmont player in Japan, one of the longest-active Belmont players, and one of the few prominent Belmont players who only plays Simon. He was first known for defeating T to place 33rd at EVO Japan 2020, and has since placed well at several other majors, such as 17th at DELTA 7 and 33rd at both Kagaribi 5 and Umebura SP 10, defeating alice and Ryuoh in the latter event. At smaller events, he has notably placed 5th at both DELTA 3 and FlyHigh!! 21, defeating Noi at the former event, and defeated KEN at WINNER! 10.


