Kirby (SSBU): Difference between revisions
(→Changes from Super Smash Bros. 4: Okay I admit to having missed that part. Either way this was redundant wording.) |
MemeDedede (talk | contribs) |
||
| (756 intermediate revisions by more than 100 users not shown) | |||
| Line 3: | Line 3: | ||
{{Infobox Character | {{Infobox Character | ||
|name = Kirby | |name = Kirby | ||
|image = [[File:Kirby SSBU.png|250px | |image = [[File:Kirby SSBU.png|250px]] | ||
|game = SSBU | |game = SSBU | ||
|ssbgame1 = SSB | |ssbgame1 = SSB | ||
| Line 10: | Line 10: | ||
|ssbgame4 = SSB4 | |ssbgame4 = SSB4 | ||
|availability = [[Starter character|Starter]] | |availability = [[Starter character|Starter]] | ||
|tier = D- | |||
|ranking = 75 | |||
}} | }} | ||
'''Kirby''' ({{ja|カービィ|Kābī}}, ''Kirby'') is a playable character in ''[[Super Smash Bros. Ultimate]]''. Like all veterans, he was confirmed on June 12th, 2018. Kirby is classified as [[Fighter number|Fighter #06]]. | |||
'''Kirby''' ({{ja|カービィ|Kābī}}, ''Kirby'') is a playable character in ''[[Super Smash Bros. Ultimate]]''. | |||
Makiko Ōmoto | Kirby is voiced in all regions once again by Makiko Ōmoto, using a combination of new voice clips and ones recycled from ''[[Super Smash Bros. 4]]''. | ||
Kirby is currently ranked 75th out of 82 on the ''Ultimate'' [[tier list]], placing him in the D- tier. This is roughly similar to his placement in the previous game, where he was ranked 49th out of 54. Kirby possesses fast frame data overall in his moveset, with few moves that come out after frame 9, granting him access to quick and powerful [[combos]]. His relatively small size and low crouch also makes him hard to hit; his crouch especially allows him to avoid most grabs and some attacks, giving it good synergy with his down tilt, which is very fast and can cause opponents to [[trip]], leading to KO confirms at high percents if it successfully trips his opponent. He also possesses high damage output on the majority of his moveset, and despite his short size and low weight, he also possesses strong KO options in moves like his back aerial and dash attack, and his finishers are generally fast for their power, giving him a solid punish ability. While his air speed is slow, his aerial moveset is generally solid: Kirby's aerials have among the lowest overall landing lag in the roster, neutral aerial covers his entire body and is one of the strongest of its type, forward aerial is one of his most versatile moves, back aerial is fast, powerful and has good range and all except for down aerial are safe on shield when used close to the ground and have KO potential, granting him decent shield pressure in the air and giving him a good edgeguarding ability alongside his six total jumps. Finally, Kirby's [[Inhale]] grants him his opponent's [[neutral special move]], which not only deals more damage than the opponent's, but can also be useful for alleviating some of Kirby's weaknesses and turning the tides of various matchups. | |||
Kirby is | |||
However, Kirby's strengths come at a cost of his poor endurance, as his light [[weight]] makes him susceptible to early KOs. His air mobility is one of the slowest of the roster, and this, as well as a lack of projectiles and the limited range in most of his attacks, presents a host of problems in [[Neutral game|neutral]] and offstage, as Kirby has trouble approaching and fighting those that can outrange him. His slow air speed, [[floatiness]] and lack of projectiles outside of [[Final Cutter]]'s shockwave make him vulnerable to pressure and juggles, and he has a poor disadvantage state: his options have their own issues defensively, as [[Stone]] and down aerial are too slow to protect him effectively from below, neutral aerial has poor range on both sides of Kirby and is not as fast as other aerials of its type, and his midair jumps and Final Cutter may leave him in a worse position when they are used at the wrong time. In the end, while his aerial attacks are versatile and powerful when he has the advantage, they are less effective when he's disadvantaged, as they're not as fast or long-reaching as those of other characters, with his low air mobility and lack of conventional projectiles worsening this issue. Also, when Kirby has a Copy Ability, he may lose it if he gets hit after the first 20 seconds since he obtained it, and the chance of it happening depends on the damage of the hit he took, so he has to swallow his opponent again to get back his Copy Ability if he loses it. While he has several KO options, most of them suffer from poor range and can be difficult to land without a combo or setup into them, and while his smash attacks are powerful without sacrificing too much in speed, they are punishable on shield and have a late hit that is much weaker and often lacks KO potential altogether, such as his up smash, which has several sourspots. Finally, Kirby's recovery, though far-reaching, is rather predictable, making him very vulnerable to edgeguarding despite possessing five midair jumps. | |||
Kirby's | Overall, Kirby's weaknesses undermine some of his strengths. As a result, he has consistently placed near the bottom in terms of competitive representation. Nevertheless, Kirby has still seen success from dedicated mains such as {{Sm|Guilheww}}, {{Sm|JeJaJeJa}}, and {{Sm|Konokururu}}. | ||
==Attributes== | |||
Kirby is known for being a small [[weight|lightweight]], being tied for the eighth-lightest character in the game. True to his franchise, Kirby is characterized as a sluggish, yet floaty fighter. He has the 31st slowest [[walk]]ing speed, and 42nd fastest [[dash]]ing and [[Dash#Initial dash|initial dashing]] speeds. He also has the 5th slowest [[air speed]], 20th highest [[air acceleration]], 3rd lowest [[gravity]], the 5th lowest [[falling speed|falling]] and [[fast fall]]ing speeds, and above average [[traction]]. Due to these statistics, Kirby has difficulty approaching opponents. Kirby's [[recovery]] is versatile: despite his slow air speed and low jump height rendering him susceptible to edgeguarding, his five midair jumps, slow falling speed, long vertical airdodge, and [[Final Cutter]]'s decent distance give him good stalling capabilities and decent safety. | |||
Kirby's | Kirby's greatest strengths are his quick frame data, high combo potential, and the versatility of his moveset. The majority of Kirby's attacks are characterized by speed, with his tilts being among the fastest in the game, while his slowest moves instead boast high power as a trade-off, while still being quite fast for their power: only four of his standard moves (forward and up smashes, forward aerial and down aerial) come out at or after frame 10. Neutral attack and forward tilt are fast and have decent range, allowing Kirby to quickly distance opponents, with the latter being used for tech chase setups. Up tilt's low knockback and high speed allow it to combo into multiple moves, such as itself, an aerial attack, or an Inhale. Down tilt's low power is compensated by its extreme speed and it launching opponents at the [[Sakurai angle]], which allows it to [[trip]] most opponents even over 80%. Should he trip his opponents with it, he can follow up with a variety of attacks, such as a dash attack, grab, or forward smash. Dash attack’s early hit is excellent for whiff punishing and scoring a KO, potentially KOing opponents starting at 90%, while the late hit can set up into an Inhale. His [[smash attack]]s have good range, high power, and great frame-data, making them excellent at scoring a KO. Kirby himself is also very small, making him hard to hit, and his minimal crouch allows him to avoid almost all grabs and several attacks. As a result, Kirby has an excellent grounded and defensive game thanks to his quick frame-data and evasive [[crouch]], requiring opponents to be careful when approaching him in neutral. | ||
Kirby's | The usefulness of Kirby's grounded game also extends to his [[grab]] game. His set of grabs' short range are counterbalanced by being among the fastest in ''Ultimate'', while his pummel's meager damage output is counterbalanced by its extreme speed. His [[forward throw]], unlike most other forward throws in the game, has combo potential, leading into aerial attacks from low to mid percentages. [[Back throw]] can be followed up by a back aerial at 0% on certain characters, can KO at high percents, and can send opponents offstage. [[Up throw]] is his strongest throw and is able to KO almost all characters around 170%, or even earlier if it lands on a platform. Lastly, while [[down throw]] has no combo potential, it is reliable for damage-racking when no other throw can yield better results, and it can KO below 200%. | ||
[[ | Kirby's aerial game is also notable, despite his poor [[air speed]], due to the versatility of his aerial attacks. With the exception of down aerial, they have very low landing lag. [[Neutral aerial]] has a long-lasting hitbox, high knockback on the clean hit, minimal landing lag, and good coverage, making it a safe landing option. The weak hit of neutral air can combo into his tilts, grab, or even a smash attack. It can also be useful as a combo finisher and as a KO move at high percents. Due to the move lasting longer compared to his other aerials, it can safely pressure shields. [[Forward aerial]] is a powerful combo tool, can pressure shields, lead into a [[wall of pain]] at low precents, be useful as a respectable KOing option when landing the final hit, and its first two hits can allow additional follow-ups due to its low landing lag. [[Up aerial]] has good vertical knockback, low landing lag and a fairly quick [[auto-cancel]] window, allowing for several potential follow-ups and even opportunities to KO when near the upper blast line. [[Back aerial]] has decent range, high knockback on the clean hit, and is Kirby's fastest aerial, making it one of his strongest options overall. Lastly, [[down aerial]] has considerable startup, but has multiple hits that drag opponents downward before the final hit [[meteor smash]]es them and has low ending lag, making it a deceptively powerful [[edgeguarding]] tool as well as a reliable combo starter with follow-ups on grounded opponents. | ||
Kirby's [[special move]]set can provide some unique strengths. {{B|Inhale|Kirby}} is his most notable example; it allows him to either [[List of Copy Abilities|copy]] the [[neutral special move]] of any character he inhales, or spit them out as a weight-dependent [[projectile]]. Depending on what character he inhales, the copy ability can give Kirby a move that assists him in matchups to various degrees, such as useful projectiles to counter-camp his opponent ([[Needle Storm]], [[Charge Shot]], {{SSBU|Wolf}}'s {{b|Blaster|Wolf}}), powerful punishing options ([[Giant Punch]], [[Homing Attack]]), a reflector ([[Nayru's Love]]), or other benefits ([[Monado Arts]]). In addition, Kirby's variant of the opponent's neutral special has a 1.2x damage multiplier. Kirby can also inhale projectiles; smaller projectiles will be swallowed, allowing him to heal himself, while larger ones (such as a fully-charged Charge Shot) can be stored in his mouth and spat out, essentially giving Kirby a reflector. The spat projectiles can be used to punish opponents at mid-range and can launch them away with high knockback. Inhale can also be used to [[Kirbycide]] or spit the opponent out offstage, although the opponent can escape by [[button mashing]]. [[Hammer Flip]] boasts amazing power, especially when fully charged, and Kirby can move and jump while charging. However, its high startup and endlag, along with its short range and Kirby's poor mobility being further slowed when charging, makes it difficult to land outside of a [[shield break]], covering ledge options, or after a jab lock. Final Cutter is his primary means of [[recovery]], granting good vertical distance, as well as a disjoint in front of him during his ascent and descent. It also emits a shockwave projectile upon landing, making it difficult to [[punish]] if the opponent is not behind Kirby. Lastly, [[Stone]] causes Kirby to turn into an object and ignore up to 25% damage. It is also a powerful attack, especially in the air, and can be canceled shortly after Kirby begins his descent, although these benefits are limited by its slow startup and ending lag, and Kirby is still vulnerable to grabs while transformed. It can also be used on the ground, where it has faster startup due to creating a shockwave and it launches at a semi-spike angle. | |||
Kirby has very notable flaws, however. His most glaring flaw is his poor approach. While his dashing speed is average, Kirby's mobility is lackluster overall, especially in the air, and with his lack of reliable projectiles, speed demons or characters who can camp with projectiles can wall out Kirby, such as {{SSBU|Sonic}}, {{SSBU|Mii Gunner}} and {{SSBU|Samus}}. Kirby's lack of reliable burst-movement options especially makes his approach in these matchups problematic and sometimes predictable. Dash attack covers a large distance, but it's punishable when not used carefully, and crossing up shields with it is risky, so he doesn't have many reliable approach options outside of a back aerial in a [[reverse aerial rush]]. Inhale can help him by giving some new options, but those depend on the matchup, and if he gets hit too much, he might lose the Copy Ability and has to suck in his opponent again to regain it if he loses it. In addition, characters with long range and/or [[disjointed hitbox]]es, such as {{SSBU|Ike}} and {{SSBU|Mr. Game & Watch}}, can outrange and wall out Kirby since his range is short relative to the cast despite having a disjoints on a few of attacks himself. Final Cutter's projectile has decent range and quick movement, but it's too slow to use it well due to it requiring Kirby to perform the entire rising and falling portions of the move beforehand, and he lacks other projectiles outside of spitting inhaled projectiles/opponents, or from a Copy Ability. It's also too slow to be used as an out of shield option, only being active at frame 23, and lacks a hitbox to protect Kirby from directly above, which can leave him vulnerable to a meteor smash if it's used at the wrong time. When using Final Cutter, he also cannot snap to the ledge until he reaches the peak of his ascent. This requires conscientious usage to avoid punishment. Despite possessing great [[air acceleration]], Kirby's air speed is also too slow for him to take advantage of it, hindering his aerial approach and recovery despite possessing five midair jumps, with the latter being especially prevalent due to his recovery being fairly linear and predictable despite Final Cutter covering a decent distance overall. Kirby also has several KO options in his kit, but some can be hard to land without a setup due to their short range. | |||
[[ | In addition, Kirby also has poor endurance. While being light and floaty can help him escape combos from other characters, this also means he risks getting KOed earlier. He is also vulnerable to [[juggling]], due to his aforementioned slow falling and air speeds. The existence of [[rage]] further pronunces this issue, as Kirby will be sent flying even further by heavily damaged opponents, and his light [[weight]] prevents him from gaining the advantage of his own rage. His floaty movement, slow speed in the air and lack of reliable projectiles without Inhale also leaves him very vulnerable to pressure, and while his aerials are versatile in an advantage state, they are less effective when he's disadvantaged. His down aerial is too slow to fight juggling, and it's also outclassed by his other aerials when it comes to edgeguarding or against shielding opponents, as it's unsafe on shield and it's also his weakest aerial in terms of damage and knockback, not even KOing lightweights until very high percents. This imposes as a risk in approaching opponents in the air, while also preventing Kirby's aerials from being used effectively when in a disadvantage state, often forcing him to rely on his jumps, Stone, or neutral aerial to escape and return to the ground or the ledge. Even then, those options have their risks: using his midair jumps might leave him vulnerable later, neutral aerial has a large hitbox that covers his entire body but it has and poor range in front of him a long duration that can be punished when used poorly, and Stone has high start-up in the air and Kirby takes a long time to transform or turn back to normal. While its immunity to attacks that deal 25% damage is useful, it has to be used carefully to avoid getting punished, as it has slow startup and a noticeable amount of ending lag and Kirby is still vulnerable to grabs when he's transformed. | ||
Overall, Kirby | Overall, Kirby has a tendency to run hot and cold. In turn, Kirby is characterized as a glass cannon who is capable of inflicting an impressive amount of damage if he gets close to his opponent thanks to his excellent frame data and potent combo game, but doing so is challenging for him due to his poor approach. As such, he functions well with a bait-and-punish playstyle, although being unprepared for an opponent's approach can be hazardous due to his low survivability, an attribute that is commonly shared with other characters of Kirby's archetype. | ||
==Changes from ''[[Super Smash Bros. 4]]''== | ==Changes from ''[[Super Smash Bros. 4]]''== | ||
Near the end of ''SSB4' | Near the end of ''SSB4''{{'}}s metagame, Kirby had been considered a low-tier character due to a combination of lackluster attributes (light, slow in the air and floaty) and underwhelming moveset despite its power. Likely owing to this, Kirby has been noticeably buffed overall in the transition to ''Ultimate'', though not enough to raise his standing on the tier list. | ||
Kirby's buffs lie in the increased utility of his moveset as a whole, with overall improved frame-data and KO power on his finishers. The first two hits of his [[neutral attack]] can now [[jab lock]] and connect better into the looping hits (albeit at the cost of reduced damage output), while [[forward tilt]] is a stronger poke and KO option due to its reduced ending lag and its increased knockback. His [[dash attack]] has been mostly reverted back to its ''Melee'' iteration — however, it is significantly faster and stronger, has less startup and a far longer duration compared to his previous dash attack in ''SSB4'', can cross-up on shields, covers more distance, and is more reliable for catching opponents thanks to only consisting of a single, long-lasting hitbox; these changes make it a stronger punishing tool and a much more versatile move overall. His [[smash attack]]s are now stronger punishing options, with [[forward smash]] having much more range, [[up smash]] having faster start-up, and [[down smash]]'s regained its semi-spike angle, restoring its utility at edgeguarding; all three also have improved KO power, with forward and up smash dealing more knockback, and down smash's altered angle KOing earlier at the edge despite its reduced knockback. Several of Kirby's attacks, such as up tilt and all his aerials excluding for up aerial also have more range, partially alleviating one of his weaknesses from ''SSB4''. | |||
The universal reduction to [[landing lag]] has also exponentially benefitted his aerials, despite already possessing among the lowest landing lag in ''SSB4''; his aerials are not only safer, but now capable of leading into followups, with [[forward aerial]]'s first two hits now being able to follow up into a grab or forward smash. His neutral and up aerials —the former being one of his most situational attacks— are now faster, deal more knockback (with the former's clean hit being one of the strongest neutral aerials in ''Ultimate'' and have less ending lag; neutral aerial also has more range, and both forward and up aerial deal higher damage, regaining some of the KO power they had lost in the transition between ''Melee'' and ''Brawl''. | |||
For Kirby's special moves, [[Inhale]] has been significantly buffed with faster startup, less ending lag, a much longer grace period in which Kirby cannot lose his Copy Ability, a lower probability of losing said ability after this period has ended, and a new 1.2× multiplier to his copied [[neutral special]] compared to his opponent (albeit without a corresponding increase to knockback), giving him a greater incentive and a higher reward from inhaling opponents. Furthermore, he can now eat the projectiles he swallows to heal himself (and store certain ones in his mouth as well, enabling him to spit them out as stars). [[Hammer Flip]] now renders Kirby nigh-impossible to stop for a longer time as long as he's grounded; [[Final Cutter]] snaps to the ledge slightly faster and its landing hit is much more powerful, which improves its utility; and [[Stone]]'s aerial variant now has super armor during its startup, making it more difficult to interrupt Kirby out of the attack, as in previous ''Smash'' games he could be interrupted even when he fully transformed. | |||
However, the nerfs Kirby has received are also noteworthy. The most notable were to his [[grab]] game: his grab has had its mediocre range further worsened (especially on his pivot grab), and [[forward throw]] depicts him jumping up higher after the throw, which runs the risk of potentially landing on top of a soft platform, negating all follow-ups when it happens too early (although following up neutral air or up aerial can allow more follow-ups), while [[back throw]] has lost most of its combo setups due to changes to the animation. Altogether, this grants Kirby a less effective combo game off of his grabs overall. His other received nerfs include Stone no longer hitting shielding opponents twice, reducing its shield pressure considerably; [[back aerial]] deals less knockback (although it has more range and the clean hit now lasts for slightly longer to compensate); and [[down aerial]], one of his most reliable combo starters in ''SSB4'', has more range on the looping hits, but slightly less on the final hit and is less advantageous on landing due to the removal of [[frame cancel]]ing, reducing the effectiveness of its follow-ups since its landing lag was not reduced enough to compensate properly. Furthermore, Kirby still retains many of the same issues that plagued him in ''SSB4'', with mediocre range, sluggish aerial mobility and a high susceptibility to being camped. | |||
Universal changes to the game's mechanics both benefit and hinder Kirby. The revamped [[air dodging]] mechanics have significantly improved his innate ability to [[edgeguard]] opponents more effectively, and directional air dodges have also given him a secondary recovering option, but this also makes him more susceptible to juggling and edgeguarding as well, due to his short-ranged aerials and predictable landing options, as his air dodges are now among the slowest in the game due to now depending on the character's fall speed and gravity. The changes to downwards velocity KOing opponents faster from the bottom blast line now render Final Cutter as a significantly more deadly edgeguarding and [[sacrificial KO]] option, further improving its utility. The increased [[shieldstun]] and increased startup on shield grabbing notably benefits Kirby's safety on hit, due to his moveset's naturally high damage and low ending lag, making him harder to shrug off and punish accordingly. Conversely, the changes to grabs' ending lag make Kirby's own grab riskier to throw out, as their ending lag can prove more punishable. The increase in mobility is a mixed bag for Kirby, as while his mobility has improved overall relative to the cast (most notably his aerial mobility), his problems with camping from the previous incarnation remain, exhibited with the increased prevalence of zoners. Overall, his edgeguarding and defensive options have been improved at the cost of his range issues becoming even more prevalent than in ''SSB4''. | |||
In the end, Kirby's changes now render his punishing game much more deadly, make him much harder to shake off once he gains the advantage, and allow him to seal stocks at much more varied percentages, but the universal changes to the game's engine have made it slightly easier for opponents to restrain him and have rendered said punishment game slightly more inconsistent. Because of this, Kirby is agreed to have not significantly improved from his appearance in ''SSB4'', which combined with several veterans being buffed to varying degrees, has resulted in Kirby being in a similar position overall, despite several of the game's updates handing Kirby a myriad of noticeable buffs. | |||
{{SSB4 to SSBU changelist|char=Kirby}} | |||
== | ==Update history== | ||
Aside from glitch fixes, Kirby has been buffed significantly via game updates. Update 2.0.0 improved his ground game by reducing the ending lag of his forward tilt, along with granting it increased base knockback, giving it newfound KO potential at very high percentages, while also boosting its safety at low percents. Dash attack's clean hit was also given a larger hitbox, and its damage output was increased overall. Update 3.0.0 improved the duration of his up smash's clean hit, making it easier to land on aerial opponents, and reduced the ending lag on his neutral aerial. {{b|Inhale|Kirby}}'s Copy Ability grace period was also extended, allowing Kirby to safely keep his abilities for longer, and the probability of him losing them when receiving damage was also reduced. Furthermore, his down throw's damage output was increased, and [[Final Cutter]] can grab ledges earlier, making it safer for recovery. | |||
Update 6.0.0 granted Kirby some of his most significant improvements. Both neutral and up aerials had their startup reduced and their knockback increased, improving their combo and KO potential. Inhale had its startup reduced as well, and the grace period for Copy Ability was further increased, along with a further reduction to the probability of losing his abilities. Up smash's sourspot had its knockback increased, improving its consistency, and neutral attack's startup was reduced by 1 frame. Following this, update 7.0.0 enlarged Kirby's shield, making him much less susceptible to shield pokes. | |||
Kirby has been buffed once more in update 8.0.0, strengthening a handful of his finishers such as down smash, back aerial, and [[Stone]], with the former having decreased start-up, alleviating the nerfs they initially received in the transition to ''Ultimate''. Dash attack had its clean hit's knockback increased and its previously high endlag reduced, with cross-ups now being much safer and as well as giving the late hit follow-up potential. Although forward aerial's increased damage output and increased knockback on the final hit makes it harder for him to follow up with his combos at low percents, it is an overall benefit since it improves its KO power at the ledge, renders his finishers to be more potent, while indirectly giving his other combo tools more flexibility. Update 13.0.1 added a minor buff/bug fix of Kirby's version of [[Lightning Buster]] less ending lag to match {{SSBU|Mythra}}. | |||
Overall, Kirby fares significantly better than he did at the launch of ''Ultimate'', with his combo potential and mobility being greatly improved, as well as the combos doing more damage, which makes his neutral game more viable and leaves him less reliant on gimmicks to consistently close stocks. | |||
Kirby | |||
'''{{GameIcon|ssbu}} {{SSBU|1.1.0}}''' | '''{{GameIcon|ssbu}} {{SSBU|1.1.0}}''' | ||
{{UpdateList (SSBU)/1.1.0|char=Kirby}} | |||
'''{{GameIcon|ssbu}} {{SSBU|1.2.0}}''' | '''{{GameIcon|ssbu}} {{SSBU|1.2.0}}''' | ||
{{UpdateList (SSBU)/1.2.0|char=Kirby}} | |||
'''{{GameIcon|ssbu}} {{SSBU|2.0.0}}''' | '''{{GameIcon|ssbu}} {{SSBU|2.0.0}}''' | ||
{{UpdateList (SSBU)/2.0.0|char=Kirby}} | |||
'''{{GameIcon|ssbu}} {{SSBU|3.0.0}}''' | '''{{GameIcon|ssbu}} {{SSBU|3.0.0}}''' | ||
{{UpdateList (SSBU)/3.0.0|char=Kirby}} | |||
'''{{GameIcon|ssbu}} {{SSBU|3.1.0}}''' | '''{{GameIcon|ssbu}} {{SSBU|3.1.0}}''' | ||
{{UpdateList (SSBU)/3.1.0|char=Kirby}} | |||
'''{{GameIcon|ssbu}} {{SSBU|6.0.0}}''' | |||
{{UpdateList (SSBU)/6.0.0|char=Kirby}} | |||
'''{{GameIcon|ssbu}} {{SSBU|7.0.0}}''' | |||
{{UpdateList (SSBU)/7.0.0|char=Kirby}} | |||
'''{{GameIcon|ssbu}} {{SSBU|8.0.0}}''' | |||
{{UpdateList (SSBU)/8.0.0|char=Kirby}} | |||
'''{{GameIcon|ssbu}} {{SSBU|13.0.1}}''' | |||
{{UpdateList (SSBU)/13.0.1|char=Kirby}} | |||
==Moveset== | ==Moveset== | ||
*Kirby can perform | *Kirby can perform [[Double jump#Multiple double jumps|5 double jumps]], tied with {{SSBU|Jigglypuff}} and {{SSBU|Meta Knight}} for most double jumps in the game. | ||
''For a gallery of Kirby's hitboxes, see [[Kirby (SSBU)/Hitboxes|here]].'' | |||
{{MovesetTable | {{MovesetTable | ||
|game=SSBU | |game=SSBU | ||
|neutralcount=2 | |neutralcount=2 | ||
|neutralinf=y | |neutralinf=y | ||
|neutralname=Vulcan Jab/ | |neutralname=Punch ({{ja|パンチ|Panchi}}) / Follow-Up Punch ({{ja|追いパンチ|Oi Panchi}}) / Vulcan Jab ({{ja|バルカンジャブ|Barukan Jabu}}) / Vulcan Finish ({{ja|バルカンフィニッシュ|Barukan Finisshu}}) | ||
|neutral1dmg=1.8% | |neutral1dmg=1.8% | ||
|neutral2dmg=1.6% | |neutral2dmg=1.6% | ||
|neutralinfdmg=0.2% (loop), 3% (last) | |neutralinfdmg=0.2% (loop), 3% (last) | ||
|neutraldesc= | |neutraldesc= A {{s|wikipedia|one-two combo}}. When button mashed, Kirby performs the Vulcan Jab from the {{s|wikirby|Fighter}} ability before concluding with the Smash Punch. It is very quick due to coming out on frame 2, and its first two hits have very minimal ending lag. These traits make it effective for [[jab cancel]]ing or as an [[out of shield]] option. Both hits can also [[jab lock]]. | ||
|ftiltname= | |ftiltname=Spinning Kick ({{ja|スピニングキック|Supiningu Kikku}}) | ||
|ftiltdmg=8% (base), 7% (tip) | |ftiltdmg=8% (base), 7% (tip) | ||
|ftiltdesc= | |ftiltdesc=Throws a spinning roundhouse kick. It is quick, due to coming out on frame 5, having very little ending lag and can be angled. The tip of Kirby's foot is a sourspot, but it is [[priority|out-prioritized]] by the other hitboxes. Due to its above average knockback, it can KO middleweights starting at around 140% at the edge of {{SSBU|Final Destination}} when sweetspotted; this makes it a useful 2-framing option when angled downwards. | ||
|utiltname= | |utiltname=Kirby Tail ({{ja|カービィテイル|Kābi Teiru}}) | ||
|utiltdmg=5% (clean), 4% (late) | |utiltdmg=5% (clean), 4% (late) | ||
|utiltdesc=A scorpion kick. Although its damage output is low, it is a very useful combo starter at low percents | |utiltdesc=A scorpion kick. Although its damage output is low, it is a very useful combo starter at low percents, due to it coming out on frame 4 and having both very minimal ending lag and disjointed range which also reaches slightly in front of him. It also renders Kirby's foot [[Intangibility|intangible]] throughout its duration, which can give him protection above him and allows it to be used as an anti-air tool despite its rather poor range. | ||
|dtiltname=Squish Kick | |dtiltname=Squish Kick ({{ja|ローキック|Rō Kikku}}, ''Low Kick'') | ||
|dtiltdmg=6% | |dtiltdmg=6% | ||
|dtiltdesc=A crouching shin kick. It is fairly spammable due to coming out on frame 4 and having minimal ending lag. When coupled with its [[trip]]ping potential, it can be a very useful set-up option. | |dtiltdesc=A crouching shin kick. It is fairly spammable due to coming out on frame 4 and having minimal ending lag. It also moves Kirby marginally forward when using it. When coupled with its [[trip]]ping potential, and the fact that Kirby's crouch allows him to dodge many attacks with high hitboxes, it can be a very useful set-up option, especially after a crouch, connecting in one of his strongest moves if it successfully trips an opponent. | ||
|dashname=Burning | |dashname=Burning ({{ja|バーニング|Bāningu}}) | ||
|dashdmg=12% (clean), 9% (mid), 6% (late) | |dashdmg=12% (clean), 9% (mid), 6% (late) | ||
|dashdesc=The Burn attack from the {{s|wikirby| | |dashdesc=The Burn attack from the {{s|wikirby|Burning}} ability from ''Kirby's Adventure''. It has decent startup at frame 9 with a long-lasting hitbox that grows weaker over time. Its clean hitbox is one of the strongest dash attacks in the game, KOing middleweights at around 100% from the edge of Final Destination, though it is extremely punishable on shield due to its ending lag. A powerful punish option. Unlike ''Melee'', it does not slide off of edges. Its late hit can start combos, but landing it is risky. | ||
|fsmashname=Smash Kick | |fsmashname=Smash Kick ({{ja|スマッシュキック|Sumasshu Kikku}}) | ||
|fsmashdmg={{ChargedSmashDmgSSBU|15}} (clean), {{ChargedSmashDmgSSBU|11}} (late) | |fsmashdmg={{ChargedSmashDmgSSBU|15}} (clean), {{ChargedSmashDmgSSBU|11}} (late) | ||
|fsmashdesc= | |fsmashdesc=Based on the Spin Kick from the Fighter ability from ''Kirby Super Star''. Due to becoming active at frame 13, it is quite fast for a forward smash. It can be angled, moderately moves Kirby forward and the clean hit is slightly disjointed, giving it deceptively good range. Its clean hitbox also deals respectable damage and has very high knockback growth, which makes it a powerful and reliable KOing option. While near the edge of Final Destination, it KOs middleweights starting at around 70%. However, its late hitbox lacks reliable KO potential due to its high base knockback at the expense of very low knockback scaling. The hitbox also has a deceptively short duration compared to what it seems, and has noticeable ending lag (29 frames), making it unsafe on shield and punishable if not used correctly. A powerful punish option that is also capable of 2-framing reliably if angled downwards. | ||
|usmashname= | |usmashname=Somersault Kick ({{ja|サマーソルトキック|Samāsoruto Kikku}}) | ||
|usmashdmg={{ChargedSmashDmgSSBU|15}}/{{ChargedSmashDmgSSBU|14}} (clean), {{ChargedSmashDmgSSBU|14}}/{{ChargedSmashDmgSSBU|13}} (mid), {{ChargedSmashDmgSSBU|13}}/{{ChargedSmashDmgSSBU|12}} (late) | |usmashdmg={{ChargedSmashDmgSSBU|15}}/{{ChargedSmashDmgSSBU|14}} (clean), {{ChargedSmashDmgSSBU|14}}/{{ChargedSmashDmgSSBU|13}} (mid), {{ChargedSmashDmgSSBU|13}}/{{ChargedSmashDmgSSBU|12}} (late) | ||
|usmashdesc=A bicycle kick. It can hit behind Kirby, while its clean hitbox deals respectable damage and has very high knockback growth | |usmashdesc=A bicycle kick. It can hit behind Kirby, while its clean hitbox deals respectable damage and has very high knockback growth akin to forward smash, KOing middleweights at around 100% from anywhere on Final Destination. Kirby's foot is also rendered intangible throughout its duration. Has moderate startup and ending lag, coming out on frame 12 and having 27 frames of ending lag, which gives it the fastest interruptibility of Kirby's smash attacks. Its mid hitbox is noticeably weaker, but still has surprisingly respectable KO power for an up smash, KOing middleweights at around 120% from anywhere on Final Destination. However, it has a sourspot on the tip of Kirby's foot that deals less damage at any point of the move and the late hit has extremely low knockback, not KOing opponents even at Sudden Death percentages. | ||
|dsmashname= | |dsmashname=Propeller Kick ({{ja|プロペラキック|Puropera Kikku}}) | ||
|dsmashdmg={{ChargedSmashDmgSSBU|14}} (clean), {{ChargedSmashDmgSSBU|10}} (late) | |dsmashdmg={{ChargedSmashDmgSSBU|14}} (clean), {{ChargedSmashDmgSSBU|10}} (late) | ||
|dsmashdesc=A spinning split kick. It hits in front of and behind Kirby, and its clean hitbox deals respectable damage and has very high knockback growth like his forward and up smashes. | |dsmashdesc=A spinning split kick. It hits in front of and behind Kirby, and its clean hitbox deals respectable damage and has very high knockback growth like his forward and up smashes. Comes out on frame 7, with the fastest startup of his smash attacks. It semi-spikes with above average power, with its clean hitbox KOing middleweights starting at around 100% from the edge of Final Destination, and is additionally a reliable 2-framing option that is very useful for edgeguarding as a result, and it can also punish defensive ot. It also renders Kirby's feet intangible for 10 frames starting from frame 5 until the clean hit ceases at frame 14. However, its late hitbox has significantly lower KO potential due to its lower damage, not KOing middleweights on the ledge of Final Destination until around 140%. Due to it having 31 frames of ending lag, it has the highest ending lag of Kirby's smash attacks, and combined with its long duration, it's very punishable if shielded or whiffed. | ||
|nairname=Twinkle Star | |nairname=Twinkle Star ({{ja|ティンクルスター|Tinkuru Sutā}}) | ||
|nairdmg={{ShortHopDmgSSBU|10}} (clean), {{ShortHopDmgSSBU|8}} (mid), {{ShortHopDmgSSBU|6}} (mid-to-late), {{ShortHopDmgSSBU|4}} (late) | |nairdmg={{ShortHopDmgSSBU|10}} (clean), {{ShortHopDmgSSBU|8}} (mid), {{ShortHopDmgSSBU|6}} (mid-to-late), {{ShortHopDmgSSBU|4}} (late) | ||
|nairdesc= | |nairdesc=A cartwheel that also appears in the {{s|wikirby|Smash Bros.}} ability. Its very low landing lag makes it a decent set-up option at low percents or a tool for shield pressure when short hopped, while its very high knockback growth makes it a decent anti-pressure option. In addition, on Final Destination, it can KO middleweights under 160% at center stage and at around 110% at the ledge if landing the clean hitbox, making it one of the strongest neutral aerials in the game, which also makes it a powerful [[out of shield]] option. It has large hitboxes that cover Kirby's body, especially at the beginning, giving good protection and coverage around him, and it can also edgeguard. It has properties of a [[sex kick]] and autocancels in a full hop. Due to coming out on frame 8, it has the second fastest startup of Kirby's aerials, although this also makes it slower in comparison to other sex kicks. | ||
|fairname= | |fairname=Triple Attack ({{ja|トリプルアタック|Toripuru Attaku}}) | ||
|fairdmg={{ShortHopDmgSSBU|4}} (hit 1), {{ShortHopDmgSSBU| | |fairdmg={{ShortHopDmgSSBU|4}} (hit 1), {{ShortHopDmgSSBU|4}} (hit 2), {{ShortHopDmgSSBU|6}} (hit 3) | ||
|fairdesc= | |fairdesc=A series of three consecutive aerial kicks. Due to coming out on frame 10, it has the second slowest startup of Kirby's aerials. The first two hits have low knockback, which allows them to connect reliably into the third hit; however, they are notably inconsistent and the first hit doesn't use the [[autolink angle]], meaning that it might experience fallouts as a result. Its low landing lag also allows the first or second hit to be used as set-up options into other moves, such as an up smash or forward smash at high percents. A versatile aerial that is good for combos and edgeguarding, it is capable of connecting into itself for a [[wall of pain]] in certain instances due to its low ending lag, and it can also combo into other moves at low to mid percents other than on landing. As of update 8.0.0, it deals the highest damage of Kirby's aerials, and while this makes it more difficult to connect two forward aerials at low to mid percents if the opponent is small or too light, the third hit's increased knockback has granted it better KO potential at high percents when edgeguarding or at the ledge due to its very high knockback growth. It can also be used as an out-of-shield option if Kirby is too far away to hit the opponent with neutral aerial or up aerial instead, and its multiple hits can pressure shields when combined with the low landing lag. It auto-cancels in a full hop. | ||
|bairname= | |bairname=Drop Kick ({{ja|ドロップキック|Doroppu Kikku}}) | ||
|bairdmg={{ShortHopDmgSSBU|13}} (clean), {{ShortHopDmgSSBU|8}} (late) | |bairdmg={{ShortHopDmgSSBU|13}} (clean), {{ShortHopDmgSSBU|8}} (late) | ||
|bairdesc=A dropkick. It functions as a sex kick, but also has the lowest amount of start-up lag out of Kirby's aerials, due to it coming out on frame 6. It | |bairdesc=A dropkick. It functions as a sex kick, but it also has the lowest amount of start-up lag out of Kirby's aerials, due to it coming out on frame 6. It can autocancel in a short hop and its clean hitbox possesses very high knockback growth, which make it a viable KOing option. While near the edge of Final Destination, its clean hitbox KOs middleweights at around 105-110%, which is around the same KO percentages of Kirby's clean neutral aerial. It also boasts good range due to its slightly disjointed hitbox, which makes it a viable edge-guarding option, and allows it use in a [[wall of pain]], as well as a good approaching option if used in a reverse aerial rush. These attributes make it one of Kirby's best finishers, but it has the highest amount of ending lag out of Kirby's aerials, totaling at 28 frames - a 6 frame increase from ''SSB4''. | ||
|uairname= | |uairname=Air Cutter ({{ja|エアカッター|Ea Kattā}}) | ||
|uairdmg={{ShortHopDmgSSBU| | |uairdmg={{ShortHopDmgSSBU|10}} | ||
|uairdesc= | |uairdesc=A bycicle kick similar to his up smash. Comes out on frame 8, tied with neutral aerial for having the second lowest startup of Kirby's aerials. A decent juggling option, it can also be used for continuing a combo due to its low landing lag. Can be used as an out-of-shield option if the opponent has a large enough [[hurtbox]]. Due to its decent damage and knockback, it is strong enough to KO middlweights at around 150% on Final Destination on ground level, making it a useful KO option after a full hop, or above platforms. It can auto-cancel in a short hop fast fall. | ||
|dairname= | |dairname=Screwdriver ({{ja|スクリュードライバー|Sukuryūdoraibā}}) | ||
|dairdmg={{ShortHopDmgSSBU|1.3}} (hits 1-5), {{ShortHopDmgSSBU|2}} (hit 6), 2% (landing) | |dairdmg={{ShortHopDmgSSBU|1.3}} (hits 1-5), {{ShortHopDmgSSBU|2}} (hit 6), 2% (landing) | ||
|dairdesc=A diagonal corkscrew dropkick. | |dairdesc=A diagonal corkscrew dropkick. A decent combo starter on grounded opponents and due its low ending lag, and the final hit is a weak meteor smash, which makes it useful for edgeguarding and allows it to gimp characters with short recoveries or to combo with it. It can even lead into a [[footstool jump]] on fast-fallers and heavyweights. While it has the highest amount of start-up lag out of Kirby's aerials and of his standard moveset due to coming out on frame 18, which also makes it one of the slowest down aerials in the game in terms of start-up, and it doesn't auto-cancel in a short hop, it has landing hitboxes, giving Kirby a decent window to safely land while tumbling. The landing hit launches vertically, giving them some combo potential. While possessing a rather good auto-canceling window and being good for edgeguarding, its usage offstage is only serviceable against characters with slow or exploitable recoveries, as the final hit cannot reliably KO characters even as high as 180% offstage, and it deals the least damage and knockback out of all of Kirby's aerials. It also has the highest landing lag of of Kirby's aerials, and due to this and the final hit's low damage output, it's unsafe on shield despite of the move's low ending lag, making it punishable when used recklessly. | ||
|grabname= | |grabname=Grab ({{ja|つかみ|Tsukami}}) | ||
|grabdesc= | |grabdesc=Reaches out with one hand. Based on the startup animation of the Torent Lariat from the Suplex ability from ''Kirby Super Star''. It's one of the fastest grabs, but has somewhat short range. | ||
|pummelname= Grab Slap ({{ja|つかみビンタ|Tsukami Pinta}}) | |||
|pummeldmg=1% | |pummeldmg=1% | ||
|pummeldesc= | |pummeldesc=A punch. It possesses a low damage output, but is one of the fastest pummels. | ||
|fthrowname= | |fthrowname=Power Bomb ({{ja|パワーボム|Pawā Bomu}}) | ||
|fthrowdmg=5% | |fthrowdmg=5% | ||
|fthrowdesc= | |fthrowdesc=A throw resembling the Rock Drop from the Suplex ability from ''Kirby Super Star''. Unlike the majority of forward throws, it possesses combo potential. Its most reliable follow-ups are neutral, forward and down aerials at low percents, and up aerial and [[Final Cutter]] at medium percents. Using it below a {{SSBU|Battlefield}} platform will have Kirby land on said platform, hindering followups at lower percents. However, as of patch 6.0.0, the faster start-up on neutral and up aerials allow him to combo with them if he lands on a platform, but those follow-ups depend on the character. | ||
|bthrowname= | |bthrowname=Brain Buster ({{ja|ブレーンバスター|Burēn Basutā}}) | ||
|bthrowdmg=8% | |bthrowdmg=8% | ||
|bthrowdesc= | |bthrowdesc=A back throw resembling the backwards dive from the Backdrop ability from ''Kirby's Adventure''. Despite possessing an average damage output and very low base knockback, it has very high knockback growth. As a result, it has decent KO potential. While near the edge of Final Destination, it KOs middleweights at around 140%. | ||
|uthrowname=Air Drop | |uthrowname=Air Drop ({{ja|いずな落とし|Izuna Otoshi}}, ''Izuna Drop'') | ||
|uthrowdmg=10% (throw), 7% (landing) | |uthrowdmg=10% (throw), 7% (landing) | ||
|uthrowdesc=The | |uthrowdesc=The Air Drop from the Ninja ability from ''Kirby Super Star''. Like {{SSBU|Meta Knight}}'s up throw, it can damage and launch bystanders upon landing. It is weaker than his back throw when used at the edge, but it is consistently strong regardless of where it is used on the stage. Great knockback, KOing middleweights at around 160% from anywhere on Final Destination without rage; though it is extremely susceptible to [[DI]] because opponents are released late. As Kirby jumps up to perform it, he can land onto platforms above him upon descending, which enables it to KO even earlier. | ||
|dthrowname= | |dthrowname=Fury Stomp ({{ja|もうれつストンピング|Mōretsu Sutonpingu}}, ''Fury Stomping'') | ||
|dthrowdmg=1% (hits 1-10), 2% (throw) | |dthrowdmg=1% (hits 1-10), 2% (throw) | ||
|dthrowdesc=The Fury Stomp from the Suplex ability. It is Kirby's most damaging throw at 12%, which makes it useful for damage racking. It can also damage nearby opponents. | |dthrowdesc=The Fury Stomp from the Suplex ability from ''Kirby Super Star''. It is Kirby's most damaging throw at 12%, which makes it useful for damage-racking when his other throws cannot do so. It can also damage nearby opponents. Due to its high knockback and unfavorable angle in comparison to other down throws, it launches too high for followups, so it is his most situational throw. However, it has enough knockback to KO middleweights at around 200% on Final Destination if Kirby has no rage, so it can be used as a situational KO option, but only on certain high platforms. On the top platform of Battlefield, it will KO middleweights at around 170-175% without rage. | ||
|floorfname= | |floorfname= | ||
|floorfdmg=7% | |floorfdmg=7% | ||
|floorfdesc=Performs a | |floorfdesc=Performs a spinning kick before getting up. Front kick’s pose reassembles the Slide Kick from the [[Kirby]] series. | ||
|floorbname= | |floorbname= | ||
|floorbdmg=7% | |floorbdmg=7% | ||
|floorbdesc=Kicks on one side and then the other before getting up. | |floorbdesc=Performs a Kicks on one side and then the other before getting up. | ||
|floortname= | |floortname=Break Spin | ||
|floortdmg=5% | |floortdmg=5% | ||
|floortdesc=The Break Spin from the | |floortdesc=The Break Spin from the {{s|wikirby|yo-yo}} ability from ''Kirby Super Star''. | ||
|edgename= | |edgename= | ||
|edgedmg=9% | |edgedmg=9% | ||
|edgedesc=Performs a cartwheeling kick while climbing up. It has surprisingly good range compared to | |edgedesc=Performs a cartwheeling kick while climbing up. It has surprisingly good range compared to several other characters' edge attacks. | ||
|nsname=Inhale | |nsname=Inhale | ||
|nspage=Inhale (Kirby) | |nspage=Inhale (Kirby) | ||
|nsdmg=10% (swallow), 6% (spit) | |nsdmg=10% (swallow), 6% (spit) | ||
|nsdesc={{s|wikirby|Inhale}}s the opponent. It has a [[grab]]box and can be held indefinitely. Upon Inhaling an opponent, Kirby can spit them out as a star to deal damage to them and any nearby opponents, copy their neutral special move, or walk around slowly and/or perform a short hop. However, the opponent can escape from Kirby's mouth via button mashing. Some characters will give Kirby a slight variation of their neutral special due to mechanics that would not work properly when copied, such as [[Luma Shot]] and [[Pikmin Pluck]]. When inhaling projectiles, Kirby will heal off a small amount of percentage, and when inhaling large projectiles, such as {{SSBU|Samus}}'s fully charged [[Charge Shot]], it can be spat out as a star. Kirby' s copied neutral special's damage output has a x1.2 multiplier compared the opponent's version. | |nsdesc={{s|wikirby|Inhale}}s the opponent. It has a [[grab]]box and can be held indefinitely. Upon Inhaling an opponent, Kirby can spit them out as a star to deal damage to them and any nearby opponents, copy their neutral special move, or walk around slowly and/or perform a short hop. However, the opponent can escape from Kirby's mouth via button mashing. Some characters will give Kirby a slight variation of their neutral special due to mechanics that would not work properly when copied, such as [[Luma Shot]] and [[Pikmin Pluck]]. When inhaling projectiles, Kirby will heal off a small amount of percentage, and when inhaling large projectiles, such as {{SSBU|Samus}}'s fully charged [[Charge Shot]], it can be spat out as a star. Kirby's copied neutral special's damage output has a x1.2 multiplier compared to the opponent's version. | ||
|ssname=Hammer Flip | |ssname=Hammer Flip | ||
|ssdmg=19% (grounded uncharged), 16% (aerial uncharged), 35% (grounded fully charged), 28% (aerial fully charged) | |ssdmg=19% (grounded uncharged), 16% (aerial uncharged), 35% (grounded fully charged), 28% (aerial fully charged) | ||
|ssdesc=The attack of the same name from the {{s|wikirby|Hammer}} ability. It is chargeable and, when fully charged, Kirby's hammer will ignite and deal [[recoil damage]]. He can also slowly walk and jump while charging | |ssdesc=The attack of the same name from the {{s|wikirby|Hammer}} ability. It is chargeable and, when fully charged, Kirby's hammer will ignite and deal [[recoil damage]]. He can also slowly walk and jump while charging. When it is used in midair, Kirby will swing his hammer twice, with each hit being equally powerful. While near the edge of Final Destination, uncharged Hammer Flip KOs middleweights at around 65%. Fully charged Hammer Flip KOs middleweights at around 6%. Although weaker, aerial Hammer Flip nevertheless possesses impressive KO potential. While near the edge of Final Destination, it KOs middleweights at around 86%. Its fully charged version KOs them at around 33%. When fully charged and on the ground, it makes Kirby invincible from frame 2-10 and gives him super armor from frame 11-17. To counteract its power, it has high startup and endlag, making its usage in competitive play outside of shield break punishes or covering get-up options from ledge very limited. | ||
|usname=Final Cutter | |usname=Final Cutter | ||
|usdmg=5% (ascent), 2% (descent), 5% (landing), 6% (shockwave) | |usdmg=5% (ascent), 2% (descent), 5% (landing), 6% (shockwave) | ||
|usdesc=The attack of the same name from the {{s|wikirby|Cutter}} ability. It | |usdesc=The attack of the same name from the {{s|wikirby|Cutter}} ability. It weakly meteor smashes any opponents he comes into contact with upon descending, which is somewhat useful as a sacrificial KO or to edgeguard opponents who run out of ledge invincibility, though not to the extent of similar moves like [[Aether]]. The sword also emits a shockwave upon hitting a solid surface, which is Kirby's only projectile aside from [[Inhale (Kirby)#Spitting characters|spitting out an Inhaled opponent]]. Solid vertical recovery distance and has serviceable horizontal distance when angled. Can also punish improper aerial approaches, but overuse will render Kirby vulnerable to punishment due to the high start-up. Kirby cannot [[sweetspot]] the edge until the peak of the ascending slash and the move doesn't have a hitbox directly above him, making this recovery vulnerable to edgeguarding, and the while the shockwave moves quickly, it has limited ranged and cannot be used until after he lands. If the platform beneath Kirby disappears or if he is pushed off while he is still in the landing animation, he will be rendered [[helpless]]. | ||
|dsname=Stone | |dsname=Stone | ||
|dsdmg=18% (impact), 14% (shockwave) | |dsdmg=18% (impact), 14% (shockwave) | ||
|dsdesc=The Stone Change (while Kirby is on the ground) and the Stone Smash (while Kirby is in the air) from the {{s|wikirby|Stone}} ability. | |dsdesc=The Stone Change (while Kirby is on the ground) and the Stone Smash (while Kirby is in the air) from the {{s|wikirby|Stone}} ability. While transformed, Kirby gains armor that can withstand at least 25%, though he can be grabbed while transformed. Stone Smash also grants super armor during startup (frames 19-28), and can also be canceled in midair by pressing the special button, which can be used for [[mindgame]]s. However, transforming and canceling the transformation takes a noticeable amount of time, which leaves Kirby vulnerable to punishes if not used carefully. Thanks to its high damage output, Stone Smash KOs middleweights at around 100% and deals considerable [[shield damage]]. Although Stone Change is considerably weaker, it is still a relatively potent [[semi-spike]] and comes out much faster thanks to its shockwave (frame 11 instead of 29). Stone's usage include combating juggles, or being used as a landing/edgeguarding tool; however, due to its high overall lag and predictability in the air, it is not often used in competitive play. | ||
|fsname=Ultra Sword | |fsname=Ultra Sword | ||
|fsdmg=3% (stun), 5% (hit 1), 2.5% (hits 2-9), 16% (hit 10) | |fsdmg=3% (stun), 5% (hit 1), 2.5% (hits 2-9), 16% (hit 10) | ||
|fsdesc=The {{s|wikirby|Super Ability}} of the same name. Kirby wields a gigantic sword to repeatedly slash the opponent before enlarging the sword and then concluding with a powerful downward slash. While near the edge of Final Destination, it KOs middleweights at around 15%. | |fsdesc=The {{s|wikirby|Super Ability}} of the same name. Kirby wields a gigantic sword to repeatedly slash the opponent before enlarging the sword and then concluding with a powerful downward-arcing slash. While near the edge of Final Destination, it KOs middleweights at around 15%. | ||
}} | }} | ||
===Stats=== | |||
Kirby's gravity and falling speed are set to 0.068544 and 1.8, respectively, during [[hitstun]] when launched at [[angle]]s between 70°-110°. | |||
{{Attributes | |||
|weight = 79 | |||
|rweight = 79-83 | |||
|cast = 89 | |||
|dash = 1.9 | |||
|rdash = 42 | |||
|run = 1.727 | |||
|rrun = 42 | |||
|walk = 0.977 | |||
|rwalk = 59 | |||
|trac = 0.116 | |||
|rtrac = 20-28 | |||
|airfric = 0.015 | |||
|rairfric = 9-29 | |||
|air = 0.84 | |||
|rair = 86 | |||
|baseaccel = 0.03 | |||
|rbaseaccel = 20 | |||
|addaccel = 0.065 | |||
|raddaccel = 20 | |||
|gravity = 0.064 | |||
|rgravity = 86-87 | |||
|fall = 1.23 | |||
|rfall = 85 | |||
|ff = 1.968 | |||
|rff = 85 | |||
|jumpsquat = 3 | |||
|rjumpsquat = 1-88 | |||
|jumpheight = 25.37 | |||
|rjumpheight= 85 | |||
|shorthop = 12.24 | |||
|rshorthop = 83-84 | |||
|djump = 21.06378125, 18.528125, 15.931125, 13.34569531, 10.82288281 | |||
|rdjump = 88 | |||
}} | |||
===[[Announcer]] call=== | |||
{{audio|Needs announcer calls from other languages.}} | |||
<gallery> | |||
Kirby English Announcer SSB4-SSBU.wav|English/Japanese/Chinese | |||
</gallery> | |||
===[[On-screen appearance]]=== | ===[[On-screen appearance]]=== | ||
Kirby rides in on his classic | *Kirby rides in on his classic [[Warp Star]], followed by a small explosion while flipping off of it. | ||
<gallery> | |||
KirbyOnScreenAppearanceSSBU.gif|Kirby's on-screen appearance | |||
</gallery> | |||
===[[Taunt]]s=== | ===[[Taunt]]s=== | ||
All taunts remove Kirby's | All taunts remove Kirby's Copy Ability if he has one. | ||
*'''Up taunt''': Smiles and poses, producing a star. | *'''Up taunt''': Smiles and poses, producing a star. | ||
*'''Side taunt''': Spins around playfully, | *'''Side taunt''': Spins around playfully, then says "Nyum!" while standing on a single foot. Based on his "character chosen" animation in the original ''[[Super Smash Bros.]]'', albeit much more subtle. | ||
*'''Down taunt''': Leans toward the screen and says "Hi!" while waving his arms. | *'''Down taunt''': Leans toward the screen and says "Hi!" while waving his arms. | ||
<gallery> | <gallery> | ||
| Line 366: | Line 252: | ||
===[[Idle pose]]s=== | ===[[Idle pose]]s=== | ||
*Dozes off, then shakes his head awake. | *Dozes off, then shakes his head awake. | ||
*Turns to face | *Turns offscreen to face the other side of the screen, then turns back to his traditional idling stance. | ||
<gallery> | <gallery> | ||
SSBUKirbyIdle1.gif|Kirby's first idle pose | SSBUKirbyIdle1.gif|Kirby's first idle pose. | ||
SSBUKirbyIdle2.gif|Kirby's second idle pose | SSBUKirbyIdle2.gif|Kirby's second idle pose. | ||
</gallery> | </gallery> | ||
===[[Crowd cheer]]=== | |||
<div class="tabber"> | |||
<div class="tabbertab" title="English, Japanese/Chinese, Italian, Dutch, French"> | |||
{| class="wikitable" border="1" cellpadding="4" cellspacing="1" | |||
|- | |||
!{{{name|}}} | |||
!Cheer (English) | |||
!Cheer (Japanese/Chinese) | |||
!Cheer (Italian) | |||
!Cheer (Dutch) | |||
!Cheer (French) | |||
|- | |||
! scope="row"|Cheer | |||
|[[File:Kirby Cheer English SSBU.ogg|center]]||[[File:Kirby Cheer Japanese SSBU.ogg|center]]||[[File:Kirby Cheer Italian SSBU.ogg|center]]||[[File:Kirby Cheer Dutch SSBU.ogg|center]]||{{NTSC}} [[File:Kirby Cheer French NTSC SSBU.ogg|center]] <br> {{PAL}} [[File:Kirby Cheer French PAL SSBU.ogg|center]] | |||
|- | |||
! scope="row"|Description | |||
|Kir - by! || Ka - a - bii! || Kir - by! || Kirby! Kirby! Kirby! || Kir - by! | |||
|} | |||
</div> | |||
<div class="tabbertab" title="German, Spanish, Russian, Korean"> | |||
{| class="wikitable" border="1" cellpadding="4" cellspacing="1" | |||
|- | |||
!{{{name|}}} | |||
!Cheer (German) | |||
!Cheer (Spanish) | |||
!Cheer (Russian) | |||
!Cheer (Korean) | |||
|- | |||
! scope="row"|Cheer | |||
|[[File:Kirby Cheer German SSBU.ogg|center]]||{{NTSC}} [[File:Kirby Cheer Spanish NTSC SSBU.ogg|center]] <br> {{PAL}} [[File:Kirby Cheer Spanish PAL SSBU.ogg|center]]||[[File:Kirby Cheer Russian SSBU.ogg|center]]||[[File:Kirby Cheer Korean SSBU.ogg|center]] | |||
|- | |||
! scope="row"|Description | |||
|Kir - by! || Kir - by! || Kir - by! Kir - by! || Keo - bi! | |||
|} | |||
</div> | |||
</div> | |||
===[[Victory pose]]s=== | ===[[Victory pose]]s=== | ||
Note: Outside of team battles, Kirby's victory poses have three separate Kirbys, referencing the Kirby | Note: Outside of team battles, Kirby's victory poses have three separate Kirbys, referencing the {{s|wikirby|Kirby Dance}} from his home series. | ||
*Moonwalks to the left, twists, slides to the right, and jumps into a pose where he stands on one foot. | *'''Left:''' Moonwalks to the left, twists, slides to the right, and jumps into a pose where he stands on one foot. Based on Kirby's dances in ''Kirby's Return to Dream Land'' and ends with a pose similar to his official ''Brawl'' render and his character select animation in ''[[Super Smash Bros.]]'', albeit much more subtle. | ||
*Cartwheels to the left twice, wiggles, and does a front flip before posing. | *'''Up:''' Cartwheels to the left twice, wiggles, and does a front flip before posing. The ending pose originated from the Kirby Dance in ''Kirby's Adventure''. | ||
*Jumps twice, shuffles backwards, | *'''Right:''' Jumps twice, shuffles backwards, performs a breakdance, and poses while facing slightly away from the camera. Based on Kirby's dances in ''Kirby's Return to Dream Land'', with the ending pose also appearing in said game. | ||
[[File:KirbyUniverseTheme.ogg|thumb|The victory theme of the ''Kirby'' universe is a cover of the short recurring theme that plays when [[Kirby]] completes a stage or defeats a boss, debuting in ''[[Kirby's Dream Land]]'', though the shortened version that this track is based on debuted in ''[[Kirby's Adventure]]''.]] | [[File:KirbyUniverseTheme.ogg|thumb|The victory theme of the ''Kirby'' universe is a cover of the short recurring theme that plays when [[Kirby]] completes a stage or defeats a boss, debuting in ''[[Kirby's Dream Land]]'', though the shortened version that this track is based on debuted in ''[[Kirby's Adventure]]''.]] | ||
<gallery> | <gallery> | ||
| Line 385: | Line 308: | ||
</gallery> | </gallery> | ||
==In competitive play== | ==In [[competitive play]]== | ||
===Most historically significant players=== | |||
<!--This character has a ten player limit for this section. Before adding and/or removing a player, read these guidelines: https://www.ssbwiki.com/SmashWiki:Notability#%22Most_historically_significant_players%22_guidelines --> | |||
:''See also: [[:Category:Kirby players (SSBU)]]'' | |||
*{{Sm|Ferretkuma|Japan}} - Although his overall activity has been limited, he notably placed 17th at the major {{Trn|Umebura SP 7}}, which is tied for the highest placement for a Kirby player at a major. | |||
*{{Sm|Guilheww|Mexico}} - One of the two best Kirby players in the post-online metagame, consistently placing highly at Mexican events including 2nd at the regional {{Trn|Hooters Ultimate Tournament}} while upsetting {{Sm|Maister}}. His 17th-place finish at the major {{Trn|Delfino Maza 2023}} is tied for the highest placement for a Kirby player at a major. | |||
*{{Sm| | *{{Sm|JeJaJeJa|USA}} - One of the two best Kirby players in the post-online metagame, having placed well at many events, including 33rd at the supermajors {{Trn|Super Smash Con 2022}}, {{Trn|Let's Make Big Moves 2023}} and {{Trn|Collision 2024}}. In addition, his 17th-place finish at {{Trn|Port Priority 7}} is tied for the highest placement for a Kirby player at a major, and he won the regional {{Trn|Afterburner 2024}}. | ||
*{{Sm| | *{{Sm|Jesuischoq|France}} - One of the best Kirby players in the world in the early metagame who regularly placed highly at European events, including 2nd at the regional {{Trn|Smash4Glory - Ultimate Edition}} upsetting {{Sm|Glutonny}}, and 13th at the superregional {{Trn|VCA 2019}}. | ||
*{{Sm| | *{{Sm|Konokururu|Japan}} - One of the best Kirby players in the world in the post-online metagame. Although his placements have been less consistent than JeJaJeJa, his 17th place finish at the supermajor {{Trn|Kagaribi 7}} is the highest placement for a Kirby player at a supermajor. | ||
===Tier placement and history=== | |||
Since the release of ''Ultimate'', several professionals immediately noticed Kirby's significant flaws from the previous installment had been retained, in spite of the mechanics suiting him better in comparison to ''SSB4''. In addition, players notified his vulnerability to being camped, poor range, slow air speed, as well as platforms potentially negating all follow-ups should he start a combo with a forward throw. Despite some representation and decent results from players such as {{Sm|Jesuischoq}} and {{Sm|Ferretkuma}}, most of the community considered Kirby to be a low or bottom-tier in the early metagame, with some going as far as to consider Kirby could be one of the worst characters in the game. | |||
However, Kirby would receive significant buffs in balance patches, more than almost every other character, especially in patches 6.0.0 and 8.0.0. These patches would give him major improvements, improving his overall frame data, KO power and versatility to many of his attacks, allowing him to be more consistent in closing stocks and starting comboes. In addition, although Kirby's representation remained rather small and was often in the bottom 10, he began seeing more success both online and offline from players such as {{Sm|Guilheww}} and {{Sm|JeJaJeJa}}, who were able to achieve strong results with him in national tournaments and in majors. These small positives were enough to raise opinions on Kirby's viability slightly. As such, although Kirby continues to have little impact on the metagame, he is usually not thought of as a candidate for the worst character in the game. This is reflected in Kirby's placement on the first tier list, where he is ranked 76th as a low-tier character, and he rose just one position in the second and current tier list, although gradually improving results from dedicated players have led a few players to believe Kirby should be ranked higher thanks to his improved advantage state. | |||
=={{SSBU|Classic Mode}}: Gourmet Clash== | =={{SSBU|Classic Mode}}: Gourmet Clash== | ||
[[File:SSBU Congratulations Kirby.png|thumb|Kirby's congratulations screen.]] | [[File:SSBU Congratulations Kirby.png|thumb|Kirby's congratulations screen.]] | ||
Kirby's opponents are characters who, like | Kirby's opponents are characters who, like him, are known for their gluttonous appetites in their respective series. For each battle, Kirby and his opponent each spawn with 35% damage and several food items appear on the stage as the match begins. | ||
{|class="wikitable | {|class="wikitable" style="text-align:center" | ||
!Round!!Opponent!!Stage!!Music | !Round!!Opponent!!Stage!!Music | ||
|- | |- | ||
|1||{{ | |1||{{CharHead|Pac-Man|SSBU|hsize=20px}}||[[Pac-Land]]||''{{SSBUMusicLink|Pac-Man|PAC-MAN}}'' | ||
|- | |- | ||
|2||Giant {{ | |2||Giant {{CharHead|Yoshi|SSBU|hsize=20px}}||{{SSBM|Yoshi's Island}}||''{{SSBUMusicLink|Super Mario Bros.|Ground Theme - Super Mario World}}'' | ||
|- | |- | ||
|3||{{ | |3||{{CharHead|Donkey Kong|SSBU|hsize=20px}}||[[Jungle Japes]]||''{{SSBUMusicLink|Donkey Kong|Jungle Hijinxs}}'' | ||
|- | |- | ||
|4||Giant {{ | |4||Giant {{CharHead|Wario|SSBU|hsize=20px}}||[[Gamer]]||''{{SSBUMusicLink|WarioWare|WarioWare, Inc.}}'' | ||
|- | |- | ||
|5||{{ | |5||{{CharHead|King K. Rool|SSBU|hsize=20px}}||{{SSB|Kongo Jungle}}||''{{SSBUMusicLink|Donkey Kong|Mangrove Cove}}'' | ||
|- | |- | ||
|6||{{ | |6||Giant {{CharHead|King Dedede|SSBU|hsize=20px}}||[[Fountain of Dreams]]||''{{SSBUMusicLink|Kirby|Gourmet Race (64)}}'' | ||
|- | |- | ||
|colspan="4"|[[Bonus Stage]] | |colspan="4"|[[Bonus Stage]] | ||
|- | |- | ||
|Final||[[Marx]]|| | |Final||[[Marx]]||[[Mysterious Dimension]]||''{{SSBUMusicLink|Kirby|Vs. Marx}}'' | ||
|} | |} | ||
| Line 421: | Line 351: | ||
{{clr}} | {{clr}} | ||
===Character unlock tree=== | ===Character unlock tree=== | ||
Kirby's Classic Mode character unlock tree includes the following characters in order: | Kirby's Classic Mode character unlock tree includes the following characters in order: | ||
#{{SSBU|Ness}} | #{{SSBU|Ness}} | ||
#{{SSBU|Jigglypuff}} | #{{SSBU|Jigglypuff}} | ||
| Line 436: | Line 366: | ||
[[File:Kirby World of Light.png|thumb|200px|left|Kirby facing the World of Light, from the mode's opening cutscene.]] | [[File:Kirby World of Light.png|thumb|200px|left|Kirby facing the World of Light, from the mode's opening cutscene.]] | ||
[[File:WoL-06Kirby.jpg|thumb|Kirby in the start of World of Light's gameplay]] | [[File:WoL-06Kirby.jpg|thumb|Kirby in the start of World of Light's gameplay]] | ||
Kirby was among the fighters summoned to the cliffside to assist in defeating an army of [[Master Hand]]s. | Kirby was among the fighters summoned to the cliffside to assist in defeating an army of [[Master Hand]]s. | ||
After [[Galeem]] absorbed all of the Master Hands during the opening cutscene, he began to unleash beams of light that vaporized all of the fighters and later | After [[Galeem]] absorbed all of the Master Hands during the opening cutscene, he began to unleash beams of light that vaporized all of the fighters and later placed all of them under Galeem's imprisonment. Kirby was the sole survivor after escaping on his [[Warp Star]], barely warping from the beams before managing to engulf him. Galeem has erased the world and the universe into nothing other than a barren wasteland, where Kirby, who has ended up becoming the sole survivor of Galeem's onslaught upon the universe, makes a rough emergency landing into a nearby canyon. As he recovers from his crash-landing, he looks towards a vast landscape consisting of various areas, some of which are recognizable as coming from the fighters' old worlds. Despite being the sole survivor, Kirby is still seen as a puppet fighter in a few areas of the mode, such as [[Spirit Battle]]s. It was later explained that Galeem had analyzed Kirby at some point during the story and had the ability to materialize puppet fighters in his image without requiring Kirby himself. | ||
Kirby crash-lands in a canyon area, and begins his quest to save the other fighters as the initial starting protagonist. | Kirby crash-lands in a canyon area, and begins his quest to save the other fighters as the initial starting protagonist. | ||
He is later seen alongside several other fighters, | He is later seen alongside several other fighters, preparing their final stand against Galeem and [[Dharkon]]. | ||
{{clrl}} | {{clrl}} | ||
==[[Spirit]]s== | ==[[Spirit]]s== | ||
Kirby's | Kirby's fighter spirit can be obtained by completing {{SSBU|Classic Mode}}. It is also available periodically for purchase in the shop for 300 Gold. Starting World of Light and playing as Kirby allows the player to preview the first spirit below in the Spirit List under the name "???". As a fighter spirit, it cannot be used in Spirit Battles and is purely aesthetic. His fighter spirit has an alternate version that replaces it with his artwork in ''Ultimate''. | ||
Additionally, Kirby makes an appearance in various | Additionally, Kirby makes an appearance in various support spirits. | ||
<center> | <center> | ||
<gallery> | <gallery> | ||
SSBU spirit Kirby.png|323. '''''Kirby''''' | |||
Warp Star | SSBU spirit Warp Star.png|326. Warp Star | ||
Star Rod.png|327. Star Rod | SSBU spirit Star Rod.png|327. Star Rod | ||
Ultra Sword | SSBU spirit Ultra Sword.png|328. Ultra Sword | ||
SSBU spirit Robobot Armor.png|329. Robobot Armor | |||
</gallery> | </gallery> | ||
</center> | </center> | ||
==In Spirit | ==In Spirit Battles== | ||
===As the main opponent=== | ===As the main opponent=== | ||
{|class="wikitable sortable" style="width:100%;" | {|class="wikitable sortable" style="width:100%;" | ||
! colspan=4|Spirit | ! colspan=4|Spirit | ||
! colspan=7|Battle parameters | ! colspan=7|Battle parameters | ||
! colspan=1|Inspiration | |||
|- | |- | ||
! style="width:5%;"|No. | ! style="width:5%;"|No. | ||
| Line 495: | Line 408: | ||
! Conditions | ! Conditions | ||
! Music | ! Music | ||
! Character | |||
|- | |- | ||
|48 | |48 | ||
|{{SpiritTableName|Boo|link=y|size=64}} | |||
|{{ | |''Super Mario'' Series | ||
|''Super Mario | |||
|•{{SSBU|Kirby}} {{Head|Kirby|g=SSBU|s=20px|cl=White}} | |•{{SSBU|Kirby}} {{Head|Kirby|g=SSBU|s=20px|cl=White}} | ||
| | |{{SpiritType|Neutral}} | ||
|1,800 | |1,800 | ||
|[[Mushroom Kingdom U]] (Slide Lift Tower) | |[[Mushroom Kingdom U]] (Slide Lift Tower) | ||
| Line 507: | Line 420: | ||
|•The enemy is invisible<br>•The enemy's shield has extra durability | |•The enemy is invisible<br>•The enemy's shield has extra durability | ||
|{{SSBUMusicLink|Super Mario Bros.|Main Theme - Luigi's Mansion (Brawl)}} | |{{SSBUMusicLink|Super Mario Bros.|Main Theme - Luigi's Mansion (Brawl)}} | ||
| | |||
|- | |- | ||
|50 | |50 | ||
|{{SpiritTableName|Bob-omb|link=y|size=64}} | |||
|{{ | |''Super Mario'' Series | ||
|''Super Mario | |•{{SSBU|Kirby}} {{Head|Kirby|g=SSBU|s=20px|cl=Purple}}×3 | ||
|•{{SSBU|Kirby}} {{Head|Kirby|g=SSBU|s=20px|cl=Purple}} | |{{SpiritType|Grab}} | ||
| | |||
|3,500 | |3,500 | ||
|[[Mushroom Kingdom]] | |[[Mushroom Kingdom]] | ||
| Line 519: | Line 432: | ||
|•The enemy's throwing-type items have increased power<br>•The enemy has increased move speed | |•The enemy's throwing-type items have increased power<br>•The enemy has increased move speed | ||
|{{SSBUMusicLink|Super Mario Bros.|Airship Theme - Super Mario Bros. 3}} | |{{SSBUMusicLink|Super Mario Bros.|Airship Theme - Super Mario Bros. 3}} | ||
| | |||
|- | |- | ||
|66 | |66 | ||
|{{SpiritTableName|King Bob-omb|size=64}} | |||
|{{ | |''Super Mario'' Series | ||
|''Super Mario | |||
|•Giant {{SSBU|Kirby}} {{Head|Kirby|g=SSBU|s=20px|cl=Purple}} | |•Giant {{SSBU|Kirby}} {{Head|Kirby|g=SSBU|s=20px|cl=Purple}} | ||
| | |{{SpiritType|Attack}} | ||
|4,100 | |4,100 | ||
|[[Peach's Castle]] | |[[Peach's Castle]] | ||
| Line 531: | Line 444: | ||
|•The enemy is giant<br>•The enemy is easily distracted by items | |•The enemy is giant<br>•The enemy is easily distracted by items | ||
|{{SSBUMusicLink|Super Mario Bros.|Main Theme - Super Mario 64}} | |{{SSBUMusicLink|Super Mario Bros.|Main Theme - Super Mario 64}} | ||
| | |||
|- | |- | ||
|69 | |69 | ||
|{{SpiritTableName|Piantas|link=y|size=64}} | |||
|{{ | |''Super Mario'' Series | ||
|''Super Mario | |•{{SSBU|Kirby}} Team {{Head|Kirby|g=SSBU|s=20px|cl=Yellow}}×2 {{Head|Kirby|g=SSBU|s=20px|cl=Blue}}×2 {{Head|Kirby|g=SSBU|s=20px|cl=Red}}×2 {{Head|Kirby|g=SSBU|s=20px|cl=Orange}}×2 | ||
|•{{SSBU|Kirby}} {{Head|Kirby|g=SSBU|s=20px|cl=Yellow}} | |{{SpiritType|Shield}} | ||
| | |||
|1,600 | |1,600 | ||
|[[Delfino Plaza]] | |[[Delfino Plaza]] | ||
|•Item | |•Item Tidal Wave<br>•Item: Mushrooms | ||
|•Certain items will appear in large numbers after a little while | |•Certain items will appear in large numbers after a little while | ||
|{{SSBUMusicLink|Super Mario Bros.|Delfino Plaza}} | |{{SSBUMusicLink|Super Mario Bros.|Delfino Plaza (Original)}} | ||
| | |||
|- | |- | ||
|71 | |71 | ||
|{{SpiritTableName|Luma|link=y|size=64}} | |||
|{{ | |''Super Mario'' Series | ||
|''Super Mario | |•{{SSBU|Kirby}} Team {{Head|Kirby|g=SSBU|s=20px|cl=Yellow}}{{Head|Kirby|g=SSBU|s=20px|cl=Blue}}{{Head|Kirby|g=SSBU|s=20px|cl=Red}}{{Head|Kirby|g=SSBU|s=20px|cl=Green}} | ||
|•{{SSBU|Kirby}} | |{{SpiritType|Shield}} | ||
| | |||
|3,500 | |3,500 | ||
|[[Mario Galaxy]] | |[[Mario Galaxy]] | ||
| Line 555: | Line 468: | ||
|•Take your strongest team into this no-frills battle | |•Take your strongest team into this no-frills battle | ||
|{{SSBUMusicLink|Super Mario Bros.|Rosalina in the Observatory / Luma's Theme}} | |{{SSBUMusicLink|Super Mario Bros.|Rosalina in the Observatory / Luma's Theme}} | ||
| | |||
|- | |- | ||
|74 | |74 | ||
|{{SpiritTableName|Lubba|size=64}} | |||
|{{ | |''Super Mario'' Series | ||
|''Super Mario | |||
|•Giant {{SSBU|Kirby}} {{Head|Kirby|g=SSBU|s=20px|cl=Purple}} | |•Giant {{SSBU|Kirby}} {{Head|Kirby|g=SSBU|s=20px|cl=Purple}} | ||
| | |{{SpiritType|Shield}} | ||
|4,100 | |4,100 | ||
|[[Mario Galaxy]] | |[[Mario Galaxy]] | ||
|•Hazard: Low Gravity<br>•Item: [[Super Launch Star]] | |•Hazard: Low Gravity<br>•Item: [[Super Launch Star]] | ||
|•Gravity is reduced<br>•The enemy starts the battle with a Super Launch Star<br>•The enemy is giant | |•Gravity is reduced<br>•The enemy starts the battle with a Super Launch Star<br>•The enemy is giant | ||
|{{SSBUMusicLink|Super Mario Bros.| | |{{SSBUMusicLink|Super Mario Bros.|The Starship Sails}} | ||
| | |||
|- | |- | ||
|116 | |116 | ||
|{{SpiritTableName|Viruses|link=y|size=64}} | |||
|{{ | |''Dr. Mario'' Series | ||
|''Dr. Mario | |•{{SSBU|Kirby}} {{Head|Kirby|g=SSBU|s=20px|cl=Blue}}{{Head|Kirby|g=SSBU|s=20px|cl=Yellow}}{{Head|Kirby|g=SSBU|s=20px|cl=Red}} | ||
|•{{SSBU|Kirby}} | |{{SpiritType|Attack}} | ||
| | |||
|4,000 | |4,000 | ||
|[[Mario Bros.]] ([[Battlefield form]]) | |[[Mario Bros.]] ([[Battlefield form]]) | ||
|N/A | |N/A | ||
|•Timed battle | |•Timed battle (1:30) | ||
|{{SSBUMusicLink|Super Mario Bros.|Fever}} | |{{SSBUMusicLink|Super Mario Bros.|Fever}} | ||
|Chill Virus (blue costume)<br>Weird Virus (yellow costume)<br>Fever Virus (red costume) | |||
|- | |- | ||
|285 | |285 | ||
|{{SpiritTableName|X Parasite|size=64}} | |||
|{{ | |''Metroid'' Series | ||
|''Metroid | |•{{SSBU|Kirby}} Team {{Head|Kirby|g=SSBU|s=20px|cl=Yellow}}×10 | ||
|•{{SSBU|Kirby}} Team {{Head|Kirby|g=SSBU|s=20px|cl=Yellow}} | |{{SpiritType|Attack}} | ||
| | |||
|2,100 | |2,100 | ||
|[[Lylat Cruise]] | |[[Lylat Cruise]] | ||
| Line 591: | Line 504: | ||
|•The enemy favors neutral specials<br>•Defeat an army of fighters | |•The enemy favors neutral specials<br>•Defeat an army of fighters | ||
|{{SSBUMusicLink|Metroid|Sector 1}} | |{{SSBUMusicLink|Metroid|Sector 1}} | ||
| | |||
|- | |- | ||
|327 | |327 | ||
|{{SpiritTableName|Star Rod|link=y|size=64}} | |||
|{{ | |''Kirby'' Series | ||
|''Kirby | |•{{SSBU|Kirby}} Team {{Head|Kirby|g=SSBU|s=20px|cl=Yellow}}×4 | ||
|•{{SSBU|Kirby}} Team {{Head|Kirby|g=SSBU|s=20px|cl=Yellow}} | |{{SpiritType|Attack}} | ||
| | |||
|9,200 | |9,200 | ||
|[[Fountain of Dreams]] | |[[Fountain of Dreams]] | ||
|N/A | |N/A | ||
|•The enemy starts the battle with a | |•The enemy starts the battle with a Star Rod | ||
|{{SSBUMusicLink|Kirby|Gourmet Race (Melee)}} | |{{SSBUMusicLink|Kirby|Gourmet Race (Melee)}} | ||
|{{s|wikirby|Kirby}}/Star Rod's shards | |||
|- | |- | ||
|329 | |329 | ||
|{{SpiritTableName|Robobot Armor|size=64}} | |||
|{{ | |''Kirby'' Series | ||
|''Kirby | |•Metal {{SSBU|Kirby}} Team {{Head|Kirby|g=SSBU|s=20px|cl=Red}}×4 (40 HP) | ||
|•Metal {{SSBU|Kirby}} Team {{Head|Kirby|g=SSBU|s=20px|cl=Red}} ( | |{{SpiritType|Attack}} | ||
| | |||
|4,000 | |4,000 | ||
|[[Halberd]] | |[[Halberd]] | ||
|•Item: | |•Item: [[Drill]] | ||
|•[[Stamina battle]]<br>•The enemy is metal | |•[[Stamina battle]]<br>•The enemy is metal | ||
|{{SSBUMusicLink|Kirby|Pink Ball Activate!}} | |{{SSBUMusicLink|Kirby|Pink Ball Activate!}} | ||
| | |||
|- | |- | ||
|331 | |331 | ||
|{{SpiritTableName|Dragoon|link=y|size=64}} | |||
|{{ | |''Kirby'' Series | ||
|''Kirby | |||
|•{{SSBU|Kirby}} {{Head|Kirby|g=SSBU|s=20px|cl=Orange}} | |•{{SSBU|Kirby}} {{Head|Kirby|g=SSBU|s=20px|cl=Orange}} | ||
| | |{{SpiritType|Attack}} | ||
|13,500 | |13,500 | ||
|[[Pilotwings]] | |[[Pilotwings]] | ||
|•Item: | |•Item: Dragoon Parts | ||
|•Items will be pulled toward the enemy<br>•The enemy has increased move speed | |•Items will be pulled toward the enemy<br>•The enemy has increased move speed | ||
|{{SSBUMusicLink|Kirby|The Legendary Air Ride Machine}} | |{{SSBUMusicLink|Kirby|The Legendary Air Ride Machine}} | ||
|{{s|wikirby|Kirby}} | |||
|- | |- | ||
|335 | |335 | ||
|{{SpiritTableName|Gooey|size=64}} | |||
|{{ | |''Kirby'' Series | ||
|''Kirby | |||
|•{{SSBU|Kirby}} {{Head|Kirby|g=SSBU|s=20px|cl=Purple}} | |•{{SSBU|Kirby}} {{Head|Kirby|g=SSBU|s=20px|cl=Purple}} | ||
| | |{{SpiritType|Neutral}} | ||
|4,200 | |4,200 | ||
|{{SSB|Dream Land}} | |{{SSB|Dream Land}} | ||
|N/A | |N/A | ||
|•Timed battle<br>•The enemy favors neutral specials | |•Timed battle (2:00)<br>•The enemy favors neutral specials | ||
|{{SSBUMusicLink|Kirby|Gourmet Race (64)}} | |{{SSBUMusicLink|Kirby|Gourmet Race (64)}} | ||
| | |||
|- | |- | ||
|339 | |339 | ||
|{{SpiritTableName|Whispy Woods|link=y|size=64}} | |||
|{{ | |''Kirby'' Series | ||
|''Kirby | |•{{SSBU|Kirby}} Team {{Head|Kirby|g=SSBU|s=20px|cl=Red}}×5 | ||
|•{{SSBU|Kirby}} Team {{Head|Kirby|g=SSBU|s=20px|cl=Red}} | |{{SpiritType|Shield}} | ||
| | |||
|9,300 | |9,300 | ||
|[[Green Greens]] | |[[Green Greens]] | ||
| Line 651: | Line 564: | ||
|•Dangerously high winds are in effect<br>•Reinforcements will appear after an enemy is KO'd | |•Dangerously high winds are in effect<br>•Reinforcements will appear after an enemy is KO'd | ||
|{{SSBUMusicLink|Kirby|Boss Theme Medley - Kirby Series}} | |{{SSBUMusicLink|Kirby|Boss Theme Medley - Kirby Series}} | ||
|Whispy Woods's apples | |||
|- | |- | ||
|341 | |341 | ||
|{{SpiritTableName|Nightmare's Power Orb|customname=[[Nightmare]]'s Power Orb|size=64}} | |||
|{{ | |''Kirby'' Series | ||
|''Kirby | |||
|•Giant {{SSBU|Kirby}} {{Head|Kirby|g=SSBU|s=20px|cl=Purple}} | |•Giant {{SSBU|Kirby}} {{Head|Kirby|g=SSBU|s=20px|cl=Purple}} | ||
| | |{{SpiritType|Grab}} | ||
|4,000 | |4,000 | ||
|[[Fountain of Dreams]] | |[[Fountain of Dreams]] | ||
|•Assist Trophy Enemies ( | |•Assist Trophy Enemies (Nightmare) | ||
|•Hostile assist trophies will appear after a little while<br>•The enemy is giant<br>•The enemy starts the battle with a [[Star Rod]] | |•Hostile assist trophies will appear after a little while<br>•The enemy is giant<br>•The enemy starts the battle with a [[Star Rod]] | ||
|{{SSBUMusicLink|Kirby|Vs. Marx}} | |{{SSBUMusicLink|Kirby|Vs. Marx}} | ||
| | |||
|- | |- | ||
|360 | |360 | ||
|{{SpiritTableName|Waddle Dee|link=y|size=64}} | |||
|{{ | |''Kirby'' Series | ||
|''Kirby | |•{{SSBU|Kirby}} Team {{Head|Kirby|g=SSBU|s=20px|cl=Orange}}×4 | ||
|•{{SSBU|Kirby}} Team {{Head|Kirby|g=SSBU|s=20px|cl=Orange}} | |{{SpiritType|Neutral}} | ||
| | |||
|3,700 | |3,700 | ||
|[[Dream Land GB]] | |[[Dream Land GB]] | ||
|N/A | |N/A | ||
|•Take your strongest team into this no-frills battle | |•Take your strongest team into this no-frills battle | ||
|{{SSBUMusicLink|Kirby|Kirby Retro Medley}} | |{{SSBUMusicLink|Kirby|Kirby Retro Medley}} (Green Greens) | ||
| | |||
|- | |- | ||
|362 | |362 | ||
|{{SpiritTableName|Waddle Doo|link=y|size=64}} | |||
|{{ | |''Kirby'' Series | ||
|''Kirby | |•{{SSBU|Kirby}} {{Head|Kirby|g=SSBU|s=20px|cl=Red}}×3 | ||
|•{{SSBU|Kirby}} {{Head|Kirby|g=SSBU|s=20px|cl=Red}} | |{{SpiritType|Attack}} | ||
| | |||
|2,500 | |2,500 | ||
|{{SSB|Dream Land}} | |{{SSB|Dream Land}} | ||
| Line 687: | Line 600: | ||
|•The floor is electrified<br>•The enemy starts the battle with a [[Super Scope]] | |•The floor is electrified<br>•The enemy starts the battle with a [[Super Scope]] | ||
|{{SSBUMusicLink|Kirby|Butter Building (for 3DS / Wii U)}} | |{{SSBUMusicLink|Kirby|Butter Building (for 3DS / Wii U)}} | ||
| | |||
|- | |- | ||
|366 | |366 | ||
|{{SpiritTableName|Scarfy|size=64}} | |||
|{{ | |''Kirby'' Series | ||
|''Kirby | |•{{SSBU|Kirby}} Team {{Head|Kirby|g=SSBU|s=20px|cl=Yellow}}{{Head|Kirby|g=SSBU|s=20px|cl=Red}}×3 | ||
|•{{SSBU|Kirby}} Team | |{{SpiritType|Shield}} | ||
| | |||
|1,400 | |1,400 | ||
|{{SSB|Dream Land}} | |{{SSB|Dream Land}} | ||
| Line 699: | Line 612: | ||
|•Reinforcements will appear after an enemy is KO'd | |•Reinforcements will appear after an enemy is KO'd | ||
|{{SSBUMusicLink|Kirby|Green Greens (Melee)}} | |{{SSBUMusicLink|Kirby|Green Greens (Melee)}} | ||
|Angry Scarfy (red Kirby) | |||
|- | |- | ||
|368 | |368 | ||
|{{SpiritTableName|Rocky|size=64}} | |||
|{{ | |''Kirby'' Series | ||
|''Kirby | |•Metal {{SSBU|Kirby}} {{Head|Kirby|g=SSBU|s=20px|cl=Orange}} (120 HP) | ||
|•Metal {{SSBU|Kirby}} {{Head|Kirby|g=SSBU|s=20px|cl=Orange}} | |{{SpiritType|Shield}} | ||
| | |||
|2,600 | |2,600 | ||
|[[The Great Cave Offensive]] ([[Battlefield form]]) | |[[The Great Cave Offensive]] ([[Battlefield form]]) | ||
|N/A | |N/A | ||
|•Timed [[ | |•Timed [[stamina battle]] (1:00)<br>•The enemy favors down specials<br>•The enemy is metal | ||
|{{SSBUMusicLink|Kirby|The Great Cave Offensive}} | |{{SSBUMusicLink|Kirby|The Great Cave Offensive}} | ||
| | |||
|- | |- | ||
|370 | |370 | ||
|{{SpiritTableName|Bomber|link=y|size=64}} | |||
|{{ | |''Kirby'' Series | ||
|''Kirby | |||
|•{{SSBU|Kirby}} {{Head|Kirby|g=SSBU|s=20px|cl=Purple}} | |•{{SSBU|Kirby}} {{Head|Kirby|g=SSBU|s=20px|cl=Purple}} | ||
| | |{{SpiritType|Attack}} | ||
|3,500 | |3,500 | ||
|[[Dream Land GB]] | |[[Dream Land GB]] | ||
|•Item: | |•Item: Bomber | ||
|•The enemy starts the battle with a Bomber | |•The enemy starts the battle with a Bomber | ||
|{{SSBUMusicLink|Kirby|Butter Building (Brawl)}} | |{{SSBUMusicLink|Kirby|Butter Building (Brawl)}} | ||
| | |||
|- | |- | ||
|380 | |380 | ||
|{{SpiritTableName|Prince Fluff|size=64}} | |||
|{{ | |''Kirby's Epic Yarn'' | ||
|''Kirby | |||
|•{{SSBU|Kirby}} {{Head|Kirby|g=SSBU|s=20px|cl=Blue}} | |•{{SSBU|Kirby}} {{Head|Kirby|g=SSBU|s=20px|cl=Blue}} | ||
| | |{{SpiritType|Grab}} | ||
|1,900 | |1,900 | ||
|[[Super Happy Tree]] | |[[Super Happy Tree]] | ||
| Line 735: | Line 648: | ||
|•The enemy's throws have increased power<br>•The enemy favors grabs and throws | |•The enemy's throws have increased power<br>•The enemy favors grabs and throws | ||
|{{SSBUMusicLink|Kirby|Green Greens (for 3DS / Wii U)}} | |{{SSBUMusicLink|Kirby|Green Greens (for 3DS / Wii U)}} | ||
| | |||
|- | |- | ||
|432 | |432 | ||
|{{SpiritTableName|Dugtrio|size=64}} | |||
|{{ | |''Pokémon'' Series | ||
|''Pokémon | |•{{SSBU|Kirby}} {{Head|Kirby|g=SSBU|s=20px|cl=Orange}}×3 | ||
|•{{SSBU|Kirby}} {{Head|Kirby|g=SSBU|s=20px|cl=Orange}} | |{{SpiritType|Shield}} | ||
| | |||
|1,500 | |1,500 | ||
|[[Pokémon Stadium 2]] (Ground type) | |[[Pokémon Stadium 2]] (Ground type) | ||
| Line 747: | Line 660: | ||
|•Periodic earthquakes will shake the stage after a little while | |•Periodic earthquakes will shake the stage after a little while | ||
|{{SSBUMusicLink|Pokémon|Pokémon Gym/Evolution - Pokémon Red / Pokémon Blue}} | |{{SSBUMusicLink|Pokémon|Pokémon Gym/Evolution - Pokémon Red / Pokémon Blue}} | ||
| | |||
|- | |- | ||
|438 | |438 | ||
|{{SpiritTableName|Geodude|size=64}} | |||
|{{ | |''Pokémon'' Series | ||
|''Pokémon | |•{{SSBU|Kirby}} Team {{Head|Kirby|g=SSBU|s=20px|cl=White}}×4 | ||
|•{{SSBU|Kirby}} Team {{Head|Kirby|g=SSBU|s=20px|cl=White}} | |{{SpiritType|Shield}} | ||
| | |||
|1,400 | |1,400 | ||
|[[Pokémon Stadium 2]] (Ground type) | |[[Pokémon Stadium 2]] (Ground type) | ||
| Line 759: | Line 672: | ||
|•The enemy favors down specials | |•The enemy favors down specials | ||
|{{SSBUMusicLink|Pokémon|Pokémon Gym/Evolution - Pokémon Red / Pokémon Blue}} | |{{SSBUMusicLink|Pokémon|Pokémon Gym/Evolution - Pokémon Red / Pokémon Blue}} | ||
| | |||
|- | |- | ||
|458 | |458 | ||
|{{SpiritTableName|Ditto|link=y|size=64}} | |||
|{{ | |''Pokémon'' Series | ||
|''Pokémon | |||
|•{{SSBU|Kirby}} {{Head|Kirby|g=SSBU|s=20px|cl=Purple}} | |•{{SSBU|Kirby}} {{Head|Kirby|g=SSBU|s=20px|cl=Purple}} | ||
| | |{{SpiritType|Grab}} | ||
|3,400 | |3,400 | ||
|[[Pokémon Stadium]] | |[[Pokémon Stadium]] | ||
|N/A | |N/A | ||
|•The enemy favors neutral specials<br>•Only certain Pokémon will emerge from Poké Balls ( | |•The enemy favors neutral specials<br>•Only certain Pokémon will emerge from Poké Balls (Ditto) | ||
|{{SSBUMusicLink|Pokémon|Road to Viridian City - Pokémon Red / Pokémon Blue}} | |{{SSBUMusicLink|Pokémon|Road to Viridian City - Pokémon Red / Pokémon Blue}} | ||
| | |||
|- | |- | ||
|470 | |470 | ||
|{{SpiritTableName|Marill|link=y|size=64}} | |||
|{{ | |''Pokémon'' Series | ||
|''Pokémon | |||
|•{{SSBU|Kirby}} {{Head|Kirby|g=SSBU|s=20px|cl=Blue}} | |•{{SSBU|Kirby}} {{Head|Kirby|g=SSBU|s=20px|cl=Blue}} | ||
| | |{{SpiritType|Shield}} | ||
|1,700 | |1,700 | ||
|[[Pokémon Stadium 2]] | |[[Pokémon Stadium 2]] | ||
| Line 783: | Line 696: | ||
|•Water and ice attacks aren't as effective against the enemy | |•Water and ice attacks aren't as effective against the enemy | ||
|{{SSBUMusicLink|Pokémon|Pokémon Gold / Pokémon Silver Medley}} | |{{SSBUMusicLink|Pokémon|Pokémon Gold / Pokémon Silver Medley}} | ||
| | |||
|- | |- | ||
|546 | |546 | ||
|{{SpiritTableName|Diancie|size=64}} | |||
|{{ | |''Pokémon'' Series | ||
|''Pokémon | |•Reflect {{SSBU|Kirby}} {{Head|Kirby|g=SSBU|s=20px|cl=Orange}}×2 | ||
|•Reflect {{SSBU|Kirby}} {{Head|Kirby|g=SSBU|s=20px|cl=Orange}} | |{{SpiritType|Grab}} | ||
| | |||
|3,900 | |3,900 | ||
|[[Kalos Pokémon League]] | |[[Kalos Pokémon League]] (hazards off) | ||
|N/A | |N/A | ||
|•The enemy reflects projectiles<br>•The enemy favors down specials<br>•The enemy takes less damage while in the air | |•The enemy reflects projectiles<br>•The enemy favors down specials<br>•The enemy takes less damage while in the air | ||
|{{SSBUMusicLink|Pokémon|Battle! (Champion) - Pokémon X / Pokémon Y}} | |{{SSBUMusicLink|Pokémon|Battle! (Champion) - Pokémon X / Pokémon Y}} | ||
| | |||
|- | |- | ||
|553 | |553 | ||
| | |{{SpiritTableName|Pyukumuku|link=y|size=64}} | ||
|''Pokémon'' Series | |||
|''Pokémon | |•Tiny {{SSBU|Kirby}} Team {{Head|Kirby|g=SSBU|s=20px|cl=Purple}}×4 | ||
|•Tiny {{SSBU|Kirby}} {{Head|Kirby|g=SSBU|s=20px|cl=Purple}} | |{{SpiritType|Shield}} | ||
| | |||
|1,600 | |1,600 | ||
|[[Wuhu Island]] | |[[Wuhu Island]] (Frisbee Dog Park) | ||
|N/A | |N/A | ||
|•Only certain Pokémon will emerge from Poké Balls ( | |•Only certain Pokémon will emerge from Poké Balls (Pyukumuku) | ||
|{{SSBUMusicLink|Pokémon|Battle! (Wild Pokémon) - Pokémon Sun / Pokémon Moon}} | |{{SSBUMusicLink|Pokémon|Battle! (Wild Pokémon) - Pokémon Sun / Pokémon Moon}} | ||
| | |||
|- | |- | ||
|559 | |559 | ||
|{{SpiritTableName|Nihilego|size=64}} | |||
|{{ | |''Pokémon'' Series | ||
|''Pokémon | |•{{SSBU|Kirby}} {{Head|Kirby|g=SSBU|s=20px|cl=Blue}}×3 | ||
|•{{SSBU|Kirby}} {{Head|Kirby|g=SSBU|s=20px|cl=Blue}} | |{{SpiritType|Grab}} | ||
| | |||
|4,100 | |4,100 | ||
|[[The Great Cave Offensive]] ([[Ω form]]) | |[[The Great Cave Offensive]] ([[Ω form]]) | ||
| Line 819: | Line 732: | ||
|•The floor is poisonous<br>•The enemy loves to jump<br>•The enemy falls slowly | |•The floor is poisonous<br>•The enemy loves to jump<br>•The enemy falls slowly | ||
|{{SSBUMusicLink|Pokémon|The Battle at the Summit!}} | |{{SSBUMusicLink|Pokémon|The Battle at the Summit!}} | ||
| | |||
|- | |- | ||
|623 | |623 | ||
|{{SpiritTableName|Wrys|iw=fireemblem|size=64}} | |||
|{{ | |''Fire Emblem'' Series | ||
|''Fire Emblem | |•{{SSBU|Kirby}} {{Head|Kirby|g=SSBU|s=20px|cl=Blue}} (30 HP) | ||
|•{{SSBU|Kirby}} {{Head|Kirby|g=SSBU|s=20px|cl=Blue}} | |{{SpiritType|Shield}} | ||
| | |||
|2,500 | |2,500 | ||
|[[Temple]] | |[[Temple]] | ||
|N/A | |N/A | ||
|•Timed [[ | |•Timed [[stamina battle]] (1:30)<br>•The enemy tends to avoid conflict<br>•The enemy heals over time | ||
|{{SSBUMusicLink|Fire Emblem|Shadow Dragon Medley}} | |{{SSBUMusicLink|Fire Emblem|Shadow Dragon Medley}} | ||
| | |||
|- | |- | ||
|806 | |806 | ||
|{{SpiritTableName|White Pikmin|customname=[[Pikmin (species)|White Pikmin]]|size=64}} | |||
|{{ | |''Pikmin'' Series | ||
|''Pikmin | |•Tiny {{SSBU|Kirby}} Team {{Head|Kirby|g=SSBU|s=20px|cl=White}}×13 (10 HP) | ||
|•Tiny {{SSBU|Kirby}} Team {{Head|Kirby|g=SSBU|s=20px|cl=White}} ( | |{{SpiritType|Grab}} | ||
| | |||
|4,400 | |4,400 | ||
|[[Distant Planet]] ([[Battlefield form]]) | |[[Distant Planet]] ([[Battlefield form]]) | ||
|•Item: [[POW Block]]<br>•Hazard: Poison Floor | |•Item: [[POW Block]]<br>•Hazard: Poison Floor | ||
|•The floor is poisonous<br>•Timed [[ | |•The floor is poisonous<br>•Timed [[stamina battle]] (1:00)<br>•The enemy favors dash attacks | ||
|{{SSBUMusicLink|Pikmin|Forest of Hope}} | |{{SSBUMusicLink|Pikmin|Forest of Hope}} | ||
| | |||
|- | |- | ||
|809 | |809 | ||
|{{SpiritTableName|Rock Pikmin|customname=[[Pikmin (species)|Rock Pikmin]]|size=64}} | |||
|{{ | |''Pikmin'' Series | ||
|''Pikmin | |•Tiny {{SSBU|Kirby}} Team {{Head|Kirby|g=SSBU|s=20px|cl=White}}×8 (10 HP) | ||
|•Tiny {{SSBU|Kirby}} Team {{Head|Kirby|g=SSBU|s=20px|cl=White}} ( | |{{SpiritType|Grab}} | ||
| | |||
|1,800 | |1,800 | ||
|[[Garden of Hope]] | |[[Garden of Hope]] (hazards off) | ||
|•Hazard: High Gravity | |•Hazard: High Gravity | ||
|•[[Stamina battle]]<br>•Your jumping power decreases<br>•The enemy favors down specials | |•[[Stamina battle]]<br>•Your jumping power decreases<br>•The enemy favors down specials | ||
|{{SSBUMusicLink|Pikmin|Garden of Hope (Original)}} | |{{SSBUMusicLink|Pikmin|Garden of Hope (Original)}} | ||
| | |||
|- | |- | ||
|948 | |948 | ||
| | |{{SpiritTableName|Ghosts|link=y|size=64}} | ||
| | |''PAC-MAN'' Series | ||
|'' | |||
|•{{SSBU|Kirby}} {{Head|Kirby|g=SSBU|s=20px|cl=Red}}<br>•{{SSBU|Jigglypuff}} {{Head|Jigglypuff|g=SSBU|s=20px|cl=Blue}}<br>•{{SSBU|Squirtle}} {{Head|Squirtle|g=SSBU|s=20px|cl=White}}<br>•{{SSBU|Pac-Man}} {{Head|Pac-Man|g=SSBU|s=20px|cl=Yellow}} | |•{{SSBU|Kirby}} {{Head|Kirby|g=SSBU|s=20px|cl=Red}}<br>•{{SSBU|Jigglypuff}} {{Head|Jigglypuff|g=SSBU|s=20px|cl=Blue}}<br>•{{SSBU|Squirtle}} {{Head|Squirtle|g=SSBU|s=20px|cl=White}}<br>•{{SSBU|Pac-Man}} {{Head|Pac-Man|g=SSBU|s=20px|cl=Yellow}} | ||
| | |{{SpiritType|Shield}} | ||
|3,500 | |3,500 | ||
|[[Pac-Land]] ([[Battlefield form]]) | |[[Pac-Land]] ([[Battlefield form]]) | ||
| | |•Assist Trophy Enemies (Ghosts) | ||
|•Hostile assist trophies will appear | |•Hostile assist trophies will appear | ||
|{{SSBUMusicLink|Pac-Man|PAC-MAN}} | |{{SSBUMusicLink|Pac-Man|PAC-MAN}} | ||
|Blinky | |||
|- | |- | ||
|1,122 | |1,122 | ||
|{{ | |{{SpiritTableName|Unira|link=y|size=64}} | ||
|''Clu Clu Land'' Series | |||
|''Clu Clu Land | |•{{SSBU|Kirby}} Team {{Head|Kirby|g=SSBU|s=20px|cl=Green}}×4 | ||
|•{{SSBU|Kirby}} Team {{Head|Kirby|g=SSBU|s=20px|cl=Green}} | |{{SpiritType|Attack}} | ||
| | |||
|1,800 | |1,800 | ||
|[[75m]] | |[[75m]] | ||
|•Item Tidal Wave<br>•Item: Unira | |•Item Tidal Wave<br>•Item: [[Unira]] | ||
|•Certain items will appear in large numbers<br>•The enemy is easily distracted by items | |•Certain items will appear in large numbers<br>•The enemy is easily distracted by items | ||
|{{SSBUMusicLink| | |{{SSBUMusicLink|Other|Clu Clu Land}} | ||
| | |||
|- | |- | ||
|1,155 | |1,155 | ||
|{{ | |{{SpiritTableName|Hakkun|size=64}} | ||
|''Sutte Hakkun'' | |''Sutte Hakkun'' | ||
|•{{SSBU|Kirby}} {{Head|Kirby|g=SSBU|s=20px|cl=Blue}} | |•{{SSBU|Kirby}} {{Head|Kirby|g=SSBU|s=20px|cl=Blue}} | ||
| | |{{SpiritType|Attack}} | ||
|2,100 | |2,100 | ||
|{{SSBB|Yoshi's Island}} | |{{SSBB|Yoshi's Island}} | ||
|•Invisibility | |•Invisibility | ||
|•Timed battle<br>•You are invisible after a little while | |•Timed battle (2:00)<br>•You are invisible after a little while | ||
|{{SSBUMusicLink|Yoshi|Flower Field}} | |{{SSBUMusicLink|Yoshi|Flower Field}} | ||
| | |||
|- | |- | ||
|1,180 | |1,180 | ||
|{{ | |{{SpiritTableName|Tomatrio|size=64}} | ||
|''Tomato Adventure'' | |''Tomato Adventure'' | ||
|•{{SSBU|Kirby}} | |•{{SSBU|Kirby}} {{Head|Kirby|g=SSBU|s=20px|cl=Red}}{{Head|Kirby|g=SSBU|s=20px|cl=Yellow}}{{Head|Kirby|g=SSBU|s=20px|cl=Green}} | ||
| | |{{SpiritType|Attack}} | ||
|1,600 | |1,600 | ||
|{{SSBM|Yoshi's Island}} (Melee) ([[Battlefield form]]) | |{{SSBM|Yoshi's Island}} (Melee) ([[Battlefield form]]) | ||
| Line 903: | Line 816: | ||
|•The enemy is easily distracted by items | |•The enemy is easily distracted by items | ||
|{{SSBUMusicLink|Super Mario Bros.|Mixed-Up Scramble}} | |{{SSBUMusicLink|Super Mario Bros.|Mixed-Up Scramble}} | ||
| | |||
|- | |- | ||
|1,186 | |1,186 | ||
|{{ | |{{SpiritTableName|Mattel|size=64}} | ||
|''The Legendary Starfy'' Series | |||
|''The Legendary Starfy | |||
|•{{SSBU|Kirby}} {{Head|Kirby|g=SSBU|s=20px|cl=Red}} | |•{{SSBU|Kirby}} {{Head|Kirby|g=SSBU|s=20px|cl=Red}} | ||
| | |{{SpiritType|Grab}} | ||
|1,800 | |1,800 | ||
|[[Delfino Plaza]] (Large Island) | |[[Delfino Plaza]] (Large Island) | ||
| | |•Assist Trophy Enemies ([[Starfy]]) | ||
|•Hostile assist trophies will appear | |•Hostile assist trophies will appear | ||
|{{SSBUMusicLink|Animal Crossing|Tortimer Island Medley}} | |{{SSBUMusicLink|Animal Crossing|Tortimer Island Medley}} | ||
| | |||
|- | |- | ||
|1,226 | |1,226 | ||
|{{ | |{{SpiritTableName|Magkid|size=64}} | ||
|''Slide Adventure MAGKID'' | |''Slide Adventure MAGKID'' | ||
|•{{SSBU|Kirby}} Team {{Head|Kirby|g=SSBU|s=20px|cl=White}} | |•{{SSBU|Kirby}} Team {{Head|Kirby|g=SSBU|s=20px|cl=White}}×4 | ||
| | |{{SpiritType|Neutral}} | ||
|1,800 | |1,800 | ||
|[[PictoChat 2]] | |[[PictoChat 2]] | ||
| | |•Assist Trophy Enemies ([[Devil]]) | ||
|•Hostile assist trophies will appear<br>•The enemy can deal damage by dashing into you<br>•The enemy has increased move speed | |•Hostile assist trophies will appear<br>•The enemy can deal damage by dashing into you<br>•The enemy has increased move speed | ||
|{{SSBUMusicLink| | |{{SSBUMusicLink|Other|PictoChat}} | ||
| | |||
|- | |- | ||
|1,278 | |1,278 | ||
|{{ | |{{SpiritTableName|Qbby|size=64}} | ||
|''BOXBOY!'' Series | |||
|''BOXBOY! | |•{{SSBU|Kirby}} Team {{Head|Kirby|g=SSBU|s=20px|cl=White}}×4 | ||
|•{{SSBU|Kirby}} {{Head|Kirby|g=SSBU|s=20px|cl=White}} | |{{SpiritType|Grab}} | ||
| | |||
|9,300 | |9,300 | ||
|[[Wii Fit Studio]] | |[[Wii Fit Studio]] | ||
| Line 939: | Line 852: | ||
|•Certain items will appear in large numbers | |•Certain items will appear in large numbers | ||
|{{SSBUMusicLink|Kirby|Ice Cream Island}} | |{{SSBUMusicLink|Kirby|Ice Cream Island}} | ||
| | |||
|- | |||
|1,330 | |||
|{{SpiritTableName|Slime (Dragon Quest)|customname=[[Slime]] (Dragon Quest)|size=64}} | |||
|''DRAGON QUEST'' Series | |||
|•{{SSBU|Kirby}} Team {{Head|Kirby|g=SSBU|s=20px|cl=Blue}}×5 (50 HP)<br>•Giant {{SSBU|Kirby}} {{Head|Kirby|g=SSBU|s=20px|cl=Blue}} (150 HP) | |||
|{{SpiritType|Grab}} | |||
|1,700 | |||
|[[Gaur Plain]] ([[Battlefield form]]) | |||
|N/A | |||
|•[[Stamina battle]]<br>•The enemy favors neutral air attacks<br>•Reinforcements will appear after an enemy is KO'd | |||
|{{SSBUMusicLink|Dragon Quest|Fighting Spirits - DRAGON QUEST III}} | |||
|King Slime (Giant Kirby) | |||
|- | |||
|1,336 | |||
|{{SpiritTableName|Liquid Metal Slime|size=64}} | |||
|''DRAGON QUEST'' Series | |||
|•Metal {{SSBU|Kirby}} {{Head|Kirby|g=SSBU|s=20px|cl=Blue}} (8 HP) | |||
|{{SpiritType|Neutral}} | |||
|5,700 | |||
|[[The Great Cave Offensive]] ([[Battlefield form]]) | |||
|•Move Speed ↑<br>•Defense ↑<br>•Attack Power ↓ | |||
|•The enemy has super armor and is hard to launch or make flinch<br>•The enemy starts the battle with a [[Franklin Badge]]<br>•Timed [[stamina battle]] (0:30) | |||
|{{SSBUMusicLink|Dragon Quest|Battle for the Glory - DRAGON QUEST IV}} | |||
| | |||
|- | |||
|1,343 | |||
|{{SpiritTableName|Jiggy|size=64}} | |||
|''Banjo-Kazooie'' Series | |||
|•Gold {{SSBU|Kirby}} {{Head|Kirby|g=SSBU|s=20px|cl=Yellow}}×5 (10 HP) | |||
|{{SpiritType|Shield}} | |||
|2,000 | |||
|[[The Great Cave Offensive]] | |||
|N/A | |||
|•Timed [[stamina battle]]<br>•The enemy falls slowly | |||
|{{SSBUMusicLink|Banjo-Kazooie|Treasure Trove Cove}} | |||
| | |||
|- | |||
|1,355 | |||
|{{SpiritTableName|O-Tetrimino|size=64}} | |||
|''Tetris'' Series | |||
|•{{SSBU|Kirby}} {{head|Kirby|g=SSBU|s=20px|cl=Yellow}} | |||
|{{SpiritType|Shield}} | |||
|2,000 | |||
|[[Mushroomy Kingdom]] | |||
|•Assist Trophy Enemies ([[Thwomp]])<br>•Item: [[POW Block]] | |||
|•Hostile assist trophies will appear<br>•The enemy favors down specials in the air | |||
|{{SSBUMusicLink|Other|Tetris: Type B}} | |||
| | |||
|- | |||
|1,433 | |||
|{{SpiritTableName|Slime (Minecraft)|size=64}} | |||
|''Minecraft'' Series | |||
|•Giant {{SSBU|Kirby}} {{Head|Kirby|g=SSBU|s=20px|cl=Green}} (120 HP)<br>•{{SSBU|Kirby}} Team {{Head|Kirby|g=SSBU|s=20px|cl=Green}}×3 (60 HP)<br>•Tiny {{SSBU|Kirby}} Team {{Head|Kirby|g=SSBU|s=20px|cl=Green}}×6 (30 HP) | |||
|{{SpiritType|Grab}} | |||
|3,300 | |||
|[[Minecraft World]] (Taiga) | |||
|N/A | |||
|•[[Stamina battle]]<br>•The enemy favors neutral air attacks<br>•Reinforcements will appear after an enemy is KO'd | |||
|{{SSBUMusicLink|Minecraft|Halland / Dalarna}} | |||
| | |||
|- | |||
|1,473 | |||
|{{SpiritTableName|Kittens|size=64}} | |||
|''Super Mario'' Series | |||
|•Tail {{SSBU|Kirby}} Team {{Head|Kirby|g=SSBU|s=20px|cl=Yellow}}{{Head|Kirby|g=SSBU|s=20px|cl=Blue}}{{Head|Kirby|g=SSBU|s=20px|cl=Red}}{{Head|Kirby|g=SSBU|s=20px|cl=Green}}{{Head|Kirby|g=SSBU|s=20px|cl=Purple}} | |||
|{{SpiritType|Grab}} | |||
|1,900 | |||
|[[Delfino Plaza]] (Large Island) | |||
|•Item: Balls | |||
|•The enemy has increased move speed and reduced weight<br>•Defeat an army of fighters | |||
|{{SSBUMusicLink|Super Mario Bros.|Main Theme - Super Mario 64 (Remix)}} | |||
| | |||
|- | |||
|1,490 | |||
|{{SpiritTableName|Tama|size=64}} | |||
|''Sakuna: Of Rice and Ruin'' | |||
|•{{SSBU|Kirby}} {{Head|Kirby|g=SSBU|s=20px|cl=Green}}<br>•Clear {{SSBU|Kirby}} {{Head|Kirby|g=SSBU|s=20px|cl=Green}} | |||
|{{SpiritType|Grab}} | |||
|1,500 | |||
|[[Garden of Hope]] ([[Ω form]]) | |||
|N/A | |||
|•The enemy favors air attacks<br>•Reinforcements will appear after an enemy is KO'd<br>•The enemy is invisible | |||
|{{SSBUMusicLink|Other|The Mysterious Murasame Castle Medley}} | |||
| Holy Sword Tama (Clear Kirby) | |||
|- | |||
|1,517 | |||
|{{SpiritTableName|Oatchi|interwiki=pikipedia|size=64}} | |||
|''Pikmin'' Series | |||
|•Giant {{SSBU|Kirby}} {{Head|Kirby|g=SSBU|s=20px|cl=Yellow}}<br>•[[Olimar (SSBU)|Alph]] {{Head|Olimar|g=SSBU|s=20px|cl=AlphPink}} | |||
|{{SpiritType|Shield}} | |||
|8,800 | |||
|[[Distant Planet]] ([[Ω form]]) | |||
|•Item: [[Hocotate Bomb]] | |||
|•The enemy favors dash attacks<br>•The enemy can deal damage by dashing into you | |||
|{{SSBUMusicLink|Pikmin|Garden of Hope (Original)}} | |||
| | |||
|- | |||
|1,528 | |||
|{{SpiritTableName|Wonder Flower & Talking Flower|size=64}} | |||
|''Super Mario'' Series | |||
|•Tiny {{SSBU|Kirby}} {{Head|Kirby|g=SSBU|s=20px|cl=Blue}}<br>•Tiny {{SSBU|Kirby}} Team {{Head|Kirby|g=SSBU|s=20px|cl=Yellow}}×20 | |||
|{{SpiritType|Neutral}} | |||
|1,900 | |||
|[[Mushroom Kingdom U]] | |||
|•Assist Trophy Enemies ([[Skull Kid]])<br>•Item: Fire Flower | |||
|•Defeat the main fighter to win<br>•The enemy has super armor and is hard to launch or make flinch<br>•Hostile assist trophies will appear | |||
|{{SSBUMusicLink|Super Mario Bros.|Pandemonium}} | |||
| {{s|supermariowiki|Wonder Flower}} (Blue Kirby)<br>{{s|supermariowiki|Talking Flower}}s (Yellow Kirby) | |||
|} | |} | ||
===As a minion=== | ===As a minion=== | ||
{|class="wikitable sortable" style="width:100%;" | {|class="wikitable sortable" style="width:100%;" | ||
! colspan=4|Spirit | ! colspan=4|Spirit | ||
! colspan=7|Battle parameters | ! colspan=7|Battle parameters | ||
| Line 962: | Line 983: | ||
|- | |- | ||
|67 | |67 | ||
|{{SpiritTableName|Shine Sprite|link=y|size=64}} | |||
|{{ | |''Super Mario'' Series | ||
|''Super Mario | |•{{SSBU|Rosalina & Luma}} {{Head|Rosalina|g=SSBU|s=20px|cl=Yellow}}<br>•{{SSBU|Kirby}} Team {{Head|Kirby|g=SSBU|s=20px|cl=Yellow}}{{Head|Kirby|g=SSBU|s=20px|cl=Blue}}{{Head|Kirby|g=SSBU|s=20px|cl=Red}} | ||
|•{{SSBU|Rosalina & Luma}} {{Head|Rosalina|g=SSBU|s=20px|cl=Yellow}}<br>•{{SSBU|Kirby}} | |{{SpiritType|Neutral}} | ||
| | |||
|13,100 | |13,100 | ||
|[[Delfino Plaza]] (roof) | |[[Delfino Plaza]] (roof) | ||
|•Temporary Invincibility<br>•Sudden | |•Temporary Invincibility<br>•Sudden Final Smash<br>•Item: Stars | ||
|•Defeat the main fighter to win<br>•The enemy will suddenly have a Final Smash<br>•The enemy will occasionally be invincible | |•Defeat the main fighter to win<br>•The enemy will suddenly have a Final Smash<br>•The enemy will occasionally be invincible | ||
|{{SSBUMusicLink|Super Mario Bros.|Delfino Plaza (Remix)}} | |{{SSBUMusicLink|Super Mario Bros.|Delfino Plaza (Remix)}} | ||
|{{s|mariowiki| | |{{s|mariowiki|Coin}}s | ||
|- | |- | ||
|72 | |72 | ||
|{{SpiritTableName|Hungry Luma|size=64}} | |||
|{{ | |''Super Mario'' Series | ||
|''Super Mario | |||
|•{{SSBU|Rosalina & Luma}} {{Head|Rosalina|g=SSBU|s=20px|cl=Pink}}<br>•{{SSBU|Kirby}} {{Head|Kirby|g=SSBU|s=20px|cl=Orange}} | |•{{SSBU|Rosalina & Luma}} {{Head|Rosalina|g=SSBU|s=20px|cl=Pink}}<br>•{{SSBU|Kirby}} {{Head|Kirby|g=SSBU|s=20px|cl=Orange}} | ||
| | |{{SpiritType|Grab}} | ||
|1,900 | |1,900 | ||
|[[Mario Galaxy]] | |[[Mario Galaxy]] | ||
| Line 988: | Line 1,007: | ||
|- | |- | ||
|104 | |104 | ||
|{{SpiritTableName|Geno|link=y|size=64}} | |||
|{{ | |||
|''Super Mario RPG: Legend of the Seven Stars'' | |''Super Mario RPG: Legend of the Seven Stars'' | ||
|•{{SSBU|Sheik}} {{Head|Sheik|g=SSBU|s=20px|cl=Indigo}}<br>•{{SSBU|Peach}} {{Head|Peach|g=SSBU|s=20px|cl=Red}}<br>•{{SSBU|Kirby}} {{Head|Kirby|g=SSBU|s=20px|cl=White}}<br>•{{SSBU|Bowser}} {{Head|Bowser|g=SSBU|s=20px|cl=Orange}}<br>•{{SSBU|Mario}} {{Head|Mario|g=SSBU|s=20px|cl=Blue}} | |•{{SSBU|Sheik}} {{Head|Sheik|g=SSBU|s=20px|cl=Indigo}}<br>•{{SSBU|Peach}} {{Head|Peach|g=SSBU|s=20px|cl=Red}}<br>•{{SSBU|Kirby}} {{Head|Kirby|g=SSBU|s=20px|cl=White}}<br>•{{SSBU|Bowser}} {{Head|Bowser|g=SSBU|s=20px|cl=Orange}}<br>•{{SSBU|Mario}} {{Head|Mario|g=SSBU|s=20px|cl=Blue}} | ||
| | |{{SpiritType|Attack}} | ||
|13,700 | |13,700 | ||
|[[Mario Galaxy]] ([[Battlefield form]]) | |[[Mario Galaxy]] ([[Battlefield form]]) | ||
|N/A | |N/A | ||
|•Defeat the main fighter to win<br>•Timed battle<br>•The enemy's FS Meter charges quickly | |•Defeat the main fighter to win<br>•Timed battle (2:30)<br>•The enemy's FS Meter charges quickly | ||
|{{SSBUMusicLink|Mario Kart|Rainbow Road Medley}} | |{{SSBUMusicLink|Mario Kart|Rainbow Road Medley}} | ||
|{{s|mariowiki|Mallow}} | |{{s|mariowiki|Mallow}} | ||
|- | |- | ||
|332 | |332 | ||
|{{SpiritTableName|Rick|size=64}} | |||
|{{ | |''Kirby'' Series | ||
|''Kirby | |||
|•{{SSBU|Pikachu}} {{Head|Pikachu|g=SSBU|s=20px|cl=Green}}<br>•{{SSBU|Kirby}} {{Head|Kirby|g=SSBU|s=20px|cl=Yellow}} | |•{{SSBU|Pikachu}} {{Head|Pikachu|g=SSBU|s=20px|cl=Green}}<br>•{{SSBU|Kirby}} {{Head|Kirby|g=SSBU|s=20px|cl=Yellow}} | ||
| | |{{SpiritType|Grab}} | ||
|4,100 | |4,100 | ||
|[[Green Greens]] | |[[Green Greens]] | ||
| Line 1,014: | Line 1,031: | ||
|- | |- | ||
|333 | |333 | ||
|{{SpiritTableName|Kine|size=64}} | |||
|{{ | |''Kirby'' Series | ||
|''Kirby | |||
|•{{SSBU|Squirtle}} {{Head|Squirtle|g=SSBU|s=20px|cl=Blue}}<br>•{{SSBU|Kirby}} {{Head|Kirby|g=SSBU|s=20px|cl=Blue}} | |•{{SSBU|Squirtle}} {{Head|Squirtle|g=SSBU|s=20px|cl=Blue}}<br>•{{SSBU|Kirby}} {{Head|Kirby|g=SSBU|s=20px|cl=Blue}} | ||
| | |{{SpiritType|Shield}} | ||
|3,600 | |3,600 | ||
|[[Wuhu Island]] (Rocks at sea) | |[[Wuhu Island]] (Rocks at sea) | ||
|•Buoyancy Reduced | |•Buoyancy Reduced | ||
|•You can't swim<br>•The enemy starts the battle with a [[Freezie]] | |•You can't swim<br>•The enemy starts the battle with a [[Freezie]] | ||
|{{SSBUMusicLink|Kirby|Float Islands | |{{SSBUMusicLink|Kirby|Kirby Retro Medley}} (Float Islands) | ||
|{{s|wikirby|Kirby}} | |{{s|wikirby|Kirby}} | ||
|- | |- | ||
|334 | |334 | ||
|{{SpiritTableName|Coo|size=64}} | |||
|{{ | |''Kirby'' Series | ||
|''Kirby | |||
|•{{SSBU|Falco}} {{Head|Falco|g=SSBU|s=20px|cl=Pink}}<br>•{{SSBU|Kirby}} {{Head|Kirby|g=SSBU|s=20px|cl=Green}} | |•{{SSBU|Falco}} {{Head|Falco|g=SSBU|s=20px|cl=Pink}}<br>•{{SSBU|Kirby}} {{Head|Kirby|g=SSBU|s=20px|cl=Green}} | ||
| | |{{SpiritType|Grab}} | ||
|4,100 | |4,100 | ||
|{{SSB|Dream Land}} | |{{SSB|Dream Land}} | ||
| Line 1,040: | Line 1,055: | ||
|- | |- | ||
|690 | |690 | ||
|{{SpiritTableName|Ball|size=64}} | |||
|{{ | |''Game & Watch'' Series | ||
|''Game & Watch | |||
|•{{SSBU|Mr. Game & Watch}} {{Head|Mr. Game & Watch|g=SSBU|s=20px}}<br>•{{SSBU|Pac-Man}} {{Head|Pac-Man|g=SSBU|s=20px|cl=Black}}<br>•{{SSBU|Jigglypuff}} {{Head|Jigglypuff|g=SSBU|s=20px|cl=Red}}<br>•{{SSBU|Kirby}} {{Head|Kirby|g=SSBU|s=20px|cl=White}} | |•{{SSBU|Mr. Game & Watch}} {{Head|Mr. Game & Watch|g=SSBU|s=20px}}<br>•{{SSBU|Pac-Man}} {{Head|Pac-Man|g=SSBU|s=20px|cl=Black}}<br>•{{SSBU|Jigglypuff}} {{Head|Jigglypuff|g=SSBU|s=20px|cl=Red}}<br>•{{SSBU|Kirby}} {{Head|Kirby|g=SSBU|s=20px|cl=White}} | ||
| | |{{SpiritType|Grab}} | ||
|3,900 | |3,900 | ||
|[[Flat Zone X]] (hazards off) | |[[Flat Zone X]] (hazards off) | ||
|•Item: Balls | |•Item: Balls | ||
|•The enemy favors grabs and throws<br>•The enemy's throwing type items have increased power | |•The enemy favors grabs and throws<br>•The enemy's throwing-type items have increased power | ||
|{{SSBUMusicLink|Game & Watch|Flat Zone 2}} | |{{SSBUMusicLink|Game & Watch|Flat Zone 2}} | ||
|{{s|mariowiki|Ball}} | |{{s|mariowiki|Ball}} | ||
|- | |- | ||
|723 | |723 | ||
|{{ | |{{SpiritTableName|Viridi|link=y|size=64}} | ||
|''Kid Icarus'' Series | |||
|''Kid Icarus | |•{{SSBU|Mii Swordfighter}} {{Head|Mii Swordfighter|g=SSBU|s=20px}} (Moveset [[Gale Strike|1]][[Gale Stab|2]][[Hero's Spin|3]][[Reversal Slash|2]], Viridi Wig, Viridi Outfit, High Voice Type 6)<br>•Giant {{SSBU|Kirby}} {{Head|Kirby|g=SSBU|s=20px|cl=White}} | ||
|•{{SSBU|Mii Swordfighter}} {{Head|Mii Swordfighter|g=SSBU|s=20px}} (Moveset [[Gale Strike|1]][[Gale Stab|2]][[Hero's Spin|3]][[Reversal Slash|2]], Viridi Wig, Viridi Outfit, High Voice Type 6)<br> | |{{SpiritType|Attack}} | ||
| | |||
|13,700 | |13,700 | ||
|[[Reset Bomb Forest]] | |[[Reset Bomb Forest]] | ||
|N/A | |N/A | ||
|•Defeat the main fighter to win<br>•The enemy's special moves have increased power<br>•Timed battle | |•Defeat the main fighter to win<br>•The enemy's special moves have increased power<br>•Timed battle (0:55) | ||
|{{SSBUMusicLink|Kid Icarus|Wrath of the Reset Bomb}} | |{{SSBUMusicLink|Kid Icarus|Wrath of the Reset Bomb}} | ||
|{{s|icaruspedia|Cragalanche}} | |{{s|icaruspedia|Cragalanche}} | ||
|- | |- | ||
|1,107 | |1,107 | ||
|{{SpiritTableName|Fighting Alloy Team|link=y|size=64}} | |||
|{{ | |''Super Smash Bros.'' Series | ||
|''Super Smash Bros. | |•{{SSBU|Captain Falcon}} Team {{Head|Captain Falcon|g=SSBU|s=20px|cl=Red}}×4<br>•{{SSBU|Zelda}} Team {{Head|Zelda|g=SSBU|s=20px|cl=Blue}}×4<br>•{{SSBU|Mario}} Team {{Head|Mario|g=SSBU|s=20px|cl=Yellow}}×4<br>•{{SSBU|Kirby}} Team {{Head|Kirby|g=SSBU|s=20px|cl=Green}}×4 | ||
|•{{SSBU|Captain Falcon}} Team {{Head|Captain Falcon|g=SSBU|s=20px|cl=Red}} | |{{SpiritType|Attack}} | ||
| | |||
|3,300 | |3,300 | ||
|{{SSBU|Final Destination}} ([[Battlefield form]]) | |{{SSBU|Final Destination}} ([[Battlefield form]]) | ||
| Line 1,079: | Line 1,091: | ||
|- | |- | ||
|1,119 | |1,119 | ||
|{{ | |{{SpiritTableName|Devil|link=y|size=64}} | ||
|''Devil World'' | |''Devil World'' | ||
|•{{SSBU|Ridley}} {{Head|Ridley|g=SSBU|s=20px|cl=Green}}<br>•{{SSBU|Kirby}} {{Head|Kirby|g=SSBU|s=20px|cl=Red}} | |•{{SSBU|Ridley}} {{Head|Ridley|g=SSBU|s=20px|cl=Green}}<br>•{{SSBU|Kirby}} {{Head|Kirby|g=SSBU|s=20px|cl=Red}}×2 | ||
| | |{{SpiritType|Shield}} | ||
|3,900 | |3,900 | ||
|[[75m]] ([[Battlefield form]]) | |[[75m]] ([[Battlefield form]]) | ||
| Line 1,089: | Line 1,100: | ||
|•Hostile assist trophies will appear | |•Hostile assist trophies will appear | ||
|{{SSBUMusicLink|Donkey Kong|25m Theme}} | |{{SSBUMusicLink|Donkey Kong|25m Theme}} | ||
| | |Medaman | ||
|- | |- | ||
|1,197 | |1,197 | ||
|{{ | |{{SpiritTableName|Munchy Monk|size=64}} | ||
| | |''Rhythm Heaven'' Series {{Flag|North America}}<br>''Rhythm Paradise'' Series {{Flag|PAL}} | ||
|''Rhythm | |•{{SSBU|Ken}} {{Head|Ken|g=SSBU|s=20px|cl=Blue}}<br>•Tiny {{SSBU|Kirby}} {{Head|Kirby|g=SSBU|s=20px|cl=White}}×3 | ||
|•{{SSBU|Ken}} {{Head|Ken|g=SSBU|s=20px|cl=Blue}}<br>•Tiny {{SSBU|Kirby}} {{Head|Kirby|g=SSBU|s=20px|cl=White}} | |{{SpiritType|Shield}} | ||
| | |||
|1,500 | |1,500 | ||
|[[Spirit Train]] | |[[Spirit Train]] | ||
| | |•Item: [[Food]] | ||
|•Defeat the main fighter to win<br>•The enemy favors up specials<br>•The enemy is easily distracted by items | |•Defeat the main fighter to win<br>•The enemy favors up specials<br>•The enemy is easily distracted by items | ||
|{{SSBUMusicLink| | |{{SSBUMusicLink|Other|Fruit Basket}} | ||
|Dumplings | |Dumplings | ||
|- | |- | ||
|1,216 | |1,216 | ||
|{{ | |{{SpiritTableName|Dr. Lobe|size=64}} | ||
|''Big Brain Academy'' Series | |||
|''Big Brain Academy | |•{{SSBU|Dr. Mario}} {{Head|Dr. Mario|g=SSBU|s=20px|cl=Yellow}}<br>•{{SSBU|Kirby}} {{Head|Kirby|g=SSBU|s=20px|cl=White}}{{Head|Kirby|g=SSBU|s=20px|cl=Purple}} | ||
|•{{SSBU|Dr. Mario}} {{Head|Dr. Mario|g=SSBU|s=20px|cl=Yellow}}<br>•{{SSBU|Kirby}} | |{{SpiritType|Neutral}} | ||
| | |||
|3,400 | |3,400 | ||
|[[PictoChat 2]] | |[[PictoChat 2]] | ||
|•Hazard: Low Gravity<br>•Hazard: High Gravity | |•Hazard: Low Gravity<br>•Hazard: High Gravity | ||
|•All fighters have reduced jump ability<br>•Gravity is reduced after a little while | |•All fighters have reduced jump ability<br>•Gravity is reduced after a little while | ||
|{{SSBUMusicLink| | |{{SSBUMusicLink|Other|Title Theme - Big Brain Academy}} | ||
| | |Floating Objects (Shadow Shift) | ||
|- | |- | ||
|1,286 | |1,286 | ||
|{{ | |{{SpiritTableName|Clip & Snip|size=64}} | ||
|''Snipperclips - Cut it out, together!'' Series | |||
|''Snipperclips - Cut it out, together! | |||
|•{{SSBU|Pac-Man}} {{Head|Pac-Man|g=SSBU|s=20px|cl=Red}}<br>•{{SSBU|Kirby}} {{Head|Kirby|g=SSBU|s=20px|cl=Red}} | |•{{SSBU|Pac-Man}} {{Head|Pac-Man|g=SSBU|s=20px|cl=Red}}<br>•{{SSBU|Kirby}} {{Head|Kirby|g=SSBU|s=20px|cl=Red}} | ||
| | |{{SpiritType|Attack}} | ||
|3,600 | |3,600 | ||
|[[PictoChat 2]] | |[[PictoChat 2]] | ||
|N/A | |N/A | ||
|•The enemy starts the battle with a [[Killing Edge]] | |•The enemy starts the battle with a [[Killing Edge]] | ||
|{{SSBUMusicLink| | |{{SSBUMusicLink|Other|Noisy Notebook}} | ||
|[https://nintendo.fandom.com/wiki/Snip Snip] | |[https://nintendo.fandom.com/wiki/Snip Snip] | ||
|- | |- | ||
|1,301 | |1,301 | ||
|{{SpiritTableName|River Survival|size=64}} | |||
|{{ | |''Super Mario'' Series | ||
|''Super Mario | |||
|•{{SSBU|Bowser}} {{Head|Bowser|g=SSBU|s=20px|cl=Red}}<br>•{{SSBU|Kirby}} {{Head|Kirby|g=SSBU|s=20px|cl=Orange}}<br>•{{SSBU|Yoshi}} {{Head|Yoshi|g=SSBU|s=20px|cl=Red}}<br>•{{SSBU|Rosalina & Luma}} {{Head|Rosalina|g=SSBU|s=20px|cl=White}} | |•{{SSBU|Bowser}} {{Head|Bowser|g=SSBU|s=20px|cl=Red}}<br>•{{SSBU|Kirby}} {{Head|Kirby|g=SSBU|s=20px|cl=Orange}}<br>•{{SSBU|Yoshi}} {{Head|Yoshi|g=SSBU|s=20px|cl=Red}}<br>•{{SSBU|Rosalina & Luma}} {{Head|Rosalina|g=SSBU|s=20px|cl=White}} | ||
| | |{{SpiritType|Shield}} | ||
|5,500 | |5,500 | ||
|[[Kongo Falls]] ([[Ω form]]) | |[[Kongo Falls]] ([[Ω form]]) | ||
|•[[Bob-omb]] Festival<br>•Item Tidal Wave<br>•Item: [[Food]] | |•[[Bob-omb]] Festival<br>•Item Tidal Wave<br>•Item: [[Food]] | ||
|•Survive until the timer runs out<br>•Bob-ombs will rain from the sky after a little while | |•Survive until the timer runs out (1:00)<br>•Bob-ombs will rain from the sky after a little while | ||
|{{SSBUMusicLink|Super Mario Bros.|Slide}} | |{{SSBUMusicLink|Super Mario Bros.|Slide}} | ||
|{{s|mariowiki|Goomba}} | |{{s|mariowiki|Goomba}} | ||
|- | |||
|1,411 | |||
|{{SpiritTableName|Duran & Angela|size=64}} | |||
|''Mana'' Series | |||
|•{{SSBU|Roy}} {{Head|Roy|g=SSBU|s=20px|cl=Green}}<br>•{{SSBU|Zelda}} {{Head|Zelda|g=SSBU|s=20px|cl=Red}}<br>•Tiny Bunny {{SSBU|Kirby}} {{Head|Kirby|g=SSBU|s=20px|cl=Yellow}}×2 | |||
|{{SpiritType|Attack}} | |||
|9,200 | |||
|[[Gaur Plain]] ([[Ω form]]) | |||
|•Item: [[Ramblin' Evil Mushroom]] | |||
|•Reinforcements will appear after an enemy is KO'd | |||
|{{SSBUMusicLink|Other|Filled with Hope}} | |||
|Rabites | |||
|- | |||
|rowspan="2"|1,450 | |||
|{{SpiritTableName|Chocobo & Moogle|size=64|customname=[[Chocobo]] & Moogle|dlcalt=y}} | |||
|rowspan="2"|''FINAL FANTASY'' Series | |||
|•{{SSBU|Mii Brawler}} {{Head|Mii Brawler|g=SSBU|s=20px}} (Moveset [[Exploding Side Kick|3]][[Onslaught|1]][[Helicopter Kick|2]][[Feint Jump|2]], Isaac Wig, Yellow Tracksuit)<br>•{{SSBU|Kirby}} {{Head|Kirby|g=SSBU|s=20px|cl=White}} | |||
|rowspan="2"|{{SpiritType|Neutral}} | |||
|rowspan="2"|1,600 | |||
|rowspan="2"|[[Garden of Hope]] | |||
|rowspan="2"|•Item: [[Cucco]] | |||
|rowspan="2"|•Take your strongest team into this no-frills battle<br>•''The enemy starts the battle with a Bob-omb'' | |||
|rowspan="2"|{{SSBUMusicLink|Yoshi|Flower Field}} | |||
|rowspan="2"|Moogle | |||
|- | |||
|style="background-color:#EEE;"|•{{SSBU|Mii Brawler}} {{Head|Mii Brawler|g=SSBU|s=20px}} (Moveset [[Exploding Side Kick|3]][[Onslaught|1]][[Helicopter Kick|2]][[Feint Jump|2]], Chocobo Hat, Yellow Tracksuit)<ref group="SB" name="DLC"/><br>•{{SSBU|Kirby}} {{Head|Kirby|g=SSBU|s=20px|cl=White}} | |||
|- | |||
|1,524 | |||
|{{SpiritTableName|Sprigatito, Fuecoco, & Quaxly|size=64}} | |||
|''Pokémon'' Series | |||
|•{{SSBU|Ivysaur}} {{Head|Ivysaur|g=SSBU|s=20px|cl=Yellow}}<br>•{{SSBU|Squirtle}} {{Head|Squirtle|g=SSBU|s=20px|cl=White}}<br>•{{SSBU|Kirby}} {{Head|Kirby|g=SSBU|s=20px|cl=Red}} | |||
|{{SpiritType|Neutral}} | |||
|3,700 | |||
|[[Delfino Plaza]] (Courtyard) | |||
|N/A | |||
|•The enemy favors side specials | |||
|{{SSBUMusicLink|Pokémon|Battle! (Trainer) - Pokémon Sun / Pokémon Moon}} | |||
|{{iw|bulbapedia|Fuecoco}} | |||
|- | |||
|1,525 | |||
|{{SpiritTableName|Peach & Stella|size=64}} | |||
|''Super Mario'' Series | |||
|•{{SSBU|Peach}} {{Head|Peach|g=SSBU|s=20px}}<br>•Tiny {{SSBU|Kirby}} {{Head|Kirby|g=SSBU|s=20px|cl=Yellow}} | |||
|{{SpiritType|Grab}} | |||
|12,800 | |||
|[[Luigi's Mansion]] | |||
|•Assist Trophy Enemies ([[Lyn]], [[Chef Kawasaki]], [[Akira Yuki]]) | |||
|•Hostile assist trophies will appear<br>•The enemy favors up smash attacks | |||
|{{SSBUMusicLink|Super Mario Bros.|Fossil Falls}} | |||
| {{s|supermariowiki|Stella}} | |||
|} | |} | ||
<references group="SB"> | |||
<ref name="DLC">This alternative occurs when the corresponding DLC has been purchased and downloaded.</ref> | |||
</references> | |||
==[[Alternate costume (SSBU)#Kirby|Alternate costumes]]== | ==[[Alternate costume (SSBU)#Kirby|Alternate costumes]]== | ||
| Line 1,167: | Line 1,227: | ||
SSBUWebsiteKirby2.jpg|"[[List of Copy Abilities|Jigglypuff Kirby]]" using [[Rollout]] with {{SSBU|Jigglypuff}} on [[Onett]]. | SSBUWebsiteKirby2.jpg|"[[List of Copy Abilities|Jigglypuff Kirby]]" using [[Rollout]] with {{SSBU|Jigglypuff}} on [[Onett]]. | ||
SSBUWebsiteKirby3.jpg|Using his {{b|Hammer|Kirby}} on {{SSBU|Little Mac}} in the [[Boxing Ring]]. | SSBUWebsiteKirby3.jpg|Using his {{b|Hammer|Kirby}} on {{SSBU|Little Mac}} in the [[Boxing Ring]]. | ||
SSBUWebsiteKirby4.jpg|"[[List of Copy Abilities|Fox Kirby]]" using a | SSBUWebsiteKirby4.jpg|"[[List of Copy Abilities|Fox Kirby]]" using a {{b|Blaster|Fox}} with {{SSBU|Fox}} on [[Mario Galaxy]]. | ||
SSBUWebsiteKirby5.jpg|Performing [[Final Cutter]] on [[Tomodachi Life]]. | SSBUWebsiteKirby5.jpg|Performing [[Final Cutter]] on [[Tomodachi Life]]. | ||
SSBUWebsiteKirby6.jpg|Inhaling an Ice Shot on [[Summit]] with the [[wikirby:Ice|Ice Kirby]]-inspired costume. | SSBUWebsiteKirby6.jpg|Inhaling an [[Ice Shot]] on [[Summit]] with the [[wikirby:Ice|Ice Kirby]]-inspired costume. | ||
SSBUWebsiteDiddyKong2.jpg|Getting [[Monkey Flip|kicked]] by {{SSBU|Diddy Kong}} on [[The Great Cave Offensive]]. | SSBUWebsiteDiddyKong2.jpg|Getting [[Monkey Flip|kicked]] by {{SSBU|Diddy Kong}} on [[The Great Cave Offensive]]. | ||
SSBUWebsiteDonkeyKong4.jpg|[[Inhale (Kirby)|Inhaling]] {{SSBU|Donkey Kong}}'s grapes on [[Gaur Plain]]. | SSBUWebsiteDonkeyKong4.jpg|[[Inhale (Kirby)|Inhaling]] {{SSBU|Donkey Kong}}'s grapes on [[Gaur Plain]]. | ||
SSBUWebsiteKingDedede4.jpg|With {{SSBU|King Dedede}} on [[Green Greens]]. | SSBUWebsiteKingDedede4.jpg|With {{SSBU|King Dedede}} on [[Green Greens]]. | ||
SSBUWebsiteMetaKnight4.jpg| | SSBUWebsiteMetaKnight4.jpg|Kirby's "unmasked Meta Knight" costume standing next to the real {{SSBU|Meta Knight}} on [[Skyworld]]. | ||
SSBUWebsiteMiiFighter5.jpg|Kirby in his new [[Stone]] transformation below an aerial {{SSBU|Mii Brawler}} on Skyworld. | SSBUWebsiteMiiFighter5.jpg|Kirby in his new [[Stone]] transformation below an aerial {{SSBU|Mii Brawler}} on Skyworld. | ||
SSBUWebsiteRosalina3.jpg|Struck by {{SSBU|Rosalina}} on [[Temple]]. | SSBUWebsiteRosalina3.jpg|Struck by {{SSBU|Rosalina}} on [[Temple]]. | ||
| Line 1,180: | Line 1,240: | ||
SSBUWebsiteKnuckles2.jpg|Kirby struck by [[Knuckles]]'s uppercut on The Great Cave Offensive. | SSBUWebsiteKnuckles2.jpg|Kirby struck by [[Knuckles]]'s uppercut on The Great Cave Offensive. | ||
SSBUWebsiteSquidSisters5.jpg|Three Kirbys watching the [[Squid Sisters]]' concert on [[New Pork City]]. | SSBUWebsiteSquidSisters5.jpg|Three Kirbys watching the [[Squid Sisters]]' concert on [[New Pork City]]. | ||
SSBUKirbyJPTwitter1.jpg| | SSBUKirbyJPTwitter1.jpg|Taunting alongside Meta Knight and King Dedede on Green Greens. | ||
SSBUKirbyJPTwitter2.jpg|With {{SSBU|Mario}}, {{SSBU|Link}}, {{SSBU|Inkling}}, {{SSBU|Marth}}, {{SSBU|Pit}}, {{SSBU|Ridley}} and {{SSBU|Villager}} on Battlefield. | SSBUKirbyJPTwitter2.jpg|With {{SSBU|Mario}}, {{SSBU|Link}}, {{SSBU|Inkling}}, {{SSBU|Marth}}, {{SSBU|Pit}}, {{SSBU|Ridley}} and {{SSBU|Villager}} on Battlefield. | ||
SSBUSoraMonochrome.jpg|With {{SSBU|Sora}}, {{SSBU|Mr. Game & Watch}} and {{SSBU|Link}} on [[PictoChat 2]]. | |||
</gallery> | </gallery> | ||
=== | ===Fighter Showcase Video=== | ||
{{#widget:YouTube|id=1FPJs_c3qY4}} | {{#widget:YouTube|id=1FPJs_c3qY4}} | ||
==Trivia== | ==Trivia== | ||
*Kirby's stock icon is one of | *Kirby's stock icon is one of only six to show eyes (the others being {{SSBU|Meta Knight}}, {{SSBU|R.O.B.}}, {{SSBU|Sonic}}, [[Steve (SSBU)|Zombie, and Enderman]]). The most likely reason is to actually tell that it is his stock icon, as it is otherwise a simplistic pink circle. | ||
**It also greatly resembles his stock icon in the original ''[[Super Smash Bros.]]'' | **It also greatly resembles his stock icon in the original ''[[Super Smash Bros.]]'' | ||
**This is also not counting {{SSBU|Captain Falcon}} or [[Bowser Jr. (SSBU)|Larry]], as the eyes depicted for the former are not his actual eyes, and the latter lacks his irises. | |||
*Kirby's pose resembles his character artwork in ''[[Kirby Super Star]]'', but rotated to slightly face the screen. Coincidentally, this was also used for his character select artwork in the original ''Super Smash Bros.'' | *Kirby's pose resembles his character artwork in ''[[Kirby Super Star]]'', but rotated to slightly face the screen. Coincidentally, this was also used for his character select artwork in the original ''Super Smash Bros.'' | ||
**Coincidentally, his pose is also used for his Wrestler artwork in Kirby Fighters 2 (with the difference between the mask and the angry frown). | |||
*Kirby is the only ''Kirby'' series character to keep his Final Smash between ''Smash 4'' and ''Ultimate''. | *Kirby is the only ''Kirby'' series character to keep his Final Smash between ''Smash 4'' and ''Ultimate''. | ||
*Since Kirby is the starter character of [[World of Light]] and part of the starter roster, | *Since Kirby is the starter character of [[World of Light]] and part of the starter roster, he is the only character that is not unlockable in the game for any mode. | ||
**This also makes Kirby the only character in the entire series that is never unlocked in any mode. | **This also makes Kirby the only character in the entire series that is never unlocked in any mode. | ||
***This means it is impossible to see the message saying that "Kirby | ***This means it is impossible to see the message saying that "Kirby Joins the Battle!". Modding the game to display this message (through setting Kirby's fighter spirit to rematchable) will reveal that Kirby does not have a text string for this instance, and [https://i.imgur.com/Y3W3Oyq.jpg the message] will simply read "Joins the Battle!" | ||
*Kirby has the highest amount of voice clips for any character in the game, with 95 clips. | **Despite his status as the mode's starter character and the closest thing to the main character, Kirby's depiction in marketing or artwork for ''Ultimate'' is no more prominent than any of the other [[starter character]]s, apart from {{SSBU|Mario}} and {{SSBU|Link}} who collectively serve as the game's mascots. | ||
*Kirby is the only starter character in ''Ultimate'' whose [[universe]] has more than one character to not include any characters in their {{SSBU|Classic Mode}} unlock table, as Meta Knight is in | *Due to his various Copy Abilities, Kirby has the highest amount of voice clips for any character in the game, with 95 clips (121 if DLC is included). | ||
*Because of the copy ability, Kirby has the most unique character models for any character in the game. There are 81 different models, with 648 models if alternate costumes are counted. | |||
*Barring {{SSBU|Yoshi}} who is the only fighter of the {{uv|Yoshi}} series, Kirby is the only starter character in ''Ultimate'' whose [[universe]] has more than one character to not include any characters in their {{SSBU|Classic Mode}} unlock table, as Meta Knight is in Link's, and {{SSBU|King Dedede}} is in {{SSBU|Donkey Kong}}'s. | |||
*Unlike other characters, Kirby can actually taunt online when playing outside of arenas, but only to discard his copy ability. | *Unlike other characters, Kirby can actually taunt online when playing outside of arenas, but only to discard his copy ability. | ||
*As a result of not being captured, Kirby is one of the few characters that doesn't have copies of him produced by Dharkon or Galeem during their boss fights. | *As a result of not being captured, Kirby is one of the few characters that doesn't have copies of him produced by Dharkon or Galeem during their boss fights. | ||
*Since Kirby was never possessed by Galeem like everyone else, his presence in many spirit battles went unclear for some time, until Masahiro Sakurai addressed this in an interview; stating that Galeem managed to analyze Kirby halfway through the story, making it possible to create puppets of him.<ref>https://twitter.com/PushDustIn/status/1098252915532165120?s=20</ref> | *Since Kirby was never possessed by Galeem like everyone else, his presence in many spirit battles went unclear for some time, until Masahiro Sakurai addressed this in an interview; stating that Galeem managed to analyze Kirby halfway through the story, making it possible to create puppets of him.<ref>https://twitter.com/PushDustIn/status/1098252915532165120?s=20</ref> | ||
*Kirby is one of the five veterans from ''Smash 4'' to have their [[Boxing Ring]] alias changed in ''Ultimate'', the others being | **Ironically, Kirby has the most spirit battle appearances of all characters, with 64 total. | ||
*Kirby is one of the five veterans from ''Smash 4'' to have their [[Boxing Ring]] alias changed in ''Ultimate'', the others being Link, King Dedede, {{SSBU|Mega Man}}, and {{SSBU|Ryu}}. | |||
==References== | ==References== | ||
Latest revision as of 23:32, May 2, 2024
| Kirby in Super Smash Bros. Ultimate | |
|---|---|
 
| |
| Universe | Kirby |
| Other playable appearances | in SSB in Melee in Brawl in SSB4 |
| Availability | Starter |
| Final Smash | Ultra Sword |
| Tier | D- (75) |
Kirby (カービィ, Kirby) is a playable character in Super Smash Bros. Ultimate. Like all veterans, he was confirmed on June 12th, 2018. Kirby is classified as Fighter #06.
Kirby is voiced in all regions once again by Makiko Ōmoto, using a combination of new voice clips and ones recycled from Super Smash Bros. 4.
Kirby is currently ranked 75th out of 82 on the Ultimate tier list, placing him in the D- tier. This is roughly similar to his placement in the previous game, where he was ranked 49th out of 54. Kirby possesses fast frame data overall in his moveset, with few moves that come out after frame 9, granting him access to quick and powerful combos. His relatively small size and low crouch also makes him hard to hit; his crouch especially allows him to avoid most grabs and some attacks, giving it good synergy with his down tilt, which is very fast and can cause opponents to trip, leading to KO confirms at high percents if it successfully trips his opponent. He also possesses high damage output on the majority of his moveset, and despite his short size and low weight, he also possesses strong KO options in moves like his back aerial and dash attack, and his finishers are generally fast for their power, giving him a solid punish ability. While his air speed is slow, his aerial moveset is generally solid: Kirby's aerials have among the lowest overall landing lag in the roster, neutral aerial covers his entire body and is one of the strongest of its type, forward aerial is one of his most versatile moves, back aerial is fast, powerful and has good range and all except for down aerial are safe on shield when used close to the ground and have KO potential, granting him decent shield pressure in the air and giving him a good edgeguarding ability alongside his six total jumps. Finally, Kirby's Inhale grants him his opponent's neutral special move, which not only deals more damage than the opponent's, but can also be useful for alleviating some of Kirby's weaknesses and turning the tides of various matchups.
However, Kirby's strengths come at a cost of his poor endurance, as his light weight makes him susceptible to early KOs. His air mobility is one of the slowest of the roster, and this, as well as a lack of projectiles and the limited range in most of his attacks, presents a host of problems in neutral and offstage, as Kirby has trouble approaching and fighting those that can outrange him. His slow air speed, floatiness and lack of projectiles outside of Final Cutter's shockwave make him vulnerable to pressure and juggles, and he has a poor disadvantage state: his options have their own issues defensively, as Stone and down aerial are too slow to protect him effectively from below, neutral aerial has poor range on both sides of Kirby and is not as fast as other aerials of its type, and his midair jumps and Final Cutter may leave him in a worse position when they are used at the wrong time. In the end, while his aerial attacks are versatile and powerful when he has the advantage, they are less effective when he's disadvantaged, as they're not as fast or long-reaching as those of other characters, with his low air mobility and lack of conventional projectiles worsening this issue. Also, when Kirby has a Copy Ability, he may lose it if he gets hit after the first 20 seconds since he obtained it, and the chance of it happening depends on the damage of the hit he took, so he has to swallow his opponent again to get back his Copy Ability if he loses it. While he has several KO options, most of them suffer from poor range and can be difficult to land without a combo or setup into them, and while his smash attacks are powerful without sacrificing too much in speed, they are punishable on shield and have a late hit that is much weaker and often lacks KO potential altogether, such as his up smash, which has several sourspots. Finally, Kirby's recovery, though far-reaching, is rather predictable, making him very vulnerable to edgeguarding despite possessing five midair jumps.
Overall, Kirby's weaknesses undermine some of his strengths. As a result, he has consistently placed near the bottom in terms of competitive representation. Nevertheless, Kirby has still seen success from dedicated mains such as Guilheww, JeJaJeJa, and Konokururu.
Attributes[edit]
Kirby is known for being a small lightweight, being tied for the eighth-lightest character in the game. True to his franchise, Kirby is characterized as a sluggish, yet floaty fighter. He has the 31st slowest walking speed, and 42nd fastest dashing and initial dashing speeds. He also has the 5th slowest air speed, 20th highest air acceleration, 3rd lowest gravity, the 5th lowest falling and fast falling speeds, and above average traction. Due to these statistics, Kirby has difficulty approaching opponents. Kirby's recovery is versatile: despite his slow air speed and low jump height rendering him susceptible to edgeguarding, his five midair jumps, slow falling speed, long vertical airdodge, and Final Cutter's decent distance give him good stalling capabilities and decent safety.
Kirby's greatest strengths are his quick frame data, high combo potential, and the versatility of his moveset. The majority of Kirby's attacks are characterized by speed, with his tilts being among the fastest in the game, while his slowest moves instead boast high power as a trade-off, while still being quite fast for their power: only four of his standard moves (forward and up smashes, forward aerial and down aerial) come out at or after frame 10. Neutral attack and forward tilt are fast and have decent range, allowing Kirby to quickly distance opponents, with the latter being used for tech chase setups. Up tilt's low knockback and high speed allow it to combo into multiple moves, such as itself, an aerial attack, or an Inhale. Down tilt's low power is compensated by its extreme speed and it launching opponents at the Sakurai angle, which allows it to trip most opponents even over 80%. Should he trip his opponents with it, he can follow up with a variety of attacks, such as a dash attack, grab, or forward smash. Dash attack’s early hit is excellent for whiff punishing and scoring a KO, potentially KOing opponents starting at 90%, while the late hit can set up into an Inhale. His smash attacks have good range, high power, and great frame-data, making them excellent at scoring a KO. Kirby himself is also very small, making him hard to hit, and his minimal crouch allows him to avoid almost all grabs and several attacks. As a result, Kirby has an excellent grounded and defensive game thanks to his quick frame-data and evasive crouch, requiring opponents to be careful when approaching him in neutral.
The usefulness of Kirby's grounded game also extends to his grab game. His set of grabs' short range are counterbalanced by being among the fastest in Ultimate, while his pummel's meager damage output is counterbalanced by its extreme speed. His forward throw, unlike most other forward throws in the game, has combo potential, leading into aerial attacks from low to mid percentages. Back throw can be followed up by a back aerial at 0% on certain characters, can KO at high percents, and can send opponents offstage. Up throw is his strongest throw and is able to KO almost all characters around 170%, or even earlier if it lands on a platform. Lastly, while down throw has no combo potential, it is reliable for damage-racking when no other throw can yield better results, and it can KO below 200%.
Kirby's aerial game is also notable, despite his poor air speed, due to the versatility of his aerial attacks. With the exception of down aerial, they have very low landing lag. Neutral aerial has a long-lasting hitbox, high knockback on the clean hit, minimal landing lag, and good coverage, making it a safe landing option. The weak hit of neutral air can combo into his tilts, grab, or even a smash attack. It can also be useful as a combo finisher and as a KO move at high percents. Due to the move lasting longer compared to his other aerials, it can safely pressure shields. Forward aerial is a powerful combo tool, can pressure shields, lead into a wall of pain at low precents, be useful as a respectable KOing option when landing the final hit, and its first two hits can allow additional follow-ups due to its low landing lag. Up aerial has good vertical knockback, low landing lag and a fairly quick auto-cancel window, allowing for several potential follow-ups and even opportunities to KO when near the upper blast line. Back aerial has decent range, high knockback on the clean hit, and is Kirby's fastest aerial, making it one of his strongest options overall. Lastly, down aerial has considerable startup, but has multiple hits that drag opponents downward before the final hit meteor smashes them and has low ending lag, making it a deceptively powerful edgeguarding tool as well as a reliable combo starter with follow-ups on grounded opponents.
Kirby's special moveset can provide some unique strengths. Inhale is his most notable example; it allows him to either copy the neutral special move of any character he inhales, or spit them out as a weight-dependent projectile. Depending on what character he inhales, the copy ability can give Kirby a move that assists him in matchups to various degrees, such as useful projectiles to counter-camp his opponent (Needle Storm, Charge Shot, Wolf's Blaster), powerful punishing options (Giant Punch, Homing Attack), a reflector (Nayru's Love), or other benefits (Monado Arts). In addition, Kirby's variant of the opponent's neutral special has a 1.2x damage multiplier. Kirby can also inhale projectiles; smaller projectiles will be swallowed, allowing him to heal himself, while larger ones (such as a fully-charged Charge Shot) can be stored in his mouth and spat out, essentially giving Kirby a reflector. The spat projectiles can be used to punish opponents at mid-range and can launch them away with high knockback. Inhale can also be used to Kirbycide or spit the opponent out offstage, although the opponent can escape by button mashing. Hammer Flip boasts amazing power, especially when fully charged, and Kirby can move and jump while charging. However, its high startup and endlag, along with its short range and Kirby's poor mobility being further slowed when charging, makes it difficult to land outside of a shield break, covering ledge options, or after a jab lock. Final Cutter is his primary means of recovery, granting good vertical distance, as well as a disjoint in front of him during his ascent and descent. It also emits a shockwave projectile upon landing, making it difficult to punish if the opponent is not behind Kirby. Lastly, Stone causes Kirby to turn into an object and ignore up to 25% damage. It is also a powerful attack, especially in the air, and can be canceled shortly after Kirby begins his descent, although these benefits are limited by its slow startup and ending lag, and Kirby is still vulnerable to grabs while transformed. It can also be used on the ground, where it has faster startup due to creating a shockwave and it launches at a semi-spike angle.
Kirby has very notable flaws, however. His most glaring flaw is his poor approach. While his dashing speed is average, Kirby's mobility is lackluster overall, especially in the air, and with his lack of reliable projectiles, speed demons or characters who can camp with projectiles can wall out Kirby, such as Sonic, Mii Gunner and Samus. Kirby's lack of reliable burst-movement options especially makes his approach in these matchups problematic and sometimes predictable. Dash attack covers a large distance, but it's punishable when not used carefully, and crossing up shields with it is risky, so he doesn't have many reliable approach options outside of a back aerial in a reverse aerial rush. Inhale can help him by giving some new options, but those depend on the matchup, and if he gets hit too much, he might lose the Copy Ability and has to suck in his opponent again to regain it if he loses it. In addition, characters with long range and/or disjointed hitboxes, such as Ike and Mr. Game & Watch, can outrange and wall out Kirby since his range is short relative to the cast despite having a disjoints on a few of attacks himself. Final Cutter's projectile has decent range and quick movement, but it's too slow to use it well due to it requiring Kirby to perform the entire rising and falling portions of the move beforehand, and he lacks other projectiles outside of spitting inhaled projectiles/opponents, or from a Copy Ability. It's also too slow to be used as an out of shield option, only being active at frame 23, and lacks a hitbox to protect Kirby from directly above, which can leave him vulnerable to a meteor smash if it's used at the wrong time. When using Final Cutter, he also cannot snap to the ledge until he reaches the peak of his ascent. This requires conscientious usage to avoid punishment. Despite possessing great air acceleration, Kirby's air speed is also too slow for him to take advantage of it, hindering his aerial approach and recovery despite possessing five midair jumps, with the latter being especially prevalent due to his recovery being fairly linear and predictable despite Final Cutter covering a decent distance overall. Kirby also has several KO options in his kit, but some can be hard to land without a setup due to their short range.
In addition, Kirby also has poor endurance. While being light and floaty can help him escape combos from other characters, this also means he risks getting KOed earlier. He is also vulnerable to juggling, due to his aforementioned slow falling and air speeds. The existence of rage further pronunces this issue, as Kirby will be sent flying even further by heavily damaged opponents, and his light weight prevents him from gaining the advantage of his own rage. His floaty movement, slow speed in the air and lack of reliable projectiles without Inhale also leaves him very vulnerable to pressure, and while his aerials are versatile in an advantage state, they are less effective when he's disadvantaged. His down aerial is too slow to fight juggling, and it's also outclassed by his other aerials when it comes to edgeguarding or against shielding opponents, as it's unsafe on shield and it's also his weakest aerial in terms of damage and knockback, not even KOing lightweights until very high percents. This imposes as a risk in approaching opponents in the air, while also preventing Kirby's aerials from being used effectively when in a disadvantage state, often forcing him to rely on his jumps, Stone, or neutral aerial to escape and return to the ground or the ledge. Even then, those options have their risks: using his midair jumps might leave him vulnerable later, neutral aerial has a large hitbox that covers his entire body but it has and poor range in front of him a long duration that can be punished when used poorly, and Stone has high start-up in the air and Kirby takes a long time to transform or turn back to normal. While its immunity to attacks that deal 25% damage is useful, it has to be used carefully to avoid getting punished, as it has slow startup and a noticeable amount of ending lag and Kirby is still vulnerable to grabs when he's transformed.
Overall, Kirby has a tendency to run hot and cold. In turn, Kirby is characterized as a glass cannon who is capable of inflicting an impressive amount of damage if he gets close to his opponent thanks to his excellent frame data and potent combo game, but doing so is challenging for him due to his poor approach. As such, he functions well with a bait-and-punish playstyle, although being unprepared for an opponent's approach can be hazardous due to his low survivability, an attribute that is commonly shared with other characters of Kirby's archetype.
Changes from Super Smash Bros. 4[edit]
Near the end of SSB4's metagame, Kirby had been considered a low-tier character due to a combination of lackluster attributes (light, slow in the air and floaty) and underwhelming moveset despite its power. Likely owing to this, Kirby has been noticeably buffed overall in the transition to Ultimate, though not enough to raise his standing on the tier list.
Kirby's buffs lie in the increased utility of his moveset as a whole, with overall improved frame-data and KO power on his finishers. The first two hits of his neutral attack can now jab lock and connect better into the looping hits (albeit at the cost of reduced damage output), while forward tilt is a stronger poke and KO option due to its reduced ending lag and its increased knockback. His dash attack has been mostly reverted back to its Melee iteration — however, it is significantly faster and stronger, has less startup and a far longer duration compared to his previous dash attack in SSB4, can cross-up on shields, covers more distance, and is more reliable for catching opponents thanks to only consisting of a single, long-lasting hitbox; these changes make it a stronger punishing tool and a much more versatile move overall. His smash attacks are now stronger punishing options, with forward smash having much more range, up smash having faster start-up, and down smash's regained its semi-spike angle, restoring its utility at edgeguarding; all three also have improved KO power, with forward and up smash dealing more knockback, and down smash's altered angle KOing earlier at the edge despite its reduced knockback. Several of Kirby's attacks, such as up tilt and all his aerials excluding for up aerial also have more range, partially alleviating one of his weaknesses from SSB4.
The universal reduction to landing lag has also exponentially benefitted his aerials, despite already possessing among the lowest landing lag in SSB4; his aerials are not only safer, but now capable of leading into followups, with forward aerial's first two hits now being able to follow up into a grab or forward smash. His neutral and up aerials —the former being one of his most situational attacks— are now faster, deal more knockback (with the former's clean hit being one of the strongest neutral aerials in Ultimate and have less ending lag; neutral aerial also has more range, and both forward and up aerial deal higher damage, regaining some of the KO power they had lost in the transition between Melee and Brawl.
For Kirby's special moves, Inhale has been significantly buffed with faster startup, less ending lag, a much longer grace period in which Kirby cannot lose his Copy Ability, a lower probability of losing said ability after this period has ended, and a new 1.2× multiplier to his copied neutral special compared to his opponent (albeit without a corresponding increase to knockback), giving him a greater incentive and a higher reward from inhaling opponents. Furthermore, he can now eat the projectiles he swallows to heal himself (and store certain ones in his mouth as well, enabling him to spit them out as stars). Hammer Flip now renders Kirby nigh-impossible to stop for a longer time as long as he's grounded; Final Cutter snaps to the ledge slightly faster and its landing hit is much more powerful, which improves its utility; and Stone's aerial variant now has super armor during its startup, making it more difficult to interrupt Kirby out of the attack, as in previous Smash games he could be interrupted even when he fully transformed.
However, the nerfs Kirby has received are also noteworthy. The most notable were to his grab game: his grab has had its mediocre range further worsened (especially on his pivot grab), and forward throw depicts him jumping up higher after the throw, which runs the risk of potentially landing on top of a soft platform, negating all follow-ups when it happens too early (although following up neutral air or up aerial can allow more follow-ups), while back throw has lost most of its combo setups due to changes to the animation. Altogether, this grants Kirby a less effective combo game off of his grabs overall. His other received nerfs include Stone no longer hitting shielding opponents twice, reducing its shield pressure considerably; back aerial deals less knockback (although it has more range and the clean hit now lasts for slightly longer to compensate); and down aerial, one of his most reliable combo starters in SSB4, has more range on the looping hits, but slightly less on the final hit and is less advantageous on landing due to the removal of frame canceling, reducing the effectiveness of its follow-ups since its landing lag was not reduced enough to compensate properly. Furthermore, Kirby still retains many of the same issues that plagued him in SSB4, with mediocre range, sluggish aerial mobility and a high susceptibility to being camped.
Universal changes to the game's mechanics both benefit and hinder Kirby. The revamped air dodging mechanics have significantly improved his innate ability to edgeguard opponents more effectively, and directional air dodges have also given him a secondary recovering option, but this also makes him more susceptible to juggling and edgeguarding as well, due to his short-ranged aerials and predictable landing options, as his air dodges are now among the slowest in the game due to now depending on the character's fall speed and gravity. The changes to downwards velocity KOing opponents faster from the bottom blast line now render Final Cutter as a significantly more deadly edgeguarding and sacrificial KO option, further improving its utility. The increased shieldstun and increased startup on shield grabbing notably benefits Kirby's safety on hit, due to his moveset's naturally high damage and low ending lag, making him harder to shrug off and punish accordingly. Conversely, the changes to grabs' ending lag make Kirby's own grab riskier to throw out, as their ending lag can prove more punishable. The increase in mobility is a mixed bag for Kirby, as while his mobility has improved overall relative to the cast (most notably his aerial mobility), his problems with camping from the previous incarnation remain, exhibited with the increased prevalence of zoners. Overall, his edgeguarding and defensive options have been improved at the cost of his range issues becoming even more prevalent than in SSB4.
In the end, Kirby's changes now render his punishing game much more deadly, make him much harder to shake off once he gains the advantage, and allow him to seal stocks at much more varied percentages, but the universal changes to the game's engine have made it slightly easier for opponents to restrain him and have rendered said punishment game slightly more inconsistent. Because of this, Kirby is agreed to have not significantly improved from his appearance in SSB4, which combined with several veterans being buffed to varying degrees, has resulted in Kirby being in a similar position overall, despite several of the game's updates handing Kirby a myriad of noticeable buffs.
Aesthetics[edit]
 Kirby's appearance is largely the same as it was in SSB4, though his model features a more subdued color scheme. His feet have a pinkish tint, and his blush marks are slightly blurred. These changes make Kirby more closely resemble his appearance in recent Kirby games.
- Like many other characters, Kirby is more expressive, both with his face and his movement.
- Some of Kirby's animations, particularly his dash and initial jump, have been tweaked to closer resemble his appearance from Kirby's Return to Dream Land onward.
- One of Kirby's voice clips when taking high knockback has been changed to his alternate KO sound from SSB4.
- As a result, he gains a new KO clip, which sounds similar to one of his unused high knockback voice clips from Brawl.
- Kirby's unused damage yell from Smash 4 is used when he takes medium knockback.
- Kirby's on-screen appearance has a more intense, fiery explosion than in previous games. The large, cartoony stars that appear have been removed, and while the sparkle effects are still present, they have been drastically toned down. All in all, it more closely resembles how it appeared in Super Smash Bros.
- Up taunt has been shortened, with Kirby striking the ending pose without dancing first. The pose itself has been tweaked; Kirby raises one of his feet, resembling the pose he makes when gaining abilities in his games.
- Kirby smiles during his side taunt.
- Kirby's victory poses have been modified. Two new dances are used, one with Kirby waving his arms and breakdancing, and another with Kirby moonwalking and sliding, both based on Kirby’s Return to Dream Land and ending in a unique pose. Kirby also splits into three separate Kirbys when not in team battles, referencing his home series. This is the first and only game to have Kirby's victory poses finish differently.
- Kirby's idle pose at the end of his victory animation is more animated, with a gentle squash-and-stretch effect leading to a more rubbery feeling.
- Kirby faces forward instead of away when "wiggling" in one of his victory poses.
- When Kirby gains a new Copy Ability, he briefly poses as he does in his home series. This animation can be canceled.
- Some Copy Ability hats have been changed.
- His Samus helmet has a fully opaque visor, as it was in Super Smash Bros.
- His Captain Falcon helmet has triangular eyes, and the visor is opaque as in Super Smash Bros.
- Unlike Smash 4, his Jigglypuff cap matches his costume color, as in previous games up to Brawl.
- His Zelda cap has been changed from the wimple she wore as a child in The Legend of Zelda: Ocarina of Time to a hairstyle matching her new A Link to the Past and A Link Between Worlds-inspired look.
- His Ganondorf cap is consistent with Ganondorf's Ocarina of Time appearance, effectively reverting to its design in Melee.
- His Ike cap uses the hairstyle from his Path of Radiance design, as in Brawl.
- His Wolf cap matches Wolf's Star Fox Zero-based appearance.
- His Robin cap, upon exhausting the Thunder tome, will disappear as it does in all other cases, instead of just disappearing with no animation.
- Kirby's Boxing Ring alias has been changed to "The Pink Demon", a direct translation of the Japanese title, for consistency with its appearance in Kirby: Planet Robobot.
Attributes[edit]
 Like all characters, Kirby's jumpsquat takes 3 frames to complete (down from 4).
- Kirby runs faster (1.57 → 1.727).
- His initial dash is noticeably faster (1.5 → 1.9).
- Kirby walks faster (0.93 → 0.977).
- Kirby's air speed is slightly faster (0.8 → 0.84).
- Kirby's traction is much higher (0.0493 → 0.116), going from below average to being tied for the 17th highest, making easier for him to punish out of shield.
- The changes to taunt interruptibility benefit Kirby more than any other returning veteran, as he can act quicker after discarding a Copy Ability.
 Forward roll grants less intangibility (frames 4-17 → 4-15).
- Back roll has more startup with less intangibility (frames 4-17 → 5-16), and more ending lag (FAF 31 → 36).
- Air dodge grants more intangibility (frames 3-27 → 3-29).
- Air dodge has significantly more ending lag (FAF 33 → 63), being tied with Rosalina for the second slowest air dodge in the game duration-wise, only behind Jigglypuff.
Ground attacks[edit]
- Neutral attack:
- Neutral attack's first and second hits have altered angles (55° → 361°/180° (hit 1), 70° → 361° (hit 2)) and knockback (8 base/30 scaling → 20 base/25/20 scaling (hit 1), 15/30 → 25/15 (hit 2)) to keep opponents close to Kirby, akin to other neutral attacks. This allows them to jab lock, and noticeably improves their previously poor linking ability.
- The first hit has less startup lag (frame 3 → 2), with its total duration reduced as well (FAF 16 → 15).
- The second hit transitions faster into the infinite (frame 8 → 5) and has a lower SDI multiplier (1× → 0.3×), although with a slightly higher hitlag multiplier (1× → 1.2×).
- The infinite has shorter gaps between hits (4 frames → 2), a consistent angle (55°/68°/80° → 361°), a lower hitlag multiplier (1× → 0.5×) and SDI multiplier (1× → 0.4×), and deals less knockback (6/4/2 base/100 scaling → 7 base/35 scaling). This allows it to connect more reliably and makes it much harder to escape.
- The infinite's finisher has less startup (frame 5 → 3) and ending lag (FAF 51 → 40).
- The finisher deals more damage (2% → 3%) and launches at a lower angle (45° → 361°), with knockback not fully compensated (80 base/120 scaling → 70/115), improving its KO potential.
- All hits except the finisher deal less damage (2% → 1.8% (hit 1), 3% → 1.6% (hit 2), 1% → 0.2% (infinite)).
- The first hit has a higher hitlag multiplier (1× → 1.7×), giving opponents more time to SDI it.
- The second hit and each hit of the infinite have a shorter hitbox duration (2 frames → 1), and the latter also has one frame more startup (frame 6 → 7), although this is compensated by its faster transition from the second hit.
- The finisher has smaller hitboxes overall (4.5u/6.5u/5.5u → 5u/5u/5u).
- The finisher has a much higher hitlag multiplier (1× → 3×), making it easier to DI after SDIing the infinite.
- The infinite has gained a shieldstun multiplier of 7×. This allows it to lock opponents into their shields between each hit, and thus pressure them more effectively, but also allows them to cancel shieldstun and punish Kirby more easily if they shield 10 hits or more.
- Kirby's punching hand disappears during his rapid jab; instead, the visual effects have been made thicker.
- Forward tilt:
- Forward tilt has less ending lag (FAF 28 → 24). Combined with the increased shieldstun for ground attacks, this makes it much safer on shield.
- It has much more base knockback (12 → 40), improving its KO potential.
- Up tilt:
- Up tilt's closest hitbox is larger (4u → 4.8u), slightly surpassing the late hit in Brawl.
- The late hit and foot intangibility last one more frame (frames 6-9 → 6-10), matching its duration from Brawl.
- It has less base knockback (40 → 30/26 (clean), 26 (late)) and more knockback scaling (116 → 132/125 (clean), 110 → 130/119 (late)), allowing it to combo better into his aerials from low to mid percents, while also improving its KO potential at very high percents.
- The hitbox at the tip of Kirby's foot launches at a slightly different angle (100° → 98° (clean), 88° → 86° (late)).
- Down tilt:
- Due to the increased traction across the cast, opponents do not slide back as much upon tripping from down tilt, improving its reliability for starting combos.
- It has more knockback scaling (30 → 43), causing it to stop tripping opponents sooner, but improving its combo potential at higher percents if it doesn't trip due to the aforementioned change.
- Dash attack:
- Dash attack has reverted to its Melee iteration, where Kirby does a flaming tackle identical to the Burning copy ability from his home series, although it does not drop him off edges.
- It hits only once instead of six times, possessing a clean hit, mid hit and late hit. This makes it more reliable overall than the previous dash attack, which could sometimes miss its last hit due to the looping hits' poor linking ability.
- It propels Kirby a much farther distance forward, increasing its range.
- It has less startup lag with its hitboxes active fully throughout (frames 12, 15, 19, 24, 30, 35-37 → 9-17 (clean)/18-26 (mid)/27-34 (late)).
- However, the total duration has not been fully compensated, giving it 1 frame more ending lag despite the shorter total duration (FAF 54 → 52).
- It has larger hitboxes (3.5u/3.5u/3.3u (hits 1-5), 3u (hit 6) → 5u (clean), 3.5u (mid & late)).
- It has lower hitlag multipliers (2× → 1.3× (clean)/1× (mid)/0.8× (late)). In combination with its faster startup and consisting of a single hit, this makes it harder to DI.
- The clean hit deals more damage (1% (hits 1-5), 4% (hit 6); 9% total → 12%), with knockback not fully compensated (100 base/70 scaling → 82/71), and launches at a more horizontal angle (65° → 46°). This turns it into a much stronger finisher, KOing opponents at around 160% from center stage and 105% near edges, compared to being unable to KO under 280% regardless of horizontal positioning.
- The mid and late hits deal more damage than the previous dash attack's last hit (4% → 9% (mid), 6% (late)), and the former launches at a higher angle (65° → 76°), allowing it to KO slightly earlier despite its lower knockback values (100 base/70 scaling → 80/50).
- The late hit deals much less knockback (100 base/70 scaling → 80/50), hindering its KO potential despite launching at a higher angle (65° → 76°).
- Forward smash:
- Forward smash's clean hit deals more knockback (30 base/102 scaling → 32/109), improving its KO potential.
- Kirby lunges farther forward, giving it more range.
- It deals more damage when angled down (14% → 15% (clean), 10% → 11% (late)).
- It deals less damage when angled up (16% → 15% (clean), 12% → 11% (late)), although the clean hit is still slightly stronger than in Smash 4 due to its higher knockback values.
- The clean hit has a higher hitlag multiplier (1× → 1.2×), making it easier to DI.
- It has a different startup animation: Kirby pulls back before executing a thrust kick instead of performing a spin first, resembling Smash Kick, one of Smash Bros. Kirby's attacks in Kirby: Planet Robobot.
- Up smash:
- Up smash has less startup (frame 14 → 12), with its leg intangibility frames moved accordingly (frames 14-19 → 12-17) and its total duration reduced (FAF 48 → 46).
- The clean hit has a longer duration, with the late hit having a shorter duration instead (frame 14 (clean)/15-16 (mid)/17-19 (late) → 12-14/15-16/17). This improves its utility as an anti-air, as the clean hit remains active when the hitboxes go above Kirby.
- The clean hit deals more knockback (33/30 base/104/99 scaling → 36 base/104 scaling), improving its KO potential.
- The mid hit's sourspot (12% → 13%) and late hit (12%/11% → 13%/12%) deal more damage.
- Down smash:
- Down smash launches at a semi-spike angle like its foot hitboxes in Melee and Brawl (69° → 29°), significantly improving its edgeguarding ability and allowing it to KO earlier near edges.
- It has less startup lag (frame 10 → 7) with its total duration reduced as well (FAF 54 → 51).
- It has much less knockback scaling (110 → 94), hindering its KO potential from center stage and across the stage.
Aerial attacks[edit]
- All aerials have less landing lag (10 frames → 6 (neutral), 13 → 8 (forward), 17 → 10 (back), 12 → 7 (up), 17 → 16 (down).
- Neutral aerial:
- Neutral aerial has less startup (frame 10 → 8) and significantly less ending lag (FAF 73 → 53).
- The clean hit deals significantly more knockback (30 base/90 scaling → 35/117), allowing it to KO reliably at around 150% from center stage.
- All hitboxes are bigger (8u → 9u (clean), 7u → 8u (mid), 6u → 7u (mid-to-late), 5u → 6u (late)).
- It auto-cancels earlier (frame 56 → 51).
- Forward aerial:
- Forward aerial's first hit launches at a higher angle (45°/80° → 53°/84°) and deals less knockback (35 base/50 scaling → 43/39 (close), 35/38 (far)), allowing it to connect into the second hit more reliably.
- The first and second hits have lower hitlag (1× → 0.8×) and SDI multipliers (1× → 0.5×), making them harder to escape.
- The first and third hits have larger hitboxes (4.3u/4.3u → 5u/4.4u (hit 1), 4.9u → 5.1u (hit 3)), with the latter extending further horizontally (Z offset: 8u-12u → 7u-13u) and vertically (Y offset: 3.9u-4.2u → 3u-4.2u), improving their range.
- Due to its reduced landing lag, and forward smash's improved range and knockback, the first hit has gained a KO setup into it at high percents.
- The second hit extends further outwards (Z offset: 8u-12u → 7u-13u) and below Kirby (Y offset: 3.7u-4.2u → 2.8u-4.1u), improving its horizontal range, and allowing it to hit short or crouching characters, even in a rising short hop.
- The second and third hit deal more damage (3% → 4% (hit 2), 5% → 6% (hit 3).
- The third hit has a longer duration (frames 25-26 → 25-27).
- Back aerial:
- Back aerial has larger hitboxes (4u → 4.5u (clean), 3.4u → 3.5u (late)), and they extend further horizontally (Z offset: 7u-10.5u → 6u-13u (clean), 7u-10u → 6u-11u (late)), noticeably improving its range.
- The clean hit has a longer duration (frames 6-7 → 6-8).
- The clean hit has slightly less base knockback (20 → 15), hindering its KO potential.
- The clean hit has a higher hitlag multiplier (1× → 1.2×), making it easier to DI.
- The late hit has a shorter duration (frames 8-14 → 9-12).
- Up aerial:
- Up aerial has less startup (frame 10 → 8), less ending lag (FAF 40 → 36), and auto-cancels earlier (frame 22 → 20).
- It deals more damage (9% → 10%) and has noticeably more knockback scaling (100 → 115), greatly improving its KO ability, without worsening its combo ability due to its reduced lag.
- Down aerial:
- Down aerial's looping hits deal more damage (1% → 1.3%, total: 7% → 8.5%), with knockback scaling compensated (107 → 100).
- The looping hits have a noticeably lower hitlag multiplier (1.5× → 0.8×), alongside a larger hitbox (5u → 6u), increasing their range and making them harder to escape from.
- It can no longer be frame canceled, with its landing lag not reduced enough to compensate. As a result, it has more landing lag relative to Smash 4 if the landing hit connects, hindering its combo potential.
- The last hit has a smaller hitbox (6.2u → 5.6u).
Throws and other attacks[edit]
- Grabs:
- All grabs have more ending lag (FAF 28 → 34 (standing), 39 → 42 (dash), 33 → 37 (pivot)), albeit they are still among the fastest in the game.
- All grabs have less range (Z2 offset: 10.2u → 9.4u (standing), 12.1u → 11u (dash), -17.9u → -15.7u (pivot)).
- Dash grab has slightly more startup lag (frame 8 → 9).
- Pummel:
- Pummel deals less damage (1.55% → 1%).
- It has less startup (frame 9 → 1) and ending lag (FAF 10 → 6), but deals considerably more hitlag (4 frames → 11), increasing its effective duration.
- Forward throw:
- Forward throw has Kirby jump slightly higher and further backwards at the end of the animation, able to reach the height of Battlefield's lower platform. The additional height weakens its combo potential at low percents, while the additional backwards distance prevents him from benefitting from the extra height at higher percents.
- Back throw:
- Back throw has Kirby jump immediately after releasing the opponent, as opposed to a few frames later, causing him to be much higher in the air after the move ends. Additionally, Kirby lands a short distance forward relative to where the throw is initiated from, rather than in the same spot. This almost completely removes the throw's followups at low percents, and weakens its edgeguarding potential, as it pushes Kirby away from edges.
- It has an altered animation where Kirby doesn't squish as much upon slamming the opponent to the ground.
- Up throw:
- Up throw has gained a collateral hitbox upon landing that deals 7%, similar to Meta Knight's up throw, increasing its effectiveness in battles with multiple opponents.
- Down throw:
- Down throw's first nine hits deal more damage (0.8% → 1%, total: 10.2% → 12%).
- Edge attack:
- Edge attack deals more damage (7% → 9%).
- It no longer inflicts 4 frames of hitlag on the opponent upon release, slightly reducing its hit advantage.
Special moves[edit]
- Inhale:
- Inhale has less startup lag (frame 14 → 10), making it much easier to combo into.
- It has a larger vortex hitbox (7u → 8.5u) with altered hitbox placements (Y offset: 7.5u → 7u, Z offset: 13u → 15.5u), and an additional vortex hitbox, increasing its range.
- It has less ending lag when failing to inhale anything (FAF 73 → 64), and after copying an opponent (FAF 30 → 21), preventing the copied opponent from being able to hit Kirby before he can move.
- The swallowing hitboxes are larger (4.2u/4.6u → 5.3u/5.8u), increasing the safety of copying an opponent when others are nearby.
- It can catch projectiles to heal Kirby, albeit with noticeable ending lag.
- Kirby can keep certain projectiles, like a fully charged Charge Shot, inside his mouth and then choose to spit them out as a star that deals damage or swallow them to heal himself.
- Kirby dies later when performing a Kirbycide, though he still dies first. This gives the opponent less time to recover after Kirby is KO'd.
- Kirby receives a 1.2× damage multiplier for his Copy Abilities compared to the copied opponent's neutral special.
- Kirby cannot lose his Copy Ability by getting hit for 20 seconds after receiving it, allowing him to keep it much more efficiently.
- The distance an opponent travels in a star scales with damage, allowing Kirby to KO spat opponents near edges more effectively at higher percents.
- Rather than a 3.125% chance regardless of move, the chance for Kirby to lose his Copy Ability by getting hit is equal to the damage % taken, thus increasing it for hits that deal more than 3.125% damage.
- This also means moves that deal less than 3.125% (like some multi-hit moves) are less likely to make Kirby lose his ability.
- Inhale has a more opaque visual effect.
- Hammer Flip:
- Hammer launches at a lower angle when not fully charged (53° → 48° (grounded), 55° → 50° (aerial)), slightly improving its KO potential.
- The grounded version has intangibility (frames 2-10) and more super armor (frames 11-13 → 11-17) when fully charged.
- The aerial version deals slightly more damage (15%-27% → 16%-28%) with no compensation on knockback.
- The aerial version sends at a higher angle when fully charged (45° → 50°), slightly reducing its KO potential despite its increased damage.
- Kirby may use his uncharged or fully charged voice lines from Smash 4 when swinging an uncharged Hammer.
- A fully charged Hammer triggers Special Zoom.
- Final Cutter:
- Final Cutter has less landing lag (34 frames → 30).
- It can snap to the ledge earlier (frame 36 → 33).
- The rising hit has a longer duration (frames 23-24 → 23-26). The set knockback during the additional active frames is lower (117/102 → 60/50) to link into the falling hit as well.
- The landing hit no longer has set knockback (120 set/100 scaling → 85 base/95 scaling).
- The falling hit has smaller hitboxes (6.5u → 6u (meteor), 6u → 5.5u (late)).
- The falling hit's meteor smash portion has slightly less set knockback (100 → 96).
- The projectile has a lower hitlag multiplier (1× → 0.7×), although this is compensated by the universal increase to hitlag.
- Stone:
- Aerial Stone has super armor during startup (frames 19-28).
- It deals more knockback while falling (65 base/70 scaling → 69/76).
- The landing hit launches at a higher angle (0° → 25°) and has much more base knockback (40 → 86), although with its knockback scaling partly compensated (40 → 30), allowing it to set up edgeguards more effectively, while also increasing its KO power.
- The aerial hit can no longer combo into the landing hit, significantly decreasing its shield damage.
- If Stone is hit with a reversing move such as Cape, the transformation will visually spin around.
- Stone can transform into a Treasure Chest found in The Legend of Zelda: Breath of the Wild's shrines.
- If Kirby is metal when using Stone, the transformation will also be metal.
- Kirby doesn't change back to normal if he lands underwater.
- Kirby briefly does his guarding pose in the startup animation, referencing the animation that plays after obtaining the Stone ability in Kirby Super Star.
- Ultra Sword:
- The final hit has less knockback scaling (100 → 95), hindering its KO potential.
- It features a special background effect upon usage, in a similar fashion to the use of Super Abilities in Kirby's Return to Dream Land.
Update history[edit]
Aside from glitch fixes, Kirby has been buffed significantly via game updates. Update 2.0.0 improved his ground game by reducing the ending lag of his forward tilt, along with granting it increased base knockback, giving it newfound KO potential at very high percentages, while also boosting its safety at low percents. Dash attack's clean hit was also given a larger hitbox, and its damage output was increased overall. Update 3.0.0 improved the duration of his up smash's clean hit, making it easier to land on aerial opponents, and reduced the ending lag on his neutral aerial. Inhale's Copy Ability grace period was also extended, allowing Kirby to safely keep his abilities for longer, and the probability of him losing them when receiving damage was also reduced. Furthermore, his down throw's damage output was increased, and Final Cutter can grab ledges earlier, making it safer for recovery.
Update 6.0.0 granted Kirby some of his most significant improvements. Both neutral and up aerials had their startup reduced and their knockback increased, improving their combo and KO potential. Inhale had its startup reduced as well, and the grace period for Copy Ability was further increased, along with a further reduction to the probability of losing his abilities. Up smash's sourspot had its knockback increased, improving its consistency, and neutral attack's startup was reduced by 1 frame. Following this, update 7.0.0 enlarged Kirby's shield, making him much less susceptible to shield pokes.
Kirby has been buffed once more in update 8.0.0, strengthening a handful of his finishers such as down smash, back aerial, and Stone, with the former having decreased start-up, alleviating the nerfs they initially received in the transition to Ultimate. Dash attack had its clean hit's knockback increased and its previously high endlag reduced, with cross-ups now being much safer and as well as giving the late hit follow-up potential. Although forward aerial's increased damage output and increased knockback on the final hit makes it harder for him to follow up with his combos at low percents, it is an overall benefit since it improves its KO power at the ledge, renders his finishers to be more potent, while indirectly giving his other combo tools more flexibility. Update 13.0.1 added a minor buff/bug fix of Kirby's version of Lightning Buster less ending lag to match Mythra.
Overall, Kirby fares significantly better than he did at the launch of Ultimate, with his combo potential and mobility being greatly improved, as well as the combos doing more damage, which makes his neutral game more viable and leaves him less reliant on gimmicks to consistently close stocks.
- Up aerial has less ending lag (FAF 40 → 38).
- The animation for Final Cutter has been adjusted.
 After copying Pac-Man's Bonus Fruit, Key will no longer be discarded when it is recycled.
- Kirby's Dash attack has greater range and all hitboxes deal 2% more damage (10%/7%/4% → 12%/9%/6%), with knockback not fully compensated.
- Forward tilt has increased base knockback (12 → 40) and reduced ending lag (frame 28 → 24). This improves its safety as a spacing tool, and even allows it to KO at higher percents.
- Stone now has damage-based armor starting on frame 19 when used in the air. This makes the move harder to intercept.
- Up smash's clean hit has a longer duration, with the late hit having a shorter duration instead (frame 12 (strong)/13-14 (mid)/15-17 (late) → 12-14/15-16/17).
- Neutral aerial has less ending lag (FAF 63 → 55) and auto-cancels earlier (frame 56 → 51).
- The first 9 hits of down throw deal more damage (0.8% → 1%, total: 10.2% → 12%).
- Inhale
- Kirby dies later when performing a Kirbycide with Inhale, though he still dies first (distance from the blastzone: (-10 → -4). This gives the opponent less time to recover after Kirby is KO'd.
- Kirby cannot lose Copy Abilities received by Inhale for a longer period of time (5 seconds → 10).
- Kirby is less likely to lose Copy Abilities when getting hit (Chance to lose: Damage Received/70 * 1.3 → Damage Received/70).
- Fixed multiple Inhale Glitches:
- Fixed a visual glitch where Kirby would retain parts of Metal status with Wii Fit Trainer.
- Fixed a visual glitch where Kirby’s Bandana from Snake would move during the camera view of each frame.
- Opponents now properly gain intangibility when caught by Inhale; previously opponents would become stuck in a hitstun during Inhale.
- Removed Infinite floating glitch that occurs when Kirby uses multiple copied Mii Swordfighter's Gale Strikes in the air after perfoming a throw that left him in the air.
- Removed Gliding glitch when Kirby uses a copied and B-reversed Mii Swordfighter's Gale Strike while running.
- Final Cutter can snap to the ledge earlier (frame 36 → 33).
- Kirby can no longer perform the initial dash cancel to Pikmin Throw.
- Fixed an issue that resulted in Kirby being unable to perform air dodges, shield and crouch after attempting to change then losing the chosen Monado Art.
- Scenarios where the opponent would not escape from Inhale after Kirby gets hitstunned at a specific frame has been fixed.
- Neutral attack's first hit has less startup (frame 3 → 2), with its total duration reduced as well (FAF 16 → 15).
- Up smash's clean sourspot deals more knockback (30 base/99 scaling → 36/104), with the knockback values matching the sweetspots.
- Neutral aerial has less startup (frame 10 → 8) with its total duration reduced as well (FAF 55 → 53), and the clean hit has more knockback scaling (100 → 117), KOing under 150% from the center of Final Destination.
- Up aerial has less startup (frame 10 → 8) with its total duration reduced as well (FAF 38 → 36), and deals more damage (9% → 10%) with more knockback scaling (108 → 115), KOing under 160% from ground level.
- Inhale has less startup (frame 14 → 10) with its total duration reduced as well (FAF 68 → 64).
- Kirby cannot lose Copy Abilities received by Inhale for a longer period of time (10 seconds → 20).
- Kirby is less likely to lose Copy Abilities when getting hit (Chance to lose: Damage Received/70 * 100% → Damage Received/70 * 70%).
- Overall shield size has been increased.
- Dash attack:
- Dash attack has less ending lag (FAF 60 → 52).
- The clean hit has more knockback scaling (66 → 71).
- Down smash:
- Down smash has less startup (frame 10 → 7), with its total duration reduced as well (FAF 54 → 51).
- It has more knockback scaling (89 → 94).
- Forward aerial's second and third hit deal more damage (3% → 4% (hit 2), 5% → 6% (hit 3); total: 12% → 14%), with base knockback on the third hit not fully compensated (30 → 24).
- Back aerial's sweetspot has more knockback scaling (100 → 104).
- Stone deals more knockback (65 base/70 scaling → 69/76 (aerial), 24 scaling → 30 (shockwave)).
- Kirby's version of Lightning Buster has less ending lag (FAF 71 → 69), now matching Mythra's.
Moveset[edit]
- Kirby can perform 5 double jumps, tied with Jigglypuff and Meta Knight for most double jumps in the game.
For a gallery of Kirby's hitboxes, see here.
Note: All numbers are listed as base damage, without the 1v1 multiplier.
| Name | Damage | Description | ||
|---|---|---|---|---|
| Neutral attack | Punch (パンチ) / Follow-Up Punch (追いパンチ) / Vulcan Jab (バルカンジャブ) / Vulcan Finish (バルカンフィニッシュ) | 1.8% | A one-two combo. When button mashed, Kirby performs the Vulcan Jab from the Fighter ability before concluding with the Smash Punch. It is very quick due to coming out on frame 2, and its first two hits have very minimal ending lag. These traits make it effective for jab canceling or as an out of shield option. Both hits can also jab lock. | |
| 1.6% | ||||
| 0.2% (loop), 3% (last) | ||||
| Forward tilt | Spinning Kick (スピニングキック) | 8% (base), 7% (tip) | Throws a spinning roundhouse kick. It is quick, due to coming out on frame 5, having very little ending lag and can be angled. The tip of Kirby's foot is a sourspot, but it is out-prioritized by the other hitboxes. Due to its above average knockback, it can KO middleweights starting at around 140% at the edge of Final Destination when sweetspotted; this makes it a useful 2-framing option when angled downwards. | |
| Up tilt | Kirby Tail (カービィテイル) | 5% (clean), 4% (late) | A scorpion kick. Although its damage output is low, it is a very useful combo starter at low percents, due to it coming out on frame 4 and having both very minimal ending lag and disjointed range which also reaches slightly in front of him. It also renders Kirby's foot intangible throughout its duration, which can give him protection above him and allows it to be used as an anti-air tool despite its rather poor range. | |
| Down tilt | Squish Kick (ローキック, Low Kick) | 6% | A crouching shin kick. It is fairly spammable due to coming out on frame 4 and having minimal ending lag. It also moves Kirby marginally forward when using it. When coupled with its tripping potential, and the fact that Kirby's crouch allows him to dodge many attacks with high hitboxes, it can be a very useful set-up option, especially after a crouch, connecting in one of his strongest moves if it successfully trips an opponent. | |
| Dash attack | Burning (バーニング) | 12% (clean), 9% (mid), 6% (late) | The Burn attack from the Burning ability from Kirby's Adventure. It has decent startup at frame 9 with a long-lasting hitbox that grows weaker over time. Its clean hitbox is one of the strongest dash attacks in the game, KOing middleweights at around 100% from the edge of Final Destination, though it is extremely punishable on shield due to its ending lag. A powerful punish option. Unlike Melee, it does not slide off of edges. Its late hit can start combos, but landing it is risky. | |
| Forward smash | Smash Kick (スマッシュキック) | 15% (clean), 11% (late) | Based on the Spin Kick from the Fighter ability from Kirby Super Star. Due to becoming active at frame 13, it is quite fast for a forward smash. It can be angled, moderately moves Kirby forward and the clean hit is slightly disjointed, giving it deceptively good range. Its clean hitbox also deals respectable damage and has very high knockback growth, which makes it a powerful and reliable KOing option. While near the edge of Final Destination, it KOs middleweights starting at around 70%. However, its late hitbox lacks reliable KO potential due to its high base knockback at the expense of very low knockback scaling. The hitbox also has a deceptively short duration compared to what it seems, and has noticeable ending lag (29 frames), making it unsafe on shield and punishable if not used correctly. A powerful punish option that is also capable of 2-framing reliably if angled downwards. | |
| Up smash | Somersault Kick (サマーソルトキック) | 15%/14% (clean), 14%/13% (mid), 13%/12% (late) | A bicycle kick. It can hit behind Kirby, while its clean hitbox deals respectable damage and has very high knockback growth akin to forward smash, KOing middleweights at around 100% from anywhere on Final Destination. Kirby's foot is also rendered intangible throughout its duration. Has moderate startup and ending lag, coming out on frame 12 and having 27 frames of ending lag, which gives it the fastest interruptibility of Kirby's smash attacks. Its mid hitbox is noticeably weaker, but still has surprisingly respectable KO power for an up smash, KOing middleweights at around 120% from anywhere on Final Destination. However, it has a sourspot on the tip of Kirby's foot that deals less damage at any point of the move and the late hit has extremely low knockback, not KOing opponents even at Sudden Death percentages. | |
| Down smash | Propeller Kick (プロペラキック) | 14% (clean), 10% (late) | A spinning split kick. It hits in front of and behind Kirby, and its clean hitbox deals respectable damage and has very high knockback growth like his forward and up smashes. Comes out on frame 7, with the fastest startup of his smash attacks. It semi-spikes with above average power, with its clean hitbox KOing middleweights starting at around 100% from the edge of Final Destination, and is additionally a reliable 2-framing option that is very useful for edgeguarding as a result, and it can also punish defensive ot. It also renders Kirby's feet intangible for 10 frames starting from frame 5 until the clean hit ceases at frame 14. However, its late hitbox has significantly lower KO potential due to its lower damage, not KOing middleweights on the ledge of Final Destination until around 140%. Due to it having 31 frames of ending lag, it has the highest ending lag of Kirby's smash attacks, and combined with its long duration, it's very punishable if shielded or whiffed. | |
| Neutral aerial | Twinkle Star (ティンクルスター) | 10% (clean), 8% (mid), 6% (mid-to-late), 4% (late) | A cartwheel that also appears in the Smash Bros. ability. Its very low landing lag makes it a decent set-up option at low percents or a tool for shield pressure when short hopped, while its very high knockback growth makes it a decent anti-pressure option. In addition, on Final Destination, it can KO middleweights under 160% at center stage and at around 110% at the ledge if landing the clean hitbox, making it one of the strongest neutral aerials in the game, which also makes it a powerful out of shield option. It has large hitboxes that cover Kirby's body, especially at the beginning, giving good protection and coverage around him, and it can also edgeguard. It has properties of a sex kick and autocancels in a full hop. Due to coming out on frame 8, it has the second fastest startup of Kirby's aerials, although this also makes it slower in comparison to other sex kicks. | |
| Forward aerial | Triple Attack (トリプルアタック) | 4% (hit 1), 4% (hit 2), 6% (hit 3) | A series of three consecutive aerial kicks. Due to coming out on frame 10, it has the second slowest startup of Kirby's aerials. The first two hits have low knockback, which allows them to connect reliably into the third hit; however, they are notably inconsistent and the first hit doesn't use the autolink angle, meaning that it might experience fallouts as a result. Its low landing lag also allows the first or second hit to be used as set-up options into other moves, such as an up smash or forward smash at high percents. A versatile aerial that is good for combos and edgeguarding, it is capable of connecting into itself for a wall of pain in certain instances due to its low ending lag, and it can also combo into other moves at low to mid percents other than on landing. As of update 8.0.0, it deals the highest damage of Kirby's aerials, and while this makes it more difficult to connect two forward aerials at low to mid percents if the opponent is small or too light, the third hit's increased knockback has granted it better KO potential at high percents when edgeguarding or at the ledge due to its very high knockback growth. It can also be used as an out-of-shield option if Kirby is too far away to hit the opponent with neutral aerial or up aerial instead, and its multiple hits can pressure shields when combined with the low landing lag. It auto-cancels in a full hop. | |
| Back aerial | Drop Kick (ドロップキック) | 13% (clean), 8% (late) | A dropkick. It functions as a sex kick, but it also has the lowest amount of start-up lag out of Kirby's aerials, due to it coming out on frame 6. It can autocancel in a short hop and its clean hitbox possesses very high knockback growth, which make it a viable KOing option. While near the edge of Final Destination, its clean hitbox KOs middleweights at around 105-110%, which is around the same KO percentages of Kirby's clean neutral aerial. It also boasts good range due to its slightly disjointed hitbox, which makes it a viable edge-guarding option, and allows it use in a wall of pain, as well as a good approaching option if used in a reverse aerial rush. These attributes make it one of Kirby's best finishers, but it has the highest amount of ending lag out of Kirby's aerials, totaling at 28 frames - a 6 frame increase from SSB4. | |
| Up aerial | Air Cutter (エアカッター) | 10% | A bycicle kick similar to his up smash. Comes out on frame 8, tied with neutral aerial for having the second lowest startup of Kirby's aerials. A decent juggling option, it can also be used for continuing a combo due to its low landing lag. Can be used as an out-of-shield option if the opponent has a large enough hurtbox. Due to its decent damage and knockback, it is strong enough to KO middlweights at around 150% on Final Destination on ground level, making it a useful KO option after a full hop, or above platforms. It can auto-cancel in a short hop fast fall. | |
| Down aerial | Screwdriver (スクリュードライバー) | 1.3% (hits 1-5), 2% (hit 6), 2% (landing) | A diagonal corkscrew dropkick. A decent combo starter on grounded opponents and due its low ending lag, and the final hit is a weak meteor smash, which makes it useful for edgeguarding and allows it to gimp characters with short recoveries or to combo with it. It can even lead into a footstool jump on fast-fallers and heavyweights. While it has the highest amount of start-up lag out of Kirby's aerials and of his standard moveset due to coming out on frame 18, which also makes it one of the slowest down aerials in the game in terms of start-up, and it doesn't auto-cancel in a short hop, it has landing hitboxes, giving Kirby a decent window to safely land while tumbling. The landing hit launches vertically, giving them some combo potential. While possessing a rather good auto-canceling window and being good for edgeguarding, its usage offstage is only serviceable against characters with slow or exploitable recoveries, as the final hit cannot reliably KO characters even as high as 180% offstage, and it deals the least damage and knockback out of all of Kirby's aerials. It also has the highest landing lag of of Kirby's aerials, and due to this and the final hit's low damage output, it's unsafe on shield despite of the move's low ending lag, making it punishable when used recklessly. | |
| Grab | Grab (つかみ) | — | Reaches out with one hand. Based on the startup animation of the Torent Lariat from the Suplex ability from Kirby Super Star. It's one of the fastest grabs, but has somewhat short range. | |
| Pummel | Grab Slap (つかみビンタ) | 1% | A punch. It possesses a low damage output, but is one of the fastest pummels. | |
| Forward throw | Power Bomb (パワーボム) | 5% | A throw resembling the Rock Drop from the Suplex ability from Kirby Super Star. Unlike the majority of forward throws, it possesses combo potential. Its most reliable follow-ups are neutral, forward and down aerials at low percents, and up aerial and Final Cutter at medium percents. Using it below a Battlefield platform will have Kirby land on said platform, hindering followups at lower percents. However, as of patch 6.0.0, the faster start-up on neutral and up aerials allow him to combo with them if he lands on a platform, but those follow-ups depend on the character. | |
| Back throw | Brain Buster (ブレーンバスター) | 8% | A back throw resembling the backwards dive from the Backdrop ability from Kirby's Adventure. Despite possessing an average damage output and very low base knockback, it has very high knockback growth. As a result, it has decent KO potential. While near the edge of Final Destination, it KOs middleweights at around 140%. | |
| Up throw | Air Drop (いずな落とし, Izuna Drop) | 10% (throw), 7% (landing) | The Air Drop from the Ninja ability from Kirby Super Star. Like Meta Knight's up throw, it can damage and launch bystanders upon landing. It is weaker than his back throw when used at the edge, but it is consistently strong regardless of where it is used on the stage. Great knockback, KOing middleweights at around 160% from anywhere on Final Destination without rage; though it is extremely susceptible to DI because opponents are released late. As Kirby jumps up to perform it, he can land onto platforms above him upon descending, which enables it to KO even earlier. | |
| Down throw | Fury Stomp (もうれつストンピング, Fury Stomping) | 1% (hits 1-10), 2% (throw) | The Fury Stomp from the Suplex ability from Kirby Super Star. It is Kirby's most damaging throw at 12%, which makes it useful for damage-racking when his other throws cannot do so. It can also damage nearby opponents. Due to its high knockback and unfavorable angle in comparison to other down throws, it launches too high for followups, so it is his most situational throw. However, it has enough knockback to KO middleweights at around 200% on Final Destination if Kirby has no rage, so it can be used as a situational KO option, but only on certain high platforms. On the top platform of Battlefield, it will KO middleweights at around 170-175% without rage. | |
| Floor attack (front) | 7% | Performs a spinning kick before getting up. Front kick’s pose reassembles the Slide Kick from the Kirby series. | ||
| Floor attack (back) | 7% | Performs a Kicks on one side and then the other before getting up. | ||
| Floor attack (trip) | Break Spin | 5% | The Break Spin from the yo-yo ability from Kirby Super Star. | |
| Edge attack | 9% | Performs a cartwheeling kick while climbing up. It has surprisingly good range compared to several other characters' edge attacks. | ||
| Neutral special | Inhale | 10% (swallow), 6% (spit) | Inhales the opponent. It has a grabbox and can be held indefinitely. Upon Inhaling an opponent, Kirby can spit them out as a star to deal damage to them and any nearby opponents, copy their neutral special move, or walk around slowly and/or perform a short hop. However, the opponent can escape from Kirby's mouth via button mashing. Some characters will give Kirby a slight variation of their neutral special due to mechanics that would not work properly when copied, such as Luma Shot and Pikmin Pluck. When inhaling projectiles, Kirby will heal off a small amount of percentage, and when inhaling large projectiles, such as Samus's fully charged Charge Shot, it can be spat out as a star. Kirby's copied neutral special's damage output has a x1.2 multiplier compared to the opponent's version. | |
| Side special | Hammer Flip | 19% (grounded uncharged), 16% (aerial uncharged), 35% (grounded fully charged), 28% (aerial fully charged) | The attack of the same name from the Hammer ability. It is chargeable and, when fully charged, Kirby's hammer will ignite and deal recoil damage. He can also slowly walk and jump while charging. When it is used in midair, Kirby will swing his hammer twice, with each hit being equally powerful. While near the edge of Final Destination, uncharged Hammer Flip KOs middleweights at around 65%. Fully charged Hammer Flip KOs middleweights at around 6%. Although weaker, aerial Hammer Flip nevertheless possesses impressive KO potential. While near the edge of Final Destination, it KOs middleweights at around 86%. Its fully charged version KOs them at around 33%. When fully charged and on the ground, it makes Kirby invincible from frame 2-10 and gives him super armor from frame 11-17. To counteract its power, it has high startup and endlag, making its usage in competitive play outside of shield break punishes or covering get-up options from ledge very limited. | |
| Up special | Final Cutter | 5% (ascent), 2% (descent), 5% (landing), 6% (shockwave) | The attack of the same name from the Cutter ability. It weakly meteor smashes any opponents he comes into contact with upon descending, which is somewhat useful as a sacrificial KO or to edgeguard opponents who run out of ledge invincibility, though not to the extent of similar moves like Aether. The sword also emits a shockwave upon hitting a solid surface, which is Kirby's only projectile aside from spitting out an Inhaled opponent. Solid vertical recovery distance and has serviceable horizontal distance when angled. Can also punish improper aerial approaches, but overuse will render Kirby vulnerable to punishment due to the high start-up. Kirby cannot sweetspot the edge until the peak of the ascending slash and the move doesn't have a hitbox directly above him, making this recovery vulnerable to edgeguarding, and the while the shockwave moves quickly, it has limited ranged and cannot be used until after he lands. If the platform beneath Kirby disappears or if he is pushed off while he is still in the landing animation, he will be rendered helpless. | |
| Down special | Stone | 18% (impact), 14% (shockwave) | The Stone Change (while Kirby is on the ground) and the Stone Smash (while Kirby is in the air) from the Stone ability. While transformed, Kirby gains armor that can withstand at least 25%, though he can be grabbed while transformed. Stone Smash also grants super armor during startup (frames 19-28), and can also be canceled in midair by pressing the special button, which can be used for mindgames. However, transforming and canceling the transformation takes a noticeable amount of time, which leaves Kirby vulnerable to punishes if not used carefully. Thanks to its high damage output, Stone Smash KOs middleweights at around 100% and deals considerable shield damage. Although Stone Change is considerably weaker, it is still a relatively potent semi-spike and comes out much faster thanks to its shockwave (frame 11 instead of 29). Stone's usage include combating juggles, or being used as a landing/edgeguarding tool; however, due to its high overall lag and predictability in the air, it is not often used in competitive play. | |
| Final Smash | Ultra Sword | 3% (stun), 5% (hit 1), 2.5% (hits 2-9), 16% (hit 10) | The Super Ability of the same name. Kirby wields a gigantic sword to repeatedly slash the opponent before enlarging the sword and then concluding with a powerful downward-arcing slash. While near the edge of Final Destination, it KOs middleweights at around 15%. | |
Stats[edit]
Kirby's gravity and falling speed are set to 0.068544 and 1.8, respectively, during hitstun when launched at angles between 70°-110°.
| Stats | Weight | Dash speed | Walk speed | Traction | Air friction | Air speed | Air acceleration | Gravity | Falling speed | Jumpsquat | Jump Height | Double jump Height |
|---|---|---|---|---|---|---|---|---|---|---|---|---|
| Value | 79 | 1.9 – Initial dash 1.727 – Run |
0.977 | 0.116 | 0.015 | 0.84 | 0.03 – Base 0.065 – Additional |
0.064 | 1.23 – Base 1.968 – Fast-fall |
3 | 25.37 - Base 12.24 - Short hop |
21.06378125, 18.528125, 15.931125, 13.34569531, 10.82288281 |
Announcer call[edit]

English/Japanese/Chinese
On-screen appearance[edit]
- Kirby rides in on his classic Warp Star, followed by a small explosion while flipping off of it.
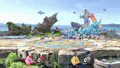
Kirby's on-screen appearance

Taunts[edit]
All taunts remove Kirby's Copy Ability if he has one.
- Up taunt: Smiles and poses, producing a star.
- Side taunt: Spins around playfully, then says "Nyum!" while standing on a single foot. Based on his "character chosen" animation in the original Super Smash Bros., albeit much more subtle.
- Down taunt: Leans toward the screen and says "Hi!" while waving his arms.
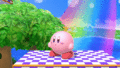
Kirby's up taunt.
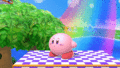
Kirby's side taunt.
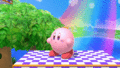
Kirby's down taunt.


Idle poses[edit]
- Dozes off, then shakes his head awake.
- Turns offscreen to face the other side of the screen, then turns back to his traditional idling stance.
Kirby's first idle pose.
Kirby's second idle pose.


Crowd cheer[edit]
| Cheer (English) | Cheer (Japanese/Chinese) | Cheer (Italian) | Cheer (Dutch) | Cheer (French) | |
|---|---|---|---|---|---|
| Cheer | |||||
| Description | Kir - by! | Ka - a - bii! | Kir - by! | Kirby! Kirby! Kirby! | Kir - by! |
| Cheer (German) | Cheer (Spanish) | Cheer (Russian) | Cheer (Korean) | |
|---|---|---|---|---|
| Cheer | ||||
| Description | Kir - by! | Kir - by! | Kir - by! Kir - by! | Keo - bi! |
Victory poses[edit]
Note: Outside of team battles, Kirby's victory poses have three separate Kirbys, referencing the Kirby Dance from his home series.
- Left: Moonwalks to the left, twists, slides to the right, and jumps into a pose where he stands on one foot. Based on Kirby's dances in Kirby's Return to Dream Land and ends with a pose similar to his official Brawl render and his character select animation in Super Smash Bros., albeit much more subtle.
- Up: Cartwheels to the left twice, wiggles, and does a front flip before posing. The ending pose originated from the Kirby Dance in Kirby's Adventure.
- Right: Jumps twice, shuffles backwards, performs a breakdance, and poses while facing slightly away from the camera. Based on Kirby's dances in Kirby's Return to Dream Land, with the ending pose also appearing in said game.


In competitive play[edit]
Most historically significant players[edit]
- See also: Category:Kirby players (SSBU)
 Ferretkuma - Although his overall activity has been limited, he notably placed 17th at the major Umebura SP 7, which is tied for the highest placement for a Kirby player at a major.
 Guilheww - One of the two best Kirby players in the post-online metagame, consistently placing highly at Mexican events including 2nd at the regional Hooters Ultimate Tournament while upsetting Maister. His 17th-place finish at the major Delfino Maza 2023 is tied for the highest placement for a Kirby player at a major.
 JeJaJeJa - One of the two best Kirby players in the post-online metagame, having placed well at many events, including 33rd at the supermajors Super Smash Con 2022, Let's Make Big Moves 2023 and Collision 2024. In addition, his 17th-place finish at Port Priority 7 is tied for the highest placement for a Kirby player at a major, and he won the regional Afterburner 2024.
 Jesuischoq - One of the best Kirby players in the world in the early metagame who regularly placed highly at European events, including 2nd at the regional Smash4Glory - Ultimate Edition upsetting Glutonny, and 13th at the superregional VCA 2019.
- Konokururu - One of the best Kirby players in the world in the post-online metagame. Although his placements have been less consistent than JeJaJeJa, his 17th place finish at the supermajor Kagaribi 7 is the highest placement for a Kirby player at a supermajor.
Tier placement and history[edit]
Since the release of Ultimate, several professionals immediately noticed Kirby's significant flaws from the previous installment had been retained, in spite of the mechanics suiting him better in comparison to SSB4. In addition, players notified his vulnerability to being camped, poor range, slow air speed, as well as platforms potentially negating all follow-ups should he start a combo with a forward throw. Despite some representation and decent results from players such as Jesuischoq and Ferretkuma, most of the community considered Kirby to be a low or bottom-tier in the early metagame, with some going as far as to consider Kirby could be one of the worst characters in the game.
However, Kirby would receive significant buffs in balance patches, more than almost every other character, especially in patches 6.0.0 and 8.0.0. These patches would give him major improvements, improving his overall frame data, KO power and versatility to many of his attacks, allowing him to be more consistent in closing stocks and starting comboes. In addition, although Kirby's representation remained rather small and was often in the bottom 10, he began seeing more success both online and offline from players such as Guilheww and JeJaJeJa, who were able to achieve strong results with him in national tournaments and in majors. These small positives were enough to raise opinions on Kirby's viability slightly. As such, although Kirby continues to have little impact on the metagame, he is usually not thought of as a candidate for the worst character in the game. This is reflected in Kirby's placement on the first tier list, where he is ranked 76th as a low-tier character, and he rose just one position in the second and current tier list, although gradually improving results from dedicated players have led a few players to believe Kirby should be ranked higher thanks to his improved advantage state.
Classic Mode: Gourmet Clash[edit]

Kirby's opponents are characters who, like him, are known for their gluttonous appetites in their respective series. For each battle, Kirby and his opponent each spawn with 35% damage and several food items appear on the stage as the match begins.
| Round | Opponent | Stage | Music |
|---|---|---|---|
| 1 | Pac-Land | PAC-MAN | |
| 2 | Giant |
Yoshi's Island | Ground Theme - Super Mario World |
| 3 | Jungle Japes | Jungle Hijinxs | |
| 4 | Giant |
Gamer | WarioWare, Inc. |
| 5 | Kongo Jungle | Mangrove Cove | |
| 6 | Giant |
Fountain of Dreams | Gourmet Race (64) |
| Bonus Stage | |||
| Final | Marx | Mysterious Dimension | Vs. Marx |
Credits roll after completing Classic Mode. Completing it as Kirby has Staff Credits - Kirby's Dream Land accompany the credits.
Character unlock tree[edit]
Kirby's Classic Mode character unlock tree includes the following characters in order:
Each character can be unlocked by clearing Kirby's Classic Mode, or the Classic Mode of any preceding character, if all preceding characters have been unlocked. Once all the above characters are unlocked, clearing Classic Mode with any of them will default to Mario's character unlock tree, starting with Sonic.
Role in World of Light[edit]


Kirby was among the fighters summoned to the cliffside to assist in defeating an army of Master Hands.
After Galeem absorbed all of the Master Hands during the opening cutscene, he began to unleash beams of light that vaporized all of the fighters and later placed all of them under Galeem's imprisonment. Kirby was the sole survivor after escaping on his Warp Star, barely warping from the beams before managing to engulf him. Galeem has erased the world and the universe into nothing other than a barren wasteland, where Kirby, who has ended up becoming the sole survivor of Galeem's onslaught upon the universe, makes a rough emergency landing into a nearby canyon. As he recovers from his crash-landing, he looks towards a vast landscape consisting of various areas, some of which are recognizable as coming from the fighters' old worlds. Despite being the sole survivor, Kirby is still seen as a puppet fighter in a few areas of the mode, such as Spirit Battles. It was later explained that Galeem had analyzed Kirby at some point during the story and had the ability to materialize puppet fighters in his image without requiring Kirby himself.
Kirby crash-lands in a canyon area, and begins his quest to save the other fighters as the initial starting protagonist.
He is later seen alongside several other fighters, preparing their final stand against Galeem and Dharkon.
Spirits[edit]
Kirby's fighter spirit can be obtained by completing Classic Mode. It is also available periodically for purchase in the shop for 300 Gold. Starting World of Light and playing as Kirby allows the player to preview the first spirit below in the Spirit List under the name "???". As a fighter spirit, it cannot be used in Spirit Battles and is purely aesthetic. His fighter spirit has an alternate version that replaces it with his artwork in Ultimate.
Additionally, Kirby makes an appearance in various support spirits.
323. Kirby
326. Warp Star
327. Star Rod
328. Ultra Sword
329. Robobot Armor


In Spirit Battles[edit]
As the main opponent[edit]
| Spirit | Battle parameters | Inspiration | |||||||||
|---|---|---|---|---|---|---|---|---|---|---|---|
| No. | Image | Name | Series | Enemy Fighter(s) | Type | Power | Stage | Rules | Conditions | Music | Character |
| 48 |  |
Boo | Super Mario Series | •Kirby |
1,800 | Mushroom Kingdom U (Slide Lift Tower) | •Invisibility | •The enemy is invisible •The enemy's shield has extra durability |
Main Theme - Luigi's Mansion (Brawl) | ||
| 50 |  |
Bob-omb | Super Mario Series | •Kirby |
3,500 | Mushroom Kingdom | •Item: Bob-omb | •The enemy's throwing-type items have increased power •The enemy has increased move speed |
Airship Theme - Super Mario Bros. 3 | ||
| 66 |  |
King Bob-omb | Super Mario Series | •Giant Kirby |
4,100 | Peach's Castle | •Item: Bob-omb | •The enemy is giant •The enemy is easily distracted by items |
Main Theme - Super Mario 64 | ||
| 69 | Piantas | Super Mario Series | •Kirby Team |
1,600 | Delfino Plaza | •Item Tidal Wave •Item: Mushrooms |
•Certain items will appear in large numbers after a little while | Delfino Plaza (Original) | |||
| 71 |  |
Luma | Super Mario Series | •Kirby Team |
3,500 | Mario Galaxy | •Item: Stars | •Take your strongest team into this no-frills battle | Rosalina in the Observatory / Luma's Theme | ||
| 74 |  |
Lubba | Super Mario Series | •Giant Kirby |
4,100 | Mario Galaxy | •Hazard: Low Gravity •Item: Super Launch Star |
•Gravity is reduced •The enemy starts the battle with a Super Launch Star •The enemy is giant |
The Starship Sails | ||
| 116 |  |
Viruses | Dr. Mario Series | •Kirby |
4,000 | Mario Bros. (Battlefield form) | N/A | •Timed battle (1:30) | Fever | Chill Virus (blue costume) Weird Virus (yellow costume) Fever Virus (red costume) | |
| 285 |  |
X Parasite | Metroid Series | •Kirby Team |
2,100 | Lylat Cruise | N/A | •The enemy favors neutral specials •Defeat an army of fighters |
Sector 1 | ||
| 327 |  |
Star Rod | Kirby Series | •Kirby Team |
9,200 | Fountain of Dreams | N/A | •The enemy starts the battle with a Star Rod | Gourmet Race (Melee) | Kirby/Star Rod's shards | |
| 329 |  |
Robobot Armor | Kirby Series | •Metal Kirby Team |
4,000 | Halberd | •Item: Drill | •Stamina battle •The enemy is metal |
Pink Ball Activate! | ||
| 331 |  |
Dragoon | Kirby Series | •Kirby |
13,500 | Pilotwings | •Item: Dragoon Parts | •Items will be pulled toward the enemy •The enemy has increased move speed |
The Legendary Air Ride Machine | Kirby | |
| 335 | Gooey | Kirby Series | •Kirby |
4,200 | Dream Land | N/A | •Timed battle (2:00) •The enemy favors neutral specials |
Gourmet Race (64) | |||
| 339 |  |
Whispy Woods | Kirby Series | •Kirby Team |
9,300 | Green Greens | •Hazard: Heavy Wind | •Dangerously high winds are in effect •Reinforcements will appear after an enemy is KO'd |
Boss Theme Medley - Kirby Series | Whispy Woods's apples | |
| 341 |  |
Nightmare's Power Orb | Kirby Series | •Giant Kirby |
4,000 | Fountain of Dreams | •Assist Trophy Enemies (Nightmare) | •Hostile assist trophies will appear after a little while •The enemy is giant •The enemy starts the battle with a Star Rod |
Vs. Marx | ||
| 360 |  |
Waddle Dee | Kirby Series | •Kirby Team |
3,700 | Dream Land GB | N/A | •Take your strongest team into this no-frills battle | Kirby Retro Medley (Green Greens) | ||
| 362 |  |
Waddle Doo | Kirby Series | •Kirby |
2,500 | Dream Land | •Hazard: Zap Floor | •The floor is electrified •The enemy starts the battle with a Super Scope |
Butter Building (for 3DS / Wii U) | ||
| 366 |  |
Scarfy | Kirby Series | •Kirby Team |
1,400 | Dream Land | N/A | •Reinforcements will appear after an enemy is KO'd | Green Greens (Melee) | Angry Scarfy (red Kirby) | |
| 368 |  |
Rocky | Kirby Series | •Metal Kirby |
2,600 | The Great Cave Offensive (Battlefield form) | N/A | •Timed stamina battle (1:00) •The enemy favors down specials •The enemy is metal |
The Great Cave Offensive | ||
| 370 | Bomber | Kirby Series | •Kirby |
3,500 | Dream Land GB | •Item: Bomber | •The enemy starts the battle with a Bomber | Butter Building (Brawl) | |||
| 380 |  |
Prince Fluff | Kirby's Epic Yarn | •Kirby |
1,900 | Super Happy Tree | N/A | •The enemy's throws have increased power •The enemy favors grabs and throws |
Green Greens (for 3DS / Wii U) | ||
| 432 |  |
Dugtrio | Pokémon Series | •Kirby |
1,500 | Pokémon Stadium 2 (Ground type) | •Earthquake | •Periodic earthquakes will shake the stage after a little while | Pokémon Gym/Evolution - Pokémon Red / Pokémon Blue | ||
| 438 | Geodude | Pokémon Series | •Kirby Team |
1,400 | Pokémon Stadium 2 (Ground type) | N/A | •The enemy favors down specials | Pokémon Gym/Evolution - Pokémon Red / Pokémon Blue | |||
| 458 | Ditto | Pokémon Series | •Kirby |
3,400 | Pokémon Stadium | N/A | •The enemy favors neutral specials •Only certain Pokémon will emerge from Poké Balls (Ditto) |
Road to Viridian City - Pokémon Red / Pokémon Blue | |||
| 470 | Marill | Pokémon Series | •Kirby |
1,700 | Pokémon Stadium 2 | N/A | •Water and ice attacks aren't as effective against the enemy | Pokémon Gold / Pokémon Silver Medley | |||
| 546 | Diancie | Pokémon Series | •Reflect Kirby |
3,900 | Kalos Pokémon League (hazards off) | N/A | •The enemy reflects projectiles •The enemy favors down specials •The enemy takes less damage while in the air |
Battle! (Champion) - Pokémon X / Pokémon Y | |||
| 553 | Pyukumuku | Pokémon Series | •Tiny Kirby Team |
1,600 | Wuhu Island (Frisbee Dog Park) | N/A | •Only certain Pokémon will emerge from Poké Balls (Pyukumuku) | Battle! (Wild Pokémon) - Pokémon Sun / Pokémon Moon | |||
| 559 | Nihilego | Pokémon Series | •Kirby |
4,100 | The Great Cave Offensive (Ω form) | •Hazard: Poison Floor | •The floor is poisonous •The enemy loves to jump •The enemy falls slowly |
The Battle at the Summit! | |||
| 623 | Wrys | Fire Emblem Series | •Kirby |
2,500 | Temple | N/A | •Timed stamina battle (1:30) •The enemy tends to avoid conflict •The enemy heals over time |
Shadow Dragon Medley | |||
| 806 | White Pikmin | Pikmin Series | •Tiny Kirby Team |
4,400 | Distant Planet (Battlefield form) | •Item: POW Block •Hazard: Poison Floor |
•The floor is poisonous •Timed stamina battle (1:00) •The enemy favors dash attacks |
Forest of Hope | |||
| 809 | Rock Pikmin | Pikmin Series | •Tiny Kirby Team |
1,800 | Garden of Hope (hazards off) | •Hazard: High Gravity | •Stamina battle •Your jumping power decreases •The enemy favors down specials |
Garden of Hope (Original) | |||
| 948 |  |
Ghosts | PAC-MAN Series | •Kirby •Jigglypuff •Squirtle •Pac-Man |
3,500 | Pac-Land (Battlefield form) | •Assist Trophy Enemies (Ghosts) | •Hostile assist trophies will appear | PAC-MAN | Blinky | |
| 1,122 |  |
Unira | Clu Clu Land Series | •Kirby Team |
1,800 | 75m | •Item Tidal Wave •Item: Unira |
•Certain items will appear in large numbers •The enemy is easily distracted by items |
Clu Clu Land | ||
| 1,155 | Hakkun | Sutte Hakkun | •Kirby |
2,100 | Yoshi's Island | •Invisibility | •Timed battle (2:00) •You are invisible after a little while |
Flower Field | |||
| 1,180 |  |
Tomatrio | Tomato Adventure | •Kirby |
1,600 | Yoshi's Island (Melee) (Battlefield form) | •Item: Maxim Tomato | •The enemy is easily distracted by items | Mixed-Up Scramble | ||
| 1,186 | Mattel | The Legendary Starfy Series | •Kirby |
1,800 | Delfino Plaza (Large Island) | •Assist Trophy Enemies (Starfy) | •Hostile assist trophies will appear | Tortimer Island Medley | |||
| 1,226 |  |
Magkid | Slide Adventure MAGKID | •Kirby Team |
1,800 | PictoChat 2 | •Assist Trophy Enemies (Devil) | •Hostile assist trophies will appear •The enemy can deal damage by dashing into you •The enemy has increased move speed |
PictoChat | ||
| 1,278 |  |
Qbby | BOXBOY! Series | •Kirby Team |
9,300 | Wii Fit Studio | •Item Tidal Wave | •Certain items will appear in large numbers | Ice Cream Island | ||
| 1,330 | .png) |
Slime (Dragon Quest) | DRAGON QUEST Series | •Kirby Team •Giant Kirby |
1,700 | Gaur Plain (Battlefield form) | N/A | •Stamina battle •The enemy favors neutral air attacks •Reinforcements will appear after an enemy is KO'd |
Fighting Spirits - DRAGON QUEST III | King Slime (Giant Kirby) | |
| 1,336 | Liquid Metal Slime | DRAGON QUEST Series | •Metal Kirby |
5,700 | The Great Cave Offensive (Battlefield form) | •Move Speed ↑ •Defense ↑ •Attack Power ↓ |
•The enemy has super armor and is hard to launch or make flinch •The enemy starts the battle with a Franklin Badge •Timed stamina battle (0:30) |
Battle for the Glory - DRAGON QUEST IV | |||
| 1,343 | Jiggy | Banjo-Kazooie Series | •Gold Kirby |
2,000 | The Great Cave Offensive | N/A | •Timed stamina battle •The enemy falls slowly |
Treasure Trove Cove | |||
| 1,355 |  |
O-Tetrimino | Tetris Series | •Kirby |
2,000 | Mushroomy Kingdom | •Assist Trophy Enemies (Thwomp) •Item: POW Block |
•Hostile assist trophies will appear •The enemy favors down specials in the air |
Tetris: Type B | ||
| 1,433 | ![In-game rip [1]](/File:SSBU_spirit_Slime_(Minecraft).png) |
Slime (Minecraft) | Minecraft Series | •Giant Kirby •Kirby Team •Tiny Kirby Team |
3,300 | Minecraft World (Taiga) | N/A | •Stamina battle •The enemy favors neutral air attacks •Reinforcements will appear after an enemy is KO'd |
Halland / Dalarna | ||
| 1,473 | Kittens | Super Mario Series | •Tail Kirby Team |
1,900 | Delfino Plaza (Large Island) | •Item: Balls | •The enemy has increased move speed and reduced weight •Defeat an army of fighters |
Main Theme - Super Mario 64 (Remix) | |||
| 1,490 |  |
Tama | Sakuna: Of Rice and Ruin | •Kirby •Clear Kirby |
1,500 | Garden of Hope (Ω form) | N/A | •The enemy favors air attacks •Reinforcements will appear after an enemy is KO'd •The enemy is invisible |
The Mysterious Murasame Castle Medley | Holy Sword Tama (Clear Kirby) | |
| 1,517 |  |
Oatchi | Pikmin Series | •Giant Kirby •Alph |
8,800 | Distant Planet (Ω form) | •Item: Hocotate Bomb | •The enemy favors dash attacks •The enemy can deal damage by dashing into you |
Garden of Hope (Original) | ||
| 1,528 |  |
Wonder Flower & Talking Flower | Super Mario Series | •Tiny Kirby •Tiny Kirby Team |
1,900 | Mushroom Kingdom U | •Assist Trophy Enemies (Skull Kid) •Item: Fire Flower |
•Defeat the main fighter to win •The enemy has super armor and is hard to launch or make flinch •Hostile assist trophies will appear |
Pandemonium | Wonder Flower (Blue Kirby) Talking Flowers (Yellow Kirby) | |
As a minion[edit]
| Spirit | Battle parameters | Inspiration | |||||||||
|---|---|---|---|---|---|---|---|---|---|---|---|
| No. | Image | Name | Series | Enemy Fighter(s) | Type | Power | Stage | Rules | Conditions | Music | Character |
| 67 | Shine Sprite | Super Mario Series | •Rosalina & Luma •Kirby Team |
13,100 | Delfino Plaza (roof) | •Temporary Invincibility •Sudden Final Smash •Item: Stars |
•Defeat the main fighter to win •The enemy will suddenly have a Final Smash •The enemy will occasionally be invincible |
Delfino Plaza (Remix) | Coins | ||
| 72 | Hungry Luma | Super Mario Series | •Rosalina & Luma •Kirby |
1,900 | Mario Galaxy | •Item: Super Launch Star | •Take your strongest team into this no-frills battle | Egg Planet | Hungry Luma | ||
| 104 | Geno | Super Mario RPG: Legend of the Seven Stars | •Sheik •Peach •Kirby •Bowser •Mario |
13,700 | Mario Galaxy (Battlefield form) | N/A | •Defeat the main fighter to win •Timed battle (2:30) •The enemy's FS Meter charges quickly |
Rainbow Road Medley | Mallow | ||
| 332 |  |
Rick | Kirby Series | •Pikachu •Kirby |
4,100 | Green Greens | •Hazard: Ice Floor | •The floor is frozen •The enemy starts the battle with a Fire Flower •The enemy has increased move speed |
Planet Popstar | Kirby | |
| 333 |  |
Kine | Kirby Series | •Squirtle •Kirby |
3,600 | Wuhu Island (Rocks at sea) | •Buoyancy Reduced | •You can't swim •The enemy starts the battle with a Freezie |
Kirby Retro Medley (Float Islands) | Kirby | |
| 334 |  |
Coo | Kirby Series | •Falco •Kirby |
4,100 | Dream Land | •Hazard: Heavy Wind | •Dangerously high winds are in effect •The enemy loves to jump •The enemy falls slowly |
Forest/Nature Area | Kirby | |
| 690 |  |
Ball | Game & Watch Series | •Mr. Game & Watch •Pac-Man •Jigglypuff •Kirby |
3,900 | Flat Zone X (hazards off) | •Item: Balls | •The enemy favors grabs and throws •The enemy's throwing-type items have increased power |
Flat Zone 2 | Ball | |
| 723 | Viridi | Kid Icarus Series | •Mii Swordfighter •Giant Kirby |
13,700 | Reset Bomb Forest | N/A | •Defeat the main fighter to win •The enemy's special moves have increased power •Timed battle (0:55) |
Wrath of the Reset Bomb | Cragalanche | ||
| 1,107 |  |
Fighting Alloy Team | Super Smash Bros. Series | •Captain Falcon Team •Zelda Team •Mario Team •Kirby Team |
3,300 | Final Destination (Battlefield form) | N/A | •Take your strongest team into this no-frills battle | Cruel Smash | Green Alloy | |
| 1,119 |  |
Devil | Devil World | •Ridley •Kirby |
3,900 | 75m (Battlefield form) | •Assist Trophy Enemies (Devil) | •Hostile assist trophies will appear | 25m Theme | Medaman | |
| 1,197 | Munchy Monk | Rhythm Heaven Series Rhythm Paradise Series |
•Ken •Tiny Kirby |
1,500 | Spirit Train | •Item: Food | •Defeat the main fighter to win •The enemy favors up specials •The enemy is easily distracted by items |
Fruit Basket | Dumplings | ||
| 1,216 | Dr. Lobe | Big Brain Academy Series | •Dr. Mario •Kirby |
3,400 | PictoChat 2 | •Hazard: Low Gravity •Hazard: High Gravity |
•All fighters have reduced jump ability •Gravity is reduced after a little while |
Title Theme - Big Brain Academy | Floating Objects (Shadow Shift) | ||
| 1,286 |  |
Clip & Snip | Snipperclips - Cut it out, together! Series | •Pac-Man •Kirby |
3,600 | PictoChat 2 | N/A | •The enemy starts the battle with a Killing Edge | Noisy Notebook | Snip | |
| 1,301 |  |
River Survival | Super Mario Series | •Bowser •Kirby •Yoshi •Rosalina & Luma |
5,500 | Kongo Falls (Ω form) | •Bob-omb Festival •Item Tidal Wave •Item: Food |
•Survive until the timer runs out (1:00) •Bob-ombs will rain from the sky after a little while |
Slide | Goomba | |
| 1,411 |  |
Duran & Angela | Mana Series | •Roy •Zelda •Tiny Bunny Kirby |
9,200 | Gaur Plain (Ω form) | •Item: Ramblin' Evil Mushroom | •Reinforcements will appear after an enemy is KO'd | Filled with Hope | Rabites | |
| 1,450 | Chocobo & Moogle | FINAL FANTASY Series | •Mii Brawler •Kirby |
1,600 | Garden of Hope | •Item: Cucco | •Take your strongest team into this no-frills battle •The enemy starts the battle with a Bob-omb |
Flower Field | Moogle | ||
| •Mii Brawler •Kirby | |||||||||||
| 1,524 | Sprigatito, Fuecoco, & Quaxly | Pokémon Series | •Ivysaur •Squirtle •Kirby |
3,700 | Delfino Plaza (Courtyard) | N/A | •The enemy favors side specials | Battle! (Trainer) - Pokémon Sun / Pokémon Moon | Fuecoco | ||
| 1,525 |  |
Peach & Stella | Super Mario Series | •Peach •Tiny Kirby |
12,800 | Luigi's Mansion | •Assist Trophy Enemies (Lyn, Chef Kawasaki, Akira Yuki) | •Hostile assist trophies will appear •The enemy favors up smash attacks |
Fossil Falls | Stella | |
- ^ This alternative occurs when the corresponding DLC has been purchased and downloaded.
Alternate costumes[edit]

| |||||||

|

|

|

|

|

|

|

|
Gallery[edit]
Kirby artwork, as posted by Kirby's official Twitter account.
Link, Kirby, Mario, and Cloud artwork, as posted by Tetsuya Nomura's official Twitter account.
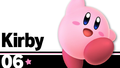
Kirby's fighter card.
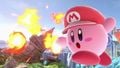
"Mario Kirby" tossing a Fireball on Battlefield.
"Jigglypuff Kirby" using Rollout with Jigglypuff on Onett.
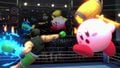
Using his Hammer on Little Mac in the Boxing Ring.
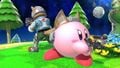
"Fox Kirby" using a Blaster with Fox on Mario Galaxy.
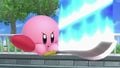
Performing Final Cutter on Tomodachi Life.
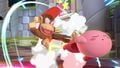
Getting kicked by Diddy Kong on The Great Cave Offensive.

Inhaling Donkey Kong's grapes on Gaur Plain.
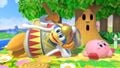
With King Dedede on Green Greens.
Kirby's "unmasked Meta Knight" costume standing next to the real Meta Knight on Skyworld.

Kirby in his new Stone transformation below an aerial Mii Brawler on Skyworld.
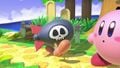
Kirby standing next to a Bomber on Green Greens.
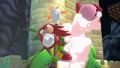
Kirby struck by Knuckles's uppercut on The Great Cave Offensive.
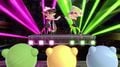
Three Kirbys watching the Squid Sisters' concert on New Pork City.
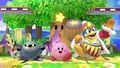
Taunting alongside Meta Knight and King Dedede on Green Greens.
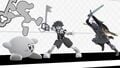
With Sora, Mr. Game & Watch and Link on PictoChat 2.


Fighter Showcase Video[edit]
Trivia[edit]
- Kirby's stock icon is one of only six to show eyes (the others being Meta Knight, R.O.B., Sonic, Zombie, and Enderman). The most likely reason is to actually tell that it is his stock icon, as it is otherwise a simplistic pink circle.
- It also greatly resembles his stock icon in the original Super Smash Bros.
- This is also not counting Captain Falcon or Larry, as the eyes depicted for the former are not his actual eyes, and the latter lacks his irises.
- Kirby's pose resembles his character artwork in Kirby Super Star, but rotated to slightly face the screen. Coincidentally, this was also used for his character select artwork in the original Super Smash Bros.
- Coincidentally, his pose is also used for his Wrestler artwork in Kirby Fighters 2 (with the difference between the mask and the angry frown).
- Kirby is the only Kirby series character to keep his Final Smash between Smash 4 and Ultimate.
- Since Kirby is the starter character of World of Light and part of the starter roster, he is the only character that is not unlockable in the game for any mode.
- This also makes Kirby the only character in the entire series that is never unlocked in any mode.
- This means it is impossible to see the message saying that "Kirby Joins the Battle!". Modding the game to display this message (through setting Kirby's fighter spirit to rematchable) will reveal that Kirby does not have a text string for this instance, and the message will simply read "Joins the Battle!"
- Despite his status as the mode's starter character and the closest thing to the main character, Kirby's depiction in marketing or artwork for Ultimate is no more prominent than any of the other starter characters, apart from Mario and Link who collectively serve as the game's mascots.
- This also makes Kirby the only character in the entire series that is never unlocked in any mode.
- Due to his various Copy Abilities, Kirby has the highest amount of voice clips for any character in the game, with 95 clips (121 if DLC is included).
- Because of the copy ability, Kirby has the most unique character models for any character in the game. There are 81 different models, with 648 models if alternate costumes are counted.
- Barring Yoshi who is the only fighter of the Yoshi series, Kirby is the only starter character in Ultimate whose universe has more than one character to not include any characters in their Classic Mode unlock table, as Meta Knight is in Link's, and King Dedede is in Donkey Kong's.
- Unlike other characters, Kirby can actually taunt online when playing outside of arenas, but only to discard his copy ability.
- As a result of not being captured, Kirby is one of the few characters that doesn't have copies of him produced by Dharkon or Galeem during their boss fights.
- Since Kirby was never possessed by Galeem like everyone else, his presence in many spirit battles went unclear for some time, until Masahiro Sakurai addressed this in an interview; stating that Galeem managed to analyze Kirby halfway through the story, making it possible to create puppets of him.[1]
- Ironically, Kirby has the most spirit battle appearances of all characters, with 64 total.
- Kirby is one of the five veterans from Smash 4 to have their Boxing Ring alias changed in Ultimate, the others being Link, King Dedede, Mega Man, and Ryu.
References[edit]
|
| |
|---|---|
| Fighters | Kirby (SSB · SSBM · SSBB · SSB4 · SSBU) · Meta Knight (SSBB · SSB4 · SSBU) · King Dedede (SSBB · SSB4 · SSBU) |
| Assist Trophies | Knuckle Joe · Nightmare · Chef Kawasaki |
| Bosses | Giant Kirby · Marx |
| Stages | Dream Land · Fountain of Dreams · Green Greens · Halberd · Dream Land GB · The Great Cave Offensive |
| Items | Maxim Tomato · Star Rod · Parasol · Warp Star · Apple · Dragoon · Superspicy Curry · Bomber |
| Enemies | Bonkers · Bronto Burt · Gordo · Parasol Waddle Dee · Plasma Wisp · Shotzo · Tac · Waddle Dee · Waddle Doo |
| Other | Gourmet Race · Whispy Woods |
| Trophies, Stickers and Spirits | Trophies (SSBM · SSBB · SSB4) · Stickers · Spirits |
| Music | Brawl · SSB4 · Ultimate |
| Masterpieces | Kirby's Dream Land · Kirby's Adventure · Kirby Super Star |