Dr. Mario (SSBU): Difference between revisions
No edit summary |
|||
| (384 intermediate revisions by more than 100 users not shown) | |||
| Line 1: | Line 1: | ||
{{ArticleIcons|ultimate=y}} | {{ArticleIcons|ultimate=y}} | ||
{{ | {{Disambig2|Dr. Mario's appearance in ''Super Smash Bros. Ultimate''|the character in other contexts|Dr. Mario}} | ||
{{Infobox Character | {{Infobox Character | ||
|name = Dr. Mario | |name = Dr. Mario | ||
| Line 8: | Line 8: | ||
|ssbgame2 = SSB4 | |ssbgame2 = SSB4 | ||
|availability = [[Unlockable character|Unlockable]] | |availability = [[Unlockable character|Unlockable]] | ||
|tier = D- | |||
|ranking = 78 | |||
}} | }} | ||
'''Dr. Mario''' ({{ja|ドクターマリオ|Dokutā Mario}}, ''Doctor Mario'') is a playable character in ''[[Super Smash Bros. Ultimate]]''. He was officially revealed on [https://www.youtube.com/watch?v=L93H7YC-83o June 12th, 2018] alongside {{SSBU|R.O.B.}}, {{SSBU|Duck Hunt}}, and the rest of the returning roster. While Dr. Mario remains a close [[clone]] of {{SSBU|Mario}}, he is not classified as an Echo Fighter. As such, Dr. Mario is classified as [[Fighter number|Fighter #18]]. | |||
'''Dr. Mario''' ({{ja|ドクターマリオ|Dokutā Mario}}, ''Doctor Mario'') is a playable character in ''[[Super Smash Bros. Ultimate]]''. He was revealed | |||
As in ''[[ | As in ''[[Super Smash Bros. 4]]'', {{iw|mariowiki|Charles Martinet}}'s portrayal of Mario from ''[[Super Smash Bros. Brawl]]'' was repurposed for Dr. Mario in ''Ultimate''.<!--Do not add that this is the last Smash Bros. game where Charles Martinet voices Dr. Mario. Besides the fact this isn't done for other characters' pages, Jigglypuff and Lucina still use their voice clips from Rachael Lillis and Laura Bailey respectively in the Smash series instead of their current actors, so it's still possible for Martinet's voice to be reused in future Smash games--> | ||
Dr. Mario is currently ranked 78th out of 82 on the ''Ultimate'' [[tier list]], placing him in the lower half of D- tier and making him a bottom five character. Despite being buffed overall, this is a slight drop from his placement in ''Smash 4'', where he was ranked 48th out of 54, and is his worst placement in the series. Dr. Mario's playstyle is effectively a slower yet stronger version of Mario's. As a result, all of his moves possess better KO potential and/or damage output compared to Mario, while he keeps most of Mario's frame data, which allows him to perform short yet effective [[combo]]s. Dr. Mario's signature projectile in [[Megavitamin]] is an effective projectile for approaching and neutral and it also opens up combos and KO confirms at higher percents into most of his moves. In addition, Dr. Mario has several strong yet effective KO options in his arsenals, including [[Super Jump Punch]], [[Dr. Tornado]], most of his aerials, and back throw. This means players have to play more carefully when close to Dr. Mario, as a single whiff could lead into a deadly [[punish]]. | |||
However, Dr. Mario's weaknesses outshine many of his strengths. His most notable weakness is his poor mobility, which cripples his [[neutral game]] and makes him vulnerable to camping. In addition, as his playstyle largely revolves around him getting close to his opponent, his poor mobility also makes it harder for him to avoid retaliation from opponents, as Dr. Mario's short range means he is vulnerable to moves with long range or disjoints. Finally, Dr. Mario's recovery, while improved, is still one of the worst in the game, as its short range and his slow air mobility makes him vulnerable to gimping. | |||
Overall, Dr. Mario is a character that has good frame data and strong damage output and KO potential, but his sluggish movements cause him to rely more on a bait-and-punish playstyle. Although his represenation has remained below average for most of the game's lifespan, he has nonetheless seen success from players such as {{Sm|JaZaR}} and {{Sm|Tsumusuto}}. | |||
==How to unlock== | ==How to unlock== | ||
Complete one of the following: | Complete one of the following: | ||
*Play [[VS. match]]es, with Dr. Mario being the 62nd character to be unlocked. | *Play [[VS. match]]es, with Dr. Mario being the 62nd character to be unlocked. | ||
*Clear {{SSBU|Classic Mode}} with {{SSBU|Mario}} or any character in his unlock tree, being the | *Clear {{SSBU|Classic Mode}} with {{SSBU|Mario}} or any character in his unlock tree, being the 7th character unlocked after {{SSBU|Roy}}. | ||
*Have Dr. Mario join the player's party in [[World of Light]]. | *Have Dr. Mario join the player's party in [[World of Light]]. | ||
With the exception of the third method, Dr. Mario must then be defeated on [[New Donk City Hall]]. | With the exception of the third method, Dr. Mario must then be defeated on [[New Donk City Hall]]. In World of Light, he is fought on the [[Ω form]] of [[Mario Bros.]] | ||
==Attributes== | ==Attributes== | ||
As a [[clone]] of {{SSBU|Mario}}, Dr. Mario is a [[Weight|middleweight]] that can [[wall jump]]. Like his normal self, Dr. Mario also has excellent frame data: when not counting [[special move]]s, the overall start-up lag of his normal moveset is very fast. As a result, Dr. Mario is both difficult to [[punish]] and very effective at punishing. Although | As a [[clone]] of {{SSBU|Mario}}, Dr. Mario is a [[Weight|middleweight]] that can [[wall jump]]. Like his normal self, Dr. Mario also has excellent frame data: when not counting [[special move]]s, the overall start-up lag of his normal moveset is very fast. As a result, Dr. Mario is both difficult to [[punish]] and very effective at punishing. Although the two share an overwhelming number of identical animations and even the exact same values for certain attributes ([[weight]], [[falling speed]], [[fast fall]]ing speed and [[gravity]]), Dr. Mario nevertheless has a number of traits that differ from his normal self. Like Mario, Dr. Mario's height is below-average. | ||
Dr. Mario functions like a stronger, yet slower Mario, owing to the implementation of multipliers to the majority of his moveset and some of his attributes. Most of Dr. Mario's moveset deals 1.176× more damage compared to Mario's moveset. Conversely, his [[jump|full hop]] height is 0.85× lower; his [[walk]]ing and [[dash]]ing speeds are 0.7942× slower; his [[air speed]], [[air acceleration]], [[short hop]] height, and [[double jump]] height are 0.7648× lower. Most of the multipliers result in Dr. Mario being distinctly affected by passive [[equipment]] physics from ''[[Super Smash Bros. 4]]'', in which he specifically possesses a +22 Attack value and a -65 Speed value.<ref name="DamageMultiplier">[https://docs.google.com/spreadsheets/d/1rwDPL1jhE-KuEbbcBkkTb44z1smJp9rYme_xb4BIJTk/edit#gid=1974906014]</ref> Although Dr. Mario's lower jump height makes his [[short hop]] more effective than Mario's, these modified attributes collectively render his overall mobility as sub-par. His wall jump and ledge jump also cover less distance as a result. Conversely, Dr. Mario's higher overall damage output results in him being noticeably more efficient at KOing in comparison to Mario. His [[traction]] is also slightly higher than Mario's, though merely average when compared to the roster. | |||
Other noticeable differences between Dr. Mario and Mario are seen in their movesets and, by extension, their playstyles. Although Dr. Mario's overall frame data is only very slightly slower than Mario's (if even at all), his higher overall damage output and slower overall mobility make him unable to use a healthy balance of offense and defense like his normal self. Instead, Dr. Mario is much better suited to a bait-and-punish playstyle. On a related note, Dr. Mario's combo game is less varied and consistent compared to his normal self's, especially with regard to aerial combos. Despite this, his combos deal respectable damage in spite of their fairly short lengths, similarly to characters like {{SSBU|Incineroar}}. | |||
Dr. Mario possesses a decent | Dr. Mario's grounded moveset has plenty of utility in spite of his slow speed. Neutral attack is Dr. Mario's fastest attack, and the first two hits can [[lock]] opponents. Forward tilt is a great get-off-me option, and possesses situational KO potential at very high percentages unlike Mario's version. Up tilt is a decent anti-air and juggling tool that can KO at very high percentages, and it can also combo into itself, neutral aerial, up aerial, back aerial and Super Jump Punch, but is not as effective as a combo starter as his down tilt; however, the move's horizontal range is shorter than in ''Smash 4'', and its hitboxes start from a higher position, allowing shorter, crouching or prone characters to potentially low-profile the move. Down tilt is one of Dr. Mario's best combo starters; although it is short-ranged, it is very reliable at a wide range of percentages, with its lower knockback scaling compared to Mario's even allowing it to combo at percentages where Mario's would not work, and depending on the percentage, it can lead into neutral attack, forward tilt, up tilt (only on certain characters), itself, up smash (only on certain characters), down smash, neutral aerial, up aerial, back aerial and Super Jump Punch. His dash attack has vertical knockback, allowing it to serve as a combo starter but hindering its edgeguarding potential. His forward smash, while slower than his other smash attacks, is extremely powerful for an attack of its speed, especially if the sweetspot connects; unlike Mario's, it possesses the [[electric]] effect, has shorter range, and the sweetspot and sourspot hitboxes are swapped around. Up smash functions more similarly to Luigi's version than to Mario's version, as it launches the opponent diagonally instead of vertically, and will launch them in the opposite direction of where Dr. Mario is facing as long as they are in front of him; compared to Luigi's, however, it launches at a lower angle, and it has lower base knockback than both Mario and Luigi's up smashes. Nevertheless, up smash's launch angle does make it much better at edgeguarding or setting up edgeguards than both Mario and Luigi's versions, and its higher damage output and knockback scaling compared to both of them also makes it a highly lethal KOing option. His down smash is his fastest smash attack, hitting on both sides (with the back hit being stronger than the front hit), and like Mario's version, it is useful for punishing rolls. | ||
Like Mario, Dr. Mario possesses a decent grab game. His overall grab range is average, but each of his grabs have minimal start-up and ending lag. Forward throw is useful for initiating [[edgeguard]]s; back throw is one of the strongest back throws in the game; up throw is a decent combo starter that can combo into up tilt (certain characters only), up aerial, neutral aerial, back aerial and Super Jump Punch; and down throw is his most effective combo throw, being able to combo into up tilt (certain characters only), up smash (certain characters only), neutral aerial, up aerial, back aerial, Super Jump Punch and Dr. Tornado depending on the opponent's percentage. | |||
Like his normal self, Dr. Mario's air game is above-average. Neutral aerial is a "reverse sex kick": its clean hitbox deals minimal damage, whereas its late hitbox deals more damage. Thanks to it hitting on frame 3 and having low landing lag, its clean hitbox is ideal for set-ups. Conversely, its late hitbox is decent at edgeguarding, due to its long hitbox duration | Like his normal self, Dr. Mario's air game is above-average. Neutral aerial is a "reverse sex kick": its clean hitbox deals minimal damage and knockback, whereas its late hitbox deals more damage. Thanks to it hitting on frame 3 and having low landing lag, its clean hitbox is ideal for set-ups. Conversely, its late hitbox is decent at edgeguarding, due to its long hitbox duration and larger hitbox than the late hit of Mario's equivalent move. Forward aerial has considerable start-up lag, but its clean hitbox makes it one of the strongest aerials in the game; as such, it is lethal when [[SHFF]]ed against unwary opponents that are near the edge. Back aerial is also fast, [[auto-cancel]]s in a short hop, and possesses a powerful clean hitbox, traits which collectively make it viable for KOing, edgeguarding and approaching. Up aerial's horizontal launching angle grants its beginning and ending frames decent combo potential into Super Jump Punch and back aerial, respectively, at low to medium percentages. This angle also makes its beginning frames capable of edgeguarding, unlike his normal self's up aerial. However, up aerial's launch angle also makes it much less effective at starting combos when SHFFed or juggling compared to Mario's. His new down aerial, while having slow startup, is a powerful [[meteor smash]], making it an excellent option for edgeguarding; it is also an extremely solid combo starter with an extremely wide range of follow-ups on grounded opponents depending on their percentage, including neutral attack, forward tilt, up tilt, down tilt, dash attack, forward smash, up smash, down smash, grab, all aerial attacks (including itself), Super Jump Punch and Dr. Tornado. | ||
With regard to special moves, [[Megavitamins]] travel farther in the air without landing compared to Mario's [[Fireball]], and they bounce twice instead of three times; they also have altered knockback, allowing for a wider range of follow-ups. [[Super Sheet]] has more vertical range but less horizontal range than [[Cape]], but its aerial version completely lacks the stalling effect of Mario's version, completely removing its recovery potential; it also has a 1.6× reflection multiplier, making reflecting projectiles with it more rewarding compared to doing so with Mario's Cape. | |||
Unlike [[F.L.U.D.D.]], Dr. Tornado deals damage. When coupled with its very high knockback scaling | Unlike [[F.L.U.D.D.]], Dr. Tornado is an effective recovery option, with repeated mashing of the special move button allowing Dr. Mario to rise upward with it. It also deals damage. When coupled with its high damage output, very high knockback scaling and [[autolink angle]], it is useful for edge-guarding, warding off edgeguarders, and even out-prioritizing attacks, and it also possesses excellent KO potential. However, Dr. Tornado's much shorter range makes it much riskier to use for edgeguarding compared to F.L.U.D.D. Due to [[Super Jump Punch]] consisting of a powerful clean hitbox and a weak late hitbox instead of multiple hitboxes like Mario's, it actually functions more similarly to {{SSBU|Ryu}}'s [[Shoryuken]] or {{SSBU|Marth}}'s [[Dolphin Slash]] instead. As a result, its clean hitbox makes it a viable KOing option unlike Mario's. Super Jump Punch is also an extremely effective [[out of shield]] option thanks to its frame 3 startup, much like Mario's version. | ||
However, Dr. Mario's flaws are significantly more noticeable in comparison to Mario's. | However, Dr. Mario's flaws are significantly more noticeable in comparison to Mario's. The most prominent one is his lackluster mobility, which hinders his ability to approach opponents, and renders him vulnerable to zoning and circle camping from characters with strong projectile games and high mobility, respectively, similarly to {{SSBU|Ganondorf}} and {{SSBU|Incineroar}}; unlike those two characters, however, Dr. Mario has an effective projectile in Megavitamins, a smaller hurtbox, effective [[out of shield]] options, and a decent reflector in Super Sheet, giving him a better defensive game in comparison. Additionally, Dr. Mario shares Mario's notable weakness of having short range in his attacks, which can give him trouble against characters with long or disjointed hitboxes; whereas Mario's faster mobility allows him to somewhat circumvent this weakness, especially against characters with poor mobility and/or frame data, Dr. Mario is less capable of weaving in and out of his opponent's range, making such characters much more difficult for him to deal with. Dr. Mario's sluggish mobility compounds another notorious weakness—his recovery. Despite being able to wall jump and the fact that Dr. Tornado is a much better recovery option than Cape, the combination of his slow air speed, low jump height, slow air acceleration and Super Jump Punch's mediocre travel distance results in his recovery being predictable like Mario's. | ||
Due to his overall recovery granting noticeably less vertical distance compared to Mario's, Dr. Mario is very vulnerable to | Due to his overall recovery granting noticeably less vertical distance compared to Mario's, Dr. Mario is very vulnerable to [[gimping]] and edgeguards. As a result, it is optimal for him to read the opponent when trying to return to the stage, as well as knowing when and how to make use of Dr. Tornado, which has a huge amount of ending lag (33 frames, aerial version) and cannot sweetspot [[edge]]s. Due to his short recovery distance, any sufficiently strong attacks, particularly [[semi-spike]]s, may launch him too far away to recover properly. Lastly, Dr. Mario is outclassed in certain aspects by other characters: in particular, {{SSBU|Zero Suit Samus}} has much better overall mobility; {{SSBU|Shulk}} has much more range; and {{SSBU|Snake}} is much better at zoning. | ||
Overall, Dr. Mario's fast frame data enables him to pressure and/or punish the opponent effectively at close range, while his above-average damage output makes him capable of KOing easily. Unlike Mario, however, his slow mobility hinders his [[neutral game]] | Overall, Dr. Mario's strengths are outweighed by his weaknesses. His fast frame data enables him to pressure, combo and/or punish the opponent effectively at close range, while his above-average damage output makes him capable of KOing easily. Unlike Mario, however, his slow mobility hinders his [[neutral game]] so much that he is largely reliant on baiting and punishing. By extension, his sub-par recovery makes him a less capable edgeguarder compared to his normal self, and he retains his normal self's lack of range as well. | ||
==Differences from {{SSBU|Mario}}== | ==Differences from {{SSBU|Mario}}== | ||
Despite not being an [[Echo Fighter]] of {{SSBU|Mario}}, Dr. Mario is still | Despite not being an [[Echo Fighter]] of {{SSBU|Mario}}, Dr. Mario is still a close clone of Mario. There is currently no confirmed reason for this oddity, though it is likely due to Dr. Mario debuting in ''Melee'' rather than ''SSB4'' or ''Ultimate'' as with the other Echo Fighters. | ||
Dr. Mario uses external modifiers to most of his stats rather than directly modifying them, so he sports subpar mobility compared to Mario. However, Dr. Mario compensates for his slower mobility with another external multiplier that increases the damage of his attacks in comparison, as all of his attacks deal noticeably more damage without any compensation on knockback, which enables him to KO more easily as a result. | |||
Aside from that, Dr. Mario also has other differences in his moveset. These include a few moves not cloned from Mario, such as [[back throw]], [[down aerial]] and [[Dr. Tornado]], as well as many moves with altered functionality, such as his [[dash attack]] launching upward, his [[up smash]] launching opponents behind him, his [[forward smash]] possessing an electric effect, his [[neutral aerial]] being a "reverse [[sex kick]]," his [[forward aerial]] not being a [[meteor smash]], his [[Megavitamins]] not being [[Absorption|absorbable]] and [[Super Jump Punch]] being a powerful singular hit at the cost of less vertical distance. Despite the aesthetic similarities, the different properties of the aforementioned moves, as well as his altered attributes, are enough to noticeably change Dr. Mario's playstyle compared to Mario's, although not quite to the same extent as {{SSBU|Luigi}}. | |||
===Aesthetics=== | ===Aesthetics=== | ||
*{{change|Dr. Mario is slightly less vocal than Mario. Some of his attacks also emit different sound effects.}} | *{{change|Dr. Mario is slightly less vocal than Mario. Some of his attacks also emit different sound effects.}} | ||
*{{change|Dr. Mario's [[on-screen appearance]], [[taunt]]s, [[idle pose]]s | *{{change|Dr. Mario's [[on-screen appearance]], [[taunt]]s, [[idle pose]]s and [[victory pose]]s are different from Mario's.}} | ||
*{{change|Dr. Mario's [[Results screen|defeated]]/[[Results screen#No Contest screen|No Contest]] animation is different from Mario's. | *{{change|Dr. Mario's [[Results screen|defeated]]/[[Results screen#No Contest screen|No Contest]] animation is different from Mario's. Mario has a new animation in which he looks slightly to the left with a smiling expression, while Dr. Mario retains his animation from ''Smash 4'', which is identical to Mario's from ''Brawl'' and ''Smash 4'' (and like the latter, features him with a neutral expression), except that Dr. Mario looks directly in front of himself.}} | ||
===Attributes=== | ===Attributes=== | ||
*{{buff|Dr. Mario's idle animation is much less exaggerated than Mario's. This gives him a consistently lower stance as a result.}} | *{{buff|Dr. Mario's idle animation is much less exaggerated than Mario's. This gives him a consistently lower stance as a result.}} | ||
*{{buff|The damage outputs of Dr. Mario's attacks use a 1. | *{{change|Some of Dr. Mario's raw properties are modified as if he were wearing equipment of +22 attack and -65 speed in ''Smash 4''.<ref name="DamageMultiplier" />}} | ||
**{{nerf|However, this limits his combo game.}} | **{{buff|The damage outputs of Dr. Mario's attacks use a 1.176× multiplier. As a result, he is significantly stronger than Mario. However, this multiplier does not apply to reflected projectiles or [[item]]s, and the base damage of his moves can also differ from Mario's.}} | ||
*{{nerf|Dr. Mario's [[walk]]ing speed, [[dash]]ing speed | ***{{nerf|However, this limits his combo game.}} | ||
*{{nerf|Dr. Mario | **{{nerf|Dr. Mario's [[walk]]ing speed, [[dash]]ing speed and initial dash speed use a 0.7942× multiplier; while his [[short hop]] height, [[double jump]] height, [[air speed]], [[air acceleration]] and [[air friction]] use a 0.7648× multiplier. As a result, Dr. Mario is significantly less mobile than Mario.}} | ||
**{{nerf|Dr. Mario's [[wall jump]] covers significantly less height, hindering his recovery.}} | ***{{change|Dr. Mario's lower short hop makes it easier for him to pressure opponents with short hops and use short hop aerials against grounded opponents, but limits his ability to perform two aerials in a short hop.}} | ||
*{{nerf|Dr. Mario's [[Jump|full hop]] height is 15% lower than Mario's (36.33 → 30.8805), although the mobility multiplier is not applied fully due to the new mechanic which speeds up full hops.}} | |||
**{{nerf|Despite this, the mobility multiplier applies fully when using shooting items, which makes it 35% lower than Mario's (36.33 → 23.6174064). It is also applied fully when performing a [[softhop]].}} | |||
*{{buff|Dr. Mario's [[shield jump]] is lower (44.1 → 40), causing him to land sooner.}} | |||
*{{nerf|Dr. Mario's [[wall jump]] covers significantly less height, hindering his recovery.}} | |||
**{{change|His ledge jump is also lower (38.165 → 35.4402).}} | |||
*{{buff|Dr. Mario has higher base acceleration when carrying heavy items (0 → 0.03) causing him to accelerate faster when walking while carrying heavy items.}} | |||
*{{buff|Dr. Mario's traction is slightly higher than Mario's (0.102 → 0.106), making it slightly easier for him to punish [[out of shield]].}} | *{{buff|Dr. Mario's traction is slightly higher than Mario's (0.102 → 0.106), making it slightly easier for him to punish [[out of shield]].}} | ||
*{{buff|Dr. Mario's ledge grab hitbox is positioned slightly higher, and extends up slightly further, making it easier for him to grab the ledge.}} | |||
===Ground attacks=== | ===Ground attacks=== | ||
*[[Neutral attack]]: | *[[Neutral attack]]: | ||
**{{buff| | **{{buff|The first two hits have different base damage values (2.2% → 2.5% (hit 1), 1.7% → 1.5% (hit 2)), resulting in the move dealing slightly more base damage in total (7.9% → 8%).}} | ||
**{{buff| | **{{buff|The first hit's hitboxes are further out (Z offset: 6u/8.7u/12u → 6.7u/9.3u/12.5u), improving its range.}} | ||
**{{nerf| | **{{nerf|The second hit's hitboxes are not attached to Dr. Mario's arm, giving it less range.}} | ||
*[[Forward tilt]]: | *[[Forward tilt]]: | ||
**{{buff|Forward tilt has higher base damage (7% → 9%) with knockback scaling not fully compensated (70 → 65). When combined with Dr. Mario's damage multiplier, this gives the move KO potential near the ledge.}} | **{{buff|Forward tilt has higher base damage (7% → 9%) with knockback scaling not fully compensated (70 → 65). When combined with Dr. Mario's damage multiplier, this gives the move KO potential near the ledge.}} | ||
*[[Up tilt]]: | *[[Up tilt]]: | ||
**{{buff|Up tilt has higher base damage (5.5 → 6.3), further improving its damage racking and KO potential when combined with Dr. Mario's damage multiplier.}} | **{{buff|Up tilt has higher base damage (5.5% → 6.3%), further improving its damage racking and KO potential when combined with Dr. Mario's damage multiplier and making it safer on hit at low percents.}} | ||
***{{nerf|However, its combo potential | ***{{nerf|However, it loses its combo potential earlier as a result.}} | ||
*[[Down tilt]]: | *[[Down tilt]]: | ||
**{{buff|Down tilt's sweetspot is larger (3.2u → 3.5u), making it easier to land.}} | **{{buff|Down tilt's sweetspot is larger (3.2u → 3.5u), making it easier to land.}} | ||
***{{nerf|However this makes the sourspot (which | ***{{nerf|However, this makes the sourspot (which combos for longer) harder to connect with.}} | ||
**{{buff| | **{{buff|It has less knockback scaling (80 → 55), and inflicts 3 additional frames of hitstun. When combined with Dr. Mario's damage multiplier increasing the move's damage output, this makes it a more damaging and effective combo starter that loses its combo potential later.}} | ||
**{{change| | **{{change|Its foot sweep visual starts earlier and has a different routine, more closely tracking his foot's current position.}} | ||
*[[Dash attack]]: | |||
**{{buff|Dash attack's clean hit has higher base damage (8% → 9.8%), further improving its damage output. Its hitlag was also compensated (1.25x → 1x).}} | |||
**{{change|It launches the opponent vertically, whereas Mario's launches them horizontally. It also deals less knockback (100 base/43 scaling → 90/38). These differences make it effective for combos at low percentages, but incapable of effectively edgeguarding.}} | |||
*[[Forward smash]]: | *[[Forward smash]]: | ||
**{{change|Dr. Mario's forward smash's sweetspot and sourspot are on his arm and [[electric]]ity respectively, whereas Mario's are on the [[flame]] and his arm respectively. This means Dr. Mario's forward smash does more damage at closer range than it would at farther range.}} | **{{change|Dr. Mario's forward smash's sweetspot and sourspot are on his arm and [[electric]]ity respectively, whereas Mario's are on the [[flame]] and his arm respectively. This means Dr. Mario's forward smash does more damage and knockback at closer range than it would at farther range.}} | ||
**{{nerf| | **{{nerf|It has lower knockback scaling (105 (sourspot)/99 (sweetspot) → 100/94), partially compensating for the increased damage.}} | ||
**{{nerf| | **{{nerf|It has noticeably less range (outer hitbox size: 5u → 3.7u), making it incapable of [[2 frame punish]]ing opponents.}} | ||
**{{change| | **{{change|It has an electric [[effect]], whereas Mario's has a flame effect. This makes it capable of hurting {{SSBU|Olimar}}'s Red Pikmin and makes it safer on shield, but makes it incapable of hurting Yellow Pikmin or instantly detonating explosives, and makes it easier to DI.}} | ||
*[[Up smash]]: | *[[Up smash]]: | ||
**{{change|Up smash launches at a lower angle ( | **{{change|Up smash launches at a lower angle (83° → 120°), allowing it to KO opponents horizontally, but weakening its vertical KO and anti-air potential.}} | ||
**{{change| | **{{change|It has altered knockback (32 (base)/94 (scaling) → 0/117), making it combo more consistently at lower damages while still making it stronger at higher damages. However, this also makes it unsafe on hit at low percents and combo less consistently at mid percents.}} | ||
**{{buff| | **{{buff|It lasts one frame longer compared to Mario's (frames 9-12 → 9-13), increasing its range in front of him.}} | ||
*[[Down smash]]: | *[[Down smash]]: | ||
**{{change|The sweeping visual on down smash is purple and white, rather than yellow, blue and white.}} | **{{change|The sweeping visual on down smash is purple and white, rather than yellow, blue and white.}} | ||
| Line 100: | Line 111: | ||
===Aerial attacks=== | ===Aerial attacks=== | ||
*[[Neutral aerial]]: | *[[Neutral aerial]]: | ||
**{{change|Dr. Mario's neutral aerial | **{{change|Dr. Mario's neutral aerial deals more damage and has higher knockback the longer it is active, whereas Mario's functions oppositely. This makes the move capable of instantly starting combos and makes it more effective at punishing, but removes its KO confirms and makes it less useful as an instant combo finisher and combo breaker.}} | ||
**{{buff| | **{{buff|The late hit has larger hitboxes (2.8u/2.8u → 3.6u/3.6u).}} | ||
**{{buff|The late hit has higher base damage than Mario's clean hit (8% → 10%) with higher knockback scaling (90 → 100). Combined with the damage multiplier, this allows it to KO under 120% at the edge.}} | |||
**{{buff|It autocancels earlier (frame 39 → 34).}} | **{{buff|It autocancels earlier (frame 39 → 34).}} | ||
**{{nerf|It has more landing lag (6 frames → 7 | **{{nerf|It has more landing lag (6 frames → 7).}} | ||
*[[Forward aerial]]: | *[[Forward aerial]]: | ||
**{{change|Dr. Mario's forward aerial | **{{change|Dr. Mario's forward aerial launches the opponent diagonally, whereas Mario's [[meteor smash]]es them. This makes it very effective at KOing on-stage, but much worse at edgeguarding and makes it less effective at starting combos on landing.}} | ||
**{{change|The sweeping visual commences | **{{buff|The clean hit has higher base damage (14% → 15%) and has much more knockback scaling (78 → 102), improving its KO potential even further.}} | ||
**{{nerf|The early and late hits have lower base damage (12% (early)/10% (late) → 10%/9%), though with their knockback scaling compensated (80 → 95).}} | |||
**{{change|The sweeping visual commences a frame earlier, and the last frame of the visual is absent.}} | |||
*[[Back aerial]]: | *[[Back aerial]]: | ||
**{{buff|Back aerial's clean hit has higher base damage (10.5 → 12) with knockback partly compensated (12 (base)/106 (scaling) → 10/95).}} | **{{buff|Back aerial's clean hit has higher base damage (10.5% → 12%) with knockback partly compensated (12 (base)/106 (scaling) → 10/95).}} | ||
**{{buff| | ***{{nerf|However, it loses its combo potential earlier as a result.}} | ||
**{{nerf| | **{{buff|The clean hit and late hit both have a longer duration (2 frames → 3 (clean), 3 frames → 5 (late)).}} | ||
**{{nerf|It has more landing lag (6 frames → 10 | **{{nerf|The clean hit has smaller hitboxes (4.5u/5.9u → 4.2u/5.4u), slightly reducing its range.}} | ||
**{{nerf|It has more landing lag (6 frames → 10).}} | |||
*[[Up aerial]]: | *[[Up aerial]]: | ||
**{{change|Up aerial launches at a lower angle ( | **{{change|Up aerial launches at a lower angle (75° → 45°), severely weakening its combo potential but granting it edgeguarding potential.}} | ||
**{{buff| | **{{buff|It has noticeably higher base damage (7% → 10.2%) with knockback scaling compensated (135 → 100), further improving its damage output.}} | ||
**{{nerf|It has more landing lag (6 frames → 8 | **{{nerf|It has more landing lag (6 frames → 8).}} | ||
*[[Down aerial]]: | *[[Down aerial]]: | ||
**{{change|Dr. Mario's down aerial | **{{change|Dr. Mario's down aerial is a double foot stomp, whereas Mario's has been [[Mario Tornado]] since ''Brawl''. Unlike Mario's, it hits once instead of six times.}} | ||
**{{change| | **{{change|It can meteor smash and send opponents horizontally instead of vertically (94° (looping hits), 75° (final hit) → (270°/361°). This makes it very good at edgeguarding, tech-chasing and starting combos, but less effective at KOing on-stage, juggling and extending/finishing combos.}} | ||
**{{buff| | **{{nerf|It deals slightly less base damage (1.4% (hits 1-5), 5.5% (hit 6); 12.5% (total) → 12%).}} | ||
**{{nerf| | **{{buff|It has reduced landing lag (15 frames → 13).}} | ||
**{{nerf| | **{{nerf|It has significantly increased startup lag (frame 5 → 14), less active frames (frame 5/7/9/11/13/23 → 14-17) and more ending lag (frame 38 → 43).}} | ||
**{{nerf| | **{{nerf|It lacks a landing hit.}} | ||
**{{nerf|It has significantly smaller hitboxes (4.3u/7.0u (looping hits), 11u (final hit) → 4.5u/5.2u), giving it significantly less range around Dr. Mario. Unlike Mario's, it cannot hit opponents above him.}} | |||
**{{change|Dr. Mario is silent when performing this move, unlike Mario.}} | |||
=== | ===Throws and other attacks=== | ||
*[[Forward throw]]: | *[[Forward throw]]: | ||
**{{nerf|Forward throw has less knockback scaling (65 → 60), preventing it from reliably KOing | **{{nerf|Forward throw has less knockback scaling (65 → 60), preventing it from reliably KOing despite the damage multiplier.}} | ||
*[[Back throw]]: | *[[Back throw]]: | ||
**{{change|Back throw has a different animation: Dr. Mario heaves the opponent off the ground and above his head, then tosses them away behind him, as opposed to swinging them around multiple times.}} | **{{change|Back throw has a different animation: Dr. Mario heaves the opponent off the ground and above his head, then tosses them away behind him, as opposed to swinging them around multiple times.}} | ||
***{{buff|Compared to Mario's back throw, Dr. Mario releases the opponent earlier (frame 44 → 30), making it harder to DI and increasing its consistency.}} | ***{{buff|Compared to Mario's back throw, Dr. Mario releases the opponent earlier (frame 44 → 30), making it harder to DI and increasing its consistency.}} | ||
***{{nerf|However, its FAF remains unchanged, increasing its ending lag.}} | ***{{nerf|However, its FAF remains unchanged, increasing its ending lag.}} | ||
***{{buff| | ***{{buff|It has higher knockback scaling (66 → 68). Combined with the damage multiplier, this makes it considerably stronger than Mario's.}} | ||
***{{nerf| | ***{{nerf|It lacks a collateral hitbox.}} | ||
*[[Up throw]]: | *[[Up throw]]: | ||
**{{nerf|Up throw has reduced knockback scaling (72 → 65), making it | **{{nerf|Up throw has reduced knockback scaling (72 → 65), making it incapable of KOing reliably despite the damage multiplier.}} | ||
*[[Down throw]]: | *[[Down throw]]: | ||
**{{change|Down throw | **{{change|Down throw launches at a higher angle (68° → 80°) and has altered knockback (40 (base)/90 (scaling) → 75/45). While this makes its combo potential into up and back aerials more consistent and allows it to combo earlier and for longer, it makes other followups like down tilt and neutral attack impossible.}} | ||
*{{nerf|Dr. Mario's [[floor attack]]s and [[edge attack]] have decreased base damage (front and back floor attacks: 7% → 6% (both hits), trip floor attack: 5% → 4.3% (both hits), edge attack: 9% → 8.51%). As a result, his floor attacks deal roughly the same damage as Mario's despite the damage multiplier.}} | |||
**{{buff|However, Dr. Mario's edge attack still outdamages Mario's version despite its lower base damage, thanks to his attack multiplier.}} | |||
===Special moves=== | ===Special moves=== | ||
*[[ | *[[Megavitamins]]: | ||
**{{buff|Unlike [[Fireball]], | **{{buff|Unlike [[Fireball]], Megavitamins cannot be [[absorb]]ed by moves like Ness's [[PSI Magnet]].}} | ||
**{{change|Megavitamins launch at a higher angle ([[361]] → | **{{change|Megavitamins bounce higher (bounce speed: 1.4 (min)/1.6 (max) → 1.65/2, restitution: 0.97 → 1).}} | ||
**{{change| | **{{change|It launch at a higher angle ([[361]]° → 65°), and deals more knockback (35 (base)/20 (scaling) → 60/40 (clean), 28 (base)/15 (scaling) → 55/40 (mid), 22 (base)/10 (scaling) → 50/40 (late)), improving its setup potential but hindering its jab reset and edgeguarding potential.}} | ||
**{{change| | **{{change|Its hitbox is longer and thinner (size: 2.4u/2.2u/2u → 1.7u/1.7u/1.7u, Y offset: 0 → -1.7—1.7), better matching the shape of a capsule.}} | ||
**{{change| | **{{change|It deals more hitlag (0.6× → 1×) improving its safety but making it easier to DI/SDI.}} | ||
**{{change|It does not have a [[flame]] effect unlike Fireball. This makes it capable of hurting Olimar's Red Pikmin, but renders it incapable of instantly detonating explosives.}} | |||
*[[ | *[[Super Sheet]]: | ||
**{{change|Compared to Mario's [[Cape]], | **{{change|Compared to Mario's [[Cape]], Super Sheet's hitbox is positioned slightly upward. This results in it having slightly more vertical range, but slightly less horizontal range.}} | ||
**{{ | ***{{nerf|While the Super Sheet's slightly higher hitbox can make the move somewhat easier to land while airborne, this is a situational advantage at best, and a rather poor trade-off compared to Mario's greater horizontal range. Dr. Mario's Super Sheet effectively covers less area overall.}} | ||
**{{change|It has altered hitbox placements.}} | |||
**{{change|It has a different animation where Dr. Mario swings the sheet upward, highlighting its increased vertical reach.}} | |||
**{{change|Unlike aerial Cape, aerial Super Sheet does not stall Dr. Mario. This makes it more effective at [[B-reversing]], but unusable for recovery.}} | **{{change|Unlike aerial Cape, aerial Super Sheet does not stall Dr. Mario. This makes it more effective at [[B-reversing]], but unusable for recovery.}} | ||
**{{buff| | **{{change|The reflect box is positioned closer and higher up (Y offset: 6.5 → 8, Z offset: 8 → 6.5), combined with its larger size (6.5u → 7.7u) it has more vertical range, and less horizontal range.}} | ||
**{{buff|Projectiles reflected by Super Sheet do more damage (1. | ***{{buff|It covers more of Dr. Mario's hurtbox.}} | ||
*[[ | **{{buff|Its hitbox has a longer duration (frames 12-14 → 12-16).}} | ||
**{{change|Dr. Mario's | **{{buff|It reflects for slightly longer (frames 9-20 → 9-22).}} | ||
**{{buff|Projectiles reflected by Super Sheet do more damage (1.5× → 1.6×).}} | |||
*[[Super Jump Punch]]: | |||
**{{change|Dr. Mario's Super Jump Punch consists of a clean hitbox and a late hitbox, whereas Mario's consists of several looping hitboxes. However, the angle of the attack remains the same as Mario's on all hitboxes, which makes it launch diagonally upon startup.}} | |||
***{{nerf|Due to this, Dr. Mario's variant is much less safe on hit at lower percents and is not as deadly of a stage spike until higher ones.}} | ***{{nerf|Due to this, Dr. Mario's variant is much less safe on hit at lower percents and is not as deadly of a stage spike until higher ones.}} | ||
**{{buff|Due to its higher damage output, | **{{change|It has altered hitbox placements.}} | ||
**{{nerf| | ***{{buff|The hitbox is overall considerably larger, making it easier to use [[out of shield]].}} | ||
**{{nerf|Unlike Mario's | **{{buff|Due to its higher damage output, the clean hit is significantly more effective for KOing when not near the upper blast line and makes it an untechable stage spike at high percents.}} | ||
**{{change| | **{{nerf|It travels a much shorter distance, making it less effective for recovery.}} | ||
**{{nerf|Unlike Mario's, Dr. Mario's Super Jump Punch lacks [[intangibility]] on start-up.}} | |||
**{{change|It has a wider array of angles (max angle change: 12° → 18°), though this is nullified by the significant distance reduction.}} | |||
**{{change|[[Cappy]] does not appear, and it does not produce {{iw|mariowiki|Coin}}s upon contact.}} | |||
*[[Down special]]: | *[[Down special]]: | ||
**{{change|Dr. Mario retains [[Dr. Tornado]] as his down special, whereas Mario's has been [[F.L.U.D.D.]] since ''Brawl''.}} | **{{change|Dr. Mario retains [[Dr. Tornado]] as his down special, whereas Mario's has been [[F.L.U.D.D.]] since ''Brawl''.}} | ||
**{{buff|Unlike F.L.U.D.D., Dr. Tornado deals damage, making it a very viable KO move at | **{{buff|Unlike F.L.U.D.D., Dr. Tornado deals damage, making it a very viable KO move at higher percents.}} | ||
**{{buff|Compared to F.L.U.D.D., Dr. Tornado | **{{buff|Compared to F.L.U.D.D., Dr. Tornado extends Dr. Mario's recovery, making it significantly more effective to get back on-stage.}} | ||
**{{nerf|Compared to F.L.U.D.D., Dr. Tornado has significantly less range and is less important to his neutral game as a result.}} | **{{nerf|Compared to F.L.U.D.D., Dr. Tornado has significantly less range and is less important to his neutral game as a result.}} | ||
**{{nerf|Due to lacking a powerful windbox that pushes opponents away, | **{{nerf|Due to lacking a powerful windbox that pushes opponents away, it is less effective at gimping and is worse at stage control.}} | ||
*[[ | *[[Doctor Finale]]: | ||
**{{change| | **{{change|Doctor Finale produces 2D and 3D Megavitamin-based effects and emits Megavitamins' contact sound effect, whereas [[Mario Finale]] produces 3D fiery effects and emits a burning sound effect.}} | ||
***{{change| | ***{{change|It does not have a flame effect as a result.}} | ||
**{{change|Its hitboxes are longer and thinner, better matching the shape of a capsules.}} | |||
***{{nerf|The shorter vertical range of its hitboxes allows for a wider spacing between Megavitamins, making it easier to miss opponents.}} | |||
<!-- X offset: 0 → -30—30 --> | |||
<!-- Y offset: -3—3 → 0 --> | |||
<!-- Z offset: 0 → -1—1/-1—1/-6—6/-9—9/-10—10 (early/front), -3—3/-4—4/-7—7/-8—8/-9—9/-10—10 (early/back), -10—10 (mid 1, mid 2, mid 3, late) --> | |||
***{{nerf|Its hitboxes are gradually expanding.}} | |||
<!-- size: 16u → 5u/8u/9u/12u/13u (early/front), 4u/6u/9u/10u/12u/13u (early/back), 16u (mid 1, mid 2, mid 3, late) --> | |||
**{{change|It launches at a averaged angle (20°-50° → 28°-36°) and has altered knockback.}} | |||
<!-- forward hit angle front: 23°/50° → 34° (early), 36° (mid 1), 30° (mid 2, mid 3, late) --> | |||
<!-- back hit angle: back: 20°/48° → 30° (early, mid 1), 28° (mid 2, mid 3, late) --> | |||
<!-- base knockback: 25 (early), 20/15 (mid), 10/5 (late) → 35/40 (early, mid 1), 18/22 (mid 2), 16/20 (mid 3), 14/18 (late) --> | |||
<!-- knockback scaling: 40 (early), 90/100 (mid), 120/130 (late) → 70 (early), 110 (mid 1), 120 (mid 2, mid 3), 130 (late) --> | |||
**{{nerf|It deals higher base damage per hit (2/2.5/3 → 3/3.2/3.4/3.6 (front), 2.3/2.5/2.6/2.8 (back))<!-- early/mid/late → early/mid 1/mid 2 and 3/late -->, but has longer gaps between hits (7 frames → 9) and a shorter duration (frames 65-224 → 65-214 (front), 79-214 (back)). As a result, it only hits 17 times instead of 24, and despite using a damage multiplier, the maximum damage it deals is significantly reduced (74% → 65.3856%).}} | |||
===Misc.=== | |||
*{{change|Dr. Mario has a different pose when trapped inside of {{SSBU|Steve}}'s [[Minecart]], being the same as {{SSBU|Luigi}}'s.}} | |||
==Changes from ''[[Super Smash Bros. 4]]''== | ==Changes from ''[[Super Smash Bros. 4]]''== | ||
Dr. Mario | Dr. Mario was previously a poorly regarded character in ''SSB4'' due to a large combination of factors, including his lackluster mobility and short range granting him a poor neutral game, as well as his abysmal recovery and limited combo game, the latter especially compared to [[Mario (SSB4)|his regular incarnation]]. Likely due to these factors, Dr. Mario has been buffed in the transition to ''Ultimate'', though not enough to raise his standing. | ||
One of Dr. Mario's biggest buffs was to his already above-average damage output; all of his moves deal much more damage (excluding his pummel and get-up attacks), which further supplements his damage-racking game and his previously inconsistent KO ability. His recovery, while still poor, has nevertheless improved slightly; [[Dr. Tornado]] has increased distance, and the readdition of directional air dodges gives him another option to possibly extend and mix up his recovery. Additionally, Dr. Mario has a new [[down aerial]] and [[back throw]]; the former can now meteor smash opponents much like Mario's forward aerial, giving him an option that he notoriously lacked in the previous game. Meanwhile, the latter, albeit losing its collateral hitbox, has gained more knockback, now being among the strongest of its kind and even stronger than Mario's own. | |||
Dr. Mario's entire special moveset has also seen numerous buffs. [[Megavitamins]] now deal enough damage and knockback to cause opponents to [[tumble]], and launch at a higher angle, making them viable as a combo starter and even giving them the ability to set up KOs. [[Super Sheet]] has a higher reflection multiplier compared to Mario's Cape, and [[Super Jump Punch]] deals more knockback, making a superior KO move and deadlier [[out of shield]] option. However, Dr. Tornado was buffed significantly; outside of its improved recovery potential, it has gained heavy armor on startup if used on the ground, which makes it useful for tanking through attacks and breaking pressure. Additionally, it deals more damage and knockback, to the point it has gained notoriety for being able to KO offstage effectively at very low percentages; combined with its increased distance, it is now a deadly edgeguarding option. As a result of the improvements to Dr. Tornado, coupled with his revamped down aerial, Dr. Mario's edgeguarding game is now much more powerful in its own right. | |||
In spite of this, Dr. Mario has received a few nerfs. Most notably, Dr. Mario's already sub-par mobility is slightly worse, given the nerfs to his air speed and jump height; while his mobility otherwise remains largely unaltered from his previous appearance, Dr. Mario is now much slower in comparison to the rest of the cast, especially considering most other fighters have received buffs to their mobility. He also shares some other nerfs with Mario, such as up tilt's hitbox placement adjusted, giving it inferior range in front of and underneath him, and his grabs having increased ending lag, hindering their utility and combos. | |||
Compared to {{SSBU|Mario}}, Dr. Mario is still a slower and stronger clone of him. Aside from having an updated [[idle animation]], slightly higher traction compared to Mario, an altered animation for his [[side special]], as well as receiving a new down aerial and back throw, he has not been further decloned. He has also received many of the same changes as Mario. | |||
Overall, Dr. Mario's damage-racking potential has increased and his recovery is safer and slightly better overall, though none of his buffs have benefitted him enough to raise his tier list placement significantly. He also retains many of his weaknesses from ''SSB4'', such as short range, poor mobility, and awful recovery, none of which were toned down in game updates. Thus, despite performing better in ''Ultimate'', Dr. Mario has not improved significantly from his appearance in ''SSB4'', which is made more egregious when coupled with the buffs other veterans have received and the introduction of plentiful, more powerful DLC characters Dr. Mario struggles against. Ultimately, despite his buffs, Dr. Mario is worse relative to the cast in ''Ultimate''. | |||
{{SSB4 to SSBU changelist|char=Dr. Mario}} | {{SSB4 to SSBU changelist|char=Dr. Mario}} | ||
==Update history== | ==Update history== | ||
Dr. Mario has been buffed overall by game updates. After a few minor changes in preceding patches, Dr. Mario received a number of useful buffs in update 7.0.0. Down tilt gained noticeable adjustments to its knockback and hitstun, improving its combo potential significantly. Forward tilt and late neutral aerial's damage outputs were increased noticeably at the cost of slight knockback compensation, which improved their spacing and KO potentials, respectively. Down aerial gained more active frames, which improved its consistency and edgeguarding potential. Lastly, clean [[Super Jump Punch]]'s knockback was increased, which heightened its already considerable strength. | |||
Afterwards, update 13.0.0 granted Dr. Mario other substantial buffs. Two of his most important tools in the neutral game, neutral aerial and up aerial, gained noticeable increases to their knockback and damage output, respectively. Other pivotal moves in Dr. Mario's moveset were also improved: down aerial is 2 frames faster overall, Super Sheet's reflection hitboxes gained more active frames, and Dr. Tornado's heavy armor activates earlier. | |||
Overall, Dr. Mario fares better than he did at the launch of ''Ultimate''. However, the competitive scene's general opinion is that [[Mario (SSBU)|his normal self]] still outshines him in nearly every category. | |||
'''{{GameIcon|ssbu}} {{SSBU|1.1.0}}''' | '''{{GameIcon|ssbu}} {{SSBU|1.1.0}}''' | ||
| Line 196: | Line 245: | ||
'''{{GameIcon|ssbu}} {{SSBU|8.0.0}}''' | '''{{GameIcon|ssbu}} {{SSBU|8.0.0}}''' | ||
{{UpdateList (SSBU)/8.0.0|char=Dr. Mario}} | {{UpdateList (SSBU)/8.0.0|char=Dr. Mario}} | ||
'''{{GameIcon|ssbu}} {{SSBU|13.0.0}}''' | |||
{{UpdateList (SSBU)/13.0.0|char=Dr. Mario}} | |||
==Moveset== | ==Moveset== | ||
| Line 204: | Line 256: | ||
|game=SSBU | |game=SSBU | ||
|neutralcount=3 | |neutralcount=3 | ||
|neutralname= | |neutralname=Jab ({{ja|ジャブ|Jabu}}) / Straight ({{ja|ストレート|Sutorēto}}) / Kick Up ({{ja|けりあげ|Keri Age}}) | ||
|neutral1dmg=2. | |neutral1dmg=2.94% | ||
|neutral2dmg=1. | |neutral2dmg=1.764% | ||
|neutral3dmg=4. | |neutral3dmg=4.704% | ||
|neutraldesc= | |neutraldesc=The {{iw|mariowiki|Punch}} + Punch + {{iw|mariowiki|Kick}} combo from ''{{iw|mariowiki|Super Mario 64}}''. Useful for spacing and comes out quickly. The first and second hits can also jab lock. Additionally, unlike Mario, the close-range hitbox of the first hit can [[jab cancel]] into Super Jump Punch at high percentages for a guaranteed KO confirm. | ||
|ftiltname= | |ftiltname=Middle Kick ({{ja|ミドルキック|Midoru Kikku}}) | ||
|ftiltdmg=10. | |ftiltdmg=10.584% | ||
|ftiltdesc=A wheel kick. It deals average knockback, but it is enough to KO at around 150% at the ledge. | |ftiltdesc=A wheel kick. It deals average knockback, but it is enough to KO at around 150% at the ledge and 209% from center stage. | ||
|utiltname= | |utiltname=Uppercut ({{ja|アッパーカット|Appākatto}}) | ||
|utiltdmg=7. | |utiltdmg=7.4088% | ||
|utiltdesc=A spinning uppercut. Can combo into itself at low percentages, and into aerials at higher percentages. At high percentages (around 140-150%), it can serve as a KO option, although it fails to hit most short opponents due to its high hitbox placement. | |utiltdesc=A spinning uppercut. Can combo into itself at low percentages, and into aerials at higher percentages. At high percentages (around 140%-150%), it can serve as a KO option, although it fails to hit most short opponents due to its high hitbox placement. It vaguely resembles the second hit of the [[mariowiki:List of weapons in Super Mario RPG: Legend of the Seven Stars|Mega Glove]]'s combo from ''{{iw|mariowiki|Super Mario RPG: Legend of the Seven Stars}}''. | ||
|dtiltname= | |dtiltname=Spinning Low Kick ({{ja|スピニングローキック|Supiningu Rō Kikku}}) | ||
|dtiltdmg=5. | |dtiltdmg=5.88% (foot), 8.232% (leg) | ||
|dtiltdesc=A legsweep. A great combo starter, as it can combo into up aerial, Super Jump Punch, and Dr. Tornado, all of which serve as KO confirms. | |dtiltdesc=A legsweep. A great combo starter, as it can combo into up aerial, Super Jump Punch, and Dr. Tornado, all of which serve as KO confirms. | ||
|dashname= | |dashname=Sliding ({{ja|スライディング|Suraidingu}}) | ||
|dashdmg=11. | |dashdmg=11.5248% (clean), 7.056% (late) | ||
|dashdesc= | |dashdesc=The {{iw|mariowiki|Slide Kick}} from ''Super Mario 64''. Launches opponents vertically unlike Mario's version, which can potentially make it a combo starter if hit late. | ||
|fsmashname= | |fsmashname=Defibrillator ({{ja|心臓マッサージ|Shinzō Massāji}}, ''Cardiac Massage'') | ||
|fsmashdmg={{ChargedSmashDmgSSBU|17. | |fsmashdmg={{ChargedSmashDmgSSBU|17.2872}} (electricity), {{ChargedSmashDmgSSBU|20.9328}} (arm) | ||
|fsmashdesc= | |fsmashdesc=A palm thrust that produces a small burst of electricity. Deals immense damage and knockback, giving it great KO potential. Its sweetspot is located on Dr. Mario's arm. One of the stronger forward smashes in the game, and one of Dr. Mario's most viable KOing options, KOing at as low as 55% at the ledge and 78% center stage. Its electric properties also make it safer on shield compared to Mario's, especially if spaced. | ||
|usmashname=Ear, Nose, and Throat | |usmashname=Ear, Nose, and Throat ({{ja|スマッシュヘッドバット|Sumasshu Heddobatto}}, ''Smash Headbutt'') | ||
|usmashdmg={{ChargedSmashDmgSSBU|16.464}} | |||
|usmashdesc=An upward arcing headbutt. Unlike most up smashes, this one launches opponents horizontally in the opposite direction he is facing. Renders Dr. Mario's head intangible for a short time. | |usmashdesc=An upward arcing headbutt. Unlike most up smashes, this one launches opponents horizontally in the opposite direction he is facing. Renders Dr. Mario's head intangible for a short time. It's fast, coming out on frame 9, is powerful and its ending lag is only moderate, making it difficult to punish. The horizontal angle allows the move to combo into itself at low percentages and KO earlier at the ledge if it hits opponents behind him, although it weakens its potential as an anti-air and punishment tool. Its hitboxes and head intangibility last 1 more frame than Mario's, hitting small opponents on the ground more easily. | ||
|dsmashname= | |dsmashname=Break Spin ({{ja|ブレイクスピン|Bureiku Supin}}) | ||
|dsmashdmg={{ChargedSmashDmgSSBU|11.76}} (front), {{ChargedSmashDmgSSBU|14.112}} (back) | |||
|dsmashdesc=A | |dsmashdesc=A breakdancing version of the {{iw|MarioWiki|Sweep Kick}} from ''Super Mario 64''. Dr. Mario's fastest smash attack, making it a rather useful defensive option. Its back hit is stronger, and can punish ledge stalls effectively. It can also semi-spike with above-average knockback, making it a great edgeguarding tool. The front hit KOs at around 130%, while the back hit KOs at 106%. | ||
|nairname=Dr. Kick ({{ja|ドクターキック|Dokutā Kikku}}) | |||
|nairdmg={{ShortHopDmgSSBU|5. | |nairdmg={{ShortHopDmgSSBU|5.88}} (clean), {{ShortHopDmgSSBU|11.75}} (late) | ||
|nairdesc=A [[sex kick]] that has the unique property of having its late hit being stronger than its clean hit. Its clean hit can jab lock and start combos, while its late hit has surprisingly high knockback for a sex kick, KOing at the edge at around 130%. | |nairdesc=A flying kick. It is a [[sex kick]] that has the unique property of having its late hit being stronger than its clean hit. Its clean hit can jab lock and start combos, while its late hit has surprisingly high knockback for a sex kick, KOing at the edge at around 130%. It can autocancel in a short hop. | ||
|fairname=Dr. Punch | |fairname=Dr. Punch ({{ja|ドクターグーパンチ|Dokutā Panchi}}) | ||
|fairdmg={{ShortHopDmgSSBU|11. | |fairdmg={{ShortHopDmgSSBU|11.76}} (early), {{ShortHopDmgSSBU|17.64}} (clean), {{ShortHopDmgSSBU|10.584}} (late) | ||
|fairdesc= | |fairdesc=An {{iw|wikipedia|overhand|boxing}}. Unlike Mario's version, it does not have a meteor smash hitbox. It has the slowest of his aerials, coming out at frame 16 and having high ending lag and landing lag, and is the only aerial that cannot autocancel in a short hop, but it has extremely high diagonal knockback when hit clean, making it one of the strongest forward aerials in the game. Can KO middleweights as early as 70% near the edge. | ||
|bairname= | |bairname=Drop Kick ({{ja|ドロップキック|Doroppu Kikku}}) | ||
|bairdmg={{ShortHopDmgSSBU|14. | |bairdmg={{ShortHopDmgSSBU|14.112}} (clean), {{ShortHopDmgSSBU|8.232}} (late) | ||
|bairdesc=A {{ | |bairdesc=A {{iw|wikipedia|dropkick}}. Comes out quickly, autocancels in a short hop fast fall and has above-average knockback, which makes it a viable edgeguarding and KO move and a [[reverse aerial rush]] option. Can also chain into itself at low percents, or set up tech-chase situations. | ||
|uairname= | |uairname=Air Slash ({{ja|エアスラッシュ|Ea Surasshu}}) | ||
|uairdmg={{ShortHopDmgSSBU| | |uairdmg={{ShortHopDmgSSBU|11.9952}} | ||
|uairdesc=A bicycle kick. The move launches diagonally unlike Mario's up aerial, which can be ideal for edgeguarding mixups. However, this renders it unusable for juggling and lengthy combos past low percentages. It can be used twice in a single [[short hop]], or the second up aerial can be replaced with a neutral aerial instead. Despite its very quick startup, it works well as a KO option at high percentages, especially offstage. | |uairdesc=A bicycle kick. The move launches diagonally unlike Mario's up aerial, which can be ideal for edgeguarding mixups. However, this renders it unusable for juggling and lengthy combos past low percentages. It can be used twice in a single [[short hop]], or the second up aerial can be replaced with a neutral aerial instead, and can autocancel in a short hop fast fall. Despite its very quick startup, it works well as a KO option at high percentages, especially offstage. | ||
|dairname=CLEAR! | |dairname=CLEAR! ({{ja|全力メテオキック|Zen Ryoku Meteo Kikku}}, ''Full Power Meteor Kick'') | ||
|dairdmg={{ShortHopDmgSSBU|14. | |dairdmg={{ShortHopDmgSSBU|14.112}} | ||
|dairdesc= | |dairdesc=A double foot stomp. While it has noticeable startup, it deals consistent damage and can powerfully [[meteor smash]] opponents when hitting with the sweetspot on his legs. It has a sourspot on his hips, which instead launches away with strong knockback. On grounded opponents, the meteor hitbox can open up many KO confirms, notably with forward aerial, back aerial, Super Jump Punch and Dr. Tornado. It can autocancel in a short hop and is decently quick for a meteor smash, coming out at frame 14. | ||
|grabname=Grab ({{ja|つかみ|Tsukami}}) | |||
|grabdesc=Reaches out. Has average range and above average speed. | |grabdesc=Reaches out. Has average range and above-average speed. | ||
|pummelname= | |pummelname=Grab Headbutt ({{ja|つかみヘッドバット|Tsukami Heddobatto}}) | ||
|pummeldmg=1. | |pummeldmg=1.5288% | ||
|pummeldesc= | |pummeldesc=A headbutt. Moderately fast. | ||
|fthrowname= | |fthrowname=Swing-Around Throw ({{ja|ふり抜き投げ|Furinuki Nage}}) | ||
|fthrowdmg=9. | |fthrowdmg=9.408% | ||
|fthrowdesc=Spins and throws the opponent away. Can be used to set up an edgeguard, or combo into dash attack against certain characters at 0%. Decently quick. It is also slightly stronger than Mario's forward throw as it can KO middleweights at around | |fthrowdesc=Spins and throws the opponent away. Can be used to set up an edgeguard, or combo into dash attack against certain characters at 0%. Decently quick. It is also slightly stronger than Mario's forward throw, as it can KO middleweights at around 190% at the edge of Final Destination, which is about 10% earlier. | ||
|bthrowname= | |bthrowname=Airplane Throw ({{ja|ヒコーキ投げ|Hikōki Nage}}) | ||
|bthrowdmg=12. | |bthrowdmg=12.936% | ||
|bthrowdesc=Dr. Mario heaves the opponent over him and then throws them diagonally. Combined with its high damage and knockback, it is one of the strongest back throws in the game, having potential to even surpass {{SSBU|Ness}}' | |bthrowdesc=Dr. Mario heaves the opponent over him and then throws them diagonally. Combined with its high damage and knockback, it is one of the strongest back throws in the game, having potential to even surpass {{SSBU|Ness}}' back throw by a small margin when at the ledge. Can KO middleweights at around 109% near the edge of Final Destination with good DI, and even from center stage can generally secure KOs around the 150-160% range. | ||
|uthrowname= | |uthrowname=Throw Up ({{ja|スルーアップ|Surū Appu}}) | ||
|uthrowdmg=8. | |uthrowdmg=8.232% | ||
|uthrowdesc=Heaves the opponent upward. Can put the opponent into a juggling situation. Can combo into up aerial and Dr. Tornado at low percentages. It can KO middleweights at around | |uthrowdesc=Heaves the opponent upward. Can put the opponent into a juggling situation. Can combo into up aerial and Dr. Tornado at low percentages. It can KO middleweights at around 225% on Final Destination, which is about 5% earlier than Mario's up throw. Due to its new animation, it heavily resembles the Upward {{iw|mariowiki|Cap Throw}} from ''{{iw|mariowiki|Super Mario Odyssey}}''. | ||
|dthrowname=Hospital Bed ({{ja|スルーダウン|Surū Daun}}, ''Throw Down'') | |||
| | |dthrowdmg=5.88% | ||
|dthrowdesc= | |dthrowdesc=A [[wikipedia:Professional wrestling throws#Body slam|body slam]]. As it launches opponents directly upward unlike Mario's version, it is one of Dr. Mario's best combo starters, being useful for initiating aerial combos. It even has KO setups into up aerial, forward aerial, back aerial, Super Jump Punch and Dr. Tornado, although the latter four followups are reliant on reading the opponent. | ||
|floorfname= | |floorfname= | ||
|floorfdmg=7% | |floorfdmg=7.056% | ||
|floorfdesc= | |floorfdesc=Punches behind himself and then in front of himself while getting up. | ||
|floorbname= | |floorbname= | ||
|floorbdmg=7% | |floorbdmg=7.056% | ||
|floorbdesc= | |floorbdesc=Performs a modified version of the Sweep Kick from ''Super Mario 64'' before getting up. | ||
|floortname= | |floortname= | ||
|floortdmg=5% | |floortdmg=5.0568% | ||
|floortdesc= | |floortdesc=Performs a side kick behind himself and then in front of himself while getting up. | ||
|edgename= | |edgename= | ||
|edgedmg=10% | |edgedmg=10.00776% | ||
|edgedesc=Performs a dropkick while climbing up. Identical to Mario's, though it deals more damage. | |edgedesc=Performs a dropkick while climbing up. Identical to Mario's, though it deals more damage. | ||
|nsname=Megavitamins | |nsname=Megavitamins | ||
|nsdmg=5. | |nsdmg=5.88% (early), 4.704% (late) | ||
|nsdesc=Throws a {{ | |nsdesc=Throws a {{iw|mariowiki|Megavitamin}}. Useful approach and pressure option. Unlike [[Fireball]], it cannot be absorbed, bounces on a different trajectory, and lacks a [[flame]] effect. It launches opponents slightly upward, which can potentially set up a combo. At higher percents, it can even set up for a KO confirm if timed correctly. | ||
|ssname=Super Sheet | |ssname=Super Sheet | ||
|ssdmg=8. | |ssdmg=8.232%, 1.6× (reflection) | ||
|ssdesc=Flips | |ssdesc=Flips a white sheet upward. It reflects projectiles and reverses enemies, as well as reversing the opponent's controls for a brief instant. However, it does not stall Dr. Mario's descent in midair, making it useless for recovery unlike [[Cape]]. Compared to Mario's version, Dr. Mario's Super Sheet has slightly increased vertical reach in exchange for slightly lower horizontal reach, and has a longer hitbox and reflecting duration along with a higher reflection multiplier. In essence, it is better for reflection in exchange for bringing less utility. | ||
|usname=Super Jump Punch | |usname=Super Jump Punch | ||
|usdmg=14. | |usdmg=14.112% (clean), 7.056% (late) | ||
|usdesc=A jumping uppercut. It functions better as an attack than a recovery option, as it has great KO potential and fast startup, which can make it a deadly [[out of shield]] option. However, it travels a short distance compared to Mario's version. | |usdesc=A jumping uppercut. Unlike Mario's (which deals multiple hits), Dr. Mario's version consists of a powerful main hit that hits once, with a weaker late hit. It functions better as an attack than a recovery option, as it has great KO potential and fast startup, which can make it a deadly [[out of shield]] option. However, it travels a short distance compared to Mario's version. KOs at 124% from center stage. | ||
|dsname=Dr. Tornado | |dsname=Dr. Tornado | ||
|dsdmg=1. | |dsdmg=1.8816% (hits 1-6), 3.528% (final hit) | ||
|dsdesc= | |dsdesc=Rapidly spins around, trapping opponents and damaging them with a series of [[Wikipedia:Professional wrestling attacks#Clothesline|discus clotheslines]] and [[Wikipedia:Professional wrestling attacks#Spinning back fist|spinning backfists]] before assuming a [[wikipedia:Spreadeagle (position)|spread-eagle position]] to launch them. Can hit up to seven times, with the final hit sending opponents diagonally. The grounded version grants Dr. Mario 10% [[armor]] during frames 2-9. This move can be used to aid in recovery, as mashing the B button will make Dr. Mario rise up. The maximum height that can be gained from this move is greater than that of Super Jump Punch, although this requires extremely fast button mashing. It gains good vertical and horizontal distance if mashed fast enough, allowing it to extend Dr. Mario's recovery, although it only grants aerial distance once before landing. As an attack, it is notorious for being able to KO very early at the sides of the stage (around 45% at earliest) due to its extremely high knockback growth on its last hit. As such, it is a deadly edgeguarding tool, although it is a bit risky due to Dr. Mario's poor recovery. | ||
|fsname=Doctor Finale | |fsname=Doctor Finale | ||
|fsdmg=3. | |fsdmg=3.528%/3.7632%/3.9984%/4.2336% (front), 2.7048%/2.94%/3.0576%/3.2928% (back) | ||
|fsdesc= | |fsdesc=Rears his arms back before thrusting them forward to generate and launch two gigantic Megavitamins, which trap and repeatedly damage any opponents in their path. Compared to [[Mario Finale]], the front Megavitamin deals more damage than the back Megavitamin, and the Megavitamins don't deal flame damage. | ||
}} | |||
===Stats=== | |||
{{Attributes | |||
|weight = 98 | |||
|rweight = 33-36 | |||
|cast = 89 | |||
|dash = 1.5375712 | |||
|rdash = 82 | |||
|run = 1.397792 | |||
|rrun = 82 | |||
|walk = 0.917301 | |||
|rwalk = 67 | |||
|trac = 0.106 | |||
|rtrac = 50-54 | |||
|airfric = 0.011472 | |||
|rairfric = 39 | |||
|air = 0.9238784 | |||
|rair = 77 | |||
|baseaccel = 0.007648 | |||
|rbaseaccel = 58 | |||
|addaccel = 0.053536 | |||
|raddaccel = 58 | |||
|gravity = 0.087 | |||
|rgravity = 54-56 | |||
|fall = 1.5 | |||
|rfall = 58-61 | |||
|ff = 2.4 | |||
|rff = 57-59 | |||
|jumpsquat = 3 | |||
|rjumpsquat = 1-88 | |||
|jumpheight = 30.8805 | |||
|rjumpheight= 61 | |||
|djump = 27.785184 | |||
|rdjump = 83 | |||
|shorthop = 13.414592 | |||
|rshorthop = 75 | |||
}} | }} | ||
Note: Dr. Mario's movement stats are coded to be the exact same as Mario's, but are multiplied to be slower using external factors. His walk, dash, and run speeds are multiplied by 0.7942, while his air friction, air speed, air acceleration, and jump heights are multiplied by 0.7648. | |||
===[[Announcer]] calls=== | |||
<gallery> | |||
Dr. Mario English Announcer SSB4-SSBU.wav|English/Japanese/Chinese | |||
Dr. Mario French Announcer SSBU.wav|French | |||
Dr. Mario German Announcer SSBU.wav|German | |||
Dr. Mario Italian Announcer SSBU.wav|Italian | |||
Dr. Mario Russian Announcer SSBU.wav|Russian | |||
Dr. Mario Spanish Announcer SSBU.wav|Spanish | |||
</gallery> | |||
===[[On-screen appearance]]=== | ===[[On-screen appearance]]=== | ||
* | *Stands behind a wall of Megavitamins, which then start to disappear starting from the top to reveal him. Stands in a thinking pose with his eyes closed until all of the Megavitamins are gone, after which he opens them with a surprised expression and assumes fighting stance. | ||
<gallery> | <gallery> | ||
Dr.MarioOnScreenAppearanceSSBU.gif|Dr. Mario's on-screen appearance | Dr.MarioOnScreenAppearanceSSBU.gif|Dr. Mario's on-screen appearance | ||
</gallery> | </gallery> | ||
===[[ | ===[[Taunt]]s=== | ||
*'''Up taunt''': Looks to the ground and rubs the sole of one of his shoes to the floor. | *'''Up taunt''': Looks to the ground and rubs the sole of one of his shoes to the floor. | ||
*'''Side taunt''': Pulls out a randomly | *'''Side taunt''': Pulls out a randomly colored Megavitamin, rolls it down his arm, uses his shoulder to toss it into the air, and then catches it. | ||
*'''Down taunt''': Balls one of his fists and lightly pounds his shoulder. | *'''Down taunt''': Balls one of his fists and lightly pounds his shoulder. | ||
<gallery> | <gallery> | ||
| Line 307: | Line 409: | ||
===[[Idle pose]]s=== | ===[[Idle pose]]s=== | ||
*Rolls his neck as if stretching it. | |||
*Pounds his fist into his palm. | *Pounds his fist into his palm. | ||
<gallery> | <gallery> | ||
SSBUDrMarioIdle1.gif|Dr. Mario's first idle pose | SSBUDrMarioIdle1.gif|Dr. Mario's first idle pose. | ||
SSBUDrMarioIdle2.gif|Dr. Mario's second idle pose | SSBUDrMarioIdle2.gif|Dr. Mario's second idle pose. | ||
</gallery> | </gallery> | ||
===[[Crowd cheer]]=== | |||
<div class="tabber"> | |||
<div class="tabbertab" title="English, Japanese/Chinese, Italian, Dutch, French"> | |||
{| class="wikitable" border="1" cellpadding="4" cellspacing="1" | |||
|- | |||
!{{{name|}}} | |||
!Cheer (English) | |||
!Cheer (Japanese/Chinese) | |||
!Cheer (Italian) | |||
!Cheer (Dutch) | |||
!Cheer (French) | |||
|- | |||
! scope="row"|Cheer | |||
|[[File:Dr. Mario Cheer English SSBU.ogg|center]]||[[File:Dr. Mario Cheer Japanese SSBU.ogg|center]]||[[File:Dr. Mario Cheer Italian SSBU.ogg|center]]||[[File:Dr. Mario Cheer Dutch SSBU.ogg|center]]||{{NTSC}} [[File:Dr. Mario Cheer French NTSC SSBU.ogg|center]] <br> {{PAL}} [[File:Dr. Mario Cheer French PAL SSBU.ogg|center]] | |||
|- | |||
! scope="row"|Description | |||
|Go - Doc!|| Iii-sha! (Doc-tor!) || Doctor Mario curali tutti! || Dok! Dok! Dr. Mario! || Doc - teur Mari - o! | |||
|} | |||
</div> | |||
<div class="tabbertab" title="German, Spanish, Russian, Korean"> | |||
{| class="wikitable" border="1" cellpadding="4" cellspacing="1" | |||
|- | |||
!{{{name|}}} | |||
!Cheer (German) | |||
!Cheer (Spanish) | |||
!Cheer (Russian) | |||
!Cheer (Korean) | |||
|- | |||
! scope="row"|Cheer | |||
|[[File:Dr. Mario Cheer German SSBU.ogg|center]]||{{NTSC}} [[File:Dr. Mario Cheer Spanish NTSC SSBU.ogg|center]] <br> {{PAL}} [[File:Dr. Mario Cheer Spanish PAL SSBU.ogg|center]]||[[File:Dr. Mario Cheer Russian SSBU.ogg|center]]||[[File:Dr. Mario Cheer Korean SSBU.ogg|center]] | |||
|- | |||
! scope="row"|Description | |||
|Dok - tor Mari - o! || Dooooctor Mario! *claps 5 times* || Dok - tor -- Mari - o! || Doc - tor Mari - o! | |||
|} | |||
</div> | |||
</div> | |||
===[[Victory pose]]s=== | ===[[Victory pose]]s=== | ||
*'''Left:''' Throws two randomly | *'''Left:''' Throws two randomly colored Megavitamins in different directions, dusts his gloves, pulls out two more Megavitamins of the same color, and smiles. | ||
*'''Up:''' | *'''Up:''' Flourishes his stethoscope around himself. | ||
*'''Right:''' Taps his shoe on the ground, | *'''Right:''' Taps his shoe on the ground, places a hand on his chin, and then looks at the screen while contemplatively rubbing his chin. | ||
[[File:MarioSeriesVictoryThemeUltimate.ogg|thumb|A flourished remix of the Course Clear Fanfare used in ''{{ | [[File:MarioSeriesVictoryThemeUltimate.ogg|thumb|A flourished remix of the Course Clear Fanfare used in ''{{iw|mariowiki|Super Mario Bros.}}'']] | ||
<gallery> | <gallery> | ||
Dr Mario Pose 2.gif | Dr Mario Pose 2.gif | ||
| Line 325: | Line 464: | ||
</gallery> | </gallery> | ||
==In competitive play== | ==In [[competitive play]]== | ||
===Most historically significant players=== | |||
<!--This character has a ten player limit for this section. Before adding and/or removing a player, read these guidelines: https://www.ssbwiki.com/SmashWiki:Notability#%22Most_historically_significant_players%22_guidelines --> | |||
Dr. Mario | ''See also: [[:Category:Dr. Mario players (SSBU)]]'' | ||
*{{Sm|JaZaR|Mexico}} - The best Dr. Mario player in the world in 2023. He is the second Dr. Mario player to be ranked on a global ranking, at 144th on the [[LumiRank 2023]]. He regularly places top 8 at Mexican regionals, including winning {{Trn|Laguna Championship 2023}} and placing 3rd at {{Trn|Xcution Summit II}} defeating {{Sm|Skyjay}}. He also has several strong major performances, including 13th at {{Trn|Delfino Maza 2023}}, 25th at {{Trn|Smash Factor X}}, and 33rd at {{Trn|Smash Factor 9}}. | |||
*{{Sm|Lui$|USA}} - One of the first Dr. Mario players to garner any noticeable results, placing 33rd at {{Trn|GENESIS 6}} with solo-Dr. Mario, 17th at {{Trn|Smash 'N' Splash 5}} with mostly Dr. Mario, and 33rd at {{Trn|Frostbite 2019}} using Dr. Mario to defeat {{Sm|ESAM}}. However since mid-2019 he has dropped Dr. Mario in favor of other characters. | |||
*{{Sm|Meowscarada|USA}} - The best Dr. Mario player in the United States' online metagame. They placed highly at several online events such as 2nd at {{Trn|Frame Perfect Series 2: ONLINE}} and 7th at {{Trn|Smash Out Breast Cancer}} and was ranked 37th on the [[Wi-Fi Warrior Rank v6]]. Although their activity has largely been in-region in the post-online metagame, they nonetheless have seen strong results, such as placing 2nd at {{Trn|Ignition 300}} defeating some of the Midwest's best players including {{Sm|skittles}} and {{Sm|Ikan}}. | |||
*{{Sm|Oryon|France}} - Although more known for his {{SSBU|Wolf}}, he also played Dr. Mario from 2019 to 2021 and was considered the best Dr. Mario player in Europe. He placed 5th at {{Trn|VCA 2021}} playing mostly Dr. Mario, and has also placed 5th at {{Trn|Syndicate 2019}}, 9th at {{Trn|Albion 4}}, and 13th at {{Trn|GENESIS 8}} using Dr. Mario in notable bracket games and sets. | |||
*{{Sm|Shissho|Japan}} - The second-best Dr. Mario player in Japan. He notably won the 256-entrants regional {{Trn|KOWLOON 1}} over {{Sm|Paseriman}} and {{Sm|Munekin}}, and has also placed highly at several majors, including 17th at {{Trn|Kagaribi 9}} and 25th at {{Trn|Maesuma TOP 10}}. | |||
*{{Sm|Tsumusuto|Japan}} - The best Dr. Mario in the world from 2019 through 2022 and is the only Dr. Mario player who had ever finished top 8 at a major, placing 3rd at {{Trn|Maesuma TOP 9}}. In addition, he has also finished strongly at several majors, including 9th at both {{Trn|Sumabato SP 5}} and {{Trn|Sumabato SP 6}}. He was ranked 115th on the [[OrionRank Ultimate: Eclipse]], the highest ranking ever for a Dr. Mario main. | |||
===Tier placement and history=== | |||
In the early metagame, opinions on Dr. Mario remained largely the same as it was in ''Super Smash Bros. 4''. Although his power, out of shield options, and damage racking capabilities were improved in the transition to ''Ultimate'', his sluggish speed, atrocious recovery, and mediocre range indicated that his worst weaknesses were still largely unaddressed, leaving him with poor matchups against characters such as {{SSBU|Palutena}}, {{SSBU|Shulk}}, and {{SSBU|Lucina}}. Although players such as {{Sm|Lui$}}, {{Sm|Locus}}, and {{Sm|Oryon}} saw success with Dr. Mario, most would either drop him or relegated him to a secondary, worsening his poor representation. As a result, most players, including {{Sm|Dark Wizzy}} and {{Sm|Mr.R}}, viewed Dr. Mario as a low tier, with some going as far as to say that he was one of the worst characters in the game. The current tier list reflects this, as Dr. Mario is ranked just above the likes of {{SSBU|King Dedede}}, {{SSBU|Little Mac}}, and {{SSBU|Ganondorf}}. | |||
Despite this negative perception, however, Dr. Mario still saw glimpses of success thanks to the efforts of dedicated mains, including {{Sm|Tsumusuto}} in Japan, {{Sm|JaZaR}} in Mexico, and {{Sm|Mabel}} during the online metagame. Furthermore, Dr. Mario received buffs from game updates that improved his combo and punish games. This left his true viability up to debate, with players such as {{Sm|Nairo}} and {{Sm|Leffen}} believing Dr. Mario was potentially a viable character, while other players maintained that he was still an unviable fighter due to improvements to other fighters, as well as the introductions of {{SSBU|Min Min}}, {{SSBU|Steve}}, and {{SSBU|Sephiroth}}. Nevertheless, Dr. Mario's perception has improved since the early metagame, although he is unanimously agreed to be inferior to {{SSBU|Mario}}. | |||
=={{SSBU|Classic Mode}}: Colorful Treatment Plan== | =={{SSBU|Classic Mode}}: Colorful Treatment Plan== | ||
[[File:SSBU Congratulations Dr Mario.png|thumb | [[File:SSBU Congratulations Dr Mario.png|thumb|Dr. Mario's congratulations screen.]] | ||
Dr. Mario's opponents are | In reference to the three viruses, [[mariowiki:Virus|Fever, Chill, and Weird]], Dr. Mario's opponents are trios consisting of red, blue, and yellow alternates of a particular fighter. | ||
{|class="wikitable | {|class="wikitable" style="text-align:center" | ||
!Round!!Opponent!!Stage!!Music!!Notes | !Round!!Opponent!!Stage!!Music!!Notes | ||
|- | |- | ||
|1|| | |1||{{Head|Mr. Game & Watch|g=SSBU|s=20x20px|cl=Red}}{{Head|Mr. Game & Watch|g=SSBU|s=20x20px|cl=Yellow}}{{Head|Mr. Game & Watch|g=SSBU|s=20x20px|cl=Blue}} {{SSBU|Mr. Game & Watch}} Team||[[Flat Zone X]]||''{{SSBUMusicLink|Super Mario Bros.|Chill (for 3DS / Wii U)}}''|| | ||
|- | |- | ||
|2|| | |2||{{Head|Kirby|g=SSBU|s=20x20px|cl=Yellow}}{{Head|Kirby|g=SSBU|s=20x20px|cl=Blue}}{{Head|Kirby|g=SSBU|s=20x20px|cl=Red}} {{SSBU|Kirby}} Team||[[Green Greens]]||''{{SSBUMusicLink|Super Mario Bros.|Fever}}''|| | ||
|- | |- | ||
|3|| | |3||{{Head|Yoshi|g=SSBU|s=20x20px|cl=Red}}{{Head|Yoshi|g=SSBU|s=20x20px|cl=Blue}}{{Head|Yoshi|g=SSBU|s=20x20px|cl=Yellow}} {{SSBU|Yoshi}} Team||{{SSBB|Yoshi's Island}}||''{{SSBUMusicLink|Super Mario Bros.|Chill (Brawl)}}''|| | ||
|- | |- | ||
|4|| | |4||{{Head|Wii Fit Trainer|g=SSBU|s=20x20px|cl=Red}}{{Head|Wii Fit Trainer|g=SSBU|s=20x20px}}{{Head|Wii Fit Trainer|g=SSBU|s=20x20px|cl=Yellow}} {{SSBU|Wii Fit Trainer}} Team||[[Wii Fit Studio]]||''{{SSBUMusicLink|Super Mario Bros.|Fever}}''|| | ||
|- | |- | ||
|5|| | |5||{{Head|R.O.B.|g=SSBU|s=20x20px|cl=Red}}{{Head|R.O.B.|g=SSBU|s=20x20px|cl=Blue}}{{Head|R.O.B.|g=SSBU|s=20x20px|cl=Yellow}} {{SSBU|R.O.B.}} Team||{{SSBU|Battlefield}}||''{{SSBUMusicLink|Super Mario Bros.|Chill (for 3DS / Wii U)}}''|| | ||
|- | |- | ||
|6|| | |6||{{Head|Wario|g=SSBU|s=20x20px|cl=Classic}}{{Head|Wario|g=SSBU|s=20x20px|cl=ClassicRed}}{{Head|Wario|g=SSBU|s=20x20px|cl=ClassicCyan}} {{SSBU|Wario}} Team||[[Luigi's Mansion]]||''{{SSBUMusicLink|Other|Tetris: Type A}}''||References his rivalry with Wario in ''Dr. Mario 64'', as well as Wario's bad diet and hygiene in the ''WarioWare'' series. | ||
|- | |- | ||
|colspan="5"|Bonus Stage | |colspan="5"|[[Bonus Stage]] | ||
|- | |- | ||
|Final||{{SSBU|Master Hand}}||{{SSBU|Final Destination}}||''{{SSBUMusicLink|Super Smash Bros.|Master Hand}}'' <small>(Less than 7.0 intensity)</small><br>''{{SSBUMusicLink|Super Smash Bros.|Master Hand / Crazy Hand}}'' <small>(Intensity 7.0 or higher)</small>||On intensity 7.0 and higher, {{SSBU|Crazy Hand}} fights alongside Master Hand. | |Final||{{SSBU|Master Hand}}||{{SSBU|Final Destination}}||''{{SSBUMusicLink|Super Smash Bros.|Master Hand}}'' <small>(Less than 7.0 intensity)</small><br>''{{SSBUMusicLink|Super Smash Bros.|Master Hand / Crazy Hand}}'' <small>(Intensity 7.0 or higher)</small>||On intensity 7.0 and higher, {{SSBU|Crazy Hand}} fights alongside Master Hand. | ||
|} | |} | ||
Note: Every stage plays a track from the | Note: Every stage plays a track related to Dr. Mario or from the {{uvm3|Tetris}} universe, no matter what universe the stage originates from. <!--This is NOT a reference to the SNES game "Tetris and Dr. Mario". Tetris and Dr. Mario never got a Japanese release.--> | ||
[[Credits]] roll after completing Classic Mode. Completing it as Dr. Mario has ''{{SSBUMusicLink|Super Mario Bros.|Fever}}'' accompany the credits. | [[Credits]] roll after completing Classic Mode. Completing it as Dr. Mario has ''{{SSBUMusicLink|Super Mario Bros.|Fever}}'' accompany the credits. | ||
The spawn positions in Round 1 were changed in version 12.0.0. Player 1 Dr. Mario starts on the second floor of the building on Flat Zone X (which was Player 2's position beforehand) instead of on the floor in front of the building. Player 2 starts on the ground level right underneath Player 1 instead of on the second floor. The Mr. Game & Watch Team was moved slightly forward.<ref>{{cite web|url=https://www.youtube.com/watch?v=FKdwKydDicM|title=Co-op Round 1 spawn positions on June 13th, 2021}}</ref><ref>{{cite web|url=https://youtu.be/w9D3SjRwW18?t=1344|title=Round 1 spawn positions on July 18th, 2021}}</ref> Dr. Mario is overall further away from the Mr. Game & Watch Team in single-player mode, which means the round will take slightly longer than average. | |||
{{clr}} | {{clr}} | ||
| Line 384: | Line 521: | ||
===Fighter Battle=== | ===Fighter Battle=== | ||
{|class="wikitable | {|class="wikitable" style="width:100%;" | ||
|- | |- | ||
! style="width:5%;"|No. | !style="width:5%;"|No. | ||
! style="width:5%;"|Image | !style="width:5%;"|Image | ||
! Name | !Name | ||
! Type | !Type | ||
! Power | !Power | ||
! Stage | !Stage | ||
! Music | !Music | ||
|- | |- | ||
| 18 | |18 | ||
| [[File:Dr. Mario SSBU.png|center|108x108px]] | |[[File:Dr. Mario SSBU.png|center|108x108px]] | ||
|Dr. Mario | |||
| | |{{SpiritType|Shield}} <center>{{color|#18aef5|Shield}}</center> | ||
| 3,400 | |3,400 | ||
| [[Mario Bros.]] ([[Ω form]]) | |[[Mario Bros.]] ([[Ω form]]) | ||
| ''{{SSBUMusicLink|Super Mario Bros.|Fever}}'' | |''{{SSBUMusicLink|Super Mario Bros.|Fever}}'' | ||
|} | |} | ||
{{ | {{clr}} | ||
==[[Spirit]]== | ==[[Spirit]]== | ||
Dr. Mario's | Dr. Mario's fighter spirit can be obtained by completing {{SSBU|Classic Mode}}. It is also available periodically for purchase in the shop for 300 Gold, but only after Dr. Mario has been unlocked. Unlocking Dr. Mario in World of Light allows the player to preview the spirit below in the Spirit List under the name "???". As a fighter spirit, it cannot be used in Spirit Battles and is purely aesthetic. His fighter spirit has an alternate version that replaces it with his artwork in ''Ultimate''. | ||
<center> | <center> | ||
<gallery> | <gallery> | ||
Dr. Mario | SSBU spirit Dr. Mario.png|8. '''''Dr. Mario''''' | ||
</gallery> | </gallery> | ||
</center> | </center> | ||
==In Spirit | ==In Spirit Battles== | ||
''Conditions in italic aren't listed on the Spirit Battle preview screen.'' | |||
===As the main opponent=== | ===As the main opponent=== | ||
{|class="wikitable sortable" style="width:100%;" | {|class="wikitable sortable" style="width:100%;" | ||
! colspan=4|Spirit | ! colspan=4|Spirit | ||
! colspan=7|Battle parameters | ! colspan=7|Battle parameters | ||
| Line 435: | Line 573: | ||
|- | |- | ||
|592 | |592 | ||
|{{SpiritTableName|Dr. Stewart|iw=fzerowiki|size=64}} | |||
|{{ | |||
|''F-Zero'' Series | |''F-Zero'' Series | ||
|•{{SSBU|Dr. Mario}} {{Head|Dr. Mario|g=SSBU|s=20px|cl=Yellow}} | |•{{SSBU|Dr. Mario}} {{Head|Dr. Mario|g=SSBU|s=20px|cl=Yellow}} | ||
| | |{{SpiritType|Neutral}} | ||
|9,500 | |9,500 | ||
|[[Mute City SNES]] ([[Battlefield form]]) | |[[Mute City SNES]] ([[Battlefield form]]) | ||
|•Item: [[Food]] | |•Item: [[Food]] | ||
|•Timed battle<br>•The enemy heals over time<br>•Items will be pulled toward the enemy | |•Timed battle (1:30)<br>•The enemy heals over time<br>•Items will be pulled toward the enemy | ||
|{{SSBUMusicLink|F-Zero|Mute City (Original)}} | |{{SSBUMusicLink|F-Zero|Mute City (Original)}} | ||
| | | | ||
|- | |- | ||
|736 | |736 | ||
|{{SpiritTableName|Dr. Crygor|size=64}} | |||
|{{ | |||
|''WarioWare'' Series | |''WarioWare'' Series | ||
|•{{SSBU|Dr. Mario}} {{Head|Dr. Mario|g=SSBU|s=20px|cl=Blue}}<br>•{{SSBU|R.O.B.}} {{Head|R.O.B.|g=SSBU|s=20px|cl=Blue}}<br>•{{SSBU|Wario}} {{Head|Wario|g=SSBU|s=20px|cl=Green}} | |•{{SSBU|Dr. Mario}} {{Head|Dr. Mario|g=SSBU|s=20px|cl=Blue}}<br>•{{SSBU|R.O.B.}} {{Head|R.O.B.|g=SSBU|s=20px|cl=Blue}}<br>•{{SSBU|Wario}} {{Head|Wario|g=SSBU|s=20px|cl=Green}} | ||
| | |{{SpiritType|Grab}} | ||
|3,400 | |3,400 | ||
|[[WarioWare, Inc.]] (hazards off) | |[[WarioWare, Inc.]] (hazards off) | ||
| Line 461: | Line 597: | ||
|- | |- | ||
|752 | |752 | ||
|{{SpiritTableName|Hal Emmerich|link=y|size=64}} | |||
|{{ | |||
|''Metal Gear Solid'' Series | |''Metal Gear Solid'' Series | ||
|•{{SSBU|Dr. Mario}} {{Head|Dr. Mario|g=SSBU|s=20px|cl=Black}}<br>•Giant Metal {{SSBU|R.O.B.}} {{Head|R.O.B.|g=SSBU|s=20px|cl=Cyan}} | |•{{SSBU|Dr. Mario}} {{Head|Dr. Mario|g=SSBU|s=20px|cl=Black}}<br>•Giant Metal {{SSBU|R.O.B.}} {{Head|R.O.B.|g=SSBU|s=20px|cl=Cyan}} | ||
| | |{{SpiritType|Shield}} | ||
|4,500 | |4,500 | ||
|[[Prism Tower]] | |[[Prism Tower]] | ||
| Line 474: | Line 609: | ||
|- | |- | ||
|867 | |867 | ||
|{{SpiritTableName|Dr. Light|size=64}} | |||
|{{ | |||
|''Mega Man'' Series | |''Mega Man'' Series | ||
|•{{SSBU|Dr. Mario}} {{Head|Dr. Mario|g=SSBU|s=20px|cl=Blue}}<br>•{{SSBU|Mega Man}} {{Head|Mega Man|g=SSBU|s=20px|cl=Cyan}} | |•{{SSBU|Dr. Mario}} {{Head|Dr. Mario|g=SSBU|s=20px|cl=Blue}} (160 HP)<br>•{{SSBU|Mega Man}} {{Head|Mega Man|g=SSBU|s=20px|cl=Cyan}} (160 HP) | ||
| | |{{SpiritType|Shield}} | ||
|10,000 | |10,000 | ||
|[[Wily Castle]] ([[Battlefield form]]) | |[[Wily Castle]] ([[Battlefield form]]) | ||
| Line 487: | Line 621: | ||
|- | |- | ||
|873 | |873 | ||
|{{SpiritTableName|Dr. Wily|link=y|size=64}} | |||
|{{ | |||
|''Mega Man'' Series | |''Mega Man'' Series | ||
|•{{SSBU|Dr. Mario}} {{Head|Dr. Mario|g=SSBU|s=20px|cl=Blue}}<br>•Metal {{SSBU|Mega Man}} {{Head|Mega Man|g=SSBU|s=20px|cl=Green}} ( | |•{{SSBU|Dr. Mario}} {{Head|Dr. Mario|g=SSBU|s=20px|cl=Blue}} (50 HP)<br>•Metal {{SSBU|Mega Man}} {{Head|Mega Man|g=SSBU|s=20px|cl=Green}}×8 (100 HP) | ||
| | |{{SpiritType|Attack}} | ||
|12,600 | |12,600 | ||
|[[Wily Castle]] (hazards off) | |[[Wily Castle]] (hazards off) | ||
| Line 500: | Line 633: | ||
|- | |- | ||
|1,132 | |1,132 | ||
|{{SpiritTableName|Hockey Players|size=64}} | |||
|{{ | |||
|''Ice Hockey'' | |''Ice Hockey'' | ||
|•{{SSBU|Dr. Mario}} {{Head|Dr. Mario|g=SSBU|s=20px|cl=Blue}}<br>•{{SSBU|Donkey Kong}} {{Head|Donkey Kong|g=SSBU|s=20px|cl=White}}<br>•{{SSBU|Luigi}} {{Head|Luigi|g=SSBU|s=20px|cl=White}} | |•{{SSBU|Dr. Mario}} {{Head|Dr. Mario|g=SSBU|s=20px|cl=Blue}}<br>•{{SSBU|Donkey Kong}} {{Head|Donkey Kong|g=SSBU|s=20px|cl=White}}<br>•{{SSBU|Luigi}} {{Head|Luigi|g=SSBU|s=20px|cl=White}} | ||
| | |{{SpiritType|Attack}} | ||
|1,500 | |1,500 | ||
|[[Pokémon Stadium]] ([[Ω form]]) | |[[Pokémon Stadium]] ([[Ω form]]) | ||
| Line 513: | Line 645: | ||
|- | |- | ||
|1,135 | |1,135 | ||
|{{SpiritTableName|Andy|size=64}} | |||
|{{ | |||
|''Advance Wars'' Series | |''Advance Wars'' Series | ||
|•{{SSBU|Dr. Mario}} {{Head|Dr. Mario|g=SSBU|s=20px|cl=Red}}<br>•Tiny {{SSBU|Snake}} {{Head|Snake|g=SSBU|s=20px|cl=Red}} | |•{{SSBU|Dr. Mario}} {{Head|Dr. Mario|g=SSBU|s=20px|cl=Red}}<br>•Tiny {{SSBU|Snake}} {{Head|Snake|g=SSBU|s=20px|cl=Red}}×8 | ||
| | |{{SpiritType|Grab}} | ||
|3,400 | |3,400 | ||
|[[Halberd]] (Ship deck) | |[[Halberd]] (Ship deck) | ||
|•Health Recovery<br>•Item: Exploding Types | |•Health Recovery<br>•Item: Exploding Types | ||
|•The enemy is healed when the enemy's at high damage<br>•Defeat an army of fighters | |•The enemy is healed when the enemy's at high damage<br>•Defeat an army of fighters | ||
|{{SSBUMusicLink| | |{{SSBUMusicLink|Other|Filled with Hope}} | ||
| | | | ||
|- | |- | ||
|1,195 | |1,195 | ||
| | |{{SpiritTableName|Sick Beats Doctor|size=64}} | ||
|{{ | |''Rhythm Heaven'' Series {{Flag|North America}}<br>''Rhythm Paradise'' Series {{Flag|PAL}} | ||
|•{{SSBU|Dr. Mario}} {{Head|Dr. Mario|g=SSBU|s=20px|cl=Blue}} | |•{{SSBU|Dr. Mario}} {{Head|Dr. Mario|g=SSBU|s=20px|cl=Blue}} | ||
| | |{{SpiritType|Shield}} | ||
|2,200 | |2,200 | ||
|[[Wrecking Crew]] | |[[Wrecking Crew]] | ||
| Line 539: | Line 669: | ||
|- | |- | ||
|1,214 | |1,214 | ||
|{{SpiritTableName|Dr. Kawashima|link=y|size=64}} | |||
|{{ | |''Brain Age: Train Your Brain in Minutes a Day!'' Series {{Flag|North America}}<br>''Dr. Kawashima's Brain Training: How Old Is Your Brain?'' Series {{Flag|PAL}} | ||
|''Brain Age: Train Your Brain in Minutes a Day!'' Series | |||
|•{{SSBU|Dr. Mario}} {{Head|Dr. Mario|g=SSBU|s=20px|cl=Blue}} | |•{{SSBU|Dr. Mario}} {{Head|Dr. Mario|g=SSBU|s=20px|cl=Blue}} | ||
| | |{{SpiritType|Neutral}} | ||
|3,800 | |3,800 | ||
|[[PictoChat 2]] (hazards off) | |[[PictoChat 2]] (hazards off) | ||
|•Assist Trophy Enemies ( | |•Assist Trophy Enemies (Dr. Kawashima) | ||
|•Hostile assist trophies will appear | |•Hostile assist trophies will appear | ||
|{{SSBUMusicLink| | |{{SSBUMusicLink|Other|Brain Age: Train Your Brain in Minutes a Day!}} | ||
| | | | ||
|- | |- | ||
|1,216 | |1,216 | ||
|{{SpiritTableName|Dr. Lobe|size=64}} | |||
|{{ | |||
|''Big Brain Academy'' Series | |''Big Brain Academy'' Series | ||
|•{{SSBU|Dr. Mario}} {{Head|Dr. Mario|g=SSBU|s=20px|cl=Yellow}}<br>•{{SSBU|Kirby}} | |•{{SSBU|Dr. Mario}} {{Head|Dr. Mario|g=SSBU|s=20px|cl=Yellow}}<br>•{{SSBU|Kirby}} {{Head|Kirby|g=SSBU|s=20px|cl=White}}{{Head|Kirby|g=SSBU|s=20px|cl=Purple}} | ||
| | |{{SpiritType|Neutral}} | ||
|3,400 | |3,400 | ||
|[[PictoChat 2]] | |[[PictoChat 2]] | ||
|•Hazard: Low Gravity<br>•Hazard: High Gravity | |•Hazard: Low Gravity<br>•Hazard: High Gravity | ||
|•All fighters have reduced jump ability<br>•Gravity is reduced after a little while | |•All fighters have reduced jump ability<br>•Gravity is reduced after a little while | ||
|{{SSBUMusicLink| | |{{SSBUMusicLink|Other|Title Theme - Big Brain Academy}} | ||
| | | | ||
|- | |- | ||
|1,266 | |1,266 | ||
|{{SpiritTableName|Plague Knight|size=64}} | |||
|{{ | |||
|''Shovel Knight'' Series | |''Shovel Knight'' Series | ||
|•{{SSBU|Dr. Mario}} {{Head|Dr. Mario|g=SSBU|s=20px|cl=Green}} | |•{{SSBU|Dr. Mario}} {{Head|Dr. Mario|g=SSBU|s=20px|cl=Green}} | ||
| | |{{SpiritType|Grab}} | ||
|1,900 | |1,900 | ||
|[[Unova Pokémon League]] | |[[Unova Pokémon League]] | ||
| Line 578: | Line 705: | ||
|- | |- | ||
|1,319 | |1,319 | ||
|{{SpiritTableName|Professor Riggs & Plaise & Lerna|size=64}} {{Flag|North America}}<br>Professor Gerry, Plaise, & Lerna {{Flag|PAL}} | |||
|{{ | |||
|''Nintendo Labo'' Series | |''Nintendo Labo'' Series | ||
|•{{SSBU|Dr. Mario}} {{Head|Dr. Mario|g=SSBU|s=20px|cl=Yellow}}<br>•{{SSBU|Bayonetta}} {{Head|Bayonetta|g=SSBU|s=20px|cl=Blue}}<br>•Tiny {{SSBU|Young Link}} {{Head|Young Link|g=SSBU|s=20px|cl=Red}} | |•{{SSBU|Dr. Mario}} {{Head|Dr. Mario|g=SSBU|s=20px|cl=Yellow}}<br>•{{SSBU|Bayonetta}} {{Head|Bayonetta|g=SSBU|s=20px|cl=Blue}}<br>•Tiny {{SSBU|Young Link}} {{Head|Young Link|g=SSBU|s=20px|cl=Red}} | ||
| | |{{SpiritType|Neutral}} | ||
|2,500 | |2,500 | ||
|[[Paper Mario]] | |[[Paper Mario]] | ||
| Line 588: | Line 714: | ||
|•The enemy has increased defense after a little while<br>•The enemy has increased attack power after a little while | |•The enemy has increased defense after a little while<br>•The enemy has increased attack power after a little while | ||
|{{SSBUMusicLink|Super Mario Bros.|Title Theme - Super Mario Maker}} | |{{SSBUMusicLink|Super Mario Bros.|Title Theme - Super Mario Maker}} | ||
|Professor Riggs | |Professor Riggs {{Flag|North America}}<br>Professor Gerry {{Flag|PAL}} | ||
|- | |- | ||
|1,390 | |1,390 | ||
|{{SpiritTableName|Seteth|iw=fireemblem|size=64}} | |||
|{{ | |||
|''Fire Emblem'' Series | |''Fire Emblem'' Series | ||
|•{{SSBU|Dr. Mario}} {{Head|Dr. Mario|g=SSBU|s=20px|cl=Black}}<br>•{{SSBU|Villager}} {{Head|Villager|g=SSBU|s=20px|cl=Green}} | |•{{SSBU|Dr. Mario}} {{Head|Dr. Mario|g=SSBU|s=20px|cl=Black}}<br>•{{SSBU|Villager}} {{Head|Villager|g=SSBU|s=20px|cl=Green}} | ||
| | |{{SpiritType|Neutral}} | ||
|4,200 | |4,200 | ||
|[[Garreg Mach Monastery]] (Cathedral) | |[[Garreg Mach Monastery]] (Cathedral) | ||
|N/A | |N/A | ||
|•Timed battle<br>•Reinforcements will appear after an enemy is KO'd<br>•The enemy has increased power for the first part of the battle | |•Timed battle (1:00)<br>•Reinforcements will appear after an enemy is KO'd<br>•The enemy has increased power for the first part of the battle | ||
|{{SSBUMusicLink|Fire Emblem|Chasing Daybreak}} | |{{SSBUMusicLink|Fire Emblem|Chasing Daybreak}} | ||
| | | | ||
| Line 606: | Line 731: | ||
===As a minion=== | ===As a minion=== | ||
{|class="wikitable sortable" style="width:100%;" | {|class="wikitable sortable" style="width:100%;" | ||
! colspan=4|Spirit | ! colspan=4|Spirit | ||
! colspan=7|Battle parameters | ! colspan=7|Battle parameters | ||
| Line 625: | Line 749: | ||
|- | |- | ||
|1,344 | |1,344 | ||
|{{SpiritTableName|Gruntilda|size=64}} | |||
|{{ | |||
|''Banjo-Kazooie'' Series | |''Banjo-Kazooie'' Series | ||
| | |•Giant {{SSBU|King Dedede}} {{Head|King Dedede|g=SSBU|s=20px|cl=Green}} (250 HP)<br>•Giant {{SSBU|Dr. Mario}} {{Head|Dr. Mario|g=SSBU|s=20px|cl=Green}} (40 HP) {{Head|Dr. Mario|g=SSBU|s=20px|cl=Green}} (45 HP) {{Head|Dr. Mario|g=SSBU|s=20px|cl=Green}} (50 HP) | ||
| | |{{SpiritType|Attack}} | ||
|13,900 | |13,900 | ||
|[[Find Mii]] ([[Ω form]]) | |[[Find Mii]] ([[Ω form]]) | ||
|•Hazard: Poison Floor | |•Hazard: Poison Floor | ||
|•Defeat the main fighter to win<br>•The floor is poisonous<br>•[[Stamina battle]] | |•Defeat the main fighter to win<br>•The floor is poisonous<br>•[[Stamina battle]]<br>''•The enemy starts the battle with a Star Rod''<br>''•Reinforcements will appear during the battle'' | ||
|{{SSBUMusicLink|Banjo-Kazooie|Vs. Klungo}} | |{{SSBUMusicLink|Banjo-Kazooie|Vs. Klungo}} | ||
|[https://banjokazooiewiki.com/wiki/Klungo Klungo] | |[https://banjokazooiewiki.com/wiki/Klungo Klungo] | ||
|- | |- | ||
|1,421 | |1,421 | ||
| | |{{SpiritTableName|Alfyn & Therion|size=64}} | ||
|Alfyn & Therion | |||
|''OCTOPATH TRAVELER'' | |''OCTOPATH TRAVELER'' | ||
|•{{SSBU|Sheik}} {{Head|Sheik|g=SSBU|s=20px|cl=Black}}<br>•{{SSBU|Dr. Mario}} {{Head|Dr. Mario|g=SSBU|s=20px|cl=Black}} | |•{{SSBU|Sheik}} {{Head|Sheik|g=SSBU|s=20px|cl=Black}}<br>•{{SSBU|Dr. Mario}} {{Head|Dr. Mario|g=SSBU|s=20px|cl=Black}} | ||
| | |{{SpiritType|Attack}} | ||
|9,200 | |9,200 | ||
|[[Distant Planet]] ([[Battlefield form]]) | |[[Distant Planet]] ([[Battlefield form]]) | ||
| Line 671: | Line 793: | ||
Dr. Mario unlock notice SSBU.jpg|Dr. Mario's unlock notice | Dr. Mario unlock notice SSBU.jpg|Dr. Mario's unlock notice | ||
SSBUWebsiteDrMario1.jpg|Dr. Mario [[idling]] on [[Wuhu Island]]. | SSBUWebsiteDrMario1.jpg|Dr. Mario [[idling]] on [[Wuhu Island]]. | ||
SSBUWebsiteDrMario2.jpg|[[ | SSBUWebsiteDrMario2.jpg|[[Taunt]]ing on [[Mario Galaxy]]. | ||
SSBUWebsiteDrMario3.jpg| | SSBUWebsiteDrMario3.jpg|Hitting {{SSBU|Link}} with his [[forward smash]] on [[New Pork City]]. | ||
SSBUWebsiteDrMario4.jpg|Jumping | SSBUWebsiteDrMario4.jpg|Jumping on [[Mushroomy Kingdom]]. | ||
SSBUWebsiteDrMario5.jpg|Tossing a [[Megavitamin]] on [[Moray Towers]]. | SSBUWebsiteDrMario5.jpg|Tossing a [[Megavitamin]] on [[Moray Towers]]. | ||
SSBUWebsiteDrMario6.jpg|Holding a [[Fairy Bottle]] while running towards Link on [[Great Bay]]. | SSBUWebsiteDrMario6.jpg|Holding a [[Fairy Bottle]] while running towards Link on [[Great Bay]]. | ||
SSBUWebsiteLittleMac4.jpg|Taunting next to {{SSBU|Little Mac}} on [[Tomodachi Life]]. | SSBUWebsiteLittleMac4.jpg|Taunting next to {{SSBU|Little Mac}} on [[Tomodachi Life]]. | ||
SSBUWebsiteMimikyu2.jpg|Snared by [[Mimikyu]] on [[ | SSBUWebsiteMimikyu2.jpg|Snared by [[Mimikyu]] on [[PictoChat 2]]. | ||
DrMarioSSBUDownAerial.png|Using his [[down aerial]] on {{SSBU|Wario}} on [[Skyworld]]. | DrMarioSSBUDownAerial.png|Using his [[down aerial]] on {{SSBU|Wario}} on [[Skyworld]]. | ||
DrMarioSSBUDoctorFinale.png| | DrMarioSSBUDoctorFinale.png|Using [[Doctor Finale]] on [[Wii Fit Studio]] against {{SSBU|Toon Link}}, {{SSBU|Wii Fit Trainer}} and {{SSBU|King Dedede}}. | ||
</gallery> | </gallery> | ||
=== | ===Fighter Showcase Video=== | ||
{{#widget:YouTube|id=w0qVpaEtEF4}} | {{#widget:YouTube|id=w0qVpaEtEF4}} | ||
==Trivia== | ==Trivia== | ||
*With {{SSBU|Link}} and {{SSBU|Young Link}} now representing different incarnations of Link, {{SSBU|Zelda}} and {{SSBU|Sheik}} now representing different incarnations of Princess Zelda, and {{SSBU|Zero Suit Samus}} now briefly transforming into [[Samus (SSBU)|her Varia Suited form]] for her [[Zero Laser (Zero Suit Samus)|Final Smash]], Dr. Mario is the only playable character to represent an alternate identity for another character, namely {{SSBU|Mario}}, with no gameplay connection between each other in ''Ultimate''. | |||
*With {{SSBU|Link}} and {{SSBU|Young Link}} now representing different incarnations of Link, {{SSBU|Zelda}} and {{SSBU|Sheik}} now representing different incarnations of Princess Zelda, and {{SSBU|Zero Suit Samus}} now briefly transforming into [[Samus (SSBU)|her Varia Suited form]] for her [[Zero Laser (Zero Suit Samus)|Final Smash]], Dr. Mario is the only playable character to represent an alternate identity for another character, namely {{SSBU|Mario}}, with no gameplay connection between | *During {{SSBU|Luigi}}'s character showcase trailer, [[Super Sheet]] uses [[Cape]]'s animation instead of its new animation. Additionally, the sheet is unanimated and is attached to Dr. Mario's left arm. | ||
*During {{SSBU|Luigi}}'s character showcase trailer, | *''Ultimate'' is the first ''Super Smash Bros.'' game where he is not holding a Megavitamin in his official art. | ||
*'' | *''Ultimate'' is the first ''Smash'' game to feature Dr. Mario and have his inclusion be planned from the start. In ''Super Smash Bros. Melee'', Dr. Mario was a late development addition to pad out the roster. In ''Smash 4'', Dr. Mario was originally going to be an {{SSB4|alternate costume}} of {{SSB4|Mario}}, but remained a clone as a last minute decision in order to appeal to his fanbase from ''Melee''. | ||
* | |||
*Using [[Megavitamins]] and pausing the game the moment the projectile appears in Dr. Mario's arm reveals that it will always appear completely red before changing to a randomized color one frame later. | *Using [[Megavitamins]] and pausing the game the moment the projectile appears in Dr. Mario's arm reveals that it will always appear completely red before changing to a randomized color one frame later. | ||
*Prior to version 2.0.0, Dr. | *Prior to version 2.0.0, Dr. Mario's down aerial was named Bone Drill, a name arguably more fitting for his down aerial in ''Smash 4''. The current name, CLEAR!, references the message appearing when a level is completed in the original ''Dr. Mario'', as well as the shout paramedics give when using defibrillators. | ||
*Dr. Mario | *Dr. Mario's section in the Sound Test is functionally identical to that of Mario's, with some voice clips not used by Dr. Mario (such as "Let's-a go!" from Mario's [[on-screen appearance]]) being removed. | ||
**Unlike Mario, Dr. Mario's Star KO voice clip is listed before his heavy knockback voice clips rather than after after them, matching the order of the other base roster characters excluding {{SSBU|Pikachu}} and {{SSBU|Roy}}. | |||
**The voice clips of Dr. Mario's forward aerial, back throw, double jump, [[Doctor Finale]], and [[Home-Run Bat]] swing are omitted despite Dr. Mario using them in-game. | |||
*Dr. Mario is the only character with custom [[equipment]] incorporated into his attributes. | |||
==References== | |||
{{reflist}} | |||
{{SSBUCharacters}} | {{SSBUCharacters}} | ||
{{Mario universe}} | {{Mario universe}} | ||
[[Category: Dr. Mario (SSBU)| ]] | |||
[[Category:Dr. Mario (SSBU)| ]] | |||
[[Category:Spirits]] | [[Category:Spirits]] | ||
[[es:Dr. Mario (SSBU)]] | [[es:Dr. Mario (SSBU)]] | ||
Latest revision as of 15:14, April 23, 2024
| Dr. Mario in Super Smash Bros. Ultimate | |
|---|---|
 
| |
| Universe | Mario |
| Other playable appearances | in Melee in SSB4 |
| Availability | Unlockable |
| Final Smash | Doctor Finale |
| Tier | D- (78) |
Dr. Mario (ドクターマリオ, Doctor Mario) is a playable character in Super Smash Bros. Ultimate. He was officially revealed on June 12th, 2018 alongside R.O.B., Duck Hunt, and the rest of the returning roster. While Dr. Mario remains a close clone of Mario, he is not classified as an Echo Fighter. As such, Dr. Mario is classified as Fighter #18.
As in Super Smash Bros. 4, Charles Martinet's portrayal of Mario from Super Smash Bros. Brawl was repurposed for Dr. Mario in Ultimate.
Dr. Mario is currently ranked 78th out of 82 on the Ultimate tier list, placing him in the lower half of D- tier and making him a bottom five character. Despite being buffed overall, this is a slight drop from his placement in Smash 4, where he was ranked 48th out of 54, and is his worst placement in the series. Dr. Mario's playstyle is effectively a slower yet stronger version of Mario's. As a result, all of his moves possess better KO potential and/or damage output compared to Mario, while he keeps most of Mario's frame data, which allows him to perform short yet effective combos. Dr. Mario's signature projectile in Megavitamin is an effective projectile for approaching and neutral and it also opens up combos and KO confirms at higher percents into most of his moves. In addition, Dr. Mario has several strong yet effective KO options in his arsenals, including Super Jump Punch, Dr. Tornado, most of his aerials, and back throw. This means players have to play more carefully when close to Dr. Mario, as a single whiff could lead into a deadly punish.
However, Dr. Mario's weaknesses outshine many of his strengths. His most notable weakness is his poor mobility, which cripples his neutral game and makes him vulnerable to camping. In addition, as his playstyle largely revolves around him getting close to his opponent, his poor mobility also makes it harder for him to avoid retaliation from opponents, as Dr. Mario's short range means he is vulnerable to moves with long range or disjoints. Finally, Dr. Mario's recovery, while improved, is still one of the worst in the game, as its short range and his slow air mobility makes him vulnerable to gimping.
Overall, Dr. Mario is a character that has good frame data and strong damage output and KO potential, but his sluggish movements cause him to rely more on a bait-and-punish playstyle. Although his represenation has remained below average for most of the game's lifespan, he has nonetheless seen success from players such as JaZaR and Tsumusuto.
How to unlock[edit]
Complete one of the following:
- Play VS. matches, with Dr. Mario being the 62nd character to be unlocked.
- Clear Classic Mode with Mario or any character in his unlock tree, being the 7th character unlocked after Roy.
- Have Dr. Mario join the player's party in World of Light.
With the exception of the third method, Dr. Mario must then be defeated on New Donk City Hall. In World of Light, he is fought on the Ω form of Mario Bros.
Attributes[edit]
As a clone of Mario, Dr. Mario is a middleweight that can wall jump. Like his normal self, Dr. Mario also has excellent frame data: when not counting special moves, the overall start-up lag of his normal moveset is very fast. As a result, Dr. Mario is both difficult to punish and very effective at punishing. Although the two share an overwhelming number of identical animations and even the exact same values for certain attributes (weight, falling speed, fast falling speed and gravity), Dr. Mario nevertheless has a number of traits that differ from his normal self. Like Mario, Dr. Mario's height is below-average.
Dr. Mario functions like a stronger, yet slower Mario, owing to the implementation of multipliers to the majority of his moveset and some of his attributes. Most of Dr. Mario's moveset deals 1.176× more damage compared to Mario's moveset. Conversely, his full hop height is 0.85× lower; his walking and dashing speeds are 0.7942× slower; his air speed, air acceleration, short hop height, and double jump height are 0.7648× lower. Most of the multipliers result in Dr. Mario being distinctly affected by passive equipment physics from Super Smash Bros. 4, in which he specifically possesses a +22 Attack value and a -65 Speed value.[1] Although Dr. Mario's lower jump height makes his short hop more effective than Mario's, these modified attributes collectively render his overall mobility as sub-par. His wall jump and ledge jump also cover less distance as a result. Conversely, Dr. Mario's higher overall damage output results in him being noticeably more efficient at KOing in comparison to Mario. His traction is also slightly higher than Mario's, though merely average when compared to the roster.
Other noticeable differences between Dr. Mario and Mario are seen in their movesets and, by extension, their playstyles. Although Dr. Mario's overall frame data is only very slightly slower than Mario's (if even at all), his higher overall damage output and slower overall mobility make him unable to use a healthy balance of offense and defense like his normal self. Instead, Dr. Mario is much better suited to a bait-and-punish playstyle. On a related note, Dr. Mario's combo game is less varied and consistent compared to his normal self's, especially with regard to aerial combos. Despite this, his combos deal respectable damage in spite of their fairly short lengths, similarly to characters like Incineroar.
Dr. Mario's grounded moveset has plenty of utility in spite of his slow speed. Neutral attack is Dr. Mario's fastest attack, and the first two hits can lock opponents. Forward tilt is a great get-off-me option, and possesses situational KO potential at very high percentages unlike Mario's version. Up tilt is a decent anti-air and juggling tool that can KO at very high percentages, and it can also combo into itself, neutral aerial, up aerial, back aerial and Super Jump Punch, but is not as effective as a combo starter as his down tilt; however, the move's horizontal range is shorter than in Smash 4, and its hitboxes start from a higher position, allowing shorter, crouching or prone characters to potentially low-profile the move. Down tilt is one of Dr. Mario's best combo starters; although it is short-ranged, it is very reliable at a wide range of percentages, with its lower knockback scaling compared to Mario's even allowing it to combo at percentages where Mario's would not work, and depending on the percentage, it can lead into neutral attack, forward tilt, up tilt (only on certain characters), itself, up smash (only on certain characters), down smash, neutral aerial, up aerial, back aerial and Super Jump Punch. His dash attack has vertical knockback, allowing it to serve as a combo starter but hindering its edgeguarding potential. His forward smash, while slower than his other smash attacks, is extremely powerful for an attack of its speed, especially if the sweetspot connects; unlike Mario's, it possesses the electric effect, has shorter range, and the sweetspot and sourspot hitboxes are swapped around. Up smash functions more similarly to Luigi's version than to Mario's version, as it launches the opponent diagonally instead of vertically, and will launch them in the opposite direction of where Dr. Mario is facing as long as they are in front of him; compared to Luigi's, however, it launches at a lower angle, and it has lower base knockback than both Mario and Luigi's up smashes. Nevertheless, up smash's launch angle does make it much better at edgeguarding or setting up edgeguards than both Mario and Luigi's versions, and its higher damage output and knockback scaling compared to both of them also makes it a highly lethal KOing option. His down smash is his fastest smash attack, hitting on both sides (with the back hit being stronger than the front hit), and like Mario's version, it is useful for punishing rolls.
Like Mario, Dr. Mario possesses a decent grab game. His overall grab range is average, but each of his grabs have minimal start-up and ending lag. Forward throw is useful for initiating edgeguards; back throw is one of the strongest back throws in the game; up throw is a decent combo starter that can combo into up tilt (certain characters only), up aerial, neutral aerial, back aerial and Super Jump Punch; and down throw is his most effective combo throw, being able to combo into up tilt (certain characters only), up smash (certain characters only), neutral aerial, up aerial, back aerial, Super Jump Punch and Dr. Tornado depending on the opponent's percentage.
Like his normal self, Dr. Mario's air game is above-average. Neutral aerial is a "reverse sex kick": its clean hitbox deals minimal damage and knockback, whereas its late hitbox deals more damage. Thanks to it hitting on frame 3 and having low landing lag, its clean hitbox is ideal for set-ups. Conversely, its late hitbox is decent at edgeguarding, due to its long hitbox duration and larger hitbox than the late hit of Mario's equivalent move. Forward aerial has considerable start-up lag, but its clean hitbox makes it one of the strongest aerials in the game; as such, it is lethal when SHFFed against unwary opponents that are near the edge. Back aerial is also fast, auto-cancels in a short hop, and possesses a powerful clean hitbox, traits which collectively make it viable for KOing, edgeguarding and approaching. Up aerial's horizontal launching angle grants its beginning and ending frames decent combo potential into Super Jump Punch and back aerial, respectively, at low to medium percentages. This angle also makes its beginning frames capable of edgeguarding, unlike his normal self's up aerial. However, up aerial's launch angle also makes it much less effective at starting combos when SHFFed or juggling compared to Mario's. His new down aerial, while having slow startup, is a powerful meteor smash, making it an excellent option for edgeguarding; it is also an extremely solid combo starter with an extremely wide range of follow-ups on grounded opponents depending on their percentage, including neutral attack, forward tilt, up tilt, down tilt, dash attack, forward smash, up smash, down smash, grab, all aerial attacks (including itself), Super Jump Punch and Dr. Tornado.
With regard to special moves, Megavitamins travel farther in the air without landing compared to Mario's Fireball, and they bounce twice instead of three times; they also have altered knockback, allowing for a wider range of follow-ups. Super Sheet has more vertical range but less horizontal range than Cape, but its aerial version completely lacks the stalling effect of Mario's version, completely removing its recovery potential; it also has a 1.6× reflection multiplier, making reflecting projectiles with it more rewarding compared to doing so with Mario's Cape.
Unlike F.L.U.D.D., Dr. Tornado is an effective recovery option, with repeated mashing of the special move button allowing Dr. Mario to rise upward with it. It also deals damage. When coupled with its high damage output, very high knockback scaling and autolink angle, it is useful for edge-guarding, warding off edgeguarders, and even out-prioritizing attacks, and it also possesses excellent KO potential. However, Dr. Tornado's much shorter range makes it much riskier to use for edgeguarding compared to F.L.U.D.D. Due to Super Jump Punch consisting of a powerful clean hitbox and a weak late hitbox instead of multiple hitboxes like Mario's, it actually functions more similarly to Ryu's Shoryuken or Marth's Dolphin Slash instead. As a result, its clean hitbox makes it a viable KOing option unlike Mario's. Super Jump Punch is also an extremely effective out of shield option thanks to its frame 3 startup, much like Mario's version.
However, Dr. Mario's flaws are significantly more noticeable in comparison to Mario's. The most prominent one is his lackluster mobility, which hinders his ability to approach opponents, and renders him vulnerable to zoning and circle camping from characters with strong projectile games and high mobility, respectively, similarly to Ganondorf and Incineroar; unlike those two characters, however, Dr. Mario has an effective projectile in Megavitamins, a smaller hurtbox, effective out of shield options, and a decent reflector in Super Sheet, giving him a better defensive game in comparison. Additionally, Dr. Mario shares Mario's notable weakness of having short range in his attacks, which can give him trouble against characters with long or disjointed hitboxes; whereas Mario's faster mobility allows him to somewhat circumvent this weakness, especially against characters with poor mobility and/or frame data, Dr. Mario is less capable of weaving in and out of his opponent's range, making such characters much more difficult for him to deal with. Dr. Mario's sluggish mobility compounds another notorious weakness—his recovery. Despite being able to wall jump and the fact that Dr. Tornado is a much better recovery option than Cape, the combination of his slow air speed, low jump height, slow air acceleration and Super Jump Punch's mediocre travel distance results in his recovery being predictable like Mario's.
Due to his overall recovery granting noticeably less vertical distance compared to Mario's, Dr. Mario is very vulnerable to gimping and edgeguards. As a result, it is optimal for him to read the opponent when trying to return to the stage, as well as knowing when and how to make use of Dr. Tornado, which has a huge amount of ending lag (33 frames, aerial version) and cannot sweetspot edges. Due to his short recovery distance, any sufficiently strong attacks, particularly semi-spikes, may launch him too far away to recover properly. Lastly, Dr. Mario is outclassed in certain aspects by other characters: in particular, Zero Suit Samus has much better overall mobility; Shulk has much more range; and Snake is much better at zoning.
Overall, Dr. Mario's strengths are outweighed by his weaknesses. His fast frame data enables him to pressure, combo and/or punish the opponent effectively at close range, while his above-average damage output makes him capable of KOing easily. Unlike Mario, however, his slow mobility hinders his neutral game so much that he is largely reliant on baiting and punishing. By extension, his sub-par recovery makes him a less capable edgeguarder compared to his normal self, and he retains his normal self's lack of range as well.
Differences from Mario[edit]
Despite not being an Echo Fighter of Mario, Dr. Mario is still a close clone of Mario. There is currently no confirmed reason for this oddity, though it is likely due to Dr. Mario debuting in Melee rather than SSB4 or Ultimate as with the other Echo Fighters.
Dr. Mario uses external modifiers to most of his stats rather than directly modifying them, so he sports subpar mobility compared to Mario. However, Dr. Mario compensates for his slower mobility with another external multiplier that increases the damage of his attacks in comparison, as all of his attacks deal noticeably more damage without any compensation on knockback, which enables him to KO more easily as a result.
Aside from that, Dr. Mario also has other differences in his moveset. These include a few moves not cloned from Mario, such as back throw, down aerial and Dr. Tornado, as well as many moves with altered functionality, such as his dash attack launching upward, his up smash launching opponents behind him, his forward smash possessing an electric effect, his neutral aerial being a "reverse sex kick," his forward aerial not being a meteor smash, his Megavitamins not being absorbable and Super Jump Punch being a powerful singular hit at the cost of less vertical distance. Despite the aesthetic similarities, the different properties of the aforementioned moves, as well as his altered attributes, are enough to noticeably change Dr. Mario's playstyle compared to Mario's, although not quite to the same extent as Luigi.
Aesthetics[edit]
 Dr. Mario is slightly less vocal than Mario. Some of his attacks also emit different sound effects.
- Dr. Mario's on-screen appearance, taunts, idle poses and victory poses are different from Mario's.
- Dr. Mario's defeated/No Contest animation is different from Mario's. Mario has a new animation in which he looks slightly to the left with a smiling expression, while Dr. Mario retains his animation from Smash 4, which is identical to Mario's from Brawl and Smash 4 (and like the latter, features him with a neutral expression), except that Dr. Mario looks directly in front of himself.
Attributes[edit]
 Dr. Mario's idle animation is much less exaggerated than Mario's. This gives him a consistently lower stance as a result.
- Some of Dr. Mario's raw properties are modified as if he were wearing equipment of +22 attack and -65 speed in Smash 4.[1]
- The damage outputs of Dr. Mario's attacks use a 1.176× multiplier. As a result, he is significantly stronger than Mario. However, this multiplier does not apply to reflected projectiles or items, and the base damage of his moves can also differ from Mario's.
 However, this limits his combo game.
- Dr. Mario's walking speed, dashing speed and initial dash speed use a 0.7942× multiplier; while his short hop height, double jump height, air speed, air acceleration and air friction use a 0.7648× multiplier. As a result, Dr. Mario is significantly less mobile than Mario.
- Dr. Mario's lower short hop makes it easier for him to pressure opponents with short hops and use short hop aerials against grounded opponents, but limits his ability to perform two aerials in a short hop.
- Dr. Mario's full hop height is 15% lower than Mario's (36.33 → 30.8805), although the mobility multiplier is not applied fully due to the new mechanic which speeds up full hops.
- Despite this, the mobility multiplier applies fully when using shooting items, which makes it 35% lower than Mario's (36.33 → 23.6174064). It is also applied fully when performing a softhop.
- Dr. Mario's shield jump is lower (44.1 → 40), causing him to land sooner.
- Dr. Mario's wall jump covers significantly less height, hindering his recovery.
- His ledge jump is also lower (38.165 → 35.4402).
- Dr. Mario has higher base acceleration when carrying heavy items (0 → 0.03) causing him to accelerate faster when walking while carrying heavy items.
- Dr. Mario's traction is slightly higher than Mario's (0.102 → 0.106), making it slightly easier for him to punish out of shield.
- Dr. Mario's ledge grab hitbox is positioned slightly higher, and extends up slightly further, making it easier for him to grab the ledge.
Ground attacks[edit]
- Neutral attack:
- The first two hits have different base damage values (2.2% → 2.5% (hit 1), 1.7% → 1.5% (hit 2)), resulting in the move dealing slightly more base damage in total (7.9% → 8%).
- The first hit's hitboxes are further out (Z offset: 6u/8.7u/12u → 6.7u/9.3u/12.5u), improving its range.
- The second hit's hitboxes are not attached to Dr. Mario's arm, giving it less range.
- Forward tilt:
- Forward tilt has higher base damage (7% → 9%) with knockback scaling not fully compensated (70 → 65). When combined with Dr. Mario's damage multiplier, this gives the move KO potential near the ledge.
- Up tilt:
- Up tilt has higher base damage (5.5% → 6.3%), further improving its damage racking and KO potential when combined with Dr. Mario's damage multiplier and making it safer on hit at low percents.
- However, it loses its combo potential earlier as a result.
- Down tilt:
- Down tilt's sweetspot is larger (3.2u → 3.5u), making it easier to land.
- However, this makes the sourspot (which combos for longer) harder to connect with.
- It has less knockback scaling (80 → 55), and inflicts 3 additional frames of hitstun. When combined with Dr. Mario's damage multiplier increasing the move's damage output, this makes it a more damaging and effective combo starter that loses its combo potential later.
- Its foot sweep visual starts earlier and has a different routine, more closely tracking his foot's current position.
- Dash attack:
- Dash attack's clean hit has higher base damage (8% → 9.8%), further improving its damage output. Its hitlag was also compensated (1.25x → 1x).
- It launches the opponent vertically, whereas Mario's launches them horizontally. It also deals less knockback (100 base/43 scaling → 90/38). These differences make it effective for combos at low percentages, but incapable of effectively edgeguarding.
- Forward smash:
- Dr. Mario's forward smash's sweetspot and sourspot are on his arm and electricity respectively, whereas Mario's are on the flame and his arm respectively. This means Dr. Mario's forward smash does more damage and knockback at closer range than it would at farther range.
- It has lower knockback scaling (105 (sourspot)/99 (sweetspot) → 100/94), partially compensating for the increased damage.
- It has noticeably less range (outer hitbox size: 5u → 3.7u), making it incapable of 2 frame punishing opponents.
- It has an electric effect, whereas Mario's has a flame effect. This makes it capable of hurting Olimar's Red Pikmin and makes it safer on shield, but makes it incapable of hurting Yellow Pikmin or instantly detonating explosives, and makes it easier to DI.
- Up smash:
- Up smash launches at a lower angle (83° → 120°), allowing it to KO opponents horizontally, but weakening its vertical KO and anti-air potential.
- It has altered knockback (32 (base)/94 (scaling) → 0/117), making it combo more consistently at lower damages while still making it stronger at higher damages. However, this also makes it unsafe on hit at low percents and combo less consistently at mid percents.
- It lasts one frame longer compared to Mario's (frames 9-12 → 9-13), increasing its range in front of him.
- Down smash:
- The sweeping visual on down smash is purple and white, rather than yellow, blue and white.
Aerial attacks[edit]
- Neutral aerial:
- Dr. Mario's neutral aerial deals more damage and has higher knockback the longer it is active, whereas Mario's functions oppositely. This makes the move capable of instantly starting combos and makes it more effective at punishing, but removes its KO confirms and makes it less useful as an instant combo finisher and combo breaker.
- The late hit has larger hitboxes (2.8u/2.8u → 3.6u/3.6u).
- The late hit has higher base damage than Mario's clean hit (8% → 10%) with higher knockback scaling (90 → 100). Combined with the damage multiplier, this allows it to KO under 120% at the edge.
- It autocancels earlier (frame 39 → 34).
- It has more landing lag (6 frames → 7).
- Forward aerial:
- Dr. Mario's forward aerial launches the opponent diagonally, whereas Mario's meteor smashes them. This makes it very effective at KOing on-stage, but much worse at edgeguarding and makes it less effective at starting combos on landing.
- The clean hit has higher base damage (14% → 15%) and has much more knockback scaling (78 → 102), improving its KO potential even further.
- The early and late hits have lower base damage (12% (early)/10% (late) → 10%/9%), though with their knockback scaling compensated (80 → 95).
- The sweeping visual commences a frame earlier, and the last frame of the visual is absent.
- Back aerial:
- Back aerial's clean hit has higher base damage (10.5% → 12%) with knockback partly compensated (12 (base)/106 (scaling) → 10/95).
- However, it loses its combo potential earlier as a result.
- The clean hit and late hit both have a longer duration (2 frames → 3 (clean), 3 frames → 5 (late)).
- The clean hit has smaller hitboxes (4.5u/5.9u → 4.2u/5.4u), slightly reducing its range.
- It has more landing lag (6 frames → 10).
- Up aerial:
- Up aerial launches at a lower angle (75° → 45°), severely weakening its combo potential but granting it edgeguarding potential.
- It has noticeably higher base damage (7% → 10.2%) with knockback scaling compensated (135 → 100), further improving its damage output.
- It has more landing lag (6 frames → 8).
- Down aerial:
- Dr. Mario's down aerial is a double foot stomp, whereas Mario's has been Mario Tornado since Brawl. Unlike Mario's, it hits once instead of six times.
- It can meteor smash and send opponents horizontally instead of vertically (94° (looping hits), 75° (final hit) → (270°/361°). This makes it very good at edgeguarding, tech-chasing and starting combos, but less effective at KOing on-stage, juggling and extending/finishing combos.
- It deals slightly less base damage (1.4% (hits 1-5), 5.5% (hit 6); 12.5% (total) → 12%).
- It has reduced landing lag (15 frames → 13).
- It has significantly increased startup lag (frame 5 → 14), less active frames (frame 5/7/9/11/13/23 → 14-17) and more ending lag (frame 38 → 43).
- It lacks a landing hit.
- It has significantly smaller hitboxes (4.3u/7.0u (looping hits), 11u (final hit) → 4.5u/5.2u), giving it significantly less range around Dr. Mario. Unlike Mario's, it cannot hit opponents above him.
- Dr. Mario is silent when performing this move, unlike Mario.
Throws and other attacks[edit]
- Forward throw:
- Forward throw has less knockback scaling (65 → 60), preventing it from reliably KOing despite the damage multiplier.
- Back throw:
- Back throw has a different animation: Dr. Mario heaves the opponent off the ground and above his head, then tosses them away behind him, as opposed to swinging them around multiple times.
- Compared to Mario's back throw, Dr. Mario releases the opponent earlier (frame 44 → 30), making it harder to DI and increasing its consistency.
- However, its FAF remains unchanged, increasing its ending lag.
- It has higher knockback scaling (66 → 68). Combined with the damage multiplier, this makes it considerably stronger than Mario's.
- It lacks a collateral hitbox.
- Up throw:
- Up throw has reduced knockback scaling (72 → 65), making it incapable of KOing reliably despite the damage multiplier.
- Down throw:
- Down throw launches at a higher angle (68° → 80°) and has altered knockback (40 (base)/90 (scaling) → 75/45). While this makes its combo potential into up and back aerials more consistent and allows it to combo earlier and for longer, it makes other followups like down tilt and neutral attack impossible.
- Dr. Mario's floor attacks and edge attack have decreased base damage (front and back floor attacks: 7% → 6% (both hits), trip floor attack: 5% → 4.3% (both hits), edge attack: 9% → 8.51%). As a result, his floor attacks deal roughly the same damage as Mario's despite the damage multiplier.
- However, Dr. Mario's edge attack still outdamages Mario's version despite its lower base damage, thanks to his attack multiplier.
Special moves[edit]
- Megavitamins:
- Unlike Fireball, Megavitamins cannot be absorbed by moves like Ness's PSI Magnet.
- Megavitamins bounce higher (bounce speed: 1.4 (min)/1.6 (max) → 1.65/2, restitution: 0.97 → 1).
- It launch at a higher angle (361° → 65°), and deals more knockback (35 (base)/20 (scaling) → 60/40 (clean), 28 (base)/15 (scaling) → 55/40 (mid), 22 (base)/10 (scaling) → 50/40 (late)), improving its setup potential but hindering its jab reset and edgeguarding potential.
- Its hitbox is longer and thinner (size: 2.4u/2.2u/2u → 1.7u/1.7u/1.7u, Y offset: 0 → -1.7—1.7), better matching the shape of a capsule.
- It deals more hitlag (0.6× → 1×) improving its safety but making it easier to DI/SDI.
- It does not have a flame effect unlike Fireball. This makes it capable of hurting Olimar's Red Pikmin, but renders it incapable of instantly detonating explosives.
- Super Sheet:
- Compared to Mario's Cape, Super Sheet's hitbox is positioned slightly upward. This results in it having slightly more vertical range, but slightly less horizontal range.
- While the Super Sheet's slightly higher hitbox can make the move somewhat easier to land while airborne, this is a situational advantage at best, and a rather poor trade-off compared to Mario's greater horizontal range. Dr. Mario's Super Sheet effectively covers less area overall.
- It has altered hitbox placements.
- It has a different animation where Dr. Mario swings the sheet upward, highlighting its increased vertical reach.
- Unlike aerial Cape, aerial Super Sheet does not stall Dr. Mario. This makes it more effective at B-reversing, but unusable for recovery.
- The reflect box is positioned closer and higher up (Y offset: 6.5 → 8, Z offset: 8 → 6.5), combined with its larger size (6.5u → 7.7u) it has more vertical range, and less horizontal range.
- It covers more of Dr. Mario's hurtbox.
- Its hitbox has a longer duration (frames 12-14 → 12-16).
- It reflects for slightly longer (frames 9-20 → 9-22).
- Projectiles reflected by Super Sheet do more damage (1.5× → 1.6×).
- Super Jump Punch:
- Dr. Mario's Super Jump Punch consists of a clean hitbox and a late hitbox, whereas Mario's consists of several looping hitboxes. However, the angle of the attack remains the same as Mario's on all hitboxes, which makes it launch diagonally upon startup.
- Due to this, Dr. Mario's variant is much less safe on hit at lower percents and is not as deadly of a stage spike until higher ones.
- It has altered hitbox placements.
- The hitbox is overall considerably larger, making it easier to use out of shield.
- Due to its higher damage output, the clean hit is significantly more effective for KOing when not near the upper blast line and makes it an untechable stage spike at high percents.
- It travels a much shorter distance, making it less effective for recovery.
- Unlike Mario's, Dr. Mario's Super Jump Punch lacks intangibility on start-up.
- It has a wider array of angles (max angle change: 12° → 18°), though this is nullified by the significant distance reduction.
- Cappy does not appear, and it does not produce Coins upon contact.
- Down special:
- Dr. Mario retains Dr. Tornado as his down special, whereas Mario's has been F.L.U.D.D. since Brawl.
- Unlike F.L.U.D.D., Dr. Tornado deals damage, making it a very viable KO move at higher percents.
- Compared to F.L.U.D.D., Dr. Tornado extends Dr. Mario's recovery, making it significantly more effective to get back on-stage.
- Compared to F.L.U.D.D., Dr. Tornado has significantly less range and is less important to his neutral game as a result.
- Due to lacking a powerful windbox that pushes opponents away, it is less effective at gimping and is worse at stage control.
- Doctor Finale:
- Doctor Finale produces 2D and 3D Megavitamin-based effects and emits Megavitamins' contact sound effect, whereas Mario Finale produces 3D fiery effects and emits a burning sound effect.
- It does not have a flame effect as a result.
- Its hitboxes are longer and thinner, better matching the shape of a capsules.
- The shorter vertical range of its hitboxes allows for a wider spacing between Megavitamins, making it easier to miss opponents.
- Its hitboxes are gradually expanding.
- It launches at a averaged angle (20°-50° → 28°-36°) and has altered knockback.
- It deals higher base damage per hit (2/2.5/3 → 3/3.2/3.4/3.6 (front), 2.3/2.5/2.6/2.8 (back)), but has longer gaps between hits (7 frames → 9) and a shorter duration (frames 65-224 → 65-214 (front), 79-214 (back)). As a result, it only hits 17 times instead of 24, and despite using a damage multiplier, the maximum damage it deals is significantly reduced (74% → 65.3856%).
Misc.[edit]
Changes from Super Smash Bros. 4[edit]
Dr. Mario was previously a poorly regarded character in SSB4 due to a large combination of factors, including his lackluster mobility and short range granting him a poor neutral game, as well as his abysmal recovery and limited combo game, the latter especially compared to his regular incarnation. Likely due to these factors, Dr. Mario has been buffed in the transition to Ultimate, though not enough to raise his standing.
One of Dr. Mario's biggest buffs was to his already above-average damage output; all of his moves deal much more damage (excluding his pummel and get-up attacks), which further supplements his damage-racking game and his previously inconsistent KO ability. His recovery, while still poor, has nevertheless improved slightly; Dr. Tornado has increased distance, and the readdition of directional air dodges gives him another option to possibly extend and mix up his recovery. Additionally, Dr. Mario has a new down aerial and back throw; the former can now meteor smash opponents much like Mario's forward aerial, giving him an option that he notoriously lacked in the previous game. Meanwhile, the latter, albeit losing its collateral hitbox, has gained more knockback, now being among the strongest of its kind and even stronger than Mario's own.
Dr. Mario's entire special moveset has also seen numerous buffs. Megavitamins now deal enough damage and knockback to cause opponents to tumble, and launch at a higher angle, making them viable as a combo starter and even giving them the ability to set up KOs. Super Sheet has a higher reflection multiplier compared to Mario's Cape, and Super Jump Punch deals more knockback, making a superior KO move and deadlier out of shield option. However, Dr. Tornado was buffed significantly; outside of its improved recovery potential, it has gained heavy armor on startup if used on the ground, which makes it useful for tanking through attacks and breaking pressure. Additionally, it deals more damage and knockback, to the point it has gained notoriety for being able to KO offstage effectively at very low percentages; combined with its increased distance, it is now a deadly edgeguarding option. As a result of the improvements to Dr. Tornado, coupled with his revamped down aerial, Dr. Mario's edgeguarding game is now much more powerful in its own right.
In spite of this, Dr. Mario has received a few nerfs. Most notably, Dr. Mario's already sub-par mobility is slightly worse, given the nerfs to his air speed and jump height; while his mobility otherwise remains largely unaltered from his previous appearance, Dr. Mario is now much slower in comparison to the rest of the cast, especially considering most other fighters have received buffs to their mobility. He also shares some other nerfs with Mario, such as up tilt's hitbox placement adjusted, giving it inferior range in front of and underneath him, and his grabs having increased ending lag, hindering their utility and combos.
Compared to Mario, Dr. Mario is still a slower and stronger clone of him. Aside from having an updated idle animation, slightly higher traction compared to Mario, an altered animation for his side special, as well as receiving a new down aerial and back throw, he has not been further decloned. He has also received many of the same changes as Mario.
Overall, Dr. Mario's damage-racking potential has increased and his recovery is safer and slightly better overall, though none of his buffs have benefitted him enough to raise his tier list placement significantly. He also retains many of his weaknesses from SSB4, such as short range, poor mobility, and awful recovery, none of which were toned down in game updates. Thus, despite performing better in Ultimate, Dr. Mario has not improved significantly from his appearance in SSB4, which is made more egregious when coupled with the buffs other veterans have received and the introduction of plentiful, more powerful DLC characters Dr. Mario struggles against. Ultimately, despite his buffs, Dr. Mario is worse relative to the cast in Ultimate.
Aesthetics[edit]
- Dr. Mario's model features a more subdued color scheme. Like Mario, the fabric of his clothes features greater detailing, and his head mirror's headband is cordovan brown instead of a dark taupe gray like in Melee. The inside of his pants is also slate grey instead of white. Additionally, Dr. Mario has a slightly darker skin tone.
- Dr. Mario has a new idle animation with less exaggerated bouncing and his head turned more toward the screen, similar to the one he had in Melee. It no longer reverts to Mario's idle when holding an item.
- Most, if not all, of Mario's aesthetic and animation changes also apply to Dr. Mario:
- Dr. Mario has become drastically more expressive in this game, to an even greater degree than its predecessor, or the rest of the cast. In particular, he will sometimes smile and appear whimsical or happy in battle, in line with his canon depiction, although he still looks serious and with angry brows most of the time. In contrast, Dr. Mario will also make much angrier expressions than before, particularly when he is preparing to throw someone or when grabbing onto a ledge.
- Walking, air dodge, helpless, skidding, and ledge-hanging animations have changed. Additionally, Dr. Mario now faces the screen instead of away while sleeping.
- Dr. Mario's mustache now moves during certain animations, such as while falling.
- The idle pose where Dr. Mario pounds his fist into his palm has been slightly altered; he now smiles during it.
- All of Dr. Mario's victory poses have been slightly altered.
- The victory animation where Dr. Mario rubs his chin has him tap the toe of his shoe on the ground before contemplatively rubbing his chin.
- The victory animation where Dr. Mario throws Megavitamins has him looking towards the camera with a happy expression when holding the Megavitamins in his hands.
- The victory animation where Dr. Mario poses with his stethoscope is more exaggerated.
- Dr. Mario once again has his own section in the Sound Test, much like in Melee.
Attributes[edit]
- Like all characters, Dr. Mario's jumpsquat animation takes 3 frames to complete (down from 5).
- Dr. Mario's damage modifier has been increased (+15 → +22), meaning that the damage output of all attacks has been increased from 1.12x to 1.176x and slightly higher KO power as a result.
- Dr. Mario's mobility modifier has been decreased (-50 → -65). Due to Dr. Mario's movement speed being relatively unchanged from his previous appearance, he hardly benefits from the universal mobility buffs, and is slower relative to the roster as a result of most other characters receiving such buffs, in a manner similar to Ryu and the Mii Gunner.
- Dr. Mario runs slightly faster (1.3312 → 1.397792).
- His initial dash is also faster (1.3312 → 1.5375712), although it is the 2nd slowest in the game.
- Dr. Mario walks slightly faster (0.9152 → 0.917301).
- Dr. Mario's air speed is slower (0.9292 → 0.9238784).
- Dr. Mario's short hop (14.171785912 → 13.414592) and midair jump (29.356105712 → 27.785184) cover less distance.
- Dr. Mario's full hop no longer uses an external multiplier and covers greater distance (29.356105712 → 30.8805).
- Dr. Mario's traction is much higher (0.045 → 0.106), allowing him to punish out of shield more easily. It is slightly higher than Mario's.
- Dr. Mario's gravity is slightly lower (0.08715 → 0.087).
- Forward roll grants less intangibility (frames 4-16 → 4-15).
- Back roll has more startup with less intangibility (frames 4-16 → 5-16), and more ending lag (FAF 30 → 35).
- Spot dodge has less ending lag (FAF 27 → 26).
- Air dodge grants more intangibility (frames 3-27 → 3-29).
- Air dodge has significantly more ending lag (FAF 33 → 53).
Ground attacks[edit]
- Neutral attack:
- Consecutive uses of the first hit of neutral attack are faster (11 → 6 frames).
- The first two hits transition into the subsequent hits noticeably faster (frame 10 → 5 (hit 1), 6 (hit 2)) and have less ending lag (FAF 23 → 20 (hit 1), 25 → 22 (hit 2)), no longer being slower than Mario's.
- The third hit comes out faster (frame 7 → 3) and goes higher, allowing it to connect better from the first two hits.
- However, its total duration was not fully compensated (FAF 36 → 34), giving it more ending lag.
- The third hit has increased base knockback (45 → 60).
- All hits have a higher hitlag multiplier (1× → 1.8× (hit 1), 1.2× (hit 2), 2× (hit 3)), giving opponents more time to SDI each hit and DI the last hit.
- All hits have smaller hitboxes (3u/2.8u/4u → 1.2u/1.5u/1.8u (hit 1), 3u/2.8u/4u → 1.8u/3u/4u (hit 2), 5u/2.5u/2.5u → 4.3u/2.5u/2.6u (hit 3)).
- The first two hits no longer use set knockback (30 set/100 scaling → 25/20/10 base/30/20 scaling (hit 1), 30/20/15 base/35/25/15 scaling (hit 2)), and have altered angles (60°/70°/80° → 361°/180° (hit 1), 70°/78°/88° → 361° (hit 2)). This allows them to lock, and gives them jab cancel setups at high percents, but causes them to connect less reliably.
- Forward tilt:
- Forward tilt deals slightly more damage (7% → 9%).
- Forward tilt has less ending lag (FAF 31 → 26). Combined with the increased shieldstun for ground attacks, this makes it much safer on shield.
- It has much more base knockback (8 → 55), but less knockback scaling (100 → 65). This makes it significantly safer on hit at low percents, but removes its ability to lock, and reduces its KO potential from across the stage.
- Up tilt:
- Up tilt has an altered animation with the spinning uppercut starting from a higher and closer position, noticeably reducing its range in front of Dr. Mario, to the point where it can no longer hit most characters on the ground unless they are very close.
- Its animation has been flipped, with Dr. Mario spinning toward the screen rather than away from it.
- Down tilt:
- Down tilt's sweetspot takes priority over the sourspot.
- It has less knockback scaling (80 → 55) and has gained a hitstun modifier of 3, significantly improving its combo ability, to the point of possessing KO setups at high percents.
- Its animation has been flipped, with Dr. Mario spinning toward the screen rather than away from it.
- Dash attack:
- Dash attack's clean hit deals more damage (8% → 9.8%) with knockback scaling not fully compensated (42 → 38), improving its KO potential.
- The hitboxes are placed farther from Dr. Mario (Z offset: 4.4u/4u → 5.4u/4.9u), improving its horizontal range.
- It has gained a shieldstun multiplier of 1.875×, which when combined with the increased shieldstun for grounded attacks makes it safer on shield.
- The late hit has a slightly bigger hitbox (2.6u → 2.7u).
- It has a different animation where Dr. Mario's head is positioned higher, his legs extend farther from him, and he gets up during the ending lag instead of staying sit. This prevents him from sliding under certain attacks, and makes him easier to hit overall.
- Forward smash:
- Forward smash deals consistent damage across all angles (14%/17% (forward), 14.7%/17.85% (up), 14.42%/17.51% (down) → 14.7%/17.8% (all)), increasing it overall, with knockback scaling minimally compensated on the unangled (96 → 94) and downward angled (96 → 95) versions.
- The electricity produced from Dr. Mario's forward smash is magenta/lavender instead of light blue.
- Up smash:
- Up smash launches at a more vertical angle (130° → 120°), which allows it to KO earlier onstage and function better as an anti-air punishment tool, but makes it more vulnerable to LSI and worsens its KO ability near the ledge.
- Its animation has been flipped, with Dr. Mario facing toward the screen rather than away from it.
- Down smash:
- Down smash's animation has been altered, resembling both the Sweep Kick move from Super Mario 64, and the breakdance Mario performs on the cover of Dance Dance Revolution: Mario Mix.
Aerial attacks[edit]
- All aerials have less landing lag (12 frames → 7 (neutral), 28 → 17 (forward), 16 → 10 (back), 14 → 8 (up), 21 → 13 (down)).
- Neutral aerial:
- Neutral aerial's late hit deals more damage (8% → 10%) and has more knockback scaling (90 → 94), improving its KO potential.
- The late hit has larger hitboxes (3u → 3.6u).
- Forward aerial:
- Forward aerial has a different animation, with Dr. Mario punching downward with his opposite hand and twisting around afterwards instead of flipping.
- Up aerial:
- Up aerial has less ending lag (FAF 32 → 31).
- It deals more damage (7% → 8.7%) and knockback (9 base/100 scaling → 10/114), giving it much more KO ability, without drastically reducing its combo ability due to its reduced lag.
- It auto-cancels earlier (frame 18 → 17).
- Its hitboxes have a shorter duration (frames 4-8 → 4-7).
- Down aerial:
- Dr. Mario has a new down aerial: a downward stomp similar to that of Captain Falcon. It consists of only one hit instead of five.
- It has a shorter total duration (FAF 52 → 43), making it safer to use offstage.
- It deals more damage (1.7% (hits 1-4), 3% (hit 5); 9.8% total → 12%), with knockback not fully compensated (50 base/120 scaling → 10/100), and has a sweetspot that meteor smashes opponents, while the sourspot launches them at a lower angle (45° → 270°/361°). Combined with its previous changes, this allows it to start combos onstage at various percents, while also improving its edgeguarding ability, being as strong as Mario's forward aerial.
- It auto-cancels much earlier (frame 45 → 35), allowing it to auto-cancel in a short hop.
- It has larger hitboxes overall (4.5u/3.2u (hits 1-4), 5.5u/3.7u (hit 5) → 5.2u/4.5u).
- Down aerial has more startup with a shorter hitbox duration (frames 11-27 → 14-17), which also increases its ending lag despite its total duration being reduced.
- It no longer possesses a landing hit.
Throws and other attacks[edit]
- Grabs:
- All grabs have increased ending lag (FAF 29 → 35 (standing), 36 → 43 (dash), 34 → 37 (pivot)).
- Dash and pivot grab have slightly more startup lag (frame 8 → 9 (dash), 9 → 10 (pivot)).
- Dash grab has slightly less range (Z2 offset: 10.6u → 10.4u).
- Pummel:
- Pummel deals more hitlag (5 frames → 14), but has significantly less startup (frame 16 → 1) and ending lag (FAF 24 → 7), shortening its duration.
- It deals much less damage (3.25% → 1.3%).
- It has a slightly different animation: Dr. Mario uses one hand during it instead of both of his hands like in previous installments, to maintain consistency with his grab animation.
- All of Dr. Mario's throws have been altered with more exaggerated animations.
- The speed of Dr. Mario's throws is no longer weight-dependent. This improves their combo potential on heavyweights, but reduces it on lightweights.
- Forward throw:
- Its animation has been altered, with Dr. Mario turning on the opposite direction faster, but the second half of the spin is slower and he tosses the opponent more exaggeratedly.
- Back throw:
- Dr. Mario has a new back throw: he heaves the opponent overhead behind him.
- It releases opponents faster (frame 44 → 30), making it harder to DI.
- However, its total duration remains unchanged, increasing its ending lag.
- It has more knockback scaling (60 → 68). In combination with Dr. Mario's higher damage multiplier, this turns it into one of the strongest back throws in the game.
- It no longer possesses a collateral hit.
- Up throw:
- Up throw has increased combo ability due to Dr. Mario's faster jumpsquat and jump speed.
- It has a different animation where Dr. Mario faces horizontally rather than towards the screen, and holds the opponent by their chest instead of lifting them on their back before throwing, more closely resembling Mario's Upward Cap Throw from Super Mario Odyssey.
- Down throw:
- Down throw has increased combo ability due to Dr. Mario's faster jumpsquat and jump speed.
- Dr. Mario no longer performs a front flip after throwing the opponent. He also slams the opponent more forcefully and with a single arm instead of two.
- Floor attack:
- Floor attacks deal less base damage (front and back floor attacks: 7 → 6 (both hits), trip floor attack: 5 → 4.3 (both hits)), meaning that they deal roughly the same damage as Mario's.
- Edge attack:
- Edge attack deals more base damage (7% → 8.51%).
Special moves[edit]
- Megavitamins:
- Megavitamins has less ending lag (FAF 53 → 50), improving its safety.
- It launches at a higher angle (361° → 65°), deals much more knockback (35 base/20 scaling → 60/40 (clean), 28/15 → 55/40 (mid), 22/10 → 50/40 (late)), and has a higher hitlag multiplier (0.3× → 1×). Alongside the previous change, this greatly improves the move's camping and followup abilities.
- Due to these changes, however, it can no longer lock opponents.
- Megavitamins are slightly larger, and have been given an extended hitbox to match their size, increasing their range despite the hitbox itself being smaller overall (2u (clean)/1.8u (mid)/1.6u (late) → 1.7u).
- The pills are generally less bouncy (bounce speed: 1.8 (min)/2.2 (max) → 1.65/2).
- It has received negative shield damage (0 → -2.5 (clean)/-2 (late)), effectively dealing half its usual damage to shields.
- Dr. Mario no longer opens his mouth when using Megavitamins on the ground.
- Super Sheet:
- Projectiles reflected by Super Sheet have a higher damage multiplier (1.5× → 1.6×).
- It no longer gives the opponent super armor on hit.
- The Super Sheet now deals knockback and hitstun to opponents grabbing the ledge.
- The reflective hitbox is smaller (9u → 7.7u), and has been moved forward (2 → 6.5). As such, it can no longer cover behind Dr. Mario, making it less safe to use.
- Although, it is easier to reflect projectiles that otherwise would have stopped short of Dr. Mario.
- The reflective hitbox has more startup with a shorter duration (frame 6-22 → 9-22), although it has a new function causing it to start two frames earlier (frame 7) if a projectile is very close to Dr. Mario at the time. This slightly reduces its safety.
- In the same circumstances, the entire move loses two frames of startup, allowing the offensive hitbox to come out earlier (on frame 10) and reducing the move's total duration.
- The animation is considerably longer (41 frames → 58). In the air, this increases the amount of time Dr. Mario's air mobility is restricted if the move is not interrupted.
- It always forces opponents to show their backside while they are using their moves; this even works to characters with mirrored stances, such as another Dr. Mario, causing them to turn away from the screen.
- Super Sheet has an updated animation to differentiate it from Cape. It starts flat on the floor, and Dr. Mario lifts it up above his head. This better indicates the move's higher vertical reach compared to Mario's Cape.
- Super Jump Punch:
- Super Jump Punch's clean hit has slightly more knockback scaling (100 → 105).
- The clean hit's hitbox is no longer extended towards Dr. Mario. Thanks to the new jostle mechanics, it does not induce a blindspot despite the reduced range.
- The window to reverse Super Jump Punch is shorter, no longer being reversible during the clean hit. This makes it easier to angle vertically, but harder to recover with when facing away from the stage.
- The clean hit has a lower hitlag multiplier (1.5× → 1×).
- Super Jump Punch has an altered landing animation where Dr. Mario lands on his feet, like in Melee, as opposed to his back.
- Dr. Tornado:
- Dr. Tornado hits seven times, up from five, and deals much more damage (1.2% (hits 1-4); 7.8% total → 1.6% (hits 1-6); 12.6% total).
- It has gained percent-based heavy armor during frames 2-9 when used on the ground, with a threshold of 10%.
- It has larger hitboxes (3.5u/4.2u → 4u/4.5u (looping hits), 6u/6u → 6.5u/6u (last hit)).
- It gains more height via button mashing, improving Dr. Mario's recovery.
- The looping hits have shorter gaps between them (6 frames → 4), different angles (90°/180° (grounded), 90°/366° (aerial) → 90°/105°/367°), a lower hitlag multiplier (1× → 0.5×), and use set knockback for all their hitboxes, allowing them to connect much more reliably despite their increased SDI multiplier (1× → 1.2×).
- The last hit has more knockback scaling (130 → 154), which combined with its increased damage greatly improves its KO potential.
- The looping hits are only active for one frame each, instead of being fully active throughout and using a rehit rate (frames 10-33 → 10, 14, 18, 22, 26, 30).
- Dr. Mario opens his hands when using the move, and rises slightly upwards on the ground.
- It has a vortex form around Dr. Mario when used, much like Luigi Cyclone.
- Doctor Finale:
- At the start of Doctor Finale, nearby opponents will be slowed down more, and for longer.
- The Megavitamins have a shorter duration with a faster travel speed (260 frames → 210). This makes them more likely to drop opponents, and makes them worse at timing out offstage opponents.
- Damage from each hit is dealt solely based on how long the attack has been out, with the Megavitamins becoming more powerful as the attack continues. This makes the front Megavitamin worse early during the Final Smash, but the back Megavitamin stronger later during it.
- Dr. Mario sports an angrier expression than in the previous game when unleashing Doctor Finale.
Update history[edit]
Dr. Mario has been buffed overall by game updates. After a few minor changes in preceding patches, Dr. Mario received a number of useful buffs in update 7.0.0. Down tilt gained noticeable adjustments to its knockback and hitstun, improving its combo potential significantly. Forward tilt and late neutral aerial's damage outputs were increased noticeably at the cost of slight knockback compensation, which improved their spacing and KO potentials, respectively. Down aerial gained more active frames, which improved its consistency and edgeguarding potential. Lastly, clean Super Jump Punch's knockback was increased, which heightened its already considerable strength.
Afterwards, update 13.0.0 granted Dr. Mario other substantial buffs. Two of his most important tools in the neutral game, neutral aerial and up aerial, gained noticeable increases to their knockback and damage output, respectively. Other pivotal moves in Dr. Mario's moveset were also improved: down aerial is 2 frames faster overall, Super Sheet's reflection hitboxes gained more active frames, and Dr. Tornado's heavy armor activates earlier.
Overall, Dr. Mario fares better than he did at the launch of Ultimate. However, the competitive scene's general opinion is that his normal self still outshines him in nearly every category.
- The reflection damage multiplier for Super Sheet has been increased (1.5x → 1.6x).
- Super Sheet's reflector has more range (6.5u → 7.7u).
- Megavitamin has received negative shield damage (0 → -2.5 (clean)/-2 (late)), effectively dealing half its usual damage to shields.
- Super Sheet no longer puts opponents into hitstun during ledge return vulnerability, increasing his combo potential.
- At the start of Doctor Finale, nearby opponents will be slowed more (10 → 20), and for longer (60 frames → 85).
- Forward tilt deals more base damage (7% → 9%), with knockback scaling not fully compensated (70 → 65).
- Down tilt has less knockback scaling (80 → 55), and inflicts 3 additional frames of hitstun. This significantly improves its combo potential, granting it KO setups into Super Jump Punch at high percents.
- Neutral aerial's late hit deals more base damage (8% → 10%), with knockback scaling not fully compensated (102 → 94).
- Down aerial has a longer hitbox duration (frames 16-17 → 16-19).
- Super Jump Punch's clean hit has more knockback scaling (100 → 105).
- Doctor Finale deals more damage (2.7%, 2%, 2.9%/2.2%, 3.1%/2.3%, 3.3%/2.5% → 3%, 2.3%, 3.2%/2.5%, 3.4%/2.6%, 3.6%/2.8%).
- Late neutral aerial has higher knockback scaling (94 → 100).
- Up aerial deals more damage (8.7% → 10.2%), with its knockback scaling compensated (114 → 100).
- Down aerial has less startup lag (frames 16-19 → 14-17). Its total duration was also subsequently reduced (FAF 45 → 43).
- Super Sheet's hitbox has a longer duration (frames 12-14 → 12-16).
- Grounded Doctor Tornado gains super armor earlier and for a longer period of time (frames 5-9 → 2-9).
Moveset[edit]
- Dr. Mario can wall jump.
For a gallery of Dr. Mario's hitboxes, see here.
Note: All numbers are listed as base damage, without the 1v1 multiplier.
| Name | Damage | Description | ||
|---|---|---|---|---|
| Neutral attack | Jab (ジャブ) / Straight (ストレート) / Kick Up (けりあげ) | 2.94% | The Punch + Punch + Kick combo from Super Mario 64. Useful for spacing and comes out quickly. The first and second hits can also jab lock. Additionally, unlike Mario, the close-range hitbox of the first hit can jab cancel into Super Jump Punch at high percentages for a guaranteed KO confirm. | |
| 1.764% | ||||
| 4.704% | ||||
| Forward tilt | Middle Kick (ミドルキック) | 10.584% | A wheel kick. It deals average knockback, but it is enough to KO at around 150% at the ledge and 209% from center stage. | |
| Up tilt | Uppercut (アッパーカット) | 7.4088% | A spinning uppercut. Can combo into itself at low percentages, and into aerials at higher percentages. At high percentages (around 140%-150%), it can serve as a KO option, although it fails to hit most short opponents due to its high hitbox placement. It vaguely resembles the second hit of the Mega Glove's combo from Super Mario RPG: Legend of the Seven Stars. | |
| Down tilt | Spinning Low Kick (スピニングローキック) | 5.88% (foot), 8.232% (leg) | A legsweep. A great combo starter, as it can combo into up aerial, Super Jump Punch, and Dr. Tornado, all of which serve as KO confirms. | |
| Dash attack | Sliding (スライディング) | 11.5248% (clean), 7.056% (late) | The Slide Kick from Super Mario 64. Launches opponents vertically unlike Mario's version, which can potentially make it a combo starter if hit late. | |
| Forward smash | Defibrillator (心臓マッサージ, Cardiac Massage) | 17.2872% (electricity), 20.9328% (arm) | A palm thrust that produces a small burst of electricity. Deals immense damage and knockback, giving it great KO potential. Its sweetspot is located on Dr. Mario's arm. One of the stronger forward smashes in the game, and one of Dr. Mario's most viable KOing options, KOing at as low as 55% at the ledge and 78% center stage. Its electric properties also make it safer on shield compared to Mario's, especially if spaced. | |
| Up smash | Ear, Nose, and Throat (スマッシュヘッドバット, Smash Headbutt) | 16.464% | An upward arcing headbutt. Unlike most up smashes, this one launches opponents horizontally in the opposite direction he is facing. Renders Dr. Mario's head intangible for a short time. It's fast, coming out on frame 9, is powerful and its ending lag is only moderate, making it difficult to punish. The horizontal angle allows the move to combo into itself at low percentages and KO earlier at the ledge if it hits opponents behind him, although it weakens its potential as an anti-air and punishment tool. Its hitboxes and head intangibility last 1 more frame than Mario's, hitting small opponents on the ground more easily. | |
| Down smash | Break Spin (ブレイクスピン) | 11.76% (front), 14.112% (back) | A breakdancing version of the Sweep Kick from Super Mario 64. Dr. Mario's fastest smash attack, making it a rather useful defensive option. Its back hit is stronger, and can punish ledge stalls effectively. It can also semi-spike with above-average knockback, making it a great edgeguarding tool. The front hit KOs at around 130%, while the back hit KOs at 106%. | |
| Neutral aerial | Dr. Kick (ドクターキック) | 5.88% (clean), 11.75% (late) | A flying kick. It is a sex kick that has the unique property of having its late hit being stronger than its clean hit. Its clean hit can jab lock and start combos, while its late hit has surprisingly high knockback for a sex kick, KOing at the edge at around 130%. It can autocancel in a short hop. | |
| Forward aerial | Dr. Punch (ドクターグーパンチ) | 11.76% (early), 17.64% (clean), 10.584% (late) | An overhand. Unlike Mario's version, it does not have a meteor smash hitbox. It has the slowest of his aerials, coming out at frame 16 and having high ending lag and landing lag, and is the only aerial that cannot autocancel in a short hop, but it has extremely high diagonal knockback when hit clean, making it one of the strongest forward aerials in the game. Can KO middleweights as early as 70% near the edge. | |
| Back aerial | Drop Kick (ドロップキック) | 14.112% (clean), 8.232% (late) | A dropkick. Comes out quickly, autocancels in a short hop fast fall and has above-average knockback, which makes it a viable edgeguarding and KO move and a reverse aerial rush option. Can also chain into itself at low percents, or set up tech-chase situations. | |
| Up aerial | Air Slash (エアスラッシュ) | 11.9952% | A bicycle kick. The move launches diagonally unlike Mario's up aerial, which can be ideal for edgeguarding mixups. However, this renders it unusable for juggling and lengthy combos past low percentages. It can be used twice in a single short hop, or the second up aerial can be replaced with a neutral aerial instead, and can autocancel in a short hop fast fall. Despite its very quick startup, it works well as a KO option at high percentages, especially offstage. | |
| Down aerial | CLEAR! (全力メテオキック, Full Power Meteor Kick) | 14.112% | A double foot stomp. While it has noticeable startup, it deals consistent damage and can powerfully meteor smash opponents when hitting with the sweetspot on his legs. It has a sourspot on his hips, which instead launches away with strong knockback. On grounded opponents, the meteor hitbox can open up many KO confirms, notably with forward aerial, back aerial, Super Jump Punch and Dr. Tornado. It can autocancel in a short hop and is decently quick for a meteor smash, coming out at frame 14. | |
| Grab | Grab (つかみ) | — | Reaches out. Has average range and above-average speed. | |
| Pummel | Grab Headbutt (つかみヘッドバット) | 1.5288% | A headbutt. Moderately fast. | |
| Forward throw | Swing-Around Throw (ふり抜き投げ) | 9.408% | Spins and throws the opponent away. Can be used to set up an edgeguard, or combo into dash attack against certain characters at 0%. Decently quick. It is also slightly stronger than Mario's forward throw, as it can KO middleweights at around 190% at the edge of Final Destination, which is about 10% earlier. | |
| Back throw | Airplane Throw (ヒコーキ投げ) | 12.936% | Dr. Mario heaves the opponent over him and then throws them diagonally. Combined with its high damage and knockback, it is one of the strongest back throws in the game, having potential to even surpass Ness' back throw by a small margin when at the ledge. Can KO middleweights at around 109% near the edge of Final Destination with good DI, and even from center stage can generally secure KOs around the 150-160% range. | |
| Up throw | Throw Up (スルーアップ) | 8.232% | Heaves the opponent upward. Can put the opponent into a juggling situation. Can combo into up aerial and Dr. Tornado at low percentages. It can KO middleweights at around 225% on Final Destination, which is about 5% earlier than Mario's up throw. Due to its new animation, it heavily resembles the Upward Cap Throw from Super Mario Odyssey. | |
| Down throw | Hospital Bed (スルーダウン, Throw Down) | 5.88% | A body slam. As it launches opponents directly upward unlike Mario's version, it is one of Dr. Mario's best combo starters, being useful for initiating aerial combos. It even has KO setups into up aerial, forward aerial, back aerial, Super Jump Punch and Dr. Tornado, although the latter four followups are reliant on reading the opponent. | |
| Floor attack (front) | 7.056% | Punches behind himself and then in front of himself while getting up. | ||
| Floor attack (back) | 7.056% | Performs a modified version of the Sweep Kick from Super Mario 64 before getting up. | ||
| Floor attack (trip) | 5.0568% | Performs a side kick behind himself and then in front of himself while getting up. | ||
| Edge attack | 10.00776% | Performs a dropkick while climbing up. Identical to Mario's, though it deals more damage. | ||
| Neutral special | Megavitamins | 5.88% (early), 4.704% (late) | Throws a Megavitamin. Useful approach and pressure option. Unlike Fireball, it cannot be absorbed, bounces on a different trajectory, and lacks a flame effect. It launches opponents slightly upward, which can potentially set up a combo. At higher percents, it can even set up for a KO confirm if timed correctly. | |
| Side special | Super Sheet | 8.232%, 1.6× (reflection) | Flips a white sheet upward. It reflects projectiles and reverses enemies, as well as reversing the opponent's controls for a brief instant. However, it does not stall Dr. Mario's descent in midair, making it useless for recovery unlike Cape. Compared to Mario's version, Dr. Mario's Super Sheet has slightly increased vertical reach in exchange for slightly lower horizontal reach, and has a longer hitbox and reflecting duration along with a higher reflection multiplier. In essence, it is better for reflection in exchange for bringing less utility. | |
| Up special | Super Jump Punch | 14.112% (clean), 7.056% (late) | A jumping uppercut. Unlike Mario's (which deals multiple hits), Dr. Mario's version consists of a powerful main hit that hits once, with a weaker late hit. It functions better as an attack than a recovery option, as it has great KO potential and fast startup, which can make it a deadly out of shield option. However, it travels a short distance compared to Mario's version. KOs at 124% from center stage. | |
| Down special | Dr. Tornado | 1.8816% (hits 1-6), 3.528% (final hit) | Rapidly spins around, trapping opponents and damaging them with a series of discus clotheslines and spinning backfists before assuming a spread-eagle position to launch them. Can hit up to seven times, with the final hit sending opponents diagonally. The grounded version grants Dr. Mario 10% armor during frames 2-9. This move can be used to aid in recovery, as mashing the B button will make Dr. Mario rise up. The maximum height that can be gained from this move is greater than that of Super Jump Punch, although this requires extremely fast button mashing. It gains good vertical and horizontal distance if mashed fast enough, allowing it to extend Dr. Mario's recovery, although it only grants aerial distance once before landing. As an attack, it is notorious for being able to KO very early at the sides of the stage (around 45% at earliest) due to its extremely high knockback growth on its last hit. As such, it is a deadly edgeguarding tool, although it is a bit risky due to Dr. Mario's poor recovery. | |
| Final Smash | Doctor Finale | 3.528%/3.7632%/3.9984%/4.2336% (front), 2.7048%/2.94%/3.0576%/3.2928% (back) | Rears his arms back before thrusting them forward to generate and launch two gigantic Megavitamins, which trap and repeatedly damage any opponents in their path. Compared to Mario Finale, the front Megavitamin deals more damage than the back Megavitamin, and the Megavitamins don't deal flame damage. | |
Stats[edit]
| Stats | Weight | Dash speed | Walk speed | Traction | Air friction | Air speed | Air acceleration | Gravity | Falling speed | Jumpsquat | Jump Height | Double jump Height |
|---|---|---|---|---|---|---|---|---|---|---|---|---|
| Value | 98 | 1.5375712 – Initial dash 1.397792 – Run |
0.917301 | 0.106 | 0.011472 | 0.9238784 | 0.007648 – Base 0.053536 – Additional |
0.087 | 1.5 – Base 2.4 – Fast-fall |
3 | 30.8805 - Base 13.414592 - Short hop |
27.785184 |
Note: Dr. Mario's movement stats are coded to be the exact same as Mario's, but are multiplied to be slower using external factors. His walk, dash, and run speeds are multiplied by 0.7942, while his air friction, air speed, air acceleration, and jump heights are multiplied by 0.7648.
Announcer calls[edit]
English/Japanese/Chinese
French
German
Italian
Russian
Spanish
On-screen appearance[edit]
- Stands behind a wall of Megavitamins, which then start to disappear starting from the top to reveal him. Stands in a thinking pose with his eyes closed until all of the Megavitamins are gone, after which he opens them with a surprised expression and assumes fighting stance.
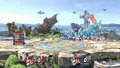
Dr. Mario's on-screen appearance

Taunts[edit]
- Up taunt: Looks to the ground and rubs the sole of one of his shoes to the floor.
- Side taunt: Pulls out a randomly colored Megavitamin, rolls it down his arm, uses his shoulder to toss it into the air, and then catches it.
- Down taunt: Balls one of his fists and lightly pounds his shoulder.
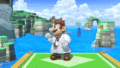
Dr. Mario's up taunt.
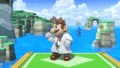
Dr. Mario's side taunt.
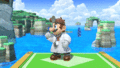
Dr. Mario's down taunt.


Idle poses[edit]
- Rolls his neck as if stretching it.
- Pounds his fist into his palm.
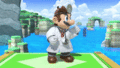
Dr. Mario's first idle pose.
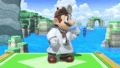
Dr. Mario's second idle pose.


Crowd cheer[edit]
| Cheer (English) | Cheer (Japanese/Chinese) | Cheer (Italian) | Cheer (Dutch) | Cheer (French) | |
|---|---|---|---|---|---|
| Cheer | |||||
| Description | Go - Doc! | Iii-sha! (Doc-tor!) | Doctor Mario curali tutti! | Dok! Dok! Dr. Mario! | Doc - teur Mari - o! |
| Cheer (German) | Cheer (Spanish) | Cheer (Russian) | Cheer (Korean) | |
|---|---|---|---|---|
| Cheer | ||||
| Description | Dok - tor Mari - o! | Dooooctor Mario! *claps 5 times* | Dok - tor -- Mari - o! | Doc - tor Mari - o! |
Victory poses[edit]
- Left: Throws two randomly colored Megavitamins in different directions, dusts his gloves, pulls out two more Megavitamins of the same color, and smiles.
- Up: Flourishes his stethoscope around himself.
- Right: Taps his shoe on the ground, places a hand on his chin, and then looks at the screen while contemplatively rubbing his chin.


In competitive play[edit]
Most historically significant players[edit]
See also: Category:Dr. Mario players (SSBU)
 JaZaR - The best Dr. Mario player in the world in 2023. He is the second Dr. Mario player to be ranked on a global ranking, at 144th on the LumiRank 2023. He regularly places top 8 at Mexican regionals, including winning Laguna Championship 2023 and placing 3rd at Xcution Summit II defeating Skyjay. He also has several strong major performances, including 13th at Delfino Maza 2023, 25th at Smash Factor X, and 33rd at Smash Factor 9.
 Lui$ - One of the first Dr. Mario players to garner any noticeable results, placing 33rd at GENESIS 6 with solo-Dr. Mario, 17th at Smash 'N' Splash 5 with mostly Dr. Mario, and 33rd at Frostbite 2019 using Dr. Mario to defeat ESAM. However since mid-2019 he has dropped Dr. Mario in favor of other characters.
- Meowscarada - The best Dr. Mario player in the United States' online metagame. They placed highly at several online events such as 2nd at Frame Perfect Series 2: ONLINE and 7th at Smash Out Breast Cancer and was ranked 37th on the Wi-Fi Warrior Rank v6. Although their activity has largely been in-region in the post-online metagame, they nonetheless have seen strong results, such as placing 2nd at Ignition 300 defeating some of the Midwest's best players including skittles and Ikan.
 Oryon - Although more known for his Wolf, he also played Dr. Mario from 2019 to 2021 and was considered the best Dr. Mario player in Europe. He placed 5th at VCA 2021 playing mostly Dr. Mario, and has also placed 5th at Syndicate 2019, 9th at Albion 4, and 13th at GENESIS 8 using Dr. Mario in notable bracket games and sets.
 Shissho - The second-best Dr. Mario player in Japan. He notably won the 256-entrants regional KOWLOON 1 over Paseriman and Munekin, and has also placed highly at several majors, including 17th at Kagaribi 9 and 25th at Maesuma TOP 10.
- Tsumusuto - The best Dr. Mario in the world from 2019 through 2022 and is the only Dr. Mario player who had ever finished top 8 at a major, placing 3rd at Maesuma TOP 9. In addition, he has also finished strongly at several majors, including 9th at both Sumabato SP 5 and Sumabato SP 6. He was ranked 115th on the OrionRank Ultimate: Eclipse, the highest ranking ever for a Dr. Mario main.
Tier placement and history[edit]
In the early metagame, opinions on Dr. Mario remained largely the same as it was in Super Smash Bros. 4. Although his power, out of shield options, and damage racking capabilities were improved in the transition to Ultimate, his sluggish speed, atrocious recovery, and mediocre range indicated that his worst weaknesses were still largely unaddressed, leaving him with poor matchups against characters such as Palutena, Shulk, and Lucina. Although players such as Lui$, Locus, and Oryon saw success with Dr. Mario, most would either drop him or relegated him to a secondary, worsening his poor representation. As a result, most players, including Dark Wizzy and Mr.R, viewed Dr. Mario as a low tier, with some going as far as to say that he was one of the worst characters in the game. The current tier list reflects this, as Dr. Mario is ranked just above the likes of King Dedede, Little Mac, and Ganondorf.
Despite this negative perception, however, Dr. Mario still saw glimpses of success thanks to the efforts of dedicated mains, including Tsumusuto in Japan, JaZaR in Mexico, and Mabel during the online metagame. Furthermore, Dr. Mario received buffs from game updates that improved his combo and punish games. This left his true viability up to debate, with players such as Nairo and Leffen believing Dr. Mario was potentially a viable character, while other players maintained that he was still an unviable fighter due to improvements to other fighters, as well as the introductions of Min Min, Steve, and Sephiroth. Nevertheless, Dr. Mario's perception has improved since the early metagame, although he is unanimously agreed to be inferior to Mario.
Classic Mode: Colorful Treatment Plan[edit]

In reference to the three viruses, Fever, Chill, and Weird, Dr. Mario's opponents are trios consisting of red, blue, and yellow alternates of a particular fighter.
| Round | Opponent | Stage | Music | Notes |
|---|---|---|---|---|
| 1 | Flat Zone X | Chill (for 3DS / Wii U) | ||
| 2 | Green Greens | Fever | ||
| 3 | Yoshi's Island | Chill (Brawl) | ||
| 4 | Wii Fit Studio | Fever | ||
| 5 | Battlefield | Chill (for 3DS / Wii U) | ||
| 6 | Luigi's Mansion | Tetris: Type A | References his rivalry with Wario in Dr. Mario 64, as well as Wario's bad diet and hygiene in the WarioWare series. | |
| Bonus Stage | ||||
| Final | Master Hand | Final Destination | Master Hand (Less than 7.0 intensity) Master Hand / Crazy Hand (Intensity 7.0 or higher) |
On intensity 7.0 and higher, Crazy Hand fights alongside Master Hand. |
Note: Every stage plays a track related to Dr. Mario or from the Tetris universe, no matter what universe the stage originates from.
Credits roll after completing Classic Mode. Completing it as Dr. Mario has Fever accompany the credits.
The spawn positions in Round 1 were changed in version 12.0.0. Player 1 Dr. Mario starts on the second floor of the building on Flat Zone X (which was Player 2's position beforehand) instead of on the floor in front of the building. Player 2 starts on the ground level right underneath Player 1 instead of on the second floor. The Mr. Game & Watch Team was moved slightly forward.[2][3] Dr. Mario is overall further away from the Mr. Game & Watch Team in single-player mode, which means the round will take slightly longer than average.
Role in World of Light[edit]

Although Dr. Mario does not appear in the World of Light opening cutscene, he was vaporized and later imprisoned alongside the rest of the fighters (sans Kirby) when Galeem unleashed his beams of light. Dr. Mario has his own awakening battle separate from that of Mario, who appears in the opening cutscene.
Dr. Mario can be awakened in a cloud that is found on a pathway connected by a ribbon that also leads to a city-like area.
Fighter Battle[edit]
| No. | Image | Name | Type | Power | Stage | Music |
|---|---|---|---|---|---|---|
| 18 | |
Dr. Mario | 3,400 | Mario Bros. (Ω form) | Fever |
Spirit[edit]
Dr. Mario's fighter spirit can be obtained by completing Classic Mode. It is also available periodically for purchase in the shop for 300 Gold, but only after Dr. Mario has been unlocked. Unlocking Dr. Mario in World of Light allows the player to preview the spirit below in the Spirit List under the name "???". As a fighter spirit, it cannot be used in Spirit Battles and is purely aesthetic. His fighter spirit has an alternate version that replaces it with his artwork in Ultimate.

8. Dr. Mario

In Spirit Battles[edit]
Conditions in italic aren't listed on the Spirit Battle preview screen.
As the main opponent[edit]
| Spirit | Battle parameters | Inspiration | |||||||||
|---|---|---|---|---|---|---|---|---|---|---|---|
| No. | Image | Name | Series | Enemy Fighter(s) | Type | Power | Stage | Rules | Conditions | Music | Character |
| 592 | Dr. Stewart | F-Zero Series | •Dr. Mario |
9,500 | Mute City SNES (Battlefield form) | •Item: Food | •Timed battle (1:30) •The enemy heals over time •Items will be pulled toward the enemy |
Mute City (Original) | |||
| 736 | Dr. Crygor | WarioWare Series | •Dr. Mario •R.O.B. •Wario |
3,400 | WarioWare, Inc. (hazards off) | N/A | •Defeat the main fighter to win | Mike's Song | |||
| 752 | Hal Emmerich | Metal Gear Solid Series | •Dr. Mario •Giant Metal R.O.B. |
4,500 | Prism Tower | N/A | •Defeat the main fighter to win •The enemy tends to avoid conflict •The enemy is metal |
Yell "Dead Cell" | |||
| 867 | Dr. Light | Mega Man Series | •Dr. Mario •Mega Man |
10,000 | Wily Castle (Battlefield form) | N/A | •Defeat the main fighter to win •Stamina battle •The enemy tends to avoid conflict |
Mega Man 2 Medley | |||
| 873 |  |
Dr. Wily | Mega Man Series | •Dr. Mario •Metal Mega Man |
12,600 | Wily Castle (hazards off) | N/A | •Stamina battle •Reinforcements will appear after an enemy is KO'd •The enemy is metal |
Mega Man 2 Medley | ||
| 1,132 | Hockey Players | Ice Hockey | •Dr. Mario •Donkey Kong •Luigi |
1,500 | Pokémon Stadium (Ω form) | •Slippery Stage | •The stage's platforms are very slippery | Core Luge | Short hockey player | ||
| 1,135 | Andy | Advance Wars Series | •Dr. Mario •Tiny Snake |
3,400 | Halberd (Ship deck) | •Health Recovery •Item: Exploding Types |
•The enemy is healed when the enemy's at high damage •Defeat an army of fighters |
Filled with Hope | |||
| 1,195 | Sick Beats Doctor | Rhythm Heaven Series Rhythm Paradise Series |
•Dr. Mario |
2,200 | Wrecking Crew | •Assist Trophy Enemies (Ghosts) •Hazard: Poison Cloud |
•The stage is covered in a poisonous cloud •Hostile assist trophies will appear |
Chill (Brawl) | |||
| 1,214 | Dr. Kawashima | Brain Age: Train Your Brain in Minutes a Day! Series Dr. Kawashima's Brain Training: How Old Is Your Brain? Series |
•Dr. Mario |
3,800 | PictoChat 2 (hazards off) | •Assist Trophy Enemies (Dr. Kawashima) | •Hostile assist trophies will appear | Brain Age: Train Your Brain in Minutes a Day! | |||
| 1,216 | Dr. Lobe | Big Brain Academy Series | •Dr. Mario •Kirby |
3,400 | PictoChat 2 | •Hazard: Low Gravity •Hazard: High Gravity |
•All fighters have reduced jump ability •Gravity is reduced after a little while |
Title Theme - Big Brain Academy | |||
| 1,266 |  |
Plague Knight | Shovel Knight Series | •Dr. Mario |
1,900 | Unova Pokémon League | •Item: Bob-omb | •The enemy's explosion and fire attacks have increased power •Items will be pulled toward the enemy •The enemy is easily distracted by items |
Flash in the Dark (Dr. Wily Stage 1) | ||
| 1,319 | Professor Riggs & Plaise & Lerna Professor Gerry, Plaise, & Lerna |
Nintendo Labo Series | •Dr. Mario •Bayonetta •Tiny Young Link |
2,500 | Paper Mario | •Attack Power ↑ •Defense ↑ |
•The enemy has increased defense after a little while •The enemy has increased attack power after a little while |
Title Theme - Super Mario Maker | Professor Riggs Professor Gerry | ||
| 1,390 | Seteth | Fire Emblem Series | •Dr. Mario •Villager |
4,200 | Garreg Mach Monastery (Cathedral) | N/A | •Timed battle (1:00) •Reinforcements will appear after an enemy is KO'd •The enemy has increased power for the first part of the battle |
Chasing Daybreak | |||
As a minion[edit]
| Spirit | Battle parameters | Inspiration | |||||||||
|---|---|---|---|---|---|---|---|---|---|---|---|
| No. | Image | Name | Series | Enemy Fighter(s) | Type | Power | Stage | Rules | Conditions | Music | Character |
| 1,344 |  |
Gruntilda | Banjo-Kazooie Series | •Giant King Dedede •Giant Dr. Mario |
13,900 | Find Mii (Ω form) | •Hazard: Poison Floor | •Defeat the main fighter to win •The floor is poisonous •Stamina battle •The enemy starts the battle with a Star Rod •Reinforcements will appear during the battle |
Vs. Klungo | Klungo | |
| 1,421 | Alfyn & Therion | OCTOPATH TRAVELER | •Sheik •Dr. Mario |
9,200 | Distant Planet (Battlefield form) | •Hazard: Poison Floor | •The floor is poisonous •The enemy's melee blows will heal them when they hit |
Save the World, Heroes! | Alfyn | ||
Alternate costumes[edit]

| |||||||

|

|

|

|

|

|

|

|
Gallery[edit]
Dr. Mario's fighter card.
Dr. Mario's unlock notice
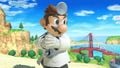
Dr. Mario idling on Wuhu Island.
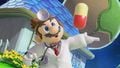
Taunting on Mario Galaxy.
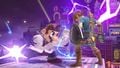
Hitting Link with his forward smash on New Pork City.
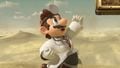
Jumping on Mushroomy Kingdom.
Tossing a Megavitamin on Moray Towers.
Holding a Fairy Bottle while running towards Link on Great Bay.
Taunting next to Little Mac on Tomodachi Life.
Snared by Mimikyu on PictoChat 2.
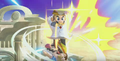
Using his down aerial on Wario on Skyworld.
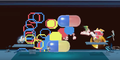
Using Doctor Finale on Wii Fit Studio against Toon Link, Wii Fit Trainer and King Dedede.


Fighter Showcase Video[edit]
Trivia[edit]
- With Link and Young Link now representing different incarnations of Link, Zelda and Sheik now representing different incarnations of Princess Zelda, and Zero Suit Samus now briefly transforming into her Varia Suited form for her Final Smash, Dr. Mario is the only playable character to represent an alternate identity for another character, namely Mario, with no gameplay connection between each other in Ultimate.
- During Luigi's character showcase trailer, Super Sheet uses Cape's animation instead of its new animation. Additionally, the sheet is unanimated and is attached to Dr. Mario's left arm.
- Ultimate is the first Super Smash Bros. game where he is not holding a Megavitamin in his official art.
- Ultimate is the first Smash game to feature Dr. Mario and have his inclusion be planned from the start. In Super Smash Bros. Melee, Dr. Mario was a late development addition to pad out the roster. In Smash 4, Dr. Mario was originally going to be an alternate costume of Mario, but remained a clone as a last minute decision in order to appeal to his fanbase from Melee.
- Using Megavitamins and pausing the game the moment the projectile appears in Dr. Mario's arm reveals that it will always appear completely red before changing to a randomized color one frame later.
- Prior to version 2.0.0, Dr. Mario's down aerial was named Bone Drill, a name arguably more fitting for his down aerial in Smash 4. The current name, CLEAR!, references the message appearing when a level is completed in the original Dr. Mario, as well as the shout paramedics give when using defibrillators.
- Dr. Mario's section in the Sound Test is functionally identical to that of Mario's, with some voice clips not used by Dr. Mario (such as "Let's-a go!" from Mario's on-screen appearance) being removed.
- Unlike Mario, Dr. Mario's Star KO voice clip is listed before his heavy knockback voice clips rather than after after them, matching the order of the other base roster characters excluding Pikachu and Roy.
- The voice clips of Dr. Mario's forward aerial, back throw, double jump, Doctor Finale, and Home-Run Bat swing are omitted despite Dr. Mario using them in-game.
- Dr. Mario is the only character with custom equipment incorporated into his attributes.
References[edit]