Zelda (SSBU): Difference between revisions
Aliks-Odev (talk | contribs) (→Moveset: filled out moveset table) |
(Trimmed down details since most moves now have overviews on their individual pages) |
||
| (772 intermediate revisions by more than 100 users not shown) | |||
| Line 1: | Line 1: | ||
{{ArticleIcons|ultimate=y}} | {{ArticleIcons|ultimate=y}} | ||
{{disambig2|Zelda's appearance in ''Super Smash Bros. Ultimate''|the character in other contexts|Princess Zelda}} | {{disambig2|Zelda's appearance in ''Super Smash Bros. Ultimate''|the character in other contexts|Princess Zelda}} | ||
{{Infobox Character | {{Infobox Character | ||
| Line 10: | Line 9: | ||
|ssbgame3 = SSB4 | |ssbgame3 = SSB4 | ||
|availability = [[Unlockable character|Unlockable]] | |availability = [[Unlockable character|Unlockable]] | ||
|tier = D- | |||
|ranking = 73 | |||
}} | }} | ||
'''Zelda''' ({{ja|ゼルダ|Zeruda}}, ''Zelda'') is a playable character in ''[[Super Smash Bros. Ultimate]]''. She was confirmed as a playable character along with {{SSBU|Sheik}} and the rest of veterans on June 12, 2018. Unlike the game's predecessors, she is [[Unlockable character|unlockable]] instead of being available from the [[Starter character|start]]. Zelda is classified as [[Fighter number|Fighter #17]]. | |||
'''Zelda''' ({{ja|ゼルダ|Zeruda}}, ''Zelda'') is a playable character in ''[[Super Smash Bros. Ultimate]]''. She was confirmed as a playable character on June 12, 2018. Zelda is classified as | |||
Zelda is voiced | In a similar vein to her fellow ''Zelda'' fighters {{SSBU|Link}} and {{SSBU|Ganondorf}}, Zelda is now voiced by {{s|wikipedia|Ayumi Fujimura}}, who reprises her role from ''{{s|zeldawiki|The Legend of Zelda: A Link Between Worlds}}'' in all regions, replacing Jun Mizusawa from ''[[Super Smash Bros. Melee]]'', ''[[Super Smash Bros. Brawl]]'', and ''[[Super Smash Bros. 4]]''. Similar to {{uv|Star Fox}} characters in ''Melee'', the former provides a single line of spoken Japanese dialogue in [[World of Light]]'s opening; this line is dubbed in English by Brandy Kopp, who also voices {{SSBU|Palutena}}. | ||
Zelda is ranked 73rd out of 82 on the current [[tier list]], placing her in the D- tier. This is a slight improvement from her 52nd/53rd out of 54 placement in ''SSB4'' where she was tied with {{SSB4|Ganondorf}}, and is her best placement in the series. She has a strong zoning tool in [[Phantom Slash]], which is a very versatile move that can also start or finish combos, force approaches and apply pressure by controlling space, namely in ledge trapping. Zelda uses magic in her attacks, giving her moderately disjointed range in general. She has an abundance of KO options, with power comparable to or exceeding that of heavyweights, despite being a lightweight; furthermore, she possesses the largest array of moves with [[transcendent priority]], so her strongest attacks tend to create favorable trades if not outright beating out the opponent due to their priority. Several of them come out surprisingly fast for how powerful they are, and are effective out-of-shield options, most notoriously her [[Lightning Kick]] and [[Farore's Wind]], the latter of which is also one of the best recoveries in the game. She also has an outstanding array of throws, being able to combo with down throw until high percents and having two strong kill throws in her up and back throws. | |||
Despite these strengths, Zelda has notable weaknesses. Her mobility is among the worst in the game; she has a low run speed, falling speed and gravity, and a laggy initial dash, leaving her with committal jumps and a poor approach and [[neutral game]]. Being tall makes her easier to hit, and being floaty with poor landing options makes her especially vulnerable to juggling; this gives her one of the worst disadvantage states in the game and only exacerbates her already low weight. While Zelda has several powerful finishers, most of them are inconsistent, having very precise sweetspots that are especially difficult to land given her poor approach and mobility, weak sourspots that can even be punishable on hit, and/or high ending lag. She lacks moves that are safe on shield, most notably her aerials; the few moves that are safe require specific spacing or timing, which are difficult given her poor mobility. The range on several of her attacks is poor, limiting their utility. Almost all her normals are transcendent, which is a double-edged sword that gives her poor defense against projectiles and larger disjoints, since she cannot clank with them and easily loses to them. She also has a limited number of moves and rather small windows to confirm into other moves, forcing her to often rack up damage and secure KOs through Phantom setups or stray hits. She has no fast, low-committal projectiles, making her susceptible to being outcamped; in general, all her special moves have high lag and can be punished hard when not used carefully. | |||
Overall, Zelda plays a decent zoning game and a strong trapping game, with tools for ledge trapping and controlling space, but her precise hitboxes, inconsistency and poor mobility gives her a weak neutral and disadvantage state, making her a glass cannon with a focus on precision. Zelda is rarely represented in tournaments, but there have been dedicated players, such as {{Sm|Yn}} from Japan, {{Sm|Naskino}} in France, and {{Sm|Ven}} in the United States, with respectable results. | |||
==How to unlock== | ==How to unlock== | ||
Complete one of the following: | Complete one of the following: | ||
*Play [[VS. match]]es, with Zelda being the 2nd character to be unlocked. | *Play [[VS. match]]es, with Zelda being the 2nd character to be unlocked. | ||
*Clear {{SSBU|Classic Mode}} with {{SSBU|Kirby}} or any character in his unlock tree, being the | *Clear {{SSBU|Classic Mode}} with {{SSBU|Kirby}} or any character in his unlock tree, being the 4th character unlocked after {{SSBU|Pac-Man}}. | ||
*Have Zelda join the player's party in [[World of Light]]. | *Have Zelda join the player's party in [[World of Light]]. | ||
Zelda must then be defeated on [[Temple]] (the [[Ω form]] is used in World of Light). | |||
==Attributes== | |||
Zelda is a tall, floaty [[weight|lightweight]] character with overall slow mobility. While she has an above-average [[air speed]], [[initial dash]] and [[traction]], her jumps and [[air acceleration]] are below average, and she has the 22nd slowest [[walk|walking speed]], the 16th slowest [[falling speed]], the 10th lowest [[gravity]], and is tied with {{SSBU|Byleth}} for the 9th slowest [[run|running speed]] in the game. Zelda's attacks are mostly based on magic, making most of them [[disjoint]]ed albeit short-ranged attacks. They also boast generally quick startup; all her normal attacks activate before frame 10, except for [[forward tilt]], [[up aerial]], [[down aerial]], and [[forward smash]]. Despite her low weight, most of her attacks have impressive [[KO]] potential and damage output, giving her power comparable to that of heavyweights. Due to these factors, Zelda can be generalized as a zoner glass cannon. | |||
Zelda's ground game is notably safer than her aerial game due to generally being less committal and more consistent. She has decent close-quarters combat, namely in her [[down tilt]], a short-ranged low-profiling poke, and [[up tilt]], a large all-around anti-air; both are quick to execute combo-starters with long-lasting hitboxes. They often work in tandem with [[dash attack]], which is her most important burst and punish option with excellent speed and large hitboxes. More situational is her [[neutral attack]], which is her fastest move at frame 4; it can transition into a [[rapid jab]] for simple damage, or sometimes combo at high percents on its own, but is short-ranged, inconsistent at comboing and unsafe on shield. [[Forward tilt]] is the biggest outlier, being much slower with narrow hitboxes, but having a strong low-priority tipper; it can be used to space (especially on shield) at a longer range. | |||
Though known for her broad power, Zelda's smash attacks are one of the few areas where she falls relatively average to below-average in strength, although they are all still respectable finishers. Her [[forward smash]] has a good horizontal disjoint with multiple hits; it is a decent option for catching ledge getups, and due to its rather low ending lag it can be hard to punish on shield, especially if spaced and/or charged. [[Up smash]] is similarly a powerful multi-hit; though laggier and having poor horizontal range, it has a fast startup (frame 9) that can punish poorly spaced moves on shield, and has a very long duration of 23 active frames, making it effective for catching getups and landings. [[Down smash]] is a simple leg sweep with average power, being one of her few non-magic attacks, but compensates by being very fast at frame 5 and executing relatively quickly; hitting on both sides, the foot sweetspots [[semi spike]] at a nasty launch angle that can set up edgeguards. | |||
Zelda possesses among the most powerful set of [[aerial]]s in the game; uniquely, a majority of them are highly polarized with high-risk and high-reward and limited usage in neutral, forcing her to play carefully in the air. Her forward and back aerials, known as her Lightning Kicks, are by far most polarized moves. Both have fast startup at frame 6 with an incredibly strong sweetspot at her toe, making them effective punishes and deadly out of shield options. However, the sweetspot is tiny and only active for one frame. Additionally, they have notable landing lag, ending lag and cannot auto-cancel in a short hop. Furthermore, the sourspots are pitifully weak, even being punishable on hit at most percents. This makes them very risky with poor utility in neutral. Down air is a similar move with a powerful single-frame sweetspot on her foot and very weak sourspots. Although slow to come out and weaker than her Lightning Kicks, the sweetspot meteor smashes and is much larger, and the sourspots linger for longer and always spike opponents downward, making them useful for gimping opponents. The clean hit has great utility in punishes, as hitting it on grounded opponents will can start a combo at nearly any percent for massive damage or a KO confirm. | |||
[[Up aerial]] is Zelda's only truly consistent aerial, as it consists of a single large hitbox with consistently high knockback. A vertically disjointed explosion with excellent power, it has relatively low landing lag. While not very risky when falling, it has significant startup and ending lag and only covers the range above her, limiting its usage. [[Neutral aerial]] stands out as her only aerial to not have outstanding power or a notable sweetspot. Instead, as a multi-hit with many active frames hitting on both sides, it serves as her least committal, most versatile aerial. It can auto-cancel in a short hop, which with good execution can convert into an up tilt or dash attack at lower percents; it can also combo into a dash attack when fast-falled, and a single hit can pop grounded opponents up into a variety of confirms at virtually any percent, making it a versatile combo starter. Despite being her most important all-around aerial, it lacks an autolink angle, instead having a rather convoluted set of six hitboxes; their knockback and launch angles cause the move to be inconsistent and the launch direction to be difficult to control. | |||
Overall, Zelda's aerials on their own can be awkward for spacing, air-to-air combat, and starting combos, instead functioning more strongly in conjunction with and as follow-ups to other moves. One of the moves that most boosts the potency of her aerials is her down special, [[Phantom Slash]], which is also her most important tool. It's a unique projectile with a hurtbox and HP that she builds piece-by-piece, with its properties becoming increasingly strong by the charge, and she can have it attack before it is complete. The earliest stages are limited to zoning and body-blocking projectiles, but by the final stage, it has outstanding HP, speed, power and range. After just over a second, Zelda will be able to move freely, while the Phantom will attack automatically after about another second if it is not manually released, granting Zelda much flexibility during this window. She can attack in tandem with it in ledge traps and to mitigate the vulnerability of laggy moves; other usages include playing mind games with manual releases, punishing shielding opponents with grabs or shield break combos, and covering her own recovery and ledge getups. It is quite good at comboing into other moves or being a combo finisher itself, due to Zelda's moves having high hitlag. Phantom Slash forms the basis of Zelda's kit and is designed to compensate for Zelda's lackluster neutral, allowing her to gain stage control, cover options, pressure, zone and trap because of how much space it covers, how much damage it deals, and how many different mixups Zelda can do with it. However, Phantom's main weakness is that it cannot be charge-canceled, requiring Zelda to commit to either an early release or to wait until she is actionable. In addition, if she enters hitstun at any point before releasing the Phantom, it falls apart. | |||
Outside Phantom Slash, the rest of her [[special move]]s take inspiration from the spells of the three Golden Goddesses that Link can use in Ocarina of Time. Her neutral special, [[Nayru's Love]], is a [[reflection|reflector]] that doubles as a melee attack; it has a long duration and horizontal range on both sides of her, with full intangibility from frames 4-13 of the move, allowing it to beat out moves, disrupt strings, two-frame and edgeguard. However, the multi-hits can be inconsistent, and it is laggy, making it highly punishable. [[Din's Fire]], her side special, is a slow ball of fire that becomes stronger and faster the farther it travels. While the explosion has a powerful sweetspot, its slow startup and predictable trajectory make it easy to avoid in most cases, and quite punishable if used in neutral. Instead, it is mostly used to gimp opponents with low resources. Her up special, [[Farore's Wind]], is an outstanding offensive teleport, allowing her to recover in almost any off-stage situation. It is difficult to edgeguard and to two-frame due to its intangibility, omnidirectional distance and large, strong hitboxes. Like {{SSBU|Palutena}}'s [[Warp]], she can avoid the move's ending lag by [[edge cancel]]ing, which grants her access to otherwise impossible movement options. It is also a fast, useful out of shield option, as the first hit can also be used on its own out of shield, or to further combo into the powerful reappearance hitbox. It can work as a burst option to punish laggy options or anti-zone from a distance, but due to its high ending lag, this option is usually very risky. While having unique uses in their own rights, her specials can be strategically be used with each other for creative setups and KOs. | |||
Zelda has good range for her [[grab]], with her pivot grab being one of the most disjointed in the game. While having notably slow startup, they have great reward in her [[throws]]. [[Forward throw]] is good at setting up edge guarding and ledge traps, while [[back throw|back]] and [[up throw]] are excellent kill throws and among the strongest of their kind. [[Down throw]] is most useful as a combo starter, and can reliably combo into neutral aerial, forward aerial or back aerial from low to mid percents. All her throws can lead into a set up Phantom with proper timing for high-damage combos or KO confirms, though forward and down throw are the most practical. | |||
Despite her strengths, Zelda has significant weaknesses. Chief among them is her poor mobility, which hampers her ability to approach and move around safely. Her initial dash, for instance, is tied for the second laggiest in the game at 15 frames, which makes her unable to shield and rather vulnerable whenever she wants to move faster than walking. This mobility issue is exacerbated through numerous frame data issues, as many of her attacks, while quick to start up, have punishing amounts of end lag and precise hitboxes, making her approach telegraphed; her floatiness makes her air-to-ground transition poor and exacerbates the downsides of her already awkward aerials. Since she is tall and floaty, with no safe landing mixups or options to help her from ledge, she is very vulnerable to getting juggled and ledge trapped, contributing to one of the worst disadvantages in the game and compounding the endurance issues from her light weight. Other issues include poor range on her normals, limiting their utility, and extremely weak sourspots that can be punished on hit. Her combo game is average to subpar, as many of her moves have too much lag or unfavorable launch angles and knockback values for reliable follow-ups or wide combo windows. Due to this, she partially relies on Phantom to land stray KOs or start or finish combos for damage-racking. Some of her moves also have consistency issues, namely neutral aerial, Nayru's Love and some of the initial windboxes of Phantom Slash. | |||
Finally, her special moves have exploitable weaknesses, as they are all committal and have varying degrees of punishable lag. With correct timing and spacing around the Phantom's possible attack ranges, opponents can punish Zelda by reading when she will use the move and preemptively closing in. If there is space, the opponent can also retreat to disengage, with Zelda not being able to do much about it except gaining some stage control. Especially against mobile characters, this forces her to play a neutral with her risky, short ranged neutral tools and subpar mobility. | |||
Among favorable matchups, Zelda excels against slower characters with poor ground and aerial approaches where Phantom Slash can effectively wall them out (Ice Climbers), against large characters that become easy targets for her normally difficult-to-land sweetspots (King K. Rool), especially those without safe options on shield, enabling easy punishes with her deadly out of shield options (King Dedede), and against poor recoveries that are legitimately threatened by Din's Fire and Phantom (Ganondorf). Zelda's weaknesses cause her to struggle against quick opponents who can bait out her options, exploit her poor movement and keep her in disadvantage (Fox, Greninja, Zero Suit Samus), against characters that can outcamp her with projectiles that are fast and/or dwarf the Phantom's range (R.O.B., Young Link, Min Min), against characters with large disjoints who can beat out her transcendent moves (Cloud, Aegis), and against characters with better boxing options than her (Shotos). | |||
Overall, Zelda's strengths include fast and powerful out of shield options, good stage control and ledge trapping with Phantom setups, and impressive kill power spread broadly across her moveset. Her weaknesses in mobility, range, frame data, consistency and sweetspot issues require her to be precise with how she spaces her attacks and to make the most out of Phantom ledge traps with proper reads and option coverage. She must be creative in her approaches to overcome her mobility issues when she does not have a lead, and in mixing up what she does to get out of disadvantage due to her floaty nature and lack of safe landing options. | |||
==Changes from ''[[Super Smash Bros. 4]]''== | ==Changes from ''[[Super Smash Bros. 4]]''== | ||
Zelda had historically and consistently been regarded as one of the worst characters (and, at one point in ''[[Super Smash Bros. 4]]'', the overall worst) in previous games, due to her combination of underwhelming frame data as a whole, a lackluster special moveset, bad hitbox placements, and an undesirable mix of attributes (slow, light, tall, and floaty). While ''SSB4'' had brought updates to her offensive game, her weaknesses remained, causing her to remain unviable. Likely as a result of being a poorly regarded character in previous games, Zelda has been significantly buffed overall in the transition to ''Ultimate''. | |||
Her | |||
One of Zelda's biggest buffs is her improved moveset: many of her moves have either reduced lag, better KO potential, or other improvements. Most notably, her aerials have significantly reduced landing lag across the board, making them much more usable. The sweetspots of her kicks are significantly easier to land, and their improved auto-cancel window make them less risky to use; forward aerial's faster startup also makes it a much better out of shield option. Examples of significantly stronger moves include [[forward tilt]], whose increased damage makes the sweetspot safe on shield and one of the strongest of its kind, and [[up aerial]] which is larger and stronger with a new late hit. Her already good grab game was improved to the point it is now among the most useful in the game; her [[back throw|back]] and [[up throw]]s are much stronger, giving her two new viable kill throws among the strongest of their kind. | |||
Zelda's special moveset, considered among the most situational in previous games, has seen various improvements. [[Din's Fire]] no longer causes [[helplessness]], has an increased duration and has a larger sweetspot, making it more usable, albeit still situational. [[Farore's Wind]] has faster startup and execution and reduced vulnerability, making it a more effective out of shield and punish option; it has more precise angles for reappearance to follow opponent DI, making the "elevator" combo more likely to connect, while also being less unsafe if it doesn't. [[Phantom Slash]] is, however, her greatest buffed special and arguably her greatest buff from Smash 4 out of any of her moves. It has less lag and been heavily reworked to possess several more stages that cover a wider variety of ranges, improving its zoning usage, and the last stage allows Zelda to move around before it is unleashed, allowing for intricate trap setups and combos. The Phantom also no longer has any cooldown if destroyed, allowing it to be used much more frequently. | |||
Additionally, Zelda noticeably benefits from some of the universal changes. Her horizontal movement has been improved (both absolutely and relative to the cast) in her increased run speed, air speed, air acceleration and initial dash. The universal 3-frame [[jumpsquat]]s and reduced landing lag improve her noticeably, as they greatly supplement her neutral game, previously one of her main weaknesses. This allows her to approach more reliably and slightly improves her combo potential from fast falled aerials—most notably down aerial, which, due to the removal of teching grounded spikes, gives Zelda a plethora of new combos and kill confirms from the move. The changes to [[air dodging]] also benefit her, as they improve her edgeguarding game with moves like Din's Fire, which also improves her ledge trapping game by forcing low recoveries and allowing time for a Phantom set up. | |||
However, Zelda has received some mixed changes and nerfs as well, most notably to the combo game of her normals. Neutral attack is drastically smaller and is no longer safe on shield nor has consistent combo potential, removing one of her best neutral and spacing tools. Down tilt is much smaller and has a considerably worse launch angle, hindering its combo ability past mid percents. Neutral aerial especially has been nerfed greatly, with the autolink removal and lower knockback harming the looping hits' consistency, completely removing their drag-down combos and making the launch direction drastically more difficult to control. Down throw's increase in knockback scaling, combined with its more horizontal launch angle removes its 50/50s at high percents. | |||
Other nerfs include her forward tilt, which is much more precise due to its slower startup and narrow hitboxes, and due to the sweetspot losing highest priority and being drastically harder to land, the move is arguably weaker on average despite the damage buffs. Down aerial's late hit is worse at gimping due to its smaller hitboxes. Zelda's dash and pivot [[grab]]s, already below-average in speed, have received even more startup, although her pivot grab has very large range for a non-tether grab and both of them have less ending lag. Farore's Wind is weaker, making the sweetspot especially worse at early KOs, cannot travel as far and is much harder to edge cancel with, hindering one of her movement options. | |||
Although Zelda benefits from some of the changes to the game's engine, other changes have impaired her as well. The new knockback speed-up effect further limits her already nerfed combo moves, as knockback was sped up more than her mobility was increased. The increased [[shieldstun]] both helps and hinders Zelda, as it allows her moves to be more safely spaced, but combined with the universal reductions to landing lag (despite aerials having less shieldstun) and nerfs to shield drop lag and grabs out of shieldstun, it also slightly worsens her out of shield game in some cases. Her air dodges are also now much laggier than average, which worsens her disadvantage state. | |||
Overall, Zelda's moveset has been enhanced from previous installments, making her strengths more defined, especially around Phantom Slash as the new crux of her game plan. The changes overall allow Zelda to fare better than in previous installments, with this incarnation being her strongest one yet. However, she still underperforms compared to the rest of the cast. Nerfs to her combo tools, consistency and precision have tempered her buffs by effectively transferring many of her other moves' usages to Phantom, centralizing her playstyle around the reworked move. Game updates have brought her quality-of-life improvements, mostly making several moves across the board even stronger, while failing to address Zelda's core weaknesses. She still suffers from her more problematic attributes, i.e. her laggy initial dash, low fall speed, low gravity and low weight. Most significantly, many of her normals are worse compared to previous iterations, suffering from lack of utility due to impractically small hitboxes, poor or inconsistent follow-up potential, punishable sourspots and/or heavy ending lag. | |||
{{SSB4 to SSBU changelist|char=Zelda}} | |||
==Update history== | |||
Zelda has been buffed overall via game updates, receiving the biggest changes in update 7.0.0, followed by update 13.0.0. A majority of the changes focused on augmenting the power of her kill moves, with up smash, down smash, up aerial, and especially forward tilt and down special being stronger compared to release. Hitbox buffs made up aerial, down aerial's clean hit and Din's Fire's sweetspot larger, and increased the hitbox duration of up aerial and Din's Fire. Slight frame data buffs reduced the ending lag of her jab by 1 frame and the landing lag of neutral aerial by 3 frames. Multihit angle changes made forward smash more consistent; while also intending to do the same for neutral aerial, its angle changes were a mixed bag in practice, only improving its consistency in some cases, but making the final hit's launch direction much more volatile and thus making auto-cancel combos more difficult. | |||
Aside from the mixed change to neutral aerial's angles, Zelda has also received two minor nerfs, though negligible as the first was eventually negated, and the second was a reversal of a very brief unintended bug. In update 3.0.0, Phantom's shield damage was reduced, but the later 7.0.0 damage buff completely compensated for this. In update 9.0.2, a bugfix removed a shadow buff from the 9.0.1 patch that allowed Zelda to displace the Phantom much more easily, specifically to spawn it in front of her to grant more protection during the charge. | |||
'''{{GameIcon|ssbu}} {{SSBU|3.0.0}}''' | |||
{{UpdateList (SSBU)/3.0.0|char=Zelda}} | |||
'''{{GameIcon|ssbu}} {{SSBU|4.0.0}}''' | |||
{{UpdateList (SSBU)/4.0.0|char=Zelda}} | |||
| | |||
'''{{GameIcon|ssbu}} {{SSBU|7.0.0}}''' | |||
{{UpdateList (SSBU)/7.0.0|char=Zelda}} | |||
'''{{GameIcon|ssbu}} {{SSBU|9.0.2}}''' | |||
{{UpdateList (SSBU)/9.0.2|char=Zelda}} | |||
'''{{GameIcon|ssbu}} {{SSBU|10.1.0}}''' | |||
{{UpdateList (SSBU)/10.1.0|char=Zelda}} | |||
'''{{GameIcon|ssbu}} {{SSBU|11.0.0}}''' | |||
{{UpdateList (SSBU)/11.0.0|char=Zelda}} | |||
'''{{GameIcon|ssbu}} {{SSBU|13.0.0}}''' | |||
{{UpdateList (SSBU)/13.0.0|char=Zelda}} | |||
==Moveset== | ==Moveset== | ||
''For a gallery of Zelda's hitboxes, see [[/Hitboxes|here]].'' | |||
{{MovesetTable | {{MovesetTable | ||
|game=SSBU | |game=SSBU | ||
|neutralcount=1 | |neutralcount=1 | ||
|neutralinf=y | |neutralinf=y | ||
|neutralname= | |neutralname=Short Flash ({{ja|ショートフラッシュ|Shōto Furasshu}}) / Rapid Flash ({{ja|ラピッドフラッシュ|Rapiddo Furasshu}}) / Flash Finish ({{ja|フラッシュフィニッシュ|Furasshu Finisshu}}) | ||
|neutral1dmg= 2.5% (hits 1-2) | |neutral1dmg=2.5% (hits 1-2) | ||
|neutralinfdmg= 0. | |neutralinfdmg= 0.4% (loop), 3% (end) | ||
|neutraldesc= | |neutraldesc=Extends her palm to emit a burst of magical energy, then optionally follows up with a series of several magical bursts before a finishing blast, which can KO near the edge. Unlike in the previous games, where it was the slowest jab at frame 11, it is now her fastest move at frame 4. It no longer has a third hit, but can start combos on its own at high percents with certain hitboxes. | ||
|ftiltname= | |ftiltname=Magical Cutter ({{ja|マジカルカッター|Majikaru Kattā}}) | ||
|ftiltdmg= | |ftiltdmg=15% (hand, blade), 11.5% (arm) | ||
|ftiltdesc=A magically-infused | |ftiltdesc=A magically-infused outward knifehand strike. It can be angled and has two sweetspots at the tip that possess great power. It has three sourspots located on Zelda's arm that take priority over the sweetspots, being noticeably weaker but still having above-average KO power. Its high base knockback makes it especially potent at early KOs near the ledge. The sweetspots KO middleweights at around 83% while near the edge of {{SSBU|Final Destination}}, and the sourspots KO at around 109%. It's safe on shield when spaced with the sweetspot. However, it has noticeable startup lag at frame 12 with an active duration of only two frames, as well as having strict priority and small and narrow hitboxes, making it hard to sweetspot, or even land at all on small or crouching characters, or opponents in the air. | ||
|utiltname= | |utiltname=Barricader ({{ja|バリケーダー|Barikēdā}}) | ||
|utiltdmg=7.2% | |utiltdmg=7.2% | ||
|utiltdesc=Waves her arm in an overhead arcing motion while her hand is infused with magical energy. Due to it hitting on frame 7 and having | |utiltdesc=Waves her arm in an overhead arcing motion while her hand is infused with magical energy. Due to it hitting on frame 7 and having a long active duration and low ending lag, it is one of Zelda's most reliable combo starters. It can combo into itself, neutral attack and up smash at low percentages, into neutral aerial as well as Lightning Kick from low to medium percentages, and into up aerial at medium percentages out of a reversed up tilt. Its combo potential increases the later the frame on which it hits. It is also a strong anti-air attack thanks to its disjoint, large hitbox and long duration. | ||
|dtiltname= | |dtiltname=Low Kick ({{ja|ローキック|Rō Kikku}}) | ||
|dtiltdmg=5.5% | |dtiltdmg=5.5% | ||
|dtiltdesc=A kneeling | |dtiltdesc=A kneeling low-level kick. Due to it hitting on frame 5, it is Zelda's fastest tilt attack and her fastest move to execute. Compared to ''SSB4'', it has smaller range and noticeably less combo potential, mostly serving as a fast, low-committal and low-profiling poke. It can, however, combo into a dash attack and Lightning Kick at mid percentages. It can also be a KO combo into forward or back aerial, especially with poor DI. It is potent in calling out fast grounded approaches and two-framing. | ||
|dashname= | |dashname=Quick Palm Shot ({{ja|クイックパームショット|Kuikku Pōmu Shotto}}) | ||
|dashdmg= 12% (clean | |dashdmg= 12% (clean sweet spot), 9% (clean sour spot), 6% (late) | ||
|dashdesc=A double palm thrust that emits a blast of magical energy from her hands | |dashdesc=A double palm thrust that emits a blast of magical energy from her hands. The sweetspot lasts for two frames and is located at Zelda's hands. Due to it hitting on frame 6, it is one of the fastest dash attacks in the game. To complement this, its sweetspot's high base knockback allows it KO middleweights at around 120% while near the edge of Final Destination. However, it is small, with its other hitboxes lacking KO potential, and is unsafe especially on shield. | ||
|fsmashname= | |fsmashname=Shining Palm Shot ({{ja|シャイニングパームショット|Shainingu Pōmu Shotto}}) | ||
|fsmashdmg={{ChargedSmashDmgSSBU|1}} (hits 1-4), {{ChargedSmashDmgSSBU|13}} (hit 5) | |fsmashdmg={{ChargedSmashDmgSSBU|1}} (hits 1-4), {{ChargedSmashDmgSSBU|13}} (hit 5) | ||
|fsmashdesc=A palm thrust that emits a multiple-hitting blast of magical energy. Its last hit's respectable damage output and | |fsmashdesc=A palm thrust that emits a multiple-hitting blast of magical energy. Its last hit's respectable damage output and high knockback growth make it strong enough to KO middleweights at around 75% near the edge of Final Destination. Its multiple hits also make it useful for pressuring shields, especially when it is charged, which combined with its moderate ending lag at 26 frames, makes it hard to punish on shield with good spacing. Due to it hitting on frame 16, however, it has the highest start-up lag out of Zelda's smash attacks. | ||
|usmashname= | |usmashname=Power Steer ({{ja|パワースティア|Pawā Sutia}}) | ||
|usmashdmg={{ChargedSmashDmgSSBU|2}} (hits 1-4), {{ChargedSmashDmgSSBU|0.8}} (hits 5-6), {{ChargedSmashDmgSSBU|5}} (hit 7) | |usmashdmg={{ChargedSmashDmgSSBU|2}} (hits 1-4), {{ChargedSmashDmgSSBU|0.8}} (hits 5-6), {{ChargedSmashDmgSSBU|5}} (hit 7) | ||
|usmashdesc=Waves her arm twice in an overhead fanning motion while her hand is infused with magical energy. It hits on frame 9, which is fairly fast for a smash attack. | |usmashdesc=Waves her arm twice in an overhead fanning motion while her hand is infused with magical energy that hits several times. It hits on frame 9, which is fairly fast for a smash attack and makes it a decent point-blank out of shield option. It has a very long duration, making it good at catching getups and landings, and has a good vertical disjoint. Its last hit KOs aerial middleweights at around 104% from anywhere on Final Destination. However, it has minimal horizontal range and 30 frames of ending lag, thus making it very punishable if not used properly. | ||
|dsmashname= | |dsmashname=Spinning Low Kick ({{ja|スピニングローキック|Supiningu Rō Kikku}}) | ||
|dsmashdmg={{ChargedSmashDmgSSBU|12}} (front), {{ChargedSmashDmgSSBU|10}} (back) | |dsmashdmg={{ChargedSmashDmgSSBU|12}} (front), {{ChargedSmashDmgSSBU|10}} (back) | ||
|dsmashdesc=A spinning | |dsmashdesc=A spinning, low-level roundhouse kick. Due to it hitting on frame 5, it is tied with {{SSBU|Mario}}, {{SSBU|Dr. Mario}}, {{SSBU|Pit}}, {{SSBU|Dark Pit}}, {{SSBU|Ryu}}, and {{SSBU|Ken}}'s down smashes for the second-fastest smash attack of any kind in the game, being surpassed only by {{SSBU|Meta Knight}}'s [[buffer]]ed down smash. It hits on both sides, making it useful for punishing rolls, and the foot hitboxes [[semi-spike]] which is useful for setting up an edge-guard. Although it is Zelda's weakest smash attack, it is still decently strong and has rather moderate ending lag. The front hit deals higher damage, and the sweetspot KOs at around 112% on middleweights near the edge of Final Destination; in comparison, the back hit sweetspot KOs them at around 117%. | ||
|nairname= | |nairname=Zelda Spin ({{ja|ゼルダスピン|Zeruda Supin}}) | ||
|nairdmg={{ShortHopDmgSSBU|2.5}} (hits 1-4, front), {{ShortHopDmgSSBU|1.5}} (hits 1-4, back), {{ShortHopDmgSSBU|5}} (hit 5) | |nairdmg={{ShortHopDmgSSBU|2.5}} (hits 1-4, front), {{ShortHopDmgSSBU|1.5}} (hits 1-4, back), {{ShortHopDmgSSBU|5}} (hit 5) | ||
|nairdesc= | |nairdesc=Twirls twice with her arms outstretched and her hands infused with magical energy. Due to it hitting on frame 6, it is tied with forward and back aerials for the lowest amount of start-up lag out of Zelda's aerials. It has large hitboxes on both sides with several hits, making it rather versatile; it has a rather high damage output, especially with the front hits, can start combos when [[SHFF]]ed, can string into other moves with good drift in an autocanceled short hop, or can be an edge-guarding option. The last hit has decent knockback for its type, as it can KO middleweights at around 150% at the edge of Final Destination without rage. The moved was changed from Smash 4, resulting in the multi-hits being weaker and less consistent, with opponents sometimes being able to fall out of the multi-hit portion, reducing its consistency and reliability. This issue is most salient if Zelda is fast-falling or drifting away in the multi-hit portion. | ||
|fairname=[[Lightning Kick]] | |fairname=[[Lightning Kick|Lightning Kick (Front)]] ({{ja|稲妻キック(前)|Inazuma Kikku (Mae)}}) | ||
|fairdmg={{ShortHopDmgSSBU|20}} (clean foot), {{ShortHopDmgSSBU|4}} (clean leg, late) | |fairdmg={{ShortHopDmgSSBU|20}} (clean foot), {{ShortHopDmgSSBU|4}} (clean leg, late) | ||
|fairdesc=A magically-infused flying kick. Its sweetspot is at the tip of her foot | |fairdesc=A magically-infused flying kick. Its sweetspot is at the tip of her foot and has both an outstanding damage output and high knockback growth, KOing middleweights at around 59% while near the edge of Final Destination, similarly to Captain Falcon's Knee Smash, though slightly weaker. At frame 6, it's quite fast for its power. Compared to back air, it has slightly less knockback, but autocancels slightly earlier and has less landing lag. However, the sweetspot only lasts for one frame, and the sourspots are very weak and unsafe, even on hit because of their extremely low damage and base knockback. Its considerable ending lag also makes it punishable at low percentages, sometimes even if it is sweetspotted. Due to the aforementioned very low damage and knockback, the sourspot can lock opponents and set up into other moves at high percents but lacks utility otherwise. Autocancels in a full hop fast fall, just one frame after Zelda reaches the peak of her short hop, similarly to Kirby's forward aerial. | ||
|bairname=Lightning Kick | |bairname=[[Lightning Kick|Lightning Kick (Back)]] ({{ja|稲妻キック(後)|Inazuma Kikku (Ato)}}) | ||
|bairdmg={{ShortHopDmgSSBU|20}} (clean foot), {{ShortHopDmgSSBU|4}} (clean leg, late) | |bairdmg={{ShortHopDmgSSBU|20}} (clean foot), {{ShortHopDmgSSBU|4}} (clean leg, late) | ||
|bairdesc=A magically-infused flying kick. It functions | |bairdesc=A magically-infused flying kick. It functions identically to forward aerial, with the only difference being that its sweetspot has slightly more base knockback and knockback growth, in exchange for having slightly more landing lag and auto-canceling slightly later. It is the strongest back aerial in the game, with the sweetspot KOing middleweights at around 54% while near the edge of Final Destination. However, it has the highest amount of landing lag out of Zelda's aerials. | ||
|uairname= | |uairname=Condense Blast ({{ja|コンデンスブラスト|Kondensu Burasuto}}) | ||
|uairdmg={{ShortHopDmgSSBU|17}} | |uairdmg={{ShortHopDmgSSBU|17}} (clean hit), {{ShortHopDmgSSBU|12}} (late hit) | ||
|uairdesc=Leans back and turns slightly | |uairdesc=Leans back and turns slightly, extending her arm to create a fiery explosion above her from her index and middle fingers. It is the most damaging and second strongest up aerial in the game, behind Shulk's up aerial if the second hit is sweetspotted. It KOs middleweights at around 100% from a full hop. It has a huge vertical disjoint thanks to its large hitbox and high position, being able to clip through platforms or the bottom of stage edges. It also has a late hit that is weaker but improves its ability to juggle. However, it is slow, hitting on frame 14, which makes it tied with down aerial for the highest amount of start-up lag out of Zelda's aerials. It also has high ending lag (35 frames) and a fairly short horizontal range. It autocancels in a full hop. | ||
|dairname= | |dairname=Meteor Heel ({{ja|マイルドメテオヒール|Mairudo Meteo Hīru}}, ''Mild Meteor Heel'') | ||
|dairdmg={{ShortHopDmgSSBU|16}} (clean), {{ShortHopDmgSSBU|5}} (late, leg), {{ShortHopDmgSSBU|4}} (late, foot) | |dairdmg={{ShortHopDmgSSBU|16}} (clean), {{ShortHopDmgSSBU|5}} (late, leg), {{ShortHopDmgSSBU|4}} (late, foot) | ||
|dairdesc=A magically-infused | |dairdesc=A magically-infused stomp, also known as the Lightning Stomp. All of its hitboxes are [[meteor smash]]es and can lock opponents, with its sweetspot being the most powerful among them. Its sourspot lasts deceptively long, allowing it to potentially gimp fighters with poor recoveries, but deals even less knockback than Lightning Kicks' sourspots. It ties for the lowest landing lag out of Zelda's aerials, which allows it to be safe on shield with proper spacing, and enables its sweetspot to reliably start combos on grounded opponents. It hits on frame 14, which ties with up aerial for the highest amount of start-up lag out of Zelda's aerials, but combined with its deceptively long duration and its low ending lag, it's somewhat fast for a meteor smash. Like neutral aerial, it can also autocancel in a short hop. | ||
|grabname= | |grabname=Holding ({{ja|ホールディング|Hōrudingu}}) | ||
|grabdesc=Restrains the opponent with magic. Zelda's grabs have long | |grabdesc=Restrains the opponent with magic. Zelda's grabs have long-range and are somewhat disjointed, with her pivot grab being one of the longest non-tether pivot grabs, but also have a noticeable start-up and ending lag. | ||
|pummelname= | |pummelname=Holding Attack ({{ja|ホールディングアタック|Hōrudingu Atakku}}) | ||
|pummeldmg=1.3% | |pummeldmg=1.3% | ||
|pummeldesc=A blast of magical energy. | |pummeldesc=A point-blank blast of magical energy. Average power and speed. | ||
|fthrowname= | |fthrowname=Force Move ({{ja|フォースムーブ|Fōsu Mūbu}}) | ||
|fthrowdmg=10% | |fthrowdmg=10% | ||
|fthrowdesc=Magically | |fthrowdesc=Magically pulls the opponent back and then tosses them away. It is useful for sending opponents off stage, even at low percents, thanks to its high base knockback, but due to its low knockback growth lacks KO potential unless extremely close to the horizontal blast zone. However, it can combo into Phantom Slash for high damage or an early KO. | ||
|bthrowname= | |bthrowname=Force Back Move ({{ja|フォースバックムーブ|Fōsu Bakku Mūbu}}) | ||
|bthrowdmg=12% | |bthrowdmg=12% | ||
|bthrowdesc=Magically spins the opponent and turns around with them in tow before throwing them away. In addition to being good for setting up | |bthrowdesc=Magically spins the opponent and turns around with them in tow before throwing them away. In addition to being good for setting up edge guards, it is among the strongest throws in the game, KOing middleweights at around 105% while near the edge of Final Destination. | ||
|uthrowname= | |uthrowname=Force Top Move ({{ja|フォーストップムーブ|Fōsu Toppu Mūbu}}) | ||
|uthrowdmg=11% | |uthrowdmg=11% | ||
|uthrowdesc=Magically spins the opponent overhead and then | |uthrowdesc=Magically spins the opponent overhead and then hurls them upward. It has excellent KO potential, being able to KO middleweights at around 146% from anywhere on Final Destination, and is tied with Incineroar and Lucas's up throws for the fifth strongest up throw in the game. On heavyweights and fast-fallers, it also has limited combo potential into neutral aerial at low percentages. Overall, these attributes make it one of the best up throws in the game. | ||
|dthrowname= | |dthrowname=Plasma Beat ({{ja|プラズマビート|Purazuma Bīto}}) | ||
|dthrowdmg=1.5% (hits 1-4), 2% (throw) | |dthrowdmg=1.5% (hits 1-4), 2% (throw) | ||
|dthrowdesc= | |dthrowdesc=Casts the opponent onto the ground and then blasts them with fiery magic from her hands while levitating. It functions as Zelda's only reliable combo throw, launching up and behind her. Its DI can be reacted to for a guaranteed follow-up from low to mid percents. With DI in, it can combo into neutral aerial, Lightning Kick, up aerial and up special. With DI out, it can combo into a dash back forward aerial or back aerial fairly consistently with proper timing from low to mid percents. Its combo potential will be more limited the more [[rage]] Zelda has. | ||
|floorfname= | |floorfname= | ||
|floorfdmg=7% | |floorfdmg=7% | ||
| Line 227: | Line 176: | ||
|edgedesc=Performs a kick while climbing up. | |edgedesc=Performs a kick while climbing up. | ||
|nsname=Nayru's Love | |nsname=Nayru's Love | ||
|nsdmg=2% (hits 1-3), 5% | |nsdmg=2%/1% (hits 1-3, near/far), 5%/4% (hit 4, near/far), 1.25× (reflected projectiles) | ||
|nsdesc=[[zeldawiki:Nayru's Love|Creates a crystalline barrier around herself]]. | |nsdesc=[[zeldawiki:Nayru's Love|Creates a blue crystalline barrier with shards around herself]]. They deal moderate damage and [[Reflection|reflect]] projectiles with 25% more damage and speed. It also grants full [[intangibility]] on frames 4-13, making it good at beating out other moves and sometimes good as a defensive option to disrupt strings. However, it has a moderate start-up for its hitboxes (frame 11) and considerable ending lag, making it punishable if used recklessly. | ||
|ssname=Din's Fire | |ssname=Din's Fire | ||
|ssdmg=7%-14% (sweetspot), 3.5%-7% (sourspot) | |ssdmg=7%-14% (sweetspot), 3.5%-7% (sourspot) | ||
|ssdesc=[[zeldawiki:Din's Fire|Launches a magical fireball]]. | |ssdesc=[[zeldawiki:Din's Fire|Launches a magical fireball]] that slowly accelerates forward. Its trajectory can be altered, albeit marginally, by holding up or down, and releasing the special button causes it to stop and then explode after a moment. It has a large hitbox, and only the explosion can be reflected or absorbed. The longer the button is held down, the farther the fireball will travel, and it will automatically detonate when it reaches its maximum distance. Its sweetspot, which is located in the inner part of the explosion, is quite powerful. When fully charged, the sweetspot can KO middleweights at around 87% while near the edge of Final Destination, but the sourspot is very weak regardless of its charge. While useful off stage on characters with bad recoveries, it is otherwise easily avoidable with an air dodge or simply clanking. Even though it is hard to land itself, it can force the opponent to use an air dodge and recover low/to the ledge. | ||
|usname=Farore's Wind | |usname=Farore's Wind | ||
|usdmg=6% (hit 1), 10% | |usdmg=6% (hit 1), 10%/7% (grounded hit 2 near/far), 12%/8% (aerial hit 2 near/far) | ||
|usdesc=[[zeldawiki:Farore's Wind|Warps | |usdesc=[[zeldawiki:Farore's Wind|Warps in a given direction]]. It travels a long distance and can be angled omnidirectionally, similarly to Fox's Fire Fox, but is much faster in comparison. It deals damage to nearby opponents both while disappearing and while reappearing, and grants full intangibility during its travel. Its disappearance launches upward, enabling it to combo into its reappearance at various percents when aimed correctly. The reappearance has a sweetspot that deals high damage, high base knockback, and high knockback growth, making it potent at KOing, especially near the upper blast line. Its sweetspotted aerial reappearance can KO middleweights off the top blast zone at around 68% from the initial grounded hit (though heavily dependent on DI and LSI), while the grounded reappearance can KO middleweights at around 71% from the edge of Final Destination. The reappearance has a sourspot that, although large and safe on hit, lacks KO potential, and due to the move incurring [[helpless]]ness, it is punishable if whiffed. It can be edge-canceled, a trait it shares with Sheik's Vanish, Mewtwo's Teleport and Palutena's Warp. | ||
|dsname=Phantom Slash | |dsname=Phantom Slash | ||
|dsdmg= | |dsdmg=5.9% (level 1), 8.2% (level 2), 10.5%/11.8% (level 3) 14.1%/15.4% (level 4), 17.7% (level 5) | ||
|dsdesc=Conjures a {{s|zeldawiki|Phantom}} piece by piece and propels it forward with another button press. Serves as a projectile with varying attacks | |dsdesc=Conjures a {{s|zeldawiki|Phantom}} piece by piece and propels it forward with another button press. Serves as a projectile with varying attacks of increasing degrees of speed, HP, power and distance. When fully charged, the Phantom can delay its attack for up to about a second, effectively controlling a large space and giving Zelda time to add pressure, perform combined combos or to retreat behind it for protection. When fully charged, the Phantom can KO middleweights at around 84% from the edge of Final Destination. Very versatile and one of Zelda's best options in the neutral game and advantage state. | ||
|fsname=Triforce of Wisdom | |fsname=Triforce of Wisdom | ||
|fsdmg=7% (initial vacuum), 3% (subsequent vacuum), 60% | |fsdmg=7% (initial vacuum), 3% (subsequent vacuum), 60% (main) | ||
|fsdesc= | |fsdesc=Uses the [[zeldawiki:Triforce|Triforce of Wisdom]] to generate a triangular portal that sucks in opponents using massive periodic shockwaves. Upon catching an opponent, they will take heavy damage before either being launched with low knockback, or being instantly KOed if they reach 100% or higher before the final hit. Very difficult to avoid on smaller stages (such as {{SSB|Dream Land}} or [[Mushroom Kingdom II]]), if not effectively impossible, due to its long duration and massive vacuum hitboxes. | ||
}} | |||
===Stats=== | |||
{{Attributes | |||
| cast=89 | |||
| weight=85 | rweight=72-73 | |||
| dash=1.958 | rdash=36-37 | |||
| run=1.43 | rrun=81-82 | |||
| walk=0.914 | rwalk=68 | |||
| trac=0.116 | rtrac=20-28 | |||
| airfric=0.006 | rairfric=77-78 | |||
| air=1.092 | rair=40-41 | |||
| baseaccel=0.01 | rbaseaccel=15-87 | |||
| addaccel=0.055 | raddaccel=51-52 | |||
| gravity=0.071 | rgravity=80 | |||
| fall=1.35 | rfall=71-74 | |||
| ff=2.16 | rff=71-74 | |||
| jumpsquat=3 | rjumpsquat=1-88 | |||
| jumpheight=31.55 | rjumpheight=54 | |||
| shorthop=15.24 | rshorthop=57 | |||
| djump=31.55 | rdjump=61 | |||
}} | }} | ||
===[[Announcer]] call=== | |||
{{audio|Needs announcer calls from other languages.}} | |||
<gallery> | |||
Zelda English Announcer SSB4-SSBU.wav|English/Japanese/Chinese | |||
</gallery> | |||
===[[On-screen appearance]]=== | |||
*Appears facing the screen, generating magical sparkles from between cupped hands. Zelda then flourishes her hands while smiling before assuming her idle pose. | |||
<gallery> | |||
ZeldaOnScreenAppearanceSSBU.gif|Zelda's on-screen appearance | |||
</gallery> | |||
===[[Taunt]]s=== | |||
*'''Up taunt''': Places her hand on her hip, while generating magic and twirling it in front of her. | |||
*'''Side taunt''': Closes her eyes and summons [[Din's Fire]] between cupped hands. | |||
*'''Down Taunt''': Giggles and waves with a smile. | |||
<gallery> | |||
SSBUZeldaTaunt1.gif|Zelda's up taunt. | |||
SSBUZeldaTaunt2.gif|Zelda's side taunt. | |||
SSBUZeldaTaunt3.gif|Zelda's down taunt. | |||
</gallery> | |||
===[[Idle pose]]s=== | |||
*Brushes her hair while looking back. | |||
*Smiles and performs a pondering gesture with a finger tapping her cheek. | |||
<gallery> | |||
SSBUZeldaIdle1.gif|Zelda's first idle pose. | |||
SSBUZeldaIdle2.gif|Zelda's second idle pose. | |||
</gallery> | |||
===[[Crowd cheer]]=== | |||
<div class="tabber"> | |||
<div class="tabbertab" title="English, Japanese/Chinese, Italian, Dutch, French"> | |||
{| class="wikitable" border="1" cellpadding="4" cellspacing="1" | |||
|- | |||
! | |||
!Cheer (English) | |||
!Cheer (Japanese/Chinese) | |||
!Cheer (Italian) | |||
!Cheer (Dutch) | |||
!Cheer (French) | |||
|- | |||
! scope="row"|Cheer | |||
|[[File:Zelda Cheer English SSBU.ogg|center]]||[[File:Zelda Cheer Japanese SSBU.ogg|center]]||[[File:Zelda Cheer Italian SSBU.ogg|center]]||[[File:Zelda Cheer Dutch SSBU.ogg|center]]||{{NTSC}} [[File:Zelda Cheer French NTSC SSBU.ogg|center]] <br> {{PAL}} [[File:Zelda Cheer French PAL SSBU.ogg|center]] | |||
|- | |||
! scope="row"|Description | |||
|Zel - da! || Zel - da! || Zeeeeel - da! || Zel - da! || Zel - da! | |||
|} | |||
</div> | |||
<div class="tabbertab" title="German, Spanish, Russian, Korean"> | |||
{| class="wikitable" border="1" cellpadding="4" cellspacing="1" | |||
|- | |||
! | |||
!Cheer (German) | |||
!Cheer (Spanish) | |||
!Cheer (Russian) | |||
!Cheer (Korean) | |||
|- | |||
! scope="row"|Cheer | |||
|[[File:Zelda Cheer German SSBU.ogg|center]]||{{NTSC}} [[File:Zelda Cheer Spanish NTSC SSBU.ogg|center]] <br> {{PAL}} [[File:Zelda Cheer Spanish PAL SSBU.ogg|center]]||[[File:Zelda Cheer Russian SSBU.ogg|center]]||[[File:Zelda Cheer Korean SSBU.ogg|center]] | |||
|- | |||
! scope="row"|Description | |||
|Zel - da! || Zeeeeel - da! || Zel - da! Zel - da! || Zelda! | |||
|} | |||
</div> | |||
</div> | |||
===[[Victory pose]]s=== | ===[[Victory pose]]s=== | ||
*Creates magic with her fingertips and waves it around. | *'''Left:''' Creates magic with her fingertips and waves it around. | ||
*Creates fire from her fingertip and waves it around while giggling. | *'''Up:''' Creates fire from her fingertip and waves it around while giggling. | ||
*Summons a [[Phantom]] and poses with it. | *'''Right:''' Summons a [[Phantom]] behind her with a snap of her finger and poses with it. | ||
[[File:ZeldaSeriesVictoryThemeUltimate.ogg|thumb|A flourished and abridged remix of the theme that plays when [[Link]] obtains a [[zeldawiki:Triforce|Triforce Piece]] in '' | [[File:ZeldaSeriesVictoryThemeUltimate.ogg|thumb|A flourished and abridged remix of the theme that plays when [[Link]] obtains a [[zeldawiki:Triforce|Triforce Piece]] in ''{{iw|zeldawiki|The Legend of Zelda|Game}}'' and has since become the main theme of ''The Legend of Zelda'' series.]] | ||
<gallery> | <gallery> | ||
ZeldaVictoryPose1SSBU.gif | ZeldaVictoryPose1SSBU.gif | ||
| Line 253: | Line 290: | ||
ZeldaVictoryPose3SSBU.gif | ZeldaVictoryPose3SSBU.gif | ||
</gallery> | </gallery> | ||
==In [[competitive play]]== | |||
===Most historically significant players=== | |||
<!--This character has a ten player limit for this section. Before adding and/or removing a player, read these guidelines: https://www.ssbwiki.com/SmashWiki:Notability#%22Most_historically_significant_players%22_guidelines --> | |||
''See also: [[:Category:Zelda players (SSBU)]]'' | |||
*{{Sm|Mystearica|USA}} - One of the best Zelda players in the world in 2019, most notably placing 3rd at {{Trn|Midwest Arena 2}} defeating {{Sm|Ned}} and {{Sm|Goblin}} and 5th at {{Trn|2GG: Run it Back}} defeating {{Sm|Tea}}, alongside some strong major/supermajor results such as 25th at {{Trn|Pound 2019}} and 33rd at {{Trn|Smash 'N' Splash 5}}. She dropped Zelda for {{SSBU|Palutena}} in 2020. | |||
*{{Sm|Naskino|France}} - The best Zelda player in Europe is a top 50 player on the continent in the post-online metagame, ranking 37th on the [[European Ultimate Power Rankings]] for the first half of 2023. He has consistently placed highly at several events, most notably 13th at {{Trn|King Of Fields 95 3}} and 17th at {{Trn|Temple: Hermès Edition}}. As of 2024, however, he has retired. | |||
*{{Sm|ven|USA}} - The best Zelda player from 2019 to 2022. His best results were in the early metagame thanks to strong performances such as 17th at {{Trn|2GG: Prime Saga}} defeating {{Sm|ESAM}} and 33rd at {{Trn|2GG: Kongo Saga}} defeating {{Sm|Elegant}}; he was also the first Zelda player ranked on a global ranking, ranking 83rd on the [[OrionRank Ultimate: Six Months In]]. Although less consistent since, he has still seen some strong results, including 9th at {{Trn|LVL UP EXPO 2023}}, tied as the best Zelda placement at a major. | |||
*{{Sm|Yn|Japan}} - The best Zelda player in the world since 2023. He has the best peaks for a Zelda player, including placing 9th at the supermajor {{Trn|Maesuma TOP 11}} defeating {{Sm|Tea}} and the major {{Trn|Maesuma TOP 14.5 "in Hyogo"}}. | |||
===Tier placement and history=== | |||
Players were initially divided on Zelda's competitive viability. Many players pointed out that her key issues, most notably her low mobility and poor endurance, were retained from previous games. On the other hand, other players were more optimistic towards the character due to improved frame data over her ''Smash 4'' iteration, particularly on her out-of-shield options, as well as [[Phantom Slash]]'s higher utility. This optimism, coupled with strong early performances from players such as {{Sm|Mystearica}}, {{Sm|Naskino}}, and {{Sm|ven}}, led many to believe the character was a solid mid-tier, with some arguing that she could be a potential high-tier. | |||
This optimism did not last for long, as Zelda's polarizing nature became more noticeable as time went on: despite receiving buffs in updates 7.0.0 and 13.0.0 that improved her consistency, Zelda's poor mobility, disadvantage, and highly risky neutral remained critical weaknesses. As a result, Zelda players began struggling in the developing metagame, and they either dropped the character (such as Mystearica) or saw worse results and consistency than before (such as ven). Although Naskino continued to do well in Europe and {{Sm|Yn}} began making waves in Japan in early-2023, opinions on Zelda continued to decline, and as a result she sits at 75th out of 82 on the first tier list, rising two spots in the second and current one. Although it is her best placement in the series and she is far better than all her previous incarnations, she is currently placed in low-tier. | |||
=={{SSBU|Classic Mode}}: Wisdom Prevails== | =={{SSBU|Classic Mode}}: Wisdom Prevails== | ||
[[File:SSBU Congratulations Zelda.png|thumb|Zelda's congratulations screen.]] | |||
Zelda's opponents are antagonists and she fights each of them on stages that hail from {{uv|The Legend of Zelda}} series. | |||
{|class="wikitable | {|class="wikitable" style="text-align:center" | ||
!Round!!Opponent!!Stage!!Music!!Notes | !Round!!Opponent!!Stage!!Music!!Notes | ||
|- | |- | ||
|1||{{SSBU| | |1||{{CharHead|Wario|SSBU|hsize=20px}}||[[Great Plateau Tower]]||''{{SSBUMusicLink|The Legend of Zelda|Main Theme - The Legend of Zelda: Breath of the Wild}}''|| | ||
|- | |- | ||
|2||{{SSBU| | |2||{{CharHead|Bowser|SSBU|hsize=20px}}||[[Skyloft]]||''{{SSBUMusicLink|The Legend of Zelda|Ballad of the Goddess (Original)}}''|| | ||
|- | |- | ||
|3|| | |3||{{CharHead|Mii Swordfighter|SSBU|hsize=20px}} (×5)||[[Temple]]||''{{SSBUMusicLink|The Legend of Zelda|Temple Theme}}''||Horde Battle.<br>The Mii Swordfighters are dressed in the Yiga Clan Mask and Yiga Clan Outfit. | ||
|- | |- | ||
|4||{{ | |4||Giant {{CharHead|King K. Rool|SSBU|hsize=20px}}||[[Bridge of Eldin]]||''{{SSBUMusicLink|The Legend of Zelda|Dark World (for 3DS / Wii U)}}''||A possible reference to King Bulblin. | ||
|- | |- | ||
|5||{{ | |5||{{CharHead|Dark Samus|SSBU|hsize=20px}}||[[Gerudo Valley]]||''{{SSBUMusicLink|The Legend of Zelda|Hidden Mountain & Forest}}''|| | ||
|- | |- | ||
|6|| | |6||{{CharHead|Link|SSBU|hsize=20px|color=Black}} (×4)||[[Hyrule Castle]]||''{{SSBUMusicLink|The Legend of Zelda|Great Temple / Temple}}''|| | ||
|- | |- | ||
|colspan="5"|Bonus Stage | |colspan="5"|[[Bonus Stage]] | ||
|- | |- | ||
|Final||{{SSBU| | |Final||{{CharHead|Ganondorf|SSBU|hsize=20px}}, then [[Ganon]]||[[Sacred Land]]||''{{SSBUMusicLink|The Legend of Zelda|Calamity Ganon Battle - Second Form}}'' <small>(Ganondorf)</small><br/>''{{SSBUMusicLink|The Legend of Zelda|Death Mountain}}'' <small>(Ganon)</small>|| A [[Maxim Tomato]] spawns on the stage after Ganondorf is KO'd. | ||
|} | |} | ||
[[Credits]] roll after completing Classic Mode. Completing it as Zelda has ''{{SSBUMusicLink|The Legend of Zelda|Hidden Mountain & Forest}}'' accompany the credits. | |||
{{clr}} | |||
==Role in [[World of Light]]== | ==Role in [[World of Light]]== | ||
[[File:WoL-16Zelda.jpg|thumb|Finding Zelda in World of Light|left]] | |||
Zelda was among the fighters that were summoned to fight the army of [[Master Hand]]s. | Zelda was among the fighters that were summoned to fight the army of [[Master Hand]]s. | ||
During the opening cutscene, Zelda tried to rally the other fighters to fight the army of Master Hands by saying, "Stow your fear; it's now or never!", and was present when [[Galeem]] unleashed his beams of light. She and {{SSBU|Mewtwo}} attempted to reflect the beams using [[Nayru's Love]] and [[Confusion]], respectively, but this attempt failed, and both of them were vaporized and placed under Galeem's imprisonment along with the rest of the fighters (excluding {{SSBU|Kirby}}). | During the opening cutscene, Zelda tried to rally the other fighters to fight the army of Master Hands by saying, "Stow your fear; it's now or never!" ("{{ja|ここまで来たらやるしかないでしょう!|Koko made kitara yarushikanai deshō!}}", ''Now that we've made it this far, there's no turning back!''), and was present on the cliffside when [[Galeem]] unleashed his beams of light. She and {{SSBU|Mewtwo}} attempted to reflect the beams using [[Nayru's Love]] and [[Confusion]], respectively, but this attempt failed, and both of them were vaporized and placed under Galeem's imprisonment along with the rest of the fighters (excluding {{SSBU|Kirby}}). | ||
Zelda was one of the many fighters that fell under [[Dharkon]]'s control upon Galeem's first defeat. She is unlocked in | Zelda was one of the many fighters that fell under [[Dharkon]]'s control upon Galeem's first defeat. She is unlocked in [[The Dark Realm]] at [[Sacred Land]], on the bottom left corner of the land which makes up the Triforce of Wisdom. The player must defeat the spirit of {{h2|List of spirits (The Legend of Zelda series)|Impa}} (which is revealed by solving a clock-based puzzle) to clear a boulder that's blocking the path to her unlock battle and then the {{h2|List of spirits (Others)|Zael}} and {{h2|List of spirits (Pokémon series)|Uxie, Mesprit, & Azelf}} spirits. Unlocking her reveals the Triforce of Wisdom in the center of the map. If {{SSBU|Young Link}} is unlocked, the boulders leading to {{SSBU|Cloud}}'s unlock battle and the Master Sword clear out. | ||
Zelda is later seen among several other fighters, making their last stand against Galeem and [[Dharkon]]. She is also seen in the bad ending where Galeem emerges victorious against Dharkon, witnessing Galeem engulf the world in light. | Zelda is later seen among several other fighters, making their last stand against Galeem and [[Dharkon]]. She is also seen in the bad ending where Galeem emerges victorious against Dharkon, witnessing Galeem engulf the world in light. | ||
{{clrl}} | |||
===Fighter Battle=== | |||
{|class="wikitable" style="width:100%;" | |||
|- | |||
!style="width:5%;"|No. | |||
!style="width:5%;"|Image | |||
!Name | |||
!Type | |||
!Power | |||
!Stage | |||
!Music | |||
|- | |||
|17 | |||
|[[File:Zelda SSBU.png|center|108x108px]] | |||
|Zelda | |||
|{{SpiritType|Shield}} <center>{{color|#18aef5|Shield}}</center> | |||
|10,100 | |||
|[[Temple]] ([[Ω form]]) | |||
|''{{SSBUMusicLink|The Legend of Zelda|Ocarina of Time Medley}}'' | |||
|} | |||
{{clr}} | |||
==[[Spirit]]s== | ==[[Spirit]]s== | ||
Zelda's | Zelda's fighter spirit can be obtained by completing {{SSBU|Classic Mode}}. It is also available periodically for purchase in the shop for 300 Gold, but only after Zelda has been unlocked. Unlocking Zelda in World of Light allows the player to preview the first spirit below in the Spirit List under the name "???". As a fighter spirit, it cannot be used in Spirit Battles and is purely aesthetic. Her fighter spirit has an alternate version that replaces it with her artwork in ''Ultimate''. | ||
Additionally, Zelda | Additionally, different incarnations of Zelda appear as primary and support spirits. | ||
<center> | <center> | ||
<gallery> | <gallery> | ||
Zelda | SSBU spirit Zelda.png|173. '''''Zelda''''' | ||
Young Zelda.png|189. Young Zelda | SSBU spirit Young Zelda.png|189. Young Zelda | ||
Zelda | SSBU spirit Zelda (Ocarina of Time).png|190. Zelda (Ocarina of Time) | ||
SSBU spirit Zelda (Breath of the Wild).png|238. Zelda (Breath of the Wild) | |||
Zelda Wind Waker | SSBU spirit Zelda (The Wind Waker).png|247. Zelda (The Wind Waker) | ||
Zelda Spirit Tracks | SSBU spirit Zelda (Spirit Tracks).png|259. Zelda (Spirit Tracks) | ||
</gallery> | </gallery> | ||
</center> | </center> | ||
==In Spirit Battles== | |||
===As the main opponent=== | |||
{|class="wikitable sortable" style="width:100%;" | |||
! colspan=4|Spirit | |||
! colspan=7|Battle parameters | |||
|- | |||
! style="width:5%;"|No. | |||
! style="width:5%;"|Image | |||
! Name | |||
! Series | |||
! Enemy Fighter(s) | |||
! style="width:5%;"|Type | |||
! style="width:5%;"|Power | |||
! Stage | |||
! Rules | |||
! Conditions | |||
! Music | |||
|- | |||
|187 | |||
|{{SpiritTableName|Marin|size=64}} | |||
|''The Legend of Zelda'' Series | |||
|•{{SSBU|Zelda}} {{Head|Zelda|g=SSBU|s=20px|cl=Violet}}<br>•{{SSBU|Link}} {{Head|Link|g=SSBU|s=20px|cl=Green}} | |||
|{{SpiritType|Shield}} | |||
|4,600 | |||
|[[Tortimer Island]] ([[Battlefield form]]) | |||
|•Hazard: Slumber Floor | |||
|•The floor is sleep-inducing<br>•Timed battle (1:30) | |||
|{{SSBUMusicLink|The Legend of Zelda|Tal Tal Heights}} | |||
|- | |||
|189 | |||
|{{SpiritTableName|Young Zelda|size=64}} | |||
|''The Legend of Zelda'' Series | |||
|•{{SSBU|Zelda}} {{Head|Zelda|g=SSBU|s=20px|cl=Purple}}<br>•{{SSBU|Young Link}} {{Head|Young Link|g=SSBU|s=20px|cl=Red}} | |||
|{{SpiritType|Shield}} | |||
|3,700 | |||
|[[Hyrule Castle]] | |||
|N/A | |||
|•Take your strongest team into this no-frills battle | |||
|{{SSBUMusicLink|The Legend of Zelda|Ocarina of Time Medley}} | |||
|- | |||
|195 | |||
|{{SpiritTableName|Malon|size=64}} | |||
|''The Legend of Zelda'' Series | |||
|•{{SSBU|Zelda}} {{Head|Zelda|g=SSBU|s=20px|cl=White}} | |||
|{{SpiritType|Shield}} | |||
|3,600 | |||
|[[Smashville]] | |||
|•Item Tidal Wave<br>•Item: [[Cucco]] | |||
|•The enemy becomes more powerful after eating<br>•Certain items will appear in large numbers | |||
|{{SSBUMusicLink|The Legend of Zelda|Ocarina of Time Medley}} | |||
|- | |||
|201 | |||
|{{SpiritTableName|Great Fairy|size=64}} | |||
|''The Legend of Zelda'' Series | |||
|•Giant {{SSBU|Zelda}} {{Head|Zelda|g=SSBU|s=20px|cl=Purple}} | |||
|{{SpiritType|Shield}} | |||
|9,500 | |||
|[[Fountain of Dreams]] ([[Battlefield form]]) | |||
|•Health Recovery | |||
|•The enemy's special moves have increased power<br>•The enemy is healed significantly when the enemy's at high damage<br>•The enemy's FS Meter charges quickly | |||
|{{SSBUMusicLink|The Legend of Zelda|Ocarina of Time Medley}} | |||
|- | |||
|215 | |||
|{{SpiritTableName|Din|size=64}} | |||
|''The Legend of Zelda'' Series | |||
|•{{SSBU|Zelda}} {{Head|Zelda|g=SSBU|s=20px|cl=Red}}×2 | |||
|{{SpiritType|Attack}} | |||
|4,000 | |||
|[[Bridge of Eldin]] ([[Battlefield form]]) | |||
|•Hazard: Lava Floor | |||
|•The floor is lava<br>•The enemy favors side specials | |||
|{{SSBUMusicLink|The Legend of Zelda|Ballad of the Goddess (Remix)}} | |||
|- | |||
|216 | |||
|{{SpiritTableName|Nayru|size=64}} | |||
|''The Legend of Zelda'' Series | |||
|•{{SSBU|Zelda}} {{Head|Zelda|g=SSBU|s=20px|cl=Blue}}×2 | |||
|{{SpiritType|Shield}} | |||
|3,500 | |||
|[[Bridge of Eldin]] | |||
|•Temporary Invincibility | |||
|•The enemy will occasionally be invincible after a little while<br>•The enemy favors neutral specials | |||
|{{SSBUMusicLink|The Legend of Zelda|Ballad of the Goddess (Original)}} | |||
|- | |||
|236 | |||
|{{SpiritTableName|Hilda (The Legend of Zelda)|size=64}} | |||
|''The Legend of Zelda'' Series | |||
|•{{SSBU|Zelda}} {{Head|Zelda|g=SSBU|s=20px|cl=Black}}<br>•Bunny {{SSBU|Young Link}} {{Head|Young Link|g=SSBU|s=20px|cl=Blue}} | |||
|{{SpiritType|Shield}} | |||
|9,100 | |||
|[[Temple]] | |||
|•Assist Trophy Enemies ([[Nightmare]]) | |||
|•Hostile assist trophies will appear | |||
|{{SSBUMusicLink|The Legend of Zelda|Lorule Main Theme}} | |||
|- | |||
|238 | |||
|{{SpiritTableName|Zelda (Breath of the Wild)|size=64}} | |||
|''The Legend of Zelda'' Series | |||
|•{{SSBU|Zelda}} {{Head|Zelda|g=SSBU|s=20px|cl=Blue}} (50 HP)<br>•{{SSBU|Link}} {{Head|Link|g=SSBU|s=20px|cl=White}} (60 HP)<br>•{{SSBU|Inkling}} {{Head|Inkling|g=SSBU|s=20px|cl=Pink}} (30 HP)<br>•{{SSBU|Donkey Kong}} {{Head|Donkey Kong|g=SSBU|s=20px|cl=Yellow}} (60 HP)<br>•{{SSBU|Falco}} {{Head|Falco|g=SSBU|s=20px|cl=Blue}} (50 HP)<br>•{{SSBU|Zero Suit Samus}} {{Head|Zero Suit Samus|g=SSBU|s=20px|cl=ShortsBlue}} (50 HP) | |||
|{{SpiritType|Shield}} | |||
|9,200 | |||
|[[Great Plateau Tower]] | |||
|N/A | |||
|•[[Stamina battle]]<br>•Reinforcements will appear after an enemy is KO'd<br>•Defeat an army of fighters | |||
|{{SSBUMusicLink|The Legend of Zelda|Main Theme - The Legend of Zelda: Breath of the Wild}} | |||
|- | |||
|258 | |||
|{{SpiritTableName|Phantom|link=y|size=64}} | |||
|''The Legend of Zelda'' Series | |||
|•Clear {{SSBU|Zelda}} {{Head|Zelda|g=SSBU|s=20px|cl=Black}} | |||
|{{SpiritType|Shield}} | |||
|3,800 | |||
|[[Spirit Train]] ([[Battlefield form]]) | |||
|N/A | |||
|•The enemy's down special has increased power<br>•The enemy favors down specials<br>•The enemy is invisible | |||
|{{SSBUMusicLink|The Legend of Zelda|Full Steam Ahead}} | |||
|- | |||
|582 | |||
|{{SpiritTableName|Hinawa|size=64}} | |||
|''EarthBound'' Series | |||
|•{{SSBU|Zelda}} {{Head|Zelda|g=SSBU|s=20px|cl=Purple}}<br>•{{SSBU|Lucas}} {{Head|Lucas|g=SSBU|s=20px|cl=Orange}}{{Head|Lucas|g=SSBU|s=20px|cl=Blue}} | |||
|{{SpiritType|Attack}} | |||
|13,100 | |||
|{{SSBB|Yoshi's Island}} | |||
|•Easy to Launch | |||
|•All fighters are easy to launch | |||
|{{SSBUMusicLink|EarthBound|Mother 3 Love Theme}} | |||
|- | |||
|659 | |||
|{{SpiritTableName|Mist|iw=fireemblem|size=64}} | |||
|''Fire Emblem'' Series | |||
|•{{SSBU|Zelda}} {{Head|Zelda|g=SSBU|s=20px|cl=White}}<br>•{{SSBU|Ike}} {{Head|Ike|g=SSBU|s=20px|cl=Yellow}} | |||
|{{SpiritType|Grab}} | |||
|3,500 | |||
|[[Reset Bomb Forest]] (hazards off) | |||
|•Health Recovery<br>•Defense ↑ | |||
|•The enemy has increased defense when the enemy's at high damage<br>•The enemy is healed when the enemy's at high damage | |||
|{{SSBUMusicLink|Fire Emblem|Victory Is Near}} | |||
|- | |||
|1,053 | |||
|{{SpiritTableName|Maria Renard|size=64}} | |||
|''Castlevania'' Series | |||
|•{{SSBU|Zelda}} {{Head|Zelda|g=SSBU|s=20px|cl=Purple}}<br>•{{SSBU|Falco}} {{Head|Falco|g=SSBU|s=20px|cl=White}}<br>•{{SSBU|Charizard}} {{Head|Charizard|g=SSBU|s=20px|cl=Blue}}<br>•{{SSBU|Incineroar}} {{Head|Incineroar|g=SSBU|s=20px|cl=White}} | |||
|{{SpiritType|Grab}} | |||
|3,700 | |||
|[[Reset Bomb Forest]] (hazards off) | |||
|N/A | |||
|•The enemy starts the battle with a [[Cucco]] | |||
|{{SSBUMusicLink|Castlevania|Slash}} | |||
|- | |||
|1,065 | |||
|{{SpiritTableName|Charlotte Aulin|size=64}} | |||
|''Castlevania'' Series | |||
|•{{SSBU|Zelda}} {{Head|Zelda|g=SSBU|s=20px|cl=Blue}}<br>•{{SSBU|Richter}} {{Head|Richter|g=SSBU|s=20px|cl=Blue}} | |||
|{{SpiritType|Attack}} | |||
|3,700 | |||
|[[Bridge of Eldin]] ([[Battlefield form]]) | |||
|N/A | |||
|•The enemy's special moves have increased power<br>•The enemy favors side specials<br>•Reinforcements will appear during the battle | |||
|{{SSBUMusicLink|Castlevania|Hail from the Past}} | |||
|- | |||
|1,174 | |||
|{{SpiritTableName|Jenna|iw=goldensununiverse|size=64}} | |||
|''Golden Sun'' Series | |||
|•{{SSBU|Zelda}} {{Head|Zelda|g=SSBU|s=20px|cl=Red}} | |||
|{{SpiritType|Shield}} | |||
|3,500 | |||
|[[Temple]] ([[Battlefield form]]) | |||
|•Assist Trophy Enemies ([[Isaac]]) | |||
|•Hostile assist trophies will appear<br>•The enemy favors side specials | |||
|{{SSBUMusicLink|Other|Battle Scene / Final Boss - Golden Sun}} | |||
|- | |||
|1,236 | |||
|{{SpiritTableName|Shop Assistant|size=64}} | |||
|''Style Savvy'' Series {{Flag|North America}}<br>''Nintendo presents: Style Boutique'' Series {{Flag|PAL}} | |||
|•{{SSBU|Zelda}} {{Head|Zelda|g=SSBU|s=20px|cl=Purple}} | |||
|{{SpiritType|Attack}} | |||
|3,600 | |||
|[[Tomodachi Life]] | |||
|•Item: Transforming Types | |||
|•The enemy is easily distracted by items | |||
|{{SSBUMusicLink|Other|Style Savvy: Trendsetters}} | |||
|- | |||
|1,241 | |||
|{{SpiritTableName|Yuri Kozukata|link=y|size=64}} | |||
|''Fatal Frame'' Series {{Flag|North America}}<br>''Project Zero'' Series {{Flag|PAL}} | |||
|•{{SSBU|Zelda}} {{Head|Zelda|g=SSBU|s=20px|cl=Red}} | |||
|{{SpiritType|Attack}} | |||
|9,200 | |||
|[[Luigi's Mansion]] | |||
|•Assist Trophy Enemies (Yuri Kozukata) | |||
|•Hostile assist trophies will appear | |||
|{{SSBUMusicLink|Super Mario Bros.|Main Theme - Luigi's Mansion (Brawl)}} | |||
|- | |||
|1,365 | |||
|{{SpiritTableName|Nakoruru|size=64}} | |||
|''SAMURAI SHODOWN'' Series | |||
|•{{SSBU|Zelda}} {{Head|Zelda|g=SSBU|s=20px|cl=Red}} (140 HP)<br>•Tiny {{SSBU|Falco}} {{Head|Falco|g=SSBU|s=20px|cl=Orange}} (40 HP) | |||
|{{SpiritType|Shield}} | |||
|3,800 | |||
|{{SSBB|Yoshi's Island}} (winter) | |||
|•Attack Power ↑<br>•Item: Swords | |||
|•Defeat the main fighter to win<br>•[[Stamina battle]]<br>•The enemy has increased attack power when the enemy's at high damage | |||
|{{SSBUMusicLink|Fatal Fury|Banquet of Nature - SAMURAI SHODOWN}} | |||
|- | |||
|rowspan="2"|1,442 | |||
|{{SpiritTableName|Aerith|link=y|size=64|dlcalt=y}} | |||
|rowspan="2"|''FINAL FANTASY'' Series | |||
|•{{SSBU|Zelda}} {{Head|Zelda|g=SSBU|s=20px|cl=Purple}}<br>•{{SSBU|Cloud}} {{Head|Cloud|g=SSBU|s=20px}} | |||
|rowspan="2"|{{SpiritType|Shield}} | |||
|rowspan="2"|7,500 | |||
|rowspan="2"|[[Fountain of Dreams]] | |||
|rowspan="2"|•Health Recovery | |||
|rowspan="2"|•Defeat the main fighter to win<br>•The enemy is healed after a little while | |||
|rowspan="2"|{{SSBUMusicLink|Final Fantasy|Aerith's Theme}} | |||
|- | |||
|style="background-color:#EEE;"|•{{SSBU|Mii Swordfighter}} {{Head|Mii Swordfighter|g=SSBU|s=20px}} (Moveset [[Gale Strike|1]][[Chakram|3]][[Stone Scabbard|1]][[Reversal Slash|2]], Aerith's outfit, Normal Voice Type 6)<ref group="SB" name="DLC"/><br>•{{SSBU|Cloud}} {{Head|Cloud|g=SSBU|s=20px}} | |||
|- | |||
|1,489 | |||
|{{SpiritTableName|Kokorowa|size=64}} | |||
|''Sakuna: Of Rice and Ruin'' | |||
|•{{SSBU|Zelda}} {{Head|Zelda|g=SSBU|s=20px|cl=Black}}<br>•{{SSBU|R.O.B.}} {{Head|R.O.B.|g=SSBU|s=20px}}×2 (INT)/{{Head|R.O.B.|g=SSBU|s=20px|cl=Grey}}×2 (JP/CH/KR) | |||
|{{SpiritType|Shield}} | |||
|3,700 | |||
|[[Suzaku Castle]] | |||
|N/A | |||
|•Defeat the main fighter to win<br>•The enemy favors down specials | |||
|{{SSBUMusicLink|Nintendo|Boss 1 - Sakura Samurai: Art of the Sword}} | |||
|} | |||
===As a minion=== | |||
{|class="wikitable sortable" style="width:100%;" | |||
! colspan=4|Spirit | |||
! colspan=7|Battle parameters | |||
! colspan=1|Inspiration | |||
|- | |||
! style="width:5%;"|No. | |||
! style="width:5%;"|Image | |||
! Name | |||
! Series | |||
! Enemy Fighter(s) | |||
! style="width:5%;"|Type | |||
! style="width:5%;"|Power | |||
! Stage | |||
! Rules | |||
! Conditions | |||
! Music | |||
! Character | |||
|- | |||
|1,107 | |||
|{{SpiritTableName|Fighting Alloy Team|link=y|size=64}} | |||
|''Super Smash Bros.'' Series | |||
|•{{SSBU|Captain Falcon}} Team {{Head|Captain Falcon|g=SSBU|s=20px|cl=Red}}×4<br>•{{SSBU|Zelda}} Team {{Head|Zelda|g=SSBU|s=20px|cl=Blue}}×4<br>•{{SSBU|Mario}} Team {{Head|Mario|g=SSBU|s=20px|cl=Yellow}}×4<br>•{{SSBU|Kirby}} Team {{Head|Kirby|g=SSBU|s=20px|cl=Green}}×4 | |||
|{{SpiritType|Attack}} | |||
|3,300 | |||
|{{SSBU|Final Destination}} ([[Battlefield form]]) | |||
|N/A | |||
|•Take your strongest team into this no-frills battle | |||
|{{SSBUMusicLink|Super Smash Bros.|Cruel Smash}} | |||
|Blue Alloy | |||
|- | |||
|1,246 | |||
|{{SpiritTableName|Orville|size=64}} | |||
|''Takt of Magic'' | |||
|•{{SSBU|Robin}} {{Head|Robin|g=SSBU|s=20px|cl=White}}<br>•{{SSBU|Pit}} {{Head|Pit|g=SSBU|s=20px|cl=Blue}}<br>•{{SSBU|Zelda}} {{Head|Zelda|g=SSBU|s=20px|cl=Red}} | |||
|{{SpiritType|Grab}} | |||
|3,400 | |||
|[[PictoChat 2]] | |||
|N/A | |||
|•Defeat the main fighter to win | |||
|{{SSBUMusicLink|Other|Struggle Against Chaos}} | |||
|Charlotte (Takt of Magic) | |||
|- | |||
|1,328 | |||
|{{SpiritTableName|Hero's Comrades|size=64}} | |||
|''DRAGON QUEST'' Series | |||
|•{{SSBU|Ike}} {{Head|Ike|g=SSBU|s=20px|cl=Black}} (120 HP)<br>•Tiny {{SSBU|King Dedede}} {{Head|King Dedede|g=SSBU|s=20px|cl=Pink}} (120 HP)<br>•{{SSBU|Zero Suit Samus}} {{Head|Zero Suit Samus|g=SSBU|s=20px|cl=ShortsBlue}} (100 HP)<br>•{{SSBU|Sheik}} {{Head|Sheik|g=SSBU|s=20px|cl=Red}} (130 HP)<br>•Tiny {{SSBU|Robin}} {{Head|Robin|g=SSBU|s=20px|cl=Red}} (90 HP)<br>•{{SSBU|Zelda}} {{Head|Zelda|g=SSBU|s=20px|cl=Green}} (110 HP)<br>•{{SSBU|Link}} {{Head|Link|g=SSBU|s=20px|cl=Teal}} (100 HP) | |||
|{{SpiritType|Shield}} | |||
|13,300 | |||
|[[Yggdrasil's Altar]] | |||
|N/A | |||
|•The enemy has increased melee-weapon damage and move speed<br>•The enemy's smash attacks have increased power<br>•[[Stamina battle]] | |||
|{{SSBUMusicLink|Dragon Quest|The Hero Goes Forth with a Determination}} | |||
|Serena | |||
|- | |||
|1,411 | |||
|{{SpiritTableName|Duran & Angela|size=64}} | |||
|''Mana'' Series | |||
|•{{SSBU|Roy}} {{Head|Roy|g=SSBU|s=20px|cl=Green}}<br>•{{SSBU|Zelda}} {{Head|Zelda|g=SSBU|s=20px|cl=Red}}<br>•Tiny Bunny {{SSBU|Kirby}} {{Head|Kirby|g=SSBU|s=20px|cl=Yellow}}×2 | |||
|{{SpiritType|Attack}} | |||
|9,200 | |||
|[[Gaur Plain]] ([[Ω form]]) | |||
|•Item: [[Ramblin' Evil Mushroom]] | |||
|•Reinforcements will appear after an enemy is KO'd | |||
|{{SSBUMusicLink|Other|Filled with Hope}} | |||
|Angela | |||
|- | |||
|1,456 | |||
|{{SpiritTableName|Seth & Gloria|size=64}} | |||
|''Bravely Default'' Series | |||
|•{{SSBU|Mii Swordfighter}} {{Head|Mii Swordfighter|g=SSBU|s=20px}} (Moveset: [[Blurring Blade|3]][[Gale Stab|2]][[Skyward Slash Dash|2]][[Power Thrust|3]], Chrom Wig, Dunban Outfit)<br>•{{SSBU|Zelda}} {{Head|Zelda|g=SSBU|s=20px|cl=Blue}} | |||
|{{SpiritType|Shield}} | |||
|9,400 | |||
|[[Delfino Plaza]] (Large Island) | |||
|•Health Recovery<br>•Defense ↑<br>•Item: Swords | |||
|•The enemy has increased defense after a little while<br>•The enemy is healed when the enemy's at high damage<br>•The enemy's melee blows will heal them when they hit | |||
|{{SSBUMusicLink|Other|Jergingha - Planet Destruction Form}} | |||
|Gloria | |||
|- | |||
|1,461 | |||
|{{SpiritTableName|Lora|size=64}} | |||
|''Xenoblade Chronicles'' Series | |||
|•{{SSBU|Lucina}} {{Head|Lucina|g=SSBU|s=20px|cl=Black}}<br>•{{SSBU|Zelda}} {{Head|Zelda|g=SSBU|s=20px|cl=Red}}<br>•{{SSBU|Cloud}} {{Head|Cloud|g=SSBU|s=20px}} | |||
|{{SpiritType|Grab}} | |||
|3,800 | |||
|[[Jungle Japes]] ([[Battlefield form]]) | |||
|N/A | |||
|•Defeat the main fighter to win | |||
|{{SSBUMusicLink|Xenoblade Chronicles|Battle!!/Torna}} | |||
|Haze | |||
|- | |||
|1,514 | |||
|{{SpiritTableName|Rauru|iw=zeldawiki|size=64}} | |||
|''The Legend of Zelda'' Series | |||
|•{{SSBU|Mewtwo}} {{Head|Mewtwo|g=SSBU|s=20px|cl=Purple}} (100 HP)<br>•{{SSBU|Zelda}} {{Head|Zelda|g=SSBU|s=20px}} (70 HP)<br>•Giant {{SSBU|R.O.B.}} {{Head|R.O.B.|g=SSBU|s=20px|cl=Green}} (70 HP)<br>•{{SSBU|Robin}} {{Head|Robin|g=SSBU|s=20px|cl=Red}} (60 HP)<br>•{{SSBU|Inkling}} {{Head|Inkling|g=SSBU|s=20px|cl=Cyan}} (60 HP)<br>•{{SSBU|Charizard}} {{Head|Charizard|g=SSBU|s=20px|cl=Yellow}} (60 HP)<br>•{{SSBU|Pit}} {{Head|Pit|g=SSBU|s=20px}} (60 HP) | |||
|{{SpiritType|Neutral}} | |||
|13,000 | |||
|[[Temple]] ([[Battlefield form]]) | |||
|N/A | |||
|•[[Stamina battle]]<br>•The enemy favors neutral specials<br>•Reinforcements will appear after an enemy is KO'd | |||
|{{SSBUMusicLink|The Legend of Zelda|Calamity Ganon Battle - Second Form}} | |||
|Zelda (Tears of the Kingdom) | |||
|} | |||
===As an ally=== | |||
{|class="wikitable sortable" style="width:100%;" | |||
! colspan=4|Spirit | |||
! colspan=7|Battle parameters | |||
! colspan=1|Inspiration | |||
|- | |||
! style="width:5%;"|No. | |||
! style="width:5%;"|Image | |||
! Name | |||
! Series | |||
! Enemy Fighter(s) | |||
! style="width:5%;"|Type | |||
! style="width:5%;"|Power | |||
! Stage | |||
! Rules | |||
! Conditions | |||
! Music | |||
! Character | |||
|- | |||
|243 | |||
|{{SpiritTableName|Calamity Ganon|size=64}} | |||
|''The Legend of Zelda'' Series | |||
|•Giant {{SSBU|Ganondorf}} {{Head|Ganondorf|g=SSBU|s=20px|cl=Grey}}<br>•Ally: {{SSBU|Zelda}} {{Head|Zelda|g=SSBU|s=20px|cl=Blue}} | |||
|{{SpiritType|Attack}} | |||
|13,900 | |||
|[[Great Plateau Tower]] ([[Ω form]]) | |||
|•Sudden Damage | |||
|•You lose if your CPU ally is KO'd<br>•You'll occasionally take sudden damage after a little while<br>•The enemy is giant | |||
|{{SSBUMusicLink|The Legend of Zelda|Calamity Ganon Battle - Second Form}} | |||
|Zelda (Breath of the Wild) | |||
|} | |||
<references group="SB"> | |||
<ref name="DLC">This alternative occurs when the corresponding DLC has been purchased and downloaded.</ref> | |||
</references> | |||
==[[Alternate costume (SSBU)#Zelda|Alternate costumes]]== | ==[[Alternate costume (SSBU)#Zelda|Alternate costumes]]== | ||
| Line 321: | Line 770: | ||
The Legend of Zelda artwork.png|Artwork of all ''The Legend of Zelda'' characters, as posted on the official Legend of Zelda Twitter account. | The Legend of Zelda artwork.png|Artwork of all ''The Legend of Zelda'' characters, as posted on the official Legend of Zelda Twitter account. | ||
SSBU Zelda Number.png|Zelda's fighter card. | SSBU Zelda Number.png|Zelda's fighter card. | ||
SSBUWebsiteZelda1.jpg|Zelda on [[Temple]]. | Zelda_unlock_notice_SSBU.jpg|Zelda's unlock notice. | ||
SSBUWebsiteZelda1.jpg|Zelda idling on [[Temple]]. | |||
SSBUWebsiteZelda2.jpg|Using her neutral aerial in her red costume on [[Tortimer Island]]. | SSBUWebsiteZelda2.jpg|Using her neutral aerial in her red costume on [[Tortimer Island]]. | ||
SSBUWebsiteZelda3.jpg|Zelda using her forward tilt on {{SSBU|King Dedede}} on [[Coliseum]]. | SSBUWebsiteZelda3.jpg|Zelda using her forward tilt on {{SSBU|King Dedede}} on [[Coliseum]]. | ||
SSBUWebsiteZelda4.jpg|Kneeling next to a sleeping {{SSBU|Pichu}} on Tortimer Island. | SSBUWebsiteZelda4.jpg|Kneeling next to a sleeping {{SSBU|Pichu}} on Tortimer Island. | ||
SSBUWebsiteZelda5.jpg|Using [[Farore's Wind]] on [[Luigi's Mansion]]. | SSBUWebsiteZelda5.jpg|Using [[Farore's Wind]] on [[Luigi's Mansion]]. | ||
SSBUWebsiteZelda6.jpg| | SSBUWebsiteZelda6.jpg|Idling in her dark costume on [[Spirit Train]]. | ||
SSBUWebsiteGanondorf5.jpg|Zelda taunting next to {{SSBU|Ganondorf}} on [[Hyrule Castle]]. | SSBUWebsiteGanondorf5.jpg|Zelda taunting next to {{SSBU|Ganondorf}} on [[Hyrule Castle]]. | ||
SSBUWebsiteRosalina4.jpg|Zelda giving {{SSBU|Rosalina}} a high-five on [[Prism Tower]]. | SSBUWebsiteRosalina4.jpg|Zelda giving {{SSBU|Rosalina}} a high-five on [[Prism Tower]]. | ||
| Line 335: | Line 785: | ||
SSBUZeldaJPTwitter1.jpg|With all playable {{uv|The Legend of Zelda}} veterans on the [[Great Plateau Tower]]. | SSBUZeldaJPTwitter1.jpg|With all playable {{uv|The Legend of Zelda}} veterans on the [[Great Plateau Tower]]. | ||
SSBU LegendofZeldaReps.jpg|With Link and Ganondorf on the Great Plateau Tower. | SSBU LegendofZeldaReps.jpg|With Link and Ganondorf on the Great Plateau Tower. | ||
SSBU challenge image 011.png|Zelda with Cloud in Tortimer Island | |||
</gallery> | </gallery> | ||
=== | ===Fighter Showcase Video=== | ||
{{#widget:YouTube|id=fMDgFn3qQ_c}} | {{#widget:YouTube|id=fMDgFn3qQ_c}} | ||
==Trivia== | ==Trivia== | ||
*Masahiro Sakurai chose to base Zelda's design in ''Ultimate'' off of her ''A Link to the Past'' and ''A Link Between Worlds'' | *Masahiro Sakurai chose to base Zelda's design in ''Ultimate'' off of her ''A Link to the Past'' and ''A Link Between Worlds'' incarnations instead of her more recent ''Breath of the Wild'' incarnation because that version of Zelda, according to him, "is more into research than fighting."<ref name="SpecialSmash" /><ref name="DirectJP" /><ref name="PaluGuidance" /><ref name="DirectEN" /> He also mentioned in a subsequent Nintendo Treehouse Live event that he chose this design to better represent ''The Legend of Zelda'' franchise as a whole instead of having all of its fighters come from the same game. | ||
*Zelda's current default design was previously an alternate costume in terms of coloration of her model, | *Zelda's current default design was previously [[Alternate costume (SSB4)#Zelda|an alternate costume]] in terms of coloration of her model, whereas her previous default design based on ''Twilight Princess'' has now become [[Alternate costume (SSBU)#Zelda|an alternate costume]] in that same regard. | ||
**Coincidentally, Zelda was revealed in '' | **Coincidentally, Zelda was revealed in ''SSB4'' at the same time ''A Link Between Worlds'' was released, which inspired her current design. | ||
*Zelda is currently the only playable ''Legend of Zelda'' character in '' | **Ironically, despite her ''Twilight Princess'' incarnation being retired after this game, even though Ganondorf's design from that game is still directly referenced via a spirit, as well as Link's Wolf form from that game, Zelda is the only returning ''Zelda'' character from ''SSB4'' that doesn't have her ''Twilight Princess'' design directly referenced in ''Ultimate'' at all. | ||
** | *Zelda can be unlocked by Kirby via his Classic Mode route, which may reference their team-up from ''Brawl''{{'}}s Adventure Mode, [[The Subspace Emissary]]. | ||
*The [[World of Light]] | *Zelda is currently the only playable ''The Legend of Zelda'' character in ''Ultimate'' whose design originates from either a handheld game or a non-3D game. | ||
**Zelda speaks English in all Western language versions of ''Ultimate'', unlike | **She is also the only ''Zelda'' character whose design comes from the [[zeldawiki:Zelda Timeline#Fallen Hero Timeline|"Fallen Hero" timeline]]. | ||
*The [[World of Light]] opening marks Zelda's first spoken line of dialogue in the ''Smash'' series. This is also the first time in the series that any ''Zelda'' character is voiced in English. | |||
**Zelda is one of the few characters to have her cutscene dialogue dubbed in English, but otherwise keep her Japanese voice actress's battle grunts, after {{SSBM|Fox}} and {{SSBM|Falco}} in ''Melee''. She is also the only character to speak English in a cutscene while still having a Japanese KO line (with her yelling "{{ja|いやぁっ!|Iyaa!}}" (''Nooo!'')). | |||
**Zelda speaks English in all Western language versions of ''Ultimate'', unlike ''Breath of the Wild'', which was dubbed into multiple languages. | |||
**She is the second ''Zelda'' character to speak in ''Smash'', the first being {{SSBM|Sheik}} in ''Melee''. | |||
*Zelda is the only ''The Legend of Zelda'' character whose animations are mirrored. | |||
*Zelda's Classic Mode route is vaguely similar to {{SSBU|Diddy Kong}}'s, as both characters fight villains and/or final bosses of various series for opponents. | |||
*Zelda, {{SSBU|Peach}}, {{SSBU|Falco}}, {{SSBU|Olimar}}, {{SSBU|Duck Hunt}}, and {{SSBU|Dark Pit}} are the only fighters to appear as allies in Spirit Battles. | |||
*''Ultimate'' marks the first time Zelda's Kirby hat no longer resembles Young Zelda's wimple from ''Ocarina of Time'', despite her appearance in ''Melee'' being based on her adult design from the same game, and her ''Brawl'' and ''SSB4'' designs both being based on her appearance in ''Twilight Princess'', which also makes it the first time said Kirby hat is based directly on how she appears in-game. | |||
*Gravity on Zelda's hair is temporarily disabled whenever she performs her hair-brushing idle pose. | |||
==References== | ==References== | ||
| Line 354: | Line 814: | ||
{{SSBUCharacters}} | {{SSBUCharacters}} | ||
{{Zelda universe}} | {{Zelda universe}} | ||
[[Category:Zelda (SSBU)]] | [[Category:Zelda (SSBU)]] | ||
[[Category:Spirits]] | [[Category:Spirits]] | ||
[[es:Zelda (SSBU)]] | |||
Latest revision as of 23:22, September 18, 2024
| Zelda in Super Smash Bros. Ultimate | |
|---|---|
 
| |
| Universe | The Legend of Zelda |
| Other playable appearances | in Melee in Brawl in SSB4 |
| Availability | Unlockable |
| Final Smash | Triforce of Wisdom |
| Tier | D- (73) |
Zelda (ゼルダ, Zelda) is a playable character in Super Smash Bros. Ultimate. She was confirmed as a playable character along with Sheik and the rest of veterans on June 12, 2018. Unlike the game's predecessors, she is unlockable instead of being available from the start. Zelda is classified as Fighter #17.
In a similar vein to her fellow Zelda fighters Link and Ganondorf, Zelda is now voiced by Ayumi Fujimura, who reprises her role from The Legend of Zelda: A Link Between Worlds in all regions, replacing Jun Mizusawa from Super Smash Bros. Melee, Super Smash Bros. Brawl, and Super Smash Bros. 4. Similar to Star Fox characters in Melee, the former provides a single line of spoken Japanese dialogue in World of Light's opening; this line is dubbed in English by Brandy Kopp, who also voices Palutena.
Zelda is ranked 73rd out of 82 on the current tier list, placing her in the D- tier. This is a slight improvement from her 52nd/53rd out of 54 placement in SSB4 where she was tied with Ganondorf, and is her best placement in the series. She has a strong zoning tool in Phantom Slash, which is a very versatile move that can also start or finish combos, force approaches and apply pressure by controlling space, namely in ledge trapping. Zelda uses magic in her attacks, giving her moderately disjointed range in general. She has an abundance of KO options, with power comparable to or exceeding that of heavyweights, despite being a lightweight; furthermore, she possesses the largest array of moves with transcendent priority, so her strongest attacks tend to create favorable trades if not outright beating out the opponent due to their priority. Several of them come out surprisingly fast for how powerful they are, and are effective out-of-shield options, most notoriously her Lightning Kick and Farore's Wind, the latter of which is also one of the best recoveries in the game. She also has an outstanding array of throws, being able to combo with down throw until high percents and having two strong kill throws in her up and back throws.
Despite these strengths, Zelda has notable weaknesses. Her mobility is among the worst in the game; she has a low run speed, falling speed and gravity, and a laggy initial dash, leaving her with committal jumps and a poor approach and neutral game. Being tall makes her easier to hit, and being floaty with poor landing options makes her especially vulnerable to juggling; this gives her one of the worst disadvantage states in the game and only exacerbates her already low weight. While Zelda has several powerful finishers, most of them are inconsistent, having very precise sweetspots that are especially difficult to land given her poor approach and mobility, weak sourspots that can even be punishable on hit, and/or high ending lag. She lacks moves that are safe on shield, most notably her aerials; the few moves that are safe require specific spacing or timing, which are difficult given her poor mobility. The range on several of her attacks is poor, limiting their utility. Almost all her normals are transcendent, which is a double-edged sword that gives her poor defense against projectiles and larger disjoints, since she cannot clank with them and easily loses to them. She also has a limited number of moves and rather small windows to confirm into other moves, forcing her to often rack up damage and secure KOs through Phantom setups or stray hits. She has no fast, low-committal projectiles, making her susceptible to being outcamped; in general, all her special moves have high lag and can be punished hard when not used carefully.
Overall, Zelda plays a decent zoning game and a strong trapping game, with tools for ledge trapping and controlling space, but her precise hitboxes, inconsistency and poor mobility gives her a weak neutral and disadvantage state, making her a glass cannon with a focus on precision. Zelda is rarely represented in tournaments, but there have been dedicated players, such as Yn from Japan, Naskino in France, and Ven in the United States, with respectable results.
How to unlockEdit
Complete one of the following:
- Play VS. matches, with Zelda being the 2nd character to be unlocked.
- Clear Classic Mode with Kirby or any character in his unlock tree, being the 4th character unlocked after Pac-Man.
- Have Zelda join the player's party in World of Light.
Zelda must then be defeated on Temple (the Ω form is used in World of Light).
AttributesEdit
Zelda is a tall, floaty lightweight character with overall slow mobility. While she has an above-average air speed, initial dash and traction, her jumps and air acceleration are below average, and she has the 22nd slowest walking speed, the 16th slowest falling speed, the 10th lowest gravity, and is tied with Byleth for the 9th slowest running speed in the game. Zelda's attacks are mostly based on magic, making most of them disjointed albeit short-ranged attacks. They also boast generally quick startup; all her normal attacks activate before frame 10, except for forward tilt, up aerial, down aerial, and forward smash. Despite her low weight, most of her attacks have impressive KO potential and damage output, giving her power comparable to that of heavyweights. Due to these factors, Zelda can be generalized as a zoner glass cannon.
Zelda's ground game is notably safer than her aerial game due to generally being less committal and more consistent. She has decent close-quarters combat, namely in her down tilt, a short-ranged low-profiling poke, and up tilt, a large all-around anti-air; both are quick to execute combo-starters with long-lasting hitboxes. They often work in tandem with dash attack, which is her most important burst and punish option with excellent speed and large hitboxes. More situational is her neutral attack, which is her fastest move at frame 4; it can transition into a rapid jab for simple damage, or sometimes combo at high percents on its own, but is short-ranged, inconsistent at comboing and unsafe on shield. Forward tilt is the biggest outlier, being much slower with narrow hitboxes, but having a strong low-priority tipper; it can be used to space (especially on shield) at a longer range.
Though known for her broad power, Zelda's smash attacks are one of the few areas where she falls relatively average to below-average in strength, although they are all still respectable finishers. Her forward smash has a good horizontal disjoint with multiple hits; it is a decent option for catching ledge getups, and due to its rather low ending lag it can be hard to punish on shield, especially if spaced and/or charged. Up smash is similarly a powerful multi-hit; though laggier and having poor horizontal range, it has a fast startup (frame 9) that can punish poorly spaced moves on shield, and has a very long duration of 23 active frames, making it effective for catching getups and landings. Down smash is a simple leg sweep with average power, being one of her few non-magic attacks, but compensates by being very fast at frame 5 and executing relatively quickly; hitting on both sides, the foot sweetspots semi spike at a nasty launch angle that can set up edgeguards.
Zelda possesses among the most powerful set of aerials in the game; uniquely, a majority of them are highly polarized with high-risk and high-reward and limited usage in neutral, forcing her to play carefully in the air. Her forward and back aerials, known as her Lightning Kicks, are by far most polarized moves. Both have fast startup at frame 6 with an incredibly strong sweetspot at her toe, making them effective punishes and deadly out of shield options. However, the sweetspot is tiny and only active for one frame. Additionally, they have notable landing lag, ending lag and cannot auto-cancel in a short hop. Furthermore, the sourspots are pitifully weak, even being punishable on hit at most percents. This makes them very risky with poor utility in neutral. Down air is a similar move with a powerful single-frame sweetspot on her foot and very weak sourspots. Although slow to come out and weaker than her Lightning Kicks, the sweetspot meteor smashes and is much larger, and the sourspots linger for longer and always spike opponents downward, making them useful for gimping opponents. The clean hit has great utility in punishes, as hitting it on grounded opponents will can start a combo at nearly any percent for massive damage or a KO confirm.
Up aerial is Zelda's only truly consistent aerial, as it consists of a single large hitbox with consistently high knockback. A vertically disjointed explosion with excellent power, it has relatively low landing lag. While not very risky when falling, it has significant startup and ending lag and only covers the range above her, limiting its usage. Neutral aerial stands out as her only aerial to not have outstanding power or a notable sweetspot. Instead, as a multi-hit with many active frames hitting on both sides, it serves as her least committal, most versatile aerial. It can auto-cancel in a short hop, which with good execution can convert into an up tilt or dash attack at lower percents; it can also combo into a dash attack when fast-falled, and a single hit can pop grounded opponents up into a variety of confirms at virtually any percent, making it a versatile combo starter. Despite being her most important all-around aerial, it lacks an autolink angle, instead having a rather convoluted set of six hitboxes; their knockback and launch angles cause the move to be inconsistent and the launch direction to be difficult to control.
Overall, Zelda's aerials on their own can be awkward for spacing, air-to-air combat, and starting combos, instead functioning more strongly in conjunction with and as follow-ups to other moves. One of the moves that most boosts the potency of her aerials is her down special, Phantom Slash, which is also her most important tool. It's a unique projectile with a hurtbox and HP that she builds piece-by-piece, with its properties becoming increasingly strong by the charge, and she can have it attack before it is complete. The earliest stages are limited to zoning and body-blocking projectiles, but by the final stage, it has outstanding HP, speed, power and range. After just over a second, Zelda will be able to move freely, while the Phantom will attack automatically after about another second if it is not manually released, granting Zelda much flexibility during this window. She can attack in tandem with it in ledge traps and to mitigate the vulnerability of laggy moves; other usages include playing mind games with manual releases, punishing shielding opponents with grabs or shield break combos, and covering her own recovery and ledge getups. It is quite good at comboing into other moves or being a combo finisher itself, due to Zelda's moves having high hitlag. Phantom Slash forms the basis of Zelda's kit and is designed to compensate for Zelda's lackluster neutral, allowing her to gain stage control, cover options, pressure, zone and trap because of how much space it covers, how much damage it deals, and how many different mixups Zelda can do with it. However, Phantom's main weakness is that it cannot be charge-canceled, requiring Zelda to commit to either an early release or to wait until she is actionable. In addition, if she enters hitstun at any point before releasing the Phantom, it falls apart.
Outside Phantom Slash, the rest of her special moves take inspiration from the spells of the three Golden Goddesses that Link can use in Ocarina of Time. Her neutral special, Nayru's Love, is a reflector that doubles as a melee attack; it has a long duration and horizontal range on both sides of her, with full intangibility from frames 4-13 of the move, allowing it to beat out moves, disrupt strings, two-frame and edgeguard. However, the multi-hits can be inconsistent, and it is laggy, making it highly punishable. Din's Fire, her side special, is a slow ball of fire that becomes stronger and faster the farther it travels. While the explosion has a powerful sweetspot, its slow startup and predictable trajectory make it easy to avoid in most cases, and quite punishable if used in neutral. Instead, it is mostly used to gimp opponents with low resources. Her up special, Farore's Wind, is an outstanding offensive teleport, allowing her to recover in almost any off-stage situation. It is difficult to edgeguard and to two-frame due to its intangibility, omnidirectional distance and large, strong hitboxes. Like Palutena's Warp, she can avoid the move's ending lag by edge canceling, which grants her access to otherwise impossible movement options. It is also a fast, useful out of shield option, as the first hit can also be used on its own out of shield, or to further combo into the powerful reappearance hitbox. It can work as a burst option to punish laggy options or anti-zone from a distance, but due to its high ending lag, this option is usually very risky. While having unique uses in their own rights, her specials can be strategically be used with each other for creative setups and KOs.
Zelda has good range for her grab, with her pivot grab being one of the most disjointed in the game. While having notably slow startup, they have great reward in her throws. Forward throw is good at setting up edge guarding and ledge traps, while back and up throw are excellent kill throws and among the strongest of their kind. Down throw is most useful as a combo starter, and can reliably combo into neutral aerial, forward aerial or back aerial from low to mid percents. All her throws can lead into a set up Phantom with proper timing for high-damage combos or KO confirms, though forward and down throw are the most practical.
Despite her strengths, Zelda has significant weaknesses. Chief among them is her poor mobility, which hampers her ability to approach and move around safely. Her initial dash, for instance, is tied for the second laggiest in the game at 15 frames, which makes her unable to shield and rather vulnerable whenever she wants to move faster than walking. This mobility issue is exacerbated through numerous frame data issues, as many of her attacks, while quick to start up, have punishing amounts of end lag and precise hitboxes, making her approach telegraphed; her floatiness makes her air-to-ground transition poor and exacerbates the downsides of her already awkward aerials. Since she is tall and floaty, with no safe landing mixups or options to help her from ledge, she is very vulnerable to getting juggled and ledge trapped, contributing to one of the worst disadvantages in the game and compounding the endurance issues from her light weight. Other issues include poor range on her normals, limiting their utility, and extremely weak sourspots that can be punished on hit. Her combo game is average to subpar, as many of her moves have too much lag or unfavorable launch angles and knockback values for reliable follow-ups or wide combo windows. Due to this, she partially relies on Phantom to land stray KOs or start or finish combos for damage-racking. Some of her moves also have consistency issues, namely neutral aerial, Nayru's Love and some of the initial windboxes of Phantom Slash.
Finally, her special moves have exploitable weaknesses, as they are all committal and have varying degrees of punishable lag. With correct timing and spacing around the Phantom's possible attack ranges, opponents can punish Zelda by reading when she will use the move and preemptively closing in. If there is space, the opponent can also retreat to disengage, with Zelda not being able to do much about it except gaining some stage control. Especially against mobile characters, this forces her to play a neutral with her risky, short ranged neutral tools and subpar mobility.
Among favorable matchups, Zelda excels against slower characters with poor ground and aerial approaches where Phantom Slash can effectively wall them out (Ice Climbers), against large characters that become easy targets for her normally difficult-to-land sweetspots (King K. Rool), especially those without safe options on shield, enabling easy punishes with her deadly out of shield options (King Dedede), and against poor recoveries that are legitimately threatened by Din's Fire and Phantom (Ganondorf). Zelda's weaknesses cause her to struggle against quick opponents who can bait out her options, exploit her poor movement and keep her in disadvantage (Fox, Greninja, Zero Suit Samus), against characters that can outcamp her with projectiles that are fast and/or dwarf the Phantom's range (R.O.B., Young Link, Min Min), against characters with large disjoints who can beat out her transcendent moves (Cloud, Aegis), and against characters with better boxing options than her (Shotos).
Overall, Zelda's strengths include fast and powerful out of shield options, good stage control and ledge trapping with Phantom setups, and impressive kill power spread broadly across her moveset. Her weaknesses in mobility, range, frame data, consistency and sweetspot issues require her to be precise with how she spaces her attacks and to make the most out of Phantom ledge traps with proper reads and option coverage. She must be creative in her approaches to overcome her mobility issues when she does not have a lead, and in mixing up what she does to get out of disadvantage due to her floaty nature and lack of safe landing options.
Changes from Super Smash Bros. 4Edit
Zelda had historically and consistently been regarded as one of the worst characters (and, at one point in Super Smash Bros. 4, the overall worst) in previous games, due to her combination of underwhelming frame data as a whole, a lackluster special moveset, bad hitbox placements, and an undesirable mix of attributes (slow, light, tall, and floaty). While SSB4 had brought updates to her offensive game, her weaknesses remained, causing her to remain unviable. Likely as a result of being a poorly regarded character in previous games, Zelda has been significantly buffed overall in the transition to Ultimate.
One of Zelda's biggest buffs is her improved moveset: many of her moves have either reduced lag, better KO potential, or other improvements. Most notably, her aerials have significantly reduced landing lag across the board, making them much more usable. The sweetspots of her kicks are significantly easier to land, and their improved auto-cancel window make them less risky to use; forward aerial's faster startup also makes it a much better out of shield option. Examples of significantly stronger moves include forward tilt, whose increased damage makes the sweetspot safe on shield and one of the strongest of its kind, and up aerial which is larger and stronger with a new late hit. Her already good grab game was improved to the point it is now among the most useful in the game; her back and up throws are much stronger, giving her two new viable kill throws among the strongest of their kind.
Zelda's special moveset, considered among the most situational in previous games, has seen various improvements. Din's Fire no longer causes helplessness, has an increased duration and has a larger sweetspot, making it more usable, albeit still situational. Farore's Wind has faster startup and execution and reduced vulnerability, making it a more effective out of shield and punish option; it has more precise angles for reappearance to follow opponent DI, making the "elevator" combo more likely to connect, while also being less unsafe if it doesn't. Phantom Slash is, however, her greatest buffed special and arguably her greatest buff from Smash 4 out of any of her moves. It has less lag and been heavily reworked to possess several more stages that cover a wider variety of ranges, improving its zoning usage, and the last stage allows Zelda to move around before it is unleashed, allowing for intricate trap setups and combos. The Phantom also no longer has any cooldown if destroyed, allowing it to be used much more frequently.
Additionally, Zelda noticeably benefits from some of the universal changes. Her horizontal movement has been improved (both absolutely and relative to the cast) in her increased run speed, air speed, air acceleration and initial dash. The universal 3-frame jumpsquats and reduced landing lag improve her noticeably, as they greatly supplement her neutral game, previously one of her main weaknesses. This allows her to approach more reliably and slightly improves her combo potential from fast falled aerials—most notably down aerial, which, due to the removal of teching grounded spikes, gives Zelda a plethora of new combos and kill confirms from the move. The changes to air dodging also benefit her, as they improve her edgeguarding game with moves like Din's Fire, which also improves her ledge trapping game by forcing low recoveries and allowing time for a Phantom set up.
However, Zelda has received some mixed changes and nerfs as well, most notably to the combo game of her normals. Neutral attack is drastically smaller and is no longer safe on shield nor has consistent combo potential, removing one of her best neutral and spacing tools. Down tilt is much smaller and has a considerably worse launch angle, hindering its combo ability past mid percents. Neutral aerial especially has been nerfed greatly, with the autolink removal and lower knockback harming the looping hits' consistency, completely removing their drag-down combos and making the launch direction drastically more difficult to control. Down throw's increase in knockback scaling, combined with its more horizontal launch angle removes its 50/50s at high percents.
Other nerfs include her forward tilt, which is much more precise due to its slower startup and narrow hitboxes, and due to the sweetspot losing highest priority and being drastically harder to land, the move is arguably weaker on average despite the damage buffs. Down aerial's late hit is worse at gimping due to its smaller hitboxes. Zelda's dash and pivot grabs, already below-average in speed, have received even more startup, although her pivot grab has very large range for a non-tether grab and both of them have less ending lag. Farore's Wind is weaker, making the sweetspot especially worse at early KOs, cannot travel as far and is much harder to edge cancel with, hindering one of her movement options.
Although Zelda benefits from some of the changes to the game's engine, other changes have impaired her as well. The new knockback speed-up effect further limits her already nerfed combo moves, as knockback was sped up more than her mobility was increased. The increased shieldstun both helps and hinders Zelda, as it allows her moves to be more safely spaced, but combined with the universal reductions to landing lag (despite aerials having less shieldstun) and nerfs to shield drop lag and grabs out of shieldstun, it also slightly worsens her out of shield game in some cases. Her air dodges are also now much laggier than average, which worsens her disadvantage state.
Overall, Zelda's moveset has been enhanced from previous installments, making her strengths more defined, especially around Phantom Slash as the new crux of her game plan. The changes overall allow Zelda to fare better than in previous installments, with this incarnation being her strongest one yet. However, she still underperforms compared to the rest of the cast. Nerfs to her combo tools, consistency and precision have tempered her buffs by effectively transferring many of her other moves' usages to Phantom, centralizing her playstyle around the reworked move. Game updates have brought her quality-of-life improvements, mostly making several moves across the board even stronger, while failing to address Zelda's core weaknesses. She still suffers from her more problematic attributes, i.e. her laggy initial dash, low fall speed, low gravity and low weight. Most significantly, many of her normals are worse compared to previous iterations, suffering from lack of utility due to impractically small hitboxes, poor or inconsistent follow-up potential, punishable sourspots and/or heavy ending lag.
AestheticsEdit
 Zelda's appearance is based on her design from The Legend of Zelda: A Link to the Past,[1][2][3] and A Link Between Worlds,[4] with her overall design being a combination of the two.[5] Her slightly smaller eyes, red necklace, more detailed epaulets, belt and bracers, and the white dress is from A Link to the Past, while her crown, bangs, and the pink dress are from A Link Between Worlds. The color scheme of her Twilight Princess design (which was her default in Brawl and Smash 4) is now the basis for an alternate costume.
- Consequently, Zelda's hair and the jewel of her crown are once again blonde and red respectively, as opposed to brown and blue respectively, with the former being no longer tied at the bottom, similar to her predecessor in Melee; her eyes are larger; her epaulets are smaller; she wears a crimson, gem-like necklace; a sleeved, white dress with a cape and a sleeveless, pink dress with a yellow, Triforce embroidery, as opposed to a purple bodice and a white silk skirt; a more traditional, crimson belt with golden ornaments instead of a gold metallic belt with a tapestry; pants under her dress; bracers with being bare-handed instead of gloves; and high heels instead of boots.
- As a result of her design change, many of Zelda's basic animations have been altered, including her standing pose, idle poses, and walking animations. All of these animations depict her as very cheerful and somewhat mischievous, making her far more expressive than her SSB4 incarnation, which rarely showed any emotion.
- Zelda has an updated Palutena's Guidance conversation to coincide with the design change.
- Many of Zelda's alternate costumes have been altered:
- The skirt of her red and blue costumes are now white, instead of maroon and navy respectively.
- Her black costume now features a purple gradation at the edges of the sleeve and the skirt.
- The skirt of her Ocarina of Time-inspired costume is now lavender and violet, instead of white and dark purple, better matching the coloration of the original.
- Zelda always faces the screen regardless of which direction she turns, causing all of her animations to be mirrored.
- All of Zelda's taunts have been altered:
- Zelda hangs onto ledges with one hand.
- Zelda's dress has independent physics.
- Many of Zelda's attacks produce brighter, flashier magical effects.
- All of Zelda's victory poses are completely new:
- For the left-inputted pose, she conjures a small flame out of her finger and swirls it around playfully, akin to Lucas' right-inputted victory pose.
- For the right-inputted pose, she summons the Phantom armor and proudly poses in front of it.
- For the up-inputted pose, she emits magic out of two fingers and points at the screen.
- Zelda is significantly more vocal.
- She vocalizes in all of her taunts and victory poses; she giggles during her down taunt and new up-inputted victory pose; makes a Kiai noise during her side taunt; makes a breath during her new right-inputted pose.
- Zelda vocalizes upon waking up from sleep status when not suffering from any knockback, similar to a few other characters such as Palutena and Cloud. She shares this addition with Link, Ganondorf and Wolf.
- Zelda's voice clips, in general, sounding significantly more dynamic and exaggerated than her predecessors, in a similar vein to Pit and Ike in their transition from Brawl. For instance, her attack and knockback voice clips are louder compared to their Brawl/Smash 4 counterparts, while stun and sleeping voice clips are quieter and longer.
AttributesEdit
 Like all characters, Zelda's jumpsquat takes 3 frames to complete (down from 6).
- Zelda runs faster (1.3 → 1.43).
- Her initial dash speed is also much faster (1.6 → 1.958). This improves her approach on the ground and gives her an above-average foxtrot.
- Zelda walks slightly faster (0.87 → 0.914).
- Zelda's air speed is slightly faster (1.04 → 1.092).
- Zelda's traction is much higher (0.054 → 0.116).
- Zelda's full hop has less air time (62 frames → 57). This allows her to land faster, but reduces her window to use aerials.
 Forward roll grants less intangibility (frames 4-17 → 4-15).
- Back roll has more startup with less intangibility (frames 4-17 → 5-16), and more ending lag (FAF 31 → 36).
- Spot dodge has less ending lag (FAF 28 → 27).
- Spot dodge grants less intangibility (frames 3-18 → 3-17).
- Air dodge grants more intangibility (frames 3-28 → 3-30).
- Air dodge has significantly more ending lag (FAF 34 → 57).
Ground attacksEdit
- Neutral attack:
- It has significantly less startup lag (frame 11 → 4), now being her fastest move and no longer being the slowest neutral attack in the game.
- The third hit has been removed. Combined with the move's faster startup, this makes the move much less safe on shield and eliminates its combo potential at low percents.
- However, neutral attack has gained a rapid jab with a finisher, which can be transitioned into after the second hit. This partially compensates for the lost third hit by having similar damage output and higher KO potential.
- The first two hits deal less damage (3% → 2.5%). With the removal of the third hit, it deals much less total damage (11% → 5%).
- The first hit lasts for 2 frames, up from 1.
- The first two hits have a lower hitlag multiplier (1× → 0.6×), which, with the removal of the third hit, makes the move execute faster on hit and harder to react to.
- They have more horizontal launch angles (361°/140°/140° → 361°/361°/180°), with only the outermost hitbox sending inward now.
- The outermost hit uses a separate outward angle (361°) for non-fighter targets, preventing Zelda from launching incoming items and projectiles toward herself.
- Due to the inner two hits both using the Sakurai angle, they can now jab lock and trip until high percents. The outermost hit can do so at any percent due to never lifting opponents off the ground.
- It no longer has set knockback (40/30 set/100 scaling → 25 base/35/30/20 scaling (hit 1), 40/25 base/25/20/25 scaling (hit 2)). The second hit has gained a hitstun modifier of 2.
- This makes the inner hits deal more knockback at high percents, giving them jab cancel setups.
- Compared to the inner hits, the outermost hit has notably lower knockback, making it negative on hit until high percents and unable to jab cancel until unrealistically extreme percents. This makes the move riskier to use without transitioning into the rapid jab, and makes its jab cancel ability inconsistent.
- The knockback scaling eventually makes the move fail to connect fully, though this only occurs at ridiculous percents.
- It has smaller hitboxes (3.2u/3.2u/4u (hits 1-2), 3.6u/3.6u/6u (hit 3) → 2.4u/2.4u/3.2u (hit 1), 3u/3.2u/3.5u (hit 2)). They are positioned closer to Zelda (z-offset 5.5u/9.5u/13u (all hits) → 4u/7u/10u (hit 1), 5u/8u/11.5u (hit 2)), drastically reducing the move's horizontal range and spacing utility.
- The hitboxes are positioned lower (y-offset 12.5u (all) → 12u/12u/11.8u (hit 1), 11.8u/11.8u/11.5u (hit 2)), worsening their range above Zelda while not improving their reach below due to their smaller sizes.
- However, there is a new hitbox in front of Zelda's lower body, improving its ability to hit shorter opponents at point-blank range.
- Forward tilt:
- It has more startup lag (frame 10 → 12).
- It has a shorter total duration (FAF 38 → 37), effectively reducing the ending lag by 3 frames due to the increased startup.
- Forward tilt no longer has a blind spot directly in front of Zelda. Instead, if she is close to another character, her lunge animation will push her backwards to allow the hitbox to connect.
- It uses five small hitboxes (2.1u/2.2u/2.3u/2.4u/2.5u) instead of three medium-sized ones (3u/3.5u/4u). This makes it much narrower, reducing its vertical range.
- However, the outer hitbox is positioned farther out (x-offset 3.5u → 6.2u), improving its disjoint.
- It deals more damage (12% → 15% (sweetspot), 10% → 11.5% (sourspot), which with its lower ending lag makes it safer on shield.
- The knockback was not fully compensated on the sweetspot (50 base/88 scaling → 72/69), significantly increasing its KO potential, especially near the horizontal blast zone.
- The sourspot has more base knockback (50 → 72), but significantly less knockback scaling (88 → 68). With its higher damage, its KO potential is slightly higher overall, especially near the horizontal blast zone, but is slightly worse from across stage.
- The three sourspot hitboxes take priority over the two sweetspot hitboxes, making the sweetspots much harder to land, especially with the aforementioned size reduction.
- The inner sweetspot hitbox has the same sound effect as the sourspots, despite having identical strength to the outer sweetspot.
- Up tilt:
- Up tilt has a longer hitbox duration (frames 7-18 → 7-19), allowing it to hit opponents lying down.
- The outermost hitbox is larger (5u → 5.5u), improving its range.
- Down tilt:
- Down tilt has less ending lag (FAF 25 → 22).
- It has 3 small unextended hitboxes (2.6u/2.6u/2.6u) instead of 1 medium-sized extended one (3.6u). Instead of being attached to her leg, they are now static hitboxes positioned closer to each other. Overall this notably reduces its range.
- It sends opponents at a much lower angle (80° → 62°), and has less base knockback (20 → 15), but more knockback scaling (120 → 125). This greatly worsens its combo potential at low and high percents, and no longer has a guaranteed set-up into up aerial.
- However, this allows it to combo more reliably into a dash attack and forward aerial at mid percents in combination with its lower ending lag and Zelda's faster jumpsquat.
- Dash attack:
- Dash attack's sweetspot is larger (2.2u → 2.8u) and is now extended (z-offset: 12.8 → 12.6-13.2). Its other hitboxes are also larger (5u (sourspot)/4.8u (late hit) → 5.2u/5u), but their horizontal ranges were compensated on the far side (z-offset 7.8-13.8 → 7.8-13.6). Overall this improves the move's range, especially for the sweetspot.
- The late hit has a longer duration (frames 8-10 → 8-12).
- Dash attack has less ending lag (FAF 40 → 36).
- Forward smash:
- The looping hits have been moved farther out (Z offset: 8/16 → 9/17), as has its final hitboxes (Z offset: 9.5/16 → 10.5/17), increasing its horizontal range while not introducing a blind spot due to the new jostle mechanics.
- The looping hits use an autolink angle (25°/165° → 366°) and have higher set knockback (40/50 → 60/60), improving their consistency.
- The final hit is slightly larger (5.5u/6u → 5.7u/6u).
- Up smash:
- The looping hits are larger (3.5u/3.5u/3.5u/4.2u → 3.5u/4u/4u/4.6u) and are positioned higher (y-offset 11u/17u/17u/18u → 12u/18u/18u/19u), improving its range.
- However, this slightly decreases its lower reach. Combined with jostling, it is more difficult to punish lower opponents out of shield.
- The looping hits use continuous hitboxes with a rehit rate, significantly reducing the gaps between its hits (frame 9/12/15/18/25/28/31 → 9-23/25-32 (rehit rate 4)).
- However, this causes it to have only six looping hits, down from seven, reducing up smash's total damage (15.4% → 14.6%).
- The side looping hits use different and higher launch angles for grounded and aerial opponents (200° → 100° (grounded)/160° (aerial)) and have different set knockback (40 → 60 (grounded)/20 (aerial)), allowing them to connect more reliably against aerial opponents, but no longer pulling in opponents standing on either side of her as easily.
- The first four looping hits have lower knockback scaling (105 → 100), and the top looping hit has lower set knockback (40 → 20).
- The final hit has more knockback scaling (214 → 222), improving its KO potential.
- The side hitboxes for the final hit are smaller (7.5u/7.5u → 6.5u/6.5u).
- Down smash:
- Down smash has higher knockback scaling (86 (front)/96 (back) → 89/100), improving its KO potential.
Aerial attacksEdit
- All aerials have less landing lag (19 frames → 12 (neutral), 23 → 15 (forward), 25 → 16 (back), 19 → 12 (up), 18 → 12 (down)).
- Lightning Kicks and down aerial have unique sound effects when used.
- Neutral aerial:
- Neutral aerial has altered hitlag (1× (all) → 0.6× (looping hits)/2× (last hit)).
- Neutral aerial is vulnerable to SDI again (0× → 0.8× (looping hits), 1× (last hit)).
- The looping hits use weight-independent knockback.
- The looping hits now use different hitboxes for aerial versus grounded opponents.
- On aerial opponents, instead of 2 medium hitboxes, the looping hits now consist of 4 small extended hitboxes (4.7u/4.7u → 1.5u/1.5u/1.5u/1.5u). This gives them much less range in the z-axis, being significantly narrower than even a Lightning Kick sweetspot. Additionally, due to being extended, they no longer interpolate.
- They no longer use the autolink angle (366° → 132°/230° (front), 152°/210° (back)), causing the move to connect less reliably. Due to the angles constantly sending in toward Zelda's opposite side and no longer matching her movement, the opponent's final launch position and direction are far less controllable, making follow-ups more difficult, especially from an auto-canceled short hop.
- The aerial hitboxes have drastically lower knockback and thus hitstun (75 set/100 scaling → 30 base/10 scaling (bottom hits), 15 base/10 scaling (top hits)). This makes it much easier for the opponent to punish Zelda if they fall out of the looping hits, and completely removes neutral aerial’s drag-down combo potential at realistic percents despite the move’s lower landing lag.
- On grounded opponents, the looping hits' angles send more outward from Zelda (80° → 70°), making it harder to connect subsequent hits.
- They also no longer use set knockback (75 set/100 scaling → 50 base/80 scaling), now sending into tumble at higher percents. Combined with the new knockback speed-up effect, at higher percents it becomes harder or even impossible to fully connect the move against grounded opponents, due to the first hit sending them too far.
- However, the angle and knockback changes improve a single hit's combo potential on grounded opponents if used in a fast fall, especially the higher their percent.
- Due to the removal of set knockback, the front hit's higher damage now makes it stronger than the back hit.
- The hitboxes are slightly larger (4.7u → 5u).
- The hitboxes have altered positions (y-offset 11 (front)/12 (back) → 10/13, z-offset 7.6/-6 → 7.6/-5).
- The hand hitboxes for the final hit are larger (4u → 5u) and have altered positions (y-offset 11 (front)/12 (back) → 9/13.5, z-offset 7.6/-6 → 8.5/-7), increasing their range.
- The last hit has less base knockback (40 → 35), allowing it to combo for longer, but reducing its KO potential.
- Lightning Kick:
- Zelda now uses a specific voice clip when performing either her forward or back aerial; it somewhat resembles Fox, Falco, Pit and Dark Pit's voice clips when they perform Fox Illusion, Falco Phantasm, Palutena Bow and Silver Bow respectively.
- On top of the magic effect, the sweetspots now have additional unique lightning effects on hit. These are purely aesthetic and not to be confused with the electric effect.
- The sweetspot hitboxes are now static instead of being attached to Zelda's toe. They are slightly larger (1.9u → 2.2u) and extend into the Z-axis (X offset: -1–1), making it easier to land and preventing it from missing due to opponents leaning into the Z-axis.
- Forward aerial:
- Forward aerial has less startup (frame 9 → 6), with its total duration reduced as well (FAF 53 → 50).
- It auto-cancels earlier (frame 50 → 43), although still not fast enough to auto-cancel in a short hop.
- Its initial auto-cancel window is shorter (frames 1-3 → 1-2).
- Back aerial:
- Back aerial has less ending lag (FAF 53 → 50).
- It auto-cancels earlier (frame 52 → 45).
- The sourspots have a longer duration (6-9 → 6-10).
- The sweetspot has more base knockback (28 → 30).
- Up aerial:
- Up aerial has a new late hit that deals 12%, doubling the move's hitbox duration (frames 14-16 → 14-16 (clean)/17-19 (late)).
- The hitbox is larger (8u → 9u).
- Its hitbox is higher up (Y offset: 23 → 26.5). Combined with its larger size, this noticeably improves its range above Zelda, but introduces a blindspot and makes it very hard (or even impossible) to hit grounded opponents onstage.
- It has more base knockback (30 → 55), but less knockback scaling (84 → 73 (clean)/70 (late)). Overall, it KOs earlier, especially near the top blast zone.
- It auto-cancels slightly earlier (frame 55 → 54), with its auto-cancel window no longer exceeding its animation length.
- It has a new animation which is longer than the previous one (54 frames → 63). This increases the amount of time Zelda cannot grab the ledge after using the move although the move has interruptibility frames to compensate for its total duration.
- Down aerial:
- Down aerial's clean hit is larger, and has an additional hitbox that covers Zelda's lower leg, giving it more range (4u → 4.2u/4u). They are also positioned farther up and down (X offset: 0 → 2/-1). This removes its blind spot and makes it easier to land.
- The late hit has smaller hitboxes (6u/6u → 5u/5u), reducing its range and worsening its gimping potential.
- The removal of teching for grounded meteor smashes improves down aerial's combo potential onstage, combined with its reduced landing lag.
Throws and other attacksEdit
- Zelda's animation when holding a Super Scope or Gust Bellows has been altered, as she now holds the item in a manner similar to a rifle.
- Grabs:
- Standing grab has more ending lag (FAF 38 → 40).
- Dash and pivot grabs have more startup lag (frame 11 → 13 (dash), 14 (pivot)).
- However, dash grab's total duration was not fully compensated (FAF 47 → 48), giving it one frame less ending lag.
- Dash grab has less range (Z2 offset: 14.5u → 13.3u).
- Pivot grab has significantly increased range (Z2 offset: -16.7u → -19.2u), becoming one of the farthest-reaching non-tether pivot grabs in the game.
- Pivot grab has less ending lag (FAF 45 → 43).
- Pummel:
- Pummel deals more hitlag (5 frames → 14), but has significantly less startup (frame 7 → 2) and ending lag (FAF 25 → 8), shortening its duration.
- It deals much less damage (3% → 1.3%).
- Zelda grabs and pummels opponents with one hand instead of two.
- Forward, back, and up throws have altered animations, and Zelda's hands emit brighter trails of magic. The speed of these throws no longer depends on the opponent's weight, making them slower for lighter opponents and faster for heavier opponents.
- Forward throw:
- Forward throw deals less damage (12% → 10%) and knockback (70 base/50 scaling → 100/30). This significantly hinders its KO potential despite launching at a lower angle (45° → 42°), to the point it can no longer KO under 215% even near the edge.
- However, the changes to up throw more than compensate due to KOing earlier from any point on stage.
- The low knockback scaling now gives Zelda a consistent throw to combo into a delayed Phantom.
- Back throw:
- Back throw deals more damage (11% → 12%) and has less base knockback (80 → 40), but more knockback scaling (60 → 90), greatly improving its KO potential, especially from center stage.
- Up throw:
- Up throw has much higher knockback scaling (60 → 82), allowing it to KO middleweights at around 150%, while in SSB4, it was unable to KO until around 200%.
- It has increased combo potential due to Zelda's faster jumpsquat and jump speed.
- It sends opponents at a marginally less vertical angle (88° → 87°).
- Down throw:
- Down throw's four looping hits deal more damage (1% → 1.5%), increasing its total damage (6% → 8%).
- The looping hits use the fire effect instead of magic.
- It has less base knockback (85 → 75), but more knockback scaling (55 → 85), marginally increasing its combo potential at lower percents in combination with Zelda's faster jumpsquat and jump speed while reducing it at higher percents.
- It has marginally more ending lag (FAF 70 → 71) and sends opponents at a less vertical angle (100° → 104°), leaving it unable to combo into an up aerial at low-mid percents and further hindering its follow-up potential at high percents.
- Due to the more outward angle, neutral aerial is a less reliable follow-up on DI away, forcing the user to use a lightning kick instead, which is much more precise.
- Edge attack:
- Edge attack deals more damage (7% → 9%).
Special movesEdit
- Nayru's Love:
- It no longer halts vertical momentum, allowing Zelda to move in the air while using the move.
- Its intangibility starts one frame earlier (frame 5 → 4).
- Its reflective hitbox has a shorter duration (frames 5-43 → 5-41). The intangibility also ends two frames earlier, reducing its duration by one frame (frames 5-15 → 4-13).
- The hitboxes have less startup lag (frame 13 → 11), with their total duration reduced as well (FAF 60 → 58).
- The inner looping hit is larger (6u → 8.5u) and positioned lower (y-offset 8 → 7). This allows it to hit below stage.
- However, the inner looping hit does not stretch as far (z-offset -4 to 4 → -0.5 to 0.5), slightly reducing the looping hits' horizontal range against aerial opponents.
- The final hit now has less vertical range than the looping hits, increasing the chance of the move not connecting fully.
- Din's Fire:
- Din's Fire no longer leaves Zelda helpless in the air.
- Zelda has a lower gravity upon using the move (0.019 → 0.012).
- It has improved maneuverability (angle addition per frame 1.375° → 1.645°, maximum angle 74.5° → 78°).
- It travels a slightly longer distance.
- The explosion's duration is longer (2 frames → 6 frames).
- Its hitboxes are larger, especially the sweetspot (2.1u → 3.5u (sweetspot), 4.5u → 4.8u (sourspot)).
- The flame has a more stylized appearance.
- Farore's Wind:
- Farore's Wind's first hit has less startup lag (frame 8 → 6), improving its out of shield utility. It also has a longer duration (1 frame → 2).
- Zelda's speed is reduced on the move's startup, making her easier to hit and reducing the added distance from a jump.
- Zelda disappears faster (frame 21 → 17), and consequently begins her teleport sooner.
- Zelda has more precise angles of teleport direction, allowing her to land its second hit on enemies who DI the initial hit.
- Its teleport duration is shorter (20 frames → 18), slightly decreasing its maximum distance.
- However, in conjunction with the faster startup, this makes the second hit come out faster (frame 41-42 → 35-36) and the move interruptible sooner (FAF 81 → 76).
- The intangibility duration is marginally shorter (frames 21-39 → 17-34) but is no longer shorter than the teleport duration. Furthermore, there is no longer a single frame of vulnerability before the reappearance hitbox comes out.
- It shows small green orbs that follow Zelda's path during her teleport.
- A more intense green/yellow vortex is produced at the start and end of the move.
- The second hit has less base knockback (90 (sweetspots)/70 (sourspots) → 80/60), with only the aerial version's sweetspot having its knockback scaling compensated, though not fully (90 → 94). This hinders its KO potential, especially near the side blast zones for the grounded hits and the top blast zone for the aerial hits.
- Due to her higher traction, Zelda does not slide as far on the ground on reappearance, making edge canceling significantly harder.
- Zelda can drift and fast fall in the air much sooner after reappearing, reducing her vulnerability.
- Phantom Slash:
- Phantom Slash has been heavily reworked. The Phantom armor assembles itself behind Zelda rather than appearing fully formed out of a portal in front of her. It is a single-press chargeable move; pressing the special move button again will cause the incomplete armor to attack at its current charge level. The move has seven charge levels, with five different types of attacks:
- 1st: Kick (frame 15)
- 2nd: Punch (frame 20)
- 3rd: Outward slash (frame 28)
- 4th: Overhead slash (frame 38)
- 5th: Upward slash (frame 50, can be delayed up to frame 120)
- Most notably, the new overhead slash makes it harder for opponents to jump over the Phantom to punish Zelda during the move's charge.
- Combined with the Phantom's much faster charge, the move has significantly improved zoning utility.
- If she doesn't release the Phantom, Zelda can now move freely starting on frame 67 while the Phantom remains in place. This creates a significant overlap between frames 67 and 120 where Zelda can simultaneously move freely and manually release the fully charged Phantom at any moment.
- Zelda can use the Phantom's automatic release on frame 120 as a trap and attack the opponent in tandem with the trap, retreat behind the Phantom for protection, or use the large window of manual release versus waiting as a mind game. This improves Zelda's neutral game and advantage state, and also discourages the opponent from reflecting the Phantom since she has enough time to respond with Nayru's Love.
- All attacks have a longer hitbox duration, and all after the first also have less startup (frame 11 (1st), 13-14 (2nd), 18-19, 24-27 (3rd) → frames 11-12 (kick), 8-12 (punch), 8-11 (outward/overhead slash), 7-17 (upward slash)).
- Releasing the Phantom has less ending lag (FAF 47 → 40).
- There is no longer a cooldown if the Phantom is destroyed. Once the armor disappears, the move can be used again immediately, improving the Phantom's bodyblocking utility.
- The Phantom's windboxes are stronger, especially for the highest charges. This improves the move's consistency and gimping potential.
- Phantom Slash deals less damage overall, especially when fully charged (≈6%-≈8% (1st level), ≈11%-≈15% (2nd), ≈24% total (3rd) → 5.9% (kick), 8.2% (punch), 10.5%/11.8% (outward slash), 14.1%/15.4% (overhead slash), 17.7% (upward slash)), as the fully charged hit only hits once. It has also received negative shield damage (0 → -1, -1.5, -2, -2.5, -3).
- The Phantom charges behind Zelda instead of in front, leaving her more vulnerable since it has to travel a short distance before it can hit in front of her.
- The last level has more base knockback (32 → 60), but less knockback scaling (100 → 75), and launches at a lower angle (50° → 46°). This make it better for KOing at the ledge, but worse from afar.
- Final Smash:
- Zelda has a new Final Smash called Triforce of Wisdom. She magically opens a glowing, triangular portal that sucks in the opponent and immobilizes them while dealing damage. If the opponent is at or above 100% damage before the portal closes, they are "sealed away" and instantly KO'd; otherwise, they receive set knockback. Other opponents above 100% damage can be launched significantly if they are within a certain radius of the portal when it closes.
- Compared to Light Arrow, Triforce of Wisdom has a significantly longer duration and more range covering the entire stage, making it almost impossible to avoid. It also deals more total damage (40% → 67%).
- Triforce of Wisdom can only trap one opponent, making it less effective in battles with more than two players.
- Triforce of Wisdom does not produce the Home-Run Bat sound effect, unlike Light Arrow.
Update historyEdit
Zelda has been buffed overall via game updates, receiving the biggest changes in update 7.0.0, followed by update 13.0.0. A majority of the changes focused on augmenting the power of her kill moves, with up smash, down smash, up aerial, and especially forward tilt and down special being stronger compared to release. Hitbox buffs made up aerial, down aerial's clean hit and Din's Fire's sweetspot larger, and increased the hitbox duration of up aerial and Din's Fire. Slight frame data buffs reduced the ending lag of her jab by 1 frame and the landing lag of neutral aerial by 3 frames. Multihit angle changes made forward smash more consistent; while also intending to do the same for neutral aerial, its angle changes were a mixed bag in practice, only improving its consistency in some cases, but making the final hit's launch direction much more volatile and thus making auto-cancel combos more difficult.
Aside from the mixed change to neutral aerial's angles, Zelda has also received two minor nerfs, though negligible as the first was eventually negated, and the second was a reversal of a very brief unintended bug. In update 3.0.0, Phantom's shield damage was reduced, but the later 7.0.0 damage buff completely compensated for this. In update 9.0.2, a bugfix removed a shadow buff from the 9.0.1 patch that allowed Zelda to displace the Phantom much more easily, specifically to spawn it in front of her to grant more protection during the charge.
- Phantom Slash deals less shield damage (0 (all) → -1 (1st charge)/-1.5 (2nd charge)/-2 (3rd charge)/-2.5 (4th charge)/-3 (5th charge)).
- Medium and fast walking animations have been adjusted to prevent her dress from clipping.
- Overall shield size has been increased.
- Forward tilt deals more damage (10%/12% → 11.5%/15%), with knockback scaling not fully compensated (70/70 → 68/69). This significantly improves its KO potential to the point it is even stronger than in Smash 4, with the sweetspot KOing at around 120% from the center of Final Destination.
- Neutral aerial's looping hits launch aerial opponents at more horizontal angles (92°/270°/92°/270° → 132°/230°/152°/210°), causing them to connect more reliably if Zelda is drifting away, but less reliably when Zelda is rising or falling.
- Due to now sending toward Zelda's opposite side, the final hit's launch direction is much more volatile. This makes follow-ups more difficult, especially from an auto-canceled short hop.
- Neutral aerial has less landing lag (15 frames → 12), matching its Brawl counterpart. This improves its combo potential, making KO setups into Lightning Kicks more reliable.
- Up aerial has a bigger hitbox (8u → 9u), increasing its range.
- Up aerial's clean hit has more knockback scaling (70 → 73).
- Up aerial has a new late hit that increases its duration (frames 14-16 → 14-19), and deals less damage (17% → 12%) with knockback not compensated.
- Din's Fire's sweetspot is larger (2.6u → 3.5u), and the explosion's hitbox is active for longer (4 frames → 6).
- Phantom Slash deals more damage on all charges (4.7% → 5.9% (level 1), 6.6% → 8.2% (level 2), 8.5%/9.4% → 10.5%/11.8% (level 3), 11.3%/12.2% → 14.1%/15.4% (level 4), 14.1% → 17.7% (level 5)), with knockback scaling partly compensated on the highest two charges (60 → 57 (level 4), 75 → 68 (level 5)).
 Fixed an issue where Zelda's momentum after using Phantom in the air was different from what was intended.
- This means she can no longer exploit this bug to improve the move's safety.
- Forward smash has received various adjustments that allow the move to connect more reliably:
- The first four hits send at an autolink angle (25°/165 → 366° (both)) and have more set knockback (40/50 → 60 (both)).
- This tends to pull opponents toward the center of the near hitbox. In the majority of cases, this marginally reduces the move's KO potential compared to before.
- The last hit's hitbox at Zelda's arm is slightly larger (5.5u → 5.7u).
- All hits have received a -100% trip chance, preventing them from tripping opponents and missing subsequent hits due to the trip's intangibility.
- Changed the length of vulnerability when crumpling to be consistent with other fighters.
- The first hit of neutral attack has less ending lag (FAF 25 → 24).
- Neutral infinite's loop hits deal more damage (0.2% → 0.4%).
- Up smash has higher knockback scaling (214 → 222).
- Down smash has higher knockback scaling (86 (front)/96 (back) → 89/100).
- Down aerial's clean hit has a larger hitbox (3.2u/3u → 4.2u/4u).
MovesetEdit
For a gallery of Zelda's hitboxes, see here.
Note: All numbers are listed as base damage, without the 1v1 multiplier.
| Name | Damage | Description | ||
|---|---|---|---|---|
| Neutral attack | Short Flash (ショートフラッシュ) / Rapid Flash (ラピッドフラッシュ) / Flash Finish (フラッシュフィニッシュ) | 2.5% (hits 1-2) | Extends her palm to emit a burst of magical energy, then optionally follows up with a series of several magical bursts before a finishing blast, which can KO near the edge. Unlike in the previous games, where it was the slowest jab at frame 11, it is now her fastest move at frame 4. It no longer has a third hit, but can start combos on its own at high percents with certain hitboxes. | |
| 0.4% (loop), 3% (end) | ||||
| Forward tilt | Magical Cutter (マジカルカッター) | 15% (hand, blade), 11.5% (arm) | A magically-infused outward knifehand strike. It can be angled and has two sweetspots at the tip that possess great power. It has three sourspots located on Zelda's arm that take priority over the sweetspots, being noticeably weaker but still having above-average KO power. Its high base knockback makes it especially potent at early KOs near the ledge. The sweetspots KO middleweights at around 83% while near the edge of Final Destination, and the sourspots KO at around 109%. It's safe on shield when spaced with the sweetspot. However, it has noticeable startup lag at frame 12 with an active duration of only two frames, as well as having strict priority and small and narrow hitboxes, making it hard to sweetspot, or even land at all on small or crouching characters, or opponents in the air. | |
| Up tilt | Barricader (バリケーダー) | 7.2% | Waves her arm in an overhead arcing motion while her hand is infused with magical energy. Due to it hitting on frame 7 and having a long active duration and low ending lag, it is one of Zelda's most reliable combo starters. It can combo into itself, neutral attack and up smash at low percentages, into neutral aerial as well as Lightning Kick from low to medium percentages, and into up aerial at medium percentages out of a reversed up tilt. Its combo potential increases the later the frame on which it hits. It is also a strong anti-air attack thanks to its disjoint, large hitbox and long duration. | |
| Down tilt | Low Kick (ローキック) | 5.5% | A kneeling low-level kick. Due to it hitting on frame 5, it is Zelda's fastest tilt attack and her fastest move to execute. Compared to SSB4, it has smaller range and noticeably less combo potential, mostly serving as a fast, low-committal and low-profiling poke. It can, however, combo into a dash attack and Lightning Kick at mid percentages. It can also be a KO combo into forward or back aerial, especially with poor DI. It is potent in calling out fast grounded approaches and two-framing. | |
| Dash attack | Quick Palm Shot (クイックパームショット) | 12% (clean sweet spot), 9% (clean sour spot), 6% (late) | A double palm thrust that emits a blast of magical energy from her hands. The sweetspot lasts for two frames and is located at Zelda's hands. Due to it hitting on frame 6, it is one of the fastest dash attacks in the game. To complement this, its sweetspot's high base knockback allows it KO middleweights at around 120% while near the edge of Final Destination. However, it is small, with its other hitboxes lacking KO potential, and is unsafe especially on shield. | |
| Forward smash | Shining Palm Shot (シャイニングパームショット) | 1% (hits 1-4), 13% (hit 5) | A palm thrust that emits a multiple-hitting blast of magical energy. Its last hit's respectable damage output and high knockback growth make it strong enough to KO middleweights at around 75% near the edge of Final Destination. Its multiple hits also make it useful for pressuring shields, especially when it is charged, which combined with its moderate ending lag at 26 frames, makes it hard to punish on shield with good spacing. Due to it hitting on frame 16, however, it has the highest start-up lag out of Zelda's smash attacks. | |
| Up smash | Power Steer (パワースティア) | 2% (hits 1-4), 0.8% (hits 5-6), 5% (hit 7) | Waves her arm twice in an overhead fanning motion while her hand is infused with magical energy that hits several times. It hits on frame 9, which is fairly fast for a smash attack and makes it a decent point-blank out of shield option. It has a very long duration, making it good at catching getups and landings, and has a good vertical disjoint. Its last hit KOs aerial middleweights at around 104% from anywhere on Final Destination. However, it has minimal horizontal range and 30 frames of ending lag, thus making it very punishable if not used properly. | |
| Down smash | Spinning Low Kick (スピニングローキック) | 12% (front), 10% (back) | A spinning, low-level roundhouse kick. Due to it hitting on frame 5, it is tied with Mario, Dr. Mario, Pit, Dark Pit, Ryu, and Ken's down smashes for the second-fastest smash attack of any kind in the game, being surpassed only by Meta Knight's buffered down smash. It hits on both sides, making it useful for punishing rolls, and the foot hitboxes semi-spike which is useful for setting up an edge-guard. Although it is Zelda's weakest smash attack, it is still decently strong and has rather moderate ending lag. The front hit deals higher damage, and the sweetspot KOs at around 112% on middleweights near the edge of Final Destination; in comparison, the back hit sweetspot KOs them at around 117%. | |
| Neutral aerial | Zelda Spin (ゼルダスピン) | 2.5% (hits 1-4, front), 1.5% (hits 1-4, back), 5% (hit 5) | Twirls twice with her arms outstretched and her hands infused with magical energy. Due to it hitting on frame 6, it is tied with forward and back aerials for the lowest amount of start-up lag out of Zelda's aerials. It has large hitboxes on both sides with several hits, making it rather versatile; it has a rather high damage output, especially with the front hits, can start combos when SHFFed, can string into other moves with good drift in an autocanceled short hop, or can be an edge-guarding option. The last hit has decent knockback for its type, as it can KO middleweights at around 150% at the edge of Final Destination without rage. The moved was changed from Smash 4, resulting in the multi-hits being weaker and less consistent, with opponents sometimes being able to fall out of the multi-hit portion, reducing its consistency and reliability. This issue is most salient if Zelda is fast-falling or drifting away in the multi-hit portion. | |
| Forward aerial | Lightning Kick (Front) (稲妻キック(前)) | 20% (clean foot), 4% (clean leg, late) | A magically-infused flying kick. Its sweetspot is at the tip of her foot and has both an outstanding damage output and high knockback growth, KOing middleweights at around 59% while near the edge of Final Destination, similarly to Captain Falcon's Knee Smash, though slightly weaker. At frame 6, it's quite fast for its power. Compared to back air, it has slightly less knockback, but autocancels slightly earlier and has less landing lag. However, the sweetspot only lasts for one frame, and the sourspots are very weak and unsafe, even on hit because of their extremely low damage and base knockback. Its considerable ending lag also makes it punishable at low percentages, sometimes even if it is sweetspotted. Due to the aforementioned very low damage and knockback, the sourspot can lock opponents and set up into other moves at high percents but lacks utility otherwise. Autocancels in a full hop fast fall, just one frame after Zelda reaches the peak of her short hop, similarly to Kirby's forward aerial. | |
| Back aerial | Lightning Kick (Back) (稲妻キック(後)) | 20% (clean foot), 4% (clean leg, late) | A magically-infused flying kick. It functions identically to forward aerial, with the only difference being that its sweetspot has slightly more base knockback and knockback growth, in exchange for having slightly more landing lag and auto-canceling slightly later. It is the strongest back aerial in the game, with the sweetspot KOing middleweights at around 54% while near the edge of Final Destination. However, it has the highest amount of landing lag out of Zelda's aerials. | |
| Up aerial | Condense Blast (コンデンスブラスト) | 17% (clean hit), 12% (late hit) | Leans back and turns slightly, extending her arm to create a fiery explosion above her from her index and middle fingers. It is the most damaging and second strongest up aerial in the game, behind Shulk's up aerial if the second hit is sweetspotted. It KOs middleweights at around 100% from a full hop. It has a huge vertical disjoint thanks to its large hitbox and high position, being able to clip through platforms or the bottom of stage edges. It also has a late hit that is weaker but improves its ability to juggle. However, it is slow, hitting on frame 14, which makes it tied with down aerial for the highest amount of start-up lag out of Zelda's aerials. It also has high ending lag (35 frames) and a fairly short horizontal range. It autocancels in a full hop. | |
| Down aerial | Meteor Heel (マイルドメテオヒール, Mild Meteor Heel) | 16% (clean), 5% (late, leg), 4% (late, foot) | A magically-infused stomp, also known as the Lightning Stomp. All of its hitboxes are meteor smashes and can lock opponents, with its sweetspot being the most powerful among them. Its sourspot lasts deceptively long, allowing it to potentially gimp fighters with poor recoveries, but deals even less knockback than Lightning Kicks' sourspots. It ties for the lowest landing lag out of Zelda's aerials, which allows it to be safe on shield with proper spacing, and enables its sweetspot to reliably start combos on grounded opponents. It hits on frame 14, which ties with up aerial for the highest amount of start-up lag out of Zelda's aerials, but combined with its deceptively long duration and its low ending lag, it's somewhat fast for a meteor smash. Like neutral aerial, it can also autocancel in a short hop. | |
| Grab | Holding (ホールディング) | — | Restrains the opponent with magic. Zelda's grabs have long-range and are somewhat disjointed, with her pivot grab being one of the longest non-tether pivot grabs, but also have a noticeable start-up and ending lag. | |
| Pummel | Holding Attack (ホールディングアタック) | 1.3% | A point-blank blast of magical energy. Average power and speed. | |
| Forward throw | Force Move (フォースムーブ) | 10% | Magically pulls the opponent back and then tosses them away. It is useful for sending opponents off stage, even at low percents, thanks to its high base knockback, but due to its low knockback growth lacks KO potential unless extremely close to the horizontal blast zone. However, it can combo into Phantom Slash for high damage or an early KO. | |
| Back throw | Force Back Move (フォースバックムーブ) | 12% | Magically spins the opponent and turns around with them in tow before throwing them away. In addition to being good for setting up edge guards, it is among the strongest throws in the game, KOing middleweights at around 105% while near the edge of Final Destination. | |
| Up throw | Force Top Move (フォーストップムーブ) | 11% | Magically spins the opponent overhead and then hurls them upward. It has excellent KO potential, being able to KO middleweights at around 146% from anywhere on Final Destination, and is tied with Incineroar and Lucas's up throws for the fifth strongest up throw in the game. On heavyweights and fast-fallers, it also has limited combo potential into neutral aerial at low percentages. Overall, these attributes make it one of the best up throws in the game. | |
| Down throw | Plasma Beat (プラズマビート) | 1.5% (hits 1-4), 2% (throw) | Casts the opponent onto the ground and then blasts them with fiery magic from her hands while levitating. It functions as Zelda's only reliable combo throw, launching up and behind her. Its DI can be reacted to for a guaranteed follow-up from low to mid percents. With DI in, it can combo into neutral aerial, Lightning Kick, up aerial and up special. With DI out, it can combo into a dash back forward aerial or back aerial fairly consistently with proper timing from low to mid percents. Its combo potential will be more limited the more rage Zelda has. | |
| Forward roll Back roll Spot dodge Air dodge |
— | — | ||
| Techs | — | — | ||
| Floor attack (front) Floor getups (front) |
7% | Kicks in front of herself and then behind herself. | ||
| Floor attack (back) Floor getups (back) |
7% | Kicks in front of herself and then behind herself. | ||
| Floor attack (trip) Floor getups (trip) |
5% | Kicks around herself. | ||
| Edge attack Edge getups |
9% | Performs a kick while climbing up. | ||
| Neutral special | Nayru's Love | 2%/1% (hits 1-3, near/far), 5%/4% (hit 4, near/far), 1.25× (reflected projectiles) | Creates a blue crystalline barrier with shards around herself. They deal moderate damage and reflect projectiles with 25% more damage and speed. It also grants full intangibility on frames 4-13, making it good at beating out other moves and sometimes good as a defensive option to disrupt strings. However, it has a moderate start-up for its hitboxes (frame 11) and considerable ending lag, making it punishable if used recklessly. | |
| Side special | Din's Fire | 7%-14% (sweetspot), 3.5%-7% (sourspot) | Launches a magical fireball that slowly accelerates forward. Its trajectory can be altered, albeit marginally, by holding up or down, and releasing the special button causes it to stop and then explode after a moment. It has a large hitbox, and only the explosion can be reflected or absorbed. The longer the button is held down, the farther the fireball will travel, and it will automatically detonate when it reaches its maximum distance. Its sweetspot, which is located in the inner part of the explosion, is quite powerful. When fully charged, the sweetspot can KO middleweights at around 87% while near the edge of Final Destination, but the sourspot is very weak regardless of its charge. While useful off stage on characters with bad recoveries, it is otherwise easily avoidable with an air dodge or simply clanking. Even though it is hard to land itself, it can force the opponent to use an air dodge and recover low/to the ledge. | |
| Up special | Farore's Wind | 6% (hit 1), 10%/7% (grounded hit 2 near/far), 12%/8% (aerial hit 2 near/far) | Warps in a given direction. It travels a long distance and can be angled omnidirectionally, similarly to Fox's Fire Fox, but is much faster in comparison. It deals damage to nearby opponents both while disappearing and while reappearing, and grants full intangibility during its travel. Its disappearance launches upward, enabling it to combo into its reappearance at various percents when aimed correctly. The reappearance has a sweetspot that deals high damage, high base knockback, and high knockback growth, making it potent at KOing, especially near the upper blast line. Its sweetspotted aerial reappearance can KO middleweights off the top blast zone at around 68% from the initial grounded hit (though heavily dependent on DI and LSI), while the grounded reappearance can KO middleweights at around 71% from the edge of Final Destination. The reappearance has a sourspot that, although large and safe on hit, lacks KO potential, and due to the move incurring helplessness, it is punishable if whiffed. It can be edge-canceled, a trait it shares with Sheik's Vanish, Mewtwo's Teleport and Palutena's Warp. | |
| Down special | Phantom Slash | 5.9% (level 1), 8.2% (level 2), 10.5%/11.8% (level 3) 14.1%/15.4% (level 4), 17.7% (level 5) | Conjures a Phantom piece by piece and propels it forward with another button press. Serves as a projectile with varying attacks of increasing degrees of speed, HP, power and distance. When fully charged, the Phantom can delay its attack for up to about a second, effectively controlling a large space and giving Zelda time to add pressure, perform combined combos or to retreat behind it for protection. When fully charged, the Phantom can KO middleweights at around 84% from the edge of Final Destination. Very versatile and one of Zelda's best options in the neutral game and advantage state. | |
| Final Smash | Triforce of Wisdom | 7% (initial vacuum), 3% (subsequent vacuum), 60% (main) | Uses the Triforce of Wisdom to generate a triangular portal that sucks in opponents using massive periodic shockwaves. Upon catching an opponent, they will take heavy damage before either being launched with low knockback, or being instantly KOed if they reach 100% or higher before the final hit. Very difficult to avoid on smaller stages (such as Dream Land or Mushroom Kingdom II), if not effectively impossible, due to its long duration and massive vacuum hitboxes. | |
StatsEdit
| Stats | Weight | Dash speed | Walk speed | Traction | Air friction | Air speed | Air acceleration | Gravity | Falling speed | Jumpsquat | Jump Height | Double jump Height |
|---|---|---|---|---|---|---|---|---|---|---|---|---|
| Value | 85 | 1.958 – Initial dash 1.43 – Run |
0.914 | 0.116 | 0.006 | 1.092 | 0.01 – Base 0.055 – Additional |
0.071 | 1.35 – Base 2.16 – Fast-fall |
3 | 31.55 - Base 15.24 - Short hop |
31.55 |
Announcer callEdit

English/Japanese/Chinese
On-screen appearanceEdit
- Appears facing the screen, generating magical sparkles from between cupped hands. Zelda then flourishes her hands while smiling before assuming her idle pose.
Zelda's on-screen appearance

TauntsEdit
- Up taunt: Places her hand on her hip, while generating magic and twirling it in front of her.
- Side taunt: Closes her eyes and summons Din's Fire between cupped hands.
- Down Taunt: Giggles and waves with a smile.
Zelda's up taunt.
Zelda's side taunt.
Zelda's down taunt.


Idle posesEdit
- Brushes her hair while looking back.
- Smiles and performs a pondering gesture with a finger tapping her cheek.
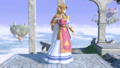
Zelda's first idle pose.
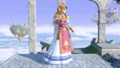
Zelda's second idle pose.


Crowd cheerEdit
| Cheer (English) | Cheer (Japanese/Chinese) | Cheer (Italian) | Cheer (Dutch) | Cheer (French) | |
|---|---|---|---|---|---|
| Cheer | |||||
| Description | Zel - da! | Zel - da! | Zeeeeel - da! | Zel - da! | Zel - da! |
| Cheer (German) | Cheer (Spanish) | Cheer (Russian) | Cheer (Korean) | |
|---|---|---|---|---|
| Cheer | ||||
| Description | Zel - da! | Zeeeeel - da! | Zel - da! Zel - da! | Zelda! |
Victory posesEdit
- Left: Creates magic with her fingertips and waves it around.
- Up: Creates fire from her fingertip and waves it around while giggling.
- Right: Summons a Phantom behind her with a snap of her finger and poses with it.


In competitive playEdit
Most historically significant playersEdit
See also: Category:Zelda players (SSBU)
 Mystearica - One of the best Zelda players in the world in 2019, most notably placing 3rd at Midwest Arena 2 defeating Ned and Goblin and 5th at 2GG: Run it Back defeating Tea, alongside some strong major/supermajor results such as 25th at Pound 2019 and 33rd at Smash 'N' Splash 5. She dropped Zelda for Palutena in 2020.
 Naskino - The best Zelda player in Europe is a top 50 player on the continent in the post-online metagame, ranking 37th on the European Ultimate Power Rankings for the first half of 2023. He has consistently placed highly at several events, most notably 13th at King Of Fields 95 3 and 17th at Temple: Hermès Edition. As of 2024, however, he has retired.
- ven - The best Zelda player from 2019 to 2022. His best results were in the early metagame thanks to strong performances such as 17th at 2GG: Prime Saga defeating ESAM and 33rd at 2GG: Kongo Saga defeating Elegant; he was also the first Zelda player ranked on a global ranking, ranking 83rd on the OrionRank Ultimate: Six Months In. Although less consistent since, he has still seen some strong results, including 9th at LVL UP EXPO 2023, tied as the best Zelda placement at a major.
 Yn - The best Zelda player in the world since 2023. He has the best peaks for a Zelda player, including placing 9th at the supermajor Maesuma TOP 11 defeating Tea and the major Maesuma TOP 14.5 "in Hyogo".
Tier placement and historyEdit
Players were initially divided on Zelda's competitive viability. Many players pointed out that her key issues, most notably her low mobility and poor endurance, were retained from previous games. On the other hand, other players were more optimistic towards the character due to improved frame data over her Smash 4 iteration, particularly on her out-of-shield options, as well as Phantom Slash's higher utility. This optimism, coupled with strong early performances from players such as Mystearica, Naskino, and ven, led many to believe the character was a solid mid-tier, with some arguing that she could be a potential high-tier.
This optimism did not last for long, as Zelda's polarizing nature became more noticeable as time went on: despite receiving buffs in updates 7.0.0 and 13.0.0 that improved her consistency, Zelda's poor mobility, disadvantage, and highly risky neutral remained critical weaknesses. As a result, Zelda players began struggling in the developing metagame, and they either dropped the character (such as Mystearica) or saw worse results and consistency than before (such as ven). Although Naskino continued to do well in Europe and Yn began making waves in Japan in early-2023, opinions on Zelda continued to decline, and as a result she sits at 75th out of 82 on the first tier list, rising two spots in the second and current one. Although it is her best placement in the series and she is far better than all her previous incarnations, she is currently placed in low-tier.
Classic Mode: Wisdom PrevailsEdit

Zelda's opponents are antagonists and she fights each of them on stages that hail from The Legend of Zelda series.
| Round | Opponent | Stage | Music | Notes |
|---|---|---|---|---|
| 1 | Great Plateau Tower | Main Theme - The Legend of Zelda: Breath of the Wild | ||
| 2 | Skyloft | Ballad of the Goddess (Original) | ||
| 3 | Temple | Temple Theme | Horde Battle. The Mii Swordfighters are dressed in the Yiga Clan Mask and Yiga Clan Outfit. | |
| 4 | Giant |
Bridge of Eldin | Dark World (for 3DS / Wii U) | A possible reference to King Bulblin. |
| 5 | Gerudo Valley | Hidden Mountain & Forest | ||
| 6 | Hyrule Castle | Great Temple / Temple | ||
| Bonus Stage | ||||
| Final | Sacred Land | Calamity Ganon Battle - Second Form (Ganondorf) Death Mountain (Ganon) |
A Maxim Tomato spawns on the stage after Ganondorf is KO'd. | |
Credits roll after completing Classic Mode. Completing it as Zelda has Hidden Mountain & Forest accompany the credits.
Role in World of LightEdit

Zelda was among the fighters that were summoned to fight the army of Master Hands.
During the opening cutscene, Zelda tried to rally the other fighters to fight the army of Master Hands by saying, "Stow your fear; it's now or never!" ("ここまで来たらやるしかないでしょう!", Now that we've made it this far, there's no turning back!), and was present on the cliffside when Galeem unleashed his beams of light. She and Mewtwo attempted to reflect the beams using Nayru's Love and Confusion, respectively, but this attempt failed, and both of them were vaporized and placed under Galeem's imprisonment along with the rest of the fighters (excluding Kirby).
Zelda was one of the many fighters that fell under Dharkon's control upon Galeem's first defeat. She is unlocked in The Dark Realm at Sacred Land, on the bottom left corner of the land which makes up the Triforce of Wisdom. The player must defeat the spirit of Impa (which is revealed by solving a clock-based puzzle) to clear a boulder that's blocking the path to her unlock battle and then the Zael and Uxie, Mesprit, & Azelf spirits. Unlocking her reveals the Triforce of Wisdom in the center of the map. If Young Link is unlocked, the boulders leading to Cloud's unlock battle and the Master Sword clear out.
Zelda is later seen among several other fighters, making their last stand against Galeem and Dharkon. She is also seen in the bad ending where Galeem emerges victorious against Dharkon, witnessing Galeem engulf the world in light.
Fighter BattleEdit
| No. | Image | Name | Type | Power | Stage | Music |
|---|---|---|---|---|---|---|
| 17 | |
Zelda | 10,100 | Temple (Ω form) | Ocarina of Time Medley |
SpiritsEdit
Zelda's fighter spirit can be obtained by completing Classic Mode. It is also available periodically for purchase in the shop for 300 Gold, but only after Zelda has been unlocked. Unlocking Zelda in World of Light allows the player to preview the first spirit below in the Spirit List under the name "???". As a fighter spirit, it cannot be used in Spirit Battles and is purely aesthetic. Her fighter spirit has an alternate version that replaces it with her artwork in Ultimate.
Additionally, different incarnations of Zelda appear as primary and support spirits.

173. Zelda
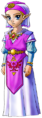
189. Young Zelda
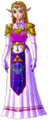
190. Zelda (Ocarina of Time)
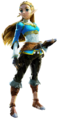
238. Zelda (Breath of the Wild)
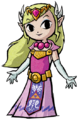
247. Zelda (The Wind Waker)

259. Zelda (Spirit Tracks)

.png)
.png)
.png)
In Spirit BattlesEdit
As the main opponentEdit
| Spirit | Battle parameters | |||||||||
|---|---|---|---|---|---|---|---|---|---|---|
| No. | Image | Name | Series | Enemy Fighter(s) | Type | Power | Stage | Rules | Conditions | Music |
| 187 | Marin | The Legend of Zelda Series | •Zelda •Link |
4,600 | Tortimer Island (Battlefield form) | •Hazard: Slumber Floor | •The floor is sleep-inducing •Timed battle (1:30) |
Tal Tal Heights | ||
| 189 | Young Zelda | The Legend of Zelda Series | •Zelda •Young Link |
3,700 | Hyrule Castle | N/A | •Take your strongest team into this no-frills battle | Ocarina of Time Medley | ||
| 195 | Malon | The Legend of Zelda Series | •Zelda |
3,600 | Smashville | •Item Tidal Wave •Item: Cucco |
•The enemy becomes more powerful after eating •Certain items will appear in large numbers |
Ocarina of Time Medley | ||
| 201 |  |
Great Fairy | The Legend of Zelda Series | •Giant Zelda |
9,500 | Fountain of Dreams (Battlefield form) | •Health Recovery | •The enemy's special moves have increased power •The enemy is healed significantly when the enemy's at high damage •The enemy's FS Meter charges quickly |
Ocarina of Time Medley | |
| 215 | Din | The Legend of Zelda Series | •Zelda |
4,000 | Bridge of Eldin (Battlefield form) | •Hazard: Lava Floor | •The floor is lava •The enemy favors side specials |
Ballad of the Goddess (Remix) | ||
| 216 | Nayru | The Legend of Zelda Series | •Zelda |
3,500 | Bridge of Eldin | •Temporary Invincibility | •The enemy will occasionally be invincible after a little while •The enemy favors neutral specials |
Ballad of the Goddess (Original) | ||
| 236 | Hilda (The Legend of Zelda) | The Legend of Zelda Series | •Zelda •Bunny Young Link |
9,100 | Temple | •Assist Trophy Enemies (Nightmare) | •Hostile assist trophies will appear | Lorule Main Theme | ||
| 238 | Zelda (Breath of the Wild) | The Legend of Zelda Series | •Zelda •Link •Inkling •Donkey Kong •Falco •Zero Suit Samus |
9,200 | Great Plateau Tower | N/A | •Stamina battle •Reinforcements will appear after an enemy is KO'd •Defeat an army of fighters |
Main Theme - The Legend of Zelda: Breath of the Wild | ||
| 258 |  |
Phantom | The Legend of Zelda Series | •Clear Zelda |
3,800 | Spirit Train (Battlefield form) | N/A | •The enemy's down special has increased power •The enemy favors down specials •The enemy is invisible |
Full Steam Ahead | |
| 582 | Hinawa | EarthBound Series | •Zelda •Lucas |
13,100 | Yoshi's Island | •Easy to Launch | •All fighters are easy to launch | Mother 3 Love Theme | ||
| 659 | Mist | Fire Emblem Series | •Zelda •Ike |
3,500 | Reset Bomb Forest (hazards off) | •Health Recovery •Defense ↑ |
•The enemy has increased defense when the enemy's at high damage •The enemy is healed when the enemy's at high damage |
Victory Is Near | ||
| 1,053 | Maria Renard | Castlevania Series | •Zelda •Falco •Charizard •Incineroar |
3,700 | Reset Bomb Forest (hazards off) | N/A | •The enemy starts the battle with a Cucco | Slash | ||
| 1,065 | Charlotte Aulin | Castlevania Series | •Zelda •Richter |
3,700 | Bridge of Eldin (Battlefield form) | N/A | •The enemy's special moves have increased power •The enemy favors side specials •Reinforcements will appear during the battle |
Hail from the Past | ||
| 1,174 | Jenna | Golden Sun Series | •Zelda |
3,500 | Temple (Battlefield form) | •Assist Trophy Enemies (Isaac) | •Hostile assist trophies will appear •The enemy favors side specials |
Battle Scene / Final Boss - Golden Sun | ||
| 1,236 |  |
Shop Assistant | Style Savvy Series Nintendo presents: Style Boutique Series |
•Zelda |
3,600 | Tomodachi Life | •Item: Transforming Types | •The enemy is easily distracted by items | Style Savvy: Trendsetters | |
| 1,241 | Yuri Kozukata | Fatal Frame Series Project Zero Series |
•Zelda |
9,200 | Luigi's Mansion | •Assist Trophy Enemies (Yuri Kozukata) | •Hostile assist trophies will appear | Main Theme - Luigi's Mansion (Brawl) | ||
| 1,365 | Nakoruru | SAMURAI SHODOWN Series | •Zelda •Tiny Falco |
3,800 | Yoshi's Island (winter) | •Attack Power ↑ •Item: Swords |
•Defeat the main fighter to win •Stamina battle •The enemy has increased attack power when the enemy's at high damage |
Banquet of Nature - SAMURAI SHODOWN | ||
| 1,442 | Aerith | FINAL FANTASY Series | •Zelda •Cloud |
7,500 | Fountain of Dreams | •Health Recovery | •Defeat the main fighter to win •The enemy is healed after a little while |
Aerith's Theme | ||
| •Mii Swordfighter •Cloud | ||||||||||
| 1,489 |  |
Kokorowa | Sakuna: Of Rice and Ruin | •Zelda •R.O.B. |
3,700 | Suzaku Castle | N/A | •Defeat the main fighter to win •The enemy favors down specials |
Boss 1 - Sakura Samurai: Art of the Sword | |
As a minionEdit
| Spirit | Battle parameters | Inspiration | |||||||||
|---|---|---|---|---|---|---|---|---|---|---|---|
| No. | Image | Name | Series | Enemy Fighter(s) | Type | Power | Stage | Rules | Conditions | Music | Character |
| 1,107 |  |
Fighting Alloy Team | Super Smash Bros. Series | •Captain Falcon Team •Zelda Team •Mario Team •Kirby Team |
3,300 | Final Destination (Battlefield form) | N/A | •Take your strongest team into this no-frills battle | Cruel Smash | Blue Alloy | |
| 1,246 | Orville | Takt of Magic | •Robin •Pit •Zelda |
3,400 | PictoChat 2 | N/A | •Defeat the main fighter to win | Struggle Against Chaos | Charlotte (Takt of Magic) | ||
| 1,328 |  |
Hero's Comrades | DRAGON QUEST Series | •Ike •Tiny King Dedede •Zero Suit Samus •Sheik •Tiny Robin •Zelda •Link |
13,300 | Yggdrasil's Altar | N/A | •The enemy has increased melee-weapon damage and move speed •The enemy's smash attacks have increased power •Stamina battle |
The Hero Goes Forth with a Determination | Serena | |
| 1,411 |  |
Duran & Angela | Mana Series | •Roy •Zelda •Tiny Bunny Kirby |
9,200 | Gaur Plain (Ω form) | •Item: Ramblin' Evil Mushroom | •Reinforcements will appear after an enemy is KO'd | Filled with Hope | Angela | |
| 1,456 | Seth & Gloria | Bravely Default Series | •Mii Swordfighter •Zelda |
9,400 | Delfino Plaza (Large Island) | •Health Recovery •Defense ↑ •Item: Swords |
•The enemy has increased defense after a little while •The enemy is healed when the enemy's at high damage •The enemy's melee blows will heal them when they hit |
Jergingha - Planet Destruction Form | Gloria | ||
| 1,461 | Lora | Xenoblade Chronicles Series | •Lucina •Zelda •Cloud |
3,800 | Jungle Japes (Battlefield form) | N/A | •Defeat the main fighter to win | Battle!!/Torna | Haze | ||
| 1,514 | Rauru | The Legend of Zelda Series | •Mewtwo •Zelda •Giant R.O.B. •Robin •Inkling •Charizard •Pit |
13,000 | Temple (Battlefield form) | N/A | •Stamina battle •The enemy favors neutral specials •Reinforcements will appear after an enemy is KO'd |
Calamity Ganon Battle - Second Form | Zelda (Tears of the Kingdom) | ||
As an allyEdit
| Spirit | Battle parameters | Inspiration | |||||||||
|---|---|---|---|---|---|---|---|---|---|---|---|
| No. | Image | Name | Series | Enemy Fighter(s) | Type | Power | Stage | Rules | Conditions | Music | Character |
| 243 |  |
Calamity Ganon | The Legend of Zelda Series | •Giant Ganondorf •Ally: Zelda |
13,900 | Great Plateau Tower (Ω form) | •Sudden Damage | •You lose if your CPU ally is KO'd •You'll occasionally take sudden damage after a little while •The enemy is giant |
Calamity Ganon Battle - Second Form | Zelda (Breath of the Wild) | |
- ^ This alternative occurs when the corresponding DLC has been purchased and downloaded.
Alternate costumesEdit

| |||||||

|

|

|

|

|

|

|

|
GalleryEdit
Artwork of all The Legend of Zelda characters, as posted on the official Legend of Zelda Twitter account.
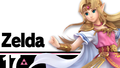
Zelda's fighter card.
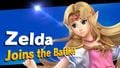
Zelda's unlock notice.
Zelda idling on Temple.
Using her neutral aerial in her red costume on Tortimer Island.
Zelda using her forward tilt on King Dedede on Coliseum.
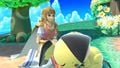
Kneeling next to a sleeping Pichu on Tortimer Island.
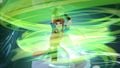
Using Farore's Wind on Luigi's Mansion.
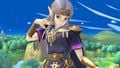
Idling in her dark costume on Spirit Train.
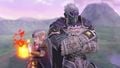
Zelda taunting next to Ganondorf on Hyrule Castle.
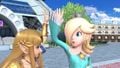
Zelda giving Rosalina a high-five on Prism Tower.
Firing a Super Scope at Yoshi on Mario Galaxy.
Taunting near Donkey Kong on Kapp'n's bus on Temple.
Zelda, Ridley, Jigglypuff, and the Ice Climbers on Summit.
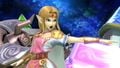
Using Phantom Slash on Mario Galaxy.
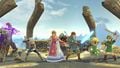
With all playable The Legend of Zelda veterans on the Great Plateau Tower.
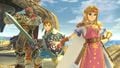
With Link and Ganondorf on the Great Plateau Tower.
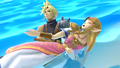
Zelda with Cloud in Tortimer Island


Fighter Showcase VideoEdit
TriviaEdit
- Masahiro Sakurai chose to base Zelda's design in Ultimate off of her A Link to the Past and A Link Between Worlds incarnations instead of her more recent Breath of the Wild incarnation because that version of Zelda, according to him, "is more into research than fighting."[1][2][3][4] He also mentioned in a subsequent Nintendo Treehouse Live event that he chose this design to better represent The Legend of Zelda franchise as a whole instead of having all of its fighters come from the same game.
- Zelda's current default design was previously an alternate costume in terms of coloration of her model, whereas her previous default design based on Twilight Princess has now become an alternate costume in that same regard.
- Coincidentally, Zelda was revealed in SSB4 at the same time A Link Between Worlds was released, which inspired her current design.
- Ironically, despite her Twilight Princess incarnation being retired after this game, even though Ganondorf's design from that game is still directly referenced via a spirit, as well as Link's Wolf form from that game, Zelda is the only returning Zelda character from SSB4 that doesn't have her Twilight Princess design directly referenced in Ultimate at all.
- Zelda can be unlocked by Kirby via his Classic Mode route, which may reference their team-up from Brawl's Adventure Mode, The Subspace Emissary.
- Zelda is currently the only playable The Legend of Zelda character in Ultimate whose design originates from either a handheld game or a non-3D game.
- She is also the only Zelda character whose design comes from the "Fallen Hero" timeline.
- The World of Light opening marks Zelda's first spoken line of dialogue in the Smash series. This is also the first time in the series that any Zelda character is voiced in English.
- Zelda is one of the few characters to have her cutscene dialogue dubbed in English, but otherwise keep her Japanese voice actress's battle grunts, after Fox and Falco in Melee. She is also the only character to speak English in a cutscene while still having a Japanese KO line (with her yelling "いやぁっ!" (Nooo!)).
- Zelda speaks English in all Western language versions of Ultimate, unlike Breath of the Wild, which was dubbed into multiple languages.
- She is the second Zelda character to speak in Smash, the first being Sheik in Melee.
- Zelda is the only The Legend of Zelda character whose animations are mirrored.
- Zelda's Classic Mode route is vaguely similar to Diddy Kong's, as both characters fight villains and/or final bosses of various series for opponents.
- Zelda, Peach, Falco, Olimar, Duck Hunt, and Dark Pit are the only fighters to appear as allies in Spirit Battles.
- Ultimate marks the first time Zelda's Kirby hat no longer resembles Young Zelda's wimple from Ocarina of Time, despite her appearance in Melee being based on her adult design from the same game, and her Brawl and SSB4 designs both being based on her appearance in Twilight Princess, which also makes it the first time said Kirby hat is based directly on how she appears in-game.
- Gravity on Zelda's hair is temporarily disabled whenever she performs her hair-brushing idle pose.
ReferencesEdit
- ^ a b Masahiro Sakurai (translated by Brando) (2018-06-20). "Smash is Special – Part 1" Sakurai's Famitsu Column Vol. 557. SourceGaming.info (original Japanese publication in Famitsu). Retrieved on 2018-06-20. “Zelda's new design is based on "The Legend of Zelda: A Link to the Past"”
- ^ a b Dairantou Smash Bros. SPECIAL (E3 2018). Nintendo (2018-06-12). Retrieved on 2018-07-08. “Breath of the Wild Zelda isn't interested in combat, so her design is from A Link to the Past.”
- ^ a b Super Smash Bros. Ultimate (North America) - Palutena's Guidance: "Yes, that's Zelda from A Link to the Past. She's a descendant of the Seven Sages. When she was captured, she used telepathy to ask Link for help."
- ^ a b Super Smash Bros. Ultimate - E3 2018. Nintendo (2018-06-12). Retrieved on 2018-07-08. “In The Legend of Zelda: Breath of the Wild, Zelda's more into research than fighting, so her design is from The Legend of Zelda: A Link Between Worlds”.
- ^ PushDustIn on Twitter: Zelda is confirmed to be based on Link to the Past AND Link Between Worlds.