Zelda (SSBU)/Down tilt
Overview[edit]
A fast, short low kick. Down tilt is one of Zelda’s few normals with ordinary priority. It is able to clank regardless of damage, even with Ganondorf’s forward smash. However, because it is so weak, with strong moves, only Zelda will enter rebound, putting her at a heavy frame disadvantage. Its low hitboxes also make it situational for the specific purpose of clanking.
Down tilt is normally a decent -10 on shield, which can be safe on many characters, especially when spaced. Zelda crouches quickly, which helps her to low-profile many moves both in OOS situations and in general. She remains crouched, allowing her to hold down to seamlessly interrupt the move into her actual crouch.
It is also one of Zelda's main combo tools. At very low percents, its base knockback is too low to normally combo into anything. At low-mid percents, it can combo into down smash, but only on fighters with a favorable combination of a high gravity, height and/or fall speed; it may also combo into itself, but this is less reliable due to its small range. At mid percents, it can combo reliably into dash attack, then into Lightning Kick. However, the opponent will start incurring tumble shortly after LK becomes possible; its combo window is heavily dependent on DI. With DI in, it can be a devastating KO confirm until high percents. DI out will quickly limit the follow-up to a sourspotted dash attack before completely preventing any follow-ups with its high knockback scaling. Due to down tilt's speed, however, the opponent will often not DI properly.
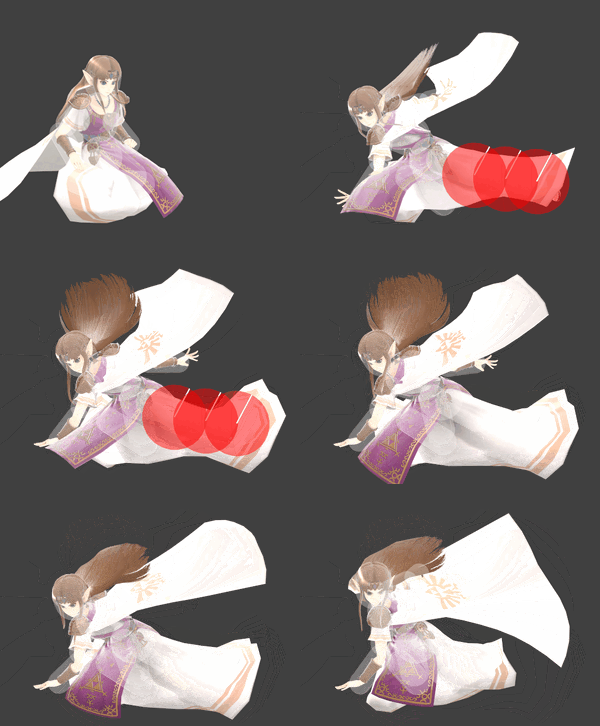
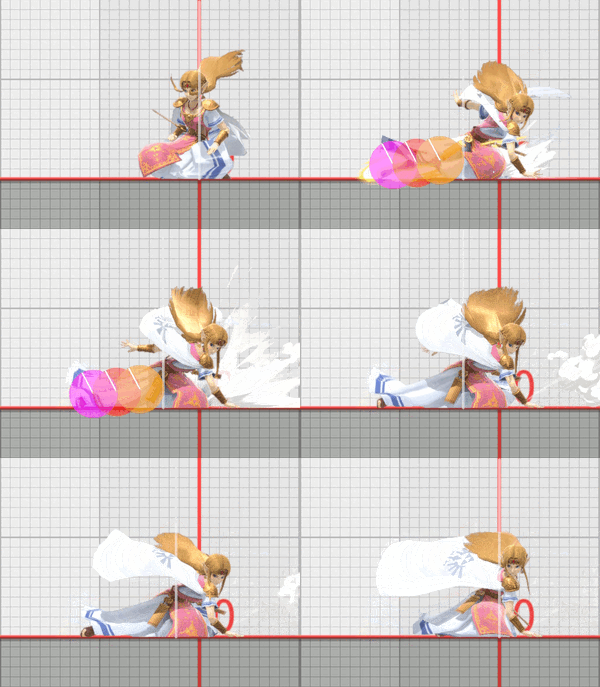
Down tilt has the quirk of launching backward more often than normal. The main reason for this occurrence is that Zelda shifts up to about 4 units forward during her leg extension; her root point is farther out on frames 2-19, with the main part of her body deceptively behind the root. Backward launches usually happen with a lack of jostling: namely, after the i-frames of opponent getups and rolls that allow the opponent and Zelda to pass through each other partially, on falling aerial opponents, or on platforms when hitting opponents jumping from below. In general, if a hit opponent is not clearly past Zelda’s torso, they will likely technically be behind her. This is harder to react to, and is undesirable when launching opponents toward center stage. However, it technically has better combo potential due to a smaller relative launch distance, as well the lack of jostling not pushing the opponent away during the move's startup. Being prepared for the typical conditions for backward launches, or preemptively spacing correctly to prevent it, are both important.
The hitboxes last for 7 frames, which is unusually high relative to its interruptibility and gives the move many uses. It can catch dashes in, and at ledge, down tilt is somewhat spammable. It can cover neutral getup and ledge jump, while discouraging getup attack due to its speed allowing Zelda to quickly shield. If the opponent ledge rolls, Zelda can often dash attack back on reaction. Down tilt is also her easiest normal to two-frame with. At mid percents, it can KO confirm into a run-off forward aerial, and at high percents, it can combo into a Phantom. In any case, landing the late frames will improve the move's follow-up potential and make it safer on shield (potential maximum safety of -4).
Overall, down tilt has small hitboxes with short range, and its knockback values combined with its launch angle make its follow-up potential limited and inconsistent. Despite these flaws, it has good hurtbox shifting and the potential for early KOs, is her quickest move to execute, and has an excellent combination of speed and hitbox duration, making it an essential, low-committal CQC option.
Hitboxes[edit]
Timing[edit]
| Hitboxes | 5-11 |
|---|---|
| Interruptible | 22 |
| Animation length | 49 |
Lag time |
Hitbox |
Interruptible |
|


