Zelda (SSBU)/Down smash
Overview[edit]
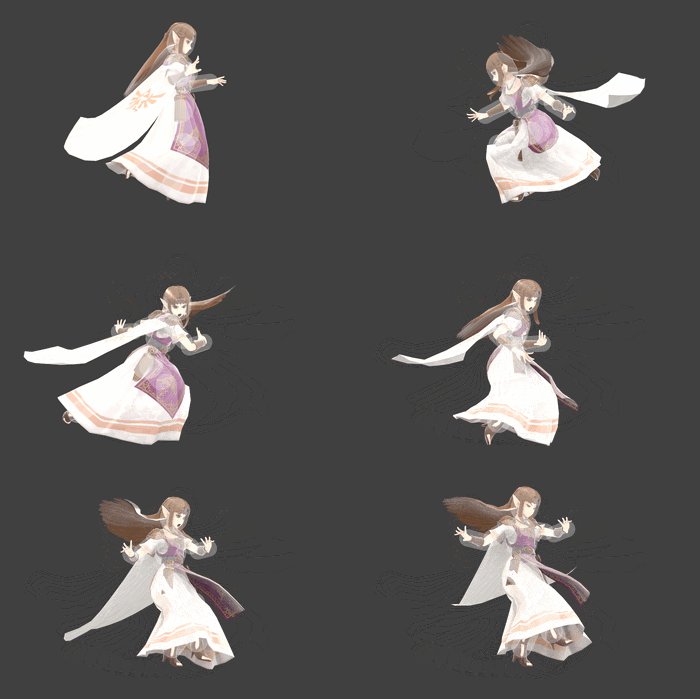
An ordinary spinning kick, being one of Zelda's few normals that is not transcendent. It hits on both sides with decent horizontal range (about the same as Mario’s down smash), giving it utility in catching rolls. The back hit has marginally less horizontal range, but its sourspot extends farther up and inward toward Zelda's body; it deals less damage than the front, but is only slightly weaker due to its higher knockback scaling, KOing around 5% later.
While one of the weaker down smashes in the game, it still has respectable power, with its KO potential off the side blast zones being nearly identical to Cloud's back aerial. At frame 5, it is very fast, especially for a smash attack; with a FAF of 38, it's one of the fastest interruptible smash attacks in the game and can be hard to punish on whiff. Furthermore, unlike the other frame 4 or 5 down smashes, it has by far the lowest launch angle, and has the benefit of its front hit being the stronger one. Its low hitbox position also provides especially important coverage against low-profiles, such as many landing animations and/or short fighters such as Kirby, Squirtle and Pikachu. All these traits combined make it a surprisingly strong and effective CQC option on the ground.
Notably, down smash's sweetspots, located at her foot, are medium-sized with high priority, making it reliable and easy to land compared to the precise sweetspots of forward tilt and Lightning Kick. Down smash cannot steal stocks like her signature finishers can, but it is very fast and one of her most consistent finishers at high percents. The leg sourspots have low KO potential due to not semi-spiking, but will rarely land due to having low priority. On grounded opponents, the sweetspot will almost always land over the sourspot.
Both foot sweetspots launch at among the lowest semi-spike angles in the game, approaching the notorious Gates of Hell angle. At higher percents, even if it doesn't outright KO, it is especially brutal on characters who either have poor recoveries or have burned their double jump, severely limiting their recovery path and making edgeguarding options like Nayru's Love and down aerial very hard or impossible to avoid, or even Din's Fire. Consequently, in matchups against fighters with exploitable recoveries, it becomes a disproportionately good move to opt for due to having high potential to set up a gimp. Due to the angle being so low, it is sometimes possible for the opponent to bounce off the ground with DI down if they are not launched close enough to the ledge; this significantly reduces the launch distance and usually eliminates any edgeguarding opportunity. However, this is fairly rare, due to the time for the opponent to react being short, as well as the risk of an even lower angle if the opponent misjudges the ability to bounce.
The sweetspots reach slightly below ledge, with the front hit preferred due to its better power and near-instant release from a charge. The short hitbox duration (2 frames) makes it difficult to land two-frames, and the lowest ledge hangs are completely immune to it; however, successfully two-framing with a charged down smash is very rewarding due to the combination of excellent knockback and the harsh launch angle, potentially taking stocks very early, especially if the opponent has a poor recovery and/or has burned their double jump. In comparison, it is much easier to punish ledge hangs and re-grabs. Against even the more difficult up specials to punish, it can still be effective, as successfully parrying the hitbox will allow a very quick down smash relative to the opponent.
One of down smash’s main limiting factors is its low base knockback, which makes it unsafe on hit at low percents, while being unable to set up an advantage state until its knockback scales enough with higher percents. Compared to her other fastest moves, jab (frame 4) and down tilt (also frame 5), it has less utility at low percents, but is a much more effective punish at higher percents due to a consistent single hit either outright killing or setting up a good edgeguarding opportunity; jab and down tilt in comparison send at much higher trajectories, and their kill confirms are inconsistent. Down smash has the best horizontal range; it also reaches very slightly lower than down tilt, and covers the ground better than jab; however, it has more ending lag than both, making it riskier in situations where the confidence of a punish is low. Knowing which of the three to use at various percentages in the heat of battle is important to optimizing Zelda’s punish game.
Update history[edit]
 Down smash has more knockback scaling (86 (front)/96 (back) → 89/100).
Hitboxes[edit]
Timing[edit]
| Charges between | 2-3 |
|---|---|
| Hit 1 | 5-6 |
| Hit 2 | 13-14 |
| Interruptible | 38 |
| Animation length | 59 |
Lag time |
Charge interval |
Hitbox |
Interruptible |
Trivia[edit]
- This move has a 20% bonus chance to trip. However, the ID 0 hitboxes can only cause it on slants due to their launch angle.
- Down smash's voice clip is recycled in the World of Light opening scene when Zelda casts Nayru's Love.
|
