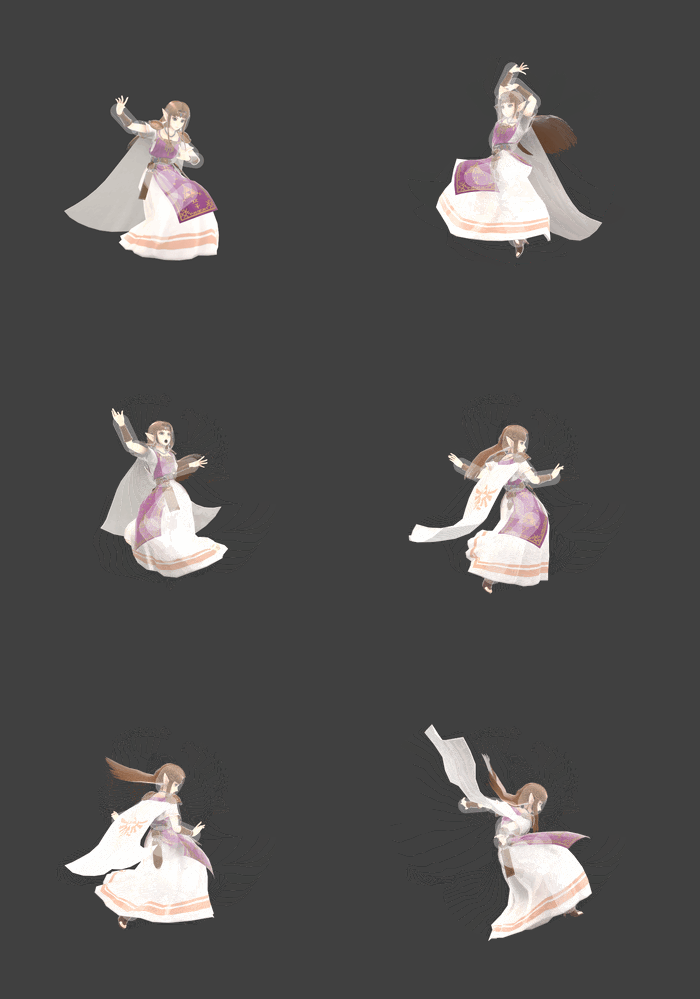
Zelda (SSBU)/Up special
Overview[edit]
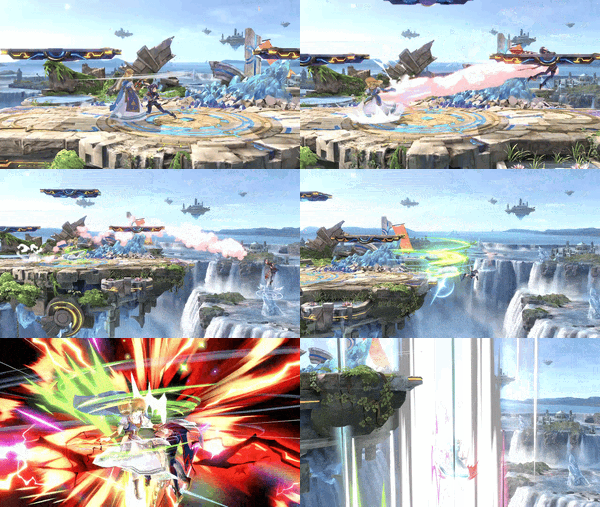
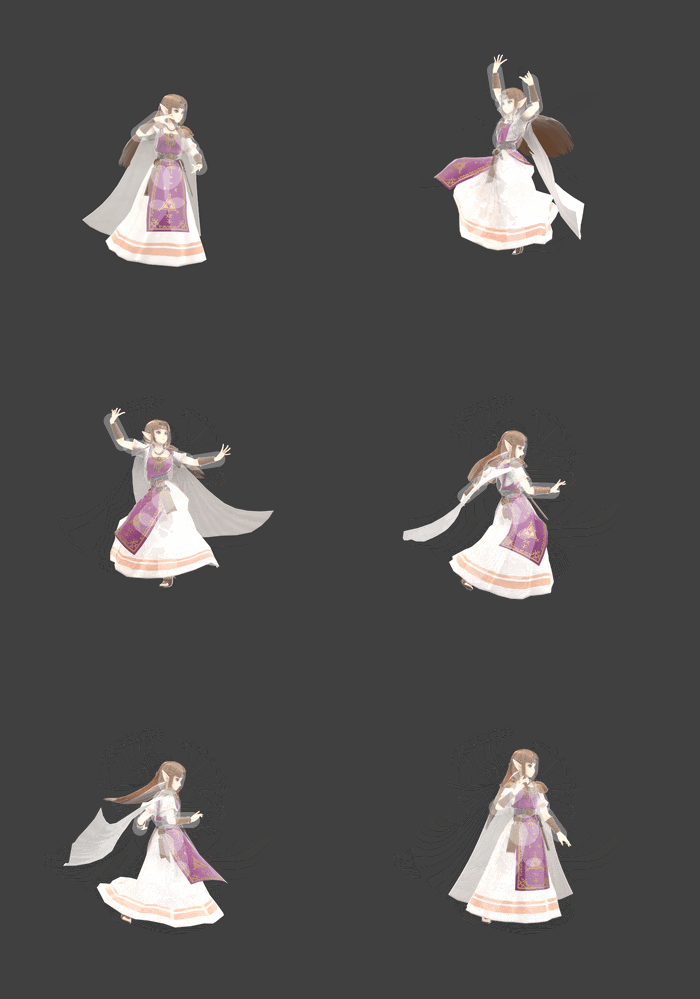
Zelda twirls to whip up a green vortex around herself before vanishing and reappearing shortly afterward. Farore's Wind is one of the most unique recoveries in the game. Among all teleports, it travels the farthest and has several hitboxes. Overall, Farore's Wind is highly complex and versatile, serving as one of the best recoveries in the game, a great out of shield option and a kill move.
Teleport mechanics[edit]
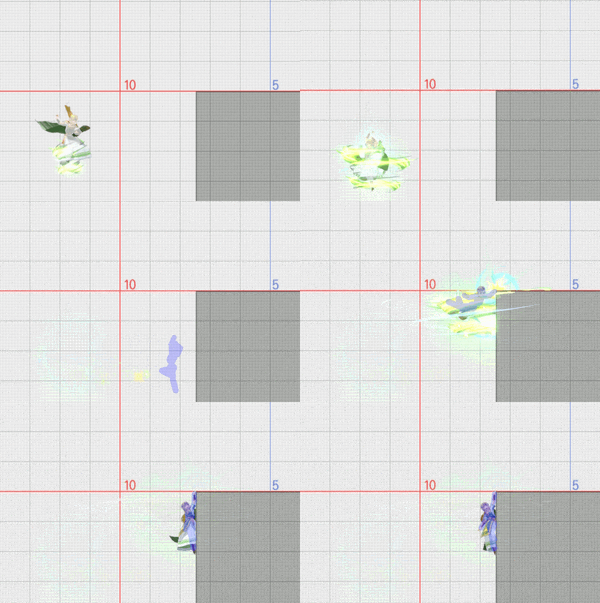
Although colloquially referred to as one, as with all so-called teleports in Smash, Farore’s Wind is not a true teleport where one is instantly transported to another point. Instead, upon disappearing, she moves in a linear direction at a fast, constant speed while invisible and fully intangible, reappearing on frame 35 with the hitboxes, or interrupting the move early with a ledge snap. There are situations where the mechanics of this linear movement is salient; for example, Zelda can pass adhesive projectiles like C4 to opponents (or vice versa), and trigger Isabelle’s Lloid Trap by traveling physically through them.
It is on frame 17 (the frame she disappears) only that the travel direction is determined. Zelda will move in a straight line at a constant speed, with the following interactions with surfaces:
- If a surface interrupts her path, her direction will then translate straight along its edge.
- Against orthogonal surfaces, a completely horizontal direction will default to upward, and a completely vertical direction will default to the direction Zelda is facing.
- The exception is if Zelda teleports straight upward into an orthogonal surface; her momentum will stop completely with no translation at all.
- Against orthogonal surfaces, a completely horizontal direction will default to upward, and a completely vertical direction will default to the direction Zelda is facing.
- If standing on a platform, she can teleport downward through it without interference.
- If standing on stage, any downward component will not be translated, allowing her teleport to be in place (fully downward direction) or effectively have shortened distances to varying degrees (diagonally downward directions).
Continuing to hold the stick or changing the stick angle during the teleport has no effect on the direction. However, holding down disables ledge snaps, so if Zelda is still holding a downward direction as her invisible body passes ledge, she will self-destruct by reappearing too far below ledge to grab it. Snapping to ledge from above is more difficult the shorter the distance to ledge, as Zelda must hold the stick downward late enough so that the travel direction registers on disappearance, but also let go before she passes ledge.
Zelda can slightly shorten her teleport; technically, this reduces the teleport’s travel speed (which consequently shortens the distance), not the duration, as the reappearance hitbox will still be frame 35. This can be done by tilting the stick, or with a C-stick tilt input in the few frames right before she disappears; if the tilt is not inputted in the proper window, then the direction will default upward at normal speed.
Recovery[edit]
The teleport’s default direction is straight upward. Therefore, it is easiest to snap to ledge from directly below. Another easy angle is a straight horizontal; however, there is a risk of accidentally reappearing on stage if Zelda starts her teleport from too high. Relying on these angles requires Zelda to slowly drift and fall toward them, leaving her vulnerable to edgeguards for longer. Thus, mastering the timing of downward teleports especially is crucial, since snapping to ledge from above stage level is faster and will make her immune to two-frames. It is good practice to release the stick as soon as Zelda disappears, only holding downward if intending not to snap to ledge; this will help achieve consistent recoveries from even the shortest distances.
Farore’s Wind is not transcendent, although it has anti-rebound properties; any clank lag will delay the timing of the teleport. For example, if Zelda is attempting to recover, but her starting hitbox clanks with a hitbox (most often of projectiles), she must ensure that the desired direction is read at the moment of disappearance. If failing to account for hitlag, she risks an easy punish on a misinputted direction, or even SDing.
Overall, a skilled Zelda is extremely difficult, if not outright impractical to attempt to edgeguard and two-frame due to the following traits of the move:
- Its omnidirectional control allows her to recover very early from hitstun, not having to fall into a strict range to recover to ledge.
- Recovering from above stage level prevents her two frames of ledge grab vulnerability.
- Unlike other teleports, it has large and strong hitboxes both on startup and on reappearance, with the reappearance hitboxes in particular being very large (nearly as large as a max-charged Din's Fire). The reappearance sweetspot is very strong.
- Zelda has uninterrupted intangibility during the teleport, so it cannot be directly stopped.
- Holding down allows Zelda to ignore ledge grab. Zelda can thus teleport past ledge and the opponent’s hitboxes and land a powerful punish on a two-frame attempt.
- If spaced maximally, Zelda can reappear with the hitbox and then snap to ledge immediately, being unpunishable even on parry.
- There are many timing mixups for Zelda’s ledge grab, and positional mixups for a full reappearance, often with a potential of at least 8 different types of teleports from a single starting point. This is due to Zelda being able to:
- Travel in a straight direction from her position toward ledge, or into the stage edge at various directions for more complex trajectories.
- Use tilt inputs, which forces the opponent to deal with two different possible teleport speeds. Since she is invisible, these differences are visually indiscernible, except for extremely minute and quick differences in camera panning and subtle particle effects.
Mastering Farore’s Wind’s movement options will allow Zelda to quickly choose between snapping to ledge or teleporting into the opponent to punish their two-frame attempt, making her practically immune to edgeguards and two-frames. As her recovery is the saving grace of her overall rough disadvantage state, it is essential in compensating for her otherwise poor endurance.
In terms of raw distance, Zelda is still vulnerable without a double jump. Although her floaty stats allow her to linger off stage for a relatively long duration, she lacks the ability to recover from very deep off stage. Zelda has a low air speed when in special fall, but she can still drift to a small degree; therefore, in dire recovery situations, she may have to prioritize a more vertical angle to be able to drift to ledge during special fall.
Edge canceling[edit]
On reappearance, Zelda retains a small fraction of momentum from the aforementioned linear movement. In the air, this can help her make it to ledge even if the teleport per se didn't quite take her far enough. On the ground, this allows her to edge cancel, being actionable the moment she slips off the ground. Due to her high traction, the distance she slides is minimal, making the technique very difficult compared to moves like Warp; however, it is much harder to challenge Zelda’s reappearance head-on, with her hitbox being impossible to prevent. Successfully edge canceling gives Zelda extraordinary options, such as escaping juggles with huge hitboxes and almost no lag, circumventing her normally slow speed to close distances faster, and having a significant frame advantage on shield. The exact lag varies slightly depending on her distance from the edge on reappearance, though it is overall negligible across the board.
There are various setups to facilitate edge cancels, such as wavelanding backward onto the edge of platforms, though at the cost of making the cancel extremely telegraphed. More effective setups involve natural movements such as running off platforms. The most effective cancels are performed from an incidental but recognized position, as the only way for the opponent to stay on par with Zelda in these cases is unrealistically to also know when she is in the exact positions. Throughout a match, Zelda will often inadvertently end up at the correct distance for a cancel, such as after moves with set distances like dash attack. Proficient players can even adjust their air drift to land in a cancel position.
Using relative positions to landmarks on the stage will help with recognition. It is more effective to perform the teleport immediately, though she may delay it, typically by setting up a Phantom, as simply standing in place without doing anything will make the nature of her position obvious. On the flip side, Zelda can exploit the knowledge differential, playing mind games and exerting passive pressure by simply standing in the vicinity, even if it isn’t actually the correct distance. Edge cancels starting from midair are also possible, but markedly more difficult due to the added variable of the y-axis. There are theoretically infinitely many air-to-ground cancels, but these are extraordinarily difficult to learn as a consistent tool.
Notches can expand her teleport point options with reasonable consistency. Shortened teleports also double her possible edge cancels, but the precision of the tilt input makes it unforgiving. The potential returns of edge cancels naturally diminish the shorter the distance, as short-ranged cancels no longer benefit from being faster than her dash.
In any case, edge cancels must be done with extreme confidence, as any botched cancel will result in high lag, and at worst, a self-destruct when overshooting stage ledges. It is also not necessarily always the best option, as teleporting to ledge can cede stage control. Although not as overall flexible as Palutena’s teleport, it is a powerful trump card and surprise option when used well.
Out of shield[edit]
Farore's Wind doubles as an excellent out of shield move. On startup, it covers both sides with a deceptively large hitbox, and is her fastest OOS option at frame 6. It is also her only OOS option that hits ground level, allowing it to reliably punish any degree of pancaking—in fact, it hits lower than down tilt and down smash. This also makes it an unreactable out of shield punish on ledge hangs. Overall, aside from disjoints and extremely low-lag moves, it can punish a surprisingly high number of moves on shield. Even low-lag aerials that are commonly considered -5 on shield or better are often not landed low enough to be that safe in practice. Zelda can reappear on the ground after launching the opponent high up with the first hit, which is her most reliable way to escape shield pressure and reset neutral, with the bonus of inflicting small damage. It is also effective when facing platform pressure, as many attempts at sharking can be punished if not spaced well.
It is preferred to reserve it for true punishes. Otherwise, opponents may also clank with the disappearance hitbox, which will leave them unharmed at a heavy advantage, while Zelda must continue the teleport with its high ending lag.
The Elevator[edit]
Uniquely, the initial hit launches vertically and can uniquely combo into the aerial reappearance, whose sweetspot is very strong with high base knockback and sends diagonally upward. This combo, colloquially known as "The Elevator," is most often used from the ground out of shield. The opponent can DI the initial hit, and will often do so inadvertently. In such cases, Zelda must angle her teleport slightly left or right to connect the reappearance hit. Reacting to the DI is difficult and perhaps unrealistic, but Zelda can try to predict the opponent's DI based on their drift prior to the hit.
Aside from DI, there are other significant potential pitfalls in the move’s consistency. If grounded opponents are actionable before they get hit, they can crouch cancel the first hit, allowing them to escape the range of the reappearance entirely. The first hit's knockback is also not fixed, so at low percents it may be too weak to combo. It will eventually then be too strong to combo at higher percents, especially with rage. To an extent, excessive knockback can be compensated with landing the first hit high relative to the opponent; insufficient knockback can be compensated with landing the first hit low relative to the opponent, or with tilt-inputted teleports (which can also counter crouch cancels).
Compared to the initial grounded hit, the aerial one covers all around Zelda in a sphere, with less horizontal range but better vertical coverage. It can still combo into the aerial reappearance, but sends more diagonally and has a significantly smaller combo due to its comparatively low base knockback and high knockback growth. It can also be a quick get-off-me option on greedy approaches and edgeguard attempts, often stage spiking almost unreactably; recognizing when it may combo and consequently holding down to hit them again instead of snapping to ledge will be very rewarding. Overall, it is more risky and situational compared to the grounded version’s OOS advantage.
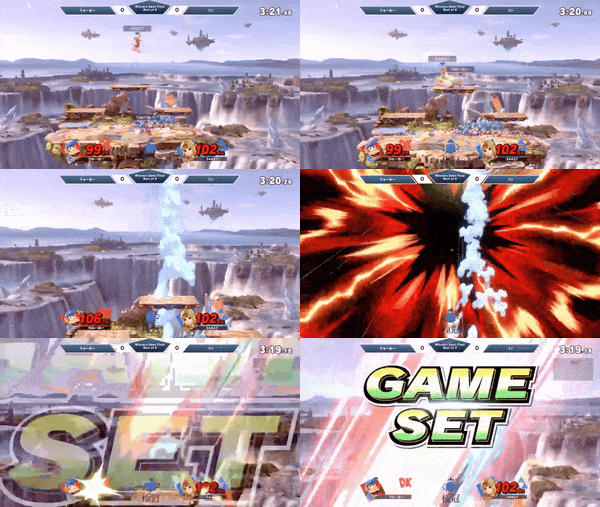
Successfully comboing Farore’s Wind into itself can be very rewarding in early KOs off the top blast zone. This is especially true with rage, on platforms and/or with improper DI (i.e. in and/or up). Farore’s aerial reappearance is a rare move in Ultimate that KOs off the top, but with fall speed and gravity still having a significant effect on the vertical knockback. For example, it will KO Samus off the top noticeably earlier than on Ridley, despite the latter being lighter. Fighters with low fall speeds and high gravities have the worst relative survivability against the move (ex. Squirtle), while fighters with high fall speeds and low gravities (ex. Simon, King Dedede) have the best.
The large sourspot provides decent room for error, but whiffing the reappearance entirely makes Zelda quite punishable, especially by fast-fallers who can return to the ground faster than her. Overall, this combo is a high-risk, high-reward option.
As direct offense[edit]
With its mix of offense from the hitbox and defense and speed from the intangible teleport, the reappearance can be used on its own, though situationally. It cannot be comboed into from anything, but it quickly transports Zelda with generous, full intangibility at the cost of high ending lag.
The grounded reappearance sends at a horizontal angle; even though it only deals 10%, it is deceptively strong at early KOs, especially near the ledge, being very similar in knockback to her sweetspotted forward tilt. It is her fastest option to punish opponents from a distance, e.g. in anti-zoning or catching landings, functioning like a slower, offensive spot dodge or long-ranged roll. Knowing the teleport’s distances from its various angles, especially downward angles on the ground, will make committal long-ranged options very risky for the opponent. With active awareness and good reaction, it can be an extremely effective punish tool.
The aerial reappearance (12%) can snipe opponents for early KOs, with even the sourspot being able to take the stock near the top blast zone, especially with bad DI. However, this will leave Zelda helpless high in the air, taking several seconds to be actionable again. Either the aerial or grounded reappearance can also be used as an offensive landing option, especially if reading a laggy enough option from the opponent. In any case, the reappearance is reactable at a consistent frame 35 and has high ending lag, making it a poor movement option that is easy to parry or dodge if the opponent is moving safely. It should only be used sparingly and be mostly reserved for confident punishes.
The aerial reappearance notably has less landing lag (30 frames) than the grounded reappearance’s ending lag (40 frames); its hitbox also deals more damage and thus shieldstun and shield pushback. This can be exploited to make Zelda's teleport slightly less punishable. For example, as a landing option, spacing it to land on a platform or stage almost immediately after reappearing will have less lag than directly reappearing on the ground, which can be deceptively difficult to punish. There are also applications of this starting from the ground; Zelda can also teleport between platforms, or from the edges of Pokémon Stadium 2 to the center. Additionally, reappearing in the air close enough to drift to ledge is another way to mitigate the ending lag.
Hitboxes[edit]
Note that the grounded and aerial versions are not necessarily respectively tied together. Zelda can perform any combination of starting on the ground/air and reappearing on the ground/air.
Start[edit]
Reappearance[edit]
Timing[edit]
Start[edit]
The grounded and aerial versions have the same timing.
| Hitbox | 6-7 |
|---|---|
| Intangibility | 17-34 |
The move's travel direction is decided on frame 17. In the air, starting on frame 18, ledge grabs are enabled from both sides. The frame strips indicate full execution.
Grounded reappearance[edit]
| Hitboxes (from appearance) | 35-36 (1-2) |
|---|---|
| Animation length (from appearance) | 75 (41) |
Aerial reappearance[edit]
| Hitboxes (from appearance) | 35-36 (1-2) |
|---|---|
| Animation length (from appearance) | 93 (59) |
Landing[edit]
| Interruptible | 31 |
|---|---|
| Animation length | 44 |
Lag time |
Hitbox |
Vulnerable |
Intangible |
Interruptible |
Parameters[edit]
| Horizontal speed divisor on startup | 1.66667 |
|---|---|
| Vertical speed divisor on startup | 2 |
| Gravity during startup | 0.03 |
| Maximum falling speed during startup | 0.75 |
| Ledge grab frame | 16 |
| Teleport base speed | 2.2 |
| Teleport maximum additional speed by stick tilt | 2 |
| Minimum stick sensitivity for additional teleport speed | 0.5 |
| Teleport duration | 18 frames |
| Speed multiplier after teleport | 0.2 |
| Maximum horizontal speed after teleport | 0.6 |
| Landing lag | 30 frames |
| Helplessness air speed multiplier | 0.8 |
|
