Unlockable character: Difference between revisions
(→Fighters: See my "List of unlockables (SSBM)" edit.) |
Gligar2007 (talk | contribs) m (→Trivia) |
||
| (97 intermediate revisions by 31 users not shown) | |||
| Line 6: | Line 6: | ||
Unique criteria must be met in order to unlock each character, as outlined below. Once such criteria are met, the challenger will appear the next time the player returns to the menu. If the player wins the subsequent battle, a [[Notice|message]] will appear congratulating them for unlocking the new fighter. | Unique criteria must be met in order to unlock each character, as outlined below. Once such criteria are met, the challenger will appear the next time the player returns to the menu. If the player wins the subsequent battle, a [[Notice|message]] will appear congratulating them for unlocking the new fighter. | ||
In ''[[Super Smash Bros.]]'', the character select screen displayed placeholders for not yet unlocked characters. This was changed in ''[[Melee]]'', where the [[clone]]s didn't have placeholders prior to unlocking, with their portraits simply appearing afterward. The placeholder slots were completely removed from ''[[Brawl]]'' onward. | In ''[[Super Smash Bros.]]'', the character select screen displayed placeholders for not yet unlocked characters. This was changed in ''[[Super Smash Bros. Melee]]'', where the [[clone]]s didn't have placeholders prior to unlocking, with their portraits simply appearing afterward. The placeholder slots were completely removed from ''[[Super Smash Bros. Brawl]]'' onward. | ||
Whenever a character is unlocked, a screen telling the player that the character is now playable will be displayed: | Whenever a character is unlocked, a screen telling the player that the character is now playable will be displayed: | ||
*In '' | *In ''Super Smash Bros.'', the screen says that "you can now use" the character, featuring a unique title for each of them. | ||
*In '' | *In ''Super Smash Bros. Melee'', the screen displays a sentence that is unique to each character and features the unlocking timestamp. | ||
*In '' | *In ''Super Smash Bros. Brawl'', the screen says that the character, with their unique title too, "has joined the brawl", and also features a portrait of the character. | ||
*In ''[[Super Smash Bros. 4]]'' and ''[[Super Smash Bros. Ultimate]]'', the screen says that the character "joins the battle!" while playing ''{{SSBMMusicLink|Rare Trophy}}'' from ''Melee'', before archiving their corresponding milestones. This also applies to [[downloadable content]] characters once they are downloaded, or when the game is booted after a character's release date in case of being purchased | *In ''[[Super Smash Bros. 4]]'' and ''[[Super Smash Bros. Ultimate]]'', the screen says that the character "joins the battle!" while playing ''{{SSBMMusicLink|Rare Trophy}}'' from ''Melee'', before archiving their corresponding milestones. This also applies to [[downloadable content]] characters once they are downloaded, or when the game is booted after a character's release date in case of being purchased via Fighters Pass in the latter game. | ||
=="Challenger Approaching!" screen== | =="Challenger Approaching!" screen== | ||
| Line 20: | Line 20: | ||
The "Challenger Approaching!" ({{ja|挑戦者が現れました!|Chōsensha ga arawaremashita!}}, ''A Challenger has Appeared!'') screen is a message that will be displayed after the player has met a criteria required to unlock any of the available characters. Every game has its unique screen. | The "Challenger Approaching!" ({{ja|挑戦者が現れました!|Chōsensha ga arawaremashita!}}, ''A Challenger has Appeared!'') screen is a message that will be displayed after the player has met a criteria required to unlock any of the available characters. Every game has its unique screen. | ||
''Smash | ''Super Smash Bros.'' had a silhouette of the character merely displayed in a blue box in front of a black background, with an exclamation point in a red circle on the top of the screen, and the phrase "Challenger Approaching" next to it. The screen uses similar music to the 1P-Game's intro, with the only difference being the absence of drums for the "challenger approaching" tune. As a result, this is the only game where the challengers' silhouettes are animated, showing them in their fighting stances while rotating (like in the character select screen), rather than just shadowed versions of their official illustrations. | ||
''Melee'' added the phrase "A new foe has appeared!," and also had a silhouette of the approaching challenger. The poses for the challengers were silhouettes of their renders when selected on the | ''Super Smash Bros. Melee'' added the phrase "A new foe has appeared!," and also had a silhouette of the approaching challenger. The poses for the challengers were silhouettes of their renders when selected on the character select screen (some, however, like Luigi and Ganondorf's, were their renders from inside the boxes). The game also added animations to the screens, with an undulating matrix effect in the background, while the exclamation point, text and silhouette would be eased in. Original music was also provided solely for the screen, which took the sound of a slow, ominous siren. | ||
''Brawl'' returned to the plain black background (there would be a silhouette of an unlockable character the player would face); but this would only occur if the [[ | ''Super Smash Bros. Brawl'' returned to the plain black background (there would be a silhouette of an unlockable character the player would face); but this would only occur if the [[Subspace Emissary]] method was not used. Also, ''Brawl'' removed the word "Warning" and the circle explanation point logo from the challenger approaching screen. It still had animations that would ease in, and when the player pressed any button, the images would fade to black, while the "Challenger Approaching!" text would scatter all over the screen; the siren is also considerably faster and more panicky in its sound than how it sounds in ''Melee''. | ||
''Smash 4'' reused ''Brawl''{{'}}s warning siren, but there are some differences in both versions. The 3DS version added in considerably more colors, including hues of green, black, and violet; the screen also says "A challenger approaches!" instead of its previous quotations. The Wii U version uses a font style similar to the ones in the newcomer trailers, and the background contains a picture of a supernova; the text is nonetheless reused from past games. The unlockable character in both versions of '' | ''Super Smash Bros. 4'' reused ''Brawl''{{'}}s warning siren, but there are some differences in both versions. The 3DS version added in considerably more colors, including hues of green, black, and violet; the screen also says "A challenger approaches!" instead of its previous quotations. The Wii U version uses a font style similar to the ones in the newcomer trailers, and the background contains a picture of a supernova; the text is nonetheless reused from past games. The unlockable character in both versions of ''Super 4'' on the screen is still a silhouette that the player would face (just like in the previous three installments). | ||
As in ''Smash 4'', the warning siren from ''Brawl'' is used in ''Ultimate''. This time there is a dark pink background with a white/pink light shining behind the silhouette of the unlockable character. The text about unlocking characters remains the same from prior games. | As in ''Smash 4'', the warning siren from ''Brawl'' is used in ''Super Smash Bros. Ultimate''. This time there is a dark pink background with a white/pink light shining behind the silhouette of the unlockable character. The text about unlocking characters remains the same from prior games. | ||
After the "Challenger Approaching!" screen, the unlockable character will then be fought in an ordinary one stock match with no time limit, on a [[Home stage|predetermined stage]] with predetermined music. The AI difficulty of the duel depends on the game, usually at low difficulty for the first fighter, then it gradually increases with every fighter unlocked, however, it is reversed in ''Melee'', and always high in the Wii U version of ''Smash 4''. The player uses the last character played as, including the last used [[alternate costume|costume]]. In the case of multiplayer battles, in the first three ''Smash'' games, the player who won the match will fight the challenger; if a CPU wins the match, the challenger will not appear. ''Super Smash Bros. 4'' changed this formula such that if a CPU wins the match, then the human-controlled player with the highest rank will battle the challenger. | After the "Challenger Approaching!" screen, the unlockable character will then be fought in an ordinary one stock match with no time limit, on a [[Home stage|predetermined stage]] with predetermined music. The AI difficulty of the duel depends on the game, usually at low difficulty for the first fighter, then it gradually increases with every fighter unlocked, however, it is reversed in ''Melee'', and always high in the Wii U version of ''Smash 4''. The player uses the last character played as, including the last used [[alternate costume|costume]]. In the case of multiplayer battles, in the first three ''Smash'' games, the player who won the match will fight the challenger; if a CPU wins the match, the challenger will not appear. ''Super Smash Bros. 4'' changed this formula such that if a CPU wins the match, then the human-controlled player with the highest rank will battle the challenger. | ||
| Line 55: | Line 55: | ||
==''[[Super Smash Bros.]]''== | ==''[[Super Smash Bros.]]''== | ||
===[[ | ===[[Fighter]]s=== | ||
{|class="wikitable sortable" style="text-align:center; min-width: 40%" | {|class="wikitable sortable" style="text-align:center; min-width: 40%" | ||
!Character!!How to unlock!!Unlock location | !Character!!How to unlock!!Unlock location | ||
|- | |- | ||
|{{CharHead| | |{{CharHead|Luigi|SSB|hsize=20px}}||Complete Bonus 1: [[Break the Targets]] with all starter characters.||[[Peach's Castle]] | ||
|- | |- | ||
|{{CharHead| | |{{CharHead|Captain Falcon|SSB|hsize=20px}}||Complete [[1P Game]] in 20 minutes or less.||[[Planet Zebes]] | ||
|- | |- | ||
|{{CharHead| | |{{CharHead|Ness|SSB|hsize=20px}}||Complete [[1P Game]] on Normal or higher with three lives or less and without using any continues.||{{SSB|Dream Land}} | ||
|- | |- | ||
|{{CharHead| | |{{CharHead|Jigglypuff|SSB|hsize=20px}}||Complete [[1P Game]] with any character.||[[Saffron City]] | ||
|} | |} | ||
===Gallery=== | ===Gallery=== | ||
<gallery> | <gallery> | ||
Challenger Approaching Luigi(SSB).png|Luigi challenging the player in ''Smash 64'' | |||
Challenger Approaching Falcon(SSB).png|Captain Falcon challenging the player in ''Smash 64'' | Challenger Approaching Falcon(SSB).png|Captain Falcon challenging the player in ''Smash 64'' | ||
Challenger Approaching Ness(SSB).png|Ness challenging the player in ''Smash 64'' | |||
Challenger Approaching Jigglypuff(SSB).png|Jigglypuff challenging the player in ''Smash 64'' | Challenger Approaching Jigglypuff(SSB).png|Jigglypuff challenging the player in ''Smash 64'' | ||
</gallery> | </gallery> | ||
==''[[Super Smash Bros. Melee]]''== | ==''[[Super Smash Bros. Melee]]''== | ||
===[[ | ===[[Fighter]]s=== | ||
''Melee'' introduces a alternate method for unlocking each fighter, by completing a certain number of VS matches, in intervals of 100. | |||
{|class="wikitable sortable" style="text-align:center; min-width: 40%" | {|class="wikitable sortable" style="text-align:center; min-width: 40%" | ||
!Character!!How to unlock!!VS matches required!!Unlock Location!!Music | !Character!!How to unlock!!VS matches required!!Unlock Location!!Music | ||
|- | |- | ||
|{{CharHead|Jigglypuff|SSBM|hsize=20px}}||Complete {{SSBM|Classic Mode}}, | |{{CharHead|Jigglypuff|SSBM|hsize=20px}}||Complete {{SSBM|Classic Mode}}, {{SSBM|Adventure Mode}}, or [[All-Star Mode]]<ref group=note name=erase/> with any character.|| |50||[[Pokémon Stadium]]||''{{MeleeMusic|Pokémon Stadium}}'' | ||
|- | |- | ||
|{{CharHead|Dr. Mario|SSBM|hsize=20px}}||Complete {{SSBM|Classic Mode}}, | |{{CharHead|Dr. Mario|SSBM|hsize=20px}}||Complete {{SSBM|Classic Mode}}, {{SSBM|Adventure Mode}}, or [[All-Star Mode]]<ref group=note name=erase/> with {{SSBM|Mario}} without using any continues. || |100||[[Princess Peach's Castle]]||''{{MeleeMusic|Dr. Mario}}'' | ||
|- | |- | ||
|{{CharHead|Pichu|SSBM|hsize=20px}}||Complete [[Event 37: Legendary Pokémon]].|| |200||[[Pokémon Stadium]]||''{{MeleeMusic|Battle Theme}}'' | |{{CharHead|Pichu|SSBM|hsize=20px}}||Complete [[Event 37: Legendary Pokémon]].|| |200||[[Pokémon Stadium]]||''{{MeleeMusic|Battle Theme}}'' | ||
| Line 89: | Line 91: | ||
|{{CharHead|Falco|SSBM|hsize=20px}}||Complete the [[100-Man Melee]].|| |300||{{SSBM|Battlefield}}||''{{MeleeMusic|Corneria}}'' | |{{CharHead|Falco|SSBM|hsize=20px}}||Complete the [[100-Man Melee]].|| |300||{{SSBM|Battlefield}}||''{{MeleeMusic|Corneria}}'' | ||
|- | |- | ||
|{{CharHead|Marth|SSBM|hsize=20px}}|| | |{{CharHead|Marth|SSBM|hsize=20px}}||Use all 14 [[starter character]]s in [[Versus Mode]], {{SSBM|Classic Mode}}, {{SSBM|Adventure Mode}}, or [[All-Star Mode]].<ref group=note name=erase/> A complete playthrough is not required for the single-player modes.|| |400||[[Fountain of Dreams]]||''{{MeleeMusic|Fire Emblem}}'' | ||
|- | |- | ||
|{{CharHead|Young Link|SSBM|hsize=20px}}||Complete {{SSBM|Classic Mode}}, | |{{CharHead|Young Link|SSBM|hsize=20px}}||Complete {{SSBM|Classic Mode}}, {{SSBM|Adventure Mode}}, or [[All-Star Mode]]<ref group=note name=erase/> with 10 different characters.|| 500||[[Great Bay]]||''{{MeleeMusic|Saria's Theme}}'' | ||
|- | |- | ||
|{{CharHead|Ganondorf|SSBM|hsize=20px}}||Complete [[Event 29: Triforce Gathering]].|| |600||{{SSBM|Final Destination}}||''{{MeleeMusic|Great Bay}}'' | |{{CharHead|Ganondorf|SSBM|hsize=20px}}||Complete [[Event 29: Triforce Gathering]].|| |600||{{SSBM|Final Destination}}||''{{MeleeMusic|Great Bay}}'' | ||
| Line 97: | Line 99: | ||
|{{CharHead|Mewtwo|SSBM|hsize=20px}}||Play [[Versus Mode]] for a combined total of 20 hours.<ref group=note name=player-hours/>|| |700||{{SSBM|Final Destination}}||''{{MeleeMusic|Poké Floats}}'' | |{{CharHead|Mewtwo|SSBM|hsize=20px}}||Play [[Versus Mode]] for a combined total of 20 hours.<ref group=note name=player-hours/>|| |700||{{SSBM|Final Destination}}||''{{MeleeMusic|Poké Floats}}'' | ||
|- | |- | ||
|{{CharHead|Luigi|SSBM|hsize=20px}}||Complete | |{{CharHead|Luigi|SSBM|hsize=20px}}||Complete {{SSBM|Adventure Mode}} when the second on the time limit in the first stage gets a "2". For example: XX:X2:XX. Afterwards, defeat Luigi and {{SSBM|Peach}} within 1 minute and clear the rest of the mode.|| |800||[[Mushroom Kingdom II]]||''{{MeleeMusic|Mushroom Kingdom II}}'' | ||
|- | |- | ||
|{{CharHead|Roy|SSBM|hsize=20px}}||Unlock {{SSBM|Marth}}, then complete {{SSBM|Classic Mode}}, | |{{CharHead|Roy|SSBM|hsize=20px}}||Unlock {{SSBM|Marth}}, then complete {{SSBM|Classic Mode}}, {{SSBM|Adventure Mode}}, or [[All-Star Mode]]<ref group=note name=erase/> as him without using any continues.|| |900||[[Temple]]||''{{MeleeMusic|Fire Emblem}}'' | ||
|- | |- | ||
|{{CharHead|Mr. Game & Watch|SSBM|hsize=20px}}||Complete {{SSBM|Classic Mode}}, | |{{CharHead|Mr. Game & Watch|SSBM|hsize=20px}}||Complete {{SSBM|Classic Mode}}, {{SSBM|Adventure Mode}}, [[All-Star Mode]]<ref group=note name=erase/>, or [[Target Test]] with all 24 other characters.|| |1000||[[Flat Zone]]||''{{MeleeMusic|Flat Zone}}'' | ||
|} | |} | ||
<references group=note> | <references group=note> | ||
| Line 124: | Line 126: | ||
==''[[Super Smash Bros. Brawl]]''== | ==''[[Super Smash Bros. Brawl]]''== | ||
In ''Super Smash Bros. Brawl'', the first game to feature third-party characters, both third-party characters ({{SSBB|Solid Snake}} and {{SSBB|Sonic the Hedgehog}}) are unlockable characters. | |||
===[[ | ===[[Fighter]]s=== | ||
{|class="wikitable sortable" style="text-align:center" | {|class="wikitable sortable" style="text-align:center" | ||
!Character!!How to unlock!!VS matches required!!Unlock location!!Music | !Character!!How to unlock!!VS matches required!!Unlock location!!Music | ||
| Line 197: | Line 199: | ||
|- | |- | ||
|{{CharHead|Jigglypuff|SSBB|hsize=20px}} | |{{CharHead|Jigglypuff|SSBB|hsize=20px}} | ||
|Have 20 or more [[event]]s cleared after beating | |Have 20 or more [[event]]s cleared after beating [[The Subspace Emissary]]. | ||
|350 | |350 | ||
|[[Pokémon Stadium 2]] | |[[Pokémon Stadium 2]] | ||
| Line 203: | Line 205: | ||
|- | |- | ||
|{{CharHead|Toon Link|SSBB|hsize=20px}} | |{{CharHead|Toon Link|SSBB|hsize=20px}} | ||
|Complete {{SSBB|Classic Mode}} after beating | |Complete {{SSBB|Classic Mode}} after beating The Subspace Emissary. | ||
|400 | |400 | ||
|[[Pirate Ship]] | |[[Pirate Ship]] | ||
| Line 216: | Line 218: | ||
===[[The Subspace Emissary]]=== | ===[[The Subspace Emissary]]=== | ||
The Subspace Emissary features its own storyline and [[character selection screen]], with characters met and joining the mode's roster as part of the story. (For example, {{SSBB|Wario}} is a starter character, but he cannot be played as in the SSE until he is 'unlocked' in the SSE.) Characters can also leave The Subspace Emissary's roster as part of the story, and cannot be played as until they are met again. | |||
Unlocking any non-starter character in The Subspace Emissary will also unlock them for play in other modes. This occurs instantly, without requiring a "Challenger Approaching" battle. Thus the Subspace Emissary serves as a third method for unlocking characters, in addition to the challenges and versus match methods. All characters can be met in The Subspace Emissary; however, Toon Link, Wolf, and Jigglypuff are only unlockable after the main story is completed by finding a secret door while replaying certain levels. | |||
Below is a chart of when each fighter is unlocked, removed, or changes or combines teams; stages with none of these are omitted. | |||
The Subspace Emissary consists of 31 different stages. As some stages share the same name, the earlier stage is denoted with | [[File:Map-labeled.png|thumb|Every level numerically ordered:<br>1: Midair Stadium<br>2: Skyworld<br>3: Sea of Clouds<br>4: The Jungle<br>5: The Plain<br>6: The Lake<br>7: The Ruined Zoo<br>8: The Battlefield Fortress<br>9: The Forest<br>10: The Research Facility I<br>11: The Lake Shore<br>12: The Path to the Ruins<br>13: The Cave<br>14: The Ruins<br>15: The Wilds I<br>16: The Ruined Hall<br>17: The Wilds II<br>18: The Swamp<br>19: The Research Facility II<br>20: Outside the Ancient Ruins<br>21: The Glacial Peak<br>22: The Canyon<br>23: Battleship Halberd Interior<br>24: Battleship Halberd Exterior<br>25: Battleship Halberd Bridge<br>26: The Subspace Bomb Factory I<br>27: The Subspace Bomb Factory II<br>28: Entrance to Subspace<br>29: Subspace I<br>30: Subspace II<br>31: The Great Maze]] | ||
The Subspace Emissary consists of 31 different stages. As some stages share the same name, the earlier stage is denoted with an I while the later-appearing stage is followed by a II. | |||
{|class=wikitable | {|class=wikitable | ||
| Line 227: | Line 231: | ||
!width="5%"|Stage | !width="5%"|Stage | ||
!width="20%"|Fighters available | !width="20%"|Fighters available | ||
!width="10%"|Unlocked fighters | !width="10%"|Unlocked fighters | ||
!width="20%"|Lost fighters | !width="20%"|Lost fighters | ||
| Line 236: | Line 239: | ||
|[[File:SSE-Midair Stadium.png]] | |[[File:SSE-Midair Stadium.png]] | ||
|[[Midair Stadium]] | |[[Midair Stadium]] | ||
|{{SSBB|Mario}} (the battle with Kirby if he was chosen, and the battle with | |{{SSBB|Mario}} (the battle with Kirby if he was chosen, and the battle with Subspace army), {{SSBB|Kirby}} (all phases, except the battle with Mario if he was not chosen), {{SSBB|Peach}}, {{SSBB|Zelda}} (both only in the battle with Subspace army) | ||
|{{SSBB|Kirby}}, {{SSBB|Peach}}/{{SSBB|Zelda}} (Mario is sent flying and Wario kidnaps either Zelda/Peach when the other princess is freed from Petey) | |||
|{{SSBB|Kirby}}, {{SSBB|Peach}}/{{SSBB|Zelda}} | |||
|— | |— | ||
|— | |— | ||
| Line 246: | Line 248: | ||
|[[File:SSE-Skyworld.png]] | |[[File:SSE-Skyworld.png]] | ||
|{{b|Skyworld|SSE}} | |{{b|Skyworld|SSE}} | ||
|{{SSBB|Pit}} (all phases), {{SSBB|Mario}} (the last sidescrolling section after | |{{SSBB|Pit}} (all phases), {{SSBB|Mario}} (the last sidescrolling section after Pit rescues him) | ||
|{{SSBB|Mario}}, {{SSBB|Pit}} | |{{SSBB|Mario}}, {{SSBB|Pit}} | ||
|— | |— | ||
| Line 253: | Line 254: | ||
|4 | |4 | ||
|2, new team: {{SSBB|Mario}}, {{SSBB|Pit}} | |2, new team: {{SSBB|Mario}}, {{SSBB|Pit}} | ||
|- | |- | ||
|[[File:SSE-The Jungle.png]] | |[[File:SSE-The Jungle.png]] | ||
|[[The Jungle]] | |[[The Jungle]] | ||
|{{SSBB|Donkey Kong}}, {{SSBB|Diddy Kong}} | |{{SSBB|Donkey Kong}}, {{SSBB|Diddy Kong}} | ||
|{{SSBB|Diddy Kong}} (Bowser captures Donkey Kong) | |||
|{{SSBB|Diddy Kong}} (Donkey Kong | |||
|— | |— | ||
|— | |— | ||
|5 | |5 | ||
|3, new team: {{SSBB|Diddy Kong}} | |3, new team: {{SSBB|Diddy Kong}} | ||
|- | |- | ||
|[[File:SSE-The Lake.png]] | |[[File:SSE-The Lake.png]] | ||
|[[The Lake]] | |[[The Lake]] | ||
|{{SSBB|Diddy Kong}}, {{SSBB|Fox}} | |{{SSBB|Diddy Kong}}, {{SSBB|Fox}} | ||
|{{SSBB|Fox}} | |{{SSBB|Fox}} | ||
|— | |— | ||
|— | |— | ||
|6 | |6 | ||
|3, {{SSBB|Fox}} | |3, {{SSBB|Fox}} joins {{SSBB|Diddy Kong}} | ||
|- | |- | ||
|[[File:SSE-The Ruined Zoo.png]] | |[[File:SSE-The Ruined Zoo.png]] | ||
|[[The Ruined Zoo]] | |[[The Ruined Zoo]] | ||
|{{SSBB|Lucas}}, {{SSBB|Ness}} (only the battle with Porky), {{SSBB|Pokémon Trainer}} ({{SSBB|Squirtle}}) ( | |{{SSBB|Lucas}} (all phases), {{SSBB|Ness}} (only the battle with Porky), {{SSBB|Pokémon Trainer}} ({{SSBB|Squirtle}} only) (only after defeating Porky) | ||
|{{SSBB|Lucas}}, {{SSBB|Pokémon Trainer}} ({{SSBB|Squirtle}}) (Wario kidnaps Ness; Ness will not be unlocked in any mode) | |||
|{{SSBB|Lucas}}, {{SSBB|Pokémon Trainer}} ({{SSBB|Squirtle}}) (Ness | |||
|— | |— | ||
|— | |— | ||
| Line 306: | Line 284: | ||
|[[File:SSE-The Battlefield Fortress.png]] | |[[File:SSE-The Battlefield Fortress.png]] | ||
|[[The Battlefield Fortress]] | |[[The Battlefield Fortress]] | ||
|{{SSBB|Marth}}, {{SSBB|Meta Knight}} ( | |{{SSBB|Marth}} (all phases), {{SSBB|Meta Knight}} (second and third phases), {{SSBB|Ike}} (third phase only) | ||
|{{SSBB|Marth}}, {{SSBB|Meta Knight}}, {{SSBB|Ike}} | |{{SSBB|Marth}}, {{SSBB|Meta Knight}}, {{SSBB|Ike}} | ||
|— | |— | ||
| Line 317: | Line 294: | ||
|[[The Forest]] | |[[The Forest]] | ||
|{{SSBB|Link}}, {{SSBB|Yoshi}} | |{{SSBB|Link}}, {{SSBB|Yoshi}} | ||
|{{SSBB|Link}}, {{SSBB|Yoshi}}, {{SSBB|Toon Link}} <ref name="pre1">Toon Link, Wolf and Jigglypuff appear after completing story mode and revisiting the stage to find a hidden door. Entering the door intiates a one stock match against the character. Win and the character joins the team.</ref> | |||
|{{SSBB|Link}}, {{SSBB|Yoshi}}, {{SSBB|Toon Link}}<ref name="pre1"/> | |||
|— | |— | ||
|— | |— | ||
| Line 326: | Line 302: | ||
|[[File:SSE-The Research Facility pt1.png]] | |[[File:SSE-The Research Facility pt1.png]] | ||
|[[The Research Facility (Part I)|The Research Facility I]] | |[[The Research Facility (Part I)|The Research Facility I]] | ||
|{{SSBB|Zero Suit Samus}}, {{SSBB|Pikachu}} (all phases | |{{SSBB|Zero Suit Samus}} (all phases), {{SSBB|Pikachu}} (all phases starting with the second) | ||
|{{SSBB|Zero Suit Samus}}, {{SSBB|Pikachu}} | |{{SSBB|Zero Suit Samus}}, {{SSBB|Pikachu}} | ||
|— | |— | ||
| Line 336: | Line 311: | ||
|[[File:SSE-The Lake Shore.png]] | |[[File:SSE-The Lake Shore.png]] | ||
|[[The Lake Shore]] | |[[The Lake Shore]] | ||
|{{SSBB|Mario}} | |{{SSBB|Mario}}, {{SSBB|Pit}} (entire level if Zelda was rescued, only the last section if Peach was rescued), {{SSBB|Link}}, {{SSBB|Yoshi}} (entire level if Peach was rescued, only the last section if Zelda was rescued), {{SSBB|Kirby}} (only the last section) | ||
|— | |— | ||
|{{SSBB|Peach}}/{{SSBB|Zelda}} (Bowser | |{{SSBB|Peach}}/{{SSBB|Zelda}} (Bowser captures her) | ||
|— | |— | ||
|14 | |14 | ||
|5, the groups of {{SSBB|Mario}} and {{SSBB|Pit}}, {{SSBB|Link}} and {{SSBB|Yoshi}}, and {{SSBB|Kirby}} | |5, the groups of {{SSBB|Mario}} and {{SSBB|Pit}}, {{SSBB|Link}} and {{SSBB|Yoshi}}, and {{SSBB|Kirby}} combine. | ||
|- | |- | ||
|[[File:SSE-The Ruins.png]] | |[[File:SSE-The Ruins.png]] | ||
|[[The Ruins]] | |[[The Ruins]] | ||
|{{SSBB|Lucas}}, {{SSBB|Pokémon Trainer}} ({{SSBB|Squirtle}} | |{{SSBB|Lucas}}, {{SSBB|Pokémon Trainer}} (with {{SSBB|Squirtle}} for all phases and {{SSBB|Ivysaur}} after Pokémon Trainer finds it) | ||
|{{SSBB|Ivysaur}}, {{SSBB|Charizard}}, {{SSBB|Wolf}}<ref name="pre1"/> | |{{SSBB|Ivysaur}}, {{SSBB|Charizard}}, {{SSBB|Wolf}}<ref name="pre1"/> | ||
|— | |— | ||
| Line 373: | Line 326: | ||
|14 | |14 | ||
|5, {{SSBB|Ivysaur}} and {{SSBB|Charizard}} now are in {{SSBB|Pokémon Trainer}}'s team | |5, {{SSBB|Ivysaur}} and {{SSBB|Charizard}} now are in {{SSBB|Pokémon Trainer}}'s team | ||
|- | |- | ||
|[[File:SSE-The Ruined Hall.png]] | |[[File:SSE-The Ruined Hall.png]] | ||
|[[The Ruined Hall]] | |[[The Ruined Hall]] | ||
|{{SSBB|Lucas}}, {{SSBB|Pokémon Trainer}} | |{{SSBB|Lucas}}, {{SSBB|Pokémon Trainer}} | ||
|— | |— | ||
|— | |— | ||
|— | |— | ||
|14 | |14 | ||
|4, the groups of {{SSBB|Marth}}, {{SSBB|Ike}} and {{SSBB|Meta Knight}}, and {{SSBB|Lucas}}, {{SSBB|Pokémon Trainer}} | |4, the groups of {{SSBB|Marth}}, {{SSBB|Ike}} and {{SSBB|Meta Knight}}, and {{SSBB|Lucas}}, {{SSBB|Pokémon Trainer}} combine. | ||
|- | |- | ||
|[[File:SSE-The Swamp.png]] | |[[File:SSE-The Swamp.png]] | ||
|[[The Swamp]] | |[[The Swamp]] | ||
|{{SSBB|Diddy Kong}}, {{SSBB|Fox}}, {{SSBB|Falco}} (all phases except the first | |{{SSBB|Diddy Kong}}, {{SSBB|Fox}} (all phases), {{SSBB|Falco}} (all phases except the first) | ||
|{{SSBB|Falco}}, {{SSBB|Jigglypuff}}<ref name="pre1"/> | |{{SSBB|Falco}}, {{SSBB|Jigglypuff}}<ref name="pre1"/> | ||
|— | |— | ||
|— | |— | ||
|15 | |15 | ||
|4, {{SSBB|Falco}} | |4, {{SSBB|Falco}} joins {{SSBB|Diddy Kong}} and {{SSBB|Fox}} | ||
|- | |- | ||
|[[File:SSE-The Research Facility pt2.png]] | |[[File:SSE-The Research Facility pt2.png]] | ||
|[[The Research Facility (Part II)|The Research Facility II]] | |[[The Research Facility (Part II)|The Research Facility II]] | ||
|{{SSBB|Zero Suit Samus}} ( | |{{SSBB|Zero Suit Samus}} (all phases, transforming from Samus by taunting whenever possible), {{SSBB|Pikachu}} (all phases), {{SSBB|Samus}} (after defeating the False Samuses) | ||
|{{SSBB|Samus}} | |{{SSBB|Samus}} | ||
|{{SSBB|Zero Suit Samus}} (Samus replaces her | |{{SSBB|Zero Suit Samus}} (Samus replaces her; playing as Zero Suit Samus is still possible by taunting or pressing C on the nunchuck) | ||
|— | |— | ||
|15 | |15 | ||
|4, {{SSBB|Samus}} | |4, {{SSBB|Samus}} replaces {{SSBB|Zero Suit Samus}} | ||
|- | |- | ||
|[[File:SSE-Outside the Ancient Ruins.png]] | |[[File:SSE-Outside the Ancient Ruins.png]] | ||
|[[Outside the Ancient Ruins]] | |[[Outside the Ancient Ruins]] | ||
|{{SSBB|Olimar}}, {{SSBB|Captain Falcon}} (both all phases), {{SSBB|Diddy Kong}}, {{SSBB|Donkey Kong}} (both only in the battle with | |{{SSBB|Olimar}}, {{SSBB|Captain Falcon}} (both all phases), {{SSBB|Diddy Kong}}, {{SSBB|Donkey Kong}} (both only in the battle with Subspace army) | ||
|{{SSBB|Donkey Kong}}, {{SSBB|Captain Falcon}}, {{SSBB|Olimar}} | |{{SSBB|Donkey Kong}}, {{SSBB|Captain Falcon}}, {{SSBB|Olimar}} | ||
|{{SSBB|Fox}}, {{SSBB|Falco}} ( | |{{SSBB|Fox}}, {{SSBB|Falco}} (they did not become trophies, but Diddy Kong leaves their group, and they all go their separate ways) | ||
|— | |— | ||
|16 | |16 | ||
|4, {{SSBB|Diddy Kong}} | |4, {{SSBB|Diddy Kong}} leaves {{SSBB|Fox}} and {{SSBB|Falco}} and joins {{SSBB|Donkey Kong}}, {{SSBB|Captain Falcon}} and {{SSBB|Olimar}} | ||
|- | |- | ||
|[[File:SSE-The Glacial Peak.png]] | |[[File:SSE-The Glacial Peak.png]] | ||
|[[The Glacial Peak]] | |[[The Glacial Peak]] | ||
|{{SSBB|Ice Climbers}} (only the sidescrolling | |{{SSBB|Ice Climbers}} (only the sidescrolling section), {{SSBB|Meta Knight}} (the sidescrolling section and the battle with Lucario if the player chose him), {{SSBB|Lucario}} (only if the player chose it in the battle with Meta Knight) | ||
|{{SSBB|Ice Climbers}}, {{SSBB|Lucario}} | |{{SSBB|Ice Climbers}}, {{SSBB|Lucario}} | ||
|— | |— | ||
|— | |— | ||
|18 | |18 | ||
|5, new team: {{SSBB|Meta Knight}} | |5, new team: {{SSBB|Meta Knight}} and {{SSBB|Lucario}}. {{SSBB|Ice Climbers}} replace Meta Knight in {{SSBB|Marth}}, {{SSBB|Lucas}}, {{SSBB|Pokémon Trainer}} ({{SSBB|Squirtle}}, {{SSBB|Ivysaur}}, {{SSBB|Charizard}}) and {{SSBB|Ike}}'s group | ||
|- | |- | ||
|[[File:SSE-The Canyon.png]] | |[[File:SSE-The Canyon.png]] | ||
|[[The Canyon]] | |[[The Canyon]] | ||
|{{SSBB|Mario}}, {{SSBB|Pit}}, {{SSBB|Link}}, {{SSBB|Yoshi}}, {{SSBB|Kirby}} | |{{SSBB|Mario}}, {{SSBB|Pit}}, {{SSBB|Link}}, {{SSBB|Yoshi}}, {{SSBB|Kirby}} | ||
|— | |— | ||
|— | |— | ||
|— | |— | ||
|18 | |18 | ||
|4, the groups of {{SSBB|Mario}}, {{SSBB|Pit}}, {{SSBB|Link}}, {{SSBB|Yoshi}} and {{SSBB|Kirby}}, and {{SSBB|Ice Climbers}}, {{SSBB|Marth}}, {{SSBB|Lucas}}, {{SSBB|Pokémon Trainer}} ({{SSBB|Squirtle}}, {{SSBB|Ivysaur}}, {{SSBB|Charizard}}) and {{SSBB|Ike}} | |4, the groups of {{SSBB|Mario}}, {{SSBB|Pit}}, {{SSBB|Link}}, {{SSBB|Yoshi}} and {{SSBB|Kirby}}, and {{SSBB|Ice Climbers}}, {{SSBB|Marth}}, {{SSBB|Lucas}}, {{SSBB|Pokémon Trainer}} ({{SSBB|Squirtle}}, {{SSBB|Ivysaur}}, {{SSBB|Charizard}}) and {{SSBB|Ike}} combine | ||
|- | |- | ||
|[[File:SSE-Battleship Halberd Interior.png]] | |[[File:SSE-Battleship Halberd Interior.png]] | ||
|[[Battleship Halberd Interior]] | |[[Battleship Halberd Interior]] | ||
|{{SSBB|Snake}}, {{SSBB|Meta Knight}} | |{{SSBB|Snake}} (all phases), {{SSBB|Meta Knight}}, {{SSBB|Lucario}} (after they meet Snake) | ||
|{{SSBB|Snake}} | |{{SSBB|Snake}} | ||
|— | |— | ||
|— | |— | ||
|19 | |19 | ||
|4, {{SSBB|Snake}} | |4, {{SSBB|Snake}} joins {{SSBB|Meta Knight}} and {{SSBB|Lucario}} | ||
|- | |- | ||
|[[File:SSE-Battleship Halberd Exterior.png]] | |[[File:SSE-Battleship Halberd Exterior.png]] | ||
|[[Battleship Halberd Exterior]] | |[[Battleship Halberd Exterior]] | ||
|{{SSBB|Peach}}, {{SSBB| | |{{SSBB|Peach}}, {{SSBB|Sheik}}/{{SSBB|Zelda}} | ||
|{{SSBB|Zelda}}/{{SSBB|Peach}} | |{{SSBB|Zelda}}/{{SSBB|Peach}} | ||
|— | |— | ||
|{{SSBB|Fox}}, {{SSBB|Peach}}/{{SSBB|Zelda}} | |{{SSBB|Fox}}, {{SSBB|Peach}}/{{SSBB|Zelda}} | ||
|22 | |22 | ||
|5, new team: {{SSBB|Fox}}, {{SSBB|Peach}}, {{SSBB|Zelda}} | |5, new team: {{SSBB|Fox}}, {{SSBB|Peach}}, {{SSBB|Zelda}} | ||
| Line 477: | Line 402: | ||
|[[Battleship Halberd Bridge]] | |[[Battleship Halberd Bridge]] | ||
|{{SSBB|Snake}}, {{SSBB|Lucario}}, {{SSBB|Fox}}, {{SSBB|Falco}}, {{SSBB|Peach}}, {{SSBB|Sheik}}/{{SSBB|Zelda}} | |{{SSBB|Snake}}, {{SSBB|Lucario}}, {{SSBB|Fox}}, {{SSBB|Falco}}, {{SSBB|Peach}}, {{SSBB|Sheik}}/{{SSBB|Zelda}} | ||
|{{SSBB|Mr. Game & Watch}} | |||
|{{SSBB|Mr. Game & Watch}} | |||
|— | |— | ||
|{{SSBB|Falco}} | |{{SSBB|Falco}} | ||
|24 | |24 | ||
|4, the groups of {{SSBB|Fox}}, {{SSBB|Peach}} and {{SSBB|Zelda}}, and {{SSBB|Meta Knight}}, {{SSBB|Lucario}} and {{SSBB|Snake}} | |4, the groups of {{SSBB|Fox}}, {{SSBB|Peach}} and {{SSBB|Zelda}}, and {{SSBB|Meta Knight}}, {{SSBB|Lucario}} and {{SSBB|Snake}} combine, along with adding {{SSBB|Falco}} and {{SSBB|Mr. Game & Watch}} | ||
|- | |- | ||
|[[File:SSE-The Subspace Bomb Factory pt2.png]] | |[[File:SSE-The Subspace Bomb Factory pt2.png]] | ||
|[[The Subspace Bomb Factory (Part II)|The Subspace Bomb Factory II]] | |[[The Subspace Bomb Factory (Part II)|The Subspace Bomb Factory II]] | ||
|{{SSBB|Donkey Kong}}, {{SSBB|Diddy Kong}}, {{SSBB|Captain Falcon}}, {{SSBB|Olimar}}, {{SSBB|Samus}}, {{SSBB|Pikachu}}, {{SSBB|R.O.B.}} ( | |{{SSBB|Donkey Kong}}, {{SSBB|Diddy Kong}}, {{SSBB|Captain Falcon}}, {{SSBB|Olimar}} (all phases); {{SSBB|Samus}}, {{SSBB|Zero Suit Samus}} (by taunting as Samus), {{SSBB|Pikachu}}, {{SSBB|R.O.B.}} (second section onwards) | ||
|{{SSBB|R.O.B.}} | |{{SSBB|R.O.B.}} | ||
|— | |— | ||
|— | |— | ||
|25 | |25 | ||
|1, all | |1, all three teams combine into one | ||
|- | |- | ||
|[[File:SSE-Entrance to Subspace.png]] | |[[File:SSE-Entrance to Subspace.png]] | ||
|[[Entrance to Subspace]] | |[[Entrance to Subspace]] | ||
|{{SSBB|Captain Falcon}}, {{SSBB|Diddy Kong}}, {{SSBB|Donkey Kong}}, {{SSBB|Falco}}, {{SSBB|Fox}}, {{SSBB|Ice Climbers}}, {{SSBB|Ike}}, {{SSBB|Kirby}}, {{SSBB|Link}}, {{SSBB|Lucario}}, {{SSBB|Lucas}}, {{SSBB|Mario}}, {{SSBB|Marth}}, {{SSBB|Meta Knight}}, {{SSBB|Mr. Game & Watch}}, {{SSBB|Olimar}}, {{SSBB|Peach}}, {{SSBB|Pikachu}}, {{SSBB|Pit}}, {{SSBB|Pokémon Trainer | |{{SSBB|Captain Falcon}}, {{SSBB|Diddy Kong}}, {{SSBB|Donkey Kong}}, {{SSBB|Falco}}, {{SSBB|Fox}}, {{SSBB|Ice Climbers}}, {{SSBB|Ike}}, {{SSBB|Kirby}}, {{SSBB|Link}}, {{SSBB|Lucario}}, {{SSBB|Lucas}}, {{SSBB|Mario}}, {{SSBB|Marth}}, {{SSBB|Meta Knight}}, {{SSBB|Mr. Game & Watch}}, {{SSBB|Olimar}}, {{SSBB|Peach}}, {{SSBB|Pikachu}}, {{SSBB|Pit}}, {{SSBB|Pokémon Trainer}}, {{SSBB|R.O.B.}}, {{SSBB|Samus}}, {{SSBB|Snake}}, {{SSBB|Yoshi}}, {{SSBB|Zelda}} (only four chosen characters can be played as) | ||
|— | |— | ||
| | |All current characters (Tabuu turns them into trophies) | ||
|— | |— | ||
|0 | |0 | ||
|0 | |0, All characters were turned into trophies | ||
|- | |- | ||
|[[File:SSE-Subspace pt1.png]] | |[[File:SSE-Subspace pt1.png]] | ||
|[[Subspace (Part I)|Subspace I]] | |[[Subspace (Part I)|Subspace I]] | ||
|{{SSBB|King Dedede}}, {{SSBB|Ness}}, {{SSBB|Luigi | |{{SSBB|King Dedede}} (all phases), {{SSBB|Ness}}, {{SSBB|Luigi}} (only in the sidescrolling sections) | ||
|{{SSBB|Luigi}}, {{SSBB|Ness}}, {{SSBB|Bowser}}, {{SSBB|King Dedede}} | |||
|{{SSBB|Luigi}}, {{SSBB|Ness}} | |||
|— | |— | ||
| | |{{SSBB|Mario}}, {{SSBB|Donkey Kong}}, {{SSBB|Samus}}, {{SSBB|Fox}}, {{SSBB|Pikachu}}, {{SSBB|Captain Falcon}}, {{SSBB|Marth}}, {{SSBB|Mr. Game & Watch}}, {{SSBB|Falco}}, {{SSBB|Pit}}, {{SSBB|Olimar}}, {{SSBB|Lucas}}, {{SSBB|Diddy Kong}}, {{SSBB|Pokémon Trainer}} ({{SSBB|Squirtle}}, {{SSBB|Ivysaur}}, {{SSBB|Charizard}}), {{SSBB|Ike}} (only if rescued by King Dedede, Ness, and Luigi; fighters not rescued can still be found when replaying the level) | ||
|From 4 to 19 | |From 4 to 19 | ||
|1, new team: {{SSBB|King Dedede}}, {{SSBB|Ness}}, {{SSBB|Luigi}}, {{SSBB|Bowser | |1, new team: {{SSBB|King Dedede}}, {{SSBB|Ness}}, {{SSBB|Luigi}}, {{SSBB|Bowser}}, and any recovered fighters | ||
|- | |- | ||
|[[File:SSE-Subspace pt2.png]] | |[[File:SSE-Subspace pt2.png]] | ||
|[[Subspace (Part II)|Subspace II]] | |[[Subspace (Part II)|Subspace II]] | ||
|{{SSBB|Kirby}} | |{{SSBB|Kirby}} | ||
|{{SSBB|Ganondorf}} (if Kirby found Link and Zelda, who rescue him), {{SSBB|Wario}} (If Kirby found him) | |||
|— | |— | ||
|{{SSBB| | |{{SSBB|Kirby}} (guaranteed), {{SSBB|Link}}, {{SSBB|Yoshi}}, {{SSBB|Peach}}, {{SSBB|Zelda}}, {{SSBB|Ice Climbers}}, {{SSBB|Meta Knight}}, {{SSBB|Lucario}}, {{SSBB|R.O.B.}}, {{SSBB|Snake}} (only if Kirby rescues them; fighters not found can be rescued upon replaying the level) | ||
|From 5 to 31 | |From 5 to 31 | ||
|1, {{SSBB|Kirby}}, | |1, {{SSBB|Kirby}}, and any recovered fighters, alongside Ganondorf if Link and Zelda are found, and Wario if he is found, will join the previous group. | ||
|- | |- | ||
|[[File:SSE-The Great Maze pt1.png]]<br>[[File:SSE-The Great Maze pt2.png]]<br>[[File:SSE-The Great Maze pt3.png]]<br>[[File:SSE-The Great Maze pt4.png]] | |[[File:SSE-The Great Maze pt1.png]]<br>[[File:SSE-The Great Maze pt2.png]]<br>[[File:SSE-The Great Maze pt3.png]]<br>[[File:SSE-The Great Maze pt4.png]] | ||
|[[The Great Maze]] | |[[The Great Maze]] | ||
|{{SSBB|Bowser}}, {{SSBB|King Dedede}}, {{SSBB|Kirby}}, {{SSBB|Luigi}}, {{SSBB|Ness | |{{SSBB|Bowser}}, {{SSBB|King Dedede}}, {{SSBB|Kirby}}, {{SSBB|Luigi}}, {{SSBB|Ness}} (guaranteed), {{SSBB|Captain Falcon}}, {{SSBB|Diddy Kong}}, {{SSBB|Donkey Kong}}, {{SSBB|Falco}}, {{SSBB|Fox}}, {{SSBB|Ganondorf}}, {{SSBB|Ice Climbers}}, {{SSBB|Ike}}, {{SSBB|Link}}, {{SSBB|Lucario}}, {{SSBB|Lucas}}, {{SSBB|Mario}}, {{SSBB|Marth}}, {{SSBB|Meta Knight}}, {{SSBB|Mr. Game & Watch}}, {{SSBB|Olimar}}, {{SSBB|Peach}}, {{SSBB|Pikachu}}, {{SSBB|Pit}}, {{SSBB|Pokémon Trainer}} ({{SSBB|Squirtle}}, {{SSBB|Ivysaur}}, {{SSBB|Charizard}}), {{SSBB|R.O.B.}}, {{SSBB|Samus}}, {{SSBB|Snake}}, {{SSBB|Wario}}, {{SSBB|Yoshi}}, {{SSBB|Zelda}} (only if they were rescued in Subspace Parts 1 and 2), {{SSBB|Sonic}} (only in the battle with Tabuu) | ||
|{{SSBB|Sonic}} | |{{SSBB|Sonic}} | ||
|— | |— | ||
|— | |— | ||
|From 6 to 32 | |From 6 to 32 | ||
|1, {{SSBB|Sonic}} | |1, {{SSBB|Sonic}} joins | ||
|} | |} | ||
<gallery> | <gallery> | ||
Subspace Emissary Plotmap.svg|A map of the stages and which characters are available in each one, not counting Wolf, Toon Link, and Jigglypuff. | Subspace Emissary Plotmap.svg|A map of the stages and which characters are available in each one, not counting Wolf, Toon Link, and Jigglypuff. | ||
| Line 573: | Line 476: | ||
=={{for3ds}}== | =={{for3ds}}== | ||
===[[ | ===[[Fighter]]s=== | ||
The inclusion of [[Wendy O. Koopa]] (as one of {{SSB4|Bowser Jr.}}'s {{SSB4|alternate costume}}s) | The inclusion of {{SSB4|Lucina}} and [[Wendy O. Koopa]] (as one of {{SSB4|Bowser Jr.}}'s {{SSB4|alternate costume}}s) as unlockable characters makes them the first female characters to be unlockable. After every tenth VS. match, the player gets to challenge an unlockable character, starting with {{SSB4|Ness}} and finishing with {{SSB4|Jigglypuff}} when 120 matches are played. | ||
In addition to the characters below, {{SSB4|Mii Fighter}}s are not shown on the character select screen until the player has created at least one. However, since the ability to create Mii Fighters is granted from the beginning, the characters cannot truly be called unlockable. | In addition to the characters below, {{SSB4|Mii Fighter}}s are not shown on the character select screen until the player has created at least one. However, since the ability to create Mii Fighters is granted from the beginning, the characters cannot truly be called unlockable. | ||
Despite {{SSB4|Duck Hunt}} having a | Despite {{SSB4|Duck Hunt}} having a [[Duck Hunt (stage)|stage of the same name]] added into the game in the {{h2|List of updates (SSB4-3DS)|1.1.1}} update, they will be fought on {{SSB4|Battlefield}} for their unlocking battle regardless of which version of the game is being played. | ||
{|class="wikitable sortable" style="text-align:center; min-width: 40%" | {|class="wikitable sortable" style="text-align:center; min-width: 40%" | ||
| Line 591: | Line 494: | ||
|{{CharHead|Lucina|SSB4|hsize=20px}}||As {{SSB4|Marth}}, clear {{SSB4-3DS|Classic Mode}} without any continues||40||[[Arena Ferox]]||''{{SSB4MusicLink|Fire Emblem|Id (Purpose)}}'' | |{{CharHead|Lucina|SSB4|hsize=20px}}||As {{SSB4|Marth}}, clear {{SSB4-3DS|Classic Mode}} without any continues||40||[[Arena Ferox]]||''{{SSB4MusicLink|Fire Emblem|Id (Purpose)}}'' | ||
|- | |- | ||
|{{CharHead|Dark Pit|SSB4|hsize=20px}}||Clear {{SSB4-3DS|Classic Mode}} with three | |{{CharHead|Dark Pit|SSB4|hsize=20px}}||Clear {{SSB4-3DS|Classic Mode}} with three different characters||50||[[Reset Bomb Forest]]||''{{SSB4MusicLink|Kid Icarus|Wrath of the Reset Bomb (Remix)|Wrath of the Reset Bomb}}'' | ||
|- | |- | ||
|{{CharHead|Dr. Mario|SSB4|hsize=20px}}||As {{SSB4|Mario}}, clear {{SSB4-3DS|Classic Mode}} on intensity 4.0 or higher||60||[[Mushroomy Kingdom]]||''{{SSB4MusicLink|Super Mario Bros.|Ground Theme (Super Mario Bros.) (Remix)|Ground Theme (Super Mario Bros.)}}'' | |{{CharHead|Dr. Mario|SSB4|hsize=20px}}||As {{SSB4|Mario}}, clear {{SSB4-3DS|Classic Mode}} on intensity 4.0 or higher||60||[[Mushroomy Kingdom]]||''{{SSB4MusicLink|Super Mario Bros.|Ground Theme (Super Mario Bros.) (Remix)|Ground Theme (Super Mario Bros.)}}'' | ||
| Line 599: | Line 502: | ||
|{{CharHead|Ganondorf|SSB4|hsize=20px}}||As {{SSB4|Link}} or {{SSB4|Zelda}}, clear {{SSB4-3DS|Classic Mode}} on intensity 5.0 or higher||80||[[Gerudo Valley]]||''{{SSB4MusicLink|The Legend of Zelda|Gerudo Valley (Remix)|Gerudo Valley}}'' | |{{CharHead|Ganondorf|SSB4|hsize=20px}}||As {{SSB4|Link}} or {{SSB4|Zelda}}, clear {{SSB4-3DS|Classic Mode}} on intensity 5.0 or higher||80||[[Gerudo Valley]]||''{{SSB4MusicLink|The Legend of Zelda|Gerudo Valley (Remix)|Gerudo Valley}}'' | ||
|- | |- | ||
|{{CharHead|Mr. Game & Watch|SSB4|hsize=20px}}||Clear {{SSB4-3DS|Classic Mode}} with 10 | |{{CharHead|Mr. Game & Watch|SSB4|hsize=20px}}||Clear {{SSB4-3DS|Classic Mode}} with 10 different characters||90||[[Flat Zone 2]]||''{{SSB4MusicLink|Game & Watch|Flat Zone 2}}'' | ||
|- | |- | ||
|{{CharHead|Bowser Jr.|SSB4|hsize=20px}}||As {{SSB4|Bowser}}, clear {{SSB4-3DS|Classic Mode}} on intensity 6.0 or higher||100||[[3D Land]]||''{{SSB4MusicLink|Super Mario Bros.|Super Mario 3D Land Theme / Beach Theme}}'' | |{{CharHead|Bowser Jr.|SSB4|hsize=20px}}||As {{SSB4|Bowser}}, clear {{SSB4-3DS|Classic Mode}} on intensity 6.0 or higher||100||[[3D Land]]||''{{SSB4MusicLink|Super Mario Bros.|Super Mario 3D Land Theme / Beach Theme}}'' | ||
|- | |- | ||
|{{CharHead|Duck Hunt|SSB4|hsize=20px}}||Clear {{SSB4-3DS|Classic Mode}} with 8 | |{{CharHead|Duck Hunt|SSB4|hsize=20px}}||Clear {{SSB4-3DS|Classic Mode}} with 8 different characters||110||{{SSB4|Battlefield}}||''{{SSB4MusicLink|Super Smash Bros.|Battlefield}}'' | ||
|- | |- | ||
|{{CharHead|Jigglypuff|SSB4|hsize=20px}}||Collect at least 30 different [[equipment]] items||120||[[Unova Pokémon League]]||''{{SSB4MusicLink|Pokémon|N's Castle Medley}}'' | |{{CharHead|Jigglypuff|SSB4|hsize=20px}}||Collect at least 30 different [[equipment]] items||120||[[Unova Pokémon League]]||''{{SSB4MusicLink|Pokémon|N's Castle Medley}}'' | ||
| Line 622: | Line 525: | ||
ChallengerApproachingBowserJr.png|Bowser Jr. challenging the player in ''Super Smash Bros. for Nintendo 3DS''. | ChallengerApproachingBowserJr.png|Bowser Jr. challenging the player in ''Super Smash Bros. for Nintendo 3DS''. | ||
ChallengerApproachingDuckHunt.png|Duck Hunt challenging the player in ''Super Smash Bros. for Nintendo 3DS''. | ChallengerApproachingDuckHunt.png|Duck Hunt challenging the player in ''Super Smash Bros. for Nintendo 3DS''. | ||
ChallengerApproachingJigglypuff. | ChallengerApproachingJigglypuff.png|Jigglypuff challenging the player in ''Super Smash Bros. for Nintendo 3DS''. | ||
</gallery> | </gallery> | ||
=={{forwiiu}}== | =={{forwiiu}}== | ||
===[[ | ===[[Fighter]]s=== | ||
Unlike {{for3ds}}, Ness, Jigglypuff, Ganondorf and Bowser Jr. are [[starter character]]s. Like the 3DS version, a character is unlocked for every ten versus matches played starting with Falco. Two exceptions to this are {{SSB4|Mr. Game & Watch}} and {{SSB4|Duck Hunt}}, which they need 20 more versus matches than {{SSB4|R.O.B.}} and Mr. Game & Watch, respectively. Unlike the previous three installments (''Melee'', ''Brawl'', and the 3DS version), no {{uv|Super Smash Bros.}} universe stages are used for challenger approaching battles. Instead, all unlockable characters use a stage from their respective universe except for R.O.B., in which he uses the Wrecking Crew stage due to him not having a stage from his [[R.O.B. (universe)|own universe]]. | Unlike {{for3ds}}, Ness, Jigglypuff, Ganondorf and Bowser Jr. are [[starter character]]s. Like the 3DS version, a character is unlocked for every ten versus matches played starting with Falco. Two exceptions to this are {{SSB4|Mr. Game & Watch}} and {{SSB4|Duck Hunt}}, which they need 20 more versus matches than {{SSB4|R.O.B.}} and Mr. Game & Watch, respectively. Unlike the previous three installments (''Melee'', ''Brawl'', and the 3DS version), no {{uv|Super Smash Bros.}} universe stages are used for challenger approaching battles. Instead, all unlockable characters use a stage from their respective universe except for R.O.B., in which he uses the Wrecking Crew stage due to him not having a stage from his [[R.O.B. (universe)|own universe]]. | ||
| Line 665: | Line 568: | ||
==''[[Super Smash Bros. Ultimate]]''== | ==''[[Super Smash Bros. Ultimate]]''== | ||
The starting roster in ''Super Smash Bros. Ultimate'' comprises the [[original 8|eight starter characters]] from the original ''[[Super Smash Bros.]]'' game, with all other fighters being unlockable or downloadable | The starting roster in ''Super Smash Bros. Ultimate'' comprises the [[original 8|eight starter characters]] from the original ''[[Super Smash Bros.]]'' game, with all other fighters being unlockable or downloadable. With the vast majority of the roster being unlockable, unlocking characters is advertised as a core feature of the game; no characters are left "secret" like in previous games, and character unlocks are designed to occur at a more streamlined and consistent pace than in previous games. | ||
Unlockable characters no longer have unique criteria to unlock them. Instead, Challenger Approaching fights take place after completing {{SSBU|Classic Mode}} with any character, and as timed encounters. | |||
As in ''Smash 4'', {{SSBU|Mii Fighter}}s can be unlocked by creating a [[character customization|custom]] Mii Fighter of that type, and do not have a standard Challenger Approaching match. | |||
The | The player may also unlock characters by awakening them in the [[World of Light]]. | ||
{|class="wikitable | ==={{SSBU|Classic Mode}}=== | ||
! | When the player completes Classic Mode with a given character, a new character will challenge the player to a Challenger Approaching duel. All of the eight starter characters have their own character unlock trees, each with eight characters to unlock, except for Pikachu, who has seven. The challenger is determined by the first player character, and will be the next character below them on the tree who has not already been unlocked or issued a Challenger Approaching duel. For example, completing Classic Mode as {{SSBU|Marth}} with {{SSBU|Ryu}} already unlocked (or met in Challenger Approaching) will cause the challenger to be {{SSBU|Ganondorf}}, even if {{SSBU|Lucario}} has not yet been unlocked or met in Challenger Approaching. | ||
If the bottom of a tree is reached, the search resumes from the top of Mario's tree, then Donkey Kong's, and so on. Completing Classic Mode with [[Downloadable content (SSBU)|downloadable fighters]] will also start from the top of Mario's tree, as these characters are not assigned an unlock tree. For example, completing Classic Mode as {{SSBU|Duck Hunt}} will receive a challenge from {{SSBU|Sonic}}, even if some characters in Donkey Kong's tree have not been unlocked or met in Challenger Approaching yet. | |||
Notably, all [[clone]]s, semi-clones, and pseudo-clones except for {{SSBU|Ganondorf}}, {{SSBU|Roy}}, and {{SSBU|Chrom}} are in the same tree as the character they are based on. | |||
{|class="wikitable" style="text-align:center;" | |||
!Unlock Order!!{{head|Mario|g=SSBU|s=32px}}!!{{head|Donkey Kong|g=SSBU|s=32px}}!!{{head|Link|g=SSBU|s=32px}}!!{{head|Samus|g=SSBU|s=32px}}!!{{head|Yoshi|g=SSBU|s=32px}}!!{{head|Kirby|g=SSBU|s=32px}}!!{{head|Fox|g=SSBU|s=32px}}!!{{head|Pikachu|g=SSBU|s=32px}} | |||
|- | |- | ||
|1st||{{ | |1st||{{head|Sonic|g=SSBU|s=32px}}||{{head|Bowser|g=SSBU|s=32px}}||{{head|King K. Rool|g=SSBU|s=32px}}||{{head|Inkling|g=SSBU|s=32px}}||{{head|Lucario|g=SSBU|s=32px}}||{{head|Ness|g=SSBU|s=32px}}||{{head|Captain Falcon|g=SSBU|s=32px}}||{{head|Villager|g=SSBU|s=32px}} | ||
|- | |- | ||
|2nd||{{ | |2nd||{{head|Bayonetta|g=SSBU|s=32px}}||{{head|Pokémon Trainer|g=SSBU|s=32px}}||{{head|Ice Climbers|g=SSBU|s=32px}}||{{head|Wii Fit Trainer|g=SSBU|s=32px}}||{{head|Marth|g=SSBU|s=32px}}||{{head|Jigglypuff|g=SSBU|s=32px}}||{{head|Zero Suit Samus|g=SSBU|s=32px}}||{{head|Shulk|g=SSBU|s=32px}} | ||
|- | |- | ||
|3rd||{{ | |3rd||{{head|Little Mac|g=SSBU|s=32px}}||{{head|Rosalina & Luma|g=SSBU|s=32px}}||{{head|Simon|g=SSBU|s=32px}}||{{head|Pit|g=SSBU|s=32px}}||{{head|Ryu|g=SSBU|s=32px}}||{{head|Pac-Man|g=SSBU|s=32px}}||{{head|Peach|g=SSBU|s=32px}}||{{head|R.O.B.|g=SSBU|s=32px|cl=Grey}} | ||
|- | |- | ||
|4th||{{ | |4th||{{head|Ike|g=SSBU|s=32px}}||{{head|King Dedede|g=SSBU|s=32px}}||{{head|Meta Knight|g=SSBU|s=32px}}||{{head|Incineroar|g=SSBU|s=32px}}||{{head|Ganondorf|g=SSBU|s=32px}}||{{head|Zelda|g=SSBU|s=32px}}||{{head|Falco|g=SSBU|s=32px}}||{{head|Mega Man|g=SSBU|s=32px}} | ||
|- | |- | ||
|5th||{{ | |5th||{{head|Luigi|g=SSBU|s=32px}}||{{head|Sheik|g=SSBU|s=32px}}||{{head|Snake|g=SSBU|s=32px}}||{{head|Dark Samus|g=SSBU|s=32px}}||{{head|Lucina|g=SSBU|s=32px}}||{{head|Robin|g=SSBU|s=32px}}||{{head|Daisy|g=SSBU|s=32px}}||{{head|Isabelle|g=SSBU|s=32px}} | ||
|- | |- | ||
|6th||{{ | |6th||{{head|Roy|g=SSBU|s=32px}}||{{head|Greninja|g=SSBU|s=32px}}||{{head|Young Link|g=SSBU|s=32px}}||{{head|Cloud|g=SSBU|s=32px}}||{{head|Ridley|g=SSBU|s=32px}}||{{head|Corrin|g=SSBU|s=32px}}||{{head|Bowser Jr.|g=SSBU|s=32px}}||{{head|Mr. Game & Watch|g=SSBU|s=32px}} | ||
|- | |- | ||
|7th||{{ | |7th||{{head|Dr. Mario|g=SSBU|s=32px}}||{{head|Diddy Kong|g=SSBU|s=32px}}||{{head|Richter|g=SSBU|s=32px}}||{{head|Wario|g=SSBU|s=32px}}||{{head|Chrom|g=SSBU|s=32px}}||{{head|Lucas|g=SSBU|s=32px}}||{{head|Wolf|g=SSBU|s=32px}}||{{head|Pichu|g=SSBU|s=32px}} | ||
|- | |- | ||
|8th||{{ | |8th||{{head|Olimar|g=SSBU|s=32px}}||{{head|Duck Hunt|g=SSBU|s=32px}}||{{head|Toon Link|g=SSBU|s=32px}}||{{head|Dark Pit|g=SSBU|s=32px}}||{{head|Ken|g=SSBU|s=32px}}||{{head|Palutena|g=SSBU|s=32px}}||{{head|Mewtwo|g=SSBU|s=32px}}||None | ||
|} | |||
===Timed encounters=== | |||
When the player finishes a VS. match, a [[Mob Smash]], a [[Home-Run Contest]] round, a [[Spirit Board]] fight, or exits the World of Light, a new character may challenge the player to a Challenger Approaching duel. This character will be the one closest to the top of the list below who has not already been unlocked or issued a Challenger Approaching duel. However, the player must have performed enough in-battle stick inputs and, in most cases, have waited at least 10 minutes since the previous Challenger Approaching duel. (Quitting a match/mode other than World of Light will not cause a challenge, and neither will VS matches that only consist of CPUs or that are themselves Challenger Approaching matches.) | |||
The in-battle stick input count considers the total since the save file was started. Its mechanics appear to be similar to how {{b|Gold|collectible}} in VS matches is counted (for example, [[dash-dancing]], Sudden Death, other Challenger Approaching matches, and jumping with the X Button do not count, but jumping with the Control Stick does count). However, unlike Gold, actions made in a VS match that is quit still count (they will not cause a challenge but will still contribute toward the total behind the scenes). If a controller disconnects during a VS match and it is still disconnected by the time the match ends, actions made by that player do not count (even though they count for Gold). Actions made during Classic Mode and World of Light count, excluding any Gold modifiers (e.g. due to difficulty level). Notably, the 5th through 30th characters in the list all have the same action count requirement, so meeting the requirement for any one of them will unlock all of them with no further in-battle actions required, provided that the wait time requirement is met between each one. Unlike the time requirements, the action count requirements cannot be changed. For example, unlocking {{SSBU|Palutena}} through a timed encounter will always require approximately 8,100 actions, regardless of if any other characters have already been unlocked through any method. | |||
The 10-minute delay requirement does not apply to the first five Challenger Approaching fights specifically. For example, if the player unlocks all but five characters through World of Light, then no time delay requirements apply to the remaining five regardless of who they are. However, Challenger Approaching fights initiated through Classic Mode will count toward the five despite Classic Mode not having a time delay requirement. For example, if the player's first Challenger Approaching fight is a character below {{SSBU|Inkling}} on the list (regardless of if the player wins or loses), and then the player attempts to unlock the rest of the characters through timed encounters, then Inkling will require a 10-minute wait. | |||
The player can bypass any wait time by closing the game and reopening it. (Note that changing the [[Language]] setting causes the game to automatically close and reopen.) The wait time applies regardless of if the previous Challenger Approaching fight was won or lost. Time spent idling on the title screen or loading screens counts, but time spent idling during a Challenger Approaching fight does not count (the time starts after the Challenger Approaching fight ends). Wait times do not carry over (if the player waits 20 minutes between one pair of Challenger Approaching fights, all future wait times are still 10 minutes). | |||
===[[Fighter]] table=== | |||
Classic Mode and timed encounters result in the same Challenger Approaching fights. | |||
The values listed under "Theoretical cumulative wait time" apply only if the player exclusively attempts to unlock characters through timed encounters, never closes the game after challenging Inkling, and never spends longer than the minimum time between Challenger Approaching fights. | |||
{|class="wikitable sortable" style="text-align:center; min-width: 40%" | |||
!data-sort-type="number"|Order!!Character!!Actions required<br/>(approx.)!!Theoretical<br/>cumulative wait time!!Stage!!Music | |||
|- | |- | ||
| | |1st||{{CharHead|Ness|SSBU|hsize=20px}}||200||0 minutes||[[Onett]] (hazards off)||''{{SSBUMusicLink|EarthBound|Bein' Friends}}'' | ||
|- | |- | ||
| | |2nd||{{CharHead|Zelda|SSBU|hsize=20px}}||400||0 minutes||[[Temple]]||''{{SSBUMusicLink|The Legend of Zelda|Ocarina of Time Medley}}'' | ||
|- | |- | ||
| | |3rd||{{CharHead|Bowser|SSBU|hsize=20px}}||700||0 minutes||[[Mushroom Kingdom U]]||''{{SSBUMusicLink|Super Mario Bros.|King Bowser - Super Mario Bros. 3}}'' | ||
|- | |- | ||
| | |4th||{{CharHead|Pit|SSBU|hsize=20px}}||1,100||0 minutes||[[Skyworld]]||''{{SSBUMusicLink|Kid Icarus|Underworld}}'' | ||
|- | |- | ||
| | |5th||{{CharHead|Inkling|SSBU|hsize=20px}}||1,400||0 minutes||[[Moray Towers]]||''{{SSBUMusicLink|Splatoon|Splattack! (Original)|Splattack!}}'' | ||
|- | |- | ||
| | |6th||{{CharHead|Villager|SSBU|hsize=20px}}||1,400||10 minutes||[[Smashville]]||''{{SSBUMusicLink|Animal Crossing|Title Theme - Animal Crossing}}'' | ||
|- | |- | ||
| | |7th||{{CharHead|Marth|SSBU|hsize=20px}}||1,400||20 minutes||[[Castle Siege]]||''{{SSBUMusicLink|Fire Emblem|Story 5 Meeting}}'' | ||
|- | |- | ||
| | |8th||{{CharHead|Young Link|SSBU|hsize=20px}}||1,400||30 minutes||[[Great Bay]]||''{{SSBUMusicLink|The Legend of Zelda|Saria's Theme}}'' | ||
|- | |- | ||
| | |9th||{{CharHead|Wii Fit Trainer|SSBU|hsize=20px}}||1,400||40 minutes||[[Wii Fit Studio]]||''{{SSBUMusicLink|Wii Fit|Main Menu - Wii Fit}}'' | ||
|- | |- | ||
| | |10th||{{CharHead|Ice Climbers|SSBU|hsize=20px}}||1,400||50 minutes||[[Summit]]||''{{SSBUMusicLink|Ice Climber|Ice Climber (Brawl)}}'' | ||
|- | |- | ||
| | |11th||{{CharHead|Captain Falcon|SSBU|hsize=20px}}||1,400||1 hour||[[Port Town Aero Dive]]||''{{SSBUMusicLink|F-Zero|F-ZERO Medley}}'' | ||
|- | |- | ||
| | |12th||{{CharHead|Peach|SSBU|hsize=20px}}||1,400||1 hour & 10 minutes||[[Princess Peach's Castle]]||''{{SSBUMusicLink|Super Mario Bros.|Rolling Hills A}}'' | ||
|- | |- | ||
| | |13th||{{CharHead|Ryu|SSBU|hsize=20px}}||1,400||1 hour & 20 minutes||{{SSBU|Battlefield}}||''{{SSBUMusicLink|Street Fighter|Ryu Stage}}'' | ||
|- | |- | ||
| | |14th||{{CharHead|Ike|SSBU|hsize=20px}}||1,400||1 hour & 30 minutes||[[Coliseum]]||''{{SSBUMusicLink|Fire Emblem|Eternal Bond}}'' | ||
|- | |- | ||
| | |15th||{{CharHead|Jigglypuff|SSBU|hsize=20px}}||1,400||1 hour & 40 minutes||[[Saffron City]]||''{{SSBUMusicLink|Pokémon|Main Theme - Pokémon Red & Pokémon Blue (64)}}'' | ||
|- | |- | ||
| | |16th||{{CharHead|King K. Rool|SSBU|hsize=20px}}||1,400||1 hour & 50 minutes||[[Jungle Japes]]||''{{SSBUMusicLink|Donkey Kong|Gang-Plank Galleon}}'' | ||
|- | |- | ||
| | |17th||{{CharHead|Sonic|SSBU|hsize=20px}}||1,400||2 hours||[[Green Hill Zone]]||''{{SSBUMusicLink|Sonic The Hedgehog|Green Hill Zone}}'' | ||
|- | |- | ||
| | |18th||{{CharHead|Simon|SSBU|hsize=20px}}||1,400||2 hours & 10 minutes||[[Dracula's Castle]]||''{{SSBUMusicLink|Castlevania|Vampire Killer (Remix)}}'' | ||
|- | |- | ||
| | |19th||{{CharHead|Zero Suit Samus|SSBU|hsize=20px}}||1,400||2 hours & 20 minutes||[[Brinstar]]||''{{SSBUMusicLink|Metroid|Theme of Samus Aran, Space Warrior}}'' | ||
|- | |- | ||
| | |20th||{{CharHead|Little Mac|SSBU|hsize=20px}}||1,400||2 hours & 30 minutes||[[Boxing Ring]] (Punch-Out!!)||''{{SSBUMusicLink|Punch-Out!!|Jogging / Countdown}}'' | ||
|- | |- | ||
| | |21st||{{CharHead|Isabelle|SSBU|hsize=20px}}||1,400||2 hours & 40 minutes||[[Town and City]]||''{{SSBUMusicLink|Animal Crossing|Plaza / Title Theme - Animal Crossing: City Folk / Animal Crossing: Wild World}}'' | ||
|- | |- | ||
| | |22nd||{{CharHead|Shulk|SSBU|hsize=20px}}||1,400||2 hours & 50 minutes||[[Gaur Plain]]||''{{SSBUMusicLink|Xenoblade|Xenoblade Chronicles Medley}}'' | ||
|- | |- | ||
| | |23rd||{{CharHead|Lucina|SSBU|hsize=20px}}||1,400||3 hours||[[Arena Ferox]]||''{{SSBUMusicLink|Fire Emblem|Id (Purpose)}}'' | ||
|- | |- | ||
| | |24th||{{CharHead|Wario|SSBU|hsize=20px}}||1,400||3 hours & 10 minutes||[[WarioWare, Inc.]]||''{{SSBUMusicLink|WarioWare|WarioWare, Inc.}}'' | ||
|- | |- | ||
| | |25th||{{CharHead|Ridley|SSBU|hsize=20px}}||1,400||3 hours & 20 minutes||[[Norfair]]||''{{SSBUMusicLink|Metroid|Vs. Ridley}}'' | ||
|- | |- | ||
| | |26th||{{CharHead|Pokémon Trainer|SSBU|hsize=20px}}||1,400||3 hours & 30 minutes||[[Pokémon Stadium]]||''{{SSBUMusicLink|Pokémon|Main Theme - Pokémon Red & Pokémon Blue (Brawl)}}'' | ||
|- | |- | ||
| | |27th||{{CharHead|Lucario|SSBU|hsize=20px}}||1,400||3 hours & 40 minutes||[[Spear Pillar]]||''{{SSBUMusicLink|Pokémon|Battle! (Team Galactic)}}'' | ||
|- | |- | ||
| | |28th||{{CharHead|Daisy|SSBU|hsize=20px}}||1,400||3 hours & 50 minutes||[[Figure-8 Circuit]]||''{{SSBUMusicLink|Super Mario Bros.|Mario Tennis / Mario Golf}}'' | ||
|- | |- | ||
| | |29th||{{CharHead|Roy|SSBU|hsize=20px}}||1,400||4 hours||[[Castle Siege]]||''{{SSBUMusicLink|Fire Emblem|Beyond Distant Skies - Roy's Departure}}'' | ||
|- | |- | ||
| | |30th||{{CharHead|King Dedede|SSBU|hsize=20px}}||1,400||4 hours & 10 minutes||[[Fountain of Dreams]]||''{{SSBUMusicLink|Kirby|King Dedede's Theme (Brawl)}}'' | ||
|- | |- | ||
| | |31st||{{CharHead|R.O.B.|SSBU|hsize=20px|color=Grey}}||1,600||4 hours & 20 minutes||[[Wrecking Crew]]||''{{SSBUMusicLink|Nintendo|Stack-Up/Gyromite}}'' | ||
|- | |- | ||
| | |32nd||{{CharHead|Falco|SSBU|hsize=20px}}||1,700||4 hours & 30 minutes||[[Corneria]]||''{{SSBUMusicLink|Star Fox|Star Fox Medley}}'' | ||
|- | |- | ||
| | |33rd||{{CharHead|Luigi|SSBU|hsize=20px}}||1,900||4 hours & 40 minutes||[[Luigi's Mansion]]||''{{SSBUMusicLink|Super Mario Bros.|Main Theme - Luigi's Mansion}}'' | ||
|- | |- | ||
| | |34th||{{CharHead|Pichu|SSBU|hsize=20px}}||2,000||4 hours & 50 minutes||[[Pokémon Stadium 2]]||''{{SSBUMusicLink|Pokémon|Pokémon Red / Pokémon Blue Medley}}'' | ||
|- | |- | ||
| | |35th||{{CharHead|Richter|SSBU|hsize=20px}}||2,200||5 hours||[[Dracula's Castle]]||''{{SSBUMusicLink|Castlevania|Divine Bloodlines}}'' | ||
|- | |- | ||
| | |36th||{{CharHead|Lucas|SSBU|hsize=20px}}||2,300||5 hours & 10 minutes||[[New Pork City]]||''{{SSBUMusicLink|EarthBound|Unfounded Revenge / Smashing Song of Praise}}'' | ||
|- | |- | ||
| | |37th||{{CharHead|Diddy Kong|SSBU|hsize=20px}}||2,400||5 hours & 20 minutes||[[Kongo Falls]]||''{{SSBUMusicLink|Donkey Kong|Stickerbush Symphony}}'' | ||
|- | |- | ||
| | |38th||{{CharHead|Meta Knight|SSBU|hsize=20px}}||2,600||5 hours & 30 minutes||[[Halberd]]||''{{SSBUMusicLink|Kirby|Meta Knight's Revenge}}'' | ||
|- | |- | ||
| | |39th||{{CharHead|Snake|SSBU|hsize=20px}}||2,700||5 hours & 40 minutes||[[Shadow Moses Island]]||''{{SSBUMusicLink|Metal Gear|Encounter}}'' | ||
|- | |- | ||
| | |40th||{{CharHead|Ganondorf|SSBU|hsize=20px}}||2,900||5 hours & 50 minutes||[[Bridge of Eldin]]||''{{SSBUMusicLink|The Legend of Zelda|Death Mountain}}'' | ||
|- | |- | ||
| | |41st||{{CharHead|Corrin|SSBU|hsize=20px}}||3,000||6 hours||[[Coliseum]]||''{{SSBUMusicLink|Fire Emblem|Lost in Thoughts All Alone (Remix)}}'' | ||
|- | |- | ||
| | |42nd||{{CharHead|Mega Man|SSBU|hsize=20px}}||3,200||6 hours & 10 minutes||[[Wily Castle]]||''{{SSBUMusicLink|Mega Man|Mega Man 2 Medley}}'' | ||
|- | |- | ||
| | |43rd||{{CharHead|Bayonetta|SSBU|hsize=20px}}||3,300||6 hours & 20 minutes||[[Umbra Clock Tower]]||''{{SSBUMusicLink|Bayonetta|Let's Hit The Climax!}}'' | ||
|- | |- | ||
| | |44th||{{CharHead|Toon Link|SSBU|hsize=20px}}||3,500||6 hours & 30 minutes||[[Pirate Ship]]||''{{SSBUMusicLink|The Legend of Zelda|Dragon Roost Island}}'' | ||
|- | |- | ||
| | |45th||{{CharHead|Rosalina & Luma|SSBU|hsize=20px}}||3,600||6 hours & 40 minutes||[[Mario Galaxy]]||''{{SSBUMusicLink|Super Mario Bros.|Egg Planet (Remix)}}'' | ||
|- | |- | ||
| | |46th||{{CharHead|Incineroar|SSBU|hsize=20px}}||3,700||6 hours & 50 minutes||[[Boxing Ring]] (Super Smash Bros.)||''{{SSBUMusicLink|Pokémon|The Battle at the Summit!}}'' | ||
|- | |- | ||
| | |47th||{{CharHead|Sheik|SSBU|hsize=20px}}||3,900||7 hours||[[Gerudo Valley]]||''{{SSBUMusicLink|The Legend of Zelda|Gerudo Valley (Remix)}}'' | ||
|- | |- | ||
| | |48th||{{CharHead|Olimar|SSBU|hsize=20px}}||4,000||7 hours & 10 minutes||[[Distant Planet]]||''{{SSBUMusicLink|Pikmin|Main Theme - Pikmin (Remix)}}'' | ||
|- | |- | ||
| | |49th||{{CharHead|Pac-Man|SSBU|hsize=20px}}||4,200||7 hours & 20 minutes||[[Pac-Land]]||''{{SSBUMusicLink|Pac-Man|PAC-MAN}}'' | ||
|- | |- | ||
| | |50th||{{CharHead|Dark Samus|SSBU|hsize=20px}}||4,300||7 hours & 30 minutes||[[Frigate Orpheon]]||''{{SSBUMusicLink|Metroid|Multiplayer - Metroid Prime 2: Echoes}}'' | ||
|- | |- | ||
| | |51st||{{CharHead|Wolf|SSBU|hsize=20px}}||4,600||7 hours & 40 minutes||[[Lylat Cruise]]||''{{SSBUMusicLink|Star Fox|Star Wolf (Brawl)}}'' | ||
|- | |- | ||
| | |52nd||{{CharHead|Mr. Game & Watch|SSBU|hsize=20px}}||4,900||7 hours & 50 minutes||[[Flat Zone X]]||''{{SSBUMusicLink|Game & Watch|Flat Zone 2}}'' | ||
|- | |- | ||
| | |53rd||{{CharHead|Robin|SSBU|hsize=20px}}||5,200||8 hours||[[Castle Siege]]||''{{SSBUMusicLink|Fire Emblem|Prelude (Ablaze)}}'' | ||
|- | |- | ||
| | |54th||{{CharHead|Dark Pit|SSBU|hsize=20px}}||5,500||8 hours & 10 minutes||[[Reset Bomb Forest]]||''{{SSBUMusicLink|Kid Icarus|Dark Pit's Theme}}'' | ||
|- | |- | ||
| | |55th||{{CharHead|Cloud|SSBU|hsize=20px}}||5,800||8 hours & 20 minutes||[[Midgar]]||''{{SSBUMusicLink|Final Fantasy|Fight On!}}'' | ||
|- | |- | ||
| | |56th||{{CharHead|Duck Hunt|SSBU|hsize=20px}}||6,100||8 hours & 30 minutes||{{b|Duck Hunt|stage}}||''{{SSBUMusicLink|Duck Hunt|Duck Hunt Medley}}'' | ||
|- | |- | ||
| | |57th||{{CharHead|Ken|SSBU|hsize=20px}}||6,400||8 hours & 40 minutes||[[Boxing Ring]] (Punch-Out!!)||''{{SSBUMusicLink|Street Fighter|Ken Stage}}'' | ||
|- | |- | ||
| | |58th||{{CharHead|Greninja|SSBU|hsize=20px}}||6,700||8 hours & 50 minutes||[[Kalos Pokémon League]]||''{{SSBUMusicLink|Pokémon|Battle! (Trainer Battle) - Pokémon X / Pokémon Y}}'' | ||
|- | |- | ||
| | |59th||{{CharHead|Chrom|SSBU|hsize=20px}}||6,900||9 hours||[[Arena Ferox]]||''{{SSBUMusicLink|Fire Emblem|Id (Purpose) (Remix)}}'' | ||
|- | |- | ||
| | |60th||{{CharHead|Mewtwo|SSBU|hsize=20px}}||7,200||9 hours & 10 minutes||[[Spear Pillar]]||''{{SSBUMusicLink|Pokémon|Battle! (Dialga/Palkia) / Spear Pillar}}'' | ||
|- | |- | ||
| | |61st||{{CharHead|Bowser Jr.|SSBU|hsize=20px}}||7,500||9 hours & 20 minutes||[[Delfino Plaza]]||''{{SSBUMusicLink|Super Mario Bros.|Delfino Plaza (Remix)}}'' | ||
|- | |- | ||
| | |62nd||{{CharHead|Dr. Mario|SSBU|hsize=20px}}||7,800||9 hours & 30 minutes||[[New Donk City Hall]]||''{{SSBUMusicLink|Super Mario Bros.|Fever}}'' | ||
|- | |- | ||
| | |63rd||{{CharHead|Palutena|SSBU|hsize=20px}}||8,100||9 hours & 40 minutes||[[Palutena's Temple]]||''{{SSBUMusicLink|Kid Icarus|Destroyed Skyworld}}'' | ||
|} | |} | ||
===[[Challenger's Approach]]=== | |||
If the player loses any Challenger Approaching fight, that character will not appear again either from Classic Mode or as a timed encounter. However, the character will later reappear under [[Challenger's Approach]] on the Games & More menu. | |||
===[[World of Light]]=== | ===[[World of Light]]=== | ||
In World of Light, | In the World of Light, only characters that have been awakened in the current World of Light save file can be used, with only {{SSBU|Kirby}} initially being available. However, awakening a fighter in the World of Light that is not a starter character also unlocks them for the regular roster. | ||
Awakening a Mii Fighter in the World of Light automatically creates a custom Mii Fighter of the awakened type. | |||
Each fighter must be unlocked through a fighter battle, with a few exceptions: | |||
:{{CharHead|Kirby|SSBU|hsize=20px}} is always available from the beginning. | :{{CharHead|Kirby|SSBU|hsize=20px}} is always available from the beginning. | ||
:{{CharHead|Bowser|SSBU|hsize=20px}} is unlocked after defeating [[Giga Bowser]] within the [[Molten Fortress]] sub- | :{{CharHead|Bowser|SSBU|hsize=20px}} is unlocked after defeating [[Giga Bowser]] within the [[Molten Fortress]] sub-world in [[The Light Realm]]. | ||
:{{Head|Piranha Plant|g=SSBU|s=20px}} {{Head|Joker|g=SSBU|s=20px}} {{Head|Hero|g=SSBU|s=20px}} {{Head|Banjo & Kazooie|g=SSBU|s=20px}} {{Head|Terry|g=SSBU|s=20px}} {{Head|Byleth|g=SSBU|s=20px}} {{Head|Min Min|g=SSBU|s=20px}} {{Head|Steve|g=SSBU|s=20px}} {{Head|Sephiroth|g=SSBU|s=20px}} {{Head|PyraMythra|g=SSBU|s=20px}} {{Head|Kazuya|g=SSBU|s=20px}} {{ | :{{Head|Piranha Plant|g=SSBU|s=20px}} {{Head|Joker|g=SSBU|s=20px}} {{Head|Hero|g=SSBU|s=20px}} {{Head|Banjo & Kazooie|g=SSBU|s=20px}} {{Head|Terry|g=SSBU|s=20px}} {{Head|Byleth|g=SSBU|s=20px}} {{Head|Min Min|g=SSBU|s=20px}} {{Head|Steve|g=SSBU|s=20px}} {{Head|Sephiroth|g=SSBU|s=20px}} {{Head|PyraMythra|g=SSBU|s=20px}} {{Head|Kazuya|g=SSBU|s=20px}} {{Head|Sora|g=SSBU|s=20px}} [[Downloadable content (SSBU)#Fighters|Downloadable fighters]] become available after freeing a total of 10 fighters. If the player has already freed 10 fighters on a file, any characters downloaded afterwards will immediately be available. | ||
The fighter battles all feature the same single condition: ''Win the battle to awaken the fighter'' | The fighter battles all feature the same single condition: ''Win the battle to awaken the fighter'' | ||
| Line 939: | Line 852: | ||
|{{OmegaStage|Luigi's Mansion}} | |{{OmegaStage|Luigi's Mansion}} | ||
|''{{SSBUMusicLink|Super Mario Bros.|Main Theme - Luigi's Mansion}}'' | |''{{SSBUMusicLink|Super Mario Bros.|Main Theme - Luigi's Mansion}}'' | ||
|In [[The Dark Realm]] (in the [[Mysterious Dimension]] sub- | |In [[The Dark Realm]] (in the [[Mysterious Dimension]] sub-world, in the flames) | ||
|- | |- | ||
|10 | |10 | ||
| Line 975: | Line 888: | ||
|[[Mushroom Kingdom U]] (Slide Lift Tower) | |[[Mushroom Kingdom U]] (Slide Lift Tower) | ||
|''{{SSBUMusicLink|Super Mario Bros.|Fortress Boss - Super Mario World}}'' | |''{{SSBUMusicLink|Super Mario Bros.|Fortress Boss - Super Mario World}}'' | ||
|In [[The Light Realm]] (in the [[Molten Fortress]] sub- | |In [[The Light Realm]] (in the [[Molten Fortress]] sub-world) | ||
|- | |- | ||
|13<sup>ε</sup> | |13<sup>ε</sup> | ||
| Line 984: | Line 897: | ||
|[[Mushroom Kingdom U]] (Slide Lift Tower) | |[[Mushroom Kingdom U]] (Slide Lift Tower) | ||
|''{{SSBUMusicLink|Super Mario Bros.|Underground Theme - Super Mario Land}}'' | |''{{SSBUMusicLink|Super Mario Bros.|Underground Theme - Super Mario Land}}'' | ||
|In [[The Dark Realm]] (in the {{b|Dracula's Castle|World of Light}} sub- | |In [[The Dark Realm]] (in the {{b|Dracula's Castle|World of Light}} sub-world) | ||
|- | |- | ||
|15 | |15 | ||
| Line 1,000: | Line 913: | ||
|{{SpiritType|Shield}} <center>{{color|#18aef5|Shield}}</center> | |{{SpiritType|Shield}} <center>{{color|#18aef5|Shield}}</center> | ||
|2,500 | |2,500 | ||
| | |{{SSBU|Final Destination}} | ||
|''{{SSBUMusicLink|Super Smash Bros.|Final Destination}}'' | |''{{SSBUMusicLink|Super Smash Bros.|Final Destination}}'' | ||
|In [[The Light Realm]], one of the 3 starter routes (north route) | |In [[The Light Realm]], one of the 3 starter routes (north route) | ||
| Line 1,011: | Line 924: | ||
|{{OmegaStage|Temple}} | |{{OmegaStage|Temple}} | ||
|''{{SSBUMusicLink|The Legend of Zelda|Ocarina of Time Medley}}'' | |''{{SSBUMusicLink|The Legend of Zelda|Ocarina of Time Medley}}'' | ||
|In [[The Dark Realm]] (in the [[Sacred Land]] sub- | |In [[The Dark Realm]] (in the [[Sacred Land]] sub-world, in Kakariko Village) | ||
|- | |- | ||
|18 | |18 | ||
| Line 1,029: | Line 942: | ||
|{{OmegaStage|Prism Tower}} | |{{OmegaStage|Prism Tower}} | ||
|''{{SSBUMusicLink|Pokémon|Pokémon Red / Pokémon Blue Medley}}'' | |''{{SSBUMusicLink|Pokémon|Pokémon Red / Pokémon Blue Medley}}'' | ||
|In [[The Light Realm]] (in the [[Power Plant]] sub- | |In [[The Light Realm]] (in the [[Power Plant]] sub-world) | ||
|- | |- | ||
|20 | |20 | ||
| Line 1,045: | Line 958: | ||
|{{SpiritType|Attack}} <center>{{color|#dc1029|Attack}}</center> | |{{SpiritType|Attack}} <center>{{color|#dc1029|Attack}}</center> | ||
|2,500 | |2,500 | ||
| | |{{SSBU|Final Destination}} | ||
|''{{SSBUMusicLink|Super Smash Bros.|Final Destination}}'' | |''{{SSBUMusicLink|Super Smash Bros.|Final Destination}}'' | ||
|In [[The Light Realm]], one of the 3 starter routes (west route) | |In [[The Light Realm]], one of the 3 starter routes (west route) | ||
| Line 1,065: | Line 978: | ||
|{{OmegaStage|Temple}} | |{{OmegaStage|Temple}} | ||
|''{{SSBUMusicLink|The Legend of Zelda|Saria's Song}}'' | |''{{SSBUMusicLink|The Legend of Zelda|Saria's Song}}'' | ||
|In [[The Dark Realm]] (in the [[Sacred Land]] sub- | |In [[The Dark Realm]] (in the [[Sacred Land]] sub-world, in the Lost Woods) | ||
|- | |- | ||
|23 | |23 | ||
| Line 1,074: | Line 987: | ||
|{{OmegaStage|Bridge of Eldin}} | |{{OmegaStage|Bridge of Eldin}} | ||
|''{{SSBUMusicLink|The Legend of Zelda|Death Mountain}}'' | |''{{SSBUMusicLink|The Legend of Zelda|Death Mountain}}'' | ||
|In [[The Dark Realm]] (in the [[Sacred Land]] sub- | |In [[The Dark Realm]] (in the [[Sacred Land]] sub-world, in the Gerudo Fortress) | ||
|- | |- | ||
|24 | |24 | ||
| Line 1,083: | Line 996: | ||
|{{OmegaStage|Spear Pillar}} | |{{OmegaStage|Spear Pillar}} | ||
|''{{SSBUMusicLink|Pokémon|Battle! (Dialga/Palkia) / Spear Pillar}}'' | |''{{SSBUMusicLink|Pokémon|Battle! (Dialga/Palkia) / Spear Pillar}}'' | ||
|In [[The Dark Realm]] (in the [[Mysterious Dimension]] sub- | |In [[The Dark Realm]] (in the [[Mysterious Dimension]] sub-world, in the red-leafed trees) | ||
|- | |- | ||
|25 | |25 | ||
| Line 1,101: | Line 1,014: | ||
|{{OmegaStage|Castle Siege}} | |{{OmegaStage|Castle Siege}} | ||
|''{{SSBUMusicLink|Fire Emblem|Id (Purpose) (Remix)}}'' | |''{{SSBUMusicLink|Fire Emblem|Id (Purpose) (Remix)}}'' | ||
|In [[The Dark Realm]] (in the [[Sacred Land]] sub- | |In [[The Dark Realm]] (in the [[Sacred Land]] sub-world, by jumping into a treasure chest in the Lost Woods) | ||
|- | |- | ||
|26 | |26 | ||
| Line 1,119: | Line 1,032: | ||
|{{OmegaStage|Halberd}} | |{{OmegaStage|Halberd}} | ||
|''{{SSBUMusicLink|Kirby|Meta Knight's Revenge}}'' | |''{{SSBUMusicLink|Kirby|Meta Knight's Revenge}}'' | ||
|In [[The Dark Realm]] (in the [[Mysterious Dimension]] sub- | |In [[The Dark Realm]] (in the [[Mysterious Dimension]] sub-world) | ||
|- | |- | ||
|28 | |28 | ||
| Line 1,128: | Line 1,041: | ||
|{{OmegaStage|Skyworld}} | |{{OmegaStage|Skyworld}} | ||
|''{{SSBUMusicLink|Kid Icarus|Underworld}}'' | |''{{SSBUMusicLink|Kid Icarus|Underworld}}'' | ||
|In [[The Light Realm]] (in the [[Temple of Light]] sub- | |In [[The Light Realm]] (in the [[Temple of Light]] sub-world) | ||
|- | |- | ||
|28<sup>ε</sup> | |28<sup>ε</sup> | ||
| Line 1,137: | Line 1,050: | ||
|{{OmegaStage|Reset Bomb Forest}} | |{{OmegaStage|Reset Bomb Forest}} | ||
|''{{SSBUMusicLink|Kid Icarus|Dark Pit's Theme}}'' | |''{{SSBUMusicLink|Kid Icarus|Dark Pit's Theme}}'' | ||
|In [[The Dark Realm]] (in the {{b|Dracula's Castle|World of Light}} sub- | |In [[The Dark Realm]] (in the {{b|Dracula's Castle|World of Light}} sub-world, through a fireplace) | ||
|- | |- | ||
|29 | |29 | ||
| Line 1,155: | Line 1,068: | ||
|{{OmegaStage|WarioWare, Inc.}} | |{{OmegaStage|WarioWare, Inc.}} | ||
|''{{SSBUMusicLink|WarioWare|WarioWare, Inc.}}'' | |''{{SSBUMusicLink|WarioWare|WarioWare, Inc.}}'' | ||
|In [[The Dark Realm]] (in the {{b|Dracula's Castle|World of Light}} sub- | |In [[The Dark Realm]] (in the {{b|Dracula's Castle|World of Light}} sub-world) | ||
|- | |- | ||
|31 | |31 | ||
| Line 1,162: | Line 1,075: | ||
|{{SpiritType|Grab}} <center>{{color|#17ba17|Grab}}</center> | |{{SpiritType|Grab}} <center>{{color|#17ba17|Grab}}</center> | ||
|9,000 | |9,000 | ||
| | |{{SSBU|Final Destination}} | ||
|''{{SSBUMusicLink|Metal Gear|Encounter}}'' | |''{{SSBUMusicLink|Metal Gear|Encounter}}'' | ||
|In [[The Light Realm]] (in the [[Base]] sub- | |In [[The Light Realm]] (in the [[Base]] sub-world) | ||
|- | |- | ||
|32 | |32 | ||
| Line 1,173: | Line 1,086: | ||
|{{OmegaStage|Coliseum}} | |{{OmegaStage|Coliseum}} | ||
|''{{SSBUMusicLink|Fire Emblem|Eternal Bond}}'' | |''{{SSBUMusicLink|Fire Emblem|Eternal Bond}}'' | ||
|In [[The Dark Realm]] (in the [[Mysterious Dimension]] sub- | |In [[The Dark Realm]] (in the [[Mysterious Dimension]] sub-world) | ||
|- | |- | ||
|33-35 | |33-35 | ||
| Line 1,191: | Line 1,104: | ||
|{{OmegaStage|Kongo Jungle}} | |{{OmegaStage|Kongo Jungle}} | ||
|''{{SSBUMusicLink|Donkey Kong|Stickerbrush Symphony}}'' | |''{{SSBUMusicLink|Donkey Kong|Stickerbrush Symphony}}'' | ||
|In [[The Light Realm]] (in the {{b|DK Island|World of Light}} sub- | |In [[The Light Realm]] (in the {{b|DK Island|World of Light}} sub-world) | ||
|- | |- | ||
|37 | |37 | ||
| Line 1,209: | Line 1,122: | ||
|{{OmegaStage|Green Hill Zone}} | |{{OmegaStage|Green Hill Zone}} | ||
|''{{SSBUMusicLink|Sonic The Hedgehog|Green Hill Zone}}'' | |''{{SSBUMusicLink|Sonic The Hedgehog|Green Hill Zone}}'' | ||
|In [[The Dark Realm]] (in the [[Sacred Land]] sub- | |In [[The Dark Realm]] (in the [[Sacred Land]] sub-world, between Kakariko Village and the Lost Woods) | ||
|- | |- | ||
|39 | |39 | ||
| Line 1,218: | Line 1,131: | ||
|{{OmegaStage|Fountain of Dreams}} | |{{OmegaStage|Fountain of Dreams}} | ||
|''{{SSBUMusicLink|Kirby|King Dedede's Theme (Brawl)}}'' | |''{{SSBUMusicLink|Kirby|King Dedede's Theme (Brawl)}}'' | ||
|In [[The Light Realm]] (in the [[Gourmet Race]] sub- | |In [[The Light Realm]] (in the [[Gourmet Race]] sub-world, after obtaining a score of 11) | ||
|- | |- | ||
|40 | |40 | ||
| Line 1,245: | Line 1,158: | ||
|{{OmegaStage|Wrecking Crew}} | |{{OmegaStage|Wrecking Crew}} | ||
|''{{SSBUMusicLink|Nintendo|Stack-Up/Gyromite}}'' | |''{{SSBUMusicLink|Nintendo|Stack-Up/Gyromite}}'' | ||
|In [[The Dark Realm]] (in the [[Mysterious Dimension]] sub- | |In [[The Dark Realm]] (in the [[Mysterious Dimension]] sub-world, eastern optional path) | ||
|- | |- | ||
|43 | |43 | ||
| Line 1,254: | Line 1,167: | ||
|[[Wuhu Island]] | |[[Wuhu Island]] | ||
|''{{SSBUMusicLink|The Legend of Zelda|Main Theme - The Legend of Zelda: Tri Force Heroes}}'' | |''{{SSBUMusicLink|The Legend of Zelda|Main Theme - The Legend of Zelda: Tri Force Heroes}}'' | ||
|In [[The Light Realm]] (in the [[Forest Hill]] sub- | |In [[The Light Realm]] (in the [[Forest Hill]] sub-world) | ||
|- | |- | ||
|44 | |44 | ||
| Line 1,263: | Line 1,176: | ||
|{{OmegaStage|Lylat Cruise}} | |{{OmegaStage|Lylat Cruise}} | ||
|''{{SSBUMusicLink|Star Fox|Star Wolf (Brawl)}}'' | |''{{SSBUMusicLink|Star Fox|Star Wolf (Brawl)}}'' | ||
|In [[The Dark Realm]] (in the [[Mysterious Dimension]] sub- | |In [[The Dark Realm]] (in the [[Mysterious Dimension]] sub-world, on the crashed plane) | ||
|- | |- | ||
|45 | |45 | ||
| Line 1,270: | Line 1,183: | ||
|{{SpiritType|Grab}} <center>{{color|#17ba17|Grab}}</center> | |{{SpiritType|Grab}} <center>{{color|#17ba17|Grab}}</center> | ||
|2,500 | |2,500 | ||
| | |{{SSBU|Final Destination}} | ||
|''{{SSBUMusicLink|Super Smash Bros.|Final Destination}}'' | |''{{SSBUMusicLink|Super Smash Bros.|Final Destination}}'' | ||
|In [[The Light Realm]], one of the 3 starter routes (east route) | |In [[The Light Realm]], one of the 3 starter routes (east route) | ||
| Line 1,317: | Line 1,230: | ||
|{{OmegaStage|Kalos Pokémon League}} | |{{OmegaStage|Kalos Pokémon League}} | ||
|''{{SSBUMusicLink|Pokémon|Battle! (Trainer Battle) - Pokémon X / Pokémon Y}}'' | |''{{SSBUMusicLink|Pokémon|Battle! (Trainer Battle) - Pokémon X / Pokémon Y}}'' | ||
|In [[The Dark Realm]] (in the [[Mysterious Dimension]] sub- | |In [[The Dark Realm]] (in the [[Mysterious Dimension]] sub-world) | ||
|- | |- | ||
|51 | |51 | ||
| Line 1,324: | Line 1,237: | ||
|{{SpiritType|Attack}} <center>{{color|#dc1029|Attack}}</center> | |{{SpiritType|Attack}} <center>{{color|#dc1029|Attack}}</center> | ||
|10,000 | |10,000 | ||
| | |{{SSBU|Final Destination}} | ||
|''{{SSBUMusicLink|Super Smash Bros.|Final Destination - Super Smash Bros. for 3DS / Wii U}}'' | |''{{SSBUMusicLink|Super Smash Bros.|Final Destination - Super Smash Bros. for 3DS / Wii U}}'' | ||
|In [[The Dark Realm]] (in the [[Sacred Land]] sub- | |In [[The Dark Realm]] (in the [[Sacred Land]] sub-world, in Kakariko Village after setting the clock to 4:40) | ||
|- | |- | ||
|52 | |52 | ||
| Line 1,333: | Line 1,246: | ||
|{{SpiritType|Shield}} <center>{{color|#18aef5|Shield}}</center> | |{{SpiritType|Shield}} <center>{{color|#18aef5|Shield}}</center> | ||
|3,300 | |3,300 | ||
| | |{{SSBU|Final Destination}} | ||
|''{{SSBUMusicLink|Super Smash Bros.|Final Destination - Super Smash Bros. for 3DS / Wii U}}'' | |''{{SSBUMusicLink|Super Smash Bros.|Final Destination - Super Smash Bros. for 3DS / Wii U}}'' | ||
|In [[The Light Realm]] (north of the eastern town) | |In [[The Light Realm]] (north of the eastern town) | ||
| Line 1,371: | Line 1,284: | ||
|{{OmegaStage|Castle Siege}} | |{{OmegaStage|Castle Siege}} | ||
|''{{SSBUMusicLink|Fire Emblem|Prelude (Ablaze)}}'' | |''{{SSBUMusicLink|Fire Emblem|Prelude (Ablaze)}}'' | ||
|In [[The Dark Realm]] (in the {{b|Dracula's Castle|World of Light}} sub- | |In [[The Dark Realm]] (in the {{b|Dracula's Castle|World of Light}} sub-world) | ||
|- | |- | ||
|57 | |57 | ||
| Line 1,389: | Line 1,302: | ||
|{{OmegaStage|Mushroomy Kingdom}} | |{{OmegaStage|Mushroomy Kingdom}} | ||
|''{{SSBUMusicLink|Super Mario Bros.|Fortress Boss - Super Mario Bros. 3}}'' | |''{{SSBUMusicLink|Super Mario Bros.|Fortress Boss - Super Mario Bros. 3}}'' | ||
|In [[The Dark Realm]] (in the [[Sacred Land]] sub- | |In [[The Dark Realm]] (in the [[Sacred Land]] sub-world, on top of a pyramid in the Gerudo Desert) | ||
|- | |- | ||
|59 | |59 | ||
| Line 1,407: | Line 1,320: | ||
|{{OmegaStage|Suzaku Castle}} | |{{OmegaStage|Suzaku Castle}} | ||
|''{{SSBUMusicLink|Street Fighter|Ryu Stage}}'' | |''{{SSBUMusicLink|Street Fighter|Ryu Stage}}'' | ||
|In [[The Light Realm]] (in the [[World Tour]] sub- | |In [[The Light Realm]] (in the [[World Tour]] sub-world) | ||
|- | |- | ||
|60<sup>ε</sup> | |60<sup>ε</sup> | ||
| Line 1,416: | Line 1,329: | ||
|{{OmegaStage|Boxing Ring}} | |{{OmegaStage|Boxing Ring}} | ||
|''{{SSBUMusicLink|Street Fighter|Ken Stage}}'' | |''{{SSBUMusicLink|Street Fighter|Ken Stage}}'' | ||
|In [[The Dark Realm]] (in the {{b|Dracula's Castle|World of Light}} sub- | |In [[The Dark Realm]] (in the {{b|Dracula's Castle|World of Light}} sub-world) | ||
|- | |- | ||
|61 | |61 | ||
| Line 1,425: | Line 1,338: | ||
|{{OmegaStage|Midgar}} | |{{OmegaStage|Midgar}} | ||
|''{{SSBUMusicLink|Final Fantasy|Fight On!}}'' | |''{{SSBUMusicLink|Final Fantasy|Fight On!}}'' | ||
|In [[The Dark Realm]] (in the [[Sacred Land]] sub- | |In [[The Dark Realm]] (in the [[Sacred Land]] sub-world, before the Master Sword) | ||
|- | |- | ||
|62 | |62 | ||
| Line 1,434: | Line 1,347: | ||
|{{OmegaStage|Castle Siege}} | |{{OmegaStage|Castle Siege}} | ||
|''{{SSBUMusicLink|Fire Emblem|Lost in Thoughts All Alone}}'' | |''{{SSBUMusicLink|Fire Emblem|Lost in Thoughts All Alone}}'' | ||
|In [[The Dark Realm]] (in the [[Mysterious Dimension]] sub- | |In [[The Dark Realm]] (in the [[Mysterious Dimension]] sub-world, on white clouds) | ||
|- | |- | ||
|63 | |63 | ||
| Line 1,461: | Line 1,374: | ||
|{{OmegaStage|Brinstar Depths}} | |{{OmegaStage|Brinstar Depths}} | ||
|''{{SSBUMusicLink|Metroid|Vs. Ridley (Brawl)}}'' | |''{{SSBUMusicLink|Metroid|Vs. Ridley (Brawl)}}'' | ||
|In [[The Dark Realm]] (in the {{b|Dracula's Castle|World of Light}} sub- | |In [[The Dark Realm]] (in the {{b|Dracula's Castle|World of Light}} sub-world) | ||
|- | |- | ||
|66 | |66 | ||
| Line 1,469: | Line 1,382: | ||
|7,500 | |7,500 | ||
|{{OmegaStage|Dracula's Castle}} | |{{OmegaStage|Dracula's Castle}} | ||
|''{{SSBUMusicLink|Castlevania|Vampire Killer}}'' | |''{{SSBUMusicLink|Castlevania|Vampire Killer (Remix)|Vampire Killer}}'' | ||
|In [[The Light Realm]] (in the [[Temple of Light]] sub- | |In [[The Light Realm]] (in the [[Temple of Light]] sub-world) | ||
|- | |- | ||
|66<sup>ε</sup> | |66<sup>ε</sup> | ||
| Line 1,479: | Line 1,392: | ||
|{{OmegaStage|Dracula's Castle}} | |{{OmegaStage|Dracula's Castle}} | ||
|''{{SSBUMusicLink|Castlevania|Divine Bloodlines}}'' | |''{{SSBUMusicLink|Castlevania|Divine Bloodlines}}'' | ||
|In [[The Dark Realm]] (in the {{b|Dracula's Castle|World of Light}} sub- | |In [[The Dark Realm]] (in the {{b|Dracula's Castle|World of Light}} sub-world, after killing all evil ghosts) | ||
|- | |- | ||
|67 | |67 | ||
| Line 1,488: | Line 1,401: | ||
|[[Pirate Ship]] | |[[Pirate Ship]] | ||
|''{{SSBUMusicLink|Donkey Kong|Gang-Plank Galleon}}'' | |''{{SSBUMusicLink|Donkey Kong|Gang-Plank Galleon}}'' | ||
|In [[The Dark Realm]] (in the [[Mysterious Dimension]] sub- | |In [[The Dark Realm]] (in the [[Mysterious Dimension]] sub-world, the pirate ship optional path) | ||
|- | |- | ||
|68 | |68 | ||
| Line 1,577: | Line 1,490: | ||
==Trivia== | ==Trivia== | ||
*In each of his unlockable appearances, [[Ness]] has always been the first one unlocked through Vs. Mode matches. | *In each of his unlockable appearances outside of ''Smash 64'', [[Ness]] has always been the first one unlocked through Vs. Mode matches. | ||
*''[[Super Smash Bros. 64]]'' is the only game in the series in which playing [[VS. Mode]] matches cannot trigger a "Challenger Approaching" battle | *''[[Super Smash Bros. 64]]'' is the only game in the series in which playing [[VS. Mode]] matches cannot trigger a "Challenger Approaching" battle, and the only game in which each unlockable character only has a single unlock criterion. | ||
*When a player fights a secret character to unlock in ''[[Super Smash Bros. Brawl]]'', the character they used always uses their default costume even if the player was originally using an alternative costume. As ''Brawl'' mods often if not always make the entire roster available by default (regardless of if they were unlocked in the vanilla game) and the player can still trigger Challenger Approaching fights, using the same character as the one the player is trying to “unlock” will make both participants use the same palette swap. | |||
*When a player fights a secret character to unlock in ''[[Super Smash Bros. Brawl]]'', | *Starting in ''[[Super Smash Bros. 4]]'', no items appear at all during the unlocking battle. | ||
* | *In ''Super Smash Bros. Brawl'', each character unlock notification has a different tone depending on the debut game of the character. | ||
**Strangely, {{SSBB|Jigglypuff}}'s unlock notification tone is the same as the ''Brawl'' newcomers despite debuting in '' | **Strangely, {{SSBB|Jigglypuff}}'s unlock notification tone is the same as the ''Brawl'' newcomers despite debuting in ''Super Smash Bros. 64''. This is likely because it is unlocked in the post-game [[Subspace Emissary]], as well as its internal ID being right next to {{SSBB|Toon Link}} and {{SSBB|Wolf}}, ''Brawl'' newcomers. The other ''Smash 64'' newcomers use "Rare Trophy" from ''[[Melee]]'', ''Melee'' newcomers use the stage unlock fanfare from ''Brawl'', and ''Brawl'' newcomers (alongside Jigglypuff) use the sound effect in ''Brawl'' when collecting songs or completing minor challenges. | ||
*In {{forwiiu}} and ''[[Super Smash Bros. Ultimate]]'', unlock matches are treated as VS. Mode matches - that is, they count towards the total number of VS. Mode matches, and all statistics accumulated during unlock matches are saved. | *In {{forwiiu}} and ''[[Super Smash Bros. Ultimate]]'', unlock matches are treated as VS. Mode matches - that is, they count towards the total number of VS. Mode matches, and all statistics accumulated during unlock matches are saved. | ||
*Masahiro Sakurai [http://www.gamnesia.com/news/sakurai-considered-having-all-fighters-available-from-the-start-in-smash-br originally intended] for all the characters in | *Masahiro Sakurai [http://www.gamnesia.com/news/sakurai-considered-having-all-fighters-available-from-the-start-in-smash-br originally intended] for all the characters in ''Super Smash Bros. for Wii U'' to be available from the start, but eventually decided against it. | ||
*In ''Super Smash Bros. 64'', ''Super Smash Bros. Brawl'', {{for3ds}}, and ''Super Smash Bros. Ultimate'', the AI level of unlockable character fights starts out very low, but increases with each consecutive character unlocked. | |||
*In '' | **In ''Super Smash Bros. Melee'', the opposite is the case. | ||
**In '' | |||
**In ''Ultimate'', the difficulty of the AI was lowered in patch 1.2.0, after notorious reports of the level of difficulty for each match. | **In ''Ultimate'', the difficulty of the AI was lowered in patch 1.2.0, after notorious reports of the level of difficulty for each match. | ||
*Counting | *Counting ''Super Smash Bros. for Nintendo 3DS'' and ''Super Smash Bros. for Wii U'' separately, [[Jigglypuff]], [[Falco]], and [[Mr. Game & Watch]] are tied for the most unlockable appearances, with five each. | ||
**Of the three of them, {{SSB4|Jigglypuff}} is the only one to | **Of the three of them, {{SSB4|Jigglypuff}} is the only one to be a starter character at any point, which was in ''Super Smash Bros. for Wii U''. | ||
*[[ | *[[Wario]] was the first starter character to become an unlockable character in a later installment. He is also the only character to have this distinction from ''Brawl'' to ''Smash 4''. | ||
*{{SSBU|Pokémon Trainer}} is the only character whose moveset involves transforming into another character to become unlockable. | *{{SSBU|Pokémon Trainer}} is the only character whose moveset involves transforming into another character to become unlockable. | ||
*Prior to ''Super Smash Bros. Ultimate'', the only unlockable characters whose playable status was not kept a secret in official material prior to release were {{SSBB|Snake}} and {{SSBB|Sonic}} in ''Super Smash Bros. Brawl'', and {{SSB4|Lucina}} in ''Super Smash Bros. 4''. | |||
*Prior to '' | |||
**Out of all of these, Lucina is the only one who is not a third-party character. | **Out of all of these, Lucina is the only one who is not a third-party character. | ||
*'' | *''Super Smash Bros. Ultimate'' is the first game to have more unlockable characters than [[starter character]]s, and the first game to feature unlockable characters on the box art. | ||
*While {{SSBU|Sephiroth}} is a downloadable fighter rather than unlockable, from 17 December to 22 December 2020, defeating him through the limited-time [[Sephiroth Challenge]] enabled access to him, [[Northern Cave]] and his music if the player had purchased Challenger Pack 8 or Fighters Pass Vol. 2 prior to his official release. | *While {{SSBU|Sephiroth}} is a downloadable fighter rather than unlockable, from 17 December to 22 December 2020, defeating him through the limited-time [[Sephiroth Challenge]] enabled access to him, [[Northern Cave]] and his music if the player had purchased Challenger Pack 8 or Fighters Pass Vol. 2 prior to his official release. | ||
*In ''Ultimate'', {{SSBU|Villager}} and {{SSBU|Isabelle}} can have different music play during their regular unlock battles. Specifically, when they're unlocked between 8:00pm and 12:00am on Saturday, K.K. Slider will perform. | |||
==See also== | ==See also== | ||
Latest revision as of 15:38, February 17, 2024
- "Challenger" redirects here. For info on fighters, to whom the title "challenger" is often applied, see Fighter.

An unlockable character (also referred to as a secret character or hidden character, and in-game as challengers, or newcomers in the N64 game's Backup Clear menu) is one that is not available at the start of the game (unlike a starter character), but instead must be received in-game (unlike downloadable characters) through other means.
Unique criteria must be met in order to unlock each character, as outlined below. Once such criteria are met, the challenger will appear the next time the player returns to the menu. If the player wins the subsequent battle, a message will appear congratulating them for unlocking the new fighter.
In Super Smash Bros., the character select screen displayed placeholders for not yet unlocked characters. This was changed in Super Smash Bros. Melee, where the clones didn't have placeholders prior to unlocking, with their portraits simply appearing afterward. The placeholder slots were completely removed from Super Smash Bros. Brawl onward.
Whenever a character is unlocked, a screen telling the player that the character is now playable will be displayed:
- In Super Smash Bros., the screen says that "you can now use" the character, featuring a unique title for each of them.
- In Super Smash Bros. Melee, the screen displays a sentence that is unique to each character and features the unlocking timestamp.
- In Super Smash Bros. Brawl, the screen says that the character, with their unique title too, "has joined the brawl", and also features a portrait of the character.
- In Super Smash Bros. 4 and Super Smash Bros. Ultimate, the screen says that the character "joins the battle!" while playing Rare Trophy from Melee, before archiving their corresponding milestones. This also applies to downloadable content characters once they are downloaded, or when the game is booted after a character's release date in case of being purchased via Fighters Pass in the latter game.
"Challenger Approaching!" screen[edit]
.png)

The "Challenger Approaching!" (挑戦者が現れました!, A Challenger has Appeared!) screen is a message that will be displayed after the player has met a criteria required to unlock any of the available characters. Every game has its unique screen.
Super Smash Bros. had a silhouette of the character merely displayed in a blue box in front of a black background, with an exclamation point in a red circle on the top of the screen, and the phrase "Challenger Approaching" next to it. The screen uses similar music to the 1P-Game's intro, with the only difference being the absence of drums for the "challenger approaching" tune. As a result, this is the only game where the challengers' silhouettes are animated, showing them in their fighting stances while rotating (like in the character select screen), rather than just shadowed versions of their official illustrations.
Super Smash Bros. Melee added the phrase "A new foe has appeared!," and also had a silhouette of the approaching challenger. The poses for the challengers were silhouettes of their renders when selected on the character select screen (some, however, like Luigi and Ganondorf's, were their renders from inside the boxes). The game also added animations to the screens, with an undulating matrix effect in the background, while the exclamation point, text and silhouette would be eased in. Original music was also provided solely for the screen, which took the sound of a slow, ominous siren.
Super Smash Bros. Brawl returned to the plain black background (there would be a silhouette of an unlockable character the player would face); but this would only occur if the Subspace Emissary method was not used. Also, Brawl removed the word "Warning" and the circle explanation point logo from the challenger approaching screen. It still had animations that would ease in, and when the player pressed any button, the images would fade to black, while the "Challenger Approaching!" text would scatter all over the screen; the siren is also considerably faster and more panicky in its sound than how it sounds in Melee.
Super Smash Bros. 4 reused Brawl's warning siren, but there are some differences in both versions. The 3DS version added in considerably more colors, including hues of green, black, and violet; the screen also says "A challenger approaches!" instead of its previous quotations. The Wii U version uses a font style similar to the ones in the newcomer trailers, and the background contains a picture of a supernova; the text is nonetheless reused from past games. The unlockable character in both versions of Super 4 on the screen is still a silhouette that the player would face (just like in the previous three installments).
As in Smash 4, the warning siren from Brawl is used in Super Smash Bros. Ultimate. This time there is a dark pink background with a white/pink light shining behind the silhouette of the unlockable character. The text about unlocking characters remains the same from prior games.
After the "Challenger Approaching!" screen, the unlockable character will then be fought in an ordinary one stock match with no time limit, on a predetermined stage with predetermined music. The AI difficulty of the duel depends on the game, usually at low difficulty for the first fighter, then it gradually increases with every fighter unlocked, however, it is reversed in Melee, and always high in the Wii U version of Smash 4. The player uses the last character played as, including the last used costume. In the case of multiplayer battles, in the first three Smash games, the player who won the match will fight the challenger; if a CPU wins the match, the challenger will not appear. Super Smash Bros. 4 changed this formula such that if a CPU wins the match, then the human-controlled player with the highest rank will battle the challenger.
By defeating the opponent, the character becomes playable. If the player fails, however, they will not unlock the character, but in the next battle they win, they are guaranteed to meet with the challenger again.
The "Challenger Approaching!" screen has become somewhat of a meme in the Smash community. Many digitally manipulated versions of these screens have appeared, often featuring characters who do not appear in the games, mostly using artwork of the character from another game instead of original artwork (which gives away its falseness). The screens became so popular that they were featured as part of the DOJO!!; in earlier updates, whenever a new character was introduced, a banner that said "Warning! Challenger Approaching!" would appear above the entry.
Challenger Approaching Screens[edit]
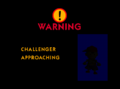
The Challenger Approaching! screen which Ness challenges the player in Super Smash Bros. 64.
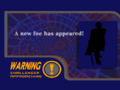
The Challenger Approaching! screen which Marth challenges the player in Super Smash Bros. Melee.
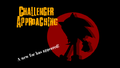
The Challenger Approaching! screen which Sonic challenges the player in Super Smash Bros. Brawl.
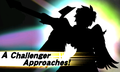
The Challenger Approaching! screen which Dark Pit challenges the player in Super Smash Bros. for Nintendo 3DS.
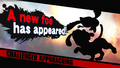
The Challenger Approaching! screen which Duck Hunt challenges the player in Super Smash Bros. for Wii U.

The Challenger Approaching! screen which Simon challenges the player in Super Smash Bros. Ultimate.
.png)
.png)
.png)


Challenger Approaching Alarms[edit]
Smash 64's challenger alarm.
Melee's challenger alarm.
Brawl, Smash 4, and Ultimate's challenger alarm.
Super Smash Bros.[edit]
Fighters[edit]
| Character | How to unlock | Unlock location |
|---|---|---|
| Complete Bonus 1: Break the Targets with all starter characters. | Peach's Castle | |
| Complete 1P Game in 20 minutes or less. | Planet Zebes | |
| Complete 1P Game on Normal or higher with three lives or less and without using any continues. | Dream Land | |
| Complete 1P Game with any character. | Saffron City |
Gallery[edit]

Luigi challenging the player in Smash 64

Captain Falcon challenging the player in Smash 64
Ness challenging the player in Smash 64
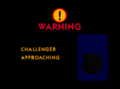
Jigglypuff challenging the player in Smash 64
.png)
.png)
Super Smash Bros. Melee[edit]
Fighters[edit]
Melee introduces a alternate method for unlocking each fighter, by completing a certain number of VS matches, in intervals of 100.
- ^ a b c d e f Because All-Star Mode is itself unlocked by unlocking all characters, it is only possible to unlock a character via All-Star Mode if the player had previously used the Erase Data > Hidden Characters option after unlocking All-Star Mode.
- ^ The time required is calculated in "player-hours" (e.g. two human players gives two hours for every hour of game-time, three human players give three and four players give four).
Gallery[edit]
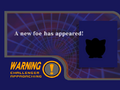
Jigglypuff challenging the player in Melee
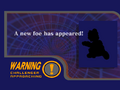
Dr. Mario challenging the player in Melee
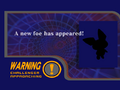
Pichu challenging the player in Melee
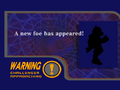
Falco challenging the player in Melee
Marth challenging the player in Melee
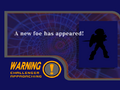
Young Link challenging the player in Melee
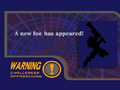
Ganondorf challenging the player in Melee
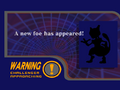
Mewtwo challenging the player in Melee
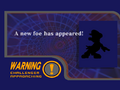
Luigi challenging the player in Melee
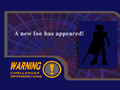
Roy challenging the player in Melee
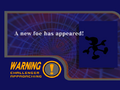
Mr. Game & Watch challenging the player in Melee


.png)
.png)
.png)

.png)

.png)
.png)
Super Smash Bros. Brawl[edit]
In Super Smash Bros. Brawl, the first game to feature third-party characters, both third-party characters (Solid Snake and Sonic the Hedgehog) are unlockable characters.
Fighters[edit]
| Character | How to unlock | VS matches required | Unlock location | Music |
|---|---|---|---|---|
| Reflect ten projectiles. | 5 | Onett | Mother (Melee) | |
| Complete Classic Mode. | 10 | Castle Siege | Fire Emblem (Melee) | |
| Complete Classic Mode without using any continues. | 22 | Luigi's Mansion | Luigi's Mansion Theme | |
| Complete 100-Man Brawl. | 50 | Lylat Cruise | Area 6 | |
| Play through Classic Mode on Normal or higher and beat it in 12 minutes or less. | 70 | Port Town Aero Dive | Mute City | |
| Clear all levels of Target Smash!! with any single character. | 100 | Spear Pillar | Victory Road | |
| Play 15 Vs. Matches on Shadow Moses Island. | 130 | Shadow Moses Island | Encounter | |
| Collect 250 different trophies. | 160 | Mario Bros. | Mario Bros. | |
| Clear Classic Mode on Hard with Link or Zelda. | 200 | Final Destination | Hidden Mountain & Forest | |
| Clear Target Smash!! with 30 different characters on any single difficulty level. | 250 | Flat Zone 2 | Flat Zone 2 | |
| Complete Classic Mode with ten characters, or Brawl for ten combined total hours. | 300 | Green Hill Zone | Sonic Heroes | |
| Have 20 or more events cleared after beating The Subspace Emissary. | 350 | Pokémon Stadium 2 | Pokémon Center | |
| Complete Classic Mode after beating The Subspace Emissary. | 400 | Pirate Ship | Dragon Roost Island | |
| Complete Boss Battles mode with Fox or Falco. | 450 | Lylat Cruise | Star Wolf |
The Subspace Emissary[edit]
The Subspace Emissary features its own storyline and character selection screen, with characters met and joining the mode's roster as part of the story. (For example, Wario is a starter character, but he cannot be played as in the SSE until he is 'unlocked' in the SSE.) Characters can also leave The Subspace Emissary's roster as part of the story, and cannot be played as until they are met again.
Unlocking any non-starter character in The Subspace Emissary will also unlock them for play in other modes. This occurs instantly, without requiring a "Challenger Approaching" battle. Thus the Subspace Emissary serves as a third method for unlocking characters, in addition to the challenges and versus match methods. All characters can be met in The Subspace Emissary; however, Toon Link, Wolf, and Jigglypuff are only unlockable after the main story is completed by finding a secret door while replaying certain levels.
Below is a chart of when each fighter is unlocked, removed, or changes or combines teams; stages with none of these are omitted.

1: Midair Stadium
2: Skyworld
3: Sea of Clouds
4: The Jungle
5: The Plain
6: The Lake
7: The Ruined Zoo
8: The Battlefield Fortress
9: The Forest
10: The Research Facility I
11: The Lake Shore
12: The Path to the Ruins
13: The Cave
14: The Ruins
15: The Wilds I
16: The Ruined Hall
17: The Wilds II
18: The Swamp
19: The Research Facility II
20: Outside the Ancient Ruins
21: The Glacial Peak
22: The Canyon
23: Battleship Halberd Interior
24: Battleship Halberd Exterior
25: Battleship Halberd Bridge
26: The Subspace Bomb Factory I
27: The Subspace Bomb Factory II
28: Entrance to Subspace
29: Subspace I
30: Subspace II
31: The Great Maze
The Subspace Emissary consists of 31 different stages. As some stages share the same name, the earlier stage is denoted with an I while the later-appearing stage is followed by a II.
| Icon | Stage | Fighters available | Unlocked fighters | Lost fighters | Recovered fighters | Total fighters | Teams |
|---|---|---|---|---|---|---|---|

|
Midair Stadium | Mario (the battle with Kirby if he was chosen, and the battle with Subspace army), Kirby (all phases, except the battle with Mario if he was not chosen), Peach, Zelda (both only in the battle with Subspace army) | Kirby, Peach/Zelda (Mario is sent flying and Wario kidnaps either Zelda/Peach when the other princess is freed from Petey) | — | — | 2 | 1, new team: Kirby, Peach/Zelda |

|
Skyworld | Pit (all phases), Mario (the last sidescrolling section after Pit rescues him) | Mario, Pit | — | — | 4 | 2, new team: Mario, Pit |

|
The Jungle | Donkey Kong, Diddy Kong | Diddy Kong (Bowser captures Donkey Kong) | — | — | 5 | 3, new team: Diddy Kong |

|
The Lake | Diddy Kong, Fox | Fox | — | — | 6 | 3, Fox joins Diddy Kong |

|
The Ruined Zoo | Lucas (all phases), Ness (only the battle with Porky), Pokémon Trainer (Squirtle only) (only after defeating Porky) | Lucas, Pokémon Trainer (Squirtle) (Wario kidnaps Ness; Ness will not be unlocked in any mode) | — | — | 8 | 4, new team: Lucas, Pokémon Trainer (Squirtle) |

|
The Battlefield Fortress | Marth (all phases), Meta Knight (second and third phases), Ike (third phase only) | Marth, Meta Knight, Ike | — | — | 11 | 5, new team: Marth, Meta Knight, Ike |

|
The Forest | Link, Yoshi | Link, Yoshi, Toon Link [1] | — | — | 13 | 6, new team: Link, Yoshi |

|
The Research Facility I | Zero Suit Samus (all phases), Pikachu (all phases starting with the second) | Zero Suit Samus, Pikachu | — | — | 15 | 7, new team: Zero Suit Samus, Pikachu |

|
The Lake Shore | Mario, Pit (entire level if Zelda was rescued, only the last section if Peach was rescued), Link, Yoshi (entire level if Peach was rescued, only the last section if Zelda was rescued), Kirby (only the last section) | — | Peach/Zelda (Bowser captures her) | — | 14 | 5, the groups of Mario and Pit, Link and Yoshi, and Kirby combine. |

|
The Ruins | Lucas, Pokémon Trainer (with Squirtle for all phases and Ivysaur after Pokémon Trainer finds it) | Ivysaur, Charizard, Wolf[1] | — | — | 14 | 5, Ivysaur and Charizard now are in Pokémon Trainer's team |

|
The Ruined Hall | Lucas, Pokémon Trainer | — | — | — | 14 | 4, the groups of Marth, Ike and Meta Knight, and Lucas, Pokémon Trainer combine. |

|
The Swamp | Diddy Kong, Fox (all phases), Falco (all phases except the first) | Falco, Jigglypuff[1] | — | — | 15 | 4, Falco joins Diddy Kong and Fox |

|
The Research Facility II | Zero Suit Samus (all phases, transforming from Samus by taunting whenever possible), Pikachu (all phases), Samus (after defeating the False Samuses) | Samus | Zero Suit Samus (Samus replaces her; playing as Zero Suit Samus is still possible by taunting or pressing C on the nunchuck) | — | 15 | 4, Samus replaces Zero Suit Samus |

|
Outside the Ancient Ruins | Olimar, Captain Falcon (both all phases), Diddy Kong, Donkey Kong (both only in the battle with Subspace army) | Donkey Kong, Captain Falcon, Olimar | Fox, Falco (they did not become trophies, but Diddy Kong leaves their group, and they all go their separate ways) | — | 16 | 4, Diddy Kong leaves Fox and Falco and joins Donkey Kong, Captain Falcon and Olimar |

|
The Glacial Peak | Ice Climbers (only the sidescrolling section), Meta Knight (the sidescrolling section and the battle with Lucario if the player chose him), Lucario (only if the player chose it in the battle with Meta Knight) | Ice Climbers, Lucario | — | — | 18 | 5, new team: Meta Knight and Lucario. Ice Climbers replace Meta Knight in Marth, Lucas, Pokémon Trainer (Squirtle, Ivysaur, Charizard) and Ike's group |

|
The Canyon | Mario, Pit, Link, Yoshi, Kirby | — | — | — | 18 | 4, the groups of Mario, Pit, Link, Yoshi and Kirby, and Ice Climbers, Marth, Lucas, Pokémon Trainer (Squirtle, Ivysaur, Charizard) and Ike combine |

|
Battleship Halberd Interior | Snake (all phases), Meta Knight, Lucario (after they meet Snake) | Snake | — | — | 19 | 4, Snake joins Meta Knight and Lucario |

|
Battleship Halberd Exterior | Peach, Sheik/Zelda | Zelda/Peach | — | Fox, Peach/Zelda | 22 | 5, new team: Fox, Peach, Zelda |

|
Battleship Halberd Bridge | Snake, Lucario, Fox, Falco, Peach, Sheik/Zelda | Mr. Game & Watch | — | Falco | 24 | 4, the groups of Fox, Peach and Zelda, and Meta Knight, Lucario and Snake combine, along with adding Falco and Mr. Game & Watch |

|
The Subspace Bomb Factory II | Donkey Kong, Diddy Kong, Captain Falcon, Olimar (all phases); Samus, Zero Suit Samus (by taunting as Samus), Pikachu, R.O.B. (second section onwards) | R.O.B. | — | — | 25 | 1, all three teams combine into one |

|
Entrance to Subspace | Captain Falcon, Diddy Kong, Donkey Kong, Falco, Fox, Ice Climbers, Ike, Kirby, Link, Lucario, Lucas, Mario, Marth, Meta Knight, Mr. Game & Watch, Olimar, Peach, Pikachu, Pit, Pokémon Trainer, R.O.B., Samus, Snake, Yoshi, Zelda (only four chosen characters can be played as) | — | All current characters (Tabuu turns them into trophies) | — | 0 | 0, All characters were turned into trophies |

|
Subspace I | King Dedede (all phases), Ness, Luigi (only in the sidescrolling sections) | Luigi, Ness, Bowser, King Dedede | — | Mario, Donkey Kong, Samus, Fox, Pikachu, Captain Falcon, Marth, Mr. Game & Watch, Falco, Pit, Olimar, Lucas, Diddy Kong, Pokémon Trainer (Squirtle, Ivysaur, Charizard), Ike (only if rescued by King Dedede, Ness, and Luigi; fighters not rescued can still be found when replaying the level) | From 4 to 19 | 1, new team: King Dedede, Ness, Luigi, Bowser, and any recovered fighters |

|
Subspace II | Kirby | Ganondorf (if Kirby found Link and Zelda, who rescue him), Wario (If Kirby found him) | — | Kirby (guaranteed), Link, Yoshi, Peach, Zelda, Ice Climbers, Meta Knight, Lucario, R.O.B., Snake (only if Kirby rescues them; fighters not found can be rescued upon replaying the level) | From 5 to 31 | 1, Kirby, and any recovered fighters, alongside Ganondorf if Link and Zelda are found, and Wario if he is found, will join the previous group. |
   
|
The Great Maze | Bowser, King Dedede, Kirby, Luigi, Ness (guaranteed), Captain Falcon, Diddy Kong, Donkey Kong, Falco, Fox, Ganondorf, Ice Climbers, Ike, Link, Lucario, Lucas, Mario, Marth, Meta Knight, Mr. Game & Watch, Olimar, Peach, Pikachu, Pit, Pokémon Trainer (Squirtle, Ivysaur, Charizard), R.O.B., Samus, Snake, Wario, Yoshi, Zelda (only if they were rescued in Subspace Parts 1 and 2), Sonic (only in the battle with Tabuu) | Sonic | — | — | From 6 to 32 | 1, Sonic joins |

A map of the stages and which characters are available in each one, not counting Wolf, Toon Link, and Jigglypuff.

Gallery[edit]
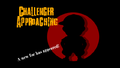
Ness challenging the player in Brawl

Marth challenging the player in Brawl
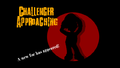
Luigi challenging the player in Brawl

Falco challenging the player in Brawl
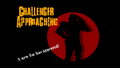
Captain Falcon challenging the player in Brawl
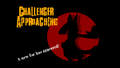
Lucario challenging the player in Brawl
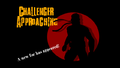
Snake challenging the player in Brawl
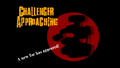
R.O.B. challenging the player in Brawl

Ganondorf challenging the player in Brawl
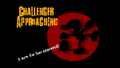
Mr. Game & Watch challenging the player in Brawl
Sonic challenging the player in Brawl

Jigglypuff challenging the player in Brawl
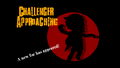
Toon Link challenging the player in Brawl
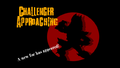
Wolf challenging the player in Brawl
.png)
.png)
.png)
.png)
.png)
.png)
.png)
.png)
.png)
.png)
.png)
.png)
.png)
Super Smash Bros. for Nintendo 3DS[edit]
Fighters[edit]
The inclusion of Lucina and Wendy O. Koopa (as one of Bowser Jr.'s alternate costumes) as unlockable characters makes them the first female characters to be unlockable. After every tenth VS. match, the player gets to challenge an unlockable character, starting with Ness and finishing with Jigglypuff when 120 matches are played.
In addition to the characters below, Mii Fighters are not shown on the character select screen until the player has created at least one. However, since the ability to create Mii Fighters is granted from the beginning, the characters cannot truly be called unlockable.
Despite Duck Hunt having a stage of the same name added into the game in the 1.1.1 update, they will be fought on Battlefield for their unlocking battle regardless of which version of the game is being played.
Gallery[edit]
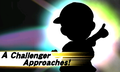
Ness challenging the player in Super Smash Bros. for Nintendo 3DS.
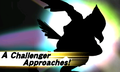
Falco challenging the player in Super Smash Bros. for Nintendo 3DS.
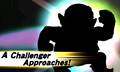
Wario challenging the player in Super Smash Bros. for Nintendo 3DS.
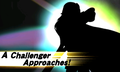
Lucina challenging the player in Super Smash Bros. for Nintendo 3DS.
Dark Pit challenging the player in Super Smash Bros. for Nintendo 3DS.

Dr. Mario challenging the player in Super Smash Bros. for Nintendo 3DS.
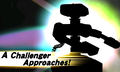
R.O.B. challenging the player in Super Smash Bros. for Nintendo 3DS.
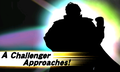
Ganondorf challenging the player in Super Smash Bros. for Nintendo 3DS.
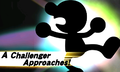
Mr. Game & Watch challenging the player in Super Smash Bros. for Nintendo 3DS.
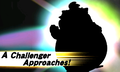
Bowser Jr. challenging the player in Super Smash Bros. for Nintendo 3DS.
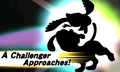
Duck Hunt challenging the player in Super Smash Bros. for Nintendo 3DS.
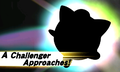
Jigglypuff challenging the player in Super Smash Bros. for Nintendo 3DS.


Super Smash Bros. for Wii U[edit]
Fighters[edit]
Unlike Super Smash Bros. for Nintendo 3DS, Ness, Jigglypuff, Ganondorf and Bowser Jr. are starter characters. Like the 3DS version, a character is unlocked for every ten versus matches played starting with Falco. Two exceptions to this are Mr. Game & Watch and Duck Hunt, which they need 20 more versus matches than R.O.B. and Mr. Game & Watch, respectively. Unlike the previous three installments (Melee, Brawl, and the 3DS version), no Super Smash Bros. universe stages are used for challenger approaching battles. Instead, all unlockable characters use a stage from their respective universe except for R.O.B., in which he uses the Wrecking Crew stage due to him not having a stage from his own universe.
In addition to the characters below, Mii Fighters are not shown on the character select screen until the player has created at least one. However, since the ability to create Mii Fighters is granted from the beginning and there is no Challenger Approaching fight, the character cannot truly be called unlockable.
| Character | How to unlock | VS Matches Required | Unlock location | Music |
|---|---|---|---|---|
| Clear Classic Mode | 10 | Orbital Gate Assault | Theme from Area 6 / Missile Slipstream | |
| Clear 100-Man Smash | 20 | Gamer | Gamer | |
| Clear Classic Mode on intensity 5.5 or higher | 30 | Coliseum | The Devoted | |
| Clear All-Star Mode on Normal | 40 | Palutena's Temple | Boss Fight 1 (Kid Icarus: Uprising) | |
| Clear Master Orders on Hard | 50 | Delfino Plaza | Delfino Plaza | |
| Clear Crazy Orders after ten rounds and defeat Crazy Hand | 60 | Wrecking Crew | Wrecking Crew Medley | |
| Clear Classic Mode on intensity 2.0 or higher with five characters | 80 | Flat Zone X | Flat Zone 2 | |
| Get at least one KO in Cruel Smash | 100 | Duck Hunt[note 1] | Duck Hunt Medley |
- ^ Dog and ducks do not appear.
Gallery[edit]
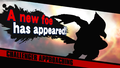
Falco challenging the player in Super Smash Bros. for Wii U.
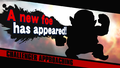
Wario challenging the player in Super Smash Bros. for Wii U.
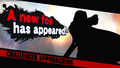
Lucina challenging the player in Super Smash Bros. for Wii U.
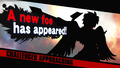
Dark Pit challenging the player in Super Smash Bros. for Wii U.
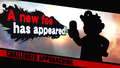
Dr. Mario challenging the player in Super Smash Bros. for Wii U.
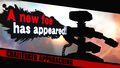
R.O.B. challenging the player in Super Smash Bros. for Wii U.
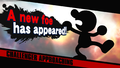
Mr. Game & Watch challenging the player in Super Smash Bros. for Wii U.
Duck Hunt challenging the player in Super Smash Bros. for Wii U.


Super Smash Bros. Ultimate[edit]
The starting roster in Super Smash Bros. Ultimate comprises the eight starter characters from the original Super Smash Bros. game, with all other fighters being unlockable or downloadable. With the vast majority of the roster being unlockable, unlocking characters is advertised as a core feature of the game; no characters are left "secret" like in previous games, and character unlocks are designed to occur at a more streamlined and consistent pace than in previous games.
Unlockable characters no longer have unique criteria to unlock them. Instead, Challenger Approaching fights take place after completing Classic Mode with any character, and as timed encounters.
As in Smash 4, Mii Fighters can be unlocked by creating a custom Mii Fighter of that type, and do not have a standard Challenger Approaching match.
The player may also unlock characters by awakening them in the World of Light.
Classic Mode[edit]
When the player completes Classic Mode with a given character, a new character will challenge the player to a Challenger Approaching duel. All of the eight starter characters have their own character unlock trees, each with eight characters to unlock, except for Pikachu, who has seven. The challenger is determined by the first player character, and will be the next character below them on the tree who has not already been unlocked or issued a Challenger Approaching duel. For example, completing Classic Mode as Marth with Ryu already unlocked (or met in Challenger Approaching) will cause the challenger to be Ganondorf, even if Lucario has not yet been unlocked or met in Challenger Approaching.
If the bottom of a tree is reached, the search resumes from the top of Mario's tree, then Donkey Kong's, and so on. Completing Classic Mode with downloadable fighters will also start from the top of Mario's tree, as these characters are not assigned an unlock tree. For example, completing Classic Mode as Duck Hunt will receive a challenge from Sonic, even if some characters in Donkey Kong's tree have not been unlocked or met in Challenger Approaching yet.
Notably, all clones, semi-clones, and pseudo-clones except for Ganondorf, Roy, and Chrom are in the same tree as the character they are based on.
| Unlock Order | ||||||||
|---|---|---|---|---|---|---|---|---|
| 1st | ||||||||
| 2nd | ||||||||
| 3rd | ||||||||
| 4th | ||||||||
| 5th | ||||||||
| 6th | ||||||||
| 7th | ||||||||
| 8th | None |
Timed encounters[edit]
When the player finishes a VS. match, a Mob Smash, a Home-Run Contest round, a Spirit Board fight, or exits the World of Light, a new character may challenge the player to a Challenger Approaching duel. This character will be the one closest to the top of the list below who has not already been unlocked or issued a Challenger Approaching duel. However, the player must have performed enough in-battle stick inputs and, in most cases, have waited at least 10 minutes since the previous Challenger Approaching duel. (Quitting a match/mode other than World of Light will not cause a challenge, and neither will VS matches that only consist of CPUs or that are themselves Challenger Approaching matches.)
The in-battle stick input count considers the total since the save file was started. Its mechanics appear to be similar to how Gold in VS matches is counted (for example, dash-dancing, Sudden Death, other Challenger Approaching matches, and jumping with the X Button do not count, but jumping with the Control Stick does count). However, unlike Gold, actions made in a VS match that is quit still count (they will not cause a challenge but will still contribute toward the total behind the scenes). If a controller disconnects during a VS match and it is still disconnected by the time the match ends, actions made by that player do not count (even though they count for Gold). Actions made during Classic Mode and World of Light count, excluding any Gold modifiers (e.g. due to difficulty level). Notably, the 5th through 30th characters in the list all have the same action count requirement, so meeting the requirement for any one of them will unlock all of them with no further in-battle actions required, provided that the wait time requirement is met between each one. Unlike the time requirements, the action count requirements cannot be changed. For example, unlocking Palutena through a timed encounter will always require approximately 8,100 actions, regardless of if any other characters have already been unlocked through any method.
The 10-minute delay requirement does not apply to the first five Challenger Approaching fights specifically. For example, if the player unlocks all but five characters through World of Light, then no time delay requirements apply to the remaining five regardless of who they are. However, Challenger Approaching fights initiated through Classic Mode will count toward the five despite Classic Mode not having a time delay requirement. For example, if the player's first Challenger Approaching fight is a character below Inkling on the list (regardless of if the player wins or loses), and then the player attempts to unlock the rest of the characters through timed encounters, then Inkling will require a 10-minute wait.
The player can bypass any wait time by closing the game and reopening it. (Note that changing the Language setting causes the game to automatically close and reopen.) The wait time applies regardless of if the previous Challenger Approaching fight was won or lost. Time spent idling on the title screen or loading screens counts, but time spent idling during a Challenger Approaching fight does not count (the time starts after the Challenger Approaching fight ends). Wait times do not carry over (if the player waits 20 minutes between one pair of Challenger Approaching fights, all future wait times are still 10 minutes).
Fighter table[edit]
Classic Mode and timed encounters result in the same Challenger Approaching fights.
The values listed under "Theoretical cumulative wait time" apply only if the player exclusively attempts to unlock characters through timed encounters, never closes the game after challenging Inkling, and never spends longer than the minimum time between Challenger Approaching fights.
Challenger's Approach[edit]
If the player loses any Challenger Approaching fight, that character will not appear again either from Classic Mode or as a timed encounter. However, the character will later reappear under Challenger's Approach on the Games & More menu.
World of Light[edit]
In the World of Light, only characters that have been awakened in the current World of Light save file can be used, with only Kirby initially being available. However, awakening a fighter in the World of Light that is not a starter character also unlocks them for the regular roster.
Awakening a Mii Fighter in the World of Light automatically creates a custom Mii Fighter of the awakened type.
Each fighter must be unlocked through a fighter battle, with a few exceptions:
 Kirby is always available from the beginning.
 Bowser is unlocked after defeating Giga Bowser within the Molten Fortress sub-world in The Light Realm.


 Downloadable fighters become available after freeing a total of 10 fighters. If the player has already freed 10 fighters on a file, any characters downloaded afterwards will immediately be available.
The fighter battles all feature the same single condition: Win the battle to awaken the fighter


Gallery[edit]
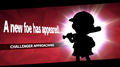
Ness challenging the player in Super Smash Bros. Ultimate

Zelda challenging the player in Super Smash Bros. Ultimate
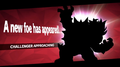
Bowser challenging the player in Super Smash Bros. Ultimate
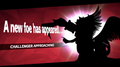
Pit challenging the player in Super Smash Bros. Ultimate
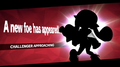
Inkling challenging the player in Super Smash Bros. Ultimate
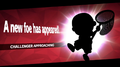
Villager challenging the player in Super Smash Bros. Ultimate

Marth challenging the player in Super Smash Bros. Ultimate
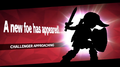
Young Link challenging the player in Super Smash Bros. Ultimate

Wii Fit Trainer challenging the player in Super Smash Bros. Ultimate
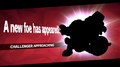
Ice Climbers challenging the player in Super Smash Bros. Ultimate

Captain Falcon challenging the player in Super Smash Bros. Ultimate

Peach challenging the player in Super Smash Bros. Ultimate

Ryu challenging the player in Super Smash Bros. Ultimate

Ike challenging the player in Super Smash Bros. Ultimate

Jigglypuff challenging the player in Super Smash Bros. Ultimate
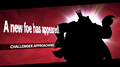
King K. Rool challenging the player in Super Smash Bros. Ultimate

Sonic challenging the player in Super Smash Bros. Ultimate
Simon challenging the player in Super Smash Bros. Ultimate

Zero Suit Samus challenging the player in Super Smash Bros. Ultimate

Little Mac challenging the player in Super Smash Bros. Ultimate

Isabelle challenging the player in Super Smash Bros. Ultimate
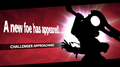
Shulk challenging the player in Super Smash Bros. Ultimate

Lucina challenging the player in Super Smash Bros. Ultimate
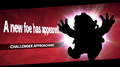
Wario challenging the player in Super Smash Bros. Ultimate
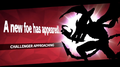
Ridley challenging the player in Super Smash Bros. Ultimate

Pokémon Trainer challenging the player in Super Smash Bros. Ultimate
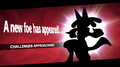
Lucario challenging the player in Super Smash Bros. Ultimate
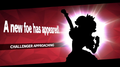
Daisy challenging the player in Super Smash Bros. Ultimate
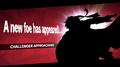
Roy challenging the player in Super Smash Bros. Ultimate

King Dedede challenging the player in Super Smash Bros. Ultimate
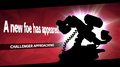
R.O.B. challenging the player in Super Smash Bros. Ultimate
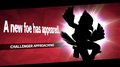
Falco challenging the player in Super Smash Bros. Ultimate
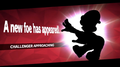
Luigi challenging the player in Super Smash Bros. Ultimate

Pichu challenging the player in Super Smash Bros. Ultimate

Richter challenging the player in Super Smash Bros. Ultimate
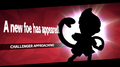
Lucas challenging the player in Super Smash Bros. Ultimate
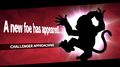
Diddy Kong challenging the player in Super Smash Bros. Ultimate
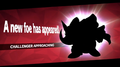
Meta Knight challenging the player in Super Smash Bros. Ultimate

Snake challenging the player in Super Smash Bros. Ultimate

Ganondorf challenging the player in Super Smash Bros. Ultimate

Corrin challenging the player in Super Smash Bros. Ultimate

Mega Man challenging the player in Super Smash Bros. Ultimate
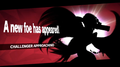
Bayonetta challenging the player in Super Smash Bros. Ultimate
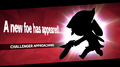
Toon Link challenging the player in Super Smash Bros. Ultimate

Rosalina & Luma challenging the player in Super Smash Bros. Ultimate

Incineroar challenging the player in Super Smash Bros. Ultimate

Sheik challenging the player in Super Smash Bros. Ultimate
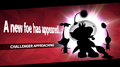
Olimar challenging the player in Super Smash Bros. Ultimate

PAC-MAN challenging the player in Super Smash Bros. Ultimate
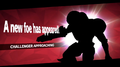
Dark Samus challenging the player in Super Smash Bros. Ultimate
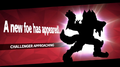
Wolf challenging the player in Super Smash Bros. Ultimate

Mr. Game & Watch challenging the player in Super Smash Bros. Ultimate
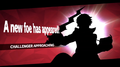
Robin challenging the player in Super Smash Bros. Ultimate
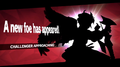
Dark Pit challenging the player in Super Smash Bros. Ultimate

Cloud challenging the player in Super Smash Bros. Ultimate
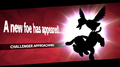
Duck Hunt challenging the player in Super Smash Bros. Ultimate

Ken challenging the player in Super Smash Bros. Ultimate
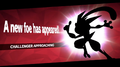
Greninja challenging the player in Super Smash Bros. Ultimate

Chrom challenging the player in Super Smash Bros. Ultimate

Mewtwo challenging the player in Super Smash Bros. Ultimate

Bowser Jr. challenging the player in Super Smash Bros. Ultimate
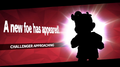
Dr. Mario challenging the player in Super Smash Bros. Ultimate

Palutena challenging the player in Super Smash Bros. Ultimate


Trivia[edit]
- In each of his unlockable appearances outside of Smash 64, Ness has always been the first one unlocked through Vs. Mode matches.
- Super Smash Bros. 64 is the only game in the series in which playing VS. Mode matches cannot trigger a "Challenger Approaching" battle, and the only game in which each unlockable character only has a single unlock criterion.
- When a player fights a secret character to unlock in Super Smash Bros. Brawl, the character they used always uses their default costume even if the player was originally using an alternative costume. As Brawl mods often if not always make the entire roster available by default (regardless of if they were unlocked in the vanilla game) and the player can still trigger Challenger Approaching fights, using the same character as the one the player is trying to “unlock” will make both participants use the same palette swap.
- Starting in Super Smash Bros. 4, no items appear at all during the unlocking battle.
- In Super Smash Bros. Brawl, each character unlock notification has a different tone depending on the debut game of the character.
- Strangely, Jigglypuff's unlock notification tone is the same as the Brawl newcomers despite debuting in Super Smash Bros. 64. This is likely because it is unlocked in the post-game Subspace Emissary, as well as its internal ID being right next to Toon Link and Wolf, Brawl newcomers. The other Smash 64 newcomers use "Rare Trophy" from Melee, Melee newcomers use the stage unlock fanfare from Brawl, and Brawl newcomers (alongside Jigglypuff) use the sound effect in Brawl when collecting songs or completing minor challenges.
- In Super Smash Bros. for Wii U and Super Smash Bros. Ultimate, unlock matches are treated as VS. Mode matches - that is, they count towards the total number of VS. Mode matches, and all statistics accumulated during unlock matches are saved.
- Masahiro Sakurai originally intended for all the characters in Super Smash Bros. for Wii U to be available from the start, but eventually decided against it.
- In Super Smash Bros. 64, Super Smash Bros. Brawl, Super Smash Bros. for Nintendo 3DS, and Super Smash Bros. Ultimate, the AI level of unlockable character fights starts out very low, but increases with each consecutive character unlocked.
- In Super Smash Bros. Melee, the opposite is the case.
- In Ultimate, the difficulty of the AI was lowered in patch 1.2.0, after notorious reports of the level of difficulty for each match.
- Counting Super Smash Bros. for Nintendo 3DS and Super Smash Bros. for Wii U separately, Jigglypuff, Falco, and Mr. Game & Watch are tied for the most unlockable appearances, with five each.
- Of the three of them, Jigglypuff is the only one to be a starter character at any point, which was in Super Smash Bros. for Wii U.
- Wario was the first starter character to become an unlockable character in a later installment. He is also the only character to have this distinction from Brawl to Smash 4.
- Pokémon Trainer is the only character whose moveset involves transforming into another character to become unlockable.
- Prior to Super Smash Bros. Ultimate, the only unlockable characters whose playable status was not kept a secret in official material prior to release were Snake and Sonic in Super Smash Bros. Brawl, and Lucina in Super Smash Bros. 4.
- Out of all of these, Lucina is the only one who is not a third-party character.
- Super Smash Bros. Ultimate is the first game to have more unlockable characters than starter characters, and the first game to feature unlockable characters on the box art.
- While Sephiroth is a downloadable fighter rather than unlockable, from 17 December to 22 December 2020, defeating him through the limited-time Sephiroth Challenge enabled access to him, Northern Cave and his music if the player had purchased Challenger Pack 8 or Fighters Pass Vol. 2 prior to his official release.
- In Ultimate, Villager and Isabelle can have different music play during their regular unlock battles. Specifically, when they're unlocked between 8:00pm and 12:00am on Saturday, K.K. Slider will perform.