King K. Rool (SSBU): Difference between revisions
m (→Attributes: grammar fixes) |
|||
| (413 intermediate revisions by more than 100 users not shown) | |||
| Line 1: | Line 1: | ||
{{ArticleIcons|ultimate=y}} | {{ArticleIcons|ultimate=y}} | ||
{{ | {{Disambig2|King K. Rool's appearance in ''Super Smash Bros. Ultimate''|the character in other contexts|King K. Rool}} | ||
{{Infobox Character | {{Infobox Character | ||
|name = King K. Rool | |name = King K. Rool | ||
| Line 6: | Line 6: | ||
|game = SSBU | |game = SSBU | ||
|availability = [[Unlockable character|Unlockable]] | |availability = [[Unlockable character|Unlockable]] | ||
|tier = E+ | |||
|ranking = 80 | |||
}} | }} | ||
{{Cquote|''King K. Rool Comes Aboard!''|cite=Introduction tagline}} | |||
'''King K. Rool''' ({{ja|キングクルール|Kingu Kurūru}}, ''King K. Rool'') is a playable character in ''[[Super Smash Bros. Ultimate]]''. He was announced as a [[newcomer]] during the August 8th, 2018 [[Nintendo Direct|Super Smash Bros. Ultimate Direct]] alongside {{SSBU|Simon}}, {{SSBU|Richter}}, {{SSBU|Chrom}}, and {{SSBU|Dark Samus}}. King K. Rool is classified as [[Fighter number|Fighter #67]]. | |||
'''King K. Rool''' ({{ja|キングクルール|Kingu Kurūru}}, ''King K. Rool'') is a playable character in ''[[Super Smash Bros. Ultimate]]''. He was announced as a newcomer during the August 8th, 2018 [[Nintendo Direct|Super Smash Bros. Ultimate Direct]]. King K. Rool is classified as | |||
Much like {{SSBU|Bowser}}, {{SSBU|Donkey Kong}}, and {{SSBU|Diddy Kong}}, ''Ultimate'' forgoes King K. Rool's voice actor ({{iw|mariowiki|Toshihide Tsuchiya}}), in favor of realistic animal vocals. | |||
King K. Rool is currently ranked 80th out of 82 on the ''Ultimate'' [[tier list]], in the middle of E+ tier, making him the lowest ranked newcomer. Typical for a super-heavyweight character, King K. Rool possesses a wide arsenal of very powerful, hard hitting attacks, with many of them also having great range. King K. Rool also boasts some of the best endurance in the game - he is the second [[weight|heaviest]] character behind {{SSBU|Bowser}}, which in combination of his unique character-specific perk, [[Belly Super Armor]], high falling speed, and a very long-distanced recovery thanks to [[Propellerpack]], allows him to survive to ludicrously high percentages and utilize [[rage]] very well, especially with his aforementioned powerful attacks. | |||
In addition, King K. Rool has a unique and rather versatile moveset. Some of his attacks, such as his neutral attack, up tilt, up smash and up aerial, all have disproportionately quick startup in comparison to other super-heavyweight characters. King K. Rool also has two projectiles, [[Blunderbuss]] and [[Crownerang]], with the former also functioning as a command grab and the latter having damage-based [[armor]], while his down special, [[Gut Check]], functions as a both counter and reflector. These moves alongside Belly Super Armor grant K. Rool unique anti-zoning tools atypical for his weight class. King K. Rool has interesting utility with many of his normals as well - down tilt can [[bury]] his opponents, neutral aerial is an excellent landing - and edgeguarding tool thanks to Belly Super Armor and long-lasting, lingering hitbox, forward aerial has a combination of great power, reach and safety due to relatively low landing lag, up aerial gives a slight vertical momentum and is disproportionately powerful, and back aerial is a very powerful [[meteor smash]]. Finally, King K. Rool has an excellent grab game, all of his grabs have very far reach and he possesses arguably one of the best set of throws in the game, with two of them having great KO potential (up and back throws), one functioning as a burying throw that can setup for KOs (down throw), and one with combo potential at low percentages (forward throw). | |||
However, for his many strengths, King K. Rool has several weaknesses. His tall, rotund hurtbox is among the largest in the game, which combined with his gargantuan weight and high falling speed makes King K. Rool very easy to combo. King K. Rool's mobility also leaves a lot to be desired - while his initial dash speed is above average, his actual run speed is poor, and his air speed is also below average. While King K. Rool has relatively fast startup on many of his attacks, a few of them (down tilt, forward smash, down smash and back air) are nevertheless somewhat slow, and almost all of his attacks suffer from an universal flaw - extreme ending lag. Because of the latter, King K. Rool is very susceptible to being whiff punished, while having very few attacks that are safe on shield. The ending lag issue is especially prominent with King K. Rool's aerials - all of his aerials other than his neutral aerial suffer from disproportionately high ending lag, with all of them having total duration of at least 54 frames. This somewhat restricts King K. Rool's air game, as most of his aerials are very punishable if not performed right before landing. | |||
Many of King K. Rool's own unique attributes have flaws attached to them. Belly Super Armor only protects his belly and can break akin to a shield break if it takes too much damage. Similarly, Gut Check only protects King K. Rool's belly, making his head and back vulnerable. While Propellerpack grants him a long-ranged recovery, it is slow, very linear, and only protects King K. Rool from above, making his recovery predictable and very exploitable. Crownerang's armor does not protect against strong attacks or grabs, and the crown can also be picked up as an item by other characters. King K. Rool also has very lackluster out of shield options - while his up smash is fast, the initial hit only hits above K. Rool and is very punishable, while his second fastest option, neutral aerial, has a short range, especially behind him. This is further made worse by the fact that King K. Rool is forced to shield relatively often due to his massive hurtbox and below-average mobility. Finally, because of his massive size and limited ledge options, King K. Rool is very susceptible to being ledgetrapped. | |||
While King K. Rool is a fairly popular character in lower level and casual play, his high-level representation is quite limited due to his significant flaws and a small playerbase. However, thanks to efforts of dedicated players such as {{Sm|Ben Gold}}, {{Sm|Raphy}}, and most notably, {{Sm|KirbyKid}}, and significant buffs via game updates, King K. Rool has nevertheless gathered a couple of decent results during ''Ultimate's'' lifespan, in spite of his aforementioned issues and low placement on the tier list. | |||
==How to unlock== | ==How to unlock== | ||
Complete one of the following: | Complete one of the following: | ||
*Play [[VS. match]]es, with King K. Rool being the 16th character to be unlocked. | *Play [[VS. match]]es, with King K. Rool being the 16th character to be unlocked. | ||
*Clear {{SSBU|Classic Mode}} with {{SSBU|Link}}, being the 1st character | *Clear {{SSBU|Classic Mode}} with {{SSBU|Link}} or anyone in his unlock tree, being the 1st character unlocked. | ||
*Have King K. Rool join the player's party in [[World of Light]]. | *Have King K. Rool join the player's party in [[World of Light]]. | ||
With the exception of the third method, King K. Rool must then be defeated on [[Jungle Japes]]. | With the exception of the third method, King K. Rool must then be defeated on [[Jungle Japes]]. In World of Light, he is fought on [[Pirate Ship]]. | ||
==Attributes== | ==Attributes== | ||
King K. Rool is a character that ostensibly fits the mold of a super | King K. Rool is a character that ostensibly fits the mold of a super [[heavyweight]], being the 2nd heaviest character in the game behind {{SSBU|Bowser}} and possessing a large array of powerful attacks with long range, but with below-average mobility; while his [[falling speed]] and [[gravity]] are noticeably above average, his [[traction]] and [[jump]]ing force are average at best, and he also has the 20th slowest [[air speed]], the 17th slowest [[walk|walking speed]], the 13th slowest [[dash|dashing speed]], and the 8th slowest [[air acceleration]] in the game. | ||
Despite this, King K. Rool's initial dash has above-average speed, which gives him a great [[dash dance]] and [[foxtrot]], the latter of which partially alleviates his sluggish grounded mobility. However, he has some characteristics that notably set him apart from his heavyweight peers; he has a wide variety of versatile moves, access to two conventional projectiles, a long-distanced [[recovery]], and other valuable techniques that aid his playstyle in regard to focusing on punishing mistakes and zoning against horizontal approaches. | |||
King K. Rool's greatest strength is the immense utility of his moveset. Though many of his attacks are typical of super-heavyweights, he also has attacks that exchange brute strength (though most of them are still powerful) for unique attributes that contribute to his punish-focused playstyle. This is best shown through his character-specific perk, [[Belly Super Armor]]: attacks with this property gain short periods of this [[super armor]], which can block incoming attacks during their duration. This mechanic gives him an advantage that allows him to win more exchanges than he would normally. Additionally, it affects a large amount of his moves, granting more safety on moves such as his {{Mvsub|King K. Rool|SSBU|forward tilt}} and {{Mvsub|King K. Rool|SSBU|dash attack}} to break through projectiles or difficult to punish attacks. As a result, Belly Super Armor heavily helps his approach and general disadvantage. | |||
Alongside the utility of his Belly Super Armor, King K. Rool has effective grounded attacks. His {{Mvsub|King K. Rool|SSBU|neutral attack}} has good range and high speed, making it reliable as a quick get-off-me option. It is also tied with {{SSBU|Incineroar}}, {{SSBU|Ike}}, and {{SSBU|Wario}}'s neutral attacks as the third most damaging non-infinite neutral attack in the game, and leads into a tech situation at low to mid percentages. His tilts are very effective; for example, {{Mvsub|King K. Rool|SSBU|up tilt}} comes out very quickly, deals respectable damage and knockback during its initial frames, and has enough range to hit platforms above K. Rool while also being slightly disjointed due to his punching arm being intangible for its duration. This can also be used to anti-air or prevent approaches from characters such as {{SSBU|Lucina}} and {{SSBU|Roy}}. It is also the most reliable move out of {{Mvsub|King K. Rool|SSBU|down throw}}, becoming a true combo from around 120% and reliably [[KO]]ing most characters at such percents if near the ledge. | |||
{{Mvsub|King K. Rool|SSBU|Down tilt}} can [[bury]] grounded opponents or KO airborne ones, making it a potent punishment option. It also works at the ledge as a ledgehang punish or 2-frame option, and has a large shockwave hitbox that notably extends its range. His aforementioned forward tilt grants him Belly Super Armor as early as frame 5, has excellent range, can be angled up or down (with latter capable of being used as a ledge hang punish or 2-frame option), and is among the most powerful of its kind. Finally, his dash attack is also equipped with Belly Super Armor, has fast startup, a long-lasting, large hitbox, and is exceptionally strong, being a very potent, powerful burst option that can go through variety of attacks. | |||
All of his [[smash attacks]] are incredibly powerful, and coupled with their unique traits and the belly armor on his up and down smashes, allow for very effective punishment. Forward smash deals heavy knockback | All of his [[smash attacks]] are incredibly powerful, and coupled with their unique traits and the belly armor on his up and down smashes, allow for very effective punishment. {{Mvsub|King K. Rool|SSBU|Forward smash}} deals heavy knockback regardless of where it hits, especially if angled upwards. It also confirms out of a down tilt bury at 70%, KOing the opponent provided they are not too far from the ledge. {{Mvsub|King K. Rool|SSBU|Up smash}} functions as a quick anti-air, is extremely strong for its speed, and also has a small [[meteor smash]] hitbox in addition to a third hitbox that punishes grounded foes. However, only the first is really useful as the other two are weak and largely ineffectual. {{Mvsub|King K. Rool|SSBU|Down smash}} deals massive shield damage and lifts K. Rool's entire body off the stage from frame 4, allowing it to dodge most ground-hugging moves and makes it his best hard punish option considering its immense strength. Overall, his smash attacks are all formidable for hard punishes. Both up and down smash are equipped with Belly Super Armor, which is especially useful in the case of down smash as it allows it to punish more attacks than similar moves such as {{SSBU|Ridley}} and Incineroar's respective down smashes could. | ||
His aerials are also fairly unique in their utility. Neutral aerial grants the longest duration of belly armor in K. Rool's moveset, making it a reliable combo | His aerials are also fairly unique in their utility. {{Mvsub|King K. Rool|SSBU|Neutral aerial}} grants the longest duration of belly armor in K. Rool's moveset, making it a reliable combo breaker or landing tool to prevent juggling. Neutral aerial also has very low landing lag, allowing it to combo into moves such as neutral attack, up tilt, dash grab, and dash attack, the latter in particular being a KO confirm at certain percentages. The move's long-lasting, lingering hitbox and Belly Super Armor makes it a very effective edgeguarding tool, as it can negate a variety of recovery moves and gimp most opponents with ease. King K. Rool's {{Mvsub|King K. Rool|SSBU|forward aerial}} is arguably his best move overall, being a cornerstone for his neutral game. It has amazing range, hits exceptionally hard, and because of its low landing lag, it is safe on shield and is his best combo starter at low percentages. This gives the move a extreme utility as a neutral tool, KO move, combo starter, decent air-to-air option against some characters, as a potent albeit situational edgeguard option, for catching jumps and even as an occasional punish out of his burying moves. Forward aerial also deals non-[[tumble]] [[hitstun]] at 0%, allowing him to confirm into a grab. | ||
{{Mvsub|King K. Rool|SSBU|Up aerial}} is a very unorthodox move with a surprisingly high amount of utility. It has quick start-up, a very long-lasting hitbox, and excellent KO power, while also working as a good platform movement out of a short hop. This is most effective when platforms are low, such as on {{SSBU|Battlefield}}; it can also be used as a situational third jump while recovering, stalling K. Rool in the air while allowing it to potentially cancel out projectiles thrown at him. Because of the Belly Super Armor, long-lasting hitbox and the fact that K. Rool does not perform the slight jump while in hitstun, it can be used as a situational combo breaker. {{Mvsub|King K. Rool|SSBU|Down aerial}} and {{Mvsub|King K. Rool|SSBU|back aerial}} are [[meteor smash]]es, with the former coming out relatively fast and being a potent combo starter and 2-frame punish, and while the latter is very slow, it is also one of the strongest meteor smashes in the game. King K. Rool's back aerial also creates a wall of hitboxes behind him as a sourspot (which is also extremely powerful and can KO as early as 75%) covers his entire arm. His up and down aerials utilize belly armor, but their utility is situational due to their hitboxes being separated from K. Rool's belly. His neutral, forward, and back aerials are also relatively safe on shield, which is unusual for a super-heavyweight character. All in all, each of King K. Rool's aerials possess respectable utility and are overall considered to be his best moves. | |||
His [[special move]]s have a wide array of uses as well, with several efficient [[projectile]]s; the [[Blunderbuss]] is useful for edgeguarding purposes (such as forcing a situation where the opponent has to recover low, allowing for a down aerial) and throws out a Kannonball that can be sucked back in and aimed in a few directions. The Blunderbuss can also act as a command grab, sucking in opponents and shooting them out in different directions, with the forward reshoot in particular sporting very high knockback. The suction of the Blunderbuss is an effective ledge-trapping tool, especially on stages with platforms. Since K. Rool can drop through platforms while still having slight control over his movement, he can limit the opponent's options to effectively escape the ledge. | |||
The vacuum animation can also be delayed and is very quick to come out if a Kannonball is in play, allowing King K. Rool to easily mix up the timings. [[Crownerang]] is a very versatile tool that covers a large distance and grants him damage-based [[armor]] throughout the majority of its duration, and the late hit can set up combos or even straight up confirm kills into numerous moves. It has high priority that beats out most projectiles, and the armor allows K. Rool to tank numerous attacks, making the move very threatening in some matchups. The pick-up animation also has some ways to be canceled, which can be adapted into the player's gameplan. | |||
King K. Rool has | Furthermore, King K. Rool has immense durability: between his extreme weight, above-average falling speed, his Belly Super Armor on various moves, and his heavy armor on Crownerang, King K. Rool has some of, if not the best longevity in the game; it is not uncommon for him to sustain more than 200% damage. Additionally, his up special move, [[Propellerpack]], travels a remarkable distance for a heavyweight and is infamously hard to intercept vertically due to its respectably disjointed hitbox. This can be used to poke opponents on the ledge, then jump up with a forward or up aerial to regain advantage. It can also situationally be used to catch opponents near the ceiling to steal a stock, most notably on high recovery routes. | ||
King K. Rool also has one of the best grab games among the entire cast. Each of his grabs have very long ranges and 3 active frames, while his throws boast a mix of high damage outputs and/or respecttable utility. King K. Rool's {{Mvsub|King K. Rool|SSBU|up throw}} is almost identical to Incineroar's equivalent throw aesthetically, but is somewhat different mechanically: it involves him jumping toward the upper blast zone quickly and, as a result, can result in him landing on a platform after he descends. It is the most damaging throw in the entire game, dealing almost 20% if the 1v1 multiplier is enabled, making it a very effective damage racking tool. It also leaves the opponent in a juggling situation. It is also one of the strongest up throws in the game, and with help of platforms it can KO even earlier. King K. Rool's {{Mvsub|King K. Rool|SSBU|back throw}} is a similarly powerful throw with fantastic KO potential near the ledge, which becomes even more potent with [[rage]]. It also sends the opponent at a [[semi-spike]] angle, setting up for potentially deadly edgeguards even when it fails to KO. | |||
At higher percentages, King K. Rool's notorious {{Mvsub|King K. Rool|SSBU|down throw}} can lead into various mixups with tilts, up smash or aerials depending on the opponent's mash speed. Most notably, he can create a 50/50 situation at around 80%-100% with the throw - up smash covers mashing, allowing him to hit the opponent before they mash out and net a KO, or if they decide not to mash, forward smash will KO them. In addition to this, dash attack or up tilt are reliable options at higher percentages, allowing K. Rool to straight up KO with the throw starting from 120%-140%. {{Mvsub|King K. Rool|SSBU|Forward throw}} does decent damage, can help put an opponent offstage and in a disadvantageous position, and leads into a dash attack for a true combo until around 20%. Once this is out of range, it is great for setting up edgeguards. With all of this, K. Rool is always able to deal significant damage if he lands a grab, and is able to KO with his throws earlier than almost every character in the game to the point where he gets a huge chunk of his KOs with his grabs. All of this is made even more effective with his excellent grab range; combined with his effective initial dash, this can allow for a string of grabs that strongly deters shielding. | |||
King K. Rool has access to a large amount of [[Advanced technique#King K. Rool|advanced technique]]s. These techniques assist with movement, mixups, and even enable combos. As a result, he is a rather technical fighter that can be rewarding to a player looking for a simple character with a high learning curve. They are all somewhat practical and reward creative use, allowing players to build interesting playstyles of their own. This makes him easily accessed at a low level, while still being usable on a higher level of play. As long as the player is aware of the options that the design of these techs provide, King K. Rool will reward them for it. | |||
King K. Rool's | However, King K. Rool's numerous advantages are also met with several weaknesses. His below-average mobility spells trouble for him in certain matchups, and can make him easier to zone. Blunderbuss Kannonballs are slow to set up, and while they can occupy space well, fast characters can easily ignore it if they are even remotely close to him. Crownerang is also somewhat slow, although the crown is a fairly powerful item that opponents can use to rack up damage very quickly. [[Gut Check]] is generally inferior to other counterattacks due to having a hitbox only on his stomach, while having significantly higher endlag than most reflectors (around 30 frames if it fails), making it unreliable. This endlag makes it almost meaningless against some projectiles, such as {{Mvsub|Mega Man|SSBU|neutral attack|poss=y}}. | ||
King K. Rool's extreme weight, very large hurtbox, and above-average falling speed make him seriously vulnerable to combos, and while his Belly Super Armor can help alleviate this, it's not completely foolproof: if K. Rool takes 36.02% of total damage to his armor over a short period of time, he will suffer a pseudo-[[shield break]] and be rendered immobile until his belly armor recovers. It also replenishes only 0.3% per second, making abuse quite difficult. Its limited HP punishes abuse of this mechanic if used frequently. Although it is hard to break in most matchups, it is certainly possible especially against other heavyweights with strong attacks, such as Bowser and {{SSBU|Ganondorf}}. | |||
However, its effectiveness varies depending on whether clashing against his attacks is actually worthwhile. The HP system of Belly Armor makes it quite exploitable and can occasionally act as a liability for survival, forcing him to rely more on non-armored moves when it's about to break. Additionally, due to their brief duration, his belly armor attacks are more reliable on quick, single-hit moves than long, multi-hitting attacks. The utility of Belly Super Armor as a combo breaker is also limited by its relative slowness to come out, being active from frame 6 on neutral and up aerial. K. Rool's other options to escape combos in the air are similarly limited; his air dodge is slower than most of the cast, starting at frame 4, and Gut Check, which also makes him intangible at frame 4 and can heavily punish reckless opponents, is in turn very vulnerable to staggered pressure, especially when used carelessly. | |||
Though a lot of King K. Rool's moves have decent start-up, especially for a super heavyweight, an equal amount of them suffer from very high ending lag, which means that King K. Rool gets easily punished if he fails to connect his attacks. Despite the wide array of tools he has at his disposal, he lacks many moves that can simply be thrown out quickly, as many of his attacks are punishable or force him to use up his belly armor. This ironically makes his [[approach]] ineffective despite the sheer amount of different, fast attacks he has; few of his attacks can maintain pressure without being exploited, and the lag can make moves like forward tilt a neutral reset at best. King K. Rool is also vulnerable to being pressured and rushed down due to a poor out-of-shield game; his up smash cannot be used out of shield in most matchups, as the headbutt (which comes out on frame 6) only hits directly above him, while the later plank hitboxes are weak and slow to come out and he is wide open if it's shielded. | |||
King K. Rool's neutral aerial, his fastest and most reliable out of shield option, has poor range, especially behind him, only covering his belly, and is unsafe on hit at low percents. As a result, K. Rool is particularly vulnerable to characters that can cross-up his shield easily, since he effectively has no option to punish this kind of approach and has to resort to retreating or jumping away. Finally, even his amazing grab game has some flaws, mainly due to the low knockback scaling of his throws: forward throw is unable to KO at realistic percentages, up throw requires platforms to KO effectively and is too laggy to have true followups, back throw loses a lot of its KO power if used center-stage due to its low knockback growth, and down throw's extensive mixups and KO confirms more often than not require reads to be effective. It is also affected by the [[bounce glitch]], which adds even more inconsistency to the move. | |||
Additionally, King K. Rool's air game can overall be seen as mediocre. Although his aerials are generally very potent moves and have interesting attributes, including two meteor smashes and armor on some of them, all of these moves (apart from his neutral aerial) suffer from one fatal flaw—very high ending lag in the air—making many of them somewhat situational, and forcing K. Rool to land with the moves to minimize the ending lag in the air. His down aerial's meteor smash hitbox only lasts for two frames and the move itself has high ending lag, making the potential punishes off of it very situational. His up aerial has extreme ending lag (the highest of any aerial in the game), preventing King K. Rool from acting even after a jump (though platforms can alleviate this), making it somewhat risky to use high up in the air. While his back aerial is very strong and has a lingering hitbox, it has very high start-up lag, which makes it easy to stuff out especially with its lack of armor or intangibility, and it additionally has a very weak sourspot that doesn't KO at reasonable percents, making it somewhat inconsistent. | |||
Additionally, none of King K. Rool's aerials autocancel in a short hop. His forward and back aerials require a full hop double jump to autocancel, while up aerial does not autocancel without being very high up. The high ending lag of his aerials makes fast-falling them offstage extremely risky, as it is possible to self-destruct before even getting a chance to recover, which depletes edgeguarding options. Due to the high overall lag of his aerials, K. Rool is unable to juggle for extended periods of time, and his aerial game is mostly constrained to a reactive playstyle. K. Rool's slow aerial mobility further hampers his aerial capacity, and his massive hurtbox makes him a very easy target if in the air, giving him a limited air game, making his playstyle generally more grounded. | |||
[[Crownerang]], while a very strong move on its own, is flawed in many ways. If an opponent picks up the crown after it has been thrown, it leaves him without one of his best tools. The crown can actually be used to edgeguard against [[Propellerpack]], or it can be thrown up to keep it from respawning. It is also very possible for opponents to combo with the crown, or pick it up again after throwing it, with very little counterplay available. The player must adopt an entirely different playstyle while the crown is on the field, or else risk losing a stock. As the pick-up animation takes 17 frames to complete, this also means that it can interrupt crucial combos, leading to the opponent getting away and resetting to neutral. While this is alleviated slightly through tech, it does not help a lot. | |||
King K. Rool's recovery, while effective in theory, is very exploitable by the majority of the roster. Propellerpack is very linear, and a knowledgeable player can edgeguard him for long periods of time. It is immensely slow, and moving around with it reduces the vertical speed and leaves strong momentum, which can lead to a self-destruct if not accounted for. The hitbox does not cover him horizontally at all, and as he cannot cancel the animation, he always has to commit to it. He is usually forced to recover low, which is extremely dangerous due to how many characters have their own unique ways to beat out Propellerpack. Characters such as {{SSBU|Piranha Plant}} and {{SSBU|Villager}} have moves ([[Ptooie]] and {{Mvsub|Villager|SSBU|forward smash}} respectively in this case) that can also counteract the vertical hitbox. | |||
Propellerpack also leaves him very vulnerable to [[stage spike]]s, though [[LSI]] greatly alleviates this and allows him to [[tech]] to unreasonable percentages. The move can be angled to try and prevent this, though K. Rool usually will not recover without taking a large amount of damage. K. Rool also has very few ledge options; his only unique one is [[forward aerial]], which requires frame-perfect precision to ledgesnap. Other than this, his ledge options are very limited—even Crownerang is too laggy to be used from the ledge reliably—and thus many characters can keep him there for a long time before finally KOing him. | |||
All in all, King K. Rool has a somewhat hard time compensating his heavy drawbacks, even though his strengths are also very potent. King K. Rool is an extremely resilient character that excels at keeping opponents out while punishing mistakes extremely hard. He enjoys playing a unique bait-and-switch playstyle, being a zoner that can switch to aggression whenever there is an opening and net a substantial punish. His damage output cannot be understated, with him often either getting a stock or leaving an opponent at KO percents. This ability to force reactions from his foe makes him unlike any other character in the cast, and creativity rewards the player with a decently versatile character. | |||
However, just like how he capitalizes heavily on mistakes and confusion, King K. Rool's own openings can be heavily punished as well, requiring him to play patiently. To use the full potential of his moveset, the player needs to balance their gameplay between zoning and up and personal aggression. For while K. Rool does have the advantage of switching between safe distancing via Crownerang and the Blunderbuss or pressuring lighter characters with his strong melee attacks, he does not perform well enough to use one strategy alone. | |||
Historically, K. Rool's competitive reception has generally been very negative, though it has somewhat fluctuated over time. Early on, he was considered to be a potential high tier or even top tier character, as well as "broken" (especially by casual players), it did not take too long for many top professionals to consider King K. Rool as one of the worst characters in the game due to his severe, heavily exploitable downsides. In Japan, his reputation was even worse, with many top professional players there universally ranking him as the single worst character in the game. This is reflected in his tournament results, as they are very limited in North America and Japan (in latter, practically completely nonexistent outside of online tournaments), especially on the national level. | |||
However, thanks to dedicated players like {{Sm|Ben Gold}} and {{Sm|Raphy}}, King K. Rool's results in Australia and Europe respectively are significantly better. Ben Gold in particular managed to win {{Trn|Battle Arena Melbourne 11}}, the biggest ''Ultimate'' major so far in Australia. Although his competitive viability still remains questionable and many players still view him as a low tier or even bottom tier character, the plehtora of significant buffs he received from game updates has made numerous top professional players question whether K. Rool really is as bad as previously thought. Some of them even believe that he might be a mid tier character instead of a low tier or bottom tier character as previously thought. However, how much these buffs have actually affected his viability remains to be seen. | |||
==Update history== | ==Update history== | ||
King K. Rool | King K. Rool received a mix of buffs, nerfs and glitch fixes via game updates, but was significantly buffed overall. In response to his early metagame perceptions, update 2.0.0 shortened [[Blunderbuss]]' vacuum duration and decreased the horizontal range of [[Propellerpack]]'s hitbox, the latter of which would previously hit opponents on the edge from noticeably far away. The most notable change, however, was to down throw: its [[bury]] duration's scaling was changed to be less effective at low percentages, but more effective at high percentages. While the former two are direct nerfs, they did not significantly impact his playstyle. While originally considered to be a significant nerf, King K. Rool proved to benefit from the change to his down throw, as the popularization of forward throw to dash attack made the early percentage usage obsolete, and the higher scaling allowed for down throw to up tilt to be a reliable KO confirm beginning around 130%. | ||
After his metagame relevance dropped, outside of a nerf to [[Crownerang]]'s shield damage, King K. Rool received his first buffs in updates 3.0.0 and 3.1.0. The most notable among these was the ending lag reduction to up aerial, making it far safer to use offstage and even more reliable for recovery thanks to it functioning as a pseudo-double jump. Forward aerial's hitbox priority would also be tweaked, making the higher-damage hitboxes connect reliably and thus drastically improve K. Rool's combo game. This would be the first of numerous buffs to the move, which would turn it from a mediocre move to among the best in K. Rool's kit. | |||
Update | Update 6.0.0 would rework [[Blunderbuss]], reducing its lag and increasing the KO power of Kannonballs. A new searchbox would be added specifically for vacuuming Kannonballs, drastically improving the consistency of reshooting them and making it reliable off-stage. K. Rool's aerials all received significant improvements as well; neutral aerial's landing lag was reduced to 9, allowing dash to be buffered consistently and making it easy to combo from, forward aerial's damage was buffed to the point it is -5 on shield, and up aerial's hitbox activity and KO potential was monumentally improved. These changes, coupled with continued tweaks to [[Gut Check]], revolutionized K. Rool's game plan and gave him some much-needed identity. | ||
After | After a minor buff to his shield in update 7.0.0, subsequent updates granted King K. Rool several useful buffs. In update 8.0.0, [[Belly Super Armor]] and Crownerang both received damage threshold increases, allowing him to force his way through many situations, notably improving his disadvantage state. Crownerang's buff was of particular note, significantly improving its utility in numerous game states, saving him from edge traps, juggling, or edge-guard situations. Back throw and up smash's changes improved his ability to KO from stray hits as well, with back throw in particular even [[gimp]]ing opponents on its own due to the new [[knockback]] angle, making it an option to respect when edge trapping K. Rool. | ||
After many {{SSBU|Steve}}-related bugs being fixed, K. Rool's KO potential was amped up even more in update 13.0.0. Up throw received a knockback growth buff that put it on par with {{SSBU|Samus}}' which, considering its ability to take K. Rool to higher platforms, made it significantly more imposing. Up tilt's damage output received a buff that made it more reliable out of down throw, whereas previously it was middling and mostly outclassed by dash attack, which is 3 frames slower. Finally, forward smash gained slightly more range and an extra active frame, now being slightly easier to land and hitting edge-hanging opponents more reliably. | |||
Overall, King K. Rool fares significantly better than he did at the launch of ''Ultimate'': his [[neutral game]] has improved drastically, he has far more reliable KO options, and his disadvantage state has been considerably reworked. Numerous top professionals, such as {{Sm|Raito}}, {{Sm|MVD}}, {{Sm|ESAM}}, and {{Sm|Dabuz}}, have acknowledged his significant turnaround, which has been reflected by players such as {{Sm|Ben Gold}}, {{Sm|KirbyKid}}, and {{Sm|Raphy}} achieving considerable success partially because of his buffs. | |||
'''{{GameIcon|ssbu}} {{SSBU|2.0.0}}''' | '''{{GameIcon|ssbu}} {{SSBU|2.0.0}}''' | ||
[[File:KingkrooldthrowSSBUgraph.png|thumb|300px | [[File:KingkrooldthrowSSBUgraph.png|thumb|300px|A graph demonstrating the differences in the burial duration's scaling between King K. Rool's down throw pre-update (blue) and post-update (red).]] | ||
{{UpdateList (SSBU)/2.0.0|char=King K. Rool}} | {{UpdateList (SSBU)/2.0.0|char=King K. Rool}} | ||
| Line 77: | Line 112: | ||
'''{{GameIcon|ssbu}} {{SSBU|6.0.0}}''' | '''{{GameIcon|ssbu}} {{SSBU|6.0.0}}''' | ||
[[File: | [[File:KingKRoolNSpecialSearchSSBU.gif|thumb|200px|Blunderbuss' updated vacuum searchbox for Kannonballs in update 6.0.0. Once the vacuum is completely stretched out, it remains as such until the Blunderbuss is put away.]] | ||
{{UpdateList (SSBU)/6.0.0|char=King K. Rool}} | {{UpdateList (SSBU)/6.0.0|char=King K. Rool}} | ||
'''{{GameIcon|ssbu}} {{SSBU|7.0.0}}''' | |||
{{UpdateList (SSBU)/7.0.0|char=King K. Rool}} | |||
'''{{GameIcon|ssbu}} {{SSBU|8.0.0}}''' | |||
{{UpdateList (SSBU)/8.0.0|char=King K. Rool}} | |||
'''{{GameIcon|ssbu}} {{SSBU|9.0.1}}''' | |||
{{UpdateList (SSBU)/9.0.1|char=King K. Rool}} | |||
'''{{GameIcon|ssbu}} {{SSBU|12.0.0}}''' | |||
{{UpdateList (SSBU)/12.0.0|char=King K. Rool}} | |||
'''{{GameIcon|ssbu}} {{SSBU|13.0.0}}''' | |||
{{UpdateList (SSBU)/13.0.0|char=King K. Rool}} | |||
==Moveset== | ==Moveset== | ||
*K. Rool has a large and tall hurtbox while standing, [[walk]]ing, and [[jump]]ing. However, he [[dash]]es on all four limbs, akin to real-life alligators and crocodiles, which makes his hurtbox significantly shorter. | *K. Rool has a large and tall hurtbox while standing, [[walk]]ing, and [[jump]]ing. However, he [[dash]]es on all four limbs, akin to real-life alligators and crocodiles, which makes his hurtbox significantly shorter. | ||
* | *Certain belly-based moves in King K. Rool's moveset (forward tilt, dash attack, up smash, down smash, neutral aerial, up aerial, down aerial, and side taunt) activate health-based [[super armor]] around his belly, known as [[Belly Super Armor]]. Each of the listed moves has this out for varying frames. However, taking damage with these moves cracks it, with K. Rool getting [[dazed]] upon it breaking completely after sustaining too much damage. The armor has 18.01 HP, but since the incoming damage is split 50/50 between K. Rool and his belly, it is practically 36.02 HP. It regenerates at 0.08 HP every 16 frames (about 0.3 HP per second). Attacks that hit K. Rool's belly super armor make a loud, distinct clanging sound as an audio cue, with a fixed 16 frames of hitlag. It is also possible to estimate the damage it has taken, with small cracks appearing at 11.5 HP (where 23% would break it) and large cracks appearing at 5.02 HP (where 10.04% would break it). | ||
''For a gallery of King K. Rool's hitboxes, see [[King K. Rool (SSBU)/Hitboxes|here]].'' | ''For a gallery of King K. Rool's hitboxes, see [[King K. Rool (SSBU)/Hitboxes|here]].'' | ||
| Line 88: | Line 138: | ||
|game=SSBU | |game=SSBU | ||
|neutralcount=3 | |neutralcount=3 | ||
|neutralname= | |neutralname=Palm Stamp ({{ja|パームスタンプ|Pāmu Sutanpu}}) / Snatch Claw ({{ja|スナッチクロー|Sunacchi Kurō}}) / Sole Kick ({{ja|ソールキック|Sõru Kikku}}) | ||
|neutral1dmg=2.5% | |neutral1dmg=2.5% | ||
|neutral2dmg=2.5% | |neutral2dmg=2.5% | ||
|neutral3dmg=7% | |neutral3dmg=7% | ||
|neutraldesc=A | |neutraldesc=A sumo-esque palm thrust (comes out on frame 3), followed by a claw swipe (frame 4), followed a front kick (frame 5). The first hit can be repeated by holding the attack button, and can [[jab reset]] large characters specifically, allowing for some interesting situations. The second hit resembles King K. Rool's standard attack from ''{{iw|mariowiki|Donkey Kong Barrel Blast}}''. | ||
|ftiltname= | |ftiltname=Buster Clap ({{ja|バスタークラップ|Basutā Kurappu}}) | ||
|ftiltdmg=11% (arms), 13% ( | |ftiltdmg=11% (arms), 13% (hands) | ||
|ftiltdesc=Rears back and performs a forceful clap, | |ftiltdesc=Rears back and performs a forceful clap, similarly to {{SSBU|Donkey Kong}}'s forward smash. Gains [[Belly Super Armor]] when he rears back to clap, making it a highly effective approach option with pivot canceling. Sends at a [[semi-spike]] angle and is decently fast for its power (comes out on frame 12), KOing at 107% at the edge of [[Final Destination]]. It can be angled up and down, making it a decent anti-air tool when angled up, and it is capable of hitting the ledge when angled down. This move has impressive range due to a massive, disjointed hitbox surrounding K. Rool's hands. It does suffer from moderately high ending lag, though this flaw can be partially mitigated when spaced correctly. The combination of its range, Belly Super Armor, KO potential, and ability to angle it up or down makes it not only one of the best moves in King K. Rool's kit, but also arguably one of the best forward tilts in the game. | ||
|utiltname= | |utiltname=Uppercut ({{ja|アッパーカット|Appākatto}}) | ||
|utiltdmg= | |utiltdmg=12.5% (clean), 7.4% (late, arm), 8.9% (late, fist) | ||
|utiltdesc=An uppercut. Has a wide hitbox, covering the front of K. Rool, and starts low enough to reach prone enemies. Almost as fast as his neutral attack, coming out on frame 5, which is very fast for a move with reasonably decent KO power. Loses power the longer it is out, with the sweetspot dealing rather strong diagonal knockback, and the sourspot dealing weak, mostly vertical knockback, which can potentially lead to another up tilt or up air. This move | |utiltdesc=An uppercut. Has a wide hitbox, covering the front of K. Rool, and starts low enough to reach prone enemies. Almost as fast as his neutral attack, coming out on frame 5, which is very fast for a move with reasonably decent KO power. Has intangibility on the arm during its duration, effectively making the move slightly disjointed. Loses power the longer it is out, with the sweetspot dealing rather strong diagonal knockback, and the sourspot dealing weak, mostly vertical knockback, which can potentially lead to another up tilt or up air. This move is a reliable followup from [[down throw]] due to its combination of speed and power. | ||
|dtiltname= | |dtiltname=Bury Leg ({{ja|バリーレッグ|Barī Reggu}}) | ||
|dtiltdmg=13% (clean), 10% (late, non-burying), 8% (late, burying), 7% (late, quake) | |dtiltdmg=13% (clean), 10% (late, non-burying), 8% (late, burying), 7% (late, quake) | ||
|dtiltdesc=A | |dtiltdesc=A stomp. K. Rool's foot [[bury|buries]] grounded opponents, though it cannot do damage to an already-buried enemy. Much stronger on aerial opponents, and can KO at 104% at the edge of Final Destination. The stomp causes a shockwave near his foot. This deals weak vertical knockback to nearby opponents and allows for moves like [[forward aerial]] to be used out of it. Starts with the non-bury hitbox on frame 13, before the bury comes out at frame 14. [[Forward smash]] is true out of this from around 70%, and frequently KOs at that percent range. The hitboxes can hit some opponents under low platforms (such as the left and right platforms on {{SSBU|Battlefield}}). Due to how buries work in ''Ultimate'', it is possible to "store" knockback on a buried opponent using a weak attack, forcing them to get unburied over time and sent at the angle of the weak attack; this can create long combo strings at low percents. | ||
|dashname= | |dashname=Body Attack ({{ja|ボディアタック|Bodi Atakku}}) | ||
|dashdmg=15% (clean), 11% (late) | |dashdmg=15% (clean), 11% (late) | ||
|dashdesc=A | |dashdesc=A [[wikipedia:Professional wrestling strikes#Body avalanche|body avalanche]]. It covers a good distance and has incredibly fast start-up for its power (comes out on frame 7), but has very high ending lag. It also deals much less damage later into the attack. Has Belly Super Armor and can KO, allowing it to tank opposing hits (especially projectiles) as a risky [[approach]]. KOs at 102% at the edge of Final Destination, making it a very good move to use out of [[down throw]] through [https://www.youtube.com/watch?v=7-mWaJuVdlo Instant Dash Attack], as it KOs larger characters earlier than forward tilt. It resembles the body avalanche he used in ''{{iw|mariowiki|Donkey Kong Land}}''. | ||
|fsmashangles=3 | |fsmashangles=3 | ||
|fsmashname= | |fsmashname=Dynamite Punch ({{ja|ダイナマイトパンチ|Dainamaito Panchi}}) | ||
|fsmashupdmg={{ | |fsmashupdmg={{ChargedSmashDmgSSBU|19.95}} (sweetspot), {{ChargedSmashDmgSSBU|17.325}} (close) | ||
|fsmashsidedmg={{ | |fsmashsidedmg={{ChargedSmashDmgSSBU|19}} (sweetspot), {{ChargedSmashDmgSSBU|16.5}} (close) | ||
|fsmashdowndmg= {{ | |fsmashdowndmg= {{ChargedSmashDmgSSBU|19.57}} (sweetspot), {{ChargedSmashDmgSSBU|16.995}} (close) | ||
|fsmashdesc=Dons a boxing glove, referencing his | |fsmashdesc=Dons a boxing glove, referencing his King Krusha K. Rool persona from ''{{iw|mariowiki|Donkey Kong 64}}'', and throws a [[wikipedia:Cross (boxing)|straight punch]]. This move has a sweetspot on the glove and a sourspot on K. Rool's arm. It can also be angled and deals more damage if angled up or down, which gives it some versatility, depending on the angle. Although the move is slightly faster than forward smashes of other super heavyweights, it still comes out slow with a short-lasting hitbox (frames 19-21), and it suffers from extremely high ending lag even for its type, making it very punishable when missed. However, the move is very powerful, with the sweetspot KOing at 53% at the edge of Final Destination. The sourspot on his arm deals less knockback and damage but is still moderately powerful. The boxing glove is also disjointed, which can be used to hard punish short hop approaches in niche circumstances. It's also very effective out of down tilt, as the move is fast enough to connect and KO at around 50%-70% before the opponent mashes out. | ||
|usmashname= | |usmashname=Heavy Fall ({{ja|ヘビーフォール|Hebī Fōru}}) | ||
|usmashdmg={{ | |usmashdmg={{ChargedSmashDmgSSBU|17}} (headbutt), {{ChargedSmashDmgSSBU|8}} (late headbutt), {{ChargedSmashDmgSSBU|10}} (plank); {{ChargedSmashDmgSSBU|3}} (meteor smash) | ||
|usmashdesc= | |usmashdesc=An upward [[wikipedia:Professional wrestling strikes#Battering ram|battering ram]] followed by a comical plank. The headbutt has a small hitbox, but has fast start-up (frame 6) and can KO from medium to high percents. It also has a slightly later hitbox on frame 10 that deals slightly less damage, making it somewhat inconsistent at times. The initial headbutt can be used to hit opponents on platforms above him, or as a risky anti-air move. It is King K. Rool's fastest out of shield option, though it is too situational and risky to be very effective for this purpose. It is also a highly effective follow-up from down throw, as it is able to hit opponents who mash out, being an effective KO confirm at around 90%-110%. The plank comes out later and has a big hitbox, but deals less damage and knockback, making it more suited for covering the headbutt or ledge trapping at best. The plank animation weakly [[meteor smash]]es opponents, though this is ineffective for edgeguarding due to its low knockback. In addition, it is the weakest meteor smash in the game, failing to KO at realistic percents. It can be used to force tech situations or awkward placements off-stage, but these are highly situational and impractical. The sheer number of hits do make it useful for causing shield damage under platforms. Each hitbox is situated on K. Rool's head and body respectively, meaning it can miss entirely if used poorly. Additionally, the move has extremely high ending lag, with the first actionable frame being 72 and the last hit being on frame 23. The headbutt KOs at 100%, while the plank KOs at 162% at the edge of Final Destination, respectively. This move has Belly Super Armor shortly after K. Rool hops and before he flops onto the ground. There are also intangibility frames on K. Rool's head when the sweetspot comes out. | ||
|dsmashname= | |dsmashname=Gigant Press ({{ja|ギガントプレス|Giganto Puresu}}) | ||
|dsmashdmg={{ | |dsmashdmg={{ChargedSmashDmgSSBU|18}} (body), {{ChargedSmashDmgSSBU|4}} (quake) | ||
|dsmashdesc=A | |dsmashdesc=A [[wikipedia:Professional wrestling strikes#Big splash|jumping splash]]. Has Belly Super Armor during the leap, and deals heavy shield damage. As K. Rool physically leaves the ground when using the move, his hurtbox gets shifted into the air, allowing it to dodge ground or belly-level attacks to deal a hard punish. It is extremely powerful, being one of the strongest down smashes in the game, KOing at 50% at the edge of Final Destination. It also has a quake hitbox that provides minimal protection if the opponent avoids the splash itself. The move is very laggy overall, with its strongest hitbox coming out on frame 22, and it also suffers from very high ending lag, which makes it very punishable if used poorly. However, thanks to its initial hop and armor, the move is surprisingly hard to intercept despite its high startup. It also can be used on platforms against opponents that try to attack K. Rool from below. The quake is extremely weak, but it covers the high ending lag of the move somewhat, and it can occasionally lead to a forward tilt. | ||
|nairname= | |nairname=Iron Balloon ({{ja|アイアンバルーン|Aian Barūn}}) | ||
|nairdmg={{ShortHopDmgSSBU|12}} (clean), {{ShortHopDmgSSBU|8}} (late) | |nairdmg={{ShortHopDmgSSBU|12}} (clean), {{ShortHopDmgSSBU|8}} (late) | ||
|nairdesc= | |nairdesc=A [[wikipedia:Professional wrestling aerial techniques#Diving splash|splash]]. Decently fast (comes out on frame 7), acts as a [[sex kick]] and has Belly Super Armor. In addition, it has very little lag in comparison to most of King K. Rool's moveset, and is his safest move on shield. Finally, it is also his fastest out-of-shield option that is somewhat practical, next to his neutral attack. Because of all of this, it is one of the safest and most versatile moves to use in K. Rool's kit. It can be used for landing, contesting aerials, approaching, and even gimping, as it beats out most recovery moves, even ones with hitboxes. In addition, due to its safety, it can be used to pressure, and it can also combo into several moves, such as his neutral attack, up tilt, forward tilt, dash attack, grab, and even situationally into down tilt, which can lead to devastating early KOs. However, it has poor range, only covering his belly, and is unsafe on hit at low percents. It is similar to an attack he uses in ''Donkey Kong Land''. | ||
|fairname= | |fairname=Drop Kick ({{ja|ドロップキック|Doroppu Kikku}}) | ||
|fairdmg={{ShortHopDmgSSBU|15.5}} (clean | |fairdmg={{ShortHopDmgSSBU|15.5}} (clean feet), {{ShortHopDmgSSBU|13.5}} (clean legs), {{ShortHopDmgSSBU|10}} (late feet), {{ShortHopDmgSSBU|8}} (late legs) | ||
|fairdesc= A dropkick | |fairdesc= A dropkick. Hitbox comes out on frame 11. Its sweetspot is at K. Rool's feet, which has a higher priority over the sourspot, making it easy to land. Has a very large hitbox with sweetspot being notably disjointed, giving it a very good range. The sweetspot has strong knockback, KOing around 100% near the edge of Final Destination. It deals disproportionately high damage, making it an very efficient damage racking tool. The move also acts as a sex kick, allowing it to be used for approaching or as a situational edgeguarding option. However, the move has relatively low landing lag, considering its power, huge, lingering hitbox, and relatively decent startup of 11 frames. This low landing lag combined with its power and range makes it K. Rool's safest move in neutral when the move is being used while landing, being safe on shield, especially when spaced correctly. Its properties make it K. Rool's best combo starter at low percents, with sweetspot being able to lead into neutral attack, forward tilt, up tilt, dash attack and grab at low percents. It can even confirm down tilt thanks to it being +15 on hit with a good landing at 0%. The sourspot on this move lies around the torso and can be used well with down tilt. It has a late hitbox with drastically weaker damage and knockback, which has some niche combo utility at mid percents, being able to lead into grabs thanks to it not sending into [[tumble]] until around 65%. However, it is very hard to land consistently. Overall, the move is considered to be among the best and most versatile moves in K. Rool's moveset. | ||
|bairname= | |bairname=Rock Breaker ({{ja|ロックブレイカー|Rokku Bureikā}}) | ||
|bairdmg={{ShortHopDmgSSBU|14.5}} (arm), {{ShortHopDmgSSBU|19}} (fist) | |bairdmg={{ShortHopDmgSSBU|14.5}} (arm), {{ShortHopDmgSSBU|19}} (fist) | ||
|bairdesc=Turns around and | |bairdesc=Turns around and throws a delayed {{iw|wikipedia|overhand punch}} behind himself. It is similar to {{SSBU|Mario}}'s forward aerial both aesthetically and mechanically: it is very slow (comes out on frame 18), but it powerfully meteor smashes opponents if K. Rool's fist hits. Against grounded opponents, it launches them diagonally with extremely high knockback, being able to KO middleweights at 65% near the ledge, making it one of the strongest aerial attacks in the entire game. The larger, disjointed sourspot around the fist is significantly weaker, dealing rather weak diagonal knockback against both grounded and airborne opponents, failing to KO reliably until 160%. It also has a slightly lingering hitbox, making it an important tool in neutral when full hopped. | ||
|uairname= | |uairname=Stretch Headbutt ({{ja|ストレッチヘッドバット|Sutorecchi Heddobatto}}) | ||
|uairdmg={{ShortHopDmgSSBU|14}}, {{ShortHopDmgSSBU|10}} (late) | |uairdmg={{ShortHopDmgSSBU|14}}, {{ShortHopDmgSSBU|10}} (late) | ||
|uairdesc= | |uairdesc=An upward battering ram. It causes K. Rool to float slightly, giving it more reach. It has extremely high ending lag due to King K. Rool laughing after the move, preventing him from acting even if performed out of a double jumìp, making it risky to use offstage and making it the laggiest aerial in the game. However, is one of K. Rool's fastest aerial attacks (comes out on frame 7), and deals less damage if hit later. In addition to this, the early hitbox is among the strongest up aerials in the game, being able to KO at around 100% and even earlier if used near the upper blast zone, giving K. Rool a possibility to pick up very early KOs with the move, especially with rage. The early hit has a large, disjointed hitbox much larger than K. Rool's head, which also lingers for a disproportionately long time. The move has Belly Super Armor while K. Rool stretches his head out, ending after the hitboxes are over. When short-hopped, this move can allow K. Rool to move onto a platform, allowing for some movement options, and significantly helps with the issue of the move having high ending lag. Like up smash, there are intangibility frames on K. Rool's head during the attack, making it disjointed and allowing it to beat projectiles or some other even reasonably disjointed moves, such as {{SSBU|Mr. Game & Watch}}'s down aerial. This move can also be used for recovering from high to mid-levels, as K. Rool can be moved from side to side while using the move. <!--K. Rool's crown does not increase this move's damage, this has been tested. Remember that short hop attacks have a damage penalty in ''Ultimate''.--> | ||
|dairname= | |dairname=Meteor Stomp ({{ja|メテオスタンプ|Meteo Sutanpu}}) | ||
|dairdmg={{ShortHopDmgSSBU|12}} (early), {{ShortHopDmgSSBU|9}} (late) | |dairdmg={{ShortHopDmgSSBU|12}} (early), {{ShortHopDmgSSBU|9}} (late) | ||
|dairdesc= | |dairdesc=A front flipping [[wikipedia:Professional wrestling strikes#Double foot stomp|double foot stomp]]. The hitbox is situated on K. Rool's legs. Decently fast (comes out on frame 14) and meteor smashes if the early hitbox connects, although the meteor smash itself is rather weak. If the opponent is hit by the early hitbox - but not meteor smashed - on-stage by this move, it confirms into a wide variety of attacks. There is also a late hitbox with a sweetspot on K. Rool's hips that has more knockback growth, plus a sourspot on the feet. It also has Belly Super Armor after K. Rool stomps, giving it some safety. | ||
|grabname= | |grabname=Grab ({{ja|つかみ|Tsukami}}) | ||
|grabdesc=Reaches out | |grabdesc=Reaches out. King K. Rool's grabs are quick and have great ranges. However, his dash and pivot grabs are slower than his standing grab. If K. Rool misses, his left eye comically bulges in frustration. | ||
|pummelname= | |pummelname=Grab Headbutt ({{ja|つかみヘッドバット|Tsukami Heddobatto}}) | ||
|pummeldmg=1.6% | |pummeldmg=1.6% | ||
|pummeldesc=Headbutts the opponent. | |pummeldesc=Headbutts the opponent. | ||
|fthrowname= | |fthrowname=Ground Throw ({{ja|グラウンドスルー|Guraundo Surū}}) | ||
|fthrowdmg=10% (throw), 7% (collateral) | |fthrowdmg=10% (throw), 7% (collateral) | ||
|fthrowdesc= | |fthrowdesc=A one-handed [[wikipedia:Professional wrestling throws#Gorilla press slam|military press slam]]. The slam possesses a collateral hitbox that can affect nearby opponents. It combos into dash attack or a dash canceled neutral attack at 0%. It also has non-[[tumble]] hitstun at that point, making the combos extremely consistent. | ||
|bthrowname= | |bthrowname=Friction Throw ({{ja|フリクションスルー|Furikushon Surū}}) | ||
|bthrowdmg=11% | |bthrowdmg=11% | ||
|bthrowdesc= | |bthrowdesc=Pins the opponent to the ground and drags them backward before flinging them behind himself. KOs at 124% at the edge of Final Destination, though [[rage]] greatly assists its KO power. | ||
|uthrowname= | |uthrowname=Super Back Breaker ({{ja|スーパーバックブリーカー|Sūpā Bakku Burīkā}}) | ||
|uthrowdmg=16% | |uthrowdmg=16% | ||
|uthrowdesc= Heaves the opponent over his head, leaps high into the air, and | |uthrowdesc=Heaves the opponent over his head, leaps high into the air, and then descends to perform an {{h2|wikipedia:Backbreaker|Argentine backbreaker rack}} [[wikipedia:Backbreaker#Backbreaker drop|drop]]. This is the most damaging throw in the entire game, and it's powerful enough to KO at around 160%, or even earlier if he lands on a raised platform. | ||
|dthrowname=Piledriver | |dthrowname=Piledriver ({{ja|パイルハンマー|Pairu Hanma}}, ''Pile Hammer'') | ||
|dthrowdmg=5% | |dthrowdmg=5% | ||
|dthrowdesc= | |dthrowdesc=A {{iw|wikipedia|powerbomb}}. Has the lowest damage output of K. Rool's throws, but this is compensated by its burial ability granting it follow-up potential. K. Rool's most versatile throw overall, as well as one of his most versatile tools in general. Down throw follows up to numerous moves depending on the opponent's percent, including jab, up tilt, and up air at lower to mid percents, as well as forward tilt, forward, and down smash at higher percents. It is also possible to infinite many fighters by throwing them, using neutral attack while they are buried, and re-grabbing them when they are released. However, most followups can be avoided if the opponent mashes out (especially since the throw itself is slow and gives plenty of time to react), making its KO setups unreliable at much higher percents. Only dash attack, forward and up tilts are able to follow up at 125% and KO reliably. However, up smash and up aerial can be used to discourage mashing and create 50/50 situations at lower percents, as the prior KOs at 100% a lot of the time. | ||
|floorfname= | |floorfname= | ||
|floorfdmg=7% | |floorfdmg=7% | ||
|floorfdesc=Swipes | |floorfdesc=Swipes in front of himself with one claw then kicks behind himself with one foot. | ||
|floorbname= | |floorbname= | ||
|floorbdmg=7% | |floorbdmg=7% | ||
|floorbdesc=Swipes his | |floorbdesc=Swipes his claw around himself. | ||
|floortname= | |floortname= | ||
|floortdmg=5% | |floortdmg=5% | ||
|floortdesc=Swipes his claws | |floortdesc=Swipes both sides of himself with his claws. | ||
|edgename= | |edgename= | ||
|edgedmg=10% | |edgedmg=10% | ||
|edgedesc= | |edgedesc=Pulls himself up from the ledge and swipes forward with one claw. Has very long-range, being slightly shorter than {{SSBU|Bowser}}'s. | ||
|nsname=Blunderbuss | |nsname=Blunderbuss | ||
|nsdmg=13% (Kannonball), 12% (throw), 17% (relaunched Kannonball) | |nsdmg=13% (Kannonball), 12% (throw), 17% (relaunched Kannonball) | ||
|nsdesc=Pulls out a {{ | |nsdesc=Pulls out a {{iw|mariowiki|blunderbuss}} and fires a {{iw|mariowiki|Kannonball}} forward while donning the pirate hat worn by his alter-ego {{iw|mariowiki|Kaptain K. Rool}} in ''{{iw|mariowiki|Donkey Kong Country 2: Diddy's Kong Quest}}''. Only one Kannonball can be in play at one time, with another being usable after ≈2.5 seconds. After a Kannonball is fired, the special button can be held to use the blunderbuss's vacuum function, sucking in nearby enemies or the Kannonball itself (though the move will eventually cancel after several seconds), similarly to [[Inhale]]. K. Rool can drop through soft platforms while vacuuming with his blunderbuss, and he also can move left and right as well while airborne, which is very useful for ledge trapping. Once it sucks something in, K. Rool will immediately launch it out at a slight angle upward in front or behind him, or directly upwards, depending on the held direction. The blunderbuss' forward "throw" KOs at 100% near the edge of Final Destination, though its upward and backward variations have noticeably less knockback. A launched fighter or re-launched Kannonball is capable of KOing as early as 70%, with the Kannonball lingering while doing minor damage after the first hit. | ||
|ssname=Crownerang | |ssname=Crownerang | ||
|ssdmg=9% (projectile), 7% (returning), | |ssdmg=9% (projectile), 7% (returning), 6% (item) | ||
|ssdesc=Takes off his crown and flings it forward | |ssdesc=Takes off his crown and flings it forward in a style based on his boss battle in ''{{iw|mariowiki|Donkey Kong Country}}''. Functions similarly to [[Boomerang]]. Has 12% damage-based [[armor]] while K. Rool is throwing his crown. Deals less damage when returning. Unlike Boomerang, it cannot be smash thrown. The crown will attempt to return to K. Rool while flying, though it will slowly lose altitude. Only one crown can be thrown at once. If K. Rool fails to catch it, the crown will drop as an item for anyone else to use, and will reappear on his head after 12 seconds or if K. Rool touches it again (does not count if the crown hits him as a thrown item, or if the crown is from another K. Rool). The pickup animation can be [[Crown canceling|canceled]] through using a move or "unavoidable" animations such as jumpsquat when coming into contact. It also has a number of advanced techniques, such as [[crown sliding]]. | ||
|usname=Propellerpack | |usname=Propellerpack | ||
|usdmg=3% (propellers) | |usdmg=3% (propellers) | ||
|usdesc=Equips the Propellerpack and flies upward. | |usdesc=Equips the {{iw|mariowiki|Propellerpack}} worn by his alter-ego {{iw|mariowiki|Baron K. Roolenstein}} in ''{{iw|mariowiki|Donkey Kong Country 3: Dixie Kong's Double Trouble}}'' and flies upward. Covers an excellent amount of distance, allowing K. Rool to fly from one end of Final Destination to the other, though changing direction is difficult. Upon reaching peak height for a moment, K. Rool will slowly drift down while flapping his arms as a direct reference to his damaged state during his boss battle in ''Donkey Kong Country 3: Dixie Kong's Double Trouble''. Pressing down will render K. Rool [[helpless]], make him fall faster, and lower his landing lag. The propellers above K. Rool deal multiple weak hits, protecting him from edgeguards while even allowing him to drag opponents to the top blast line, though this can be [[DI]]'d out of if it hits more than 3 times. | ||
|dsname=Gut Check | |dsname=Gut Check | ||
|dsdmg= 1.5× ( | |dsdmg= 1.5× (gut counter, reflected projectiles) (minimum 12%, maximum 50%)<br/>{{rollover|1.05×|0.7× of the counter/reflection|?}} (shockwave) (minimum 8.4%, maximum 35%) | ||
|dsdesc=Puffs out his stomach and retaliates against attacks. It works like a [[counterattack]] and can also [[ | |dsdesc=Puffs out his stomach and retaliates against attacks. It works like a [[counterattack]] and can also [[reflect]] [[projectile]]s. However, the counter hitbox is centered on K. Rool's stomach, making the rest of his body vulnerable (most notably his face), much like how [[Toad]] functioned in ''Melee'' and ''Brawl''. Its sweetspot has a damage multiplier of 1.5×, tying it with [[Slip Counter]] and [[Counter Throw]] for the second-highest damage multiplier out of any counterattack in ''Ultimate'', surpassed only by [[Tetrakarn]]. It is possible for the opponent to get hit by both the reflected projectile and the counterattack if the opponent is close enough, causing them to receive double the amount of damage and resulting in KOs from moves like a fully charged [[Charge Shot]] at extremely low percents. The shockwave has a hitbox further away that deals 0.7× of the counter's damage (resulting in a multiplier of 1.05×). | ||
|fsname=Blast-O-Matic | |fsname=Blast-O-Matic | ||
|fsdmg=3% (stomp), 10% (tackle), 25% ( | |fsdmg=3% (stomp), 10% (tackle), 25% (energy beam), 10% (ending) | ||
|fsdesc=K. Rool stomps, stunning any nearby opponents | |fsdesc=K. Rool stomps, stunning any nearby opponents and lunges forward while catching those in his path. If at least one opponent was caught, a cutscene plays in which K. Rool sits on his throne at {{iw|mariowiki|Crocodile Isle}} before firing a massive energy beam from his {{iw|mariowiki|Blast-o-Matic}}. The beam then fires through {{iw|mariowiki|Donkey Kong Island}}, destroying the island and dealing massive damage on the victims. | ||
}} | |||
===Stats=== | |||
{{Attributes | |||
| cast=89 | |||
| weight=133 | rweight=2 | |||
| dash=1.936 | rdash=38-43 | |||
| run=1.485 | rrun=78 | |||
| walk=0.903 | rwalk=71 | |||
| trac=0.105 | rtrac=55-59 | |||
| airfric=0.015 | rairfric=9-30 | |||
| air=0.945 | rair=70 | |||
| baseaccel=0.01 | rbaseaccel=15-87 | |||
| addaccel=0.04 | raddaccel=69-78 | |||
| gravity=0.105 | rgravity=33 | |||
| fall=1.7 | rfall=27-29 | |||
| ff=2.72 | rff=28-30 | |||
| jumpsquat=3 | rjumpsquat=1-88 | |||
| jumpheight=33 | rjumpheight=39-42 | |||
| shorthop=13.5 | rshorthop=75 | |||
| djump=32.61 | rdjump=52-53 | |||
}} | }} | ||
===[[Announcer]] call=== | |||
{{audio|Needs announcer calls from other languages.}} | |||
<gallery> | |||
King K. Rool English Announcer SSBU.wav|English | |||
King K. Rool Japanese Announcer SSBU.wav|Japanese/Chinese | |||
</gallery> | |||
===[[On-screen appearance]]=== | ===[[On-screen appearance]]=== | ||
* | *Descends from the sky with his arms crossed before chuckling. His pose is based on how he appears in ''{{iw|mariowiki|Donkey Konga}}'', while his descent is a reference to ''Donkey Kong Country''. | ||
<gallery> | |||
KingK.RoolOnScreenAppearanceSSBU.gif|King K. Rool's on-screen appearance | |||
</gallery> | |||
===[[ | ===[[Taunt]]s=== | ||
*'''Up taunt''': Viciously | *'''Up taunt''': Viciously bites forward four times. It is similar to {{SSBU|Bowser}}'s side taunt. | ||
*'''Side taunt''': Slaps his belly once in amusement. | *'''Side taunt''': Slaps his belly once in amusement. Despite being a taunt, it uses K. Rool's Belly Super Armor during the frames before he slaps his belly. | ||
*'''Down taunt''': | *'''Down taunt''': Performs a [[wikipedia:Glossary of sumo terms#S|shiko]], a powerful stomp in sumo that functions as both an exercise and a pre-bout ritual to ward off evil spirits. | ||
<gallery> | <gallery> | ||
SSBUKingKRoolTaunt1.gif|King K. Rool's up taunt. | SSBUKingKRoolTaunt1.gif|King K. Rool's up taunt. | ||
| Line 193: | Line 274: | ||
===[[Idle pose]]s=== | ===[[Idle pose]]s=== | ||
*Angrily bites the air. | *Angrily bites the air. | ||
*Slaps his belly twice and gloats | *Slaps his belly twice and gloats. | ||
<gallery> | <gallery> | ||
SSBUKingKRoolIdle1.gif|King K. Rool's first idle pose | SSBUKingKRoolIdle1.gif|King K. Rool's first idle pose. | ||
SSBUKingKRoolIdle2.gif|King K. Rool's second idle pose | SSBUKingKRoolIdle2.gif|King K. Rool's second idle pose. | ||
</gallery> | </gallery> | ||
===[[Crowd cheer]]=== | |||
<div class="tabber"> | |||
<div class="tabbertab" title="English, Japanese/Chinese, Italian, Dutch, French"> | |||
{| class="wikitable" border="1" cellpadding="4" cellspacing="1" | |||
|- | |||
!{{{name|}}} | |||
!Cheer (English) | |||
!Cheer (Japanese/Chinese) | |||
!Cheer (Italian) | |||
!Cheer (Dutch) | |||
!Cheer (French) | |||
|- | |||
! scope="row"|Cheer | |||
|[[File:King K. Rool Cheer English SSBU.ogg|center]]||[[File:King K. Rool Cheer Japanese SSBU.ogg|center]]||[[File:King K. Rool Cheer Italian SSBU.ogg|center]]||[[File:King K. Rool Cheer Dutch SSBU.ogg|center]]||{{NTSC}} [[File:King K. Rool Cheer French NTSC SSBU.ogg|center]] <br> {{PAL}} [[File:King K. Rool Cheer French PAL SSBU.ogg|center]] | |||
|- | |||
! scope="row"|Description | |||
|Krem - ling Krew! || (high voices) Kin - gu! (low voices) Kuru - ru! || King - K. - Rool! || Ro - oo! King - K! || Roi K. Rool, t'es trop cool! <br> {{NTSC}} <br> King K. Rool, t'es trop cool! <br> {{PAL}} | |||
|} | |||
</div> | |||
<div class="tabbertab" title="German, Spanish, Russian, Korean"> | |||
{| class="wikitable" border="1" cellpadding="4" cellspacing="1" | |||
|- | |||
!{{{name|}}} | |||
!Cheer (German) | |||
!Cheer (Spanish) | |||
!Cheer (Russian) | |||
!Cheer (Korean) | |||
|- | |||
! scope="row"|Cheer | |||
|[[File:King K. Rool Cheer German SSBU.ogg|center]]||{{NTSC}} [[File:King K. Rool Cheer Spanish NTSC SSBU.ogg|center]] <br> {{PAL}} [[File:King K. Rool Cheer Spanish PAL SSBU.ogg|center]]||[[File:King K. Rool Cheer Russian SSBU.ogg|center]]||[[File:King K. Rool Cheer Korean SSBU.ogg|center]] | |||
|- | |||
! scope="row"|Description | |||
|King K. Rooool *stomp* *clap* *stomps 2 times* *clap* || King - K. - Rool! {{NTSC}} <br> King - Kah - Rool! {{PAL}} || King - Kah - Rool! || King -- Kuru! | |||
|} | |||
</div> | |||
</div> | |||
===[[Victory pose]]s=== | ===[[Victory pose]]s=== | ||
*'''Left:''' Shifts his eyes left and right before ending with a triumphant pose. | *'''Left:''' Shifts his eyes left and right before ending with a triumphant pose. | ||
*'''Up:''' Flips his cape around before ending in a pose similar to his official artwork. | *'''Up:''' Flips his cape around before ending in a pose similar to his official artwork. | ||
*'''Right:''' Belly flops on screen and rebounds with a backflip, before landing on his feet and slapping his belly with his tongue sticking out. | *'''Right:''' Belly flops on-screen and rebounds with a backflip, before landing on his feet and slapping his belly with his tongue sticking out. | ||
[[File:KRoolVictoryThemeUltimate.ogg|thumb|A flourished orchestration of the first few bars of "Gang-Plank Galleon", his boss theme from | [[File:KRoolVictoryThemeUltimate.ogg|thumb|A flourished orchestration of the first few bars of "Gang-Plank Galleon", his boss theme from ''{{iw|mariowiki|Donkey Kong Country}}''.]] | ||
<gallery> | <gallery> | ||
KingKRoolVictoryPose1.gif | KingKRoolVictoryPose1.gif | ||
| Line 212: | Line 329: | ||
</gallery> | </gallery> | ||
==In competitive play== | ==In [[competitive play]]== | ||
===Most historically significant players=== | |||
<!--This character has a ten player limit for this section. Before adding and/or removing a player, read these guidelines: https://www.ssbwiki.com/SmashWiki:Notability#%22Most_historically_significant_players%22_guidelines --> | |||
''See also: [[:Category:King K. Rool players (SSBU)]]'' | |||
*{{Sm|Ben Gold|Australia}} - The best King K. Rool player in the world as well as one of the best Australian players during the early metagame. He is notable for being the first King K. Rool player to win a notable regional event with {{Trn|Battle Arena Melbourne 11}} and he continued to have notable results in Australia with 5th at {{Trn|Phantom 2019}} and a notable major placement with 17th at {{Trn|Thunder Smash 3: Clash of the Pandas}}. After 2019, he dropped the character in favor of playing {{SSBU|Wolf}} and makes rare appearances regionally. | |||
*{{Sm|Lukewarm|USA}} - The best King K. Rool player in the world. While was notable during the early metagame, he gained recognition in online tournaments where he beat top players such as {{Sm|Sonix}} and ranked 17th on the [[Wi-Fi Warrior Rank v7]]. At offline tournaments, he became the second King K. Rool player to win a regional in {{Trn|Anime Houston 2021}} and holds some of the best King K. Rool results at majors such as 17th at {{Trn|CEO 2021}} and 25th at {{Trn|Rise 'N Grind}}. He currently competes on rare occasions, but still headlines the character in the meta, seen with his 49th place finish at {{Trn|Luminosity Makes BIG Moves 2024}} defeating {{Sm|MKBigBoss}}. | |||
King K. Rool | ===Tier placement and history=== | ||
Upon ''Ultimate''{{'}}s release, many players noted King K. Rool's numerous strengths that were never seen before on a super-heavyweight character, namely his two projectiles, unique [[Belly Super Armor]] mechanic, a down throw that — in theory — leads to very early kill confirms, good startup on many moves, and a very long-ranged recovery. This, coupled with the inherent strengths of being a super-heavyweight, had top professionals speculating that King K. Rool could be high- or even top-tier on release. Additionally, less experienced players struggled mightily against him, with some calling him "broken". In the first few weeks of the game's release, King K. Rool picked up multiple strong early tournament results, primarily in the US, such as {{Sm|Vikerkaar}} placing 9th at {{Trn|Don't Park on the Grass 2018}}, {{Sm|Ito}} placing 13th at {{Trn|Super Splat Bros}}, and {{Sm|WAR}} placing 4th at {{Trn|Poi Poundaz 2}}. | |||
However, it quickly became apparent that King K. Rool was not nearly as good as players thought, as he has some of the nastiest downsides in the game to counter his strengths. Compounding this, King K. Rool received nerfs in update 2.0.0 that made his already negative perception even worse, despite being largely irrelevant in retrospect. Because of these factors, almost every top professional saw him as one of the worst characters in the game within months, which was especially notorious among the Japanese top players, many of whom considered him to be the single-worst character in the game. He was simply too inconsistent to be seen as a viable pick in the high-power metagame that ''Ultimate''{{'}}s cast brought to the table. | |||
King K. Rool later received a small number of helpful buffs in update 3.0.0 in 2019, although they were not significant enough to address his significant flaws, and his competitive reputation remained poor. Nevertheless, it improved his representation, with {{Sm|Dera}} getting a win against {{Sm|Somé}} during {{Trn|Obasuma OST 4}} and placing 3rd, which was the first glimmer of hope for K. Rool in spite of his then-bottom tier perception. While still typically ranked very low, players such as {{Sm|Ben Gold}}, {{Sm|KirbyKid}}, and {{Sm|Muk}} began to earn cosmopolitan results that made people question King K. Rool's reputation as a low tier character. This was especially evident when Ben Gold managed to win {{Trn|Battle Arena Melbourne 11}}, an Australian B-tier tournament, with King K. Rool as his solo main. While still revied rather lowly by top players, 2019 proved to be a decent year for the Kremling King, with players like {{Sm|ESAM}} and {{Sm|MVD}} arguing that he could be mid-tier. | |||
Ben Gold would continue achieving astounding results at PGR-level events well into 2020, such as 17th at {{Trn|Phantom 2020}}, which was the event to truly bring King K. Rool's low-tier status into question. During this period, western players began connecting with the Japanese playerbase, where they learned some of King K. Rool's more nuanced gameplay lines, and as resources continued to improve, the skill floor for King K. Rool began to increase as well. Thus, by the time Ben Gold dropped King K. Rool, {{Sm|KirbyKid}} carried the torch, going on to on to place 13th at {{Trn|InfinityCON Tally 2021}}. Additionally, Raphy, a German player, placed 5th at {{Trn|Smash Contest: DoKomi 2021}}. While Ben Gold dropped the character, his, Raphy, and KirbyKid's success solo maining King K. Rool from 2020 through 2022, along with repeated significant buffs in hand, led to further conversations about King K. Rool's viability. {{Sm|Dabuz}} went as far as to say that King K. Rool is a high-mid-tier character, and some Japanese players — such as {{Sm|Raito}}, who considered him to be the worst character in the game — stated that K. Rool might be a lot more threatening than initially perceived. | |||
More recently, many of King K. Rool's top players have either decreased in tournament attendance or moved towards different characters. Many of his buffs, while accentuating his strengths, failed to answer many of his weaknesses, such as a poor [[out of shield]] game and lack of non-committal anti-airs. With multiple periods of competitive viability, his staying power at top level can be called questionable, with him fading in and out of top cut lists over months. King K. Rool's true viability is hotly contested, with some arguing his national-level top cut placements prove his potential, while others will call it a fluke. King K. Rool would end up ranking 74th on the first tier list, near the top of the low tier. With a lack of top level representation throughout 2023, alongside his inherent flaws and inconsistent top level results, he would fall even further to 80th on the second and current tier list, in the newly created E+ Tier, ranking him among the worst characters in the game. | |||
=={{SSBU|Classic Mode}}: Super Heavyweight Class== | =={{SSBU|Classic Mode}}: Super Heavyweight Class== | ||
[[File:SSBU Congratulations King K Rool.png|thumb|King K Rool's congratulations screen.]] | [[File:SSBU Congratulations King K Rool.png|thumb|King K. Rool's congratulations screen.]] | ||
King K. Rool's opponents are among the heaviest characters in the game. The name of the route uses boxing terminology, referencing his boxing-themed final boss fight in ''{{s|mariowiki|Donkey Kong 64}}''. The boss of his route is [[Galleom]], who is the heaviest boss in the game. On an extended note, Galleom's hulking proportions and posture are similar to {{SSBU|Donkey Kong}}'s (King K. Rool's arch-nemesis), and his name is spelled similarly to "Galleon", which can be a reference to ''{{SSBUMusicLink|Donkey Kong|Gang-Plank Galleon}}'' (the song associated with King K. Rool). | |||
{|class="wikitable | {|class="wikitable" style="text-align:center" | ||
!Round!!Opponent!!Stage!!Music | !Round!!Opponent!!Stage!!Music!!Notes | ||
|- | |- | ||
|1||{{ | |1||{{CharHead|Charizard|SSBU|hsize=20px}}||[[Unova Pokémon League]]||''{{SSBUMusicLink|Pokémon|Victory Road - Pokémon Ruby / Pokémon Sapphire}}''||Charizard's {{SSBU|Pokémon Trainer}} is absent. | ||
|- | |- | ||
|2||{{ | |2||{{CharHead|Bowser|SSBU|hsize=20px}}||[[Find Mii]]||''{{SSBUMusicLink|Super Mario Bros.|King Bowser - Super Mario Bros. 3}}''||The stage references Bowser's Castle. | ||
|- | |- | ||
|3||{{ | |3||{{CharHead|King Dedede|SSBU|hsize=20px}}||[[Boxing Ring]]||''{{SSBUMusicLink|Kirby|King Dedede's Theme (Brawl)}}''||The stage references the Dedede Arena, where Kirby fights King Dedede. | ||
|- | |- | ||
|4||{{ | |4||{{CharHead|Ridley|SSBU|hsize=20px}}||[[Brinstar Depths]] ([[Battlefield form]])||''{{SSBUMusicLink|Metroid|Vs. Ridley}}''|| | ||
|- | |- | ||
|5||{{ | |5||{{CharHead|Ganondorf|SSBU|hsize=20px}}||[[Bridge of Eldin]]||''{{SSBUMusicLink|The Legend of Zelda|Calamity Ganon Battle - Second Form}}''|| | ||
|- | |- | ||
|6||{{ | |6||{{CharHead|Donkey Kong|SSBU|hsize=20px}}||{{SSB|Kongo Jungle}}||''{{SSBUMusicLink|Donkey Kong|Crocodile Cacophony}}''||Items do not appear. | ||
|- | |- | ||
|colspan=" | |colspan="5"|[[Bonus Stage]] | ||
|- | |- | ||
|Final||[[Galleom]]||Base||''{{SSBUMusicLink|Super Smash Bros.|Boss Battle - Super Smash Bros. Brawl}}'' | |Final||[[Galleom]]||[[Base]]||''{{SSBUMusicLink|Super Smash Bros.|Boss Battle - Super Smash Bros. Brawl}}'' | ||
| | |||
|} | |} | ||
[[Credits]] roll after completing Classic Mode. Completing it as King K. Rool has ''{{SSBUMusicLink|Donkey Kong|Gang-Plank Galleon}}'' accompany the credits. | [[Credits]] roll after completing Classic Mode. Completing it as King K. Rool has ''{{SSBUMusicLink|Donkey Kong|Gang-Plank Galleon}}'' accompany the credits. | ||
| Line 268: | Line 384: | ||
During the opening cutscene, King K. Rool was present on the cliffside when [[Galeem]] unleashed his beams of light. He was vaporized offscreen and placed under Galeem's imprisonment along with the other fighters, excluding {{SSBU|Kirby}}. | During the opening cutscene, King K. Rool was present on the cliffside when [[Galeem]] unleashed his beams of light. He was vaporized offscreen and placed under Galeem's imprisonment along with the other fighters, excluding {{SSBU|Kirby}}. | ||
King K. Rool was one of the many fighters that fell under [[Dharkon]]'s control upon Galeem's first defeat. He can be found on a ship in the [[Mysterious Dimension]] sub-area, guarded by the spirit of fellow pirate, Risky Boots. To reach his location, the player must defeat the spirit of Trevor C. Belmont, the right answer to a quiz question of which | King K. Rool was one of the many fighters that fell under [[Dharkon]]'s control upon Galeem's first defeat. He can be found on a ship in the [[Mysterious Dimension]] sub-area, guarded by the spirit of fellow pirate, Risky Boots. To reach his location, the player must first defeat the [[List of spirits (Kirby series)#Scarfy|Scarfy]] spirit, which is one of the right answers to a quiz question of which spirit Kirby cannot inhale. Then, the player must defeat the spirit of [[List of spirits (Castlevania series)#Trevor C. Belmont|Trevor C. Belmont]], the right answer to a quiz question of which spirit assisted [[Alucard]] in defeating [[Dracula]]. | ||
{{clrl}} | {{clrl}} | ||
===Fighter Battle=== | ===Fighter Battle=== | ||
{|class="wikitable | {|class="wikitable" style="width:100%;" | ||
|- | |- | ||
! style="width:5%;"|No. | !style="width:5%;"|No. | ||
! style="width:5%;"|Image | !style="width:5%;"|Image | ||
! Name | !Name | ||
! Type | !Type | ||
! Power | !Power | ||
! Stage | !Stage | ||
! Music | !Music | ||
|- | |- | ||
| 67 | |67 | ||
| [[File:King K. Rool SSBU.png|center|108x108px]] | |[[File:King K. Rool SSBU.png|center|108x108px]] | ||
|King K. Rool | |||
|{{SpiritType|Attack}} <center>{{color|#dc1029|Attack}}</center> | |||
| 10,600 | |10,600 | ||
| [[Pirate Ship]] | |[[Pirate Ship]] | ||
| ''{{SSBUMusicLink|Donkey Kong|Gang-Plank Galleon}}'' | |''{{SSBUMusicLink|Donkey Kong|Gang-Plank Galleon}}'' | ||
|} | |} | ||
{{ | {{clr}} | ||
==[[Spirit]]s== | ==[[Spirit]]s== | ||
King K. Rool's | King K. Rool's fighter spirit can be obtained by completing {{SSBU|Classic Mode}}. It is also available periodically for purchase in the shop for 300 Gold, but only after King K. Rool has been unlocked. Unlocking King K. Rool in World of Light allows the player to preview the first spirit below in the Spirit List under the name "???". As a fighter spirit, it cannot be used in Spirit Battles and is purely aesthetic. His fighter spirit has an alternate version that replaces it with his artwork in ''Ultimate''. | ||
Additionally, he makes an appearance as a few | Additionally, he makes an appearance as a few primary spirits under his alter-egos from the ''Donkey Kong Country'' series. | ||
<center> | <center> | ||
<gallery> | <gallery> | ||
King K Rool | SSBU spirit King K. Rool.png|136. '''''King K. Rool''''' | ||
SSBU spirit Kaptain K. Rool.png|162. Kaptain K. Rool | |||
Baron K Roolenstein | SSBU spirit Baron K. Roolenstein.png|163. Baron K. Roolenstein | ||
</gallery> | </gallery> | ||
</center> | </center> | ||
==In Spirit | ==In Spirit Battles== | ||
''Conditions in italic aren't listed on the Spirit Battle preview screen.'' | |||
===As the main opponent=== | ===As the main opponent=== | ||
{|class="wikitable sortable" style="width:100%;" | {|class="wikitable sortable" style="width:100%;" | ||
! colspan=4|Spirit | ! colspan=4|Spirit | ||
! colspan=7|Battle parameters | ! colspan=7|Battle parameters | ||
| Line 325: | Line 441: | ||
|- | |- | ||
|47 | |47 | ||
|{{SpiritTableName|Wart|iw=mariowiki|size=64}} | |||
|{{ | |''Super Mario'' Series | ||
|''Super Mario | |||
|•{{SSBU|King K. Rool}} {{Head|King K. Rool|g=SSBU|s=20px|cl=Blue}}<br>•{{SSBU|Peach}} {{Head|Peach|g=SSBU|s=20px|cl=White}} | |•{{SSBU|King K. Rool}} {{Head|King K. Rool|g=SSBU|s=20px|cl=Blue}}<br>•{{SSBU|Peach}} {{Head|Peach|g=SSBU|s=20px|cl=White}} | ||
| | |{{SpiritType|Grab}} | ||
|4,000 | |4,000 | ||
|Skyworld ([[Battlefield form]]) | |[[Skyworld]] ([[Battlefield form]]) | ||
|•Hazard: Slumber Floor | |•Hazard: Slumber Floor | ||
|•Defeat the main fighter to win<br>•The floor is sleep-inducing | |•Defeat the main fighter to win<br>•The floor is sleep-inducing | ||
| Line 337: | Line 452: | ||
|- | |- | ||
|159 | |159 | ||
|{{SpiritTableName|Kritter|link=y|size=64}} | |||
|{{ | |''Donkey Kong'' Series | ||
|''Donkey Kong | |||
|•{{SSBU|King K. Rool}} {{Head|King K. Rool|g=SSBU|s=20px|cl=Blue}} | |•{{SSBU|King K. Rool}} {{Head|King K. Rool|g=SSBU|s=20px|cl=Blue}} | ||
| | |{{SpiritType|Grab}} | ||
|1,700 | |1,700 | ||
|{{SSB|Kongo Jungle}} | |{{SSB|Kongo Jungle}} | ||
| Line 349: | Line 463: | ||
|- | |- | ||
|161 | |161 | ||
|{{SpiritTableName|Klaptrap|link=y|size=64}} | |||
|{{ | |''Donkey Kong'' Series | ||
|''Donkey Kong | |||
|•Tiny {{SSBU|King K. Rool}} {{Head|King K. Rool|g=SSBU|s=20px|cl=Blue}} | |•Tiny {{SSBU|King K. Rool}} {{Head|King K. Rool|g=SSBU|s=20px|cl=Blue}} | ||
| | |{{SpiritType|Attack}} | ||
|4,000 | |4,000 | ||
|{{SSB|Kongo Jungle}} | |{{SSB|Kongo Jungle}} | ||
|•Assist Trophy Enemies ( | |•Assist Trophy Enemies (Klaptrap) | ||
|•Hostile assist trophies will appear | |•Hostile assist trophies will appear | ||
|{{SSBUMusicLink|Donkey Kong| | |{{SSBUMusicLink|Donkey Kong|Stickerbush Symphony}} | ||
|- | |- | ||
|162 | |162 | ||
|{{SpiritTableName|Kaptain K. Rool|customname=[[King K. Rool|Kaptain K. Rool]]|size=64}} | |||
|{{ | |''Donkey Kong'' Series | ||
|''Donkey Kong | |•{{SSBU|King K. Rool}} {{Head|King K. Rool|g=SSBU|s=20px|cl=Brown}} (180 HP) | ||
|•{{SSBU|King K. Rool}} {{Head|King K. Rool|g=SSBU|s=20px|cl=Brown}} | |{{SpiritType|Attack}} | ||
| | |||
|13,500 | |13,500 | ||
|[[Halberd]] | |[[Halberd]] | ||
| Line 373: | Line 485: | ||
|- | |- | ||
|166 | |166 | ||
| | |{{SpiritTableName|Lord Fredrik|size=64}} | ||
|Lord Fredrik | |''Donkey Kong'' Series | ||
|''Donkey Kong | |||
|•{{SSBU|King K. Rool}} {{Head|King K. Rool|g=SSBU|s=20px|cl=White}} | |•{{SSBU|King K. Rool}} {{Head|King K. Rool|g=SSBU|s=20px|cl=White}} | ||
| | |{{SpiritType|Grab}} | ||
|2,300 | |2,300 | ||
|[[Summit]] ([[Battlefield form]]) | |[[Summit]] ([[Battlefield form]]) | ||
| Line 385: | Line 496: | ||
|- | |- | ||
|229 | |229 | ||
|{{SpiritTableName|The Imprisoned|size=64}} | |||
|{{ | |''The Legend of Zelda'' Series | ||
|''The Legend of Zelda | |•Giant {{SSBU|King K. Rool}} {{Head|King K. Rool|g=SSBU|s=20px|cl=Black}} (140 HP) | ||
|•Giant {{SSBU|King K. Rool}} {{Head|King K. Rool|g=SSBU|s=20px|cl=Black}} | |{{SpiritType|Shield}} | ||
| | |||
|4,600 | |4,600 | ||
|[[Gerudo Valley]] | |[[Gerudo Valley]] | ||
|•Assist Trophy Enemies ([[Ghirahim]]) | |•Assist Trophy Enemies ([[Ghirahim]]) | ||
|•The enemy has super armor but moves slower<br>•Timed [[ | |•The enemy has super armor but moves slower<br>•Timed [[stamina battle]] (1:30)<br>•Hostile assist trophies will appear | ||
|{{SSBUMusicLink|The Legend of Zelda|Ballad of the Goddess (Remix)}} | |{{SSBUMusicLink|The Legend of Zelda|Ballad of the Goddess (Remix)}} | ||
|- | |- | ||
|244 | |244 | ||
|{{SpiritTableName|Bokoblin|size=64}} | |||
|{{ | |''The Legend of Zelda'' Series | ||
|''The Legend of Zelda | |•Tiny {{SSBU|King K. Rool}} Team {{Head|King K. Rool|g=SSBU|s=20px|cl=Brown}}×4 | ||
|•Tiny {{SSBU|King K. Rool}} Team {{Head|King K. Rool|g=SSBU|s=20px|cl=Brown}} | |{{SpiritType|Neutral}} | ||
| | |||
|1,400 | |1,400 | ||
|[[Gaur Plain]] ([[Battlefield form]]) | |[[Gaur Plain]] ([[Battlefield form]]) | ||
| Line 409: | Line 518: | ||
|- | |- | ||
|281 | |281 | ||
|{{SpiritTableName|Queen Metroid|size=64}} | |||
|{{ | |''Metroid'' Series | ||
|''Metroid | |•{{SSBU|King K. Rool}} {{Head|King K. Rool|g=SSBU|s=20px|cl=Brown}} (180 HP) | ||
|•{{SSBU|King K. Rool}} {{Head|King K. Rool|g=SSBU|s=20px|cl=Brown}} | |{{SpiritType|Grab}} | ||
| | |||
|13,300 | |13,300 | ||
|[[Brinstar]] ([[Battlefield form]]) | |[[Brinstar]] ([[Battlefield form]]) | ||
| Line 421: | Line 529: | ||
|- | |- | ||
|283 | |283 | ||
|{{SpiritTableName|Kraid|link=y|size=64}} | |||
|{{ | |''Metroid'' Series | ||
|''Metroid | |•Giant {{SSBU|King K. Rool}} {{Head|King K. Rool|g=SSBU|s=20px|cl=Blue}} (280 HP) | ||
|•Giant {{SSBU|King K. Rool}} {{Head|King K. Rool|g=SSBU|s=20px|cl=Blue}} | |{{SpiritType|Neutral}} | ||
| | |||
|10,000 | |10,000 | ||
|[[Brinstar Depths]] ([[Ω form]]) | |[[Brinstar Depths]] ([[Ω form]]) | ||
| Line 433: | Line 540: | ||
|- | |- | ||
|461 | |461 | ||
|{{SpiritTableName|Snorlax|link=y|size=64}} | |||
|{{ | |''Pokémon'' Series | ||
|''Pokémon | |•Giant {{SSBU|King K. Rool}} {{Head|King K. Rool|g=SSBU|s=20px|cl=Black}} (500 HP) | ||
|•Giant {{SSBU|King K. Rool}} {{Head|King K. Rool|g=SSBU|s=20px|cl=Black}} | |{{SpiritType|Shield}} | ||
| | |||
|4,500 | |4,500 | ||
|[[Tortimer Island]] | |[[Tortimer Island]] | ||
|N/A | |N/A | ||
|•Timed [[ | |•Timed [[stamina battle]] (1:00)<br>•The enemy prefers not to move<br>''•The enemy heals over time'' | ||
|{{SSBUMusicLink|Pokémon|Main Theme - Pokémon Red & Pokémon Blue (Melee)}} | |{{SSBUMusicLink|Pokémon|Main Theme - Pokémon Red & Pokémon Blue (Melee)}} | ||
|- | |- | ||
|474 | |474 | ||
|{{SpiritTableName|Wobbuffet|link=y|size=64}} | |||
|{{ | |''Pokémon'' Series | ||
|''Pokémon | |•Reflect {{SSBU|King K. Rool}} {{Head|King K. Rool|g=SSBU|s=20px|cl=Blue}}×2 | ||
|•Reflect {{SSBU|King K. Rool}} {{Head|King K. Rool|g=SSBU|s=20px|cl=Blue}} | |{{SpiritType|Shield}} | ||
| | |||
|4,300 | |4,300 | ||
|[[The Great Cave Offensive]] ([[Battlefield form]]) | |[[The Great Cave Offensive]] ([[Battlefield form]]) | ||
| Line 457: | Line 562: | ||
|- | |- | ||
|483 | |483 | ||
|{{SpiritTableName|Tyranitar|size=64}} | |||
|{{ | |''Pokémon'' Series | ||
|''Pokémon | |||
|•{{SSBU|King K. Rool}} {{Head|King K. Rool|g=SSBU|s=20px|cl=Blue}} | |•{{SSBU|King K. Rool}} {{Head|King K. Rool|g=SSBU|s=20px|cl=Blue}} | ||
| | |{{SpiritType|Shield}} | ||
|3,900 | |3,900 | ||
|[[Mushroomy Kingdom]] ([[Battlefield form]]) | |[[Mushroomy Kingdom]] ([[Battlefield form]]) | ||
| Line 469: | Line 573: | ||
|- | |- | ||
|622 | |622 | ||
|{{SpiritTableName|Draug|iw=fireemblem|size=64}} | |||
|{{ | |''Fire Emblem'' Series | ||
|''Fire Emblem | |•{{SSBU|King K. Rool}} {{Head|King K. Rool|g=SSBU|s=20px|cl=Blue}} (120 HP) | ||
|•{{SSBU|King K. Rool}} {{Head|King K. Rool|g=SSBU|s=20px|cl=Blue}} | |{{SpiritType|Shield}} | ||
| | |||
|2,400 | |2,400 | ||
|[[Castle Siege]] (hazards off) | |[[Castle Siege]] (hazards off) | ||
| Line 481: | Line 584: | ||
|- | |- | ||
|716 | |716 | ||
| | |{{SpiritTableName|Thanatos|size=64}} | ||
|''Kid Icarus'' Series | |||
|''Kid Icarus | |||
|•{{SSBU|King K. Rool}} {{Head|King K. Rool|g=SSBU|s=20px|cl=Brown}} | |•{{SSBU|King K. Rool}} {{Head|King K. Rool|g=SSBU|s=20px|cl=Brown}} | ||
| | |{{SpiritType|Shield}} | ||
|3,800 | |3,800 | ||
|[[Kalos Pokémon League]] ([[Battlefield form]]) | |[[Kalos Pokémon League]] ([[Battlefield form]]) | ||
| Line 493: | Line 595: | ||
|- | |- | ||
|748 | |748 | ||
|{{SpiritTableName|Shake King|iw=mariowiki|size=64}} | |||
|{{ | |''Wario Land'' Series | ||
|''Wario Land | |||
|•{{SSBU|King K. Rool}} {{Head|King K. Rool|g=SSBU|s=20px|cl=Yellow}} | |•{{SSBU|King K. Rool}} {{Head|King K. Rool|g=SSBU|s=20px|cl=Yellow}} | ||
| | |{{SpiritType|Grab}} | ||
|1,900 | |1,900 | ||
|[[Pirate Ship]] (hazards off) | |[[Pirate Ship]] (hazards off) | ||
| Line 505: | Line 606: | ||
|- | |- | ||
|812 | |812 | ||
|{{SpiritTableName|Emperor Bulblax|iw=pikipedia|size=64}} | |||
|{{ | |''Pikmin'' Series | ||
|''Pikmin | |•Giant {{SSBU|King K. Rool}} {{Head|King K. Rool|g=SSBU|s=20px|cl=Yellow}} (160 HP) | ||
|•Giant {{SSBU|King K. Rool}} {{Head|King K. Rool|g=SSBU|s=20px|cl=Yellow}} | |{{SpiritType|Attack}} | ||
| | |||
|9,700 | |9,700 | ||
|[[ | |[[Distant Planet]] ([[Ω form]]) | ||
|N/A | |N/A | ||
|•The enemy has super armor and is hard to launch or make flinch<br>•[[Stamina battle]]<br>•The enemy is giant | |•The enemy has super armor and is hard to launch or make flinch<br>•[[Stamina battle]]<br>•The enemy is giant | ||
| Line 517: | Line 617: | ||
|- | |- | ||
|938 | |938 | ||
| | |{{SpiritTableName|Bear Hugger|size=64}} | ||
|''Punch-Out!!'' Series | |||
|''Punch-Out!! | |•{{SSBU|King K. Rool}} {{Head|King K. Rool|g=SSBU|s=20px|cl=Pink}} (140 HP) | ||
|•{{SSBU|King K. Rool}} {{Head|King K. Rool|g=SSBU|s=20px|cl=Pink}} | |{{SpiritType|Grab}} | ||
| | |||
|3,500 | |3,500 | ||
|[[Boxing Ring]] | |[[Boxing Ring]] | ||
| Line 529: | Line 628: | ||
|- | |- | ||
|943 | |943 | ||
| | |{{SpiritTableName|King Hippo|size=64}} | ||
|''Punch-Out!!'' Series | |||
|''Punch-Out!! | |•Giant {{SSBU|King K. Rool}} {{Head|King K. Rool|g=SSBU|s=20px|cl=Pink}} (160 HP) | ||
|•Giant {{SSBU|King K. Rool}} {{Head|King K. Rool|g=SSBU|s=20px|cl=Pink}} | |{{SpiritType|Shield}} | ||
| | |||
|9,500 | |9,500 | ||
|[[Boxing Ring]] | |[[Boxing Ring]] | ||
| Line 541: | Line 639: | ||
|- | |- | ||
|1,267 | |1,267 | ||
|{{ | |{{SpiritTableName|King Knight|size=64}} | ||
|''Shovel Knight'' Series | |||
|''Shovel Knight | |||
|•{{SSBU|King K. Rool}} {{Head|King K. Rool|g=SSBU|s=20px|cl=Yellow}} | |•{{SSBU|King K. Rool}} {{Head|King K. Rool|g=SSBU|s=20px|cl=Yellow}} | ||
| | |{{SpiritType|Shield}} | ||
|2,000 | |2,000 | ||
|[[Mushroom Kingdom U]] (Slide Lift Tower) | |[[Mushroom Kingdom U]] (Slide Lift Tower) | ||
|N/A | |N/A | ||
|•The enemy's dash attacks have increased power<br>•The enemy starts the battle with a [[Star Rod]] | |•The enemy's dash attacks have increased power<br>•The enemy starts the battle with a [[Star Rod]] | ||
|{{SSBUMusicLink|Mega Man|Flash | |{{SSBUMusicLink|Mega Man|Flash in the Dark (Dr. Wily Stage 1)}} | ||
|- | |- | ||
|1,329 | |1,329 | ||
| | |{{SpiritTableName|Cetacea|size=64}} | ||
|''DRAGON QUEST'' Series | |||
|''DRAGON QUEST | |•Giant {{SSBU|King K. Rool}} {{Head|King K. Rool|g=SSBU|s=20px|cl=White}} (200 HP)<br>•{{SSBU|Hero}} {{Head|Hero|g=SSBU|s=20px}} (70 HP) | ||
|•Giant {{SSBU|King K. Rool}} {{Head|King K. Rool|g=SSBU|s=20px|cl=White}}<br>•{{SSBU|Hero}} {{Head|Hero|g=SSBU|s=20px}} | |{{SpiritType|Neutral}} | ||
| | |||
|9,500 | |9,500 | ||
|[[Yggdrasil's Altar]] ([[Ω form]]) | |[[Yggdrasil's Altar]] ([[Ω form]]) | ||
|N/A | |N/A | ||
|•Defeat the main fighter to win<br>•The enemy has super armor but moves slower<br>•Timed stamina battle | |•Defeat the main fighter to win<br>•The enemy has super armor but moves slower<br>•Timed [[stamina battle]] (1:30)<br>''•The enemy favors neutral air attack'' | ||
|{{SSBUMusicLink|Dragon Quest|The Hero Goes Forth with a Determination}} | |{{SSBUMusicLink|Dragon Quest|The Hero Goes Forth with a Determination}} | ||
|- | |||
|1,420 | |||
|{{SpiritTableName|Max Brass|size=64}} | |||
|''ARMS'' | |||
|•{{SSBU|King K. Rool}} {{Head|King K. Rool|g=SSBU|s=20px|cl=Yellow}} (180 HP) | |||
|{{SpiritType|Attack}} | |||
|12,600 | |||
|[[Norfair]] ([[Ω form]]) | |||
|•Attack Power ↑<br>•Giant | |||
|•The enemy is giant when the enemy's at high damage<br>•Stamina battle<br>•The enemy has increased attack power when the enemy's at high damage | |||
|{{SSBUMusicLink|ARMS|Sky Arena}} | |||
|- | |||
|1,455 | |||
|{{SpiritTableName|Master Kohga|size=64}} | |||
|''The Legend of Zelda'' Series | |||
|•{{SSBU|King K. Rool}} {{Head|King K. Rool|g=SSBU|s=20px|cl=Orange}}<br>•Giant {{SSBU|Mii Swordfighter}} {{Head|Mii Swordfighter|g=SSBU|s=20px}} (Moveset [[Shuriken of Light|2]][[Airborne Assault|1]][[Hero's Spin|3]][[Power Thrust|3]], Yiga Clan Mask, Yiga Clan Outfit) | |||
|{{SpiritType|Attack}} | |||
|3,400 | |||
|[[Suzaku Castle]] ([[Battlefield form]]) | |||
|•Item: [[Banana Peel]] | |||
|•Defeat the main fighter to win<br>•The enemy favors neutral specials<br>•Reinforcements will appear during the battle | |||
|{{SSBUMusicLink|The Legend of Zelda|Woodlands - The Legend of Zelda: Tri Force Heroes}} | |||
|} | |} | ||
===As a minion=== | ===As a minion=== | ||
{|class="wikitable sortable" style="width:100%;" | {|class="wikitable sortable" style="width:100%;" | ||
! colspan=4|Spirit | ! colspan=4|Spirit | ||
! colspan=7|Battle parameters | ! colspan=7|Battle parameters | ||
| Line 586: | Line 703: | ||
|- | |- | ||
|782 | |782 | ||
|{{ | |{{SpiritTableName|Chaotix|size=64}} | ||
|''Sonic The Hedgehog'' Series | |||
|''Sonic | |||
|•{{SSBU|Sonic}} {{Head|Sonic|g=SSBU|s=20px|cl=Purple}}<br>•{{SSBU|Pichu}} {{Head|Pichu|g=SSBU|s=20px|cl=Cyan}}<br>•{{SSBU|King K. Rool}} {{Head|King K. Rool|g=SSBU|s=20px|cl=Blue}} | |•{{SSBU|Sonic}} {{Head|Sonic|g=SSBU|s=20px|cl=Purple}}<br>•{{SSBU|Pichu}} {{Head|Pichu|g=SSBU|s=20px|cl=Cyan}}<br>•{{SSBU|King K. Rool}} {{Head|King K. Rool|g=SSBU|s=20px|cl=Blue}} | ||
| | |{{SpiritType|Grab}} | ||
|1,600 | |1,600 | ||
|[[Windy Hill Zone]] | |[[Windy Hill Zone]] | ||
| Line 599: | Line 715: | ||
|- | |- | ||
|1,143 | |1,143 | ||
|{{ | |{{SpiritTableName|Frog & Snake|customname=[[Sablé Prince|Frog & Snake]]|size=64}} | ||
|[[Sablé Prince|Frog & Snake]] | |||
|''Kaeru no Tame ni Kane wa Naru'' | |''Kaeru no Tame ni Kane wa Naru'' | ||
|•{{SSBU|Greninja}} {{Head|Greninja|g=SSBU|s=20px|cl=Green}}<br>•{{SSBU|King K. Rool}} {{Head|King K. Rool|g=SSBU|s=20px|cl=Blue}} | |•{{SSBU|Greninja}} {{Head|Greninja|g=SSBU|s=20px|cl=Green}}<br>•{{SSBU|King K. Rool}} {{Head|King K. Rool|g=SSBU|s=20px|cl=Blue}} | ||
| | |{{SpiritType|Shield}} | ||
|3,600 | |3,600 | ||
|[[Dream Land GB]] (Castle Lololo interior) | |[[Dream Land GB]] (Castle Lololo interior) | ||
| | |•Assist Trophy Enemies ([[Sablé Prince]]) | ||
|•Hostile assist trophies will appear | |•Hostile assist trophies will appear | ||
|{{SSBUMusicLink|Kirby|Castle Lololo | |{{SSBUMusicLink|Kirby|Kirby Retro Medley}} (Castle Lololo) | ||
|[https://nintendo.fandom.com/wiki/ | |[https://nintendo.fandom.com/wiki/Prince_of_Sablé Snake] | ||
|- | |- | ||
|1,271 | |1,271 | ||
|{{ | |{{SpiritTableName|Allen|size=64}} | ||
|''Culdcept'' Series | |||
|''Culdcept | |||
|•{{SSBU|Shulk}} {{Head|Shulk|g=SSBU|s=20px|cl=Black}}<br>•{{SSBU|King K. Rool}} {{Head|King K. Rool|g=SSBU|s=20px|cl=Black}}<br>•{{SSBU|Ridley}} {{Head|Ridley|g=SSBU|s=20px|cl=Red}} | |•{{SSBU|Shulk}} {{Head|Shulk|g=SSBU|s=20px|cl=Black}}<br>•{{SSBU|King K. Rool}} {{Head|King K. Rool|g=SSBU|s=20px|cl=Black}}<br>•{{SSBU|Ridley}} {{Head|Ridley|g=SSBU|s=20px|cl=Red}} | ||
| | |{{SpiritType|Neutral}} | ||
|3,500 | |3,500 | ||
|[[Arena Ferox]] | |[[Arena Ferox]] | ||
|•Item: [[Assist Trophy]] | |•Item: [[Assist Trophy]] | ||
|•Defeat the main fighter to win<br>•Reinforcements will appear during the battle | |•Defeat the main fighter to win<br>•Reinforcements will appear during the battle | ||
|{{SSBUMusicLink| | |{{SSBUMusicLink|Other|Worthy Rival Battle}} | ||
| | |Werebear | ||
|} | |} | ||
| Line 642: | Line 756: | ||
==[[List of Super Smash Bros. Ultimate character trailers#King K. Rool|Reveal trailer]]== | ==[[List of Super Smash Bros. Ultimate character trailers#King K. Rool|Reveal trailer]]== | ||
{{#widget:YouTube|id=0-gfC1upmoA}} | {{#widget:YouTube|id=0-gfC1upmoA}} | ||
==Gallery== | ==Gallery== | ||
| Line 649: | Line 762: | ||
King K. Rool amiibo.png|King K. Rool's [[amiibo]]. | King K. Rool amiibo.png|King K. Rool's [[amiibo]]. | ||
SSBU King K. Rool Number.png|King K. Rool's fighter card. | SSBU King K. Rool Number.png|King K. Rool's fighter card. | ||
SSBUWebsiteKingKRool1.jpg| | King K. Rool unlock notice SSBU.jpg|King K. Rool's unlock notice. | ||
SSBUWebsiteKingKRool2.jpg|Using | SSBUWebsiteKingKRool1.jpg|Posing on [[Green Greens]]. | ||
SSBUWebsiteKingKRool2.jpg|Using [[Blunderbuss]] on [[Pirate Ship]]. | |||
SSBUWebsiteKingKRool3.jpg|Posing on [[Boxing Ring]]. | SSBUWebsiteKingKRool3.jpg|Posing on [[Boxing Ring]]. | ||
SSBUWebsiteKingKRool4.jpg|{{SSBU|Villager}} taking out K. Rool's [[Pocket | SSBUWebsiteKingKRool4.jpg|{{SSBU|Villager}} taking out K. Rool's [[Pocket]]ed crown on [[Tortimer Island]]. | ||
SSBUWebsiteKingKRool5.jpg|Using [[Gut Check]] against {{SSBU|Snake}} on [[Magicant]]. | SSBUWebsiteKingKRool5.jpg|Using [[Gut Check]] against {{SSBU|Snake}} on [[Magicant]]. | ||
SSBUWebsiteKingKRool6.jpg|His pink and blue [[Alternate costume (SSBU)|costumes]] on [[Prism Tower]]. | SSBUWebsiteKingKRool6.jpg|His pink and blue [[Alternate costume (SSBU)|alternate costumes]] on [[Prism Tower]]. | ||
SSBUWebsiteSteve2.jpg|{{SSBU|Steve}} striking K. Rool with his down tilt on [[Gerudo Valley]]. | |||
</gallery> | </gallery> | ||
=== | ===Fighter Showcase Video=== | ||
{{#widget:YouTube|id=pKcXgSV8PTE}} | {{#widget:YouTube|id=pKcXgSV8PTE}} | ||
==Trivia== | ==Trivia== | ||
* | *''Ultimate'' marks King K. Rool's first major video game appearance in over a decade, last appearing in ''{{iw|mariowiki|Mario Super Sluggers}}'', released in 2008. | ||
*King K. Rool is one of five ''Ultimate'' [[newcomer]]s that were previously [[Mii Costume]]s in ''[[Super Smash Bros. 4]]'', alongside {{SSBU|Inkling}}, {{SSBU|Daisy}}, {{SSBU|Chrom}}, and {{SSBU|Isabelle}}. | |||
*King K. Rool is | |||
*According to [[Masahiro Sakurai]], King K. Rool's inclusion in ''Ultimate'' was a result of his popularity in the Super Smash Bros. Fighter Ballot.<ref>[https://sourcegaming.info/2018/08/22/more-information-about-the-smash-direct-sakurais-famitsu-column-vol-561/ Source Gaming — More Information about the Smash Direct (Famitsu Gaming)]</ref> | *According to [[Masahiro Sakurai]], King K. Rool's inclusion in ''Ultimate'' was a result of his popularity in the Super Smash Bros. Fighter Ballot.<ref>[https://sourcegaming.info/2018/08/22/more-information-about-the-smash-direct-sakurais-famitsu-column-vol-561/ Source Gaming — More Information about the Smash Direct (Famitsu Gaming)]</ref> | ||
**As a result of | **As a result of K. Rool's inclusion, fans of the character issued a [https://twitter.com/KRoolKountry/status/1033530396657508352 thank you letter] to Masahiro Sakurai and Nintendo of America for including him as a fighter. The letter was signed by fans, and Nintendo of America [https://twitter.com/KRoolKountry/status/1059523712838459392 even wrote back] to the fans, expressing gratitude towards them for the fan letter. | ||
*King K. Rool is the second fighter whose [[back aerial]] meteor smashes opponents, with the first being {{SSBB|Lucas}}. | |||
**King K. Rool is also the second fighter who has a smash attack (his up smash) that is able to meteor smash, with the first being {{SSB4|Bayonetta}}'s down smash. | |||
*King K. Rool is the second | *King K. Rool is the second fighter to have both a [[counterattack]] and a [[reflection|reflector]] in his default moveset, with the first being {{SSBU|Palutena}}. | ||
**King K. Rool is also the second | *King K. Rool is the only fighter to have a taunt that utilizes [[armor]]. | ||
*King K. Rool is the second | |||
*King K. Rool is the only | |||
*Pausing and zooming in on and around King K. Rool during his side taunt reveals a gap between his scales and his belly armor.<ref>[https://twitter.com/GamerZardEX/status/1086292253818011649]</ref> | *Pausing and zooming in on and around King K. Rool during his side taunt reveals a gap between his scales and his belly armor.<ref>[https://twitter.com/GamerZardEX/status/1086292253818011649]</ref> | ||
*If King K. Rool gets caught by a grab that uses a unique animation on capturing characters ([[Flame Choke]], Snake's grab, etc.) while using his forward smash, the boxing glove will remain on his hand until he gets released. | |||
*If King K. Rool gets | |||
*King K. Rool's animation when using the [[Home-Run Bat]]'s forward smash utilizes a one-handed swing, similar to his batting stance in ''Mario Super Sluggers''. | *King K. Rool's animation when using the [[Home-Run Bat]]'s forward smash utilizes a one-handed swing, similar to his batting stance in ''Mario Super Sluggers''. | ||
*In the Canadian French version, the name tag and voice clip from the announcer on the victory screen is slightly different from the one used on the character select screen, instead featuring a noticeable translation of "the" ('''le''' Roi K. Rool). | |||
*King K. Rool's [https://www.nintendo.com/amiibo/detail/king-k-rool-amiibo-super-smash-bros-series/ description] from the North American [[amiibo]] website is based on his NTSC trophy description from ''SSB4''. | |||
==References== | ==References== | ||
Latest revision as of 18:57, April 23, 2024
| King K. Rool in Super Smash Bros. Ultimate | |
|---|---|
 
| |
| Universe | Donkey Kong |
| Availability | Unlockable |
| Final Smash | Blast-O-Matic |
| Tier | E+ (80) |
| “ | King K. Rool Comes Aboard! | ” |
| —Introduction tagline | ||
King K. Rool (キングクルール, King K. Rool) is a playable character in Super Smash Bros. Ultimate. He was announced as a newcomer during the August 8th, 2018 Super Smash Bros. Ultimate Direct alongside Simon, Richter, Chrom, and Dark Samus. King K. Rool is classified as Fighter #67.
Much like Bowser, Donkey Kong, and Diddy Kong, Ultimate forgoes King K. Rool's voice actor (Toshihide Tsuchiya), in favor of realistic animal vocals.
King K. Rool is currently ranked 80th out of 82 on the Ultimate tier list, in the middle of E+ tier, making him the lowest ranked newcomer. Typical for a super-heavyweight character, King K. Rool possesses a wide arsenal of very powerful, hard hitting attacks, with many of them also having great range. King K. Rool also boasts some of the best endurance in the game - he is the second heaviest character behind Bowser, which in combination of his unique character-specific perk, Belly Super Armor, high falling speed, and a very long-distanced recovery thanks to Propellerpack, allows him to survive to ludicrously high percentages and utilize rage very well, especially with his aforementioned powerful attacks.
In addition, King K. Rool has a unique and rather versatile moveset. Some of his attacks, such as his neutral attack, up tilt, up smash and up aerial, all have disproportionately quick startup in comparison to other super-heavyweight characters. King K. Rool also has two projectiles, Blunderbuss and Crownerang, with the former also functioning as a command grab and the latter having damage-based armor, while his down special, Gut Check, functions as a both counter and reflector. These moves alongside Belly Super Armor grant K. Rool unique anti-zoning tools atypical for his weight class. King K. Rool has interesting utility with many of his normals as well - down tilt can bury his opponents, neutral aerial is an excellent landing - and edgeguarding tool thanks to Belly Super Armor and long-lasting, lingering hitbox, forward aerial has a combination of great power, reach and safety due to relatively low landing lag, up aerial gives a slight vertical momentum and is disproportionately powerful, and back aerial is a very powerful meteor smash. Finally, King K. Rool has an excellent grab game, all of his grabs have very far reach and he possesses arguably one of the best set of throws in the game, with two of them having great KO potential (up and back throws), one functioning as a burying throw that can setup for KOs (down throw), and one with combo potential at low percentages (forward throw).
However, for his many strengths, King K. Rool has several weaknesses. His tall, rotund hurtbox is among the largest in the game, which combined with his gargantuan weight and high falling speed makes King K. Rool very easy to combo. King K. Rool's mobility also leaves a lot to be desired - while his initial dash speed is above average, his actual run speed is poor, and his air speed is also below average. While King K. Rool has relatively fast startup on many of his attacks, a few of them (down tilt, forward smash, down smash and back air) are nevertheless somewhat slow, and almost all of his attacks suffer from an universal flaw - extreme ending lag. Because of the latter, King K. Rool is very susceptible to being whiff punished, while having very few attacks that are safe on shield. The ending lag issue is especially prominent with King K. Rool's aerials - all of his aerials other than his neutral aerial suffer from disproportionately high ending lag, with all of them having total duration of at least 54 frames. This somewhat restricts King K. Rool's air game, as most of his aerials are very punishable if not performed right before landing.
Many of King K. Rool's own unique attributes have flaws attached to them. Belly Super Armor only protects his belly and can break akin to a shield break if it takes too much damage. Similarly, Gut Check only protects King K. Rool's belly, making his head and back vulnerable. While Propellerpack grants him a long-ranged recovery, it is slow, very linear, and only protects King K. Rool from above, making his recovery predictable and very exploitable. Crownerang's armor does not protect against strong attacks or grabs, and the crown can also be picked up as an item by other characters. King K. Rool also has very lackluster out of shield options - while his up smash is fast, the initial hit only hits above K. Rool and is very punishable, while his second fastest option, neutral aerial, has a short range, especially behind him. This is further made worse by the fact that King K. Rool is forced to shield relatively often due to his massive hurtbox and below-average mobility. Finally, because of his massive size and limited ledge options, King K. Rool is very susceptible to being ledgetrapped.
While King K. Rool is a fairly popular character in lower level and casual play, his high-level representation is quite limited due to his significant flaws and a small playerbase. However, thanks to efforts of dedicated players such as Ben Gold, Raphy, and most notably, KirbyKid, and significant buffs via game updates, King K. Rool has nevertheless gathered a couple of decent results during Ultimate's lifespan, in spite of his aforementioned issues and low placement on the tier list.
How to unlock[edit]
Complete one of the following:
- Play VS. matches, with King K. Rool being the 16th character to be unlocked.
- Clear Classic Mode with Link or anyone in his unlock tree, being the 1st character unlocked.
- Have King K. Rool join the player's party in World of Light.
With the exception of the third method, King K. Rool must then be defeated on Jungle Japes. In World of Light, he is fought on Pirate Ship.
Attributes[edit]
King K. Rool is a character that ostensibly fits the mold of a super heavyweight, being the 2nd heaviest character in the game behind Bowser and possessing a large array of powerful attacks with long range, but with below-average mobility; while his falling speed and gravity are noticeably above average, his traction and jumping force are average at best, and he also has the 20th slowest air speed, the 17th slowest walking speed, the 13th slowest dashing speed, and the 8th slowest air acceleration in the game.
Despite this, King K. Rool's initial dash has above-average speed, which gives him a great dash dance and foxtrot, the latter of which partially alleviates his sluggish grounded mobility. However, he has some characteristics that notably set him apart from his heavyweight peers; he has a wide variety of versatile moves, access to two conventional projectiles, a long-distanced recovery, and other valuable techniques that aid his playstyle in regard to focusing on punishing mistakes and zoning against horizontal approaches.
King K. Rool's greatest strength is the immense utility of his moveset. Though many of his attacks are typical of super-heavyweights, he also has attacks that exchange brute strength (though most of them are still powerful) for unique attributes that contribute to his punish-focused playstyle. This is best shown through his character-specific perk, Belly Super Armor: attacks with this property gain short periods of this super armor, which can block incoming attacks during their duration. This mechanic gives him an advantage that allows him to win more exchanges than he would normally. Additionally, it affects a large amount of his moves, granting more safety on moves such as his forward tilt and dash attack to break through projectiles or difficult to punish attacks. As a result, Belly Super Armor heavily helps his approach and general disadvantage.
Alongside the utility of his Belly Super Armor, King K. Rool has effective grounded attacks. His neutral attack has good range and high speed, making it reliable as a quick get-off-me option. It is also tied with Incineroar, Ike, and Wario's neutral attacks as the third most damaging non-infinite neutral attack in the game, and leads into a tech situation at low to mid percentages. His tilts are very effective; for example, up tilt comes out very quickly, deals respectable damage and knockback during its initial frames, and has enough range to hit platforms above K. Rool while also being slightly disjointed due to his punching arm being intangible for its duration. This can also be used to anti-air or prevent approaches from characters such as Lucina and Roy. It is also the most reliable move out of down throw, becoming a true combo from around 120% and reliably KOing most characters at such percents if near the ledge.
Down tilt can bury grounded opponents or KO airborne ones, making it a potent punishment option. It also works at the ledge as a ledgehang punish or 2-frame option, and has a large shockwave hitbox that notably extends its range. His aforementioned forward tilt grants him Belly Super Armor as early as frame 5, has excellent range, can be angled up or down (with latter capable of being used as a ledge hang punish or 2-frame option), and is among the most powerful of its kind. Finally, his dash attack is also equipped with Belly Super Armor, has fast startup, a long-lasting, large hitbox, and is exceptionally strong, being a very potent, powerful burst option that can go through variety of attacks.
All of his smash attacks are incredibly powerful, and coupled with their unique traits and the belly armor on his up and down smashes, allow for very effective punishment. Forward smash deals heavy knockback regardless of where it hits, especially if angled upwards. It also confirms out of a down tilt bury at 70%, KOing the opponent provided they are not too far from the ledge. Up smash functions as a quick anti-air, is extremely strong for its speed, and also has a small meteor smash hitbox in addition to a third hitbox that punishes grounded foes. However, only the first is really useful as the other two are weak and largely ineffectual. Down smash deals massive shield damage and lifts K. Rool's entire body off the stage from frame 4, allowing it to dodge most ground-hugging moves and makes it his best hard punish option considering its immense strength. Overall, his smash attacks are all formidable for hard punishes. Both up and down smash are equipped with Belly Super Armor, which is especially useful in the case of down smash as it allows it to punish more attacks than similar moves such as Ridley and Incineroar's respective down smashes could.
His aerials are also fairly unique in their utility. Neutral aerial grants the longest duration of belly armor in K. Rool's moveset, making it a reliable combo breaker or landing tool to prevent juggling. Neutral aerial also has very low landing lag, allowing it to combo into moves such as neutral attack, up tilt, dash grab, and dash attack, the latter in particular being a KO confirm at certain percentages. The move's long-lasting, lingering hitbox and Belly Super Armor makes it a very effective edgeguarding tool, as it can negate a variety of recovery moves and gimp most opponents with ease. King K. Rool's forward aerial is arguably his best move overall, being a cornerstone for his neutral game. It has amazing range, hits exceptionally hard, and because of its low landing lag, it is safe on shield and is his best combo starter at low percentages. This gives the move a extreme utility as a neutral tool, KO move, combo starter, decent air-to-air option against some characters, as a potent albeit situational edgeguard option, for catching jumps and even as an occasional punish out of his burying moves. Forward aerial also deals non-tumble hitstun at 0%, allowing him to confirm into a grab.
Up aerial is a very unorthodox move with a surprisingly high amount of utility. It has quick start-up, a very long-lasting hitbox, and excellent KO power, while also working as a good platform movement out of a short hop. This is most effective when platforms are low, such as on Battlefield; it can also be used as a situational third jump while recovering, stalling K. Rool in the air while allowing it to potentially cancel out projectiles thrown at him. Because of the Belly Super Armor, long-lasting hitbox and the fact that K. Rool does not perform the slight jump while in hitstun, it can be used as a situational combo breaker. Down aerial and back aerial are meteor smashes, with the former coming out relatively fast and being a potent combo starter and 2-frame punish, and while the latter is very slow, it is also one of the strongest meteor smashes in the game. King K. Rool's back aerial also creates a wall of hitboxes behind him as a sourspot (which is also extremely powerful and can KO as early as 75%) covers his entire arm. His up and down aerials utilize belly armor, but their utility is situational due to their hitboxes being separated from K. Rool's belly. His neutral, forward, and back aerials are also relatively safe on shield, which is unusual for a super-heavyweight character. All in all, each of King K. Rool's aerials possess respectable utility and are overall considered to be his best moves.
His special moves have a wide array of uses as well, with several efficient projectiles; the Blunderbuss is useful for edgeguarding purposes (such as forcing a situation where the opponent has to recover low, allowing for a down aerial) and throws out a Kannonball that can be sucked back in and aimed in a few directions. The Blunderbuss can also act as a command grab, sucking in opponents and shooting them out in different directions, with the forward reshoot in particular sporting very high knockback. The suction of the Blunderbuss is an effective ledge-trapping tool, especially on stages with platforms. Since K. Rool can drop through platforms while still having slight control over his movement, he can limit the opponent's options to effectively escape the ledge.
The vacuum animation can also be delayed and is very quick to come out if a Kannonball is in play, allowing King K. Rool to easily mix up the timings. Crownerang is a very versatile tool that covers a large distance and grants him damage-based armor throughout the majority of its duration, and the late hit can set up combos or even straight up confirm kills into numerous moves. It has high priority that beats out most projectiles, and the armor allows K. Rool to tank numerous attacks, making the move very threatening in some matchups. The pick-up animation also has some ways to be canceled, which can be adapted into the player's gameplan.
Furthermore, King K. Rool has immense durability: between his extreme weight, above-average falling speed, his Belly Super Armor on various moves, and his heavy armor on Crownerang, King K. Rool has some of, if not the best longevity in the game; it is not uncommon for him to sustain more than 200% damage. Additionally, his up special move, Propellerpack, travels a remarkable distance for a heavyweight and is infamously hard to intercept vertically due to its respectably disjointed hitbox. This can be used to poke opponents on the ledge, then jump up with a forward or up aerial to regain advantage. It can also situationally be used to catch opponents near the ceiling to steal a stock, most notably on high recovery routes.
King K. Rool also has one of the best grab games among the entire cast. Each of his grabs have very long ranges and 3 active frames, while his throws boast a mix of high damage outputs and/or respecttable utility. King K. Rool's up throw is almost identical to Incineroar's equivalent throw aesthetically, but is somewhat different mechanically: it involves him jumping toward the upper blast zone quickly and, as a result, can result in him landing on a platform after he descends. It is the most damaging throw in the entire game, dealing almost 20% if the 1v1 multiplier is enabled, making it a very effective damage racking tool. It also leaves the opponent in a juggling situation. It is also one of the strongest up throws in the game, and with help of platforms it can KO even earlier. King K. Rool's back throw is a similarly powerful throw with fantastic KO potential near the ledge, which becomes even more potent with rage. It also sends the opponent at a semi-spike angle, setting up for potentially deadly edgeguards even when it fails to KO.
At higher percentages, King K. Rool's notorious down throw can lead into various mixups with tilts, up smash or aerials depending on the opponent's mash speed. Most notably, he can create a 50/50 situation at around 80%-100% with the throw - up smash covers mashing, allowing him to hit the opponent before they mash out and net a KO, or if they decide not to mash, forward smash will KO them. In addition to this, dash attack or up tilt are reliable options at higher percentages, allowing K. Rool to straight up KO with the throw starting from 120%-140%. Forward throw does decent damage, can help put an opponent offstage and in a disadvantageous position, and leads into a dash attack for a true combo until around 20%. Once this is out of range, it is great for setting up edgeguards. With all of this, K. Rool is always able to deal significant damage if he lands a grab, and is able to KO with his throws earlier than almost every character in the game to the point where he gets a huge chunk of his KOs with his grabs. All of this is made even more effective with his excellent grab range; combined with his effective initial dash, this can allow for a string of grabs that strongly deters shielding.
King K. Rool has access to a large amount of advanced techniques. These techniques assist with movement, mixups, and even enable combos. As a result, he is a rather technical fighter that can be rewarding to a player looking for a simple character with a high learning curve. They are all somewhat practical and reward creative use, allowing players to build interesting playstyles of their own. This makes him easily accessed at a low level, while still being usable on a higher level of play. As long as the player is aware of the options that the design of these techs provide, King K. Rool will reward them for it.
However, King K. Rool's numerous advantages are also met with several weaknesses. His below-average mobility spells trouble for him in certain matchups, and can make him easier to zone. Blunderbuss Kannonballs are slow to set up, and while they can occupy space well, fast characters can easily ignore it if they are even remotely close to him. Crownerang is also somewhat slow, although the crown is a fairly powerful item that opponents can use to rack up damage very quickly. Gut Check is generally inferior to other counterattacks due to having a hitbox only on his stomach, while having significantly higher endlag than most reflectors (around 30 frames if it fails), making it unreliable. This endlag makes it almost meaningless against some projectiles, such as Mega Man's neutral attack.
King K. Rool's extreme weight, very large hurtbox, and above-average falling speed make him seriously vulnerable to combos, and while his Belly Super Armor can help alleviate this, it's not completely foolproof: if K. Rool takes 36.02% of total damage to his armor over a short period of time, he will suffer a pseudo-shield break and be rendered immobile until his belly armor recovers. It also replenishes only 0.3% per second, making abuse quite difficult. Its limited HP punishes abuse of this mechanic if used frequently. Although it is hard to break in most matchups, it is certainly possible especially against other heavyweights with strong attacks, such as Bowser and Ganondorf.
However, its effectiveness varies depending on whether clashing against his attacks is actually worthwhile. The HP system of Belly Armor makes it quite exploitable and can occasionally act as a liability for survival, forcing him to rely more on non-armored moves when it's about to break. Additionally, due to their brief duration, his belly armor attacks are more reliable on quick, single-hit moves than long, multi-hitting attacks. The utility of Belly Super Armor as a combo breaker is also limited by its relative slowness to come out, being active from frame 6 on neutral and up aerial. K. Rool's other options to escape combos in the air are similarly limited; his air dodge is slower than most of the cast, starting at frame 4, and Gut Check, which also makes him intangible at frame 4 and can heavily punish reckless opponents, is in turn very vulnerable to staggered pressure, especially when used carelessly.
Though a lot of King K. Rool's moves have decent start-up, especially for a super heavyweight, an equal amount of them suffer from very high ending lag, which means that King K. Rool gets easily punished if he fails to connect his attacks. Despite the wide array of tools he has at his disposal, he lacks many moves that can simply be thrown out quickly, as many of his attacks are punishable or force him to use up his belly armor. This ironically makes his approach ineffective despite the sheer amount of different, fast attacks he has; few of his attacks can maintain pressure without being exploited, and the lag can make moves like forward tilt a neutral reset at best. King K. Rool is also vulnerable to being pressured and rushed down due to a poor out-of-shield game; his up smash cannot be used out of shield in most matchups, as the headbutt (which comes out on frame 6) only hits directly above him, while the later plank hitboxes are weak and slow to come out and he is wide open if it's shielded.
King K. Rool's neutral aerial, his fastest and most reliable out of shield option, has poor range, especially behind him, only covering his belly, and is unsafe on hit at low percents. As a result, K. Rool is particularly vulnerable to characters that can cross-up his shield easily, since he effectively has no option to punish this kind of approach and has to resort to retreating or jumping away. Finally, even his amazing grab game has some flaws, mainly due to the low knockback scaling of his throws: forward throw is unable to KO at realistic percentages, up throw requires platforms to KO effectively and is too laggy to have true followups, back throw loses a lot of its KO power if used center-stage due to its low knockback growth, and down throw's extensive mixups and KO confirms more often than not require reads to be effective. It is also affected by the bounce glitch, which adds even more inconsistency to the move.
Additionally, King K. Rool's air game can overall be seen as mediocre. Although his aerials are generally very potent moves and have interesting attributes, including two meteor smashes and armor on some of them, all of these moves (apart from his neutral aerial) suffer from one fatal flaw—very high ending lag in the air—making many of them somewhat situational, and forcing K. Rool to land with the moves to minimize the ending lag in the air. His down aerial's meteor smash hitbox only lasts for two frames and the move itself has high ending lag, making the potential punishes off of it very situational. His up aerial has extreme ending lag (the highest of any aerial in the game), preventing King K. Rool from acting even after a jump (though platforms can alleviate this), making it somewhat risky to use high up in the air. While his back aerial is very strong and has a lingering hitbox, it has very high start-up lag, which makes it easy to stuff out especially with its lack of armor or intangibility, and it additionally has a very weak sourspot that doesn't KO at reasonable percents, making it somewhat inconsistent.
Additionally, none of King K. Rool's aerials autocancel in a short hop. His forward and back aerials require a full hop double jump to autocancel, while up aerial does not autocancel without being very high up. The high ending lag of his aerials makes fast-falling them offstage extremely risky, as it is possible to self-destruct before even getting a chance to recover, which depletes edgeguarding options. Due to the high overall lag of his aerials, K. Rool is unable to juggle for extended periods of time, and his aerial game is mostly constrained to a reactive playstyle. K. Rool's slow aerial mobility further hampers his aerial capacity, and his massive hurtbox makes him a very easy target if in the air, giving him a limited air game, making his playstyle generally more grounded.
Crownerang, while a very strong move on its own, is flawed in many ways. If an opponent picks up the crown after it has been thrown, it leaves him without one of his best tools. The crown can actually be used to edgeguard against Propellerpack, or it can be thrown up to keep it from respawning. It is also very possible for opponents to combo with the crown, or pick it up again after throwing it, with very little counterplay available. The player must adopt an entirely different playstyle while the crown is on the field, or else risk losing a stock. As the pick-up animation takes 17 frames to complete, this also means that it can interrupt crucial combos, leading to the opponent getting away and resetting to neutral. While this is alleviated slightly through tech, it does not help a lot.
King K. Rool's recovery, while effective in theory, is very exploitable by the majority of the roster. Propellerpack is very linear, and a knowledgeable player can edgeguard him for long periods of time. It is immensely slow, and moving around with it reduces the vertical speed and leaves strong momentum, which can lead to a self-destruct if not accounted for. The hitbox does not cover him horizontally at all, and as he cannot cancel the animation, he always has to commit to it. He is usually forced to recover low, which is extremely dangerous due to how many characters have their own unique ways to beat out Propellerpack. Characters such as Piranha Plant and Villager have moves (Ptooie and forward smash respectively in this case) that can also counteract the vertical hitbox.
Propellerpack also leaves him very vulnerable to stage spikes, though LSI greatly alleviates this and allows him to tech to unreasonable percentages. The move can be angled to try and prevent this, though K. Rool usually will not recover without taking a large amount of damage. K. Rool also has very few ledge options; his only unique one is forward aerial, which requires frame-perfect precision to ledgesnap. Other than this, his ledge options are very limited—even Crownerang is too laggy to be used from the ledge reliably—and thus many characters can keep him there for a long time before finally KOing him.
All in all, King K. Rool has a somewhat hard time compensating his heavy drawbacks, even though his strengths are also very potent. King K. Rool is an extremely resilient character that excels at keeping opponents out while punishing mistakes extremely hard. He enjoys playing a unique bait-and-switch playstyle, being a zoner that can switch to aggression whenever there is an opening and net a substantial punish. His damage output cannot be understated, with him often either getting a stock or leaving an opponent at KO percents. This ability to force reactions from his foe makes him unlike any other character in the cast, and creativity rewards the player with a decently versatile character.
However, just like how he capitalizes heavily on mistakes and confusion, King K. Rool's own openings can be heavily punished as well, requiring him to play patiently. To use the full potential of his moveset, the player needs to balance their gameplay between zoning and up and personal aggression. For while K. Rool does have the advantage of switching between safe distancing via Crownerang and the Blunderbuss or pressuring lighter characters with his strong melee attacks, he does not perform well enough to use one strategy alone.
Historically, K. Rool's competitive reception has generally been very negative, though it has somewhat fluctuated over time. Early on, he was considered to be a potential high tier or even top tier character, as well as "broken" (especially by casual players), it did not take too long for many top professionals to consider King K. Rool as one of the worst characters in the game due to his severe, heavily exploitable downsides. In Japan, his reputation was even worse, with many top professional players there universally ranking him as the single worst character in the game. This is reflected in his tournament results, as they are very limited in North America and Japan (in latter, practically completely nonexistent outside of online tournaments), especially on the national level.
However, thanks to dedicated players like Ben Gold and Raphy, King K. Rool's results in Australia and Europe respectively are significantly better. Ben Gold in particular managed to win Battle Arena Melbourne 11, the biggest Ultimate major so far in Australia. Although his competitive viability still remains questionable and many players still view him as a low tier or even bottom tier character, the plehtora of significant buffs he received from game updates has made numerous top professional players question whether K. Rool really is as bad as previously thought. Some of them even believe that he might be a mid tier character instead of a low tier or bottom tier character as previously thought. However, how much these buffs have actually affected his viability remains to be seen.
Update history[edit]
King K. Rool received a mix of buffs, nerfs and glitch fixes via game updates, but was significantly buffed overall. In response to his early metagame perceptions, update 2.0.0 shortened Blunderbuss' vacuum duration and decreased the horizontal range of Propellerpack's hitbox, the latter of which would previously hit opponents on the edge from noticeably far away. The most notable change, however, was to down throw: its bury duration's scaling was changed to be less effective at low percentages, but more effective at high percentages. While the former two are direct nerfs, they did not significantly impact his playstyle. While originally considered to be a significant nerf, King K. Rool proved to benefit from the change to his down throw, as the popularization of forward throw to dash attack made the early percentage usage obsolete, and the higher scaling allowed for down throw to up tilt to be a reliable KO confirm beginning around 130%.
After his metagame relevance dropped, outside of a nerf to Crownerang's shield damage, King K. Rool received his first buffs in updates 3.0.0 and 3.1.0. The most notable among these was the ending lag reduction to up aerial, making it far safer to use offstage and even more reliable for recovery thanks to it functioning as a pseudo-double jump. Forward aerial's hitbox priority would also be tweaked, making the higher-damage hitboxes connect reliably and thus drastically improve K. Rool's combo game. This would be the first of numerous buffs to the move, which would turn it from a mediocre move to among the best in K. Rool's kit.
Update 6.0.0 would rework Blunderbuss, reducing its lag and increasing the KO power of Kannonballs. A new searchbox would be added specifically for vacuuming Kannonballs, drastically improving the consistency of reshooting them and making it reliable off-stage. K. Rool's aerials all received significant improvements as well; neutral aerial's landing lag was reduced to 9, allowing dash to be buffered consistently and making it easy to combo from, forward aerial's damage was buffed to the point it is -5 on shield, and up aerial's hitbox activity and KO potential was monumentally improved. These changes, coupled with continued tweaks to Gut Check, revolutionized K. Rool's game plan and gave him some much-needed identity.
After a minor buff to his shield in update 7.0.0, subsequent updates granted King K. Rool several useful buffs. In update 8.0.0, Belly Super Armor and Crownerang both received damage threshold increases, allowing him to force his way through many situations, notably improving his disadvantage state. Crownerang's buff was of particular note, significantly improving its utility in numerous game states, saving him from edge traps, juggling, or edge-guard situations. Back throw and up smash's changes improved his ability to KO from stray hits as well, with back throw in particular even gimping opponents on its own due to the new knockback angle, making it an option to respect when edge trapping K. Rool.
After many Steve-related bugs being fixed, K. Rool's KO potential was amped up even more in update 13.0.0. Up throw received a knockback growth buff that put it on par with Samus' which, considering its ability to take K. Rool to higher platforms, made it significantly more imposing. Up tilt's damage output received a buff that made it more reliable out of down throw, whereas previously it was middling and mostly outclassed by dash attack, which is 3 frames slower. Finally, forward smash gained slightly more range and an extra active frame, now being slightly easier to land and hitting edge-hanging opponents more reliably.
Overall, King K. Rool fares significantly better than he did at the launch of Ultimate: his neutral game has improved drastically, he has far more reliable KO options, and his disadvantage state has been considerably reworked. Numerous top professionals, such as Raito, MVD, ESAM, and Dabuz, have acknowledged his significant turnaround, which has been reflected by players such as Ben Gold, KirbyKid, and Raphy achieving considerable success partially because of his buffs.

 Down throw has a different bury scaling formula (90 frames + 0.5*damage → 60 + 0.75*damage). This allows buried opponents to more easily escape at low percents, but more difficult at high percents. Specifically, it buries opponents for less time below 125%, and buries them longer above 125%.
 This change makes direct KO followups beyond 125% more consistent, especially against opponents good at mashing.
 It conversely makes it take longer for followups at low percents to start connecting, as well as makes it easier for opponents bad at mashing to avoid slower KO followups like forward smash below 125%.
- The infinite jab combo (down throw to jab, repeat) that worked at 200%+ has been removed, now having the opponent "bounce" on the third loop.
- Blunderbuss:
- Blunderbuss has a shorter windbox duration, (5 seconds → 2.5 seconds).
 Blunderbuss no longer turns opponents invisible when KOing at their last stock.
- Propellerpack's horizontal hitbox is smaller, making it difficult to KO opponents straight to the upper blast zone and making it less safe when recovering. Most notably, it doesn't snap to the ledge as often as it used to.
- Forward tilt's sweetspot has more range.
- Forward aerial's sweetspot has priority over the sourspot.
- Up aerial has less ending lag (FAF 82 → 72).
- Up throw is no longer affected by wind zones for the duration of the move.
- Crownerang:
- Crownerang deals less shield damage (0 → -4.5/-3.5 (traveling/returning)).
- The crown item also deals less shield damage (0 → -3), slightly alleviating the shield pressure against K. Rool when the crown is stolen.
- Fixed crown duplication with Villager or Isabelle's Pocket.
- No longer increases the size of the crown while in an egg form from Yoshi's Egg Lay.
- Gut Check has less ending lag (Fail/Succeed: FAF 68/48 → 63/43).
- The desync glitch involving King Dedede has been fixed.
- Up aerial grabs the ledge more quickly when using the move (ledge lockout: 102 → 96). As an example of the change, full hop double jump up aerial will now cancel on the ledge during the endlag.
- Fixed an issue with Blunderbuss upon reflect of kannonball resulted King K Rool's windbox becoming stuck.

- Neutral aerial has less landing lag (13 frames → 9).
- Forward aerial:
- Forward aerial's clean and mid hits deal more damage (14%/12% → 15.5%/13.5%) with knockback not fully compensated (40 base/78 scaling (clean), 35/80 (mid) → 36/76), improving their KO potential.
- The clean and mid hits' sweetspot is larger (5.5u → 6.5u) and placed higher (Y offset: 7.5u → 8.5u (clean), 10.5u → 11.5u (mid)), increasing its range.
- The mid hit lasts longer (frames 11 (clean)/12-13 (mid)/14-17 (late) → 11/12-14/15-17).
- Up aerial has a longer hitbox duration (frames 7-8 (clean)/9-16 (late) → 7-13/14-19), and the clean hit deals more knockback (85 base/56 scaling → 84/60), KOing at around 135% from ground level.
- Blunderbuss:
- Blunderbuss has less startup (frame 30 → 25), with its total duration reduced as well (FAF 70 → 65).
- The Kannonball is easier to vacuum, and has less base knockback (30 → 18), but much more knockback scaling (70 → 92), improving its KO potential overall.
- Both the Kannonball and opponents are shot faster after being vacuumed. This makes it much easier for King K. Rool to recover offstage after using the move without self-destructing, increasing its utility as an edgeguarding tool.
- Gut Check:
- The counter detection hitbox has more range (size: 6u → 7.8u, Y offset: 8.6u → 7.4u, Z offset: 6u → 4.4u), now covering some area below his belly.
- A successful Gut Check has less ending lag (Normal/Reversed: FAF 42/53 → 38/45).
- The counter hitbox and the counterattack's sweetspot have more range (size: 10u → 12u, Y offset: 11u → 12.5u, Z offset: 9u → 10.5u).
- Overall shield size has been increased by 1.011×.
- The shield's center and K. Rool's posture while shielding has been adjusted to match.
- Belly Super Armor has more durability (14.01 HP → 18.01 HP), allowing it to withstand stronger attacks such as Falcon Punch from full durability, and improving its overall reliability. Considering the armor splitting damage between itself and King K. Rool, it's got effectively 36.02 HP.
- Dash attack:
- The move has more knockback scaling (57 → 61 (clean), 48 → 55 (late)).
- The clean hit has a longer duration, with the late hit's duration reduced accordingly (frames 7-11 (clean)/12-25 (late) → 7-14/15-25).
- Up smash's first hit deals more damage (15% → 17%) without full compensation on knockback (32 base/95 scaling → 31/90), improving its KO potential.
- Pummel has a larger hitbox (7u → 8u), allowing it to connect more consistently.
- Back throw launches at a lower angle (45° → 35°), allowing it to KO around 20% earlier.
- Crownerang has an increased armor threshold (6% → 12%).
- Fixed an issue in which K. Rool could fall though the stage when breaking Steve's blocks.
- Fixed an issue where King K. Rool could float over Steve's blocks using the final hit of up smash or the final hit of his jab.
- Fixed an issue where King K. Rool could bypass the collision of Steve's blocks up close with the final hit of his jab.
- Up tilt deals more damage (11.5% → 12.5% (clean), 6.8%/8.2% → 7.4%/8.9% (late)), improving its KO potential, as its knockback was not compensated.
- Forward smash has a longer hitbox duration (frames 19-20 → 19-21).
- Forward smash's sweetspot has a larger hitbox during its first two active frames (5.2u → 5.8u).
- Forward aerial has less ending lag (FAF 58 → 55).
- Up throw has higher knockback scaling (40 → 44).
Moveset[edit]
- K. Rool has a large and tall hurtbox while standing, walking, and jumping. However, he dashes on all four limbs, akin to real-life alligators and crocodiles, which makes his hurtbox significantly shorter.
- Certain belly-based moves in King K. Rool's moveset (forward tilt, dash attack, up smash, down smash, neutral aerial, up aerial, down aerial, and side taunt) activate health-based super armor around his belly, known as Belly Super Armor. Each of the listed moves has this out for varying frames. However, taking damage with these moves cracks it, with K. Rool getting dazed upon it breaking completely after sustaining too much damage. The armor has 18.01 HP, but since the incoming damage is split 50/50 between K. Rool and his belly, it is practically 36.02 HP. It regenerates at 0.08 HP every 16 frames (about 0.3 HP per second). Attacks that hit K. Rool's belly super armor make a loud, distinct clanging sound as an audio cue, with a fixed 16 frames of hitlag. It is also possible to estimate the damage it has taken, with small cracks appearing at 11.5 HP (where 23% would break it) and large cracks appearing at 5.02 HP (where 10.04% would break it).
For a gallery of King K. Rool's hitboxes, see here.
Note: All numbers are listed as base damage, without the 1v1 multiplier.
| Name | Damage | Description | ||
|---|---|---|---|---|
| Neutral attack | Palm Stamp (パームスタンプ) / Snatch Claw (スナッチクロー) / Sole Kick (ソールキック) | 2.5% | A sumo-esque palm thrust (comes out on frame 3), followed by a claw swipe (frame 4), followed a front kick (frame 5). The first hit can be repeated by holding the attack button, and can jab reset large characters specifically, allowing for some interesting situations. The second hit resembles King K. Rool's standard attack from Donkey Kong Barrel Blast. | |
| 2.5% | ||||
| 7% | ||||
| Forward tilt | Buster Clap (バスタークラップ) | 11% (arms), 13% (hands) | Rears back and performs a forceful clap, similarly to Donkey Kong's forward smash. Gains Belly Super Armor when he rears back to clap, making it a highly effective approach option with pivot canceling. Sends at a semi-spike angle and is decently fast for its power (comes out on frame 12), KOing at 107% at the edge of Final Destination. It can be angled up and down, making it a decent anti-air tool when angled up, and it is capable of hitting the ledge when angled down. This move has impressive range due to a massive, disjointed hitbox surrounding K. Rool's hands. It does suffer from moderately high ending lag, though this flaw can be partially mitigated when spaced correctly. The combination of its range, Belly Super Armor, KO potential, and ability to angle it up or down makes it not only one of the best moves in King K. Rool's kit, but also arguably one of the best forward tilts in the game. | |
| Up tilt | Uppercut (アッパーカット) | 12.5% (clean), 7.4% (late, arm), 8.9% (late, fist) | An uppercut. Has a wide hitbox, covering the front of K. Rool, and starts low enough to reach prone enemies. Almost as fast as his neutral attack, coming out on frame 5, which is very fast for a move with reasonably decent KO power. Has intangibility on the arm during its duration, effectively making the move slightly disjointed. Loses power the longer it is out, with the sweetspot dealing rather strong diagonal knockback, and the sourspot dealing weak, mostly vertical knockback, which can potentially lead to another up tilt or up air. This move is a reliable followup from down throw due to its combination of speed and power. | |
| Down tilt | Bury Leg (バリーレッグ) | 13% (clean), 10% (late, non-burying), 8% (late, burying), 7% (late, quake) | A stomp. K. Rool's foot buries grounded opponents, though it cannot do damage to an already-buried enemy. Much stronger on aerial opponents, and can KO at 104% at the edge of Final Destination. The stomp causes a shockwave near his foot. This deals weak vertical knockback to nearby opponents and allows for moves like forward aerial to be used out of it. Starts with the non-bury hitbox on frame 13, before the bury comes out at frame 14. Forward smash is true out of this from around 70%, and frequently KOs at that percent range. The hitboxes can hit some opponents under low platforms (such as the left and right platforms on Battlefield). Due to how buries work in Ultimate, it is possible to "store" knockback on a buried opponent using a weak attack, forcing them to get unburied over time and sent at the angle of the weak attack; this can create long combo strings at low percents. | |
| Dash attack | Body Attack (ボディアタック) | 15% (clean), 11% (late) | A body avalanche. It covers a good distance and has incredibly fast start-up for its power (comes out on frame 7), but has very high ending lag. It also deals much less damage later into the attack. Has Belly Super Armor and can KO, allowing it to tank opposing hits (especially projectiles) as a risky approach. KOs at 102% at the edge of Final Destination, making it a very good move to use out of down throw through Instant Dash Attack, as it KOs larger characters earlier than forward tilt. It resembles the body avalanche he used in Donkey Kong Land. | |
| Forward smash | ↗ | Dynamite Punch (ダイナマイトパンチ) | 19.95% (sweetspot), 17.325% (close) | Dons a boxing glove, referencing his King Krusha K. Rool persona from Donkey Kong 64, and throws a straight punch. This move has a sweetspot on the glove and a sourspot on K. Rool's arm. It can also be angled and deals more damage if angled up or down, which gives it some versatility, depending on the angle. Although the move is slightly faster than forward smashes of other super heavyweights, it still comes out slow with a short-lasting hitbox (frames 19-21), and it suffers from extremely high ending lag even for its type, making it very punishable when missed. However, the move is very powerful, with the sweetspot KOing at 53% at the edge of Final Destination. The sourspot on his arm deals less knockback and damage but is still moderately powerful. The boxing glove is also disjointed, which can be used to hard punish short hop approaches in niche circumstances. It's also very effective out of down tilt, as the move is fast enough to connect and KO at around 50%-70% before the opponent mashes out. |
| → | 19% (sweetspot), 16.5% (close) | |||
| ↘ | 19.57% (sweetspot), 16.995% (close) | |||
| Up smash | Heavy Fall (ヘビーフォール) | 17% (headbutt), 8% (late headbutt), 10% (plank); 3% (meteor smash) | An upward battering ram followed by a comical plank. The headbutt has a small hitbox, but has fast start-up (frame 6) and can KO from medium to high percents. It also has a slightly later hitbox on frame 10 that deals slightly less damage, making it somewhat inconsistent at times. The initial headbutt can be used to hit opponents on platforms above him, or as a risky anti-air move. It is King K. Rool's fastest out of shield option, though it is too situational and risky to be very effective for this purpose. It is also a highly effective follow-up from down throw, as it is able to hit opponents who mash out, being an effective KO confirm at around 90%-110%. The plank comes out later and has a big hitbox, but deals less damage and knockback, making it more suited for covering the headbutt or ledge trapping at best. The plank animation weakly meteor smashes opponents, though this is ineffective for edgeguarding due to its low knockback. In addition, it is the weakest meteor smash in the game, failing to KO at realistic percents. It can be used to force tech situations or awkward placements off-stage, but these are highly situational and impractical. The sheer number of hits do make it useful for causing shield damage under platforms. Each hitbox is situated on K. Rool's head and body respectively, meaning it can miss entirely if used poorly. Additionally, the move has extremely high ending lag, with the first actionable frame being 72 and the last hit being on frame 23. The headbutt KOs at 100%, while the plank KOs at 162% at the edge of Final Destination, respectively. This move has Belly Super Armor shortly after K. Rool hops and before he flops onto the ground. There are also intangibility frames on K. Rool's head when the sweetspot comes out. | |
| Down smash | Gigant Press (ギガントプレス) | 18% (body), 4% (quake) | A jumping splash. Has Belly Super Armor during the leap, and deals heavy shield damage. As K. Rool physically leaves the ground when using the move, his hurtbox gets shifted into the air, allowing it to dodge ground or belly-level attacks to deal a hard punish. It is extremely powerful, being one of the strongest down smashes in the game, KOing at 50% at the edge of Final Destination. It also has a quake hitbox that provides minimal protection if the opponent avoids the splash itself. The move is very laggy overall, with its strongest hitbox coming out on frame 22, and it also suffers from very high ending lag, which makes it very punishable if used poorly. However, thanks to its initial hop and armor, the move is surprisingly hard to intercept despite its high startup. It also can be used on platforms against opponents that try to attack K. Rool from below. The quake is extremely weak, but it covers the high ending lag of the move somewhat, and it can occasionally lead to a forward tilt. | |
| Neutral aerial | Iron Balloon (アイアンバルーン) | 12% (clean), 8% (late) | A splash. Decently fast (comes out on frame 7), acts as a sex kick and has Belly Super Armor. In addition, it has very little lag in comparison to most of King K. Rool's moveset, and is his safest move on shield. Finally, it is also his fastest out-of-shield option that is somewhat practical, next to his neutral attack. Because of all of this, it is one of the safest and most versatile moves to use in K. Rool's kit. It can be used for landing, contesting aerials, approaching, and even gimping, as it beats out most recovery moves, even ones with hitboxes. In addition, due to its safety, it can be used to pressure, and it can also combo into several moves, such as his neutral attack, up tilt, forward tilt, dash attack, grab, and even situationally into down tilt, which can lead to devastating early KOs. However, it has poor range, only covering his belly, and is unsafe on hit at low percents. It is similar to an attack he uses in Donkey Kong Land. | |
| Forward aerial | Drop Kick (ドロップキック) | 15.5% (clean feet), 13.5% (clean legs), 10% (late feet), 8% (late legs) | A dropkick. Hitbox comes out on frame 11. Its sweetspot is at K. Rool's feet, which has a higher priority over the sourspot, making it easy to land. Has a very large hitbox with sweetspot being notably disjointed, giving it a very good range. The sweetspot has strong knockback, KOing around 100% near the edge of Final Destination. It deals disproportionately high damage, making it an very efficient damage racking tool. The move also acts as a sex kick, allowing it to be used for approaching or as a situational edgeguarding option. However, the move has relatively low landing lag, considering its power, huge, lingering hitbox, and relatively decent startup of 11 frames. This low landing lag combined with its power and range makes it K. Rool's safest move in neutral when the move is being used while landing, being safe on shield, especially when spaced correctly. Its properties make it K. Rool's best combo starter at low percents, with sweetspot being able to lead into neutral attack, forward tilt, up tilt, dash attack and grab at low percents. It can even confirm down tilt thanks to it being +15 on hit with a good landing at 0%. The sourspot on this move lies around the torso and can be used well with down tilt. It has a late hitbox with drastically weaker damage and knockback, which has some niche combo utility at mid percents, being able to lead into grabs thanks to it not sending into tumble until around 65%. However, it is very hard to land consistently. Overall, the move is considered to be among the best and most versatile moves in K. Rool's moveset. | |
| Back aerial | Rock Breaker (ロックブレイカー) | 14.5% (arm), 19% (fist) | Turns around and throws a delayed overhand punch behind himself. It is similar to Mario's forward aerial both aesthetically and mechanically: it is very slow (comes out on frame 18), but it powerfully meteor smashes opponents if K. Rool's fist hits. Against grounded opponents, it launches them diagonally with extremely high knockback, being able to KO middleweights at 65% near the ledge, making it one of the strongest aerial attacks in the entire game. The larger, disjointed sourspot around the fist is significantly weaker, dealing rather weak diagonal knockback against both grounded and airborne opponents, failing to KO reliably until 160%. It also has a slightly lingering hitbox, making it an important tool in neutral when full hopped. | |
| Up aerial | Stretch Headbutt (ストレッチヘッドバット) | 14%, 10% (late) | An upward battering ram. It causes K. Rool to float slightly, giving it more reach. It has extremely high ending lag due to King K. Rool laughing after the move, preventing him from acting even if performed out of a double jumìp, making it risky to use offstage and making it the laggiest aerial in the game. However, is one of K. Rool's fastest aerial attacks (comes out on frame 7), and deals less damage if hit later. In addition to this, the early hitbox is among the strongest up aerials in the game, being able to KO at around 100% and even earlier if used near the upper blast zone, giving K. Rool a possibility to pick up very early KOs with the move, especially with rage. The early hit has a large, disjointed hitbox much larger than K. Rool's head, which also lingers for a disproportionately long time. The move has Belly Super Armor while K. Rool stretches his head out, ending after the hitboxes are over. When short-hopped, this move can allow K. Rool to move onto a platform, allowing for some movement options, and significantly helps with the issue of the move having high ending lag. Like up smash, there are intangibility frames on K. Rool's head during the attack, making it disjointed and allowing it to beat projectiles or some other even reasonably disjointed moves, such as Mr. Game & Watch's down aerial. This move can also be used for recovering from high to mid-levels, as K. Rool can be moved from side to side while using the move. | |
| Down aerial | Meteor Stomp (メテオスタンプ) | 12% (early), 9% (late) | A front flipping double foot stomp. The hitbox is situated on K. Rool's legs. Decently fast (comes out on frame 14) and meteor smashes if the early hitbox connects, although the meteor smash itself is rather weak. If the opponent is hit by the early hitbox - but not meteor smashed - on-stage by this move, it confirms into a wide variety of attacks. There is also a late hitbox with a sweetspot on K. Rool's hips that has more knockback growth, plus a sourspot on the feet. It also has Belly Super Armor after K. Rool stomps, giving it some safety. | |
| Grab | Grab (つかみ) | — | Reaches out. King K. Rool's grabs are quick and have great ranges. However, his dash and pivot grabs are slower than his standing grab. If K. Rool misses, his left eye comically bulges in frustration. | |
| Pummel | Grab Headbutt (つかみヘッドバット) | 1.6% | Headbutts the opponent. | |
| Forward throw | Ground Throw (グラウンドスルー) | 10% (throw), 7% (collateral) | A one-handed military press slam. The slam possesses a collateral hitbox that can affect nearby opponents. It combos into dash attack or a dash canceled neutral attack at 0%. It also has non-tumble hitstun at that point, making the combos extremely consistent. | |
| Back throw | Friction Throw (フリクションスルー) | 11% | Pins the opponent to the ground and drags them backward before flinging them behind himself. KOs at 124% at the edge of Final Destination, though rage greatly assists its KO power. | |
| Up throw | Super Back Breaker (スーパーバックブリーカー) | 16% | Heaves the opponent over his head, leaps high into the air, and then descends to perform an Argentine backbreaker rack drop. This is the most damaging throw in the entire game, and it's powerful enough to KO at around 160%, or even earlier if he lands on a raised platform. | |
| Down throw | Piledriver (パイルハンマー, Pile Hammer) | 5% | A powerbomb. Has the lowest damage output of K. Rool's throws, but this is compensated by its burial ability granting it follow-up potential. K. Rool's most versatile throw overall, as well as one of his most versatile tools in general. Down throw follows up to numerous moves depending on the opponent's percent, including jab, up tilt, and up air at lower to mid percents, as well as forward tilt, forward, and down smash at higher percents. It is also possible to infinite many fighters by throwing them, using neutral attack while they are buried, and re-grabbing them when they are released. However, most followups can be avoided if the opponent mashes out (especially since the throw itself is slow and gives plenty of time to react), making its KO setups unreliable at much higher percents. Only dash attack, forward and up tilts are able to follow up at 125% and KO reliably. However, up smash and up aerial can be used to discourage mashing and create 50/50 situations at lower percents, as the prior KOs at 100% a lot of the time. | |
| Floor attack (front) | 7% | Swipes in front of himself with one claw then kicks behind himself with one foot. | ||
| Floor attack (back) | 7% | Swipes his claw around himself. | ||
| Floor attack (trip) | 5% | Swipes both sides of himself with his claws. | ||
| Edge attack | 10% | Pulls himself up from the ledge and swipes forward with one claw. Has very long-range, being slightly shorter than Bowser's. | ||
| Neutral special | Blunderbuss | 13% (Kannonball), 12% (throw), 17% (relaunched Kannonball) | Pulls out a blunderbuss and fires a Kannonball forward while donning the pirate hat worn by his alter-ego Kaptain K. Rool in Donkey Kong Country 2: Diddy's Kong Quest. Only one Kannonball can be in play at one time, with another being usable after ≈2.5 seconds. After a Kannonball is fired, the special button can be held to use the blunderbuss's vacuum function, sucking in nearby enemies or the Kannonball itself (though the move will eventually cancel after several seconds), similarly to Inhale. K. Rool can drop through soft platforms while vacuuming with his blunderbuss, and he also can move left and right as well while airborne, which is very useful for ledge trapping. Once it sucks something in, K. Rool will immediately launch it out at a slight angle upward in front or behind him, or directly upwards, depending on the held direction. The blunderbuss' forward "throw" KOs at 100% near the edge of Final Destination, though its upward and backward variations have noticeably less knockback. A launched fighter or re-launched Kannonball is capable of KOing as early as 70%, with the Kannonball lingering while doing minor damage after the first hit. | |
| Side special | Crownerang | 9% (projectile), 7% (returning), 6% (item) | Takes off his crown and flings it forward in a style based on his boss battle in Donkey Kong Country. Functions similarly to Boomerang. Has 12% damage-based armor while K. Rool is throwing his crown. Deals less damage when returning. Unlike Boomerang, it cannot be smash thrown. The crown will attempt to return to K. Rool while flying, though it will slowly lose altitude. Only one crown can be thrown at once. If K. Rool fails to catch it, the crown will drop as an item for anyone else to use, and will reappear on his head after 12 seconds or if K. Rool touches it again (does not count if the crown hits him as a thrown item, or if the crown is from another K. Rool). The pickup animation can be canceled through using a move or "unavoidable" animations such as jumpsquat when coming into contact. It also has a number of advanced techniques, such as crown sliding. | |
| Up special | Propellerpack | 3% (propellers) | Equips the Propellerpack worn by his alter-ego Baron K. Roolenstein in Donkey Kong Country 3: Dixie Kong's Double Trouble and flies upward. Covers an excellent amount of distance, allowing K. Rool to fly from one end of Final Destination to the other, though changing direction is difficult. Upon reaching peak height for a moment, K. Rool will slowly drift down while flapping his arms as a direct reference to his damaged state during his boss battle in Donkey Kong Country 3: Dixie Kong's Double Trouble. Pressing down will render K. Rool helpless, make him fall faster, and lower his landing lag. The propellers above K. Rool deal multiple weak hits, protecting him from edgeguards while even allowing him to drag opponents to the top blast line, though this can be DI'd out of if it hits more than 3 times. | |
| Down special | Gut Check | 1.5× (gut counter, reflected projectiles) (minimum 12%, maximum 50%) 1.05× (shockwave) (minimum 8.4%, maximum 35%) |
Puffs out his stomach and retaliates against attacks. It works like a counterattack and can also reflect projectiles. However, the counter hitbox is centered on K. Rool's stomach, making the rest of his body vulnerable (most notably his face), much like how Toad functioned in Melee and Brawl. Its sweetspot has a damage multiplier of 1.5×, tying it with Slip Counter and Counter Throw for the second-highest damage multiplier out of any counterattack in Ultimate, surpassed only by Tetrakarn. It is possible for the opponent to get hit by both the reflected projectile and the counterattack if the opponent is close enough, causing them to receive double the amount of damage and resulting in KOs from moves like a fully charged Charge Shot at extremely low percents. The shockwave has a hitbox further away that deals 0.7× of the counter's damage (resulting in a multiplier of 1.05×). | |
| Final Smash | Blast-O-Matic | 3% (stomp), 10% (tackle), 25% (energy beam), 10% (ending) | K. Rool stomps, stunning any nearby opponents and lunges forward while catching those in his path. If at least one opponent was caught, a cutscene plays in which K. Rool sits on his throne at Crocodile Isle before firing a massive energy beam from his Blast-o-Matic. The beam then fires through Donkey Kong Island, destroying the island and dealing massive damage on the victims. | |
Stats[edit]
| Stats | Weight | Dash speed | Walk speed | Traction | Air friction | Air speed | Air acceleration | Gravity | Falling speed | Jumpsquat | Jump Height | Double jump Height |
|---|---|---|---|---|---|---|---|---|---|---|---|---|
| Value | 133 | 1.936 – Initial dash 1.485 – Run |
0.903 | 0.105 | 0.015 | 0.945 | 0.01 – Base 0.04 – Additional |
0.105 | 1.7 – Base 2.72 – Fast-fall |
3 | 33 - Base 13.5 - Short hop |
32.61 |
Announcer call[edit]

English
Japanese/Chinese
On-screen appearance[edit]
- Descends from the sky with his arms crossed before chuckling. His pose is based on how he appears in Donkey Konga, while his descent is a reference to Donkey Kong Country.

King K. Rool's on-screen appearance

Taunts[edit]
- Up taunt: Viciously bites forward four times. It is similar to Bowser's side taunt.
- Side taunt: Slaps his belly once in amusement. Despite being a taunt, it uses K. Rool's Belly Super Armor during the frames before he slaps his belly.
- Down taunt: Performs a shiko, a powerful stomp in sumo that functions as both an exercise and a pre-bout ritual to ward off evil spirits.
King K. Rool's up taunt.
King K. Rool's side taunt.

King K. Rool's down taunt.


Idle poses[edit]
- Angrily bites the air.
- Slaps his belly twice and gloats.
King K. Rool's first idle pose.
King K. Rool's second idle pose.


Crowd cheer[edit]
| Cheer (English) | Cheer (Japanese/Chinese) | Cheer (Italian) | Cheer (Dutch) | Cheer (French) | |
|---|---|---|---|---|---|
| Cheer | |||||
| Description | Krem - ling Krew! | (high voices) Kin - gu! (low voices) Kuru - ru! | King - K. - Rool! | Ro - oo! King - K! | Roi K. Rool, t'es trop cool! King K. Rool, t'es trop cool! |
| Cheer (German) | Cheer (Spanish) | Cheer (Russian) | Cheer (Korean) | |
|---|---|---|---|---|
| Cheer | ||||
| Description | King K. Rooool *stomp* *clap* *stomps 2 times* *clap* | King - K. - Rool! King - Kah - Rool! |
King - Kah - Rool! | King -- Kuru! |
Victory poses[edit]
- Left: Shifts his eyes left and right before ending with a triumphant pose.
- Up: Flips his cape around before ending in a pose similar to his official artwork.
- Right: Belly flops on-screen and rebounds with a backflip, before landing on his feet and slapping his belly with his tongue sticking out.


In competitive play[edit]
Most historically significant players[edit]
See also: Category:King K. Rool players (SSBU)
 Ben Gold - The best King K. Rool player in the world as well as one of the best Australian players during the early metagame. He is notable for being the first King K. Rool player to win a notable regional event with Battle Arena Melbourne 11 and he continued to have notable results in Australia with 5th at Phantom 2019 and a notable major placement with 17th at Thunder Smash 3: Clash of the Pandas. After 2019, he dropped the character in favor of playing Wolf and makes rare appearances regionally.
 Lukewarm - The best King K. Rool player in the world. While was notable during the early metagame, he gained recognition in online tournaments where he beat top players such as Sonix and ranked 17th on the Wi-Fi Warrior Rank v7. At offline tournaments, he became the second King K. Rool player to win a regional in Anime Houston 2021 and holds some of the best King K. Rool results at majors such as 17th at CEO 2021 and 25th at Rise 'N Grind. He currently competes on rare occasions, but still headlines the character in the meta, seen with his 49th place finish at Luminosity Makes BIG Moves 2024 defeating MKBigBoss.
Tier placement and history[edit]
Upon Ultimate's release, many players noted King K. Rool's numerous strengths that were never seen before on a super-heavyweight character, namely his two projectiles, unique Belly Super Armor mechanic, a down throw that — in theory — leads to very early kill confirms, good startup on many moves, and a very long-ranged recovery. This, coupled with the inherent strengths of being a super-heavyweight, had top professionals speculating that King K. Rool could be high- or even top-tier on release. Additionally, less experienced players struggled mightily against him, with some calling him "broken". In the first few weeks of the game's release, King K. Rool picked up multiple strong early tournament results, primarily in the US, such as Vikerkaar placing 9th at Don't Park on the Grass 2018, Ito placing 13th at Super Splat Bros, and WAR placing 4th at Poi Poundaz 2.
However, it quickly became apparent that King K. Rool was not nearly as good as players thought, as he has some of the nastiest downsides in the game to counter his strengths. Compounding this, King K. Rool received nerfs in update 2.0.0 that made his already negative perception even worse, despite being largely irrelevant in retrospect. Because of these factors, almost every top professional saw him as one of the worst characters in the game within months, which was especially notorious among the Japanese top players, many of whom considered him to be the single-worst character in the game. He was simply too inconsistent to be seen as a viable pick in the high-power metagame that Ultimate's cast brought to the table.
King K. Rool later received a small number of helpful buffs in update 3.0.0 in 2019, although they were not significant enough to address his significant flaws, and his competitive reputation remained poor. Nevertheless, it improved his representation, with Dera getting a win against Somé during Obasuma OST 4 and placing 3rd, which was the first glimmer of hope for K. Rool in spite of his then-bottom tier perception. While still typically ranked very low, players such as Ben Gold, KirbyKid, and Muk began to earn cosmopolitan results that made people question King K. Rool's reputation as a low tier character. This was especially evident when Ben Gold managed to win Battle Arena Melbourne 11, an Australian B-tier tournament, with King K. Rool as his solo main. While still revied rather lowly by top players, 2019 proved to be a decent year for the Kremling King, with players like ESAM and MVD arguing that he could be mid-tier.
Ben Gold would continue achieving astounding results at PGR-level events well into 2020, such as 17th at Phantom 2020, which was the event to truly bring King K. Rool's low-tier status into question. During this period, western players began connecting with the Japanese playerbase, where they learned some of King K. Rool's more nuanced gameplay lines, and as resources continued to improve, the skill floor for King K. Rool began to increase as well. Thus, by the time Ben Gold dropped King K. Rool, KirbyKid carried the torch, going on to on to place 13th at InfinityCON Tally 2021. Additionally, Raphy, a German player, placed 5th at Smash Contest: DoKomi 2021. While Ben Gold dropped the character, his, Raphy, and KirbyKid's success solo maining King K. Rool from 2020 through 2022, along with repeated significant buffs in hand, led to further conversations about King K. Rool's viability. Dabuz went as far as to say that King K. Rool is a high-mid-tier character, and some Japanese players — such as Raito, who considered him to be the worst character in the game — stated that K. Rool might be a lot more threatening than initially perceived.
More recently, many of King K. Rool's top players have either decreased in tournament attendance or moved towards different characters. Many of his buffs, while accentuating his strengths, failed to answer many of his weaknesses, such as a poor out of shield game and lack of non-committal anti-airs. With multiple periods of competitive viability, his staying power at top level can be called questionable, with him fading in and out of top cut lists over months. King K. Rool's true viability is hotly contested, with some arguing his national-level top cut placements prove his potential, while others will call it a fluke. King K. Rool would end up ranking 74th on the first tier list, near the top of the low tier. With a lack of top level representation throughout 2023, alongside his inherent flaws and inconsistent top level results, he would fall even further to 80th on the second and current tier list, in the newly created E+ Tier, ranking him among the worst characters in the game.
Classic Mode: Super Heavyweight Class[edit]

King K. Rool's opponents are among the heaviest characters in the game. The name of the route uses boxing terminology, referencing his boxing-themed final boss fight in Donkey Kong 64. The boss of his route is Galleom, who is the heaviest boss in the game. On an extended note, Galleom's hulking proportions and posture are similar to Donkey Kong's (King K. Rool's arch-nemesis), and his name is spelled similarly to "Galleon", which can be a reference to Gang-Plank Galleon (the song associated with King K. Rool).
| Round | Opponent | Stage | Music | Notes |
|---|---|---|---|---|
| 1 | Unova Pokémon League | Victory Road - Pokémon Ruby / Pokémon Sapphire | Charizard's Pokémon Trainer is absent. | |
| 2 | Find Mii | King Bowser - Super Mario Bros. 3 | The stage references Bowser's Castle. | |
| 3 | Boxing Ring | King Dedede's Theme (Brawl) | The stage references the Dedede Arena, where Kirby fights King Dedede. | |
| 4 | Brinstar Depths (Battlefield form) | Vs. Ridley | ||
| 5 | Bridge of Eldin | Calamity Ganon Battle - Second Form | ||
| 6 | Kongo Jungle | Crocodile Cacophony | Items do not appear. | |
| Bonus Stage | ||||
| Final | Galleom | Base | Boss Battle - Super Smash Bros. Brawl | |
Credits roll after completing Classic Mode. Completing it as King K. Rool has Gang-Plank Galleon accompany the credits.
Role in World of Light[edit]

King K. Rool was among the fighters that were summoned to fight against the army of Master Hands.
During the opening cutscene, King K. Rool was present on the cliffside when Galeem unleashed his beams of light. He was vaporized offscreen and placed under Galeem's imprisonment along with the other fighters, excluding Kirby.
King K. Rool was one of the many fighters that fell under Dharkon's control upon Galeem's first defeat. He can be found on a ship in the Mysterious Dimension sub-area, guarded by the spirit of fellow pirate, Risky Boots. To reach his location, the player must first defeat the Scarfy spirit, which is one of the right answers to a quiz question of which spirit Kirby cannot inhale. Then, the player must defeat the spirit of Trevor C. Belmont, the right answer to a quiz question of which spirit assisted Alucard in defeating Dracula.
Fighter Battle[edit]
| No. | Image | Name | Type | Power | Stage | Music |
|---|---|---|---|---|---|---|
| 67 | |
King K. Rool | 10,600 | Pirate Ship | Gang-Plank Galleon |
Spirits[edit]
King K. Rool's fighter spirit can be obtained by completing Classic Mode. It is also available periodically for purchase in the shop for 300 Gold, but only after King K. Rool has been unlocked. Unlocking King K. Rool in World of Light allows the player to preview the first spirit below in the Spirit List under the name "???". As a fighter spirit, it cannot be used in Spirit Battles and is purely aesthetic. His fighter spirit has an alternate version that replaces it with his artwork in Ultimate.
Additionally, he makes an appearance as a few primary spirits under his alter-egos from the Donkey Kong Country series.
136. King K. Rool
162. Kaptain K. Rool
163. Baron K. Roolenstein


In Spirit Battles[edit]
Conditions in italic aren't listed on the Spirit Battle preview screen.
As the main opponent[edit]
| Spirit | Battle parameters | |||||||||
|---|---|---|---|---|---|---|---|---|---|---|
| No. | Image | Name | Series | Enemy Fighter(s) | Type | Power | Stage | Rules | Conditions | Music |
| 47 |  |
Wart | Super Mario Series | •King K. Rool •Peach |
4,000 | Skyworld (Battlefield form) | •Hazard: Slumber Floor | •Defeat the main fighter to win •The floor is sleep-inducing |
Boss Theme - Super Mario Bros. 2 | |
| 159 |  |
Kritter | Donkey Kong Series | •King K. Rool |
1,700 | Kongo Jungle | •Defense ↑ | •The enemy has increased defense •The enemy starts the battle with a Rocket Belt |
Jungle Level (64) | |
| 161 | Klaptrap | Donkey Kong Series | •Tiny King K. Rool |
4,000 | Kongo Jungle | •Assist Trophy Enemies (Klaptrap) | •Hostile assist trophies will appear | Stickerbush Symphony | ||
| 162 |  |
Kaptain K. Rool | Donkey Kong Series | •King K. Rool |
13,500 | Halberd | •Invisibility | •The enemy's neutral special has increased power •Stamina battle •The enemy is invisible after a little while |
Crocodile Cacophony | |
| 166 |  |
Lord Fredrik | Donkey Kong Series | •King K. Rool |
2,300 | Summit (Battlefield form) | •Hazard: Ice Floor | •The floor is frozen | Swinger Flinger | |
| 229 |  |
The Imprisoned | The Legend of Zelda Series | •Giant King K. Rool |
4,600 | Gerudo Valley | •Assist Trophy Enemies (Ghirahim) | •The enemy has super armor but moves slower •Timed stamina battle (1:30) •Hostile assist trophies will appear |
Ballad of the Goddess (Remix) | |
| 244 | Bokoblin | The Legend of Zelda Series | •Tiny King K. Rool Team |
1,400 | Gaur Plain (Battlefield form) | N/A | •The enemy starts the battle with an Ore Club | Kass's Theme | ||
| 281 | Queen Metroid | Metroid Series | •King K. Rool |
13,300 | Brinstar (Battlefield form) | •Giant •Attack Power ↑ |
•The enemy is giant after a little while •Stamina battle •The enemy has increased attack power after a little while |
Boss Battle 4 - Metroid: Samus Returns | ||
| 283 |  |
Kraid | Metroid Series | •Giant King K. Rool |
10,000 | Brinstar Depths (Ω form) | •Jump Power ↓ •Move Speed ↓ |
•Stamina battle •The enemy is giant |
Brinstar Depths (Melee) | |
| 461 |  |
Snorlax | Pokémon Series | •Giant King K. Rool |
4,500 | Tortimer Island | N/A | •Timed stamina battle (1:00) •The enemy prefers not to move •The enemy heals over time |
Main Theme - Pokémon Red & Pokémon Blue (Melee) | |
| 474 | Wobbuffet | Pokémon Series | •Reflect King K. Rool |
4,300 | The Great Cave Offensive (Battlefield form) | N/A | •The enemy reflects projectiles •The enemy favors down specials |
Pokémon Gold / Pokémon Silver Medley | ||
| 483 |  |
Tyranitar | Pokémon Series | •King K. Rool |
3,900 | Mushroomy Kingdom (Battlefield form) | •Sudden Damage | •You'll occasionally take sudden damage after a little while | Pokémon Gold / Pokémon Silver Medley | |
| 622 | Draug | Fire Emblem Series | •King K. Rool |
2,400 | Castle Siege (hazards off) | •Defense ↑ | •The enemy has super armor but moves slower •Stamina battle •The enemy has increased defense |
Under This Banner | ||
| 716 | Thanatos | Kid Icarus Series | •King K. Rool |
3,800 | Kalos Pokémon League (Battlefield form) | •Tiny •Giant |
•The enemy is giant •The enemy is tiny after a little while |
In the Space-Pirate Ship | ||
| 748 | Shake King | Wario Land Series | •King K. Rool |
1,900 | Pirate Ship (hazards off) | •Earthquake | •Periodic earthquakes will shake the stage •The enemy favors grabs and throws |
Ruins - Wario Land: Shake It! | ||
| 812 |  |
Emperor Bulblax | Pikmin Series | •Giant King K. Rool |
9,700 | Distant Planet (Ω form) | N/A | •The enemy has super armor and is hard to launch or make flinch •Stamina battle •The enemy is giant |
Main Theme - Pikmin (Remix) | |
| 938 | Bear Hugger | Punch-Out!! Series | •King K. Rool |
3,500 | Boxing Ring | N/A | •The enemy's throws have increased power •Stamina battle |
World Circuit Theme | ||
| 943 |  |
King Hippo | Punch-Out!! Series | •Giant King K. Rool |
9,500 | Boxing Ring | N/A | •Stamina battle •The enemy is giant |
Minor Circuit (Remix) | |
| 1,267 |  |
King Knight | Shovel Knight Series | •King K. Rool |
2,000 | Mushroom Kingdom U (Slide Lift Tower) | N/A | •The enemy's dash attacks have increased power •The enemy starts the battle with a Star Rod |
Flash in the Dark (Dr. Wily Stage 1) | |
| 1,329 | Cetacea | DRAGON QUEST Series | •Giant King K. Rool •Hero |
9,500 | Yggdrasil's Altar (Ω form) | N/A | •Defeat the main fighter to win •The enemy has super armor but moves slower •Timed stamina battle (1:30) •The enemy favors neutral air attack |
The Hero Goes Forth with a Determination | ||
| 1,420 |  |
Max Brass | ARMS | •King K. Rool |
12,600 | Norfair (Ω form) | •Attack Power ↑ •Giant |
•The enemy is giant when the enemy's at high damage •Stamina battle •The enemy has increased attack power when the enemy's at high damage |
Sky Arena | |
| 1,455 |  |
Master Kohga | The Legend of Zelda Series | •King K. Rool •Giant Mii Swordfighter |
3,400 | Suzaku Castle (Battlefield form) | •Item: Banana Peel | •Defeat the main fighter to win •The enemy favors neutral specials •Reinforcements will appear during the battle |
Woodlands - The Legend of Zelda: Tri Force Heroes | |
As a minion[edit]
| Spirit | Battle parameters | Inspiration | |||||||||
|---|---|---|---|---|---|---|---|---|---|---|---|
| No. | Image | Name | Series | Enemy Fighter(s) | Type | Power | Stage | Rules | Conditions | Music | Character |
| 782 |  |
Chaotix | Sonic The Hedgehog Series | •Sonic •Pichu •King K. Rool |
1,600 | Windy Hill Zone | •Invisibility | •The enemy is invisible | Sonic Heroes | Vector the Crocodile | |
| 1,143 | Frog & Snake | Kaeru no Tame ni Kane wa Naru | •Greninja •King K. Rool |
3,600 | Dream Land GB (Castle Lololo interior) | •Assist Trophy Enemies (Sablé Prince) | •Hostile assist trophies will appear | Kirby Retro Medley (Castle Lololo) | Snake | ||
| 1,271 | Allen | Culdcept Series | •Shulk •King K. Rool •Ridley |
3,500 | Arena Ferox | •Item: Assist Trophy | •Defeat the main fighter to win •Reinforcements will appear during the battle |
Worthy Rival Battle | Werebear | ||
Alternate costumes[edit]

| |||||||

|

|

|

|

|

|

|

|
Reveal trailer[edit]
Gallery[edit]
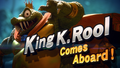
King K. Rool's splash art.
King K. Rool's amiibo.
King K. Rool's fighter card.
King K. Rool's unlock notice.
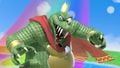
Posing on Green Greens.
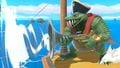
Using Blunderbuss on Pirate Ship.
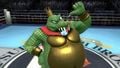
Posing on Boxing Ring.
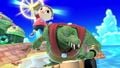
Villager taking out K. Rool's Pocketed crown on Tortimer Island.
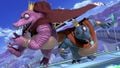
His pink and blue alternate costumes on Prism Tower.
Steve striking K. Rool with his down tilt on Gerudo Valley.


Fighter Showcase Video[edit]
Trivia[edit]
- Ultimate marks King K. Rool's first major video game appearance in over a decade, last appearing in Mario Super Sluggers, released in 2008.
- King K. Rool is one of five Ultimate newcomers that were previously Mii Costumes in Super Smash Bros. 4, alongside Inkling, Daisy, Chrom, and Isabelle.
- According to Masahiro Sakurai, King K. Rool's inclusion in Ultimate was a result of his popularity in the Super Smash Bros. Fighter Ballot.[1]
- As a result of K. Rool's inclusion, fans of the character issued a thank you letter to Masahiro Sakurai and Nintendo of America for including him as a fighter. The letter was signed by fans, and Nintendo of America even wrote back to the fans, expressing gratitude towards them for the fan letter.
- King K. Rool is the second fighter whose back aerial meteor smashes opponents, with the first being Lucas.
- King K. Rool is also the second fighter who has a smash attack (his up smash) that is able to meteor smash, with the first being Bayonetta's down smash.
- King K. Rool is the second fighter to have both a counterattack and a reflector in his default moveset, with the first being Palutena.
- King K. Rool is the only fighter to have a taunt that utilizes armor.
- Pausing and zooming in on and around King K. Rool during his side taunt reveals a gap between his scales and his belly armor.[2]
- If King K. Rool gets caught by a grab that uses a unique animation on capturing characters (Flame Choke, Snake's grab, etc.) while using his forward smash, the boxing glove will remain on his hand until he gets released.
- King K. Rool's animation when using the Home-Run Bat's forward smash utilizes a one-handed swing, similar to his batting stance in Mario Super Sluggers.
- In the Canadian French version, the name tag and voice clip from the announcer on the victory screen is slightly different from the one used on the character select screen, instead featuring a noticeable translation of "the" (le Roi K. Rool).
- King K. Rool's description from the North American amiibo website is based on his NTSC trophy description from SSB4.
References[edit]
|
| |
|---|---|
| Fighters | Donkey Kong (SSB · SSBM · SSBB · SSB4 · SSBU) · Diddy Kong (SSBB · SSB4 · SSBU) · King K. Rool (SSBU) |
| Assist Trophy | Klaptrap |
| Boss | Giant Donkey Kong |
| Stages | Kongo Jungle · Kongo Falls · Jungle Japes · Rumble Falls · 75m · Jungle Hijinxs |
| Items | Hammer · Barrel Cannon · Peanut · Spring |
| Enemies | Kritter · Tiki Buzz |
| Other | Dixie Kong · DK Barrel · DK Island · Pauline · Zinger |
| Trophies, Stickers and Spirits | Trophies (SSBM · SSBB · SSB4) · Stickers · Spirits |
| Music | Brawl · SSB4 · Ultimate |
| Masterpiece | Donkey Kong |
| Related universe | Mario |