Donkey Kong (SSBU): Difference between revisions
(→Attributes: It looks like Engrish) |
No edit summary Tag: Mobile edit |
||
| (407 intermediate revisions by more than 100 users not shown) | |||
| Line 10: | Line 10: | ||
|ssbgame4 = SSB4 | |ssbgame4 = SSB4 | ||
|availability = [[Starter character|Starter]] | |availability = [[Starter character|Starter]] | ||
|tier = D+ | |||
|ranking = 68 | |||
}} | }} | ||
'''Donkey Kong''' ({{ja|ドンキーコング|Donkī Kongu}}, ''Donkey Kong'') is a playable character in ''[[Super Smash Bros. Ultimate]]''. Initially teased in the then-unnamed ''Ultimate''{{'}}s announcement trailer, Donkey Kong was confirmed on June 12th, 2018. Donkey Kong is classified as [[Fighter number|Fighter #02]]. | |||
'''Donkey Kong''' ({{ja|ドンキーコング|Donkī Kongu}}, ''Donkey Kong'') is a playable character in ''[[Super Smash Bros. Ultimate]]''. | |||
Donkey Kong retains his | Donkey Kong retains his gorilla-like grunts and roars from ''[[Super Smash Bros. 4]]'', instead of using his voice actor, Takashi Nagasako. | ||
Donkey Kong is ranked 68th out of 82 on the current tier list, placing him in the D+ tier. This is a significant drop from his 22nd out of 54 placement in ''SSB4''. Donkey Kong has surprisingly good mobility for a superheavyweight, having both a good dash and air speed. He also has a strong set of normals in his moveset. His down tilt has a chance to trip; his up tilt is a solid anti air that can kill at high percents, and his forward tilt is a good spacing tool. His aerials are all good as they serve their purpose in Donkey Kong's strong advantage state, with back aerial as a good walling and edgeguarding option, up air as a strong juggling and KO tool, down aerial and forward aerial for spiking opponents offstage, and neutral aerial as a good get off me or landing option. Donkey Kong also possesses one of the best throws in the game with cargo throw, which is a reason why he does fine against a lot of characters with poor to mediocre recoveries. His specials are also improved as [[Giant Punch]] became a more viable move to challenge opponents; [[Headbutt]] has the ability to break shields; [[Spinning Kong]] can be a useful out of shield option; and [[Hand Slap]] can be used to set up for kill confirms. | |||
Donkey Kong has a lot of flaws to counteract his strengths. Despite having a strong advantage state, his disadvantage state is among one of the worst in the game. Donkey Kong has little to no option to escape from combos due to his frame 4 air dodge, and not having many moves that are fast enough to combo break. As a result, this makes him one of the easiest characters to juggle. DK has a lackluster and risky [[neutral game]], especially when his opponent is at low percents, as his attacks have high ending lag and a decent chunk of them are unsafe on hit at low percents, while most of his out-of-shield options are too slow to be reliable. His recovery is also one of the most exploitable in the game, as a simple spike is enough for Donkey Kong to quickly lose his stock, since [[Spinning Kong]] offers very little vertical distance. | |||
Donkey Kong is a character who can do a lot of damage and get early KOs but one simple mistake might make it hard for him to get back into the game. He has seen some results from players, such as {{Sm|ChunkyKong}} and {{Sm|HIKARU}}, taking him decently far in tournaments. | |||
==Attributes== | ==Attributes== | ||
Donkey Kong is unsurprisingly a large [[Weight|super heavyweight]], having the same weight value as {{SSBU|King Dedede}}, and is the third-heaviest character in the game behind {{SSBU|Bowser}} and {{SSBU|King K. Rool}}. Despite this, he | Donkey Kong is unsurprisingly a large [[Weight|super heavyweight]], having the same weight value as {{SSBU|King Dedede}}, and is the third-heaviest character in the game behind {{SSBU|Bowser}} and {{SSBU|King K. Rool}}. Despite this, he's one of the fastest heavy characters in the game, both in terms of general mobility and attack speed. He has the 10th fastest [[walk]]ing speed, the 29th fastest [[dash]]ing speed, the 16th highest [[traction]], above average [[falling speed]] and jumping force, and is tied with {{SSBU|Mario}}, {{SSBU|Sonic}}, {{SSBU|Little Mac}}, and {{SSBU|Inkling}} for the 13th fastest [[air speed]]. In contrast, he has below average [[gravity]] and moderately slow [[air acceleration]]. | ||
A typical heavyweight is expected to possess moves with | A typical heavyweight is expected to possess moves with high power, and Donkey Kong is no exception to this - it is possibly his greatest attribute. Donkey Kong has no problem with setting up into KOs with moves that have both high power and decent [[range]]: his sweetspotted up tilt, smash attacks, aerials, back throw, [[Giant Punch]], and grounded [[Spinning Kong]] are all prime examples. His ability to take stocks with his powerful attacks is made easier with his decent approach. His mobility and size work together to give him an effective grounded approach and longer range, respectively. All of these attributes combined allow him to have an easier time fighting in close quarters and landing attacks on his opponents. He also has very strong survivability thanks to his aforementioned high weight and above average falling speed, which is also common for his archetype. In total, Donkey Kong's attributes give him some of the best overall endurance in the game, with only {{SSBU|Bowser}} and {{SSBU|King K. Rool}} surpassing him horizontally. | ||
Donkey Kong works well with his grounded moveset | Donkey Kong works well with his grounded moveset. His neutral attack has decent damage and startup. Forward tilt's long range makes it one of his main spacing tools and works better with its intangibility. Up tilt is a safe move to interrupt his opponents, with the move covering Donkey Kong's entire body, acting as an anti-air, and hitting through low platforms such as the ones on {{SSBU|Battlefield}}. Down tilt gives him a long range crouching option and has a chance to [[trip]] opponents. His dash attack works as a combo starter and a situational KO option at low and very high percentages, respectively. All of his smash attacks are notoriously strong and relatively fast, making them his go-to options for hard reads and scoring KOs. His aerial options also have considerable utility. His forward and down aerials are some of his best edgeguarding tools due to both of them being [[meteor smash]]es. His neutral aerial is hard to interrupt, helps him break out of combos, and is one of the strongest of its type in the game when hit clean. His up aerial serves as an effective vertical KO option (if the situation he's in allows for it) thanks to its high knockback, and it is also safe, as his head is intangible during it and it has modest end lag. His back aerial is his fastest aerial and is debatably an even better spacing tool than his forward tilt, being fast, long-ranged, and having a [[sex kick]]-like hitbox, with a long duration and high knockback when hit clean. His air speed allows his aerial moves to be used at their fullest potential and, with the exception of forward aerial, they’re all decently fast. | ||
A well-known part of his playstyle is his grab game, as he has a long grab that allows for setups into the rest of his moves. Although his down throw has little to no use, every other option does to some extent. His [[pummel]] is slower compared to many others in the cast, but deals decent damage. Up throw has combo potential into his aerials and back throw is his primary kill throw, but his forward throw is easily his most useful one and possibly the most unique part of his character. During his forward throw, Donkey Kong can move, jump, and walk off the stage while having the opponent in his hands, acting like he usually would outside of a typical grab (aside from being unable to use his other moves and having only one jump). Forward throw also gives Donkey Kong different types of throws based on what direction is pressed, basically giving him eight throws; these are commonly known as the "cargo throws." Cargo forward and down throw both work as niche edgeguarding options, with cargo down throw even being a [[semi-spike]]. Cargo back throw does good damage and is a very solid kill throw. It also has utility as a [[stage spike]] unless his opponent is able to properly tech it. Finally, cargo up throw has more combo potential than his vanilla up throw, being able to combo into his aerials at low percents. Cargo up throw also possesses fairly good kill power, since Donkey Kong can jump and then heave his opponents for additional height. | |||
Donkey Kong's special moves are also helpful for his gameplan. [[Giant Punch]] is his surprise KO and punish move, can be used to pressure the opponent, and has [[super armor]] if fully charged. [[Headbutt]] can [[bury]] opponents, which can allow him to setup into KOs, and spikes in the air. It has super armor during the move's startup and deals very high [[shield damage]] while also having deceptively long range, giving him a shield pressure option and the ability to call out poor shield positioning. Grounded [[Hand Slap]] has very long range and allows for stage control, but has no usage for aerial opponents, as it leaves Donkey Kong immobile and its hitbox only deals damage to grounded opponents. The aerial Hand Slap is his last move which can meteor smash and is fast, making it effective and easy to land. His final special move, [[Spinning Kong]], acts similarly to Bowser's [[Whirling Fortress]] as his primary [[out of shield]] option. It is hard to disrupt and is a multi-hit move with high damage. In the air, it works as an incredibly fast horizontal recovery option and deals a lot of damage if all the hits connect. Due to the speed [[Spinning Kong]] has in the air, it can work as an effective combo breaker. | |||
However, despite his versatile moveset and high power, Donkey Kong falls into a plethora of problems. His defensive game is very poor, a common issue for characters of his size. While his massive weight gives him very high endurance and his large frame is the reason his range is better than characters like {{SSBU|Mario}} and {{SSBU|Squirtle}}, it becomes a problem when having to dodge attacks which is hard for him because he is a very large target. His tie hurtbox is also extremely large, further exacerbating the issue. Coincidentally, just like those two previously mentioned fighters, he has frequent trouble dealing with characters that have disjoints due to his lack of projectiles, primarily against swordfighters such as {{SSBU|Shulk}} and {{SSBU|Ike}}, hitboxes on moves such as {{SSBU|Mewtwo}}'s up and back aerials, or fast multi-hits such as {{SSBU|Palutena}}'s neutral air. Donkey Kong's size also makes him vulnerable to combos and [[juggling]], which is worsened by his lack of combo breakers (outside of neutral aerial and up special). The reintroduction of directional air dodges makes his aerial defense even more linear, and the new air dodge's increased ending lag hurts all characters; it debatably hurts a character such as Donkey Kong the most. Moreover, his otherwise great forward throw (cargo throw) also has certain drawbacks - notably, the risk of trying to slam the opponent into the ledge with a backward cargo throw. Due to Donkey Kong's horrid vertical recovery, if the opponent either DIs fast enough, squat jumps on him or simply has better air reach, this attempt for an easy KO may backfire. The trajectory of both forward and back cargo throw also possess a minor challenge. Unlike traditional forward and back throws, Donkey Kong sends the opponent at a high vertical angle instead of horizontal. This makes it more situational if they will KO or not, especially cargo forward throw. Cargo back throw ironically has more vertical range than his cargo up throw and therefore has more usage KOing at the top of the screen than the side. Thus, the player may find more reliability in a normal back throw near the edge. | |||
Despite many of his moves having fast startup, Donkey Kong's moveset is made much slower by its ending lag, and most of his moves are not safe on hit at low percents. This forces him to be more careful with the moves he uses, as he can be heavily punished just for putting out one attack (a situation that can rapidly snowball due to his poor defensive options). Unlike the all-around heavyweight Bowser, perhaps Donkey Kong's most glaring weakness is his lack of out-of-shield options. Neither his neutral attack nor his tilts are enough to distance himself from an aggressive opponent if the player forces him to remain in shield. His forward tilt has good range, but lacks the power or perks of other super heavyweights, like Bowser's Tough Guy or King K. Rool's Belly Armour. A lot of his moves are also limited in some way despite their strengths: his smash attacks are slow and have very linear hitboxes; a chunk of his throws, despite their variety, don't have much utility; Giant Punch forces Donkey Kong to get up-close to the opponent to land the attack and needs to be charged for it to be effective; Headbutt and Hand Slap are both slow, causing them to be difficult to use for their intended purposes; and Spinning Kong, while it has decently long horizontal recovery distance, offers almost no vertical recovery and is prone to edgeguarding against meteor smashes, like {{SSBU|Captain Falcon}} and {{SSBU|Falco}}'s down aerials. | |||
All in all, Donkey Kong's mixture of fast mobility, fairly long range, high weight, decent combo potential, and excellent kill power make him adept and flexible in many different situations, but killing and pressuring opponents stand out as his biggest strengths. Despite this, DK's high weight, large hurtbox, and lack of good escape tools make him vulnerable to many combos. In addition, his recovery is extremely poor, and his moveset is frequently punishable due to the end lag on many of his moves. As such, Donkey Kong has to capitalize on his power and range to limit opponents' approaches in order to win matches. | |||
==Changes from ''[[Super Smash Bros. 4]]''== | ==Changes from ''[[Super Smash Bros. 4]]''== | ||
Donkey Kong received a mix of buffs and nerfs in his transition to Ultimate, | Donkey Kong received a mix of buffs and nerfs in his transition from ''SSB4'' to ''Ultimate''. Though he received more buffs than nerfs, the latter are more prominent than the former, as they either weakened or removed some of his best traits from ''SSB4''. Because of this, Donkey Kong has been nerfed overall. | ||
Donkey Kong has received several useful buffs, with those to his special moves being among the most notable. [[Giant Punch]] charges faster no longer leaves him helpless when used in the air, giving him a new edgeguarding option. [[Headbutt]] now grants him [[super armor]] before the hit comes, and moves also deal their full knockback when opponents are buried, both changes of which improve the moves' versatility. Grounded [[Spinning Kong]] has less difficulty linking its multi-hits and has faster super armor, while the aerial version is now a proper multi-hitting move with a finishing hit, making it safer. [[Hand Slap]] is generally faster and the aerial version has reduced landing lag, which gives Donkey Kong a useful combo starter and allows it to confirm into KOs at high percentages. Particularly, both it and Headbutt alleviate some of DK's difficulty with landing safely. | |||
His biggest buff, however, comes from a vastly improved forward throw (cargo throw), which is much harder to mash out of and has had its cargo throws' properties improved; this grants him much more options and turns it into his most versatile throw, and arguably the best throw in the game overall. His [[dash attack]] also has less ending lag, giving him another combo starter if the late hit is landed and making it much safer if shielded. Donkey Kong's already impressive KO power has been further increased as well, as most of his moves deal more knockback. Further miscellaneous buffs include [[up smash]]'s previously infamous hitboxes being larger, making the move much easier to land. | |||
Finally, Donkey Kong also benefits to some of the universal changes, as his already great mobility has improved from faster walking and dashing speeds, the universal 3-frame jumpsquat change improves his ground-to-air [[out of shield]] game and allows him for with combo opportunities, and the increased [[shieldstun]] and reduced [[landing lag]] on aerial attacks makes his attacks even safer on shield (despite the reduced shieldstun on aerials). | |||
However Donkey Kong | However, the few direct nerfs Donkey Kong received were severe enough to eclipse his buffs. Like {{SSBU|Bowser}}, his biggest nerf is to his previously infamous combo throw — his cargo up throw now has more knockback, which makes its combo potential more strict and noticeably neuters the effectiveness of its infamous "Ding Dong" KO confirm at high percentages unless it's initiated on a platform, often requiring a specific amount of [[rage]] to work. Although his grab game was overall buffed, Donkey Kong is one of the characters who suffers the most from the universal nerfing of grabs, making them less safe for him to use. His pummel was nerfed as well, making it less reliable for racking up damage. Thus, this makes it less feasible for Donkey Kong to rely on his grab as his main way to rack up damage, forcing him to use other methods to do so. | ||
Among his other direct nerfs, Donkey Kong's up aerial has had its animation altered, which shortens its range and hinders its versatility. Spinning Kong now gains less horizontal distance and no longer grants intangibility on startup, worsening his already poor recovery. Many of Donkey Kong's attacks, such as his tilts and his up aerial, no longer have disproportionately long intangibility, now only matching their hitbox duration. | |||
Although he has gained some notable benefits from them, the universal changes to gameplay mechanics hamper Donkey Kong more than they help him. While the universal increase in mobility, faster jumpsquat, and reduced landing lag on aerials improve his own mobility and combo game, it also means opponents are more likely to close the distance on him, giving them more combo opportunities. The increased shieldstun, reduced landing lag, and the universal nerfing of grabs also make it harder for Donkey Kong to react to a shielded attack; the universal nerfing of grabs is especially harmful, as it's one of the key points to his gameplan. Altogether, this hinders his grounded out-of-shield game, limiting him to directly contesting them by making use of his moves' super armor to muscle through them, which can be risky despite his large weight. Lastly, the changes to [[air dodging]] worsen Donkey Kong's recovery, as they give him less protection and make him easier to edgeguard. All of these changes worsen Donkey Kong's defensive game, which is further notable since the game's engine prioritizes more aggressive playstyles than defensive ones. This forces him not only to [[approach]] more, but to be more unpredictable at doing so. | |||
In the end, Donkey Kong has potentially received many more options for racking up damage and being less predictable, but the neutering of his KO confirm and grabs means he can no longer close out stocks as reliably as before. Though his strengths and weaknesses are more defined, the gameplay mechanics accentuate his weaknesses more when compared to his strengths, causing his nerfs to overshadow his buffs even despite the numerous buffs he received in game updates. As a result, Donkey Kong fares worse in ''Ultimate'' than he did in ''Smash 4''. | |||
{{SSB4 to SSBU changelist|char=Donkey Kong}} | |||
=== | ==Update history== | ||
Donkey Kong has been buffed via game updates. Initially, his most noteworthy buffs were to inconsistencies of two moves: forward aerial now autocancels properly (an issue that had been present since ''Melee'') and [[Giant Punch]]'s hitbox no longer shifts into the Z-axis, which would result in it missing opponents at point-blank range. Donkey Kong also benefits from the universal nerf on projectiles dealing less shield damage in update 3.0.0. | |||
After only receiving minor buffs for the first few game patches, update 6.0.0 gave Donkey Kong more noticeable buffs. His forward tilt deals significantly more knockback to the point of becoming a viable KO move, his neutral aerial deals more damage and knockback and has more range, and his Giant Punch reaches the maximum charge even faster than before and deals slightly more knockback. [[Spinning Kong]] was also improved, as the move's super armor starts three frames faster, it connects more reliably against airborne opponents, and the last hit deals more knockback. Finally, [[Hand Slap]] on the ground has less startup and less ending lag. | |||
After receiving some minor buffs, patch 13.0.1 buffed Donkey Kong yet again. The second hit of Donkey Kong’s neutral attack was given more active frames and had it’s ending lag reduced. [[Giant Punch]] was given more super armor on both the ground and in the air. Most notably, Donkey Kong’s down tilt was given 5 additional frames of hitstun, this allows him to follow up with another attack in certain situations. | |||
Overall, Donkey Kong has improved by a decent margin compared to how he fared during ''Ultimate''{{'}}s initial release. However, in comparison to the buffs gained by other lukewarmly received characters, Donkey Kong's buffs are fairly minor, so how much he has benefited from these changes is debatable. | |||
Donkey Kong has | |||
'''{{GameIcon|ssbu}} {{SSBU|1.2.0}}''' | '''{{GameIcon|ssbu}} {{SSBU|1.2.0}}''' | ||
{{UpdateList (SSBU)/1.2.0|char=Donkey Kong}} | |||
'''{{GameIcon|ssbu}} {{SSBU|2.0.0}}''' | '''{{GameIcon|ssbu}} {{SSBU|2.0.0}}''' | ||
{{UpdateList (SSBU)/2.0.0|char=Donkey Kong}} | |||
'''{{GameIcon|ssbu}} {{SSBU|3.0.0}}''' | '''{{GameIcon|ssbu}} {{SSBU|3.0.0}}''' | ||
{{UpdateList (SSBU)/3.0.0|char=Donkey Kong}} | |||
'''{{GameIcon|ssbu}} {{SSBU|3.1.0}}''' | '''{{GameIcon|ssbu}} {{SSBU|3.1.0}}''' | ||
{{UpdateList (SSBU)/3.1.0|char=Donkey Kong}} | |||
'''{{GameIcon|ssbu}} {{SSBU|4.0.0}}''' | '''{{GameIcon|ssbu}} {{SSBU|4.0.0}}''' | ||
{{UpdateList (SSBU)/4.0.0|char=Donkey Kong}} | |||
'''{{GameIcon|ssbu}} {{SSBU|6.0.0}}''' | |||
{{UpdateList (SSBU)/6.0.0|char=Donkey Kong}} | |||
'''{{GameIcon|ssbu}} {{SSBU|7.0.0}}''' | |||
{{UpdateList (SSBU)/7.0.0|char=Donkey Kong}} | |||
'''{{GameIcon|ssbu}} {{SSBU|9.0.0}}''' | |||
{{UpdateList (SSBU)/9.0.0|char=Donkey Kong}} | |||
'''{{GameIcon|ssbu}} {{SSBU|13.0.1}}''' | |||
{{UpdateList (SSBU)/13.0.1|char=Donkey Kong}} | |||
==Moveset== | ==Moveset== | ||
''For a gallery of Donkey Kong's hitboxes, see [[Donkey Kong (SSBU)/Hitboxes|here]].'' | |||
{{MovesetTable | {{MovesetTable | ||
|game=SSBU | |game=SSBU | ||
|neutralname= | |neutralname=Jab ({{ja|ジャブ|Jyabu}}) / Upper ({{ja|アッパー|Appā}}) | ||
|neutralcount=2 | |neutralcount=2 | ||
|neutral1dmg=4% | |neutral1dmg=4% | ||
|neutral2dmg=6% | |neutral2dmg=6% | ||
|neutraldesc=A hook followed by an uppercut. | |neutraldesc=A hook followed by an uppercut. The second hit has above average power for a neutral attack, although generally speaking its KO potential is unimpressive. It can chain into itself fairly reliably at low percentages however. | ||
|ftiltname= | |ftiltname=Kongo Backhand ({{ja|コンゴバックハンド|Kongo Bakkuhando}}) | ||
|ftiltangles=3 | |ftiltangles=3 | ||
|ftiltupdmg=9% | |ftiltupdmg=9% | ||
|ftiltsidedmg=8% | |ftiltsidedmg=8% | ||
|ftiltdowndmg=9% | |ftiltdowndmg=9% | ||
|ftiltdesc=A backhanded slap. Can be angled to deal more damage. | |ftiltdesc=A backhanded slap. Can be angled to deal more damage. It grants intangibility to his attacking arm on frames 6-9. | ||
|utiltname= | |utiltname=Spiderweb Sweep ({{ja|くもの巣はらい|Kumo no Su Harai}}) | ||
|utiltdmg=10% (hand), 9% (arm), 8% (elbow) | |utiltdmg=10% (hand), 9% (arm), 8% (elbow) | ||
|utiltdesc=An overhead arcing swipe. It deals more damage and knockback if the target is hit near DK's | |utiltdesc=An overhead arcing swipe. It deals more damage and knockback if the target is hit near DK's hand. It grants intangibility to his attacking arm on frames 5-11 and is one of the strongest up tilts in the game when sweetspotted. | ||
|dtiltname=Slouch Slap | |dtiltname=Slouch Slap ({{ja|ロースラップ|Rō Surappu}}, ''Low Slap'') | ||
|dtiltdmg=6% | |dtiltdmg=6% | ||
|dtiltdesc=A crouching swat. It has a chance to [[Tripping|trip]] opponents. | |dtiltdesc=A crouching swat. It has a 40% chance to [[Tripping|trip]] opponents, making it one of his best combo starters. Grants intangibility to his attacking arm (frames 5-7). | ||
|dashname= | |dashname=Rolling Attack ({{ja|ローリングアタック|Rōringu Atakku}}) | ||
|dashdmg=12% (clean), 9% (late) | |dashdmg=12% (clean), 9% (late) | ||
|dashdesc=The {{s|mariowiki|Roll Attack}}, his signature attack from ''{{s|mariowiki|Donkey Kong Country}}''. It deals less damage towards its end. | |dashdesc=The {{s|mariowiki|Roll Attack}}, his signature attack from ''{{s|mariowiki|Donkey Kong Country}}''. It deals less damage towards its end, granting it combo potential. | ||
|fsmashname= | |fsmashname=Dyna Clap ({{ja|ダイナクラップ|Daina Kurappu}}) | ||
|fsmashdmg={{ChargedSmashDmgSSBU|22}} (hands), {{ChargedSmashDmgSSBU|21}} (arms) | |fsmashdmg={{ChargedSmashDmgSSBU|22}} (hands), {{ChargedSmashDmgSSBU|21}} (arms) | ||
|fsmashdesc=A lunging {{s|mariowiki|clap}}. It deals slightly less damage if it hits with Donkey Kong's arms. | |fsmashdesc=A lunging {{s|mariowiki|clap}}. It deals slightly less damage and knockback if it hits with Donkey Kong's arms. It additionally grants intangibility to his head and arms on frames 20-26, effectively giving it disjointed hitboxes, and its ending lag is rather low for a smash attack with 31-32 frames, but its startup is slow, with its hitboxes coming out on frame 22. It’s also one of the more powerful forward smashes, with the uncharged sweetspot KOing Mario at 98% from the center of Final Destination with optimal DI and no rage. | ||
|usmashname= | |usmashname=Jumbo Press ({{ja|ジャンボプレス|Janbo Puresu}}) | ||
|usmashdmg={{ChargedSmashDmgSSBU|19}} | |usmashdmg={{ChargedSmashDmgSSBU|19}} | ||
|usmashdesc=An overhead clap. | |usmashdesc=An overhead clap. It grants intangibility to his head and arms (frames 12-15), effectively giving it disjointed hitboxes. It has immense power, being one of the strongest up smashes in the game, with it KOing Mario from the ground level of FD at 92% with optimal DI and no rage. In practice it will KO a bit sooner as it typically hits opponents in the air. Its startup is additionally rather fast for a move of its power (coming out in 14 frames), though it has a lengthy enough duration to be quite punishable (with the move's lasting 49 frames total). However it is hard to hit as its hitboxes are situated straight vertically above DK and aren't that large in size, while it lacks grounded launching hitboxes to launch grounded opponents into it like other vertically-placed up smashes have (e.g. Marcina's and R.O.B.'s up smashes). | ||
|dsmashname= | |dsmashname=Twin Beat ({{ja|ツインビート|Tsuin Bīto}}) | ||
|dsmashdmg={{ChargedSmashDmgSSBU|14}} (arms), {{ChargedSmashDmgSSBU|17}} (early, fists), {{ChargedSmashDmgSSBU|18}} (late, fists) | |dsmashdmg={{ChargedSmashDmgSSBU|14}} (arms), {{ChargedSmashDmgSSBU|17}} (early, fists), {{ChargedSmashDmgSSBU|18}} (late, fists) | ||
|dsmashdesc=Raises his arms overhead and then quickly swings them downward to perform [[Wikipedia:Professional wrestling attacks#Forearm club|forearm clubs]]. | |dsmashdesc=Raises his arms overhead and then quickly swings them downward to perform [[Wikipedia:Professional wrestling attacks#Forearm club|forearm clubs]]. It grants intangibility to his arms (frames 11-14), effectively giving the move disjointed hitboxes, and is his fastest smash attack startup-wise (frame 11), though it has the highest amount of endlag out of all his smash attacks (with 41 frames of endlag after hitboxes cease, and lasting 55 frames total). Without DI, it is very powerful for a down smash, with the sweetspot KOing Mario from ground level on FD at 109% with no rage, but the move launches at a 70 degree and is thus very susceptible to LSI, where with optimal DI Mario can survive up to 129%, making its KO power underwhelming for a heavily punishable smash attack. | ||
|nairname= | |nairname=Donkey Lariat ({{ja|ドンキーラリアット|Donkī Rariatto}}) | ||
|nairdmg={{ShortHopDmgSSBU| | |nairdmg={{ShortHopDmgSSBU|12}} (clean), {{ShortHopDmgSSBU|9}} (late) | ||
|nairdesc=Quickly spins around to perform [[Wikipedia:Professional wrestling attacks#Clothesline|discus clotheslines]] with both arms, similarly to [[Spinning Kong]]. | |nairdesc=Quickly spins around to perform [[Wikipedia:Professional wrestling attacks#Clothesline|discus clotheslines]] with both arms, similarly to [[Spinning Kong]]. While it isn't DK's fastest aerial in terms of startup, it does have the longest-lasting hitbox duration and is one of the strongest neutral aerials in the game when hit clean. | ||
|fairname= | |fairname=Hammer Knuckle ({{ja|ハンマーナックル|Hanmā Nakkuru}}) | ||
|fairdmg={{ShortHopDmgSSBU|16}} (clean), {{ShortHopDmgSSBU|15}} (late, hands), {{ShortHopDmgSSBU|13}} (late, arms) | |fairdmg={{ShortHopDmgSSBU|16}} (clean), {{ShortHopDmgSSBU|15}} (late, hands), {{ShortHopDmgSSBU|13}} (late, arms) | ||
|fairdesc=A [[Wikipedia:Professional wrestling attacks#Double axe handle|double axe handle]]. If [[sweetspot]]ted, the opponent is [[meteor smash]]ed. One of the strongest meteor smashes in the game, | |fairdesc=A [[Wikipedia:Professional wrestling attacks#Double axe handle|double axe handle]]. If [[sweetspot]]ted, the opponent is [[meteor smash]]ed. One of the strongest meteor smashes in the game, killing at around 35% offstage. It appears similar to his midair attack from ''{{s|mariowiki|Donkey Kong 64}}'', which itself was inspired by this attack due to ''Smash 64'' debuting before ''Donkey Kong 64''. | ||
|bairname= | |bairname=Kong Rocket ({{ja|コングロケット|Kongu Roketto}}) | ||
|bairdmg={{ShortHopDmgSSBU|13}} (clean), {{ShortHopDmgSSBU|8}} (late) | |bairdmg={{ShortHopDmgSSBU|13}} (clean), {{ShortHopDmgSSBU|8}} (late) | ||
|bairdesc=A back kick. | |bairdesc=A back kick. DK's strongest aerial when hit clean, killing Mario at around 130% from center stage. It is an extremely useful move as a whole due to its speed and power, and if used correctly, it can act as a Wall of Pain. One of the best back aerials in the game. | ||
|uairname= | |uairname=Air Headbutt ({{ja|エアヘッドバット|Ea Heddobatto}}) | ||
|uairdmg={{ShortHopDmgSSBU|13}} | |uairdmg={{ShortHopDmgSSBU|13}} | ||
|uairdesc=An | |uairdesc=An upwards arcing headbutt that appears visually similar to his side special, Headbutt. It grants intangibility to his head on frames 5-10 and is one of the more powerful up aerials, killing Mario at around 140% from ground level. Those features, along with its fast startup and fairly low ending lag, make it a good move for juggling. | ||
|dairname= | |dairname=Air Stampede ({{ja|エアスタンピード|Ea Sutanpīdo}}) | ||
|dairdmg={{ShortHopDmgSSBU|16}} (foot), {{ShortHopDmgSSBU|13}} (leg) | |dairdmg={{ShortHopDmgSSBU|16}} (foot), {{ShortHopDmgSSBU|13}} (leg) | ||
|dairdesc=A stomp. Its sweetspot is a strong [[meteor smash]], while its sourspot, which is close to Donkey Kong's chest, deals diagonal knockback. | |dairdesc=A stomp. Its sweetspot is a strong [[meteor smash]], while its sourspot, which is close to Donkey Kong's chest, deals diagonal knockback. Slightly weaker than his forward aerial, but it has faster startup. | ||
|grabname= | |grabname=Grab ({{ja|つかみ|Tsukami}}) | ||
|grabdesc=Reaches out. | |grabdesc=Reaches out with one hand. Donkey Kong's grab range is above average. | ||
|pummelname= | |pummelname=Grab Chop ({{ja|つかみチョップ|Tsukami Choppu}}) | ||
|pummeldmg=1.6% | |pummeldmg=1.6% | ||
|pummeldesc= | |pummeldesc=Chops the opponent's body. A slow but strong pummel. | ||
|fthrowname=Kong Karry | |fthrowname=Kong Karry ({{ja|リフティング|Rifutingu}}, ''Lifting'') | ||
|fthrowdmg=12% (forward, up), 13% (back), 11% (down) | |fthrowdmg=12% (forward, up), 13% (back), 11% (down) | ||
|fthrowdesc=Hauls the opponent on his shoulder, allowing him to move and jump around while still holding the opponent. Appears to be based off of when DK holds an item in ''Donkey Kong Country'', such as a Steel Keg. This gives him access to forward, back, up, and down throws that are distinct from his normal grabs. | |fthrowdesc=Hauls the opponent on his shoulder, allowing him to move and jump around while still holding the opponent. Appears to be based off of when DK holds an item in ''Donkey Kong Country'', such as a Steel Keg. This gives him access to forward, back, up, and down throws that are distinct from his normal grabs. He also gains Knockback-based Armor when he starts a throw instead of gaining Throw Invulnerability, of which allows him to resist up to 16 Units of Knockback, akin to {{SSBU|Bowser}}'s [[Tough Guy]]. | ||
''Forward'': | ''Forward'': Rears back and violently throws the opponent forward at a high angle. Able to stage spike if Donkey Kong faces the stage center. | ||
''Back'': Heaves the opponent | ''Back'': Heaves the opponent backwards using both hands, launching them at a slightly higher trajectory than the forwards variant. This is his most damaging cargo throw and possesses the best kill power as well. | ||
''Up'': Heaves the opponent | ''Up'': Heaves the opponent upwards. It can be used to start combos. It also has decent KO potential, with Donkey Kong able to jump on platforms for extra height. | ||
''Down'': A | ''Down'': A {{iw|wikipedia|bear hug}}. Donkey Kong gets a small boost upwards when using this move in the air, making it his safest throw offstage. | ||
When the opponent is too damaged to escape in time, all of these throws allow for easy [[stage spike]]s. Donkey Kong can simply walk off the edge, pull back and throw them against the underside. However, this carries significant risk, as the opponent can [[tech]] it and thus result in DK ending up too far below the edge to recover if his timing is off. | When the opponent is too damaged to escape in time, all of these throws allow for easy [[stage spike]]s. Donkey Kong can simply walk off the edge, pull back and throw them against the underside. However, this carries significant risk, as the opponent can [[tech]] it and thus result in DK ending up too far below the edge to recover if his timing is off. | ||
Kong Karry has | Kong Karry has a unique grab duration, equal to '''((90 + 1.7p) * 11 / 6) - g''', where '''p''' is the opponent's percent at the time of the carry's initiation, and '''g''' is the grab time passed prior to it (including [[button mashing]]). As a result, it lasts longer the earlier it is initiated after grabbing an opponent. As with standard grabs, button mashing reduces this amount by 8 frames per stick input, and 14.4 frames per button input (though they cannot be registered as quickly). | ||
|bthrowname= | |bthrowname=Reverse Throw ({{ja|反転投げ|Hanten Nage}}) | ||
|bthrowdmg=11% | |bthrowdmg=11% | ||
|bthrowdesc=Flings the opponent backward. DK's most damaging throw, it KOs even the heaviest characters | |bthrowdesc=Flings the opponent backward. DK's most damaging throw and one of the strongest back throws in the game, it KOs even the heaviest of characters below 170% near the edge without [[rage]]. | ||
|uthrowname= | |uthrowname=Coconut Toss ({{ja|ココナッツトス|Kokonattsu Tosu}}) | ||
|uthrowdmg=9% | |uthrowdmg=9% | ||
|uthrowdesc=Heaves the opponent upward with one arm. | |uthrowdesc=Heaves the opponent upward with one arm. | ||
|dthrowname= | |dthrowname=Bottom Shoot ({{ja|ボトムシュート|Botomu Shūto}}) | ||
|dthrowdmg=7% | |dthrowdmg=7% | ||
|dthrowdesc=Shoves the opponent into the ground with one arm. It launches opponents horizontally in front of DK. | |dthrowdesc=Shoves the opponent into the ground with one arm. It launches opponents horizontally in front of DK. Due to its high ending lag, it has little to no followups and is thus practically useless, despite having low knockback. | ||
|floorbname= | |floorbname= | ||
|floorbdmg=7% | |floorbdmg=7% | ||
| Line 284: | Line 186: | ||
|nsname=Giant Punch | |nsname=Giant Punch | ||
|nsdmg=10% (uncharged), 28% (tenth wind-up/fully charged grounded), 25% (tenth wind-up/fully charged aerial) | |nsdmg=10% (uncharged), 28% (tenth wind-up/fully charged grounded), 25% (tenth wind-up/fully charged aerial) | ||
|nsdesc=A wind-up punch which fully charges after ten wind-ups. When fully-charged, the punch deals excellent damage, grants super armor | |nsdesc=A wind-up punch which fully charges after ten wind-ups. When fully-charged, the punch deals excellent damage, grants super armor and is overall faster than if used uncharged. Its charge can be [[charge cancel]]ed and saved, and chosen when to be released after being fully charged. Unlike in ''Melee'', ''Brawl'', and ''Smash 4'', Giant Punch does not induce helplessness in the air, much like in ''Smash 64''. | ||
|ssname=Headbutt | |ssname=Headbutt | ||
|ssdmg=10% (grounded/sweetspot aerial), 8% (sourspot aerial) | |ssdmg=10% (grounded/sweetspot aerial), 8% (sourspot aerial) | ||
|ssdesc=A headbutt. The move [[Bury|buries]] the opponent, who will remain | |ssdesc=A headbutt. The move [[Bury|buries]] the opponent, who will remain trapped longer if the opponent has already been dealt a fair amount of damage. The aerial version will [[meteor smash]] the opponent if they are hit by its [[sweetspot]]. The move has [[super armor]] during startup, but only in the middle of the animation, providing no protection at the very beginning or the end. It has a deceptively large range and tremendous shield damage, so full power shields will barely manage to avoid breaking against this move. | ||
|usname=Spinning Kong | |usname=Spinning Kong | ||
|usdmg=5% (grounded hit 1), 1.4% (grounded hits 2-6), 4% (grounded hit 7), 5% (aerial hit 1), 1% (aerial hits 2-13), 2% (aerial hit 14) | |usdmg=5% (grounded hit 1), 1.4% (grounded hits 2-6), 4% (grounded hit 7), 5% (aerial hit 1), 1% (aerial hits 2-13), 2% (aerial hit 14) | ||
|usdesc=Rapidly spins around, trapping opponents and damaging them with a series of [[Wikipedia:Professional wrestling attacks#Clothesline|discus clotheslines]] and [[Wikipedia:Professional wrestling attacks#Spinning back fist|spinning backfists]] before launching them. | |usdesc=Rapidly spins around, trapping opponents and damaging them with a series of [[Wikipedia:Professional wrestling attacks#Clothesline|discus clotheslines]] and [[Wikipedia:Professional wrestling attacks#Spinning back fist|spinning backfists]] before launching them. It has good horizontal distance, but very little vertical distance. The grounded version grants Donkey Kong super armor on frame 5, making it a reliable tool for powering through many moves. The grounded version is also a potent KO option, especially at ledge, being able to even KO [[Weight|heavy characters]] around 70%-80% when used on Battlefield's ledge. Donkey Kong is immune to most windboxes during the move. | ||
|dsname=Hand Slap | |dsname=Hand Slap | ||
|dsdmg=14% (ground), 5% (midair hit 1), 6% (midair hit 2) | |dsdmg=14% (ground), 5% (midair hit 1), 6% (midair hit 2) | ||
|dsdesc=[[mariowiki:Hand Slap|Slaps the ground to cause earth-shaking vibrations]]. When grounded, Donkey Kong can keep pounding by repeatedly pressing the special button. The attack gives him some protection from opponents while grounded and has good range, but is unable to KO until extreme percentages due to its very low knockback growth. In midair, Donkey Kong will perform two midair slaps, the second hit being a powerful meteor smash that combos from the first slap. Originates from ''Donkey Kong Country''. | |dsdesc=[[mariowiki:Hand Slap|Slaps the ground to cause earth-shaking vibrations]]. When grounded, Donkey Kong can keep pounding by repeatedly pressing the special button. The attack gives him some protection from opponents while grounded and has good range, but is unable to KO until extreme percentages due to its very low knockback growth. In midair, Donkey Kong will perform two midair slaps, the second hit being a powerful meteor smash that combos from the first slap. Can combo into a KO confirm with up smash at 60%-80%. Originates from ''Donkey Kong Country''. | ||
|fsname=Jungle Rush | |fsname=Jungle Rush | ||
|fsdmg=12% (initial hit), 1.2% (rapid hits), 14% (final hit), 61.9% (maximum) | |fsdmg=12% (initial hit), 1.2% (rapid hits), 14% (final hit), 61.9% (maximum) | ||
|fsdesc=Punches forward. If the initial hit connects, Donkey Kong will then perform a long series of rapid punches. Has about same range as his forward smash, but extremely powerful, | |fsdesc=Punches forward. If the initial hit connects, Donkey Kong will then perform a long series of rapid punches. Has about the same range as his forward smash, but extremely powerful, killing Mario as low as 24% on Final Destination. | ||
}} | }} | ||
===Stats=== | |||
{{Attributes | |||
|weight = 127 | |||
|rweight = 3-4 | |||
|cast = 89 | |||
|dash = 2.09 | |||
|rdash = 29 | |||
|run = 1.873 | |||
|rrun = 29 | |||
|walk = 1.365 | |||
|rwalk = 10 | |||
|trac = 0.123 | |||
|rtrac = 16 | |||
|airfric = 0.015 | |||
|rairfric = 9-29 | |||
|air = 1.208 | |||
|rair = 13-17 | |||
|baseaccel = 0.01 | |||
|rbaseaccel = 59-66 | |||
|addaccel = 0.05 | |||
|raddaccel = 59-66 | |||
|gravity = 0.085 | |||
|rgravity = 57-59 | |||
|fall = 1.63 | |||
|rfall = 39-40 | |||
|ff = 2.608 | |||
|rff = 40 | |||
|jumpsquat = 3 | |||
|rjumpsquat = 1-88 | |||
|jumpheight = 34 | |||
|rjumpheight= 29-31 | |||
|shorthop = 17.3 | |||
|rshorthop = 22-23 | |||
|djump = 35.5 | |||
|rdjump = 28-30 | |||
}} | |||
===[[Announcer]] call=== | |||
{{audio|Needs announcer calls from other languages.}} | |||
<gallery> | |||
Donkey Kong English Announcer SSB4-SSBU.wav|English/Japanese/Chinese | |||
Donkey Kong French Announcer SSBU.wav|French | |||
Donkey Kong French EU Announcer SSBU.wav|French (PAL) | |||
Donkey Kong Russian Announcer SSBU.wav|Russian | |||
</gallery> | |||
===[[On-screen appearance]]=== | ===[[On-screen appearance]]=== | ||
Bursts out of a DK Barrel, | *Bursts out of a DK Barrel, frontflips thrice, lands and strikes a flexing pose. | ||
<gallery> | |||
DonkeyKongOnScreenAppearanceSSBU.gif|Donkey Kong's on-screen appearance | |||
</gallery> | |||
===[[ | ===[[Taunt]]s=== | ||
*'''Up | *'''Up taunt''': Beats his chest rapidly while scowling. | ||
*'''Side | *'''Side taunt''': Shakes himself with a humorous expression as if he is drying off. | ||
*'''Down | *'''Down taunt''': Faces the camera and shrugs while bellowing confusedly with a humorously shocked expression. | ||
<gallery> | <gallery> | ||
SSBUDonkeyKongTaunt1.gif|Donkey Kong's up taunt. | SSBUDonkeyKongTaunt1.gif|Donkey Kong's up taunt. | ||
| Line 311: | Line 264: | ||
</gallery> | </gallery> | ||
===[[Idle | ===[[Idle pose]]s=== | ||
* | *Leans forward slightly and assumes a cross-eyed expression, as if trying to stare at his own nose. | ||
* | *Lightly punches his open hand and then does a rotational shoulder stretch. | ||
<gallery> | <gallery> | ||
SSBUDonkeyKongIdle1.gif|Donkey Kong's first idle pose | SSBUDonkeyKongIdle1.gif|Donkey Kong's first idle pose. | ||
SSBUDonkeyKongIdle2.gif|Donkey Kong's second idle pose | SSBUDonkeyKongIdle2.gif|Donkey Kong's second idle pose. | ||
</gallery> | </gallery> | ||
===[[Crowd cheer]]=== | |||
<div class="tabber"> | |||
<div class="tabbertab" title="English, Japanese/Chinese, Italian, Dutch, French"> | |||
{| class="wikitable" border="1" cellpadding="4" cellspacing="1" | |||
|- | |||
!{{{name|}}} | |||
!Cheer (English) | |||
!Cheer (Japanese/Chinese) | |||
!Cheer (Italian) | |||
!Cheer (Dutch) | |||
!Cheer (French) | |||
|- | |||
! scope="row"|Cheer | |||
|[[File:Donkey Kong Cheer English SSBU.ogg|center]]||[[File:Donkey Kong Cheer Japanese SSBU.ogg|center]]||[[File:Donkey Kong Cheer Italian SSBU.ogg|center]]||[[File:Donkey Kong Cheer Dutch SSBU.ogg|center]]||{{NTSC}} [[File:Donkey Kong Cheer French NTSC SSBU.ogg|center]] <br> {{PAL}} [[File:Donkey Kong Cheer French PAL SSBU.ogg|center]] | |||
|- | |||
! scope="row"|Description | |||
|D - K! -- Donkey - Kong! || Don - key Kong! || Donkeeeey Kong! || Donkey Kong! || Donkey Kong! | |||
|} | |||
</div> | |||
<div class="tabbertab" title="German, Spanish, Russian, Korean"> | |||
{| class="wikitable" border="1" cellpadding="4" cellspacing="1" | |||
|- | |||
!{{{name|}}} | |||
!Cheer (German) | |||
!Cheer (Spanish) | |||
!Cheer (Russian) | |||
!Cheer (Korean) | |||
|- | |||
! scope="row"|Cheer | |||
|[[File:Donkey Kong Cheer German SSBU.ogg|center]]||{{NTSC}} [[File:Donkey Kong Cheer Spanish NTSC SSBU.ogg|center]] <br> {{PAL}} [[File:Donkey Kong Cheer Spanish PAL SSBU.ogg|center]]||[[File:Donkey Kong Cheer Russian SSBU.ogg|center]]||[[File:Donkey Kong Cheer Korean SSBU.ogg|center]] | |||
|- | |||
! scope="row"|Description | |||
|Don - key Kong! || Don - key Kong! || Don - key Kong! || Don - key Kong! | |||
|} | |||
</div> | |||
</div> | |||
===[[Victory pose]]s=== | ===[[Victory pose]]s=== | ||
*'''Left:''' Does a backflip and flexes his arms (his "character chosen" animation in ''Super Smash Bros.''). | *'''Left:''' Does a backflip and flexes his arms (his "character chosen" animation in ''Super Smash Bros.''). | ||
*'''Up:''' Holds his hands above his head and shakes them (his animation upon completing a bonus game in ''Donkey Kong Country'') | *'''Up:''' Holds his hands above his head and shakes them (his animation upon completing a bonus game in ''Donkey Kong Country''). He then continues to shake his hands while constantly looking left to right, as if thanking an offscreen crowd. | ||
*'''Right:''' Angrily beats his chest then looks at the camera. | *'''Right:''' Angrily beats his chest with a scowl and then looks at the camera. | ||
[[File:DKUniverseTheme.ogg|thumb|A cover of the short track that plays in ''{{s|mariowiki|Donkey Kong Country}}'' and subsequent games whenever a playable Kong defeated a boss or completed a bonus game.]] | [[File:DKUniverseTheme.ogg|thumb|A cover of the short track that plays in ''{{s|mariowiki|Donkey Kong Country}}'' and subsequent games whenever a playable Kong defeated a boss or completed a bonus game.]] | ||
<gallery> | <gallery> | ||
| Line 330: | Line 320: | ||
</gallery> | </gallery> | ||
==In competitive play== | ==In [[competitive play]]== | ||
Donkey Kong was met in the E3 demo build with a degree of cautious optimism. Although | ===Tier placement and history=== | ||
Donkey Kong was met in the E3 demo build with a degree of cautious optimism. Although players could no longer easily perform most of Donkey Kong's throw-based kill confirms from ''Smash 4'', including his infamous "Ding-Dong" combo, Donkey Kong players were willing to do away with this in favor of better frame data, speed, damage, and hitboxes, most notably on his tilts and dash attack, and hoped that he would play differently from {{SSBU|Bowser}}. Though DK was considered one of the worst heavyweights from the demo, thought to be only marginally better than {{SSBU|Ridley}}, players were excited for Donkey Kong's opportunities in competitive play. | |||
Upon the game's release, however, Donkey Kong fell out of favor very quickly, for a number of reasons. The biggest issue is his low-percent safety: many of Donkey Kong's moves are punishable on hit at early percents, making his neutral rather egregious in a meta favoring speed and punish games. His already poor disadvantage state was also made even worse due to his larger hurtbox and his out of shield options remaining poor. Although Donkey Kong has been buffed in patches, none of Donkey Kong's biggest flaws were addressed. As a result, despite efforts from dedicated players such as {{Sm|LeSou}} and {{Sm|YMCA}} pre-pandemic, {{Sm|HIKARU}} briefly post-pandemic, and {{Sm|ChunkyKong}} online, Donkey Kong was mostly used as an occasional counterpick during the early metagame. As such, he is commonly ranked as a low tier, with some players such as {{Sm|Dabuz}}, {{Sm|Maister}} and {{Sm|ESAM}} ranking him as one of the absolute worst characters in the entire game. Regardless, he is ranked 68th on the current tier list. | |||
=== | ===Most historically significant players=== | ||
<!-- | <!--This character has a ten player limit for this section. Before adding and/or removing a player, read these guidelines: https://www.ssbwiki.com/SmashWiki:Notability#%22Most_historically_significant_players%22_guidelines --> | ||
''See also: [[:Category:Donkey Kong players (SSBU)]]'' | |||
*{{Sm|HIKARU|Japan}} - | |||
*{{Sm| | *{{Sm|ChunkyKong|USA}} - The current best Donkey Kong player in the world. Placed 13th at {{Trn|Let's Make Moves Miami}}, 17th at {{Trn|Super Smash Con 2022}}, 25th at {{Trn|InfinityCON Tally 2021}}, and 33rd at both {{Trn|CEO 2021}} and {{Trn|CEO 2022}} with wins over players such as {{Sm|Kola}}, {{Sm|MuteAce}}, and {{Sm|Goblin}}. He is also the best online Donkey Kong player in the United States, placing 2nd at both {{Trn|Get Clipped 3}} and {{Trn|Get Clipped 7}}, 9th at both {{Trn|Frame Perfect Series 3: ONLINE}} and {{Trn|Steal the Show 5: Heist in Smashville}}, and 13th at {{Trn|HABBY Birthday 2020}}. Formerly ranked 44th on the [[Wi-Fi Warrior Rank v6]]. | ||
*{{Sm| | *{{Sm|Doctor A Ness|Australia}} - The best Donkey Kong in Australia during the early metagame, but has since been banned. Placed 5th at both {{Trn|Battle Arena Melbourne 11}} and {{Trn|BigWinChampionship 2}}, 7th at {{Trn|Phantom 2020}}, and 9th at {{Trn|Sunny Side Up}} with wins over players such as {{Sm|Purple~H}}, {{Sm|Sriks}}, and {{Sm|Ben Gold}}. Currently ranked 8th on the [[Australian Power Rankings]]. | ||
*{{Sm|HIKARU|Japan}} - Tri-mains {{SSBU|Sora}} and {{SSBU|Roy}} with Donkey Kong and was the best Donkey Kong player in the world prior to his retirement. Placed 3rd at {{Trn|Ultimate Fighting Arena 2022}}, 5th at {{Trn|Sumabato SP 12}}, 9th at {{Trn|Umebura SP 3}}, 13th at {{Trn|Maesuma TOP 4}}, and 17th at {{Trn|EVO Japan 2020}} with wins over players such as {{Sm|Glutonny}}, {{Sm|KEN}}, and {{Sm|zackray}}. | |||
*{{Sm|LeSou|Mexico}} - One of the best Donkey Kong players in the world during the early metagame. Placed 5th at {{Trn|Smash Fest to the Sky}}, 9th at {{Trn|Ragnarok}}, {{Trn|WeTecThose 9}}, and {{Trn|Abierto Guadalajara Ultimo Reto}}, and 17th at {{Trn|Smash Factor 8}} with wins over players such as {{Sm|Cloudy}}, {{Sm|Meme}}, and {{Sm|Joker}}. | |||
*{{Sm|YMCA|USA}} - One of the best Donkey Kong players in the United States during the early metagame. Placed 9th at {{Trn|SIEGE 2019}}, 13th at {{Trn|DreamHack Anaheim 2020}}, 25th at {{Trn|2GG: Nightmare on Smashville}}, and 65th at {{Trn|EVO 2019}} with wins over players such as {{Sm|Klaatu}}, {{Sm|NAKAT}}, and {{Sm|Ignaize}}. | |||
=={{SSBU|Classic Mode}}: Journey to New Donk City== | =={{SSBU|Classic Mode}}: Journey to New Donk City== | ||
[[File:SSBU Congratulations Donkey Kong.png|thumb | [[File:SSBU Congratulations Donkey Kong.png|thumb|Donkey Kong's congratulations screen.]] | ||
Donkey Kong's path chronicles Donkey Kong traveling from his home to New Donk City | Donkey Kong's path chronicles Donkey Kong traveling via plane (Pilotwings) from the jungle (his home stages) to New Donk City (through urban stages, Onett and Moray Towers). After defeating Diddy Kong, he becomes Donkey Kong's partner for the rest of the mode, referencing the original ''Donkey Kong Country''. | ||
{|class="wikitable | {|class="wikitable" style="text-align:center" | ||
!Round!!Opponent!!Stage!!Music!!Notes | !Round!!Opponent!!Stage!!Music!!Notes | ||
|- | |- | ||
|1||{{ | |1||{{CharHead|Diddy Kong|SSBU|hsize=20px}}||{{SSB|Kongo Jungle}}||''{{SSBUMusicLink|Donkey Kong|Jungle Level (64)}}''|| | ||
|- | |- | ||
|2||{{ | |2||{{CharHead|King K. Rool|SSBU|hsize=20px}}||[[Kongo Falls]]||''{{SSBUMusicLink|Donkey Kong|Gang-Plank Galleon}}''||rowspan="5"|{{Head|Diddy Kong|g=SSBU|s=20px}} Diddy Kong is a CPU ally. | ||
|- | |- | ||
|3||{{ | |3||{{CharHead|Wario|SSBU|hsize=20px}} and {{CharHead|Captain Falcon|SSBU|hsize=20px}} ||[[Pilotwings]]||''{{SSBUMusicLink|Donkey Kong|Gear Getaway}}'' | ||
|- | |- | ||
|4||{{ | |4||{{CharHead|Ness|SSBU|hsize=20px}} and {{CharHead|Lucas|SSBU|hsize=20px}}||[[Onett]]||''{{SSBUMusicLink|Donkey Kong|The Map Page / Bonus Level (Remix)}}'' | ||
|- | |- | ||
|5|| | |5||{{Head|Inkling|g=SSBU|s=24px}}{{Head|Inkling|g=SSBU|s=24px|cl=Blue}} {{SSBU|Inkling}} (x2)||[[Moray Towers]]||''{{SSBUMusicLink|Donkey Kong|Donkey Kong / Donkey Kong Jr. Medley}}'' | ||
|- | |- | ||
|6||{{ | |6||{{CharHead|Mario|SSBU|hsize=20px}} and {{CharHead|Luigi|SSBU|hsize=20px}} ||[[New Donk City Hall]]||''{{SSBUMusicLink|Super Mario Bros.|New Donk City}}'' | ||
|- | |- | ||
|colspan="5"|[[Bonus Stage]] | |colspan="5"|[[Bonus Stage]] | ||
|- | |- | ||
|Final||{{SSBU|Master Hand}}||New Donk City Hall ([[Ω form]])||''{{SSBUMusicLink|Super Smash Bros.|Master Hand}}'' <small>(Less than 7.0 intensity)</small><br>''{{SSBUMusicLink|Super Smash Bros.|Master Hand / Crazy Hand}}'' <small>(Intensity 7.0 or higher)</small>||{{Head|Diddy Kong|g=SSBU|s=20px}} | |Final||{{SSBU|Master Hand}}||New Donk City Hall ([[Ω form]])||''{{SSBUMusicLink|Super Smash Bros.|Master Hand}}'' <small>(Less than 7.0 intensity)</small><br>''{{SSBUMusicLink|Super Smash Bros.|Master Hand / Crazy Hand}}'' <small>(Intensity 7.0 or higher)</small>|| {{Head|Diddy Kong|g=SSBU|s=20px}} Diddy Kong is a CPU ally.<br>On intensity 7.0 and higher, {{SSBU|Crazy Hand}} fights alongside Master Hand. | ||
|} | |} | ||
Note: Every stage until Round 6 plays a track from the {{uv|Donkey Kong}} universe, no matter what universe the stage originates from. | |||
Note 2: In Round 3, the music and stage also reference the Rocket Barrel levels in ''Donkey Kong Country Returns'', with Gear Getaway being among them. | |||
Note 3: In Round 5, the stage references 25m. | |||
[[Credits]] roll after completing Classic Mode. Completing it as Donkey Kong has ''{{SSBUMusicLink|Donkey Kong|Donkey Kong Country Returns (Vocals)}}'' accompany the credits. | |||
{{clr}} | {{clr}} | ||
===Character unlock tree=== | ===Character unlock tree=== | ||
Donkey Kong's Classic Mode character unlock tree includes the following characters in order: | Donkey Kong's Classic Mode character unlock tree includes the following characters in order: | ||
#{{SSBU|Bowser}} | #{{SSBU|Bowser}} | ||
#{{SSBU|Pokémon Trainer}} | #{{SSBU|Pokémon Trainer}} | ||
| Line 394: | Line 388: | ||
During the opening cutscene, Donkey Kong was present on the cliffside when [[Galeem]] unleashed his beams of light. Galeem's light beams vaporized Donkey Kong offscreen, placing him under Galeem's imprisonment along with the other fighters, excluding {{SSBU|Kirby}}. | During the opening cutscene, Donkey Kong was present on the cliffside when [[Galeem]] unleashed his beams of light. Galeem's light beams vaporized Donkey Kong offscreen, placing him under Galeem's imprisonment along with the other fighters, excluding {{SSBU|Kirby}}. | ||
He can be rescued in a jungle segment of | He can be rescued in a jungle segment of [[The Light Realm]], on a space that looks like the treehouse where he lives on his series. | ||
{{clrl}} | {{clrl}} | ||
===Fighter Battle=== | ===Fighter Battle=== | ||
{|class="wikitable | {|class="wikitable" style="width:100%;" | ||
|- | |- | ||
! style="width:5%;"|No. | !style="width:5%;"|No. | ||
! style="width:5%;"|Image | !style="width:5%;"|Image | ||
! Name | !Name | ||
! Type | !Type | ||
! Power | !Power | ||
! Stage | !Stage | ||
! Music | !Music | ||
|- | |- | ||
| 02 | |02 | ||
| [[File:Donkey Kong SSBU.png|center|108x108px]] | |[[File:Donkey Kong SSBU.png|center|108x108px]] | ||
| {{ | |Donkey Kong | ||
|{{SpiritType|Grab}} <center>{{color|#17ba17|Grab}}</center> | |||
| 3,300 | |3,300 | ||
| | |{{SSB|Kongo Jungle}} ([[Ω form]]) | ||
| ''{{SSBUMusicLink|Donkey Kong|Jungle Level (64)}}'' | |''{{SSBUMusicLink|Donkey Kong|Jungle Level (64)}}'' | ||
|} | |} | ||
{{ | {{clr}} | ||
==[[Spirit]]s== | ==[[Spirit]]s== | ||
Donkey Kong's | Donkey Kong's fighter spirit can be obtained by completing {{SSBU|Classic Mode}}. It is also available periodically for purchase in the shop for 300 Gold. Unlocking Donkey Kong in World of Light allows the player to preview the first spirit below in the Spirit List under the name "???". As a fighter spirit, it cannot be used in Spirit Battles and is purely aesthetic. His fighter spirit has an alternate version that replaces it with his artwork in ''Ultimate''. | ||
Additionally, Donkey Kong makes an appearance in a few | Additionally, Donkey Kong makes an appearance in a few primary (albeit in name only){{ref|a}} and support spirits. | ||
<center> | <center> | ||
<gallery> | <gallery> | ||
SSBU spirit Donkey Kong.png|134. '''''Donkey Kong''''' | |||
Donkey Kong & Lady.png|137. Donkey Kong & Lady | SSBU spirit Donkey Kong & Lady.png|137. Donkey Kong & Lady | ||
SSBU spirit Donkey Kong & Bongos.png|169. Donkey Kong & Bongos | |||
</gallery> | </gallery> | ||
</center> | </center> | ||
==In Spirit | ==In Spirit Battles== | ||
===As the main opponent=== | ===As the main opponent=== | ||
{|class="wikitable sortable" style="width:100%;" | {|class="wikitable sortable" style="width:100%;" | ||
! colspan=4|Spirit | ! colspan=4|Spirit | ||
! colspan=7|Battle parameters | ! colspan=7|Battle parameters | ||
! colspan=1|Inspiration | |||
|- | |- | ||
! style="width:5%;"|No. | ! style="width:5%;"|No. | ||
| Line 449: | Line 443: | ||
! Conditions | ! Conditions | ||
! Music | ! Music | ||
! Character | |||
|- | |- | ||
|36 | |36 | ||
|{{SpiritTableName|Goomba|link=y|size=64}} | |||
|{{ | |''Super Mario'' Series | ||
| ''Super Mario | |•Tiny {{SSBU|Donkey Kong}} Team {{Head|Donkey Kong|g=SSBU|s=20px|cl=Red}}×5 | ||
|•Tiny {{SSBU|Donkey Kong}} Team {{Head|Donkey Kong|g=SSBU|s=20px|cl=Red}} | |{{SpiritType|Neutral}} | ||
| | |||
|1,800 | |1,800 | ||
|{{SSB|Mushroom Kingdom}} ([[Battlefield form]]) | |{{SSB|Mushroom Kingdom}} ([[Battlefield form]]) | ||
| Line 461: | Line 455: | ||
|•Defeat an army of fighters | |•Defeat an army of fighters | ||
|{{SSBUMusicLink|Super Mario Bros.|Ground Theme - Super Mario Bros.}} | |{{SSBUMusicLink|Super Mario Bros.|Ground Theme - Super Mario Bros.}} | ||
| | |||
|- | |- | ||
|82 | |82 | ||
|{{SpiritTableName|Barrel Train|size=64}} | |||
|{{ | |''Mario Kart'' Series | ||
| ''Mario Kart | |||
|•{{SSBU|Donkey Kong}} {{Head|Donkey Kong|g=SSBU|s=20px|cl=Black}}<br>•{{SSBU|Diddy Kong}} {{Head|Diddy Kong|g=SSBU|s=20px|cl=Yellow}} | |•{{SSBU|Donkey Kong}} {{Head|Donkey Kong|g=SSBU|s=20px|cl=Black}}<br>•{{SSBU|Diddy Kong}} {{Head|Diddy Kong|g=SSBU|s=20px|cl=Yellow}} | ||
| | |{{SpiritType|Shield}} | ||
|3,500 | |3,500 | ||
|[[Spirit Train]] | |[[Spirit Train]] | ||
|•Item: | |•Item: [[Bullet Bill]] | ||
|•The enemy can deal damage by dashing into you<br>•The enemy has increased attack power<br>•The enemy has increased move speed | |•The enemy can deal damage by dashing into you<br>•The enemy has increased attack power<br>•The enemy has increased move speed | ||
|{{SSBUMusicLink|Mario Kart|Rainbow Road - Mario Kart: Double Dash!!}} | |{{SSBUMusicLink|Mario Kart|Rainbow Road - Mario Kart: Double Dash!!}} | ||
|Donkey Kong | |||
|- | |- | ||
|117 | |117 | ||
|{{SpiritTableName|Flies & Hand|link=y|size=64}} | |||
|{{ | |''Mario Paint'' Series | ||
| ''Mario Paint | |•Giant {{SSBU|Donkey Kong}} {{Head|Donkey Kong|g=SSBU|s=20px|cl=White}}<br>•Tiny {{SSBU|Dark Pit}} {{Head|Dark Pit|g=SSBU|s=20px|cl=Brown}}×4 | ||
|•Giant {{SSBU|Donkey Kong}} {{Head|Donkey Kong|g=SSBU|s=20px|cl=White}}<br> | |{{SpiritType|Attack}} | ||
| | |||
|4,000 | |4,000 | ||
|[[Living Room]] | |[[Living Room]] | ||
| | |•Assist Trophy Enemies (Flies & Hand)<br>•Item: [[Food]] | ||
|•Survive until the timer runs out<br>•Hostile assist trophies will appear | |•Survive until the timer runs out (1:00)<br>•Hostile assist trophies will appear | ||
|{{SSBUMusicLink|Super Mario Bros.|Mario Paint Medley}} | |{{SSBUMusicLink|Super Mario Bros.|Mario Paint Medley}} | ||
|Hand | |||
|- | |- | ||
|131 | |131 | ||
|{{SpiritTableName|Rabbid Kong|iw=mariowiki|size=64}} | |||
|{{ | |''Mario + Rabbids Kingdom Battle'' | ||
| ''Mario + Rabbids Kingdom Battle'' | |||
|•Bunny {{SSBU|Donkey Kong}} {{Head|Donkey Kong|g=SSBU|s=20px|cl=White}} | |•Bunny {{SSBU|Donkey Kong}} {{Head|Donkey Kong|g=SSBU|s=20px|cl=White}} | ||
| | |{{SpiritType|Attack}} | ||
|1,700 | |1,700 | ||
|[[3D Land]] | |[[3D Land]] | ||
|N/A | |N/A | ||
|•The enemy's punches and elbow strikes have increased power | |•The enemy's punches and elbow strikes have increased power | ||
|{{SSBUMusicLink| | |{{SSBUMusicLink|Other|Arcade Bunny's Theme}} | ||
| | |||
|- | |- | ||
|137 | |137 | ||
|{{SpiritTableName|Donkey Kong & Lady|size=64}} | |||
|{{ | |''Donkey Kong'' Series | ||
| ''Donkey Kong | |•Giant {{SSBU|Donkey Kong}} {{Head|Donkey Kong|g=SSBU|s=20px|cl=Yellow}} (250 HP)<br>•Ally: {{SSBU|Peach}} {{Head|Peach|g=SSBU|s=20px|cl=Red}} (120 HP) | ||
|•Giant {{SSBU|Donkey Kong}} {{Head|Donkey Kong|g=SSBU|s=20px|cl=Yellow}}<br>•Ally: {{SSBU|Peach}} {{Head|Peach|g=SSBU|s=20px|cl=Red}} | |{{SpiritType|Grab}} | ||
| | |||
|13,500 | |13,500 | ||
|[[75m]] | |[[75m]] | ||
|•Item Tidal Wave | |•Item Tidal Wave | ||
|•You lose if your CPU ally is KO'd<br>•The enemy has super armor and is hard to launch or make flinch<br>•Timed [[ | |•You lose if your CPU ally is KO'd<br>•The enemy has super armor and is hard to launch or make flinch<br>•Timed [[stamina battle]] (1:30) | ||
|{{SSBUMusicLink|Donkey Kong|Donkey Kong / Donkey Kong Jr. Medley}} | |{{SSBUMusicLink|Donkey Kong|Donkey Kong / Donkey Kong Jr. Medley}} | ||
|Original Donkey Kong (currently known as [[Cranky Kong]]) | |||
|- | |- | ||
|138 | |138 | ||
|{{SpiritTableName|Donkey Kong Jr.|size=64}} | |||
|{{ | |''Donkey Kong'' Series | ||
| ''Donkey Kong | |•{{SSBU|Donkey Kong}} {{Head|Donkey Kong|g=SSBU|s=20px|cl=Yellow}}<br>•Giant {{SSBU|Donkey Kong}} {{Head|Donkey Kong|g=SSBU|s=20px|cl=Yellow}} | ||
|•{{SSBU|Donkey Kong}} {{Head|Donkey Kong|g=SSBU|s=20px|cl=Yellow}}<br>•Giant Donkey Kong {{Head|Donkey Kong|g=SSBU|s=20px|cl=Yellow}} | |{{SpiritType|Grab}} | ||
| | |||
|9,000 | |9,000 | ||
|{{SSB|Kongo Jungle}} | |{{SSB|Kongo Jungle}} (hazards off) | ||
|N/A | |N/A | ||
|•Defeat the main fighter to win<br>•The enemy's throws have increased power<br>•Reinforcements will appear during the battle | |•Defeat the main fighter to win<br>•The enemy's throws have increased power<br>•Reinforcements will appear during the battle | ||
|{{SSBUMusicLink|Donkey Kong|Donkey Kong / Donkey Kong Jr. Medley}} | |{{SSBUMusicLink|Donkey Kong|Donkey Kong / Donkey Kong Jr. Medley}} | ||
|Original Donkey Kong (Giant Donkey Kong) | |||
|- | |- | ||
|140 | |140 | ||
|{{SpiritTableName|Cranky Kong|size=64}} | |||
|{{ | |''Donkey Kong'' Series | ||
| ''Donkey Kong | |||
|•{{SSBU|Donkey Kong}} {{Head|Donkey Kong|g=SSBU|s=20px|cl=White}} | |•{{SSBU|Donkey Kong}} {{Head|Donkey Kong|g=SSBU|s=20px|cl=White}} | ||
| | |{{SpiritType|Attack}} | ||
|9,700 | |9,700 | ||
|[[Jungle Japes]] | |[[Jungle Japes]] | ||
| Line 533: | Line 527: | ||
|•The floor is sleep-inducing | |•The floor is sleep-inducing | ||
|{{SSBUMusicLink|Donkey Kong|Opening - Donkey Kong}} | |{{SSBUMusicLink|Donkey Kong|Opening - Donkey Kong}} | ||
| | |||
|- | |- | ||
|143 | |143 | ||
|{{SpiritTableName|Swanky Kong|size=64}} | |||
|{{ | |''Donkey Kong'' Series | ||
| ''Donkey Kong | |||
|•{{SSBU|Donkey Kong}} {{Head|Donkey Kong|g=SSBU|s=20px|cl=Red}} | |•{{SSBU|Donkey Kong}} {{Head|Donkey Kong|g=SSBU|s=20px|cl=Red}} | ||
| | |{{SpiritType|Attack}} | ||
|1,700 | |1,700 | ||
|[[Kongo Jungle]] | |[[Kongo Jungle]] | ||
| Line 545: | Line 539: | ||
|•The enemy is easily distracted by items | |•The enemy is easily distracted by items | ||
|{{SSBUMusicLink|Donkey Kong|Funky's Fugue}} | |{{SSBUMusicLink|Donkey Kong|Funky's Fugue}} | ||
| | |||
|- | |- | ||
|144 | |144 | ||
|{{SpiritTableName|Wrinkly Kong|size=64}} | |||
|{{ | |''Donkey Kong'' Series | ||
| ''Donkey Kong | |||
|•Clear {{SSBU|Donkey Kong}} {{Head|Donkey Kong|g=SSBU|s=20px|cl=White}} | |•Clear {{SSBU|Donkey Kong}} {{Head|Donkey Kong|g=SSBU|s=20px|cl=White}} | ||
| | |{{SpiritType|Shield}} | ||
|3,500 | |3,500 | ||
|[[Luigi's Mansion]] | |[[Luigi's Mansion]] | ||
| Line 557: | Line 551: | ||
|•Your jumping power decreases when the enemy's at high damage<br>•The enemy is less affected by gravity<br>•The enemy starts with damage but is more powerful | |•Your jumping power decreases when the enemy's at high damage<br>•The enemy is less affected by gravity<br>•The enemy starts with damage but is more powerful | ||
|{{SSBUMusicLink|Donkey Kong|The Map Page / Bonus Level (Remix)}} | |{{SSBUMusicLink|Donkey Kong|The Map Page / Bonus Level (Remix)}} | ||
| | |||
|- | |- | ||
|149 | |149 | ||
|{{SpiritTableName|Chunky Kong|size=64}} | |||
|{{ | |''Donkey Kong'' Series | ||
| ''Donkey Kong | |||
|•{{SSBU|Donkey Kong}} {{Head|Donkey Kong|g=SSBU|s=20px|cl=Yellow}} | |•{{SSBU|Donkey Kong}} {{Head|Donkey Kong|g=SSBU|s=20px|cl=Yellow}} | ||
| | |{{SpiritType|Attack}} | ||
|3,800 | |3,800 | ||
|[[Jungle Japes]] | |[[Jungle Japes]] | ||
| Line 569: | Line 563: | ||
|•The enemy's punches and elbow strikes have increased power | |•The enemy's punches and elbow strikes have increased power | ||
|{{SSBUMusicLink|Donkey Kong|DK Rap}} | |{{SSBUMusicLink|Donkey Kong|DK Rap}} | ||
| | |||
|- | |- | ||
|150 | |150 | ||
|{{SpiritTableName|Rambi|size=64}} | |||
|{{ | |''Donkey Kong'' Series | ||
| ''Donkey Kong | |||
|•{{SSBU|Donkey Kong}} {{Head|Donkey Kong|g=SSBU|s=20px|cl=White}} | |•{{SSBU|Donkey Kong}} {{Head|Donkey Kong|g=SSBU|s=20px|cl=White}} | ||
| | |{{SpiritType|Attack}} | ||
|9,100 | |9,100 | ||
|[[Kongo Falls]] ([[Ω form]]) | |[[Kongo Falls]] ([[Ω form]]) | ||
| Line 581: | Line 575: | ||
|•The enemy can deal damage by dashing into you | |•The enemy can deal damage by dashing into you | ||
|{{SSBUMusicLink|Donkey Kong|Jungle Level (Brawl)}} | |{{SSBUMusicLink|Donkey Kong|Jungle Level (Brawl)}} | ||
| | |||
|- | |- | ||
|158 | |158 | ||
|{{SpiritTableName|Professor Chops|size=64}} | |||
|{{ | |''Donkey Kong'' Series | ||
| ''Donkey Kong | |||
|•{{SSBU|Donkey Kong}} {{Head|Donkey Kong|g=SSBU|s=20px|cl=White}} | |•{{SSBU|Donkey Kong}} {{Head|Donkey Kong|g=SSBU|s=20px|cl=White}} | ||
| | |{{SpiritType|Grab}} | ||
|1,700 | |1,700 | ||
|[[Kongo Falls]] | |[[Kongo Falls]] | ||
| Line 593: | Line 587: | ||
|•The enemy can instantly escape from movement-disabling moves | |•The enemy can instantly escape from movement-disabling moves | ||
|{{SSBUMusicLink|Donkey Kong|Jungle Hijinxs}} | |{{SSBUMusicLink|Donkey Kong|Jungle Hijinxs}} | ||
|{{s|mariowiki|Super Kong}} | |||
|- | |- | ||
|171 | |171 | ||
|{{SpiritTableName|Ninja Kong|size=64}} | |||
|{{ | |''Donkey Kong Jungle Beat'' | ||
| ''Donkey Kong Jungle Beat'' | |||
|•{{SSBU|Donkey Kong}} {{Head|Donkey Kong|g=SSBU|s=20px|cl=Black}} | |•{{SSBU|Donkey Kong}} {{Head|Donkey Kong|g=SSBU|s=20px|cl=Black}} | ||
| | |{{SpiritType|Shield}} | ||
|1,900 | |1,900 | ||
|[[Distant Planet]] ([[Battlefield form]]) | |[[Distant Planet]] ([[Battlefield form]]) | ||
| Line 605: | Line 599: | ||
|•The enemy's kicks and knee strikes have increased power<br>•The enemy favors side specials | |•The enemy's kicks and knee strikes have increased power<br>•The enemy favors side specials | ||
|{{SSBUMusicLink|Donkey Kong|Battle for Storm Hill}} | |{{SSBUMusicLink|Donkey Kong|Battle for Storm Hill}} | ||
| | |||
|- | |- | ||
|197 | |197 | ||
|{{SpiritTableName|Goron|size=64}} | |||
|{{ | |''The Legend of Zelda'' Series | ||
| ''The Legend of Zelda | |||
|•{{SSBU|Donkey Kong}} {{Head|Donkey Kong|g=SSBU|s=20px|cl=Yellow}} | |•{{SSBU|Donkey Kong}} {{Head|Donkey Kong|g=SSBU|s=20px|cl=Yellow}} | ||
| | |{{SpiritType|Shield}} | ||
|1,700 | |1,700 | ||
|[[The Great Cave Offensive]] ([[Battlefield form]]) | |[[The Great Cave Offensive]] ([[Battlefield form]]) | ||
| Line 617: | Line 611: | ||
|•The enemy's dash attacks have increased power<br>•The enemy favors dash attacks | |•The enemy's dash attacks have increased power<br>•The enemy favors dash attacks | ||
|{{SSBUMusicLink|The Legend of Zelda|Hidden Mountain & Forest}} | |{{SSBUMusicLink|The Legend of Zelda|Hidden Mountain & Forest}} | ||
| | |||
|- | |- | ||
|198 | |198 | ||
|{{SpiritTableName|Darunia|size=64}} | |||
|{{ | |''The Legend of Zelda'' Series | ||
| ''The Legend of Zelda | |•{{SSBU|Donkey Kong}} {{Head|Donkey Kong|g=SSBU|s=20px|cl=Yellow}}<br>•{{SSBU|Jigglypuff}} {{Head|Jigglypuff|g=SSBU|s=20px|cl=Blue}}×8 | ||
|•{{SSBU|Donkey Kong}} {{Head|Donkey Kong|g=SSBU|s=20px|cl=Yellow}}<br>•{{SSBU|Jigglypuff}} {{Head|Jigglypuff|g=SSBU|s=20px|cl=Blue}} | |{{SpiritType|Neutral}} | ||
| | |||
|1,400 | |1,400 | ||
|[[Gerudo Valley]] ([[Battlefield form]]) | |[[Gerudo Valley]] ([[Battlefield form]]) | ||
| Line 629: | Line 623: | ||
|•Defeat the main fighter to win<br>•The floor is lava<br>•The enemy starts the battle with a {{b|Hammer|item}} | |•Defeat the main fighter to win<br>•The floor is lava<br>•The enemy starts the battle with a {{b|Hammer|item}} | ||
|{{SSBUMusicLink|The Legend of Zelda|Hidden Mountain & Forest}} | |{{SSBUMusicLink|The Legend of Zelda|Hidden Mountain & Forest}} | ||
| | |||
|- | |- | ||
|240 | |240 | ||
|{{SpiritTableName|Daruk|size=64}} | |||
|{{ | |''The Legend of Zelda'' Series | ||
| ''The Legend of Zelda | |•{{SSBU|Donkey Kong}} {{Head|Donkey Kong|g=SSBU|s=20px|cl=Yellow}} (180 HP) | ||
|•{{SSBU|Donkey Kong}} {{Head|Donkey Kong|g=SSBU|s=20px|cl=Yellow}} | |{{SpiritType|Shield}} | ||
| | |||
|4,300 | |4,300 | ||
|[[Find Mii]] ([[Battlefield form]]) | |[[Find Mii]] ([[Battlefield form]]) | ||
| Line 641: | Line 635: | ||
|•The floor is lava<br>•[[Stamina battle]]<br>•The enemy's shield has extra durability | |•The floor is lava<br>•[[Stamina battle]]<br>•The enemy's shield has extra durability | ||
|{{SSBUMusicLink|The Legend of Zelda|Nintendo Switch Presentation 2017 Trailer BGM}} | |{{SSBUMusicLink|The Legend of Zelda|Nintendo Switch Presentation 2017 Trailer BGM}} | ||
| | |||
|- | |- | ||
|372 | |372 | ||
|{{SpiritTableName|Bonkers|link=y|size=64}} | |||
|{{ | |''Kirby'' Series | ||
| ''Kirby | |||
|•{{SSBU|Donkey Kong}} {{Head|Donkey Kong|g=SSBU|s=20px|cl=Blue}} | |•{{SSBU|Donkey Kong}} {{Head|Donkey Kong|g=SSBU|s=20px|cl=Blue}} | ||
| | |{{SpiritType|Attack}} | ||
|8,400 | |8,400 | ||
|{{SSB|Kongo Jungle}} | |{{SSB|Kongo Jungle}} | ||
| Line 653: | Line 647: | ||
|•The enemy starts the battle with a {{b|Hammer|item}}<br>•The enemy can swing the Hammer for a long time | |•The enemy starts the battle with a {{b|Hammer|item}}<br>•The enemy can swing the Hammer for a long time | ||
|{{SSBUMusicLink|Kirby|Forest Stage}} | |{{SSBUMusicLink|Kirby|Forest Stage}} | ||
| | |||
|- | |- | ||
|443 | |443 | ||
|{{SpiritTableName|Gengar|size=64}} | |||
|{{ | |''Pokémon'' Series | ||
| ''Pokémon | |||
|•{{SSBU|Donkey Kong}} {{Head|Donkey Kong|g=SSBU|s=20px|cl=Blue}} | |•{{SSBU|Donkey Kong}} {{Head|Donkey Kong|g=SSBU|s=20px|cl=Blue}} | ||
| | |{{SpiritType|Grab}} | ||
|4,300 | |4,300 | ||
|[[Luigi's Mansion]] ([[Battlefield form]]) | |[[Luigi's Mansion]] ([[Battlefield form]]) | ||
| Line 665: | Line 659: | ||
|•The floor is sleep-inducing | |•The floor is sleep-inducing | ||
|{{SSBUMusicLink|Pokémon|Pokémon Red / Pokémon Blue Medley}} | |{{SSBUMusicLink|Pokémon|Pokémon Red / Pokémon Blue Medley}} | ||
| | |||
|- | |- | ||
|506 | |506 | ||
| | |{{SpiritTableName|Abomasnow|link=y|size=64}} | ||
| | |''Pokémon'' Series | ||
| ''Pokémon | |||
|•{{SSBU|Donkey Kong}} {{Head|Donkey Kong|g=SSBU|s=20px|cl=White}} | |•{{SSBU|Donkey Kong}} {{Head|Donkey Kong|g=SSBU|s=20px|cl=White}} | ||
| | |{{SpiritType|Shield}} | ||
|2,300 | |2,300 | ||
|[[Summit]] ([[Battlefield form]]) | |[[Summit]] ([[Battlefield form]]) | ||
|•Item: [[Freezie]]<br>•Hazard: Ice Floor | |•Item: [[Freezie]]<br>•Hazard: Ice Floor | ||
|•The floor is frozen<br>•The enemy is weak to fire attacks<br>•Only certain Pokémon will emerge from Poké Balls ( | |•The floor is frozen<br>•The enemy is weak to fire attacks<br>•Only certain Pokémon will emerge from Poké Balls (Abomasnow) | ||
|{{SSBUMusicLink|Pokémon|Battle! (Wild Pokémon) - Pokémon Diamond / Pokémon Pearl}} | |{{SSBUMusicLink|Pokémon|Battle! (Wild Pokémon) - Pokémon Diamond / Pokémon Pearl}} | ||
| | |||
|- | |- | ||
|530 | |530 | ||
|{{SpiritTableName|Landorus (Therian Forme)|size=64}} | |||
|{{ | |''Pokémon'' Series | ||
| ''Pokémon | |||
|•{{SSBU|Donkey Kong}} {{Head|Donkey Kong|g=SSBU|s=20px|cl=Red}} | |•{{SSBU|Donkey Kong}} {{Head|Donkey Kong|g=SSBU|s=20px|cl=Red}} | ||
| | |{{SpiritType|Neutral}} | ||
|9,200 | |9,200 | ||
|[[Gerudo Valley]] | |[[Gerudo Valley]] (hazards off) | ||
|•Earthquake | |•Earthquake | ||
|•Periodic earthquakes will shake the stage after a little while | |•Periodic earthquakes will shake the stage after a little while | ||
|{{SSBUMusicLink|Pokémon|N's Castle}} | |{{SSBUMusicLink|Pokémon|N's Castle}} | ||
| | |||
|- | |- | ||
|552 | |552 | ||
|{{SpiritTableName|Bewear|link=y|size=64}} | |||
|{{ | |''Pokémon'' Series | ||
| ''Pokémon | |||
|•{{SSBU|Donkey Kong}} {{Head|Donkey Kong|g=SSBU|s=20px|cl=Pink}} | |•{{SSBU|Donkey Kong}} {{Head|Donkey Kong|g=SSBU|s=20px|cl=Pink}} | ||
| | |{{SpiritType|Attack}} | ||
|3,500 | |3,500 | ||
|{{SSB|Kongo Jungle}} | |{{SSB|Kongo Jungle}} | ||
|N/A | |N/A | ||
|•The enemy has super armor but moves slower<br>•Only certain Pokémon will emerge from Poké Balls ( | |•The enemy has super armor but moves slower<br>•Only certain Pokémon will emerge from Poké Balls (Bewear) | ||
|{{SSBUMusicLink|Pokémon|Battle! (Trainer) - Pokémon Sun / Pokémon Moon}} | |{{SSBUMusicLink|Pokémon|Battle! (Trainer) - Pokémon Sun / Pokémon Moon}} | ||
| | |||
|- | |- | ||
|608 | |608 | ||
| | |{{SpiritTableName|Polar Bear|link=y|size=64}} | ||
|''Ice Climber'' Series | |||
| ''Ice Climber | |•{{SSBU|Donkey Kong}} {{Head|Donkey Kong|g=SSBU|s=20px|cl=White}} (160 HP) | ||
|•{{SSBU|Donkey Kong}} {{Head|Donkey Kong|g=SSBU|s=20px|cl=White}} | |{{SpiritType|Attack}} | ||
| | |||
|9,300 | |9,300 | ||
|[[Summit]] ([[Battlefield form]]) | |[[Summit]] ([[Battlefield form]]) | ||
| Line 713: | Line 707: | ||
|•The enemy has super armor but moves slower<br>•[[Stamina battle]]<br>•Periodic earthquakes will shake the stage | |•The enemy has super armor but moves slower<br>•[[Stamina battle]]<br>•Periodic earthquakes will shake the stage | ||
|{{SSBUMusicLink|Ice Climber|Ice Climber (Melee)}} | |{{SSBUMusicLink|Ice Climber|Ice Climber (Melee)}} | ||
| | |||
|- | |- | ||
|807 | |807 | ||
|{{SpiritTableName|Purple Pikmin|customname=[[Pikmin (species)|Purple Pikmin]]|size=64}} | |||
|{{ | |''Pikmin'' Series | ||
|''Pikmin | |•Tiny {{SSBU|Donkey Kong}} Team {{Head|Donkey Kong|g=SSBU|s=20px|cl=Blue}}×10 (20 HP) | ||
|•Tiny {{SSBU|Donkey Kong}} Team {{Head|Donkey Kong|g=SSBU|s=20px|cl=Blue}} ( | |{{SpiritType|Shield}} | ||
| | |||
|3,500 | |3,500 | ||
|[[Distant Planet]] | |[[Distant Planet]] | ||
| Line 725: | Line 719: | ||
|•[[Stamina battle]]<br>•The enemy deals damage when falling<br>•Reinforcements will appear after an enemy is KO'd | |•[[Stamina battle]]<br>•The enemy deals damage when falling<br>•Reinforcements will appear after an enemy is KO'd | ||
|{{SSBUMusicLink|Pikmin|Forest of Hope}} | |{{SSBUMusicLink|Pikmin|Forest of Hope}} | ||
| | |||
|- | |- | ||
|937 | |937 | ||
| | |{{SpiritTableName|Mr. Sandman|size=64}} | ||
|Mr. Sandman | |''Punch-Out!!'' Series | ||
|''Punch-Out!! | |•{{SSBU|Donkey Kong}} {{Head|Donkey Kong|g=SSBU|s=20px|cl=Red}} (160 HP) | ||
|•{{SSBU|Donkey Kong}} {{Head|Donkey Kong|g=SSBU|s=20px|cl=Red}} | |{{SpiritType|Attack}} | ||
| | |||
|9,700 | |9,700 | ||
|[[Boxing Ring]] | |[[Boxing Ring]] | ||
| Line 737: | Line 731: | ||
|•The floor is sleep-inducing<br>•The enemy's smash attacks have increased power<br>•[[Stamina battle]] | |•The floor is sleep-inducing<br>•The enemy's smash attacks have increased power<br>•[[Stamina battle]] | ||
|{{SSBUMusicLink|Punch-Out!!|Minor Circuit (Original)}} | |{{SSBUMusicLink|Punch-Out!!|Minor Circuit (Original)}} | ||
| | |||
|- | |- | ||
|982 | |982 | ||
| | |{{SpiritTableName|Blanka|size=64}} | ||
|''Street Fighter'' Series | |||
|''Street Fighter | |•{{SSBU|Donkey Kong}} {{Head|Donkey Kong|g=SSBU|s=20px|cl=Green}} (140 HP) | ||
|•{{SSBU|Donkey Kong}} {{Head|Donkey Kong|g=SSBU|s=20px|cl=Green}} | |{{SpiritType|Shield}} | ||
| | |||
|3,700 | |3,700 | ||
|[[Jungle Japes]] | |[[Jungle Japes]] | ||
| Line 749: | Line 743: | ||
|•[[Stamina battle]]<br>•All fighters have reduced jump power<br>•The enemy starts the battle with a {{b|Screw Attack|item}} | |•[[Stamina battle]]<br>•All fighters have reduced jump power<br>•The enemy starts the battle with a {{b|Screw Attack|item}} | ||
|{{SSBUMusicLink|Street Fighter|Blanka Stage Type A}} | |{{SSBUMusicLink|Street Fighter|Blanka Stage Type A}} | ||
| | |||
|- | |- | ||
|1,101 | |1,101 | ||
|{{SpiritTableName|Master Giant|link=y|size=64}} | |||
|{{ | |''Super Smash Bros.'' Series | ||
|''Super Smash Bros. | |•Giant {{SSBU|Donkey Kong}} {{Head|Donkey Kong|g=SSBU|s=20px|cl=Black}} (160 HP) | ||
|•Giant {{SSBU|Donkey Kong}} {{Head|Donkey Kong|g=SSBU|s=20px|cl=Black}} | |{{SpiritType|Grab}} | ||
| | |||
|9,900 | |9,900 | ||
|{{SSBU|Final Destination}} | |{{SSBU|Final Destination}} | ||
| Line 761: | Line 755: | ||
|•Bob-ombs will rain from the sky after a little while<br>•The enemy has super armor and is hard to launch or make flinch<br>•[[Stamina battle]] | |•Bob-ombs will rain from the sky after a little while<br>•The enemy has super armor and is hard to launch or make flinch<br>•[[Stamina battle]] | ||
|{{SSBUMusicLink|Super Smash Bros.|Master Core}} | |{{SSBUMusicLink|Super Smash Bros.|Master Core}} | ||
| | |||
|- | |- | ||
|1,146 | |1,146 | ||
|{{ | |{{SpiritTableName|Muddy Mole|size=64}} | ||
|''Mole Mania'' | |''Mole Mania'' | ||
|•{{SSBU|Donkey Kong}} {{Head|Donkey Kong|g=SSBU|s=20px|cl=Red}} | |•{{SSBU|Donkey Kong}} {{Head|Donkey Kong|g=SSBU|s=20px|cl=Red}} | ||
| | |{{SpiritType|Grab}} | ||
|1,700 | |1,700 | ||
|[[The Great Cave Offensive]] ([[Battlefield form]]) | |[[The Great Cave Offensive]] ([[Battlefield form]]) | ||
|•Item: [[Pitfall]] | |•Item: [[Pitfall]] | ||
|•Take your strongest team into this no-frills battle | |•Take your strongest team into this no-frills battle | ||
|{{SSBUMusicLink|Kirby|Float Islands | |{{SSBUMusicLink|Kirby|Kirby Retro Medley}} (Float Islands) | ||
| | |||
|- | |- | ||
|1,200 | |1,200 | ||
|{{ | |{{SpiritTableName|Sumo Brothers|size=64}} | ||
| | |''Rhythm Heaven'' Series {{Flag|North America}}<br>''Rhythm Paradise'' Series {{Flag|PAL}} | ||
|'' | |•Giant {{SSBU|Donkey Kong}} {{Head|Donkey Kong|g=SSBU|s=20px|cl=Red}}{{Head|Donkey Kong|g=SSBU|s=20px|cl=Blue}} | ||
|•Giant {{SSBU|Donkey Kong}} | |{{SpiritType|Grab}} | ||
| | |||
|1,900 | |1,900 | ||
|[[Arena Ferox]] ([[Ω form]]) | |[[Arena Ferox]] ([[Ω form]]) | ||
| Line 785: | Line 779: | ||
|•The enemy's physical attacks have increased power<br>•Periodic earthquakes will shake the stage<br>•The enemy loves to taunt | |•The enemy's physical attacks have increased power<br>•Periodic earthquakes will shake the stage<br>•The enemy loves to taunt | ||
|{{SSBUMusicLink|Street Fighter|E. Honda Stage Type B}} | |{{SSBUMusicLink|Street Fighter|E. Honda Stage Type B}} | ||
| Red Sumo Brother (red costume)<br>Blue Sumo Brother (purple costume) | |||
|- | |- | ||
|1,339 | |1,339 | ||
|{{ | |{{SpiritTableName|Bottles|size=64}} | ||
|''Banjo-Kazooie'' Series | |||
|''Banjo-Kazooie | |||
|•{{SSBU|Donkey Kong}} {{Head|Donkey Kong|g=SSBU|s=20px|cl=Black}} | |•{{SSBU|Donkey Kong}} {{Head|Donkey Kong|g=SSBU|s=20px|cl=Black}} | ||
| | |{{SpiritType|Shield}} | ||
| | |3,900 | ||
|[[Spiral Mountain]] | |[[Spiral Mountain]] (Bottles) | ||
|•Invisibility<br>•Item: [[Pitfall]] | |•Invisibility<br>•Item: [[Pitfall]] | ||
|•The enemy is invisible<br>•The enemy favors side specials<br>•The enemy is easily distracted by items | |•The enemy is invisible<br>•The enemy favors side specials<br>•The enemy is easily distracted by items | ||
|{{SSBUMusicLink|Banjo-Kazooie|Spiral Mountain}} | |{{SSBUMusicLink|Banjo-Kazooie|Spiral Mountain}} | ||
| | |||
|- | |||
|1,396 | |||
|{{SpiritTableName|Goda|size=64}} | |||
|''River City'' Series | |||
|•{{SSBU|Donkey Kong}} {{Head|Donkey Kong|g=SSBU|s=20px|cl=Green}}<br>•{{SSBU|Diddy Kong}} {{Head|Diddy Kong|g=SSBU|s=20px|cl=Yellow}} | |||
|{{SpiritType|Neutral}} | |||
|2,000 | |||
|[[Onett]] | |||
|•Item: Battering Types | |||
|•Defeat the main fighter to win<br>•The enemy's side special has increased power<br>•The enemy favors side specials | |||
|{{SSBUMusicLink|Other|Golden Forest}} | |||
| | |||
|- | |||
|1,415 | |||
|{{SpiritTableName|Master Mummy|link=y|size=64}} | |||
|''ARMS'' | |||
|•{{SSBU|Donkey Kong}} {{Head|Donkey Kong|g=SSBU|s=20px|cl=White}} | |||
|{{SpiritType|Shield}} | |||
|3,400 | |||
|[[Dracula's Castle]] ([[Ω form]]) | |||
|N/A | |||
|•The enemy has super armor but moves slower<br>•The enemy favors grabs and throws | |||
|{{SSBUMusicLink|ARMS|Mausoleum}} | |||
| | |||
|- | |||
|1,485 | |||
|{{SpiritTableName|Jack-7|size=64}} | |||
|''Tekken'' series | |||
|•{{SSBU|Donkey Kong}} Team {{Head|Donkey Kong|g=SSBU|s=20px|cl=Green}}×5 (70 HP) | |||
|{{SpiritType|Neutral}} | |||
|1,800 | |||
|[[Mishima Dojo]] | |||
|N/A | |||
|•The enemy has super armor but moves slower<br>•[[Stamina battle]]<br>•The enemy favors neutral specials | |||
|{{SSBUMusicLink|Tekken|Abyss of Time}} | |||
| Jack-4s | |||
|} | |} | ||
===As a minion=== | ===As a minion=== | ||
{|class="wikitable sortable" style="width:100%;" | {|class="wikitable sortable" style="width:100%;" | ||
! colspan=4|Spirit | ! colspan=4|Spirit | ||
! colspan=7|Battle parameters | ! colspan=7|Battle parameters | ||
| Line 820: | Line 850: | ||
|- | |- | ||
|79 | |79 | ||
|{{SpiritTableName|Pauline|link=y|size=64}} | |||
|{{ | |''Super Mario'' Series | ||
|''Super Mario | |||
|•{{SSBU|Peach}} {{Head|Peach|g=SSBU|s=20px|cl=Red}}<br>•{{SSBU|Mario}} {{Head|Mario|g=SSBU|s=20px|cl=White}}<br>•Giant {{SSBU|Donkey Kong}} {{Head|Donkey Kong|g=SSBU|s=20px|cl=Red}} | |•{{SSBU|Peach}} {{Head|Peach|g=SSBU|s=20px|cl=Red}}<br>•{{SSBU|Mario}} {{Head|Mario|g=SSBU|s=20px|cl=White}}<br>•Giant {{SSBU|Donkey Kong}} {{Head|Donkey Kong|g=SSBU|s=20px|cl=Red}} | ||
| | |{{SpiritType|Shield}} | ||
|13,700 | |13,700 | ||
|[[75m]] | |[[75m]] (hazards off) | ||
|•Jump Power ↓ | |•Jump Power ↓ | ||
|•Defeat the main fighter to win<br>•You have reduced jump power<br>•Reinforcements will appear during the battle | |•Defeat the main fighter to win<br>•You have reduced jump power<br>•Reinforcements will appear during the battle<br>•''The enemy tends to avoid conflict'' | ||
|{{SSBUMusicLink|Super Mario Bros.|Jump Up, Super Star!}} | |{{SSBUMusicLink|Super Mario Bros.|Jump Up, Super Star!}} | ||
|Original Donkey Kong | |Original Donkey Kong | ||
|- | |- | ||
|141 | |141 | ||
|{{SpiritTableName|Funky Kong|size=64}} | |||
|{{ | |''Donkey Kong'' Series | ||
|''Donkey Kong | |||
|•{{SSBU|Captain Falcon}} {{Head|Captain Falcon|g=SSBU|s=20px|cl=Blue}}<br>•{{SSBU|Diddy Kong}} {{Head|Diddy Kong|g=SSBU|s=20px|cl=White}}<br>•{{SSBU|Donkey Kong}} {{Head|Donkey Kong|g=SSBU|s=20px|cl=Yellow}} | |•{{SSBU|Captain Falcon}} {{Head|Captain Falcon|g=SSBU|s=20px|cl=Blue}}<br>•{{SSBU|Diddy Kong}} {{Head|Diddy Kong|g=SSBU|s=20px|cl=White}}<br>•{{SSBU|Donkey Kong}} {{Head|Donkey Kong|g=SSBU|s=20px|cl=Yellow}} | ||
| | |{{SpiritType|Neutral}} | ||
|9,000 | |9,000 | ||
|{{SSB|Kongo Jungle}} | |{{SSB|Kongo Jungle}} | ||
|•Item: | |•Item: [[Bullet Bill]] | ||
|•The enemy is easily distracted by items | |•The enemy is easily distracted by items | ||
|{{SSBUMusicLink|Donkey Kong|Funky's Fugue}} | |{{SSBUMusicLink|Donkey Kong|Funky's Fugue}} | ||
| Line 859: | Line 874: | ||
|- | |- | ||
|238 | |238 | ||
|{{SpiritTableName|Zelda (Breath of the Wild)|size=64}} | |||
|{{ | |''The Legend of Zelda'' Series | ||
| ''The Legend of Zelda | |•{{SSBU|Zelda}} {{Head|Zelda|g=SSBU|s=20px|cl=Blue}} (50 HP)<br>•{{SSBU|Link}} {{Head|Link|g=SSBU|s=20px|cl=White}} (60 HP)<br>•{{SSBU|Inkling}} {{Head|Inkling|g=SSBU|s=20px|cl=Pink}} (30 HP)<br>•{{SSBU|Donkey Kong}} {{Head|Donkey Kong|g=SSBU|s=20px|cl=Yellow}} (60 HP)<br>•{{SSBU|Falco}} {{Head|Falco|g=SSBU|s=20px|cl=Blue}} (50 HP)<br>•{{SSBU|Zero Suit Samus}} {{Head|Zero Suit Samus|g=SSBU|s=20px|cl=ShortsBlue}} (50 HP) | ||
|•{{SSBU|Zelda}} {{Head|Zelda|g=SSBU|s=20px|cl=Blue}}<br>•{{SSBU|Link}} {{Head|Link|g=SSBU|s=20px|cl=White}}<br>•{{SSBU|Inkling}} {{Head|Inkling|g=SSBU|s=20px|cl=Pink}}<br>•{{SSBU|Donkey Kong}} {{Head|Donkey Kong|g=SSBU|s=20px|cl=Yellow}}<br>•{{SSBU|Falco}} {{Head|Falco|g=SSBU|s=20px|cl=Blue}}<br>•{{SSBU|Zero Suit Samus}} {{Head|Zero Suit Samus|g=SSBU|s=20px|cl=ShortsBlue}} | |{{SpiritType|Shield}} | ||
| | |||
|9,200 | |9,200 | ||
|[[Great Plateau Tower]] | |[[Great Plateau Tower]] | ||
| Line 872: | Line 886: | ||
|- | |- | ||
|1,132 | |1,132 | ||
|{{ | |{{SpiritTableName|Hockey Players|size=64}} | ||
|''Ice Hockey'' | |''Ice Hockey'' | ||
|•{{SSBU|Dr. Mario}} {{Head|Dr. Mario|g=SSBU|s=20px|cl=Blue}}<br>•{{SSBU|Donkey Kong}} {{Head|Donkey Kong|g=SSBU|s=20px|cl=White}}<br>•{{SSBU|Luigi}} {{Head|Luigi|g=SSBU|s=20px|cl=White}} | |•{{SSBU|Dr. Mario}} {{Head|Dr. Mario|g=SSBU|s=20px|cl=Blue}}<br>•{{SSBU|Donkey Kong}} {{Head|Donkey Kong|g=SSBU|s=20px|cl=White}}<br>•{{SSBU|Luigi}} {{Head|Luigi|g=SSBU|s=20px|cl=White}} | ||
| | |{{SpiritType|Attack}} | ||
|1,500 | |1,500 | ||
|[[Pokémon Stadium]] ([[Ω form]]) | |[[Pokémon Stadium]] ([[Ω form]]) | ||
| Line 883: | Line 896: | ||
|{{SSBUMusicLink|Wii Fit|Core Luge}} | |{{SSBUMusicLink|Wii Fit|Core Luge}} | ||
|Large hockey player | |Large hockey player | ||
|- | |||
|1,362 | |||
|{{SpiritTableName|Kyo Kusanagi|size=64}} | |||
|''THE KING OF FIGHTERS'' Series | |||
|•{{SSBU|Captain Falcon}} {{Head|Captain Falcon|g=SSBU|s=20px|cl=Black}}<br>•{{SSBU|Pikachu}} {{Head|Pikachu|g=SSBU|s=20px}}<br>•{{SSBU|Donkey Kong}} {{Head|Donkey Kong|g=SSBU|s=20px|cl=White}} | |||
|{{SpiritType|Attack}} | |||
|9,500 | |||
|[[King of Fighters Stadium]] | |||
|•Jump Power ↓ | |||
|•The enemy's explosion and fire attacks have increased power<br>•Reinforcements will appear after an enemy is KO'd<br>•All fighters have reduced jump power | |||
|{{SSBUMusicLink|Fatal Fury|ESAKA!! - KOF 2002 UM}} | |||
|[https://snk.fandom.com/wiki/Goro_Daimon Goro Daimon] | |||
|} | |} | ||
| Line 903: | Line 928: | ||
<gallery> | <gallery> | ||
SSBU Donkey Kong Number.png|Donkey Kong's fighter card. | SSBU Donkey Kong Number.png|Donkey Kong's fighter card. | ||
SSBUWebsiteDonkeyKong1.jpg|Donkey Kong [[grabbing]] on [[ | Donkey Kong unlock notice SSBU.jpg|Donkey Kong's unlock notice when obtaining him in [[World of Light]]. | ||
SSBUWebsiteDonkeyKong1.jpg|Donkey Kong [[grabbing]] on [[Kongo Falls]]. | |||
SSBUWebsiteDonkeyKong2.jpg|Charging [[Giant Punch]] before a [[Banzai Bill]] on [[Princess Peach's Castle]]. | SSBUWebsiteDonkeyKong2.jpg|Charging [[Giant Punch]] before a [[Banzai Bill]] on [[Princess Peach's Castle]]. | ||
SSBUWebsiteDonkeyKong3.jpg|[[Taunting]] with {{SSBU|Diddy Kong}} on [[Great Bay]]. | SSBUWebsiteDonkeyKong3.jpg|[[Taunting]] with {{SSBU|Diddy Kong}} holding a [[Banana Gun|banana]] on [[Great Bay]]. | ||
SSBUWebsiteDonkeyKong4.jpg|Falling next to {{SSBU|Kirby}} on [[Gaur Plain]]. | SSBUWebsiteDonkeyKong4.jpg|Falling next to {{SSBU|Kirby}} on [[Gaur Plain]]. | ||
SSBUWebsiteDonkeyKong5.jpg|Performing his [[ | SSBUWebsiteDonkeyKong5.jpg|Performing his [[up smash]] on [[Boxing Ring]]. | ||
SSBUWebsiteDonkeyKong6.jpg|Performing [[Spinning Kong]] on [[Skyworld]]. | SSBUWebsiteDonkeyKong6.jpg|Performing [[Spinning Kong]] on [[Skyworld]]. | ||
SSBUWebsite16.jpg|Taunting with Diddy on [[Distant Planet]]. | SSBUWebsite16.jpg|Taunting with Diddy on [[Distant Planet]]. | ||
| Line 913: | Line 939: | ||
SSBUWebsiteDitto2.jpg|Idling with [[Ditto]] on {{SSBU|Battlefield}}. | SSBUWebsiteDitto2.jpg|Idling with [[Ditto]] on {{SSBU|Battlefield}}. | ||
SSBUWebsiteKapp'n2.jpg|Captured by [[Kapp'n]] on [[Bridge of Eldin]]. | SSBUWebsiteKapp'n2.jpg|Captured by [[Kapp'n]] on [[Bridge of Eldin]]. | ||
SSBUSoraFiveManParty.jpg|With Mario, Kirby, {{SSBU|Pikachu}} and {{SSBU|Sora}} on [[Mushroom Kingdom U]]. | |||
8-PlayerSSBU 1.jpg|With Mario, {{SSBU|Link}}, {{SSBU|Samus}}, {{SSBU|Ice Climbers}}, Pit, {{SSBU|Villager}} and {{SSBU|Inkling}} on Battlefield. | 8-PlayerSSBU 1.jpg|With Mario, {{SSBU|Link}}, {{SSBU|Samus}}, {{SSBU|Ice Climbers}}, Pit, {{SSBU|Villager}} and {{SSBU|Inkling}} on Battlefield. | ||
</gallery> | </gallery> | ||
=== | ===Fighter Showcase Video=== | ||
{{#widget:YouTube|id=K7IsUGeFXP0}} | {{#widget:YouTube|id=K7IsUGeFXP0}} | ||
==Trivia== | ==Trivia== | ||
*Donkey Kong | *Donkey Kong's pose in his official render resembles the pose he assumes after using [[Giant Punch]]. | ||
**Donkey Kong is | *Donkey Kong, {{SSBU|Joker}} and {{SSBU|Sephiroth}} are the only characters to face Master Hand and Crazy Hand on a stage other than Final Destination, not counting the [[Master Hand glitch]] in ''[[Super Smash Bros. Melee]]''. | ||
**Donkey Kong is the only one of those three who is not a DLC character. | |||
*Though Donkey Kong's Final Smash has been updated to [[Jungle Rush]], the DK Bongos from his previous Final Smash, [[Konga Beat]], remain within his character files. Despite being unused, the model's textures have been updated.<ref>[https://tcrf.net/Super_Smash_Bros._Ultimate#DK Super Smash Bros. Ultimate - The Cutting Room Floor]</ref> | *Though Donkey Kong's Final Smash has been updated to [[Jungle Rush]], the DK Bongos from his previous Final Smash, [[Konga Beat]], remain within his character files. Despite being unused, the model's textures have been updated.<ref>[https://tcrf.net/Super_Smash_Bros._Ultimate#DK Super Smash Bros. Ultimate - The Cutting Room Floor]</ref> | ||
*The tip of Donkey Kong's second tuft of hair is not closed off, letting players see inside his model with the camera.<ref>[https://youtu.be/B1TAxjEvFxQ?t=454 What if You Play on SMASHVILLE in DIFFERENT TIMEZONES? -- Random Smash Ultimate Facts]</ref> | |||
==Notes== | |||
:1.{{note|a}}Due to {{s|mariowiki|Cranky Kong}} being the original Donkey Kong, the "Donkey Kong & Lady" Spirit technically features him instead of his grandson, the current [[Donkey Kong]]. | |||
==References== | ==References== | ||
Latest revision as of 19:53, April 26, 2024
| Donkey Kong in Super Smash Bros. Ultimate | |
|---|---|
 
| |
| Universe | Donkey Kong |
| Other playable appearances | in SSB in Melee in Brawl in SSB4 |
| Availability | Starter |
| Final Smash | Jungle Rush |
| Tier | D+ (68) |
Donkey Kong (ドンキーコング, Donkey Kong) is a playable character in Super Smash Bros. Ultimate. Initially teased in the then-unnamed Ultimate's announcement trailer, Donkey Kong was confirmed on June 12th, 2018. Donkey Kong is classified as Fighter #02.
Donkey Kong retains his gorilla-like grunts and roars from Super Smash Bros. 4, instead of using his voice actor, Takashi Nagasako.
Donkey Kong is ranked 68th out of 82 on the current tier list, placing him in the D+ tier. This is a significant drop from his 22nd out of 54 placement in SSB4. Donkey Kong has surprisingly good mobility for a superheavyweight, having both a good dash and air speed. He also has a strong set of normals in his moveset. His down tilt has a chance to trip; his up tilt is a solid anti air that can kill at high percents, and his forward tilt is a good spacing tool. His aerials are all good as they serve their purpose in Donkey Kong's strong advantage state, with back aerial as a good walling and edgeguarding option, up air as a strong juggling and KO tool, down aerial and forward aerial for spiking opponents offstage, and neutral aerial as a good get off me or landing option. Donkey Kong also possesses one of the best throws in the game with cargo throw, which is a reason why he does fine against a lot of characters with poor to mediocre recoveries. His specials are also improved as Giant Punch became a more viable move to challenge opponents; Headbutt has the ability to break shields; Spinning Kong can be a useful out of shield option; and Hand Slap can be used to set up for kill confirms.
Donkey Kong has a lot of flaws to counteract his strengths. Despite having a strong advantage state, his disadvantage state is among one of the worst in the game. Donkey Kong has little to no option to escape from combos due to his frame 4 air dodge, and not having many moves that are fast enough to combo break. As a result, this makes him one of the easiest characters to juggle. DK has a lackluster and risky neutral game, especially when his opponent is at low percents, as his attacks have high ending lag and a decent chunk of them are unsafe on hit at low percents, while most of his out-of-shield options are too slow to be reliable. His recovery is also one of the most exploitable in the game, as a simple spike is enough for Donkey Kong to quickly lose his stock, since Spinning Kong offers very little vertical distance.
Donkey Kong is a character who can do a lot of damage and get early KOs but one simple mistake might make it hard for him to get back into the game. He has seen some results from players, such as ChunkyKong and HIKARU, taking him decently far in tournaments.
Attributes[edit]
Donkey Kong is unsurprisingly a large super heavyweight, having the same weight value as King Dedede, and is the third-heaviest character in the game behind Bowser and King K. Rool. Despite this, he's one of the fastest heavy characters in the game, both in terms of general mobility and attack speed. He has the 10th fastest walking speed, the 29th fastest dashing speed, the 16th highest traction, above average falling speed and jumping force, and is tied with Mario, Sonic, Little Mac, and Inkling for the 13th fastest air speed. In contrast, he has below average gravity and moderately slow air acceleration.
A typical heavyweight is expected to possess moves with high power, and Donkey Kong is no exception to this - it is possibly his greatest attribute. Donkey Kong has no problem with setting up into KOs with moves that have both high power and decent range: his sweetspotted up tilt, smash attacks, aerials, back throw, Giant Punch, and grounded Spinning Kong are all prime examples. His ability to take stocks with his powerful attacks is made easier with his decent approach. His mobility and size work together to give him an effective grounded approach and longer range, respectively. All of these attributes combined allow him to have an easier time fighting in close quarters and landing attacks on his opponents. He also has very strong survivability thanks to his aforementioned high weight and above average falling speed, which is also common for his archetype. In total, Donkey Kong's attributes give him some of the best overall endurance in the game, with only Bowser and King K. Rool surpassing him horizontally.
Donkey Kong works well with his grounded moveset. His neutral attack has decent damage and startup. Forward tilt's long range makes it one of his main spacing tools and works better with its intangibility. Up tilt is a safe move to interrupt his opponents, with the move covering Donkey Kong's entire body, acting as an anti-air, and hitting through low platforms such as the ones on Battlefield. Down tilt gives him a long range crouching option and has a chance to trip opponents. His dash attack works as a combo starter and a situational KO option at low and very high percentages, respectively. All of his smash attacks are notoriously strong and relatively fast, making them his go-to options for hard reads and scoring KOs. His aerial options also have considerable utility. His forward and down aerials are some of his best edgeguarding tools due to both of them being meteor smashes. His neutral aerial is hard to interrupt, helps him break out of combos, and is one of the strongest of its type in the game when hit clean. His up aerial serves as an effective vertical KO option (if the situation he's in allows for it) thanks to its high knockback, and it is also safe, as his head is intangible during it and it has modest end lag. His back aerial is his fastest aerial and is debatably an even better spacing tool than his forward tilt, being fast, long-ranged, and having a sex kick-like hitbox, with a long duration and high knockback when hit clean. His air speed allows his aerial moves to be used at their fullest potential and, with the exception of forward aerial, they’re all decently fast.
A well-known part of his playstyle is his grab game, as he has a long grab that allows for setups into the rest of his moves. Although his down throw has little to no use, every other option does to some extent. His pummel is slower compared to many others in the cast, but deals decent damage. Up throw has combo potential into his aerials and back throw is his primary kill throw, but his forward throw is easily his most useful one and possibly the most unique part of his character. During his forward throw, Donkey Kong can move, jump, and walk off the stage while having the opponent in his hands, acting like he usually would outside of a typical grab (aside from being unable to use his other moves and having only one jump). Forward throw also gives Donkey Kong different types of throws based on what direction is pressed, basically giving him eight throws; these are commonly known as the "cargo throws." Cargo forward and down throw both work as niche edgeguarding options, with cargo down throw even being a semi-spike. Cargo back throw does good damage and is a very solid kill throw. It also has utility as a stage spike unless his opponent is able to properly tech it. Finally, cargo up throw has more combo potential than his vanilla up throw, being able to combo into his aerials at low percents. Cargo up throw also possesses fairly good kill power, since Donkey Kong can jump and then heave his opponents for additional height.
Donkey Kong's special moves are also helpful for his gameplan. Giant Punch is his surprise KO and punish move, can be used to pressure the opponent, and has super armor if fully charged. Headbutt can bury opponents, which can allow him to setup into KOs, and spikes in the air. It has super armor during the move's startup and deals very high shield damage while also having deceptively long range, giving him a shield pressure option and the ability to call out poor shield positioning. Grounded Hand Slap has very long range and allows for stage control, but has no usage for aerial opponents, as it leaves Donkey Kong immobile and its hitbox only deals damage to grounded opponents. The aerial Hand Slap is his last move which can meteor smash and is fast, making it effective and easy to land. His final special move, Spinning Kong, acts similarly to Bowser's Whirling Fortress as his primary out of shield option. It is hard to disrupt and is a multi-hit move with high damage. In the air, it works as an incredibly fast horizontal recovery option and deals a lot of damage if all the hits connect. Due to the speed Spinning Kong has in the air, it can work as an effective combo breaker.
However, despite his versatile moveset and high power, Donkey Kong falls into a plethora of problems. His defensive game is very poor, a common issue for characters of his size. While his massive weight gives him very high endurance and his large frame is the reason his range is better than characters like Mario and Squirtle, it becomes a problem when having to dodge attacks which is hard for him because he is a very large target. His tie hurtbox is also extremely large, further exacerbating the issue. Coincidentally, just like those two previously mentioned fighters, he has frequent trouble dealing with characters that have disjoints due to his lack of projectiles, primarily against swordfighters such as Shulk and Ike, hitboxes on moves such as Mewtwo's up and back aerials, or fast multi-hits such as Palutena's neutral air. Donkey Kong's size also makes him vulnerable to combos and juggling, which is worsened by his lack of combo breakers (outside of neutral aerial and up special). The reintroduction of directional air dodges makes his aerial defense even more linear, and the new air dodge's increased ending lag hurts all characters; it debatably hurts a character such as Donkey Kong the most. Moreover, his otherwise great forward throw (cargo throw) also has certain drawbacks - notably, the risk of trying to slam the opponent into the ledge with a backward cargo throw. Due to Donkey Kong's horrid vertical recovery, if the opponent either DIs fast enough, squat jumps on him or simply has better air reach, this attempt for an easy KO may backfire. The trajectory of both forward and back cargo throw also possess a minor challenge. Unlike traditional forward and back throws, Donkey Kong sends the opponent at a high vertical angle instead of horizontal. This makes it more situational if they will KO or not, especially cargo forward throw. Cargo back throw ironically has more vertical range than his cargo up throw and therefore has more usage KOing at the top of the screen than the side. Thus, the player may find more reliability in a normal back throw near the edge.
Despite many of his moves having fast startup, Donkey Kong's moveset is made much slower by its ending lag, and most of his moves are not safe on hit at low percents. This forces him to be more careful with the moves he uses, as he can be heavily punished just for putting out one attack (a situation that can rapidly snowball due to his poor defensive options). Unlike the all-around heavyweight Bowser, perhaps Donkey Kong's most glaring weakness is his lack of out-of-shield options. Neither his neutral attack nor his tilts are enough to distance himself from an aggressive opponent if the player forces him to remain in shield. His forward tilt has good range, but lacks the power or perks of other super heavyweights, like Bowser's Tough Guy or King K. Rool's Belly Armour. A lot of his moves are also limited in some way despite their strengths: his smash attacks are slow and have very linear hitboxes; a chunk of his throws, despite their variety, don't have much utility; Giant Punch forces Donkey Kong to get up-close to the opponent to land the attack and needs to be charged for it to be effective; Headbutt and Hand Slap are both slow, causing them to be difficult to use for their intended purposes; and Spinning Kong, while it has decently long horizontal recovery distance, offers almost no vertical recovery and is prone to edgeguarding against meteor smashes, like Captain Falcon and Falco's down aerials.
All in all, Donkey Kong's mixture of fast mobility, fairly long range, high weight, decent combo potential, and excellent kill power make him adept and flexible in many different situations, but killing and pressuring opponents stand out as his biggest strengths. Despite this, DK's high weight, large hurtbox, and lack of good escape tools make him vulnerable to many combos. In addition, his recovery is extremely poor, and his moveset is frequently punishable due to the end lag on many of his moves. As such, Donkey Kong has to capitalize on his power and range to limit opponents' approaches in order to win matches.
Changes from Super Smash Bros. 4[edit]
Donkey Kong received a mix of buffs and nerfs in his transition from SSB4 to Ultimate. Though he received more buffs than nerfs, the latter are more prominent than the former, as they either weakened or removed some of his best traits from SSB4. Because of this, Donkey Kong has been nerfed overall.
Donkey Kong has received several useful buffs, with those to his special moves being among the most notable. Giant Punch charges faster no longer leaves him helpless when used in the air, giving him a new edgeguarding option. Headbutt now grants him super armor before the hit comes, and moves also deal their full knockback when opponents are buried, both changes of which improve the moves' versatility. Grounded Spinning Kong has less difficulty linking its multi-hits and has faster super armor, while the aerial version is now a proper multi-hitting move with a finishing hit, making it safer. Hand Slap is generally faster and the aerial version has reduced landing lag, which gives Donkey Kong a useful combo starter and allows it to confirm into KOs at high percentages. Particularly, both it and Headbutt alleviate some of DK's difficulty with landing safely.
His biggest buff, however, comes from a vastly improved forward throw (cargo throw), which is much harder to mash out of and has had its cargo throws' properties improved; this grants him much more options and turns it into his most versatile throw, and arguably the best throw in the game overall. His dash attack also has less ending lag, giving him another combo starter if the late hit is landed and making it much safer if shielded. Donkey Kong's already impressive KO power has been further increased as well, as most of his moves deal more knockback. Further miscellaneous buffs include up smash's previously infamous hitboxes being larger, making the move much easier to land.
Finally, Donkey Kong also benefits to some of the universal changes, as his already great mobility has improved from faster walking and dashing speeds, the universal 3-frame jumpsquat change improves his ground-to-air out of shield game and allows him for with combo opportunities, and the increased shieldstun and reduced landing lag on aerial attacks makes his attacks even safer on shield (despite the reduced shieldstun on aerials).
However, the few direct nerfs Donkey Kong received were severe enough to eclipse his buffs. Like Bowser, his biggest nerf is to his previously infamous combo throw — his cargo up throw now has more knockback, which makes its combo potential more strict and noticeably neuters the effectiveness of its infamous "Ding Dong" KO confirm at high percentages unless it's initiated on a platform, often requiring a specific amount of rage to work. Although his grab game was overall buffed, Donkey Kong is one of the characters who suffers the most from the universal nerfing of grabs, making them less safe for him to use. His pummel was nerfed as well, making it less reliable for racking up damage. Thus, this makes it less feasible for Donkey Kong to rely on his grab as his main way to rack up damage, forcing him to use other methods to do so.
Among his other direct nerfs, Donkey Kong's up aerial has had its animation altered, which shortens its range and hinders its versatility. Spinning Kong now gains less horizontal distance and no longer grants intangibility on startup, worsening his already poor recovery. Many of Donkey Kong's attacks, such as his tilts and his up aerial, no longer have disproportionately long intangibility, now only matching their hitbox duration.
Although he has gained some notable benefits from them, the universal changes to gameplay mechanics hamper Donkey Kong more than they help him. While the universal increase in mobility, faster jumpsquat, and reduced landing lag on aerials improve his own mobility and combo game, it also means opponents are more likely to close the distance on him, giving them more combo opportunities. The increased shieldstun, reduced landing lag, and the universal nerfing of grabs also make it harder for Donkey Kong to react to a shielded attack; the universal nerfing of grabs is especially harmful, as it's one of the key points to his gameplan. Altogether, this hinders his grounded out-of-shield game, limiting him to directly contesting them by making use of his moves' super armor to muscle through them, which can be risky despite his large weight. Lastly, the changes to air dodging worsen Donkey Kong's recovery, as they give him less protection and make him easier to edgeguard. All of these changes worsen Donkey Kong's defensive game, which is further notable since the game's engine prioritizes more aggressive playstyles than defensive ones. This forces him not only to approach more, but to be more unpredictable at doing so.
In the end, Donkey Kong has potentially received many more options for racking up damage and being less predictable, but the neutering of his KO confirm and grabs means he can no longer close out stocks as reliably as before. Though his strengths and weaknesses are more defined, the gameplay mechanics accentuate his weaknesses more when compared to his strengths, causing his nerfs to overshadow his buffs even despite the numerous buffs he received in game updates. As a result, Donkey Kong fares worse in Ultimate than he did in Smash 4.
Aesthetics[edit]
 Due to the aesthetic used in Ultimate, Donkey Kong's model features a more subdued color scheme. His fur appears flatter overall, while his tie features subtle detailing. His facial proportions have also been tweaked.
- Donkey Kong faces the foreground at an angle, instead of facing directly forward. In addition, he now faces the screen regardless of whether he's facing left or right, resulting in all of his animations being mirrored and many of them being tweaked.
- Like most of the returning roster, Donkey Kong has become much more expressive than in the previous games. For example, he scowls during multiple attacks, he also appears furious when he fully charges Giant Punch, with his face turning red and veins being visible.
- Up taunt has a new animation where he moves his body much less, more closely resembling how real-life gorillas beat their chests.
- Ledge-hanging animation has changed.
- Two of Donkey Kong's victory poses have been tweaked:
- His up-inputted victory pose now has him looking at the camera at the freeze frame and shaking his hands as opposed to his whole body afterward.
- His right-inputted victory pose has him strike a different pose while maintaining an angrier expression.
Attributes[edit]
 Like all characters, Donkey Kong's jumpsquat animation takes 3 frames to complete (down from 6).
- Donkey Kong is heavier (122 → 127). However, he is no longer the second heaviest character in the game (claimed by King K. Rool) but instead tied with King Dedede for the third heaviest. Nevertheless, this noticeably improves his survivability.
- Donkey Kong walks faster (1.3 → 1.365).
- Donkey Kong dashes faster (1.7031 → 1.873).
- Donkey Kong's initial dash is much faster (1.6 → 2.09).
- Donkey Kong's air speed is faster (1.15 → 1.208).
- Donkey Kong's traction is much higher (0.0529 → 0.123), going from the 37th highest to the 15th highest.
- Donkey Kong's gravity is very slightly lower (0.08505 → 0.085). It is also lower relative to the cast, going from the 35th highest to the 53rd highest.
 Forward roll grants less intangibility (frames 4-16 → 4-15) and has more ending lag (FAF 30 → 31).
- Back roll has has more startup (frame 4 → 5) and ending lag (FAF 30 → 36).
- Spot dodge has less startup (frame 4 → 3) and ending lag (FAF 29 → 27).
- Spot dodge grants less intangibility (frames 4-19 → 3-17).
- Air dodge grant more intangibility (frames 4-29 → 4-32).
- Air dodge has significantly more ending lag (FAF 35 → 49).
Ground attacks[edit]
- Neutral attack:
- The first hit transitions into the second hit faster (frame 11 → 8).
- The second hit comes out faster (frame 6 → 4), which alongside the previous change allows it to connect better from the first hit. It also has less ending lag (FAF 35 → 32), and a longer hitbox duration (2 frames → 3 frames).
- Both hits have a higher hitlag multiplier (1× → 1.5× (hit 1), 1.8× (hit 2)), giving opponents more time to SDI the first hit and DI the second hit.
- The first hit deals less knockback (0/35/45 base/100/25/25 scaling → 25/20/20 base/35/20/20 scaling) and its outermost hitbox launches opponents closer to Donkey Kong (110° → 180°), allowing it to connect better, but hindering its jab cancel setups.
- Forward tilt:
- The move has less startup (frame 8 → 6) and ending lag (FAF 38 → 35).
- Its hitboxes are larger (4.5u/5u/3.2u → 5.5u/5u/3.5u).
- It deals less damage when angled up (11% → 9%) and not angled (10% → 8%).
- It grants much less intangibility on Donkey Kong's arm (frames 7-11 (up), 1-25 (forward, down) → 6-9 (all)), being in line with the duration of the hitboxes.
- For all angles, it has higher base knockback, but lower knockback scaling (10 base/100 scaling → 50/78). This makes it much safer on hit at low percents, but weakens its KO potential.
- It has an altered animation where Donkey Kong keeps his other arm planted on the ground rather than it twisting with the rest of his body.
- This new animation shifts his body backwards a considerable distance as soon as it begins; combined with the changes to jostling, this allows him to dodge many close-range attacks as early as frame 1.
- Up tilt:
- The move deals less damage (11%/10%/9% → 10%/9%/8%) without compensation on knockback, hindering its KO potential.
- The sweetspot is on the hand instead of the shoulder, making it easier to land overall.
- The move now has a medium punch sound effect.
- Down tilt:
- The move has less startup lag (frame 7 → 6).
- It has a hitstun modifier of +5, improving its combo potential.
- The hitbox duration is shorter (3 frames → 2 frames).
- It has more ending lag (FAF 23 → 25).
- It grants much less intangibility on Donkey Kong's arm (frames 1-9 → 5-7), being more in line with the duration of the hitboxes.
- The hitboxes on Donkey Kong's arm deal less damage (7% → 6%), matching the sourspot.
- However, their knockback was not compensated, allowing them to trip opponents for longer.
- Dash attack:
- The move has less ending lag (FAF 42 → 35).
- It deals more damage (10% → 12% (clean), 8% → 9% (late)), with knockback scaling compensated (53 → 46 (clean), 65 → 60 (late)).
- Its hitboxes are larger (6u → 7u (clean), 4u → 5.5u (late)) and further out (Z offset: 7 (clean)/4.2 (late) → 8/5.2), improving its range.
- It deals more hitlag (1x → 1.25x), making it easier to DI.
- Forward smash:
- The move deals more damage (20%/19% → 22%/21%) without proper compensation on knockback (30/25 base/91 scaling → 21/18 base/88/86 scaling), improving its KO power.
- Its animation has been altered: Donkey Kong no longer brings his arms behind him as much when charging the move, doing so before releasing the move.
- Up smash:
- The move deals more damage (18% → 19%) and has increased knockback (30 base/83 scaling → 40/84), improving its KO potential.
- Up smash's hand hitbox is higher up (Y offset: 26 → 28) and the arm hitbox is lower down (Y offset: 20 → 18) and extends further outwards (Z offset: -3—3 → -5—5). This improves the move's range above and next to Donkey Kong, allowing it to hit larger fighters on the ground.
- Down smash:
- The fist hitboxes exchange IDs between the early hit and the clean hit, causing interpolation to cover the floor below Donkey Kong.
Aerial attacks[edit]
- All aerials have less landing lag (17 frames → 11 (neutral), 29 → 17 (forward), 18 → 11 (back), 25 → 15 (up), 24 → 14 (down)).
- The removal of teching for grounded meteor smashes improves the combo potential of Donkey Kong's forward and down aerials onstage, compounded further by their reduced landing lag.
- Neutral aerial:
- It deals more damage (11% → 12% (clean), 8% → 9% (late)) with no compensation on knockback, improving its KO potential.
- It has larger hitboxes (5u/4u → 5u/5u/5.7u), and the clean hit has received an additional hitbox during its first active frame that is placed further vertically (Y offset: 8u) and horizontally (Z offset: 15u), greatly improving the move's range.
- Forward aerial:
- The late hit lasts one frame longer (frames 21-22 → 21-23), allowing it to reach farther below Donkey Kong.
- It has a slightly altered animation, with Donkey Kong spinning at an angle after performing a downwards punch. This new animation is longer (55 frames → 62) increasing the amount of time DK cannot grab the ledge after using it.
- Up aerial:
- The move grants less intangibility on Donkey Kong's head (frames 1-10 → 5-10), being more in line with the duration of the hitboxes.
- The move has an altered animation where Donkey Kong doesn't bring his head as far backwards as before, reducing its coverage behind him.
Throws and other attacks[edit]
- Grabs:
- All grabs have increased ending lag (FAF 31 → 39 (standing), 39 → 47 (dash), 37 → 42 (pivot)).
- Dash and pivot grab have slightly more startup lag (frame 10 → 11 (dash), 11 → 12 (pivot)).
- Dash and pivot grab have less range (Z2 offset: 17 → 15.9 (dash), -24.5 → -21.5 (pivot)).
- Pummel:
- Pummel deals less damage (2.1% → 1.6%).
- It has much less startup (frame 9 → 2) and ending lag (FAF 16 → 8), but deals considerably more hitlag (4 frames → 15), increasing its effective duration.
- Relative to the rest of the cast, Donkey Kong's pummel is among the slowest but most damaging, rather than average on both accounts.
- Its animation has been slightly changed. Donkey Kong chops the opponent's body rather than their head.
- Donkey Kong's throws are no longer weight-dependent. This improves their combo potential on heavyweights, but reduces it on lightweights.
- Forward throw (cargo throw):
- Cargo throw involves Donkey Kong hauling the opponent over his shoulder, similarly to his grandfather in the Donkey Kong arcade game and his own carrying animation in Donkey Kong Country Returns and Donkey Kong Country: Tropical Freeze.
- Cargo forward throw:
- The move deals more damage (10% → 12%) without proper compensation on knockback (80 base/50 scaling → 90/46), slightly improving its KO potential.
- Cargo back throw:
- Donkey Kong has a new cargo back throw: he holds the opponent with both hands by the legs and hurls them behind himself. This new throw deals more damage (12% → 13%) and knockback (70 base/50 scaling → 85/52), improving its KO potential to the point it can KO middleweights under 150% in the air.
- Cargo up throw:
- The move deals more damage (10% → 12%).
- The move has increased knockback (58 base/52 scaling → 65/53). While this slightly improves its combo potential at low to mid-percentages due to Donkey Kong's faster jumpsquat, it also limits its combo potential into only up aerial. It also noticeably worsens its combo potential past mid-percentages, no longer leading into guaranteed KOs off the top blast line except if initiated on platforms.
- However, this grants the move KO potential, especially when combined with a jump.
- Cargo down throw:
- Donkey Kong has a new cargo down throw: he performs a bearhug instead of throwing the opponent downward.
- This new throw deals more damage (7% → 11%).
- It grants Donkey Kong a slight boost upwards if used in the air, giving it more offstage utility.
- It has altered knockback (50 base/80 scaling → 70/45). Combined with its upward boost, this makes it safer to use at low percentages and keeps its KO potential at high ones if used offstage, but removes its ability to chain grab opponents on moving platforms (such as Smashville's) or against walls, while still lacking KO ability if not used offstage.
- Down throw:
- Down throw releases the opponent earlier (frame 24 → 19), with its total duration reduced as well (FAF 60 → 55), making it harder to DI in time.
- Edge attack:
- Edge attack deals more damage (8% → 10%).
Special moves[edit]
- Giant Punch:
- The move has less lag when charge-canceled by shielding (8 frames → 4), making it safer to charge.
- Additionally, it can now be charge-cancelled by shielding at any point, rather than only when DK's arm is behind him at a certain point.
- It can also now be charge-canceled by jumping or spot dodging, with the same amount of lag beforehand.
- However, this lag applies to rolls out of the move as well, instead of them being immediate, making it riskier to charge-cancel by rolling.
- It no longer causes helplessness when used in the air, much like in Smash 64.
- The move reaches its full charge much faster (frame 154 → 121).
- The move gains damage at a different rate (2% per 14 frames → 1% per 6.77 frames). This makes it closer to other chargeable moves.
- Uncharged Giant Punch deals less knockback (15 base/100 scaling → 45/70). This makes it weaker than the fully charged version regardless of charge.
- Fully charged Giant Punch deals more knockback that is consistent throughout (10 base/80/50 scaling → 35/73), making it stronger than the almost fully charged version.
- Fully charged Giant Punch's mid-arm hitbox is larger (5u → 6.5u).
- The move no longer has a hitbox that hits behind Donkey Kong, removing its situational ability to KO off the top blast line.
- Donkey Kong charges Giant Punch with either arm due to his mirrored animation. Previously, it was charged with his right arm in Smash 64 and his left arm in the other games.
- Donkey Kong charges up Giant Punch with more circular arm motions, and trails of electricity appear on Donkey Kong's arm and fist during the charge up and punch of the move (reminiscent of Lightning Punch, one of his custom moves in Smash 4). Additionally, he makes an angry expression when he gets a full charge (including maintaining the expression throughout other animations after its charge), and he winds up faster the closer the move is to being fully charged. He also has an altered pose upon using the punch.
- Fully charged Giant Punch triggers the Special Zoom upon hitting an opponent.
- Headbutt:
- The move has super armor on frames 5-14.
- The grounded version has an additional hitbox against grounded opponents that is placed higher (Y offset: 5u → 13u), increasing its vertical range.
- It has one frame less ending lag (FAF 64 → 63).
- The aerial version stalls less (gravity multiplier: 0.3 → 0.5).
- Spinning Kong:
- The move's loop hits connect more reliably, especially for the aerial version, which uses the autolink angle (20°/180°/180° → 366°). The grounded version's loop hits hold the opponent in place rather than knocking them back and forth.
- The move has less landing lag (40 frames → 38).
- The grounded version's super armor starts earlier and has a longer duration (frames 8-17 → 5-17).
- The grounded version's last hit has more base knockback (40 → 60), but less knockback scaling (170 → 157), slightly improving its KO potential overall.
- The aerial version has a final hit that launches opponents away with more knockback (0 base/100 scaling → 72/80), improving its utility.
- The grounded version has more ending lag (FAF 93 → 105).
- Both versions of the move deal less total damage, most significantly the aerial version (17.5% → 16% (grounded), 36% → 19% (aerial)). The grounded version deals more damage on its loop hits (1.3% → 1.4%), but less on the first hit (7% → 5%), and the aerial version has 14 hits instead of 8, but they deal drastically less damage (10% (hit 1), 5%/4% (hits 2-5), 2% (hits 6-8) → 5% (hit 1), 1% (hits 2-13), 2% (hit 14)) and have inconsistent timing, only dealing full damage to opponents that are very close to Donkey Kong.
- The aerial version no longer grants intangibility on frames 3-6 upon startup.
- Donkey Kong glints and strikes a pose upon ending a grounded Spinning Kong, doing another spin before coming to a full stop.
- The aerial version travels a shorter distance horizontally, but also goes slightly higher overall.
- The aerial version has a shorter duration due to its animation being sped up (94 frames → 54).
- Unlike Grounded Spinning Kong, the aerial version no longer produces a visual "blue ring" effect upon startup.
- Hand Slap:
- The grounded version has less startup lag (frame 18 → 12).
- Both the grounded and aerial versions have drastically less ending lag (FAF 75 → 47 (grounded), 62 → 50 (aerial)).
- The aerial version has significantly less landing lag (30 frames → 10), greatly improving its ability to set up combos and tech-chases.
- The aerial animation is longer (61 frames → 69), increasing the amount of time mobility is restricted if the move is not interrupted.
- The grounded version's hitboxes are smaller (13u → 10.3u).
- The grounded version has gained a shieldstun multiplier of 0.58×, thus dealing less shieldstun than in Smash 4 despite it being increased for moves other than smash attacks and aerials. This allows shielding opponents to escape between hits more easily, worsening the move's shield breaking ability.
- Final Smash:
- Donkey Kong has a new Final Smash called Jungle Rush, which replaces Konga Beat. It consists of a single punch that, if successfully landed, leads to a barrage of rapid punches that traps the opponent, concluding with an uppercut that launches them. The move, alongside the comical bongo noises it produces, are based off Donkey Kong's attacks in Donkey Kong Jungle Beat.
- Since the move's first hit only hits in front of Donkey Kong, Jungle Rush can no longer hit opponents behind, above and below him as Konga Beat could, giving it significantly less range.
- Jungle Rush's hits deals less damage than a perfectly inputted Konga Beat (7% initial shockwave/1% "miss" shockwave/7% "good" shockwave/12% "great" shockwave/15% fourth "great" shockwave → 12% hit 1/1.2% hits 2-19/1.1% hits 20-32/14% hit 33). This makes the Final Smash deal potentially deal less damage than Konga Beat (150~% → 61.9%), but makes it more consistent.
- Jungle Rush's last hit has stronger knockback than a fourth "great" shockwave from Konga Beat (55 base/90 scaling → 90/96), making it much more powerful and consistent at KOing.
- Jungle Rush's last hit sends at a vertical angle compared to Konga Beat's horizontal one for the fourth "great" shockwave (361° → 70°).
Update history[edit]
Donkey Kong has been buffed via game updates. Initially, his most noteworthy buffs were to inconsistencies of two moves: forward aerial now autocancels properly (an issue that had been present since Melee) and Giant Punch's hitbox no longer shifts into the Z-axis, which would result in it missing opponents at point-blank range. Donkey Kong also benefits from the universal nerf on projectiles dealing less shield damage in update 3.0.0.
After only receiving minor buffs for the first few game patches, update 6.0.0 gave Donkey Kong more noticeable buffs. His forward tilt deals significantly more knockback to the point of becoming a viable KO move, his neutral aerial deals more damage and knockback and has more range, and his Giant Punch reaches the maximum charge even faster than before and deals slightly more knockback. Spinning Kong was also improved, as the move's super armor starts three frames faster, it connects more reliably against airborne opponents, and the last hit deals more knockback. Finally, Hand Slap on the ground has less startup and less ending lag.
After receiving some minor buffs, patch 13.0.1 buffed Donkey Kong yet again. The second hit of Donkey Kong’s neutral attack was given more active frames and had it’s ending lag reduced. Giant Punch was given more super armor on both the ground and in the air. Most notably, Donkey Kong’s down tilt was given 5 additional frames of hitstun, this allows him to follow up with another attack in certain situations.
Overall, Donkey Kong has improved by a decent margin compared to how he fared during Ultimate's initial release. However, in comparison to the buffs gained by other lukewarmly received characters, Donkey Kong's buffs are fairly minor, so how much he has benefited from these changes is debatable.
- Donkey Kong has been affected, although the changes are currently unknown.
- Forward aerial autocancels earlier (frame 63 → 56), matching the move's interruptibility.
- Giant Punch has more range (5u → 6.5u), no longer missing opponents up close.
- Giant Punch has longer super armor when using a fully-charged punch.
 Fixed a bug that caused Donkey Kong to not get armor when landing during frames 12-17 of Giant Punch.
- The lag upon waking up from the sleep effect has been adjusted, matching the rest of the cast.
- Forward tilt has much more knockback scaling (55 → 78), KOing at around 160% at the edge of Final Destination.
- Neutral aerial:
- Neutral aerial deals more damage (11% → 12% (clean), 8% → 9% (late)) with no compensation on knockback.
- It has larger hitboxes (4.5u/4.5u/5.5u → 5u/5u/5.7u), and the clean hit has received an additional hitbox during its first active frame that is placed further vertically (Y offset: 8u) and horizontally (Z offset: 15u), greatly improving the move's range.
- Giant Punch reaches its full charge faster (frame 131 → 121), and the fully charged punch has more base knockback (20 → 35), but less knockback scaling (78 → 73), slightly improving its KO potential overall.
- Spinning Kong (grounded):
- Spinning Kong's super armor starts earlier and has a longer duration (frames 8-17 → 5-17).
- The looping hits have received hitboxes that use the autolink angle (80° → 366°) against aerial opponents, allowing them to connect more reliably.
- The last hit has more base knockback (40 → 60), but less knockback scaling (170 → 157), slightly improving its KO potential overall.
- Grounded Hand Slap has less startup (frame 15 → 12) and ending lag (FAF 58 → 47).
- Overall shield size has been increased.
- Donkey Kong's head is briefly intangible when activating and deactivating his shield.
- Grounded Headbutt has an additional hitbox against grounded opponents that is placed higher (Y offset: 5u → 13u), increasing its vertical range.
- The second hit of neutral attack has more active frames (frames 5-6 → 5-7) and less ending lag (FAF 35 → 32).
- Down tilt has 5 additional frames of hitstun on all hitboxes.
- Fully charged Giant Punch has more super armor on both the grounded (frames 11-20 → 9-20) and aerial (frames 17-20 → 15-20) hitboxes.
Moveset[edit]
For a gallery of Donkey Kong's hitboxes, see here.
Note: All numbers are listed as base damage, without the 1v1 multiplier.
| Name | Damage | Description | ||
|---|---|---|---|---|
| Neutral attack | Jab (ジャブ) / Upper (アッパー) | 4% | A hook followed by an uppercut. The second hit has above average power for a neutral attack, although generally speaking its KO potential is unimpressive. It can chain into itself fairly reliably at low percentages however. | |
| 6% | ||||
| Forward tilt | ↗ | Kongo Backhand (コンゴバックハンド) | 9% | A backhanded slap. Can be angled to deal more damage. It grants intangibility to his attacking arm on frames 6-9. |
| → | 8% | |||
| ↘ | 9% | |||
| Up tilt | Spiderweb Sweep (くもの巣はらい) | 10% (hand), 9% (arm), 8% (elbow) | An overhead arcing swipe. It deals more damage and knockback if the target is hit near DK's hand. It grants intangibility to his attacking arm on frames 5-11 and is one of the strongest up tilts in the game when sweetspotted. | |
| Down tilt | Slouch Slap (ロースラップ, Low Slap) | 6% | A crouching swat. It has a 40% chance to trip opponents, making it one of his best combo starters. Grants intangibility to his attacking arm (frames 5-7). | |
| Dash attack | Rolling Attack (ローリングアタック) | 12% (clean), 9% (late) | The Roll Attack, his signature attack from Donkey Kong Country. It deals less damage towards its end, granting it combo potential. | |
| Forward smash | Dyna Clap (ダイナクラップ) | 22% (hands), 21% (arms) | A lunging clap. It deals slightly less damage and knockback if it hits with Donkey Kong's arms. It additionally grants intangibility to his head and arms on frames 20-26, effectively giving it disjointed hitboxes, and its ending lag is rather low for a smash attack with 31-32 frames, but its startup is slow, with its hitboxes coming out on frame 22. It’s also one of the more powerful forward smashes, with the uncharged sweetspot KOing Mario at 98% from the center of Final Destination with optimal DI and no rage. | |
| Up smash | Jumbo Press (ジャンボプレス) | 19% | An overhead clap. It grants intangibility to his head and arms (frames 12-15), effectively giving it disjointed hitboxes. It has immense power, being one of the strongest up smashes in the game, with it KOing Mario from the ground level of FD at 92% with optimal DI and no rage. In practice it will KO a bit sooner as it typically hits opponents in the air. Its startup is additionally rather fast for a move of its power (coming out in 14 frames), though it has a lengthy enough duration to be quite punishable (with the move's lasting 49 frames total). However it is hard to hit as its hitboxes are situated straight vertically above DK and aren't that large in size, while it lacks grounded launching hitboxes to launch grounded opponents into it like other vertically-placed up smashes have (e.g. Marcina's and R.O.B.'s up smashes). | |
| Down smash | Twin Beat (ツインビート) | 14% (arms), 17% (early, fists), 18% (late, fists) | Raises his arms overhead and then quickly swings them downward to perform forearm clubs. It grants intangibility to his arms (frames 11-14), effectively giving the move disjointed hitboxes, and is his fastest smash attack startup-wise (frame 11), though it has the highest amount of endlag out of all his smash attacks (with 41 frames of endlag after hitboxes cease, and lasting 55 frames total). Without DI, it is very powerful for a down smash, with the sweetspot KOing Mario from ground level on FD at 109% with no rage, but the move launches at a 70 degree and is thus very susceptible to LSI, where with optimal DI Mario can survive up to 129%, making its KO power underwhelming for a heavily punishable smash attack. | |
| Neutral aerial | Donkey Lariat (ドンキーラリアット) | 12% (clean), 9% (late) | Quickly spins around to perform discus clotheslines with both arms, similarly to Spinning Kong. While it isn't DK's fastest aerial in terms of startup, it does have the longest-lasting hitbox duration and is one of the strongest neutral aerials in the game when hit clean. | |
| Forward aerial | Hammer Knuckle (ハンマーナックル) | 16% (clean), 15% (late, hands), 13% (late, arms) | A double axe handle. If sweetspotted, the opponent is meteor smashed. One of the strongest meteor smashes in the game, killing at around 35% offstage. It appears similar to his midair attack from Donkey Kong 64, which itself was inspired by this attack due to Smash 64 debuting before Donkey Kong 64. | |
| Back aerial | Kong Rocket (コングロケット) | 13% (clean), 8% (late) | A back kick. DK's strongest aerial when hit clean, killing Mario at around 130% from center stage. It is an extremely useful move as a whole due to its speed and power, and if used correctly, it can act as a Wall of Pain. One of the best back aerials in the game. | |
| Up aerial | Air Headbutt (エアヘッドバット) | 13% | An upwards arcing headbutt that appears visually similar to his side special, Headbutt. It grants intangibility to his head on frames 5-10 and is one of the more powerful up aerials, killing Mario at around 140% from ground level. Those features, along with its fast startup and fairly low ending lag, make it a good move for juggling. | |
| Down aerial | Air Stampede (エアスタンピード) | 16% (foot), 13% (leg) | A stomp. Its sweetspot is a strong meteor smash, while its sourspot, which is close to Donkey Kong's chest, deals diagonal knockback. Slightly weaker than his forward aerial, but it has faster startup. | |
| Grab | Grab (つかみ) | — | Reaches out with one hand. Donkey Kong's grab range is above average. | |
| Pummel | Grab Chop (つかみチョップ) | 1.6% | Chops the opponent's body. A slow but strong pummel. | |
| Forward throw | Kong Karry (リフティング, Lifting) | 12% (forward, up), 13% (back), 11% (down) | Hauls the opponent on his shoulder, allowing him to move and jump around while still holding the opponent. Appears to be based off of when DK holds an item in Donkey Kong Country, such as a Steel Keg. This gives him access to forward, back, up, and down throws that are distinct from his normal grabs. He also gains Knockback-based Armor when he starts a throw instead of gaining Throw Invulnerability, of which allows him to resist up to 16 Units of Knockback, akin to Bowser's Tough Guy.
Forward: Rears back and violently throws the opponent forward at a high angle. Able to stage spike if Donkey Kong faces the stage center. Back: Heaves the opponent backwards using both hands, launching them at a slightly higher trajectory than the forwards variant. This is his most damaging cargo throw and possesses the best kill power as well. Up: Heaves the opponent upwards. It can be used to start combos. It also has decent KO potential, with Donkey Kong able to jump on platforms for extra height. Down: A bear hug. Donkey Kong gets a small boost upwards when using this move in the air, making it his safest throw offstage. When the opponent is too damaged to escape in time, all of these throws allow for easy stage spikes. Donkey Kong can simply walk off the edge, pull back and throw them against the underside. However, this carries significant risk, as the opponent can tech it and thus result in DK ending up too far below the edge to recover if his timing is off. Kong Karry has a unique grab duration, equal to ((90 + 1.7p) * 11 / 6) - g, where p is the opponent's percent at the time of the carry's initiation, and g is the grab time passed prior to it (including button mashing). As a result, it lasts longer the earlier it is initiated after grabbing an opponent. As with standard grabs, button mashing reduces this amount by 8 frames per stick input, and 14.4 frames per button input (though they cannot be registered as quickly). | |
| Back throw | Reverse Throw (反転投げ) | 11% | Flings the opponent backward. DK's most damaging throw and one of the strongest back throws in the game, it KOs even the heaviest of characters below 170% near the edge without rage. | |
| Up throw | Coconut Toss (ココナッツトス) | 9% | Heaves the opponent upward with one arm. | |
| Down throw | Bottom Shoot (ボトムシュート) | 7% | Shoves the opponent into the ground with one arm. It launches opponents horizontally in front of DK. Due to its high ending lag, it has little to no followups and is thus practically useless, despite having low knockback. | |
| Floor attack (front) | 7% | Performs a swat before getting up. | ||
| Floor attack (back) | 7% | Claps behind himself and then in front of himself before getting up. | ||
| Floor attack (trip) | 5% | Throws a spinning, wind-up punch while getting up. | ||
| Edge attack | 10% | Performs a forearm club while climbing up. | ||
| Neutral special | Giant Punch | 10% (uncharged), 28% (tenth wind-up/fully charged grounded), 25% (tenth wind-up/fully charged aerial) | A wind-up punch which fully charges after ten wind-ups. When fully-charged, the punch deals excellent damage, grants super armor and is overall faster than if used uncharged. Its charge can be charge canceled and saved, and chosen when to be released after being fully charged. Unlike in Melee, Brawl, and Smash 4, Giant Punch does not induce helplessness in the air, much like in Smash 64. | |
| Side special | Headbutt | 10% (grounded/sweetspot aerial), 8% (sourspot aerial) | A headbutt. The move buries the opponent, who will remain trapped longer if the opponent has already been dealt a fair amount of damage. The aerial version will meteor smash the opponent if they are hit by its sweetspot. The move has super armor during startup, but only in the middle of the animation, providing no protection at the very beginning or the end. It has a deceptively large range and tremendous shield damage, so full power shields will barely manage to avoid breaking against this move. | |
| Up special | Spinning Kong | 5% (grounded hit 1), 1.4% (grounded hits 2-6), 4% (grounded hit 7), 5% (aerial hit 1), 1% (aerial hits 2-13), 2% (aerial hit 14) | Rapidly spins around, trapping opponents and damaging them with a series of discus clotheslines and spinning backfists before launching them. It has good horizontal distance, but very little vertical distance. The grounded version grants Donkey Kong super armor on frame 5, making it a reliable tool for powering through many moves. The grounded version is also a potent KO option, especially at ledge, being able to even KO heavy characters around 70%-80% when used on Battlefield's ledge. Donkey Kong is immune to most windboxes during the move. | |
| Down special | Hand Slap | 14% (ground), 5% (midair hit 1), 6% (midair hit 2) | Slaps the ground to cause earth-shaking vibrations. When grounded, Donkey Kong can keep pounding by repeatedly pressing the special button. The attack gives him some protection from opponents while grounded and has good range, but is unable to KO until extreme percentages due to its very low knockback growth. In midair, Donkey Kong will perform two midair slaps, the second hit being a powerful meteor smash that combos from the first slap. Can combo into a KO confirm with up smash at 60%-80%. Originates from Donkey Kong Country. | |
| Final Smash | Jungle Rush | 12% (initial hit), 1.2% (rapid hits), 14% (final hit), 61.9% (maximum) | Punches forward. If the initial hit connects, Donkey Kong will then perform a long series of rapid punches. Has about the same range as his forward smash, but extremely powerful, killing Mario as low as 24% on Final Destination. | |
Stats[edit]
| Stats | Weight | Dash speed | Walk speed | Traction | Air friction | Air speed | Air acceleration | Gravity | Falling speed | Jumpsquat | Jump Height | Double jump Height |
|---|---|---|---|---|---|---|---|---|---|---|---|---|
| Value | 127 | 2.09 – Initial dash 1.873 – Run |
1.365 | 0.123 | 0.015 | 1.208 | 0.01 – Base 0.05 – Additional |
0.085 | 1.63 – Base 2.608 – Fast-fall |
3 | 34 - Base 17.3 - Short hop |
35.5 |
Announcer call[edit]

English/Japanese/Chinese
French
French (PAL)
Russian
On-screen appearance[edit]
- Bursts out of a DK Barrel, frontflips thrice, lands and strikes a flexing pose.
Donkey Kong's on-screen appearance

Taunts[edit]
- Up taunt: Beats his chest rapidly while scowling.
- Side taunt: Shakes himself with a humorous expression as if he is drying off.
- Down taunt: Faces the camera and shrugs while bellowing confusedly with a humorously shocked expression.
Donkey Kong's up taunt.
Donkey Kong's side taunt.
Donkey Kong's down taunt.


Idle poses[edit]
- Leans forward slightly and assumes a cross-eyed expression, as if trying to stare at his own nose.
- Lightly punches his open hand and then does a rotational shoulder stretch.
Donkey Kong's first idle pose.
Donkey Kong's second idle pose.


Crowd cheer[edit]
| Cheer (English) | Cheer (Japanese/Chinese) | Cheer (Italian) | Cheer (Dutch) | Cheer (French) | |
|---|---|---|---|---|---|
| Cheer | |||||
| Description | D - K! -- Donkey - Kong! | Don - key Kong! | Donkeeeey Kong! | Donkey Kong! | Donkey Kong! |
| Cheer (German) | Cheer (Spanish) | Cheer (Russian) | Cheer (Korean) | |
|---|---|---|---|---|
| Cheer | ||||
| Description | Don - key Kong! | Don - key Kong! | Don - key Kong! | Don - key Kong! |
Victory poses[edit]
- Left: Does a backflip and flexes his arms (his "character chosen" animation in Super Smash Bros.).
- Up: Holds his hands above his head and shakes them (his animation upon completing a bonus game in Donkey Kong Country). He then continues to shake his hands while constantly looking left to right, as if thanking an offscreen crowd.
- Right: Angrily beats his chest with a scowl and then looks at the camera.


In competitive play[edit]
Tier placement and history[edit]
Donkey Kong was met in the E3 demo build with a degree of cautious optimism. Although players could no longer easily perform most of Donkey Kong's throw-based kill confirms from Smash 4, including his infamous "Ding-Dong" combo, Donkey Kong players were willing to do away with this in favor of better frame data, speed, damage, and hitboxes, most notably on his tilts and dash attack, and hoped that he would play differently from Bowser. Though DK was considered one of the worst heavyweights from the demo, thought to be only marginally better than Ridley, players were excited for Donkey Kong's opportunities in competitive play.
Upon the game's release, however, Donkey Kong fell out of favor very quickly, for a number of reasons. The biggest issue is his low-percent safety: many of Donkey Kong's moves are punishable on hit at early percents, making his neutral rather egregious in a meta favoring speed and punish games. His already poor disadvantage state was also made even worse due to his larger hurtbox and his out of shield options remaining poor. Although Donkey Kong has been buffed in patches, none of Donkey Kong's biggest flaws were addressed. As a result, despite efforts from dedicated players such as LeSou and YMCA pre-pandemic, HIKARU briefly post-pandemic, and ChunkyKong online, Donkey Kong was mostly used as an occasional counterpick during the early metagame. As such, he is commonly ranked as a low tier, with some players such as Dabuz, Maister and ESAM ranking him as one of the absolute worst characters in the entire game. Regardless, he is ranked 68th on the current tier list.
Most historically significant players[edit]
See also: Category:Donkey Kong players (SSBU)
 ChunkyKong - The current best Donkey Kong player in the world. Placed 13th at Let's Make Moves Miami, 17th at Super Smash Con 2022, 25th at InfinityCON Tally 2021, and 33rd at both CEO 2021 and CEO 2022 with wins over players such as Kola, MuteAce, and Goblin. He is also the best online Donkey Kong player in the United States, placing 2nd at both Get Clipped 3 and Get Clipped 7, 9th at both Frame Perfect Series 3: ONLINE and Steal the Show 5: Heist in Smashville, and 13th at HABBY Birthday 2020. Formerly ranked 44th on the Wi-Fi Warrior Rank v6.
 Doctor A Ness - The best Donkey Kong in Australia during the early metagame, but has since been banned. Placed 5th at both Battle Arena Melbourne 11 and BigWinChampionship 2, 7th at Phantom 2020, and 9th at Sunny Side Up with wins over players such as Purple~H, Sriks, and Ben Gold. Currently ranked 8th on the Australian Power Rankings.
 HIKARU - Tri-mains Sora and Roy with Donkey Kong and was the best Donkey Kong player in the world prior to his retirement. Placed 3rd at Ultimate Fighting Arena 2022, 5th at Sumabato SP 12, 9th at Umebura SP 3, 13th at Maesuma TOP 4, and 17th at EVO Japan 2020 with wins over players such as Glutonny, KEN, and zackray.
 LeSou - One of the best Donkey Kong players in the world during the early metagame. Placed 5th at Smash Fest to the Sky, 9th at Ragnarok, WeTecThose 9, and Abierto Guadalajara Ultimo Reto, and 17th at Smash Factor 8 with wins over players such as Cloudy, Meme, and Joker.
- YMCA - One of the best Donkey Kong players in the United States during the early metagame. Placed 9th at SIEGE 2019, 13th at DreamHack Anaheim 2020, 25th at 2GG: Nightmare on Smashville, and 65th at EVO 2019 with wins over players such as Klaatu, NAKAT, and Ignaize.
Classic Mode: Journey to New Donk City[edit]

Donkey Kong's path chronicles Donkey Kong traveling via plane (Pilotwings) from the jungle (his home stages) to New Donk City (through urban stages, Onett and Moray Towers). After defeating Diddy Kong, he becomes Donkey Kong's partner for the rest of the mode, referencing the original Donkey Kong Country.
| Round | Opponent | Stage | Music | Notes |
|---|---|---|---|---|
| 1 | Kongo Jungle | Jungle Level (64) | ||
| 2 | Kongo Falls | Gang-Plank Galleon | ||
| 3 | Pilotwings | Gear Getaway | ||
| 4 | Onett | The Map Page / Bonus Level (Remix) | ||
| 5 | Moray Towers | Donkey Kong / Donkey Kong Jr. Medley | ||
| 6 | New Donk City Hall | New Donk City | ||
| Bonus Stage | ||||
| Final | Master Hand | New Donk City Hall (Ω form) | Master Hand (Less than 7.0 intensity) Master Hand / Crazy Hand (Intensity 7.0 or higher) |
On intensity 7.0 and higher, Crazy Hand fights alongside Master Hand. |
Note: Every stage until Round 6 plays a track from the Donkey Kong universe, no matter what universe the stage originates from.
Note 2: In Round 3, the music and stage also reference the Rocket Barrel levels in Donkey Kong Country Returns, with Gear Getaway being among them.
Note 3: In Round 5, the stage references 25m.
Credits roll after completing Classic Mode. Completing it as Donkey Kong has Donkey Kong Country Returns (Vocals) accompany the credits.
Character unlock tree[edit]
Donkey Kong's Classic Mode character unlock tree includes the following characters in order:
Each character can be unlocked by clearing Donkey Kong's Classic Mode, or the Classic Mode of any preceding character, if all preceding characters have been unlocked. Once all the above characters are unlocked, clearing Classic Mode with any of them will default to Mario's character unlock tree, starting with Sonic.
Role in World of Light[edit]

Donkey Kong was among the fighters that were summoned to fight against the army of Master Hands.
During the opening cutscene, Donkey Kong was present on the cliffside when Galeem unleashed his beams of light. Galeem's light beams vaporized Donkey Kong offscreen, placing him under Galeem's imprisonment along with the other fighters, excluding Kirby.
He can be rescued in a jungle segment of The Light Realm, on a space that looks like the treehouse where he lives on his series.
Fighter Battle[edit]
| No. | Image | Name | Type | Power | Stage | Music |
|---|---|---|---|---|---|---|
| 02 | |
Donkey Kong | 3,300 | Kongo Jungle (Ω form) | Jungle Level (64) |
Spirits[edit]
Donkey Kong's fighter spirit can be obtained by completing Classic Mode. It is also available periodically for purchase in the shop for 300 Gold. Unlocking Donkey Kong in World of Light allows the player to preview the first spirit below in the Spirit List under the name "???". As a fighter spirit, it cannot be used in Spirit Battles and is purely aesthetic. His fighter spirit has an alternate version that replaces it with his artwork in Ultimate.
Additionally, Donkey Kong makes an appearance in a few primary (albeit in name only) and support spirits.
134. Donkey Kong
137. Donkey Kong & Lady
169. Donkey Kong & Bongos


In Spirit Battles[edit]
As the main opponent[edit]
| Spirit | Battle parameters | Inspiration | |||||||||
|---|---|---|---|---|---|---|---|---|---|---|---|
| No. | Image | Name | Series | Enemy Fighter(s) | Type | Power | Stage | Rules | Conditions | Music | Character |
| 36 |  |
Goomba | Super Mario Series | •Tiny Donkey Kong Team |
1,800 | Mushroom Kingdom (Battlefield form) | N/A | •Defeat an army of fighters | Ground Theme - Super Mario Bros. | ||
| 82 |  |
Barrel Train | Mario Kart Series | •Donkey Kong •Diddy Kong |
3,500 | Spirit Train | •Item: Bullet Bill | •The enemy can deal damage by dashing into you •The enemy has increased attack power •The enemy has increased move speed |
Rainbow Road - Mario Kart: Double Dash!! | Donkey Kong | |
| 117 |  |
Flies & Hand | Mario Paint Series | •Giant Donkey Kong •Tiny Dark Pit |
4,000 | Living Room | •Assist Trophy Enemies (Flies & Hand) •Item: Food |
•Survive until the timer runs out (1:00) •Hostile assist trophies will appear |
Mario Paint Medley | Hand | |
| 131 |  |
Rabbid Kong | Mario + Rabbids Kingdom Battle | •Bunny Donkey Kong |
1,700 | 3D Land | N/A | •The enemy's punches and elbow strikes have increased power | Arcade Bunny's Theme | ||
| 137 |  |
Donkey Kong & Lady | Donkey Kong Series | •Giant Donkey Kong •Ally: Peach |
13,500 | 75m | •Item Tidal Wave | •You lose if your CPU ally is KO'd •The enemy has super armor and is hard to launch or make flinch •Timed stamina battle (1:30) |
Donkey Kong / Donkey Kong Jr. Medley | Original Donkey Kong (currently known as Cranky Kong) | |
| 138 | Donkey Kong Jr. | Donkey Kong Series | •Donkey Kong •Giant Donkey Kong |
9,000 | Kongo Jungle (hazards off) | N/A | •Defeat the main fighter to win •The enemy's throws have increased power •Reinforcements will appear during the battle |
Donkey Kong / Donkey Kong Jr. Medley | Original Donkey Kong (Giant Donkey Kong) | ||
| 140 |  |
Cranky Kong | Donkey Kong Series | •Donkey Kong |
9,700 | Jungle Japes | •Hazard: Slumber Floor | •The floor is sleep-inducing | Opening - Donkey Kong | ||
| 143 | Swanky Kong | Donkey Kong Series | •Donkey Kong |
1,700 | Kongo Jungle | •Item: Beastball | •The enemy is easily distracted by items | Funky's Fugue | |||
| 144 | Wrinkly Kong | Donkey Kong Series | •Clear Donkey Kong |
3,500 | Luigi's Mansion | •Hazard: High Gravity •Hazard: Low Gravity |
•Your jumping power decreases when the enemy's at high damage •The enemy is less affected by gravity •The enemy starts with damage but is more powerful |
The Map Page / Bonus Level (Remix) | |||
| 149 |  |
Chunky Kong | Donkey Kong Series | •Donkey Kong |
3,800 | Jungle Japes | N/A | •The enemy's punches and elbow strikes have increased power | DK Rap | ||
| 150 | Rambi | Donkey Kong Series | •Donkey Kong |
9,100 | Kongo Falls (Ω form) | N/A | •The enemy can deal damage by dashing into you | Jungle Level (Brawl) | |||
| 158 | Professor Chops | Donkey Kong Series | •Donkey Kong |
1,700 | Kongo Falls | •Item: Banana Peel | •The enemy can instantly escape from movement-disabling moves | Jungle Hijinxs | Super Kong | ||
| 171 |  |
Ninja Kong | Donkey Kong Jungle Beat | •Donkey Kong |
1,900 | Distant Planet (Battlefield form) | N/A | •The enemy's kicks and knee strikes have increased power •The enemy favors side specials |
Battle for Storm Hill | ||
| 197 |  |
Goron | The Legend of Zelda Series | •Donkey Kong |
1,700 | The Great Cave Offensive (Battlefield form) | •Item: Bob-omb | •The enemy's dash attacks have increased power •The enemy favors dash attacks |
Hidden Mountain & Forest | ||
| 198 |  |
Darunia | The Legend of Zelda Series | •Donkey Kong •Jigglypuff |
1,400 | Gerudo Valley (Battlefield form) | •Hazard: Lava Floor | •Defeat the main fighter to win •The floor is lava •The enemy starts the battle with a Hammer |
Hidden Mountain & Forest | ||
| 240 |  |
Daruk | The Legend of Zelda Series | •Donkey Kong |
4,300 | Find Mii (Battlefield form) | •Hazard: Lava Floor | •The floor is lava •Stamina battle •The enemy's shield has extra durability |
Nintendo Switch Presentation 2017 Trailer BGM | ||
| 372 | Bonkers | Kirby Series | •Donkey Kong |
8,400 | Kongo Jungle | N/A | •The enemy starts the battle with a Hammer •The enemy can swing the Hammer for a long time |
Forest Stage | |||
| 443 |  |
Gengar | Pokémon Series | •Donkey Kong |
4,300 | Luigi's Mansion (Battlefield form) | •Hazard: Slumber Floor | •The floor is sleep-inducing | Pokémon Red / Pokémon Blue Medley | ||
| 506 | Abomasnow | Pokémon Series | •Donkey Kong |
2,300 | Summit (Battlefield form) | •Item: Freezie •Hazard: Ice Floor |
•The floor is frozen •The enemy is weak to fire attacks •Only certain Pokémon will emerge from Poké Balls (Abomasnow) |
Battle! (Wild Pokémon) - Pokémon Diamond / Pokémon Pearl | |||
| 530 | .png) |
Landorus (Therian Forme) | Pokémon Series | •Donkey Kong |
9,200 | Gerudo Valley (hazards off) | •Earthquake | •Periodic earthquakes will shake the stage after a little while | N's Castle | ||
| 552 | Bewear | Pokémon Series | •Donkey Kong |
3,500 | Kongo Jungle | N/A | •The enemy has super armor but moves slower •Only certain Pokémon will emerge from Poké Balls (Bewear) |
Battle! (Trainer) - Pokémon Sun / Pokémon Moon | |||
| 608 | Polar Bear | Ice Climber Series | •Donkey Kong |
9,300 | Summit (Battlefield form) | •Earthquake •Item: Freezie |
•The enemy has super armor but moves slower •Stamina battle •Periodic earthquakes will shake the stage |
Ice Climber (Melee) | |||
| 807 | Purple Pikmin | Pikmin Series | •Tiny Donkey Kong Team |
3,500 | Distant Planet | N/A | •Stamina battle •The enemy deals damage when falling •Reinforcements will appear after an enemy is KO'd |
Forest of Hope | |||
| 937 | Mr. Sandman | Punch-Out!! Series | •Donkey Kong |
9,700 | Boxing Ring | •Hazard: Slumber Floor | •The floor is sleep-inducing •The enemy's smash attacks have increased power •Stamina battle |
Minor Circuit (Original) | |||
| 982 | Blanka | Street Fighter Series | •Donkey Kong |
3,700 | Jungle Japes | •Jump Power ↓ | •Stamina battle •All fighters have reduced jump power •The enemy starts the battle with a Screw Attack |
Blanka Stage Type A | |||
| 1,101 |  |
Master Giant | Super Smash Bros. Series | •Giant Donkey Kong |
9,900 | Final Destination | •Bob-omb Festival | •Bob-ombs will rain from the sky after a little while •The enemy has super armor and is hard to launch or make flinch •Stamina battle |
Master Core | ||
| 1,146 |  |
Muddy Mole | Mole Mania | •Donkey Kong |
1,700 | The Great Cave Offensive (Battlefield form) | •Item: Pitfall | •Take your strongest team into this no-frills battle | Kirby Retro Medley (Float Islands) | ||
| 1,200 | Sumo Brothers | Rhythm Heaven Series Rhythm Paradise Series |
•Giant Donkey Kong |
1,900 | Arena Ferox (Ω form) | •Earthquake | •The enemy's physical attacks have increased power •Periodic earthquakes will shake the stage •The enemy loves to taunt |
E. Honda Stage Type B | Red Sumo Brother (red costume) Blue Sumo Brother (purple costume) | ||
| 1,339 |  |
Bottles | Banjo-Kazooie Series | •Donkey Kong |
3,900 | Spiral Mountain (Bottles) | •Invisibility •Item: Pitfall |
•The enemy is invisible •The enemy favors side specials •The enemy is easily distracted by items |
Spiral Mountain | ||
| 1,396 | Goda | River City Series | •Donkey Kong •Diddy Kong |
2,000 | Onett | •Item: Battering Types | •Defeat the main fighter to win •The enemy's side special has increased power •The enemy favors side specials |
Golden Forest | |||
| 1,415 |  |
Master Mummy | ARMS | •Donkey Kong |
3,400 | Dracula's Castle (Ω form) | N/A | •The enemy has super armor but moves slower •The enemy favors grabs and throws |
Mausoleum | ||
| 1,485 |  |
Jack-7 | Tekken series | •Donkey Kong Team |
1,800 | Mishima Dojo | N/A | •The enemy has super armor but moves slower •Stamina battle •The enemy favors neutral specials |
Abyss of Time | Jack-4s | |
As a minion[edit]
| Spirit | Battle parameters | Inspiration | |||||||||
|---|---|---|---|---|---|---|---|---|---|---|---|
| No. | Image | Name | Series | Enemy Fighter(s) | Type | Power | Stage | Rules | Conditions | Music | Character |
| 79 | Pauline | Super Mario Series | •Peach •Mario •Giant Donkey Kong |
13,700 | 75m (hazards off) | •Jump Power ↓ | •Defeat the main fighter to win •You have reduced jump power •Reinforcements will appear during the battle •The enemy tends to avoid conflict |
Jump Up, Super Star! | Original Donkey Kong | ||
| 141 |  |
Funky Kong | Donkey Kong Series | •Captain Falcon •Diddy Kong •Donkey Kong |
9,000 | Kongo Jungle | •Item: Bullet Bill | •The enemy is easily distracted by items | Funky's Fugue | Donkey Kong | |
| 238 | Zelda (Breath of the Wild) | The Legend of Zelda Series | •Zelda •Link •Inkling •Donkey Kong •Falco •Zero Suit Samus |
9,200 | Great Plateau Tower | N/A | •Stamina battle •Reinforcements will appear after an enemy is KO'd •Defeat an army of fighters |
Main Theme - The Legend of Zelda: Breath of the Wild | Daruk | ||
| 1,132 | Hockey Players | Ice Hockey | •Dr. Mario •Donkey Kong •Luigi |
1,500 | Pokémon Stadium (Ω form) | •Slippery Stage | •The stage's platforms are very slippery | Core Luge | Large hockey player | ||
| 1,362 | Kyo Kusanagi | THE KING OF FIGHTERS Series | •Captain Falcon •Pikachu •Donkey Kong |
9,500 | King of Fighters Stadium | •Jump Power ↓ | •The enemy's explosion and fire attacks have increased power •Reinforcements will appear after an enemy is KO'd •All fighters have reduced jump power |
ESAKA!! - KOF 2002 UM | Goro Daimon | ||
Alternate costumes[edit]

| |||||||

|

|

|

|

|

|

|

|
Gallery[edit]
Donkey Kong's fighter card.
Donkey Kong's unlock notice when obtaining him in World of Light.

Donkey Kong grabbing on Kongo Falls.
Charging Giant Punch before a Banzai Bill on Princess Peach's Castle.
Taunting with Diddy Kong holding a banana on Great Bay.

Falling next to Kirby on Gaur Plain.
Performing his up smash on Boxing Ring.
Performing Spinning Kong on Skyworld.
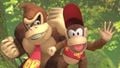
Taunting with Diddy on Distant Planet.
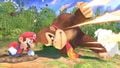
Headbutting Mario on Gaur Plain.
Idling with Ditto on Battlefield.
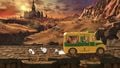
Captured by Kapp'n on Bridge of Eldin.
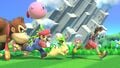
With Mario, Kirby, Pikachu and Sora on Mushroom Kingdom U.
With Mario, Link, Samus, Ice Climbers, Pit, Villager and Inkling on Battlefield.


Fighter Showcase Video[edit]
Trivia[edit]
- Donkey Kong's pose in his official render resembles the pose he assumes after using Giant Punch.
- Donkey Kong, Joker and Sephiroth are the only characters to face Master Hand and Crazy Hand on a stage other than Final Destination, not counting the Master Hand glitch in Super Smash Bros. Melee.
- Donkey Kong is the only one of those three who is not a DLC character.
- Though Donkey Kong's Final Smash has been updated to Jungle Rush, the DK Bongos from his previous Final Smash, Konga Beat, remain within his character files. Despite being unused, the model's textures have been updated.[1]
- The tip of Donkey Kong's second tuft of hair is not closed off, letting players see inside his model with the camera.[2]
Notes[edit]
- 1.^ Due to Cranky Kong being the original Donkey Kong, the "Donkey Kong & Lady" Spirit technically features him instead of his grandson, the current Donkey Kong.
References[edit]
|
| |
|---|---|
| Fighters | Donkey Kong (SSB · SSBM · SSBB · SSB4 · SSBU) · Diddy Kong (SSBB · SSB4 · SSBU) · King K. Rool (SSBU) |
| Assist Trophy | Klaptrap |
| Boss | Giant Donkey Kong |
| Stages | Kongo Jungle · Kongo Falls · Jungle Japes · Rumble Falls · 75m · Jungle Hijinxs |
| Items | Hammer · Barrel Cannon · Peanut · Spring |
| Enemies | Kritter · Tiki Buzz |
| Other | Dixie Kong · DK Barrel · DK Island · Pauline · Zinger |
| Trophies, Stickers and Spirits | Trophies (SSBM · SSBB · SSB4) · Stickers · Spirits |
| Music | Brawl · SSB4 · Ultimate |
| Masterpiece | Donkey Kong |
| Related universe | Mario |