User:Everyman Or Nobody?
| Everyman Or Nobody? | |
|---|---|
| Character info | |
| Melee mains | Mewtwo, Roy, Mr. Game & Watch, Young Link |
| Brawl mains | Fox, Mr. Game & Watch, Kirby, Pikachu |
| Smash 4 mains | Mewtwo, Kirby, Cloud, Ganondorf, Corrin, R.O.B., Mr. Game & Watch, Roy, Pikachu, Duck Hunt, Robin, Ryu, Bayonetta, Rosalina & Luma |
| Ultimate mains | Kirby, Pikachu, Ganondorf, Mewtwo, Roy, Mr. Game & Watch, Snake, R.O.B., Mii Gunner, Duck Hunt, Ryu, Cloud, Corrin, Bayonetta, Simon, Richter, King K. Rool |
What follows is a list of my personal ideas for DLC characters for Super Smash Bros. Ultimate. Please feel free to leave input on the talk page with suggestions or input.
WARNING: This page includes spoilers for Kirby 64: The Crystal Shards, Bayonetta, Bayonetta 2, and Off.
This page is under construction.
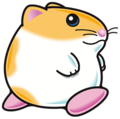
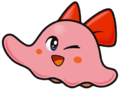
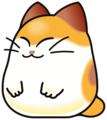
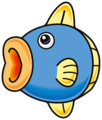
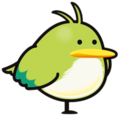
Animal Friends (SSBU)
| Animal Friends | |
|---|---|
 
Animal Friends' reveal image for Super Smash Bros. Ultimate. | |
| Universe | Kirby |
| Debut | Kirby's Dream Land 2 (1995) Kirby's Dream Land 3 (1997) |
| Smash Bros. appearances | Ultimate |
| Most recent non-Smash appearance | Kirby Star Allies (2018) |
| Console/platform of origin | Super Nintendo Entertainment System |
| Species | Hamster (Rick) Octopus (ChuChu) Owl (Coo) Cat (Nago) Fish (Kine) Bird (Pitch) |
| Gender | Male (Rick, Coo, Nago, Kine, Pitch) Female (ChuChu) |
| Place of origin | Dream Land, Popstar |
| Article on WiKirby | Animal Friend |
| “ | Animal Friends Ally Together! | ” |
| —Introduction Tagline | ||
Animal Friends are a playable character in Super Smash Bros. Ultimate. They were revealed as a DLC fighter in the Nintendo Direct on February 28th, 2023, as the first character in the Fighters Pass Vol. 3. Animal Friends are classified as fighters #83, #84, and #85.
Attributes
A cross between Pokémon Trainer and Banjo & Kazooie, Animal Friends from Kirby's Dream Land 3 are a tripartite character comprised of Rick & ChuChu (for convenience here, R&C), Coo & Nago (C&N), and Kine & Pitch (K&P). Like Banjo & Kazooie and Duck Hunt, a pair fights as one unit on the stage at a time, but like Pokémon Trainer, a new pair can be swapped in using the team's down special move, Animal Swap, in the order displayed above. Like Squirtle, Ivysaur, and Charizard, each pair has their own distinct moveset, save for their joint down special move and Final Smash, and character attributes that distinguish them from the other pairs.
Rick & ChuChu
Rick & ChuChu are a middleweight, about as tall as Roy with the body proportions of King Dedede. R&C's character design is such that ChuChu clings to Rick's shoulders at all times as Kirby does in Kirby's Dream Land 3, except when prone or hanging from a ledge, in which case Rick grabs the stage and ChuChu hangs on from Rick's feet.
Coo & Nago
Coo & Nago comprise a heavyweight character, though they are on the lighter side in this category. Due to Coo and Nago being roughly the same proportions as each other, C&N have a stature similar to Ganondorf. Coo is perched upon Nago's back at almost all times, and when performing mid-air jumps, Coo flies into the air holding Nago in his feet in a manner similar to Duck Hunt.
Kine & Pitch
Kine & Pitch are together smaller than Rick & ChuChu, standing slightly taller than Kirby, weighing in about equally to Duck Hunt. Pitch sits atop Kine as K&P hop around to perambulate.
Moveset
Rick & ChuChu
Rick & ChuChu can wall jump. Like Ice Climbers, R&C resist slipping on icy surfaces.
Note: All numbers are listed as base damage, without the 1v1 multiplier.
| Name | Damage | Description | |
|---|---|---|---|
| Neutral attack | 4% | ChuChu slaps in front of the duo just once. Will not hit opponents very low to the ground, like a much weaker form of Ganondorf's neutral attack. Its weakness makes it useful in combos. | |
| Forward tilt | Spark Rick | 9.3% | Similar to Kirby's Beam Copy Ability in his series, a thin bar of electricity arcs downward from 45 to -45 degrees coming out of Rick's mouth. Boasts considerable range at the cost of speed and vulnerability. |
| Up tilt | Parasol Rick | 2% (parasol), 6.8% (ChuChu) | Rick balances a parasol in the air on his nose just in front of himself with ChuChu on top of it. Both ChuChu and the parasol act as hitboxes. The parasol hit sends the opponent into ChuChu's hitbox. |
| Down tilt | Clean Rick | 3% (first hit), 7% (second) | Rick pulls out a blue feather duster and waggles it in front of himself near the floor, striking twice. Decent range. |
| Dash attack | Parasol ChuChu | 9% | R&C spin together in an upturned parasol facing each other, colliding into opponents. |
| Forward smash | Stone ChuChu | 17% | Rick transforms into a rock, and ChuChu swings him in a circle in front of herself once on the xz-plane. A bit faster than Wolf's forward smash. |
| Up smash | Needle ChuChu | 12.8% (clean), 10.4% (late) | Needles are shot out of ChuChu's body at 0, 45, 90, 135, and 180 degree angles. The needles are all reflectable projectiles, but they do not go very far, similar to Olimar's smash attacks. |
| Down smash | 11% | Like R&C's neutral aerial, Rick grabs ChuChu and spins her around on the floor, similar in form to Simon's down smash. | |
| Neutral aerial | Cutter ChuChu | 8.5% | Rick spins ChuChu around himself on the xy-axis once, clockwise. Similar to Shulk's neutral aerial. |
| Forward aerial | 5% | Rick slams his feather duster downward in front of himself, not unlike Corrin's forward aerial, and can similarly combo into itself. | |
| Back aerial | Needle Rick | 12% | Rick's backside turns into a mass of spikes for a moment. Not their fastest move, but a powerful one. |
| Up aerial | Fire ChuChu | 9% (fire), 5% (ChuChu) | Rick breathes fire upward into ChuChu's body, turning her into the shape of a parachute. Increased damage + fire effect if enemy is hit at Rick's mouth, sending the opponent into ChuChu. |
| Down aerial | Stone Rick | 12% | Rick turns to stone with ChuChu walking on top of him, falling fast. Rick is a hitbox, but ChuChu is not. |
| Grab | — | Rick bites the enemy. | |
| Pummel | 1.8% | ChuChu slaps the enemy while they are caught in Rick's mouth. | |
| Forward throw | Ice ChuChu | 1% (each snowball), 5% (throw) | ChuChu throws the enemy forward, but as she does so, Rick spits three snowballs at them. |
| Back throw | Fire Rick | 11% | Rick turns around and releases the opponent from his jaws before blowing fireballs at them. |
| Up throw | 2% (toss), 8% (launch) | ChuChu throws the opponent up on top of a parasol, which Rick bounces upward in his hand to send the enemy flying upward. | |
| Down throw | Ice Rick | 8% (opponent), 1.6% (snowfall) | R&C form a snowman atop the enemy, with ChuChu on top, Rick in the middle, and the enemy on the bottom. Snow falls from ChuChu's head around the three of them, dealing minor damage and knockback to anyone else who touches them during the throw. Combos well into an up aerial. |
| Floor attack (front) | 7% | As Rick struggles to get up, ChuChu hides behind him with respect to the camera and punches first forward and then backward. | |
| Floor attack (back) | 7% | Rick rolls backward onto his shoulders and jumps to his feet, damaging anyone in his path. | |
| Floor attack (trip) | 5% | Rick gets up and hops slightly, damaging opponents on his way, as ChuChu climbs again onto his shoulders. | |
| Edge attack | 8.4% | After hanging from Rick's feet (who is grabbing the stage), ChuChu climbs up Rick's back and flips her body onto the ledge. | |
| Neutral special | Spark ChuChu | 4.6% (uncharged), 8% (charged) | Shoots a laser beam from ChuChu's arm directly ahead. With similar charging and speed as Toon Link's Hero's Bow, Spark ChuChu can be charged at the start of the move for increased power and distance. Bounces off of walls a growing number of times depending on for how long the attack was charged. The laser passes through opponents in addition to damaging them, much like R.O.B.'s Robo Beam. |
| Side special | Cutter Rick | 11% (projectile), 8% (returning) | Rick throws ChuChu like a boomerang directly ahead, about half the distance of Final Destination. Rick can move and jump (but can not perform a mid-air jump) after the incarnation of the move. Like King K. Rool's Crownerang, ChuChu will home in on Rick during her return trip, despite obstacles such as terrain. ChuChu deals damage upon collision with opponents throughout the entire attack. |
| Up special | Clean ChuChu | 5% | R&C ride a controllable broomstick with relative freedom of movement, though it is better horizontally than vertically. Deals minor damage and knockback only behind them at the broom's brush section. Potential usage as a gimp when edgeguarding. |
| Down special | Animal Swap | — | Rick runs into the background out of sight as ChuChu jumps repeatedly up and to the right, soon vanishing. At the same time, Coo descends from above and the left and lands on Nago, who has walked forward into place from nothingness. The player will now control Coo & Nago. |
| Final Smash | Animal Frenzy | 42% (total) | An entrapment Final Smash, R&C and the ensnared opponent(s) appear in a grassy field akin to the opening levels of Kirby's Dream Land 3, where they are joined by the other four Animal Friends (Coo, Nago, Kine, and Pitch). The team of six begin whaling on the target(s), nearly identically to Shulk's final smash. |
On-screen appearance
- Rick jogs in from in front of R&C's eventual stance, skidding to a stop, and turning around, all while ChuChu hops downward from the top-right.
Taunts
- Up taunt: R&C hop into the air and hover for a moment, turning twice. While aloft, Rick runs in place vigorously as ChuChu bears an open smile.
- Side taunt: ChuChu taps Rick on the shoulder closer to the camera. When he turns to see who it was, ChuChu retreats to his opposite side, chuckling.
- Down taunt: Rick uses ChuChu as a jump rope and performs three small jumps.
Idle poses
- R&C sway from side to side.
- ChuChu adjusts her bow as Rick sniffs diagonally upward, first closer to the camera, and then farther from it.
Victory poses
- Left: Rick runs toward ChuChu. Upon colliding with her, she becomes a slingshot, sending Rick flying forward as the camera pauses on him, with ChuChu still visible behind him. Afterward, Rick face-plants on the ground, with ChuChu checking up on him.
- Up: Rick runs on a hamster wheel made of ChuChu before ChuChu resumes her normal form, tripping her partner when the camera presents their name, Rick still in the air. ChuChu laughs at him during and after.
- Right: ChuChu attempts to lift a snoozing Rick into the air as a weightlifter would. After struggling for a bit, she emerges victorious, thrusting him into the air right when he wakes up.
Coo & Nago
Coo & Nago can perform five mid-air jumps, keeping with the standard set by the three Kirby veterans.
Note: All numbers are listed as base damage, without the 1v1 multiplier.
| Name | Damage | Description | |
|---|---|---|---|
| Neutral attack | 2.9% (hit 1) 2.9% (hit 2) 4.4% (hit 3) |
A three-hit combo consisting of two pecks by Coo and a finishing kick by Nago. Both pecks come from a higher angle, as Coo is perched on top of Nago throughout the move. The first peck features Coo's head tilted toward the camera a bit, while the second one is tilted slightly away. Coo flutters in the air for the final hit as Nago hangs from Coo's feet and delivers a kick with both feet. | |
| Forward tilt | Cutter Coo | 5.2% (up) 5.3% (side) 4.1% (down) |
Coo spins around along his y-axis and shoots a projectile feather spinning on the xy-plane a short distance ahead. Can be angled up or down. |
| Up tilt | Parasol Nago | 10% (Coo), 7.1% (Nago, parasol) | Nago sits inside an upturned parasol as Coo perches on the opposite side. Nago makes the parasol hop, and they rise into the air very slightly. Both the parasol and the entirety of C&N's bodies are hitboxes for the duration of this attack. |
| Down tilt | Fire Nago | 3.7% (short), 7% (peak) | Coo spits out a small column of fire toward the ground, which moves along the floor ahead of C&N about one character length in front of them. The projectile flame grows in stature from barely above the ground to half of C&N's height halfway through its movement, after which point it diminishes at the same rate. |
| Dash attack | Clean Nago | 11% (clean), 7% (late) | Nago pulls Coo in front of himself and dives forward, not unlike Wario's dash attack in Brawl. In a comical fashion, Coo appears angry at Nago for pushing him along the floor. |
| Forward smash | Needle Nago | 3% (hit 1), 3% (hit 2), 12% (hit 3) | Nago holds Coo in his hands by Coo's feet as Coo prepares to peck forward. Three pecks take place, each of which feeds into the next, reminiscent of Cloud's forward smash. Unimpressive range, with the last hit going about as far ahead as Mario's forward smash, but makes up for this with speed and power. |
| Up smash | Cutter Nago | 15% (close), 12% (far) | A smash attack projectile akin to Mega Man's forward smash, except angled diagonally upward akin to Mewtwo's forward throw, Shadow Cannon. Nago holds Coo in front of and underneath himself during charging, and upon release, Nago performs a back flip while still clutching onto Coo. A purple semicircular shockwave is released from Coo's body. |
| Down smash | Stone Nago | 15% (each) | During the charge, Nago lifts Coo, who has transformed into a rock shaped just like him, and upon release, he slams him down on the ground in front of him three times in quick succession, comparable to a physical version of Lucas' down smash, PK Blow. The hits do not normally connect into each other. |
| Neutral aerial | Needle Coo | 11% (sweetspot), 8% (sourspot) | Nago's body reshapes into a downward-pointing spike for a moment, inflicting damage only directly below the pair. The first time this move is used in each set of jumps, C&N are completely still, briefly cancelling all jumping or falling momentum. There is a very small meteor hitbox at the tip of the spike. Sufficient range to hit beneath a fall-through platform when hovering just above it. |
| Forward aerial | Fire Coo | 15% (sweetspot), 11% (duration) | Nago is engulfed in flames as the duo descends diagonally downward. Similar to the latter half of Incineroar's Cross Chop, except it only travels half of the distance, and does not end in an explosion. Acts as a diagonal meteor smash, similar to Ryu's down aerial, when sweetspotted at the incarnation of the move, adding to C&N's air superiority. |
| Back aerial | Clean Coo | 10% | Coo turns into a feather duster, and Nago swings the owl by his talons behind himself and a bit below, similar to Shulk's forward aerial. |
| Up aerial | Parasol Coo | 1.1% (hits 1-10) | C&N spin rapidly along the y-axis, similar to Kirby's Tornado Copy Ability in his series. Effectively Olimar's up tilt, but as an aerial attack. |
| Down aerial | Spark Coo | 14% (sweetspot), 8% (bolt) | As Coo hovers in the air, Nago is surrounded by electricity, generating a blue and yellow lightning bolt shooting straight downward, ranging about half the height of Palutena's up smash. Like C&N's neutral aerial, the first time the move is used during each flight, the team is completely motionless during the animation, granting the ability to fake out the opponent, but because it will cancel out the jump's momentum, Spark Coo can also hinder the user's recovery. Meteor smashes if sweetspotted on Nago's body when the attack comes out, similar to the storm cloud of Pikachu's Thunder. |
| Grab | — | Coo uses his talons to claw diagonally downward at the opponent. | |
| Pummel | 1.4% | Coo, detached from C&N, holds the opponent by their head/shoulders in front of Nago, facing him, as Coo tightens his grip for each pummel. Nago stands in a ready position, awaiting a throw. | |
| Forward throw | 1% (drop), 11% (kick) | Coo drops the opponent before Nago jumps into his talons, just after which Coo performs an aerial front flip, flinging a kicking Nago into the opponent. | |
| Back throw | 1% (toss), 8% (launch) | Coo tosses the opponent underhanded toward Nago, who catches them and suplexes them backward, as in Kirby's back throw. | |
| Up throw | 10% (throw), 7% (landing) | Coo soars high into the air like Kirby and Charizard do in their respective up throws as Nago pretends not to know what is happening. Just before Coo returns to Earth, Nago slides out of the way and poses comically. Like Kirby's up throw, the move can damage and launch bystanders upon landing. Nago is completely invulnerable until Coo lands. | |
| Down throw | Stone Coo | 9% | Coo throws the caught opponent down in front of Nago, who hops above them as Coo catches him in his talons, at which point Nago turns to stone and Coo drops him onto the opponent. Launches the opponent straight upward, potentially setting up a combo into an up aerial at lower percentages. |
| Floor attack (front) | 7% | Nago gets up lazily as Coo's wings slam downward on both sides, similar to Palutena's down smash. | |
| Floor attack (back) | 7% | Nago gets up lazily as Coo swipes his wing first forward and then behind. | |
| Floor attack (trip) | 5% | Nago gets up lazily as Coo claws with his talons first ahead and then behind. | |
| Edge attack | 8% | While hanging, Nago grabs the stage as Coo dangles upside-down from Nago's feet, a comically dull expression on his face. When the attack button is pressed, Coo flies onto the stage and pecks ahead. Nago climbs up and boosts Coo up onto his back, resuming their standing pose. | |
| Neutral special | Spark Nago | 2% | Nago rubs Coo on the ground and generates static electricity, creating a weak hitbox surrounding the pair, one which lasts longer the more the move is charged. After the move is finished charging, or the player interrupts the charge by pressing the special move button again, the hitbox encasing C&N moves with them, dealing extremely minor damage and knockback to any hurtboxes that collide with it, not unlike Mega Man's Leaf Shield. The static electricity will dissipate quickly if C&N leave the ground, but there is enough time with a full charge to persist for the rising phase of one jump. No effect if used in the air until C&N hit the floor, though the animation will still commence. Very useful as a combo starter. |
| Side special | Ice Coo | 5% | Coo twists around and shoots three ice shards ahead, one at 45 degrees, another at 0 degrees, and the third at -45 degrees. While the shards are incredibly weak, the move does not take long to activate and each ice fragment travels a good distance, with each piece disappearing just past the midpoint of Final Destination. Additionally, the move functions as an incredibly potent gimp, hindering opponents' recovery quite efficiently. |
| Up special | Ice Nago | 1.9% (hits 1-7) | Nago blows freezing breath downward as Coo flutters upward, dealing 13.3% if all hits connect, achieving about the same height as Kirby's Final Cutter. Not a very useful move for recovery purposes, but C&N make up for it with their impressive jumping capabilities. Nago's ice breath can freeze opponents at high damage percentages, just like Ice Climbers' Blizzard. In addition, the move does not cause helplessness, opening up its options considerably. |
| Down special | Animal Swap | — | Nago jogs off into the background as Coo flies away upward and forward. Just after, Kine emerges from a suddenly-appearing floor of water (purely aesthetic, no effect on the stage or other characters) as Pitch flutters in from behind, landing on Kine's dorsal fin. The player will now control Kine & Pitch. |
| Final Smash | Animal Frenzy | 42% (total) | An entrapment Final Smash, C&N and the ensnared opponent(s) appear in a grassy field akin to the opening levels of Kirby's Dream Land 3, where they are joined by the other four Animal Friends (Rick, Kine, ChuChu, and Pitch). The team of six begin whaling on the target(s), nearly identically to Shulk's Final Smash. |
On-screen appearance
- Nago walks forward into place as Coo flaps in from above and the left, landing on top of him.
Taunts
- Up taunt: Coo flies above Nago, making Nago jump up to get him back as Coo chuckles lightly.
- Side taunt: Nago moves his arm up and down in the manner of a Maneki-neko, a real-life Japanese figurine, as Coo winks at the camera.
- Down taunt: Nago falls asleep. When Coo notices, he wakes him up with a squawk.
Idle poses
- Coo cleans his feathers on one wing with his beak as Nago takes a deep breath.
- Nago cleans his arm with his tongue like a cat as Coo shakes his feathers out.
Victory poses
- Left: Nago chases a flying Coo. The camera pauses on the duo when the cat jumps in the air and catches the owl's foot, giving Coo an expression of shock.
- Up: Facing the camera, Nago mimics a Maneki-neko, just like in the pair's side taunt, while Coo stands next to him, looking around. After a moment, Coo looks straight up and, surprised, is exposed to a barrage of gold Smash Coins from above.
- Right: Nago shuffles on top of a small red rug with the Smash logo on it, generating static electricity. Laughing, he then walks over to Coo, who is resting on a branch. Nago touches Coo's foot with his paw, comically electrocuting him as the screen displays their name.
Kine & Pitch
Uniquely, Kine & Pitch are unable to drown while swimming.
Note: All numbers are listed as base damage, without the 1v1 multiplier.
| Name | Damage | Description | |
|---|---|---|---|
| Neutral attack | 3% (hit 1) 6% (hit 2) |
A fast slap with Kine's tailfin as K&P spin around quickly. If used twice, the pair will not complete the spin after the first hit and will instead reverse direction, slapping with the same fin again. At certain percentages, the first hit alone can combo into a forward smash. | |
| Forward tilt | 7% | Kine spits Pitch out from his mouth a short distance straight ahead, after which Pitch quickly rejoins his friend. Does not count as a projectile. | |
| Up tilt | 4% (hit 1) 4% (hit 2) |
A two-part attack, Pitch pokes upward just behind and then upward just ahead. Functionally similar dynamics to Mr. Game & Watch's up tilt, except that the attack button must be pressed twice to gain the secondary hit. | |
| Down tilt | Clean Pitch | 5% | Pitch detaches from Kine as Kine spits a ball of water forward in a low arc. The water can be reflected, though the window for this is very small. Potentially leads into a forward or reverse back aerial. |
| Dash attack | Ice Kine | 7.8% (Kine), 9.4% (Pitch) | Kine is encased in a frozen ball of ice, with a small mound of ice on top where Pitch stood. The ball rolls forward until the Pitch portion hits the floor. Halted, the move ends, and they return to normal. Will never freeze opponents. |
| Forward smash | Spark Kine | 3% (initial), 14% (release) | A lightbulb shines, fully exposed, out of Kine's mouth during the charge while Pitch shields his eyes from the light with his wing. Upon release, the lightbulb shatters, dealing considerable damage and knockback. Both Kine and Pitch appear surprised when it breaks. Uniquely, the lightbulb deals a small amount of damage once only right when it comes out, setting K&P up for a mostly safe uncharged forward smash. |
| Up smash | Stone Pitch | 14% | Clutching Kine tightly, a stone variant of Pitch readies a mostly upward, partially diagonal hop, and upon release, jumps, dragging his fish companion along with him. Pitch then falls back down to Earth, still a hitbox. The move has some similarities to King K. Rool's up smash. Kine is not a hitbox for this move, allowing for the opponent to interrupt the attack if they direct their attack at him. |
| Down smash | Stone Kine | 16% | Pitch hovers rigorously in the air, struggling to hold a downward-facing stone version of Kine. Upon releasing the attack button, Pitch's grip gives way and he drops Kine onto the floor. K&P's hurtbox is airborne during the charge, avoiding some attacks and potentially leading to a punish. |
| Neutral aerial | Needle Kine | 8% | Kine swallows Pitch, who expands into a needle ball shape inside the fish, poking out all around Kine without breaking through his scales. Not their fastest aerial attack, but it does hit on all sides. |
| Forward aerial | Needle Pitch | 2% (hit 1), 2% (hit 2), 4% (hit 3) | In Kine's mouth, Pitch's beak juts forward three times, each time moving K&P horizontally forward a bit, cancelling all momentum the first time it is used in the air. Can aid in horizontal recovery. Because K&P's jumping momentum is cancelled, it can be used immediately after a short hop to effectively function as a grounded attack. |
| Back aerial | Cutter Kine | 8% | K&P face behind themselves temporarily and Kine shoots out a yellow energy pulse that propels them forward a bit. The pulse can be reflected/absorbed, but it doesn't go very far. |
| Up aerial | Parasol Kine | 8% (clean), 3% (late) | With the help of Pitch's fluttering, K&P face the sky as a parasol opens out of Kine's mouth, forming a small disjointed hitbox above K&P. |
| Down aerial | Fire Pitch | 8% | Kine spits a flaming Pitch straight downward, following K&P's established momentum; Pitch rejoins his partner shortly after, still dealing damage on the return trip. |
| Grab | Clean Kine | — | A black plunger emerges from Kine's mouth, restraining the opponent. |
| Pummel | 1% | Standing atop Kine, Pitch pecks downward with a blank expression on his face. Equally as rapid as Kirby's pummel. | |
| Forward throw | Clean Kine | 7.8% | Like Donkey Kong, K&P's forward throw allows them to walk and jump while still holding the opponent in Kine's plunger. The throw commences simply by walking forward, after which character control matches Donkey Kong's forward throw until the opponent mashes out of it, the opponent or K&P is attacked by an external source, or the K&P player presses the attack or grab button, in which case the enemy is shot straight forward similar to the release portion of King Dedede's Inhale, though without the star. K&P can not turn around during this carry, allowing them to walk backward while holding the opponent. Additionally, because the opponent can only be released forward, the throw allows for a potential stage spike if the player walks off the ledge as they face the stage. |
| Back throw | 10% | Kine rolls on his back such that his plunger and opponent are hoisted in the air as Pitch, engulfed in flames, circles counterclockwise from behind Kine and rams into the opponent, sending them flying backward. | |
| Up throw | Ice Pitch | 1.5% (hits 1-6) | Kine twirls the large feather on top of Pitch's head with his lateral fin like a crank, making Pitch shoot six snowballs at the opponent. Freezes the opponent for a brief moment after the sixth shot, sending them flying vertically. The freezing effect does not scale with damage, and will not increase in duration if the enemy is at a high damage percentage (knockback scaling is normal). |
| Down throw | Fire Kine | 9.8% | Pitch jumps onto the prone opponent as Kine jumps up and angles himself diagonally downward, shooting out an orange lava pulse. |
| Floor attack (front) | 7% | His dorsal fin pointed toward the camera before the attack input, Kine spins rapidly and flops back up to his "feet", dealing damage during the spin. | |
| Floor attack (back) | 7% | His ventral side facing the camera before the attack input, Kine spins rapidly and flops back up to his "feet", dealing damage during the spin. | |
| Floor attack (trip) | 5% | As Kine manages to stand up straight, Pitch pecks once on either side. | |
| Edge attack | 8.5% | Kine's mouth gripping the stage before the edge attack, Pitch flaps his wings and hoists him up as he thrusts himself forward onto the stage. | |
| Neutral special | Parasol Pitch | 11.9% (early), 7.7% (lower momentum), 8.5% (return trip) | Kine uses a closed parasol as a makeshift golf club, which he uses to launch Pitch at an angle determined by how long the special move button is held. If tapped only slightly, Pitch will roll forward; if held for the maximum duration of 1 second, Kine lobs the bird in a tall, thin arc; and the angle otherwise rises depending on time spent holding down the special move button, between 0 and 1 second. After his travels begin, Pitch will bounce off of all physical terrain (unless he is rolling along the ground) until momentum is lost, he collides with a hurtbox, he moves past any blast line, or the special move button is pressed again. After any of these conditions are met, Pitch will gravitate back to Kine just as Luma does when returning to Rosalina, except Pitch still acts as a hitbox during the return trip. Kine can walk, run, jump (but not double jump), dodge, shield, and perform attacks that do not require Pitch (neutral attack, forward smash, and back aerial only) while he is separated from his partner. Pitch's body is not a hurtbox while he is being treated as a projectile. |
| Side special | Cutter Pitch | 10.8% | Kine spits Pitch in the shape of a tailless arrow out forward a great distance at only moderate speed, more than half of Final Destination. Pitch, now a projectile, deals damage throughout the move, returning to Kine at a much slower rate than in K&P's neutral and up special moves. Because Pitch will be drawn back to Kine after maximum distance is achieved, a falling orbit can be established around Kine if the player can manipulate the duo's positioning correctly. Unlike K&P's other two pair-specific special moves, Pitch can not be recalled to Kine on command here. Kine can walk, run, jump (but not double jump), dodge, shield, and perform attacks that do not require Pitch (neutral attack, forward smash, and back aerial only) while he is separated from his partner. Pitch's body is not a hurtbox while he is being treated as a projectile. |
| Up special | Spark Pitch | 11% | Kine pulls out a remote controller with which he dictates Pitch's flight path. If used in the air, Kine will stand on top of the bird as the move takes place, forming a considerably useful recovery move. The airborne Spark Pitch begins by moving forward, but can immediately be angled up or down at will until damage is taken, the move concludes naturally, or the player interrupts it by pressing the special move button again. Causes helplessness upon completion if activated in the air. If used on the ground, Kine will stay in place as he controls Pitch remotely, similar to Snake's Remote Missile. In the variant of the move initiated on the ground, Pitch can soar in any direction freely, nearly identically to Lucas' PK Thunder, after moving forward briefly at the incarnation. Pitch speeds back to Kine when the move ends organically, the move is cancelled mid-flight, or Kine is attacked; in any of these cases, Pitch is no longer a hitbox. |
| Down special | Animal Swap | — | Kine hops away into the background as Pitch flies away upward and forward. Just after, Rick scampers in from the front, skids to a stop, and faces forward as ChuChu descends from above and behind. The player will now control Rick & ChuChu. |
| Final Smash | Animal Frenzy | 42% (total) | An entrapment Final Smash, K&P and the ensnared opponent(s) appear in a grassy field akin to the opening levels of Kirby's Dream Land 3, where they are joined by the other four Animal Friends (Rick, Coo, ChuChu, and Nago). The team of six begin whaling on the target(s), nearly identically to Shulk's Final Smash. |
On-screen appearance
- Kine rises from a puddle of water as Pitch flutters downward and to the right, joining his partner.
Taunts
- Up taunt: Keeping with their up special move, Spark Pitch, Kine pulls out their remote control and navigates Pitch in an infinity loop above himself.
- Side taunt: Pitch excitedly runs on top of Kine, who spins in place like a wheel.
- Down taunt: Kine faces upward with his mouth full of water, allowing Pitch to take a birdbath.
Idle poses
- Kine blows a pair of bubbles like a real-world fish might as Pitch looks around rapidly.
- Kine rocks back and forth as Pitch deftly balances, stepping quickly.
Victory poses
- Left: His mouth closed, something is poking out of Kine's body in various spots as he follows each stimulus with his eyes. When he can not take any more of this, he opens his mouth and spits Pitch out toward the camera at an angle.
- Up: Separated from each other, Kine rapidly swims in water from the left with purpose; next, the camera cuts to Pitch fluttering vigorously leftward; finally, in a third shot, Kine jumps out of the water and Pitch catches his dorsal fin, as they strike a pose.
- Right: K&P perform their side special move, Cutter Pitch, into the distance. Before Pitch can come back, Kine faces the camera and poses alone. When he notices that the victory pose climax did not happen, a comically large bead of sweat appears next to his forehead as his eyes look back at Pitch zeroing in on him from behind, at which point their name arrives on the screen just before Pitch hits him. Afterward, the collision takes place and Kine is knocked down, with Pitch returning to bird form.
Classic Mode: The Land of Dreams
With the exception of Round 6, Animal Friends' Classic Mode fighter opponents all reference mission characters from Kirby's Dream Land 3, even though none of the original characters can be fought in the base game.
| Round | Opponent | Stage | Music | Notes |
|---|---|---|---|---|
| 1 | Ivysaur |
Dream Land (Ω) | Kirby Retro Medley | Kirby and the Animal Friends must help a red tulip by avoiding crushing any of the flower's brethren in the very first mission of Kirby's Dream Land 3. |
| 2 | Greninja |
Tortimer Island | Ice Cream Island | The Animal Friends must reunite a small frog with its parent in Stage 4 of Ripple Field. |
| 3 | R.O.B. |
Gerudo Valley | Gourmet Race (64) | Sand Canyon's final mission in Kirby's Dream Land 3 requires the player to collect the scattered pieces of R.O.B.'s body for Professor Hector to rebuild. |
| 4 | Kirby |
Skyworld | Butter Building (for 3DS / Wii U) | Stage 3 of Cloudy Park features a short memorization-based sub-game proctored by a character made of three stacked spheres, one yellow, one red, and one blue. |
| 5 | Samus |
Norfair | Dangerous Dinner | Samus makes a cameo in Iceberg, the final area of Kirby's Dream Land 3, where she tasks Kirby with disabling six Metroids. Accordingly, the only items that will appear on this stage are Assist Trophies, each of which will call forth a Metroid. |
| Bonus Stage | ||||
| 6 | King Dedede |
Luigi's Mansion (Ω) | King Dedede's Theme (Brawl) | The player fights a possessed King Dedede on top of a dark castle as the last boss before the true ending of the game. |
| Final | Master Hand | Final Destination | Master Hand | Both Master Hand and Zero, the true final boss of Kirby's Dream Land 3, are white, floating final bosses of their original respective games. |
Credits roll after completing Classic Mode. Completing it with Animal Friends has Staff Credits - Kirby's Dream Land accompany the credits.
Spirits
After acquiring them as DLC, Animal Friends' Fighter Spirit can be obtained by completing Classic Mode. The six members of the team each appear in their own separate spirits, with Nago getting the special privilege of a primary spirit.
332. Rick
338. ChuChu

334. Coo
336. Nago
333. Kine
337. Pitch


Alternate costumes
With the exception of Coo, all of the Animal Friends' palette swaps are based on allies met in the stage inhabited by their respective counterparts in Kirby's Dream Land 3. As Coo has no counterpart, his colorations are based on that game's bosses. Although each pair's character model changes slightly in their last palette swaps, the names written on the screen and spoken by the Announcer never change.


| Default | |
| Brown | Rick's brown and white fur becomes brown and pink, and his feet turn green. ChuChu turns brown, her bow remaining red. Based on Hibanamodoki and Geromazudake. Coo's purple and white feathers turn brown and light green. Nago's orange and white fur becomes brown and light purple. Based on Whispy Woods and Kogoesou. Kine's blue and yellow scales become brown and red. Pitch's green and white feathers turn brown and pink. Based on Goku of Chao & Goku and Kogamugael of Gamugael & Kogamugael. |
| Red | Rick's fur becomes red and white, and his feet turn yellow. ChuChu turns yellow, her bow remaining red. Based on Piyo & Keko and Obachan. Coo's feathers turn red and yellow. Nago's fur becomes yellow and white. Based on King Dedede and Angel. Kine's scales become red and black. Pitch's feathers turn brown and pink, similar to his previous palette swap. Based on Chao of Chao & Goku and Gamugael of Gamugael & Kogamugael. |
| Gray | Rick's fur becomes gray and white, and his feet turn gray. ChuChu turns red, her bow becoming black. Based on Kagamimocchi of Mikarin & Kagamimocchi and Hikari of Donbe & Hikari. Coo's feathers turn gray and white, resembling his original design. Nago's fur becomes red and orange. Based on Acro and Samus as she appears in Kirby's Dream Land 3. Kine's scales become white and red. Pitch's feathers turn yellow and gray. Based on Pierre and HB-002. |
| Yellow | Rick's fur becomes orange and yellow, and his feet turn green. ChuChu turns blue, her bow becoming yellow. Based on Mikarin of Mikarin & Kagamimocchi and Donbe of Donbe & Hikari. Coo's feathers turn yellow and white. Nago's fur becomes brown and beige. Based on Con of Pon & Con and Nametsumuri without his shell. Kine's scales become green and blue. Pitch's feathers turn yellow and white. Based on MuchiMuchi and Bakasa. |
| Pink | Rick's fur becomes dark pink and light pink, somewhat resembling Kirby. ChuChu turns gray, her bow remaining red. Based on HB-007 and R.O.B. as he appears in Kirby's Dream Land 3. Coo's feathers turn red and green. Nago's fur becomes yellow and pink. Based on Ado and Nametsumuri, shelled. Kine's scales become pink and green. Pitch's feathers turn pink and light green. Based on Tulip and Kamuribana. |
| Blue | Rick's fur becomes yellow and light blue, and his feet turn red. ChuChu turns white, her bow becoming yellow. Based on Tamasan and Caramello. Coo's feathers turn brown and white. Nago's fur becomes orange and light blue. Based on Pon of Pon & Con and Chef Kawasaki. Kine's scales become dark blue and light blue. Pitch's feathers turn blue and white. Based on Pitcher Man and Elieel. |
| Allies | Pick is Rick's girlfriend, appearing like him but with pink and white fur, also donning a red bow atop her head. ChuChu's companion, Nyupun, is yellow with a pink hat instead of a bow. All six Animal Friends have counterpart allies in Kirby's Dream Land 3 except for Coo, so he assumes Zero's color scheme, gaining white and red feathers. Shiro is Nago's love interest, appearing as an all-white cat with wide-open anime-style eyes. Mine is Kine's wife, a blushing pink-and-orange sunfish with larger pupils than her husband. Pitch's mother, known simply as Pitch Mama, is a pink and white bird with one large feather sticking up instead of Pitch's two small ones. |
Trivia
- Although Animal Friends' icon on the character selection screen displays the name, "Animal Friends," neither the boxes below the list of characters nor the victory screen will ever display this title.
- Despite this, only Rick & ChuChu appear as the character icon, due to the unavoidable difficulty of fitting all six characters in that small cell.
- When Animal Friends is selected by the player, the character displayed will default to Rick & ChuChu, with Coo & Nago in the top-left-hand corner. The player can select as whom to begin the match in this manner, akin to Pokémon Trainer.
- No matter the outcome of the match, only the pair active upon the game's conclusion will appear on the victory screen.
- There are English and Japanese voice clips for the name, "Animal Friends," in the game's files, though they were never used in the final product.
- Kine is the second character in the Super Smash Bros. series to have neither arms nor legs, after Piranha Plant. However, considering his partnership with Pitch, the overall character technically has a total of two legs.
- Unless one counts Olimar and his multiple species of Pikmin, Animal Friends comprise the fighter with the highest number of characters playable in a single match, at six.
- Animal Friends' congratulations screen displays the team of six gazing at Duck Hunt and Banjo & Kazooie on PictoChat 2, apparently receiving a lesson. This is a reference to the five characters all being pairs of animals.
- Animal Friends are the first Kirby newcomer since Super Smash Bros. Brawl, where Meta Knight and King Dedede debuted. They are also the first representative of the universe since Kirby in the original Super Smash Bros. to not be a villain.
- Animal Friends' introduction tagline is a reference to Kirby Star Allies, in which all six characters appear to some capacity.
- If Kirby inhales:
- Rick & ChuChu:
- Kirby gains Rick's brown fur as it is placed on Rick, and puts on ChuChu's red bow.
- The laser beam produced by the copy ability will be closer to the ground than it is when used by R&C, due to Kirby's shorter stature.
- Coo & Nago:
- Kirby dons Nago's ears and tail, and gains Coo's chest pattern.
- Because Kirby has no partner to rub on the ground, he shuffles on the ground himself to generate the move's static charge.
- Kine & Pitch:
- Kine's dorsal and tail fins get attached to Kirby, and his hands become Kine's lateral fins. His appearance is not influenced by Pitch.
- Pitch is not represented in Kirby's K&P hat because like Luma, Pitch is the projectile used in the neutral special move.
- Rick & ChuChu:
- Animal Friends' in-stage description on Boxing Ring reads, "The Pride of Pop Star". This applies to all three character pairs.
- One of Coo & Nago's victory poses involves Smash Coins. With the removal of Coin Battle, this is the only instance in all of Super Smash Bros. Ultimate where these coins can be seen.
0² (SSBU)
| 0² | |
|---|---|

0² in Kirby 64: The Crystal Shards. | |
| Universe | Kirby |
| Debut | Kirby 64: The Crystal Shards (2000) |
| Smash Bros. appearances | Ultimate |
| Most recent non-Smash appearance | Kirby Star Allies (2018) |
| Console/platform of origin | Nintendo 64 |
| Place of origin | Dark Star |
| Article on WiKirby | 0² |
| “ | 0² Zeroes In, Too! | ” |
| —Introduction Tagline | ||
0², pronounced "Zero-Two," is a playable character in Super Smash Bros. Ultimate. He was revealed as a DLC fighter in the Nintendo Direct on April 1st, 2023 as the second character in the Fighters Pass Vol. 3. 0² is classified as fighter #86.
Attributes
The primary villain of Kirby 64: The Crystal Shards, 0² is a large, white, bulbous mass, sporting a massive red eye with a black pupil, a pair of segmented wings, an occasional cactus growth growing out from his "tail," a halo, and a bandage beneath that halo. 0² has similar physical proportions as King Dedede and Ridley, except that he is surprisingly a light middleweight. 0²'s wings act as disjointed hitboxes during all wing-based attacks, and his gargantuan wings' impressive size endows him with formidable range. 0² also employs numerous small incarnations of Dark Matter (true form) in certain moves, further contributing to his arsenal. 0²'s pupil will point toward the opponent closest in front of him at all times; if no opponent is near enough, he will simply look forward (this does not affect gameplay, and is purely aesthetic).
0²'s ground game is above average. Although the second hit of his neutral attack is a meteor smash, it is far too weak to be useful except in combos either into the third hit of the neutral attack (as in most neutral attacks) or his down tilt, assuming the opponent does not tech. This down tilt is not particularly fast, but it covers a very wide range, useful for keeping opponents at bay. Forward tilt actually hits behind 0² just before the stronger half of the attack takes place in front of him, which an enemy will rarely expect; the rear hit is also weak enough to combo into forward or back aerial at mid-range percentages. The up tilt does not cover a large area, but is very useful against opponents in front of and above him, with strong knockback and virtually inexistent start-up lag. 0²'s dash attack is one of only three moves in his arsenal that incorporates his main body, a simple headbutt/body slam while charging forward, an attack that comes out immediately and yields respectable damage and knockback. The second of these body-based attacks is his up smash, a forceful rush into the air popular as a finishing move due to the bloody tear that escapes 0²'s eye during the thrust. 0² and Pit have similar forward smashes, though 0²'s features much more impressive knockback on the second hit. Down smash attacks in a forward overhead arc with his cactus tail before slamming vengefully down on the ground, which, aided by impressive speed and power, gives the fighter another formidable KO move.
Considering that he is never grounded in his Kirby 64 debut, it makes sense that 0² would have a strong air game. Neutral aerial comes out on frame 4 and can interrupt opponent's combos from the sides, though like Bayonetta's neutral aerial, he is still vulnerable from directly above and below. Forward aerial is a quick cactus-powered back flip, which combos into itself very easily. His back aerial is essentially an airborne reversal of his forward tilt, and like that attack, it will first strike in the direction opposite of the input before leading to a stronger second hit behind himself. Down aerial is his slowest mid-air move and yet still not his strongest, though it launches opponents more horizontally than most down aerial attacks. Inarguably 0²'s best airborne finishing move is his up aerial, a fast, upward, disjointed halo strike that can KO damaged combatants without difficulty.
0²'s special moves can prove sufficiently useful, as well. Crystal Shards blocks the opponent from approaching ahead of him, and at low percents can lead into a forward aerial, itself leading to further options. Dark Matter Command generates four projectiles that will attempt to hone in on their targets after being sent out ahead, an attack with unmatched versatility for how simple it is. Dark Matter Blade is without a doubt 0²'s coup de grâce, essentially summoning a short-ranged variant of Lyn that will charge at anyone who comes near it, dealing a devastating 21%.
0²'s grab game leaves much to be desired, with none of his throws leading to truly reliable follow-ups. Forward and down throw each launch the opponent forward at a 45° angle, and forward throw has the potential to lead into forward or down tilt against heavyweights at extremely low percents. Although up throw sends the released opponent straight upward, 0² is unable to act out of it quickly enough after launching his adversary, giving them time to escape, dodge, etc. To make up for these shortcomings, his back throw has incredible KO potential, with monstrous knockback scaling rivaling that of Ness' famous back throw. As a side note, because 0² has no arms, he "grabs" the other fighter by gazing into them scarily, giving him deceptively medium-to-high grab range.
It appears that an unspoken rule concerning characters from the Kirby universe is that they all are able to perform six jumps in a single sitting, and 0² is no exception, blessing him with strong recovery abilities. In addition to his many mid-air jumps, he can also push himself forward using his back aerial, in the same manner as Corrin. His up special move, Halo Tunnel, not only gives him extra height, but also deals a formidable 16% throughout the ascent; it can not, however, be angled, making it fairly predictable in many situations.
Despite 0²'s many strengths, he has one glaring weakness: his miserably poor survivability. Physically, he is one of the largest characters in the game, as toweringly huge as Ridley and King K. Rool, but he is much, much lighter than them, weighing in equally to Palutena and Toon Link. Although this admittedly does hinder opponents' ability to entrap him in combos and juggle him, one strong attack will condemn him to the blast line. Mewtwo and Rosalina suffer from this same condition, though it is less pronounced in 0²'s case.
All in all, 0² has more helping him than hurting him, suggesting that he will see decent competitive performance in the tournament world, though this is yet to be seen. In particular, his air superiority is one of the best on the roster, and because he can still hold his own on the ground, it is likely that 0² will be cemented as a favorite among casual and serious players alike.
Moveset
Keeping with the standard set by the three Kirby veterans, 0² is gifted with five mid-air jumps.
Note: All numbers are listed as base damage, without the 1v1 multiplier.
| Name | Damage | Description | |
|---|---|---|---|
| Neutral attack | 2.2% (hit 1) 1.9% (hit 2) 4.4% (hit 3) |
A three-hit combo. For the first move, 0² quickly summons a Dark Matter from the ground, bidding it move straight up in front of him a short distance before it disappears. Second, another Dark Matter is generated where its predecessor vanished, this one moving downward toward the ground, additionally acting as a very weak meteor smash. For the last hit, a red blob is propelled straight ahead from 0²'s eye. None of these hits are considered projectiles. | |
| Forward tilt | 6.2% (back), 8.5% (forward) | 0² flaps his wings in front of himself, but opponents can also be hit behind him on the brief wind-up that takes place first. The second hit has a vertical range equal to 0²'s height, making this a very effective forward tilt. | |
| Up tilt | 10% | 0²'s halo angles upward and juts at that angle overhead as 0² looks upward. | |
| Down tilt | 6.8% | 0² spins his body on the ground, sweeping ahead of him with his wing at a very impressive distance. Similar to Squirtle's down tilt, except slower and with much more range. | |
| Dash attack | 11.5% | Performs a running headbutt into the opponent, landing on the ground afterward. Has some similarities to King K. Rool's dash attack. | |
| Forward smash | 4% (hit 1), 13% (hit 2) | Slashes diagonally downward twice, once with each wing, in the shape of an invisible "X". Similar to Pit's forward smash, in it that the attack button does not need to be pressed a second time in order to unleash the latter half of the move, and because the first hit flows into its successor organically. | |
| Up smash | 13% | During the charge, 0²'s wings begin flat on the ground like Palutena's do at the conclusion of her up smash. He is looking down angrily until the attack button is depressed, at which point he thrusts his main body straight upward with his halo briefly disappearing, dealing considerable damage at full charge. A single bloody tear escapes the corner of his eye at the apex of the move. | |
| Down smash | 6% (flip), 16% (landing) | The cactus growth appears on 0²'s underside in front of him on the ground, and upon release, 0² performs a front flip in place, slamming the plant down ahead only. Deals minor damage to opponents hit by the plant portion during the flip. | |
| Neutral aerial | 8% (clean), 3% (late) | Four Dark Matter orbit around 0² as he clenches his eye diagonally downward. The Dark Matter revolve around him in the same direction as R.O.B.'s Arm Rotor. | |
| Forward aerial | 8% | Performs a back flip, smacking opponents with his cactus in front of himself. A much faster, one-hit version of Rosalina & Luma's forward aerial. Combos into itself very efficiently. | |
| Back aerial | 6% (forward), 8.5% (back) | 0² flaps his wings behind himself, looking backward, but opponents can also be hit in front of him on the brief wind-up that takes place first. Functionally identical to his forward tilt, except in reverse. Like Corrin's back aerial, the move grants him some air distance forward. | |
| Up aerial | 11% | 0²'s halo shoots a ring of light upward, similar to Rosalina & Luma's up aerial. | |
| Down aerial | 9.6% | The cactus tail emerges, and 0² whips it forward. | |
| Grab | — | 0² lunges forward a bit as his eye opens widely. If the grab is successful, 0² will not physically hold the opponent; instead, he will stare intensely at them, rendering them immobile until they escape. | |
| Pummel | 1.9% | 0²'s eye widens further, making the enemy cringe. | |
| Forward throw | 8.7% | 0² rises menacingly above the opponent at an angle and closes in on them, "biting" them with his eyelid. | |
| Back throw | 11% | The enemy orbits around 0² as they would around Rosalina in her back throw, eventually being launched backward over his head. His pupil follows them for the duration of the move. | |
| Up throw | 9.2% | 0²'s halo tightens around the opponent with his big, red eye closed. Damage is dealt when the halo fully constricts around them. | |
| Down throw | 7.8% | Rises upward, stabbing his opponent diagonally downward with his white tail (the cactus does not sprout). | |
| Floor attack (front) | 7% | While prone in any position, 0²'s halo is absent. It appears suddenly as a hitbox in front of him, arcing backward overhead to also attack in the opposite direction. | |
| Floor attack (back) | 7% | A tear in the corner of his eye, his halo appears behind him as does his cactus on the other side, both components dealing damage. | |
| Floor attack (trip) | 5% | 0² curls his wings into fists and slams them down on either side before unfurling them. | |
| Edge attack | 8% | 0²'s halo shoots forward along the floor of the ledge before returning to its owner as he climbs onto the stage. | |
| Neutral special | Crystal Shards | 6% (first shot), 2% (each smaller piece), 2% (each explosion) | Shoots a single, spiky energy projectile directly ahead as he does in his original game. Upon collision, the object will separate into smaller versions of itself, whereafter each smaller version creates mini explosions. Travels a little farther than one-quarter of Final Destination at maximum. Can be used repeatedly at the same rate as Wolf's Blaster. |
| Side special | Dark Matter Command | 7% (each) | Points forward by curling the bottom four red components of one wing, commanding four Dark Matter forward in a wave-like motion. The Dark Matter will automatically home in on nearby opponents in their path, though they can escape the projectiles with sufficient evasion, as their inertia can make them miss opponents. |
| Up special | Halo Tunnel | 5% (wingbeat), 16% (ascent) | 0² looks upward and flaps his wings effortfully once as his halo enlarges to just greater than the diameter of his body. With his wings pointed downward after the flap, he soars perfectly vertically into the air through two additional halos that appear above him. Damage is dealt not only on the ascent but also on the wingbeat on both sides. Can not be angled. Has some similarities to Ridley's Wing Blitz when pointed upward. |
| Down special | Dark Matter Blade | 21% | Summons Dark Matter Blade, an alternate version of the pure Dark Matter seen in other attacks. Only successful if uninterrupted. Upon completion, Dark Matter Blade stands still for just over five seconds, waiting for an opponent to come near it. If an enemy moves within its radius, Dark Matter Blade will charge at them swiftly in any direction, delivering a decisive slash and then disappearing. The player can not summon more than one Dark Matter Blade at a time. Like Zelda's Phantom Slash, the creature has a hurtbox and can take damage, though it is generally more productive on the part of the opponent to simply wait it out, if possible. Although it takes a full two seconds to activate, it can be very rewarding. For example, using the move near the ledge while an enemy is hanging from it can limit their choices, for the minion will attack them if they can't properly avoid it. |
| Final Smash | Tough It Out! | Damage by battle, 11% (end) | Grimacing violently, the dark red background from the final boss fight of Kirby 64: The Crystal Shards appears around 0² in the shape of a massive rectangle about two-thirds the width of Battlefield and a total height reaching the top platform, forming an enclosed room that traps all opponents within range. Invincible, and with his adversaries unable to escape but able to move and attack freely, the player controls 0² as they normally would, not unlike Bayonetta in her Final Smash, minus the slowing of time and cutscene. At the end, 0² breaks the box by moving automatically to the center and thrusting his wings outward climatically, launching opponents. |
On-screen appearance
- 0² descends from above, facing the camera with his false smile before opening what looks like a mouth, revealing his true eye.
Taunts
- Up taunt: Ribbon flies around him. He glances at her, and then, annoyed, looks away.
- Side taunt: Appears to be surprised by something in front of him, flinching backward.
- Down taunt: His wings and halo remaining still, 0² rotates at an askew angle, making two full rotations.
Idle poses
- Pats down his bandages with one of his wings.
- He winces, a single tear of blood falling from his eye.
Victory poses
- Left: A single Dark Matter floats in the air, facing left. The whole screen flashes white thrice as 0² instantaneously takes the place of his minion, just as his predecessor, Zero, did in Kirby's Dream Land 3.
- Up: Performs a double shuttle loop toward the camera, posing with open wings at the end.
- Right: Three Dark Matter look up at 0² as he inaudibly delivers instructions to them. Understanding, they all nod, flying off into the distance as their master points forward decisively with his wing, as in his side special, Dark Matter Command.
Classic Mode: Shattered Crystal
All of 0²'s opponents represent other bosses in Kirby 64: The Crystal Shards. The music played for each round is a boss theme from the stage's universe.
| Round | Opponent | Stage | Music | Notes |
|---|---|---|---|---|
| 1 | Ivysaur |
Green Greens | King Dedede's Theme (for 3DS / Wii U) | Whispy Woods and his three children comprise the first boss of Kirby 64: The Crystal Shards. |
| 2 | Team Mr. Game & Watch |
Hyrule Castle (Ω) | Calamity Ganon Battle - Second Form | Based on Pix, the boss of the Rock Star stage. |
| 3 | Inkling |
Kongo Falls | Gang-Plank Galleon | Acro is fought at the end of Aqua Star. |
| 4 | Incineroar |
Brinstar Depths (Ω) | Vs. Parasite Queen | Kirby fights Magman in Neo Star. |
| 5 | R.O.B. |
Wily Castle | Metal Man Stage | Kirby fights HR-H to close out Shiver Star. |
| 6 | Mewtwo |
Spear Pillar (Ω) | Battle! (Elite Four) / Battle! (Solgaleo/Lunala) | Miracle Matter precedes 0² as the false final boss of their original game. |
| Bonus Stage | ||||
| Final | Marx | Mysterious Dimension | 02 Battle | Marx is the final boss of Kirby Super Star, just as 0² is the final boss of Kirby 64: The Crystal Shards. |
Credits roll after completing Classic Mode. Completing it with 0² has Staff Credits - Kirby's Dream Land accompany the credits.
Alternate costumes
| Default | |
| Yellow | Once red, 0²'s now yellow wing segments make him resemble Kracko. |
| Green | In addition to green wingtips, 0²'s halo leans slightly green, as well. |
| Blue | The wings' ends turn blue. |
| Red | The entirety of 0²'s wings redden, not just their tips. |
| Pink | 0²'s body gains a hint of pink as his wings end in yellow, reminiscent of Kirby. |
| Gray | The wings' ends turn black. |
| Black | 0²'s wingtips remain red, with the rest of his normally white body turning a deep black. |
Trivia
- 0² is the:
- first character in any Super Smash Bros. game to have a name completely devoid of letters.
- third DLC fighter in Super Smash Bros. Ultimate to be a villain, after Piranha Plant and Sephiroth, unless Steve's alternate costumes of Zombie and Enderman are counted.
- third character in Ultimate to bleed, after Little Mac, whose bruises acquired during a match reflect internal bleeding, and Bayonetta, who bleeds roses when she takes damage.
- Although the red liquid falling from 0²'s eye is never explicitly stated to be blood in the game, it is canonically established to be blood in Kirby 64: The Crystal Shards.
- It is never confirmed to be blood because an admission of this would affect the game's rating.
- 0²'s introduction tagline references Zero Suit Samus' splash art in Super Smash Bros. 4, "Zero Suit Samus Zeroes In!"
- If one tries to exit the battle against 0² in Kirby 64 prematurely, the game will forbid it, telling the player to "tough it out," inspiring the name of his Final Smash in Ultimate.
- If Kirby inhales 0², he adopts his bandages and halo. In addition, his eyes will always appear angry.
- 0²'s in-stage tagline on Boxing Ring is written as "Turning Sorrow into Strength", a nod to the fact that 0² is incapable of experiencing positive emotions.
The Batter (SSBU)
| The Batter | |
|---|---|
 
Official art for The Batter in Super Smash Bros. Ultimate. | |
| Universe | Off |
| Debut | Off (2007) |
| Smash Bros. appearances | Ultimate |
| Most recent non-Smash appearance | Off (Nintendo Switch) (2023) |
| Console/platform of origin | PC |
| Gender | Male |
| Created by | Mortis Ghost |
| “ | The Batter is in the Zone! | ” |
| —Introduction Tagline | ||
The Batter is a playable character in Super Smash Bros. Ultimate. He was revealed as a DLC fighter in the Nintendo Direct on July 15th, 2023 as the third character in the Fighters Pass Vol. 3. The Batter is classified as fighter #87.
Attributes
Hailing from the Off universe new to the Super Smash Bros. series, The Batter comes armed with his trusty Harold Bat (his primary method of physical attack) and his three Add-Ons, white, circular beings that accompany him one at a time. Add-Ons Alpha, Omega, and Epsilon each have different properties in combat, not unlike Min Min's ARMS, interchangeable via The Batter's down special move, Wide Angle. The Batter will always begin the match teamed up with Alpha, somewhat necessitating a quick change if the player does not prefer that Add-On. Confusingly, all three Add-Ons look exactly alike; the only ways to tell which one is active is by observing the effects of Add-On-based attacks and checking the damage meter. To the left of The Batter's face on the damage meter are three circles representative of his Add-On partners in a mostly vertical column (the same way they appear in their base game) with Alpha on the bottom, Omega in the middle, and Epsilon on top. The Add-On currently in the field will appear in white on this display, while the other two will be blackened. Like Marth's sword, The Batter's bat has a sweetspot at the tip.
Moveset
- Fighter ability: When The Batter perfect shields an attack, the active Add-On, which surrounds him whenever he is shielding, will expand quickly and briefly, yielding an effect. This ability is known as Pure.
- For simplicity, if, for instance, the length of the Harold Bat does 5% damage while the tip does 7%, and the attack has no other hitboxes, it is written as 5%/7%.
| Name | Damage | Description | ||||
|---|---|---|---|---|---|---|
| The Batter | Alpha | Omega | Epsilon | |||
| Neutral attack | 3%/4.8% | — | — | — | Swings the Harold Bat loosely with one hand. No change due to active Add-On. | |
| Forward tilt | — | 12% | 8% | 8% | Commands the Add-On as a projectile an impressive distance ahead for a tilt, able to be angled up or down. The downward direction can hit below the ledge. Alpha: Deals the most damage of the three Add-Ons. Omega: Heals one-twentieth of the damage inflicted. Epsilon: Slightly increases the attack power of the next attack, whether it connects or not. | |
| Up tilt | 7% | — | — | — | Thrusts his bat horizontally into the air, holding both ends of it. Because his hand blocks the normal sweetspot, there is none on this move. | |
| Down tilt | 4.9%/6.3% | — | — | — | Swipes his bat across the ground quickly. Useful as a combo starter. | |
| Dash attack | 7.8% (clean), 5.5% (late) | — | — | — | Performs a baseball slide low to the ground, striking with his cleats. Nearly identical to Mario's dash attack. | |
| Forward smash | 11% (sourspot) | 19% | 13% | 1% (hits 1-4), 12% (hit 5) | Swings his bat with a formal stance, the active Add-On encircling the weapon. Add-On effect takes place if sweetspotted. Alpha: Creates an explosion upon contact. Omega: Heals The Batter one-tenth of the damage inflicted. Epsilon: The hitbox persists for five hits in rapid succession, with the opponent being stunned for the first four before being launched. | |
| Up smash | 3% (bat sourspot/body) | 14% | 13% | 1% (hits 1-4), 12% (hit 5) | Thrusts his bat upward in the air, spinning his Add-On around it, launching opponents upon contact. Collision lower on the bat efficiently sends opponents into the Add-On hitbox. Alpha: Bestows upon the target the flower status effect. Omega: Slams opponent toward the ground instead of launching them, identically to Ganondorf's Flame Choke. Opens up many follow-up options if the player can properly read the opponent. Epsilon: Changes the attack from a single hit to multiple hits, becoming more similar to Mewtwo's up smash. | |
| Down smash | — | 12% (Omega), 9% (Epsilon) | 9% (Epsilon), 17% (Alpha) | 17% (Alpha), 12% (Omega) | The active Add-On retreats out of focus behind The Batter during the charge as he raises his hands in the air. Upon release, the two inactive Add-Ons appear and slam straight down on either side, with different effects depending on the active Add-On (though it is not used in the attack). Alpha: Omega attacks in front, and Epsilon attacks behind. Omega buries the opponent, while Epsilon paralyzes them. Omega: Epsilon attacks in front, and Alpha attacks behind. Epsilon paralyzes the opponent, while Alpha deals high damage and knockback. Epsilon: Alpha attacks in front, while Omega attacks behind. Alpha deals high damage and knockback, while Omega buries the opponent. | |
| Neutral aerial | — | 6% | 6% | 1% (hits 1-4), 3% (hit 5) | The active Add-On expands to surround The Batter. Alpha: Launches the opponent straight upward. Omega: Launches the opponent forward at a slightly upward angle. Epsilon: Entraps the opponent in a five-hit loop, as Pikachu does in his neutral aerial. | |
| Forward aerial | 7%/9% | — | — | — | Swings his bat with one hand, using his other hand to keep balance. Too much endlag to effectively include in combos. | |
| Back aerial | Classical Taking | — | 10% | 10% | 8% | A giant hand appears from within the Add-On, pointing directly behind The Batter. Qualifies as an Add-On-based attack. Alpha: Launches the opponent backward. Omega: Launches the opponent in the opposite direction of the point (forward). Epsilon: Deals no knockback, simply making the opponent flinch. |
| Up aerial | 9%/13% | — | — | — | Standing on the Add-On like a recovery platform, The Batter performs a low, golf-like swing up and over his head. | |
| Down aerial | 10% | — | — | — | Swings both legs inwardly downward, cleats slashing the opponent. | |
| Grab | — | — | — | — | Grabs the opponent with his open hand. | |
| Pummel | 2% | — | — | — | Pounds on the opponent with the handle of his bat. | |
| Forward throw | 9.6% | — | — | — | Swings at the opponent while they rest atop the grounded Add-On, not unlike a T-ball swing in real life. | |
| Back throw | 9.7% | — | — | — | The enemy is caught within the active Add-On, who holds them behind The Batter before he performs a back kick. | |
| Up throw | 9.8% | — | — | — | Mightily throws the opponent upward into the air, similar to Roy's up throw. References a piece of official art. | |
| Down throw | 3.3% (each hit) | — | — | — | Violently bashes downward on the enemy three times, mouth open. | |
| Floor attack (front) | 5.2%/6.5% | — | — | — | Swipes his bat across the ground on both sides. | |
| Floor attack (back) | 5.2%/6.5% | — | — | — | Swipes his bat across the ground on both sides. | |
| Floor attack (trip) | 4.1%/5.3% | — | — | — | Swings his bat across the ground in a single 180-degree arc. | |
| Edge attack | 6.8%/8% | — | — | — | The Batter stands on top of his Add-On as he does in his up aerial, swinging toward the stage before hopping onto it. | |
| Neutral special | Furious Homerun | 5% (Stage 0) | 19% (Stage 1); 26.6% (Stage 2); 1.4% (hits 1-4), 26.6% (hit 5) (Stage 3) | 13% (Stage 1); 1% (hits 1-4), 13% (hit 5) (Stage 2); 1.4% (hits 1-4), 26.6% (hit 5) (Stage 3) | 1% (hits 1-4), 12% (hit 5) (Stage 1); 1% (hits 1-4), 19% (hit 5) (Stage 2); 1.4% (hits 1-4), 26.6% (hit 5) (Stage 3) | A special move that charges identically to Robin's Thunder, minus the exhaustion mechanic. The stage of charge can be understood by the number of Add-Ons, from 0 to 3, encircling the bat during The Batter's wind-up. Charged none at all to only a little (Stage 0) has The Batter swing without the aid of his Add-On partners, ending up being simply a weak attack. The next phase (Stage 1) includes the active Add-On around the Harold Bat, with effects identical to The Batter's forward smash when equipped with that Add-On. Stage 2 retains that same Add-On but also adds the next one in line in the order of Alpha, Omega, Epsilon (for example, if Omega is in play, then Epsilon will be added), also gaining that Add-On's forward smash effect. The fully-charged Stage 3 will utilize all three Add-Ons, with identical effects no matter who the current Add-On is. The entire hitbox in Stages 1-3 gains these effects, with the tip sweetspot no longer being relevant. If Alpha is present, the swing will create an explosion upon launch. If Omega is present, the swing will heal The Batter one-tenth of the damage inflicted. If Epsilon is present, the swing's hitbox will persist for five hits in quick succession, launching the opponent on the fifth hit. |
| Side special | Run with Courage | 15.6% | — | — | — | Directs the Add-On straight ahead as in his forward tilt, but this time, the Add-On acts as a command grab instead of a projectile hitbox. Whether or not an enemy is caught, The Batter runs forward toward the Add-On and swings at it. In addition to being the longest-distance command grab in the game (just under 1.5x the distance of Incineroar's Alolan Whip), the move is also useful in aiding horizontal recovery, as it does not cause helplessness; however, it can only be used once in mid-air, like Corrin's Dragon Lunge. |
| Up special | Save First Base | 9.5%/11.1% | 12.5% | 12.5% | 4.9% | Sends his Add-On diagonally upward and ahead, though without Run with Courage's grab mechanic. With the exception of Epsilon, the ring will stop upon collision with a hurtbox; otherwise, it will travel its full distance. The Add-On attacks depending on who is active, and The Batter jumps diagonally toward it before striking with the Harold Bat once he reaches his partner. Alpha: Knockback is directed straight downward, creating a meteor effect. Omega: Heals The Batter exactly 2.5% upon launch. Epsilon: Passes through the opponent instead of stopping upon contact, dealing minor damage and knockback along the way. Because it will always travel the full distance, this is The Batter's greatest recovery option. |
| Down special | Wide Angle | — | — | — | — | The Wide Angle competence from Off surrounds The Batter (purely aesthetically) as the active Add-On rotates twice, switching from Alpha to Omega, Omega to Epsilon, or Epsilon to Alpha. The Add-On display next to the damage meter adjusts accordingly. The Batter can not act during this half-second move, but he can still be attacked, grabbed, etc. (the Add-On will still switch even if interrupted). |
| Final Smash | Bad Batter | 5% (initial), 20% (Alpha), 13% (Omega), 0.5% (hits 1-9) (Epsilon), 12.5% (ending) | Transforms into Bad Batter, a gargantuan monstrosity with menacing claws, and swipes at the opponent. If this initial strike connects, a cutscene begins, placing the opponent(s) on the right-hand side of Off's white Battle Time display, with Bad Batter and all three Add-Ons on the left. Simliar to the beginning of Cloud's Omnislash, the top of the screen will display the names of the team's attacks as they begin, as in their base game. Regardless of who is active, the Add-Ons attack in sequence first, damaging opponents remotely with automatic crosshairs that appear where they're positioned. Lastly, Bad Batter lunges at his adversaries, biting them with his terrifying jaws. Alpha: Deals 20%. Written at the top of the screen is the attack name, "Complete String". Omega: Deals 13% to the opponent, and heals The Batter 13%. Called "Radial Blur". Epsilon: Deals nine quick hits in rapid succession, each dealing 0.5% for a total of 4.5%. The top of the screen reads, "Fauvestic Tragedy". Bad Batter: During Epsilon's onslaught, Bad Batter attacks, launching the opponent and ending the cutscene. The caption reads, "Ultimate Homerun". | |||
On-screen appearance
- Descends from the air in an outstretched skydiving position, falling through all three Add-Ons while decelerating.
Taunts
- Up taunt: Uses the Add-On as a hula hoop, The Batter's face comically dull.
- Side taunt: Bounces the Add-On twice on his bat, held in front of him.
- Down taunt: The "Global" sound effect from Off ("Hhhhh...") plays, and The Batter assumes an alert stance.
Idle poses
- Taps his heel with his bat twice.
- Adjusts his baseball cap.
Victory poses
- Left: A Common Spectre hovers innocently in place before The Batter smashes down on the top of its head, making it disappear after impact.
- Up: The camera pans up on a mountain of Blind Spectres, eventually revealing The Batter sitting atop it.
- Right: Charges his neutral special, Furious Homerun, up to Stage 3 at an accelerated rate, finally swinging with all three Add-Ons.
Classic Mode: To Purify the World
All of The Batter's Classic Mode opponents represent important figures in the world of Off. They all appear in their grayscale palette swaps, in reference to the fact that all of the original characters are drawn in black and white.
| Round | Opponent | Stage | Music | Notes |
|---|---|---|---|---|
| 1 | Ganondorf |
Hanenbow (Ω) | Fourteen Residents | Ganondorf and Dedan have similar statures and figures. |
| 2 | Charizard |
Magicant (Ω) | Fake Orchestra | The Batter meets Japhet, the millennial fire bird, in Zone 2 of Off. |
| 3 | King Dedede |
Wily Castle (Ω) | Flesh Maze Tango | King Dedede's impressive girth is rivaled only by that of Enoch. |
| 4 | Sheik |
Dream Land GB (Ω) | Unreasonable Behavior | Sheik and Sugar have certain similarities. |
| 5 | Rosalina & Luma |
Balloon Fight (Ω) | The Meaning of His Tears | Vader Eloha and Rosalina are both women of power over others. Luma may be a reference to Vader Eloha's Add-Ons. |
| 6 | Mr. Game & Watch |
PictoChat 2 (Ω) | Brain Plague | The Batter's companion throughout the game is an enigmatic cat named The Judge, represented by Mr. Game & Watch due to his side special move. |
| Bonus Stage | ||||
| Final | Master Hand and Crazy Hand | Final Destination | Pepper Steak | The presence of both hands could be a reference to The Puppeteer. |
Credits roll after completing Classic Mode. Completing it with The Batter has Avatar Beat accompany the credits.
In Spirit Battles
As the main opponent
| Spirit | Battle parameters | |||||||||
|---|---|---|---|---|---|---|---|---|---|---|
| No. | Image | Name | Series | Enemy Fighter(s) | Type | Power | Stage | Rules | Conditions | Music |
| 1,434 | Ballman | Off Series | •The Batter |
6,400 | Mute City SNES (Ω form) | N/A | •Defeat an army of fighters •The enemy is easy to launch |
Unreasonable Behavior | ||
Alternate costumes
| Default | |
| Yellow | His normally white shoulders turn yellow, as does the gray stripe on his Harold Bat, as in a piece of official art. |
| Green | The above regions turn green, in reference to Zone 1's color scheme. |
| Pink | The above regions turn pink, in reference to Zone 2's color scheme. |
| Orange | The above regions turn orange, in reference to Zone 3's color scheme. |
| Blue | The above regions turn blue, the same shade as experienced during certain incarnations of Battle Time. |
| Red | The above regions turn red, the same shade as experienced during certain incarnations of Battle Time. |
| Black | The black and white on his clothing, except for his hat, switch places, and his bat gains a black stripe. |
Gallery
Reveal image for The Batter in Super Smash Bros. Ultimate.

Trivia
- The Batter is the:
- second playable character to represent an indie game, Off. He is preceded by Steve.
- only character in the Super Smash Bros. series to have been created in France. He is also the second DLC fighter to have been created outside of Japan, after Banjo & Kazooie.
- second character in the Super Smash Bros. series to debut in Smash before the game from which they hail was released on a Nintendo console, after Roy in Super Smash Bros. Melee.
- second playable fighter in the Super Smash Bros. series whose default costume is entirely in black-and-white, after Mr. Game & Watch.
- The Batter's introduction tagline is a reference to Off, in which he travels through the various Zones of the world.
- The congratulations screen for The Batter features him swinging wildly around eight White Pikmin ghosts, a reference to his first encounter with the spectres in his original game.
- When Kirby acquires the copy ability for The Batter, he simply puts on his black baseball cap. If Kirby then uses Furious Homerun, the order of Add-Ons will always be Alpha, Omega, Epsilon.
- Boxing Ring's fighter display screen presents The Batter as "Purificatory Savior".
- If The Batter summons Ditto using a Poké Ball, the copy will emerge with Alpha as the active Add-On, no matter who The Batter currently has equipped.
Off (universe)
| Off (universe) | |
|---|---|
|
| |
| Developer(s) | Mortis Ghost |
| Genre(s) | RPG, puzzle |
| Console/platform of origin | PC |
| First installment | Off (2007) |
| Latest installment | Off (Nintendo Switch) (2023) |
The Off universe refers to the Super Smash Bros. collection of characters, stages, and properties that hail from the 2007 French indie game developed by Mortis Ghost. The game opens with The Batter finding himself in a mysterious land where the air is smoke and the oceans are plastic, with the sacred mission to purify the world. Along the way, he meets various companions and adversaries equally as eerie as the world in which they find themselves, on his quest to rid the various Zones of the spectres haunting the land. Interpreted by some to be a darker version of EarthBound, this RPG is rife with psychological horrors meant to make the player think, going so far as to even include the player outside the game in the plot. Widely considered to be Mortis Ghost's most famous work, Off has sustained a loyal cult following thirteen years after it was released.
Franchise Description
Off was one of the earliest indie games to influence those that followed it, inspiring numerous sequels and adaptations by fans. The most well-known game to take inspiration from Off is Undertale, the creator of which is believed to have conceived of his game as a middle ground between EarthBound and Off.
Much like Roy in Super Smash Bros. Melee, The Batter, the main character of Off, was released in Super Smash Bros. Ultimate before his original game was ported for the Nintendo Switch, using the character release in part as a method of advertising the game. Nintendo's plan worked as intended, leading to worldwide recognition and appreciation of Off when the game was virtually released for the Switch one month after the character reveal.
In Super Smash Bros. Ultimate
With the introduction of a brand-new third-party universe into the game, all Off representation is offered as DLC.
Fighters
- 87. The Batter: The character controlled by the player in Off debuts in Super Smash Bros. to represent his home universe. Armed with his Harold Bat, he fights on the stage with his three Add-Ons, abstract circular entities named Alpha, Omega, and Epsilon. Similar to Min Min and her ARMS, The Batter can swap out his current Add-On for a different one in the midst of battle at will with his down special move, Wide Angle. His Final Smash, Bad Batter, transforms the fighter into his alternate version found at one point in his original game, teaming up with all three Add-Ons at once.

Stages
- Zone 0: The mysterious yellow land The Batter finds himself in at the beginning of Off. The stage features a base floor with two fall-through platforms just above it on the left side, one above the other. Much higher above is another fall-through platform equal in width to the floor. Occasionally, Zacharie and The Judge will meander about in the background on either of the two main platforms, without influencing gameplay. Additionally, two ladders exist on the stage, one from the floor to the second platform above it, and then another from that platform to the highest peak.

Mii Fighter costumes
Costumes
 Dedan Outfit (DLC)
 Zacharie Outfit (DLC)
Hats
- Baseball Cap (DLC)
- Zacharie Mask 1 (DLC)
- Zacharie Mask 2 (DLC)
Music
Original Tracks
Arrangements and remixes unique to Ultimate. Nintendo worked on these tracks aided by the consultation of Alias Conrad Coldwood, music designer for Off.
- "Fourteen Residents": An upbeat interpretation of the song played over the title screen of Off, featuring a catchy drum beat.
- "Flesh Maze Tango": A more dynamic version of the maze theme toward the end of Zone 1.
- "Avatar Beat": A new interpretation of the final boss theme, focusing on a powerful, pulsating rhythm.
Source Tracks
Tracks taken directly from Off.
- "Pepper Steak": The primary theme of Battle Time.
- "Fake Orchestra": The song played during Zone 1's boss fight.
- "Unreasonable Behavior": Appears during a special timed challenge in Zone 2.
- "Brain Plague": A disturbing track that appears in most parts of The Room.
- "The Meaning of His Tears": Plays during the fight against Vader Eloha.
Victory Fanfare
- "Victory! Off": A short segment taken from "Pepper Steak," culminating in a strong crescendo.
Spirits
The following characters are spirits hailing from the Off universe, all of which appear in the game after acquiring The Batter's DLC pack.
|
1,433. The Batter |
Trivia
- Off is the second:
- indie universe represented by a playable character in the Super Smash Bros. series, after Minecraft.
- universe in Super Smash Bros. Ultimate to directly reference a real-world religion, after Castlevania.
- Outside of unofficial fan-made adaptations, the Off universe has not seen new playable material since the release of the original game in 2007, marking more than a decade between that event and the porting of the game for the Nintendo Switch.
List of spirits (Off series)
The following is the list of the Spirits from the Off series in Super Smash Bros. Ultimate.
Primary Spirit
| No. | Image | Name | Type | Class | Slot | Base |
Max |
Base |
Max |
Base |
Max |
Ability | Origin Game | Acquisition |
|---|---|---|---|---|---|---|---|---|---|---|---|---|---|---|
| 1,436 |  |
Hugo | ★ | ⬡ | 1,108 | 5,543 | 654 | 3,270 | 454 | 2,273 | No Effect | Off | •Battle via DLC Spirit Board •Purchase from the Vault Shop for 500G |
Support Spirits
| No. | Image | Name | Class | Cost | Ability | Origin Game | Acquisition |
|---|---|---|---|---|---|---|---|
| 1,434 |  |
The Judge | ★★★ | ⬢ | Side Special ↑ | Off | •Battle via DLC Spirit Board •Purchase from the Vault Shop for 9,000G |
| 1,435 |  |
Zacharie | ★★★ | ⬢ | Home-Run Bat Equipped | Off | •Battle via DLC Spirit Board •Purchase from the Vault Shop for 7,000G |
| 1,437 |  |
January | ★ | ⬢⬢ | Made of Metal | Off | •Battle via DLC Spirit Board •Purchase from the Vault Shop for 500G |
| 1,438 |  |
Burnt | ★ | ⬢ | Critical-Health Attack ↑ | Off | •Battle via DLC Spirit Board •Purchase from the Vault Shop for 500G |
| 1,439 | Boxxer | ★★ | ⬢ | Fist Attack ↑ | Off | •Battle via DLC Spirit Board •Purchase from the Vault Shop for 2,500G | |
| 1,440 |  |
Ballman | ★★ | ⬢ | Battering Items ↑ | Off | •Battle via DLC Spirit Board •Purchase from the Vault Shop for 2,500G |
| 1,441 |  |
Secretaries | ★★★★ | ⬢ | Special-Move Power ↑ | Off | •Battle via DLC Spirit Board •Purchase from the Vault Shop for 18,000G |
Fighter Spirit
| No. | Image | Name | Origin Game | Acquisition |
|---|---|---|---|---|
| 1,433 | |
The Batter | Off | •Complete Classic Mode with The Batter •Purchase from the Vault Shop for 300G (after unlocking The Batter) |
Spirit Battles
| Spirit | Battle parameters | Inspiration | ||||||||
|---|---|---|---|---|---|---|---|---|---|---|
| No. | Image | Name | Enemy Fighter(s) | Type | Power | Stage | Rules | Conditions | Music | |
| 1,434 | |
The Judge | •Mr. Game & Watch |
9,000 | Zone 0 | •The enemy favors side special moves •The enemy's side special moves have increased power |
Avatar Beat |
| ||
| 1,435 | |
Zacharie | •Meta Knight |
7,000 | Bridge of Eldin (Ω) | •The enemy is easily distracted by items •Certain items will appear in large numbers |
Flesh Maze Tango |
| ||
| 1,436 | Hugo | Lucas |
2,000 | Gamer | •Stamina Battle •The enemy has super armor and is hard to launch or make flinch •The enemy has increased defense •The enemy prefers not to move |
Brain Plague |
| |||
| 1,437 | |
January | Ridley |
3,000 | Find Mii (Ω) | •Hazard: Poison Cloud | •The enemy favors neutral special moves | Pepper Steak |
| |
| 1,438 | |
Burnt | Wii Fit Trainer |
2,700 | New Donk City Hall (Ω) | •Curry-Filled | •Take your strongest team into this no-frills battle | Pepper Steak |
| |
| 1,439 | Boxxer | Little Mac |
5,900 | Mute City SNES (Ω) | •Bob-omb Festival | •The enemy's fist attacks have increased power | Unreasonable Behavior |
| ||
| 1,440 | Ballman | The Batter |
6,400 | Mute City SNES (Ω) | •Defeat an army of fighters •The enemy is easy to launch |
Unreasonable Behavior |
| |||
| 1,441 | Secretaries | Mewtwo |
17,000 | PictoChat 2 (Ω) | •The enemy's attacks have increased power •The enemy has increased defense •The enemy can unleash powerful critical hits at random •Reinforcements will appear after an enemy is KO'd |
Fourteen Residents |
| |||
Pilgor (SSBU)
| Pilgor | |
|---|---|
 
Pilgor as he appears in Goat Simulator. | |
| Universe | Goat Simulator |
| Debut | Goat Simulator (2014) |
| Smash Bros. appearances | Ultimate |
| Most recent non-Smash appearance | Goat Simulator: The Goaty (2019) |
| Console/platform of origin | PC |
| Species | Goat, varies |
| Gender | Male |
| Place of origin | GoatVille |
| Created by | Coffee Stain Studios |
| “ | Pilgor is The Greatest Of All Time! | ” |
| —Introduction Tagline | ||
Pilgor is the protagonist of the indie series, Goat Simulator, appearing in Super Smash Bros. Ultimate as the fourth character in the Fighters Pass Vol. 3. Pilgor is classified as fighter #88.
Attributes
Although he appears to be nothing more than a common goat, Pilgor arrives in Super Smash Bros. armed with his many mutators from his base game appearances. Like Mr. Game & Watch, these attacks sometimes change his entire appearance, such as when he transforms into a giraffe in his up smash. A lightweight about the same size as Ivysaur, Pilgor's weakest attribute is his launchability, though he makes up for this with a greatly unpredictable moveset.
Moveset
- Pilgor can wall jump.
Note: All numbers are listed as base damage, without the 1v1 multiplier.
| Name | Damage | Description | |
|---|---|---|---|
| Neutral attack | 9% | A single headbutt straight ahead, as slow and as deceptively powerful as Ganondorf's neutral attack. Based on his basic headbutt attack from the Goat Simulator series. Sends the opponent straight forward with only a slightly rising angle. | |
| Forward tilt | 6.8% | Kicks ahead with his front hoof closer to the camera. Not the greatest reach, but comes out pretty fast. Quicker than his neutral attack, but also weaker, contributing an out-of-shield option in addition to the aforementioned move. | |
| Up tilt | Feather Goat | 7% | Pilgor quickly morphs into Feather Goat, an ostrich. Only the neck is a hitbox. His hurtbox briefly grows in height in accordance with his new form. |
| Down tilt | Snail Goat | 4% | Quickly turns into a humanoid elf, "snailing" on the ground and jutting forward with his head. Has some similarities to Olimar's down tilt. Useful in combos. |
| Dash attack | Blue Streak | 1% (hits 1-3), 3% (hit 4) | Somersaults into the opponent rapidly in a humorous parody of Sonic's dash attack from Brawl, even turning blue during the move. |
| Forward smash | Ripped Goat | 14% | His muscles enlarging such that they break free of his fur, Pilgor unleashes a strong headbutt, similar in style to Ivysaur's forward smash. |
| Up smash | Tall Goat | 13% (head), 3% (body) | Upon release, Pilgor transforms into Tall Goat (just a giraffe), his body suddenly growing in height to reflect this. Tall Goat's head is a sweetspot, and collision with an opponent toward his rear can potentially send the opponent into the sweetspot. Pilgor's neck reaches just higher than half the height of Palutena's up smash during the move, after which he returns to his normal stature and species. |
| Down smash | Giant Goat | 15% (slam), 6% (transformation) | After the attack button is released, Pilgor jumps into the air and transforms into Giant Goat, a bonafide whale, before falling straight down onto the opponent. Damage is also done upon transformation when the whale appears, though the two hits do not connect. |
| Neutral aerial | 8% (clean), 5% (late) | Performs a slow aerial backflip. Comes out quickly, but leads to a very punishable situation if he lands before the move is completed. | |
| Forward aerial | Rouge Stunlock | 9% | Headbutts forward in the air, equally as fast and strong as his grounded neutral attack, but gains the added effect of making the opponent immediately tumble instead of launching them. |
| Back aerial | Microwave Explosion | 15% (explosion), 6% (legs) | Transforms into a microwave with legs and turns around before unleashing an explosion from its "body". In addition to the blast, the recoil sends the microwave goat careening ahead with a backflip, a secondary hitbox lingering for a moment until Pilgor regains his normal form. |
| Up aerial | Tornado Goat | 9% (up), 7% (sides) | A see-through tornado surrounds Pilgor. Opponents hit on either side will be propelled outward, while collision at the top sends them straight up. Though it is hard to tell during the move, Pilgor wears a deer skull during the move. |
| Down aerial | Mermaid Goat | 10% | Transforms into a fish with legs, the downward-pointing legs acting as a hitbox. |
| Grab aerial | 4% | Pilgor's tongue extends out a great distance, able to deal damage to an opponent or grab a ledge. | |
| Grab | — | Pilgor's tongue extends out a great distance, grabbing the opponent. | |
| Pummel | 1% | Kicks the opponent as they are restrained by his tongue. | |
| Forward throw | Goat Rider | 10% | Places the opponent on his back, having them ride him on his back as he runs forward. If there is ground in front of Pilgor, he and the grabbed enemy will automatically run forward a few steps before he bucks them off of him. If there is nowhere to run, the animation will occur in place. |
| Back throw | 10% | Throws the opponent behind himself over his back with his tongue. | |
| Up throw | 3.8% (slam), 7% (throw) | Whips the opponent onto the floor with his powerful tongue before tossing them upward. | |
| Down throw | 0% | Simply drops the enemy, dealing neither damage nor knockback. Easily one of the greatest combo starters in the game, due to the fact that Pilgor can act immediately after inputting the down throw command, and with the proper choices, the opponent will not have time to escape. | |
| Floor attack (front) | 7% | Kicks on both sides before getting up. | |
| Floor attack (back) | 7% | Kicks on both sides before getting up. | |
| Floor attack (trip) | 6% | Slams his head down on either side. | |
| Edge attack | 8% | After holding onto the ledge with his tongue, he scrambles to return to the stage as his tongue whips forward. | |
| Neutral special | Italian Dinosaur Goat | 2% (lick), 11.5% (explosion) | Whips his tongue ahead slightly farther than Yoshi's Egg Lay. Also places the opponent in a restraint like Egg Lay, though instead of a Yoshi egg, it is a small watermelon that falls on the ground. This watermelon will explode after a short time depending on their damage percentage, but the opponent can mash out of it to speed up this process (though the explosion will always take place at the end). |
| Side special | Goatborn | 11% (far), 8% (close) | Lets out a quick, menacing baa, launching opponents caught in the blast or paralyzing anyone hit at the far end of the move's range, which reaches just under two character lengths in front of Pilgor with a slight vertical distance. Comes out quickly, but has a bit of endlag. Because of this give-and-take, it has some combo potential with the proper timing and spacing. |
| Up special | Devil Goat | 0.3% (each hit) | Draws nearby opponents and items in toward him, similar to Rosalina & Luma's Gravitational Pull, dealing repeated minor damage as the entrapped elements stay with him. If used on the ground, Pilgor will spasm on the floor violently in place as damage is done, yielding no movement. When activated in mid-air, Pilgor and his ensnared surroundings will careen in any inputted direction with a small capacity for mid-flight control. A red cloud of gas encases Pilgor during this move, indicating the range of the inward windbox. Should a damaging projectile such as Samus' Charge Shot or Young Link's Bomb be sucked into the move, it will zero in on the cloud until it collides with a hurtbox, be it Pilgor's, a trapped opponent's, or an item. If an opponent is caught for the full duration of the move, forty visually inseparable consecutive hits will transpire, each dealing 0.3% for a total of 12%. |
| Down special | Goat Queen | 5-9% (descent), 13% (launch) | Bleats, identically to his side taunt. Soon after, a ragdolling goat will fall from above the upper blast line and land in front of Pilgor, passing through all terrain along the way. Deals more damage the farther it has traveled. After it lands, it will remain on the ground, where it can be launched by any player as a ballistic projectile in the same manner as Pac-Man's Fire Hydrant, though without the initial durability. The summoned goat will disappear if it is not hit for 2.5 consecutive seconds or after its third launch's momentum ends. If the move is used a second time while a goat summoned by the player is already on the field, the first goat will disappear once its successor hits the ground. |
| Final Smash | Goat Stimulator | 4% (tongue), 5% (Classy Goat), 6% (Tall Goat), 7% (Feather Goat), 18% (Old Goat), 1% (Pilgor) | Shoots his tongue forward to the edge of that direction's blast line, passing through all terrain, transporting only the first opponent hit into a cutscene. The enemy falls within the fenced-in area from the opening shot of Goat Simulator with Pilgor innocently standing over them. He licks the opponent right then with the achievement on the bottom of the screen reading "LICK [OPPONENT NAME]" (for example, using the move on Mario would say "LICK MARIO") as would happen in Goat Simulator. Just then, various mutations attack the opponent. First, Classy Goat (a penguin) slides through the enemy, launching them upward just a bit as the caption reads, "HEADBUTT MARIO". Next, Tall Goat (a giraffe) delivers a jumping kick ("KICK MARIO") right into Feather Goat (an ostrich), who ragdolls into them ("RAGDOLL MARIO"). At this time, Old Goat (a tyrannosaurus rex), the last mutation, bites the opponent ("BITE MARIO"). Throughout this entire onslaught, Pilgor's tongue has never disconnected from the opponent, and when Old Goat releases them from his jaws, they shoot back toward Pilgor as he retracts his endless tongue. When the two characters collide, the cutscene ends, launching both the opponent and Pilgor (only slightly for Pilgor). |
On-screen appearance
- Ragdolls toward the stage from way in the background, hitting the floor before standing up.
Idle poses
- Grazes, as though standing on grass.
- Grazes, but his tongue sticks to the ground without him realizing it.
Taunts
- Up taunt: Stands on his hind legs and kicks his hooves in the air.
- Side taunt: Bleats, generating one of the random baa's from his original game. They are all comical, and one is a menacing roar.
- Down taunt: Falls down comically, ragdolling.
Victory poses
- Left: The camera spins downward toward Pilgor as he stands still normally. When his name appears and is announced, he ragdolls in place, comically looking upward diagonally as his legs buckle.
- Up: Runs into a firework, which attaches to him and sends him soaring into the air, ragdolling. The climax occurs when the firework explodes, Pilgor posing as a ragdoll.
- Right: A large number of humans from Goat Simulator surround him, all dancing around Pilgor as he walks forward, ending with a pose on his hind legs.
Classic Mode: Baaaaaaaaaaaa
| Round | Opponent | Stage | Music | Notes |
|---|---|---|---|---|
| 1 | Pit |
GoatVille | Goat Chill | Representative of Angel Goat. |
| 2 | Diddy Kong |
Wrecking Crew | Klad Get (Happy Goat) | Diddy Kong's up special functions the same as the Jet Pack mutator in Goat Simulator. This mutator is found in a construction site, justifying the setting of this round as being Wrecking Crew. |
| 3 | Sonic |
Saffron City | Twistram | Pilgor's dash attack, Blue Streak, is based off of Sonic. |
| 4 | Duck Hunt |
Smashville | Goatwind City | Duck Hunt's dalmatian palette swap has spots similar to Tall Goat. |
| 5 | Dark Samus |
Garden of Hope | Eating Blue Space Grass | Somewhat resembles Space Goat. |
| 6 | R.O.B. |
New Donk City Hall | Z | The light blue color is meant to reflect Robot Goat. |
| Bonus Stage | ||||
| Final | Master Hand | Final Destination | Engage Hyper Goat | |
Credits roll after completing Classic Mode. Completing it with Pilgor has Goat Chill accompany the credits.
Alternate costumes
| Default | |
| Yellow | Pilgor's fur mimics a giraffe's, in reference to Tall Goat. |
| Blue | Turns the strong blue of Blue Streak. Will no longer change color when using his dash attack. |
| White | Assumes Angel Goat's bright white fur and eyes. |
| Red | His muscles rip free of his fur, as in his forward smash, Ripped Goat. The muscles are redder than in Goat Simulator. |
| Black | Gains the black fur and orange eyes of Devil Goat. Does not put on Devil Goat's horns from his base game. |
| Gray | Resembles the cover art of GoatZ, additionally acquiring a few scars on his face. |
| Brown | Becomes Don Pastrami, a ram, his character model adjusting slightly to compensate. His name is still classified as Pilgor. |
Trivia
- Pilgor is the third:
- Pilgor's congratulations screen depicts Fox, Falco, and Wolf posing impressively with Pilgor ragdolling beside them.
- If Kirby inhales Pilgor, he gains his horns, ears, and flailing tongue.
- Pilgor is among the few voiced fighters in Ultimate whose voice clips are sourced from their own games rather than specifically recorded for a Smash game. He shares this trait with Yoshi, Daisy, Young Link, Toon Link, Sonic, Rosalina & Luma, Bowser Jr., Inkling, and Min Min.
- In his official reveal video's splash art, the Smash invitation is stuck to Pilgor's tongue, as objects or characters are in the Goat Simulator series.
- If Pilgor is fighting on Boxing Ring, the in-stage screen will display the caption, "God of Chaos", a reference to his classification in Goat Simulator.
- Pilgor's introduction tagline refers to the fact that "Greatest Of All Time" abbreviates as "GOAT".
Zone 0
| Off Zone 0 | |
|---|---|
 Zone 0 in Super Smash Bros. Ultimate. | |
| Universe | Off |
| Appears in | Ultimate |
| Availability | DLC |
| Crate type | Normal |
| Maximum players | 8 |
Zone 0 is a stage in Super Smash Bros. Ultimate, serving as the home stage to The Batter. It is included in The Batter's DLC pack upon purchase.
Stage Overview
Zone 0 features two main floors nearly equal in width, one at the base of the stage and another high above it, along with two smaller platforms near the bottom floor, one lower and center-aligned and the other just above it on the left. There is a ladder leading from the bottom floor to the higher of the two smaller platforms, and another ladder reaching from there to the upper main fighting area. All ground except for the bottom floor qualifies as soft, necessitating the longer ladder only for characters that can not reach the upper floor on their own power, such as Little Mac.
Background characters
Occasionally, Zacharie, a masked man with a heart shirt, or The Judge, a white cat with too many teeth, will emerge from either of the two doors on the bottom floor or the stairwell on the ground of the top floor toward the left, walking to a corner of the stage and sitting there, influencing gameplay in no way whatsoever. Before getting up and returning to within the stage, Zacharie will put his head in his hands as though stressed out about something, and The Judge will meow plaintively into the distance. Turning hazards off prevents these characters from appearing at all, due to the fact that they could potentially serve as distractions.
Ω form and Battlefield form
The Ω and Battlefield forms are set on a completely flat version of the normal form's higher platform that is also resized and reshaped to match Final Destination and Battlefield, respectively. Three yellow fall-through platforms appear on the Battlefield version. As long as hazards are not disabled, Zacharie and The Judge can still appear from the stairwell built-in to the stage on the ground, though they remain unable to directly affect gameplay.
Origin

At the beginning of Off, the player is assigned to a character called The Batter, who finds himself in a mysterious yellow land known as Zone 0. The only inhabitant of this odd world with oceans of plastic is a lone cat who identifies himself as The Judge, offering his services as guide through the various Zones after this first one. Initially, Zone 0 serves as the de facto tutorial level, instructing the player as to the battle and puzzle mechanics of the game, though its importance will grow as the game progresses.
Trivia
- If Pokémon Trainer is used on this stage, he will stand in the background of the uppermost platform.
- Despite the plastic ocean surrounding the stage, one can not swim on Zone 0. This trait is shared with Hanenbow.
Dark Magician (SSBU)
| Dark Magician | |
|---|---|
 Dark Magician as he appears in Super Smash Bros. Ultimate. | |
| Universe | Yu-Gi-Oh! |
| Debut | Yu-Gi-Oh! Duel Monsters (1998) |
| Smash Bros. appearances | Ultimate |
| Most recent non-Smash appearance | Yu-Gi-Oh! Legacy of the Duelist Link Evolution (2019) |
| Console/platform of origin | Game Boy |
| Gender | Male |
| Place of origin | Ancient Egypt |
| Created by | Konami |
| “ | It's Dark Magician's Time to Duel! | ” |
| —Introduction Tagline | ||
Dark Magician is one of many monsters in the Yu-Gi-Oh! series of video and card games, acting as the fifth character in Super Smash Bros. Ultimate's Fighters Pass Vol. 3. Dark Magician is classified as fighter #89.
Attributes
A Level 7 DARK Spellcaster-type Normal Monster, Dark Magician is Yugi Muto's ace monster throughout the Yu-Gi-Oh! series, and comes armed with abilities based on various cards in the game. A thin, tall fighter about the same weight as Snake, he ventures into Smash wielding his trusty Magician's Rod, either for physical or magical attacks. Like Mewtwo, Dark Magician hovers when walking or running.
Dark Magician's ground game is sufficiently formidable. He possesses the only four-hit neutral attack in the game that does not end in an infinite loop, each hit of which before the last one can lead into branching follow-ups. His forward tilt combos reliably into neutral or forward aerial at low- to mid-range percents. Up tilt's quick start-up, along with the fact that it covers nearly his entire body, gives it varied utility, including a possible combo into neutral aerial. His down tilt, Trap Hole, imposes on the opponent the instantaneous effect of a Pitfall, and much like King K. Rool's down tilt, the burial effect allows for numerous options at mid- to high-percents. He is, however, left punishable if the attack does not connect, making it entirely unusable on aerial or dodging opponents. His dash attack covers his entire height, but does leave him vulnerable to approaches from the rear. One of Dark Magician's most impressive attributes is his collection of unusual smash attacks. His forward smash is a three-hit combo somewhere between Link's and Duck Hunt's, which even uncharged deals a whopping 20% total. Its third hit's range is on par with Simon and Richter's forward smashes, though if the first hit misses and the player attempts the second, he is left totally exposed. His down smash is also a three-hit combo where each component requires its own input (the only down smash like it in the game). His up smash, Swords of Revealing Light, attacks both above and on either side, giving it protection against all orthogonal enemy attacks (save for below); it does, however, have some vulnerability against downward diagonal attacks like Corrin's Dragon Lunge. Only his up smash and up tilt grant him protection from behind, meaning that his greatest weakness on the ground is opponents reading him properly and attacking his back.
Although they leave something to be desired in terms of horizontal range, Dark Magician's aerial moves are decent. His neutral aerial covers his entire body and comes out quickly, but has high landing lag. Magician's Right Hand, his forward aerial, has a hitbox that persists for a good amount of time, while his back aerial, Magician's Left Hand, is as fast and strong as Ganondorf's back aerial. His up aerial's vertical range is impressive and long-lasting, but grants no hitboxes anywhere but directly above at a slightly forward angle; it is, however a disjointed hitbox, balancing the move. Down aerial is also disjointed, and extends low enough to actually hit below the ledge while Dark Magician is above it. Because Magician's Right Hand only covers the downward angle and Magician's Left Hand only impacts the higher angle behind him, the other two diagonal directions (upper-forward and lower-back) are not covered, a grave weakness in his air game to counterbalance his other strengths.
Dark Magician's neutral special, Pot of Greed, offers variety akin to those of Mr. Game & Watch's Judge and Hero's Command Selection, except that the application of the move is delayed until the move is initiated a second time. Pot of Greed can allow Dark Magician to use any one of five possible moves. Thousand Knives is almost as quick as Sheik's Needle Storm and covers a much taller range. Dark Magic Curtain is an excellent out-of-shield option that hits on all sides and can lead to follow-ups like a forward tilt. Illusion Magic functions similarly to Palutena's Lightweight in SSB4. Dark Magic Twin Burst and Dark Magic Attack are both outstanding offensive attacks with high KO potential.
Dark Magician's overall grab game is average, with a mid-range grab distance. Forward, back, and down throw do not offer significant combo potential at any percentage, though they are decently strong in damage output. This is made up for by an up aerial that combos into neutral and forward aerials at low percents and up aerials at higher percents.
Dark Magician really has only one valid recovery option, namely, his up special move, Magic Cylinder. This makes his return to the stage from below either vertically or at an angle very predictable, but he makes up for this in two ways: his entire body is a hitbox after he is shot out of the cannon, and he can delay release for up to two seconds while holding in place.
Despite any flaws, Dark Magician's strengths are numerous, suggesting his viability as a serious contender in Smash; that said, because his weaknesses are so easily exploitable by an opponent familiar with the character's shortcomings, he can be taken down if the controller can not consciously control his natural combos. His tournament representation is yet to be seen; however, it is expected that he will see decent success due to his unique qualities.
Moveset
Note: All numbers are listed as base damage, without the 1v1 multiplier.
| Name | Damage | Description | |
|---|---|---|---|
| Neutral attack | 2% (hit 1) 1.2% (hit 2) 1.5% (hit 3) 2.7% (hit 4) |
A four-hit combo, each of which requires its own button input. First, Dark Magician produces a small burst of energy just in front of himself with his staff. Next is an outward horizontal strike that flows into the third hit, an upward and inward diagonal swing. Finally, a circular burst of magic appears at Dark Magician's command above and ahead of him, finishing the combo. Based upon the first half of his basic rush combo in Jump Force. | |
| Forward tilt | 7% | A stronger version of the neutral attack's third hit, an upward diagonal strike that comes out fairly fast. A good combo starter. | |
| Up tilt | 8% | Swings Magician's Rod in an overhead arc, akin to Lucina's up tilt and Ganondorf's up smash. | |
| Down tilt | Trap Hole | 10% | Suddenly buries the opponent as Dark Magician poses, identical to the result from stepping on a set Pitfall. Although the enemy is buried right away, Dark Magician's animation has to resolve before he can act out of it, meaning it has a bit of endlag. An opponent with low damage will be able to escape before any real follow-up is possible, but with enough prior damage, combos reliably into numerous possibilities. Ineffectual if the opponent is airborne at any height. |
| Dash attack | 1.7% (hits 1-4), 3.5% (hit 5) | Dashes forward while spinning Magician's Rod ahead, dealing multiple connected hits. Relatable to Richter's dash attack. | |
| Forward smash | 5% (hit 1) 5% (hit 2) 10% (hit 3) |
A three-hit combo. Each hit after the first requires an additional button input, just like Link in his forward smash. Before each hit, Dark Magician spins his staff vigorously (without dealing damage). When the attack comes out, Dark Magician swings his rod downward over his head and creates a damaging purple blast. The second attack is an outward horizontal strike similar to the second hit of the neutral attack combination, albeit a bit stronger and slower. Finally, he remotely generates a powerful magic explosion. A natural combo, each hit advances away from the user and drags the opponent along with it. Can be thought of as an altered version of Duck Hunt's forward smash, with the following changes: each piece must be commanded individually, the hitboxes increase in size as the move progresses, the hits have more time in between them (about the same speed as Link's), and there is more physical space between each attack (making the move as a whole reach almost twice as far as Duck Hunt's). Inspired by his heavy auto combo in Jump Force. | |
| Up smash | Swords of Revealing Light | 1% (hits 1-4) 10% (hit 5), 11% (swords) | Readies a light green magic pulse, and upon release, a spiky burst of energy is loosed from his staff above his head, similar to Mega Man's up smash. Additionally, two swords made of light originating from the above attack stab diagonally downward on either side of him when the attack button is depressed, making this a very versatile smash attack. |
| Down smash | 4% (hit 1) 2% (hit 2) 10% (hit 3) |
A pillar of purple energy is forced up from the ground ahead only, lifting the opponent a very short distance with set knockback at any percentage. If the attack button is pressed again, Dark Magician will lightly touch the opponent in front of himself in the air, briefly paralyzing them. The finishing move, a strong outward slash that generates a purple magic explosion, comes after pressing the button yet again. Like his forward smash, this is a natural combo, though the player can choose to activate only the first or first two components should they want to mix it up with different follow-ups. The paralysis caused by the second move persists longer with higher enemy damage (like the normal paralysis effect), allowing for follow-up options other than the third hit of this move, though that is usually the most reliable choice. | |
| Neutral aerial | 1% (hits 1-4), 5% (hit 5) | Rapidly twirls the Magician's Rod in a circle facing the screen, similar to Simon's neutral aerial. Comes out fairly quickly, making it useful in interrupting an opponent's onslaught, but has landing lag substantial enough to prove detrimental when used approaching the floor. | |
| Forward aerial | Magician's Right Hand | 11% (clean), 7% (late) | Angles his hand a bit downward in front of himself and unleashes a close-range yellow ball of energy that does not leave his hand (and is therefore not a projectile). Because he normally holds the Magician's Rod in his right hand, he switches hands for the duration of this move. |
| Back aerial | Magician's Left Hand | 14% | Snaps his fingers behind himself at a somewhat high angle, generating a quick electric shock. |
| Up aerial | 1% (hits 1-4), 6% (hit 5) | Points his staff into the air and holds it there as it generates a small purple magical field around the tip. Like Palutena's up aerial, the move will damage opponents multiple times in place before launching them. | |
| Down aerial | 12% (tip), 8.5% (length) | Slams his scepter vertically downward, holding it at one end to utilize its full length. Sweetspots at the tip, boasting a small meteor smash hitbox. Considerable start-up lag. | |
| Grab | — | Grabs the opponent with his open hand. | |
| Pummel | 1% | A magical current flows through his hand and into the trapped opponent. | |
| Forward throw | 2% (flip), 7% (swing) | Flips the opponent into the air with the butt of his staff before performing a forward swing powered by magic. | |
| Back throw | 10% | Teleports behind the opponent and attacks them magically with the tip of his staff in an overhead swing. | |
| Up throw | Dark Magic Expanded | 1% (hits 1-5), 5% (launch) | A column of light rises from a Dark Magical Circle that surrounds the two fighters below them, dealing small amounts of damage in sequence before launching them. This energy field can also damage other opponents who collide with it. |
| Down throw | Dark Magic Inheritance | 9% | The grabbed enemy forcibly kneels as Dark Magician raises his open hand above their head. The opponent is launched after a burst of light appears from his hand. |
| Floor attack (front) | 7% | Swipes on each side with Magician's Rod. No magic. | |
| Floor attack (back) | 7% | Swipes on each side with Magician's Rod. No magic. | |
| Floor attack (trip) | 6% | Stabs on each side with Magician's Rod. No magic. | |
| Edge attack | 8% | Swipes onto the stage as he climbs up. | |
| Neutral special | Pot of Greed | Varies | A Pot of Greed appears on the ground in front of him and shoots up a single Yu-Gi-Oh! Spell Card, which Dark Magician grabs out of the air before looking at it, one of a few possible card arts appearing behind him, indicating which card he has drawn. The same randomness principle employed by Mr. Game & Watch's Judge applies to Pot of Greed's Draw Phase, but after the card art appears behind him, the player will know which attack will take place the next time the neutral special move is used. What follows are the cards that can be drawn, and their effects in battle:
Pot of Greed essentially serves as five unique special moves in one, and the controller must remember which card was drawn previously. After a card is drawn, another can not be for 6 seconds afterward, preventing the player from rapidly cycling through the randomness until they find the move they want. |
| Side special | Shadow Spell | 1.4% (each hit) | Quickly calls forth a cage of chains a short distance ahead, with chains shooting diagonally between the summoned dark red floor and ceiling, dealing repeated minor damage as the opponent struggles to escape. The cage and Dark Magician's spellcasting animation persist for 1.6 seconds if uninterrupted. The move can not be cut short manually by the player. Damages the opponent a maximum of five times if all hits connect. Inspired by Seto Kaiba's interpretation of Shadow Spell in Jump Force. |
| Up special | Magic Cylinder | 12% | A Magic Cylinder, a red barrel with several question marks on it, appears, shooting the user straight upward. Can also be angled slightly left or right. The special move button can be held for up to two seconds to delay release, though no extra height is gained by this maneuver. This intended delay can be used in reading descending opponents, though this is not without risk, considering that the move ends in helplessness. |
| Down special | Mirror Force | 1.2× (minimum 8%) | A traditional counterattack, except for the fact that the attack will send the opponent on the same trajectory that Dark Magician would have traveled had the incoming attack been successful. For example, if Kirby's Hammer Flip is countered by Mirror Force while the two fighters are facing each other, then Kirby will be launched behind Dark Magician. This mirrored trajectory also applies to meteor smashes, meaning that if Ganondorf sweetspots his down aerial on an airborne Dark Magician who counters on time with Mirror Force, the resulting counterattack will send Ganondorf careening straight downward. |
| Final Smash | Exodia the Forbidden One | 7% (each punch/kick), 40% (blast) | Jumps high into the air off-screen as Exodia the Forbidden One appears in the distant background, slowly getting closer and closer. As he approaches the stage, his two arms and two legs appear around the stage, floating free of any body. Each of these limbs, tethered by chains that retreat into the background, will home in on the nearest opponent at moderate speed and either punch or kick them toward the center of the stage. When Exodia gets close enough to the stage, at about the size of Bowser's Final Smash, he will unleash a massive column of furious orange magic stretching between the upper and lower blast lines, functioning similarly to Bahamut ZERO's Teraflare on Midgar, dealing 40% if the enemy is caught for the full duration of the energy pillar. This magical onslaught covers a wider horizontal range on larger stages. The arms and legs will continue to launch opponents toward the blast as it is occurring. Like certain other characters' Final Smashes, agile enough opponents may be able to avoid the attack in its entirety, though Exodia's arms and legs make this a more difficult task. |
Pot of Greed Damage
| Spell | Damage |
|---|---|
| Thousand Knives | 2% (each hit) |
| Dark Magic Curtain | 1.3% (each hit) |
| Illusion Magic | — |
| Dark Magic Twin Burst | 0.5% (first, hits 1-3), 1% (first, hit 4), 1.2% (second, hits 1-3), 6.1% (second, hit 4) |
| Dark Magic Attack | 5% (projectile), 17% (center), 14% (center ring), 10% (rim) |
On-screen appearance
- A face-up Yu-Gi-Oh! card appears on the ground, and Dark Magician materializes above it, surrounded by a Dark Magical Circle.
Idle poses
- Flips his staff once with one hand.
- Magician's Rod floats around him while remaining vertical.
Taunts
- Up taunt: Summons a Dark Magical Circle from his open hand toward the camera, drawing with his finger the Super Smash Bros. logo inside of it with gold-colored energy.
- Side taunt: The Magician's Rod spins around in a circle detached from its master as it revolves around him.
- Down taunt: Crosses his arms into an "X" while Magician's Rod floats in the air in front of him. Resembles Magician of Chaos' pose.
Victory poses
- Left: Shoots out of a Dark Magical Circle on the ground and performs a single mid-air back flip, landing on his feet. Throws a spinning Magician's Rod around the field in the background as the camera spins upward toward his head, focusing on his penetrating eye. After the climax, he strikes a powerful pose. Inspired by his default summoning animation in Yu-Gi-Oh! Duel Links.
- Up: Descends from high in the air while performing numerous connected curled front flips. After landing on one knee, he stands up quickly, the camera zooming in on his face as he smirks powerfully downward toward it. The camera zooms out as the climax arrives, featuring Dark Magician with his arms crossed. Based on Arkana's Dark Magician's summoning animation in Yu-Gi-Oh! Duel Links.
- Right: Performs a spinning erect back flip. Upon landing, he jumps high into the air and readies a magical attack at the tip of his scepter held over his shoulder, pointing toward the camera as the climax is reached. Based on the Dark Side of Dimensions Dark Magician's summoning animation in Yu-Gi-Oh! Duel Links.
Classic Mode: Dedication through Light and Darkness
Dark Magician battles against the most signature monsters of each of the six Yu-Gi-Oh! series in order.
| Round | Opponent | Stage | Music | Notes |
|---|---|---|---|---|
| 1 | Charizard |
Necrovalley | Falsebound Kingdom Medley | Because Dark Magician, himself, is arguably the mascot for the original series, Charizard represents Blue-Eyes White Dragon as Dark Magician's rival. |
| 2 | Captain Falcon |
Saffron City (Ω) | Nightmare Troubadour Medley | Captain Falcon represents Elemental HERO Neos, star monster of Yu-Gi-Oh! GX. |
| 3 | Corrin |
Port Town Aero Dive | Edge of Adversity | Yusei Fudo's Stardust Dragon bears a resemblance to Corrin's dragon form. |
| 4 | King Dedede |
Fountain of Dreams | Frozen Hillside | Despite having no visual similarities, King Dedede serves to represent Number 39: Utopia because he is fighter #39 in the Smash Bros. order. |
| 5 | Ridley |
Prism Tower (Ω) | ARC V Duel | Odd-Eyes Pendulum Dragon and Ridley are fairly similar in appearance. |
| 6 | Mega Man |
Wily Castle (Ω) | VRAINS Duel | Decode Talker and Mega Man are both cybernetic, humanoid fighters. |
| Bonus Stage | ||||
| Final | Master Hand | Final Destination | Master Hand | |
Credits roll after completing Classic Mode. Completing it as Dark Magician has Yu-Gi-Oh! Theme accompany the credits.
In Spirit Battles
As the main opponent
| Spirit | Battle parameters | |||||||||
|---|---|---|---|---|---|---|---|---|---|---|
| No. | Image | Name | Series | Enemy Fighter(s) | Type | Power | Stage | Rules | Conditions | Music |
| 1,438 |  |
Dark Magician Girl | Yu-Gi-Oh! Series | •Dark Magician |
6,000 | Magicant | N/A | •The enemy has increased attack power when the enemy's at high damage | Falsebound Kingdom Medley | |
Alternate costumes

| |||||||

|

|

|

|

|

|

|

|
| Purple | |
| Blue | Assumes his primary alternate card art, his Magician's Robe featuring blue apparel with red trim. His hair turns blonde and his skin turns a pale blue. |
| Red | Arkana's version of Dark Magician, a black-haired variant with darker skin and red garb. This costume's eyes are an opaque white at all times. |
| Gray | Dark Magician as he appears in Yu-Gi-Oh! The Dark Side of Dimensions, with blue skin and gray gloves. |
| Black | Resembles Dark Flare Knight, with black and red clothing. Wields an orange staff. |
| Green | Resembles Dark Paladin, boasting a green and yellow design. |
| Yellow | Resembles Palladium Oracle Mahad, his outfit becoming yellow, white, and black. |
| Cyan | His clothing and staff shift toward cyan and pink while his hair turns blonde, representative of Dark Magician Girl. |
Trivia
- Dark Magician is the fourth playable fighter in Super Smash Bros. Ultimate to have been created by Konami, after Snake, Simon, and Richter.
- Dark Magician's congratulations screen features him (left) and Pikachu (right) facing each other close to the camera with Cloud and Pokémon Trainer in the background on the left and right, respectively. This is a reference to the Yu-Gi-Oh! and Pokémon universes offering popular real-life trading card games in addition to their digital products. Pokémon Trainer commands Pikachu, the functional Pokémon mascot, while Dark Magician, arguably the most famous Yu-Gi-Oh! monster, is controlled by Cloud because his spiky hair resembles that of Yugi Muto, the protagonist of the original Yu-Gi-Oh! series.
- If Kirby inhales Dark Magician, he dons the hood of his Magician's Robe.
- Boxing Ring's marquee presents Dark Magician with the caption, "Dark Burning Magic".
- Pot of Greed will only release one card at a time, despite its effect in the Yu-Gi-Oh! series allowing it to draw two cards. The developers considered using Jar of Greed instead, because its card effect only produces one card, but decided that Pot of Greed was more iconic.
- Dark Magician and Exodia the Forbidden One, represented in the fighter's Final Smash, are both DARK Spellcaster-type monsters used by Yugi Muto.
GoatVille
| Goat Simulator GoatVille | |
|---|---|
 GoatVille as it appears in Super Smash Bros. Ultimate. | |
| Universe | Goat Simulator |
| Appears in | Ultimate |
| Availability | DLC |
| Crate type | Normal |
| Maximum players | 8 |
GoatVille is a stage in Super Smash Bros. Ultimate, released as part of Pilgor's DLC pack. It is set in the eponymous primary map of the original Goat Simulator.
Stage Overview
Like Delfino Plaza and Skyloft, GoatVille traverses several different stage layouts, each one a different area of Pilgor's hometown. There are four different stage layouts that transport the fighters from one part of the map to another, in the following order:
- A format identical to Battlefield, though with a flat main platform.
- A format nearly identical to Small Battlefield.
- A Final Destination-style platform with one lone soft platform hovering above it. Similar to Battlefield, except minus the two lower platforms and with the upper platform brought down a bit.
- Final Destination, albeit flatter on the bottom.
Following this fourth iteration, the cycle repeats, returning first to the Battlefield form and continuing down the list. Between each of these above styles are multiple locations with unique stage structures, ordered randomly.
- A continuous ground that stretches horizontally across the entire stage, with a goat tower on the left and a goat toward the right. The tower has two soft platforms attached to it, one on the upper-left and the other on the middle-right. The goat on the right behaves identically to Pilgor's down special move, Goat Queen, acting as a ballistic projectile that can be used offensively, although unlike Goat Queen, this goat can not disappear.
- An empty swimming pool with continuous ground above it on the right only. The left third of the pool is deeper than the right third, with a slant in the middle connecting the two. To the left of this pool is a large, light-blue slide, which, due to the fact that the game recognizes it as a wall, fighters can neither stand nor walk on. Unlike its origin in Goat Simulator, there are no trampolines in the area.
- A gasoline station, again, with no accessible lower blast line. There is a large, solid, black platform with gray above the floor here, acting as the gas station's roof. This platform is also one giant hurtbox, which, after its HP is decreased from its maximum of 100 to 0, will violently explode, sending all individuals around the platform flying. The gray rim around the platform will change color depending on who has dealt the last hit (red for player 1, blue for player 2, etc.). Credit for any KO's caused by the explosion will go to the player that dealt the finishing blow on the platform. Once the chaos dies down, the platform will be gone, and this location of GoatVille will simply be a floor and large sky.
- The temple of the Goat Queen, an interior room found inside the goat tower found in the first bullet point of this list. Like the previous locations, there is no lower blast line to fall past, as the sides stretch to either side of the screen. Two rows of goats extend into the distance, and if Pilgor is in the match, these goats will bow down in reverence after a moment. The middle area, about the same width as Final Destination, is elevated slightly higher than the ground to either side of it, though all components are built into the ground, meaning there are no floating platforms. The queen's red throne sits in the center of the floor, which can be walked on top of as a hard platform.
- A construction site, with certain similarities to Wrecking Crew. A three-tiered structure with pallets and other equipment scattered about, there are gas canisters in organized piles at the corners and sides of the stage that can be either attacked or grabbed as an item. If one is attacked, it will explode, setting off any other gas canisters in its radius, potentially causing a chain reaction within the pile, causing multiple dangerous explosions. If picked up, it can be thrown like a weaker version of a Bob-omb that is longer in shape. Other than the transfer platforms, this is one of only two locations in GoatVille where fighters can fall below the lower blast line, as the construction site has gaps on either side of it.
- A massive yellow crane pointing right, with a blue storage box hanging from the end of it. Players can walk both on top of the crane and on the metal box below. The metal box is connected to the crane by a wire, but this wire is merely a background element. The crane's trunk is near the left side of the stage rising from the lower blast line, though this really only impacts the game if a player is launched toward it leftward from the storage box. There is more space on the right of the crane's neck than on the left, balanced due to a large, gray cement block that acts as a raised platform on the left. The vertical portion rising up out of the main platform is much lower than it is in Goat Simulator. The crane area is the second of two locations in GoatVille where characters can fall past the lower blast line.
If stage hazards are turned off, the stage will generate one of the four possible transfer platforms and stick that way for the entire match.
Ω and Battlefield forms
The Ω and Battlefield forms of this stage are respectively identical to the fourth and first transfer platforms listed above, though the bases are reshaped to match the standard set by previous stages' Ω and Battlefield forms.
Origin

The first of many maps in the Goat Simulator series, GoatVille appears to be Pilgor's home, as it is the area where he is found fenced in with fellow goats before beginning his adventures. Each of the six locations the stage can visit can be found in Goat Simulator, with very few editions between the base game and Ultimate.
Gallery
The tower portion of GoatVille.
A shot of the pool area as the camera descends toward it.
A lower, askew angle of the gas station floor.
Goat Queen's temple, as seen in Goat Simulator.
A corner of the construction site from Goat Simulator.
The crane can be seen in the distance.


Goat Simulator (universe)
| Goat Simulator (universe) | |
|---|---|

| |
| Developer(s) | Coffee Stain Studios |
| Console/platform of origin | PC |
| First installment | Goat Simulator (2014) |
| Latest installment | Goat Simulator: The Goaty (2019) |
The Goat Simulator universe refers to the Super Smash Bros. collection of characters, stages, and properties that originate from the series of games under the Goat Simulator banner. Recently ported for the Nintendo Switch in a form that includes all games so far, the series is heralded as one of the most comical creations in gaming history, with massive popularity across the world. With the induction of Pilgor into the roster, Goat Simulator is represented in many ways in Super Smash Bros. Ultimate.
Franchise Description
The Goat Simulator universe is comprised of multiple games, many of which have themes that reference universes outside the games, themselves. The general purpose of the series is to simulate life as a goat, though many liberties are taken with this assessment. Unlike real-life goats, Pilgor, the character the player controls in all games in the series (presumably), is able to transform into other forms and species, each with unique qualities that add further layers of entertainment to the games.
The original Goat Simulator set Pilgor in GoatVille, a quaint little small town complete with opportunities perfect for slapstick hilarity, represented in Smash in the form of a stage. Among other things, the original GoatVille features a goatfighting arena, a water slide, an exploding gas station, a low-gravity testing facility, and a mysterious pentacle. The majority of Pilgor's mutations in Super Smash Bros. Ultimate hail from this first game, with only a few exceptions. Following the monstrous success of this experience, Coffee Stain Studios released a second map, Goat City Bay, a high-profile beach town where one can encounter a helicopter, a skyscraper, an amusement park, and even references to Minecraft and Slender, two other popular PC games.
Soon after the releases of GoatVille and Goat City Bay came an entirely new format, Goat MMO Simulator, the first Goat Simulator game to feature an actual plot. Driving this are pre-loaded quests the player can complete to gain experience points, though the game can also be played solely for entertainment value with no concern for story. Besides quests, certain highlights of this game include an all-new combat system, interaction with other characters, an inventory system, and the server farm for the game, itself. Super Smash Bros. takes certain elements from this game, most namely both Mii Fighter costumes, the Old Goat and Microwave Mii Fighter hats, two songs, and three of Pilgor's aerial attacks (forward, back, and down).
The next installment in the Goat Simulator series is GoatZ, a humorous criticism of the zombie survival genre. Because the controlled goat is pursued by zombies at all times, GoatZ is the first game in the series to allow the player to die, at which point the game resets and the player must try again. The ultimate goal of this installment is simply to survive as long as possible, with an in-game clock informing the player of their progress. Very little of GoatZ made it into Smash; those components which are included are a single piece of music and an alternate costume that gives Pilgor opaque eyes and a scarred face.
Because the Goat Simulator fanbase never seemed to dissipate, another entry in the series was quickly released for purchase, with Goat Simulator: Waste of Space parodying anything and everything outer space. In particular, a host of film and television series are referenced, including Star Trek, Doctor Who, and Star Wars (none of these inspirations are ever directly referenced in Super Smash Bros. Ultimate due to potential copyright risk). The only element of Waste of Space included in Smash is a couple of songs, Engage Hyper Goat and Eating Blue Space Grass.
The last new game in the series is Goat Simulator: Payday, which is essentially a crossover between the Goat Simulator and Payday universes. Like Goat MMO Simulator, Goat Simulator: Payday focuses on a mission mode at its core, this time being the primary gameplay function. Because the rights to the external Payday games are well outside Nintendo's reach, the only element from this composite game put into Smash is Pilgor's final alternate costume, in which he assumes the character model of Don Pastrami, one of the stars of Goat Simulator: Payday.
Pilgor and the rest of the Goat Simulator series are able to be included in Super Smash Bros. due to the fact that Coffee Stain Studios partnered with Nintendo to produce Goat Simulator: The Goaty, a complete collection of all Goat Simulator games to date. Like Bayonetta and Off before it, Goat Simulator qualifies as a legitimate third-party universe in Smash because the series has seen representation on a Nintendo console as a third-party game, and like those two other series with their respective games and characters, worldwide recognition of the Goat Simulator series soared after the release of The Goaty and Pilgor as a playable character in Smash, further contributing to the profits of both Coffee Stain Studios and Nintendo.
In Super Smash Bros. Ultimate
With the introduction of a brand-new third-party universe into the game, all Goat Simulator representation exists as DLC.
Fighters
- 88. Pilgor: Pilgor makes his debut in Smash fully equipped with his many mutators from across the Goat Simulator series, able to transform into an ostrich, a giraffe, a whale, an elf, a fish with legs, and a microwave. His Final Smash, Goat Stimulator (not to be confused with his home universe of a similar spelling), transports one caught opponent and Pilgor into the goat pen of the original Goat Simulator, where several different mutations will pummel the ensnared enemy.


Stages
- GoatVille: The very first map from the original Goat Simulator, this stage visits numerous locations in the open world that is GoatVille. Among these are an enclosed pen with a goat tower, a dry swimming pool, a gas station, a mysterious shrine, a construction site, and a crane.

Mii Fighter costumes
Costumes
- Old Goat Outfit (DLC)
- Hunter Outfit (DLC)
Hats
- Goat Mask (DLC)
- Devil Goat Horns (DLC)
- Microwave (DLC)
- Old Goat Mask (DLC)
Music
Original Tracks
Arrangements and remixes unique to Ultimate, with GSTFS, music producer for Goat Simulator, as consultant.
- "Klad Get (Happy Goat)": The theme of Goat City Bay, the second map of the first game. It has been updated to be even catchier than it was originally.
- "Twistram": Hailing from Goat MMO Simulator, this song has been made even more ominous and adventurous than it was in its debut incarnation.
- "Engage Hyper Goat": An outer space-themed song from Goat Simulator: Waste of Space, made more epic and vast.
Source Tracks
Songs borrowed directly from the Goat Simulator games.
- "Goat Chill": The main map theme from the original Goat Simulator.
- "Goatwind City": A mystical fantasy song from Goat MMO Simulator.
- "Eating Blue Space Grass": An endlessly catchy piece featured in Waste of Space.
- "Z": The only song to represent GoatZ in Smash, replete with static interruptions to fit the zombie theme.
Victory Fanfare
- "Victory! Goat Simulator": A brief segment inspired by "Goat Chill," featuring horn instruments.
Spirits
The following characters are spirits hailing from the Goat Simulator universe, all of which become available after purchasing Pilgor's DLC pack.
|
1,442. Pilgor |
Trivia
- Goat Simulator is the third indie series to be represented in full in Super Smash Bros., after Minecraft and Off.
- Goat Simulator's Victory Fanfare may include a pun about goats. Just as the main instruments used are musical horns, goats, themselves, have physical horns.
- Of all of the songs in the Super Smash Bros. series, Z is the one with the shortest possible name, at only one letter.
List of spirits (Yu-Gi-Oh! series)
What follows is the list of the Spirits from the Yu-Gi-Oh! series in Super Smash Bros. Ultimate.
Fighter Spirit
| No. | Image | Name | Origin Game | Acquisition |
|---|---|---|---|---|
| 1,450 | |
Dark Magician | Yu-Gi-Oh! Duel Monsters | •Complete Classic Mode with Dark Magician •Purchase from the Vault Shop for 300G (after unlocking Dark Magician) |
Spirit Battles
| Spirit | Battle parameters | Inspiration | ||||||||
|---|---|---|---|---|---|---|---|---|---|---|
| No. | Image | Name | Enemy Fighter(s) | Type | Power | Stage | Rules | Conditions | Music | |
| 1,451 | |
Dark Magician Girl | Dark Magician |
6,000 | Magicant | •The enemy has increased attack power when the enemy's at high damage | Falsebound Kingdom Medley |
| ||
| 1,452 | Black Luster Soldier | Lucina |
9,000 | Final Destination | •The enemy starts the battle with a Back Shield | Eternal Bond |
| |||
| 1,453 |  |
Alligator's Sword Dragon | •King K. Rool •Charizard |
5,100 | Coliseum | •The enemy starts the battle with a Killing Edge •Bury attacks aren't as effective against the enemy •Water attacks aren't as effective against the enemy •Fire attacks aren't as effective against the enemy |
Nightmare Troubadour Medley |
| ||
| 1,454 |  |
Relinquished | Reflect Kirby |
0 | Necrovalley | •The enemy's neutral special moves have increased power | Yu-Gi-Oh! Theme |
| ||
| 1,455 |  |
Obelisk the Tormentor | Giant Bowser |
12,000 | Necrovalley | •The enemy will occasionally be invincible •The enemy will suddenly have a Final Smash •The enemy can use their Final Smash twice in a row |
Yu-Gi-Oh! Theme |
| ||
| 1,456 |  |
Gravekeeper's Oracle | Ganondorf |
6,000 | Necrovalley | •The enemy's Darkness attacks have increased power •Periodic earthquakes will shake the stage •You'll occasionally take sudden damage |
Falsebound Kingdom Medley |
| ||
Trivia
- All Yu-Gi-Oh! spirits' power rankings are their respective ATK or DEF points times 300. Because Relinquished's original ATK and DEF are 0, its spirit receives a power level of 0, though that spirit is unique in this manner.
- With the exception of Black Luster Soldier, it appears that a Yu-Gi-Oh! Spirit is of type Attack if the original card's ATK is higher than its DEF, Shield if its DEF is higher than its ATK, and Grab if its ATK and DEF are equal. Black Luster Soldier is of type Neutral because it is a Normal Monster.
Neo (SSBU)
| Neo | |
|---|---|
     Official artworks of Neo, Trinity, Morpheus, and Agent Smith in Super Smash Bros. Ultimate. | |
| Universe | The Matrix |
| Debut | Enter the Matrix (2005) |
| Smash Bros. appearances | Ultimate |
| Most recent non-Smash appearance | The Matrix: Path of Neo HD (2023) |
| Console/platform of origin | Nintendo GameCube |
| Species | Human (Neo, Trinity, Morpheus) Program (Agent Smith) |
| Gender | Male (Neo, Morpheus, Agent Smith) Female (Trinity) |
| Place of origin | Earth, the Matrix |
| English voice actor | Keanu Reeves (Neo) Carrie-Anne Moss (Trinity) Laurence Fishburne (Morpheus) Hugo Weaving (Agent Smith) |
| “ | Neo Plugs In! | ” |
| —Introduction tagline | ||
Neo is a playable character in Super Smash Bros. Ultimate, released as the sixth fighter in the Fighters Pass Vol. 3. He is joined by his comrade, Trinity, his mentor, Morpheus, and his foil, Agent Smith, as alternate costumes, with the four characters receiving two costumes each, identically to Hero. Like Bowser Jr. and the Koopalings, each character is named separately, and comes equipped with their own voice clips. Neo is classified as fighter #90.
Vocal sound clips from Enter the Matrix and The Matrix: Path of Neo HD are reused in Ultimate, with Keanu Reeves, Carrie-Anne Moss, Laurence Fishburne, and Hugo Weaving reprising their roles as Neo, Trinity, Morpheus, and Agent Smith, respectively.
Attributes
In many ways an enhanced cross between Snake and Ryu, Neo joins the Smash roster equipped with his mastery of the laws of computer programs, which Super Smash Bros., itself, qualifies as. He is also fluent in numerous different fighting styles, including kung fu and boxing. Certain attacks also utilize firearms, giving him a projectile arsenal. Unlike most characters, because he understands the nature of the game he is in, he is able to manipulate the game to his will in many capacities, such as by grabbing opponents at a distance and halting projectiles in the air.
Moveset
Note: All numbers are listed as base damage, without the 1v1 multiplier.
| Name | Damage | Description | |
|---|---|---|---|
| Neutral attack | 3% (hit 1) 0.2% (loop), 6% (ending) |
A quick jab forward, with higher vertical range than may be expected, optionally followed by a barrage of blurred-together faster-than-possible punches with both arms, ending in a single strong punch. Has some similarities to Mewtwo's neutral attack, but with Bayonetta's neutral infinite's range. Activating only the first hit leads into numerous viable choices, including another neutral attack, forward tilt, up tilt at higher percentages, forward smash (if the opponent does not react properly), grab, tapped Guns, and Superman. | |
| Forward tilt | 2% (hit 1) 2% (hit 2) 6.9% (hit 3) |
A front kick, a round kick, and another front kick, all with the same leg and without touching the ground with that leg between strikes. Like Bayonetta's forward tilt, each hit requires its own button input, though Neo does not walk forward during the move. | |
| Up tilt | 2% (hit 1), 6.5% (hit 2) | His upper body low to the ground, delivers two upward diagonal kicks in sequence. Opponents hit by the final kick will be sent upward at only a slightly forward angle, allowing for potential follow-ups, such as forward aerial. Inspired by the subway scene toward the end of The Matrix. | |
| Down tilt | 6.2% | A leg sweep, Neo spinning on the ground during the move. Launches opponents mostly vertically, making it brilliant in combos. Legitimate follow-ups include up tilt, neutral aerial, forward aerial, and up aerial (at higher percents). | |
| Dash attack | 9% | Runs into the opponent shoulder-first. Seen in the apartment complex in the first The Matrix movie. | |
| Forward smash | 13% | Similar to Ken's forward smash, a high, standing, circular kick. Neo's body twists in the opposite direction as Ken's during the move, striking with his heel. Deceptively tall vertical range, and can not be ducked under. | |
| Up smash | 13% | Crouches very small while charging before flexing his entire body (as in Lucario's up taunt), launching anyone touching him or around him in a radius equal to Ganondorf's up smash (although all at once, with no arc). Affected opponents fly very, very slowly at first before careening off at normal speed. Based on the mob fight from The Matrix: Reloaded. | |
| Down smash | 1% (hit 1), 13% (hit 2) | Sweeps the opponent's leg, lifting them just a bit before unleashing a forward palm thrust that sends enemies flying straight forward. Can combo into an already-activated Bullet Stop in certain situations. Found in the subway scene in The Matrix. | |
| Neutral aerial | 9% | Suddenly armed with a gray metal pole, holds it outward as he spins like a helicopter. Can give Neo a little height if the button is pressed repeatedly during the animation, similar to Wii Fit Trainer's Super Hoop. Wide horizontal range, but offers only a short vertical hitbox. One of the earliest weapon moves Neo uses in the mob fight of Reloaded. | |
| Forward aerial | 1% (hit 1), 2% (hit 2), 11% (hit 3) | Three forward kicks, alternating with each leg. Usually combos into itself. | |
| Back aerial | 6% (torso), 9% (legs), 11% (feet) | Performs an aerial back flip without curling his body, defying the laws of physics. The hitboxes strengthen down his legs, with a sweetspotted meteor smash at his feet. Could be interpreted as a more physically extended version of Lucas' PK Meteor Kick. | |
| Up aerial | 2% (hits 1-5), 4% (hit 6) | Shoots a total of six bullets from two handguns straight upward, a less flashy version of Mii Gunner's up aerial. Launches on the last shot. Performed by Trinity in her fight against Agent Thompson in Reloaded. | |
| Down aerial | 2% (each hit) | Shoots three reflectable bullets diagonally downward a short distance. None of the hits have the ability to launch, each one making the opponent flinch, cementing the attack as a potent gimp and edgeguarding tactic. | |
| Grab | — | Pulls the opponent in toward him telekinetically. By a wide margin the longest-distance non-tether grab in the game, reaching equally as far as Samus' grab; however, because there is no tether involved, it is classified as a normal grab. | |
| Pummel | 1.2% | Punches the opponent in their side. | |
| Forward throw | 8.9% | Headbutts the opponent. Used by both Agent Smith and Neo in the first film's subway scene. | |
| Back throw | 8% | Hoists the opponent upward with both hands and throws them straight backward. Because of the horizontal launch angle, can combo into the effect of Bullet Stop. Performed by Agent Smith in the subway in The Matrix. | |
| Up throw | 9% (collision), 1.1% (throw) | The enemy placed on his back, jumps upward and collides with an invisible ceiling about three character heights above him, launching the opponent upon landing. Also a hitbox outside the throw, if another player is hit on the ascent. The conclusion of the aforementioned subway scene. | |
| Down throw | 9.7% | Reaches into the opponent's chest as though effortlessly dipping a hand into water, and crushes their heart inside their body. During the move, a stress-inducing heartbeat can be heard, which is more rapid with higher opponent damage. Launches the enemy diagonally forward. Adapted from an action taken by Neo at the end of Reloaded. | |
| Floor attack (front) | 7% | A grounded helicopter kick, similar to Sheik's down smash. | |
| Floor attack (back) | 7% | A grounded helicopter kick, similar to Sheik's down smash. | |
| Floor attack (trip) | 5% | Rolls onto his back and kicks into the air with both feet. | |
| Edge attack | 8% | Performs a sweep kick after climbing onto the stage. | |
| Neutral special | Guns | Tapped: 1.4% (each hit) Held: 0.4% (hits 1-15), 5% (hit 16) |
This move has two varieties, executable in the same manner as Ryu's tilt attacks, with one tapped and one held attack.
Tapped: Fires a pistol straight ahead a maximum of six times, shooting a number of shots equal to the number of button presses. Each bullet travels a little over twice as far as Mega Man's forward tilt, and like Mega Man's forward tilt, Neo can walk while using this move. A bit of endlag if the player chooses to use all six shots, as Neo will need to reload. If five or fewer shots are fired, he will automatically have six new bullets ready the next time he uses the move. Each of the bullets will make the enemy flinch, and because no grandiose launch occurs, this move is great for starting and within combos. Held: Fires a machine gun while kneeling on one leg, which can be angled up or down during the move. Unlike the tapped alternative, Neo can not walk during the animation. Can be dodged or shielded out of. If the entire attack is allowed to resolve, which takes about two seconds, there will be a moment of endlag as Neo reloads. Only the last bullet will launch the opponent; each of the fifteen shots before then will make the opponent flinch in place, so as to better guarantee that all hits can connect. |
| Side special | Bullet Stop | 1.4x (reflected projectile) | His hand outstretched, Neo will stop any projectile approaching him from the front, changing ownership to his authority. Uniquely, the reflected projectile will not be sent back along its original course, but will rather simply stay where it was reflected, still an active hitbox. If Neo uses Bullet Stop again and successfully affects another projectile, the first projectile will disappear, meaning that the player must be very conservative with the move's usage (if the second usage is not successful, there will be no change). For example, if Toon Link throws a bomb at Neo and he activates Bullet Stop, the bomb will halt in mid-air and will not explode until it collides with a hurtbox. This attack proves even more useful against stronger projectiles like Samus' Charge Shot, which will hover in place until something touches it. Neo may be able to launch opponents into the stagnant projectile with moves such as forward tilt, down smash, back throw, and Superman, a devastating combo under certain circumstances. Should another character attempt to reflect the unmoving projectile, ownership will be shifted to them, but because there is no longer a trajectory to send it back on, it will remain where it is (Neo can simply use Bullet Stop on it again to regain ownership). No effect on projectiles coming from the rear. |
| Up special | Superman | 9% (punch), 7% (ripple), 6% (flight) | Slams his hand downward before flying away in a manner reminiscent of Lucario's Extreme Speed, his fist extended out during the flight. Neo's entire body is a hitbox during the aerial movement, though it does not do much damage. Like Mii Gunner's Cannon Jump Kick, the initial downward punch has the potential to meteor smash airborne opponents if sweetspotted. If used on the ground, the terrain beneath Neo's feet will ripple in slow motion, the same visual effect as dropping a stone in a lake, launching opponents horizontally away from him. Neo's preferred mode of transportation in The Matrix: Reloaded and The Matrix: Revolutions. |
| Down special | Operator | — | Takes out a cellular flip phone, which plays a lighthearted techno ringtone before an unknown voice says the word, "Operator," marking the completion of the move. If the entire three-second animation takes place and is not interrupted (either by the player or some outside force), a Pistol, an item unique to Neo's moveset akin to Peach's Vegetable and R.O.B.'s Gyro, will spawn five seconds later where the move was used, able to be picked up and used by any player. The Pistol functions similarly to the tapped variant of Neo's neutral special, Guns, with six bullets loaded that each deal very minor damage and knockback. The unloaded weapon can be thrown after all shots are fired, just like any other gun. Like Peach's down special move, Operator also has a small chance of producing other items, with a 1/166 chance of spawning a Super Scope and a 1/250 chance of generating a Killing Edge, as guns are used by all four characters and Morpheus wields a sword in the highway fight of Reloaded. The Killing Edge will exhaust after a certain amount of uses, similar to Robin's Levin Sword. Only one item summoned by the player can be on the field at a time; using Operator while an item summoned previously is already on the field will have no effect, and the operator will not answer the phone. |
| Final Smash | Exit the Matrix | 0.1%-50% | Vanishes into Matrix digital rain, overlaid atop his body. After he disappears, the entire screen appears on a small monitor in the Nebuchadnezzar, Morpheus' ship in the real world outside of the Matrix. Surrounding this screen are other monitors with descending digital rain and program user interfaces displayed on them. Neo then sits down at the keyboard as a crosshair appears in the center of the screen, similar to Snake's Covering Fire, at which point he begins typing. As he does this, the player can move the crosshair over the combatants' damage meters on the bottom of the now small screen, which other fighters are still actively playing on as normal. When the player presses the attack or special attack button, the damage percentage of the character display currently in the crosshair will change based on their current damage. If the affected player has a damage percentage of at least 0% and at most 49.9%, their new damage percentage will become 50%; if the player is at 50% or above, their damage percentage will become 100%. A player at or above 100% will still have their damage percentage changed to 100%, meaning that this Final Smash has the capacity to heal. Fortunately, the player can actually target themself using this move, meaning that if the Neo player is between 100.1% and 999.9%, they will be healed back down to 100%. Exit the Matrix can not produce knockback, but the Neo player is credited with the last hit and the KO if the affected opponent would fall after being impacted by Neo's Final Smash. If one wishes to use the move offensively and not for healing purposes, it is unwise to use the move if they are just under 50%, as it could potentially deal a minimum of only 0.1% damage, so one should try to use the move when the opponent is close to 0% or just above 50%. |
On-screen appearance
- Neo, dressed in rags, sits back in an intensely technological yet plain metallic chair, when a brain jack plugs into the back of his head as he closes his eyes. Just then, he is covered in digital rain, reappearing through more digital rain in a standing position in black clothes and sunglasses.
Taunts
- Up taunt: Cocks his pistol. If playing as Agent Smith, he will let out a bit of a smirk.
- Side taunt: Speaks a famous line from the The Matrix series, varying by character.
- If playing as Neo, he will say, "I know kung-fu."
- If playing as Trinity, she will say, "Dodge this."
- If playing as Morpheus, he will say, "C'mon! Stop trying to hit me and hit me!"
- If playing as Agent Smith, he will say, "I'm going to enjoy watching you die...."
- Down taunt: Digital rain covers him briefly.
Idle poses
- Tugs downward at the chest portion of his outermost layer of clothing, tidying himself up.
- Grips the corner of his sunglasses and adjusts them, a silver sheen reflecting off of them.
Victory poses
- Left: Arises from an exhausted, face-down position, followed by a full-body flex that shakes dust off of him.
- Up: Shoots two bullets from a handgun in one direction, two more in the opposite direction, and then two more at the camera. At the climax, the camera begins to fall to Neo's feet, as though the "cameraman" was shot.
- Right: Picks up a pay phone, answered by a man saying the word, "Operator," as in his down special move. Neo then says, "Get me out of here," after which he is enveloped in digital rain before finally disappearing, the telephone hanging limply.
Classic Mode: Free Your Mind
With the exception of Round 6, Neo battles against fighters who have had to face machines in their respective home series. Round 6 is a reference to the The Matrix universe. Additionally, many opponents will appear in their green alternate costumes, another homage to The Matrix. With the exception of Sparring Program, all of the stages are digital in appearance, an obvious comment on how the Matrix is a digital world.
| Round | Opponent | Stage | Music | Notes |
|---|---|---|---|---|
| 1 | Mega Man |
Sparring Program | Spybreak! | Virtually every Mega Man villain is technological in nature. |
| 2 | Shulk |
Duck Hunt | Du Hast | A primary antagonist of the Xenoblade series is a giant machine called Metal Face. Shulk does not appear in a green alternate costume because he does not have one. |
| 3 | Kirby |
Dream Land GB | Dragula | Kirby: Planet Robobot features a machine theme. |
| 4 | Sonic |
Balloon Fight (Ω) | Prime Audio Soup | Sonic must regularly fight against Dr. Eggman's robots in nearly all of his games. |
| 5 | Samus |
Mario Bros. (Ω) | Look to Your Orb for the Warning | Machines are common enemies fought against in the Metroid universe. |
| Bonus Stage | ||||
| 6 | Agent Smith | Flat Zone X | Leave You Far Behind | The fated battle between Neo and Agent Smith. If using Agent Smith, the player will fight against Neo, instead. |
| Final | Master Hand | Final Destination | Clubbed to Death | |
Credits roll after completing Classic Mode. Completing it as Neo has Wake Up accompany the credits.
Alternate costumes
| Neo | |
| Neo Blue | Neo's clothing is shaded blue, like the visual nature of the real world outside the Matrix. |
| Trinity | |
| Trinity Red | The tint of her jumpsuit resembles Niobe's outfit. |
| Morpheus | |
| Morpheus Purple | Morpheus' overcoat shifts more purple. |
| Agent Smith | |
| Agent Smith Green | Agent Smith's black suit turns a dark green, meant to represent the fact that he is native to the Matrix. |
Trivia
- Neo is the first character in the Super Smash Bros. series to have been popularized through means other than a video game, known primarily for his appearance in the The Matrix movie series.
- These films are never credited in Super Smash Bros. Ultimate; instead, Neo is stated as originating from his three video games.
- Mario, Donkey Kong, Yoshi, Luigi, Daisy, Bowser, Sonic, Pac-Man, Ryu, Ken, Cloud, Bayonetta, Sephiroth, Dark Magician, Balder, and all Pokémon characters have also appeared in motion pictures, but each of their appearances were made after they were established as video game characters, making Neo unique.
- All The Matrix music exists in the universe's films, creating the first Super Smash Bros. character universe to feature no video game music.
- Most of the music also originates from music artists not otherwise involved with The Matrix. Those musicians are individually credited, and the rights to use their songs were acquired after Nintendo struck a deal with Warner Bros.
- Like all Bayonetta music with spoken words, every The Matrix song with lyrics has been remixed to remove them, either replacing them with instrumentation or eliminating them altogether. Not only did this make it more fitting for a fighting game, but this also made it easier for Nintendo to gain access to the music.
- Neo is advertised as "The One" on Boxing Ring's fighter display.
- If Kirby swallows Neo, he simply puts on his dark sunglasses. Due to his shorter stature, Kirby's tapped Guns will fire lower to the ground than Neo's.
- Neo is classified as a third-party character, being the very first Atari representative (Atari produced all The Matrix games).
- Controversy followed Neo's reveal trailer on the official Smash Bros. website, with people being concerned that his heavily violent moveset would affect the game's rating. Nintendo responded to this with an official statement claiming that if it did not need to change for Snake or Joker, who also use firearms, it need not change for Neo.
- Neo's congratulations screen features the fighter in a tripped position inside Luigi's Mansion, sitting on the floor before Dr. Mario in his black alternate costume. Dr. Mario poses with one red and one blue Megavitamin, a reference to the famous red pill/blue pill scene in The Matrix.
Balder (SSBU)
| Balder | |
|---|---|
  
Balder's official art in Super Smash Bros. Ultimate. | |
| Universe | Bayonetta |
| Debut | Bayonetta (2009) |
| Smash Bros. appearances | Ultimate |
| Most recent non-Smash appearance | Bayonetta 2 (2014) |
| Console/platform of origin | Xbox 360 Playstation 3 |
| Species | Human |
| Gender | Male |
| Place of origin | Isla del Sol |
| English voice actor | J. Grant Albrecht |
| Japanese voice actor | Norio Wakamoto |
| “ | Balder Lights Up the Fight! | ” |
| —Introduction Tagline | ||
Balder is a playable fighter in Super Smash Bros. Ultimate, acting as the seventh character in the Fighters Pass Vol. 3. Balder is registered as fighter #91.
Vocal sound clips from Bayonetta and Bayonetta 2 have been ported to Ultimate, with J. Grant Albrecht and Norio Wakamoto respectively reprising their English and Japanese voice roles.
Attributes
Comparable to a more ranged version of Wii Fit Trainer, Balder challenges the Smash roster armed with his Holy Glaive, a double-sided spear that can separate into two components similarly to Pit's Palutena Bow, and mastery of the Light Arts, the Lumen Sages' counterpart to the Dark Arts practiced by Bayonetta and the rest of the Umbra Witches. Almost every attack Balder executes that involves his full, unbroken glaive strikes on both sides of him, as both spearheads are usually hitboxes. Due to the fact that all of their moves are inspired by the same original games, Balder's moveset has many similarities to Bayonetta's.
Moveset
- For simplicity's sake, if the primary spearhead deals 6% and the secondary one deals 4%, it is listed as 6%/4%.
Note: All numbers are listed as base damage, without the 1v1 multiplier.
| Name | Damage | Description | |
|---|---|---|---|
| Neutral attack | 1.3%/1.2% (hit 1) 1.5%/1.4% (hit 2) 0.4% (hit 3) 0.6% (hit 4) 4.0% (hit 5) |
The first three hits of his grounded PPP combo from Bayonetta 2, a low stab straight ahead, a diagonal slash over his shoulder, followed by three sequential horizontal slashes after bisecting his Holy Glaive. Has some similarities in execution to Cloud's Cross Slash. The first two hits also have smaller hitboxes behind him, as his unseparated Holy Glaive has two spearheads. | |
| Forward tilt | Tetsuzanko | 9.8%/7% | Suddenly jumps three character widths behind himself very quickly, even if there is no ground there, before lunging forward with a horizontal swipe, ending up where he started. Incredibly difficult to predict, and very handy as an evasion mechanism. Each end of the glaive is a hitbox upon returning to his original position, the forward hitbox being a bit stronger than the rear one. |
| Up tilt | 8.4%/6.9% | An upward swipe with his glaive in front of himself, sending opponents upward. Also a downward swipe behind him with the other side of his staff, a very weak meteor smash. Effectively a standing version of Rising Sun, and combos very efficiently into it. | |
| Down tilt | 10%/5% | Stabs his spear diagonally forward into the ground. If there is no ground ahead of him, hits slightly below the platform or ledge. Also a hitbox around his head, as the rear spearhead is positioned there. Similar in form to Sephiroth's down smash. | |
| Dash attack | Stiletto | 11%/8% (clean), 8%/6% (late) | Lunges forward, thrusting the Holy Glaive ahead with one hand. Hitboxes are present on both sides of him during the move. The timing of the move is reminiscent of Bayonetta's dash attack, also named Stiletto. |
| Forward smash | 16% (wrist), 13% (fist) | Just like Bayonetta and the Umbra Witches' Wicked Weaves, Balder can call on the Lumen Sages' yellow portals of light, and he summons Temperantia's fist for his forward smash. The summoning portal curves around him before the fist comes out, only aesthetically different from Bayonetta's forward smash. | |
| Up smash | 17% (tip), 15% (base) | Summons a giant spearhead out of a portal upward in front of him, very similar to Bayonetta's up smash. Stronger at the tip than anywhere else, with even more impressive knockback. Balder spins once when the spearhead comes out, his open hand raised in the air. | |
| Down smash | 15% | Summons one of Fortitudo's dragon heads to bite downward out of a portal above and in front of him. Similar to Bayonetta's down smash, except this move is not a meteor smash. The red and blue heads alternate with each usage, with only aesthetic differences. The dragon neck descends in an S-shape, with one uniform hitbox across the entire move. Balder snaps his fingers upon summoning success. | |
| Neutral aerial | 4%/3% (hit 1) 4%/3% (hit 2) 0.3% (hits 3-5) 4% (hit 6) |
A three-hit combo similar in form to Bayonetta's forward aerial, though because of his massive double-sided spear, the first two hits also attack behind him. An underhanded diagonal slash, an overhand swipe, and four quick hits ahead with his divided spears. Only three button inputs are required to unleash all six hits. Hit 1 and hits 1 & 2 can combo fairly reliably into forward aerial. | |
| Forward aerial | 7%/8% | Mostly identical to Bayonetta's After Burner Kick. The first time it is used in the air, grants horizontal and vertical movement; every time it is used after that in the same flight, it occurs statically in place. Balder attacks while standing atop his spear in a crouched position. A secondary hitbox behind and below him (the other spearhead) has a sweetspot at the tip that sends opponents horizontally backward at a slightly negative angle; if sourspotted, the rear hitbox just sends opponents upward with moderate knockback. The front spearhead sets the opponent up for a neutral aerial, back aerial, Sage Strike, or turned-around Rising Sun. | |
| Back aerial | 15%/11% (sweetspot), 7.5%/8% (sourspot) | Flips his staff downward behind himself, with a small meteor smash hitbox at the tip. Unusually for a back aerial, reaches as far forward as it does backward, with a sweetspot at each end. Unlike the primary rear hitbox, the secondary spear half sends opponents straight upward, very useful in combos if properly executed. Both sourspots launch the opponent weakly away from Balder in their respective directions diagonally. If sweetspotted in front of the user, combos fairly easily into Rising Sun. | |
| Up aerial | Sage Strike | 2.2% (hits 1-5) | Resembles Bayonetta's Witch Strike in her original games, spinning his bisected Holy Glaive halves around himself as he gradually angles them toward the sky. The initially horizontal hitboxes rise inward to become vertical (upward only), dragging opponents throughout the attack. Unlike Sage Strike in Bayonetta 2, this move does not yield any height. |
| Down aerial | 13%/12% (clean), 6%/5% (late) | A stall-then-fall with his spear pointed downward, with slightly slower start-up than Toon Link's Sword Plant. Also a secondary hitbox above him at the upward-pointing spearhead, which is strongest just before the descent begins. Never a meteor smash. One sneaky strategy is to use the move after a short hop to act as a powerful and unexpected anti-air. Based on the ending component of his aerial PPPP combo in Bayonetta 2. | |
| Grab | — | Grabs the opponent with his open hand. | |
| Pummel | 1.4% | Knees the opponent in the chest at moderate speed. | |
| Forward throw | 2% (each) | A wall of six peacock feathers pointing their quills at the opponent appears behind Balder before each one shoots forward at them. Each feather is a hitbox even before shooting forward, and each one disappears after colliding with a hurtbox, meaning they can impact other opponents behind Balder, too. | |
| Back throw | 6.5% | Back kicks his opponent behind him. Average strength. Similar to Link's back throw. | |
| Up throw | 10% | Several angelic hands from a portal above and in front of Balder force the opponent upward through it, launching the opponent vertically. Combos well into up tilt, neutral aerial, forward aerial, and Rising Sun. Based on the consequence of losing all of your health when playing as Balder in Bayonetta 2. | |
| Down throw | 10.3%/10% | Holding his weapon ahead in front of himself, lifts it into the air before thrusting it with both hands straight downward into the grounded, flailing opponent, launching them diagonally forward. A secondary hitbox above the pair on the skyward spearhead. | |
| Floor attack (front) | 7% | Twirls the Holy Glaive above himself before getting up. | |
| Floor attack (back) | 7% | Twirls the Holy Glaive above himself before getting up. | |
| Floor attack (trip) | 6% | Stabs on both sides, backward first. | |
| Edge attack | 8%/8% | Swipes his glaive across the floor of the stage. The rear spearhead is a separate, backward-launching hitbox. | |
| Neutral special | Light Arts | Stage 1: 4% Stage 2: 12.5% (clean), 7% (late, sourspot) Stage 3: 1.2% (each) Stage 4: 20% (sweetspot, clean), 12% (sweetspot, late), 10% (sourspot) |
Charges and executes identically to Robin's Thunder.
|
| Side special | Cardinal Virtue | 7% | Quickly throws his Holy Glaive straight ahead. The moment it leaves his hand, he instantaneously teleports ahead to catch it using time manipulation, and can therefore aid in evasion. Very useful for horizontal recovery, but can only be used once in mid-air. The spear qualifies as a projectile, and if reflected, will harm Balder when he catches it. Guaranteed to move only horizontally, ignoring gravity and all windboxes. |
| Up special | Rising Sun | 8.8% | A slightly slower version of the first half of Shulk's Air Slash. Incredibly useful in combos, as it raises the opponent and the user in the air next to each other and does not cause helplessness. Like Bayonetta's Witch Twist, can be used a second time if the user performs a mid-air jump after the first usage. Valid follow-ups include neutral, forward, and up aerial. |
| Down special | Light Speed | — | The Lumen Sages' answer to the Umbra Witches' Witch Time, but instead of slowing down the opponent, it freezes them in time. The duration of this effect functions identically to Bayonetta's down special, affected by opponent damage (higher damage means longer duration), the directness of the incoming attack (direct attacks produce a longer effect), and frequency of use (attempting Light Speed too often will decrease the length of the time stop). A gray field appears around the countered opponent for the duration of the move, along with a gray clock hand that marks how long the move has left, just like Witch Time. Because he has no Bat Within equivalent, Balder's down special is more conventional than Bayonetta's, and can not be activated as a result of a dodge. |
| Final Smash | Supercharge | XXXXX | XXXXX |
On-screen appearance
- Calmly and confidently walks out of a portal of light adorned with the seal of the Lumen Sages.
Taunts
- Up taunt: Raises his hand in the air before limply pointing it forward and making the "come at me" gesture. Says, "Are you frightened?"
- Side taunt: Says, "You have disappointed me," while flipping his hair with his open hand coolly and smugly.
- Down taunt: Takes a step forward, confidently exclaiming, "You have no chance here!"
Idle poses
- Runs his fingers through his hair.
- Calmly takes a deep breath.
Victory poses
Each of Balder's victory quotes originates from the results screen of Bayonetta 2 after winning as Balder in Tag Climax.
- Left: Combs his hair with a peacock feather once while nonchalantly saying, "Oh, were you there?" Balder performs this action upon winning a verse in Tag Climax.
- Up: Leaning on his Holy Glaive, which has pierced and become lodged in the ground, calmly concedes, "Perhaps I should have held back." Bears a slight resemblance to Cloud's down taunt.
- Right: Levitating, and with his wings of peacock feathers behind him as in his Final Smash, descends from above before decisively declaring, "This is your fate!"
Classic Mode: Light Shines in Darkness
Balder fights the Infernal Demons antagonized by Paradiso, up until the final round. All of these opponents are giant for the entirety of each match; the final battle is unique.
| Round | Opponent | Stage | Music | Notes |
|---|---|---|---|---|
| 1 | Giant Bowser |
New Donk City Hall | Tomorrow Is Mine (Bayonetta 2 Theme) (Instrumental) | Represents Gomorrah, Devourer of the Divine, as seen in Bayonetta's Final Smash. Gomorrah is fought as it clutches a skyscraper, not unlike New Donk City Hall, in the beginning of Bayonetta 2. |
| 2 | Giant Falco |
Find Mii (Ω) | Theme Of Bayonetta - Mysterious Destiny (Instrumental) | Falco stands in for Malphas, a pitch-black raven callable by Bayonetta in his first game. The theme of the first Bayonetta game plays because Malphas does not significantly return in its sequel. |
| 3 | Giant Donkey Kong |
Brinstar Depths (Ω) | One Of A Kind | Based on Hekatoncheir, Shatterer of the Earth. Although we never see Hekatoncheir's body, Donkey Kong well simulates its formidable fists. |
| 4 | Giant Cloud |
Reset Bomb Forest | After Burner (∞ Climax Mix) | Cloud's massive Buster Sword is rivaled only by the blade wielded by Diomedes, Severer of the Dark. |
| 5 | Giant Yoshi |
Skyworld | Red & Black | Baal, Empress of the Fathoms, uses her colossal tongue as a weapon just as Yoshi does. |
| 6 | Giant Ridley |
Umbra Clock Tower | Time For The Climax! | Representative of the Infernal bat, Mictlantecuhtli, Presser of Destruction. |
| Bonus Stage | ||||
| Final | Corrin |
Final Destination | The Legend Of Aesir | Just as Bayonetta's Classic Mode ends with the final boss of Bayonetta, so ends Balder's route with the final boss of Bayonetta 2 (Jubileus and Aesir, respectively). In keeping with that latter boss fight, the player teams up with Bayonetta |
Credits roll after completing Classic Mode. Completing it with Balder has Let's Dance, Boys! accompany the credits.
Alternate costumes
| Young Default | Balder as he appears in Bayonetta 2. |
| Old Default | Balder as he appears in Bayonetta. |
| Young Blue | His clothing resembles Fortitudo's blue dragon head. |
| Old Green | The green outfit and purple trim likely represent Iustitia. |
| Young Red | His clothing resembles Fortitudo's red dragon head. |
| Old Brown | Resembles Rodin's New York outfit, not seen in his Assist Trophy role. |
| Young Gray | His black and gray clothing reflect his partner, Rosa. |
| Old Black | Adorns himself in black and red, matching Bayonetta's appearance in the first game. |