Samus (SSBU): Difference between revisions
Tag: Mobile edit |
SacredFire37 (talk | contribs) m (It's frame 3, which isn't slow) Tag: Mobile edit |
||
| (229 intermediate revisions by 99 users not shown) | |||
| Line 1: | Line 1: | ||
{{ArticleIcons|ultimate=y}} | {{ArticleIcons|ultimate=y}} | ||
{{ | {{Disambig2|Samus's appearance in ''Super Smash Bros. Ultimate''|the character in other contexts|Samus Aran}} | ||
{{Infobox Character | {{Infobox Character | ||
|name = Samus | |name = Samus | ||
| Line 10: | Line 10: | ||
|ssbgame4 = SSB4 | |ssbgame4 = SSB4 | ||
|availability = [[Starter character|Starter]] | |availability = [[Starter character|Starter]] | ||
|tier = A | |||
|ranking = 15 | |||
}} | }} | ||
'''Samus''' ({{ja|サムス|Samusu}}, ''Samus'') is a playable character in ''[[Super Smash Bros. Ultimate]]''. Initially teased in the then-unnamed ''Ultimate''{{'}}s announcement trailer, Samus was officially confirmed in the gameplay trailer on June 12, 2018 during E3 2018. Samus is classified as [[Fighter number|Fighter #04]]. | |||
'''Samus''' ({{ja|サムス|Samusu}}, ''Samus'') is a playable character in ''[[Super Smash Bros. Ultimate]]''. | |||
Samus, alongside her [[Echo Fighter]] {{SSBU|Dark Samus}}, is ranked 15th out of 82 on the current [[tier list]], placing her in the A tier. This is a drastic improvement over ''[[Super Smash Bros. 4]]'', where she was tied with {{SSB4|Robin}} at 36th/37th out of 54, and is her best placement in the series to date. This mainly comes as a result of Samus' dynamic moveset, improved from the previous games. Samus' main strength is her powerful far-range neutral game, combined with a decent close-range game as well. For her archetype, Samus possesses a highly sophisticated variety of attacks, ranging from [[Charge Shot]], one of the most powerful neutral specials in the game, to her quick, short and basic hard-hitting combos. She also carries the undisputed best shield pressure in the game for a zoner. Charge Shot is fast and covers wide distance when fully charged. Not only does it deal heavy shield damage, but when slightly charged, can set up for a combo, and when fully charged, can deliver a KO. [[Missile|Missiles]] is a projectile that allows her to easily force approaches, as it covers space wide enough to catch opponents in the air or spot-dodging, and it inflicts good shield damage. She provides an excellent air game as well, possessing among the strongest aerial attacks in the game, all of which are useful for combos or easy KOs. On top of that, Samus, for a zoner, has a fairly admirable close-range neutral. Her forward aerial is one of the best anti-aerial attacks in the game, as it covers a lot of distance and also inflicts heavy damage and KOs at fairly high percents. She also possesses the longest tether grab of any character in the game in the form of [[Grapple Beam]], which allows her to easily punish opponents that are quick to approach her on the ground. Should opponents reach Samus up closer, she can quickly punish and reset neutral with [[Screw Attack]], which has very high hitsun and knockback, allowing for an easy [[out of shield]] KO option at higher percents. Furthermore, Samus has an excellent recovery, with her slow falling speed, Grapple Beam, the great vertical and horizontal distance of Screw Attack, as well as [[Bomb (Samus)|Bombs]] providing minor boosts to her recovery and serving as a tool for recovery mixups as well. Finally, Samus boasts amazing survivability, with a very heavy weight and amazing recovery allowing her to survive until higher percents, which could sometimes give her [[Rage|rage]] for an extended period of time and allow her to eliminate opponents first. | |||
However, Samus has weaknesses, the most significant ones being her slow mobility and frame data. Samus has rather poor ground mobility, largely hindering her defensive options, and giving her a harder time against opponents who can catch up to her quickly. Samus' projectiles being the most useful part of her gameplan especially, are burdened with significant startup and endlag. Aside from Charge Shot, which takes time and calculation to land successfully, all of her special attacks, especially Screw Attack, have a high amount of cooldown lag and often leave Samus vulnerable to a sharp punish. This, combined with her low traction relative to the cast, gives her a rather mediocre out of shield game, and with Grapple Beam coming out at frame 15, it gives opponents enough time to spot dodge and punish Samus accordingly. Samus relies on spacing with her special attacks and out of shield options to succeed against her opponents, but with most of her defensive options being risky, she would have a difficult time handling opponents that avoid her projectiles and defensive options. Therefore, Samus is often forced to refrain from using her special attacks carelessly, despite their amazing strength, and it gives her somewhat difficult match-ups against characters that have better frame data and/or mobility and defense options, such as [[Mario]], [[Fox]], and [[Bayonetta]]. Furthermore, the relatively high ending lag on her attacks plagues even her stronger attacks, that being her KO options. Her up-smash, while serving as an effective out of shield punish option, is escapable via [[SDI]], struggles to hit short characters on the ground and has a lot of ending lag, while her forward-smash, while quick, is burdened with a large and weak sourspot at close range that takes precedence over the [[Sweet spot (hitbox)|sweetspot]] hitbox. Furthermore, Samus has a rather poor ground game, with a forward tilt that loses a lot of power at point-blank range, a slow up-tilt and a down tilt with dangerously high ending lag. Her [[jab]], while often used for mixups, is notorious for its inability to connect consistently. This causes Samus to seriously struggle when the opponent is too close to her. Being tall and surprisingly floaty for her weight is only beneficial to a limited degree, as it also makes her relatively easier to punish when in the air and juggle. Finally, her recovery, while amazing, is rather slow, linear, and predictable, so opponents with an effective offstage game will often give Samus a hard time recovering. | |||
Overall, Samus is an effective zoner that can quickly and easily deal massive amounts of damage, shield pressure, and secure stocks, while surviving to very high percents. Samus is also a rather popular character in competitive play, mostly because she has a rather low learning curve, with basic combos and neutral gameplay that is highly effective. From the early until the current metagame, Samus has had consistent growth in successful representation, and has seen strong results from players such as {{Sm|Yaura}}, {{Sm|Sisqui}} and {{Sm|quiK}}. | |||
==Attributes== | |||
Samus is a [[Weight|heavyweight]] unique among others. She is a [[Falling speed#Floaty|floaty]] character with slightly below-average [[walk]]ing and [[dash]]ing speeds, average [[air speed]], above-average [[air acceleration]], high [[jump]]s and slow [[falling speed]]. These attributes grant her an easier time chasing aerial opponents and forcing air dodges, yet also cause her to be juggled rather easily. When combined with her few reliable landing options and slow falling speed, opponents will also have more time to punish Samus as she attempts to return to the stage. | |||
Samus' moveset consists of playing defensively, as she uses her projectiles to space, rack up damage from a distance and pressure shields. [[Charge Shot]] is her most consistent KOing option out of her special moves when fully charged, due to its speed and power. Missiles is mostly used for spacing, due to both its Homing and Super variants being extremely inefficient at KOing, while {{b|Bomb|Samus}} grants Samus various mix-ups and can aid her recovery. However, Missile and Bomb also possess valuable utility in that they can guarantee a shield break when used in conjunction with a sufficiently charged Charge Shot or a sweetspotted back aerial. Lastly, {{b|Screw Attack|move}} is a very useful out of shield option thanks to it’s very high knockback and hitstun, KOing option near the upper blast line and a viable combo finisher from aerial combo strings. | |||
In addition, Samus has a strong air game. The changes to air dodges have benefitted her overall, as they notably improve her ability to edgeguard (especially with moves such as forward aerial or her renowned Charge Shot), while she isn't hindered as much due to her fast air speed, the ability to stall midair using her Bombs, and her Grapple Beam tether recovery's long range. All of Samus' aerials have no more than 20 frames of landing lag, and her back aerial is one of her best moves courtesy of its power, damage output, speed and range. Her down aerial can be a powerful meteor smash, forward aerial is a good pressuring tool due to its long duration, and up aerial is an excellent combo option. Lastly, her neutral aerial is a viable KOing option. When coupled with her high jumps, Samus' air game is also potent while she is off-stage, as she can recover from nearly anywhere on the stage, stay in position for longer periods of time due to her floatiness, or bait the opponent by stalling in the air and punishing edge-guard attempts. | |||
Samus' grab game is also useful thanks to a variety of perks. Her [[Grapple Beam]] has impressive overall range and is useful in the air as either a [[tether recovery]] or a [[grab aerial]], the latter of which is potent for zoning thanks to its aforementioned range and very minimal landing lag. Down throw is very useful for starting combos that deal respectable damage and can be used with her neutral, forward and up aerials at varying percentages. Many of her combos can rack up more than 30% and when using platforms to her advantage, or string together multiple times and then be finished with Screw Attack, leading to a KO or dealing 40%-50% at the very least. Up throw is Samus' strongest throw and, unlike in ''SSB4'', it is capable of KOing quite reliably (especially on platforms), thanks to its redistributed damage output and increased knockback. Although forward throw and back throw have decent damage outputs, their only utility is creating space and setting up edge-guards, and both are mediocre at best in doing so. | |||
However, Samus has noticeable flaws. Samus' ground game is mediocre overall as her smash attacks are punishable, with only her forward smash being a fairly reliable KOing option due to its quick start-up lag. Her neutral attack is very mediocre, which is noticeably exemplified in its inability to connect at high percentages and thus limits Samus' anti-pressuring ability. Due to this and her average dashing speed, most Samus players will often find themselves in the air, where her strengths lie. | |||
Samus also has issues with her recovery. Her grab aerial has very long range, her jumps are among the highest in the game, Screw Attack is fast and hard to punish, and Bomb jumping provides infinite horizontal recovery, but they are all offset by Screw Attack's only average distance, Bomb's high ending lag in the air and Samus' only average air speed and reliance on her grab aerial to grab edges from a distance. Altogether, this results in her recovery being slightly slow, linear and predictable. | |||
Overall, Samus is a character that performs best when using her projectiles and grab aerial for spacing in order to set up combos and either finish off pressured opponents off-stage, or KO them outright with Charge Shot. Unlike the majority of veterans, Samus' optimal playstyle is highly unorthodox; as she falls short in regard to zoning-exclusive or melee-exclusive offense, success with Samus requires careful and strategic use of her various tools to keep momentum in her favor. As such, she is a character that is hard to master, but greatly rewards patient and calculated play. | |||
==Changes from ''[[Super Smash Bros. 4]]''== | ==Changes from ''[[Super Smash Bros. 4]]''== | ||
Samus has historically been a lower-ranking character in the ''Smash Bros.'' series | Aside from [[Samus (SSBM)|her incarnation in]] ''[[Super Smash Bros. Melee|Melee]]'', Samus has historically been a lower-ranking character in the ''Super Smash Bros.'' series. Even her appearance in ''[[Super Smash Bros. 4|SSB4]]'' was mixed, as the significant buffs she received via game updates elevated her perception from "unviable" to "viable but outclassed". Likely as a result of her polarized viability, Samus has been buffed significantly overall in the transition to ''Ultimate''. | ||
Samus' largest buffs come from the improvements made to her [[grab]] game and her repertoire of projectiles. Historically considered among the most lackluster grab games despite her grabs' long range and her down throw's excellent combo ability, all of Samus' [[throw]]s have increased utility, damage and knockback; her new [[up throw]] is now her strongest throw and a viable KO option at high percentages, [[down throw]]'s combo potential was further improved due to its lower ending lag, and both her [[forward throw|forward]] and [[back throw]]s have more knockback, even situationally KOing at high percentages when close to an edge. | |||
In terms of her projectile game, {{b|Bomb|Samus}}s explode earlier on contact with enemies, [[Missile]]s deal more damage and have less ending lag, while Super Missiles deal more knockback and stall for a longer time before flying forward, greatly improving their use for trapping. Most notably, [[Charge Shot]] can now be charged in the air, used as a combo tool due to Samus' improved mobility and its lower ending lag, and deals greater damage and knockback, which gives Samus more opportunities to charge up her most threatening move. In bulk, all of these changes have significantly strengthened her zoning and punish game. | |||
Other buffs to Samus also include many of her up-close moves dealing more knockback, most notably her [[down tilt]], [[dash attack]] and [[down smash]], improving her previously inconsistent KO potential; and her previously slow and punishable [[roll]] was also notably increased in speed, making it more usable as an escape option. She also benefits considerably from the universal changes to the engine, as the reduced [[landing lag]] and weakening of [[shield]]s makes her aerials safer to use for approaching despite their lower [[shieldstun]]. As with most other veterans, her mobility has been improved and, when coupled with the [[dash-cancel]], the miscellaneous buffs to her standard moves and their relatively fast frame data, and the increased shieldstun, grants her a much safer close-quarters game. | |||
The changes to [[air dodge]]s, particularly, have benefitted Samus overall, as they notably improve her ability to edge-guard (especially with moves such as [[forward aerial]] or her renowned Charge Shot), while she has one of the longest horizontal distances of any air dodge, giving her a situational recovery option; she also isn't hindered as much by them due to her fast air speed, the ability to stall midair using her Bombs, and her [[Grapple Beam]]'s long range as a [[tether recovery]]. Finally, the universal changes to grabs have benefitted her likely the most of any character, as not only do her grabs now have less ending lag relative to the rest of the cast, but her standing and pivot grabs now have less ending lag as well, which further improves her grab game. | |||
However, Samus has received nerfs that, while fewer in comparison to her buffs, have drastically affected her playstyle. Her dash attack, previously a notorious combo starter and often considered her best close-quarters option (and her best move overall), it has been repurposed into a somewhat strong yet situational KO option due to its now-horizontal launching angle and significantly higher power and ending lag. Her infamously inconsistent [[neutral attack]] has worsened even further, as its first hit's lower knockback and slower transition into its second hit have removed its most reliable setups at higher percents and rendered the second hit nearly useless. [[Up smash]] has less range, higher [[SDI]] multipliers, and no longer has set knockback, which collectively result in it becoming more inconsistent than before. Finally, Samus' [[up aerial]] has increased landing lag and its looping hits inflict lower hitstun, reducing its combo and setup potential, especially on landing. | |||
In terms of indirect changes, Samus is one of the characters to be hindered the most by the nerfs to [[rage]]: while the lower total multiplier make it slightly harder for Samus to close out a stock if she is able to endure a hit, the fact rage no longer applies to set knockback removes her ability to KO at very early percents by setting up a {{b|Screw Attack|move}} with high rage (which was a commonly exploitable tactic in conjunction with her dash attack). Lastly, of further note is that some of Samus' most noticeable weaknesses from previous games remain, such as a lackluster close quarters game in comparison to her spacing and zoning games, her moveset's high ending lag leaving her prone to punishment, her susceptibility to being juggled, and a vulnerable recovery despite her access to a tether option. | |||
Overall, Samus' changes and buffs have improved her playstyle's most noticeable attributes in her zoning and long-ranged options, and her heightened offensive power and the changes to gameplay mechanics give her more opportunities to take advantage of this playstyle, though because of the nerfs to her more polarized offensive options, Samus still relies on a patient playstyle. Regardless, her changes have allowed her to veer closer to a balanced, long range-based "mighty glacier", with potent KO power, generally well-rounded attributes (with particularly high endurance yet below-average overall mobility), and a focus on hard-hitting punishes and combos at both long and mid-range, while having difficulty dealing with rushdown and disjoints, which evokes her very projectile-oriented fighting style in [[Metroid (universe)|her home series]]. Her plentiful buffs have allowed Samus to perform significantly better relative to the cast than in ''SSB4'', with this being her strongest incarnation yet and a solid contender in competitive play. | |||
{{SSB4 to SSBU changelist|char=Samus}} | |||
==Update history== | ==Update history== | ||
Samus | Samus received a mix of buffs, nerfs and glitch fixes via game updates, but was buffed overall. Update 2.0.0 increased [[Missile]]'s range, which allows her to space better and deal damage at safer ranges. However, it also received more ending lag when used in the air, which standardized it with {{SSBU|Dark Samus}}' version. Additionally, grounded [[Bomb (Samus)|Bomb]]'s ending lag was decreased, which made it safer and allows her to act out of it more effectively. | ||
However, update 3.0.0's near-universal nerf to projectiles' shield damage outputs hindered Samus (and Dark Samus by extension) more so than most other characters, as it noticeably worsened [[Charge Shot]]'s shield pressuring potential. Following this, update 3.1.0 improved up smash's linking hits as part of a near-universal buff. | |||
Update | Update 7.0.0 would later provide Samus with substantial buffs. Up smash, down smash and up throw each gained considerable increases to their knockback, which noticeably improved their KO potentials. On a similar note, early dash attack deals 3% more damage: this makes it functionally identical to the clean hit, and thus improved dash attack's consistency as a situational, yet viable KO option. Aside from these improved KO options, aerial [[Grapple Beam]]'s damage output and hitbox duration were increased, which slightly improved her spacing game. Lastly, Samus' shield was enlarged as part of a near-universal buff. | ||
Overall, Samus fares better than she did at the launch of ''Ultimate''. | |||
'''{{GameIcon|ssbu}} {{SSBU|2.0.0}}''' | '''{{GameIcon|ssbu}} {{SSBU|2.0.0}}''' | ||
| Line 178: | Line 75: | ||
'''{{GameIcon|ssbu}} {{SSBU|4.0.0}}''' | '''{{GameIcon|ssbu}} {{SSBU|4.0.0}}''' | ||
{{UpdateList (SSBU)/4.0.0|char=Samus}} | {{UpdateList (SSBU)/4.0.0|char=Samus}} | ||
'''{{GameIcon|ssbu}} {{SSBU|7.0.0}}''' | |||
{{UpdateList (SSBU)/7.0.0|char=Samus}} | |||
'''{{GameIcon|ssbu}} {{SSBU|9.0.0}}''' | |||
{{UpdateList (SSBU)/9.0.0|char=Samus}} | |||
'''{{GameIcon|ssbu}} {{SSBU|9.0.1}}''' | |||
{{UpdateList (SSBU)/9.0.1|char=Samus}} | |||
'''{{GameIcon|ssbu}} {{SSBU|9.0.2}}''' | |||
{{UpdateList (SSBU)/9.0.2|char=Samus}} | |||
==Moveset== | ==Moveset== | ||
| Line 187: | Line 96: | ||
|game=SSBU | |game=SSBU | ||
|neutralcount=2 | |neutralcount=2 | ||
|neutralname=Straight | |neutralname=Straight ({{ja|ストレート|Sutorēto}}) / Cannon Hammer ({{ja|アームキャノンハンマー|Āmu Kyanon Hanmā}}, ''Arm Cannon Hammer'') | ||
|neutral1dmg=3% | |neutral1dmg=3% | ||
|neutral2dmg=8% | |neutral2dmg=8% | ||
|neutraldesc=A left-handed jab followed by a [[wikipedia:Professional wrestling attacks#Forearm club|forearm club]] with the {{ | |neutraldesc=A left-handed jab followed by a [[wikipedia:Professional wrestling attacks#Forearm club|forearm club]] with the {{iw|metroidwiki|Arm Cannon}}. Despite dealing above-average damage for a neutral attack, it is poor overall, as opponents can usually act out before the second hit connects by shielding or using a fast attack, while the second hit may not even connect at high percentages. Depending on the opponent's weight, it is safe and a true combo at high percents, but only if the first hit connects relatively close to the arm and not at the fist. The second hit does have KO potential at very high percentages, however, and the first hit is very fast, coming out on frame 3, making it a decent interrupt tool. | ||
|ftiltangles=3 | |ftiltangles=3 | ||
|ftiltname= | |ftiltname=Spin Kick ({{ja|スピンキック|Supin Kikku}}) | ||
|ftiltupdmg=11% (foot), 10% (leg), 9% (body) | |ftiltupdmg=11% (foot), 10% (leg), 9% (body) | ||
|ftiltsidedmg=10% (foot), 9% (leg), 8% (body) | |ftiltsidedmg=10% (foot), 9% (leg), 8% (body) | ||
|ftiltdowndmg=11% (foot), 10% (leg), 9% (body) | |ftiltdowndmg=11% (foot), 10% (leg), 9% (body) | ||
|ftiltdesc=A | |ftiltdesc=A roundhouse kick. Deals more damage and knockback at her foot, while her leg deals less damage and knockback. It can be [[angle]]d, which causes it to deal more damage, but it may cause it to miss shorter characters on the ground if angled up. The foot sweetspot deals rather potent knockback for a tilt attack, which can KO at the edge at around 125%. At varying percentages, depending on which part of the move is landed, it can lead into a guaranteed [[Charge Shot]], as regardless of [[tech]]ing, Charge Shot can catch the opponent's option in time if they are knocked down. As the closest hitboxes deal low knockback and damage, it has low shield safety at low to mid percents. | ||
|utiltname= | |utiltname=Heel Kick ({{ja|ヒールキック|Hīru Kikku}}) | ||
|utiltdmg=13% (grounded), 12% (aerial) | |utiltdmg=13% (grounded), 12% (aerial) | ||
|utiltdesc=An axe kick | |utiltdesc=An axe kick. It is almost identical to {{SSBU|Captain Falcon}}'s up tilt in both appearance and functionality. Like Falcon's, it [[meteor smash]]es grounded opponents, but unlike his, it launches aerial opponents at a horizontal angle. This allows it to set up combos against grounded opponents at a wide range of percentages while also being a reliable tool against ledge hangs, due to its wide coverage and powerful knockback enabling it to cover most ledge options and KO outright at around 95% at the edge. At high percentages, the grounded meteor can also set up KO confirms into a fully charged Charge Shot. However, the move has noticeable startup, due to coming out on frame 15, making it Samus' slowest normal attack on the ground. Oddly, the very first frame of the hitbox will send opponent backwards instead of in front of Samus, which could make the move kill even earlier should they DI wrong. | ||
|dtiltname= | |dtiltname=Earth Blaster ({{ja|アースブラスター|Āsu Burasutā}}) | ||
|dtiltdmg=12% | |dtiltdmg=12% | ||
|dtiltdesc=Kneels and quickly thrusts her Arm Cannon downward to fire a small, fiery blast. It is very fast, due to coming out on frame 6, and deals respectable damage and knockback for a tilt attack, KOing at around 160% off the top blast line. It is useful as a close range anti-pressure option on opponents in front of Samus, or as a punishment option. However, its very high ending lag leaves it easy to punish if shielded | |dtiltdesc=Kneels and quickly thrusts her Arm Cannon downward to fire a small, fiery blast. It is very fast, due to coming out on frame 6, and deals respectable damage and knockback for a tilt attack, KOing at around 160% off the top blast line. It is useful as a close range anti-pressure option on opponents in front of Samus, or as a punishment option. However, its very high ending lag leaves it easy to punish if shielded or missed. | ||
|dashname= | |dashname=Shoulder Tackle ({{ja|ショルダータックル|Shorudā Takkuru}}) | ||
|dashdmg= | |dashdmg=10% (clean), 6% (late) | ||
|dashdesc=A shoulder tackle | |dashdesc=A shoulder tackle. Deals more damage and knockback during the first half of the move, KOing opponents at around 140% from the center of {{SSBU|Final Destination}}, and earlier near edges. However, the late hit is significantly weaker, not being capable of KOing until around 200% under the same circumstances, and the move lacks any combo potential. It resembles the {{iw|metroidwiki|Shinespark}}, a {{iw|metroidwiki|Speed Booster}}-related technique that debuted in [[Super Metroid]]. | ||
|fsmashangles=3 | |fsmashangles=3 | ||
|fsmashname= | |fsmashname=Arm Cannon Knuckle ({{ja|アームキャノンナックル|Āmu Kyanon Nakkuru}}) | ||
|fsmashupdmg={{ChargedSmashDmgSSBU|13}} (Arm Cannon), {{ChargedSmashDmgSSBU|15}} (blast) | |fsmashupdmg={{ChargedSmashDmgSSBU|13}} (Arm Cannon), {{ChargedSmashDmgSSBU|15}} (blast) | ||
|fsmashsidedmg={{ChargedSmashDmgSSBU|12}} (Arm Cannon), {{ChargedSmashDmgSSBU|14}} (blast) | |fsmashsidedmg={{ChargedSmashDmgSSBU|12}} (Arm Cannon), {{ChargedSmashDmgSSBU|14}} (blast) | ||
|fsmashdowndmg={{ChargedSmashDmgSSBU|11}} (Arm Cannon), {{ChargedSmashDmgSSBU|13.5}} (blast) | |fsmashdowndmg={{ChargedSmashDmgSSBU|11}} (Arm Cannon), {{ChargedSmashDmgSSBU|13.5}} (blast) | ||
|fsmashdesc=Quickly thrusts her Arm Cannon forward to fire a small, fiery blast. Functions similarly to {{SSBU|Mario}}'s forward smash, with the blast being the most powerful part of the move. It is one of the fastest forward smashes in the game, coming out on frame 10, while the blast has the highest knockback out of her smash attacks, KOing at around 100% from center stage. However, it is rather weak otherwise, with the Arm Cannon KOing at around 135% and the sourspot taking priority over the sweetspot. It can be angled like her forward tilt, with the upward angle dealing more damage and knockback, though it can typically miss as a result; conversely, the downward angle can hit | |fsmashdesc=Quickly thrusts her Arm Cannon forward to fire a small, fiery blast. Functions similarly to {{SSBU|Mario}}'s forward smash, with the blast being the most powerful part of the move. It is one of the fastest forward smashes in the game, coming out on frame 10, while the blast has the highest knockback out of her smash attacks, KOing at around 100% from center stage. However, it is rather weak otherwise, with the Arm Cannon KOing at around 135% and the sourspot taking priority over the sweetspot. Due to its 37 frames of ending lag, it's also punishable if it doesn't hit. It can be angled like her forward tilt, with the upward angle dealing more damage and knockback, though it can typically miss as a result; conversely, the downward angle can hit edge hanging opponents, but deals slightly less damage and knockback. | ||
|usmashname=Cover Fire | |usmashname=Cover Fire ({{ja|ヘルファイア|Herufaia}}, ''Hellfire'') | ||
|usmashdmg={{ChargedSmashDmgSSBU|3}} (hits 1-4), {{ChargedSmashDmgSSBU|6}} (hit 5) | |usmashdmg={{ChargedSmashDmgSSBU|3}} (hits 1-4), {{ChargedSmashDmgSSBU|6}} (hit 5) | ||
|usmashdesc=Fires five fiery blasts in an overhead arcing motion. True to its name, this move works best as an anti-air attack, as its multiple hits give a good amount of aerial protection. Conversely, it is unable to hit grounded opponents unless they are close enough to Samus. It is also her most damaging smash attack, dealing 18% total uncharged. However, due to its hits being spread above Samus, it can fail to fully connect if the opponent is hit from too far. | |usmashdesc=Fires five fiery blasts in an overhead arcing motion. True to its name, this move works best as an anti-air attack, as its multiple hits give a good amount of aerial protection. Conversely, it is unable to hit grounded opponents unless they are close enough to Samus. It is also her most damaging smash attack, dealing 18% total uncharged. However, due to its hits being spread above Samus, it can fail to fully connect if the opponent is hit from too far. If all 5 hits connect, it can KO middleweights at around 100% from ground level. | ||
|dsmashname= | |dsmashname=Spinning Low Kick ({{ja|スピニングローキック|Supiningu Rō Kikku}}) | ||
|dsmashdmg={{ChargedSmashDmgSSBU|10}} (front), {{ChargedSmashDmgSSBU|12}} (back) | |dsmashdmg={{ChargedSmashDmgSSBU|10}} (front), {{ChargedSmashDmgSSBU|12}} (back) | ||
|dsmashdesc=A legsweep. A [[semi-spike]] with decent speed and high base knockback, allowing it to set up edgeguards and punish rolls effectively. | |dsmashdesc=A legsweep. It comes out of frame 9 and it's Samus's fastest smash attack. A [[semi-spike]] with decent speed and high base knockback, allowing it to set up edgeguards and punish rolls effectively. The front hit can KO middleweights center stage around 150%, with the back hit KOing even earlier at around 135%. | ||
|nairname= | |nairname=Turning Kick ({{ja|ターニングキック|Tāningu Kikku}}) | ||
|nairdmg={{ShortHopDmgSSBU|10}} (hit 1), {{ShortHopDmgSSBU|9}} (hit 2, clean), {{ShortHopDmgSSBU|8}} (hit 2, late) | |nairdmg={{ShortHopDmgSSBU|10}} (hit 1), {{ShortHopDmgSSBU|9}} (hit 2, clean), {{ShortHopDmgSSBU|8}} (hit 2, late) | ||
|nairdesc=A spinning roundhouse kick | |nairdesc=A spinning roundhouse kick. Comes out in frame 8. Hits on both sides quickly and can autocancel with a short hop fast fall. Its front hit and sweetspotted back hit also deal powerful knockback, which makes it a viable KOing option offstage or near the edge, as well as a decent combo finisher and one of the strongest aerials of its type. It resembles the aerial version of the Counter Attack from ''{{iw|metroidwiki|Metroid: Other M}}''. | ||
|fairname= | |fairname=Aerial Fire ({{ja|エアリアルヘルファイア|Eariaru Herufaia}}, ''Aerial Hellfire'') | ||
|fairdmg={{ShortHopDmgSSBU|3}} (hit 1), {{ShortHopDmgSSBU|1.6}} (hits 2-4), {{ShortHopDmgSSBU|5}} (hit 5) | |fairdmg={{ShortHopDmgSSBU|3}} (hit 1), {{ShortHopDmgSSBU|1.6}} (hits 2-4), {{ShortHopDmgSSBU|5}} (hit 5) | ||
|fairdesc=Fires five fiery blasts in a slow, downward arcing motion. | |fairdesc=Fires five fiery blasts in a slow, downward arcing motion. Due to it coming out on frame 6, it has the second lowest start-up lag of Samus' aerials. The first four hits drag opponents into the rest of the move using the [[autolink angle]], with the last hit carrying the entire attack's knockback. Samus' main aerial move for both combos and protection. Extremely useful as an edge get-up option or against air dodges due to its multiple hits, and using the move immediately after a short hop can hit opponents with the last hit before Samus lands again. It's her only aerial that does not autocancel in a short hop. It can KO middleweights at around 155% from center-stage if all hits connect. | ||
|bairname= | |bairname=Sobat ({{ja|ソバット|Sobatto}}) | ||
|bairdmg={{ShortHopDmgSSBU|14}} (clean foot), {{ShortHopDmgSSBU|12}} (clean leg), {{ShortHopDmgSSBU|9}} (late) | |bairdmg={{ShortHopDmgSSBU|14}} (clean foot), {{ShortHopDmgSSBU|12}} (clean leg), {{ShortHopDmgSSBU|9}} (late) | ||
|bairdesc=A back kick. It | |bairdesc=A back kick. It's fast, can autocancel in a short hop and deals powerful knockback when connecting the sweetspot on Samus' foot, which makes it an excellent KOing option, especially when edgeguarding. When sweetspotted, it is among the strongest back aerials in the game, KOing {{SSBU|Mario}} at 100% from center stage. | ||
|uairname= | |uairname=Drill Kick ({{ja|ドリルキック|Doriru Kikku}}) | ||
|uairdmg={{ShortHopDmgSSBU|3}} (hit 1), {{ShortHopDmgSSBU|1.3}} (hits 2-5), {{ShortHopDmgSSBU|4}} (hit 5) | |uairdmg={{ShortHopDmgSSBU|3}} (hit 1), {{ShortHopDmgSSBU|1.3}} (hits 2-5), {{ShortHopDmgSSBU|4}} (hit 5) | ||
|uairdesc=A diagonal corkscrew flying kick | |uairdesc=A diagonal corkscrew flying kick. It hits multiple times and is her fastest aerial, due to it coming out on frame 5. Grounded opponents can be hit by the last hitbox if Samus lands while starting the move in the air, although it is difficult to do so, and risky due to the move's high landing lag. It can be used as a follow-up after a dash attack, grounded up tilt, down aerial, or down throw, all of which can be followed up with another up aerial and/or can be finished off with a {{b|Screw Attack|move}}. On stages with platforms, it even has potential for a [[zero-to-death]] when using a platform to extend the combo. Can KO if used high enough and close to the blast line. | ||
|dairname= | |dairname=Meteor Drop ({{ja|メテオドロップ|Meteo Doroppu}}) | ||
|dairdmg={{ShortHopDmgSSBU|10}} (early, late), {{ShortHopDmgSSBU|14}} (clean) | |dairdmg={{ShortHopDmgSSBU|10}} (early, late), {{ShortHopDmgSSBU|14}} (clean) | ||
|dairdesc=Swings her Arm Cannon in a downward arcing motion. Hitting | |dairdesc=Swings her Arm Cannon in a downward arcing motion. Hitting directly below Samus [[meteor smash]]es opponents, while the edges of the move at the very start and end deal decent horizontal knockback. It has slow startup at frame 17, but it autocancels from a short hop, and due to its relatively low ending lag, the meteor smash is excellent for starting combos on grounded opponents, much like her up tilt. | ||
|zairname= | |zairname=Midair Grapple Beam ({{ja|空中グラップリングビーム|Kūchū Gurappuringu Bīmu}}, ''Aerial Grappling Beam'') | ||
|zairdmg= | |zairdmg=2.5% (early), 4% (full length) | ||
|zairdesc=Fires the {{ | |zairdesc=Fires the {{iw|metroidwiki|Grapple Beam}}. A useful spacing option due to having only 8 frames of landing lag. It autocancels from a full hop and has impressive range, being the longest grab aerial in game. In addition to its recovery and spacing capabilities, it is good at setting up combos at close range upon landing, due to its low landing lag. Unlike in previous games, however, hitting an opponents causes the Grapple Beam to retract earlier, while not reducing the move's ending lag. It deals more damage when fully extended and, with precise spacing, it is possible to get both hits to connect. The late hit can KO {{SSBU|Mario}} on {{SSBU|Final Destination}} around 365% from the center and around 270% at the edge, while the early hit is unable to KO {{SSBU|Pichu}} at the edge at any percent. | ||
|grabname=Grapple Beam | |grabname=[[Grapple Beam]] ({{ja|グラップリングビーム|Gurappuringu Bīmu}}, ''Grappling Beam'') | ||
|grabdesc=Fires the Grapple Beam. It has impressive range and is the longest tether grab in the game. However, it is tied with [[Zero Suit Samus (SSB4)|her Zero Suited form]]'s grab as the second slowest in terms of ending lag, making it very punishable if missed. | |grabdesc=Fires the Grapple Beam from ''Super Metroid''. It has impressive range and is the longest tether grab in the game. However, it is tied with [[Zero Suit Samus (SSB4)|her Zero Suited form]]'s grab as the second slowest in terms of ending lag, making it very punishable if missed. | ||
|pummelname= | |pummelname=Grab Chop ({{ja|つかみチョップ|Tsukami Choppu}}) | ||
|pummeldmg=1.3% | |pummeldmg=1.3% | ||
|pummeldesc=A palm strike. Has moderate damage and speed relative to other pummels. | |pummeldesc=A palm strike. Has moderate damage and speed relative to other pummels. | ||
|fthrowname= | |fthrowname=Grappling Throw Front ({{ja|グラップリングスルーフロント|Gurappuringu Surū Furonto}}) | ||
|fthrowdmg=10% | |fthrowdmg=10% | ||
|fthrowdesc=Twirls the opponent overhead, then flings them forward. Although its knockback has been increased, it remains too weak for KOing at realistic percents, unless Samus has [[rage]] and is at the edge of the stage. | |fthrowdesc=Twirls the opponent overhead, then flings them forward. Although its knockback has been increased, it remains too weak for KOing at realistic percents, unless Samus has [[rage]] and is at the edge of the stage. | ||
|bthrowname= | |bthrowname=Grappling Throw Back ({{ja|グラップリングスルーバック|Gurappuringu Surū Bakku}}) | ||
|bthrowdmg=10% | |bthrowdmg=10% | ||
|bthrowdesc=Swings the opponent behind herself. Slightly more effective for KOing and setting up edgeguards than her forward throw, due to its lower launch angle. | |bthrowdesc=Swings the opponent behind herself. Slightly more effective for KOing and setting up edgeguards than her forward throw, due to its lower launch angle. | ||
|uthrowname= | |uthrowname=Grappling Cannon ({{ja|グラップリングキャノン|Gurappuringu Kyanon}}) | ||
|uthrowdmg=5% (hit 1), 7% (throw) | |uthrowdmg=5% (hit 1), 7% (throw) | ||
|uthrowdesc= | |uthrowdesc=Hoists the opponent above herself and blasts them with a point-blank shot from her {{iw|metroidwiki|Power Beam}}. Samus' most damaging and strongest throw, possessing enough knockback to KO middleweights around 150% from ground level and without rage. At low percentages, it can also combo into an up aerial against large characters, as well as Screw Attack against most characters, though the latter will only connect its hits reliably on a few characters. | ||
|dthrowname= | |dthrowname=Grappling Throw Down ({{ja|グラップリングスルーダウン|Gurappuringu Surū Daun}}) | ||
|dthrowdmg=8% | |dthrowdmg=8% | ||
|dthrowdesc=Swings the opponent | |dthrowdesc=Swings the opponent overhead and then slams them onto the ground. A reliable combo starter, with its follow-ups including dash attack, [[small step forward smash]] and dashing up smash at low percentages, as well as neutral, forward, back and up aerials up to mid percentages. | ||
|floorfname= | |floorfname= | ||
|floorfdmg=7% | |floorfdmg=7% | ||
|floorfdesc= | |floorfdesc=Performs a low-level roundhouse kick. | ||
|floorbname= | |floorbname= | ||
|floorbdmg=7% | |floorbdmg=7% | ||
|floorbdesc= | |floorbdesc=Swings her Arm Cannon forwards before firing a blast backwards. | ||
|floortname= | |floortname= | ||
|floortdmg=5% | |floortdmg=5% | ||
| Line 267: | Line 176: | ||
|nsname=Charge Shot | |nsname=Charge Shot | ||
|nsdmg=5% (uncharged), 28% (fully charged) | |nsdmg=5% (uncharged), 28% (fully charged) | ||
|nsdesc=[[metroidwiki:Charge Beam|Charges a ball of energy and fires it]]. Boasts excellent KO potential when fully charged, and is a useful intercepting move at a low charge. KOs at 70%-110% depending on rage and the opponent's weight and DI. Can be used to break shields if used in conjunction with her neutral attack, up or down tilts, aerials, Bomb and Super Missile. When using her forward tilt to launch the opponent into [[tumbling]], it can set up a guaranteed combo into Charge Shot regardless of the opponent's tech option, as Charge Shot will always catch their tech direction. | |nsdesc=[[metroidwiki:Charge Beam|Charges a ball of energy and fires it]]. Boasts excellent KO potential when fully charged, and is a useful intercepting move at a low charge. KOs at 70%-110% depending on rage and the opponent's weight and DI. Can be used to break shields if used in conjunction with her neutral attack, up or down tilts, aerials, Bomb and Super Missile. When using her forward tilt to launch the opponent into [[tumbling]], it can set up a guaranteed combo into Charge Shot regardless of the opponent's tech option, as Charge Shot will always catch their tech direction. A non-fully charged Charge Shot has way less ending lag than its fully charged counterpart, allowing for follow-ups and combos at various percentages at the cost of less power. | ||
|ssname=Missile | |ssname=Missile | ||
|ssdmg=8% (Homing), 12% (Super) | |ssdmg=8% (Homing), 12% (Super) | ||
|ssdesc=Fires a {{ | |ssdesc=Fires a {{iw|metroidwiki|Missile}}, which homes in on the opponent. If the special button is tapped like a smash attack, Samus will instead fire a {{iw|metroidwiki|Super Missile}}, which stays in place for a short while before traveling in a straight line, and deals more damage and knockback. Both variations deal low knockback, but can be used to break a shield if used in conjunction with a fully charged Charge Shot. Both Missile variations can also be used as set-ups by opening up an opportunity for a grab aerial, or Charge Shot, while the Super variation sets up better for a true combo into a forward jumping Charge Shot at high percentages. The Homing variation is also useful for catching recoveries and forcing air dodges, which can open up punishment opportunities. | ||
|uspage=Screw Attack (move) | |uspage=Screw Attack (move) | ||
|usname=Screw Attack | |usname=Screw Attack | ||
| Line 278: | Line 187: | ||
|dsname=Bomb | |dsname=Bomb | ||
|dsdmg=4% (contact), 5% (explosion) | |dsdmg=4% (contact), 5% (explosion) | ||
|dsdesc=Rolls into her {{ | |dsdesc=Rolls into her {{iw|metroidwiki|Morph Ball}} form and drops a {{iw|metroidwiki|Bomb}}, which explodes after a set time. Useful to force an opponent to shield and for edgeguarding, being capable of [[2 frame punish]]es if timed correctly. It can also break shields depending on their health if used along with her up and down tilts or a fully charged Charge Shot. | ||
|fsname=Zero Laser | |fsname=Zero Laser | ||
|fspage=Zero Laser (Samus) | |fspage=Zero Laser (Samus) | ||
|fsdmg=0.5% (fringe loop), 1.5% (main loop), 2.5% (fringe blast), | |fsdmg= 1% (charge loop), 0.5% (fringe loop), 1.5% (thruster, main loop), 2% (main loop; point blank, long range), 2.5% (contact blast), 8% (fringe blast), 10.5% (main blast) | ||
|fsdesc=Fires a very large, bluish white energy beam. The beam can be angled vertically during the Final Smash. | |fsdesc=Fires a very large, bluish white energy beam. The beam can be angled vertically during the Final Smash. | ||
}} | }} | ||
===Stats=== | |||
Samus' gravity and falling speed are set to 0.078288 and 1.8, respectively, during [[hitstun]] when launched at angles between 70°-110°. | |||
{{Attributes | |||
|weight = 108 | |||
|rweight = 10-13 | |||
|cast = 89 | |||
|dash = 1.87 | |||
|rdash = 50-51 | |||
|run = 1.654 | |||
|rrun = 50-51 | |||
|walk = 1.115 | |||
|rwalk = 44-45 | |||
|trac = 0.082 | |||
|rtrac = 83-84 | |||
|airfric = 0.0075 | |||
|rairfric = 67-75 | |||
|air = 1.103 | |||
|rair = 73-76 | |||
|baseaccel = 0.04 | |||
|rbaseaccel = 29-30 | |||
|addaccel = 0.05 | |||
|raddaccel = 29-30 | |||
|gravity = 0.075 | |||
|rgravity = 77-78 | |||
|fall = 1.33 | |||
|rfall = 75-76 | |||
|ff = 2.128 | |||
|rff = 75-76 | |||
|jumpsquat = 3 | |||
|rjumpsquat = 1-88 | |||
|jumpheight = 37 | |||
|rjumpheight= 13-14 | |||
|shorthop = 18 | |||
|rshorthop = 10-13 | |||
|djump = 37 | |||
|rdjump = 19-21 | |||
}} | |||
===[[Announcer]] call=== | |||
{{audio|Needs announcer calls from other languages.}} | |||
<gallery> | |||
Samus English Announcer SSB4-SSBU.wav|English/Japanese/Chinese | |||
</gallery> | |||
===[[On-screen appearance]]=== | ===[[On-screen appearance]]=== | ||
Arrives from a {{ | *Arrives from a {{iw|metroidwiki|Save Station}}. | ||
<gallery> | |||
SamusOnScreenAppearanceSSBU.gif|Samus' on-screen appearance | |||
</gallery> | |||
===[[Taunt]]s=== | ===[[Taunt]]s=== | ||
*'''Up taunt''': Salutes vigorously with her left arm as her thrusters activate. | *'''Up taunt''': Salutes vigorously with her left arm as her thrusters activate. | ||
*'''Side taunt''': Faces the screen and | *'''Side taunt''': Faces the screen and demonstrates her Arm Cannon's Zero Laser configuration. | ||
*'''Down taunt''': Aims her Arm Cannon behind | *'''Down taunt''': Aims her Arm Cannon behind her, then kneels while aiming it in front of herself. | ||
<gallery> | <gallery> | ||
SSBUSamusTaunt1.gif|Samus' | SSBUSamusTaunt1.gif|Samus' up taunt. | ||
SSBUSamusTaunt2.gif|Samus' | SSBUSamusTaunt2.gif|Samus' side taunt. | ||
SSBUSamusTaunt3.gif|Samus' | SSBUSamusTaunt3.gif|Samus' down taunt. | ||
</gallery> | </gallery> | ||
| Line 302: | Line 259: | ||
*Brings her Arm Cannon down and then pulls it back up. | *Brings her Arm Cannon down and then pulls it back up. | ||
<gallery> | <gallery> | ||
SSBUSamusIdle1.gif|Samus' | SSBUSamusIdle1.gif|Samus' first idle pose. | ||
SSBUSamusIdle2.gif|Samus' | SSBUSamusIdle2.gif|Samus' second idle pose. | ||
</gallery> | </gallery> | ||
===[[Crowd cheer]]=== | |||
<div class="tabber"> | |||
<div class="tabbertab" title="English, Japanese/Chinese, Italian, Dutch, French"> | |||
{| class="wikitable" border="1" cellpadding="4" cellspacing="1" | |||
|- | |||
!{{{name|}}} | |||
!Cheer (English) | |||
!Cheer (Japanese/Chinese) | |||
!Cheer (Italian) | |||
!Cheer (Dutch) | |||
!Cheer (French) | |||
|- | |||
! scope="row"|Cheer | |||
|[[File:Samus Cheer English SSBU.ogg|center]]||[[File:Samus Cheer Japanese SSBU.ogg|center]]||[[File:Samus Cheer Italian SSBU.ogg|center]]||[[File:Samus Cheer Dutch SSBU.ogg|center]]||{{NTSC}} [[File:Samus Cheer French NTSC SSBU.ogg|center]] <br> {{PAL}} [[File:Samus Cheer French PAL SSBU.ogg|center]] | |||
|- | |||
! scope="row"|Description | |||
|Sa - mus! || Sam - Su! || Sa - mus! || Sa - mus! || Sa - mus! | |||
|} | |||
</div> | |||
<div class="tabbertab" title="German, Spanish, Russian, Korean"> | |||
{| class="wikitable" border="1" cellpadding="4" cellspacing="1" | |||
|- | |||
!{{{name|}}} | |||
!Cheer (German) | |||
!Cheer (Spanish) | |||
!Cheer (Russian) | |||
!Cheer (Korean) | |||
|- | |||
! scope="row"|Cheer | |||
|[[File:Samus Cheer German SSBU.ogg|center]]||{{NTSC}} [[File:Samus Cheer Spanish NTSC SSBU.ogg|center]] <br> {{PAL}} [[File:Samus Cheer Spanish PAL SSBU.ogg|center]]||[[File:Samus Cheer Russian SSBU.ogg|center]]||[[File:Samus Cheer Korean SSBU.ogg|center]] | |||
|- | |||
! scope="row"|Description | |||
|Sa - mus! || Saaaaa - mus! || Sa - mus! Sa - mus! || Sa - mu - s! | |||
|} | |||
</div> | |||
</div> | |||
===[[Victory pose]]s=== | ===[[Victory pose]]s=== | ||
*'''Left:''' Lands on the ground and readies her Arm Cannon. | *'''Left:''' Lands on the ground and readies her Arm Cannon. | ||
*'''Up:''' Fires multiple shots from her Arm Cannon while kneeling, then strikes a pose. The pose is based on her appearance on the | *'''Up:''' Fires multiple {{iw|metroidwiki|Power Beam}} shots from her Arm Cannon while kneeling, then strikes a pose. The pose is based on her appearance on the covers of ''{{iw|metroidwiki|Metroid II: Return of Samus}}'' and ''{{iw|metroidwiki|Metroid: Samus Returns}}''. | ||
*'''Right:''' Fires a Super Missile and strikes a pose | *'''Right:''' Fires a Super Missile and strikes a pose resembling her render from ''{{iw|metroidwiki|Metroid: Other M}}'', and by extension, her official artwork in ''Ultimate'', as well as her character select animation in ''[[Super Smash Bros.]]'' | ||
[[File:MetroidUniverseTheme.ogg|thumb|A flourished remix of the theme that would play when [[Samus Aran]] obtained a new power-up or addition to her {{ | [[File:MetroidUniverseTheme.ogg|thumb|A flourished remix of the theme that would play when [[Samus Aran]] obtained a new power-up or addition to her {{iw|metroidwiki|Power Suit}}. It would also play when Samus defeated [[Ridley]] or [[Kraid]].]] | ||
<gallery> | <gallery> | ||
SamusVictoryPose1SSBU.gif | SamusVictoryPose1SSBU.gif | ||
| Line 317: | Line 311: | ||
</gallery> | </gallery> | ||
==In competitive play== | ==In [[competitive play]]== | ||
{{Samus and Dark Samus in competitive play (SSBU)}} | |||
=={{SSBU|Classic Mode}}: Another Planet, Another Bounty== | =={{SSBU|Classic Mode}}: Another Planet, Another Bounty== | ||
| Line 337: | Line 318: | ||
The opponents Samus faces are akin to the battles that she has faced throughout the ''Metroid'' series. In addition, all of the battles take place on stages from the ''Metroid'' universe. | The opponents Samus faces are akin to the battles that she has faced throughout the ''Metroid'' series. In addition, all of the battles take place on stages from the ''Metroid'' universe. | ||
{|class="wikitable | {|class="wikitable" style="text-align:center" | ||
!Round!!Opponent!!Stage!!Music!!Notes | !Round!!Opponent!!Stage!!Music!!Notes | ||
|- | |- | ||
|1||{{ | |1||{{CharHead|Wolf|SSBU|hsize=20px}}||[[Brinstar]]||''{{SSBUMusicLink|Metroid|Title Theme - Metroid}}''|| | ||
|- | |- | ||
|2||Giant {{ | |2||Giant {{CharHead|King K. Rool|SSBU|hsize=20px}} ||Brinstar ([[Ω form]])||''{{SSBUMusicLink|Metroid|Brinstar Depths}}''||References Samus' battles with {{s|metroidwiki|Kraid}}. | ||
|- | |- | ||
|3|| | |3||{{Head|R.O.B.|g=SSBU|s=20px|cl=Grey}}{{Head|R.O.B.|g=SSBU|s=20px}}{{Head|R.O.B.|g=SSBU|s=20px|cl=Yellow}}{{Head|R.O.B.|g=SSBU|s=20px|cl=Purple}}{{Head|R.O.B.|g=SSBU|s=20px|cl=Blue}}{{Head|R.O.B.|g=SSBU|s=20px|cl=Green}} {{SSBU|R.O.B.}} (x6)||[[Brinstar Depths]]||''{{SSBUMusicLink|Metroid|Brinstar (Melee)}}''||Horde Battle. | ||
|- | |- | ||
|4|| Giant {{ | |4||Giant {{CharHead|Ridley|SSBU|hsize=20px}}||[[Norfair]]||''{{SSBUMusicLink|Metroid|Vs. Ridley}}''||References Samus' battles with {{s|metroidwiki|Ridley}}. | ||
|- | |- | ||
|5||{{ | |5||{{CharHead|Mewtwo|SSBU|hsize=20px}}, {{CharHead|Bowser|SSBU|hsize=20px}}, and {{CharHead|Charizard|SSBU|hsize=20px}}||Norfair (Ω form)||''{{SSBUMusicLink|Metroid|Multiplayer - Metroid Prime 2: Echoes}}''||Charizard's {{SSBU|Pokémon Trainer}} is absent. Items do not appear. | ||
|- | |- | ||
|6||{{ | |6||{{CharHead|Dark Samus|SSBU|hsize=20px}}||[[Frigate Orpheon]]||''{{SSBUMusicLink|Metroid|Vs. Parasite Queen}}''||References Samus' battles with {{s|metroidwiki|Dark Samus}}. | ||
|- | |- | ||
|colspan="5"|[[Bonus Stage]] | |colspan="5"|[[Bonus Stage]] | ||
| Line 361: | Line 342: | ||
{{clr}} | {{clr}} | ||
===Character unlock tree=== | ===Character unlock tree=== | ||
Samus' Classic Mode character unlock tree includes the following characters in order: | Samus' Classic Mode character unlock tree includes the following characters in order: | ||
#{{SSBU|Inkling}} | #{{SSBU|Inkling}} | ||
#{{SSBU|Wii Fit Trainer}} | #{{SSBU|Wii Fit Trainer}} | ||
| Line 377: | Line 358: | ||
Samus was among the fighters summoned to the cliffside to fight an army of [[Master Hand]]s. | Samus was among the fighters summoned to the cliffside to fight an army of [[Master Hand]]s. | ||
During the opening cutscene, Samus was present when [[Galeem]] unleashed his beams of light. Samus attempted to fight back against the beams by shooting them with her | During the opening cutscene, Samus was present when [[Galeem]] unleashed his beams of light. Samus attempted to fight back against the beams by shooting them with her {{iw|metroidwiki|Power Beam}}, but to no avail. Samus was vaporized and placed under Galeem's imprisonment alongside the rest of the fighters (except for {{SSBU|Kirby}}). | ||
In gameplay, {{SSBU|Zero Suit Samus}} has a separate awakening battle from Samus. | In gameplay, {{SSBU|Zero Suit Samus}} has a separate awakening battle from Samus. | ||
| Line 387: | Line 368: | ||
===Fighter Battle=== | ===Fighter Battle=== | ||
{|class="wikitable | {|class="wikitable" style="width:100%;" | ||
|- | |- | ||
! style="width:5%;"|No. | !style="width:5%;"|No. | ||
! style="width:5%;"|Image | !style="width:5%;"|Image | ||
! Name | !Name | ||
! Type | !Type | ||
! Power | !Power | ||
! Stage | !Stage | ||
! Music | !Music | ||
|- | |- | ||
| 04 | |04 | ||
| [[File:Samus SSBU.png|center|108x108px]] | |[[File:Samus SSBU.png|center|108x108px]] | ||
| {{ | |Samus | ||
|{{SpiritType|Shield}} <center>{{color|#18aef5|Shield}}</center> | |||
| 7,500 | |7,500 | ||
| [[Brinstar]] ([[Ω form]]) | |[[Brinstar]] ([[Ω form]]) | ||
| ''{{SSBUMusicLink|Metroid|Title Theme - Metroid}}'' | |''{{SSBUMusicLink|Metroid|Title Theme - Metroid}}'' | ||
|} | |} | ||
{{ | {{clr}} | ||
==[[Spirit]]s== | ==[[Spirit]]s== | ||
Samus's | Samus's fighter spirit can be obtained by completing {{SSBU|Classic Mode}}. It is also available periodically for purchase in the shop for 300 Gold. Unlocking Samus in World of Light allows the player to preview the first spirit below in the Spirit List under the name "???". As a fighter spirit, it cannot be used in Spirit Battles and is purely aesthetic. Her fighter spirit has an alternate version that replaces it with her artwork in ''Ultimate''. | ||
Additionally, Samus makes an appearance in various | Additionally, Samus makes an appearance in various primary and support spirits. Note that {{SSBU|Zero Suit Samus}}' fighter spirit is not listed here due to her status as a separate playable character (despite the fact that she is the puppet/possessed fighter who represents Young Samus). | ||
<center> | <center> | ||
<gallery> | <gallery> | ||
Samus | SSBU spirit Samus.png|264. '''''Samus Aran''''' | ||
SSBU spirit Gravity Suit.png|269. Gravity Suit | |||
SSBU | SSBU spirit Fusion Suit.png|270. Fusion Suit | ||
SSBU | SSBU spirit Phazon Suit.png|271. Phazon Suit | ||
SSBU | SSBU spirit Dark Suit.png|272. Dark Suit | ||
SSBU | SSBU spirit Light Suit.png|273. Light Suit | ||
Samus | SSBU spirit Young Samus.png|274. Young Samus | ||
SSBU spirit Samus (Metroid Dread).png|1,497. Samus (Metroid Dread) | |||
</gallery> | </gallery> | ||
</center> | </center> | ||
==In Spirits | ==In Spirits Battles== | ||
===As the main opponent=== | ===As the main opponent=== | ||
{|class="wikitable sortable" style="width:100%;" | {|class="wikitable sortable" style="width:100%;" | ||
! colspan=4|Spirit | ! colspan=4|Spirit | ||
! colspan=7|Battle parameters | ! colspan=7|Battle parameters | ||
| Line 444: | Line 425: | ||
|- | |- | ||
|269 | |269 | ||
|{{SpiritTableName|Gravity Suit|size=64}} | |||
|{{ | |''Metroid'' Series | ||
|''Metroid | |||
|•{{SSBU|Samus}} {{Head|Samus|g=SSBU|s=20px|cl=Purple}} | |•{{SSBU|Samus}} {{Head|Samus|g=SSBU|s=20px|cl=Purple}} | ||
| | |{{SpiritType|Shield}} | ||
|3,800 | |3,800 | ||
|[[Castle Siege]] (Underground Cavern) | |[[Castle Siege]] (Underground Cavern) | ||
| Line 456: | Line 436: | ||
|- | |- | ||
|276 | |276 | ||
|{{SpiritTableName|Chozo Statue|size=64}} | |||
|{{ | |''Metroid'' Series | ||
|''Metroid | |||
|•{{SSBU|Samus}} {{Head|Samus|g=SSBU|s=20px|cl=Brown}} | |•{{SSBU|Samus}} {{Head|Samus|g=SSBU|s=20px|cl=Brown}} | ||
| | |{{SpiritType|Grab}} | ||
|3,600 | |3,600 | ||
|[[Brinstar]] | |[[Brinstar]] | ||
| | |•Item: {{b|Screw Attack|item}} | ||
|•The enemy starts the battle with a Screw Attack | |•The enemy starts the battle with a Screw Attack | ||
|{{SSBUMusicLink|Metroid|Brinstar Depths (Melee)}} | |{{SSBUMusicLink|Metroid|Brinstar Depths (Melee)}} | ||
|- | |- | ||
|293 | |293 | ||
|{{SpiritTableName|Kanden|size=64}} | |||
|{{ | |''Metroid Prime'' Series | ||
|''Metroid | |||
|•{{SSBU|Samus}} {{Head|Samus|g=SSBU|s=20px|cl=Green}} | |•{{SSBU|Samus}} {{Head|Samus|g=SSBU|s=20px|cl=Green}} | ||
| | |{{SpiritType|Attack}} | ||
|1,700 | |1,700 | ||
|[[Brinstar]] | |[[Brinstar]] | ||
| Line 480: | Line 458: | ||
|- | |- | ||
|294 | |294 | ||
|{{SpiritTableName|Trace|size=64}} | |||
|{{ | |''Metroid Prime'' Series | ||
|''Metroid | |||
|•{{SSBU|Samus}} {{Head|Samus|g=SSBU|s=20px|cl=Pink}} | |•{{SSBU|Samus}} {{Head|Samus|g=SSBU|s=20px|cl=Pink}} | ||
| | |{{SpiritType|Attack}} | ||
|1,900 | |1,900 | ||
|[[Norfair]] ([[Battlefield form]]) | |[[Norfair]] ([[Battlefield form]]) | ||
| Line 492: | Line 469: | ||
|- | |- | ||
|896 | |896 | ||
|{{ | |{{SpiritTableName|Skull Man|size=64}} | ||
|''Mega Man'' Series | |||
|''Mega Man | |•Reflect {{SSBU|Samus}} {{Head|Samus|g=SSBU|s=20px|cl=White}} (140 HP) | ||
|•Reflect {{SSBU|Samus}} {{Head|Samus|g=SSBU|s=20px|cl=White}} | |{{SpiritType|Shield}} | ||
| | |||
|3,900 | |3,900 | ||
|[[Wily Castle]] ([[Ω form]]) | |[[Wily Castle]] ([[Ω form]]) | ||
| Line 504: | Line 480: | ||
|- | |- | ||
|1,093 | |1,093 | ||
|{{SpiritTableName|Sandbag|link=y|size=64}} | |||
|{{ | |''Super Smash Bros.'' Series | ||
|''Super Smash Bros. | |||
|•{{SSBU|Samus}} {{Head|Samus|g=SSBU|s=20px|cl=White}} | |•{{SSBU|Samus}} {{Head|Samus|g=SSBU|s=20px|cl=White}} | ||
| | |{{SpiritType|Grab}} | ||
|2,000 | |2,000 | ||
|[[Pokémon Stadium 2]] ([[Ω form]]) | |[[Pokémon Stadium 2]] ([[Ω form]]) | ||
|•Item: [[Home-Run Bat]] | |•Item: [[Home-Run Bat]] | ||
|•Timed | |•Timed battle (0:10)<br>•The enemy prefers not to move | ||
|{{SSBUMusicLink|Super Smash Bros.|Online Practice Stage - Super Smash Bros. for 3DS / Wii U}} | |{{SSBUMusicLink|Super Smash Bros.|Online Practice Stage - Super Smash Bros. for 3DS / Wii U}} | ||
|- | |- | ||
|1,150 | |1,150 | ||
|{{ | |{{SpiritTableName|ST Falcon|size=64}} | ||
|''Battle Clash'' | |''Battle Clash'' | ||
|•{{SSBU|Samus}} {{Head|Samus|g=SSBU|s=20px|cl=Blue}} | |•{{SSBU|Samus}} {{Head|Samus|g=SSBU|s=20px|cl=Blue}} | ||
| | |{{SpiritType|Attack}} | ||
|1,900 | |1,900 | ||
|[[Port Town Aero | |[[Port Town Aero Dive]] | ||
|•Item: [[Super Scope]] | |•Item: [[Super Scope]] | ||
|•The enemy starts the battle with a | |•The enemy starts the battle with a Super Scope | ||
|{{SSBUMusicLink| | |{{SSBUMusicLink|Other|Marionation Gear}} | ||
|- | |- | ||
|1,162 | |1,162 | ||
|{{ | |{{SpiritTableName|Flare|size=64}} | ||
|''Custom Robo'' Series | |||
|''Custom Robo | |•{{SSBU|Samus}} {{Head|Samus|g=SSBU|s=20px|cl=Pink}} (120 HP) | ||
|•{{SSBU|Samus}} {{Head|Samus|g=SSBU|s=20px|cl=Pink}} | |{{SpiritType|Neutral}} | ||
| | |||
|1,800 | |1,800 | ||
|[[Pokémon Stadium]] | |[[Pokémon Stadium]] | ||
|N/A | |N/A | ||
|•[[Stamina battle]]<br>•The enemy starts the battle with a [[Ray Gun]]<br>•The enemy starts the battle with a [[Rocket Belt]] | |•[[Stamina battle]]<br>•The enemy starts the battle with a [[Ray Gun]]<br>•The enemy starts the battle with a [[Rocket Belt]] | ||
|{{SSBUMusicLink| | |{{SSBUMusicLink|Other|Marionation Gear}} | ||
|- | |||
|1,497 | |||
|{{SpiritTableName|Samus (Metroid Dread)|size=64}} | |||
|''Metroid'' Series | |||
|•{{SSBU|Samus}} {{Head|Samus|g=SSBU|s=20px|cl=Blue}} | |||
|{{SpiritType|Shield}} | |||
|9,500 | |||
|[[Frigate Orpheon]] | |||
|•Assist Trophy Enemies ({{b|Metroid|creature}}) | |||
|•Hostile assist trophies will appear when the enemy's at high damage | |||
|{{SSBUMusicLink|Metroid|Sector 1}} | |||
|} | |} | ||
===As a minion=== | ===As a minion=== | ||
{|class="wikitable sortable" style="width:100%;" | {|class="wikitable sortable" style="width:100%;" | ||
! colspan=4|Spirit | ! colspan=4|Spirit | ||
! colspan=7|Battle parameters | ! colspan=7|Battle parameters | ||
| Line 561: | Line 544: | ||
|- | |- | ||
|899 | |899 | ||
| | |{{SpiritTableName|Dark Man 4|size=64}} | ||
|''Mega Man'' Series | |||
|''Mega Man | |•{{SSBU|Mega Man}} {{Head|Mega Man|g=SSBU|s=20px|cl=Brown}} (100 HP)<br>•{{SSBU|Samus}} {{Head|Samus|g=SSBU|s=20px|cl=Brown}}×3 (30 HP) | ||
|•{{SSBU|Mega Man}} {{Head|Mega Man|g=SSBU|s=20px|cl=Brown}}<br>•{{SSBU|Samus}} {{Head|Samus|g=SSBU|s=20px|cl=Brown}} ( | |{{SpiritType|Attack}} | ||
| | |||
|1,400 | |1,400 | ||
|[[Wily Castle]] ([[Battlefield form]]) | |[[Wily Castle]] ([[Battlefield form]]) | ||
| Line 574: | Line 556: | ||
|- | |- | ||
|1,127 | |1,127 | ||
|{{ | |{{SpiritTableName|Diskun|size=64}} | ||
|''Disk System'' | |''Disk System'' | ||
|•{{SSBU|Young Link}} {{Head|Young Link|g=SSBU|s=20px|cl=Red}}<br>•{{SSBU|Pit}} {{Head|Pit|g=SSBU|s=20px|cl=Yellow}}<br>•{{SSBU|Simon}} {{Head|Simon|g=SSBU|s=20px|cl=Red}}<br>•{{SSBU|Samus}} {{Head|Samus|g=SSBU|s=20px|cl=Blue}} | |•{{SSBU|Young Link}} {{Head|Young Link|g=SSBU|s=20px|cl=Red}}<br>•{{SSBU|Pit}} {{Head|Pit|g=SSBU|s=20px|cl=Yellow}}<br>•{{SSBU|Simon}} {{Head|Simon|g=SSBU|s=20px|cl=Red}}<br>•{{SSBU|Samus}} {{Head|Samus|g=SSBU|s=20px|cl=Blue}} | ||
| | |{{SpiritType|Attack}} | ||
|9,100 | |9,100 | ||
|[[Temple]] ([[Battlefield form]]) | |[[Temple]] ([[Battlefield form]]) | ||
|N/A | |N/A | ||
|•Take your strongest team into this no-frills battle | |•Take your strongest team into this no-frills battle | ||
|{{SSBUMusicLink| | |{{SSBUMusicLink|Other|Famicom Medley}} | ||
|Samus Aran (''Metroid'' for the Famicom Disk System) | |Samus Aran (''Metroid'' for the Famicom Disk System) | ||
|- | |- | ||
|1,163 | |1,163 | ||
|{{ | |{{SpiritTableName|Bayonette|size=64}} | ||
|''Custom Robo'' Series | |||
|''Custom Robo | |•{{SSBU|Dark Samus}} {{Head|Dark Samus|g=SSBU|s=20px|cl=Yellow}} (70 HP)<br>•{{SSBU|Samus}} {{Head|Samus|g=SSBU|s=20px|cl=Blue}} (70 HP) | ||
|•{{SSBU|Dark Samus}} {{Head|Dark Samus|g=SSBU|s=20px|cl=Yellow}}<br>•{{SSBU|Samus}} {{Head|Samus|g=SSBU|s=20px|cl=Blue}} | |{{SpiritType|Attack}} | ||
| | |||
|1,900 | |1,900 | ||
|[[Mushroomy Kingdom]] ([[Battlefield form]]) | |[[Mushroomy Kingdom]] ([[Battlefield form]]) | ||
|N/A | |N/A | ||
|•The enemy's side special has increased power<br>•[[Stamina battle]]<br>•The enemy favors side specials | |•The enemy's side special has increased power<br>•[[Stamina battle]]<br>•The enemy favors side specials | ||
|{{SSBUMusicLink| | |{{SSBUMusicLink|Other|Marionation Gear}} | ||
|[https://customrobo.fandom.com/wiki/Spear Spear] | |[https://customrobo.fandom.com/wiki/Spear Spear] | ||
|- | |- | ||
|1,348 | |1,348 | ||
| | |{{SpiritTableName|Kloster (Grief)|size=64}} | ||
|Kloster (Grief) | |||
|''DAEMON X MACHINA'' | |''DAEMON X MACHINA'' | ||
| | |•Tiny {{SSBU|Snake}} {{Head|Snake|g=SSBU|s=20px|cl=Black}}<br>•Giant {{SSBU|Samus}} {{Head|Samus|g=SSBU|s=20px|cl=Black}}×2<br>•Giant {{SSBU|Dark Samus}} {{Head|Dark Samus|g=SSBU|s=20px|cl=Grey}} | ||
| | |{{SpiritType|Neutral}} | ||
|9,500 | |9,500 | ||
|[[Frigate Orpheon]] | |[[Frigate Orpheon]] (hazards off) | ||
|•Attack Power ↑<br>•Item: Shooting Types | |•Attack Power ↑<br>•Item: Shooting Types | ||
|•The enemy has increased attack power after a little while<br>•Reinforcements will appear after an enemy is KO'd | |•The enemy has increased attack power after a little while<br>•Reinforcements will appear after an enemy is KO'd | ||
|{{SSBUMusicLink|Xenoblade|Mechanical Rhythm}} | |{{SSBUMusicLink|Xenoblade Chronicles|Mechanical Rhythm}} | ||
| | |[https://daemonxmachina.gamepedia.com/Antanaklasi Antanaklasi]<br>[https://daemonxmachina.gamepedia.com/Eleos Eleos] | ||
|- | |- | ||
|1,353 | |1,353 | ||
| | |{{SpiritTableName|S-Tetrimino & Z-Tetrimino|size=64}} | ||
|S-Tetrimino & Z-Tetrimino | |''Tetris'' Series | ||
|''Tetris | |||
|•{{SSBU|Zero Suit Samus}} {{head|Zero Suit Samus|g=SSBU|s=20px|cl=Red}}<br>•{{SSBU|Samus}} {{head|Samus|g=SSBU|s=20px|cl=Green}} | |•{{SSBU|Zero Suit Samus}} {{head|Zero Suit Samus|g=SSBU|s=20px|cl=Red}}<br>•{{SSBU|Samus}} {{head|Samus|g=SSBU|s=20px|cl=Green}} | ||
| | |{{SpiritType|Grab}} | ||
|4,300 | |4,300 | ||
|[[Mushroom Kingdom U]] (Slide | |[[Mushroom Kingdom U]] (Slide Lift Tower) | ||
|•Sudden Final Smash<br>•Item: | |•Sudden Final Smash<br>•Item: {{b|Screw Attack|item}} | ||
|•The enemy will suddenly have a Final Smash | |•The enemy will suddenly have a Final Smash | ||
|{{SSBUMusicLink|Super Mario Bros.|Chill (for 3DS / Wii U)}} | |{{SSBUMusicLink|Super Mario Bros.|Chill (for 3DS / Wii U)}} | ||
| Line 643: | Line 621: | ||
==Gallery== | ==Gallery== | ||
<gallery> | <gallery> | ||
SSBU Samus Number.png|Samus' fighter card. | SSBU Samus Number.png|Samus' fighter card. | ||
Samus unlock notice SSBU.jpg|Samus' unlock notice when obtaining her in [[World of Light]]. | |||
SSBUWebsiteSamus1.jpg|Samus on [[The Great Cave Offensive]]. | SSBUWebsiteSamus1.jpg|Samus on [[The Great Cave Offensive]]. | ||
SSBUWebsiteSamus2.jpg|Alongside her {{b|Bomb|Samus}} in [[Onett]]. | SSBUWebsiteSamus2.jpg|Alongside her {{b|Bomb|Samus}} in [[Onett]]. | ||
SSBUWebsiteSamus3.jpg| | SSBUWebsiteSamus3.jpg|Using her back throw on {{SSBU|Mega Man}} on [[Find Mii]]. | ||
SSBUWebsiteSamus4.jpg| | SSBUWebsiteSamus4.jpg|Preparing to fire a [[Missile]] at [[Mother Brain]] on [[Lylat Cruise]]. | ||
SSBUWebsiteSamus5.jpg|Preparing her [[Charge Shot]] on [[Summit]]. | SSBUWebsiteSamus5.jpg|Preparing her [[Charge Shot]] on [[Summit]]. | ||
SSBUWebsiteSamus6.jpg|[[Taunting]] on [[Coliseum]] | SSBUWebsiteSamus6.jpg|[[Taunting]] on [[Coliseum]] while wearing her {{iw|metroidwiki|Gravity Suit}}. | ||
SSBUWebsiteBayonetta5.jpg| | SSBUWebsiteBayonetta5.jpg|Getting hit by {{SSBU|Bayonetta}}'s forward smash on [[Spirit Train]]. | ||
SSBUWebsiteInkling6.jpg|[[Buried]] by | SSBUWebsiteInkling6.jpg|[[Buried]] by {{SSBU|Inkling}}'s [[Splat Roller]] on [[Mario Circuit (SSBB)|Figure-8 Circuit]]. | ||
SSBUWebsiteLucario5.jpg|Samus watching an aerial {{SSBU|Lucario}} on [[Prism Tower]]. | SSBUWebsiteLucario5.jpg|Samus watching an aerial {{SSBU|Lucario}} on [[Prism Tower]]. | ||
SSBUWebsiteShulk3.jpg|Samus getting launched by {{SSBU|Shulk}}'s dash attack on [[Gaur Plain]]. | SSBUWebsiteShulk3.jpg|Samus getting launched by {{SSBU|Shulk}}'s dash attack on [[Gaur Plain]]. | ||
SSBUWebsitePalutena3.jpg|Samus's Charge Shot getting reflected by {{SSBU|Palutena}} on [[Temple]]. | SSBUWebsitePalutena3.jpg|Samus's Charge Shot getting reflected by {{SSBU|Palutena}} on [[Temple]]. | ||
SSBUWebsiteZeroSuitSamus4.jpg|Posing behind [[Zero Suit Samus (SSBU)|her Zero Suited self]] on Gaur Plain. | SSBUWebsiteZeroSuitSamus4.jpg|Posing behind [[Zero Suit Samus (SSBU)|her Zero Suited self]] on Gaur Plain. | ||
SSBUWebsiteBewear2.jpg| | SSBUWebsiteBewear2.jpg|Getting hit by [[Bewear]]'s uppercut on [[Wuhu Island]]. | ||
SSBUWebsiteLunala3.jpg|Getting launched by [[Lunala]]'s Moongeist Beam along with {{SSBU|Fox}} and Palutena on Summit. | SSBUWebsiteLunala3.jpg|Getting launched by [[Lunala]]'s Moongeist Beam along with {{SSBU|Fox}} and Palutena on Summit. | ||
SSBUWebsite9.jpg|Firing a [[Missile]] on [[Wrecking Crew]]. | SSBUWebsite9.jpg|Firing a [[Missile]] on [[Wrecking Crew]]. | ||
8-PlayerSSBU 1.jpg|With {{SSBU|Mario}}, {{SSBU|Donkey Kong}}, {{SSBU|Link}}, {{SSBU|Ice Climbers}}, {{SSBU|Pit}}, {{SSBU|Villager}} and Inkling on {{SSBU|Battlefield}}. | 8-PlayerSSBU 1.jpg|With {{SSBU|Mario}}, {{SSBU|Donkey Kong}}, {{SSBU|Link}}, {{SSBU|Ice Climbers}}, {{SSBU|Pit}}, {{SSBU|Villager}} and Inkling on {{SSBU|Battlefield}}. | ||
SSBUWebsiteMoon1.png|Samus, Palutena, Villager, and [[Shovel Knight]] fighting on [[Find Mii]] [[Ω form|Ω]] with the [[Moon]] about to crash | SSBUWebsiteMoon1.png|Samus, Palutena, Villager, and [[Shovel Knight]] fighting on [[Find Mii]] [[Ω form|Ω]] with the [[Moon]] about to crash onto the stage. | ||
</gallery> | </gallery> | ||
=== | ===Fighter Showcase Video=== | ||
{{#widget:YouTube|id=I9tcvSeemVo}} | {{#widget:YouTube|id=I9tcvSeemVo}} | ||
==Trivia== | ==Trivia== | ||
*Samus' neutral attack | *The notorious unreliability of Samus' neutral attack is alluded to in one of the [[tips]], stating that "Foes can often put up their shields in between the first and second hits of this combo. It's safer to just hit with the first attack and then flee." | ||
*Samus is the only female | *Samus is the only member of ''Super Smash Bros. Ultimate''{{'}}s starting roster to be a female by default. | ||
*Samus is the only | **However, she is technically not the only female on the starting roster, due to ''Ultimate'' including two female Pikachu as [[Alternate costume|alternate characters]] alongside the default male {{SSBU|Pikachu}}. | ||
** | *Samus is the only member of the [[Original 8]] to have an [[Echo Fighter]], that being {{SSBU|Dark Samus}}. | ||
**She is also the only fighter to have an Echo Fighter that represents a separate entity in addition to [[Zero Suit Samus (SSBU)|a non-clone fighter]] representing an alternate form of herself. | |||
*In her official artwork, Samus' pose matches [[metroidwiki:File:Anthony and Samus Artwork.png|the image]] of her alongside {{iw|metroidwiki|Anthony Higgs}} from ''{{iw|metroidwiki|Metroid: Other M}}''. This same image was used on the official ''Other M'' website with Higgs removed, and was used as Samus' primary promotional image across various media prior to the release of ''{{iw|metroidwiki|Metroid: Samus Returns}}''. | |||
*Although Samus reuses her ''Other M'' design instead of her updated design from ''{{iw|metroidwiki|Metroid: Samus Returns}}'', her fighter spirit uses her artwork from ''Samus Returns'' instead of ''Other M''. | |||
*When fighting off the fifty puppet fighter army as Master Hand in World of Light, Samus is one of the eight fighters fought there, being affiliated with Galeem. | |||
*In her official artwork, Samus' | **Out of all the eight fighters affiliated with either Galeem or Dharkron, Samus is the only female. | ||
* | *Samus, Dark Samus, {{SSBU|Mr. Game & Watch}}, and {{SSBU|Pac-Man}} are the only fighters who do not emit red-flashing eyes in the Spirit Battle previews in World of Light. | ||
{{SSBUCharacters}} | {{SSBUCharacters}} | ||
Latest revision as of 13:03, April 27, 2024
| Samus in Super Smash Bros. Ultimate | |
|---|---|
 
| |
| Universe | Metroid |
| Other playable appearances | in SSB in Melee in Brawl in SSB4 |
| Availability | Starter |
| Final Smash | Zero Laser |
| Tier | A (15) |
Samus (サムス, Samus) is a playable character in Super Smash Bros. Ultimate. Initially teased in the then-unnamed Ultimate's announcement trailer, Samus was officially confirmed in the gameplay trailer on June 12, 2018 during E3 2018. Samus is classified as Fighter #04.
Samus, alongside her Echo Fighter Dark Samus, is ranked 15th out of 82 on the current tier list, placing her in the A tier. This is a drastic improvement over Super Smash Bros. 4, where she was tied with Robin at 36th/37th out of 54, and is her best placement in the series to date. This mainly comes as a result of Samus' dynamic moveset, improved from the previous games. Samus' main strength is her powerful far-range neutral game, combined with a decent close-range game as well. For her archetype, Samus possesses a highly sophisticated variety of attacks, ranging from Charge Shot, one of the most powerful neutral specials in the game, to her quick, short and basic hard-hitting combos. She also carries the undisputed best shield pressure in the game for a zoner. Charge Shot is fast and covers wide distance when fully charged. Not only does it deal heavy shield damage, but when slightly charged, can set up for a combo, and when fully charged, can deliver a KO. Missiles is a projectile that allows her to easily force approaches, as it covers space wide enough to catch opponents in the air or spot-dodging, and it inflicts good shield damage. She provides an excellent air game as well, possessing among the strongest aerial attacks in the game, all of which are useful for combos or easy KOs. On top of that, Samus, for a zoner, has a fairly admirable close-range neutral. Her forward aerial is one of the best anti-aerial attacks in the game, as it covers a lot of distance and also inflicts heavy damage and KOs at fairly high percents. She also possesses the longest tether grab of any character in the game in the form of Grapple Beam, which allows her to easily punish opponents that are quick to approach her on the ground. Should opponents reach Samus up closer, she can quickly punish and reset neutral with Screw Attack, which has very high hitsun and knockback, allowing for an easy out of shield KO option at higher percents. Furthermore, Samus has an excellent recovery, with her slow falling speed, Grapple Beam, the great vertical and horizontal distance of Screw Attack, as well as Bombs providing minor boosts to her recovery and serving as a tool for recovery mixups as well. Finally, Samus boasts amazing survivability, with a very heavy weight and amazing recovery allowing her to survive until higher percents, which could sometimes give her rage for an extended period of time and allow her to eliminate opponents first.
However, Samus has weaknesses, the most significant ones being her slow mobility and frame data. Samus has rather poor ground mobility, largely hindering her defensive options, and giving her a harder time against opponents who can catch up to her quickly. Samus' projectiles being the most useful part of her gameplan especially, are burdened with significant startup and endlag. Aside from Charge Shot, which takes time and calculation to land successfully, all of her special attacks, especially Screw Attack, have a high amount of cooldown lag and often leave Samus vulnerable to a sharp punish. This, combined with her low traction relative to the cast, gives her a rather mediocre out of shield game, and with Grapple Beam coming out at frame 15, it gives opponents enough time to spot dodge and punish Samus accordingly. Samus relies on spacing with her special attacks and out of shield options to succeed against her opponents, but with most of her defensive options being risky, she would have a difficult time handling opponents that avoid her projectiles and defensive options. Therefore, Samus is often forced to refrain from using her special attacks carelessly, despite their amazing strength, and it gives her somewhat difficult match-ups against characters that have better frame data and/or mobility and defense options, such as Mario, Fox, and Bayonetta. Furthermore, the relatively high ending lag on her attacks plagues even her stronger attacks, that being her KO options. Her up-smash, while serving as an effective out of shield punish option, is escapable via SDI, struggles to hit short characters on the ground and has a lot of ending lag, while her forward-smash, while quick, is burdened with a large and weak sourspot at close range that takes precedence over the sweetspot hitbox. Furthermore, Samus has a rather poor ground game, with a forward tilt that loses a lot of power at point-blank range, a slow up-tilt and a down tilt with dangerously high ending lag. Her jab, while often used for mixups, is notorious for its inability to connect consistently. This causes Samus to seriously struggle when the opponent is too close to her. Being tall and surprisingly floaty for her weight is only beneficial to a limited degree, as it also makes her relatively easier to punish when in the air and juggle. Finally, her recovery, while amazing, is rather slow, linear, and predictable, so opponents with an effective offstage game will often give Samus a hard time recovering.
Overall, Samus is an effective zoner that can quickly and easily deal massive amounts of damage, shield pressure, and secure stocks, while surviving to very high percents. Samus is also a rather popular character in competitive play, mostly because she has a rather low learning curve, with basic combos and neutral gameplay that is highly effective. From the early until the current metagame, Samus has had consistent growth in successful representation, and has seen strong results from players such as Yaura, Sisqui and quiK.
Attributes[edit]
Samus is a heavyweight unique among others. She is a floaty character with slightly below-average walking and dashing speeds, average air speed, above-average air acceleration, high jumps and slow falling speed. These attributes grant her an easier time chasing aerial opponents and forcing air dodges, yet also cause her to be juggled rather easily. When combined with her few reliable landing options and slow falling speed, opponents will also have more time to punish Samus as she attempts to return to the stage.
Samus' moveset consists of playing defensively, as she uses her projectiles to space, rack up damage from a distance and pressure shields. Charge Shot is her most consistent KOing option out of her special moves when fully charged, due to its speed and power. Missiles is mostly used for spacing, due to both its Homing and Super variants being extremely inefficient at KOing, while Bomb grants Samus various mix-ups and can aid her recovery. However, Missile and Bomb also possess valuable utility in that they can guarantee a shield break when used in conjunction with a sufficiently charged Charge Shot or a sweetspotted back aerial. Lastly, Screw Attack is a very useful out of shield option thanks to it’s very high knockback and hitstun, KOing option near the upper blast line and a viable combo finisher from aerial combo strings.
In addition, Samus has a strong air game. The changes to air dodges have benefitted her overall, as they notably improve her ability to edgeguard (especially with moves such as forward aerial or her renowned Charge Shot), while she isn't hindered as much due to her fast air speed, the ability to stall midair using her Bombs, and her Grapple Beam tether recovery's long range. All of Samus' aerials have no more than 20 frames of landing lag, and her back aerial is one of her best moves courtesy of its power, damage output, speed and range. Her down aerial can be a powerful meteor smash, forward aerial is a good pressuring tool due to its long duration, and up aerial is an excellent combo option. Lastly, her neutral aerial is a viable KOing option. When coupled with her high jumps, Samus' air game is also potent while she is off-stage, as she can recover from nearly anywhere on the stage, stay in position for longer periods of time due to her floatiness, or bait the opponent by stalling in the air and punishing edge-guard attempts.
Samus' grab game is also useful thanks to a variety of perks. Her Grapple Beam has impressive overall range and is useful in the air as either a tether recovery or a grab aerial, the latter of which is potent for zoning thanks to its aforementioned range and very minimal landing lag. Down throw is very useful for starting combos that deal respectable damage and can be used with her neutral, forward and up aerials at varying percentages. Many of her combos can rack up more than 30% and when using platforms to her advantage, or string together multiple times and then be finished with Screw Attack, leading to a KO or dealing 40%-50% at the very least. Up throw is Samus' strongest throw and, unlike in SSB4, it is capable of KOing quite reliably (especially on platforms), thanks to its redistributed damage output and increased knockback. Although forward throw and back throw have decent damage outputs, their only utility is creating space and setting up edge-guards, and both are mediocre at best in doing so.
However, Samus has noticeable flaws. Samus' ground game is mediocre overall as her smash attacks are punishable, with only her forward smash being a fairly reliable KOing option due to its quick start-up lag. Her neutral attack is very mediocre, which is noticeably exemplified in its inability to connect at high percentages and thus limits Samus' anti-pressuring ability. Due to this and her average dashing speed, most Samus players will often find themselves in the air, where her strengths lie.
Samus also has issues with her recovery. Her grab aerial has very long range, her jumps are among the highest in the game, Screw Attack is fast and hard to punish, and Bomb jumping provides infinite horizontal recovery, but they are all offset by Screw Attack's only average distance, Bomb's high ending lag in the air and Samus' only average air speed and reliance on her grab aerial to grab edges from a distance. Altogether, this results in her recovery being slightly slow, linear and predictable.
Overall, Samus is a character that performs best when using her projectiles and grab aerial for spacing in order to set up combos and either finish off pressured opponents off-stage, or KO them outright with Charge Shot. Unlike the majority of veterans, Samus' optimal playstyle is highly unorthodox; as she falls short in regard to zoning-exclusive or melee-exclusive offense, success with Samus requires careful and strategic use of her various tools to keep momentum in her favor. As such, she is a character that is hard to master, but greatly rewards patient and calculated play.
Changes from Super Smash Bros. 4[edit]
Aside from her incarnation in Melee, Samus has historically been a lower-ranking character in the Super Smash Bros. series. Even her appearance in SSB4 was mixed, as the significant buffs she received via game updates elevated her perception from "unviable" to "viable but outclassed". Likely as a result of her polarized viability, Samus has been buffed significantly overall in the transition to Ultimate.
Samus' largest buffs come from the improvements made to her grab game and her repertoire of projectiles. Historically considered among the most lackluster grab games despite her grabs' long range and her down throw's excellent combo ability, all of Samus' throws have increased utility, damage and knockback; her new up throw is now her strongest throw and a viable KO option at high percentages, down throw's combo potential was further improved due to its lower ending lag, and both her forward and back throws have more knockback, even situationally KOing at high percentages when close to an edge.
In terms of her projectile game, Bombs explode earlier on contact with enemies, Missiles deal more damage and have less ending lag, while Super Missiles deal more knockback and stall for a longer time before flying forward, greatly improving their use for trapping. Most notably, Charge Shot can now be charged in the air, used as a combo tool due to Samus' improved mobility and its lower ending lag, and deals greater damage and knockback, which gives Samus more opportunities to charge up her most threatening move. In bulk, all of these changes have significantly strengthened her zoning and punish game.
Other buffs to Samus also include many of her up-close moves dealing more knockback, most notably her down tilt, dash attack and down smash, improving her previously inconsistent KO potential; and her previously slow and punishable roll was also notably increased in speed, making it more usable as an escape option. She also benefits considerably from the universal changes to the engine, as the reduced landing lag and weakening of shields makes her aerials safer to use for approaching despite their lower shieldstun. As with most other veterans, her mobility has been improved and, when coupled with the dash-cancel, the miscellaneous buffs to her standard moves and their relatively fast frame data, and the increased shieldstun, grants her a much safer close-quarters game.
The changes to air dodges, particularly, have benefitted Samus overall, as they notably improve her ability to edge-guard (especially with moves such as forward aerial or her renowned Charge Shot), while she has one of the longest horizontal distances of any air dodge, giving her a situational recovery option; she also isn't hindered as much by them due to her fast air speed, the ability to stall midair using her Bombs, and her Grapple Beam's long range as a tether recovery. Finally, the universal changes to grabs have benefitted her likely the most of any character, as not only do her grabs now have less ending lag relative to the rest of the cast, but her standing and pivot grabs now have less ending lag as well, which further improves her grab game.
However, Samus has received nerfs that, while fewer in comparison to her buffs, have drastically affected her playstyle. Her dash attack, previously a notorious combo starter and often considered her best close-quarters option (and her best move overall), it has been repurposed into a somewhat strong yet situational KO option due to its now-horizontal launching angle and significantly higher power and ending lag. Her infamously inconsistent neutral attack has worsened even further, as its first hit's lower knockback and slower transition into its second hit have removed its most reliable setups at higher percents and rendered the second hit nearly useless. Up smash has less range, higher SDI multipliers, and no longer has set knockback, which collectively result in it becoming more inconsistent than before. Finally, Samus' up aerial has increased landing lag and its looping hits inflict lower hitstun, reducing its combo and setup potential, especially on landing.
In terms of indirect changes, Samus is one of the characters to be hindered the most by the nerfs to rage: while the lower total multiplier make it slightly harder for Samus to close out a stock if she is able to endure a hit, the fact rage no longer applies to set knockback removes her ability to KO at very early percents by setting up a Screw Attack with high rage (which was a commonly exploitable tactic in conjunction with her dash attack). Lastly, of further note is that some of Samus' most noticeable weaknesses from previous games remain, such as a lackluster close quarters game in comparison to her spacing and zoning games, her moveset's high ending lag leaving her prone to punishment, her susceptibility to being juggled, and a vulnerable recovery despite her access to a tether option.
Overall, Samus' changes and buffs have improved her playstyle's most noticeable attributes in her zoning and long-ranged options, and her heightened offensive power and the changes to gameplay mechanics give her more opportunities to take advantage of this playstyle, though because of the nerfs to her more polarized offensive options, Samus still relies on a patient playstyle. Regardless, her changes have allowed her to veer closer to a balanced, long range-based "mighty glacier", with potent KO power, generally well-rounded attributes (with particularly high endurance yet below-average overall mobility), and a focus on hard-hitting punishes and combos at both long and mid-range, while having difficulty dealing with rushdown and disjoints, which evokes her very projectile-oriented fighting style in her home series. Her plentiful buffs have allowed Samus to perform significantly better relative to the cast than in SSB4, with this being her strongest incarnation yet and a solid contender in competitive play.
Aesthetics[edit]
 Due to the aesthetic used in Ultimate, Samus has a sleeker design, and her overall color scheme is significantly more vibrant, now matching her color scheme from Metroid: Samus Returns. The Varia Suit's black vents are much more defined and detailed, and her visor is more opaque; it along with the suit's accents are lime green rather than emerald-like in Brawl.
- Samus's eighth costume, formerly based on Dark Samus, has been replaced with a black and yellow costume due to Dark Samus's inclusion as a playable fighter.
- Samus's idle animation is altered slightly; she faces the foreground at an angle instead of facing directly forward, and her Arm Cannon is positioned slightly lower.
- Air dodge's animation has changed.
- Samus emits sparks whenever she takes damage. This is shared with Dark Samus, R.O.B., and Mega Man, all of which are mechanical-based fighters.
- Samus has two new victory poses and one slightly modified:
- She fires a Super Missile and strikes a pose similar to her official artwork.
- She lands on the ground and readies her arm cannon.
- Samus retains her up-inputted victory pose, however, the shots resemble the shotgun blast from her Melee Charge Shot custom move from SSB4 rather than small explosions.
Attributes[edit]
 Like all characters, Samus's jumpsquat animation takes 3 frames to complete (down from 4).
- Samus runs faster (1.504 → 1.654).
- Samus's initial dash is slightly faster (1.86 → 1.87). However, it is much slower relative to the cast.
- Samus's air speed is faster (1.03 → 1.103).
- Samus reaches the maximum height of her jumps more quickly.
- Samus has a slightly faster falling speed (1.3 → 1.33).
- Samus's fast falling speed is faster (2.08 → 2.168). This improves her air mobility and makes her less susceptible to juggles.
- Samus's traction is higher (0.0585 → 0.082 ).
- Forward roll has less ending lag (FAF 40 → 35).
 Forward roll grants less intangibility (frames 4-23 → 4-19).
- Back roll has more startup and grants less intangibility (frames 4-23 → 5-20).
- Air dodge grants more intangibility (frames 3-27 → 3-29).
- Air dodge has significantly more ending lag (FAF 33 → 57).
Ground attacks[edit]
- Neutral attack:
- The first hit has a lower hitlag multiplier (1× → 0.8×).
- The first hit has reduced knockback to keep opponents closer to Samus (8 base/80/100 scaling → 20/15), akin to other neutral attacks. However, unlike the case with other characters, this is a nerf for Samus as it further worsens the first hit's ability to true combo into the second hit at higher percents, while also hindering its jab cancel setups.
- The first hit transitions slower into the second hit (frame 13 → 15).
- The first hit has gained a hitstun modifier of 4, increasing its safety on hit at low percents, although due to the aforementioned changes, it still fails to truly connect into the second hit.
- Forward tilt:
- Forward tilt has three different hitboxes instead of four, no longer possessing a sourspot that deals 7% (8% if angled). This makes its damage output more consistent.
- The sourspot deals more knockback (20 base/70 scaling → 30/80), increasing its safety on hit and KO potential.
- Up tilt:
- The removal of teching for grounded meteor smashes drastically improves up tilt's combo potential.
- Down tilt:
- Down tilt has increased knockback scaling (48 → 65), giving the move KO potential against middleweights under 160%, compared to being unable to KO under 200% in Smash 4. This change brings it closer to its Brawl strength.
- It has more ending lag (FAF 40 → 45).
- Dash attack:
- Dash attack has increased knockback scaling (60 → 90), allowing the clean hit KOing middleweights at around 150% from the center of Final Destination.
- The early hit no longer deals less damage than the clean hit (7% → 10%), which makes the hits only differ in hitbox size.
- It has drastically more ending lag (FAF 34 → 42), removing its combo potential entirely.
- It launches at a more horizontal angle (75° → 55°), which hinders its combo and juggling potential, but further assists in its KO ability near edges.
- It produces a visual effect similar to the Shinespark ability from Super Metroid.
- Forward smash:
- Forward smash's innermost hitbox is larger (2.2u → 3.3u), allowing Samus to hit short nearby opponents more easily.
- Up smash:
- Up smash has a different kind of autolink angle (366° → 368°), and the second to fourth hits use weight-independent knockback (although not on all hitboxes), allowing it to connect more reliably when used out of a run, and making it more consistent across characters.
- The last hit has more knockback scaling (150 → 162), improving its KO potential.
- The hitboxes aren't placed as far horizontally (X offset: 9u/9u/-1u → -3.5u/6.5u/6.5u (hit 1), 7.3u/9u/-1u → -3.5u/6.5u/6.5u (hits 2-4), 9u/-1u → -3.5u/7.8u (hit 5)), and all except the last hit's are smaller (5.5u/5.5u/4u → 4.5u/5u/5u (hit 1), 6u/5.5u/4u → 4.5u/5u/5u (hits 2-3), 6u/6u/4u → 4u/5u/5u (hit 4)), reducing the move's range.
- It has a higher SDI multiplier (0.8× → 1×), and the first to fourth hits no longer use set knockback. Coupled with the aforementioned hitbox changes, this causes the move to connect less reliably overall.
- Down smash:
- Down smash has drastically increased knockback scaling (46/48 (front/back) → 70/68), with the front hit and back hit KOing at around 160% and 138% (respectively) from the center of Final Destination. It is no longer the weakest smash attack in the game by a considerable margin.
- It has an altered ending animation, with Samus retaining more momentum from the kick.
Aerial attacks[edit]
- All aerials except up aerial have less landing lag (16 frames → 9 (neutral), 24 → 14 (forward), 18 → 14 (back), 20 → 12 (down)).
- Neutral aerial:
- Neutral aerial's second hit comes out faster (frame 16 → 14).
- However, its total duration remains the same, increasing its ending lag.
- Forward aerial:
- The first hit has altered angles (80°/280°/60° → 367°/18°), while the first to fourth hits deal more set knockback (15 → 25 (hit 1), 30 → 35/40 (hits 2-4)). These changes overall improve its linking capabilities.
- The first four hits have a lower hitlag multiplier (1× → 0.8×), but a higher SDI multiplier (0.8× → 1×).
- Back aerial:
- Back aerial has more ending lag (FAF 39 → 42).
- It has a slightly different animation. Samus faces further behind herself while kicking and curls in her leg afterwards.
- Up aerial:
- Up aerial deals five total hits, down from six.
- The first four hits' feet hitboxes use the autolink angle (361° → 367°) and set knockback (0 base/130 scaling → 25 set/100 scaling), allowing them to connect more reliably.
- The hits after the first are faster (frame 8, 11, 14, 17, 20 → 7, 10, 13, 16).
- However, the move's total duration remains unchanged, giving it more ending lag and making it harder to combo multiple up aerials.
- Up aerial has more landing lag (12 frames → 18).
- The first four hits' leg hitbox deals much more set knockback (30 → 90) and launches at a higher angle (80° → 84°); however, it has gained a hitstun modifier of -10. As a result, and combined with its increased landing lag, it connects less reliably into the following hits without having increased combo potential.
- Due to its lower amount of hits, it deals less total damage (11% → 10.9%), despite the second to fourth hits dealing more damage (1% → 1.3%).
- Its initial auto-cancel window is shorter (frames 1-4 → 1-2).
- The last hit has a higher hitlag multiplier (1x → 1.8×).
- The last hit has an altered animation, with Samus thrusting her foot upward.
- Down aerial:
- The removal of teching for grounded meteor smashes improves down aerial's combo potential onstage, compounded further by its reduced landing lag.
- The late hit deals less damage (11% → 10%) with no compensation on knockback, hindering its KO potential.
- Grab aerial:
- Grab aerial deals more damage (1.5% → 2.5% (hit 1), 3% → 4% (hit 2)).
- The second hit has a slightly longer duration (frames 16-17 → 16-19).
- It causes the Grapple Beam to retract upon hitting an opponent, hindering its utility in battles with multiple opponents.
- The tip of the Grapple Beam stays in place instead of following Samus's vertical movement, similar to how it behaved in Melee.
Throws and other attacks[edit]
- Grabs:
- Standing grab has less startup (frame 16 → 15).
- Standing and pivot grab have less ending lag, especially the latter (FAF 70 → 60 (standing), 84 → 63 (pivot)).
- Dash and pivot grab have more startup (frame 16 → 17 (dash), 17 → 18 (pivot)).
- All grabs have decreased active frames (10 (standing)/11 (dash)/12 (pivot) frames → 8 (all)).
- Pummel:
- Pummel deals slightly more damage (1.2% → 1.3%).
- It has less startup (frame 3 → 1) and ending lag (FAF 9 → 7), but deals much more hitlag (4 frames → 14), drastically increasing its effective duration. This hinders its damage racking ability, no longer being one of the fastest pummels in the game.
- All throws deal more damage (9% → 10% (forward), 8% → 10% (back), 9% → 12% (up), 6% → 8% (down)).
- Forward and back throw's knockback was not compensated, improving their KO potential.
- Forward, back and down throws now use a unique hit effect when releasing opponents, causing them to flash blue with small electric sparks.
- Samus's forward, back and up throws are no longer weight-dependent.
- Up throw:
- Samus has a new up throw: she blasts her opponent upward with her arm cannon. It uses the flame effect, and consists of two hits instead of six, with its damage being redistributed (1% (hits 1-5), 4% (throw) → 5% (hit 1), 7% (throw)).
- It has increased knockback scaling (70 → 80) on top of its higher damage, making it powerful enough to KO middleweights under 170%.
- It releases opponents faster (frame 28 → 16), making it harder to DI. Opponents are also released closer to Samus.
- However, its total duration remains the same, increasing its ending lag.
- Down throw:
- Samus has a slightly altered animation, jumping while slamming the opponent instead of only raising her foot. Her Grapple Beam also retreats earlier, no longer extending all the way behind her after the throw.
- Down throw releases opponents one frame slower (frame 20 → 21), but has less ending lag (FAF 42 → 38). Combined with Samus's faster jumpsquat and jump speed, this noticeably improves its combo potential.
- It has lower base knockback (80 → 60), but higher knockback scaling (50 → 75). This gives it new followup options at low percents, such as a dash attack and dashing up smash, without hindering its combo potential at higher percents due to the aforementioned changes.
- It launches at a slightly lower angle (80° → 74°).
- Floor attacks:
- Edge attack:
- Edge attack deals more damage (7% → 9%).
Special moves[edit]
- Charge Shot:
- Charge Shot can now be charged in midair.
- As with other charge specials, it can now be charge-canceled by jumping or spot dodging.
- It can now be B-reversed.
- It has less ending lag when not fully charged (FAF 54 → 45), now only being one frame longer than its pre-Smash 4 counterparts.
- It deals more damage (3%-25% → 5%-28%). The uncharged version's knockback was not compensated, while the fully charged version's knockback was mostly compensated (30 base/62 scaling → 46/50), making it stronger overall.
- The fully charged version travels faster (3.2 → 3.3).
- Charge Shot can now be fired by pressing the attack button.
- The fully charged version has a higher hitlag multiplier (0.7x → 1x).
- This gives it less ending lag on hit as well as making it safer on shield.
- However, this also makes it considerably easier to DI.
- Charge-canceling the move incurs 4 frames of lag, rather than being instantaneous.
- The projectile has a shorter duration (69 frames → 60).
- The uncharged version travels slower (1.8 → 1.6).
- It has received negative shield damage (0 (uncharged)/3 (fully charged) → -2.5/-7), weakening fully charged shots' ability to break shields.
- Missile:
- Both Homing Missiles and Super Missiles deal more damage (5% → 8% (Homing), 10% → 12% (Super)) without compensation on knockback, improving the KO ability of Super Missiles.
- Both types of Missiles have slightly less ending lag (FAF 57 → 55 (Homing), 59 → 58 (Super)).
- Homing Missiles last longer (102 frames → 120).
- Homing Missiles can turn more sharply.
- Super Missiles have a slower initial speed (0.6 → 0.18), and take longer to start accelerating (frame 10 → 26), but accelerate twice as fast (0.08 → 0.16) and have a higher max speed (1.75 → 4.2). Overall, they behave more like Turbo Missiles from Smash 4.
- Super Missiles don't last as long (66 → 50).
- Samus can drift horizontally after firing a Missile in midair, and Missiles don't halt her aerial momentum.
- Homing Missiles travel more slowly (1.3 (initial)/0.5 (minimum) → 1.15/0.4), but take longer before decelerating (56 → 85).
- The window for inputting a Super Missile is longer (3 frames → 5).
- Missiles have updated designs. When firing a missile, Samus's visor and armor lights briefly change colors in reference to Samus's palette changing when Missiles are selected in the original Metroid.
- Screw Attack:
- Screw Attack has less lag before Samus begins falling.
- Grounded Screw Attack has less startup (frame 5 → 4), making it more effective out of shield.
- The looping hits have a lower hitlag multiplier (1× → 0.5×), and a lower SDI multiplier for the aerial version (1× → 0.5×), allowing them to transition faster and making them harder to escape.
- The last hit has a slightly larger hitbox (9.6u → 10u), allowing it to connect better from the looping hits.
- Due to rage being changed to not affect set knockback, the linking hits of Screw Attack can no longer KO off the top blast line at low percents, removing Samus's early KO setups.
- Grounded Screw Attack deals up to nine hits instead of eleven, but has increased damage on its first hit (2% → 3%) and last hit (1% → 2%).
- The last hit's knockback was not fully compensated (50 base/240 scaling → 56/190), slightly improving its KO potential.
- The grounded version's last hit has a higher hitlag multiplier (2× → 2.5×).
- The move uses unique sound effects on hit, rather than standard "kick" sound effects.
- Bomb:
- Bombs explode earlier on contact (frame 22).
- Zero Laser:
- When Samus unleashes Zero Laser, the jets on the back of her suit vent flames as exhaust, which deal damage.
Update history[edit]
Samus received a mix of buffs, nerfs and glitch fixes via game updates, but was buffed overall. Update 2.0.0 increased Missile's range, which allows her to space better and deal damage at safer ranges. However, it also received more ending lag when used in the air, which standardized it with Dark Samus' version. Additionally, grounded Bomb's ending lag was decreased, which made it safer and allows her to act out of it more effectively.
However, update 3.0.0's near-universal nerf to projectiles' shield damage outputs hindered Samus (and Dark Samus by extension) more so than most other characters, as it noticeably worsened Charge Shot's shield pressuring potential. Following this, update 3.1.0 improved up smash's linking hits as part of a near-universal buff.
Update 7.0.0 would later provide Samus with substantial buffs. Up smash, down smash and up throw each gained considerable increases to their knockback, which noticeably improved their KO potentials. On a similar note, early dash attack deals 3% more damage: this makes it functionally identical to the clean hit, and thus improved dash attack's consistency as a situational, yet viable KO option. Aside from these improved KO options, aerial Grapple Beam's damage output and hitbox duration were increased, which slightly improved her spacing game. Lastly, Samus' shield was enlarged as part of a near-universal buff.
Overall, Samus fares better than she did at the launch of Ultimate.
 Missiles follow the Pokémon Trainer's new Pokémon if they switch after the missile was fired.
- Missile has more range.
- Aerial Missile has slightly more ending lag (FAF 60 → 62), no longer being less laggy than Dark Samus's version.
- Bomb has less endlag when used on the ground (FAF 49 → 47).
- Charge Shot deals significantly less shield damage (0 → -2.5 (uncharged); 3 → -7 (fully charged).
- Samus no longer launches herself off screen when grab and Bomb occur at the same time.
- However, the phantom knockback would still occur at the exact frame of the hitbox and the explosion.
 Created visual glitch where Samus’s tether grab beam would disconnect from her arm when performed in the air before landing.
- Up smash's hits connect more reliably.
- Fixed tether beam glitch from 3.0.0.
- The lag upon waking up from the sleep effect has been adjusted, matching the rest of the cast.
- Certain hitboxes of up smash no longer use set weight, fixing a glitch that caused their position vector to last much longer than usual and launch opponents much farther if the move was interrupted.
- Overall shield size has been increased by 1.025×.
- Dash attack's early hit no longer deals less damage than the main hit (7% → 10%).
- Up smash's last hit has more knockback scaling (150 → 162), noticeably improving its KO potential.
- Down smash has more knockback scaling (58 → 70 (hit 1), 58 → 68 (hit 2)), drastically improving its KO potential.
- Grab aerial deals more damage (1.5% → 2.5% (hit 1), 3% → 4% (hit 2)), and the second hit has a longer duration (frames 16-17 → 16-19).
- Up throw has more knockback scaling (72 → 80), drastically improving its KO potential.
- Grounded Screw Attack covers slightly less vertical distance, no longer being able to reach the top platform of Yoshi's Story.
- Fixed an issue in which Samus could fall though the stage when breaking Steve's blocks.
- Fixed an issue where Samus' grounded up special gained slightly less height in the first few frames, resulting in it gaining less height overall than intended.
Moveset[edit]
For a gallery of Samus' hitboxes, see here.
Note: All numbers are listed as base damage, without the 1v1 multiplier.
| Name | Damage | Description | ||
|---|---|---|---|---|
| Neutral attack | Straight (ストレート) / Cannon Hammer (アームキャノンハンマー, Arm Cannon Hammer) | 3% | A left-handed jab followed by a forearm club with the Arm Cannon. Despite dealing above-average damage for a neutral attack, it is poor overall, as opponents can usually act out before the second hit connects by shielding or using a fast attack, while the second hit may not even connect at high percentages. Depending on the opponent's weight, it is safe and a true combo at high percents, but only if the first hit connects relatively close to the arm and not at the fist. The second hit does have KO potential at very high percentages, however, and the first hit is very fast, coming out on frame 3, making it a decent interrupt tool. | |
| 8% | ||||
| Forward tilt | ↗ | Spin Kick (スピンキック) | 11% (foot), 10% (leg), 9% (body) | A roundhouse kick. Deals more damage and knockback at her foot, while her leg deals less damage and knockback. It can be angled, which causes it to deal more damage, but it may cause it to miss shorter characters on the ground if angled up. The foot sweetspot deals rather potent knockback for a tilt attack, which can KO at the edge at around 125%. At varying percentages, depending on which part of the move is landed, it can lead into a guaranteed Charge Shot, as regardless of teching, Charge Shot can catch the opponent's option in time if they are knocked down. As the closest hitboxes deal low knockback and damage, it has low shield safety at low to mid percents. |
| → | 10% (foot), 9% (leg), 8% (body) | |||
| ↘ | 11% (foot), 10% (leg), 9% (body) | |||
| Up tilt | Heel Kick (ヒールキック) | 13% (grounded), 12% (aerial) | An axe kick. It is almost identical to Captain Falcon's up tilt in both appearance and functionality. Like Falcon's, it meteor smashes grounded opponents, but unlike his, it launches aerial opponents at a horizontal angle. This allows it to set up combos against grounded opponents at a wide range of percentages while also being a reliable tool against ledge hangs, due to its wide coverage and powerful knockback enabling it to cover most ledge options and KO outright at around 95% at the edge. At high percentages, the grounded meteor can also set up KO confirms into a fully charged Charge Shot. However, the move has noticeable startup, due to coming out on frame 15, making it Samus' slowest normal attack on the ground. Oddly, the very first frame of the hitbox will send opponent backwards instead of in front of Samus, which could make the move kill even earlier should they DI wrong. | |
| Down tilt | Earth Blaster (アースブラスター) | 12% | Kneels and quickly thrusts her Arm Cannon downward to fire a small, fiery blast. It is very fast, due to coming out on frame 6, and deals respectable damage and knockback for a tilt attack, KOing at around 160% off the top blast line. It is useful as a close range anti-pressure option on opponents in front of Samus, or as a punishment option. However, its very high ending lag leaves it easy to punish if shielded or missed. | |
| Dash attack | Shoulder Tackle (ショルダータックル) | 10% (clean), 6% (late) | A shoulder tackle. Deals more damage and knockback during the first half of the move, KOing opponents at around 140% from the center of Final Destination, and earlier near edges. However, the late hit is significantly weaker, not being capable of KOing until around 200% under the same circumstances, and the move lacks any combo potential. It resembles the Shinespark, a Speed Booster-related technique that debuted in Super Metroid. | |
| Forward smash | ↗ | Arm Cannon Knuckle (アームキャノンナックル) | 13% (Arm Cannon), 15% (blast) | Quickly thrusts her Arm Cannon forward to fire a small, fiery blast. Functions similarly to Mario's forward smash, with the blast being the most powerful part of the move. It is one of the fastest forward smashes in the game, coming out on frame 10, while the blast has the highest knockback out of her smash attacks, KOing at around 100% from center stage. However, it is rather weak otherwise, with the Arm Cannon KOing at around 135% and the sourspot taking priority over the sweetspot. Due to its 37 frames of ending lag, it's also punishable if it doesn't hit. It can be angled like her forward tilt, with the upward angle dealing more damage and knockback, though it can typically miss as a result; conversely, the downward angle can hit edge hanging opponents, but deals slightly less damage and knockback. |
| → | 12% (Arm Cannon), 14% (blast) | |||
| ↘ | 11% (Arm Cannon), 13.5% (blast) | |||
| Up smash | Cover Fire (ヘルファイア, Hellfire) | 3% (hits 1-4), 6% (hit 5) | Fires five fiery blasts in an overhead arcing motion. True to its name, this move works best as an anti-air attack, as its multiple hits give a good amount of aerial protection. Conversely, it is unable to hit grounded opponents unless they are close enough to Samus. It is also her most damaging smash attack, dealing 18% total uncharged. However, due to its hits being spread above Samus, it can fail to fully connect if the opponent is hit from too far. If all 5 hits connect, it can KO middleweights at around 100% from ground level. | |
| Down smash | Spinning Low Kick (スピニングローキック) | 10% (front), 12% (back) | A legsweep. It comes out of frame 9 and it's Samus's fastest smash attack. A semi-spike with decent speed and high base knockback, allowing it to set up edgeguards and punish rolls effectively. The front hit can KO middleweights center stage around 150%, with the back hit KOing even earlier at around 135%. | |
| Neutral aerial | Turning Kick (ターニングキック) | 10% (hit 1), 9% (hit 2, clean), 8% (hit 2, late) | A spinning roundhouse kick. Comes out in frame 8. Hits on both sides quickly and can autocancel with a short hop fast fall. Its front hit and sweetspotted back hit also deal powerful knockback, which makes it a viable KOing option offstage or near the edge, as well as a decent combo finisher and one of the strongest aerials of its type. It resembles the aerial version of the Counter Attack from Metroid: Other M. | |
| Forward aerial | Aerial Fire (エアリアルヘルファイア, Aerial Hellfire) | 3% (hit 1), 1.6% (hits 2-4), 5% (hit 5) | Fires five fiery blasts in a slow, downward arcing motion. Due to it coming out on frame 6, it has the second lowest start-up lag of Samus' aerials. The first four hits drag opponents into the rest of the move using the autolink angle, with the last hit carrying the entire attack's knockback. Samus' main aerial move for both combos and protection. Extremely useful as an edge get-up option or against air dodges due to its multiple hits, and using the move immediately after a short hop can hit opponents with the last hit before Samus lands again. It's her only aerial that does not autocancel in a short hop. It can KO middleweights at around 155% from center-stage if all hits connect. | |
| Back aerial | Sobat (ソバット) | 14% (clean foot), 12% (clean leg), 9% (late) | A back kick. It's fast, can autocancel in a short hop and deals powerful knockback when connecting the sweetspot on Samus' foot, which makes it an excellent KOing option, especially when edgeguarding. When sweetspotted, it is among the strongest back aerials in the game, KOing Mario at 100% from center stage. | |
| Up aerial | Drill Kick (ドリルキック) | 3% (hit 1), 1.3% (hits 2-5), 4% (hit 5) | A diagonal corkscrew flying kick. It hits multiple times and is her fastest aerial, due to it coming out on frame 5. Grounded opponents can be hit by the last hitbox if Samus lands while starting the move in the air, although it is difficult to do so, and risky due to the move's high landing lag. It can be used as a follow-up after a dash attack, grounded up tilt, down aerial, or down throw, all of which can be followed up with another up aerial and/or can be finished off with a Screw Attack. On stages with platforms, it even has potential for a zero-to-death when using a platform to extend the combo. Can KO if used high enough and close to the blast line. | |
| Down aerial | Meteor Drop (メテオドロップ) | 10% (early, late), 14% (clean) | Swings her Arm Cannon in a downward arcing motion. Hitting directly below Samus meteor smashes opponents, while the edges of the move at the very start and end deal decent horizontal knockback. It has slow startup at frame 17, but it autocancels from a short hop, and due to its relatively low ending lag, the meteor smash is excellent for starting combos on grounded opponents, much like her up tilt. | |
| Grab aerial | Midair Grapple Beam (空中グラップリングビーム, Aerial Grappling Beam) | 2.5% (early), 4% (full length) | Fires the Grapple Beam. A useful spacing option due to having only 8 frames of landing lag. It autocancels from a full hop and has impressive range, being the longest grab aerial in game. In addition to its recovery and spacing capabilities, it is good at setting up combos at close range upon landing, due to its low landing lag. Unlike in previous games, however, hitting an opponents causes the Grapple Beam to retract earlier, while not reducing the move's ending lag. It deals more damage when fully extended and, with precise spacing, it is possible to get both hits to connect. The late hit can KO Mario on Final Destination around 365% from the center and around 270% at the edge, while the early hit is unable to KO Pichu at the edge at any percent. | |
| Grab | Grapple Beam (グラップリングビーム, Grappling Beam) | — | Fires the Grapple Beam from Super Metroid. It has impressive range and is the longest tether grab in the game. However, it is tied with her Zero Suited form's grab as the second slowest in terms of ending lag, making it very punishable if missed. | |
| Pummel | Grab Chop (つかみチョップ) | 1.3% | A palm strike. Has moderate damage and speed relative to other pummels. | |
| Forward throw | Grappling Throw Front (グラップリングスルーフロント) | 10% | Twirls the opponent overhead, then flings them forward. Although its knockback has been increased, it remains too weak for KOing at realistic percents, unless Samus has rage and is at the edge of the stage. | |
| Back throw | Grappling Throw Back (グラップリングスルーバック) | 10% | Swings the opponent behind herself. Slightly more effective for KOing and setting up edgeguards than her forward throw, due to its lower launch angle. | |
| Up throw | Grappling Cannon (グラップリングキャノン) | 5% (hit 1), 7% (throw) | Hoists the opponent above herself and blasts them with a point-blank shot from her Power Beam. Samus' most damaging and strongest throw, possessing enough knockback to KO middleweights around 150% from ground level and without rage. At low percentages, it can also combo into an up aerial against large characters, as well as Screw Attack against most characters, though the latter will only connect its hits reliably on a few characters. | |
| Down throw | Grappling Throw Down (グラップリングスルーダウン) | 8% | Swings the opponent overhead and then slams them onto the ground. A reliable combo starter, with its follow-ups including dash attack, small step forward smash and dashing up smash at low percentages, as well as neutral, forward, back and up aerials up to mid percentages. | |
| Floor attack (front) | 7% | Performs a low-level roundhouse kick. | ||
| Floor attack (back) | 7% | Swings her Arm Cannon forwards before firing a blast backwards. | ||
| Floor attack (trip) | 5% | Performs a shin kick in front of herself and then a back kick behind herself. | ||
| Edge attack | 9% | Performs a legsweep while climbing up. | ||
| Neutral special | Charge Shot | 5% (uncharged), 28% (fully charged) | Charges a ball of energy and fires it. Boasts excellent KO potential when fully charged, and is a useful intercepting move at a low charge. KOs at 70%-110% depending on rage and the opponent's weight and DI. Can be used to break shields if used in conjunction with her neutral attack, up or down tilts, aerials, Bomb and Super Missile. When using her forward tilt to launch the opponent into tumbling, it can set up a guaranteed combo into Charge Shot regardless of the opponent's tech option, as Charge Shot will always catch their tech direction. A non-fully charged Charge Shot has way less ending lag than its fully charged counterpart, allowing for follow-ups and combos at various percentages at the cost of less power. | |
| Side special | Missile | 8% (Homing), 12% (Super) | Fires a Missile, which homes in on the opponent. If the special button is tapped like a smash attack, Samus will instead fire a Super Missile, which stays in place for a short while before traveling in a straight line, and deals more damage and knockback. Both variations deal low knockback, but can be used to break a shield if used in conjunction with a fully charged Charge Shot. Both Missile variations can also be used as set-ups by opening up an opportunity for a grab aerial, or Charge Shot, while the Super variation sets up better for a true combo into a forward jumping Charge Shot at high percentages. The Homing variation is also useful for catching recoveries and forcing air dodges, which can open up punishment opportunities. | |
| Up special | Screw Attack | 3% (grounded hit 1), 1% (grounded hits 2-8), 2% (grounded hit 9), 1% (aerial hits 1-12) | Leaps upward to perform a high-speed somersault while discharging energy. Shoots upward if initiated from the ground, while it gains distance slower if started in the air. A useful out of shield option, due to coming out on frame 4 on the ground, and deals good knockback that can KO around 100% while near the upper blast line. | |
| Down special | Bomb | 4% (contact), 5% (explosion) | Rolls into her Morph Ball form and drops a Bomb, which explodes after a set time. Useful to force an opponent to shield and for edgeguarding, being capable of 2 frame punishes if timed correctly. It can also break shields depending on their health if used along with her up and down tilts or a fully charged Charge Shot. | |
| Final Smash | Zero Laser | 1% (charge loop), 0.5% (fringe loop), 1.5% (thruster, main loop), 2% (main loop; point blank, long range), 2.5% (contact blast), 8% (fringe blast), 10.5% (main blast) | Fires a very large, bluish white energy beam. The beam can be angled vertically during the Final Smash. | |
Stats[edit]
Samus' gravity and falling speed are set to 0.078288 and 1.8, respectively, during hitstun when launched at angles between 70°-110°.
| Stats | Weight | Dash speed | Walk speed | Traction | Air friction | Air speed | Air acceleration | Gravity | Falling speed | Jumpsquat | Jump Height | Double jump Height |
|---|---|---|---|---|---|---|---|---|---|---|---|---|
| Value | 108 | 1.87 – Initial dash 1.654 – Run |
1.115 | 0.082 | 0.0075 | 1.103 | 0.04 – Base 0.05 – Additional |
0.075 | 1.33 – Base 2.128 – Fast-fall |
3 | 37 - Base 18 - Short hop |
37 |
Announcer call[edit]

English/Japanese/Chinese
On-screen appearance[edit]
- Arrives from a Save Station.
Samus' on-screen appearance

Taunts[edit]
- Up taunt: Salutes vigorously with her left arm as her thrusters activate.
- Side taunt: Faces the screen and demonstrates her Arm Cannon's Zero Laser configuration.
- Down taunt: Aims her Arm Cannon behind her, then kneels while aiming it in front of herself.
Samus' up taunt.

Samus' side taunt.
Samus' down taunt.


Idle poses[edit]
- Rubs her Arm Cannon with one finger.
- Brings her Arm Cannon down and then pulls it back up.
Samus' first idle pose.
Samus' second idle pose.


Crowd cheer[edit]
| Cheer (English) | Cheer (Japanese/Chinese) | Cheer (Italian) | Cheer (Dutch) | Cheer (French) | |
|---|---|---|---|---|---|
| Cheer | |||||
| Description | Sa - mus! | Sam - Su! | Sa - mus! | Sa - mus! | Sa - mus! |
| Cheer (German) | Cheer (Spanish) | Cheer (Russian) | Cheer (Korean) | |
|---|---|---|---|---|
| Cheer | ||||
| Description | Sa - mus! | Saaaaa - mus! | Sa - mus! Sa - mus! | Sa - mu - s! |
Victory poses[edit]
- Left: Lands on the ground and readies her Arm Cannon.
- Up: Fires multiple Power Beam shots from her Arm Cannon while kneeling, then strikes a pose. The pose is based on her appearance on the covers of Metroid II: Return of Samus and Metroid: Samus Returns.
- Right: Fires a Super Missile and strikes a pose resembling her render from Metroid: Other M, and by extension, her official artwork in Ultimate, as well as her character select animation in Super Smash Bros.


In competitive play[edit]
Most historically significant players[edit]
See also: Category:Samus players (SSBU); Category:Dark Samus players (SSBU)
 Abadango
  - Plays Samus alongside Meta Knight and Mr. Game & Watch. Placed 2nd at Kagaribi 8, 3rd at VCA 2022, 4th at Shinosuma HEROES 1, 5th at Sumabato SP 24, and 9th at KOWLOON 3, with wins over players such as takera, Peli, and alice.
 IcyMist - One of the best Samus players in North America in the post-online metagame, peaking at 76th on the UltRank 2022. She is considered one of the best players in the Midwest, regularly placing top 8 at Midwest events including 4th at both Riptide 2023 and The Big House 11. Outside of the Midwest, her best results including placing 9th at Let's Make Big Moves 2022 and 13th at Super Smash Con: Fall Fest, while her best wins include Sonix at Super Smash Con 2023 and Riddles at Fall Fest.
 Joker - The best Samus player in North America in the early metagame, peaking at 95th on the OrionRank 2019, and was a top 10 player in Mexico during this period. His best results during this period were in the United States, placing 7th at 2GG: SwitchFest 2019 defeating Nicko and WaDi as well as 9th at Low Tier City 7 defeating ESAM. Although less active since then, he still places highly at Mexican events when he does attend.
- Parme - The best Samus player in Japan in 2019, placing highly at multiple Sumabatos including 9th at Sumabato SP 6 and 13th at Sumabato SP 5. Although his results have since declined, he still remains a threat in Chūgoku and has seen some decent results at majors, including placing 33rd at Maesuma TOP 13.
 quiK - The third-best Samus player of all-time who was the definitive best in 2019, ranked 37th on the OrionRank 2019. He was the second-best player in Europe during this time as well, notably placing 2nd behind Glutonny at Syndicate 2019, Ultimate WANTED 2, and Valhalla III, and also placed 7th at Ultimate Fighting Arena 2019 and 9th at Albion 4.
 Sisqui
  - One of the two best Samus players of all-time, peaking at 21st on the LumiRank 2023, and is one of the best players in Europe in the post-online metagame. He regularly places top 8 at European majors, including 2nd at Ultimate Fighting Arena 2023 and 5th at COLOSSEL 2022, while internationally he has notably placed 4th at Rise 'N Grind and 5th at Smash Factor X.
- Teaser - One of the best Samus players in North America in 2022, peaking at 134th on the OrionRank 2022. He was a consistent threat in the Southeast, especially with wins over some of its best players such as Kola, Wrath, and Fatality and placing highly at Southeast majors, including 17th at Let's Make Moves Miami and 25th at MomoCon 2022. Outside of his region, he notably placed 17th at GENESIS 8.
- Toura - The second-best Samus player in Japan especially in the post-online metagame, peaking at 97th on the OrionRank 2022. He frequently places highly at Japanese majors, most notably 5th at Umebura SP 9 and 9th at both Maesuma TOP 8 and Maesuma TOP 9.
- Yaura - One of the two best Samus and Dark Samus players of all-time who regularly places top 8 at major Japanese events, most notably 4th at the supermajors Maesuma TOP 10 and DELTA 5, and has wins over three of the four Horsemen. He is the only Samus player ever ranked in the top 20, with his highest being 18th on the LumiRank 2023.
- YB - Mainly known for dominating the early Smashmate ladder, including ranking 1st on half of the first ten Smashmate rankings. He has only made a handful of appearances offline but is best known offline for his appearances in the United States, which includes placing 13th at 2GG: Prime Saga defeating VoiD and WaDi as well as top 8 finishes at 2GG: Prime Saga Kickoff and Mega Smash Mondays 185, where he also defeated Ally in the latter.
Tier placement and history[edit]
Initial impressions of Samus and Dark Samus in Ultimate were negative, largely due to comparisons with Samus's previous iteration. Players pointed out how she lost the combo potential of her dash attack, one of her most useful tools in Smash 4, along with her general lack of mechanical changes compared to fellow veterans such as Link. Her unsafe jab, seemingly unchanged from Smash 4 and once again acknowledged in in-game tips, became a common point of mockery. However this viewpoint did not stick for long, as Samus players began demonstrating how her improved projectile game, KO potential, and Charge Shot shield break potential allowed her to compete in the top level, although the latter was eventually nerfed in updates. Early Samus representation came from YB, who despite being a relatively unknown player from Japan shocked the world by placing 13th at 2GG: Prime Saga. Other Samus players later followed suit, most notably Joker and quiK, both of who became one of the best players in Mexico and Europe, respectively. As such, players in the early metagame considered the Samuses as a high-tier character.
This viewpoint was maintained in the post-online metagame, which saw the Samuses' overall representation improve significantly, notably entering the top 10 by 2022.[1] This rise was due to the continued success of older Samus players alongside the appearances of several other Samus players on the global scene, including Sisqui, IcyMist, and Yaura. Due to this high representation and strong results, the Samuses were ranked 25th on the first tier list. Since then, the Samuses continued to be a top 10 character representation-wise, and Sisqui and Yaura remained top level threats in the metagame. As such, the Samuses received a large boost on the second tier list, and they are currently sitting at 15th in the A-tier.
Classic Mode: Another Planet, Another Bounty[edit]

The opponents Samus faces are akin to the battles that she has faced throughout the Metroid series. In addition, all of the battles take place on stages from the Metroid universe.
| Round | Opponent | Stage | Music | Notes |
|---|---|---|---|---|
| 1 | Brinstar | Title Theme - Metroid | ||
| 2 | Giant |
Brinstar (Ω form) | Brinstar Depths | References Samus' battles with Kraid. |
| 3 | Brinstar Depths | Brinstar (Melee) | Horde Battle. | |
| 4 | Giant |
Norfair | Vs. Ridley | References Samus' battles with Ridley. |
| 5 | Norfair (Ω form) | Multiplayer - Metroid Prime 2: Echoes | Charizard's Pokémon Trainer is absent. Items do not appear. | |
| 6 | Frigate Orpheon | Vs. Parasite Queen | References Samus' battles with Dark Samus. | |
| Bonus Stage | ||||
| Final | Master Hand | Final Destination | Master Hand (Less than 7.0 intensity) Master Hand / Crazy Hand (7.0 or higher intensity) |
On Intensity 7.0 or higher, Crazy Hand teams up with Master Hand. |
Credits roll after completing Classic Mode. Completing it as Samus has Ending - Metroid accompany the credits.
Character unlock tree[edit]
Samus' Classic Mode character unlock tree includes the following characters in order:
Each character can be unlocked by clearing Samus' Classic Mode, or the Classic Mode of any preceding character, if all preceding characters have been unlocked. Once all the above characters are unlocked, clearing Classic Mode with any of them will default to Mario's character unlock tree, starting with Sonic.
Role in World of Light[edit]

Samus was among the fighters summoned to the cliffside to fight an army of Master Hands.
During the opening cutscene, Samus was present when Galeem unleashed his beams of light. Samus attempted to fight back against the beams by shooting them with her Power Beam, but to no avail. Samus was vaporized and placed under Galeem's imprisonment alongside the rest of the fighters (except for Kirby).
In gameplay, Zero Suit Samus has a separate awakening battle from Samus.
Samus can be found blocking the path of the bridge once engulfed in light and a location reminiscent of Pac-Maze. Defeating her is necessary to progress through the story, making her an obligatory unlock.
Samus is later seen among several other fighters, making their last stand against Galeem and Dharkon. She also shows up in the ending where Galeem emerges victorious against Dharkon, witnessing Galeem engulf the world in light.
Fighter Battle[edit]
| No. | Image | Name | Type | Power | Stage | Music |
|---|---|---|---|---|---|---|
| 04 | |
Samus | 7,500 | Brinstar (Ω form) | Title Theme - Metroid |
Spirits[edit]
Samus's fighter spirit can be obtained by completing Classic Mode. It is also available periodically for purchase in the shop for 300 Gold. Unlocking Samus in World of Light allows the player to preview the first spirit below in the Spirit List under the name "???". As a fighter spirit, it cannot be used in Spirit Battles and is purely aesthetic. Her fighter spirit has an alternate version that replaces it with her artwork in Ultimate.
Additionally, Samus makes an appearance in various primary and support spirits. Note that Zero Suit Samus' fighter spirit is not listed here due to her status as a separate playable character (despite the fact that she is the puppet/possessed fighter who represents Young Samus).
264. Samus Aran
269. Gravity Suit
270. Fusion Suit
271. Phazon Suit
272. Dark Suit
273. Light Suit
274. Young Samus
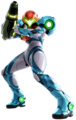
1,497. Samus (Metroid Dread)


.png)
In Spirits Battles[edit]
As the main opponent[edit]
| Spirit | Battle parameters | |||||||||
|---|---|---|---|---|---|---|---|---|---|---|
| No. | Image | Name | Series | Enemy Fighter(s) | Type | Power | Stage | Rules | Conditions | Music |
| 269 | Gravity Suit | Metroid Series | •Samus |
3,800 | Castle Siege (Underground Cavern) | •Hazard: High Gravity | •Your jumping power decreases | Sector 1 | ||
| 276 |  |
Chozo Statue | Metroid Series | •Samus |
3,600 | Brinstar | •Item: Screw Attack | •The enemy starts the battle with a Screw Attack | Brinstar Depths (Melee) | |
| 293 |  |
Kanden | Metroid Prime Series | •Samus |
1,700 | Brinstar | •Item: Motion-Sensor Bomb | •The enemy is easily distracted by items | Psycho Bits | |
| 294 |  |
Trace | Metroid Prime Series | •Samus |
1,900 | Norfair (Battlefield form) | •Invisibility | •The enemy is invisible | Psycho Bits | |
| 896 |  |
Skull Man | Mega Man Series | •Reflect Samus |
3,900 | Wily Castle (Ω form) | •Reflect-Damage Buffed | •The enemy reflects projectiles •Stamina battle •All fighters' reflected projectiles have increased power |
Mega Man 4 Medley | |
| 1,093 | Sandbag | Super Smash Bros. Series | •Samus |
2,000 | Pokémon Stadium 2 (Ω form) | •Item: Home-Run Bat | •Timed battle (0:10) •The enemy prefers not to move |
Online Practice Stage - Super Smash Bros. for 3DS / Wii U | ||
| 1,150 |  |
ST Falcon | Battle Clash | •Samus |
1,900 | Port Town Aero Dive | •Item: Super Scope | •The enemy starts the battle with a Super Scope | Marionation Gear | |
| 1,162 |  |
Flare | Custom Robo Series | •Samus |
1,800 | Pokémon Stadium | N/A | •Stamina battle •The enemy starts the battle with a Ray Gun •The enemy starts the battle with a Rocket Belt |
Marionation Gear | |
| 1,497 | Samus (Metroid Dread) | Metroid Series | •Samus |
9,500 | Frigate Orpheon | •Assist Trophy Enemies (Metroid) | •Hostile assist trophies will appear when the enemy's at high damage | Sector 1 | ||
As a minion[edit]
| Spirit | Battle parameters | Inspiration | |||||||||
|---|---|---|---|---|---|---|---|---|---|---|---|
| No. | Image | Name | Series | Enemy Fighter(s) | Type | Power | Stage | Rules | Conditions | Music | Character |
| 899 |  |
Dark Man 4 | Mega Man Series | •Mega Man •Samus |
1,400 | Wily Castle (Battlefield form) | N/A | •Stamina battle •The enemy's shield has extra durability •Reinforcements will appear after an enemy is KO'd |
Dark Man Stage | Dark Man 1, Dark Man 2, Dark Man 3 | |
| 1,127 |  |
Diskun | Disk System | •Young Link •Pit •Simon •Samus |
9,100 | Temple (Battlefield form) | N/A | •Take your strongest team into this no-frills battle | Famicom Medley | Samus Aran (Metroid for the Famicom Disk System) | |
| 1,163 |  |
Bayonette | Custom Robo Series | •Dark Samus •Samus |
1,900 | Mushroomy Kingdom (Battlefield form) | N/A | •The enemy's side special has increased power •Stamina battle •The enemy favors side specials |
Marionation Gear | Spear | |
| 1,348 | Kloster (Grief) | DAEMON X MACHINA | •Tiny Snake •Giant Samus •Giant Dark Samus |
9,500 | Frigate Orpheon (hazards off) | •Attack Power ↑ •Item: Shooting Types |
•The enemy has increased attack power after a little while •Reinforcements will appear after an enemy is KO'd |
Mechanical Rhythm | Antanaklasi Eleos | ||
| 1,353 |  |
S-Tetrimino & Z-Tetrimino | Tetris Series | •Zero Suit Samus •Samus |
4,300 | Mushroom Kingdom U (Slide Lift Tower) | •Sudden Final Smash •Item: Screw Attack |
•The enemy will suddenly have a Final Smash | Chill (for 3DS / Wii U) | S-Tetrimino | |
Alternate costumes[edit]

| |||||||

|

|

|

|

|

|

|

|
Gallery[edit]
Samus' fighter card.

Samus' unlock notice when obtaining her in World of Light.
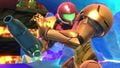
Samus on The Great Cave Offensive.
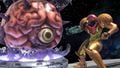
Preparing to fire a Missile at Mother Brain on Lylat Cruise.
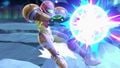
Preparing her Charge Shot on Summit.
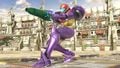
Taunting on Coliseum while wearing her Gravity Suit.
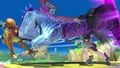
Getting hit by Bayonetta's forward smash on Spirit Train.
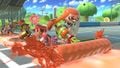
Buried by Inkling's Splat Roller on Figure-8 Circuit.
Samus watching an aerial Lucario on Prism Tower.
Samus getting launched by Shulk's dash attack on Gaur Plain.
Posing behind her Zero Suited self on Gaur Plain.
Getting hit by Bewear's uppercut on Wuhu Island.
Firing a Missile on Wrecking Crew.
With Mario, Donkey Kong, Link, Ice Climbers, Pit, Villager and Inkling on Battlefield.
Samus, Palutena, Villager, and Shovel Knight fighting on Find Mii Ω with the Moon about to crash onto the stage.


Fighter Showcase Video[edit]
Trivia[edit]
- The notorious unreliability of Samus' neutral attack is alluded to in one of the tips, stating that "Foes can often put up their shields in between the first and second hits of this combo. It's safer to just hit with the first attack and then flee."
- Samus is the only member of Super Smash Bros. Ultimate's starting roster to be a female by default.
- However, she is technically not the only female on the starting roster, due to Ultimate including two female Pikachu as alternate characters alongside the default male Pikachu.
- Samus is the only member of the Original 8 to have an Echo Fighter, that being Dark Samus.
- She is also the only fighter to have an Echo Fighter that represents a separate entity in addition to a non-clone fighter representing an alternate form of herself.
- In her official artwork, Samus' pose matches the image of her alongside Anthony Higgs from Metroid: Other M. This same image was used on the official Other M website with Higgs removed, and was used as Samus' primary promotional image across various media prior to the release of Metroid: Samus Returns.
- Although Samus reuses her Other M design instead of her updated design from Metroid: Samus Returns, her fighter spirit uses her artwork from Samus Returns instead of Other M.
- When fighting off the fifty puppet fighter army as Master Hand in World of Light, Samus is one of the eight fighters fought there, being affiliated with Galeem.
- Out of all the eight fighters affiliated with either Galeem or Dharkron, Samus is the only female.
- Samus, Dark Samus, Mr. Game & Watch, and Pac-Man are the only fighters who do not emit red-flashing eyes in the Spirit Battle previews in World of Light.
|
| |
|---|---|
| Fighters | Samus (SSB · SSBM · SSBB · SSB4 · SSBU) · Zero Suit Samus (SSBB · SSB4 · SSBU) · Ridley (SSBU) · Dark Samus (SSBU) |
| Assist Trophies | Metroid · Dark Samus · Mother Brain |
| Bosses | Ridley · Meta Ridley |
| Stages | Planet Zebes · Brinstar · Brinstar Depths · Frigate Orpheon · Norfair · Pyrosphere Brinstar Escape Shaft (Adventure Mode) |
| Item | Screw Attack · Power Suit Piece |
| Enemies | Geemer · Kihunter · Metroid · Reo · FG II-Graham · Joulion · Zero |
| Other | Gunship · Kraid |
| Trophies, Stickers and Spirits | Trophies (SSBM · SSBB · SSB4) · Stickers · Spirits |
| Music | Brawl · SSB4 · Ultimate |
| Masterpieces | Metroid · Super Metroid |