Zero-to-death combo

A zero-to-death combo, commonly referred to as a zero-death or 0-death for short, is a combo, usually particularly long and intricate, that starts on an opponent at 0% damage, and ends with the eventual KO of the character being comboed. "Zero-death" is also used to refer to any general sequence where a player brought an opponent from 0% to a KO without interruption (such as beginning the opponent's stock with a combo that sends them into the air, then reading their landing option and punishing with an attack that sends them offstage, then reading their recovery option and punishing with an attack that KOs them). Zero-deaths are related to infinites, but are not the same. While an infinite can continue forever regardless of damage percent, a zero-death must come to an end as the opponent will eventually be knocked too far away to continue comboing, if they are not finished before then. However, zero-deaths and infinites are functionally equivalent, since infinites are utilised to zero-death the opponent, with their only additional utility over zero-deaths being able to stall by continuing the infinite beyond KO percent, which all serious tournaments have a general blanket rule forbidding.
While combos of some sort are relatively common, zero-to-death combos require almost perfect timing and placement in order to properly work, and even a single missed hitbox can ruin a combo; owing to the particularly high hitstun and lack of DI in the original Super Smash Bros. compared to the future installments, zero-to-death combos are most frequently seen in the first game, though their high need for technical skill makes them rare sights at tournaments unless at high level play, where they are more often seen in demonstrations or friendlies.
Zero-to-death combos also vary in characteristics in the games; whereas the original game focuses on continued aerial combat, particularly with multi-hit attacks and similar traps, Super Smash Bros. Melee, with its lesser hitstun, relies on good movement and tech chasing. Combos in Super Smash Bros. Brawl are rare due to the ability to act out of hitstun, but the few that remain rely on continued chain throws and jab locks. In Super Smash Bros. 4, hitstun cancelling was removed and thus combos were restored, though due to its moderate falling speeds, combos in the game usually don't last more than 3-4 hits; this, combined with the removal of chain throws and the inability to lock opponents indefinitely, has led to repeatable zero-deaths becoming a rarity. Additionally, with patching now being possible, it is unlikely for repeatable zero-deaths to remain in the game long after their discovery.
In all Smash games, zero-to-death combos are a common subject of TAS videos; extensions of the zero-to-death combo also exist in these runs, such as having multiple characters perform the combo on one character, or making the combo have a particularly high number of glancing blows.
A rather easy to perform zero-to-death combo in a specific matchup is often responsible for creating hard counters. In Brawl, for example, Pikachu hard counters all the spacies and Captain Falcon, as it possesses a simple chain throw (with its down throw) that can bring each of them from 0% to over 100%, and end with an unavoidable up smash, which, if it doesn't KO, can then be followed up by a Thunder that will finish them off.
Notable examples[edit]
In Super Smash Bros.[edit]
- Every character apart from Samus is capable of pulling off a zero-death in their natural combos. In the case of Samus, she is unable to perform a zero-death because of a missing hitbox on her up aerial.
- Donkey Kong's grab release chain with his forward throw (cargo hold) works on most of the cast up to the point where a simple back-throw will KO. A video demonstrating this with Kirby can be viewed here.
In Super Smash Bros. Melee[edit]
- The Wombo Combo, while not a specific repeatable combo, is the most well-known zero-death combo pulled off in tournament play.
- The Ice Climbers can zero-death any character but themselves through wobbling when both Climbers are together. Compared to other zero-deaths in Melee, it is arguably much simpler to perform, and only requires the Ice Climbers to get a sometimes difficult initial grab to start it. Wobbling's effectiveness has been the center of controversy. Today, most tournaments have banned the technique in their rulesets. However, a similar, but more difficult chain throwing technique known as hand-offs can be done in some situations with similar results.
- In NTSC versions, Sheik's down throw can combo into itself and then flow into her sweetspotted up smash, which is one of the strongest in the game; this combo was notable for being one of the reasons why Sheik was considered the best character in the first five years of Melee's metagame.
- Ganondorf is capable of chain throwing most characters, like Pichu, Falco, and even several floatier characters (if done fast enough), with his down throw and then following it up with an unavoidable up smash (against floaty characters) or down smash/Wizard's Foot (against fast fallers). Depending on the opponent's DI, he may need to turn around in order to continue the combo. It can also be started with a short combo with Gerudo Dragon or a hit from Ganondorf's down aerial, depending on the victim's falling speed. Sheik can be zero-death down throw chain grabbed on Final Destination, ending with a forward smash.
- Jigglypuff's Up throw Rest (also known as the "space animal slayer"), a short and very effective zero-death combo that Jigglypuff can pull off on the fast fallers, which begins with an up throw, followed by a couple of up tilts and/or up aerials, finished with a Rest.
- Donkey Kong can zero-death fast fallers with his cargo up throw chain grab, combined with consecutive up aerial's, and then finish the combo with an unavoidable Giant Punch, or Smash attack. It can also end on a powerful aerial attack and/or a follow-up Spinning Kong to set up a lethal edgeguard/edgehog scenario.
- Marth can also zero-death Fox and Falco, most notably on Final Destination, beginning with an up throw chain grab to ~30%, which then leads to a string of: up tilt, up throw, up tilt - and finally, ending on a string of aerial attacks into a KO move. Falco must be pummeled once or comboed into a grab at 4%+ to execute this zero-death. Pivot grabs may also be necessary in order to complete this.
- Mr. Game & Watch can down throw Jigglypuff at zero and combo it into an unavoidable side special Judgement which, if a 9 is rolled, will zero-death on Final Destination. However, it is a 1-in-7 chance - only if the last two numbers rolled were not a 9. If either of them were, it will not zero-death. Mr. Game & Watch spawns into a match with 1 and 2 set as his last rolled numbers.
In Super Smash Bros. Brawl[edit]
- The Ice Climbers can pull off infinite chain grabs on every character but themselves at any damage percent when both Climbers are in play, by repeatedly grabbing the opposing character after the other Climber throws them. While it requires considerable technical skill to pull off, the best Ice Climbers players are capable of pulling them off to death with a degree of consistency. This is the main reason the Ice Climbers are considered the second best character in Brawl after Meta Knight, and why they are one of the most detested characters to play against in tournament.
- King Dedede can pull off a variety of infinite chain throws with his down throw on some characters. The most simple and significant, the standing down throw infinite, can be pulled off on Donkey Kong, Mario, Luigi, and Samus (though since Dedede must pummel to keep the down throw fresh enough to deal 6% or more damage on the latter three to keep the infinite working, they can easily escape it with sufficient button mashing if grabbed at low damage). Dedede can additionally pull off a ledge infinite on himself and Wolf when chain grabbing on a ledge or over a steep enough slope (though the infinite can very rarely be pulled off to death, as the prior pummel rule applies, as well as the fact that pummeling Dedede can cause an instant grab break). Additionally, Dedede has an advanced bufferred pivot grab infinite (where Dedede can buffer his farther-reaching pivot grab out of his down throw, and regrab the opponent without moving), which works on himself, Wolf, Bowser, Charizard, Ivysaur, Ganondorf, and most notably, Snake. However, the prior pummel rule also applies here, and since the buffered pivot infinite requires such insane tech skill to pull off to any significant consecutive amount, it has never saw real use in tournament play.
- Dedede can also easily infinite any character he can chain throw if he using his down throw against a wall, and he can easily zero-death these characters on a walk-off, by chain throwing the character up to the blast line. This is the main reason stages with permanent (or semi-permanent) walls and walk-offs, such as Shadow Moses Island and Bridge of Eldin, were immediately universally banned in Brawl's early competitive play.
- Diddy Kong can inescapably infinitely lock any character (except Luigi and the Ice Climbers when both Climbers are present) at any damage percent with the single nanner lock. The very high amount of tech skill required to pull it off and the highly situational setup of it prevent it from being consistently seen in tournaments, though Zinoto has gained fame from repeatedly pulling off the single nanner lock to death in tournament matches.
- Wario's down throw chain throw on Bowser, where Wario can bring Bowser to KO percent and then follow up with an unavoidable forward smash.
- Meta Knight's down tilt lock on a knocked down opponent, where his down tilt causes a knocked down opponent to flop helplessly a small distance forward. Meta Knight can repeatedly use down tilt in such a situation to keep the opponent down, and when he reaches the end of the stage, he can buffer a forward roll to get behind the opponent and a subsequent d-tilt to continue to lock to the other side of the stage. Meta Knight's d-tilt is weak enough to bring the opponent to KO percent without knocking them up, where Meta Knight can then finish the opponent with an unavoidable forward or down smash. This lock can be escaped with proper SDI.
- Falco's down throw chain throw to down aerial finish on Wolf. Due to Wolf's subpar vertical recovery and his 60-frame delay in meteor cancelling, he is sent down too far to where he must rely on the ledge to recover, where he can then be easily edge hogged. Wolf has a guaranteed way of surviving this by utilising a combination of DI and SDI to land on the stage, though this requires considerable reaction and tech skill to pull off. This is the main reason most players consider Falco to win the matchup, despite Wolf holding several significant advantages over Falco in other areas.
- The aforementioned Pikachu down throw chain throw and up smash to Thunder follow-up on the spacies and Captain Falcon.
- Pikachu's QAC lock technique, performed by footstooling an opponent (usually set up with a down throw to up tilt or up aerial) to knock them onto the ground, and then using Quick Attack back and forth to infinite them via a lock. This can be followed up with a forward smash if the opponent is already at KO percentage, or if not, a normal jab lock, which allows Pikachu to continue the combo until it reaches the end of the stage, in which a free forward smash or Thunder is possible. This technique is extremely situational and difficult to perform consistently, with only ESAM being known to attempt to utilize the technique in tournament matches.
- Marth's grab release chain grab on Ness and Lucas. While an infinite when done against a wall, Marth must move forward a little distance to continue the chain grab. However, it's possible for him to bring Ness and Lucas to a high enough percentage for his forward and down smash to KO (which are guaranteed follow ups on the grab release) before reaching the end of the stage.
- Zero Suit Samus can infinite R.O.B. through use of her down smash and footstool. After stunning R.O.B. through her down smash, she can footstool him to knock him down, and for some unknown reason, Zero Suit Samus gains no height from footstooling R.O.B. in this position, resulting in her landing immediately. This then allows her to restun R.O.B. with her down smash before he can get back up, allowing her to knock him back down with a footstool and continue the infinite indefinitely, before finishing it with one of her powerful aerials at KO percent. The infinite requiring considerable tech skill and reaction to pull off to a significant degree has kept it from seeing much use in tournaments, however.
- Ganondorf can potentially zero-death any character but the Ice Climbers after landing a Flame Choke, by repeatedly reading the opponent's getup reaction and chaining them with Flame Choke up to death percent, and then ending it with one of the guaranteed KOing followups (usually his dash attack or down tilt), or by reading the opponent's getup successfully a final time and landing a more powerful blow (such as his forward smash and down aerial). However, the extreme amount of consecutive reads required prevents Ganondorf players from actually pulling it off in tournament play.
- Snake can perform a zero-death similar to this with his down throw, where after using his down throw, he can read the opponent's getup to regrab them, and down throw again ad infinitum, then read the opponent's getup a final time at KO percent to end them with one of Snake's many powerful KO moves. However, with his down throw's higher damage output compared to Flame Choke, and the fact Snake can pummel between throws to keep his down throw's damage output from staling too much, Snake has to pull off much less consecutive down throws and reads to actually zero-death the opponent compared to Ganondorf. However, it still requires too much consecutive reads to be pulled off with any degree of consistency, and thus it is very rarely seen successfully pulled off in tournament play.
In Super Smash Bros. 4[edit]
- Similar to her infinite on R.O.B. in Brawl, Zero Suit Samus can infinite Robin in early versions of Super Smash Bros. for Nintendo 3DS through use of her down smash and footstool; she can land immediately after footstooling a stunned Robin, where she can then stun his getup with her Paralyzer, forcing a neutral getup, leading to stunning him with a down smash, allowing her to knock him back down with a footstool during his stun, continuing the process indefinitely before being able to end it with an unavoidable forward smash at KO percent. This infinite was patched out in Smash 3DS's 1.0.4 update and in Super Smash Bros. for Wii U's initial released version, where Zero Suit Samus now jumps high up after footstooling Robin like she does with every other character, making the infinite impossible to perform to any degree. However, another type of zero-to-death is possible with her down smash against certain fastfallers. At zero percent, if a sweetspotted down smash is connected, she can link up to 2 more and then neutral aerial them into another down smash, where she can true combo into a Flip Jump kick for a meteor smash KO.
- Due to the extremely high base knockback of the Mii Brawler's Piston Punch's first hit, it is possible to OHKO the lightest characters in the game with it, and since the move can be combo'd from down throw at low damages, it is possible for Mii Brawler to zero-death characters like Rosalina & Luma. This combo was patched out in version 1.0.6, where the first hit of the Piston Punch's knockback was reduced.
- Due to Oil Panic's one-hit KO potential after absorbing strong projectiles, and the ability for Mr. Game & Watch to combo into it at low damages out of his down throw, he can potentially zero-death any character by using his down throw to rising short-hopped Oil Panic. This combo is easy to perform, but it requires hard reads and a careless opponent to absorb strong enough projectiles (which few characters possess) to give Oil Panic OHKO power, and Oil Panic has to be filled soon enough to make it utilizable at 0%, so it is generally used as a low-percent KO setup rather than a zero-death, which is much more situational.
- Villager possesses a zero-death infinite combo using his woodchip from Timber, which has low knockback to cause jab resets. Immediately after the woodchip hits an opponent, Villager footstools them, then catches the woodchip again and throws it back down onto the opponent, footstools again, and continues the cycle. This combo can be reset with a neutral air which also causes a jab reset.
- Like the Villager, Pac-Man can zero-death infinite any character using his Bonus Fruits, although the key is the most effective as it deals the most damage. With frame-perfect inputs, Pac-Man can break full shields against a shielding opponent by tossing a key, dropping a Fire Hydrant, then doing a back aerial to completely deplete a shield. He can then follow-up by dropping the key, footstooling them, catching the key, then repeating the process, similarly to the Villager.
- Like in Brawl, Ganondorf can potentially zero-death any character in the game through repeated Flame Chokes, and then finishing through one of his guaranteed followups or reading the opponent's getup and punishing appropriately at KO percent. Due to Flame Choke's increased damage output, combined with Ganondorf's generally increased KO power and the removal of momentum cancelling making characters not live as long as they did in Brawl, Ganondorf has to pull off much fewer consecutive reads to successfully pull off a zero-death compared to Brawl, though it is still too much for a Ganondorf player to successfully perform this zero-death to any consistency.
- Meta Knight's down throw and dash attack can be followed up by a back aerial. By fastfalling the back aerial and landing before the third hit, Meta Knight can jab lock his opponent with two (or three) down tilts. As the opponent is forced into their neutral get-up, Meta Knight can land an up tilt or dash attack, both of which can lead into a chain of up aerials, before finishing off with a high-altitude Shuttle Loop and KOing them. If performed correctly, it is near-inescapable, as the opponent's only opportunity to escape is to tech after the back aerial, though this requires quick reflexes. Alternatively, Meta Knight can dash attack into an up aerial and then footstool the opponent, which provides no chance to tech. Unlike other zero-deaths in Smash 4, this one is comparatively easy to pull off, as it requires minimal set-up, and is therefore the only one that is considered realistic in a tournament setting. In patch version 1.1.5, this setup is near impossible to perform, due to the changes to his up aerial. However, this setup is still easy to perform against floaty characters.
- Bayonetta has two ways to perform zero-death combos. This can be avoided with DI and SDI efficiently (excluding the late hit of After Burner Kick Up, which cannot be DI'd). Some characters, such as Mr. Game & Watch, can escape those combos if they have invincibility frames on their special attacks before she uses another attack (Greninja can escape it with Shadow Sneak without invincibility frames). In patch version 1.1.6, this combo now only works if the opponent does not SDI and only DIs the wrong way (towards her) on Downward After Burner Kick due to angle changes and nerfs on her Witch Twist and Upward After Burner Kick.
- Starting with a down tilt to launch the opponent into the air, she can string into the first hit of her forward air, Witch Twist, a midair jump to regain Witch Twist for later, two After-Burner Kicks angled downward, another one hit of her forward air, and finally another Witch Twist, gradually bringing the opponent to the upper blast line.
- Starting with Witch Twist, which can also be followed up from Heel Slide or her down tilt, she can chain into a double jump to another Witch Twist, two After-Burner Kicks angled down, and finally two hits of her forward air, also raising the opponent to the upper blast line.
- Peach can perform zero-death combos against all characters except small ones by repeatedly using a footstool, float, fast-falled auto-canceled first hit of her up aerial ending with a footstool, float, falling neutral at the edge or down aerial to forward aerial. She has multiple set-ups that can lead into this. This requires quick reflexes and considerable skills to pull off. It also requires opponents to be locked with her neutral aerial at a low percentage to work against certain characters. In patch version 1.1.5, this setup only works against taller characters.
In Super Smash Bros. Ultimate[edit]
- Luigi can perform many zero-death combos with his down throw, the most infamous one being a combo where he uses his down throw, then uses his down aerial and falling neutral aerial repeatedly in succession before using his down aerial's grounded spike into the sweet spot of his Super Jump Punch. Due to this combo, Luigi's down aerial's grounded spike has been removed since version 2.0.0. The combo, however, is still possible if an up aerial or grab aerial is used instead, though it is more difficult to perform and less consistent overall.
- Pichu can perform zero-death combos by consecutively utilizing the loop hits of its back aerial while fastfalling (known as "lightning loops"), up tilts, and up aerials before using a down aerial spike to finish off the opponent.
- Isabelle can perform an infinite with her jab on the ledge, then can finish it with most of her moveset, including several KO moves. This zero-death is commonly called Wobbelle due to its similarity to wobbling.
- Diddy Kong was able to perform an infinite with his banana peel with an opponent on a platform by repeatedly throwing it downwards at them. It was patched as of update 8.0.0.
- Mario can perform many zero-death combos through his various ladder combos depending on character, stage choice, and Mario's own rage.
- Joker can perform an infinite by getting an opponent on a platform, then utilizing his dragdown up aerial to keep an opponent on the platform while taking damage.
- R.O.B. can perform zero-to-death combos with his Gyro, using Arm Rotor as a finisher.
- Sephiroth can perform a zero-death combo by releasing Gigaflare and comboing into a well-spaced forward smash. Unlike most conventional zero-death combos, the opponent does not need to be at zero to successfully pull off, and the combo is only strengthened by rage and (unique to Sephiroth) his Winged Form. Because of the extremely high startup of Gigaflare, this combo is difficult to perform in the neutral game, and is often used to punish a shield break or a reading an edge recovery.
- Byleth can perform a zero-death combo on Donkey Kong by performing Sword of the Creator on the latter, following up immediately with a neutral aerial, then repeating this sequence of moves a second time. Due to Sword of the Creator's startup being reduced by two frames in update 11.0.0, this is now a guaranteed true combo.
- Wario can perform combos into Wario Waft starting at 0. Depending on the charge at the time, mostly half charge to full charge and how much Rage he he has, he can zero-death the majority of the roster.
- Steve can utilize his "NIL" advanced technique with blocks along with his powerful aerials in order to zero-death an opponent in many unique ways, especially if he has access to diamond tools.
- Kazuya can utilize his down throw into Electric Wind God Fist, along with various other input attacks and aerials, in order to zero-death an opponent.
Gallery[edit]
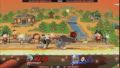
An example of a zero-to-death combo in SSB4, performed on Akiro (Sheik) by Tyrant (Meta Knight).
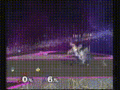
An example of a zero-to-death combo in Melee, performed by Marth.


External links[edit]
- Ice Climber chain grab zero-death in Brawl
- Ganondorf chaingrabbing Falco zero-to-death in Melee, using a down smash to setup the grab
- Zero Suit Samus zero-death in SSB4, and how to do it
- Peach turnip lock zero-death in SSB4
- Mii Brawler's zero-death against Rosalina
- Villager's zero-death
- Bayonetta's zero-death
- Another of Bayonetta's zero-death