Young Link (SSBU): Difference between revisions
(→Differences from {{SSB4|Link}} in SSB4: More detailed changelist about their differences. I'll finish it later.) |
|||
| Line 55: | Line 55: | ||
*{{nerf|It has a shorter duration (15-18 → 10-12).}} | *{{nerf|It has a shorter duration (15-18 → 10-12).}} | ||
Up tilt: | Up tilt: | ||
*{{change|Up tilt deals less damage (9% → 8%) and knockback (base 30/ scaling /122/130/124 → | *{{change|Up tilt deals less damage (9% → 8%) and knockback (base 30/ scaling /122/130/124 → (20/130/128/126). This hinders its KO power, but makes it better for combos.}} | ||
20/130/128/126). This hinders its KO power, but makes it better for combos.}} | |||
*{{buff|It has a longer duration (8-12 → 9-14) and less ending lag ( FAF 36 → 32), further improving its juggling and combo potential.}} | *{{buff|It has a longer duration (8-12 → 9-14) and less ending lag ( FAF 36 → 32), further improving its juggling and combo potential.}} | ||
*{{nerf|It has more startup (frame 8 → 9).}} | *{{nerf|It has more startup (frame 8 → 9).}} | ||
Revision as of 18:46, February 8, 2020
| Young Link in Super Smash Bros. Ultimate | |
|---|---|
 
| |
| Universe | The Legend of Zelda |
| Other playable appearance | in Melee |
| Availability | Unlockable |
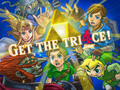
| Final Smash | Triforce Slash |
| “ | He’s back after 17 years! Young Link is faster than Link but he’s also lighter, making him easier to launch. | ” |
| —Super Smash Blog, Super Smash Bros. Ultimate Official Site | ||
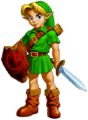
Young Link (こどもリンク, Young Link) is a playable character in Super Smash Bros. Ultimate. He was officially confirmed as playable on June 12th, 2018. Young Link is classified as fighter #22.
Fujiko Takimoto's portrayals of Young Link from The Legend of Zelda: Ocarina of Time and Majora's Mask were repurposed for Ultimate, with mostly returning voice clips from Super Smash Bros. Melee, and in addition to some new ones sourced from these games.
How to unlock
Complete one of the following:
- Play VS. matches, with Young Link being the 8th character to be unlocked.
- Clear Classic Mode with Link or any character in his unlock tree, being the 6th character unlocked after Snake.
- Have Young Link join the player's party in World of Light.
With the exception of the third method, Young Link must then be defeated on Great Bay.
Differences from Link in SSB4
Despite not being an Echo Fighter, Young Link is still a faster and lighter clone of Link. However, since Link has been heavily reworked to match his appearance in Breath of the Wild, Young Link effectively functions as a stand-in for Link’s older appearances. Furthermore, as Young Link is based off of Ocarina of Time rather than Twilight Princess, he is closest to Link’s appearances in Smash 64 and Melee. He retains moves and characteristics from Melee that Link himself no longer possesses, such as a rapid jab, dash attack, and Hookshot. Their moves largely appear and function similarly, but some of them have different attributes.
Aesthetics
 Young Link is based on The Legend of Zelda: Ocarina of Time rather than The Legend of Zelda: Twilight Princess. This means that Young Link’s clothes are much brighter and less shabby.
- Young Link wields the Kokiri Sword and Deku Shield instead of the Master Sword and Hylian Shield.
- Young Link's on-screen appearance, taunts, idle poses, and two of his victory animations are different from Link's.
Attributes
- Young Link is shorter than Link. While this does make him harder to hit, it also results in him having less reach in his attacks.
 Young Link will sometimes hold his Deku Shield to the side during his walking and idle animations. This makes it less reliable for blocking projectiles.
- Young Link's Kokiri Sword has less of a disjointed range advantage on his attacks than Link, which gives him inferior range when combined with his shorter height.
 Young Link's air speed is faster than Link's (0.88 → 0.966).
- Young Link walks faster than Link (1.188 → 1.26).
- Young Link dashes faster than Link (1.3944 → 1.749).
- Young Link falls faster (1.6 → 1.8) than Link.
- Young Link's traction is significantly higher than Link's (0.064 → 0.105).
- Young Link has a greater jump height than Link.
- Young Link deals less knockback for most of his attacks. This overall weakens his KO potential in comparison to Link, but it also grants Young link access to new combos.
- Unlike Link, Young Link can wall jump.
- Young Link's Hookshot is shorter than Link's Clawshot, reducing its utility as a recovery tool.
- Young Link is significantly lighter than Link (104 → 88). While this drastically worsens his endurance for horizontal and vertical survival, his faster falling speed lessens his otherwise reduced weakness to combos.
- Except for the downward throw, Young Link releases items 1 frame later than Link does then throwing them (7/9/11/4/5 (forward/backward/up/dash/drop) → 8/10/12/5/6).
- Young Link releases heavy items 1 frame earlier than Link when throwing them either forward or backwards (20 → 19).
Ground attacks
Neutral attack:
- Young Link's neutral attack can be followed by neutral infinite and a finisher, unlike Link's.
- His basic jab deals less damage than Link's (3%,3%,4% → 2%, 1.5%, 3.5%), total (10% → 7.5).
- The first hit has less startup lag than Link's (frame 7 → 4) and transitions into the second hit faster (10 → 8), which transitions faster into the third hit (frame 10 → 9). All hits also have less ending lag (FAF 27 → 18, (hit 1), FAF 21 → 17 (hit 2) , FAF 37 → 36 (hit 3)).
Forward tilt:
- Forward tilt has noticeably less startup lag (frame 15 → 10 and less ending lag (FAF 38 → 34), making it safer to use.
- It deals less damage with a sourspot at the tip of the Kokiri Sword (13% → 12%/12/11%) and much less knockback (base 55/82 scaling → 30/25/85), KOing much later than Link's.
- It has a shorter duration (15-18 → 10-12).
Up tilt:
- Up tilt deals less damage (9% → 8%) and knockback (base 30/ scaling /122/130/124 → (20/130/128/126). This hinders its KO power, but makes it better for combos.
- It has a longer duration (8-12 → 9-14) and less ending lag ( FAF 36 → 32), further improving its juggling and combo potential.
- It has more startup (frame 8 → 9).
Down tilt:
- Down tilt has less startup (frame 11 → 8) and ending lag (FAF 30 → 26), as well as less knockback (base 90/scaling 30 → 80/25), making it better for combos.
- However, it doesn't have a meteor smash hitbox, making it useless for edgeguarding and reducing its versatility.
- It deals less damage and has sourspots (11% → 10%/9%/7%).
- Instead of using a extended hitbox, it uses three unextended hiboxes that are overall larger (3.1u → 3.4u, 3.4u, 3.0u).
Dash attack:
- Young Link has a different dash attack: instead of performing the Jump Attack from Ocarina of Time, he performs a lunging downwards slash.
- It has much less startup (frame 20 → 8) and ending lag ( FAF 57 → 35), making it much safer.
- It has a shorter duration (20-23 → 8-10).
- It deals less damage (14%/13%12% → 11/10%/10%) and less knockback, (base 70/85/85 scaling 85/85/77→ 70/70), making it worse for KOing. It also has range due to Young Link not jumping.
Smash attacks
Forward smash:
- The first hit has less ending lag (FAF 52 → 48) when not followed into the second.
- The second hit has less startup ( frame 12 → 11) and much less ending lag (FAF 68 → 50).
- It deals less damage (7%/7%/14% → 6%) (hit 1), (13%/13%/12%/12% → 12%/10%/12% (hit 2) without a hitbox on the first hit that deals 14% and the second hit has less base knockback and more knockback scaling, but wasn't compensated enough (base 85/scaling 89 → 43/115), hindering its damage racking and KO potential.
- However, the hitboxes in the first hit have less base knockback with its knockback scaling unchanged (base 47 → 35/40), allowing it to connect better into the second hit.
Up smash:
- It has less ending lag (FAF 78 → 70).
- The first two hits have a slightly shorter duration (10-15 → 10-14 (hit 1), 25-30 → 25-29)
- The first and third hits deal less damage (4% → 3%) (hit 1) (11%/10%/9% → 8%/7%/8%/8%/) and the knockback in the final hit wasn't fully compensated (base 60/ scaling 96 → 75/108), hindering its KO potential.
Down smash:
- Unlike Link's, the first hit is a semi-spike like the second hit, making it better for edgeguarding.
- Both hits deal less damage (14%/17%/16% → 13%/10%/13%) (hit 1) (12%/12%/11%/10% → 12%/9%/12%) (hit 2) and knockback (base 40/88 → 30/90 (hit 1), 80/63 → 25/90), hindering their KO potential.
Aerial attacks
- All aerials have less noticeably landing lag (10 frames → 6 (neutral, back), 12 → 6 (forward), 23 → 14 (up), 32 → 17), making them harder to punish if not autocanceled.
Neutral aerial:
- Young Link's neutral aerial autocancels earlier than Link's neutral aerial (frame 36 → 32). Because of this, unlike Link's , it can autocancel in a short hop.
- It has less startup (frame 7 → 4).
- Young Link's neutral aerial has a shorter duration (7-31 → 4-21), causing it to have six more frames of ending lag than Link's version despite the earlier FAF (FAF 39 → 36).
- Unlike Link's, the clean hit of Young Link's version doesn't have sourspots on his leg.
- It deals less damage (11%/9% → 10%) (clean), (6% → 5%) (late) with the clean hit's knockback mostly (but not fully) compensated (base 22/scaling 100 → 20/108), causing it to KO slighly later than Link's.
- The late hit has less base knockback (base 15 → 10). Combined with its lower damage, this allows it to combo and lock for longer.
Forward aerial:
- Unlike Link's, it's interruptible, giving it less ending lag (FAF 50 → 41).
- {{nerf|It deals much less damage (11% → 6%) (hit 1) (13% → 8%) and the second hit has less knockback than the first hit of Link's version (base 20/ scaling 130 → 45/125).
- However, the first hit has more base knockback but drastically less knockback scaling and uses the autolink angle instead of launching diagonally (base 20/ scaling 130 → 25/30), allowing it to connect better into the stronger second hit.
- The second hit comes out faster (frame 26 → 24).
- It autocancels earlier (frame 51 → 41). Unlike Link, this allows it to autocancel in a full hop.
Back aerial:
- Both hits deal more damage, increasing its damage output (3% → 5%) (hit 1), (5% → 7%) (hit 2), (8% → 12%) (total)
- The second kick has noticeably less base knockback and much more knockback scaling (base 70/ scaling 70 → 40/102). This improves its KO potential, but this also means its combos will stop working earlier.
- The second hit has a shorter duration (18-22 → 18-20), giving it one more frame of ending lag despite the shorter FAF (FAF 31 → 30).
Up aerial:
- It has noticeably less startup lag with a longer active duration (11-40 → 5-49), making it safer to use and decreasing its ending lag compared to the hitbox despite the later FAF (FAF 59 → 60).
- {{nerf|The clean hit has more base knockback, but less knockback scaling, KOing slighly later (base 25/ scaling 93 → 25/85).
- The late hit deals less damage and knockback (13% → 12%) (base 18/ scaling 88 → 25/82. * However, the reduced damage and knockback makes slightly better for juggling when combined with its lower ending lag.
- Because of its longer duration, it autocancels later (47 → 56). Unlike Link's, it cannot autocancel in a full hop and can only autocancel in a double jump.
Down aerial:
- Down aerial does not have a meteor smash hitbox.
- The clean hit has a shorter duration, being halved, compared to Link's version (14-19 → 13-15).
- The late hit deals less damage (18% → 15%) and knockback (base 30/ scaling 80 → 30/83).
- {{buff|The clean hit deals more damage (15% → 18%) and knockback (base 30/ scaling 80 → 30/83) than Link's version.
- It has less startup (frame 14 → 13).
Throws and other attacks
- All grabs have less ending lag (FAF 62 → 53 (standing) /(66 → 61 (dash) /67 → 56 (pivot)
Pummel:
- It has more hitlag (4 frames → 13) but much less startup (frame 10 → 1) and ending lag (16 → 7) making it faster overall, to the point it's one of the fastest pummels.
- It deals less damage (2.1% → 1%)
Forward throw:
- {{nerf|The throw hitbox deals less damage (3% (collateral),(4%→ 3%) (throw) total (7% → 6%)
- However, it launches at the Sakurai angle and has slighty less base knockback but much more knockback scaling (base 50/ scaling 120 → 48/184), making it among the strongest forward throws and allowing it to KO at around middleweights at around 130% near the ledge.
- Edge attack has Young Link swipe his sword in front of himself, unlike Link who stabs forward.
Special moves
- Fire Arrows deal more knockback than Link's arrows, and launch upwards instead of away, increasing his combo ability and making the move safer on hit up close. It also has a slightly faster startup than Link's Hero's Bow.
- Fire Arrow deals flame damage (hence the name).
- Fire Arrows travel less distance.
- Instead of the Gale Boomerang, Young Link retains his standard Boomerang, which does not have a windbox.
- Boomerang travels less distance compared to Link's Gale Boomerang.
- Boomerang can damage opponents on the way back.
- Spin Attack lands multiple hits instead of one, allowing it to trap opponents within its hitboxes, and the late hitboxes inflict more damage.
- Nonetheless, it is still weaker than Link's clean Spin Attack in damage. Also, it is not a viable KO move unlike Link's.
- Young Link's Bomb looks slightly different from Link's, as it is smaller; it has a smaller projectile hitbox but is slightly harder to track visually when thrown.
- Young Link's bombs have four hitboxes as opposed to Link's two, increasing their hitstun and combo ability.
- Young Link's bombs do more damage to opponents than Link's, given that all of their hitboxes connect.
- The multi-hit property of the bombs means that their explosion can affect Young Link more often in close range.
- Young Link's Bombs travel a shorter distance when thrown.
- For Triforce Slash, the final flourish and slash have altered animations, as Young Link rears his hand back and does an outward slash, instead of a stab.
Changes from Super Smash Bros. Melee
Young Link has been significantly buffed in the transition from Melee to Ultimate. Young Link's speed has been improved from Melee not just in terms of his mobility but also his attacks. Many of his attacks have decreased ending lag and his aerials have heavily decreased landing lag (even compared to their L-canceled counterparts). Some of his moves have also been reworked to make them more reliable and effective, such as his up smash and his forward and back aerials, and the weakening of SDI heavily benefits his multi-hit attacks.
However, he has also seen a few nerfs. Some of Young Link's attacks deal less damage, while others have shorter durations, and a few of his attacks even have slightly increased startup and ending lag. His aerial mobility is also worse (especially when relative to the cast), and his down tilt and down aerial no longer have meteor smash hitboxes, meaning that Young Link gains no benefits from the removal of meteor canceling. The changes to air dodging also hinder his mobility, as wavedashing and wavelanding are significantly less effective.
Overall, Young Link is a significantly better character than he was in Melee, with professional players such as Tweek and T demonstrating Young Link’s strong potential and, as a result, he is commonly considered to be a high tier character in spite of currently having low tournament representation.
Aesthetics
- Due to the game's graphical improvements, Young Link's design is drastically more detailed, particularly in his hair. His colors are more subdued than they were in Melee, while his eye color is more vibrant.
- The Kokiri Sword now has a bronze hilt and leaves behind new sword trails:
- All standard sword attacks have a white trail with blue accents, as opposed to a pure white trail in Melee.
- Spin Attack has a yellow and blue trail, similar to the one Link had in SSB4, instead of purple as in Melee.
- Young Link is much more expressive. He appears angry while attacking, and smiles in his taunts and one of his victory poses.
- Young Link has been updated with universal features introduced in Brawl and SSB4.
- Young Link now has an on-screen appearance, a Boxing Ring title, a Palutena's Guidance conversation, and two new taunts. His taunt from Melee has been moved to his down taunt and executes significantly faster.
- Young Link has gained three additional alternate costumes, bringing his total up to the standard eight. His Dark Link costume now has the same color scheme as Link and Toon Link's corresponding counterparts, making the costume appear virtually almost identical to Dark Young Link in Hyrule Warriors: Definitive Edition, albeit with gray hair.
- Young Link uses various voice clips for any move between the third hit of his neutral attack, any tilt attack, his dash attack, and any aerial attack (except grab aerial), and always uses specific clips for each of his smash attacks.
- Young Link has new voice clips for taking medium and heavy knockback, when Star KO'd, when waking out of sleep status when not suffering any knockback, and a second KO voice clip.
- Young Link also has a voice clip when emerging from underwater, although it now uses the voice clip previously used for his taunt in Melee, which now uses a new voice clip.
- All sword attacks make a standard slash sound effect on hit, instead of a punch/kick sound effect like in Melee.
- Young Link's victory pose where he adjusts his belt is slightly different. After adjusting his belt, he holds the Kokiri Sword and flicks his nose with his thumb.
Attributes
- Young Link is relatively bigger than in Melee. This increases his range, but also increases his hurtbox.
- Like all characters, Young Link's jumpsquat animation takes 3 frames to complete (down from 4).
- Young Link walks faster (1.2 → 1.26).
- Young Link runs faster (1.6 → 1.749).
- His initial dash speed is much faster (1.72 → 2.09).
- Young Link's air speed is slower (1 → 0.966), one of the few exceptions to returning veterans. It has gone from the 6th highest air speed to only the 60th highest.
- Young Link's falling speed has been reduced (2.13 → 1.8), but is now faster relative to the roster.
- Young Link's midair jump is significantly higher. This improves his ability to recover back to the stage.
- Young Link's fast falling speed is much more in line with the rest of the roster (2.2 → 2.88), in comparison to his almost unnoticeable fast fall in Melee. This greatly increases the versatility of his air game, and allows him to use various mixups like other characters.
- Young Link's Deku Shield now protects him from projectiles while walking, similar to the shields of all other Link incarnations.
- Young Link is slightly heavier (85 → 88), improving his survivability, while still being less susceptible to combos than in Melee due to the changes to hitstun and his decreased falling speed.
- The removal of meteor canceling harms Young Link more than any other returning veteran, as he no longer has access to any meteor smashes of his own, whereas his endurance is significantly hindered against opponents' meteor smashes.
- Both rolls have noticeably less ending lag (FAF 38 → 29 (forward), 34 (back)), making them safer to use for repositioning and escaping pressure.
- Both rolls grant less intangibility (frames 4-19 → 4-14 (forward), 4-15 (back)).
- Spot dodge has more startup (frame 2 → 3) and ending lag (FAF 23 → 25).
- Air dodge has less startup (frame 4 → 2), making it better for escaping combos. Due to its altered mechanics, it also no longer causes helplessness, and allows Young Link to sweetspot edges with directional air dodges.
- Air dodge grants less intangibility (frames 4-29 → 2-26 (neutral), 2-19 (directional)), and due to the altered mechanics, directional air dodges have more landing lag (10 frames → 11-19) and are significantly less effective for wavedashing. Young Link can also no longer use his grab aerial out of an air dodge, hindering his recovery.
Ground attacks
- The increased shieldstun for ground attacks makes Young Link's slightly to moderately safer on shield, especially his tilt attacks (although not his smash attacks due to their increased ending lag).
- Neutral attack:
- The first and second hits deal less knockback (10 base/60 scaling → 25/20 base/25/15 scaling), and launch opponents towards Young Link with the farthest hitboxes (361° → 180°), akin to other neutral attacks. This allows them to connect more reliably.
- The first hit transitions faster into the second hit (frame 10 → 9), which transitions faster into the third hit (frame 11 → 9).
- All hits have less startup (frame 6 (first hit)/frame 7 (second & third) → 4/6), with the first and second's total duration decreased as well (FAF 20/18 → 18/17).
- The third hit has greatly increased base knockback (10 → 75/70), and launches at a lower angle much like Link's (361° → 30°), increasing its safety on hit at low percents and allowing it to set up tech-chases.
- Neutral infinite has a different animation: rather than repeatedly stabbing at different angles, Young Link performs a flurry of slashes.
- Neutral infinite has faster startup (frame 10 → 6), a shorter gap between hits (7 frames → 2), and deals less knockback (10 base/40/50/60 scaling → 8/15) while gaining a hitstun modifier of 2 on each hit, allowing it to connect much more reliably. Like all neutral infinites since Smash 4, it has also gained a finisher in the form of an ascending slash, making it significantly safer.
- Neutral infinite has gained a lower hitlag multiplier (0.5×) and SDI multiplier (0.4×), which alongside the changes to DI and SDI from Melee to Ultimate make it much harder to escape from, increasing its reliability for racking up damage.
- Neutral attack deals less damage (3% → 2% (hit 1), 2% → 1.5% (hit 2), 5% → 3.5% (hit 3), 1% → 0.3% (infinite)).
- The first three hits have shorter durations (frames 6-8 (hit 1), 7-9 (hit 2), 7-11 (hit 3) → 6-7 (all)).
- The third hit has more ending lag (FAF 33 → 36), and decreased knockback scaling (100 → 70), causing it to KO later from center stage despite its higher base knockback.
- Like most neutral attacks from Brawl onward, the full sequence of hits can be unleashed by simply holding the attack button instead of pressing it multiple times. Likewise, the neutral infinite can be looped by holding the button instead of having to mash it.
- The second hit can transition into the neutral infinite if the attack button is pressed three times in quick succession, with the third hit now being activated by holding it or pressing it at a slower rate. In Melee, it would only transition into the infinite if the button was pressed more than three times.
- The infinite has gained a shieldstun multiplier of 6×. This allows it to lock opponents into their shields between each hit, and thus pressure them more effectively, but also allows them to cancel shieldstun and punish Young Link more easily if they shield 10 hits or more.
- Forward tilt:
- Forward tilt has less startup lag (frame 11 → 10).
- It has more vertical range.
- It has higher base knockback (5/2 → 30/25), although with its knockback scaling reduced to compensate (100 → 85). This increases its safety on hit at low percents, while keeping its KO ability at high percents.
- The weaker sourspots have been replaced by sweetspots (12%/11%/10%/10% → 12%/11%/12%), making the move's power more consistent.
- The sweetspot has a higher hitlag multiplier (1.2×).
- Up tilt:
- Up tilt has a shorter duration (frames 9-15 → 9-14) and more ending lag (FAF 30 → 32), hindering its combo potential.
- It has an altered animation, with Young Link slashing in a faster and heavier arc, akin to Link in Brawl and Smash 4.
- Down tilt:
- Down tilt has much faster startup (frame 14 → 8), with its total duration reduced as well (FAF 32 → 26). This makes it safer and more reliable as a combo starter.
- It has considerably reduced knockback scaling (50 → 25), allowing it to combo for longer.
- It has a shorter hitbox duration (frames 14-16 → 8-9), and less vertical range.
- It launches at a consistent angle (280°/70° → 80°). While this slightly improves its combo potential, it most notably removes its ability to meteor smash.
- Dash attack:
- Dash attack has less ending lag (FAF 40 → 35).
- It has significantly higher base knockback (10 → 70), increasing its safety on hit at lower percents.
- It has less sourspots (11%/10%/10%/10% → 11%/10%/11%), making its power more consistent.
- It has more startup lag with a shorter duration (frames 7-12 → 8-10).
- It has lower knockback scaling (100 → 70), reducing its KO ability.
- It launches at higher angles (361° → 45°/50°/55°).
- The sweetspot has a higher hitlag multiplier (1.2×).
- Forward smash:
- The first hit has less ending lag (FAF 50 → 48).
- The second hit's damage output is properly affected by charging.
- Due to the changes to jostle mechanics, the second hit of forward smash no longer misses when Young Link is extremely close to the opponent, improving its reliability.
- Both hits have a shorter duration (frames 15-17 → 15-16 (hit 1), 10-13 → 10-11 (hit 2)).
- The first hit deals less damage (10% → 6%), and no longer has set knockback (40 set/100 scaling → 35/40 base/15 scaling), hindering its reliability at higher percents.
- The second hit has more startup (frame 10 → 11) and ending lag (FAF 40 → 50).
- The second hit launches at a higher angle (361° → 48°) with more base knockback (30 → 43), but less knockback scaling (120 → 115), hindering its KO potential if not used near the edge.
- The first hit has different angles (75° → 65°/50°).
- The second hit has a higher hitlag multiplier (1.5×).
- The second hit's two previous sourspots have been merged into one, with its damage being the average of both (11%/9% → 10%).
- Up smash:
- Up smash's first two hits have lower hitlag (0.6×) and SDI multipliers (0.5×), and use weight-independent knockback, which alongside the changes to DI and SDI allows them to connect much more reliably.
- The first two hits have less startup lag and longer durations (frames 11-14/26-28 → 10-14/25-29).
- The second hit deals more damage (2% → 3%), which alongside the changes to stale-move negation increases the move's total damage (12.1%/11.19% → 14%/13%).
- The third hit deals much more knockback (70 base/70 scaling → 75/108), allowing it to KO at realistic percents.
- Up smash has significantly more ending lag (FAF 52 → 70), removing its combo potential.
- The third hit has more startup lag (frame 40 → 41).
- The third hit no longer has a late hit that deals more damage (8%/9% → 7%/8%) and is a semi-spike (30° → 100°), removing its edgeguarding potential.
- Down smash:
- Down smash's sourspots deal more damage (7% → 10% (hit 1), 6% → 9% (hit 2)), and thus have increased knockback.
- The first hit no longer has hitboxes that launch opponents vertically (30°/70°/70°/30° → 30°), improving its consistency in edgeguarding and KOing.
- It has more ending lag (FAF 42 → 50).
- Both hits have a shorter duration (frames 9-12 → 9-10 (hit 1), 21-23 → 21-22 (hit 2)).
- The second hit no longer has a hitbox on Young Link's foot, preventing it from hitting opponents in front of him.
Aerial attacks
- All aerials have significantly less landing lag (15 frames → 6 (neutral, forward, back), 30 → 14 (up), 50 → 17 (down)) having even less than when L-canceled in Melee.
- The decreased shieldstun for aerial attacks makes Young Link's slightly to moderately less safe on shield compared to their L-canceled versions in Melee, despite their reduced landing lag.
- Neutral aerial:
- Neutral aerial deals less damage (12% → 10% (clean), 8% → 5% (late)), with knockback not fully compensated on the clean hit (15 base/100 scaling → 20/108), slightly hindering its KO potential.
- However, this allows the late hit to combo for longer.
- Forward aerial:
- Forward aerial is no longer a single degrading hit, and instead hits twice like Link's. It deals more damage if both hits connect (12%/11%/9% (clean), 8%/7%/5% (late) → 6% (hit 1), 8%/7% (hit 2); 14%/13% total), and has increased knockback on the second hit (5 base/100 scaling → 45/125), improving its KO potential.
- It has less ending lag (FAF 47 → 41).
- It always launches opponents in the direction Young Link is facing, even if they are hit from behind, making it more reliable for edgeguarding.
- The first hit can lead into combos if Young Link lands before the second hit comes out, which gives him more options to rack up damage or secure a KO.
- Forward aerial has a much shorter hitbox duration (frames 14-32 → 14-15 (hit 1), 24-25 (hit 2)).
- It launches at a consistent angle (361° (clean), 76° (late) → 48°).
- The second hit has a higher hitlag multiplier (1.2×).
- Back aerial:
- Back aerial's first hit has set knockback (0 base/100 scaling → 50/20 set/100 scaling) and launches at higher angles (361° → 75°/72°/70°), allowing it to connect more reliably into the second hit.
- It always launches opponents opposite the direction Young Link is facing, even if hit from the front, making it more reliable for edgeguarding.
- Both hits have shorter durations (frames 6-9 → 6-8 (hit 1), 18-23 → 18-20 (hit 2)).
- The first hit deals less damage (7% → 5%).
- The second hit deals much more knockback (15 base/100 scaling → 40/102), improving its KO potential, but hindering its combo potential.
- The second hit has a higher hitlag multiplier (1.2×).
- Up aerial:
- Up aerial has lower knockback scaling (85 → 82), slightly hindering its KO potential.
- It has smaller hitboxes (4.8u/2.4u → 3.4u/2.6u). Combined with the changes to jostle mechanics, landing an up aerial on a grounded opponent is much more difficult than before.
- Down aerial:
- Down aerial's early hit deals more damage (14%/16% → 18%).
- It no longer has a flame hitbox near Young Link's head that deals more damage and is a meteor smash, removing its extreme edgeguarding potential against opponents hit from below.
- The late hit deals less damage (17%/21% → 15%).
- The move deals less knockback (40/70 base/100 scaling → 30/83), especially with the late hit due to its decreased damage, significantly hindering its KO potential.
- It has a higher hitlag multiplier (1.2×).
- Grab aerial:
- Grab aerial has less startup with a longer hitbox duration (frames 11-15 → 9-16).
- It has significantly less landing lag (30 frames → 8) and no longer causes helplessness, making it much more useful offensively.
- It launches at a higher angle (361° → 60°) and has gained a hitstun modifier of 4, which alongside its reduced landing lag grants it combo potential even up to high percents.
- It deals less damage (5% → 4%).
- However, it deals additional shield damage to compensate (0 → 1).
- It causes the Hookshot to retract upon hitting an opponent, hindering its utility in battles with multiple opponents.
- It has more base knockback (40 → 70), but even less knockback scaling (40 → 20), no longer KOing opponents even at 999%.
- It has a lower hitlag multiplier (0.8×).
- It is now affected by stale-move negation, reducing its damage output with consecutive uses, but allowing it to refresh other moves.
- Due to universal changes, grab aerial functions like a tether recovery rather than a wall grapple.
- This allows it to be shot much faster to ledges if used close enough to them, leaving opponents with a shorter window to edgeguard Young Link.
- However, this removes its ability to grapple to any wall, reducing its versatility.
Throws and other attacks
- Grabs:
- Standing and dash grabs have significantly less ending lag (FAF 85 → 53 (standing), FAF 95 → 61 (dash)), leaving them much less punishable if they miss.
- Both grabs have longer durations (4 frames → 7), and the hitbox on the Hookshot's end now affects aerial opponents.
- Standing grab has one frame more startup lag (frame 11 → 12).
- Pummel:
- Pummel deals more hitlag (4 frames → 13), but has significantly less startup (frame 10 → 1) and ending lag (FAF 26 → 7), shortening its duration.
- It deals much less damage (3% → 1%).
- Forward and back throw release the opponent faster (frame 16 → 13), although with their total duration unchanged, and the former's first hit is faster (frame 12 → 11). This reduces the time for the opponent to DI them properly, but increases their ending lag.
- Forward throw:
- Forward throw launches at a slightly lower angle (55° → 52°), and deals much more knockback (25 base/110 scaling → 48/184), allowing it to KO under 170% at the edge.
- Back throw:
- Back throw deals much more knockback (24 base/110 scaling → 45/140), allowing it to KO under 200% at the edge.
- Up throw:
- Up throw releases the opponent slower (frame 27 → 29) with its total duration unchanged, increasing its combo potential at low percents.
- It has more base knockback (18 → 30), but less knockback scaling (230 → 210). This further improves its combo potential at low percents (due to its previously lacking hit advantage), but hinders its KO potential at high percents.
- Young Link jumps a bit higher during up throw.
- Down throw:
- Down throw deals much more knockback (60 base/50 scaling → 70/115), drastically hindering its combo potential beyond mid percents. Most notably, it no longer has a guaranteed KO confirm into an up aerial at high percents.
- Its speed is no longer weight-dependent, further diminishing its combo ability on lightweights, while still being worse on heavyweights due to its increased knockback.
- Its damage values have been redistributed (2% → 3% (hit 1), 4% → 3% (throw)).
- It launches opponents at a slightly more horizontal angle (90° → 86°).
- Floor attacks:
- Floor attacks deal more damage (6% → 7%) and shield damage (1 → 8) per hit, with minimally compensated knockback scaling (50 → 48).
- Their angles have been altered (361° → 48°).
- Edge attack:
- Edge attack deals more damage (8% → 9%) and no longer has set knockback (90 set/100 scaling → 90 base/20 scaling).
Special moves
- Due to the changes to Perfect Shielding, Young Link's projectiles can no longer be reflected back at him by any character.
- The decreased shieldstun for projectiles hinders their safety at close distances.
- Fire Arrow:
- Fire Bow has been renamed to Fire Arrow.
- Fire Arrow has one frame less ending lag (FAF 39 → 38).
- It can be B-reversed.
- Arrows fly much further, especially when uncharged. This greatly increases Fire Arrow's zoning and pressing ability, making it a more essential part of Young Link's toolkit.
- Arrows have more knockback scaling (30 → 70), increasing their combo potential despite launching at a slightly lower angle (80° → 78°).
- They stay active for a shorter period of time.
- They deal less damage (8%-15% → 4%-12%), and have received negative shield damage (0 → -2.5).
- The move can no longer be held indefinitely upon reaching full charge, instead firing the arrow automatically if held for more than three seconds.
- Fire Arrows are ablaze when being charged and fired, compared to Melee where the arrow does not light up at all.
- Fire Arrows have been redesigned to more closely resemble the artwork found in the manual for Ocarina of Time.
 Ghost Arrow glitch has been removed.
- Boomerang:
- Boomerang is bigger, and Young Link throws it vertically instead of horizontally, increasing its coverage immensely.
- It can be B-reversed.
- It deals much less damage at point-blank range (16% → 11% (normal), 19% → 13.2% (smash input)), and has received negative shield damage (0 → -5.5 (clean), -3.5 (late), -1 (return)), effectively dealing half its usual damage to shields.
- However, its knockback has not been compensated, improving its combo potential.
- Boomerang cannot be angled as sharply as in Melee; however, this makes its more useful angles easier to use.
- Young Link has a new throwing animation for the boomerang.
- The boomerang superjump and chain dance glitches have been removed.
- Spin Attack (grounded):
- Grounded Spin Attack has less ending lag (FAF 80 → 71), while its last hit is slower (frame 44 → 49), allowing it to combo reliably into aerial attacks even up to high percents.
- Its linking hits have set, weight-independent knockback (80/60 base/40 scaling → 55/10 set/100 scaling), and lower hitlag (0.4×) and SDI multipliers (0.5×), which combined with the weakening of SDI allows them to connect much more reliably.
- The last hit has higher base knockback (60 → 71), but lower knockback scaling (100 → 85), and launches at a higher angle (80° → 84°), further improving its combo potential.
- It can be charged to increase its damage and knockback, as with the other incarnations of Link.
- Grounded Spin Attack has one frame more startup (frame 8 → 9), and its linking hits have a slightly longer duration (frames 8-43 → 9-45), but a slower rehit rate (3 → 4). As a result, it deals a total of 11 hits instead of 13, reducing its total damage when uncharged despite the changes to stale-move negation (13.74% → 13%).
- The last hit has a higher hitlag multiplier (1.8×).
- Spin Attack (aerial):
- Aerial Spin Attack has increased vertical distance, preserves much more momentum after being used, and Young Link can drift more in the air during its animation.
- Like most recovery moves from Brawl onward, it sweetspots the edge much earlier, making it safer to recover with.
- The multi-hits have a lower SDI multiplier (0.3×), weight-independent knockback, and use the autolink angle (367°), which alongside the changes to DI and SDI allows them to connect much more reliably.
- It deals more total damage due to the changes to stale-move negation (11.19% → 12%).
- The last hit has a higher hitlag multiplier (2×).
- Bomb:
- Like with Link's Bombs in Smash 4, the explosions from Young Link's bombs do not damage him if they hit an opponent.
- The bombs travel further when thrown.
- Their multi-hits accumulate much faster, making their damage more consistent.
- Similarly to Link in Smash 4, Young Link can "soft-toss" his Bombs, which lets him lay them on the floor with a throw without having them explode. This allows Young Link to set traps on the floor to hinder his opponent, and also allows for mindgame potential. Additionally, Young Link can Z-drop Bombs without them exploding much easier than in Melee.
- Bomb's damage output is lower, even with all hits connecting (13% → 8%).
- The bomb dash glitch has been removed.
- Young Link now has a Final Smash, that being Triforce Slash. Visually, it resembles Link's version from Smash 4, but it has completely unique animations for attacks, including a shield bash, kicks, and a different finisher in an outward slash.
Update History
Young Link received a mix of buffs and nerfs in, but was buffed overall. The nerfs to the shield damage of various projectiles in update 3.0.0 affect Young Link more negatively than most other characters. However, the version 7.0.0 update gave Young Link increased knockback on many of his attacks, allowing for more KO options.
- Fixed the Invisible Bomb glitch.
- Fire Arrow has received negative shield damage (0 → -2.5).
- Boomerang has received negative shield damage (0 → -5.5 (clean), -3.5 (late), -1 (return)), effectively dealing half its usual damage to shields.
 An unknown bug was created where opponents would unexpectedly teleport in any direction upon releasing Boomerang.
- Boomerang teleportation glitch fixed.
- Young Link can now shield SDI if a projectile hits his Deku Shield.
- Overall shield size has been increased.
- Neutral attack's first hit has less startup lag (frame 6 → 4), with its total duration reduced as well (FAF 20 → 18).
- Up smash has more knockback scaling (100 → 108), improving its KO potential.
- Up aerial has more knockback scaling (77 → 82), slightly improving its KO potential.
- Forward throw deals more knockback (45 base/165 scaling → 48/184), allowing it to KO at realistic percents.
- Grab aerial has less startup lag (frame 11 → 9).
- Grab aerial launches at a higher angle (38˚ → 60˚), and inflicts 4 additional frames of hitstun, giving it combo potential even up to high percents.
Moveset
- While standing still, walking, or crouching, incoming projectiles that hit Young Link's Deku Shield will deal no damage and simply push him back. It can block any amount of projectiles regardless of power.
- Young Link can wall jump.
- Young Link possesses a tether attack and grab.
For a gallery of Young Link's hitboxes, see here.
Note: All numbers are listed as base damage, without the 1v1 multiplier.
| Name | Damage | Description | ||
|---|---|---|---|---|
| Neutral attack | 2% | Two forward swings, followed by either a stab or a loop of quick slices ending with a forward thrust. | ||
| 1.5% | ||||
| 3.5% | ||||
| 0.3% (loop), 2.5% (final hit) | ||||
| Forward tilt | 12% (base), 11% (tip) | Raises the Kokiri Sword over his head, and then brings it down in front of himself. | ||
| Up tilt | 8% | An arcing swing with the Kokiri Sword. Combos into itself at medium percents. | ||
| Down tilt | 10% (base), 9% (middle), 7% (tip) | A crouching slash in front of himself. Has low, vertical knockback, allowing it to easily chain into all of his aerials at almost any percent. One of Young Link's best combo tools. | ||
| Dash attack | 11% (base), 10% (tip) | A dashing swing. | ||
| Forward smash | 6% | Winds up and swings the Kokiri Sword forwards. Pressing the button again allows for a second, more powerful slash. The first hit deals almost no knockback, but is a natural combo into the second hit. | ||
| 12% (base), 10% (tip) | ||||
| Up smash | 3% (hits 1-2), 8% (hit 3, base), 7% (hit 3, tip) | Three upwards overhead slashes. The first two slashes trap opponents, with the third slice launching them vertically. Decently powerful, but the move's long duration makes it easy to punish if whiffed. | ||
| Down smash | 13% (front, base), 10% (front, tip), 12% (back, base), 9% (back, tip) | A crouching slash in front of Young Link, immediately followed by a second slash behind himself. | ||
| Neutral aerial | 10% (clean), 5% (late) | A standard sex kick. One of the fastest aerials in the game, making it a very good option to get opponents off of him. Additionally, it has a just as strong of an offense use, as the late hit can function both as a combo starter or can be used in the middle of a combo to lead into a variety of moves. Overall, it is commonly regarded as one of the best aerials in the game and is a vital part of Young Link’s combo game. | ||
| Forward aerial | 6% (hit 1), 8% (hit 2, base), 7% (hit 2, tip) | Quickly slices twice in the air. The first hit traps opponents into the second hit, which deals reasonably high knockback, making it useful for knocking opponents offstage or killing them outright at higher percents. Landing on the ground after the first hit but before the second will cancel the move, allowing for a follow-up into a different attack. | ||
| Back aerial | 5% (hit 1), 7% (hit 2) | Performs a double backwards kick. Functions similarly to his forward aerial, including the ability to drag-down foes with the first hit, but trades range and power for reduced startup. | ||
| Up aerial | 15% (clean), 12% (late) | An upwards thrust. Has a deceptively long duration, and can KO at around 130% with the clean hit. Despite that, it has very fast startup at frame 5. | ||
| Down aerial | 18% (clean), 15% (late) | Performs the Down Thrust. Unlike Link's similar move, it does not meteor smash even with the clean hit. Deals enough knockback to KO at high percents, but is dangerous to use offstage due to its long duration and high ending lag. Landing the clean hit on an opponent or their shield will cause Young Link to bounce upwards. | ||
| Grab aerial | Midair Hookshot | 4% | Shoots his Hookshot forward. Can be used to grab stage ledges. | |
| Grab | Hookshot | — | Fires his Hookshot straight forward. Functions as a Tether Grab, and can be used for tether recovery. | |
| Pummel | 1% | Quickly hits the opponent with the pommel of the Kokiri Sword. | ||
| Forward throw | 3% (hit 1), 3% (throw) | A forward kick. It is easily Young Link's strongest throw, and one of the strongest forward throws in the game, starting to KO middleweights around 130% from the edge of Final Destination. | ||
| Back throw | 3% (hit 1), 3% (throw) | Swings his opponent to his back, and kicks them away. Launches at a high angle, but has low endlag and relatively low knockback growth, potentially leading into edgeguard setups. It is also capable of KOing around 180% from the edge of Final Destination. | ||
| Up throw | 4% (hit 1), 2% (throw) | Tosses the opponent up into the air and performs a spinning upwards slash. Starts to KO around 190% on Final Destination. If the initial sword slash hits another opponent, they will be launched at a very low angle, allowing for edgeguard setups. | ||
| Down throw | 3% (hit 1), 3% (throw) | Pins the opponent to the ground and performs an elbow drop. | ||
| Floor attack (front) | 7% | Slashes in front and behind himself while getting up. | ||
| Floor attack (back) | 7% | Slashes in front and behind himself while getting up. | ||
| Floor attack (trip) | 5% | Slashes in front and behind himself while getting up. | ||
| Edge attack | 9% | Climbs up the ledge and performs a slash. | ||
| Neutral special | Fire Arrow | 4%-12% | Uses the Fairy Bow to fire a Fire Arrow. Can be charged up for more power and range. The arrows send opponents at an upwards angle with low knockback, making it a good aerial combo starter. In addition, it has low startup and ending lag, making it an excellent combo/spacing tool all around. | |
| Side special | Boomerang | 11% (close, normal throw), 13.2% (close, smash throw), 7% (far), 2% (return) | Throws his Boomerang forward. It can be angled diagonally and deals damage when returning to Young Link. Can combo into an aerial at most percents. | |
| Up special | Spin Attack | 1%-1.6% (grounded hits 1-10), 3%-4.8% (grounded hit 11), 3% (aerial hit 1), 2% (aerial hits 2-4), 3% (aerial hit 5) | Spins with his sword outwards, slashing opponents nearby. Has very quick startup, making it a potent out-of-shield option. Just like the Spin Attack of the other two Link incarnations, it can be charged when grounded for more damage. Similarly to Toon Link's version of the move, it hits multiple times on the ground, with the final hit launching opponents. However, while Toon Link's deals strong horizontal knockback, Young Link's deals weak vertical knockback, making Young Link's version unviable as a KO tool but useful as a combo starter. The aerial version can carry opponents to the upper blast line, and KO them there at high enough percents. | |
| Down special | Bomb | 2%-2.4% (hits 1-4) | Pulls out a Bomb. Just like in Melee, the explosion from the bomb hits multiple times. The bomb explodes after hitting a surface or enemy, or after enough time passes. The bomb's weak knockback makes it useful as a combo starter. Can be used to extend Young Link's recovery, as the damage from the explosion will take him out of helplessness. | |
| Final Smash | Triforce Slash | 60% | Uses the Triforce of Courage to emit a thin beam of light from his left hand to stun an opponent in front of himself. If the beam comes in contact with an opponent, Link dashes forward and performs a barrage of slashes while they are trapped in a Triforce-shaped energy field before concluding with an outward slash that shatters the energy field and launches them and any bystanders. | |
On-screen appearance
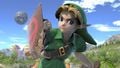
- Floats down from the sky while surrounded by a blue magical field, referencing the Ocarina of Time's powers. Upon landing, he equips the Kokiri Sword and Deku Shield. This is akin to his older self's on-screen appearance in SSB.
Idle poses
- Looks around himself.
- Kicks the toes of his boots on the ground, as if knocking off dirt.
Young Link's first idle pose
Young Link's second idle pose


Taunts
- Up taunt: Holds the Kokiri Sword up in the air.
- Side taunt: Places the Deku Shield on his back and watches Navi fly around him.
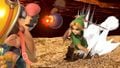
- Down taunt: Sheaths the Kokiri Sword and places the Deku Shield on his back and takes a drink of Lon Lon Milk.
Young Link's up taunt.

Young Link's side taunt.
Young Link's down taunt.


Victory poses
- Left: While holding his sword in a reverse grip, adjusts his belt and flicks his nose. Based off one of Young Link's idle animations in Ocarina of Time.
- Up: Stabs forward with his sword, then holds it up, giving off a battle cry. This is identical to one of Link's poses other than the camera angle.
- Right: Sheathes his sword, dusts his hands off, and puts them on his hips while grinning.


In competitive play
Notable players
Active
Any number following the Smasher name indicates placement on the Fall 2019 PGRU, which recognizes the official top 50 players in the world in Super Smash Bros. Ultimate from July 13th, 2019 to December 15th, 2019.
 Biddy - The best Young Link player in Tri-state. Placed 4th at Player's Ball Ultimate, 13th at The Scarlet Classic V and 65th at both EVO 2019 and Glitch 7 - Minus World. Has wins over Wishes, LeoN, Suarez, Jul, Mew2King, and The Great Gonzales.
- colinies - One of the best Young Link players in the United States. Placed 1st at Steel City Showdown, 3rd at COST 2019, and 17th at Collision 2019. Ranked 2nd on the Ohio Smash Ultimate Power Rankings.
 Jdizzle - The best Young Link player in Australia. Placed 1st at BigWinChampionship 2, 3rd at Phantom 2019, and 7th at Expand Gong 4.
- Kobe - One of the best active Young Link players in the world. Placed 13th at both Smash Conference United and Come to Papa 3, 33rd at GENESIS 6, and 49th at CEO 2019.
 Mr.R (#44) - Uses Young Link as a secondary. Placed 2nd at DreamHack Winter 2019 and 9th at 2GG: SwitchFest 2019 using mainly Young Link. Notably reverse 3-0'd Leffen with the character.
- SKITTLES!! - The best Young Link player in Nebraska. Placed 1st at PG Keys to EVO: Smash Ultimate Final Showdown, 9th at Paradigm Shift 2019, and 25th at Low Tier City 7. Ranked 1st on the Nebraska Ultimate Power Rankings and 24th on the Wi-Fi Warrior Rank.
- SS - The best Young Link player in Arizona. Placed 2nd at Ascension II, 3rd at Ascension, and 9th at both Ascension III and Ascension IV.
- Supahsemmie - The best Young Link player in Europe. Placed 1st at Elysium: Yggdrasil and Lightning: Volume 3, 7th at The Ultimate Performance, and 13th at Syndicate 2019 and Valhalla III.
- Toast - The best active Young Link player in the world. Placed 2nd at Just Roll With It! 12, 7th at both Just Roll With It! 11 and 2GG: Run it Back, 13th at Let's Make Big Moves, 17th at DreamHack Atlanta 2019, and 33rd at The Big House 9. Has wins over Raito, 8BitMan, Peabnut, and Secret.
- Zan - One of the best Young Link players in the United States. Placed 17th at both Heart of Battle and Ultimate Nimbus as well as 25th at SoCal Chronicles.
Inactive
 Suinoko - Considered one of the best Young Link players in Japan before dropping him in favor of Peach. Placed 9th at KVOxTSB 2019, 17th at Sumabato SP 4, 25th at Umebura Japan Major 2019, and 33rd at Umebura SP 3 with solo Young Link.
- T (#15) - Considered one of the best Young Link players in Japan. Placed 3rd at Midwest Mayhem Ultimate with solo Young Link, and 17th at 2GG: Prime Saga, and 25th at Umebura SP 2 in conjunction with Link. Although he hasn't officially dropped the character, he now only uses Link in brackets, and very rarely uses Young Link or any of his other characters anymore.
- Tweek (#3) - Formerly the best Young Link player in the world. Placed 1st at Glitch 6 and Frostbite 2019 and 7th at 2GG: Prime Saga. Has wins over Nairo, WaDi, and Jakal.
Classic Mode: Hyrule Smash

Young Link's opponents are all from the Zelda series. Additionally, to go with the theme of the route, all stages, items and assist trophies are from the The Legend of Zelda universe.
| Round | Opponent | Stage | Music | Notes |
|---|---|---|---|---|
| 1 | Zelda |
Hyrule Castle | Hyrule Main Theme | |
| 2 | Young Link |
Temple | Song of Storms | If the player is using the Dark Young Link costume, the CPU player will be default Young Link |
| 3 | Sheik |
Gerudo Valley (Ω form) | Gerudo Valley | |
| 4 | Toon Link (x4) |
Pirate Ship | The Great Sea / Menu Select | The multicolored Toon Links is a references to The Legend of Zelda: Four Swords. |
| 5 | Ganondorf |
Bridge of Eldin (Ω form) | Main Theme - The Legend of Zelda: Twilight Princess | |
| 6 | Link |
Great Plateau Tower | Main Theme - The Legend of Zelda: Breath of the Wild | |
| Bonus Stage | ||||
| Final | Ganon | Sacred Realm | Calamity Ganon Battle - Second Form | |
Credits roll after completing Classic Mode. Completing it as Young Link has Termina Field (Remix) accompany the credits.
Role in World of Light

Although Young Link does not appear in the World of Light opening cutscene, he was vaporized and later imprisoned alongside the rest of the fighters (sans Kirby) when Galeem unleashed his beams of light.
Young Link was one of the many imprisoned fighters that fell under Dharkon's control upon Galeem's first defeat. He is a necessary unlock found in the Sacred Realm sub-area on the bottom right corner of the land which makes up the Triforce of Courage. The player must rely on the owl statues which will guide the player to Saria's spirit battle. Unlocking her spirit clears out a tree stump that blocked access to his unlock battle. Once Young Link is unlocked, the Triforce of Courage appears in the center of the map. If Zelda is unlocked, the path leading to Cloud's unlock battle and the Master Sword clears out.
Fighter Battle
| No. | Image | Name | Type | Power | Stage | Music |
|---|---|---|---|---|---|---|
| 22 | |
Young Link | Grab | 10,300 | Temple (Ω form) | Saria's Song |
Spirits
Young Link's Fighter Spirit can be obtained by completing Classic Mode. It is also available periodically for purchase in the shop for 500 coins. Unlocking Young Link in World of Light allows the player to preview the first spirit below in the Spirit List under the name "???". As a Fighter Spirit, it cannot be used in Spirit Battles and is purely aesthetic. Each Fighter Spirit has an alternate version that replaces them with their artwork in Ultimate.
Additionally, this incarnation of Link makes an appearance in a few Primary and Support Spirits under other forms.
176. Young Link
- Epona Spirit.png
196. Epona
- Deku Link.png
207. Deku Link
- FierceDeityLinkSpirit.png
208. Fierce Deity Link

In Spirit battles
As the main opponent
| Spirit | Battle parameters | Inspiration | |||||||||
|---|---|---|---|---|---|---|---|---|---|---|---|
| No. | Image | Name | Series | Enemy Fighter(s) | Type | Power | Stage | Rules | Conditions | Music | Character |
| 178 | .png) |
Link (The Legend of Zelda) | The Legend of Zelda series | •Young Link |
13,500 | Find Mii (hazards off) | N/A | •The enemy's melee weapons have increased power •The enemy's FS Meter charges quickly •The enemy has increased attack power |
Overworld Theme - The Legend of Zelda | ||
| 184 | Fairy Bottle | The Legend of Zelda series | •Young Link |
3,700 | Fountain of Dreams | •Sudden Damage | •All fighters take serious damage •The enemy has increased defense |
Saria's Theme | |||
| 194 |  |
Kaepora Gaebora | The Legend of Zelda series | •Young Link |
3,700 | Distant Planet (Battlefield form) | •Hazard: Screen Flip | •The screen will suddenly flip after a little while | Ocarina of Time Medley | ||
| 212 | Happy Mask Salesman | The Legend of Zelda series | •Young Link |
4,300 | Umbra Clock Tower | •Attack Power ↑ •Move Speed ↑ •Jump Power ↑ |
•Timed battle •All fighters have increased jump power •All fighters have increased move speed after a little while |
Song of Storms | |||
| 213 | Kafei | The Legend of Zelda series | •Bunny Young Link |
4,600 | Skyloft | N/A | •Timed battle •The enemy tends to avoid conflict |
Termina Field (Remix) | |||
| 235 | Ravio | The Legend of Zelda series | •Bunny Young Link |
4,000 | Skyloft | N/A | •Timed battle •The enemy favors special moves •The enemy is easily distracted by items |
Hyrule Main Theme | |||
| 364 |  |
Poppy Bros. Jr. | Kirby series | •Young Link |
1,500 | Yoshi's Island | •Item: Bob-omb | •The enemy's down special has increased power •The enemy favors down specials in the air |
Green Greens (for 3DS / Wii U) | ||
| 876 | Cut Man | Mega Man series | •Young Link |
3,700 | Wily Castle (Ω form) | N/A | •The enemy's side special has increased power •Stamina battle •The enemy favors side specials |
Cut Man Stage | |||
| 879 | Bomb Man | Mega Man series | •Young Link |
3,500 | Wily Castle (Ω form) | N/A | •The enemy's explosion and fire attacks have increased power •Stamina battle •The enemy favors down specials |
Bomb Man Stage | |||
| 1,127 | Diskun | Disk System | •Young Link •Pit •Simon •Samus |
9,100 | Temple (Battlefield form) | N/A | •Take your strongest team into this no-frills battle | Famicom Medley | Link (The Legend of Zelda for the Famicom Disk System) | ||
| 1,130 | Donbe & Hikari | Famicom Mukashibanashi series | •Young Link •Villager •Falco •Diddy Kong •Duck Hunt |
3,500 | Duck Hunt (hazards off) | N/A | •Defeat an army of fighters | Shin Onigashima Medley | Donbe | ||
| 1,145 |  |
Prince Richard | Kaeru no Tame ni Kane wa Naru | •Young Link |
9,900 | Dream Land GB | •Temporary Invincibility •Assist Trophy Enemies (Sablé Prince) |
•The enemy will occasionally be invincible after a little while •The enemy can unleash powerful critical hits at random •Hostile assist trophies will appear |
Castle Lololo | ||
| 1,280 |  |
Tethu | Ever Oasis | •Young Link |
3,700 | Gerudo Valley (hazards off) | •Flowery •Item: Deku Nut |
•You constantly take minor damage •The enemy starts the battle with a Gust Bellows |
Struggle Against Chaos | ||
| 1,282 |  |
Musashi | Sushi Striker: The Way of Sushido | •Young Link |
2,400 | Onett | •Item Tidal Wave •Hazard: Heavy Wind |
•Dangerously high winds are in effect after a little while •The enemy favors side specials •Certain items will appear in large numbers after a little while |
Gourmet Race (Brawl) | ||
As a minion
| Spirit | Battle parameters | Inspiration | |||||||||
|---|---|---|---|---|---|---|---|---|---|---|---|
| No. | Image | Name | Series | Enemy Fighter(s) | Type | Power | Stage | Rules | Conditions | Music | Character |
| 189 | Young Zelda | The Legend of Zelda series | •Zelda •Young Link |
3,700 | Hyrule Castle | N/A | •Take your strongest team into this no-frills battle | Ocarina of Time Medley | Young Link (Ocarina of Time) | ||
| 192 | Saria | The Legend of Zelda series | •Isabelle •Young Link |
9,900 | Garden of Hope | •Hazard: Fog | •The stage is covered in fog •The enemy will charge up a powerful Final Smash |
Saria's Theme | Young Link (Ocarina of Time) | ||
| 211 | Tingle | The Legend of Zelda series | •Villager (×3) ( •Young Link |
9,000 | Great Bay | •Uncontrollable Speed •Slippery Stage |
•Defeat the main fighter to win •All fighters move faster and can't stop quickly after a while •The enemy loves to taunt |
Termina Field (Remix) | Link (Majora's Mask) | ||
| 218 | Dimitri | The Legend of Zelda series | •Yoshi •Young Link |
1,700 | Great Bay | N/A | •The enemy favors neutral specials | Tal Tal Heights | Link (Oracle of Ages/Oracle of Seasons) | ||
| 233 |  |
Wall-Merged Link | The Legend of Zelda series | •Mr. Game & Watch •Young Link |
3,500 | Flat Zone X | N/A | •Reinforcements will appear after an enemy is KO'd | Lorule Main Theme | Link (A Link Between Worlds) | |
| 236 | Hilda | The Legend of Zelda series | •Zelda •Bunny Young Link |
9,100 | Temple | •Assist Trophy Enemies (Nightmare) | •Hostile assist trophies will appear | Lorule Main Theme | Ravio | ||
| 1,319 | Professor Riggs & Plaise & Lerna | Nintendo Labo series | •Dr. Mario •Bayonetta •Young Link |
2,500 | Paper Mario | •Attack Power ↑ •Defense ↑ |
•The enemy has increased defense after a little while •The enemy has increased attack power after a little while |
Title Theme - Super Mario Maker | Plaise Allatyme | ||
Alternate costumes

| |||||||

|

|

|

|

|

|

|

|
Gallery
Artwork of all The Legend of Zelda characters, as posted on the official Legend of Zelda Twitter account.
Young Link's amiibo.
Young Link's fighter card.
Young Link on Great Bay.
Tossing his Bomb at Wario on Castle Siege.

Drinking Lon Lon Milk with Inkling on Temple.
Performing his down aerial in his Dark Link-based costume on the Umbra Clock Tower.
Young Link drinking his Lon Lon Milk with Simon on Figure-8 Circuit.
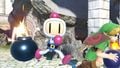
Carrying his Bomb with Bomberman on Temple.
Idling with Mario on Tomodachi Life.
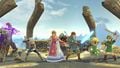
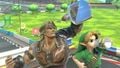
With all playable The Legend of Zelda veterans on the Great Plateau Tower.


Character Showcase Video
Trivia
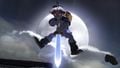
- Young Link's official artwork is based upon the pose he strikes after using his grounded Spin Attack.
- Young Link and Pichu share the longest gap between playable appearances in the Super Smash Bros. series, with seventeen years between Melee and Ultimate.
- This has been noted by both of their Super Smash Bros. blog's "Today's Fighter" descriptions.
- Young Link's light blue costume gives him a pair of beige trousers. Although it may appear that his legs were just recolored, the fabric and seams can be seen by zooming in on his legs during gameplay.
- Due to Young Link's hair having more physics-based movement, in certain animations such as taking damage, it's possible to see that his sideburns get cut off rather than being connected to his cap.[1][2]
- Additionally, when looking at the cuffs of his boots from below, there's a visible gap.[3]
- Young Link is among the few voiced fighters in Ultimate whose voice clips are recycled from their own games rather than specifically recorded for a Smash game. He shares this trait with Banjo & Kazooie, Daisy, Inkling, Rosalina & Luma, Sonic, Toon Link and Yoshi.
- An animation error is present in Young Link's up tilt; the Kokiri Sword rotates in his hand as he returns to his idle stance.
- When Young Link activates his side taunt where Navi flies around his head, if the game is slowed down to 1/4 speed, she can be seen flying in to her initial position from offscreen. This suggests that Navi's model is kept somewhere offscreen and changes location on activation of the taunt, however, when the taunt ends, she returns back into his hat like normal and does not appear to fly back offscreen.
- Young Link, Marth, Lucina, Roy, Chrom and Wolf are the only characters that uses their crouching animation from their previous Smash Bros. game when holding a small item.
- Out of all of them, Young Link is the only one who's doesn't revert to his previous idle pose when holding a small throwable item.
- When performing a wall jump, Young Link does not directly touch the wall before the jump.
- Young Link's Star KO voice clip, unusually, begins with a short pause.
- In German, the name tag and voice clip from the announcer on the victory screen is slightly different from the one used on the character select screen, instead featuring a noticeable translation of "the" (der Jonger Link). He shares this trait with Dark Pit.
References