Meta Knight (SSBU): Difference between revisions
m (→Trivia: Reducing ambiguity and double-links) |
Tag: Mobile edit |
||
| Line 250: | Line 250: | ||
''See also: [[:Category:Meta Knight professionals (SSBU)]]'' | ''See also: [[:Category:Meta Knight professionals (SSBU)]]'' | ||
*{{Sm|BONK!|USA}} - One of the best Meta Knight players in the world. Placed 17th at | *{{Sm|BONK!|USA}} - One of the best Meta Knight players in the world. Placed 17th at {{Trn|Glitch - Infinite}}, {{Trn|Glitch 8.5 - Konami Code}} and {{Trn|Let's Make Big Moves 2022}} as well as 33rd at {{Trn|Let's Make Big Moves}}, with wins over players such as {{Sm|Ned}}, {{Sm|WaDi}}, and {{Sm|LeoN}}. | ||
*{{Sm|Lickey|Japan}} - One of the best Meta Knight players in Japan. Placed 13th at {{Trn|Maesuma TOP 5}}, 17th at both {{Trn|Sumabato SP 9}} and {{Trn|Maesuma TOP 1}}, and 25th at {{Trn|Umebura SP 3}} with wins over players such as {{Sm|Etsuji}}, {{Sm|Lunamado}}, and {{Sm|Sigma}}. | *{{Sm|Lickey|Japan}} - One of the best Meta Knight players in Japan. Placed 13th at {{Trn|Maesuma TOP 5}}, 17th at both {{Trn|Sumabato SP 9}} and {{Trn|Maesuma TOP 1}}, and 25th at {{Trn|Umebura SP 3}} with wins over players such as {{Sm|Etsuji}}, {{Sm|Lunamado}}, and {{Sm|Sigma}}. | ||
*{{Sm|sdsg|Japan}} - Placed 17th at both {{Trn|Sumabato SP 14}} and {{Trn|Sumabato SP 17}} as well as 25th at {{Trn|Sumabato SP 15}} with wins over players such as {{Sm|Kome}} and {{Sm|Atelier}}. | *{{Sm|sdsg|Japan}} - Placed 17th at both {{Trn|Sumabato SP 14}} and {{Trn|Sumabato SP 17}} as well as 25th at {{Trn|Sumabato SP 15}} with wins over players such as {{Sm|Kome}} and {{Sm|Atelier}}. | ||
Revision as of 21:58, June 22, 2022
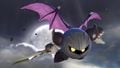
| Meta Knight in Super Smash Bros. Ultimate | |
|---|---|
 
| |
| Universe | Kirby |
| Other playable appearances | in Brawl in SSB4 |
| Availability | Unlockable |
| Final Smash | Darkness Illusion |
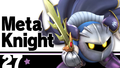
Meta Knight (メタナイト, Meta Knight) is a playable character in Super Smash Bros. Ultimate. He was officially confirmed on June 12th, 2018 during E3 2018, alongside Mewtwo and the rest of the returning roster. Meta Knight is classified as Fighter #27, the first fighter number of the Super Smash Bros. Brawl veterans.
As in Super Smash Bros. 4, Eric Newsome and Atsushi Kisaichi's portrayals of Meta Knight from Brawl were repurposed for the English and Japanese versions of Ultimate, respectively.
How to unlock
Complete one of the following:
- Play VS. matches, with Meta Knight being the 38th character to be unlocked.
- Clear Classic Mode with Link or any character in his unlock tree, being the 4th character unlocked after Simon.
- Have Meta Knight join the player's party in World of Light.
Meta Knight must then be defeated on Halberd (the Ω form is used in World of Light).
Attributes
Meta Knight combines several unusual traits. He has multiple jumps, but unlike other characters who share this ability, he has strong mobility, comprising fast dashing and walking speeds, high falling speed and gravity, and average air speed. He is also the only small character to use a sword, which gives his attacks a bit more range relative to his stature. Overall, unlike other characters with multiple jumps, Meta Knight is neither wanting for speed nor range.
As expected, Meta Knight's playstyle relies heavily on his speed, both in terms of mobility and frame data. His low, quick short hop and fast, low lag aerials allow him to continuously apply pressure to opponents at close range. He is not lacking in grounded pressure either, having a fast down tilt that can trip, and a dash attack that can cross-up shields, and both of these moves are capable of setting up combos. If Meta Knight finds himself on the defensive, he has several options to relieve pressure, such as a fast, decently long-ranged forward tilt for countering aerial approaches, a fast, long-lasting, and strong neutral aerial, and the 2nd fastest down aerial in the game. For attacks that are poorly spaced, he can opt for a grab, from which he has a down throw that can start combos up to mid-percentages, a back throw to set up edge-guards and KO at very high percentages while near the edge, and an up throw that can also KO at very high percentages (especially on platforms).
While his damage output per hit is not impressive, Meta Knight's speed and jumps allow him to rack up damage through combos at lower percentages and chase opponents through the air through to higher damages, punishing their escape options. His dash attack and down throw can combo into an up smash or aerials at lower damages, while his up aerial can link into other aerials or his up special. Even after his opponents are launched too far for a true combo, he can continue pressuring them by punishing their air dodges and landing options through effective use of his aerials, dash attack, and up tilt. Thanks to his flexible aerial mobility, he has little trouble chasing opponents offstage, and his aerials are well-suited to edge-guarding. Neutral aerial has a lingering hitbox and strong knockback, back aerial is fast with high power, and down aerial is a safe semi-spike than can gimp deceptively early.
Meta Knight's edge-guarding prowess is mainly courtesy of his recovery, which is arguably the best in the game. In addition to having five jumps and passable air speed, his special moveset is full of recovery options. Shuttle Loop, his up special and main recovery method, is fast, offers high vertical recovery, and has a large hitbox. Mach Tornado and Drill Rush travel far horizontally and with long-lasting active hitboxes, and the latter can be angled. Dimensional Cape allows Meta Knight to cover the distance in any direction while invisible, and offers the option to attack upon reappearing. Such options grant him the ability to vary his recovery to make it incredibly difficult to punish him offstage, let alone gimp him.
Meta Knight does have several weaknesses. His attacks generally have very few active frames, forcing him to be extremely precise with his moves lest his opponent punishes him. Despite being a lightweight, Meta Knight's falling speed, gravity and unusually round hurtbox make him highly vulnerable to combos, which combined with his low weight grants him poor overall endurance. Though he has a strong, safe finisher in his forward smash, a fast, powerful back aerial and up smash, he has difficulty landing these moves. Forward smash has high startup, making it easy to avoid, up smash is risky due to its ending lag, and back aerial has trouble connecting on grounded opponents. Furthermore, his up and back throws require rage and favorable positioning to KO at reasonable percentages. While Meta Knight's neutral game is fairly good, his lack of a projectile can be a thorn in his side, especially against zoning characters such as Mega Man.
Overall, Meta Knight is at his best so long as he has his opponent in a disadvantaged state, being able to rack up damage well at lower percentages, before keeping the pressure on them through juggles and edge-guards. A player must be patient in finding an opening, as he cannot sustain much damage himself, and such patience is especially needed when his foe is at high percentages where Meta Knight may find difficulty in landing his finishers.
Changes from Super Smash Bros. 4
Meta Knight was infamous for being the best character in Brawl, to the point where he was universally considered to be broken. Although SSB4 initially nerfed him drastically, Meta Knight managed to secure a spot as a high tier character (16th out of 55 characters), thanks to the combination of his excellent mobility and recovery, great edge-guarding potential, numerous buffs from game updates and, most notoriously, his deadly punish game that allowed him to perform zero-to-death combos with his up aerial and Shuttle Loop. Possibly as a result of these strengths, Meta Knight has been significantly nerfed in the transition from SSB4 to Ultimate.
Meta Knight's already quick mobility has improved even further, and his aerials have considerably decreased landing lag, even compared to most other characters' aerials, improving his neutral game and combo game. Some of his moves such as his tilts and aerials also have increased range, with his down tilt notably no longer possessing blind spots, and his neutral attack is more effective as a close-range option to rack up damage, due to having faster startup and linking much more reliably. Moreover, the changes to air dodging greatly complement his attributes, offering more opportunities to exploit his strong offstage game, while his recovery remains among the best.
However, the changes to Meta Knight's dash attack, which he relied on in the previous game, have worsened his combo and punish games. Due to the move having higher knockback and ending lag, follow-ups are unreliable beyond low percentages, which consequently hampers Meta Knight's KO potential, as it can no longer combo into Shuttle Loop at high percentages. The nerfs to rage exacerbate this: while his endurance is slightly improved, he can no longer abuse the mechanic to secure early vertical KOs due to Shuttle Loop's first hit now having set knockback, and he has a harder time finishing off opponents in general. Like Captain Falcon, his increased traction also hinders his dash grab as an effective approach, punish, and burst option, and removes his forward throw's combo potential. Furthermore, Meta Knight does not benefit from the expanded dash-canceling mechanic as much as other characters, since none of his tilts are reliable for KOing, down tilt is decent at best for starting combos, and his smash attacks are unsafe.
Overall, Meta Knight's changes have generally toned down his most powerful tools and setups from SSB4, and thus heightened his learning curve noticeably in the transition to Ultimate. Meta Knight's biggest downfall, however, is that other characters with similar game plans to him (such as Mario and Zero Suit Samus) have benefitted from Ultimate's mechanics much more than he has. In addition, other characters that once struggled against him (such as Peach and Bowser) received noticeable buffs that allow them to fight on par with Meta Knight or even overwhelm him outright.
Due to this, along with the fact that he has failed to attain the same level of success as in SSB4 despite the efforts of Abadango, who dropped him in favor of Palutena and Wario, and that he has not received as much improvements as other characters from game updates, Meta Knight is considered to be noticeably worse than he was in SSB4. Although Meta Knight's perception initially fluctuated between that of a lower mid tier to a low tier character, he has nevertheless continued to show respectable amount of success in tournaments, thanks to the efforts of players such as BONK!, Yei, and Lickey. As a result, the general consensus is that Meta Knight is not only a mid tier character, but also potentially underrated. Because of this, Meta Knight's overall viability is currently debatable.
Aesthetics
 Due to the aesthetic used in Ultimate, Meta Knight's model features a more subdued color scheme. His mask, gauntlets, pauldrons, and sabatons have subtle detailing. His mask in particular is a notably darker gray, and his eyes now have a bright orange glow around them.
- Galaxia's design has been altered: its blade is flatter, resembling its official artwork for Kirby Super Star Ultra and Kirby: Planet Robobot.
- Galaxia's sword trails have reversed colors, using aqua with yellow accents instead of the yellow with turquoise accents from Smash 4.
- His Galacta Knight-inspired alternate costume more closely resembles its inspiration: his mask becomes cross-shaped with red eyes, his spikes and insignia become yellow, and Galaxia turns pink like Galacta Knight's lance. Similarly, Galaxia turns silver with a blue gem when donning the Dark Meta Knight costume, his sabatons turn a darker red as opposed to the inaccurate purple of Smash 4, and his mask gains a scar and has paler eyes, much like his Mirror World doppelgänger.
- Meta Knight now wraps himself in his cape when performing his spot dodge, like his rolling animation.
- Meta Knight's wings now droop or curl up when fast falling.
- Two of Meta Knight's victory animations were altered:
- The one where he warps away now has him perform three sword slashes before warping.
- The one where he flies on-screen from the side now shows him flying around and dropping to the ground before striking a pose.
 Meta Knight no longer grunts twice during his reeling animation.
Attributes
 Like all characters, Meta Knight's jumpsquat takes 3 frames to complete (down from 4).
- Meta Knight walks faster (1.18 → 1.239).
- Meta Knight runs faster (1.9 → 2.09).
- His initial dash is much faster (1.7 → 2.211).
- Meta Knight's air speed is faster (0.99 → 1.04).
- Meta Knight's traction is much higher (0.055 → 0.097).
 Forward roll grants less intangibility (frames 4-15 → 4-14) and has more ending lag (FAF 28 → 29).
- Back roll has more ending lag (FAF 28 → 34).
- Spot dodge has more startup (frame 2 → 3).
- However, its total duration remains the same, giving it one frame less ending lag.
- Air dodge grants more intangibility (frames 2-25 → 2-26).
- Air dodge has significantly more ending lag (FAF 31 → 48).
- The new air dodge mechanics improve Meta Knight's juggling and edge-guarding abilities.
Ground attacks
- Neutral attack:
- Neutral attack has received several changes to allow it to connect better and rack up damage more effectively:
- It has considerably less startup with a shorter gap between hits (frame 7, 11, 15, 20, 24 → 4, 7, 10, 13, 16), and a lower hitlag multiplier (1× → 0.5×), making it harder to SDI out of.
- It has a different launch angle to keep grounded opponents closer to Meta Knight (60°/84° → 361°).
- It has more base knockback (8 → 10) and each hit has gained a hitstun modifier of 2.
- The finisher has less ending lag (FAF 35 → 31).
- The multi-hits have 1 extended hitbox rather than 2 extended hitboxes, with the hitbox being larger than either of the previous hitboxes (5.8u/6.8u → 7u), and extending slightly further outward (Z2 offset 13 → 13.5), improving its range overall.
- The single hitbox is placed higher up (Y offset: 5.2/5.3 → 6.5), improving its vertical range but reducing its ability to hit below the ledge.
- It deals less damage per hit (1.2% → 1%) and no longer deals extra shield damage (1 → 0).
- It has gained a shieldstun multiplier of 4×. This allows it to lock opponents into their shields between each hit, and thus pressure them more effectively, but also allows them to cancel shieldstun and punish Meta Knight more easily if they shield 10 hits or more.
- The finisher consists of three medium-sized unextended hitboxes instead of a single large extended one (8u → 5u/6u/6u). The new hitboxes cover the same horizontal distance (with slightly reduced internal range, though this is negated by the changes to jostle mechanics), but cover less vertical range, shortening the finisher's range overall.
- Forward tilt:
- The first two hits have different knockback (8 base/88 scaling → 25/20 (hit 1), 20/20 (hit 2)) and their outermost hitboxes launch opponents closer to Meta Knight (85° → 88° (hit 1), 80° → 85° (hit 2)), allowing them to connect more reliably.
- The second hit has larger hitboxes (3.5u/3.5u → 4u/3.6u) which are positioned further out (Z offset: 8/16 → 9/16.5) and higher (Y offset: 2/4/6 → 3/5/7), improving its range.
- Up tilt:
- Up tilt's sweetspot has more vertical range (Y offset: 23.9u → 25.2u (clean), 7.5u → 9u (late)).
- The sourspot deals more damage during the clean hit (5% → 6%), but less during the late hit (6% → 5%).
- Down tilt:
- Down tilt's innermost hitbox is larger (3.2u → 3.5u), while the outermost hitbox stretches farther horizontally (Z offset: 13u → 15u), removing its blindspot next to Meta Knight and increasing its range to the point it properly covers the full tip of the blade.
- Dash attack:
- Dash attack has an altered animation. Meta Knight now spins on himself before thrusting his foot forward.
- It deals more damage (6%/5% → 7%/6%).
- It has one more frame of ending lag (FAF 32 → 33).
- It has slightly less base knockback (70 → 65/65/67), but more knockback scaling (90 → 107). In combination with the previous changes, this hampers its combo potential past low percents.
- However, this allows it to KO under 180%, giving it more utility as an emergency KO move.
- It has smaller hitboxes (5.5u/5u/4.5u → 5u/4u/3.5u).
- Forward smash:
- Forward smash has a modified sword trail with spiked edges.
- Meta Knight no longer swings as outward fully, on top of its hitbox also no longer reaching fully behind him anymore.
- Up smash:
- Up smash deals more damage (3% (hit 1)/2% (hit 2)/4% (hit 3) → 4%/3%/5%; 9% → 12% (total)), with knockback scaling compensated on the last hit (166 → 148).
- The first and second hits have more set knockback (20/25 → 30), and their outer hitboxes launch opponents at a higher angle (135° → 130°), allowing them to connect more reliably.
- Down smash:
- Down smash has an altered animation with Meta Knight swinging Galaxia upwards for the first hit.
- It deals more damage (7% → 10% (hit 1), 10% → 13% (hit 2)) with knockback scaling not fully compensated (93 → 77 (hit 1)/78 (hit 2)), allowing the first hit to KO under 190% from center stage.
- It no longer starts charging immediately (frame 1 → 2), allowing the player to use the uncharged move without buffering.
- The second hit has larger hitboxes (4.5u/4u → 4.6u/4.6u).
- The first hit has a smaller hitbox (4.5u/4u → 3.8u).
- It has more horizontal range due to the hitbox being extended to match the sword instead of not covering it completely, but is angled upward, making it harder to 2-frame with.
Aerial attacks
- All aerials have less landing lag (16 frames → 7 (neutral), 16 → 10 (forward), 18 → 11 (back), 18 → 9 (up), 22 → 9 (down)).
- Neutral aerial:
- Neutral aerial auto-cancels earlier (frame 50 → 40).
- The late hit has an additional hitbox that is larger (3.5u → 5u), giving it more range.
- Forward aerial:
- All hits have slightly more horizontal range (outer hitbox Z offset: 13u → 13.5u).
- The first two hits' ground-only hitboxes launch at a higher angle (361° → 60°) and have more base knockback (30 → 60), but less knockback scaling (130 → 100). This allows them to connect more reliably, and in combination with the move's lower landing lag, start combos into other attacks at various percents.
- The first two hits' aerial-only hitboxes use the autolink angle like in the original version of Smash 4 (85° → 367°), allowing them to once again drag opponents down and set up combos, which is strengthened by the move's lower landing lag.
- The first two hits' ground-only hitboxes deal less damage (2.2% → 1.5%).
- Back aerial:
- All hits have more horizontal range (Z offset: -12u/-6u → -15u/-9u).
- The first two hits' ground-only hitboxes launch at a higher angle (361° → 55°) and have more base knockback (40 → 50), but less knockback scaling (130 → 90). Much like forward aerial, this allows them to connect more reliably, and in combination with the move's lower landing lag, start combos into other attacks at various percents.
- The first and second hits' ground-only hitboxes deal less damage (2.2% → 1.5%).
- The third hit has less knockback scaling (212 → 198), hindering its KO potential.
- Up aerial:
- Up aerial's angles have been altered (69°/69°/52° → 67°/67°/50°), improving its combo potential into other aerials, but worsening the consistency of up aerial ladder combos.
Throws and other attacks
- Grabs:
- All grabs have increased ending lag (FAF 32 → 37 (standing), 40 → 45 (dash), 38 → 40 (pivot)).
- All grabs have less range, especially standing grab (Z2 offset: 10u → 8.5u (standing), 10.8u → 10.1u (dash), -15u → -14.3u (pivot)).
- Dash and pivot grabs have increased startup (frame 9 → 11 (dash), 9 → 12 (pivot)).
- In a similar vein to Captain Falcon, due to Meta Knight's increased traction, dash grab does not cause him to retain as much horizontal momentum, further decreasing its effective range.
- Pummel:
- Pummel deals more hitlag (5 frames → 11), but has less startup (frame 4 → 1) and significantly less ending lag (FAF 24 → 6), greatly shortening its effective duration.
- It deals much less damage (3% → 1%).
- Relative to the rest of the cast, Meta Knight's pummel is among the fastest but least damaging, rather than among the slowest but most damaging.
- Forward throw:
- Due to Meta Knight's increased traction no longer allowing him to retain horizontal momentum during throws, forward throw has lost its combo potential entirely past very low percents.
- Up throw:
- Up throw's notoriously powerful collateral hitbox deals less knockback (90 base/160 scaling → 85/150), no longer KOing under 80% from ground level.
- Down throw:
- Down throw has less ending lag (FAF 88 → 87).
- Edge attack:
- Edge attack deals more damage (7% → 9%).
Special moves
- Mach Tornado:
- Mach Tornado travels faster horizontally, and gives more height via button mashing.
- It has gained a windbox, allowing it to pull opponents more effectively into the attack.
- The duration of the attack can no longer be extended by button mashing, making it worse for covering rolls and getups, or for juggling.
- Instead of being a multi-hit attack, it only hits once, possessing a clean hit and late hit.
- It deals significantly less total damage (22% → 12% (clean)/8% (late)).
- It launches opponents horizontally (70° → 361°), which allows it to KO far earlier, working as a potent combo finisher and even an edgeguarding tool.
- The clean hit is stronger than the previous final hit from center stage (55 base/170 scaling → 90/44), but the late hit is weaker (55/170 → 70/60).
- It has more range than the previous multi-hits, but less than the previous final hit (6u/11u → 9u).
- It has a lower hitlag multiplier (2× → 1.2×), although it still has more hitlag due to its higher individual damage and the universal hitlag increase.
- Mach Tornado has updated visual effects: its trails are more opaque and incorporate more white accents than yellow. Its shape is also thinner, better resembling how it looked in Brawl.
- Drill Rush:
- Drill Rush has a faster rehit rate (6 → 4), causing it to hit up to twelve times (up from nine), and its looping hits deal more damage (1% → 1.1%), increasing its total output (11% → 15.1%).
- The looping hits have different angles (0°/30°/361°/366° (clean), 50°/366°/366° (late) → 363°/367°/30°/30°/367°/365°) and knockback (30/30/0/0 set/60/100/70/70 base → 45/30/45/45/0/0 set/50/80/50/80/25/25 base), alongside a lower hitlag multiplier (1× → 0.6×). In combination with their faster rehit rate, this allows them to connect much more effectively and makes them harder to escape.
- The final hit has gained an additional hitbox that is larger (6u → 8u), increasing its range.
- Drill Rush loses a significant amount of momentum if shielded. This hinders its ability to cross-up opponents, making it easier to punish.
- The final hit has less knockback scaling (200 → 185), although it launches at a lower angle to compensate (60° → 40°).
- The final hit has a unique, bright red visual effect if it hits an opponent.
- Shuttle Loop:
- Shuttle Loop conserves more vertical momentum after the second hit.
- The first hit deals set knockback (grounded: 130/127/98/98 base/10 scaling (early), 90/10 (late) → 125/125/120/120 set/120 scaling (early), 100/120 (mid), 80/100 (late); aerial: 120/70 base/10 scaling → 116/110 set/120 scaling (early), 80/100 (late)) and is weight-independent. While this would make it connect the same way regardless of percent, the set knockback means it no longer scales with percent, removing its ability to potentially hit opponents up to a higher position and lead to earlier KOs with the second hit, hindering the move's KO potential, which is further worsened by rage no longer affecting moves with set knockback.
- Dimensional Cape:
- Dimensional Cape deals more damage if done on the ground without moving (15% → 16%).
- It deals less damage if done on the ground moving backward (14% → 13%).
- Due to the changes to the jostle mechanics, Dimensional Cape can no longer cross-up opponents once Meta Knight reappears.
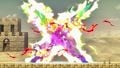
- Darkness Illusion:
- Meta Knight has a new Final Smash, Darkness Illusion. It creates a surge of energy around Meta Knight which traps opponents, dragging them into the air, where Meta Knight clones himself to strike repeatedly, before finishing with a slash that sends opponents at a horizontal angle. It bears a resemblance to Upper Calibur, Meta Knight's strongest attack in Kirby: Star Allies, with the cross-lightning being similar to Kirby Super Star Ultra's version of Mach Tornado and Meta Knight's Shuttle Loop when combined with electricity in Kirby Star Allies.
- The surge of energy from Darkness Illusion has less range than the cape from Galaxia Darkness. In addition, it has lost the ability to hit others not trapped in the Final Smash, unlike Galaxia Darkness.
Update history
Meta Knight received a mix of buffs, a single nerf and a single glitch fix via game updates, but was buffed slightly overall. Update 1.1.0 increased his dash attack's ending lag, which made it slightly less safe on shield and slightly exacerbated its already worsened combo potential. After an absence from game updates, Meta Knight was buffed slightly in update 7.0.0, which enlarged his shield as part of a near-universal buff.
However, update 8.0.0 granted Meta Knight his most useful buffs. Most notably, forward aerial, back aerial and Shuttle Loop each received hitbox and/or knockback adjustments; these changes not only improved their consistency (especially Shuttle Loop's), but also improved forward and back aerials' combo potentials. On an extended note, forward aerial auto-cancels earlier and its ending lag was decreased; both of these buffs not only further supplement its improved combo potential, but also improve its utility for approaching and edge-guarding. Aside from these changes, neutral aerial's range was increased via enlarged and repositioned hitboxes, while clean Mach Tornado gained more active frames.
Following this, update 9.0.0 made neutral attack slightly safer by granting its finisher transcendent priority as part of a near-universal buff. Lastly, update 13.0.1 improved up smash's consistency, slightly increased forward and back aerials' damage outputs, and increased up throw's knockback to the point that it now functions as a situational KO option (especially on platforms).
Overall, Meta Knight fares slightly better than he did at the launch of Ultimate.
- Dash attack has more ending lag (FAF 32 → 33).
- Overall shield size has been increased.
- Neutral aerial has larger hitboxes (4u/7u → 4.5u/7.5u (clean), 3.8u/5u → 4u/6u (late)) with altered vertical placements (Y offset: 0u/5.2u/7.2u → 0u/5.2u/5.5u (clean), 0u/4u/7.2u/0u → 0u/5.2u/7.7u/5.5u (late)), increasing its range.
- Forward aerial:
- The move has less ending lag (FAF 46 → 40) and autocancels earlier (frame 44 → 39).
- The first two hits have weight-independent knockback, use set knockback against grounded opponents (60 base/100 scaling → 65 set/100 scaling), and launch at a higher angle with the farthest hitbox (60° → 70°). This allows them to both connect reliably into the third hit and start combos more effectively, now possessing a KO setup into down smash at high percents.
- Back aerial's first two hits have weight-independent knockback, and use set knockback against grounded opponents (50 base/90 scaling → 55 set/100 scaling). This allows them to both connect reliably into the third hit and start combos more effectively.
- Mach Tornado's clean hit has a longer duration.
- Shuttle Loop:
- The first hit's late hit launches at a slightly lower angle (86° → 84°) with reduced set knockback (80 → 68).
- The second hit's sword hitbox is much larger (5.5u → 7.7u) and stretches farther vertically (4u—9u → 3.5u—10u), increasing its range and allowing it to connect more reliably from the first hit.
- Rapid jab finisher has transcendent priority, preventing it from being canceled out by weak attacks.
- Fixed an issue where Meta Knight would pass through non-stage terrain such as Steve's blocks or Pac-Man's Fire Hydrant.
- Up smash now has more range (hits 1-2: 4.5u → 5.5u, hit 3: 6u → 7u) and now has a trip chance of -1, making it so the opponent can't trip and fall out of the move.
- The first two hits of forward and back aerial deal 0.5% more damage (1.5% → 2%).
- Up throw has more knockback growth (70 → 76).
Moveset
- Meta Knight can perform 5 double jumps.
For a gallery of Meta Knight's hitboxes, see here.
Note: All numbers are listed as base damage, without the 1v1 multiplier.
| Name | Damage | Description | ||
|---|---|---|---|---|
| Neutral attack | Chaos Slash (乱れ斬り) / Slash Up (斬り上げ) | 1% (loop), 2% (last) | An extremely fast flurry of slashes followed by a backflipping slash. It is notably the only neutral attack in the game that consists solely of a neutral infinite. | |
| Forward tilt | Diagonal Slash (袈裟斬り) / Counter Slash (返し斬り) / Flip Up (跳ね上げ) | 2% | A kesagiri, followed by an outward slash, followed by an upward slash. Unlike the majority of tilt attacks (with an exception to the forward tilts of Snake, Bayonetta, Piranha Plant, and Hero and the down tilts of the Belmonts), it functions like a neutral attack: pressing the attack button will cause Meta Knight to perform its first hit, while subsequently pressing the attack button will cause him to perform its second and last hits. Due to its last hit having slightly above-average base knockback and high knockback growth, it can function as a situational KO option at very high percentages while near the edge. | |
| 2% | ||||
| 4% | ||||
| Up tilt | Spiral Up Thrust (螺旋突き上げ) | 7% (sweetspot), 6% (clean sourspot), 5% (late sourspot) | A spinning, overhead thrust. It is a decent anti-air move and has a sweetspot located on Galaxia's tip. However, its horizontal range is so poor that it will miss an opponent unless they are at point-blank range in front of Meta Knight. Unlike most up tilts, it also has very minimal combo potential, with its only reliable follow-ups being itself, up smash and up aerial at 0% to very low percentages. | |
| Down tilt | Lower Thrust (下段突き) | 5% | A crouching thrust. May cause tripping and can lock at low percentages. Due to its very low overall lag, it is a decent combo starter. | |
| Dash attack | Charge Kick (突進蹴り) | 7% (foot), 6% (tip) | A side kick. It is a decent combo starter at low percentages, but is much less effective in that role than in SSB4. | |
| Forward smash | Torso Quick-Draw (胴抜き) | 16% | An outward slash. Due to it coming out on frame 24, it is his slowest standard attack in terms of start-up lag. In addition, its hitbox only lasts for 1 frame. However, it is powerful and has low ending lag and high shield pushback, making it safe on shield when spaced sufficiently. | |
| Up smash | Triple Flag Swing (旗振り三連) | 4% (hit 1), 3% (hit 2), 5% (hit 3) | Performs three upward fanning slashes. Despite its appearance, it is only able to hit opponents directly touching Galaxia. However, it will hit a target that has a large hurtbox. Deals noticeably more damage than it did in SSB4, but remains a fairly weak smash attack and it is not safe on shield. | |
| Down smash | Front and Back Slash (前後斬り) | 10% (front), 13% (back) | A spinning, low-angle inward slash. Both hits are semi-spikes, which makes it useful for warding off pressure, punishing rolls, and launching opponents off-stage. Due to it coming out on frame 4, it is extremely fast for a smash attack. It also deals noticeably more damage than it did in SSB4, but remains a fairly weak smash attack, especially in regard to its front hit. | |
| Neutral aerial | Aerial Spin Slash (空中回転斬り) | 10% (clean), 7.5% (late) | A somersaulting slash. It has sex kick properties and, when clean, it is one of the strongest in the game, KOing reliably below 150% and much earlier offstage. It also autocancels with a jump and is safe on shield. Based on the Knight Spin, which debuted in Kirby's Adventure. | |
| Forward aerial | Midair Front Triple Combo (空中前三連) | 2% (hits 1 and 2), 3% (hit 3) | Performs three fanning slashes in front of himself. It does not autocancel with a short hop. It also struggles to consistently connect into itself, which can typically result in only the first part of the move hitting opponents. | |
| Back aerial | Midair Back Triple Combo (空中後三連) | 2% (hits 1 and 2), 4% (hit 3) | Spins backward to perform three outward slashes behind himself. When used during a fast fall, the first two hits can drag midair opponents towards the ground to start combos. It does not autocancel with a short hop. | |
| Up aerial | Midair Up Sweep (空中上なぎ) | 4% | An upward arcing slash. Hitbox lasts 1 frame and is the basis for Meta Knight's ladder combos. Based on his jumping attack from Kirby's Adventure. | |
| Down aerial | Midair Down Sweep (空中下なぎ) | 6% | A downward arcing slash. Hitbox lasts 1 frame, though it comes out on frame 4, making it among the fastest down aerials in the game. | |
| Grab | Grab (つかみ) | — | Reaches out with his free hand. Very short range. | |
| Pummel | Wing Claw (翼爪) | 1% | Jabs with one of the talons on his cape's wings. One of the fastest, yet least damaging pummels in the game. | |
| Forward throw | Toe Kick (つま先蹴り) | 6% (hit), 3% (throw) | A bicycle kick. Unlike in SSB4, its combo potential is almost totally nonexistent due to Ultimate's changes to traction. Due to dash attack being its only potential follow-up, forward throw's primary utility is to launch the opponent into an unfavorable position and follow up with either forward aerial, back aerial or Mach Tornado for an edgeguard attempt, or Shuttle Loop for a KO attempt. | |
| Back throw | Warp Slash (ワープ斬り) | 7% (hit), 3% (throw) | Lays the opponent behind himself, teleports, and then slashes their back. It is useful for launching opponents off-stage to set up an edgeguard, and is a situational KO option at very high percentages while near the edge. It can even start a tech-chase from 0% to low percentages. | |
| Up throw | Air Drop (いづな落とし, Izuna Drop) | 10% (throw), 7% (collateral) | The Air Drop from Kirby's Ninja ability. Its collateral hitbox, although noticeably weaker than in SSB4, is still strong enough to KO reliably and thus makes it a useful option in doubles matches. Update 13.0.1 also increased its knockback growth to the point that it is a situational KO option at very high percentages. It KOs middleweights beginning at 165% on Final Destination, and KOs them beginning at 140% on Battlefield's top platform. Despite dealing the same amount of damage as Kirby's up throw and having marginally higher knockback growth compared to his, Meta Knight's up throw KOs ≈10% later due to Kirby's version having higher base knockback. | |
| Down throw | Trample (踏みつけ | 0.5% (hits 1-9), 1% (hit 10), 2% (throw) | The Fury Stomp from Kirby's Suplex ability. Deals decent damage and, unlike Kirby's down throw, it has combo potential. It can combo into Mach Tornado at 0%, dashing up smash and all aerials at low percentages, and forward aerial, reverse aerial rush back aerial and Shuttle Loop from 0% to medium percentages. However, its extremely high knockback scaling and Meta Knight's slightly below-average air speed make its other follow-ups difficult to perform past medium percentages, especially if the opponent DIs properly. | |
| Floor attack (front) | 7% | Slashes around himself. | ||
| Floor attack (back) | 7% | Slashes around himself. | ||
| Floor attack (trip) | 5% | Slashes around himself. | ||
| Edge attack | 9% | Performs an outward slash while climbing up. | ||
| Neutral special | Mach Tornado | 12% (clean), 8% (late) | Spins rapidly to form a tornado around himself and slam into the opponent. Button mashing both increases the move's duration and makes Meta Knight ascend slightly; he can also move left and right. Unlike its previous versions, the tornado consists of a clean hitbox and late hitbox instead of looping hitboxes. A great edgeguarding tool, one must be careful to avoid bouncing off the underside of the stage, as using this move in midair renders Meta Knight helpless. It is based on the Mach Tornado attack from his boss fight in Kirby Super Star, but unlike its previous versions, it functions similarly to the Tornado Attack from Kirby's Tornado ability. | |
| Side special | Drill Rush | 1.1% (hits 1-11), 3% (hit 12) | Rushes forward to perform a corkscrewing thrust. The flight path can be maneuvered up or down, allowing it to function as a recovery option (although it will render him helpless). Meta Knight will also bounce backward or upwards if he lands the last hit on an opponent or onto the terrain. It is based on the attack same name from Kirby's Master ability. | |
| Up special | Shuttle Loop | 9% (grounded hit 1, clean), 6% (grounded hit 1, late; grounded hit 2; aerial hits 1-2) | Soars high into the air to perform an upward thrust, then swoops downward and ascends in a fast loop to perform a second upward thrust. The speed, range, and power of this move, as well as its follow-up potential, makes it one of Meta Knight's best KO moves. However, due to Meta Knight being rendered helpless, it is highly punishable if whiffed. It is based on the attack of the same name from Kirby's Wing ability, as well as Meta Knight's use of the attack in Meta Knightmare Ultra, Kirby's Return to Dream Land, Kirby: Planet Robobot, and Kirby Star Allies. | |
| Down special | Dimensional Cape | 16% (advancing, stationary), 13% (grounded, retreating), 14% (aerial, retreating) | Wraps himself in his cape and teleports to the direction inputted. He is granted intangibility during the move's execution (frames 12-39). Holding the attack/special button, however, will have him perform a very powerful slash upon reappearing (frame 34), at the expense of more end lag. The damage output depends on what direction he teleports. This move can also be used as a recovery option, though it does render Meta Knight helpless. | |
| Final Smash | Darkness Illusion | 3% (trapping hit), 27.6% (flurry attack), 10% (launch) | Meta Knight's cape turns into two pairs of wings as he raises Galaxia skyward. A lightning bolt strikes Galaxia and spreads out in a cross-shaped burst, knocking anybody who touches it up and above the stage. Meta Knight then proceeds to launch a series of rushing slashes from multiple directions, ending with a final slash that launches the opponent away. | |
On-screen appearance
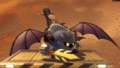
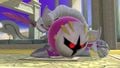
- Uses Dimensional Cape to warp onto the stage.
Meta Knight's on-screen appearance

Taunts
- Up taunt: Wraps himself in his cape and spins repeatedly (as if he is about to warp) while scoffing.
- Side taunt: Says "Fight me!" (勝負だ!, Let's battle!) while slashing twice and then pointing Galaxia in front of himself.
- Down taunt: Turns his cape into wings and spreads them out while shouting "Come!" (来いっ!) If he is facing left, he will perform the taunt while facing the background instead, similarly to how taunts function in Super Smash Bros.
Meta Knight's up taunt.
Meta Knight's side taunt.
Meta Knight's down taunt.


Idle poses
- Swings Galaxia and clenches his fist in front of himself.
- Pulls his cape in front of himself and then throws it back.
Meta Knight's first idle pose
Meta Knight's second idle pose


Crowd cheer
| Cheer (English) | Cheer (Japanese/Chinese) | Cheer (Italian) | Cheer (Dutch) | Cheer (French) | |
|---|---|---|---|---|---|
| Cheer | |||||
| Description | Me - ta - Knight! | Me - ta - Knight! | Me - ta - Knight! | Meta Knight! Meta Knight! Me - ta - Knight! | Me - ta - Knight! |
| Cheer (German) | Cheer (Spanish) | Cheer (Russian) | Cheer (Korean) | |
|---|---|---|---|---|
| Cheer | ||||
| Description | Me - ta - Knight! | Meeeeta - Knight! | Me - ta - Knight! | Metaaaa - Knight! |
Victory poses
- Left: Performs three slashes with Galaxia, says "Come back when you can put up a fight," then warps away. ("もっと強くなって来い。", Come at me when you're stronger.). The warp is a reference to his defeat animation from most of his appearances as a boss.
- Up: Flies into the scene and then spreads his cape, saying "You've much yet to learn." ("まだまだだな。", You're not yet ready.).
- Right: Performs two slashes and then twirls Galaxia, saying "Victory...is my destiny." ("これも宿命だ。", This, too, was destiny.).


In competitive play
When Ultimate was released, many players believed Meta Knight to be a strong character. This was due to his outstanding recovery, great frame data, and great mobility. Due to many smaller characters getting emphasized more, Meta Knight had better matchups against fighters who struggle against short characters, such as Wii Fit Trainer. Because of this, many players considered Meta Knight as a solid high tier character who was not as strong or broken as he was in Brawl, but just as good as he was in SSB4, if not better.
As the metagame advanced, however, players recognized the exploitable weaknesses of Meta Knight: his terrible endurance, watered down punish game, lack of effective finishers outside of forward smash, below-average overall damage output, poor range compared to other swordfighters like Cloud, and moves unsafe on shield. This resulted in him being worse than initially imagined, with many professionals calling him a mid tier or even a low tier character. Despite this, he has amassed a respectable playerbase and achieved notable results from players such as Jayy, Abadango, Slither2Hunter, BONK!, and Yei. As a result, several major players now believe Meta Knight to be a lower mid tier character, though with potential to become a solid mid tier.
Most historically significant players
See also: Category:Meta Knight professionals (SSBU)
 BONK! - One of the best Meta Knight players in the world. Placed 17th at Glitch - Infinite, Glitch 8.5 - Konami Code and Let's Make Big Moves 2022 as well as 33rd at Let's Make Big Moves, with wins over players such as Ned, WaDi, and LeoN.
 Lickey - One of the best Meta Knight players in Japan. Placed 13th at Maesuma TOP 5, 17th at both Sumabato SP 9 and Maesuma TOP 1, and 25th at Umebura SP 3 with wins over players such as Etsuji, Lunamado, and Sigma.
- sdsg - Placed 17th at both Sumabato SP 14 and Sumabato SP 17 as well as 25th at Sumabato SP 15 with wins over players such as Kome and Atelier.
 Soar - The best Meta Knight player in Canada before dropping the character. Placed 1st at Terry Christmas, 2nd at LAN ETS 2020, 17th at Super Smash Con 2019, and 33rd at Get On My Level 2019 with wins over players such as Myran, Riddles, and Blacktwins. Currently ranked 10th on the Smash Canada Rankings Ultimate.
- Uto - Placed 13th at Karisuma SP 6, and 17th at Sumabato SP 3, Karisuma SP 5, and Mēsuma with wins over players such as Kome and DIO.
 Yei - Uses Meta Knight alongside numerous secondaries, and is one of the best Meta Knight players in the world. Placed 1st at Smash Legends 2, 2nd at Smash Vertex, 5th at SWT: Central America Ultimate Regional Finals, and 7th at Smash Factor 8 with wins over players such as Maister, Joker, and Mr. E.
Classic Mode: Two Sides of the Same Coin

Half of Meta Knight's opponents consist of duos (for every even round), while the other half (for every odd round) consists of free-for-all rounds of characters fighting their dark counterparts.
| Round | Opponent | Stage | Music | Notes |
|---|---|---|---|---|
| 1 | Bridge of Eldin (Ω form) | Hidden Mountain & Forest | The second Link is Dark Link, a shadowy copy of Link. | |
| 2 | Reset Bomb Forest | Dark Pit's Theme | ||
| 3 | Port Town Aero Dive | Fire Field (Remix) | The second Captain Falcon represents Blood Falcon, Captain Falcon's evil clone. | |
| 4 | New Pork City | Mother 3 Love Theme | The second Lucas is Claus, Lucas' twin brother. | |
| 5 | Frigate Orpheon | Multiplayer - Metroid Prime 2: Echoes | ||
| 6 | Fountain of Dreams | The World to Win | Items do not appear. The Meta Knights represent Galacta Knight (a recurring boss in the Kirby series) and Dark Meta Knight (Meta Knight's Mirror World counterpart), respectively. If either of these costumes are used by the player, | |
| Bonus Stage | ||||
| Final | Master Hand and Crazy Hand | Final Destination | Master Hand / Crazy Hand | The Hands references themselves two sides of the same coin. Both Hands are fought at any difficulty. |
Credits roll after completing Classic Mode. Completing it as Meta Knight has Meta Knight's Revenge accompany the credits.
Role in World of Light

Meta Knight is absent from the World of Light opening cutscene, though he was vaporized and later imprisoned alongside the rest of the fighters (except Kirby) when Galeem unleashed his beams of light.
Meta Knight was one of the many fighters that fell under Dharkon's control upon Galeem's first defeat. He can be found in the Mysterious Dimension sub-area, making him an obligatory unlock. After saving him, Ike and Greninja, the player can advance toward the boss.
Fighter Battle
| No. | Image | Name | Type | Power | Stage | Music |
|---|---|---|---|---|---|---|
| 27 | |
Meta Knight | 11,800 | Halberd (Ω form) | Meta Knight's Revenge |
Spirit
Meta Knight's fighter spirit can be obtained by completing Classic Mode. It is also available periodically for purchase in the shop for 300 Gold, but only after Meta Knight has been unlocked. Unlocking Meta Knight in World of Light allows the player to preview the spirit below in the Spirit List under the name "???". As a fighter spirit, it cannot be used in Spirit Battles and is purely aesthetic. His fighter spirit has an alternate version that replaces it with his artwork in Ultimate.
324. Meta Knight

In Spirit battles
Conditions in italic aren't listed on the Spirit Battle preview screen.
As the main opponent
| Spirit | Battle parameters | Inspiration | |||||||||
|---|---|---|---|---|---|---|---|---|---|---|---|
| No. | Image | Name | Series | Enemy Fighter(s) | Type | Power | Stage | Rules | Conditions | Music | Character |
| 101 |  |
Dimentio | Paper Mario Series | •Meta Knight •Giant Luigi |
3,800 | Paper Mario | •Attack Power ↑ | •The enemy has increased attack power after a little while •The enemy deals damage when falling •The enemy is giant |
Battle! - Paper Mario: Color Splash | ||
| 306 |  |
Bandit | Yoshi Series | •Meta Knight |
3,300 | Yoshi's Island | N/A | •The enemy favors grabs and throws | Obstacle Course - Yoshi's Island | ||
| 309 |  |
Grim Leecher | Yoshi Series | •Meta Knight |
1,800 | Yoshi's Island | •Hazard: Left Is Right, Right Is Left | •Left and right controls will suddenly reverse | Obstacle Course - Yoshi's Island | ||
| 343 |  |
Dark Matter | Kirby Series | •Meta Knight •King Dedede |
13,500 | Halberd (Ω form) | •Assist Trophy Enemies (Nightmare) | •The enemy's melee weapons have increased power •The enemy can unleash powerful critical hits at random •Stamina battle |
02 Battle | ||
| 374 |  |
Meta-Knights | Kirby Series | •Meta Knight Team |
8,800 | Halberd (Ship deck) | N/A | •Stamina battle •Reinforcements will appear during the battle •The enemy starts the battle with a Killing Edge |
Meta Knight's Revenge | Javelin Knight (red costume) Axe Knight, Mace Knight, and Trident Knight (navy costume) | |
| 539 |  |
Aegislash | Pokémon Series | •Gold Meta Knight |
4,000 | Kalos Pokémon League (hazards off) | N/A | •The enemy's melee weapons have increased power •Timed battle (1:30) •Reinforcements will appear after an enemy is KO'd |
Battle! (Trainer Battle) - Pokémon X / Pokémon Y | ||
| 987 | Vega | Street Fighter Series | •Meta Knight |
9,100 | Arena Ferox (Ω form) | •Jump Power ↓ | •Stamina battle •All fighters have reduced jump power •The enemy loves to jump |
Vega Stage Type A | |||
| 1,019 | Masked Lumen | Bayonetta Series | •Giant Meta Knight |
4,100 | Umbra Clock Tower (hazards off) | •Item: Timer | •The enemy is giant | The Legend Of Aesir | |||
| 1,068 |  |
Medusa Head | Castlevania Series | •Meta Knight •Tiny Mewtwo |
3,600 | Dracula's Castle | •Move Speed ↓ | •You have reduced move speed after a little while •The enemy falls slowly •Defeat an army of fighters |
Starker / Wicked Child | ||
| 1,072 |  |
Carmilla | Castlevania Series | •Giant Meta Knight |
2,100 | Dracula's Castle | •Defense ↑ •Invisibility |
•The enemy is invisible •The enemy has increased defense after a little while •The enemy is giant |
Dwelling of Doom | ||
| 1,332 | Dracky | Dragon Quest Series | •Meta Knight |
2,200 | Dracula's Castle (hazards off) | •Defense ↓ | •You have reduced defense •Timed stamina battle (1:00) •The enemy has increased jump power |
Unflinchable Courage | |||
As a minion
| Spirit | Battle parameters | Inspiration | |||||||||
|---|---|---|---|---|---|---|---|---|---|---|---|
| No. | Image | Name | Series | Enemy Fighter(s) | Type | Power | Stage | Rules | Conditions | Music | Character |
| 205 | Skull Kid | The Legend of Zelda Series | •Mii Brawler •Tiny Meta Knight |
4,000 | Distant Planet (hazards off) | •Assist Trophy Enemies (Skull Kid (Invisibility Effect)) •Hazard: Fog |
•Defeat the main fighter to win •The stage is covered in fog •Hostile assist trophies will appear |
Saria's Song / Middle Boss Battle | Tatl (pink costume) and Tael (navy costume) | ||
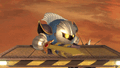
| 310 | Roger the Potted Ghost | Yoshi Series | •Giant Wii Fit Trainer •Meta Knight |
4,400 | Dracula's Castle (Ω form) | •Hard to Launch •Jump Power ↓ •Hazard: High Gravity |
•Defeat the main fighter to win •All fighters have reduced jumping ability •Timed stamina battle (1:00) |
Yoshi's Island (Brawl) | Green Shy Guys | ||
| 358 | Susie | Kirby Series | •Isabelle •Metal Meta Knight |
3,400 | Halberd (hazards off) | N/A | •The enemy is metal | Pink Ball Activate! | Mecha Knight | ||
Alternate costumes

| |||||||

|

|

|

|

|

|

|

|
Gallery
Meta Knight's fighter card.

Meta Knight's unlock notice.
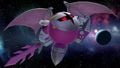
Meta Knight above Umbra Clock Tower.
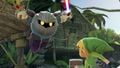
Jumping toward Toon Link with a Beam Sword on Kongo Falls.
On Skyworld alongside Kirby, who is sporting his unmasked Meta Knight-inspired alternate costume.
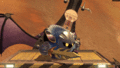
Using Dimensional Cape on Bowser on Smashville.
Sporting his Galacta Knight-inspired alternate costume on Skyworld.
Meta Knight and Roy facing a Fake Smash Ball on Mushroomy Kingdom...
...and then being hit by its blast.
Using his up aerial on Lylat Cruise.
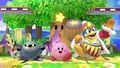
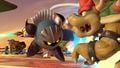
Alongside Kirby and King Dedede on Green Greens.
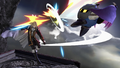
Meta Knight getting attacked by Alucard on Umbra Clock Tower.


Fighter Showcase Video
Trivia
- Meta Knight, Kirby, R.O.B., Sonic, Zombie and Enderman are the only fighters whose stock icons feature their eyes.
- Although Captain Falcon and Larry's stock icons are similar, they are exempt due to Falcon's icon featuring the eyes of his visor instead of his actual eyes, and Larry's icon lacking his irises.
- Additionally, Meta Knight's stock icon resembles his HUD icon from Kirby's Return to Dream Land, albeit with the small indented sections of his mask.
- Meta Knight was the first Super Smash Bros. Brawl newcomer to be confirmed for Super Smash Bros. Ultimate. Coincidentally, he was the first newcomer revealed for Brawl.
- The sword swooshing sound effects during Meta Knight's rapid jab don't match up with the actual sword swings. This is because the move uses the same sound effect timings as Smash 4, where the rapid jab was slower. This can be easily heard by slowing down the game speed, where the 5-swing sound sequence can be heard.
- Meta Knight is the only character whose eyes glow a color other than yellow when perfect shielding or while capable of using a Final Smash. In his case, they glow red; this may be a reference to Kirby: Right Back at Ya!, which depicted Meta Knight's eyes turning red when he is angry. This also makes Meta Knight's 5th and Galacta Knight alternate costumes his only costumes in which his eye color does not change via perfect shielding or while capable of using a Final Smash.
- When Meta Knight is poisoned or cursed, his eyes become slightly smaller than usual. This may suggest that he is surprised in a similar vein to Yoshi, Kirby, Daisy, Diddy Kong, Olimar, or Pac-Man.
- Meta Knight, Inkling, Hero, Banjo & Kazooie, Sephiroth, Pyra, Mythra, and Sora are the only fighters who use their walking animations when navigating through the map in World of Light.
- Out of all of them, Meta Knight is the only one of who is a veteran.
- Excluding Sephiroth, who is a DLC fighter, Meta Knight and Wario are the only playable antagonists that are not fought by their respective main protagonists in Classic Mode. Unlike Sephiroth, Wario has been an anti-hero following Super Mario Land 2: 6 Golden Coins, and Meta Knight has been a hero by default following Revenge of Meta Knight.
- Meta Knight and Sephiroth are the only fighters to leave the victory screen after performing one of their victory poses.
- Meta Knight's Classic Mode route is somewhat similar to Pyra and Mythra's, since each of them face duos as opponents and their routes have the same opponents in some Rounds.
- Both also share the same boss, that being Master Hand and Crazy Hand, regardless of the difficulty level.
- When fighting off the 50 puppet fighter army as Master Hand in World of Light, Meta Knight is one of the 8 fighters fought there, being affiliated with Dharkon.
References
|
| |
|---|---|
| Fighters | Kirby (SSB · SSBM · SSBB · SSB4 · SSBU) · Meta Knight (SSBB · SSB4 · SSBU) · King Dedede (SSBB · SSB4 · SSBU) |
| Assist Trophies | Knuckle Joe · Nightmare · Chef Kawasaki |
| Bosses | Giant Kirby · Marx |
| Stages | Dream Land · Fountain of Dreams · Green Greens · Halberd · Dream Land GB · The Great Cave Offensive |
| Items | Maxim Tomato · Star Rod · Parasol · Warp Star · Apple · Dragoon · Superspicy Curry · Bomber |
| Enemies | Bonkers · Bronto Burt · Gordo · Parasol Waddle Dee · Plasma Wisp · Shotzo · Tac · Waddle Dee · Waddle Doo |
| Other | Gourmet Race · Whispy Woods |
| Trophies, Stickers and Spirits | Trophies (SSBM · SSBB · SSB4) · Stickers · Spirits |
| Music | Brawl · SSB4 · Ultimate |
| Masterpieces | Kirby's Dream Land · Kirby's Adventure · Kirby Super Star |