Bowser (SSBB): Difference between revisions
m (Both Bowser and Koopas are based on turtles, and retreating into their shell is a thing turtles do and is a common thing done with many turtle-based characters) |
|||
| (93 intermediate revisions by 56 users not shown) | |||
| Line 2: | Line 2: | ||
{{disambig2|Bowser's appearance in ''Brawl''|other uses|Bowser}} | {{disambig2|Bowser's appearance in ''Brawl''|other uses|Bowser}} | ||
{{Infobox Character | {{Infobox Character | ||
|name = Bowser | |name = Bowser | ||
|image = [[File:Bowser SSBB.jpg|250px]] | |image = [[File:Bowser SSBB.jpg|250px]] | ||
|game = SSBB | |game = SSBB | ||
| Line 12: | Line 12: | ||
|ranking = 33 | |ranking = 33 | ||
}} | }} | ||
{{ | '''Bowser''' ({{ja|クッパ|Kuppa}}, ''Koopa'') is a playable character in ''[[Super Smash Bros. Brawl]]''. Confirmed on the [[Smash Bros. DOJO!!]] website on July 3, 2007, he returns from his ''{{b|Super Smash Bros.|series}}'' series debut in ''[[Super Smash Bros. Melee]]''. | ||
Confirmed on the [[Smash Bros. DOJO!!]] website on July 3, 2007, | |||
Bowser | Rather than use his stock roars from ''Mario Kart 64'' (like in ''Melee'') or portrayals by Kenny James or Scott Burns, his most recent voice actors at the time, Bowser now uses modified stock pig sounds taken from the Serafine L2 Sound Library, with his star KO scream including an elk bugle. The same stock sound effects are also used for [[Ridley]] in ''[[Super Smash Bros. Brawl]]'' and ''[[Super Smash Bros. for Wii U]]'', through with considerably less modification. | ||
Bowser ranks 33rd out of 38 on the [[tier list]], putting him in 3rd place on the F tier, a slight improvement from his last place ranking in ''Melee''. Compared to his ''Melee'' incarnation, Bowser is faster and more mobile character at the expense of slightly less power. Despite the slight power nerf, Bowser is still one of the strongest characters in ''Brawl'', possessing a moveset full of potential finishers, several of which can even reliably KO under 100%. Along with his trademark power, Bowser holds distinction as the heaviest character, with strong [[momentum cancelling]] to complement it, giving Bowser one of the best endurance potentials in ''Brawl''. Additionally, Bowser has gained an excellent aerial grab in [[Flying Slam]], which also gives him access to the [[Koopa hopping]] technique to improve his mobility and approach. Bowser also has some great [[reach]] throughout his moveset, a 10-frame advantage on [[grab release]]s that gives him grab release options on nearly every character, and a powerful, five-frame move in [[Whirling Fortress]] that can be immediately used [[out of shield]] to escape pressure. Despite his speed [[buff]]s, Bowser is still one of the slowest characters in ''Brawl'', possessing only average dashing speed and the slowest [[initial dash]] speed, and he can have difficulty in keeping up with several characters. He is also one of the largest characters, which combines with his massive weight to make him quite vulnerable to [[combo]]s and [[chain throw]]s, some of which are infinite or even a zero-to-death (most notoriously from {{SSBB|King Dedede}}). Importantly, Bowser has significant trouble landing, with all of his landing options being slow, punishable, predictable, which is also compounded by his laggy aerials. Finally, Bowser possesses an easily [[gimp]]able recovery that gains barely any vertical height, and his lack of an effective [[projectile]] makes it difficult for him to break through opposing [[camp]]ing. His flaws overpower his strengths, resulting in mostly terrible match-ups and, when combined with his miniscule [[tournament]] representation, some of the worst tournament results of any character. | |||
==Attributes== | ==Attributes== | ||
Bowser is the largest and heaviest character in ''Brawl''. This grants him high durability, yet | Bowser is the largest and heaviest character in ''Brawl''. This grants him high durability, yet makes him easier to hit due to his large [[hurtbox]]. Because of his heavy weight, Bowser's [[recovery]] has significant horizontal range but marginal vertical movement. His dodging abilities are among the worst relative to the rest of the cast in having the second slowest roll and slowest spot dodge. He also has the ability to [[crawl]], but due to his large size, it is ineffective at avoiding incoming projectiles or other attacks. As with other large characters, Bowser's strengths lie in his KO ability and not his speed. He sports a wide variety of powerful attacks both in the air and on the ground. For example, Bowser's forward smash is the most damaging smash attack in ''Brawl''. However, this KO ability comes at the price of high startup lag and [[cooldown]]. Due to his average speed and reliance on powerful KO moves, Bowser can struggle somewhat in the low [[damage]] game, as he lacks diverse ways of racking up damage on the opponent. The one possible exception is his [[neutral special]] [[Fire Breath]], which can help set up pseudo-chaingrabs or combos into his strongest attacks. He also notably has an effective [[grab release]], due to its animation being shorter than any other character. Out of a ground release, Bowser can hit his opponent with a jab, tilt or he can regrab them (except {{SSBB|Donkey Kong}}, because of his unusually short ground release animation). An aerial release can lead into a forward aerial against multiple characters, as well as a smash attack against {{SSBB|Wario}} or an up aerial against {{SSBB|Jigglypuff}}. Fire Breath serves multiple roles for Bowser, such as racking up damage on the opponent as well as preventing an opponent's approach; it also serves as a functional edge guarding attack. Bowser also has a potent [[Sacrificial KO]] in [[Flying Slam]]. This move allows Bowser to grab an opponent, then leap into the air and fall back to the ground with Bowser on top of them. Thus, the opponent will always be KOed first if they go down offstage. It is also useful in [[Classic Mode (SSBB)|Classic]] and [[All-Star Mode|All-Star]] modes, making for an easy KO when only one opponent is left. Given Bowser's difficulty racking up damage, this can be a useful move when the opponent is far ahead of Bowser in the damage count. However, opponents can control Flying Slam when Bowser is at higher or even equal damage, preventing [[Bowsercide]], or forcing it if up in stock. Bowser's standard attack can cancel out incoming projectiles, including Samus' and Lucario's standard specials. This is effective, as it allows the player to conserve Bowser's shield, as well as provide quicker reaction times after blocking enemy projectiles without experiencing [[shieldstun]]. | ||
However, given Bowser's extreme heavy weight and | However, given Bowser's extreme heavy weight, large size and high gravity, it makes him vulnerable for infinite [[chain grabs]] like Wario's and {{SSBB|King Dedede}}'s, and other combos in general. In addition, his primary recovery, [[Whirling Fortress]], is worse than Donkey Kong's [[Spinning Kong]] and gives poor vertical and horizontal distance, although it is a very good out-of-shield move, though it can be shielded if read. His poor mobility also severely hinders his approach and allows many characters to easily [[camp]] him and rack up damage. He also lacks an effective aerial game due to a combination of low jumps and having mostly laggy or easily avoidable aerial attacks. All of his aerials have high landing lag and all of them except for forward aerial are incapable of [[auto-cancel]]ling in a short hop, resulting in Bowser's aerials being extremely ineffective for approaching and spacing, except for forward aerial. | ||
Overall, Bowser can dish out large amounts of damage to opponents in minimal hits, | Overall, Bowser can dish out large amounts of damage to opponents in minimal hits, complemented with a useful [[sacrificial KO]] and a strong OoS game due to his Whirling Fortress and high weight. This often allows him to not be KO'd until late percentages. However, most of his stats work against him; he is extremely vulnerable to chain grabs due to his large size, high weight and gravity, and his primary recovery [[Whirling Fortress]] can easily be [[gimp]]ed. Without committal reads, Bowser’s lack of speed means he will usually be unable to break the opposition between him and his foe, meaning he can be overwhelmed with fast attacks and/or mobility, or he will be forced to play in a disadvantageous situation throughout a game. | ||
==Changes from ''[[Super Smash Bros. Melee]]''== | |||
Bowser is considered to be buffed overall from ''Melee'' due to his increased speed, both in overall mobility, and to a lesser extent, frame data. Bowser's ground speed has slightly improved, and his air speed has been greatly improved, significantly improving his recovery. A variety of his moves have decreased startup lag, and his claw attacks have increased range. His new side special, [[Flying Slam]], has significantly higher utility than [[Koopa Klaw]], and his [[grab release]] game is overall more consistent due to the introduction of [[buffer]]ing; additionally, the general changes to aerial grab releases also improve his grab release game. Lastly, the introduction of [[hitstun canceling]] benefits him as it makes him less vulnerable to combos, aids his endurance via [[momentum canceling]], and does not have a huge impact on him due to his lack of combo potential. | |||
However, he has also seen some nerfs, mainly to his power. His power is slightly toned down (although he still is one of the strongest characters in the game), with many of his attacks dealing less damage and knockback, making it more difficult for Bowser to KO his opponents. Two of Bowser's most versatile attacks have also seen significant nerfs: his fast [[edge attack]] has much less [[intangibility]] and a shorter duration, making it a significantly less effective tool, while his grounded [[Whirling Fortress]] is slightly slower and weaker, though it is still a very strong [[OOS]] option. Finally, the removal of [[L-cancelling]] has crippled his already poor aerial game by rendering his already slow aerials even slower and consequently making them even more unsafe. | |||
Overall, while Bowser is better than he previously was, his tournament results and representation have not significantly improved, due to most of his severe flaws still remaining intact and some of them being exacerbated (most notably his aerials being much more unsafe on landing due to the loss of L-cancelling.) As such, he still remains as a bottom tier character with a multitude of poor matchups and extremely scarce tournament representation. | |||
===Aesthetics=== | ===Aesthetics=== | ||
*{{change|As with all characters, Bowser has received a boost in texture quality and now | *{{change|As with all characters, Bowser has received a boost in texture quality and now more closely resembles his design from ''Super Mario Sunshine'' onwards, such as yellower skin, being more scaly, and his arms and legs being less muscular.}} | ||
*{{change|Bowser has two new [[alternate costume]]s, a grey skin and a brown skin.}} | |||
*{{change|As on-screen appearances were not present in ''Melee'', Bowser now receives one}}. | |||
*{{change|Bowser no longer uses his [[stun]] voice clip when waking out of [[asleep|sleep]] status.}} | |||
===Attributes=== | ===Attributes=== | ||
*{{change|Bowser is slightly [[Weight|heavier]] (117 → 120).}} | *{{change|Bowser is slightly [[Weight|heavier]] (117 → 120).}} | ||
*{{buff|Bowser [[dash]]es slightly faster (1.5 → 1.527).}} | *{{buff|Bowser [[dash]]es slightly faster (1.5 → 1.527), even relative to returning veterans; going from the 15th fastest out of 26 characters to the 16th fastest out of 39.}} | ||
*{{buff|Bowser | *{{buff|Bowser [[walk]]s faster (0.65 → 0.8), no longer having the slowest walking speed of the entire cast.}} | ||
*{{buff|Bowser's [[air speed]] is drastically faster (0.8 → 1.034), going from tied for 5th worst to tied for 11th best.}} | *{{buff|Bowser's [[air speed]] is drastically faster (0.8 → 1.034), going from tied for 5th worst to tied for 11th best, significantly improving his aerial approach and recovery.}} | ||
*{{change|Bowser's additional [[air acceleration]] is higher (0.03 → 0.04). However, his base air acceleration is lower to compensate (0.02 → 0.01).}} | *{{change|Bowser's additional [[air acceleration]] is higher (0.03 → 0.04). However, his base air acceleration is lower to compensate (0.02 → 0.01).}} | ||
*{{buff|Bowser's [[traction]] is lower (0.06 → 0.0577), going from the | *{{buff|Bowser's [[traction]] is lower (0.06 → 0.0577), going from the 11th lowest to the 19th lowest. Relative to returning veterans, however, Bowser's traction is slightly higher, making it slightly easier for him to punish out of shield.}} | ||
*{{change|As with the returning veterans, Bowser's [[falling speed]] is slower (1.9 → 1.39). Compared to the returning veterans, however, Bowser falls faster. While this improves his already strong endurance, it worsens his already poor vertical recovery and makes him more vulnerable to combos and chain throws.}} | *{{change|As with the returning veterans, Bowser's [[falling speed]] is slower (1.9 → 1.39). Compared to the returning veterans, however, Bowser falls faster. While this improves his already strong endurance, it worsens his already poor vertical recovery and makes him more vulnerable to combos and chain throws.}} | ||
*{{change|Bowser's [[gravity]] is lower (0.13 → 0.1027).}} | |||
*{{buff|Bowser's [[jumping]] height has been increased.}} | *{{buff|Bowser's [[jumping]] height has been increased.}} | ||
*{{buff|Bowser's arms are longer, which results in his arm based attacks having better reach.}} | *{{buff|Bowser's arms are longer, which results in his arm based attacks having better reach.}} | ||
*{{nerf|The removal of [[L-canceling]] has adversely affected Bowser more than any other character in the game other than {{SSBB|Ganondorf}} and {{SSBB|Link}}, with his aerials now being very unsafe and punishable on landing due to their extreme landing lag, and now having no ways to reduce it.}} | *{{nerf|The removal of [[L-canceling]] has adversely affected Bowser more than any other character in the game other than {{SSBB|Ganondorf}} and {{SSBB|Link}}, with his aerials now being very unsafe and punishable on landing due to their extreme landing lag, and now having no ways to reduce it.}} | ||
*{{buff|Bowser can now [[crawl]], though since Bowser's crouch barely reduces his height, its function is largely limited, except for its use in [[crouch cancel]]ling.}} | *{{nerf|The general changes to [[lock]]ing hinder Bowser more than any other veteran, as his large size and high weight make him one of (if not) the most vulnerable characters to locks, while he himself lacks any locking options outside of very low percents, and even then, his locking options are very difficult to land.}} | ||
*{{buff|[[ | *{{buff|Bowser can now [[crawl]], though since Bowser's crouch barely reduces his height, its function is largely limited, except for its use in [[crouch cancel]]ling (which is far less useful than in ''Melee'').}} | ||
*{{nerf|[[Roll]]s (frame 4 → 5) and air dodge (frame 3 → 4) have more startup lag.}} | |||
*{{buff|[[Spot dodge]] has decreased startup with a slightly longer duration (frames 4-24 → 3-24), and less ending lag (FAF 43 → 33), although it is still the longest spot dodge in the game.}} | |||
*{{bugfix|Giant hand glitch that was caused by air dodging while holding an item has been fixed.}} | *{{bugfix|Giant hand glitch that was caused by air dodging while holding an item has been fixed.}} | ||
===Ground attacks=== | ===Ground attacks=== | ||
*{{buff|Neutral attack and all tilts grant [[intangibility]] on Bowser's arms while their hitboxes are active, improving their safety.}} | *{{buff|Neutral attack and all tilts grant [[intangibility]] on Bowser's arms while their hitboxes are active, improving their safety.}} | ||
*{{buff|[[Forward tilt]] now has about twice the reach, having increased hitbox sizes overall (3.2u/6u/4.8u → 4u/5u/5.7u). It also has less startup (frame 12 → 10), and has gained a [[trip]] chance of 40% when angled down.}} | *[[Neutral attack]]: | ||
*{{nerf| | **{{buff|Both hits have less startup (frame 7/9 → 6/8) and ending lag (FAF 25/31 → 21/26). The first hit also has higher [[set knockback]] (20 → 45/30/18), different angles (83° → 30°/50°/85°), and transitions into the second hit faster (frame 14 → 11), allowing it to connect better.}} | ||
* | **{{nerf|The second hit of deals less damage (6% → 5%), although its knockback has been mostly compensated (30 (base)/110 (scaling) → 50/100).}} | ||
* | *[[Forward tilt]]: | ||
*{{buff|Both hits | **{{buff|Forward tilt now has about twice the reach, having increased hitbox sizes overall (3.2u/6u/4.8u → 4u/5u/5.7u). It also has less startup (frame 12 → 10), and has gained a [[trip]] chance of 40% when angled down.}} | ||
*{{nerf| | **{{nerf|It deals less damage (15%/13% (up), 14%/12%/13% (non-angled), 13%/11% (down) → 11% (all)) along with less knockback (29/25/31 (base)/100 (scaling) → 45/83), drastically reducing its KO potential, and no longer being the strongest forward tilt in the game. It also has more ending lag (FAF 37 → 38). Despite having more reach, it is less disjointed by comparison due to Bowser's hand being larger, but having a slightly smaller hitbox (6u → 5.7u).}} | ||
*{{buff| | *[[Up tilt]]: | ||
*{{nerf| | **{{buff|Up tilt has a longer duration (frames 7-10 → 8-13), with Bowser swiping his arm at a slower speed overhead.}} | ||
*{{buff| | **{{nerf|It deals less damage (13% → 12%) and knockback (40 (base)/120 (scaling) → 55/97), hindering its KO potential, though it is still one of the strongest up tilts in the game. It also has more startup (frame 7 → 8), leaving it unable to hit opponents directly in front of Bowser, as well as more ending lag (FAF 50 → 51).}} | ||
*{{nerf| | *[[Down tilt]]: | ||
*{{buff| | **{{buff|Both hits have less startup (frame 14/27 → 10/20) and deal more damage (13%/10% → 14%/11%), with the first hit having more base knockback as well (15 → 20), allowing it to KO reliably around 125%. The move also has drastically less ending lag (FAF 60 → 46), and both hits have gained a trip chance of 30%.}} | ||
*{{nerf| | **{{nerf|Its range is slightly shorter, with the hitboxes no longer covering his claws and being smaller overall (5.6u/4.8u → 5u/5u/4.5u/4u).}} | ||
*[[Forward smash]]: | |||
**{{buff|Forward smash has faster startup (frame 29 → 27) and consists of two hits, which increase its total damage (24% → 10% (hit 1), 23%/21% (hit 2)), making it the most damaging forward smash in the game.}} | |||
**{{nerf|Its second hit has smaller hitboxes (8u/6.4u → 7.3u/6.3u), and deals less knockback (30 (base)/100 (scaling) → 25/22 (base)/81 (scaling)), no longer being the most powerful smash attack in the game. Additionally, the first hit of the move can hit opponents away from the second hit at high percents due to its knockback (30 (base)/130 (scaling)), while KOing even later standalone. Lastly, the move has more ending lag (FAF 66 → 67).}} | |||
*[[Up smash]]: | |||
**{{buff|Up smash's hitboxes cover more of Bowser's shell, increasing its vertical reach. It also grants [[invincibility]] instead of intangibility, which lasts noticeably longer (frames 16-17 → 14-27), allowing it to cancel out opposing attacks and protect Bowser much more effectively.}} | |||
**{{nerf|It now has two sourspots instead of one, which cover Bowser's respective sides, deal less damage (17% → 15%), launch at less vertical angles (90° → 70°/120°), and both them and the sweetspot deal less knockback (40 (base)/86 (scaling) → 23 (base)/80/90 (scaling)), hindering the move's KO potential. The landing hit has also received sourspots that deal less damage (12% → 10%).}} | |||
*[[Down smash]]: | |||
**{{buff|Down smash has less ending lag (FAF 68 → 67), and deals more total damage (20.2% → 21%) due to the changes to [[stale-move negation]], despite the last hit dealing less damage (10% → 9%).}} | |||
**{{nerf|Its last hit launches at a less vertical angle (90° → 65°), which along with its lower damage output hinders its KO potential.}} | |||
===Aerial attacks=== | ===Aerial attacks=== | ||
*{{change|Neutral, forward and down aerials have decreased landing lag (30/15 frames → 24 (neutral, forward), 30/15 frames → 28 (up)). Due to the removal of L-canceling, however, their landing lag is not properly compensated.}} | *{{change|Neutral, forward and down aerials have decreased landing lag (30/15 frames → 24 (neutral, forward), 30/15 frames → 28 (up)). Due to the removal of L-canceling, however, their landing lag is not properly compensated.}} | ||
*{{nerf| | *[[Neutral aerial]]: | ||
*{{buff|Due to Bowser's slower falling speed, [[forward aerial]] can now [[autocancel]] in a short hop.}} | **{{nerf|Neutral aerial has a smaller hitbox (10u → 8u), and now possesses a late hit (frames 8-23 → 8-13 (clean)/14-23 (late)) that deals less damage (13% → 9%).}} | ||
*{{nerf| | *[[Forward aerial]]: | ||
*{{change|Forward aerial now has a [[slash]] effect instead of a normal effect.}} | **{{buff|Due to Bowser's slower falling speed, [[forward aerial]] can now [[autocancel]] in a short hop.}} | ||
*{{ | **{{nerf|It has less base knockback (50 → 40), and its sweetspot deals less damage (14% → 13%), hindering its KO potential.}} | ||
*{{nerf| | **{{change|Forward aerial now has a [[slash]] effect instead of a normal effect.}} | ||
*{{change| | **{{change|The 11% hitbox was moved over from Bowser's right shoulder to his left shoulder.}} | ||
*{{buff| | *[[Back aerial]]: | ||
*{{nerf| | **{{buff|Back aerial's clean hit deals more damage (13% → 15%) with more knockback scaling (80 → 83), making it a reliable KO move.}} | ||
*{{buff|Down aerial deals more total damage (26.66% → 29%) due to the changes to stale-move negation. Additionally, its last hit is now a [[meteor smash]] (80° → 270°) without set knockback (10 (set)/0 (base)/100 (scaling) → 0/10/100), granting it [[edgeguarding]] potential, while its landing hit has more base knockback (58 → 60) and larger hitboxes (8u → 9.6u).}} | **{{nerf|It has a shorter duration (frames 9-17 → 9-15), and its clean hit no longer semi-spikes as effectively (24° → 35°). Its late hit also has a smaller hitbox (8.8u → 8u), and deals less damage (9% → 7%), albeit with knockback compensated (25 (base)/80 (scaling) → 35/100).}} | ||
*{{nerf| | **{{change|Its hitbox size has been altered (8.8 → 9/5).}} | ||
*[[Up aerial]]: | |||
**{{buff|Up aerial has less startup with a longer duration (frame 22-25 → 16-20), and now grants intangibility on Bowser's head (frames 10-20), improving its safety.}} | |||
**{{nerf|It has a smaller hitbox (8.8u → 7u) and reduced knockback (50 (base)/100 (scaling) → 35/93), no longer being the most powerful up aerial in the game.}} | |||
*[[Down aerial]]: | |||
**{{buff|Down aerial deals more total damage (26.66% → 29%) due to the changes to stale-move negation. Additionally, its last hit is now a [[meteor smash]] (80° → 270°) without set knockback (10 (set)/0 (base)/100 (scaling) → 0/10/100), granting it [[edgeguarding]] potential, while its landing hit has more base knockback (58 → 60) and larger hitboxes (8u → 9.6u).}} | |||
**{{nerf|Its last hit has a shorter duration (frames 38-39 → 38).}} | |||
===Throws/other attacks=== | ===Throws/other attacks=== | ||
*{{buff|Standing and dash grab have longer range (4.8u/3.6u/2.8u → 5.5u/4.3u/3.3u).}} | *[[Grab]]s: | ||
*{{nerf|Dash grab has a shorter duration (frames 10-12 → 10-11).}} | **{{buff|Standing and dash grab have longer range (4.8u/3.6u/2.8u → 5.5u/4.3u/3.3u).}} | ||
*{{buff|The introduction of [[buffer]]ing makes Bowser's 10 frame advantage on grab release viably usable now, giving him effective grab release followups on the entire cast | **{{nerf|Dash grab has a shorter duration (frames 10-12 → 10-11).}} | ||
*{{buff|Up throw deals more total damage (9.37% → 10%) due to the changes to stale-move negation.}} | **{{buff|The introduction of [[buffer]]ing makes Bowser's 10 frame advantage on [[grab release]] viably usable now, giving him effective grounded grab release followups on the entire cast (combined with grounded grab release animations being 1 frame longer across the board) except {{SSBB|Donkey Kong}}. The general changes to aerial grab releases also benefit him, as he now has a 31-frame advantage, giving him inescapable followups against various characters.}} | ||
*{{nerf|Due to the generally slower falling speeds in ''Brawl'' | *[[Up throw]]: | ||
*{{change|Bowser now retreats into his shell during up throw.}} | **{{buff|Up throw deals more total damage (9.37% → 10%) due to the changes to stale-move negation.}} | ||
* | **{{nerf|Due to the generally slower falling speeds in ''Brawl'', up throw can no longer [[chain grab]] fast-fallers.}} | ||
*{{nerf|Fast edge attack grants drastically less intangibility (frames 1-34 → 1-4), and has more startup with a much shorter duration (frames 7-34 → 8-17), significantly weakening its ability to intercept high recoveries and beat out opposing attacks, although it remains one of the best edge attacks in the game.}} | **{{change|Bowser now retreats into his shell during up throw.}} | ||
*[[Edge attack]]s: | |||
**{{buff|Both edge attacks have more set knockback (90 → 110).}} | |||
**{{nerf|Fast edge attack grants drastically less intangibility (frames 1-34 → 1-4), and has more startup with a much shorter duration (frames 7-34 → 8-17) and covers much less distance, significantly weakening its ability to intercept high recoveries and beat out opposing attacks, although it remains one of the best edge attacks in the game.}} | |||
===Special Moves=== | ===Special Moves=== | ||
*{{buff|[[Fire Breath]] can be [[angle]]d up and down while it is active.}} | *[[Fire Breath]]: | ||
* | **{{buff|[[Fire Breath]] can be [[angle]]d up and down while it is active.}} | ||
*{{change|Bowser has a new side special: [[Flying Slam]]. It functions as a | *[[Flying Slam]]: | ||
*{{buff| | **{{change|Bowser has a new side special: [[Flying Slam]]. It functions as a command grab like [[Koopa Klaw]], but instead of Bowser biting opponents and having the ability to throw them forward or backward, he somersaults high into the air with them, while having the ability to move horizontally, then plummets down to slam them into the ground.}} | ||
*{{nerf|Flying Slam only has one throw triggered by landing on the stage, which has different knockback values (140 (base)/15 (scaling) (forward), 60/100 (back) → 80/50) and a different angle (80° (forward)/361° (back) → 60°), leaving it unable to set up follow-ups as well as Koopa Klaw's forward throw or KO as effectively as its back throw. It also has more startup in the air (frame 16 → 17), and deals less damage overall due to lacking a [[pummel]], despite the throw itself being more damaging than the previous throws alone (15% (forward)/11% (back) → 18%). Lastly, the initial swipe no longer has hitboxes placed farther away from the grab-boxes, reducing its effective range.}} | **{{buff|Flying Slam has much less startup on the ground (frame 16 → 8), less ending lag when missed (frame 60 → 43 (grounded)/50 (aerial)), and autocancels throughout its entire duration, allowing for more versatile movement (particularly giving Bowser access to [[Koopa hopping]]). It can also be used to perform [[sacrificial KO]]s.}} | ||
* | **{{nerf|Flying Slam only has one throw triggered by landing on the stage, which has different knockback values (140 (base)/15 (scaling) (forward), 60/100 (back) → 80/50) and a different angle (80° (forward)/361° (back) → 60°), leaving it unable to set up follow-ups as well as Koopa Klaw's forward throw or KO as effectively as its back throw. It also has more startup in the air (frame 16 → 17), and deals less damage overall due to lacking a [[pummel]], despite the throw itself being more damaging than the previous throws alone (15% (forward)/11% (back) → 18%). Lastly, the initial swipe no longer has hitboxes placed farther away from the grab-boxes, reducing its effective range.}} | ||
*{{nerf|Whirling Fortress has | *[[Whirling Fortress]]: | ||
*{{buff|Grounded [[Bowser Bomb]] produces a hitbox when Bowser jumps that leads into the drop, allowing it to deal more total damage (21% → 24%) and significantly decreasing its startup (frame 42 → 11 (jump), 36 (drop)). The move's landing hitbox also deals more damage (8% → 11%).}} | **{{nerf|Whirling Fortress has more startup lag (frame 5 → 6).}} | ||
*{{nerf| | ***{{buff|However, the grounded version also has one more frame of intangibility (frames 1-4 → 1-5).}} | ||
*{{change|Bowser now has a Final Smash: [[Giga Bowser]]. Upon activating the Final Smash, Bowser transforms into the gigantic, powered-up version of himself that originally debuted in ''Melee''. Giga Bowser keeps the same moveset and attributes as regular Bowser, but his moves have more damage | ***{{buff|Additionally, with it now being possible to perform Whirling Fortress on the first frame of a jumpsquat, the move is not only the same speed [[out of shield]] but Bowser can now become intangible on frame 1 OoS rather than on frame 2 which along with its greater range, makes it a more versatile out of shield option overall.}} | ||
**{{nerf|Whirling Fortress has drastically higher landing lag (10 frames → 50) and it now suffers from [[RCO lag]] (although Bowser only gains an additional 4 frames of hard landing lag with RCO).}} | |||
**{{buff|The grounded version has larger hitboxes (7.812u/7.812 → 9.5u/9.5u (hit 1), 4.687u/4.687u → 5.8u/5.8u (hit 2)) which are positioned further away from Bowser (z offset: {{rollover|-2.695|-3.906 x 0.69)|y}}/{{rollover|5.39|7.812 x 0.69)|y}} → -4/8), improving its range.}} | |||
**{{change|The grounded version is more reliant on momentum. If the player lets go of the control stick for example, Bowser will continue to move at close to full speed rather than halting to a stop.}} | |||
**{{nerf|The grounded version's first hit deals less damage (13% → 11%) and has less base knockback (90 → 70), significantly hindering its KO potential.}} | |||
**{{nerf|The grounded version's second hit has a shorter duration (frames 7-26 (clean)/27-46 (late) → 8-23/24-39).}} | |||
**{{buff|The aerial version grants slightly more height (1.78 → 1.85).}} | |||
**{{buff|Bowser can grab ledges from the front while using Whirling Fortress much sooner (frame 36 → 8).}} | |||
**{{buff|The aerial version has a longer animation before Bowser enters free fall (49 frames → 79). Considering that the move transitions to the grounded animation when Bowser lands and considering its much higher landing lag, this benefits the move overall.}} | |||
**{{buff|The aerial version deals more total damage due to the changes to stale-move negation (32.75% → 35%).}} | |||
**{{buff|The aerial version has larger hitboxes (8.984u (hit 1)/7.812u (hits 2-11) → 10u (hit 1)/9u (hits 2-6)/8.2u (hits 7-11)).}} | |||
**{{nerf|Bowser cannot grab ledges from behind while using Whirling Fortress as early (frame 36 → 48).}} | |||
***{{nerf|Additionally, the move now uses a fixed value for when Bowser can grab the ledge, rather than only depending on Bowser falling. This greatly increases the amount of time Bowser cannot grab the ledge while sliding off of a platform, heavily limiting Bowser's ability to perform [[Fortress Hogging]] when facing away from the ledge.}} | |||
*[[Bowser Bomb]]: | |||
**{{buff|Grounded [[Bowser Bomb]] produces a hitbox when Bowser jumps that leads into the drop, allowing it to deal more total damage (21% → 24%) and significantly decreasing its startup (frame 42 → 11 (jump), 36 (drop)). The move's landing hitbox also deals more damage (8% → 11%).}} | |||
**{{nerf|The drop deals less damage (21% → 20%), although its KO ability is compensated by its higher knockback scaling (72 → 75) and the generally slower falling speeds.}} | |||
*[[Final Smash]]: | |||
**{{change|Bowser now has a Final Smash: [[Giga Bowser]]. Upon activating the Final Smash, Bowser transforms into the gigantic, powered-up version of himself that originally debuted in ''Melee''. Giga Bowser keeps the same moveset and attributes as regular Bowser, but his moves have more damage and knockback, he has immunity to knockback, and some of his moves have different elemental effects, such as [[darkness]] and [[freezing]]. After 11 seconds, Bowser will power down and change back to his normal form.}} | |||
==Moveset== | ==Moveset== | ||
:''For a visual representation of Bowser's attack hitboxes, see [[/Hitboxes|this page]].'' | :''For a visual representation of Bowser's attack hitboxes, see [[/Hitboxes|this page]].'' | ||
*Bowser can [[crawl]], although it has little practical use due to his large crouching hurtbox. | *Bowser can [[crawl]], although it has little practical use due to his large crouching hurtbox. | ||
{{MovesetTable | {{MovesetTable | ||
|game=SSBB | |game=SSBB | ||
|neutralcount=2 | |neutralcount=2 | ||
|neutralname= | |neutralname=Left Scratch ({{ja|左ひっかき|Hidari Hikkaki}}) / Right Scratch ({{ja|右ひっかき|Migi Hikkaki}}) | ||
|neutral1dmg=5% | |neutral1dmg=5% | ||
|neutral2dmg=5% | |neutral2dmg=5% | ||
|neutraldesc=Two quick claw swipes. Relatively safe move, as the arm Bowser is swiping with is intangible while the hitboxes are out. Decent knockback but lacks KO power. | |neutraldesc=Two quick claw swipes. Relatively safe move, as the arm Bowser is swiping with is intangible while the hitboxes are out. It has respectable jab cancelling potential, with the first hit linking into a forward tilt if the opponent does not air dodge. Decent knockback but lacks KO power. | ||
|ftiltname= | |ftiltname=Koopa Back Fist ({{ja|クッパ裏拳|Kuppa Uraken}}) | ||
|ftiltdmg=11% | |ftiltdmg=11% | ||
|ftiltdesc=Does a backhanded punch while leaning his body forward. Can be aimed up or down. Has decent KO potential, and it can KO at 154% when angled up from the center of Final Destination. If angled down, has a decent chance of tripping. Bowser's lower arm is intangible while the hitboxes are out. The attack is based on the second hit of his [[supermariowiki:List of weapons in Super Mario RPG: Legend of the Seven Stars#Drill Claw|Drill Claw]] attack in ''{{s|supermariowiki|Super Mario RPG: Legend of the Seven Stars}}''. | |ftiltdesc=Does a backhanded punch while leaning his body forward. Can be aimed up or down. Has decent KO potential, and it can KO at 154% when angled up from the center of Final Destination. If angled down, has a decent chance of tripping. Bowser's lower arm is intangible while the hitboxes are out. However, it has poor frame data to compensate for it's strengths. The attack is based on the second hit of his [[supermariowiki:List of weapons in Super Mario RPG: Legend of the Seven Stars#Drill Claw|Drill Claw]] attack in ''{{s|supermariowiki|Super Mario RPG: Legend of the Seven Stars}}''. | ||
|utiltname= | |utiltname=Ceiling Scratch ({{ja|天井ひっかき|Tenjō Hikkaki}}) | ||
|utiltdmg=12% | |utiltdmg=12% | ||
|utiltdesc=Swats the air above him. A decent juggling move but has high ending lag. This is also a very powerful KO move and can KO at 109% despite its surprising speed. Like his forward tilt, Bowser's lower arm cannot be hit while the hitboxes are out. | |utiltdesc=Swats the air above him. A decent juggling move but has high ending lag. This is also a very powerful KO move and can KO at 109% despite its surprising speed. Like his forward tilt, Bowser's lower arm cannot be hit while the hitboxes are out. | ||
|dtiltname= | |dtiltname=Mish-Mash Scratch ({{ja|よせあつめひっかき|Yose Atsume Hikkaki}}) | ||
|dtiltdmg=14% (hit 1), 11% (hit 2) | |dtiltdmg=14% (hit 1), 11% (hit 2) | ||
|dtiltdesc=Claw swipes while crouched. Does two hits; unlike most multi-hit moves, the first hit is the stronger one. High knockback for its kind with speed make this another speedy KO move, KOing at 89% at the ledge, or 123% from the center of Final Destination. Like his neutral combo, the active arm cannot be hit. | |dtiltdesc=Claw swipes while crouched. Does two hits; unlike most multi-hit moves, the first hit is the stronger one. High knockback for its kind with speed make this another speedy KO move, KOing at 89% at the ledge, or 123% from the center of Final Destination. Like his neutral combo, the active arm cannot be hit. | ||
|dashname= | |dashname=Convoy Tackle ({{ja|コンボイタックル|Conboi Takkuru}}) | ||
|dashdmg=11% (clean), 8% (late) | |dashdmg=11% (clean), 8% (late) | ||
|dashdesc=A running headbutt. Has good vertical knockback, though it cannot KO until past 200%. This move's high ending lag makes it easily [[punish]]able if whiffed. | |dashdesc=A running headbutt. Has good vertical knockback, though it cannot KO until past 200%. This move's high ending lag makes it easily [[punish]]able if whiffed. | ||
|fsmashname= | |fsmashname=Bull Head ({{ja|ブルヘッド|Buru Heddo}}) | ||
|fsmashdmg={{ChargedSmashDmgSSBB|10}} (hit 1), {{ChargedSmashDmgSSBB|23}}/{{ChargedSmashDmgSSBB|21}} (hit 2) | |fsmashdmg={{ChargedSmashDmgSSBB|10}} (hit 1), {{ChargedSmashDmgSSBB|23}}/{{ChargedSmashDmgSSBB|21}} (hit 2) | ||
|fsmashdesc=Rears back and then performs a very strong headbutt. This is the most damaging forward smash in the game. If used correctly, the second hit can prevent shield grabbing. Uncharged it KOs at 53% at the ledge and 81% from the center of {{SSBB|Final Destination}} if both hits connect, while fully charged it's extremely powerful, KOing at just 17% at the ledge, and 38% from the center. | |fsmashdesc=Rears back and then performs a very strong headbutt. This is the most damaging forward smash in the game. If used correctly, the second hit can prevent shield grabbing. Uncharged it KOs at 53% at the ledge and 81% from the center of {{SSBB|Final Destination}} if both hits connect, while fully charged it's extremely powerful, KOing at just 17% at the ledge, and 38% from the center. | ||
|usmashname= | |usmashname=Rising Spike ({{ja|ライジングスパイク|Raijingu Supaiku}}) | ||
|usmashdmg={{ChargedSmashDmgSSBB|20}}/{{ChargedSmashDmgSSBB|15}} (hit 1), {{ChargedSmashDmgSSBB|12}}/{{ChargedSmashDmgSSBB|10}} (hit 2) | |usmashdmg={{ChargedSmashDmgSSBB|20}}/{{ChargedSmashDmgSSBB|15}} (hit 1), {{ChargedSmashDmgSSBB|12}}/{{ChargedSmashDmgSSBB|10}} (hit 2) | ||
|usmashdesc=Hunkers down on all fours and jumps straight up, hitting with his shell. Hitting with the sides of the attack does less damage. Opponents who only shield his jump may be hit by his landing (this only applies to grounded opponents). Very high knockback (one of the strongest up smashes in the game), KOing at 100% when uncharged and 62% when fully charged. | |usmashdesc=Hunkers down on all fours and jumps straight up, hitting with his shell. Hitting with the sides of the attack does less damage. Opponents who only shield his jump may be hit by his landing (this only applies to grounded opponents). Very high knockback (one of the strongest up smashes in the game), KOing at 100% when uncharged and 62% when fully charged. | ||
|dsmashname= | |dsmashname=Buzzsaw ({{ja|バズソー|Bazusō}}) | ||
|dsmashdmg={{ChargedSmashDmgSSBB|2}} (hits 1-6), {{ChargedSmashDmgSSBB|9}} (hit 7) | |dsmashdmg={{ChargedSmashDmgSSBB|2}} (hits 1-6), {{ChargedSmashDmgSSBB|9}} (hit 7) | ||
|dsmashdesc=Retracts into his shell and spins around. Multi-hit attack that does up to seven hits. Very high knockback, but it is possible to SDI upwards to jump out of the move. KOs at 100% when uncharged and 61% when fully charged. | |dsmashdesc=Retracts into his shell and spins around. Multi-hit attack that does up to seven hits. Very high knockback, but it is possible to SDI upwards to jump out of the move. KOs at 100% when uncharged and 61% when fully charged. | ||
|nairname= | |nairname=Gyroscope ({{ja|ジャイロスコープ|Jairosukōpu}}) | ||
|nairdmg=13% (clean), 9% (late) | |nairdmg=13% (clean), 9% (late) | ||
|nairdesc=Spins around inside his shell. It has low knockback, not KOing until around 165%. | |nairdesc=Spins around inside his shell. It has low knockback, not KOing until around 165%. | ||
|fairname= | |fairname=Jump Scratch ({{ja|ジャンプひっかき|Janpu Hikkaki}}) | ||
|fairdmg=13% (hand), 12% (arm), 11% (shoulder) | |fairdmg=13% (hand), 12% (arm), 11% (shoulder) | ||
|fairdesc=A quick slash forwards. Decent knockback with surprising speed, and when sweetspotted can KO at 105% from the ledge, and at 150% from the center of Final Destination. | |fairdesc=A quick slash forwards. Decent knockback with surprising speed, and when sweetspotted can KO at 105% from the ledge, and at 150% from the center of Final Destination. | ||
|bairname= | |bairname=Spike Bomber ({{ja|スパイクボンバー|Supaiku Bonbā}}) | ||
|bairdmg=15% (clean), 7% (late) | |bairdmg=15% (clean), 7% (late) | ||
|bairdesc=Thrusts out his shell behind him, dealing massive damage and above average knockback, which can KO at 98% at the ledge, or at 136%. Low startup, but high ending lag and landing lag if not auto-cancelled. | |bairdesc=Thrusts out his shell behind him, dealing massive damage and above average knockback, which can KO at 98% at the ledge, or at 136%. Low startup, but high ending lag and landing lag if not auto-cancelled. | ||
|uairname= | |uairname=Heading ({{ja|ヘディング|Hedingu}}) | ||
|uairdmg=17% | |uairdmg=17% | ||
|uairdesc=Swings his head upward. Has noticeable startup, but its very high damage and knockback make it one of the | |uairdesc=Swings his head upward. Has noticeable startup, but its very high damage and knockback make it one of the strongest up aerials in the game (2nd strongest up air in the game), and can KO Mario at 92% from the ground. It is hindered, however, by its high startup and low hitbox duration. | ||
|dairname= | |dairname=Scrub Brush ({{ja|スクラブブラシ|Sukurabu Burashi}}) | ||
|dairdmg=3% (hits 1-9), 2% (landing) | |dairdmg=3% (hits 1-9), 2% (landing) | ||
|dairdesc=Retracts into his shell and spins himself into the ground. Limited shockwave if it hits the ground. The last hit can meteor smash, but it's weak and not recommended overall. Often used for [[SHFF]]s, due to its high overall damage output and extra hit upon landing. | |dairdesc=Retracts into his shell and spins himself into the ground. Limited shockwave if it hits the ground. The last hit can meteor smash, but it's weak and not recommended overall. Often used for [[SHFF]]s, due to its high overall damage output and extra hit upon landing. | ||
|grabname= | |grabname=Grab ({{ja|つかみ|Tsukami}}) | ||
|grabdesc= | |grabdesc= | ||
|pummelname= | |pummelname=Grab Headbutt ({{ja|つかみヘッドバット|Tsukami Heddobatto}}) | ||
|pummeldmg=3% | |pummeldmg=3% | ||
|pummeldesc=Hits foe with his head. Very slow pummel. | |pummeldesc=Hits foe with his head. Very slow pummel. | ||
|fthrowname= | |fthrowname=Slingshot ({{ja|スリングショット|Suringushotto}}) | ||
|fthrowdmg=10% | |fthrowdmg=10% | ||
|fthrowdesc=Launches foe forward using his head. Decent knockback, but will rarely KO, not doing so until 187% at the ledge. | |fthrowdesc=Launches foe forward using his head. Decent knockback, but will rarely KO, not doing so until 187% at the ledge. | ||
|bthrowname= | |bthrowname=Back Throw ({{ja|バックスルー|Bakku Surū}}) | ||
|bthrowdmg=10% | |bthrowdmg=10% | ||
|bthrowdesc=Almost identical to Bowser's forward throw, but has a faster execution, and the altered animation causes it to throw opponents from further out, allowing it to KO earlier at 177% from the ledge. | |bthrowdesc=Almost identical to Bowser's forward throw, but has a faster execution, and the altered animation causes it to throw opponents from further out, allowing it to KO earlier at 177% from the ledge. | ||
|uthrowname= | |uthrowname=Fresh Mixer ({{ja|フレッシュミキサー|Furessu Mikisā}}) | ||
|uthrowdmg=1% (hits 1-8), 2% (throw) | |uthrowdmg=1% (hits 1-8), 2% (throw) | ||
|uthrowdesc=Tosses foe upwards, retreats into his shell, and spins, damaging the foe with his spikes. Damage also applies to bystanders. Deals decent damage overall, but the throw always deals set knockback, making it incapable of scoring KOs by itself. | |uthrowdesc=Tosses foe upwards, retreats into his shell, and spins, damaging the foe with his spikes. Damage also applies to bystanders. Deals decent damage overall, but the throw always deals set knockback, making it incapable of scoring KOs by itself. | ||
|dthrowname= | |dthrowname=Heavy Press ({{ja|ヘビープレス|Hebī Puresu}}) | ||
|dthrowdmg=12% (hit 1), 0% (throw) | |dthrowdmg=12% (hit 1), 0% (throw) | ||
|dthrowdesc=Sets opponent on floor, then flings himself forward, performing a body slam on his opponent. The full damage of the attack is also applied to bystanders, but it doesn't deal much knockback at low damage percentages. The throw doesn't deal any damage, and its knockback isn't strong enough to KO, even at 999% damage, unless the grabbed fighter is tiny-sized and near a stage ledge. | |dthrowdesc=Sets opponent on floor, then flings himself forward, performing a body slam on his opponent. The full damage of the attack is also applied to bystanders, but it doesn't deal much knockback at low damage percentages. The throw doesn't deal any damage, and its knockback isn't strong enough to KO, even at 999% damage, unless the grabbed fighter is tiny-sized and near a stage ledge. | ||
| Line 187: | Line 231: | ||
|dsname=Bowser Bomb | |dsname=Bowser Bomb | ||
|dsdmg=4% (hop), 20% (drop), 11% (landing) | |dsdmg=4% (hop), 20% (drop), 11% (landing) | ||
|dsdesc=Leaps into the air and plummets downwards. A great KOing and punishing option. When both hits connect, it can KO Mario from ground on Final Destination at 77%. However, due to hitstun cancelling, the first hit is not a true combo into the second. The main attack does not have any [[freeze frame]]s. | |dsdesc=Leaps into the air and plummets downwards. A great KOing and punishing option. When both hits connect, it can KO Mario from ground on Final Destination at 77%. However, due to hitstun cancelling, the first hit is not a true combo into the second. The main attack does not have any [[freeze frame]]s. The move is based on the attack from his boss battle in Super Mario Bros. 3. | ||
|fsname=Giga Bowser | |fsname=Giga Bowser | ||
|fspage=Giga Bowser (Final Smash) | |fspage=Giga Bowser (Final Smash) | ||
| Line 194: | Line 238: | ||
|- | |- | ||
}} | }} | ||
===Stats=== | |||
{{technical data|Needs short hop and double jump heights}} | |||
{{Attributes | |||
|cast = 39 | |||
|weight = 120 | |||
|rweight = 1 | |||
|dash = 1 | |||
|rdash = 39 | |||
|run = 1.527 | |||
|rrun = 16 | |||
|walk = 0.8 | |||
|rwalk = 35-36 | |||
|trac = 0.0577 | |||
|rtrac = 19 | |||
|airfric = 0.0075 | |||
|rairfric = 27-31 | |||
|air = 1.034 | |||
|rair = 11-13 | |||
|baseaccel = 0.04 | |||
|rbaseaccel = 7-36 | |||
|addaccel = 0.08 | |||
|raddaccel = 31-35 | |||
|gravity = 0.1027 | |||
|rgravity = 6-8 | |||
|fall = 1.39 | |||
|rfall = 19-20 | |||
|ff = 1.946 | |||
|rff = 19-20 | |||
|jumpsquat = 8 | |||
|rjumpsquat = 38 | |||
|jumpheight = 32.87722406 | |||
|rjumpheight= 22 | |||
|shorthop = ? | |||
|rshorthop = ? | |||
|djump = ? | |||
|rdjump = ? | |||
}} | |||
===[[Announcer]] call=== | |||
{{audio|Needs Japanese and Korean announcer calls.}} | |||
<gallery> | |||
Bowser English Announcer SSBB.wav|English | |||
Bowser French Announcer SSBU.wav|French | |||
Bowser French EU Announcer SSBU.wav|French (PAL) | |||
Bowser German Announcer SSBU.wav|German | |||
Bowser Italian Announcer SSBU.wav|Italian | |||
Bowser Spanish Announcer SSBU.wav|Spanish | |||
</gallery> | |||
===[[Wii Remote selection sound]]=== | |||
{{SelectSound|char=Bowser|desc=Bowser roars. The sound clip is taken directly from ''Melee''.}} | |||
===[[On-screen appearance]]=== | ===[[On-screen appearance]]=== | ||
| Line 204: | Line 300: | ||
{{Taunt/SSBB | {{Taunt/SSBB | ||
|char=Bowser | |char=Bowser | ||
|desc-up= | |desc-up=Rears his head back and roars. | ||
|desc-side=Snaps furiously forward five times. | |desc-side=Snaps furiously forward five times. | ||
|desc-down=Balances precariously on one leg.}} | |desc-down=Balances precariously on one leg.}} | ||
| Line 224: | Line 320: | ||
|pitch-us=Deep male | |pitch-us=Deep male | ||
|pitch-jp=Male}} | |pitch-jp=Male}} | ||
===[[Victory pose]]s=== | ===[[Victory pose]]s=== | ||
| Line 238: | Line 331: | ||
==In [[competitive play]]== | ==In [[competitive play]]== | ||
===Notable players=== | ===Notable players=== | ||
:''See also: [[:Category:Bowser | {{cleanup|[[SmashWiki:Cleanup of the Notable Players sections|To fit these guidelines]]}} | ||
*{{Sm|Ixis Naugus|UK}} | :''See also: [[:Category:Bowser players (SSBB)]]'' | ||
*{{Sm|KingKong|Canada}} | *{{Sm|Ixis Naugus|UK}} - Although more well known for his {{SSB4|Sonic}} in ''[[SSB4]]'', he had a high-level Bowser and was considered to be the top Bowser player in Europe. | ||
*{{Sm|KishSquared|USA}} | *{{Sm|KENT|Japan}} - Considered to be the premier Bowser player in Japan. | ||
*{{Sm|Vex Kasrani|USA}} | *{{Sm|KingKong|Canada}} - Considered to be the best Bowser player of all time. | ||
*{{Sm|Zigsta|USA}} | *{{Sm|KishSquared|USA}} - One of the best Bowser players in the United States. | ||
*{{Sm|Vex Kasrani|USA}} - While he mostly used {{SSBB|King Dedede}} for most of his tournament results, he had a high-level Bowser and was considered to be one of the best Bowser players in the United States. | |||
*{{Sm|Zigsta|USA}} - A top Bowser player in the United States. | |||
===Tier placement and history=== | ===Tier placement and history=== | ||
Bowser was initially seen as a solid middle tier character, being ranked at 22nd on the first tier list. Bowser's speed and mobility buffs were immediately noticed, which when combined with his still great power and the slower, less combo-orientated pace of ''Brawl'', allowed Bowser to compete decently with an inexperienced playerbase that could not effectively evade him and was still discovering the potential of other characters. Bowser still had the traits of a classic low tier character, however: he was still very slow compared to the rest of the cast, very large and thus heavily vulnerable to deadly chain throws and combos, had an easily gimpable recovery that compromised his endurance potential, and was vulnerable to camping while being incapable of camping himself, with a lack of any outstanding attributes to counteract this. Thus, as the metagame progressed, Bowser steadily declined, with Bowser players finding it difficult to keep up with the quickening pace of other advancing characters and having their weaknesses (most notably to chain throws and camping) more frequently exploited, while lacking any significant developments for Bowser's metagame outside of grab release followups. Through the second to fourth tier lists, Bowser fell no more than two spots at a time, but it was not until the fifth list that he saw a significant drop, falling five spaces to 32nd and formally entering the low tiers, though many players thought of Bowser as a low tier character well before then. | Bowser was initially seen as a solid middle tier character, being ranked at 22nd on the first tier list. Bowser's speed and mobility buffs were immediately noticed, which when combined with his still great power and the slower, less combo-orientated pace of ''Brawl'', allowed Bowser to compete decently with an inexperienced playerbase that could not effectively evade him and was still discovering the potential of other characters. Bowser still had the traits of a classic low tier character, however: he was still very slow compared to the rest of the cast, very large and thus heavily vulnerable to deadly chain throws and combos, had an easily gimpable recovery that compromised his endurance potential, and was vulnerable to camping while being incapable of camping himself, with a lack of any outstanding attributes to counteract this. Thus, as the metagame progressed, Bowser steadily declined, with Bowser players finding it difficult to keep up with the quickening pace of other advancing characters and having their weaknesses (most notably to chain throws and camping) more frequently exploited, while lacking any significant developments for Bowser's metagame outside of grab release followups. Through the second to fourth tier lists, Bowser fell no more than two spots at a time, but it was not until the fifth list that he saw a significant drop, falling five spaces to 32nd and formally entering the low tiers, though many players thought of Bowser as a low tier character well before then. | ||
Bowser's decline additionally saw his playerbase diminish, and most of his top players, notably his best player {{Sm|KingKong}}, dropped Bowser or stopped playing ''Brawl'' competitively altogether, while fewer and fewer players used Bowser overall. | Bowser's decline additionally saw his playerbase diminish, and most of his top players, notably his best player {{Sm|KingKong}}, dropped Bowser or stopped playing ''Brawl'' competitively altogether, while fewer and fewer players used Bowser overall. By the end of the game’s competitive lifespan, Bowser was one of the most unpopular characters in ''Brawl'' tournaments, having almost no established active players who use him, and being rare at even locals with casual players, which has led to his poor tournament results. As such, Bowser has never risen on any tier list. However, despite Bowser's weak representation and tournament results, the characters below him are generally considered to be even worse by a noticeable margin. | ||
==Role in | ==Role in [[The Subspace Emissary]]== | ||
[[File:SubspaceIntro-Bowser.png|thumb|250px|Bowser in ''[[SSE]]'']] | [[File:SubspaceIntro-Bowser.png|thumb|250px|Bowser in ''[[SSE]]''.]] | ||
Bowser is one of the | Bowser is one of the two secondary antagonists alongside Ganondorf in the Subspace Emissary. He first appears after {{SSBB|Donkey Kong}} and {{SSBB|Diddy Kong}} chase down his troops, who had stolen their bananas in order to lure them to him as a trap. Bowser confronts the two and transforms DK into a trophy with a [[Dark Cannon]], but not before DK punches Diddy away. Bowser chases him down, and has a [[Shadow Bug]] [[clone]] of himself fight Diddy and {{SSBB|Fox}}. After defeating the clone, the real Bowser attempts to turn them into trophies, but they manage to dodge the shot. Although Diddy is eager to fight Bowser, Fox knows that they're no match, so he grabs Diddy and makes their escape. While continuing his chase, he is told by {{SSBB|Ganondorf}} to hunt down {{SSBB|King Dedede}}, who had stolen Wario's trophies. He also transforms {{SSBB|Zelda}}/{{SSBB|Peach}} into a trophy, and after having another Shadow bug clone of him copy her, orders her Shadow bug clone to attack {{SSBB|Mario}} and {{SSBB|Pit}}/{{SSBB|Link}} and {{SSBB|Yoshi}}. Bowser and his troops attack King Dedede's castle, where Dedede is hiding but when they broke the roof a stone fell on Dedede's head, knocking him out. The debris buries Dedede along with the trophies of Ness and Luigi. As such he only finds the trophy of Peach/Zelda. Bowser steals Peach/Zelda's trophy and evades Mario and Pit's attacks, but when he dodges Pit's arrow he falls off a cliff, but is shown to be unharmed after he landed in his Clown Car. After this, he returns to attack Fox and Diddy Kong at the Swamp and transforms Diddy into a trophy. Fox dodges the shots however. Bowser then orders shadow bugs to clone Diddy's trophy. He flees after {{SSBB|Falco}} attacks him and destroys his Dark Cannon. He orders more shadow bugs to make the Diddy clone giant however. Fox, Falco, and the real Diddy defeat it though. He is next seen with {{SSBB|Ganondorf}} on the [[Subspace Gunship]]. They destroy the [[Halberd]], but fail to stop {{SSBB|Kirby}} from destroying the Gunship with a [[Dragoon]]. Fleeing into Subspace, Bowser is betrayed by Ganondorf and turned into a trophy by a surprise blast by a Dark Cannon. He is eventually brought back to life, and after being defeated by King Dedede, fights him Bowser is defeated, revived again, and then notices the downed {{SSBB|Master Hand}} and decides to help the heroes take down [[Tabuu]]. Later Bowser beats up Ganondorf's trophy for revenge. The sight of Master Hand lying on the ground seems to trouble Bowser, probably because Bowser was really the only smasher accomplice who was loyal to Master Hand, unlike Ganondorf (who planned to betray him to take control of the Subspace Army) and Wario (who did it just to enjoy himself). Bowser and the others manage to defeat Tabuu and end the invasion. | ||
=== | ===Non-playable appearances=== | ||
*[[The Jungle]] | *[[The Jungle]] | ||
*[[The Lake]] | |||
*[[The Lake Shore]] | *[[The Lake Shore]] | ||
*[[The Cave]] | *[[The Cave]] | ||
| Line 299: | Line 392: | ||
*Yoshi (''Yoshi Touch & Go''): [Arm, Leg] attack +8 | *Yoshi (''Yoshi Touch & Go''): [Arm, Leg] attack +8 | ||
==In [[Event Match]]es== | ==In Solo Modes== | ||
===Solo Events=== | ==={{SSBB|Classic Mode}}=== | ||
In Classic Mode, Bowser can appear as an opponent or ally in Stage 8 along with {{SSBB|Mario}}, {{SSBB|Luigi}}, and {{SSBB|Peach}} on [[Delfino Plaza]], {{SSBB|Mario Circuit}}, [[Mushroomy Kingdom]], or [[Luigi's Mansion]] (with the latter available if it has been unlocked). Bowser can also appear as an opponent in Stage 11, but only if he hasn't appeared in Stage 8. | |||
===[[All-Star Mode]]=== | |||
In All-Star Mode, Bowser is fought in Stage 2 alongside {{SSBB|Mario}}, {{SSBB|Luigi}}, and {{SSBB|Peach}} on [[Delfino Plaza]], {{SSBB|Mario Circuit}}, [[Mushroomy Kingdom]], or [[Luigi's Mansion]] (with the latter available if it has been unlocked). | |||
===[[Event Match]]es=== | |||
====Solo Events==== | |||
*'''[[Event 1: Two Trouble Kings]]''': As {{SSBB|Mario}}, the player must defeat Bowser and {{SSBB|King Dedede}} on [[Delfino Plaza]]. | *'''[[Event 1: Two Trouble Kings]]''': As {{SSBB|Mario}}, the player must defeat Bowser and {{SSBB|King Dedede}} on [[Delfino Plaza]]. | ||
*'''[[Event 6: Super Bowser Bros.]]''': As Bowser, the player must reach the flagpole in [[Mushroomy Kingdom]] without getting KO'd by the three Marios. | *'''[[Event 6: Super Bowser Bros.]]''': As Bowser, the player must reach the flagpole in [[Mushroomy Kingdom]] without getting KO'd by the three Marios. | ||
*'''[[Event 27: Three-Beast Carnage]]''': As a tiny {{SSBB|R.O.B.}}, the player must defeat a giant Bowser, a giant {{SSBB|Donkey Kong}}, and a giant {{SSBB|Charizard}} on [[New Pork City]]. | *'''[[Event 27: Three-Beast Carnage]]''': As a tiny {{SSBB|R.O.B.}}, the player must defeat a giant Bowser, a giant {{SSBB|Donkey Kong}}, and a giant {{SSBB|Charizard}} on [[New Pork City]]. | ||
*'''[[Event 34: All-Star Battle Melee]]''': Bowser is one of the opponents fought in this event. All opponents are newcomers from ''[[Super Smash Bros Melee]]''. | *'''[[Event 34: All-Star Battle Melee]]''': Bowser is one of the opponents fought in this event. All opponents are newcomers from ''[[Super Smash Bros. Melee]]''. | ||
*'''[[Event 40: The Final Battle]]''': The player selects any character and must defeat Bowser, {{SSBB|Ganondorf}} and {{SSBB|King Dedede}} on {{SSBB|Final Destination}}. | *'''[[Event 40: The Final Battle]]''': The player selects any character and must defeat Bowser, {{SSBB|Ganondorf}} and {{SSBB|King Dedede}} on {{SSBB|Final Destination}}. | ||
===Co- | ====Co-Op Events==== | ||
*'''[[Co-Op Event 8: ALL MINE!]]''': {{SSBB|Wario}} and Bowser must work together to collect 2000 coins together on [[Skyworld]] while fighting {{SSBB|Mario}} and {{SSBB|Luigi}}. | *'''[[Co-Op Event 8: ALL MINE!]]''': {{SSBB|Wario}} and Bowser must work together to collect 2000 coins together on [[Skyworld]] while fighting {{SSBB|Mario}} and {{SSBB|Luigi}}. | ||
*'''[[Co-Op Event 20: The Final Battle for Two]]''': Both players select a character and must defeat Bowser, {{SSBB|Wario}}, {{SSBB|King Dedede}}, {{SSBB|Wolf}}, {{SSBB|Meta Knight}}, and {{SSBB|Ganondorf}} on {{SSBB|Final Destination}}. | *'''[[Co-Op Event 20: The Final Battle for Two]]''': Both players select a character and must defeat Bowser, {{SSBB|Wario}}, {{SSBB|King Dedede}}, {{SSBB|Wolf}}, {{SSBB|Meta Knight}}, and {{SSBB|Ganondorf}} on {{SSBB|Final Destination}}. | ||
*'''[[Co-Op Event 21: The True All-Star Battle]]''': Both players select a character and take on the entire roster on {{SSBB|Battlefield}}. | *'''[[Co-Op Event 21: The True All-Star Battle]]''': Both players select a character and take on the entire roster on {{SSBB|Battlefield}}. | ||
== | ===[[Congratulations_screen#Super_Smash_Bros._Brawl|Ending Images]]=== | ||
<center> | <center> | ||
<gallery> | <gallery> | ||
Bowser | Bowser Congratulations Screen Classic Mode Brawl.png|Classic Mode | ||
Bowser Congratulations Screen All-Star Brawl.png|All-Star Mode | |||
</gallery> | </gallery> | ||
</center> | </center> | ||
==[[Trophies]]== | |||
Bowser's main and [[Final Smash]] trophies can be obtained by clearing {{SSBB|Classic Mode}} and [[All-Star]] mode respectively with Bowser. | |||
{{Trophy/Fighter | |||
|name=Bowser | |||
|image=Bowser - Brawl Trophy.png | |||
|mode=Classic | |||
|desc-ntsc=The king of the Koopas and Mario's eternal rival. He breathes fire, hurls hammers, attacks from vehicles like the Koopa Clown Car, and uses all sorts of weapons in hopes of taking out Mario. As his size suggests, he's immensely powerful. His son Bowser Jr. is a chip off the old block who spends his time creating trouble for Mario. | |||
|desc-pal=The king of the Koopas and Mario's eternal rival. He breathes fire, hurls hammers, attacks from vehicles like the Koopa Clown Car, and uses all sorts of weapons in the hope of taking out Mario. As his size suggests, he's immensely powerful. His son Bowser Jr. is a chip off the old block who spends his time creating trouble for Mario. | |||
|gamelist={{Trophy games|console1=NES|game1=Super Mario Bros.|console2=GCN|game2={{iw|mariowiki|Super Mario Sunshine}}}} | |||
|game=Brawl | |||
}} | |||
{{clrl}} | |||
{{Trophy/Fighter | |||
|name=Giga Bowser | |||
|image=Giga Bowser - Brawl Trophy.png | |||
|desc=Bowser, transformed into the terrible and brutal form first seen in Super Smash Bros. Melee. While in this form, he cannot be stunned or budged. His appearance is so fierce, it's as if he doesn't even belong in the Smash Bros. universe. He cannot maintain this form for long, so dealing out damage efficiently is key. | |||
|gamelist={{Trophy games|console1=Wii|game1=Super Smash Bros. Brawl}} | |||
|game=Brawl | |||
}} | |||
{{clrl}} | |||
==[[Alternate costume (SSBB)#Bowser|Alternate costumes]]== | ==[[Alternate costume (SSBB)#Bowser|Alternate costumes]]== | ||
| Line 345: | Line 455: | ||
|{{Head|Bowser|g=SSBB|s=25px|cl=Brown}} | |{{Head|Bowser|g=SSBB|s=25px|cl=Brown}} | ||
|} | |} | ||
==Gallery== | |||
<gallery> | |||
FireBreath.jpg|Using [[Fire Breath]] on [[Lylat Cruise]]. | |||
SSBBDojoBowser2.jpg|Using his [[neutral attack]] on {{SSBB|Fox}} on [[Castle Siege]]. | |||
Bowser Whirling Fortress.png|Using [[Whirling Fortress]] next to {{SSBB|Pikachu}} on {{SSBB|Yoshi's Island}}. | |||
SSBBDojoBowser4.jpg|Posing on [[Delfino Plaza]]. | |||
Bowserbomb.jpg|Using [[Bowser Bomb]] on {{SSBB|Donkey Kong}} on Yoshi's Island. | |||
Flyingslam.jpg|Using [[Flying Slam]] on {{SSBB|Wario}} on Castle Siege. | |||
Giga Bowser.jpg|Giga Bowser in ''Brawl''. | |||
GigaBowserFtilt.jpg|Giga Bowser's forward tilt. | |||
</gallery> | |||
==Trivia== | ==Trivia== | ||
[[File:Bowser four eyes.jpg|thumb|Bowser's four eyes bug]] | [[File:Bowser four eyes.jpg|thumb|Bowser's four eyes bug]] | ||
*Bowser's voice clip for his Wii Remote selection is | *Bowser's voice clip for his Wii Remote selection is one of the stock roars used for him in ''Mario Kart 64'' and ''Melee''. | ||
*Bowser's animation for being grabbed has some placement issues. His hurtbox bends away from the grabber, and it is rather far away. {{SSBB|Samus}}' pummel will only hit the first time, and {{SSBB|Lucario}} and {{SSBB|Wolf}}'s will only hit every other time. | *Bowser's animation for being grabbed has some placement issues. His hurtbox bends away from the grabber, and it is rather far away. {{SSBB|Samus}}' pummel will only hit the first time, and {{SSBB|Lucario}} and {{SSBB|Wolf}}'s will only hit every other time. | ||
*Bowser, {{SSBB|Mario}}, and {{SSBB| | *Bowser, {{SSBB|Mario}}, {{SSBB|Ganondorf}}, and {{SSBB|Link}} are the only returning characters in ''Brawl'' to have at least one completely different special move. In this case, Bowser's side special is changed. | ||
*If Bowser jumps with a {{b|Screw Attack|item}} while in possession of a [[Smash Ball]], the glow given off by the Smash Ball will glow in the areas where Bowser's head, arms, and legs would normally be. | *If Bowser jumps with a {{b|Screw Attack|item}} while in possession of a [[Smash Ball]], the glow given off by the Smash Ball will glow in the areas where Bowser's head, arms, and legs would normally be. | ||
**Additionally, if Bowser performs a backwards double jump while in possession of a | **Additionally, if Bowser performs a backwards double jump while in possession of a Smash Ball, his "Smash Ball" eyes will be shown in the position where his head would normally be—despite both his eyes being visible inside his shell—making it will look as if he has four eyes. | ||
*Bowser, {{SSBB|Meta Knight}}, and {{SSBB|Marth}} can all perform the [[floor glitch]]. | *Bowser, {{SSBB|Meta Knight}}, and {{SSBB|Marth}} can all perform the [[floor glitch]]. | ||
*There exists a glitch on the [[Mushroomy Kingdom]] stage. If Bowser were to hit the first invisible block of the stage scrolling cycle to solidify it, jump backwards onto the stack of blocks to the right of the block, and get grabbed by {{SSBB|King Dedede}} right before he lands, | *There exists a glitch on the [[Mushroomy Kingdom]] stage. If Bowser were to hit the first invisible block of the stage scrolling cycle to solidify it, jump backwards onto the stack of blocks to the right of the block, and get grabbed by {{SSBB|King Dedede}} right before he lands, he will rapidly flip between his aerial grab and grounded grab animation. | ||
*Bowser is the only character whose theme in the [[Character Roll Call]] does not belong to his universe. His theme is | *Bowser is the only character in ''Brawl'' to not have the tweeting sound when he is stunned. | ||
*Bowser is the only character whose theme in the [[Character Roll Call]] does not belong to his universe. His theme is {{SSBBMusicLink|Super Smash Bros.|Giga Bowser (Melee)}}, a theme belonging to the {{uv|Super Smash Bros.}} universe. | |||
**This also makes him and Marth the only characters to use a theme from ''Melee'' for their Character Roll Call. | |||
==External links== | ==External links== | ||
*[http://www.smashbros.com/wii/en_us/characters/bowser.html Bowser's page at Smash Bros. DOJO!!.] | *[http://www.smashbros.com/wii/en_us/characters/bowser.html Bowser's page at Smash Bros. DOJO!!.] | ||
*[http://www.smashboards.com/showthread.php?t=156448 Bowser character guide on SmashBoards] | *[http://www.smashboards.com/showthread.php?t=156448 Bowser character guide on SmashBoards] | ||
*[http://www.youtube.com/watch?v=qkMlsPV_p-8 | *[http://www.youtube.com/watch?v=qkMlsPV_p-8 Bowser's hitbox size of each of his moves] | ||
{{SSBBCharacters}} | {{SSBBCharacters}} | ||
{{SubspaceArmy}} | {{SubspaceArmy}} | ||
{{Mario universe}} | {{Mario universe}} | ||
[[Category:Bowser (SSBB)| ]] | [[Category:Bowser (SSBB)| ]] | ||
[[Category:Trophies (SSBB)]] | [[Category:Trophies (SSBB)]] | ||
[[es:Bowser (SSBB)]] | |||
Latest revision as of 17:38, April 22, 2024
| Bowser in Super Smash Bros. Brawl | |
|---|---|
 
| |
| Universe | Mario |
| Other playable appearances | in Melee in SSB4 in Ultimate |
| Availability | Starter |
| Final Smash | Giga Bowser |
| Tier | F (33) |
Bowser (クッパ, Koopa) is a playable character in Super Smash Bros. Brawl. Confirmed on the Smash Bros. DOJO!! website on July 3, 2007, he returns from his Super Smash Bros. series debut in Super Smash Bros. Melee.
Rather than use his stock roars from Mario Kart 64 (like in Melee) or portrayals by Kenny James or Scott Burns, his most recent voice actors at the time, Bowser now uses modified stock pig sounds taken from the Serafine L2 Sound Library, with his star KO scream including an elk bugle. The same stock sound effects are also used for Ridley in Super Smash Bros. Brawl and Super Smash Bros. for Wii U, through with considerably less modification.
Bowser ranks 33rd out of 38 on the tier list, putting him in 3rd place on the F tier, a slight improvement from his last place ranking in Melee. Compared to his Melee incarnation, Bowser is faster and more mobile character at the expense of slightly less power. Despite the slight power nerf, Bowser is still one of the strongest characters in Brawl, possessing a moveset full of potential finishers, several of which can even reliably KO under 100%. Along with his trademark power, Bowser holds distinction as the heaviest character, with strong momentum cancelling to complement it, giving Bowser one of the best endurance potentials in Brawl. Additionally, Bowser has gained an excellent aerial grab in Flying Slam, which also gives him access to the Koopa hopping technique to improve his mobility and approach. Bowser also has some great reach throughout his moveset, a 10-frame advantage on grab releases that gives him grab release options on nearly every character, and a powerful, five-frame move in Whirling Fortress that can be immediately used out of shield to escape pressure. Despite his speed buffs, Bowser is still one of the slowest characters in Brawl, possessing only average dashing speed and the slowest initial dash speed, and he can have difficulty in keeping up with several characters. He is also one of the largest characters, which combines with his massive weight to make him quite vulnerable to combos and chain throws, some of which are infinite or even a zero-to-death (most notoriously from King Dedede). Importantly, Bowser has significant trouble landing, with all of his landing options being slow, punishable, predictable, which is also compounded by his laggy aerials. Finally, Bowser possesses an easily gimpable recovery that gains barely any vertical height, and his lack of an effective projectile makes it difficult for him to break through opposing camping. His flaws overpower his strengths, resulting in mostly terrible match-ups and, when combined with his miniscule tournament representation, some of the worst tournament results of any character.
Attributes[edit]
Bowser is the largest and heaviest character in Brawl. This grants him high durability, yet makes him easier to hit due to his large hurtbox. Because of his heavy weight, Bowser's recovery has significant horizontal range but marginal vertical movement. His dodging abilities are among the worst relative to the rest of the cast in having the second slowest roll and slowest spot dodge. He also has the ability to crawl, but due to his large size, it is ineffective at avoiding incoming projectiles or other attacks. As with other large characters, Bowser's strengths lie in his KO ability and not his speed. He sports a wide variety of powerful attacks both in the air and on the ground. For example, Bowser's forward smash is the most damaging smash attack in Brawl. However, this KO ability comes at the price of high startup lag and cooldown. Due to his average speed and reliance on powerful KO moves, Bowser can struggle somewhat in the low damage game, as he lacks diverse ways of racking up damage on the opponent. The one possible exception is his neutral special Fire Breath, which can help set up pseudo-chaingrabs or combos into his strongest attacks. He also notably has an effective grab release, due to its animation being shorter than any other character. Out of a ground release, Bowser can hit his opponent with a jab, tilt or he can regrab them (except Donkey Kong, because of his unusually short ground release animation). An aerial release can lead into a forward aerial against multiple characters, as well as a smash attack against Wario or an up aerial against Jigglypuff. Fire Breath serves multiple roles for Bowser, such as racking up damage on the opponent as well as preventing an opponent's approach; it also serves as a functional edge guarding attack. Bowser also has a potent Sacrificial KO in Flying Slam. This move allows Bowser to grab an opponent, then leap into the air and fall back to the ground with Bowser on top of them. Thus, the opponent will always be KOed first if they go down offstage. It is also useful in Classic and All-Star modes, making for an easy KO when only one opponent is left. Given Bowser's difficulty racking up damage, this can be a useful move when the opponent is far ahead of Bowser in the damage count. However, opponents can control Flying Slam when Bowser is at higher or even equal damage, preventing Bowsercide, or forcing it if up in stock. Bowser's standard attack can cancel out incoming projectiles, including Samus' and Lucario's standard specials. This is effective, as it allows the player to conserve Bowser's shield, as well as provide quicker reaction times after blocking enemy projectiles without experiencing shieldstun.
However, given Bowser's extreme heavy weight, large size and high gravity, it makes him vulnerable for infinite chain grabs like Wario's and King Dedede's, and other combos in general. In addition, his primary recovery, Whirling Fortress, is worse than Donkey Kong's Spinning Kong and gives poor vertical and horizontal distance, although it is a very good out-of-shield move, though it can be shielded if read. His poor mobility also severely hinders his approach and allows many characters to easily camp him and rack up damage. He also lacks an effective aerial game due to a combination of low jumps and having mostly laggy or easily avoidable aerial attacks. All of his aerials have high landing lag and all of them except for forward aerial are incapable of auto-cancelling in a short hop, resulting in Bowser's aerials being extremely ineffective for approaching and spacing, except for forward aerial.
Overall, Bowser can dish out large amounts of damage to opponents in minimal hits, complemented with a useful sacrificial KO and a strong OoS game due to his Whirling Fortress and high weight. This often allows him to not be KO'd until late percentages. However, most of his stats work against him; he is extremely vulnerable to chain grabs due to his large size, high weight and gravity, and his primary recovery Whirling Fortress can easily be gimped. Without committal reads, Bowser’s lack of speed means he will usually be unable to break the opposition between him and his foe, meaning he can be overwhelmed with fast attacks and/or mobility, or he will be forced to play in a disadvantageous situation throughout a game.
Changes from Super Smash Bros. Melee[edit]
Bowser is considered to be buffed overall from Melee due to his increased speed, both in overall mobility, and to a lesser extent, frame data. Bowser's ground speed has slightly improved, and his air speed has been greatly improved, significantly improving his recovery. A variety of his moves have decreased startup lag, and his claw attacks have increased range. His new side special, Flying Slam, has significantly higher utility than Koopa Klaw, and his grab release game is overall more consistent due to the introduction of buffering; additionally, the general changes to aerial grab releases also improve his grab release game. Lastly, the introduction of hitstun canceling benefits him as it makes him less vulnerable to combos, aids his endurance via momentum canceling, and does not have a huge impact on him due to his lack of combo potential.
However, he has also seen some nerfs, mainly to his power. His power is slightly toned down (although he still is one of the strongest characters in the game), with many of his attacks dealing less damage and knockback, making it more difficult for Bowser to KO his opponents. Two of Bowser's most versatile attacks have also seen significant nerfs: his fast edge attack has much less intangibility and a shorter duration, making it a significantly less effective tool, while his grounded Whirling Fortress is slightly slower and weaker, though it is still a very strong OOS option. Finally, the removal of L-cancelling has crippled his already poor aerial game by rendering his already slow aerials even slower and consequently making them even more unsafe.
Overall, while Bowser is better than he previously was, his tournament results and representation have not significantly improved, due to most of his severe flaws still remaining intact and some of them being exacerbated (most notably his aerials being much more unsafe on landing due to the loss of L-cancelling.) As such, he still remains as a bottom tier character with a multitude of poor matchups and extremely scarce tournament representation.
Aesthetics[edit]
 As with all characters, Bowser has received a boost in texture quality and now more closely resembles his design from Super Mario Sunshine onwards, such as yellower skin, being more scaly, and his arms and legs being less muscular.
- Bowser has two new alternate costumes, a grey skin and a brown skin.
- As on-screen appearances were not present in Melee, Bowser now receives one.
- Bowser no longer uses his stun voice clip when waking out of sleep status.
Attributes[edit]
- Bowser is slightly heavier (117 → 120).
 Bowser dashes slightly faster (1.5 → 1.527), even relative to returning veterans; going from the 15th fastest out of 26 characters to the 16th fastest out of 39.
- Bowser walks faster (0.65 → 0.8), no longer having the slowest walking speed of the entire cast.
- Bowser's air speed is drastically faster (0.8 → 1.034), going from tied for 5th worst to tied for 11th best, significantly improving his aerial approach and recovery.
- Bowser's additional air acceleration is higher (0.03 → 0.04). However, his base air acceleration is lower to compensate (0.02 → 0.01).
- Bowser's traction is lower (0.06 → 0.0577), going from the 11th lowest to the 19th lowest. Relative to returning veterans, however, Bowser's traction is slightly higher, making it slightly easier for him to punish out of shield.
- As with the returning veterans, Bowser's falling speed is slower (1.9 → 1.39). Compared to the returning veterans, however, Bowser falls faster. While this improves his already strong endurance, it worsens his already poor vertical recovery and makes him more vulnerable to combos and chain throws.
- Bowser's gravity is lower (0.13 → 0.1027).
- Bowser's jumping height has been increased.
- Bowser's arms are longer, which results in his arm based attacks having better reach.
 The removal of L-canceling has adversely affected Bowser more than any other character in the game other than Ganondorf and Link, with his aerials now being very unsafe and punishable on landing due to their extreme landing lag, and now having no ways to reduce it.
- The general changes to locking hinder Bowser more than any other veteran, as his large size and high weight make him one of (if not) the most vulnerable characters to locks, while he himself lacks any locking options outside of very low percents, and even then, his locking options are very difficult to land.
- Bowser can now crawl, though since Bowser's crouch barely reduces his height, its function is largely limited, except for its use in crouch cancelling (which is far less useful than in Melee).
- Rolls (frame 4 → 5) and air dodge (frame 3 → 4) have more startup lag.
- Spot dodge has decreased startup with a slightly longer duration (frames 4-24 → 3-24), and less ending lag (FAF 43 → 33), although it is still the longest spot dodge in the game.
 Giant hand glitch that was caused by air dodging while holding an item has been fixed.
Ground attacks[edit]
- Neutral attack and all tilts grant intangibility on Bowser's arms while their hitboxes are active, improving their safety.
- Neutral attack:
- Both hits have less startup (frame 7/9 → 6/8) and ending lag (FAF 25/31 → 21/26). The first hit also has higher set knockback (20 → 45/30/18), different angles (83° → 30°/50°/85°), and transitions into the second hit faster (frame 14 → 11), allowing it to connect better.
- The second hit of deals less damage (6% → 5%), although its knockback has been mostly compensated (30 (base)/110 (scaling) → 50/100).
- Forward tilt:
- Forward tilt now has about twice the reach, having increased hitbox sizes overall (3.2u/6u/4.8u → 4u/5u/5.7u). It also has less startup (frame 12 → 10), and has gained a trip chance of 40% when angled down.
- It deals less damage (15%/13% (up), 14%/12%/13% (non-angled), 13%/11% (down) → 11% (all)) along with less knockback (29/25/31 (base)/100 (scaling) → 45/83), drastically reducing its KO potential, and no longer being the strongest forward tilt in the game. It also has more ending lag (FAF 37 → 38). Despite having more reach, it is less disjointed by comparison due to Bowser's hand being larger, but having a slightly smaller hitbox (6u → 5.7u).
- Up tilt:
- Up tilt has a longer duration (frames 7-10 → 8-13), with Bowser swiping his arm at a slower speed overhead.
- It deals less damage (13% → 12%) and knockback (40 (base)/120 (scaling) → 55/97), hindering its KO potential, though it is still one of the strongest up tilts in the game. It also has more startup (frame 7 → 8), leaving it unable to hit opponents directly in front of Bowser, as well as more ending lag (FAF 50 → 51).
- Down tilt:
- Both hits have less startup (frame 14/27 → 10/20) and deal more damage (13%/10% → 14%/11%), with the first hit having more base knockback as well (15 → 20), allowing it to KO reliably around 125%. The move also has drastically less ending lag (FAF 60 → 46), and both hits have gained a trip chance of 30%.
- Its range is slightly shorter, with the hitboxes no longer covering his claws and being smaller overall (5.6u/4.8u → 5u/5u/4.5u/4u).
- Forward smash:
- Forward smash has faster startup (frame 29 → 27) and consists of two hits, which increase its total damage (24% → 10% (hit 1), 23%/21% (hit 2)), making it the most damaging forward smash in the game.
- Its second hit has smaller hitboxes (8u/6.4u → 7.3u/6.3u), and deals less knockback (30 (base)/100 (scaling) → 25/22 (base)/81 (scaling)), no longer being the most powerful smash attack in the game. Additionally, the first hit of the move can hit opponents away from the second hit at high percents due to its knockback (30 (base)/130 (scaling)), while KOing even later standalone. Lastly, the move has more ending lag (FAF 66 → 67).
- Up smash:
- Up smash's hitboxes cover more of Bowser's shell, increasing its vertical reach. It also grants invincibility instead of intangibility, which lasts noticeably longer (frames 16-17 → 14-27), allowing it to cancel out opposing attacks and protect Bowser much more effectively.
- It now has two sourspots instead of one, which cover Bowser's respective sides, deal less damage (17% → 15%), launch at less vertical angles (90° → 70°/120°), and both them and the sweetspot deal less knockback (40 (base)/86 (scaling) → 23 (base)/80/90 (scaling)), hindering the move's KO potential. The landing hit has also received sourspots that deal less damage (12% → 10%).
- Down smash:
- Down smash has less ending lag (FAF 68 → 67), and deals more total damage (20.2% → 21%) due to the changes to stale-move negation, despite the last hit dealing less damage (10% → 9%).
- Its last hit launches at a less vertical angle (90° → 65°), which along with its lower damage output hinders its KO potential.
Aerial attacks[edit]
- Neutral, forward and down aerials have decreased landing lag (30/15 frames → 24 (neutral, forward), 30/15 frames → 28 (up)). Due to the removal of L-canceling, however, their landing lag is not properly compensated.
- Neutral aerial:
- Neutral aerial has a smaller hitbox (10u → 8u), and now possesses a late hit (frames 8-23 → 8-13 (clean)/14-23 (late)) that deals less damage (13% → 9%).
- Forward aerial:
- Due to Bowser's slower falling speed, forward aerial can now autocancel in a short hop.
- It has less base knockback (50 → 40), and its sweetspot deals less damage (14% → 13%), hindering its KO potential.
- Forward aerial now has a slash effect instead of a normal effect.
- The 11% hitbox was moved over from Bowser's right shoulder to his left shoulder.
- Back aerial:
- Back aerial's clean hit deals more damage (13% → 15%) with more knockback scaling (80 → 83), making it a reliable KO move.
- It has a shorter duration (frames 9-17 → 9-15), and its clean hit no longer semi-spikes as effectively (24° → 35°). Its late hit also has a smaller hitbox (8.8u → 8u), and deals less damage (9% → 7%), albeit with knockback compensated (25 (base)/80 (scaling) → 35/100).
- Its hitbox size has been altered (8.8 → 9/5).
- Up aerial:
- Up aerial has less startup with a longer duration (frame 22-25 → 16-20), and now grants intangibility on Bowser's head (frames 10-20), improving its safety.
- It has a smaller hitbox (8.8u → 7u) and reduced knockback (50 (base)/100 (scaling) → 35/93), no longer being the most powerful up aerial in the game.
- Down aerial:
- Down aerial deals more total damage (26.66% → 29%) due to the changes to stale-move negation. Additionally, its last hit is now a meteor smash (80° → 270°) without set knockback (10 (set)/0 (base)/100 (scaling) → 0/10/100), granting it edgeguarding potential, while its landing hit has more base knockback (58 → 60) and larger hitboxes (8u → 9.6u).
- Its last hit has a shorter duration (frames 38-39 → 38).
Throws/other attacks[edit]
- Grabs:
- Standing and dash grab have longer range (4.8u/3.6u/2.8u → 5.5u/4.3u/3.3u).
- Dash grab has a shorter duration (frames 10-12 → 10-11).
- The introduction of buffering makes Bowser's 10 frame advantage on grab release viably usable now, giving him effective grounded grab release followups on the entire cast (combined with grounded grab release animations being 1 frame longer across the board) except Donkey Kong. The general changes to aerial grab releases also benefit him, as he now has a 31-frame advantage, giving him inescapable followups against various characters.
- Up throw:
- Up throw deals more total damage (9.37% → 10%) due to the changes to stale-move negation.
- Due to the generally slower falling speeds in Brawl, up throw can no longer chain grab fast-fallers.
- Bowser now retreats into his shell during up throw.
- Edge attacks:
- Both edge attacks have more set knockback (90 → 110).
- Fast edge attack grants drastically less intangibility (frames 1-34 → 1-4), and has more startup with a much shorter duration (frames 7-34 → 8-17) and covers much less distance, significantly weakening its ability to intercept high recoveries and beat out opposing attacks, although it remains one of the best edge attacks in the game.
Special Moves[edit]
- Fire Breath:
- Fire Breath can be angled up and down while it is active.
- Flying Slam:
- Bowser has a new side special: Flying Slam. It functions as a command grab like Koopa Klaw, but instead of Bowser biting opponents and having the ability to throw them forward or backward, he somersaults high into the air with them, while having the ability to move horizontally, then plummets down to slam them into the ground.
- Flying Slam has much less startup on the ground (frame 16 → 8), less ending lag when missed (frame 60 → 43 (grounded)/50 (aerial)), and autocancels throughout its entire duration, allowing for more versatile movement (particularly giving Bowser access to Koopa hopping). It can also be used to perform sacrificial KOs.
- Flying Slam only has one throw triggered by landing on the stage, which has different knockback values (140 (base)/15 (scaling) (forward), 60/100 (back) → 80/50) and a different angle (80° (forward)/361° (back) → 60°), leaving it unable to set up follow-ups as well as Koopa Klaw's forward throw or KO as effectively as its back throw. It also has more startup in the air (frame 16 → 17), and deals less damage overall due to lacking a pummel, despite the throw itself being more damaging than the previous throws alone (15% (forward)/11% (back) → 18%). Lastly, the initial swipe no longer has hitboxes placed farther away from the grab-boxes, reducing its effective range.
- Whirling Fortress:
- Whirling Fortress has more startup lag (frame 5 → 6).
- However, the grounded version also has one more frame of intangibility (frames 1-4 → 1-5).
- Additionally, with it now being possible to perform Whirling Fortress on the first frame of a jumpsquat, the move is not only the same speed out of shield but Bowser can now become intangible on frame 1 OoS rather than on frame 2 which along with its greater range, makes it a more versatile out of shield option overall.
- Whirling Fortress has drastically higher landing lag (10 frames → 50) and it now suffers from RCO lag (although Bowser only gains an additional 4 frames of hard landing lag with RCO).
- The grounded version has larger hitboxes (7.812u/7.812 → 9.5u/9.5u (hit 1), 4.687u/4.687u → 5.8u/5.8u (hit 2)) which are positioned further away from Bowser (z offset: -2.695/5.39 → -4/8), improving its range.
- The grounded version is more reliant on momentum. If the player lets go of the control stick for example, Bowser will continue to move at close to full speed rather than halting to a stop.
- The grounded version's first hit deals less damage (13% → 11%) and has less base knockback (90 → 70), significantly hindering its KO potential.
- The grounded version's second hit has a shorter duration (frames 7-26 (clean)/27-46 (late) → 8-23/24-39).
- The aerial version grants slightly more height (1.78 → 1.85).
- Bowser can grab ledges from the front while using Whirling Fortress much sooner (frame 36 → 8).
- The aerial version has a longer animation before Bowser enters free fall (49 frames → 79). Considering that the move transitions to the grounded animation when Bowser lands and considering its much higher landing lag, this benefits the move overall.
- The aerial version deals more total damage due to the changes to stale-move negation (32.75% → 35%).
- The aerial version has larger hitboxes (8.984u (hit 1)/7.812u (hits 2-11) → 10u (hit 1)/9u (hits 2-6)/8.2u (hits 7-11)).
- Bowser cannot grab ledges from behind while using Whirling Fortress as early (frame 36 → 48).
- Additionally, the move now uses a fixed value for when Bowser can grab the ledge, rather than only depending on Bowser falling. This greatly increases the amount of time Bowser cannot grab the ledge while sliding off of a platform, heavily limiting Bowser's ability to perform Fortress Hogging when facing away from the ledge.
- Bowser Bomb:
- Grounded Bowser Bomb produces a hitbox when Bowser jumps that leads into the drop, allowing it to deal more total damage (21% → 24%) and significantly decreasing its startup (frame 42 → 11 (jump), 36 (drop)). The move's landing hitbox also deals more damage (8% → 11%).
- The drop deals less damage (21% → 20%), although its KO ability is compensated by its higher knockback scaling (72 → 75) and the generally slower falling speeds.
- Final Smash:
- Bowser now has a Final Smash: Giga Bowser. Upon activating the Final Smash, Bowser transforms into the gigantic, powered-up version of himself that originally debuted in Melee. Giga Bowser keeps the same moveset and attributes as regular Bowser, but his moves have more damage and knockback, he has immunity to knockback, and some of his moves have different elemental effects, such as darkness and freezing. After 11 seconds, Bowser will power down and change back to his normal form.
Moveset[edit]
- For a visual representation of Bowser's attack hitboxes, see this page.
- Bowser can crawl, although it has little practical use due to his large crouching hurtbox.
| Name | Damage | Description | ||
|---|---|---|---|---|
| Neutral attack | Left Scratch (左ひっかき) / Right Scratch (右ひっかき) | 5% | Two quick claw swipes. Relatively safe move, as the arm Bowser is swiping with is intangible while the hitboxes are out. It has respectable jab cancelling potential, with the first hit linking into a forward tilt if the opponent does not air dodge. Decent knockback but lacks KO power. | |
| 5% | ||||
| Forward tilt | Koopa Back Fist (クッパ裏拳) | 11% | Does a backhanded punch while leaning his body forward. Can be aimed up or down. Has decent KO potential, and it can KO at 154% when angled up from the center of Final Destination. If angled down, has a decent chance of tripping. Bowser's lower arm is intangible while the hitboxes are out. However, it has poor frame data to compensate for it's strengths. The attack is based on the second hit of his Drill Claw attack in Super Mario RPG: Legend of the Seven Stars. | |
| Up tilt | Ceiling Scratch (天井ひっかき) | 12% | Swats the air above him. A decent juggling move but has high ending lag. This is also a very powerful KO move and can KO at 109% despite its surprising speed. Like his forward tilt, Bowser's lower arm cannot be hit while the hitboxes are out. | |
| Down tilt | Mish-Mash Scratch (よせあつめひっかき) | 14% (hit 1), 11% (hit 2) | Claw swipes while crouched. Does two hits; unlike most multi-hit moves, the first hit is the stronger one. High knockback for its kind with speed make this another speedy KO move, KOing at 89% at the ledge, or 123% from the center of Final Destination. Like his neutral combo, the active arm cannot be hit. | |
| Dash attack | Convoy Tackle (コンボイタックル) | 11% (clean), 8% (late) | A running headbutt. Has good vertical knockback, though it cannot KO until past 200%. This move's high ending lag makes it easily punishable if whiffed. | |
| Forward smash | Bull Head (ブルヘッド) | 10% (hit 1), 23%/21% (hit 2) | Rears back and then performs a very strong headbutt. This is the most damaging forward smash in the game. If used correctly, the second hit can prevent shield grabbing. Uncharged it KOs at 53% at the ledge and 81% from the center of Final Destination if both hits connect, while fully charged it's extremely powerful, KOing at just 17% at the ledge, and 38% from the center. | |
| Up smash | Rising Spike (ライジングスパイク) | 20%/15% (hit 1), 12%/10% (hit 2) | Hunkers down on all fours and jumps straight up, hitting with his shell. Hitting with the sides of the attack does less damage. Opponents who only shield his jump may be hit by his landing (this only applies to grounded opponents). Very high knockback (one of the strongest up smashes in the game), KOing at 100% when uncharged and 62% when fully charged. | |
| Down smash | Buzzsaw (バズソー) | 2% (hits 1-6), 9% (hit 7) | Retracts into his shell and spins around. Multi-hit attack that does up to seven hits. Very high knockback, but it is possible to SDI upwards to jump out of the move. KOs at 100% when uncharged and 61% when fully charged. | |
| Neutral aerial | Gyroscope (ジャイロスコープ) | 13% (clean), 9% (late) | Spins around inside his shell. It has low knockback, not KOing until around 165%. | |
| Forward aerial | Jump Scratch (ジャンプひっかき) | 13% (hand), 12% (arm), 11% (shoulder) | A quick slash forwards. Decent knockback with surprising speed, and when sweetspotted can KO at 105% from the ledge, and at 150% from the center of Final Destination. | |
| Back aerial | Spike Bomber (スパイクボンバー) | 15% (clean), 7% (late) | Thrusts out his shell behind him, dealing massive damage and above average knockback, which can KO at 98% at the ledge, or at 136%. Low startup, but high ending lag and landing lag if not auto-cancelled. | |
| Up aerial | Heading (ヘディング) | 17% | Swings his head upward. Has noticeable startup, but its very high damage and knockback make it one of the strongest up aerials in the game (2nd strongest up air in the game), and can KO Mario at 92% from the ground. It is hindered, however, by its high startup and low hitbox duration. | |
| Down aerial | Scrub Brush (スクラブブラシ) | 3% (hits 1-9), 2% (landing) | Retracts into his shell and spins himself into the ground. Limited shockwave if it hits the ground. The last hit can meteor smash, but it's weak and not recommended overall. Often used for SHFFs, due to its high overall damage output and extra hit upon landing. | |
| Grab | Grab (つかみ) | — | ||
| Pummel | Grab Headbutt (つかみヘッドバット) | 3% | Hits foe with his head. Very slow pummel. | |
| Forward throw | Slingshot (スリングショット) | 10% | Launches foe forward using his head. Decent knockback, but will rarely KO, not doing so until 187% at the ledge. | |
| Back throw | Back Throw (バックスルー) | 10% | Almost identical to Bowser's forward throw, but has a faster execution, and the altered animation causes it to throw opponents from further out, allowing it to KO earlier at 177% from the ledge. | |
| Up throw | Fresh Mixer (フレッシュミキサー) | 1% (hits 1-8), 2% (throw) | Tosses foe upwards, retreats into his shell, and spins, damaging the foe with his spikes. Damage also applies to bystanders. Deals decent damage overall, but the throw always deals set knockback, making it incapable of scoring KOs by itself. | |
| Down throw | Heavy Press (ヘビープレス) | 12% (hit 1), 0% (throw) | Sets opponent on floor, then flings himself forward, performing a body slam on his opponent. The full damage of the attack is also applied to bystanders, but it doesn't deal much knockback at low damage percentages. The throw doesn't deal any damage, and its knockback isn't strong enough to KO, even at 999% damage, unless the grabbed fighter is tiny-sized and near a stage ledge. | |
| Floor attack (front) | 6% | Leaps forward to strike with his head, then back to kick behind, and finally up into a standing position. | ||
| Floor attack (back) | 6% | Gets up while swinging his hand around. | ||
| Floor attack (trip) | 5% | Gets up while facing backwards, and does a claw swipe that brings him facing forward. | ||
| Edge attack (fast) | 8% | Quickly spins onto the stage, then retreats back a bit. | ||
| Edge attack (slow) | 10% | Slowly climbs onto stage, and does a quick claw jab. | ||
| Neutral special | Fire Breath | 2% (near), 1% (far) | Takes a short breath and lets loose with a stream of fire. | |
| Side special | Flying Slam | 18% (slam), 13% (SSE slash) | Snatches the opponent and does a massive flying suplex. Enemies in the Subspace Emissary are instead launched away by different hitboxes. Can be used to commit Bowsercide, which under most circumstances KOs the opponent first. The slam KOs at 146%, and its angle makes DI risky. | |
| Up special | Whirling Fortress | 11% (ground hit 1), 5% (ground hit 2 (clean)), 3% (ground hit 2 (late)) 10% (air hit 1), 3% (air hits 2-6), 2% (air hits 7-11) |
Gets into his shell and spins around. One of the best out of shield moves in the game, but only deals up to two hits when used on the ground, making it unsafe to use against enemy shields. As a recovery move, it falls subpar from others, with very little vertical distance, but it is good for recovery from a large horizontal distance. On the ground, the clean hit deals good vertical knockback, KOing at 131%. | |
| Down special | Bowser Bomb | 4% (hop), 20% (drop), 11% (landing) | Leaps into the air and plummets downwards. A great KOing and punishing option. When both hits connect, it can KO Mario from ground on Final Destination at 77%. However, due to hitstun cancelling, the first hit is not a true combo into the second. The main attack does not have any freeze frames. The move is based on the attack from his boss battle in Super Mario Bros. 3. | |
| Final Smash | Giga Bowser | — | Turns into Giga Bowser. During the transformation, Bowser will have armor, and most of his attacks gain elemental attributes. Transformation lasts for 11 seconds. | |
Stats[edit]

| Stats | Weight | Dash speed | Walk speed | Traction | Air friction | Air speed | Air acceleration | Gravity | Falling speed | Jumpsquat | Jump Height | Double jump Height |
|---|---|---|---|---|---|---|---|---|---|---|---|---|
| Value | 120 | 1 – Initial dash 1.527 – Run |
0.8 | 0.0577 | 0.0075 | 1.034 | 0.04 – Base 0.08 – Additional |
0.1027 | 1.39 – Base 1.946 – Fast-fall |
8 | 32.87722406 - Base ? - Short hop |
? |
Announcer call[edit]

English
French
French (PAL)
German
Italian
Spanish
Wii Remote selection sound[edit]
- Bowser roars. The sound clip is taken directly from Melee.
On-screen appearance[edit]
- Emerges from a wall of flames.

|
|---|
Taunts[edit]
- Up taunt: Rears his head back and roars.
- Side taunt: Snaps furiously forward five times.
- Down taunt: Balances precariously on one leg.
| Up taunt | Side taunt | Down taunt |
|---|---|---|

|

|

|
Idle pose[edit]
- Leans back and exhales steam. Similar to his up taunt but he doesn't lean back as far.
- Clenches his fists and releases steam from his nose.
 |

|
|---|
Crowd cheer[edit]
| English | Japanese | |
|---|---|---|
| Cheer | ||
| Description | Bow-ser | Koo-pa |
| Pitch | Deep male | Male |
Victory poses[edit]
- Up: Takes two steps forward while swiping with his claws twice.
- Left: Steps forward, builds up a little and roars.
- Right: Spins around in his shell and comes out grinning.
| Up | Left | Right |
|---|---|---|

|

|

|
In competitive play[edit]
Notable players[edit]

- See also: Category:Bowser players (SSBB)
 Ixis Naugus - Although more well known for his Sonic in SSB4, he had a high-level Bowser and was considered to be the top Bowser player in Europe.
 KENT - Considered to be the premier Bowser player in Japan.
 KingKong - Considered to be the best Bowser player of all time.
 KishSquared - One of the best Bowser players in the United States.
- Vex Kasrani - While he mostly used King Dedede for most of his tournament results, he had a high-level Bowser and was considered to be one of the best Bowser players in the United States.
- Zigsta - A top Bowser player in the United States.
Tier placement and history[edit]
Bowser was initially seen as a solid middle tier character, being ranked at 22nd on the first tier list. Bowser's speed and mobility buffs were immediately noticed, which when combined with his still great power and the slower, less combo-orientated pace of Brawl, allowed Bowser to compete decently with an inexperienced playerbase that could not effectively evade him and was still discovering the potential of other characters. Bowser still had the traits of a classic low tier character, however: he was still very slow compared to the rest of the cast, very large and thus heavily vulnerable to deadly chain throws and combos, had an easily gimpable recovery that compromised his endurance potential, and was vulnerable to camping while being incapable of camping himself, with a lack of any outstanding attributes to counteract this. Thus, as the metagame progressed, Bowser steadily declined, with Bowser players finding it difficult to keep up with the quickening pace of other advancing characters and having their weaknesses (most notably to chain throws and camping) more frequently exploited, while lacking any significant developments for Bowser's metagame outside of grab release followups. Through the second to fourth tier lists, Bowser fell no more than two spots at a time, but it was not until the fifth list that he saw a significant drop, falling five spaces to 32nd and formally entering the low tiers, though many players thought of Bowser as a low tier character well before then.
Bowser's decline additionally saw his playerbase diminish, and most of his top players, notably his best player KingKong, dropped Bowser or stopped playing Brawl competitively altogether, while fewer and fewer players used Bowser overall. By the end of the game’s competitive lifespan, Bowser was one of the most unpopular characters in Brawl tournaments, having almost no established active players who use him, and being rare at even locals with casual players, which has led to his poor tournament results. As such, Bowser has never risen on any tier list. However, despite Bowser's weak representation and tournament results, the characters below him are generally considered to be even worse by a noticeable margin.
Role in The Subspace Emissary[edit]

Bowser is one of the two secondary antagonists alongside Ganondorf in the Subspace Emissary. He first appears after Donkey Kong and Diddy Kong chase down his troops, who had stolen their bananas in order to lure them to him as a trap. Bowser confronts the two and transforms DK into a trophy with a Dark Cannon, but not before DK punches Diddy away. Bowser chases him down, and has a Shadow Bug clone of himself fight Diddy and Fox. After defeating the clone, the real Bowser attempts to turn them into trophies, but they manage to dodge the shot. Although Diddy is eager to fight Bowser, Fox knows that they're no match, so he grabs Diddy and makes their escape. While continuing his chase, he is told by Ganondorf to hunt down King Dedede, who had stolen Wario's trophies. He also transforms Zelda/Peach into a trophy, and after having another Shadow bug clone of him copy her, orders her Shadow bug clone to attack Mario and Pit/Link and Yoshi. Bowser and his troops attack King Dedede's castle, where Dedede is hiding but when they broke the roof a stone fell on Dedede's head, knocking him out. The debris buries Dedede along with the trophies of Ness and Luigi. As such he only finds the trophy of Peach/Zelda. Bowser steals Peach/Zelda's trophy and evades Mario and Pit's attacks, but when he dodges Pit's arrow he falls off a cliff, but is shown to be unharmed after he landed in his Clown Car. After this, he returns to attack Fox and Diddy Kong at the Swamp and transforms Diddy into a trophy. Fox dodges the shots however. Bowser then orders shadow bugs to clone Diddy's trophy. He flees after Falco attacks him and destroys his Dark Cannon. He orders more shadow bugs to make the Diddy clone giant however. Fox, Falco, and the real Diddy defeat it though. He is next seen with Ganondorf on the Subspace Gunship. They destroy the Halberd, but fail to stop Kirby from destroying the Gunship with a Dragoon. Fleeing into Subspace, Bowser is betrayed by Ganondorf and turned into a trophy by a surprise blast by a Dark Cannon. He is eventually brought back to life, and after being defeated by King Dedede, fights him Bowser is defeated, revived again, and then notices the downed Master Hand and decides to help the heroes take down Tabuu. Later Bowser beats up Ganondorf's trophy for revenge. The sight of Master Hand lying on the ground seems to trouble Bowser, probably because Bowser was really the only smasher accomplice who was loyal to Master Hand, unlike Ganondorf (who planned to betray him to take control of the Subspace Army) and Wario (who did it just to enjoy himself). Bowser and the others manage to defeat Tabuu and end the invasion.
Non-playable appearances[edit]
Playable appearances[edit]
Exclusive stickers[edit]
These stickers can be used by only Bowser or a select few including Bowser:
- 1-Up Mushroom: [Leg] attack +4
- Bowser (DDR:Mario Mix): [Throwing] attack +20
- Bowser (Mario Kart 64): [Weapon] attack +13
- Bowser (Super Paper Mario): [Arm] attack +23
- Coin: [Specials: Indirect] attack +4
- Dice Block: [Arm] attack +8
- Dr. Mario: [Head] attack +18
- Koopa: [Body, Spin] attack +10
- Lakitu (Mario Kart: Super Circuit): [Leg] attack +13
- Luigi & Baby Luigi: Launch power +5
- Luigi (Mario & Luigi: Superstar Saga): Launch power +23
- Mario & Luigi: [Flame] resistance +19
- Mario & Yoshi: [Specials: Indirect] attack +13
- Mario (Mario Kart DS): [Leg] attack +22
- Mega Rush Badge: [Specials: Direct] attack +8
- Mushroom: [Arm, Leg] attack +5
- Peach (Mario Superstar Baseball): [Slash] attack +5
- Peach (Super Mario Bros. 2): Launch resistance +29
- Peach (Super Princess Peach): [Weapon] attack +23
- Rawk Hawk: [Arm] attack +5
- Red Fire: [Flame] attack +26
- Super Mario Bros.: [Arm, Leg] attack +15
- Waluigi (Mario Superstar Baseball): [Specials: Indirect] attack +8
- Waluigi (Super Mario Strikers): [Slash] attack +15
- Yoshi (Mario Party 2): [Launch] resistance +35
- Yoshi (Paper Mario: The Thousand-Year Door): [Throwing] attack +5
- Yoshi (Yoshi Touch & Go): [Arm, Leg] attack +8
In Solo Modes[edit]
Classic Mode[edit]
In Classic Mode, Bowser can appear as an opponent or ally in Stage 8 along with Mario, Luigi, and Peach on Delfino Plaza, Mario Circuit, Mushroomy Kingdom, or Luigi's Mansion (with the latter available if it has been unlocked). Bowser can also appear as an opponent in Stage 11, but only if he hasn't appeared in Stage 8.
All-Star Mode[edit]
In All-Star Mode, Bowser is fought in Stage 2 alongside Mario, Luigi, and Peach on Delfino Plaza, Mario Circuit, Mushroomy Kingdom, or Luigi's Mansion (with the latter available if it has been unlocked).
Event Matches[edit]
Solo Events[edit]
- Event 1: Two Trouble Kings: As Mario, the player must defeat Bowser and King Dedede on Delfino Plaza.
- Event 6: Super Bowser Bros.: As Bowser, the player must reach the flagpole in Mushroomy Kingdom without getting KO'd by the three Marios.
- Event 27: Three-Beast Carnage: As a tiny R.O.B., the player must defeat a giant Bowser, a giant Donkey Kong, and a giant Charizard on New Pork City.
- Event 34: All-Star Battle Melee: Bowser is one of the opponents fought in this event. All opponents are newcomers from Super Smash Bros. Melee.
- Event 40: The Final Battle: The player selects any character and must defeat Bowser, Ganondorf and King Dedede on Final Destination.
Co-Op Events[edit]
- Co-Op Event 8: ALL MINE!: Wario and Bowser must work together to collect 2000 coins together on Skyworld while fighting Mario and Luigi.
- Co-Op Event 20: The Final Battle for Two: Both players select a character and must defeat Bowser, Wario, King Dedede, Wolf, Meta Knight, and Ganondorf on Final Destination.
- Co-Op Event 21: The True All-Star Battle: Both players select a character and take on the entire roster on Battlefield.
Ending Images[edit]
Classic Mode
All-Star Mode


Trophies[edit]
Bowser's main and Final Smash trophies can be obtained by clearing Classic Mode and All-Star mode respectively with Bowser.

- Bowser
 The king of the Koopas and Mario's eternal rival. He breathes fire, hurls hammers, attacks from vehicles like the Koopa Clown Car, and uses all sorts of weapons in hopes of taking out Mario. As his size suggests, he's immensely powerful. His son Bowser Jr. is a chip off the old block who spends his time creating trouble for Mario.
 The king of the Koopas and Mario's eternal rival. He breathes fire, hurls hammers, attacks from vehicles like the Koopa Clown Car, and uses all sorts of weapons in the hope of taking out Mario. As his size suggests, he's immensely powerful. His son Bowser Jr. is a chip off the old block who spends his time creating trouble for Mario.
 : Super Mario Bros.
 : Super Mario Sunshine

- Giga Bowser
- Bowser, transformed into the terrible and brutal form first seen in Super Smash Bros. Melee. While in this form, he cannot be stunned or budged. His appearance is so fierce, it's as if he doesn't even belong in the Smash Bros. universe. He cannot maintain this form for long, so dealing out damage efficiently is key.
 : Super Smash Bros. Brawl
Alternate costumes[edit]
.png)
| |||||
Gallery[edit]
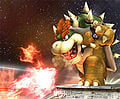
Using Fire Breath on Lylat Cruise.
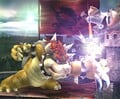
Using his neutral attack on Fox on Castle Siege.
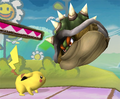
Using Whirling Fortress next to Pikachu on Yoshi's Island.
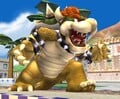
Posing on Delfino Plaza.
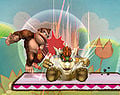
Using Bowser Bomb on Donkey Kong on Yoshi's Island.
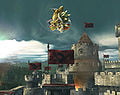
Using Flying Slam on Wario on Castle Siege.
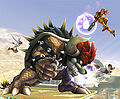
Giga Bowser in Brawl.
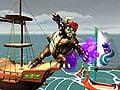
Giga Bowser's forward tilt.


Trivia[edit]

- Bowser's voice clip for his Wii Remote selection is one of the stock roars used for him in Mario Kart 64 and Melee.
- Bowser's animation for being grabbed has some placement issues. His hurtbox bends away from the grabber, and it is rather far away. Samus' pummel will only hit the first time, and Lucario and Wolf's will only hit every other time.
- Bowser, Mario, Ganondorf, and Link are the only returning characters in Brawl to have at least one completely different special move. In this case, Bowser's side special is changed.
- If Bowser jumps with a Screw Attack while in possession of a Smash Ball, the glow given off by the Smash Ball will glow in the areas where Bowser's head, arms, and legs would normally be.
- Additionally, if Bowser performs a backwards double jump while in possession of a Smash Ball, his "Smash Ball" eyes will be shown in the position where his head would normally be—despite both his eyes being visible inside his shell—making it will look as if he has four eyes.
- Bowser, Meta Knight, and Marth can all perform the floor glitch.
- There exists a glitch on the Mushroomy Kingdom stage. If Bowser were to hit the first invisible block of the stage scrolling cycle to solidify it, jump backwards onto the stack of blocks to the right of the block, and get grabbed by King Dedede right before he lands, he will rapidly flip between his aerial grab and grounded grab animation.
- Bowser is the only character in Brawl to not have the tweeting sound when he is stunned.
- Bowser is the only character whose theme in the Character Roll Call does not belong to his universe. His theme is Giga Bowser (Melee), a theme belonging to the Super Smash Bros. universe.
- This also makes him and Marth the only characters to use a theme from Melee for their Character Roll Call.
External links[edit]
- Bowser's page at Smash Bros. DOJO!!.
- Bowser character guide on SmashBoards
- Bowser's hitbox size of each of his moves
| Fighters in Super Smash Bros. Brawl | |
|---|---|
| Veterans | Bowser · Captain Falcon · Donkey Kong · Falco · Fox · Ganondorf · Ice Climbers · Jigglypuff · Kirby · Link · Luigi · Mario · Marth · Mr. Game & Watch · Ness · Peach · Pikachu · Samus · Yoshi · Zelda / Sheik |
| Newcomers | Diddy Kong · Ike · King Dedede · Lucario · Lucas · Meta Knight · Olimar · Pit · Pokémon Trainer (Charizard · Ivysaur · Squirtle) · R.O.B. · Snake · Sonic · Toon Link · Wario · Wolf · (Zero Suit Samus) |