Toon Link (SSBU): Difference between revisions
m (→Trivia) |
Tag: Mobile edit |
||
| (295 intermediate revisions by more than 100 users not shown) | |||
| Line 8: | Line 8: | ||
|ssbgame2 = SSB4 | |ssbgame2 = SSB4 | ||
|availability = [[Unlockable character|Unlockable]] | |availability = [[Unlockable character|Unlockable]] | ||
|tier = B- | |||
|ranking = 46 | |||
}} | }} | ||
'''Toon Link''' ({{ja|トゥーンリンク|Tūn Rinku}}, ''Toon Link'') is a playable character in ''[[Super Smash Bros. Ultimate]]''. He was officially confirmed as playable alongside his predecessor {{SSBU|Young Link}} and the rest of veterans on June 12th, 2018. As in ''[[Super Smash Bros. Brawl]]'', he is [[unlockable character|unlockable]], instead of being available from the [[starter character|start]]. Toon Link is classified as [[Fighter number|Fighter #43]]. | |||
'''Toon Link''' ({{ja|トゥーンリンク|Tūn Rinku}}, ''Toon Link'') is a playable character in ''[[Super Smash Bros. Ultimate]]''. He was officially confirmed as playable on June 12th, 2018. Toon Link is classified as | |||
As in '' | As in ''Brawl'' and ''[[Super Smash Bros. 4]]'', {{s|wikipedia|Sachi Matsumoto}}'s portrayal of Toon Link from ''{{s|zeldawiki|The Legend of Zelda: The Wind Waker}}'' was repurposed for ''Ultimate''. | ||
Toon Link is ranked 46th out of 82 on the current [[tier list]], placing him in the B- tier. This is a noticeable drop from his 23rd out of 54 placement in ''SSB4'' and is his worst placement in the series. Toon Link's gameplan is relatively a middle ground between Young Link's strong projectile and combo game and Link's strong kill power or Bomb usage. Toon Link has a pretty strong zoning game thanks to his numerous projectiles in [[Bomb (Link)|Bomb]] and [[Boomerang]]. The former allows him to set up combos or confirm into KOs at higher percents while the latter is a good combo starter or a way for opponents to approach him in neutral. Toon Link's mobility is also among the best of the three Links on the ground, allowing him to catch up or run away from his opponents more reliably. His frame 2 air dodge and floatiness also allow him to escape from more combos too. | |||
Toon Link has some weaknesses similarly shared to the other Links. Because of his floatiness, it makes him take a while to land back on the ground, making him prone to juggling. Toon Link also has lower range than most other swordfighters who can outrange and pressure better than he can. His recovery is also relatively exploitable as it travels in a predictable path, though it can be mixed up with Bomb Jump. | |||
Overall, Toon Link is a character with a simple, effective, and consistent gameplan that works when he gets momentum or wins neutral interactions. Toon Link has seen some strong results and representation mostly in Japan, through players, such as {{Sm|Lv.1}} and {{Sm|Sigma}}, who have had strong placements at majors. | |||
==How to unlock== | ==How to unlock== | ||
Complete one of the following: | Complete one of the following: | ||
*Play [[VS. match]]es, with Toon Link being the 44th character to be unlocked. | *Play [[VS. match]]es, with Toon Link being the 44th character to be unlocked. | ||
*Clear {{SSBU|Classic Mode}} with {{SSBU|Link}} or any character in his unlock tree, being the last character unlocked. | *Clear {{SSBU|Classic Mode}} with {{SSBU|Link}} or any character in his unlock tree, being the last character unlocked after {{SSBU|Richter}}. | ||
*Have Toon Link join the player's party in [[World of Light]]. | *Have Toon Link join the player's party in [[World of Light]]. | ||
With the exception of the third method, Toon Link must then be defeated on [[Pirate Ship]]. | With the exception of the third method, Toon Link must then be defeated on [[Pirate Ship]]. In World of Light, he is fought on [[Wuhu Island]]. | ||
== | ==Attributes== | ||
{{incomplete|This section needs an in depth explanation of Toon Link's strengths and weaknesses.}} | |||
Toon Link is a [[weight|middleweight]], yet boasts above-average [[dash]]ing speed and [[air acceleration]], as well as the ability to [[wall jump]]. However, his [[air speed]] is average and his [[falling speed|falling]] and [[fast fall]]ing speeds are both slow, while his [[gravity]] is low. Although they differ on the majority of their attributes, Toon Link and {{SSBU|Link}} both have above-average [[walk]]ing speeds. Like Link, he also wields his respective version of the {{s|zeldawiki|Master Sword}} and possesses a [[shield]]. The Master Sword grants Toon Link disjointed range, while the [[Passive shield|Hero's Shield]] blocks opposing [[projectile]]s if he is standing still or walking. Overall, Toon Link's attributes render him as a fairly quick, yet fairly [[Falling speed#Floaty|floaty]] character. | |||
As a zoning-orientated character, Toon Link possesses a number of [[projectile]]s. His [[Hero's Bow]], [[Boomerang]] and {{b|Bomb|Link}} enable him to not only force approaches, but also camp effectively. In addition to these strengths, Boomerang and Bomb boast combo potential, with the latter being his most varied and useful combo starter. Thanks to its explosion no longer damaging Toon Link upon contact with an opponent, Bomb now grants him a number of follow-ups at varying percentages. With precise usage, it can be followed by his up smash or forward aerial even at high percentages, both of which are among his most viable KOing options. | |||
Bomb's combo potential is further supplemented by [[jump-canceling]] and its status as an [[item]], with the latter trait ensuring that its combo potential is never susceptible to [[rage]] or [[stale-move negation]]. Although it is not as versatile in comparison, Boomerang is nevertheless useful for Toon Link's combo game, as it can combo into his up tilt, grab and various other moves depending on its positioning. | |||
Although Toon Link's combo game largely revolves around Bomb, he also possesses non-projectile combo starters. Up tilt is the most effective of these: it can combo into itself, up smash, and Spin Attack at low percentages; a short hopped neutral aerial, short hopped back aerial, and short hopped Spin Attack at low to medium percentages; and forward aerial and up aerial at medium to high percentages. Aside from up tilt, grab aerial can be used as a long-ranged set-up similarly to Bomb, regardless of the opponent's damage, while neutral attack can be jab canceled reliably. | |||
However, Toon Link has some weaknesses. His grab game is overall very polarized: [[Hookshot]] grants him long-lasting grabs that can grab airborne opponents, and a [[grab aerial]] and [[tether recovery]] that are both very useful, yet his grabs have considerable start-up and ending lag (albeit much less so than in previous installments). By extension, Toon Link's back throw is one of his most viable KO options due to being one of the strongest back throws in the game, while his forward throw is decent for setting up edge-guards and creating space. Conversely, Toon Link's down throw lacks combo potential, which makes it drastically inferior to Link and Young Link's versions. It can almost combo into back aerial. Although Toon Link's up throw is a situational KO option on platforms like Link and Young Link's versions, his back throw utterly outclasses it in this role. As a result, Toon Link's up and down throws are used primarily for setting up aerial pressure, such as by launching an opponent into the trajectory of a previously thrown Boomerang or Bomb. | |||
Toon Link's floatiness makes him particularly susceptible to strong vertical attacks, and renders his recovery quite predictable in spite of its improvements. Unlike other floaty characters, however, Toon Link cannot use his floatiness to perform long aerial combos because of his aerials' considerable ending lag. Toon Link's disjointed range is also somewhat offset by his short size, while the faster pace of ''Ultimate'' makes his defensive, projectile-based gameplan less effective than it was in previous installments. | |||
Overall, Toon Link is considered a very balanced and fast fighter with a plethora of attack options via his projectiles, tether grab/recovery, and decent frame data. The combination of low ending lag on his forward and back aerials with his slow fall speed allow Toon Link to dominate in the air with combos, while his moderately fast yet fairly useful tilt attacks and reasonably strong smash attacks allow for relatively easy KOs. While his middling weight and slow falling speed make him easier to combo and KO, it is generally agreed that Toon Link's strengths outweigh his weaknesses by a fair margin. | |||
==Changes from ''[[Super Smash Bros. 4]]''== | ==Changes from ''[[Super Smash Bros. 4]]''== | ||
Toon Link has received a notable mix of buffs and nerfs in the transition from ''SSB4'' to ''Ultimate''. Many of his standard attacks have been improved, but the general pace of ''Ultimate'', combined with the worsening of his camping tools, have annulled his improvements to an extent. As a result, Toon Link has been slightly nerfed overall. | |||
Several of Toon Link's attacks where he uses the Master Sword have been notably buffed, alleviating one of his weaker points from ''SSB4''. Particularly, Toon Link now boasts a vastly buffed ground game: [[neutral attack]]'s first two hits can now [[lock]], and the third hit now has the tech-chasing ability his adult counterpart has. [[Forward tilt]] has less ending lag, all hitboxes send opponents in front of him, and its hitboxes can now hit behind Toon Link. The changes to the [[Sakurai angle]] allow [[down tilt]] to launch aerial opponents lower, improving its tech chasing potential. [[Dash attack]] is much faster, has more range and less endlag, and the sweetspots out-prioritize the sourspot, turning it into a respectable combo starter at low percentages. [[Up smash]] is more consistent on landing the sweetspot, whereas [[down smash]] now has consistent KO potential on both sides of the move instead of pulling opponents into a second hit. | |||
Toon Link's air game, while seeing less buffs, has also become more useful; [[neutral aerial]] has more range, [[forward aerial]] can once again autocancel if performed in a short hop, [[back aerial]] is faster and has regained some of its combo potential, and [[up aerial]] is notably much safer to use due to its altered animation. Finally, Toon Link's Spin Attack has received various improvements, with the grounded version now being one of the best out of shield options in the game due to it being much faster and gaining KO potential, whereas the aerial version's power and safety have both improved and it will now always send opponents in front of Toon Link. | |||
However, Toon Link also received some noticeable nerfs. One of his biggest nerfs was to his [[forward smash]]; the move no longer has a second hit, while its single hit instead is slightly slower, deals less aggregate damage, possesses no mixup or spacing potential, and has a debatably worse hitbox that fails to strike short opponents or ones hanging on an edge. His other major nerf was to his {{b|Bomb|Link}}s, which no longer beat weak projectiles and continue on, instead bouncing off of them; this massively worsens their potential in trade and projectile situations. Other nerfs to his [[camping]] ability include his item throws having more ending lag, which worsens his combo game via his Bombs; and his [[grab aerial]] now bouncing off of the first projectile or hurtbox it makes contact with, instead of piercing through. Aside from forward smash, a few of his sword-based moves also received some nerfs. [[Up tilt]] has slightly inferior combo potential at high percentages due to the changes to knockback, [[up smash]] has fewer active frames, and [[back aerial]]'s already minimal KO potential has been almost totally removed in favor of restoring its combo potential. | |||
The universal changes to gameplay mechanics are overall mixed for Toon Link. The reduced landing lag makes it easier for him to combo, and safer to land if his aerials hit. The ability to [[Dash-canceling|use any attack out of a run]] also allows Toon Link more access to his now respectable grounded game. On the other hand, the changes to [[shieldstun]] make his grounded moveset much safer, though it also means shielding opponents are now more likely to punish mispaced aerials as easily. The nerfs to shield grabbing alleviate the negative changes from shieldstun, but combined with other characters also having reduced landing lag, and the changes to shieldstun, this notably worsens his grab game, despite his grabs' much lower ending lag. Finally, the universal increase to mobility further contributes to Toon Link's grounded game (due to his faster [[walk]]ing and [[dash]]ing speeds) and allows him to now combo out of his [[Hero's Bow]] when uncharged, but also allows more mobile opponents to close in on the distance to him and/or stay away from him easier. | |||
Overall, Toon Link has more utility in his sword-based attacks, but has to contend with worsened camping tools and the faster pace of ''Ultimate'', which makes his defensive, projectile-based game less effective compared to previous titles. This noticeably changes his playstyle, shifting from primarily a zoner and counter-zoner, to a more movement and pressure-based playstyle that utilizes his sword attacks more. Combined with various buffs other veterans have received, Toon Link performs worse than his ''SSB4'' iteration, and while he remains relatively viable, he's widely considered overshadowed by {{SSBU|Young Link}} due to the former's faster air-to-ground mobility, superior damage output, and stronger projectile game. | |||
{{SSB4 to SSBU changelist|char=Toon Link}} | |||
== | ==Update history== | ||
Toon Link received a mix of buffs, a single nerf and glitch fixes via game updates, but was buffed slightly overall. | |||
Starting with update 2.0.0, Toon Link's forward aerial can now auto-cancel out of a short hop, greatly buffing the move's utility and offense. He also can now grab the ledge earlier after using his back aerial. Update 3.0.0 nerfed Boomerang's shield damage as a part of a universal nerf to projectiles. Update 3.1.0 made neutral attack connect better, and Toon Link can now shield SDI if a projectiles hits his Hero's Shield thanks to update 4.0.0. | |||
Update 7.0.0 brought the most noteworthy buffs to Toon Link's kit. His dash attack was given less ending lag, both hits of his down smash now deal more knockback, his back aerial now hits earlier and has a slightly longer hitbox duration. His down aerial is now drastically stronger than it was before due to it now dealing more damage and not having its knockback not fully compensated. And finally, his grab aerial's hitbox lasts 2 frames longer. Due to these changes, Toon Link's KO potential and spacing were improved. | |||
Update 10.1.0 made Aerial Spin Attack much more consistent by giving it much better hitboxes and a more favorable angle if Toon Link is moving forward. | |||
Overall, Toon Link fares slightly better than he did at the launch of ''Ultimate''. | |||
'''{{GameIcon|ssbu}} {{SSBU|1.2.0}}''' | '''{{GameIcon|ssbu}} {{SSBU|1.2.0}}''' | ||
{{UpdateList (SSBU)/1.2.0|char=Toon Link}} | |||
'''{{GameIcon|ssbu}} {{SSBU|2.0.0}}''' | '''{{GameIcon|ssbu}} {{SSBU|2.0.0}}''' | ||
{{UpdateList (SSBU)/2.0.0|char=Toon Link}} | |||
'''{{GameIcon|ssbu}} {{SSBU|3.0.0}}''' | '''{{GameIcon|ssbu}} {{SSBU|3.0.0}}''' | ||
{{UpdateList (SSBU)/3.0.0|char=Toon Link}} | |||
'''{{GameIcon|ssbu}} {{SSBU|3.1.0}}''' | '''{{GameIcon|ssbu}} {{SSBU|3.1.0}}''' | ||
{{UpdateList (SSBU)/3.1.0|char=Toon Link}} | |||
'''{{GameIcon|ssbu}} {{SSBU|4.0.0}}''' | '''{{GameIcon|ssbu}} {{SSBU|4.0.0}}''' | ||
{{UpdateList (SSBU)/4.0.0|char=Toon Link}} | |||
'''{{GameIcon|ssbu}} {{SSBU|7.0.0}}''' | |||
{{UpdateList (SSBU)/7.0.0|char=Toon Link}} | |||
'''{{GameIcon|ssbu}} {{SSBU|10.1.0}}''' | |||
{{UpdateList (SSBU)/10.1.0|char=Toon Link}} | |||
==Moveset== | ==Moveset== | ||
*While standing still, walking, or crouching, incoming [[projectile]]s that hit | *While Toon Link is standing still, walking, or crouching, any incoming [[projectile]]s that hit his [[Passive shield|Hero's Shield]] will simply push him back slightly instead of inflicting damage. It can block any amount of projectiles, regardless of their power. | ||
*Toon Link can [[wall jump]]. | *Toon Link can [[wall jump]]. | ||
*Toon Link possesses a [[tether]] attack and grab. | *Toon Link possesses a [[tether]] attack and grab. | ||
''For a gallery of Toon Link's hitboxes, see [[Toon Link (SSBU)/Hitboxes|here]].'' | |||
{{MovesetTable | {{MovesetTable | ||
|game=SSBU | |game=SSBU | ||
|neutralcount=3 | |neutralcount=3 | ||
|neutralname= | |neutralname=Slash ({{ja|なぎ払い|Nagiharai}}) / Counter Slash ({{ja|返し|Kaeshi}}) / Stab ({{ja|突き|Tsuki}}) | ||
|neutral1dmg=2% | |neutral1dmg=2% | ||
|neutral2dmg=2% | |neutral2dmg=2% | ||
|neutral3dmg=4% | |neutral3dmg=4% | ||
|neutraldesc=An outward slash, followed by an inward slash, | |neutraldesc=An outward slash, followed by an inward slash, followed by a forward thrust. The first two hits can [[lock]], and the third hit's semi-spike angle makes it useful to set up tech-chases. It is based on the final series of strikes that the {{iw|zeldawiki|Hero of Time}} inflicts to [[Ganon]] in ''The Legend of Zelda: Ocarina of Time''. | ||
|ftiltname= | |ftiltname=Bamboo Splitter ({{ja|からたけわり|Karatake Wari}}) | ||
|ftiltdmg=9% | |ftiltdmg=9% | ||
|ftiltdesc=Toon Link | |ftiltdesc= A lunging downward slash. Moderate startup at frame 9, with low ending lag and decent knockback, making it fast for its power. The hilt and the middle of the swords are semi-spikes, while the tip launches at the Sakurai angle. Its hitboxes at the beginning of the animation reach far enough back for Toon Link to hit opponents behind him. It resembles the [[zeldawiki:Targeting#Z-Targeting|Z-Targeting]] slash used by the Hero of Time. | ||
|utiltname=Half-Moon Slash | |utiltname=Half-Moon Slash ({{ja|半月斬り|Hangetsu Kiri}}) | ||
|utiltdmg=5% | |utiltdmg=5% | ||
|utiltdesc=An | |utiltdesc=An overhead arcing slash. Thanks to its frame 8 startup and very low ending lag, it is one of Toon Link's best combo starters. Can combo into itself at low percentages, and at later percents, it can combo into his neutral, forward, back and up aerials. | ||
|dtiltname= | |dtiltname=Grass Cutter ({{ja|草薙ぎ|Kusa Nagi}}) | ||
|dtiltdmg=7% | |dtiltdmg=7% | ||
|dtiltdesc=A | |dtiltdesc=A kneeling inward slash. Can cause opponents to [[trip]] at low percents with a 50% trip chance and comes out on frame 9 with very minimal ending lag, making it very good for set-ups and tech-chases as well as being able to lock. At higher percents, it launches opponents away at a horizontal angle. | ||
|dashname= | |dashname=Running Hack ({{ja|追い斬り|Oi Kiri}}) | ||
|dashdmg=8% | |dashdmg=8% (sweetspot), 6% (sourspot) | ||
|dashdesc=A | |dashdesc= A lunging outward slash. It has fast startup at frame 7 and very little ending lag (19 frames), making it safe on shield despite its lack of shieldstun and useful for catching landings. However, it has a sourspot on Toon Link's arm that deals less damage. | ||
|fsmashname= | |fsmashname=Smash Upper ({{ja|スマッシュアッパー|Sumasshu Appā}}) | ||
|fsmashdmg={{ChargedSmashDmgSSBU|14}} | |fsmashdmg={{ChargedSmashDmgSSBU|14}} | ||
|fsmashdesc=Winds up and | |fsmashdesc=Winds up and then performs an upward slash. Toon Link moves slightly forwards when using it. It comes out on frame 16, it's strong and it and has less ending lag compared to his previous forward smash, but also less versatile. The duration of this move's hitbox is deceptively short compared to the animation, only lasting for two frames. As such, the move's range is also deceptively short and will fail to damage those above Toon Link beginning at frame 18. | ||
|usmashname= | |usmashname=Sky Slash ({{ja|天空斬り|Tenkū Kiri}}) | ||
|usmashdmg={{ChargedSmashDmgSSBU|13}} | |usmashdmg={{ChargedSmashDmgSSBU|13}} | ||
|usmashdesc= | |usmashdesc=A hopping, overhead arcing slash. Can hit behind Toon Link. Although the animation causes Toon Link to hop, it cannot reach opponents standing on a Battlefield platform above him. A standard anti-air and effective for covering both sides of Toon Link quickly should down smash not suffice. | ||
|dsmashname= | |dsmashname=Front and Back Sword Slice ({{ja|前後足元斬り|Zengo Ashimoto Giri}}) | ||
|dsmashdmg={{ChargedSmashDmgSSBU|12}} (front), {{ChargedSmashDmgSSBU|13}} (back) | |dsmashdmg={{ChargedSmashDmgSSBU|12}} (front), {{ChargedSmashDmgSSBU|13}} (back) | ||
|dsmashdesc=A | |dsmashdesc=A kneeling inward slash in front of himself, followed by a kneeling outward slash behind himself. Unlike in previous games, the first hit no longer leads into the second, although both hits have their knockbacks compensated, making the move effective near the sides of the stage. | ||
|nairname=Two Part Slash | |nairname=Two Part Slash ({{ja|二段斬り|Nidan Kiri}}) | ||
|nairdmg={{ShortHopDmgSSBU|8.5}} (front), {{ShortHopDmgSSBU|7}} (back) | |nairdmg={{ShortHopDmgSSBU|8.5}} (front), {{ShortHopDmgSSBU|7}} (back) | ||
|nairdesc= | |nairdesc=An inward slash followed by an outward slash behind himself. Has a chance to trip (30% trip chance) grounded opponents at low percents. Can also be used to lock, or as a combo starter. It can autocancel at the peak of a short hop. | ||
|fairname= | |fairname=Slash Up ({{ja|斬り上げ|Kiri Age}}) | ||
|fairdmg={{ShortHopDmgSSBU|13}} | |fairdmg={{ShortHopDmgSSBU|13}} | ||
|fairdesc=A | |fairdesc=A spinning outward slash. Has noticeable startup at frame 14, but it has low ending lag, can autocancel in a short hop and has respectable damage and great knockback, being able to KO at higher percents. It resembles his rolling {{iw|zeldawiki|Parry Attack}}. | ||
|bairname= | |bairname=Backward Slash Up ({{ja|後方斬り上げ|Kōhō Kiri Age}}) | ||
|bairdmg={{ShortHopDmgSSBU|8}} | |bairdmg={{ShortHopDmgSSBU|8}} | ||
|bairdesc= | |bairdesc=Turns around and performs an upward slash behind himself. Almost identical to forward aerial, but trades power for faster startup, being tied with neutral aerial for the fastest startup of his aerials, at frame 6. While it is extremely weak and will not KO at any reasonable percent, its very low base knockback, high knockback growth, and ability to autocancel with a short hop make it a fairly good option for combos. It can combo into itself at low percents, and into an aerial Spin Attack as a KO combo. | ||
|uairname= | |uairname=Jump Thrust ({{ja|上突き|Ue Tsuki}}, ''Up Thrust'') | ||
|uairdmg={{ShortHopDmgSSBU| | |uairdmg={{ShortHopDmgSSBU|14}} (clean), {{ShortHopDmgSSBU|11}} (late) | ||
|uairdesc= | |uairdesc=The {{iw|zeldawiki|Jump Thrust}}. Possesses [[sex kick]] properties. The clean hit has high knockback and can KO off the upper blast line at high percents, and the late hit can be used as a combo starter until high percents. | ||
|dairname=Sword Plant | |dairname=Sword Plant ({{ja|下突き急降下|Shita Tsuki Kyūkōka}}, ''Down Thrust Dive'') | ||
|dairdmg={{ShortHopDmgSSBU| | |dairdmg={{ShortHopDmgSSBU|16}} (clean), {{ShortHopDmgSSBU|14}} (late) , 5% (landing) | ||
|dairdesc=A [[stall-then-fall]] version of the {{ | |dairdesc=A [[stall-then-fall]] version of the {{iw|zeldawiki|Down Thrust}}. Has a powerful meteor smash at the start of the descent, and weak [[windbox]]es on landing, while also having a small hitbox that deals 5% when Toon Link takes out the Master Sword. Extremely risky to use offstage, as it has a long duration and, unlike the down aerials of the other Links, Toon Link's will not bounce off of any opponents he hits. Resembles his final strike to Ganondorf's head in ''The Legend of Zelda: The Wind Waker''. | ||
|zairname=Midair Hookshot | |zairname=Midair Hookshot ({{ja|空中フックショット|Kūchū Fukkushotto}}) | ||
|zairdmg=4% | |zairdmg=4% | ||
|zairdesc= | |zairdesc=Fires his {{s|zeldawiki|Hookshot}} forward. Can be used to [[Tether recovery|grab edges]] and is a very useful spacing option. As well as being safe on shield, it set ups tech situations at high percentages, which can act as an effective kill confirm. It replaces Down Tilt as Toon Link's main jab reset setup above 80-100% depending on character weight. | ||
|grabname=[[Hookshot]] | |grabname=[[Hookshot]] ({{ja|フックショット|Fukkushotto}}) | ||
|grabdesc=Fires his Hookshot | |grabdesc=Fires his Hookshot forward. It is a tether grab, and thus has higher lag than normal grabs in exchange for much longer range. Has noticeably less ending lag than {{SSBU|Young Link}}'s grabs. | ||
|pummelname= | |pummelname=Grab Hilt Strike ({{ja|つかみ柄なぐり|Tsukami Gara Naguri}}) | ||
|pummeldmg=1% | |pummeldmg=1% | ||
|pummeldesc=Quickly hits the opponent with the pommel of the Master Sword. | |pummeldesc=Quickly hits the opponent with the pommel of the Master Sword. | ||
|fthrowname= | |fthrowname=Tackle ({{ja|タックル|Takkuru}}) | ||
|fthrowdmg=3% (hit), 4% (throw) | |fthrowdmg=3% (hit), 4% (throw) | ||
|fthrowdesc=A shoulder tackle. | |fthrowdesc=A shoulder tackle. Deals collateral damage to bystanders. Its moderate knockback makes it a decent option for setting up edgeguards and creating space, as well as launching the opponent into the trajectory of a returning Boomerang or a descending Bomb. It can also combo into a dash attack at low percentages, but this combo is only effective if the opponent misses their [[tech]] and does not [[DI]]. It appears similar to [https://zeldawiki.wiki/wiki/File:ALttP_Link_Bashing_Artwork_2.png an illustration] in ''A Link to the Past'' where Link performs a shoulder bash. | ||
|bthrowname= | |bthrowname=Circle Throw ({{ja|巴投げ|Tomoe Nage}}) | ||
|bthrowdmg=7% | |bthrowdmg=7% | ||
|bthrowdesc=Performs the tomoe nage{{ref|a}} | |bthrowdesc=Performs the tomoe nage,{{ref|a}} a judo throw. A reliable KO throw, as it can KO middleweights at around 138% at the edge of {{SSBU|Final Destination}} with good [[DI]]. | ||
|uthrowname= | |uthrowname=Throw Away Slash ({{ja|投げ捨て斬り|Nagasute Kiri}}) | ||
|uthrowdmg=5% (hit), 2% (throw) | |uthrowdmg=5% (hit), 2% (throw) | ||
|uthrowdesc=Tosses the opponent up into the air and performs a spinning | |uthrowdesc=Tosses the opponent up into the air and performs a spinning upward slash. Has very minimal KO potential, even on platforms, as it KOs middleweights at around 185% on Final Destination. Instead, it is best suited for setting up aerial pressure or launching an opponent into the trajectory of a previously thrown Boomerang or Bomb. | ||
|dthrowname= | |dthrowname=Elbow Strike ({{ja|ヒジ打ち|Hiji Uchi}}, ''ヒジ打ち'') | ||
|dthrowdmg=3% (hit), 4% (throw) | |dthrowdmg=3% (hit), 4% (throw) | ||
|dthrowdesc=Pins the opponent to the ground and performs an elbow drop. | |dthrowdesc=Pins the opponent to the ground and performs an elbow drop. Due to its lack of combo potential, it is absolutely inferior to his alternate timeline counterparts' down throws. As a result, its only utility is for setting up aerial pressure or launching an opponent into the trajectory of a previously thrown Boomerang or Bomb. | ||
|floorfname= | |floorfname= | ||
|floorfdmg=7% | |floorfdmg=7% | ||
| Line 381: | Line 175: | ||
|nsname=Hero's Bow | |nsname=Hero's Bow | ||
|nsdmg=4% (uncharged), 12% (fully charged) | |nsdmg=4% (uncharged), 12% (fully charged) | ||
|nsdesc= | |nsdesc=Wields his {{iw|zeldawiki|Hero's Bow}} to fire an {{iw|zeldawiki|arrow}}. It can be charged up for more power and range. The arrows move much slower than the arrows that Link or Young Link fire, making them easier to avoid. However, this also means that the arrows remain active for longer. It can also lock at low percents. | ||
|ssname=Boomerang | |ssname=Boomerang | ||
|ssdmg= 8% ( | |ssdmg= 8% (close), 9.6% (smash throw), 5% (far), 3% (return) | ||
|ssdesc=Throws his {{ | |ssdesc=Throws his {{iw|zeldawiki|Boomerang}} forward. It flies forward and then returns to Toon Link. On the way forward, it launches enemies vertically with low base knockback, and on the way back, it launches them towards Link with no base knockback but very high knockback growth, allowing it to set up combos. It can be angled up or down, and inputting it like a smash attack increases its damage, as well as the distance it can travel. | ||
|usname=Spin Attack | |usname=Spin Attack | ||
|usdmg= 1% (uncharged hits 1-10), 3% (uncharged hit 11), 1.6% (charged hits 1-10), 4% (charged hit 11), 4% (aerial hit 1), 2% (aerial hits 2-4) 4% (aerial hit 5) | |usdmg= 1% (uncharged hits 1-10), 3% (uncharged hit 11), 1.6% (charged hits 1-10), 4% (charged hit 11), 4% (aerial hit 1), 2% (aerial hits 2-4) 4% (aerial hit 5) | ||
|usdesc=[[zeldawiki:Spin Attack|Spins with | |usdesc=[[zeldawiki:Spin Attack|Spins rapidly with the Master Sword outstretched]]. The grounded version is a series of outward slashes, whereas the aerial version is a series of inward slashes. The last hit of both versions has a horizontal launching angle. The grounded version can be charged to inflict even more damage, and due to it being faster and much stronger than in ''SSB4'', it is a very good out of shield option and one of Toon Link's best KO options. The aerial version can carry opponents to the upper blast line, and KO them there if they are sufficiently damaged. | ||
|dspage=Bomb_(Link) | |dspage=Bomb_(Link) | ||
|dsname=Bomb | |dsname=Bomb | ||
|dsdmg= 5.4%-7% | |dsdmg= 5.4%-7% | ||
|dsdesc=Pulls out a {{ | |dsdesc=Pulls out a {{iw|zeldawiki|Bomb}}, which explodes 4.98 seconds (299 frames) after being pulled out. Its explosion deals low knockback and sends opponents diagonally upwards, while creating brief comical smoke. The bomb's explosion does not harm Toon Link if it hits an opponent, and it deals more damage when smash thrown at the opponent's feet. Compared to Young Link's bombs, Toon Link's bombs are very volatile, exploding upon contact with the ground unless dropped on a platform while dropping through it. Arguably Toon Link's best combo starter, it grants him a number of follow-ups at varying percentages. With precise usage, it can be followed up with up smash or forward aerial for a potential KO confirm, even at high percentages. As the Bomb functions on a timer, it can help Toon Link with recovery by [[Bomb (Link)#Bomb recovery|removing him from helplessness]]. | ||
|fsname=Triforce Slash | |fsname=Triforce Slash | ||
|fsdmg= | |fsdmg=1% (trapping), 2.8% (hits 1-14), 2% (hit 15), 14% (final) | ||
|fsdesc=Uses the [[zeldawiki:Triforce|Triforce of Courage]] to emit a thin beam of light from his left hand to stun an opponent in front of himself. If the beam comes in contact with an opponent, Link dashes forward and performs a barrage of slashes while they are trapped in a Triforce-shaped energy field before concluding with an outward slash that shatters the energy field and launches them and any bystanders. | |fsdesc=Uses the [[zeldawiki:Triforce|Triforce of Courage]] to emit a thin beam of light from his left hand to stun an opponent in front of himself. If the beam comes in contact with an opponent, Toon Link dashes forward and performs a barrage of slashes while they are trapped in a Triforce-shaped energy field before concluding with an outward slash that shatters the energy field and launches them and any bystanders. | ||
}} | |||
===Stats=== | |||
{{Attributes | |||
| cast=89 | |||
| weight=91 | rweight=59-60 | |||
| dash=1.914 | rdash=45 | |||
| run=1.906 | rrun=27 | |||
| walk=1.288 | rwalk=15 | |||
| trac=0.086 | rtrac=77-78 | |||
| airfric=0.01 | rairfric=40-51 | |||
| air=1.05 | rair=44-47 | |||
| baseaccel=0.01 | rbaseaccel=15-87 | |||
| addaccel=0.08 | raddaccel=16-24 | |||
| gravity=0.081 | rgravity=65-67 | |||
| fall=1.38 | rfall=68-69 | |||
| ff=2.208 | rff=68-69 | |||
| jumpsquat=3 | rjumpsquat=1-88 | |||
| jumpheight=33.8 | rjumpheight=32 | |||
| shorthop=16.32 | rshorthop=39 | |||
| djump=33.8 | rdjump=40-41 | |||
}} | }} | ||
===[[Announcer]] call=== | |||
{{audio|Needs announcer calls from other languages.}} | |||
<gallery> | |||
Toon Link English Announcer SSB4-SSBU.wav|English/Japanese/Chinese | |||
</gallery> | |||
===[[On-screen appearance]]=== | ===[[On-screen appearance]]=== | ||
*A cartoony explosion appears on-screen. As the smoke fades, Toon Link appears and equips the Master Sword and Hero's Shield. | *A cartoony explosion appears on-screen. As the smoke fades, Toon Link appears and equips the Master Sword and Hero's Shield. | ||
<gallery> | |||
ToonLinkOnScreenAppearanceSSBU.gif|Toon Link's on-screen appearance | |||
</gallery> | |||
===[[ | ===[[Taunt]]s=== | ||
*'''Up taunt''': Sheaths the Master Sword and places the Hero's Shield on his back and | *'''Up taunt''': Sheaths the {{iw|zeldawiki|Master Sword}} and places the {{iw|zeldawiki|Hero's Shield}} on his back and uses the {{iw|zeldawiki|Wind Waker}} to conduct the "{{iw|zeldawiki|Wind God's Aria}}", with a tune at the end, which is the same one heard after completing a song in ''{{s|zeldawiki|The Legend of Zelda: The Wind Waker}}''. | ||
*'''Side taunt''': Sheaths the Master Sword and places the Hero's Shield on his back and watches a fairy fly around. | *'''Side taunt''': Sheaths the Master Sword and places the Hero's Shield on his back and watches a {{iw|zeldawiki|fairy}} fly around. | ||
*'''Down taunt''': Swings the Master Sword in front of himself while yelling in a panicked tone, ending with him | *'''Down taunt''': Swings the Master Sword in front of himself while yelling in a panicked tone, ending with him being comically exhausted and catching his breath. | ||
<gallery> | <gallery> | ||
SSBUToonLinkTaunt1.gif|Toon Link's up taunt. | SSBUToonLinkTaunt1.gif|Toon Link's up taunt. | ||
| Line 410: | Line 236: | ||
===[[Idle pose]]s=== | ===[[Idle pose]]s=== | ||
*Looks around cautiously | *Looks around cautiously. | ||
*Taps his foot on the ground | *Taps his foot on the ground. | ||
<gallery> | <gallery> | ||
SSBUToonLinkIdle1.gif|Toon Link's first idle pose | SSBUToonLinkIdle1.gif|Toon Link's first idle pose. | ||
SSBUToonLinkIdle2.gif|Toon Link's second idle pose | SSBUToonLinkIdle2.gif|Toon Link's second idle pose. | ||
</gallery> | </gallery> | ||
===[[Crowd cheer]]=== | |||
<div class="tabber"> | |||
<div class="tabbertab" title="English, Japanese/Chinese, Italian, Dutch, French"> | |||
{| class="wikitable" border="1" cellpadding="4" cellspacing="1" | |||
|- | |||
!{{{name|}}} | |||
!Cheer (English) | |||
!Cheer (Japanese/Chinese) | |||
!Cheer (Italian) | |||
!Cheer (Dutch) | |||
!Cheer (French) | |||
|- | |||
! scope="row"|Cheer | |||
|{{NTSC}} [[File:Link & Toon Link Cheer English NTSC SSBU.ogg|center]] <br> {{PAL}} [[File:Link & Toon Link Cheer English PAL SSBU.ogg|center]]||[[File:Link & Toon Link Cheer Japanese SSBU.ogg|center]]||[[File:Link & Toon Link Cheer Italian SSBU.ogg|center]]||[[File:Link & Toon Link Cheer Dutch SSBU.ogg|center]]||{{NTSC}} [[File:Link & Toon Link Cheer French NTSC SSBU.ogg|center]] <br> {{PAL}} [[File:Link & Toon Link Cheer French PAL SSBU.ogg|center]] | |||
|- | |||
! scope="row"|Description | |||
|Link Link Link! || Lin - k! || Forza Link! *claps 3 times* || Link! Link! *claps 3 times* || Allez Link! *clap 3 times* | |||
|} | |||
</div> | |||
<div class="tabbertab" title="German, Spanish, Russian, Korean"> | |||
{| class="wikitable" border="1" cellpadding="4" cellspacing="1" | |||
|- | |||
!{{{name|}}} | |||
!Cheer (German) | |||
!Cheer (Spanish) | |||
!Cheer (Russian) | |||
!Cheer (Korean) | |||
|- | |||
! scope="row"|Cheer | |||
|[[File:Link & Toon Link Cheer German SSBU.ogg|center]]||{{NTSC}} [[File:Link & Toon Link Cheer Spanish NTSC SSBU.ogg|center]] <br> {{PAL}} [[File:Link & Toon Link Cheer Spanish PAL SSBU.ogg|center]]||[[File:Link & Toon Link Cheer Russian SSBU.ogg|center]]||[[File:Link & Toon Link Cheer Korean SSBU.ogg|center]] | |||
|- | |||
! scope="row"|Description | |||
|Link Link Link! *claps 3 times* || || Link! Link! *claps 3 times* || Lin - ku! *claps 3 times* | |||
|} | |||
</div> | |||
</div> | |||
===[[Victory pose]]s=== | ===[[Victory pose]]s=== | ||
*'''Left:''' | *'''Left:''' Conducts using the Wind Waker before striking a pose similar to his official artwork from ''The Legend of Zelda: The Wind Waker''. | ||
*'''Up:''' Chases a pig. Upon catching | *'''Up:''' Chases a pig. Upon catching a {{s|ZeldaWiki|pig}}, he holds it above his head. Whilst balancing on one foot, he occasionally starts to lose balance before steadying himself. | ||
*'''Right:''' Tries to catch a pig, but ends up tripping and falling on his bottom. He then proceeds to rub his bottom for the rest of the victory pose while sheepishly | *'''Right:''' Tries to catch a pig, but ends up tripping and falling on his bottom. He then proceeds to rub his bottom for the rest of the victory pose while smiling sheepishly. | ||
[[File:ZeldaSeriesVictoryThemeUltimate.ogg|thumb|A flourished and abridged remix of the theme that plays when [[Link]] obtains a [[zeldawiki:Triforce|Triforce Piece]] in '' | [[File:ZeldaSeriesVictoryThemeUltimate.ogg|thumb|A flourished and abridged remix of the theme that plays when [[Link]] obtains a [[zeldawiki:Triforce|Triforce Piece]] in ''{{iw|zeldawiki|The Legend of Zelda|Game}}'' and has since become the main theme of ''The Legend of Zelda'' series.]] | ||
<gallery> | <gallery> | ||
ToonLinkVictoryPose1SSBU.gif | ToonLinkVictoryPose1SSBU.gif | ||
| Line 428: | Line 291: | ||
</gallery> | </gallery> | ||
==In competitive play== | ==In [[competitive play]]== | ||
===Most historically significant players=== | |||
<!--This character has a ten player limit for this section. Before adding and/or removing a player, read these guidelines: https://www.ssbwiki.com/SmashWiki:Notability#%22Most_historically_significant_players%22_guidelines --> | |||
''See also: [[:Category:Toon Link players (SSBU)]]'' | |||
*{{Sm|Ang|Mexico}} - Although his activity is relegated to Mexico, he has consistently been one of the best Toon Link players in North America, regularly placing top 8 at {{Trn|BIT MASTER MTY}} events and has also placed 17th at the supermajor {{Trn|Smash Factor 9}}. | |||
*{{Sm|JoJoDaHoBo|USA}} - One of the best Toon Link players in North America who has higher peaks. He most notably placed 13th at the superregional {{Trn|Crown 2}} upsetting {{Sm|Zomba}} as well as 17th at the major {{Trn|MAJOR UPSET}}. | |||
*{{Sm|Lv.1|Japan}} - One of the best Toon Link players in the world, especially since 2023. His 3rd-place finish at the major {{Trn|Maesuma TOP 15 "FINAL"}} is currently the best Toon Link placement at a major. | |||
*{{Sm|Manzoku|Japan}} - The third-best Toon Link player in Japan. Although not as consistent, he has seen some strong results such as 25th at the supermajors {{Trn|Kagaribi 5}}, {{Trn|Umebura SP 9}}, and {{Trn|DELTA 4}}. | |||
*{{Sm|Marvelous_Marco|USA}} - One of the best Toon Link players in North America who is more consistent at majors, most notably 17th at the major {{Trn|Rise 'N Grind 2023}} and 33rd at the supermajor {{Trn|Battle of BC 5}}. | |||
*{{Sm|Sigma|Japan}} - The best Toon Link player of all-time, and the only Toon Link player ranked top 50 on a global ranking, ranking 44th on the [[UltRank 2022]]. | |||
===Tier placement and history=== | |||
Toon Link saw middling success in the early metagame, most notably in Mexico -- thanks to players such as {{Sm|Ang}} and {{Sm|Hyuga}} -- and Japan -- thanks to players such as {{Sm|Lv.1}}, {{Sm|Ri-ma}}, and {{Sm|Sigma}}. However, Toon Link's representation was not as strong outside of those two regions, mainly due to perceptions that Toon Link was noticeably inferior to Link and Young Link. This perception stemmed from the buffs and changes Link and Young Link received, which made many to consider both characters at least high-tier. Coversely, Toon Link received a mix of buffs and nerfs in his transition, and was seen as a weaker version of Young Link due to having a weaker projectile game and damage output. In addition, most of Toon Link's best players generally only participated at regional-level events, while Ri-ma relegated Toon Link to a secondary in favor of {{SSBU|Joker}}, leaving Sigma as the only notable Toon Link player consistently performing well at majors. As such, many players considered Toon Link to be a mid-tier. | |||
Dedicated mains would continue to push Toon Link, which led his overall representation to remain relatively stable for most of the game's lifespan, usually hovering between the high-30s to low-40s. Although some Toon Link players ultimately fell out of the limelight, newer players would appear and replace them, including {{Sm|Marvelous_Marco}} and {{Sm|JoJoDaHoBo}}, who began placing well at American events in the post-online metagame, and {{Sm|Manzoku}}, who dropped Link for Toon Link during the pandemic. In addition, Lv.1's results began improving, most notably in mid-2023, while Sigma's results remained strong, which ultimately led to him being ranked 44th on the [[UltRank 2022]], the first Toon Link player to be ranked in the top 50 globally. This has led many to believe Toon Link was stronger than previously perceived. As it currently stands, Toon Link is ranked 46th on the tier list as an upper mid-tier and is no longer considered the worst Link, as he is ranked 10 spots above Link. | |||
=={{SSBU|Classic Mode}}: The Teamwork of Courage== | =={{SSBU|Classic Mode}}: The Teamwork of Courage== | ||
[[File:SSBU Congratulations Toon Link.png|thumb|Toon Link's congratulations screen.]] | [[File:SSBU Congratulations Toon Link.png|thumb|Toon Link's congratulations screen.]] | ||
Toon Link fights alongside two CPU Toon Link teammates in all of his battles, likely referencing ''The Legend of Zelda: Tri Force Heroes''. Toon Link | Toon Link fights alongside two CPU Toon Link teammates in all of his battles, likely referencing ''The Legend of Zelda: Tri Force Heroes''. Toon Link fights characters from different universes in each stage. If playing Classic Mode in Co-op, one CPU Toon Link will still appear. | ||
{|class="wikitable | {|class="wikitable" style="text-align:center" | ||
!Round!!Opponent!!Stage!!Music!!Notes | !Round!!Opponent!!Stage!!Music!!Notes | ||
|- | |- | ||
|1||{{ | |1||{{CharHead|Mario|SSBU|hsize=20px}}, {{CharHead|Luigi|SSBU|hsize=20px}}, {{CharHead|Peach|SSBU|hsize=20px}}, and {{CharHead|Yoshi|SSBU|hsize=20px}}||[[3D Land]]||''{{SSBUMusicLink|Super Mario Bros.|Ground Theme / Underwater Theme - Super Mario 3D Land}}''||rowspan="6"|{{Head|Toon Link|g=SSBU|s=20px|cl=Red}}{{CharHead|Toon Link|SSBU|hsize=20px|color=Blue}} (x2) are CPU allies. If either of these costumes are being used by the player, the {{Head|Toon Link|g=SSBU|s=20px}} default Toon Link takes their place. | ||
|- | |- | ||
|2||{{ | |2||{{CharHead|Villager|SSBU|hsize=20px}} and {{CharHead|Isabelle|SSBU|hsize=20px}}||[[Tortimer Island]]||''{{SSBUMusicLink|Animal Crossing|Kapp'n's Song}}'' | ||
|- | |- | ||
|3|| | |3||{{Head|R.O.B.|g=SSBU|s=20px|cl=Grey}}{{Head|R.O.B.|g=SSBU|s=20px}}{{Head|R.O.B.|g=SSBU|s=20px|cl=Yellow}} {{SSBU|R.O.B.}} (x3)||[[75m]] ([[Battlefield form]])||''{{SSBUMusicLink|Other|Stack-Up/Gyromite}}'' | ||
|- | |- | ||
|4||{{ | |4||{{CharHead|Squirtle|SSBU|hsize=20px}}, {{CharHead|Ivysaur|SSBU|hsize=20px}}, and {{CharHead|Charizard|SSBU|hsize=20px}}||[[Pokémon Stadium]]||''{{SSBUMusicLink|Pokémon|Battle! (Trainer) - Pokémon Sun / Pokémon Moon}}'' | ||
|- | |- | ||
|5|| | |5||{{Head|Inkling|g=SSBU|s=20px}}{{Head|Inkling|g=SSBU|s=20px|cl=Blue}}{{Head|Inkling|g=SSBU|s=20px|cl=Yellow}}{{Head|Inkling|g=SSBU|s=20px|cl=Green}} {{SSBU|Inkling}} (x4)||[[Moray Towers]]||''{{SSBUMusicLink|Splatoon|Now or Never!}}'' | ||
|- | |- | ||
|6||Giant {{ | |6||Giant {{CharHead|Ganondorf|SSBU|hsize=20px}}||[[Great Plateau Tower]] (Battlefield form)||''{{SSBUMusicLink|The Legend of Zelda|Main Theme - The Legend of Zelda: Tri Force Heroes}}'' | ||
|- | |- | ||
|colspan="5"|[[Bonus Stage]] | |colspan="5"|[[Bonus Stage]] | ||
|- | |- | ||
|Final||[[Ganon]]||Sacred | |Final||[[Ganon]]||[[Sacred Land]]||''{{SSBUMusicLink|The Legend of Zelda|Calamity Ganon Battle - Second Form}}''||{{Head|Toon Link|g=SSBU|s=20px|cl=Red}}{{Head|Toon Link|g=SSBU|s=20px|cl=Blue}} Toon Link (x2) are CPU allies. If either of these costumes are being used by the player, the {{Head|Toon Link|g=SSBU|s=20px}} default Toon Link takes their place. | ||
|} | |} | ||
Note: | Note: In the fourth round, {{SSBU|Pokémon Trainer}} is absent. | ||
Note 2: Items do not appear in the sixth round. | |||
[[Credits]] roll after completing Classic Mode. Completing it as Toon Link has ''{{SSBUMusicLink|The Legend of Zelda|Hyrule Main Theme}}'' accompany the credits. | [[Credits]] roll after completing Classic Mode. Completing it as Toon Link has ''{{SSBUMusicLink|The Legend of Zelda|Hyrule Main Theme}}'' accompany the credits. | ||
| Line 471: | Line 342: | ||
==Role in [[World of Light]]== | ==Role in [[World of Light]]== | ||
[[File:WoL-43ToonLink.jpg|thumb|Finding Toon Link in World of Light|left]] | [[File:WoL-43ToonLink.jpg|thumb|Finding Toon Link in World of Light|left]] | ||
Although Toon Link does not appear in the World of Light opening cutscene, he was vaporized and later imprisoned alongside the rest of the fighters ( | Although Toon Link does not appear in the World of Light opening cutscene, he was vaporized and later imprisoned alongside the rest of the fighters (except {{SSBU|Kirby}}) when Galeem unleashed his beams of light. | ||
Toon Link is unlocked in the [[Forest Hill]] sub-area of | Toon Link is unlocked in the [[Forest Hill]] sub-area of [[The Light Realm]]. To awaken him, the player must activate a nearby switch which extends the bridge and defeat the spirit of [[List of spirits (The Legend of Zelda series)|Zelda (Breath of the Wild)]] that's in front of him. | ||
{{clrl}} | {{clrl}} | ||
===Fighter Battle=== | ===Fighter Battle=== | ||
{|class="wikitable | {|class="wikitable" style="width:100%;" | ||
|- | |- | ||
! style="width:5%;"|No. | !style="width:5%;"|No. | ||
! style="width:5%;"|Image | !style="width:5%;"|Image | ||
! Name | !Name | ||
! Type | !Type | ||
! Power | !Power | ||
! Stage | !Stage | ||
! Music | !Music | ||
|- | |- | ||
| 43 | |43 | ||
| [[File:Toon Link SSBU.png|center|108x108px]] | |[[File:Toon Link SSBU.png|center|108x108px]] | ||
| {{ | |Toon Link | ||
|{{SpiritType|Attack}} <center>{{color|#dc1029|Attack}}</center> | |||
| 7,500 | |7,500 | ||
| [[Wuhu Island]] (volcano) | |[[Wuhu Island]] (volcano) | ||
| ''{{SSBUMusicLink|The Legend of Zelda|Main Theme - The Legend of Zelda: Tri Force Heroes}}'' | |''{{SSBUMusicLink|The Legend of Zelda|Main Theme - The Legend of Zelda: Tri Force Heroes}}'' | ||
|} | |} | ||
{{ | {{clr}} | ||
==[[Spirit]]s== | ==[[Spirit]]s== | ||
Toon Link's | Toon Link's fighter spirit can be obtained by completing {{SSBU|Classic Mode}}. It is also available periodically for purchase in the shop for 300 Gold, but only after Toon Link has been unlocked. Unlocking Toon Link in World of Light allows the player to preview the first spirit below in the Spirit List under the name "???". As a fighter spirit, it cannot be used in Spirit Battles and is purely aesthetic. His fighter spirit has an alternate version that replaces it with his artwork in ''Ultimate''. | ||
Additionally, this incarnation of Link and others under the same artstyle appear in a few | Additionally, this incarnation of Link and others under the same artstyle appear in a few primary and support spirits. | ||
<center> | <center> | ||
<gallery> | <gallery> | ||
SSBU spirit Toon Link.png|177. '''''Toon Link''''' | |||
King of Red Lions.png|248. King of Red Lions | SSBU spirit King of Red Lions.png|248. King of Red Lions | ||
Alfonzo | SSBU spirit Alfonzo & Engineer Link.png|260. Alfonzo & Engineer Link | ||
Totem Link | SSBU spirit Totem Link.png|262. Totem Link | ||
</gallery> | </gallery> | ||
</center> | </center> | ||
==In Spirit | ==In Spirit Battles== | ||
===As the main opponent=== | ===As the main opponent=== | ||
{|class="wikitable sortable" style="width:100%;" | {|class="wikitable sortable" style="width:100%;" | ||
! colspan=4|Spirit | ! colspan=4|Spirit | ||
! colspan=7|Battle parameters | ! colspan=7|Battle parameters | ||
! colspan=1|Inspiration | |||
|- | |- | ||
! style="width:5%;"|No. | ! style="width:5%;"|No. | ||
| Line 529: | Line 400: | ||
! Conditions | ! Conditions | ||
! Music | ! Music | ||
! Character | |||
|- | |- | ||
|246 | |246 | ||
|{{SpiritTableName|Tetra|link=y|size=64}} | |||
|{{ | |''The Legend of Zelda'' Series | ||
|''The Legend of Zelda | |||
|•{{SSBU|Toon Link}} {{Head|Toon Link|g=SSBU|s=20px|cl=Blue}} | |•{{SSBU|Toon Link}} {{Head|Toon Link|g=SSBU|s=20px|cl=Blue}} | ||
| | |{{SpiritType|Shield}} | ||
|9,800 | |9,800 | ||
|[[Pirate Ship]] | |[[Pirate Ship]] | ||
| Line 541: | Line 412: | ||
|•Dangerously high winds are in effect<br>•The enemy is easily distracted by items | |•Dangerously high winds are in effect<br>•The enemy is easily distracted by items | ||
|{{SSBUMusicLink|The Legend of Zelda|The Great Sea / Menu Select}} | |{{SSBUMusicLink|The Legend of Zelda|The Great Sea / Menu Select}} | ||
| | |||
|- | |- | ||
|256 | |256 | ||
|{{SpiritTableName|Ezlo|size=64}} | |||
|{{ | |''The Legend of Zelda'' Series | ||
|''The Legend of Zelda | |||
|•{{SSBU|Toon Link}} {{Head|Toon Link|g=SSBU|s=20px|cl=Teal}} | |•{{SSBU|Toon Link}} {{Head|Toon Link|g=SSBU|s=20px|cl=Teal}} | ||
| | |{{SpiritType|Attack}} | ||
|3,700 | |3,700 | ||
|[[Distant Planet]] | |[[Distant Planet]] | ||
| Line 553: | Line 424: | ||
|•The enemy is giant<br>•Left and right controls will suddenly reverse after a little while | |•The enemy is giant<br>•Left and right controls will suddenly reverse after a little while | ||
|{{SSBUMusicLink|The Legend of Zelda|Village of the Blue Maiden}} | |{{SSBUMusicLink|The Legend of Zelda|Village of the Blue Maiden}} | ||
|{{s|zeldawiki|Link}} (The Minish Cap) | |||
|- | |- | ||
|260 | |260 | ||
|{{SpiritTableName|Alfonzo & Engineer Link|customname=Alfonzo and Engineer [[Link]]|size=64}} | |||
|{{ | |''The Legend of Zelda'' Series | ||
|''The Legend of Zelda | |||
|•{{SSBU|Toon Link}} {{Head|Toon Link|g=SSBU|s=20px|cl=Blue}}<br>•{{SSBU|Captain Falcon}} {{Head|Captain Falcon|g=SSBU|s=20px|cl=Yellow}} | |•{{SSBU|Toon Link}} {{Head|Toon Link|g=SSBU|s=20px|cl=Blue}}<br>•{{SSBU|Captain Falcon}} {{Head|Captain Falcon|g=SSBU|s=20px|cl=Yellow}} | ||
| | |{{SpiritType|Attack}} | ||
|3,600 | |3,600 | ||
|[[Spirit Train]] | |[[Spirit Train]] | ||
| Line 565: | Line 436: | ||
|•The enemy's dash attacks have increased power<br>•The enemy has increased attack power after a little while<br>•The enemy can deal damage by dashing into you | |•The enemy's dash attacks have increased power<br>•The enemy has increased attack power after a little while<br>•The enemy can deal damage by dashing into you | ||
|{{SSBUMusicLink|The Legend of Zelda|Full Steam Ahead}} | |{{SSBUMusicLink|The Legend of Zelda|Full Steam Ahead}} | ||
|Engineer {{s|zeldawiki|Link}} | |||
|- | |- | ||
|262 | |262 | ||
|{{SpiritTableName|Totem Link|customname=Totem [[Link]]|size=64}} | |||
|{{ | |''The Legend of Zelda'' Series | ||
|''The Legend of Zelda | |•{{SSBU|Toon Link}} {{Head|Toon Link|g=SSBU|s=20px|cl=Brown}}{{Head|Toon Link|g=SSBU|s=20px|cl=Red}}{{Head|Toon Link|g=SSBU|s=20px|cl=Blue}} | ||
|•{{SSBU|Toon Link}} | |{{SpiritType|Grab}} | ||
| | |||
|3,500 | |3,500 | ||
|[[Hyrule Castle]] | |[[Hyrule Castle]] | ||
| | |•Item: The Legend of Zelda | ||
|•The enemy favors smash attacks | |•The enemy favors smash attacks | ||
|{{SSBUMusicLink|The Legend of Zelda|Main Theme - The Legend of Zelda: Tri Force Heroes}} | |{{SSBUMusicLink|The Legend of Zelda|Main Theme - The Legend of Zelda: Tri Force Heroes}} | ||
| | |||
|- | |- | ||
|1,293 | |1,293 | ||
| | |{{SpiritTableName|Bomberman|link=y|size=64}} | ||
| | |''Bomberman'' Series | ||
|''Bomberman | |||
|•{{SSBU|Toon Link}} {{Head|Toon Link|g=SSBU|s=20px|cl=Grey}} | |•{{SSBU|Toon Link}} {{Head|Toon Link|g=SSBU|s=20px|cl=Grey}} | ||
| | |{{SpiritType|Grab}} | ||
|9,700 | |9,700 | ||
|[[Wrecking Crew]] ([[Battlefield form]]) | |[[Wrecking Crew]] ([[Battlefield form]]) | ||
| | |•Assist Trophy Enemies (Bomberman)<br>•Item: Exploding Types | ||
|•The enemy's explosion and fire attacks have increased power<br>•Hostile assist trophies will appear | |•The enemy's explosion and fire attacks have increased power<br>•Hostile assist trophies will appear | ||
|{{SSBUMusicLink|Mega Man|Bomb Man Stage}} | |{{SSBUMusicLink|Mega Man|Bomb Man Stage}} | ||
| | |||
|- | |- | ||
|1,322 | |1,322 | ||
| | |{{SpiritTableName|Link (Link's Awakening)|customname=[[Link]] (Link's Awakening)|size=64}} | ||
|[[Link]] (Link's Awakening) | |''The Legend of Zelda'' Series | ||
|''The Legend of Zelda | |||
|•{{SSBU|Toon Link}} {{Head|Toon Link|g=SSBU|s=20px|cl=Brown}} | |•{{SSBU|Toon Link}} {{Head|Toon Link|g=SSBU|s=20px|cl=Brown}} | ||
| | |{{SpiritType|Neutral}} | ||
|9,400 | |9,400 | ||
|[[Tortimer Island]]<br>(Two palm trees, two regular trees) | |[[Tortimer Island]]<br>(Two palm trees, two regular trees) | ||
| | |•Assist Trophy Enemies ([[Chain Chomp]]) | ||
|•Hostile assist trophies will appear | |•Hostile assist trophies will appear | ||
|{{SSBUMusicLink|The Legend of Zelda|Tal Tal Heights}} | |{{SSBUMusicLink|The Legend of Zelda|Tal Tal Heights}} | ||
| | |||
|- | |||
|1,427 | |||
|{{SpiritTableName|King Olly|size=64}} | |||
|''Paper Mario'' Series | |||
|•{{SSBU|Toon Link}} {{Head|Toon Link|g=SSBU|s=20px|cl=Purple}}<br>•Giant Metal {{SSBU|Pac-Man}} {{Head|Pac-Man|g=SSBU|s=20px}} | |||
|{{SpiritType|Attack}} | |||
|9,700 | |||
|[[Princess Peach's Castle]] ([[Ω form]]) | |||
|N/A | |||
|•Defeat the main fighter to win<br>•The enemy favors air attacks<br>•The enemy is metal | |||
|{{SSBUMusicLink|Super Mario Bros.|Attack and Run!}} | |||
| | |||
|} | |} | ||
===As a minion=== | ===As a minion=== | ||
{|class="wikitable sortable" style="width:100%;" | {|class="wikitable sortable" style="width:100%;" | ||
! colspan=4|Spirit | ! colspan=4|Spirit | ||
! colspan=7|Battle parameters | ! colspan=7|Battle parameters | ||
| Line 624: | Line 507: | ||
|- | |- | ||
|250 | |250 | ||
|{{SpiritTableName|Aryll|size=64}} | |||
|{{ | |''The Legend of Zelda'' Series | ||
|''The Legend of Zelda | |||
|•{{SSBU|Villager}} {{Head|Villager|g=SSBU|s=20px|cl=Blue}}<br>•{{SSBU|Toon Link}} {{Head|Toon Link|g=SSBU|s=20px|cl=Teal}} | |•{{SSBU|Villager}} {{Head|Villager|g=SSBU|s=20px|cl=Blue}}<br>•{{SSBU|Toon Link}} {{Head|Toon Link|g=SSBU|s=20px|cl=Teal}} | ||
| | |{{SpiritType|Shield}} | ||
|9,000 | |9,000 | ||
|[[Wuhu Island]] | |[[Wuhu Island]] (Swaying Bridge) | ||
|N/A | |N/A | ||
|•The enemy has increased attack power | |•The enemy has increased attack power | ||
|{{SSBUMusicLink|The Legend of Zelda|The Great Sea / Menu Select}} | |{{SSBUMusicLink|The Legend of Zelda|The Great Sea / Menu Select}} | ||
|{{s|zeldawiki|Link}} (Wind Waker) | |{{s|zeldawiki|Link}} (The Wind Waker) | ||
|- | |- | ||
|253 | |253 | ||
|{{SpiritTableName|Beedle|size=64}} | |||
|{{ | |''The Legend of Zelda'' Series | ||
|''The Legend of Zelda | |||
|•{{SSBU|Shulk}} {{Head|Shulk|g=SSBU|s=20px|cl=Trunks}}<br>•{{SSBU|Toon Link}} {{Head|Toon Link|g=SSBU|s=20px|cl=Brown}} | |•{{SSBU|Shulk}} {{Head|Shulk|g=SSBU|s=20px|cl=Trunks}}<br>•{{SSBU|Toon Link}} {{Head|Toon Link|g=SSBU|s=20px|cl=Brown}} | ||
| | |{{SpiritType|Neutral}} | ||
|2,600 | |2,600 | ||
|[[Gaur Plain]] ([[Battlefield form]]) | |[[Gaur Plain]] ([[Battlefield form]]) | ||
| Line 647: | Line 528: | ||
|•Items will be pulled toward the enemy | |•Items will be pulled toward the enemy | ||
|{{SSBUMusicLink|The Legend of Zelda|Dragon Roost Island}} | |{{SSBUMusicLink|The Legend of Zelda|Dragon Roost Island}} | ||
|{{s|zeldawiki|Link}} (Wind Waker) | |{{s|zeldawiki|Link}} (The Wind Waker) | ||
|- | |- | ||
|257 | |257 | ||
|{{SpiritTableName|Linebeck|size=64}} | |||
|{{ | |''The Legend of Zelda'' Series | ||
|''The Legend of Zelda | |||
|•{{SSBU|Luigi}} {{Head|Luigi|g=SSBU|s=20px|cl=Cyan}}<br>•{{SSBU|Toon Link}} {{Head|Toon Link|g=SSBU|s=20px|cl=Blue}} | |•{{SSBU|Luigi}} {{Head|Luigi|g=SSBU|s=20px|cl=Cyan}}<br>•{{SSBU|Toon Link}} {{Head|Toon Link|g=SSBU|s=20px|cl=Blue}} | ||
| | |{{SpiritType|Neutral}} | ||
|9,000 | |9,000 | ||
|[[Wuhu Island]] (The boat) | |[[Wuhu Island]] (The boat) | ||
| Line 663: | Line 543: | ||
|- | |- | ||
|263 | |263 | ||
|{{SpiritTableName|Madame Couture|size=64}} | |||
|{{ | |''The Legend of Zelda'' Series | ||
|''The Legend of Zelda | |•{{SSBU|Rosalina & Luma}} {{Head|Rosalina|g=SSBU|s=20px|cl=Red}}<br>•{{SSBU|Toon Link}} {{Head|Toon Link|g=SSBU|s=20px|cl=Teal}}{{Head|Toon Link|g=SSBU|s=20px|cl=Red}}{{Head|Toon Link|g=SSBU|s=20px|cl=Blue}} | ||
|•{{SSBU|Rosalina & Luma}} {{Head|Rosalina|g=SSBU|s=20px|cl=Red}}<br>•{{SSBU|Toon Link}} | |{{SpiritType|Grab}} | ||
| | |||
|3,300 | |3,300 | ||
|[[Skyloft]] | |[[Skyloft]] | ||
| Line 674: | Line 553: | ||
|{{SSBUMusicLink|The Legend of Zelda|Main Theme - The Legend of Zelda: Tri Force Heroes}} | |{{SSBUMusicLink|The Legend of Zelda|Main Theme - The Legend of Zelda: Tri Force Heroes}} | ||
|{{s|zeldawiki|Links}} (Tri Force Heroes) | |{{s|zeldawiki|Links}} (Tri Force Heroes) | ||
|- | |||
|1,519 | |||
|{{SpiritTableName|Power Pro-Kun, Aoi Hayakawa, & Mamoru Ikari|size=64}} | |||
|''eBASEBALL: POWER PROS'' | |||
|•{{SSBU|Ness}} {{Head|Ness|g=SSBU|s=20px|cl=White}}<br>•{{SSBU|Toon Link}} {{Head|Toon Link|g=SSBU|s=20px|cl=Blue}}<br>•{{SSBU|Villager}} {{Head|Villager|g=SSBU|s=20px|cl=Blue}} | |||
|{{SpiritType|Grab}} | |||
|9,600 | |||
|[[Pokémon Stadium 2]] (hazards off) | |||
|•Item: [[Beastball]] | |||
|•The enemy starts the battle with a [[Home-Run Bat]] | |||
|{{SSBUMusicLink|Other|Baseball (Training)}} | |||
|Mamoru Ikari | |||
|} | |} | ||
| Line 695: | Line 586: | ||
The Legend of Zelda artwork.png|Artwork of all ''The Legend of Zelda'' characters, as posted on the official Legend of Zelda Twitter account. | The Legend of Zelda artwork.png|Artwork of all ''The Legend of Zelda'' characters, as posted on the official Legend of Zelda Twitter account. | ||
SSBU Toon Link Number.png|Toon Link's fighter card. | SSBU Toon Link Number.png|Toon Link's fighter card. | ||
Toon Link unlock notice SSBU.jpg|Toon Link's unlock notice. | |||
SSBUWebsiteToonLink1.jpg|On [[Arena Ferox]]. | SSBUWebsiteToonLink1.jpg|On [[Arena Ferox]]. | ||
SSBUWebsiteToonLink2.jpg|Avoiding a [[Cucco]] on [[Skyloft]]. | SSBUWebsiteToonLink2.jpg|Avoiding a [[Cucco]] on [[Skyloft]]. | ||
| Line 707: | Line 599: | ||
SSBUWebsiteRobin4.jpg|Taunting alongside {{SSBU|Robin}} on [[Wii Fit Studio]]. | SSBUWebsiteRobin4.jpg|Taunting alongside {{SSBU|Robin}} on [[Wii Fit Studio]]. | ||
SSBUZeldaJPTwitter1.jpg|With all playable {{uv|The Legend of Zelda}} veterans on the [[Great Plateau Tower]]. | SSBUZeldaJPTwitter1.jpg|With all playable {{uv|The Legend of Zelda}} veterans on the [[Great Plateau Tower]]. | ||
SSBUWebsitePiranhaPlant3.jpg|{{SSBU|Piranha Plant}} using [[Poison Breath]] on Toon Link on the {{SSB|Mushroom Kingdom|SSB}} stage. | |||
</gallery> | </gallery> | ||
=== | ===Fighter Showcase Video=== | ||
{{#widget:YouTube|id=62uBiZfw9w0}} | {{#widget:YouTube|id=62uBiZfw9w0}} | ||
== Trivia == | == Trivia == | ||
*Toon Link is | *Toon Link's pose in his official render is based on [https://zeldawiki.wiki/wiki/File:TWW_Spin_Attack_Artwork.png an artwork] of him performing a [[Spin Attack]] in ''The Wind Waker'', which was also used in [https://zeldawiki.wiki/wiki/File:TWW_Platinum_GameCube_Bundle_Box.jpg promotional art] for European limited edition bundles of the game. This artwork was also [https://zeldawiki.wiki/wiki/File:TMC_Spin_Attack_Artwork.png edited and reused] for ''The Minish Cap''. | ||
*Toon Link is the only character who travels to [[3D Land]] in {{SSBU|Classic Mode}}. | |||
*Toon Link and {{SSBU|Diddy Kong}} are the only characters who have a [[CPU]] ally in every round of their Classic Mode. | |||
*While holding a small [[item]], Toon Link reuses his facial expressions from ''[[Smash 4]]'' in his [[idle]] animation. | |||
*Despite Toon Link's {{mvsub|Toon Link|SSBU|down aerial}} no longer bouncing off opponents, his character files still have data for the 8% damage hitbox used after a bounce, which is labeled as "AttackAirLw2Attack". This was also the case in ''Smash 4''. | |||
*In his ''Ultimate'' trailer, his sword attacks use punching sounds when they hit: this is different from the actual game, where they use unique comical [[slash]]ing sounds. | |||
*Toon Link is one of only five characters to predominantly use his left hand to wield his weapon, sharing this trait with {{SSBU|Young Link}}, {{SSBU|Sephiroth}}, {{SSBU|Ice Climbers}}, and {{SSBU|Rosalina & Luma}}. | |||
*Toon Link is the only character who travels to [[3D Land]] in Classic Mode. | *Toon Link is one of five characters whose unlocking battle in World of Light is not on either Final Destination or a Ω form. The other four are {{SSBU|Peach}}, {{SSBU|Daisy}}, {{SSBU|King K. Rool}}, and {{SSBU|Mii Gunner}}. | ||
*Toon Link | *When using his up taunt and in one of his [[victory screen]]s, Toon Link appears to conduct the Wind’s Requiem with the Wind Waker, which is the first song Link learns in ''The Legend of Zelda: The Wind Waker''. | ||
*Toon Link is | |||
* | |||
== Notes == | == Notes == | ||
Latest revision as of 04:31, April 17, 2024
| Toon Link in Super Smash Bros. Ultimate | |
|---|---|
 
| |
| Universe | The Legend of Zelda |
| Other playable appearances | in Brawl in SSB4 |
| Availability | Unlockable |
| Final Smash | Triforce Slash |
| Tier | B- (46) |
Toon Link (トゥーンリンク, Toon Link) is a playable character in Super Smash Bros. Ultimate. He was officially confirmed as playable alongside his predecessor Young Link and the rest of veterans on June 12th, 2018. As in Super Smash Bros. Brawl, he is unlockable, instead of being available from the start. Toon Link is classified as Fighter #43.
As in Brawl and Super Smash Bros. 4, Sachi Matsumoto's portrayal of Toon Link from The Legend of Zelda: The Wind Waker was repurposed for Ultimate.
Toon Link is ranked 46th out of 82 on the current tier list, placing him in the B- tier. This is a noticeable drop from his 23rd out of 54 placement in SSB4 and is his worst placement in the series. Toon Link's gameplan is relatively a middle ground between Young Link's strong projectile and combo game and Link's strong kill power or Bomb usage. Toon Link has a pretty strong zoning game thanks to his numerous projectiles in Bomb and Boomerang. The former allows him to set up combos or confirm into KOs at higher percents while the latter is a good combo starter or a way for opponents to approach him in neutral. Toon Link's mobility is also among the best of the three Links on the ground, allowing him to catch up or run away from his opponents more reliably. His frame 2 air dodge and floatiness also allow him to escape from more combos too.
Toon Link has some weaknesses similarly shared to the other Links. Because of his floatiness, it makes him take a while to land back on the ground, making him prone to juggling. Toon Link also has lower range than most other swordfighters who can outrange and pressure better than he can. His recovery is also relatively exploitable as it travels in a predictable path, though it can be mixed up with Bomb Jump.
Overall, Toon Link is a character with a simple, effective, and consistent gameplan that works when he gets momentum or wins neutral interactions. Toon Link has seen some strong results and representation mostly in Japan, through players, such as Lv.1 and Sigma, who have had strong placements at majors.
How to unlock[edit]
Complete one of the following:
- Play VS. matches, with Toon Link being the 44th character to be unlocked.
- Clear Classic Mode with Link or any character in his unlock tree, being the last character unlocked after Richter.
- Have Toon Link join the player's party in World of Light.
With the exception of the third method, Toon Link must then be defeated on Pirate Ship. In World of Light, he is fought on Wuhu Island.
Attributes[edit]

Toon Link is a middleweight, yet boasts above-average dashing speed and air acceleration, as well as the ability to wall jump. However, his air speed is average and his falling and fast falling speeds are both slow, while his gravity is low. Although they differ on the majority of their attributes, Toon Link and Link both have above-average walking speeds. Like Link, he also wields his respective version of the Master Sword and possesses a shield. The Master Sword grants Toon Link disjointed range, while the Hero's Shield blocks opposing projectiles if he is standing still or walking. Overall, Toon Link's attributes render him as a fairly quick, yet fairly floaty character.
As a zoning-orientated character, Toon Link possesses a number of projectiles. His Hero's Bow, Boomerang and Bomb enable him to not only force approaches, but also camp effectively. In addition to these strengths, Boomerang and Bomb boast combo potential, with the latter being his most varied and useful combo starter. Thanks to its explosion no longer damaging Toon Link upon contact with an opponent, Bomb now grants him a number of follow-ups at varying percentages. With precise usage, it can be followed by his up smash or forward aerial even at high percentages, both of which are among his most viable KOing options.
Bomb's combo potential is further supplemented by jump-canceling and its status as an item, with the latter trait ensuring that its combo potential is never susceptible to rage or stale-move negation. Although it is not as versatile in comparison, Boomerang is nevertheless useful for Toon Link's combo game, as it can combo into his up tilt, grab and various other moves depending on its positioning.
Although Toon Link's combo game largely revolves around Bomb, he also possesses non-projectile combo starters. Up tilt is the most effective of these: it can combo into itself, up smash, and Spin Attack at low percentages; a short hopped neutral aerial, short hopped back aerial, and short hopped Spin Attack at low to medium percentages; and forward aerial and up aerial at medium to high percentages. Aside from up tilt, grab aerial can be used as a long-ranged set-up similarly to Bomb, regardless of the opponent's damage, while neutral attack can be jab canceled reliably.
However, Toon Link has some weaknesses. His grab game is overall very polarized: Hookshot grants him long-lasting grabs that can grab airborne opponents, and a grab aerial and tether recovery that are both very useful, yet his grabs have considerable start-up and ending lag (albeit much less so than in previous installments). By extension, Toon Link's back throw is one of his most viable KO options due to being one of the strongest back throws in the game, while his forward throw is decent for setting up edge-guards and creating space. Conversely, Toon Link's down throw lacks combo potential, which makes it drastically inferior to Link and Young Link's versions. It can almost combo into back aerial. Although Toon Link's up throw is a situational KO option on platforms like Link and Young Link's versions, his back throw utterly outclasses it in this role. As a result, Toon Link's up and down throws are used primarily for setting up aerial pressure, such as by launching an opponent into the trajectory of a previously thrown Boomerang or Bomb.
Toon Link's floatiness makes him particularly susceptible to strong vertical attacks, and renders his recovery quite predictable in spite of its improvements. Unlike other floaty characters, however, Toon Link cannot use his floatiness to perform long aerial combos because of his aerials' considerable ending lag. Toon Link's disjointed range is also somewhat offset by his short size, while the faster pace of Ultimate makes his defensive, projectile-based gameplan less effective than it was in previous installments.
Overall, Toon Link is considered a very balanced and fast fighter with a plethora of attack options via his projectiles, tether grab/recovery, and decent frame data. The combination of low ending lag on his forward and back aerials with his slow fall speed allow Toon Link to dominate in the air with combos, while his moderately fast yet fairly useful tilt attacks and reasonably strong smash attacks allow for relatively easy KOs. While his middling weight and slow falling speed make him easier to combo and KO, it is generally agreed that Toon Link's strengths outweigh his weaknesses by a fair margin.
Changes from Super Smash Bros. 4[edit]
Toon Link has received a notable mix of buffs and nerfs in the transition from SSB4 to Ultimate. Many of his standard attacks have been improved, but the general pace of Ultimate, combined with the worsening of his camping tools, have annulled his improvements to an extent. As a result, Toon Link has been slightly nerfed overall.
Several of Toon Link's attacks where he uses the Master Sword have been notably buffed, alleviating one of his weaker points from SSB4. Particularly, Toon Link now boasts a vastly buffed ground game: neutral attack's first two hits can now lock, and the third hit now has the tech-chasing ability his adult counterpart has. Forward tilt has less ending lag, all hitboxes send opponents in front of him, and its hitboxes can now hit behind Toon Link. The changes to the Sakurai angle allow down tilt to launch aerial opponents lower, improving its tech chasing potential. Dash attack is much faster, has more range and less endlag, and the sweetspots out-prioritize the sourspot, turning it into a respectable combo starter at low percentages. Up smash is more consistent on landing the sweetspot, whereas down smash now has consistent KO potential on both sides of the move instead of pulling opponents into a second hit.
Toon Link's air game, while seeing less buffs, has also become more useful; neutral aerial has more range, forward aerial can once again autocancel if performed in a short hop, back aerial is faster and has regained some of its combo potential, and up aerial is notably much safer to use due to its altered animation. Finally, Toon Link's Spin Attack has received various improvements, with the grounded version now being one of the best out of shield options in the game due to it being much faster and gaining KO potential, whereas the aerial version's power and safety have both improved and it will now always send opponents in front of Toon Link.
However, Toon Link also received some noticeable nerfs. One of his biggest nerfs was to his forward smash; the move no longer has a second hit, while its single hit instead is slightly slower, deals less aggregate damage, possesses no mixup or spacing potential, and has a debatably worse hitbox that fails to strike short opponents or ones hanging on an edge. His other major nerf was to his Bombs, which no longer beat weak projectiles and continue on, instead bouncing off of them; this massively worsens their potential in trade and projectile situations. Other nerfs to his camping ability include his item throws having more ending lag, which worsens his combo game via his Bombs; and his grab aerial now bouncing off of the first projectile or hurtbox it makes contact with, instead of piercing through. Aside from forward smash, a few of his sword-based moves also received some nerfs. Up tilt has slightly inferior combo potential at high percentages due to the changes to knockback, up smash has fewer active frames, and back aerial's already minimal KO potential has been almost totally removed in favor of restoring its combo potential.
The universal changes to gameplay mechanics are overall mixed for Toon Link. The reduced landing lag makes it easier for him to combo, and safer to land if his aerials hit. The ability to use any attack out of a run also allows Toon Link more access to his now respectable grounded game. On the other hand, the changes to shieldstun make his grounded moveset much safer, though it also means shielding opponents are now more likely to punish mispaced aerials as easily. The nerfs to shield grabbing alleviate the negative changes from shieldstun, but combined with other characters also having reduced landing lag, and the changes to shieldstun, this notably worsens his grab game, despite his grabs' much lower ending lag. Finally, the universal increase to mobility further contributes to Toon Link's grounded game (due to his faster walking and dashing speeds) and allows him to now combo out of his Hero's Bow when uncharged, but also allows more mobile opponents to close in on the distance to him and/or stay away from him easier.
Overall, Toon Link has more utility in his sword-based attacks, but has to contend with worsened camping tools and the faster pace of Ultimate, which makes his defensive, projectile-based game less effective compared to previous titles. This noticeably changes his playstyle, shifting from primarily a zoner and counter-zoner, to a more movement and pressure-based playstyle that utilizes his sword attacks more. Combined with various buffs other veterans have received, Toon Link performs worse than his SSB4 iteration, and while he remains relatively viable, he's widely considered overshadowed by Young Link due to the former's faster air-to-ground mobility, superior damage output, and stronger projectile game.
Aesthetics[edit]
 As with all veterans returning from Smash 4, Toon Link's model features a more subdued color scheme. His clothing now features simple woven and stitched detailing, similar to his design in Brawl, though his hair remains clay-like.
- Some of the textures of Toon Link's face have been modified: his brow is more furrowed, and his mouth is now represented by a black dash, making it look less organic. Overall, he appears more cartoonish as a result.
- Toon Link's hair is now affected by gravity and wind. His hat also now has more physics-based movement than before.
- Like many other returning characters, Toon Link is more expressive. He is now more consistently angry and serious to match the other Links. In general, he now has a wide variety of expressions in his animations.
- Several of Toon Link's animations have been altered to further distinguish him from the other Links.
- While jumping, he raises his shield more.
- During his falling animation, he spreads his legs apart. His helpless animation is also different, now leaning more forward as he falls. However, he reuses his falling animations from Smash 4 when moving forward or backward while falling.
- His double jump animation is now an upward flip similar to Roy and Ganondorf.
- Toon Link's sword attacks now use a set of new, cartoonish slash sound effects when they land.
- Toon Link's taunts have all been modified:
- His up taunt now faces the screen regardless of the direction he is facing.
- His side taunt has a more surprised expression and pose. The fairy also now disappears in a Wind Waker style puff of smoke.
- His down taunt now has him visibly sweating. Like his up taunt, it now faces the screen regardless of the direction he's facing.
- Toon Link's victory pose where he conducts with the Wind Waker has been modified to be more in line with his official art from The Legend of Zelda: The Wind Waker and its HD version.
Attributes[edit]
 Like all characters, Toon Link's jumpsquat animation takes three frames to complete (down from 5).
 Toon Link is slightly lighter (93 → 91), now being the same weight as Palutena. This slightly hinders his endurance.
- Toon Link walks slightly faster (1.2265 → 1.288).
- Toon Link dashes faster (1.7325 → 1.906).
- Toon Link's air speed has been increased (0.94 → 1.05).
- Toon Link's falling speed has been increased (1.28 → 1.38).
- His fast fall speed has also been increased (2.048 → 2.208), making him harder to juggle.
- Due to his higher falling speed, Toon Link's air time is shorter (SH timing: 41 → 40), (FH timing: 63 → 56).
- Toon Link's sidestep has increased startup on his invincibility (2-15 → 3-16), but less ending lag (25 → 20), now being tied for the third fastest.
- Toon Link's back roll has slightly increased invincibility (4-14 → 4-15), but much more ending lag (27 frames → 34).
- Toon Link's forward roll has slightly longer duration (FAF 27 → 29).
- Toon Link can now Z-drop items such as his Bombs without releasing the Hookshot. This vastly improves its versatility and utility as a tactic, mixup, combo and disadvantage tool. This also sees the return of the Invincibomb technique.
- This change no longer allows Toon Link to Z-drop and use hookshot at the same time.
- The mechanical change to Tethers removes Toon Link's ability to cancel his airdodge into his hookshot, removing an option from his kit and vastly nerfing his recovery mixup potential.
- Toon Link is still able to Tether to ledge while holding a bomb, by simply pressing Grab without holding a direction.
Ground attacks[edit]
- Neutral attack:
- Neutral attack's first hit has faster startup (frame 6 → 5).
- Neutral attack's first hit does slightly less damage (3% → 2%).
- Neutral attack's third hit has fewer active frames (frame 6-10 → 6-7), reducing consistency and utility.
- Neutral attack's third hit deals more base knockback but less knockback scaling (55 base/100 scaling → 70/75) and sends opponents at a lower angle (48° → 30°), granting it tech chase setups.
- Toon Link strikes a pose at the end of his third neutral attack.
- As with nearly every other character, Toon Link's first and second neutral attack can now lock opponents.
- Neutral attack's first hit (3.5u/4.2/3.8u → 1.8u/1.8u/1.8u/1.8u) and second (3.5u/4.2u/4u → 2.5u/3.2u/3.2u/3.2u) hits have had their three larger hitboxes replaced with four smaller ones, and the third hit has lost one of its hitboxes altogether (4.2u/4.2u/3u → 4.5u/3.5u).
- Forward tilt:
- Forward tilt has less ending lag (FAF 34 → 30), improving its safety and utility.
- Forward tilt's frame 9 hit now has its farthest hitbox launch opponents in the direction he is facing (361° → 38°), improving its consistency and trap potential.
- Forward tilt has more base knockback, but less knockback scaling (25 base/102 scaling → 45/83), improving its safety on hit at lower percents but hindering its KO potential.
- Forward tilt's arm hitbox is deleted on frame 10, slightly weakening the move's consistency.
- Down tilt:
- Down tilt has a lower knockback angle, increasing its tech chase and setup potential.
- Down tilt has an altered animation where Toon Link's sword doesn't stay pointed outwards for both frames of the active hitbox, reducing its effective duration.
- Dash attack:
- Dash attack has less startup (frame 9 → 7) and ending lag (FAF 40 → 29), making it much more useful and safer in landing trap situations.
- Both sweetspot hitboxes now have priority over the sourspot.
- Dash attack's hitboxes are larger (3.5u/4u/3u → 4.2u/4u/3.5u).
- Forward smash:
- Toon Link has a new forward smash: a single upward swing.
- Toon Link is now silent when performing the move.
- Forward smash now has slightly more startup (15 frames → 16) and has decreased damage due to the removal of the second hit (21% → 14%).
- Due to the removal of the second swing, Toon Link is also no longer able to use this move to space or mix up his opponent.
- Forward smash's new animation has Toon Link swipe upwards and lunge farther, improving its vertical range.
- The new animation also makes hitting grounded opponents more inconsistent, and no longer able to hit opponents hanging at the ledge.
- It has reduced knockback values compared to his old forward smash's second hit (25/32 base / 130 scaling → 25/20 / 110) to compensate for its increased damage (12% → 14%).
- Up smash:
- Up smash has a slightly altered animation. Toon Link slightly turns after leaping.
- Due to the altered animation, the sourspot hitbox is harder to land, improving its consistency and KO potential.
- Up Smash has fewer active frames (frame 11-17 → 11-15).
- Down smash:
- Down smash has a tweaked animation.
- Down smash's front hitbox no longer sends opponents behind Toon Link; instead, each swing has strong knockback on its own.
- This means Toon Link can no longer use down smash to send opponents behind him. The overall damage output for hitting the front hitbox has also been reduced (14% (both hits) → 12%).
- Down smash has less ending lag (FAF 50 → 47). Also, each hit of down smash does more damage (6%/7% → 12% (front)/13% (back)) and can KO on either side of Toon Link.
- This also vastly improves the consistency of the move and prevents grounded opponents from escaping between hits. Aerial opponents also are now hit with the regular hitbox as opposed to the aerial-only hitbox, which had reduced damage and altered knockback.
Aerial attacks[edit]
- All aerials have less landing lag (12 frames → 7 (neutral), 18 → 11 (forward), 17 → 8 (back), 21 → 13 (up), 40 → 23 (down)).
- Neutral aerial:
- Both of neutral aerial's hits have larger hitboxes (3u/3.6u/4u/2.5u → 4u/4.5u/4.5u/2.5u)
- Forward aerial:
- Forward aerial auto-cancels significantly earlier (frame 51 → 39), matching its interruptibility. This also allows it to auto-cancel out of a short hop like in Brawl.
- Forward aerial's large hitbox has been replaced with three smaller ones (7.5u → 5u/5u/4u) that are attached to his arm and sword.
- These new hitboxes follow the sword hitbox more closely, allowing forward aerial to hit opponents above Toon Link on frame 15.
- Back aerial:
- Back aerial has less startup (frame 7 → 6).
- Back aerial has far less ending lag (FAF 46 → 36), allowing Toon Link to double jump out of a short hop with it once again.
- Back aerial auto-cancels earlier (frame 38 → 34).
- Back aerial deals less damage (11% → 8%) without full compensation for its base knockback (18 → 24), losing its already poor KO potential.
- Back aerial's lowered knockback and less ending lag has vastly improved its combo and setup potential.
- Up aerial:
- Up aerial has an altered animation where Toon Link ducks more. This lowers his hurtbox and allows him to hit opponents beneath him more effectively, similar to Link's up aerial.
- Down aerial:
- Down aerial's hitboxes are slightly smaller (5.6u (clean)/5.3u (late) → 5.5u/5u) and higher up (Y offset: -3 → -1.1), reducing its range.
- Grab aerial:
- Grab aerial has less ending lag (FAF 75 → 74).
- Grab aerial can only hit one opponent or projectile. Once it collides with something, it bounces off and the hitbox is disabled.
Throws and other attacks[edit]
- All grabs have less ending lag (FAF 62 → 53 (standing), 72 → 61 (dash), 72 → 56 (pivot)).
- Toon Link has an altered down throw animation where he jumps much higher in the air before tackling his opponent. This helps him avoid projectiles close to the ground (especially his own bombs), but opens him to projectiles in the air.
- Up throw's collateral has a much shorter duration (26-30 → 27), hindering its range.
- Back throw has less knockback growth (120 → 110), reducing its KO potential.
- Toon Link now faces the opposite direction when using down throw.
- All of Toon Link's item tosses have more ending lag, reducing the potency of his item throws and followups (20 → 24 (forward/back), 20 → 23 (up), 19 → 20 (down)).)
Special moves[edit]
- Hero's Bow:
- Arrows can no longer be held indefinitely upon reaching full charge, now automatically firing if held for more than three seconds.
- Boomerang:
- Boomerang appears to have a new model, featuring a more simplistic design.
- A Boomerang performed with a smash input has increased damage and slightly increased knockback compared to a Tilt input (8% (near)/5% (mid) → 9.6%/6%).
- Boomerang now has a clanking animation where it bounces quickly before falling and disappearing.
- Boomerang is unavailable during this clanking animation, reducing Boomerang's utility in trade situations.
- Boomerang has less duration on the returning hitbox. This reduces the potential of the returning boomerang, but the Boomerang now reappears in Toon Link's hands more quickly.
- Boomerang has different physics when bouncing against surfaces in certain situations, most notably on return, altering the utility of returning boomerang.
- Spin Attack:
- Spin Attack's sword trails are blue, now matching how they were in The Legend of Zelda: The Wind Waker. In addition, the grounded version's animation was altered a bit. Toon Link no longer holds the sword perfectly parallel to the ground while he spins.
- Grounded Spin Attack has less startup lag (frame 9 → 6) and its duration was compensated (FAF 81 → 78), increasing its utility and safety.
- Grounded Spin Attack's final hit has significantly increased knockback scaling (141 → 180) and launches at a lower angle (55° → 48°), granting it KO potential.
- Grounded Spin Attack always knocks opponents in the direction Toon Link is facing, giving Toon Link the ability to control where his opponent is sent.
- Aerial Spin Attack has a lower angle (75 → 45°) and much more knockback growth (120 → 170), giving it much better edgeguarding and kill power.
- Aerial Spin Attack now has multiple hitboxes behind Toon Link, improving its safety and utility, and also increasing damage output on large targets caught in the attack.
- Aerial Spin Attack now allows Toon Link to retain much more horizontal drift after the final hitbox, improving its spacing and recovery potential.
 Aerial Spin Attack no longer takes away Toon Link's midair jump if he is interrupted before recovering, granting him more recovery mixups.
- Toon Link strikes a slightly different pose during the final hit of Aerial Spin Attack, closely matching Link's new pose during his Aerial Spin Attack as well.
- Bomb:
- Toon Link now pulls out the Bomb slightly quicker (FAF 40 → 37).
- Bomb no longer does differing damage based on direct contact (4%) or the explosion (5%-8%). Both damage values have been homogenized, and the only factor to the bombs damage is the velocity before impact.
- Bombs overall do less damage (4%-8% → 4.2%-6.5%). However, the lower damage betters bomb combo potential.
- Bombs launch at a higher angle (70° → 75°), and have altered knockback (42 (base)/70 (scaling) → 40/80).
- Bombs no longer beat weak projectiles, instead bouncing at the point of contact and falling to the ground. This massively reduces the potency of bombs in trade situations.
- Bombs now always explode against fire-based attacks, regardless of how much damage the move does. While this removes their potential to absorb fire-based projectiles, it also allows Toon Link to force an opponent to blow up a bomb in his favor.
- Triforce Slash:
- Triforce Slash has had its activation range massively increased, allowing Toon Link to chase down targets across Final Destination, like Link's iteration from Brawl and Smash 4.
Update history[edit]
Toon Link received a mix of buffs, a single nerf and glitch fixes via game updates, but was buffed slightly overall.
Starting with update 2.0.0, Toon Link's forward aerial can now auto-cancel out of a short hop, greatly buffing the move's utility and offense. He also can now grab the ledge earlier after using his back aerial. Update 3.0.0 nerfed Boomerang's shield damage as a part of a universal nerf to projectiles. Update 3.1.0 made neutral attack connect better, and Toon Link can now shield SDI if a projectiles hits his Hero's Shield thanks to update 4.0.0.
Update 7.0.0 brought the most noteworthy buffs to Toon Link's kit. His dash attack was given less ending lag, both hits of his down smash now deal more knockback, his back aerial now hits earlier and has a slightly longer hitbox duration. His down aerial is now drastically stronger than it was before due to it now dealing more damage and not having its knockback not fully compensated. And finally, his grab aerial's hitbox lasts 2 frames longer. Due to these changes, Toon Link's KO potential and spacing were improved.
Update 10.1.0 made Aerial Spin Attack much more consistent by giving it much better hitboxes and a more favorable angle if Toon Link is moving forward.
Overall, Toon Link fares slightly better than he did at the launch of Ultimate.
- Fixed the Invisible Bomb glitch.
- Forward aerial auto-cancels earlier (frame 51 → 39), matching the move's interruptibility and allowing it to auto-cancel out of a short hop.
- Shortened the amount of time the player can't grab ledges after using his back aerial (68 frames → 60).
- Boomerang deals less shield damage (0 → -4/-2.5/-1.5 (clean/late/return)).
- Neutral attack 1 connects into neutral attack 2 more reliably.
- Boomerang teleportation glitch fixed.
- Toon Link can now shield SDI if a projectile hits his Hero's Shield.
- Down aerial no longer has its downward movement disabled when used out from of hitstun.
- Dash attack has less ending lag (FAF 31 → 29), improving its combo potential.
- Down smash has more knockback scaling (83 → 90 (hit 1), 79 → 85 (hit 2)).
- Back aerial:
- Back aerial has less startup lag with a longer hitbox duration (frames 7-9 → 6-9).
 The stronger "attack connect" HD rumble no longer triggers.
- Down aerial's late hit deals more damage (12% → 14%) with knockback scaling not fully compensated (100 → 98), drastically improving its KO potential.
- Grab aerial has a longer hitbox duration (frames 11-18 → 11-20).
- Aerial Spin Attack has received various adjustments that allow the move to connect more reliably:
- The first front hit has a new ground-only hitbox that outprioritizes the old hitbox and is smaller (size: 6u → 4u) but has similar range (Y-offset: 7.5 → 5.5, Z-offset: 13.5—7.5 → 14.5—6.5) and more set knockback (83 → 107). This sends opponents higher, setting them up for the following hits.
- The third and fourth hits no longer use an autolink angle (367° → 84°). This allows them to connect more reliably if Toon Link is moving forwards, but less reliably if he is moving backwards.
- All of its hitboxes no longer check for the opponent's position to determine where the opponent is sent, instead sending the opponent in front of Toon Link consistently. This especially improves the final hit's consistency drastically, as it can no longer send opponents behind Toon Link.
Moveset[edit]
- While Toon Link is standing still, walking, or crouching, any incoming projectiles that hit his Hero's Shield will simply push him back slightly instead of inflicting damage. It can block any amount of projectiles, regardless of their power.
- Toon Link can wall jump.
- Toon Link possesses a tether attack and grab.
For a gallery of Toon Link's hitboxes, see here.
Note: All numbers are listed as base damage, without the 1v1 multiplier.
| Name | Damage | Description | ||
|---|---|---|---|---|
| Neutral attack | Slash (なぎ払い) / Counter Slash (返し) / Stab (突き) | 2% | An outward slash, followed by an inward slash, followed by a forward thrust. The first two hits can lock, and the third hit's semi-spike angle makes it useful to set up tech-chases. It is based on the final series of strikes that the Hero of Time inflicts to Ganon in The Legend of Zelda: Ocarina of Time. | |
| 2% | ||||
| 4% | ||||
| Forward tilt | Bamboo Splitter (からたけわり) | 9% | A lunging downward slash. Moderate startup at frame 9, with low ending lag and decent knockback, making it fast for its power. The hilt and the middle of the swords are semi-spikes, while the tip launches at the Sakurai angle. Its hitboxes at the beginning of the animation reach far enough back for Toon Link to hit opponents behind him. It resembles the Z-Targeting slash used by the Hero of Time. | |
| Up tilt | Half-Moon Slash (半月斬り) | 5% | An overhead arcing slash. Thanks to its frame 8 startup and very low ending lag, it is one of Toon Link's best combo starters. Can combo into itself at low percentages, and at later percents, it can combo into his neutral, forward, back and up aerials. | |
| Down tilt | Grass Cutter (草薙ぎ) | 7% | A kneeling inward slash. Can cause opponents to trip at low percents with a 50% trip chance and comes out on frame 9 with very minimal ending lag, making it very good for set-ups and tech-chases as well as being able to lock. At higher percents, it launches opponents away at a horizontal angle. | |
| Dash attack | Running Hack (追い斬り) | 8% (sweetspot), 6% (sourspot) | A lunging outward slash. It has fast startup at frame 7 and very little ending lag (19 frames), making it safe on shield despite its lack of shieldstun and useful for catching landings. However, it has a sourspot on Toon Link's arm that deals less damage. | |
| Forward smash | Smash Upper (スマッシュアッパー) | 14% | Winds up and then performs an upward slash. Toon Link moves slightly forwards when using it. It comes out on frame 16, it's strong and it and has less ending lag compared to his previous forward smash, but also less versatile. The duration of this move's hitbox is deceptively short compared to the animation, only lasting for two frames. As such, the move's range is also deceptively short and will fail to damage those above Toon Link beginning at frame 18. | |
| Up smash | Sky Slash (天空斬り) | 13% | A hopping, overhead arcing slash. Can hit behind Toon Link. Although the animation causes Toon Link to hop, it cannot reach opponents standing on a Battlefield platform above him. A standard anti-air and effective for covering both sides of Toon Link quickly should down smash not suffice. | |
| Down smash | Front and Back Sword Slice (前後足元斬り) | 12% (front), 13% (back) | A kneeling inward slash in front of himself, followed by a kneeling outward slash behind himself. Unlike in previous games, the first hit no longer leads into the second, although both hits have their knockbacks compensated, making the move effective near the sides of the stage. | |
| Neutral aerial | Two Part Slash (二段斬り) | 8.5% (front), 7% (back) | An inward slash followed by an outward slash behind himself. Has a chance to trip (30% trip chance) grounded opponents at low percents. Can also be used to lock, or as a combo starter. It can autocancel at the peak of a short hop. | |
| Forward aerial | Slash Up (斬り上げ) | 13% | A spinning outward slash. Has noticeable startup at frame 14, but it has low ending lag, can autocancel in a short hop and has respectable damage and great knockback, being able to KO at higher percents. It resembles his rolling Parry Attack. | |
| Back aerial | Backward Slash Up (後方斬り上げ) | 8% | Turns around and performs an upward slash behind himself. Almost identical to forward aerial, but trades power for faster startup, being tied with neutral aerial for the fastest startup of his aerials, at frame 6. While it is extremely weak and will not KO at any reasonable percent, its very low base knockback, high knockback growth, and ability to autocancel with a short hop make it a fairly good option for combos. It can combo into itself at low percents, and into an aerial Spin Attack as a KO combo. | |
| Up aerial | Jump Thrust (上突き, Up Thrust) | 14% (clean), 11% (late) | The Jump Thrust. Possesses sex kick properties. The clean hit has high knockback and can KO off the upper blast line at high percents, and the late hit can be used as a combo starter until high percents. | |
| Down aerial | Sword Plant (下突き急降下, Down Thrust Dive) | 16% (clean), 14% (late) , 5% (landing) | A stall-then-fall version of the Down Thrust. Has a powerful meteor smash at the start of the descent, and weak windboxes on landing, while also having a small hitbox that deals 5% when Toon Link takes out the Master Sword. Extremely risky to use offstage, as it has a long duration and, unlike the down aerials of the other Links, Toon Link's will not bounce off of any opponents he hits. Resembles his final strike to Ganondorf's head in The Legend of Zelda: The Wind Waker. | |
| Grab aerial | Midair Hookshot (空中フックショット) | 4% | Fires his Hookshot forward. Can be used to grab edges and is a very useful spacing option. As well as being safe on shield, it set ups tech situations at high percentages, which can act as an effective kill confirm. It replaces Down Tilt as Toon Link's main jab reset setup above 80-100% depending on character weight. | |
| Grab | Hookshot (フックショット) | — | Fires his Hookshot forward. It is a tether grab, and thus has higher lag than normal grabs in exchange for much longer range. Has noticeably less ending lag than Young Link's grabs. | |
| Pummel | Grab Hilt Strike (つかみ柄なぐり) | 1% | Quickly hits the opponent with the pommel of the Master Sword. | |
| Forward throw | Tackle (タックル) | 3% (hit), 4% (throw) | A shoulder tackle. Deals collateral damage to bystanders. Its moderate knockback makes it a decent option for setting up edgeguards and creating space, as well as launching the opponent into the trajectory of a returning Boomerang or a descending Bomb. It can also combo into a dash attack at low percentages, but this combo is only effective if the opponent misses their tech and does not DI. It appears similar to an illustration in A Link to the Past where Link performs a shoulder bash. | |
| Back throw | Circle Throw (巴投げ) | 7% | Performs the tomoe nage, a judo throw. A reliable KO throw, as it can KO middleweights at around 138% at the edge of Final Destination with good DI. | |
| Up throw | Throw Away Slash (投げ捨て斬り) | 5% (hit), 2% (throw) | Tosses the opponent up into the air and performs a spinning upward slash. Has very minimal KO potential, even on platforms, as it KOs middleweights at around 185% on Final Destination. Instead, it is best suited for setting up aerial pressure or launching an opponent into the trajectory of a previously thrown Boomerang or Bomb. | |
| Down throw | Elbow Strike (ヒジ打ち, ヒジ打ち) | 3% (hit), 4% (throw) | Pins the opponent to the ground and performs an elbow drop. Due to its lack of combo potential, it is absolutely inferior to his alternate timeline counterparts' down throws. As a result, its only utility is for setting up aerial pressure or launching an opponent into the trajectory of a previously thrown Boomerang or Bomb. | |
| Floor attack (front) | 7% | Slashes in front and behind himself while getting up. | ||
| Floor attack (back) | 7% | Slashes in front and behind himself while getting up. | ||
| Floor attack (trip) | 5% | Slashes in front and behind himself while getting up. | ||
| Edge attack | 9% | Performs an outwards slash while climbing up. | ||
| Neutral special | Hero's Bow | 4% (uncharged), 12% (fully charged) | Wields his Hero's Bow to fire an arrow. It can be charged up for more power and range. The arrows move much slower than the arrows that Link or Young Link fire, making them easier to avoid. However, this also means that the arrows remain active for longer. It can also lock at low percents. | |
| Side special | Boomerang | 8% (close), 9.6% (smash throw), 5% (far), 3% (return) | Throws his Boomerang forward. It flies forward and then returns to Toon Link. On the way forward, it launches enemies vertically with low base knockback, and on the way back, it launches them towards Link with no base knockback but very high knockback growth, allowing it to set up combos. It can be angled up or down, and inputting it like a smash attack increases its damage, as well as the distance it can travel. | |
| Up special | Spin Attack | 1% (uncharged hits 1-10), 3% (uncharged hit 11), 1.6% (charged hits 1-10), 4% (charged hit 11), 4% (aerial hit 1), 2% (aerial hits 2-4) 4% (aerial hit 5) | Spins rapidly with the Master Sword outstretched. The grounded version is a series of outward slashes, whereas the aerial version is a series of inward slashes. The last hit of both versions has a horizontal launching angle. The grounded version can be charged to inflict even more damage, and due to it being faster and much stronger than in SSB4, it is a very good out of shield option and one of Toon Link's best KO options. The aerial version can carry opponents to the upper blast line, and KO them there if they are sufficiently damaged. | |
| Down special | Bomb | 5.4%-7% | Pulls out a Bomb, which explodes 4.98 seconds (299 frames) after being pulled out. Its explosion deals low knockback and sends opponents diagonally upwards, while creating brief comical smoke. The bomb's explosion does not harm Toon Link if it hits an opponent, and it deals more damage when smash thrown at the opponent's feet. Compared to Young Link's bombs, Toon Link's bombs are very volatile, exploding upon contact with the ground unless dropped on a platform while dropping through it. Arguably Toon Link's best combo starter, it grants him a number of follow-ups at varying percentages. With precise usage, it can be followed up with up smash or forward aerial for a potential KO confirm, even at high percentages. As the Bomb functions on a timer, it can help Toon Link with recovery by removing him from helplessness. | |
| Final Smash | Triforce Slash | 1% (trapping), 2.8% (hits 1-14), 2% (hit 15), 14% (final) | Uses the Triforce of Courage to emit a thin beam of light from his left hand to stun an opponent in front of himself. If the beam comes in contact with an opponent, Toon Link dashes forward and performs a barrage of slashes while they are trapped in a Triforce-shaped energy field before concluding with an outward slash that shatters the energy field and launches them and any bystanders. | |
Stats[edit]
| Stats | Weight | Dash speed | Walk speed | Traction | Air friction | Air speed | Air acceleration | Gravity | Falling speed | Jumpsquat | Jump Height | Double jump Height |
|---|---|---|---|---|---|---|---|---|---|---|---|---|
| Value | 91 | 1.914 – Initial dash 1.906 – Run |
1.288 | 0.086 | 0.01 | 1.05 | 0.01 – Base 0.08 – Additional |
0.081 | 1.38 – Base 2.208 – Fast-fall |
3 | 33.8 - Base 16.32 - Short hop |
33.8 |
Announcer call[edit]

English/Japanese/Chinese
On-screen appearance[edit]
- A cartoony explosion appears on-screen. As the smoke fades, Toon Link appears and equips the Master Sword and Hero's Shield.
Toon Link's on-screen appearance

Taunts[edit]
- Up taunt: Sheaths the Master Sword and places the Hero's Shield on his back and uses the Wind Waker to conduct the "Wind God's Aria", with a tune at the end, which is the same one heard after completing a song in The Legend of Zelda: The Wind Waker.
- Side taunt: Sheaths the Master Sword and places the Hero's Shield on his back and watches a fairy fly around.
- Down taunt: Swings the Master Sword in front of himself while yelling in a panicked tone, ending with him being comically exhausted and catching his breath.
Toon Link's up taunt.
Toon Link's side taunt.
Toon Link's down taunt.


Idle poses[edit]
- Looks around cautiously.
- Taps his foot on the ground.
Toon Link's first idle pose.
Toon Link's second idle pose.


Crowd cheer[edit]
| Cheer (English) | Cheer (Japanese/Chinese) | Cheer (Italian) | Cheer (Dutch) | Cheer (French) | |
|---|---|---|---|---|---|
| Cheer | |||||
| Description | Link Link Link! | Lin - k! | Forza Link! *claps 3 times* | Link! Link! *claps 3 times* | Allez Link! *clap 3 times* |
| Cheer (German) | Cheer (Spanish) | Cheer (Russian) | Cheer (Korean) | |
|---|---|---|---|---|
| Cheer | ||||
| Description | Link Link Link! *claps 3 times* | Link! Link! *claps 3 times* | Lin - ku! *claps 3 times* |
Victory poses[edit]
- Left: Conducts using the Wind Waker before striking a pose similar to his official artwork from The Legend of Zelda: The Wind Waker.
- Up: Chases a pig. Upon catching a pig, he holds it above his head. Whilst balancing on one foot, he occasionally starts to lose balance before steadying himself.
- Right: Tries to catch a pig, but ends up tripping and falling on his bottom. He then proceeds to rub his bottom for the rest of the victory pose while smiling sheepishly.


In competitive play[edit]
Most historically significant players[edit]
See also: Category:Toon Link players (SSBU)
 Ang - Although his activity is relegated to Mexico, he has consistently been one of the best Toon Link players in North America, regularly placing top 8 at BIT MASTER MTY events and has also placed 17th at the supermajor Smash Factor 9.
 JoJoDaHoBo - One of the best Toon Link players in North America who has higher peaks. He most notably placed 13th at the superregional Crown 2 upsetting Zomba as well as 17th at the major MAJOR UPSET.
 Lv.1 - One of the best Toon Link players in the world, especially since 2023. His 3rd-place finish at the major Maesuma TOP 15 "FINAL" is currently the best Toon Link placement at a major.
- Manzoku - The third-best Toon Link player in Japan. Although not as consistent, he has seen some strong results such as 25th at the supermajors Kagaribi 5, Umebura SP 9, and DELTA 4.
- Marvelous_Marco - One of the best Toon Link players in North America who is more consistent at majors, most notably 17th at the major Rise 'N Grind 2023 and 33rd at the supermajor Battle of BC 5.
- Sigma - The best Toon Link player of all-time, and the only Toon Link player ranked top 50 on a global ranking, ranking 44th on the UltRank 2022.
Tier placement and history[edit]
Toon Link saw middling success in the early metagame, most notably in Mexico -- thanks to players such as Ang and Hyuga -- and Japan -- thanks to players such as Lv.1, Ri-ma, and Sigma. However, Toon Link's representation was not as strong outside of those two regions, mainly due to perceptions that Toon Link was noticeably inferior to Link and Young Link. This perception stemmed from the buffs and changes Link and Young Link received, which made many to consider both characters at least high-tier. Coversely, Toon Link received a mix of buffs and nerfs in his transition, and was seen as a weaker version of Young Link due to having a weaker projectile game and damage output. In addition, most of Toon Link's best players generally only participated at regional-level events, while Ri-ma relegated Toon Link to a secondary in favor of Joker, leaving Sigma as the only notable Toon Link player consistently performing well at majors. As such, many players considered Toon Link to be a mid-tier.
Dedicated mains would continue to push Toon Link, which led his overall representation to remain relatively stable for most of the game's lifespan, usually hovering between the high-30s to low-40s. Although some Toon Link players ultimately fell out of the limelight, newer players would appear and replace them, including Marvelous_Marco and JoJoDaHoBo, who began placing well at American events in the post-online metagame, and Manzoku, who dropped Link for Toon Link during the pandemic. In addition, Lv.1's results began improving, most notably in mid-2023, while Sigma's results remained strong, which ultimately led to him being ranked 44th on the UltRank 2022, the first Toon Link player to be ranked in the top 50 globally. This has led many to believe Toon Link was stronger than previously perceived. As it currently stands, Toon Link is ranked 46th on the tier list as an upper mid-tier and is no longer considered the worst Link, as he is ranked 10 spots above Link.
Classic Mode: The Teamwork of Courage[edit]

Toon Link fights alongside two CPU Toon Link teammates in all of his battles, likely referencing The Legend of Zelda: Tri Force Heroes. Toon Link fights characters from different universes in each stage. If playing Classic Mode in Co-op, one CPU Toon Link will still appear.
| Round | Opponent | Stage | Music | Notes |
|---|---|---|---|---|
| 1 | 3D Land | Ground Theme / Underwater Theme - Super Mario 3D Land | ||
| 2 | Tortimer Island | Kapp'n's Song | ||
| 3 | 75m (Battlefield form) | Stack-Up/Gyromite | ||
| 4 | Pokémon Stadium | Battle! (Trainer) - Pokémon Sun / Pokémon Moon | ||
| 5 | Moray Towers | Now or Never! | ||
| 6 | Giant |
Great Plateau Tower (Battlefield form) | Main Theme - The Legend of Zelda: Tri Force Heroes | |
| Bonus Stage | ||||
| Final | Ganon | Sacred Land | Calamity Ganon Battle - Second Form | |
Note: In the fourth round, Pokémon Trainer is absent.
Note 2: Items do not appear in the sixth round.
Credits roll after completing Classic Mode. Completing it as Toon Link has Hyrule Main Theme accompany the credits.
Role in World of Light[edit]

Although Toon Link does not appear in the World of Light opening cutscene, he was vaporized and later imprisoned alongside the rest of the fighters (except Kirby) when Galeem unleashed his beams of light.
Toon Link is unlocked in the Forest Hill sub-area of The Light Realm. To awaken him, the player must activate a nearby switch which extends the bridge and defeat the spirit of Zelda (Breath of the Wild) that's in front of him.
Fighter Battle[edit]
| No. | Image | Name | Type | Power | Stage | Music |
|---|---|---|---|---|---|---|
| 43 | |
Toon Link | 7,500 | Wuhu Island (volcano) | Main Theme - The Legend of Zelda: Tri Force Heroes |
Spirits[edit]
Toon Link's fighter spirit can be obtained by completing Classic Mode. It is also available periodically for purchase in the shop for 300 Gold, but only after Toon Link has been unlocked. Unlocking Toon Link in World of Light allows the player to preview the first spirit below in the Spirit List under the name "???". As a fighter spirit, it cannot be used in Spirit Battles and is purely aesthetic. His fighter spirit has an alternate version that replaces it with his artwork in Ultimate.
Additionally, this incarnation of Link and others under the same artstyle appear in a few primary and support spirits.
177. Toon Link
248. King of Red Lions
260. Alfonzo & Engineer Link
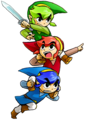
262. Totem Link


In Spirit Battles[edit]
As the main opponent[edit]
| Spirit | Battle parameters | Inspiration | |||||||||
|---|---|---|---|---|---|---|---|---|---|---|---|
| No. | Image | Name | Series | Enemy Fighter(s) | Type | Power | Stage | Rules | Conditions | Music | Character |
| 246 | Tetra | The Legend of Zelda Series | •Toon Link |
9,800 | Pirate Ship | •Item: Bullet Bill •Hazard: Heavy Wind |
•Dangerously high winds are in effect •The enemy is easily distracted by items |
The Great Sea / Menu Select | |||
| 256 | Ezlo | The Legend of Zelda Series | •Toon Link |
3,700 | Distant Planet | •Hazard: Left Is Right, Right Is Left •Giant |
•The enemy is giant •Left and right controls will suddenly reverse after a little while |
Village of the Blue Maiden | Link (The Minish Cap) | ||
| 260 |  |
Alfonzo and Engineer Link | The Legend of Zelda Series | •Toon Link •Captain Falcon |
3,600 | Spirit Train | •Attack Power ↑ | •The enemy's dash attacks have increased power •The enemy has increased attack power after a little while •The enemy can deal damage by dashing into you |
Full Steam Ahead | Engineer Link | |
| 262 | Totem Link | The Legend of Zelda Series | •Toon Link |
3,500 | Hyrule Castle | •Item: The Legend of Zelda | •The enemy favors smash attacks | Main Theme - The Legend of Zelda: Tri Force Heroes | |||
| 1,293 | Bomberman | Bomberman Series | •Toon Link |
9,700 | Wrecking Crew (Battlefield form) | •Assist Trophy Enemies (Bomberman) •Item: Exploding Types |
•The enemy's explosion and fire attacks have increased power •Hostile assist trophies will appear |
Bomb Man Stage | |||
| 1,322 | .png) |
Link (Link's Awakening) | The Legend of Zelda Series | •Toon Link |
9,400 | Tortimer Island (Two palm trees, two regular trees) |
•Assist Trophy Enemies (Chain Chomp) | •Hostile assist trophies will appear | Tal Tal Heights | ||
| 1,427 |  |
King Olly | Paper Mario Series | •Toon Link •Giant Metal Pac-Man |
9,700 | Princess Peach's Castle (Ω form) | N/A | •Defeat the main fighter to win •The enemy favors air attacks •The enemy is metal |
Attack and Run! | ||
As a minion[edit]
| Spirit | Battle parameters | Inspiration | |||||||||
|---|---|---|---|---|---|---|---|---|---|---|---|
| No. | Image | Name | Series | Enemy Fighter(s) | Type | Power | Stage | Rules | Conditions | Music | Character |
| 250 | Aryll | The Legend of Zelda Series | •Villager •Toon Link |
9,000 | Wuhu Island (Swaying Bridge) | N/A | •The enemy has increased attack power | The Great Sea / Menu Select | Link (The Wind Waker) | ||
| 253 | Beedle | The Legend of Zelda Series | •Shulk •Toon Link |
2,600 | Gaur Plain (Battlefield form) | •Item: Beetle | •Items will be pulled toward the enemy | Dragon Roost Island | Link (The Wind Waker) | ||
| 257 | Linebeck | The Legend of Zelda Series | •Luigi •Toon Link |
9,000 | Wuhu Island (The boat) | •Buoyancy Reduced | •No one knows how to swim | The Great Sea / Menu Select | Link (Phantom Hourglass) | ||
| 263 |  |
Madame Couture | The Legend of Zelda Series | •Rosalina & Luma •Toon Link |
3,300 | Skyloft | N/A | •Defeat the main fighter to win •Reinforcements will appear during the battle |
Main Theme - The Legend of Zelda: Tri Force Heroes | Links (Tri Force Heroes) | |
| 1,519 |  |
Power Pro-Kun, Aoi Hayakawa, & Mamoru Ikari | eBASEBALL: POWER PROS | •Ness •Toon Link •Villager |
9,600 | Pokémon Stadium 2 (hazards off) | •Item: Beastball | •The enemy starts the battle with a Home-Run Bat | Baseball (Training) | Mamoru Ikari | |
Alternate costumes[edit]

| |||||||

|

|

|

|

|

|

|

|
Gallery[edit]
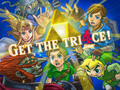
Artwork of all The Legend of Zelda characters, as posted on the official Legend of Zelda Twitter account.
Toon Link's fighter card.
Toon Link's unlock notice.
On Arena Ferox.

Toon Link confronting Bowser on the Bridge of Eldin.
Performing his up taunt on Tortimer Island.
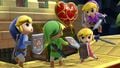
Toon Link with Purple Link, Red Link and Blue Link on The Great Cave Offensive.
Attacking Ganondorf with Triforce Slash.
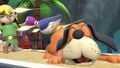
Toon Link getting hit by Duck Hunt's neutral infinite on The Great Cave Offensive.
Getting attacked by Jigglypuff on 3D Land.
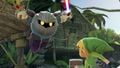
Advancing towards Meta Knight on Kongo Falls.

Taunting alongside Robin on Wii Fit Studio.
With all playable The Legend of Zelda veterans on the Great Plateau Tower.
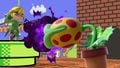
Piranha Plant using Poison Breath on Toon Link on the Mushroom Kingdom stage.


Fighter Showcase Video[edit]
Trivia[edit]
- Toon Link's pose in his official render is based on an artwork of him performing a Spin Attack in The Wind Waker, which was also used in promotional art for European limited edition bundles of the game. This artwork was also edited and reused for The Minish Cap.
- Toon Link is the only character who travels to 3D Land in Classic Mode.
- Toon Link and Diddy Kong are the only characters who have a CPU ally in every round of their Classic Mode.
- While holding a small item, Toon Link reuses his facial expressions from Smash 4 in his idle animation.
- Despite Toon Link's down aerial no longer bouncing off opponents, his character files still have data for the 8% damage hitbox used after a bounce, which is labeled as "AttackAirLw2Attack". This was also the case in Smash 4.
- In his Ultimate trailer, his sword attacks use punching sounds when they hit: this is different from the actual game, where they use unique comical slashing sounds.
- Toon Link is one of only five characters to predominantly use his left hand to wield his weapon, sharing this trait with Young Link, Sephiroth, Ice Climbers, and Rosalina & Luma.
- Toon Link is one of five characters whose unlocking battle in World of Light is not on either Final Destination or a Ω form. The other four are Peach, Daisy, King K. Rool, and Mii Gunner.
- When using his up taunt and in one of his victory screens, Toon Link appears to conduct the Wind’s Requiem with the Wind Waker, which is the first song Link learns in The Legend of Zelda: The Wind Waker.
Notes[edit]
- 1.^ translates to "Circle Throw"