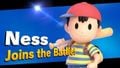
Ness (SSBU)
| Ness in Super Smash Bros. Ultimate | |
|---|---|
 
| |
| Universe | EarthBound |
| Other playable appearances | in SSB in Melee in Brawl in SSB4 |
| Availability | Unlockable |
| Final Smash | PK Starstorm |
| Tier | B+ (40) |
Ness (ネス, Ness) is a playable character in Super Smash Bros. Ultimate. He was revealed along with the fellow EarthBound fighter Lucas and all of the other previous veterans on June 12th, 2018. As in the original Super Smash Bros., Super Smash Bros. Brawl, and Super Smash Bros. for Nintendo 3DS, he is unlockable, instead of being available from the start. Ness is classified as Fighter #10.
In a first for the series, Makiko Ōmoto lacks new voice-clips for Ness. Instead, all (excluding one) of his voice-lines from Super Smash Bros. 4 have been repurposed for Ultimate.
Ness is ranked 40th out of 82 characters on the Ultimate tier list, placing him in the B+ tier. This is a marginal improvement from his ranking in Smash 4, where he was ranked 28th/29th out of 54 characters and tied with Lucas, being his best position in the series to date. Ness has a fairly well-rounded design in Ultimate, with useful tools in most phases of the game. He is most notable for his strong aerial game: all of his aerials are quick, powerful, disjointed, and useful for both racking up damage and KOing, as well as contributing to combos at lower precents. His grab game is also among the best across the cast, as all of his throws have practical applications of utility: his down throw is a viable combo starter, and his back throw remains the most versatile KO throw in the series by default. Furthermore, Ness' special moveset has flexible utility: PK Flash, PSI Magnet, and PK Fire can all start or extend combos, while the latter can quickly rack up damage and set up strong punishes. Meanwhile, PK Flash and PK Thunder 2 can both lead to early KOs if landed. Ness' recovery has improved in Ultimate thanks to buffs to PK Thunder and PK Thunder 2 — and by virtue of possessing the longest directional air dodging distance in the game alongside Lucas.
However, Ness does have some exploitable weaknesses. He suffers from poor grounded mobility and a lack of range in his normal attacks. Altogether, characters with large and/or disjointed hitboxes can easily outrange Ness, forcing him to play defensively against them and leaving him with few options to deal with them. Because of his slow mobility on the ground, his approaching options are also hindered as a result especially when combined with his aforementioned sub-par range, and speed demons are capable of outspeeding him. Still, his most glaring flaw is perhaps his recovery, which, despite its improvements, is one of the more exploitable recoveries in the game.
As a result of his strengths and weaknesses, Ness is perceived as a strong, albeit volatile character in competitive play. Ness' competitive positioning in Ultimate is generally considered his best in the series, and players such as Gackt, Scend, and Syrup have seen consistent success with Ness in tournaments.
How to unlock
Complete one of the following:
- Play VS. matches, with Ness being the 1st character to be unlocked.
- Clear Classic Mode with Kirby or anyone in his unlock tree, being the 1st character unlocked.
- Have Ness join the player's party in World of Light.
With the exception of the third method, Ness must then be defeated on Onett.
Attributes
Ness is a versatile character with strong tools for a variety of situations, having a unique moveset that borrows from various archetypes. His three projectiles allow for some zoning, but his fast normals and punishing grab game make him most dangerous at short distances. Although he has relatively poor grounded mobility — his walking speed, initial dash, and dashing speed are below-average — his aerial mobility shines thanks to his excellent air acceleration, average air speed, above-average jumping height, and unique double jump cancelling ability; the former, in particular, is tied with Falco, Pichu and Pikachu for the 6th-fastest, while his double jump is the 6th-highest. Further bolstering his aerial game, Ness' low gravity and slow falling speed allow him to perform multiple aerials in one short hop, and all of his aerial normals can be auto-canceled. Ness has three projectiles with numerous applications, including juggling, edgeguarding, and even recovery. Despite his small stature, Ness is a middleweight, tied with Lucas, Mii Brawler, and Inkling.
Ness' outstanding aerial mobility is supported by one of the best sets of aerial normals in the entire game. His neutral aerial activates on frame 5 and functions well as a combo-breaker and out-of-shield option. It also sets up tech-chasing situations at middle percents and deals decent knockback at high percents, making it a viable edgeguarding and KO option. His forward aerial has a large disjoint and is quite active for a lengthy time, making it excellent for starting combos, edgeguarding, and approaching. The final hit can KO at higher precents near the edge, while it is an effective wall of pain tool due to its ability to chain into itself multiple times. Ness' new multi-hitting up aerial is strong for KOs at high precents and great for juggling, and its drag-down properties allow Ness to set up grabs, combos, and KOs. Ness' back aerial is quick and powerful when sweetspotted, making it another reliable KO option in his kit. Finally, his down aerial is a slow-but-powerful meteor smash useful for edgeguarding or starting vertical combos.
Ness' grab and throw game is also outstanding and among the best across the cast. His grab is relatively quick, his pummel's decent speed allows Ness to inflict decent damage before throwing, and all of his throws have useful applications. Ness' down throw is a solid combo starter that will often lead into certain aerials, such as either neutral aerial or multiple forward aerials. His forward throw has disproportionate base knockback, allowing Ness to reliably set up edgeguarding situations and ending a stock extremely early when nearing the horizontal blast lines. Ness' up throw, while not as practical compared to his other throws, is a solid mix-up that can set up juggling with PK Thunder or PK Flash. Although not as versatile as his down throw, it is a solid combo starter at lower precents, leading to certain aerials at lower precents. As well, its good knockback also allows it to KO at high precentages as well. Most notorious, however, is Ness' back throw, which remains the most consistent KO throw in the series.
While limited by his poor grounded mobility, Ness' grounded game is still respectable as it features a variety of powerful attacks. His forward tilt and dash attack are quick and strong enough to KO at high percents, and the latter has improved range to make it a reliable approaching tool. His up tilt is a good combo tool at low percents and can even KO at higher percents. His down tilt, which is extremely fast and spammable, can be used to two-frame, jab lock, pressure shields, confirm into a grab, or deal immense damage if the opponent is trapped at the ledge. His forward smash (baseball bat) has high start-up and ending lag, but deals exceptional damage and knockback, especially when sweetspotted with the tip of the bat, often KOing as low as 45% when sweetspotted at the edge. The bat is also a reflector with a damage multiplier of 2.0 and a speed multiplier of 2.5, giving it the second-highest damage multiplier (after Kazuya's Left Splits Kick) and the single-highest speed multiplier of any reflector in the game, excluding items. Ness' up and down smashes (yo-yo) have significantly improved knockback, deal damage while charging, and can hang below the stage, making them some of the best and easiest-to-use edgeguarding tools in the game.
Ness is perhaps best known for his flexible special moveset. His neutral special, PK Flash, is a large projectile that travels in an arc from Ness' head, gaining strength and distance depending on how long the input is held for. Because it has low ending lag and freezes opponents briefly when successful, PK Flash has great utility as a combo starter and juggling tool. It also no longer sends Ness into helplessness, making it useful for knocking opponents away from the ledge while Ness is offstage. PK Flash, at full charge, can KO Bowser, the heaviest character in Ultimate, as low as 70%. Ness' side special, PK Fire, is a tiny projectile that travels horizontally a short distance and bursts into a pillar of flames on contact with an opponent, dealing multiple hits. When performed in the air, PK Fire has a diagonal trajectory and decreased landing lag, bolstering its safety in neutral, especially on platforms. The move is infamously spammable and can set up combos, condition opponents to jump, or simply rack up damage itself. Ness' up special, PK Thunder, doubles as a versatile projectile and Ness' primary recovering option. The move sends a ball of electricity upward from Ness' head that can be guided with the control stick, costing Ness his mobility while active, but granting him the ability to pressure deep offstage, juggle opponents repeatedly, or at times KO an opponent into the upper blast zone. Ness can also send the lightning into himself at any angle, launching him in that direction for an extremely powerful attack (PK Thunder 2), which can both often KO extremely early and also allow Ness to recover from deep offstage. Ness' down special, PSI Magnet, creates a psychic field around Ness that absorbs energy-based attacks and heals Ness a proportionate percent. PSI Magnet also has newfound offensive utility in Ultimate, as it now features an active hitbox with set knockback. The aerial hitbox can confirm into several of Ness' normal aerials, while the grounded hitbox places opponents in perfect range for a sweetspotted forward smash, making it practical in jab locking situations. PSI Magnet also alters the momentum of Ness' double jump, a form of double jump cancelling that makes for a unique aerial burst option and a stylish way to start or extend combos.
However, Ness' strengths are counterbalanced by notable weaknesses, with the most notable one being his poor approach. While Ness' hitboxes are large and disjointed, his overall range still falls short relative to the cast. This is especially worsened considering the lack of range on his normal attack. As such, he can still be stuffed out or outranged by characters with even larger disjoints (especially swordies), such as Cloud or Marth. Moreover, Ness' below-average running speed and average air speed, as well as his projectiles being rather slow or short-ranged, render him slightly vulnerable to camping, especially against opponents with non-energy projectiles. In addition, his poor grounded mobility also allows speed demons, such as Sonic, to outspeed him easily. Although Grounded PK Fire deals good damage, but is punishable on shield and easily escapable with good DI, rendering it inferior compared to Aerial PK Fire.
Ness is also vulnerable to juggling given his floatiness and lack of reliable landing options, as well as the removal of multiple air dodges. As such, characters with powerful and disjointed aerials, such as Palutena and Ike, can give Ness a difficult time landing. However, Ness' most glaring weakness remains his recovery. Despite traveling a good distance, PK Thunder 2 is quite exploitable: if the attack makes contact with an opponent or projectile mid-flight, its distance will be halved, often resulting in a gimp. Furthermore, opponents with good timing can hit Ness with a powerful attack or fall into PK Thunder 1 before he can launch himself, causing the projectile to instantly disappear and sending Ness into immediate helplessness. It can also disappear upon contact with opponents or terrain, allowing characters with excellent recoveries (such as Mr. Game & Watch) can merely jump into the projectile and receive minor knockback and damage, immediately sending Ness into a state of helplessness, though this is a risky strategy. Because of its enormous knockback, PK Thunder 2 is also susceptible to several counters, and opponents who time their counter correctly will almost typically kill Ness. In addition, PK Thunder 2 has significant ending lag, and if Ness recovers directly onto the stage after using it, opponents can easily capitalize on this ending lag by landing a powerful hit on Ness that he cannot hope to counter. Conversely, opponents who mistime an edgeguard against Ness will often die for it. As a result, characters with multiple jumps, such as Jigglypuff, Kirby and Meta Knight, with counters, such as most of the Fire Emblem cast, or with moves that reflect or absorb, such as Rosalina, Villager, and Pit, can force Ness into disadvantage when offstage.
Overall, Ness is characterized as a zoner glass cannon, like Zelda. Ness excels in most offensive aspects of the game; possessing an extremely versatile moveset, gifted with an excellent combo game and potent KO potential, an impressive off-stage presence and good zoning tools. On the other hand, he suffers in certain defensive situations; he especially struggles when launched offstage or high above his opponent due to his exploitable recovery and poor landing options, respectively. He also struggles against characters who can outrange his disjoints or outspeed his mobility, though this is less problematic compared to in previous games.
Changes from Super Smash Bros. 4
Ness has been significantly buffed in his transition from SSB4 to Ultimate, despite being regarded as a viable high-tier in the previous game; various changes to his previous options and the addition of new ones have positively impacted his playstyle, and the changes to the game's engine have universally strengthened his kit.
Ness' grounded game has been improved compared to previous iterations; forward tilt is now a viable KO option, dash attack has increased knockback and range, up tilt has decreased ending lag and is useful for starting combos, and down tilt racks up damage much more effectively, especially near the ledge. Among his most significant buffs are the changes to his yo-yo smash attacks (up smash and down smash), which not only regained their charging hitboxes, but now hang below the ledge to very easily set up edgeguards against most characters; up smash has also lost its early hit and deals dramatically more knockback, making it a viable KO option for the first time.
Many of Ness' other tools are more effective as well. All of his aerials, save for neutral aerial, deal more damage, and he has gained a new up aerial that hits multiple times, allowing for drag-down combos and set-ups while retaining most of its standalone KO power. Down aerial has more range, can once again be auto-canceled from a short hop, and is a drastically stronger meteor smash when clean. In terms of special moves, PK Flash charges much more quickly and no longer causes helplessness when performed mid-air; PK Fire has reduced lag (especially in terms of landing lag, greatly improving its utility in the air) that improves its combo and set-up potential, and PK Thunder deals more damage. Chief Ness' most prominent buff among the rest of his changes, however, comes from a significantly improved PSI Magnet; the move now has a hitbox (comparatively to Lucas, although during the move rather than when canceling the move) that possesses a rehit rate, which gives it offensive usage for the first time in the series, as it assists Ness in extending combos and gives him newfound KO confirms at high percentages.
The changes to Ultimate's engine have universally improved Ness as well, especially the revamped air dodging mechanics and general buffs to aerial attacks. The reintroductional of directional air dodges benefits Ness tremendously, as his own directional air dodge travels further than the rest of the entire roster (aside from Lucas), providing a reliable recovering option aside from the notoriously exploitable PK Thunder 2. The removal of multiple air dodges also enables Ness to pressure opponents in the air with PK Thunder more consistently. Furthermore, Ness' already great aerial game is further compounded by the universal reductions to landing lag, improving their safety and combo potential.
However, Ness has also received a few nerfs. His new up aerial provides less horizontal range, requires landing all hits (which start from behind and move in an arc above Ness) to deal considerable damage, and launches at a lower angle that hinders its KO potential, worsening Ness' ability to juggle his opponents. The potency of Ness' grab game has been noticeably toned down: his slower and more standardized pummel cannot rack up damage as effectively compared to Brawl and SSB4, and is no longer among the fastest pummels in the entire game; back throw is marginally worse for KOing (though it remains the strongest throw in the game) due to launching the opponent closer to Ness; down throw's increased ending lag hinders its combo potential past low to mid-percents, and the universal nerfs to grabs affects Ness as much as the rest of the cast, as grabbing is a key component to his gameplan. This also leaves Ness more vulnerable to punishment should he whiff a single grab. Lastly, the power of his yo-yo smash attacks now only increases by half as much when charged, and PK Flash, in exchange for its much quicker charge, is drastically weaker when fully charged, making it less versatile for early KOs.
While he benefits from the universal changes to Ultimate's engine, some of those changes have also universally impaired Ness as well. The removal of multiple air dodges hinders Ness' ability to land safely, as air dodging multiple times was one of Ness' primary methods to land safely, making him more vulnerable to juggling. The universal growth to mobility considerably improves Ness' ability to approach (especially in the air), however, his grounded mobility still remains sub-par relative to the cast, meaning that his troublesome matchups against speed demons remain. This is especially exhibited considering the increased prevalence of rushdowners. While the reintroduction of directional air dodging greatly benefits Ness' recovery, the revamped air dodging mechanics have made Ness' air dodges some of the slowest in the game, thus leading to punishes should one be performed carelessly. Finally, most of Ness' former flaws from SSB4 are still repurposed in Ultimate, including the lack of range, poor approach and exploitable recovery, with the increased prevalance of swordfighters in Ultimate further pronouncing the former issue.
Overall, the buffs to Ness' neutral game, punishing game, edgeguarding, and recovery outweigh the few nerfs he received, and while his primary weaknesses—such as lack of range and an exploitable recovery—are still present, they have nevertheless been toned down compared to previous Smash installments. Thus, despite his similar position among the roster, Ness performs better than in SSB4, and his incarnation in Ultimate is widely considered his strongest in the Smash series to date.
Aesthetics
 Due to the aesthetic used in Ultimate, Ness' model features a more subdued color scheme, now more closely resembles his sprite in EarthBound. The detailing on his clothes and weapons are more prominent, such as the stitching on his socks.
- Ness faces the foreground at an angle, instead of facing directly forward. In addition, he always faces the screen regardless of which direction he turns, causing all of his animations to be mirrored while altering some, such as his dash animation.
- Ness' idle animation has been altered: he keeps his arms to his side rather than swinging them around.
- Ness, like many other characters, has been made much more expressive. He is much angrier when attacking, such as using his tilts. His eyes bulge and grow more circular when he is hit or frozen. His eyebrows are much more prominent when attacking or stunned.
- Ness' PSI graphic effects have been changed: both rings are thinner and are colored magenta instead of just the smaller circle, closely resembling the appearance of Hypnosis in Mother 3.
- Air dodging animation has changed.
- Ness' victory poses have been slightly altered:
- His left-inputted victory pose now shows Ness with a more astonished expression.
- His up-inputted victory pose now shows Ness skipping into the victory area instead of hopping in place.
- His right-inputted victory pose now has Ness swing his bat only once instead of multiple times, in a similar manner to his forward smash.
- Ness has a new victory theme; it is an arrangement of the last two out of the Eight Melodies from EarthBound Beginnings.
Attributes
 Like all characters, Ness' jumpsquat animation takes 3 frames to complete (down from 5).
- Ness runs faster (1.46265 → 1.609).
- Ness' initial dash is significantly faster (1.3 → 1.826).
- Ness walks slightly faster (0.8635 → 0.907).
- Ness' air speed is faster (0.9588 → 1.007).
- Ness' traction has been significantly increased (0.0546 → 0.131), going from average to being tied for the fifth-highest traction in the game.
- Ness' jumping height has been increased (34.47 → 34.48 (full hop), 34.47 → 45.65 (double hop), 68.95 → 80.13 (maximum)).
- Forward roll has less ending lag (FAF 31 → 30).
 Forward roll grants less intangibility (frames 4-17 → 4-15).
- Back roll has more startup with less intangibility (frames 4-17 → 5-16), and more ending lag (FAF 31 → 35).
- Spot dodge has less ending lag (FAF 28 → 26).
- Spot dodge grants less intangibility (frames 3-18 → 3-17).
- Air dodge has significantly more ending lag (FAF 34 → 60), being one of the slowest.
- Air dodge grants more intangibility (frames 3-28 → 3-30).
- The reintroduction of directional air dodges benefits Ness more than the rest of the cast, as his directional air dodge grants more distance compared to other characters' (a trait he shares with Lucas), and it provides him with a reliable recovery mixup to avoid leaving himself vulnerable by using PK Thunder.
Ground attacks
- Neutral attack:
- The first hit drags opponents towards Ness with the farthest hitboxes (361° → 180°), and the second hit uses a different angle throughout (70° → 361°). Both hits also have altered knockback (8 base/50 scaling → 30/20 base/25/15 scaling (hit 1), 30/20/25/20 (hit 2)). This allows for the full neutral attack to connect more reliably.
- Consecutive uses of the first hit are faster (9 frames → 7).
- The first hit transitions faster into the second hit (frame 7 → 5), which transitions faster into the third hit (frame 7 → 6).
- All hits have a higher hitlag multiplier (1× → 1.7× (hit 1), 1.2× (hit 2), 2× (hit 3)), giving opponents more time to SDI each hit and DI the last hit.
- The second hit deals less damage (2% → 1.5%).
- The third hit has a shorter hitbox-duration (frames 6-9 → 6-7).
- Forward tilt:
- Forward tilt has drastically increased base knockback (12 → 35), turning it into a viable KO option starting at around 155% from the center of Final Destination.
- It deals more damage when not angled (9% → 10%), no longer dealing less damage than the angled versions, and thus making its KO ability consistent.
- The hitboxes have been moved slightly inwards (X offset: 0.7u/2.9u → 0.6u/2.7u), marginally reducing its range.
- Up tilt:
- Up tilt has less startup, with the sweetspot having a longer duration (frames 7-8 → 5-6 (sourspot)/5-8 (sweetspot)), and less ending lag (FAF 32 → 29). This improves its combo potential and allows it to function more effectively as an anti-air.
- It deals more damage (7% → 9% (spark), 5% → 7% (body)) with knockback not fully compensated (42 base/126 scaling → 46/113), improving its KO potential, without worsening its combo ability due to its reduced lag and Ness' faster jumpsquat.
- Down tilt:
- Down tilt deals more damage (4%/2% → 4.5%/3%).
- It can be interrupted earlier by actions besides another down tilt (FAF 14 → 12).
- Its base knockback and knockback scaling have been reversed (3/6 base/20 scaling → 20/3). This increases its safety on hit at low percents so that opponents in range can no longer shield in-between hits, improving its reliability for racking up damage.
- The increased shieldstun for tilts allows down tilt to repeatedly hit and keep opponents locked into their shields until they get out of the move's range or are shield stabbed, improving its offensive utility.
- It no longer has a bonus trip chance, removing its guaranteed setups.
- Dash attack:
- Dash attack's second hit extends backwards (Z offset: 16u → 13u-16u), improving its ability to hit opponents next to Ness.
- The last hit deals more damage (4% → 6%) and knockback (80 base/104 scaling → 85/113), significantly improving its KO potential, despite launching at a lower angle (80° → 70°).
- Yo-yo (up smash and down smash):
- Up smash and down smash once again have their charging hitboxes from Melee and Brawl, hitting opponents repeatedly for 1% damage per hit. Unlike in those games, however, charging these moves still increases their damage, making the charging hitboxes far more useful. The yo-yo can also hang below the ledge, improving Ness' edgeguarding abilities significantly.
- They have a lower maximum damage multiplier (1.4× → 1.2×) and cannot be held as long as most other smash attacks.
- The text on the yo-yo reads "SUPER NINTENDO 2018 MOTHER".
- Up smash:
- Up smash has less ending lag (FAF 56 → 53).
- It no longer possesses an early hit that deals 9%, allowing it to KO more consistently.
- It has considerably more knockback scaling (60 → 79), significantly improving its KO potential.
- It has more startup (frame 6 → 10), no longer hitting behind Ness during its first active frames.
- Down smash:
- Down smash deals one hit less at both sides, increasing its startup (frame 10 → 12) and reducing its total damage (12% → 11%).
Aerial attacks
- All aerials have much less landing lag (18 frames → 8 (neutral), 20 → 12 (forward), 17 → 10 (back), 14 → 8 (up), 28 → 12 (down)).
- Neutral aerial:
- Ness emits PSI from his hands when using the move. It also uses a magic effect and SFX, rather than a neutral effect and a punch SFX.
- Forward aerial:
- Forward aerial deals more damage (1% → 1.5% (hits 1-3), 4% → 5.5% (hit 4); 7% → 10% (total)), with knockback scaling adjusted on the final hit (150 → 128), resulting in more knockback at high percents, improving its KO potential.
- Back aerial:
- Back aerial's outer-hitbox has been moved outward and down (X offset: 2.7u → 3.7u, Y offset: 0u → 2u), improving its horizontal range and better matching the inner-hitbox in height.
- Up aerial:
- Ness has a new up aerial: he waves his hand in an overhead arc while emitting PSI from his index finger. It is a multi-hit move, dealing up to five hits.
- Up aerial has a longer hitbox duration (frames 8-11 → 8-14 (hits 1-4), 15-16 (hit 5)), and more disjointed vertical range above Ness.
- It has less ending lag (FAF 42 → 34). Coupled with its longer duration and multi-hit nature (guaranteeing opponents are launched during the latest active frames), this allows it to combo into itself in the air from low to mid percents.
- The first four hits use the autolink angle (366°). This allows Ness to drag opponents down to the ground with the move and combo into several others, which is further complemented by its lower landing lag.
- It deals more total damage (13% → 2.5% (hits 1-4), 5% (hit 5); 15% total), with knockback adjusted on the last hit (13 base/109 scaling → 40/180). The move deals more knockback at low to mid percents, but deals less knockback at very high percents (≈110+%), overall KOing earlier.
- If not all hits connect, the move may do less damage than it used to.
- Up aerial has drastically decreased horizontal range, hindering its use for landing and approaching directly.
- It auto-cancels later (frame 27 → 34), matching its interruptibility.
- The last hit launches at a more horizontal angle (85° → 73°). While this allows it to combo better into other moves at low percents, such as neutral and forward aerial, it greatly hinders its KO potential, as it is vulnerable to LSI.
- Down aerial:
- Down aerial has less startup (frame 20 → 18) and ending lag (FAF 60 → 53).
- It deals more damage (12% → 14% (clean), 10% → 12% (late)) and knockback (20 base/70 scaling → 37/74 (clean), 70 scaling → 74 (late)), making it a significantly stronger meteor smash and no longer one of the weakest.
- It has a longer duration (frames 20-21 (clean)/22-25 (late) → 18-20/21-24).
- It auto-cancels earlier (frame 50 → 39), allowing Ness to auto-cancel it in a short hop like in earlier Smash titles.
- The clean hit has a much larger hitbox (3.9u → 6u), making it easier to land.
- The removal of teching for grounded meteor smashes, coupled with down aerial's immensely decreased landing lag and better auto-cancel window, significantly improve its combo potential onstage.
- Down aerial uses a kick SFX instead of a magic SFX on hit.
- Its animation was reversed to make Ness face the screen. The landing animation was also tweaked.
Throws and other attacks
- Ness grabs and pummels his opponents using PSI, with accompanying sound effects.
- Forward, back and up throws are no longer weight-dependent.
- Grabs:
- Standing grab has increased ending lag (FAF 35 → 38).
- Dash grab has more startup (frame 8 → 9) and ending lag (FAF 43 → 46), and slightly less horizontal range (Z2 offset: 10u → 9.8u).
- Pummel:
- Pummel deals slightly more damage (1.2% → 1.3%).
- It has less startup (frame 3 → 1) and ending lag (FAF 10 → 7), but deals much more hitlag (4 frames → 14), drastically increasing its effective duration. This hinders its damage-racking ability, no longer being one of the fastest pummels in the game.
- It uses a magic effect, rather than a neutral effect.
- Back throw:
- Back throw has an altered animation. Due to this new animation, Ness releases the opponent closer to himself, slightly reducing its KO potential.
- Up throw:
- Up throw deals more damage (10% → 12%) with no compensation on knockback, allowing it to KO middleweights at around 180%, though this is rarely practical.
- Down throw:
- Down throw's first three hits have a lower hitlag multiplier (1× → 0.5×), allowing it to execute faster.
- Ness launches the opponent from it earlier (frame 30 → 27), and it has slightly increased ending lag (FAF 50 → 51), reducing its combo potential.
- While the move's total damage is unchanged, it deals four hits before the throw instead of five, which have redistributed timings (frames 10/14/18/22/26 → 6/10/14/27) and damage values (0.6% (hits 1-5) → 0.5% (hits 1-3), 1.5% (hit 4)).
- Edge attack:
- Edge attack deals more damage (7% → 9%).
Special moves
- PK Flash:
- PK Flash has less startup (frame 44 → 40), travels faster, and reaches its full charge much quicker (frame 150 → 117).
- It has less ending lag (uncharged: FAF 70 → 62).
- It can travel through soft and semisoft platforms. It also no longer dissipates immediately upon making contact with hard platforms, allowing its full charge to be unleashed on the ground by simply holding the button, much like in Melee.
- The explosion has a longer hitbox duration (1 → 5 frames) and is larger (size multiplier: 0.9× uncharged/1.43× fully charged → 1.05×/1.8×).
- It no longer causes helplessness when performed in the air, allowing Ness to hit opponents near edges from offstage without self-destructing.
- It has much more base knockback (10 → 50), with knockback scaling barely compensated (70 → 65), strengthening it at lower charge levels. Combined with its lower ending lag, and the increased hitlag in Ultimate, which effectively lengthens the move's frame advantage on hit due to its projectile properties, it can also start combos at low to mid percents if the opponent is hit close enough to Ness.
- It deals significantly less damage when fully charged (37% → 27%), hindering its KO potential despite its increased knockback values.
- PK Flash has a more aquamarine color and emits its respective EarthBound graphic (specifically the "α" form) upon detonating.
- PK Fire:
- PK Fire has less startup (frame 21 → 18), with its total duration reduced as well (FAF 59 → 56).
- It has significantly less landing lag (30 frames → 12), improving the aerial version's zoning ability.
- The spark is bigger and deals more damage on its initial hit (4% → 6%).
- Due to the universal nerfs to roll-intangibility frames, PK Fire can catch rolls more effectively.
- The flame pillar has a faster rehit rate (11 → 7), but no longer has a hitbox that deals more damage (2%/1% → 1%). As a result, it cannot deal as much damage, but it is more consistent overall.
- PK Fire pushes Ness back slightly, similar to Lucas's PK Fire.
- Ness uses one hand to fire the projectile while emitting a red spark from his index finger. Diamond-shaped PSI energy also rises up within the fire pillar, resembling PK Fire γ's graphics from EarthBound.
- PK Thunder:
- PK Thunder deals more damage (8% → 11%) and has increased knockback scaling (50 → 55), allowing it to KO near the top blast line at high percents.
- The new air dodging mechanics significantly improve its edgeguarding ability, allowing Ness to pressure opponents more reliably and force them to spend their air dodge, leaving them open to punishes.
- PK Thunder emits yellow hexagon-shaped PSI energy, which more closely resembles its appearance in EarthBound.
- It has an angle indicator when the ball of lighting moves close to Ness. While this allows for the player to more accurately determine the trajectory Ness will travel during PK Thunder 2, it also makes it more predictable to opponents.
- PK Thunder 2:
- PK Thunder 2 travels further.
- In addition to its full intangibility during frames 1-9, it grants intangibility on Ness' head during frames 10-32, improving its safety for recovery.
- The window for using PK Thunder again after bouncing off a wall is much bigger. In addition, Ness enters the rebound animation when bouncing against the ground, instead of being knocked down, allowing him to use PK Thunder a second time.
- When hit by PK Thunder 2, the opponent is always launched in the horizontal direction Ness is facing. This makes KOing at very low percents much less likely if the opponent gets hit behind Ness.
- The clean hit triggers Special Zoom upon hitting an opponent.
- PSI Magnet:
- PSI Magnet begins absorbing projectiles faster (frame 10 → 7), and has less ending lag (FAF 30 → 25).
- It no longer halts Ness' horizontal momentum in the air, functioning as it did in Brawl, improving Ness' movement options.
- It has gained a hitbox close to Ness from frame 7 onward, which deals 4% damage with weak set knockback, and can rehit opponents every 10 frames. This grants the move offensive utility, and alongside the changes above, allows it to be used in combos. The lingering hitbox can also destroy weak projectiles, improving its safety when used for absorption.
- PSI Magnet emits pink diamond-shaped PSI from the center, more closely resembles its appearance in EarthBound. It also features a visible suction effect around the magnet.
- PK Starstorm:
- PK Starstorm summons slower meteors that spread out over the stage, similar to its Brawl iteration, but can still be aimed horizontally like the Smash 4 iteration. Paula and Poo accompany Ness during the move. PK Starstorm particle effects from EarthBound accompany each meteor, and the Sound Stone's background pattern appears in the stage's background.
- Ness no longer sinks downward while channeling PK Starstorm while airborne. In addition, if this Final Smash was initiated while in the air, Ness is propelled upward a moderate amount at the conclusion. This can assist in recovery.
Update history
Ness has received a mix of buffs and nerfs, but he was buffed overall. Update 2.0.0 increased the auto-canceling windows for up aerial matching the ending lag of the move, and his down aerial deals more damage while retaining its knockback values. Update 3.0.0, however, nerfed the yo-yo charging smash attacks, which were infamous for breaking shields easily. He also received various buffs, such as PK Flash possessing a larger hitbox, and physics changes to the yo-yo that improved its potential as an edge-guarding tool. Update 3.1.0 reverted the yo-yo physics back to its pre-patch state, and his neutral attack connects more reliably.
However, Ness has received a number of buffs in 9.0.0. His up tilt, dash attack and up throw deal more damage, which allows the latter to KO middleweights at around 180%, though with knockback adjusted for the former two. In addition, down aerial and PK Flash have less start-up lag. Overall, Ness remains a powerful fighter who can compete well with the rest of the cast.
- Up aerial autocancels earlier (frame 45 → 34), matching the move's interruptibility.
- Down aerial deals more damage (12%/10% → 14%/12%) with its knockback scaling compensated (84/86 (clean/late) → 74).
- Up smash and down smash are automatically unleashed from charging state earlier (charge hold: 60 frames → 30) and hit less often while charging (rehit rate: 3 → 4).
- PK Flash has more range ( Size multiplier: 0.9×-1.7× → 1.05×-1.8×).
- The physics of Ness' yo-yo string are stiffer. This improves the consistency of up smash and down smash at the ledge.
- Neutral attack 2 has more range and the hitbox is moved forward, causing it to connect into neutral attack 3 more reliably.
- The physics of Ness' yo-yo string have been reverted back to their pre-3.0.0 properties.
- Up tilt deals more damage (7% → 9% (spark), 5% → 7% (body)), with knockback compensated (42 base/140 scaling → 46/113).
- However, the knockback was slightly overcompensated, and the sweetspot now KOs slightly later.
- Dash attack's third hit deals more damage (4% → 6%) without full compensation on knockback (80 base/133 scaling → 85/113), improving its KO potential (KOing middleweights at around 150% with no DI, and 190% with the most optimal DI, down from around 175% and 220% respectively).
- Down aerial has less startup (frame 20 → 18), with its total duration reduced as well (FAF 55 → 53).
- Up throw deals more damage (10% → 12%) with no compensation on knockback, allowing it to KO middleweights at around 180%.
- PK Flash has less startup (frame 44-121 → 40-117), with its total duration reduced as well (FAF 66-143 → 62-139).
Moveset
- Ness possesses a special jump. When jumping in midair, Ness will ascend in a floatier, curved trajectory. The upward momentum of Ness' double jump can be canceled by inputting a special move or throwing an item. This trait is shared with Mewtwo, Lucas, Kazuya, and Sora.
For a gallery of Ness' hitboxes, see here.
Note: All numbers are listed as base damage, without the 1v1 multiplier.
| Name | Damage | Description | ||
|---|---|---|---|---|
| Neutral attack | Jab (ジャブ) / Straight (ストレート) / Middle Kick (ミドルキック) | 2% | A pair of one-two combo punches, followed by a roundhouse kick. The first and second hits can lock. | |
| 1.5% | ||||
| 4% | ||||
| Forward tilt | Side Kick (サイドキック) | 10% | An arcing roundhouse kick. Can be angled. It has quick startup lag, hitting on frame 7, and possesses 17 frames of ending lag, giving it decent safety on shield and hit. It has surprisingly good power for a tilt attack of its kind, KOing middleweights at around 120% at the edge of Final Destination. | |
| Up tilt | PK Toss (PKトス) | 9% (spark), 7% (body) | Hops and performs a vertical double-palm thrust that produces a PSI spark from his hands. It hits on frame 5, making it disproportionaly quick for a tilt attack. Possesses a sourspot located on his body that deals 7%. A decent anti-air and juggling tool with surprisingly high power for a tilt attack similar to Ness' forward tilt, KOing middleweights at around 133% on Final Destination. It is also versatile for partaking in combos despite its moderate ending lag. | |
| Down tilt | Crouching Kick (クラウチングキック) | 4.5% (foot), 3% (toes) | A swift shin kick. Due to the move's lack of start-up lag and ending lag, it is extremely spammable and is useful for jab resetting, locking, pressuring shields, two-framing and racking up quick damage while the opponent is trapped at the edge. The move is a sourspot located on the tip of his foot. However, it no longer has the ability to trip opponents like in SSB4 and Brawl, removing its guaranteed setups. | |
| Dash attack | PK Hand Stamp (PKハンドスタンプ) | 4% (hit 1), 7% (hit 1 aerial), 2% (hit 2), 4% (hit 3) | A double-palm thrust that launches three PSI sparks out in front of him, with the final spark knocking the opponent up into the air. It has rather impressive power for a dash attack, as the final hit starts KOing middleweights at around 141% on Final Destination. The first spark deals more damage to aerial opponents. The move is useful for setting up juggles and pressuring from afar. It is difficult to punish on shield if only the last hit connects. The disjointed hitboxes have considerable distances, offering it impressive range for a dash attack and giving it decent utility for approaching, as well as pressuring from a distance. The first hit is more damaging on opponents in the air. | |
| Forward smash | Batter Up! (バットスイング, Bat Swing) | 18% (low), 20% (mid), 22% (tip), 2× damage (reflected projectiles) | Swings his baseball bat. It can reflect incoming projectiles with a high multiplier and is one of the strongest forward smashes in the game, killing most characters around 50% by the ledge. However, its lag is considerable and makes it easy to punish up close. The reflector has a damage multiplier of 2.0 and a speed multiplier of 2.5, giving it the second-highest damage multiplier (after Kazuya's Left Splits Kick) and the single-highest speed multiplier of any reflector in the game, excluding items. | |
| Up smash | Around the World (シャトルループ, Shuttle Loop) | 1% (charge), 13% | Sends his yo-yo forward and performs an "around-the-world," hitting first in front of and then above and behind. Unlike in previous installments, it can KO middleweights at around 116% on Final Destinaton. It has a hitbox while charging and can hang from the ledge. This makes it effective for edgeguarding and two-framing, but can only be held for an additional half of a second instead of two in comparison to the rest of the other smash attacks, and has a maximum charging damage multiplier of 1.2×. A decent anti-air and a good out of shield option. | |
| Down smash | Walk the Dog (ヨーヨーショット, Yo-Yo Shot) | 1% (charge), 10% | Sends his yo-yo backward and performs the "walk-the-dog" with it, hitting first behind then in front. Unlike in previous installments, it can KO middleweights at around 101% at the edge of Final Destinaton. It has a hitbox while charging and can hang from the ledge. This makes it effective for edgeguarding and 2-frame punishing, but can only be held for an additional half of a second instead of two in comparison to the rest of the other smash attacks, and has a maximum charging damage multiplier of 1.2×. It potentially has inconsistency linking correctly if the opponent is at the furthest point of the back hit. | |
| Neutral aerial | Ness Spin (ネススピン) | 11% (clean), 7% (late) | Spins diagonally in the air with his arms outstretched, emitting PSI from his palms. It has quick startup lag, coming out on frame 5, with the properties of a sex kick. It is rather useful for breaking combos and as an out-of-shield option. The clean hitboxes deal decent knockback, making it a good edgeguarding and killing option, as it starts KOing middleweights under 120% at the edge of Final Destination. It auto-cancels from a short hop. | |
| Forward aerial | Aerial PK Hand Stamp (空中PKハンドスタンプ | 1.5% (hit 1-3), 5.5% (hit 4) | A double-palm trust while generating a stream of PSI out of his hands. It is tied with up aerial for the second-fastest startup out of Ness' aerials, coming out on frame 5. Due to Ness' excellent air acceleration, it functions as an excellent approaching and spacing tool as Ness is capable of retreating while the opponent gets hit by the move's lingering and rather large hitboxes, and it is useful for starting and extending combos. It auto-cancels from a short hop. Can chain into itself multiple times at low percentages, making it an effective wall of pain tool. | |
| Back aerial | PK Drop Kick (PKドロップキック) | 15% (clean), 8% (late) | A dropkick that produces PSI from his feet. If landing the clean hitbox, it his Ness' strongest aerial and one of the strongest back aerials in the game, KOing middleweights at 125% on Final Destination and even lower at the ledge. Despite its high power, it also has relatively quick startup lag, hitting on frame 10, and low ending lag. It is also useful for edgeguarding an leading to a wall of pain at lower precentages. It auto-cancels from a short hop. | |
| Up aerial | PK Wiper (PKワイパー) | 2.5% (hits 1-4), 5% (hit 5) | Waves his finger in an arc above his head while generating sparkles of PSI from his index finger, hitting up to 5 times. Due to hitting on frame 5, it is tied with forward aerial for the second-fastest startup out of Ness' aerials. It auto-cancels from a short hop. A great combo and juggling tool that can rack up damage quickly in tandem with his double jump, as its linking hits and last hit's vertical angle combine to make it a great combo extender. Since the final hit has extremely high knockback scaling, it is one of the strongest up aerials in the game, as the final hit starts KOing middleweights at around 134% at grounded levels on Final Destination. | |
| Down aerial | PK Meteor Kick (PKメテオキック) | 14% (clean), 12% (late) | Twirls before stomping below himself, producing a spark of PSI from his foot. The clean hitbox is a powerful meteor smash that can KO early offstage, and is versatile for starting and/or extending combos onstage if landed against grounded opponents. The late hitbox is a semi-spike that can KO middleweights at around 158% at the edge of Final Destination. It auto-cancels from a short hop. It is Ness' slowest aerial, however, coming out on frame 18. | |
| Grab | Grab (つかみ) | — | Clinches the opponent. A quick grab with moderate amount of ending lag, although it is burdened with short range. | |
| Pummel | Grab PK Shock (つかみPKショック) | 1.3% | Zaps the opponent with a blast of PSI. A fairly fast pummel with decent damage output. | |
| Forward throw | PK Throw (PKスルー) | 11% | Psychokinetically swings his opponent in a small circle in front of himself before sending them off forward. It has disproportional base knockback, but almost lacks knockback scaling, which gives it little/no KO potential even after Sudden Death percentages. It is useful for setting up an edgeguard, however, or KOing an opponent early on if nearing the horizontal blast zones. | |
| Back throw | Reverse PK Throw (リバースPKスルー) | 11% | Psychokinetically swings the opponent over his head before sending them off backward, in a diagonal and vertical motion. It is the opposite of his forward throw, possessing minimal base knockback, but incredibly high knockback scaling, making it one of the strongest back throws in the game, KOing even the heaviest characters with optimal DI at 122% near the ledge without rage, and is considered the most versatile and common killing throw overall, as it can KO much more reliably anywhere onstage at higher percentages than most other back throws at its level of strength like Incineroar's or Dr. Mario's, due to its much higher knockback scaling. | |
| Up throw | Cowboy PK Throw (カウボーイPKスルー) | 12% | Psychokinetically spins the opponent overhead before sending them straight into the air. It leaves the opponent in an unfavorable position that leads into juggling, especially by using PK Thunder. Since update 9.0.0 has increased it damage output, it is capable of KOing middleweights at around 180% on Final Destination. However, if Ness has high amount of rage, it is tied with Zelda, Incineroar and Lucas' up throws as the fifth-strongest up throw in the game, as it can KO middleweights at around 146% from anywhere on Final Destination. | |
| Down throw | Rapid PK Fire (ラピッドPKファイヤー) | 0.5% (hits 1-3), 1.5% (hit 4), 4% (throw) | Throws the opponent onto the ground and scorches them with PK Fire. A strong combo starter, possessing guaranteed follow-ups into neutral aerial, forward aerial and up aerial. | |
| Floor attack (front) | 7% | Sweep kicks in front of and behind himself in a circle. | ||
| Floor attack (back) | 7% | Planting on the ground, Ness sweeps his leg behind and in front of himself in a circle. | ||
| Floor attack (trip) | 5% | Performs a dropkick behind and in front of himself with both hands planted on the ground. | ||
| Edge attack | 9% | Cartwheels onto the stage and performs a sweep kick in front of himself. | ||
| Neutral special | PK Flash | 11%-27% | Generates a light blue, energetic pulse of sphere light that appears above him. As the special input is held, the sphere curves downwards and increases its power, until the attacking input is released or until the move's level of charge is maxed out, it explodes. PK Flash is effective at edgeguarding and gimping characters with predictable or linear recoveries, like Sonic, respectively. PK Flash boasts extreme power at full charge, KOing even the heaviest characters under 80% on Final Destination. PK Flash is also a hard punish if reading the opponent's options from a ledge. The arc it travels can be controlled, and the projectile is able to go through soft and semisoft platforms and will not dissipate upon contact with hard platforms.
The longer the special button is held, the stronger the explosion will be. | |
| Side special | PK Fire | 6% (bolt), 1% (fire) | Fires a yellow, lightning-bolt shaped projectile, that travels in a straight line until it hits an opponent or destructible portion of a stage, at which point, it explodes into into a gradually-fading and quick-hitting pillar of fire, making said opponent vulnerable to guaranteed followups or KO confirms. Due to SDI being drastically weakened since SSB4, it is a versatile tool for racking up quick damage. When performed in midair, Ness fires the bolt at a 45° angle. | |
| Up special | PK Thunder | 11% (PK Thunder), 1% (Thunder's tail), 25% (PK Thunder 2 initial hitbox), 21% (PK Thunder 2 late hitbox) | Creates a stream of lightning that can be aimed into opponents to deal damage with the head and stun with the tail. It can be aimed into opponents to deal damage and launch them in the direction they got hit from, or into Ness to turn him into a powerful human-projectile. Aiming the head of the projectile into Ness himself will launch him in a trajectory opposite to the side the projectile collided onto Ness, which is referred to as PK Thunder 2. PK Thunder 2 has brief invincibility during the first half of the move. Ness' primary means of recovery, but it can be easily gimped during startup. PK Thunder invulnerability from frame 1 to 32 and is constituted of an early and late hit. Colliding with a projectile, opponent or an item during PK Thunder 2 will shorten the distance traveled, and slamming into a wall allows Ness to perform another PK Thunder if the player is sufficiently quick enough. The tail of the thunder projectile can be useful for juggling and disrupt opponents recovering. | |
| Down special | PSI Magnet | 4% per hit | Surrounds Ness with a purple energy field, allowing him to absorb energy-based projectiles (such as Mario's Fireball, Fox's Blaster or Samus's Charge Shot or explosions (including all of Snake's explosives) and heal for 1.6× the damage he would have received, but only at a maximum of 30% damage per projectile. It possesses a hitbox on startup if held, and will also slightly push back opponents on release. Upon absorption, the magnet can be canceled with a jump, roll or spot dodge. PSI Magnet is also useful as a fall break to stall Ness' vertical momentum slightly in the air. | |
| Final Smash | PK Starstorm | 8% per hit | Paula and Poo join Ness, assisting him in summoning a shower of falling stars to attack his opponents. The comets will rain down over the stage and can be slightly aimed left and right. | |
Stats
| Stats | Weight | Dash speed | Walk speed | Traction | Air friction | Air speed | Air acceleration | Gravity | Falling speed | Jumpsquat | Jump Height | Double jump Height |
|---|---|---|---|---|---|---|---|---|---|---|---|---|
| Value | 94 | 1.826 – Initial dash 1.609 – Run |
0.907 | 0.131 | 0.0225 | 1.007 | 0.01 – Base 0.09 – Additional |
0.077 | 1.31 – Base 2.096 – Fast-fall |
3 | 34.48 - Base 16.65 - Short hop |
45.65 |
Announcer calls
English/Japanese/Chinese
Dutch
French
German
Italian
Russian
Spanish
On-screen appearance
- Ness teleports onto the stage using PSI Teleport, ending in an explosion leaving him covered in soot, which he then shakes off his body.

Ness's on-screen appearance

Taunts
- Up taunt: Turns toward the screen, positions his arms on his hips and nods while saying "Okay." The pose is similar to that of his clay model from EarthBound.
- Side taunt: Points his bat outward in front of him and strikes a pose, similar to how baseball players strike this pose to indicate they are hitting a home-run.
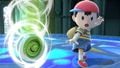
- Down taunt: Waves his hand in an S-motion while emitting a stream of PSI from his finger.
Ness' up taunt.

Ness' side taunt.
Ness' down taunt.


Idle poses
- Curiously look to his left, then to his right.
- Closes his eyes and places his fingers on his forehead, concentrating his PSI, and then points it forward.

Ness' first idle pose.
Ness' second idle pose.


Crowd cheer
| Cheer (English) | Cheer (Japanese/Chinese) | Cheer (Italian) | Cheer (Dutch) | Cheer (French) | |
|---|---|---|---|---|---|
| Cheer | |||||
| Description | Su-per Ness! | Ness Ness Ness! | Forza Ness ole ole! | Ness Ness Ness! - Go - Ness Ness Ness! - Go - Ness Ness Ness! - Go - Ness Ness Ness! | Ness Ness Ness! Ohhhhh! |
| Cheer (German) | Cheer (Spanish) | Cheer (Russian) | Cheer (Korean) | |
|---|---|---|---|---|
| Cheer | ||||
| Description | Ness Ness Ness! Yaaaaa! | Viva Ness! *claps 5 times* | Ness! Ness! Ness! | Ne - seu! |
Victory poses
- Left: Walks in to the screen, then looks around with a surprised expression, before rubbing the back of his head while smiling (his "character chosen" animation in Super Smash Bros. 64, albeit much more subtle).
- Up: Skips into the victory screen, then stops before nodding slightly with his arms positioned on his hips, holding a pose similar to his official clay model, up taunt, and official render from Super Smash Bros. Brawl.
- Right: Swings his bat once, then strikes a pose similar to his side taunt.


In competitive play
Most historically significant players
See also: Category:Ness players (SSBU)
 ATATA - One of the best Ness players in the United States. He began attending more out-of-region events in 2022 and has seen strong showings such as 13th at Low Tide City 2022 and 17th at Get On My Level 2022. He is ranked 91st on the UltRank 2022 for the second half of 2022.
 Gackt - The best Ness player of all time, having placed top 8 at more majors than any other Ness player. He finished 3rd at both Kagaribi 7 and Maesuma TOP 12, the highest placements for a Ness player at a major.
 PeW - The best Ness player in Europe since the end of the online era, and was also the second-best Ness player in Europe in the early metagame. He placed top 32 at several majors, including 13th at VCA 2022 and 25th at both Albion 4 and COLOSSEL 2022. Since late-2022, he has been playing Ness as a secondary alongside Min Min.
 S1 - The best Ness player in Europe in the early metagame and was also a top 10 player in Europe during that time. Consistently placed top 8 at European tournaments, including placing 7th at the major Albion 4 and 5th at the superregional Valhalla III. He has been mostly inactive since early-2020, occasionally entering tournaments while using secondaries.
- Syrup - Came to prominence in the online metagame, placing 2nd at the SWT: NA Northeast Ultimate Online Qualifier. He has also established himself as one of two best Ness players in the United States in 2022, placing 5th at the major Get On My Level 2022 as well as the superregionals Shine 2022 and Apex 2022. However since early-2023 he has shifted his focus towards Steve, although he still uses Ness as a secondary.
- Scend - The second-best Ness player of all time. He has consistently placed top 64 at majors, including 5th at Let's Make Big Moves 2022 and 9th at both Low Tier City 7 and MomoCon 2022. He was also one of the best players in the online metagame, and notably won The Box, the largest Smash tournament in terms of entrants.
Tier placement and history
Initial opinions on Ness were rather positive, due to the myriad of buffs he received during the transition from Smash 4 and benefiting from new mechanics in Ultimate, all of which improved his neutral, advantage, recovery, and movement-based options. As a result, early results from Ness were rather strong thanks to the strong performances from Gackt and Scend, as well as a myriad of strong regional players such as ATATA, Awestin, and FOW. This led several players to consider Ness as a solid high-tier character.
Although Ness' representation in the metagame continued to remain in the top 20, as well as the rise of new players such as Syrup, Ness' weaknesses progressively became more apparent as the metagame progressed. For a notable example, his limited range hindered his performances as the metagame was often populated with swordfighters or characters that could outrange Ness. In addition, his best players either became rather inconsistent -- for example, Gackt's performances ranged from a top 3 finish at Kagaribi 7 to placing 49th at Maesuma TOP 8 a month later -- or picked up secondaries to alleviate Ness's weaknesses -- for example, Syrup eventually picked up Steve as a co-main. This has led opinions on Ness to vary: while most of the community still consider Ness as a solid high-tier, especially in the United States, others, notably in Japan, hold a lower opinion of the character.[1] This varying opinion is currently reflected in Ness' position in the current tier list, where he is ranked 40th as the second-highest upper mid-tier character.
Ness is considered an even stronger character in Ultimate's online mode, as the presence of increased input lag ostensibly benefits him more than the other characters, making his quick aerials even safer and his recovery more difficult to challenge. These perceived advantages, while traditionally dismissed as meaningless in high-level competition, gained unforeseen significance as a result of the COVID-19 pandemic, which temporarily relegated all major tournaments to an online format. Ness' strong online results include impressive first-place finishes by Scend at The Quarantine Series: Minor Tournament 1 and The Box, the latter of which featured a $10,000 prize pool and the largest bracket of any Smash tournament (online or offline) to date.
Classic Mode: Home to Onett!

Ness fights opponents largely based on his journey in EarthBound in reverse from Magicant to Onett.
| Round | Opponent | Stage | Music | Notes |
|---|---|---|---|---|
| 1 | Magicant | Magicant (for 3DS / Wii U) | The opponent has his blue alternate costume equipped, referencing Ness' younger self that he encounters in Magicant. If the player is using the blue alternate costume, | |
| 2 | New Pork City | You Call This a Utopia?! | ||
| 3 | Fourside | Fourside | A reference to the Sentry Robots fought in the Monotoli Building. | |
| 4 | Gerudo Valley | Bein' Friends | A reference to Dusty Dunes Desert. | |
| 5 | Luigi's Mansion | Unfounded Revenge / Smashing Song of Praise | A reference to the zombies fought in Threed. When used, the only Assist Trophy summoned will be Jeff. | |
| 6 | Onett | Onett Theme / Winters Theme | A reference to the Sharks and the dogs fought in Onett. When used, the only Assist Trophy summoned will be Starman. | |
| Bonus Stage | ||||
| Final | Master Hand | Final Destination | Master Hand (Less than 7.0 intensity) Master Hand / Crazy Hand (7.0 or higher intensity) |
Crazy Hand teams up with Master Hand on Intensity 7.0 or higher. |
Note: Every stage plays a track from the EarthBound universe, no matter what universe the stage originates from.
Credits roll after completing Classic Mode. Completing it as Ness has Smiles and Tears accompany the credits.
Role in World of Light

Although Ness has been absent from the opening cutscene of World of Light, he was vaporized and later placed under Galeem's imprisonment when the latter unleashed his beams of light to engulf the world and the universe, along with the rest of the fighters (minus Kirby).
Ness can be found in the pink clouds reminiscent of Magicant, and the player needs to defeat the Flying Man spirit in order to access his fighter battle and awaken him.
Later, the fighters prepare their final stand against Galeem and Dharkon, including Ness among them.
Fighter Battle
| No. | Image | Name | Type | Power | Stage | Music |
|---|---|---|---|---|---|---|
| 10 | |
Ness | 7,500 | Magicant (Ω form) | Magicant (for 3DS / Wii U) |
Spirit
Ness' fighter spirit can be obtained by completing Classic Mode. It is also available periodically for purchase in the shop for 300 Gold, but only after Ness has been unlocked. Unlocking Ness in World of Light allows the player to preview the spirit below in the Spirit List under the name "???". As a fighter spirit, it cannot be used in Spirit Battles and is purely aesthetic. His fighter spirit has an alternate version that replaces it with his artwork in Ultimate.

563. Ness

In Spirit Battles
As the main opponent
| Spirit | Battle parameters | Inspiration | |||||||||
|---|---|---|---|---|---|---|---|---|---|---|---|
| No. | Image | Name | Series | Enemy Fighter(s) | Type | Power | Stage | Rules | Conditions | Music | Character |
| 307 |  |
Slugger & Green Glove | Yoshi Series | •Ness •Lucas |
1,500 | Yoshi's Island | •Item: Beastball | •The enemy starts the battle with a Home-Run Bat | Obstacle Course - Yoshi's Island | Slugger | |
| 565 | Ninten | EarthBound Series | •Ness Team |
13,700 | Magicant (hazards off) | N/A | •The enemy's PSI attacks have increased power •Stamina battle •The enemy's FS Meter charges quickly |
Bein' Friends | |||
| 571 | Starman | EarthBound Series | •Metal Ness |
4,200 | Lylat Cruise | •Assist Trophy Enemies (Starman) •Item: Stars |
•Stamina battle •Hostile assist trophies will appear •The enemy is metal |
Unfounded Revenge / Smashing Song of Praise | |||
| 579 |  |
Ramblin' Evil Mushroom | EarthBound Series | •Ness |
1,600 | Distant Planet | •Item: Ramblin' Evil Mushroom | •The enemy starts the battle with a Ramblin' Evil Mushroom | Humoresque of a Little Dog | ||
| 1,087 |  |
Nico Fire Nico Flame |
StreetPass Mii Plaza Series | •Ness •Fox •Sonic |
1,500 | Big Blue | •Uncontrollable Speed | •All fighters move faster and can't stop quickly | Wii Sports Resort | ||
| 1,116 | Pitcher & Batter | Baseball | •Ness •Lucas |
1,700 | Pokémon Stadium 2 (hazards off) | •Item Tidal Wave •Item: Sports |
•The enemy favors side smash attacks •The enemy starts the battle with a Home-Run Bat •Certain items will appear in large numbers |
Baseball (Training) | Batter | ||
| 1,466 |  |
Sophia | Persona Series | •Ness •Metal R.O.B. |
9,500 | New Pork City (Battlefield form) | N/A | •Defeat the main fighter to win •The enemy is metal |
Light Plane (Vocal Mix) (for 3DS / Wii U) | ||
| Mementos (Battlefield form)[SB 1] | Last Surprise[SB 1] | ||||||||||
| 1,519 |  |
Power Pro-Kun, Aoi Hayakawa, & Mamoru Ikari | eBASEBALL: POWER PROS | •Ness •Toon Link •Villager |
9,600 | Pokémon Stadium 2 (hazards off) | •Item: Beastball | •The enemy starts the battle with a Home-Run Bat | Baseball (Training) | Power Pro-Kun | |
As a minion
| Spirit | Battle parameters | Inspiration | |||||||||
|---|---|---|---|---|---|---|---|---|---|---|---|
| No. | Image | Name | Series | Enemy Fighter(s) | Type | Power | Stage | Rules | Conditions | Music | Character |
| 566 | Ana | EarthBound Series | •Villager •Ness |
9,200 | Magicant (hazards off) | N/A | •Stamina battle •The enemy heals over time |
Pollyanna (I Believe in You) | Ninten | ||
| 570 |  |
Flying Man | EarthBound Series | •Mii Brawler Team •Ness |
9,100 | Magicant (hazards off) | N/A | •Defeat the main fighter to win •Stamina battle |
Magicant | Ness | |
| 572 | Paula | EarthBound Series | •Villager •Ness |
13,300 | Onett | •Sudden Final Smash | •The enemy will suddenly have a Final Smash •The enemy's PSI attacks have increased power •Stamina battle |
Smiles and Tears | Ness | ||
| 576 | Ness's Father | EarthBound Series | •Clear Snake •Ness |
13,500 | Onett | N/A | •Defeat the main fighter to win •The enemy is invisible |
Humoresque of a Little Dog | Ness | ||
| 1,156 | Girl from Hajimari no Mori | Hajimari no Mori | •Villager •Ness |
2,300 | Duck Hunt (Battlefield form) | •Hazard: Fog | •The stage is covered in fog •The enemy favors down specials |
Yūyūki Medley | Protagonist of Hajimari no Mori | ||
Alternate costumes

| |||||||

|

|

|

|

|

|

|

|
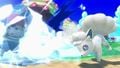
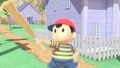
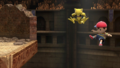
Gallery
Ness's fighter card.
Ness's unlock notice.
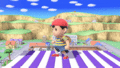
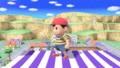
Ness idling on the Bridge of Eldin.
Performing his up smash on Kalos Pokémon League.

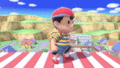
Performing PK Flash on Frigate Orpheon.
Dashing in Smashville.
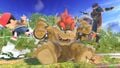
Dodging Bowser's Bowser Bomb with Ike on Gaur Plain.
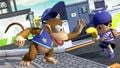
Diddy Kong trying to steal Ness' banana on Moray Towers.
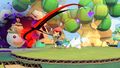
Ness striking Bowser Jr. with Death's Scythe on Yoshi's Story.
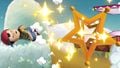
Expelled by a Super Launch Star on Yoshi's Island.
Frozen by Alolan Vulpix on Tortimer Island.
Using his side taunt in Onett.
Ness being teleported away by Abra on Arena Ferox.


Fighter Showcase Video
Trivia
- Ness was the only one of the four original unlockable characters from Super Smash Bros. 64 to be playable in the E3 demo.
- Ness is also the only original unlockable character to appear on the box artwork. However, Captain Falcon is featured in the full-group artwork.
- Although most characters from the original Super Smash Bros. are numbered by their debut game's original release date, Captain Falcon and Ness can be considered an exception; F-Zero was originally released in 1990, four years before EarthBound. Additionally, in Super Smash Bros., Captain Falcon will typically be fought first if the unlock conditions for both him and Ness are met simultaneously. However, it is also possible that Ness is numbered per the 1989 release of Mother, which is also how he is ordered in Brawl's All-Star Mode.
- Ultimate marks the first time since Super Smash Bros. Melee where Ness' artwork depicts him holding his baseball bat.
- Ultimate is the first Smash game in which Ness has a greater number of aerials that emit PSI than Lucas, being 5 to 4 as opposed to 2 and 3 to 3 in Brawl and Smash 4, respectively.
- Ness being unlocked by clearing Classic Mode as Kirby could be a reference to Ness being unlocked on Dream Land in the original Super Smash Bros., that both are voiced by Makiko Ōmoto, or that both are from games developed by HAL Laboratory, Inc.
- As of Ultimate's release, Ness has had more different victory themes than any other character, receiving new ones in Brawl and Ultimate, in addition to his original one from the first two games.
- Ness is one of the only two unlockable characters in Ultimate who can be the first character unlocked in more than one method, as he is the first character to be unlocked through VS. Matches and the first unlock in Kirby's Classic Mode tree. The other character who shares this distinction is Villager.
- Despite the fact that Ness' PSI Magnet can absorb Bob-omb explosions, Ness cannot absorb explosions from the Bob-ombs that drop from the sky during Sudden Death.
|
| |
|---|---|
| Fighters | Ness (SSB · SSBM · SSBB · SSB4 · SSBU) · Lucas (SSBB · SSB4 · SSBU) |
| Assist Trophies | Jeff · Starman |
| Bosses | Porky Statue · Porky |
| Stages | Onett · Fourside · New Pork City · Magicant |
| Items | Mr. Saturn · Franklin Badge · Ramblin' Evil Mushroom |
| Enemies | Devil Car · Starman |
| Other | Boney · Flying Man · Kumatora · Paula · Poo · Rope Snake · Ultimate Chimera |
| Trophies, Stickers and Spirits | Trophies (SSBM · SSBB · SSB4) · Stickers · Spirits |
| Music | Brawl · SSB4 · Ultimate |
| Masterpiece | EarthBound |
- ^ First Official SSBU Tier List., data located in the "Regional Differences" section