Ness (SSBU): Difference between revisions
(→Fighter Battle: Added Spirit Type Icon) Tag: Mobile edit |
AnnieCat07 (talk | contribs) Tag: Mobile edit |
||
| Line 486: | Line 486: | ||
==Gallery== | ==Gallery== | ||
<gallery> | <gallery> | ||
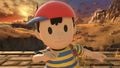
Ness SSBU Banner.png|Ness' appearance on the panoramic artwork. | |||
SSBU Ness Number.png|Ness' fighter card. | SSBU Ness Number.png|Ness' fighter card. | ||
NessJoinsTheBattleSSBU.jpg|Ness' unlock notice. | NessJoinsTheBattleSSBU.jpg|Ness' unlock notice. | ||
Revision as of 03:52, February 17, 2020
| Ness in Super Smash Bros. Ultimate | |
|---|---|
 
| |
| Universe | EarthBound |
| Other playable appearances | in SSB in Melee in Brawl in SSB4 |
| Availability | Unlockable |
| Final Smash | PK Starstorm |
| “ | Ness has a variety of moves, from long-range attacks using psychic powers known as "PSI," to short-range attacks with his bat and yo-yo. Ness can also unleash PK Thunder, a guided attack that can launch him like a rocket or help him recover! | ” |
| —Super Smash Blog, Super Smash Bros. Ultimate Official Site | ||
Ness (ネス, Ness) is a playable character in Super Smash Bros. Ultimate. He was revealed along with all other previous veterans on June 12, 2018 and is classified as Fighter #10.
Makiko Ōmoto's portrayal of Ness from Super Smash Bros. 4 were repurposed for Ultimate. This makes Ultimate the only installment where Ness does not receive any new voice clips.
How to unlock
Complete one of the following:
- Play VS. matches, with Ness being the 1st character to be unlocked.
- Clear Classic Mode with Kirby or any character in his unlock tree, being the 1st character unlocked.
- Have Ness join the player's party in World of Light.
With the exception of the third method, Ness must then be defeated on Onett.
Attributes
Ness represents a unique blend of character archetypes. Although he uses several projectiles, Ness does not excel at camping and functions best at shorter ranges, where he can pressure opponents with a mixture of projectiles and disjointed aerials. Ness' overall mobility is also somewhat mixed. While his walking speed, initial dash, and dash speed are all below average, his aerial movement is quite strong thanks to his solid air speed, above-average jump height, and excellent air acceleration. Moreover, his low gravity and low falling speed allow him to perform multiple aerials in succession. Despite his small stature, Ness' weight is average.
Ness, while not a traditional zoner, enjoys a useful set of projectiles: PK Flash, PK Fire, and PK Thunder. PK Flash is a relatively slow-moving projectile that can be charged. Because it has low ending lag and no longer sends Ness into helplessness, PK Flash can be used to knock opponents away from the ledge while Ness is being edgeguarded or to combo into moves like up air. It also freezes opponents in place briefly when it connects, allowing for an immediate grab or other fast option if Ness is right next to the opponent. PK Fire is infamous for being spammable and can help set up combos, trap opponents for a grab or aerial, or simply rack up damage. When used in the air, PK Fire has a diagonal trajectory and decreased landing lag. PK Thunder is arguably Ness' most useful special, as it can be used to gimp opponents offstage, juggle them repeatedly, or even KO them into the upper blast zone. Ness can also send the tail into himself, launching him forward for an extremely powerful PK Thunder 2 attack that can be used to recover or take a very early stock from an unsuspecting opponent. Ness' down special, PSI Magnet, creates a psychic field around Ness that absorbs energy-based moves and heals Ness based on the strength of the attack. This is particularly effective against characters such as Pikachu, Pichu, and Snake, who rely on energy-based projectiles in neutral. PSI Magnet also has great offensive utility in Ultimate, as it now features an active hitbox with set knockback. The aerial hitbox confirms into most of Ness' normal aerials, while the grounded hitbox places opponents in perfect range for a sweetspotted Ness forward smash, making it practical in jab lock situations. PSI Magnet also alters the momentum of Ness' double jump, a form of double-jump cancelling that makes for a unique aerial burst option and a stylish way to start or extend combos.
Ness' strength is his amazing air game. All of his aerials are relatively fast, have disjointed hitboxes, combo into each other, can KO at high percents, and autocancel from a short hop. His neutral aerial comes out on frame 5 and is very useful as a combo-breaker and out-of-shield option. It also sets up jab lock and tech chase situations at middle percents and has decent knockback at high percents, making it a viable edgeguarding and KO option. His forward aerial has a large disjoint and is quite active, making it excellent for combos, edgeguarding, and approaching. Ness' new multi-hit up aerial is strong and great for juggling, and its drag-down properties allow Ness to set up combos and KOs. Ness' back aerial is very strong when sweetspotted, and his down aerial is a slow-but-powerful meteor smash that can edgeguard or start vertical combos.
Ness' grab and throw game is also outstanding and among the best in the cast. His grab is relatively fast, and all of his throws have useful applications. Ness' down throw is a useful combo starter and will often lead into multiple forward airs, and his forward throw has very high base knockback, allowing Ness to set up edgeguarding situations or even KO opponents at very early percents on some stages. Ness' up throw, while not as practical, is a solid mix-up that can set up juggling with PK Thunder or PK Flash. Most notorious, however, is Ness' back throw, which remains the most consistent kill throw in the game.
Ness' ground game, while limited, also has strengths. His forward tilt and dash attack are fast and strong enough to KO at high percents, and the latter has improved range. His up tilt is a good combo starter at low percents and can even KO at higher percents. His down tilt, which is very fast and highly spammable, can be used to two-frame, jab lock, confirm into a grab, or deal immense damage if the opponent is trapped at the ledge. His forward smash (baseball bat) deals high damage and is among the strongest forward smashes in the game if sweetspotted with the tip of the bat. Ness' up and down smashes (yo-yo) have significantly improved knockback, deal damage while charging, and can hang below the stage, making them some of the best and easiest-to-use edgeguarding tools in the game.
Ness' strengths are balanced by notable weaknesses. Grounded PK Fire does good damage, but is punishable on shield and easily escapable with good DI, making it generally less useful than its aerial counterpart. While Ness' hitboxes are large and powerful, he can still be outspaced or stuffed out by characters with even larger disjoints, especially swordfighters such as Shulk, Marth, and Lucina. Moreover, Ness' below-average run and air speed, as well as his lack of a quick, long-ranged projectile, render him slightly vulnerable to camping. This is especially true if Ness' opponent utilizes projectiles that are not energy-based, such as Link's arrows and boomerang. Ness is also vulnerable to juggling given his floatiness and lack of reliable landing options, as well as the removal of multiple air dodges. Powerful, disjointed aerials such as Palutena's and Ike's up aerials are particularly effective against Ness. However, Ness' most glaring weakness remains his recovery. Despite traveling a good distance, his PK Thunder 2 is extraordinarily exploitable: if the attack makes contact with an opponent or projectile mid-flight, its distance will be halved, often resulting in a gimp. Furthermore, opponents with good timing can hit Ness with a powerful attack or fall into PK Thunder 1 before he can launch himself. Because of its enormous knockback, PK Thunder 2 is also susceptible to many counters, and opponents who time their counter correctly will almost always kill Ness. Conversely, opponents who mistime an edgeguard against Ness will often die for it.
Overall, Ness is an offense-oriented character who excels in pressuring, edgeguarding, ledgetrapping, juggling, comboing, and KOing, but suffers from limited range, difficulty landing, and a predictable recovery. As a result, he has a somewhat polarizing matchup spread, with even or favorable matchups against some top-tier characters, most notably Pikachu, Snake, Fox, and Joker, and poor matchups against others, particularly Lucina and Shulk.
Changes from Super Smash Bros. 4
Ness has been greatly buffed in his transition to Ultimate. His forward tilt is now a viable KO option, and his dash attack has increased knockback and range. His up tilt has decreased ending lag and is useful for starting combos, while his down tilt racks up damage much more effectively, especially near the ledge. One of Ness's most significant buffs were to his yo-yo smash attacks (up smash and down smash), which not only regained their charging hitboxes, but now can hang below the ledge to set up easy edgeguards against most characters. His up smash in particular also has dramatically improved knockback, making it a viable KO option. Many of Ness's other tools are more effective as well: his down aerial has more range, can once again be autocanceled from a short hop, and has a much stronger meteor smash effect; his new up aerial has drag-down properties, enabling him to set up combos. Ness has also recieved buffs to his special moves: his PK Flash charges much more quickly and no longer causes helplessness; his PK Fire has reduced lag (especially landing lag, making it far more useful when used in the air); his PK Thunder deals more damage; and his PSI Magnet now has a hitbox that helps Ness extend combos or set up kills.
Ness has also recieved significant indirect buffs from the universal changes in Ultimate, especially from the new air dodge mechanics and general buffs to aerial attacks. The return of directional air dodges benefit Ness the most out of the cast, as Ness's directional air dodge travels further than that of any character (a trait he shares with Lucas), providing him with a reliable recovery option aside from the notoriously exploitable PK Thunder 2. The removal of multiple air dodges also enables Ness to pressure opponents in the air with PK Thunder more consistently. Furthermore, Ness's already great aerial game is even better, as his forward, down, and up aerials deal more damage, and all of his aerials have drastically less landing lag, even compared to other characters. Most notable in this regard are his neutral and down aerials, which have less than half their previous amount of landing lag.
However, Ness did receive some nerfs. His new up aerial has less horizontal range, decreased KO power, and requires landing all hits (which start from behind and move in an arc above Ness) to deal considerable damage, hindering Ness's ability to juggle opponents. His grab game has been toned down, as his slower, more standard pummel cannot rack up damage as effectively, and his down throw has more ending lag, hindering its combo potential past low percents. Lastly, the power of his yo-yo smash attacks now only increases by half as much when charged, and PK Flash, in exchange for its much faster charge, is significantly weaker when fully charged.
All in all, the buffs to Ness's neutral game, punish game, edgeguarding, and recovery far outweigh the few nerfs he received. Although the weaknesses he had in previous games still affect him, such as lack of range and exploitable recovery (albiet to a lesser extent), Ultimate's incarnation is widely aconsidered his best incarnation in the series. His tournament representation in Ultimate's early metagame has been generally stronger than in Smash 4, with several players such as FOW, BestNess, Gackt, and Awestin achieving strong results with the character. As such, Ness is commonly considered to be an upper-mid or high-tier character.
Aesthetics
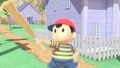
 Due to the aesthetic used in Ultimate, Ness' model features a more subdued color scheme, now more closely resembles his sprite in EarthBound. The detailing on his clothes and weapons are more prominent, such as the stitching on his socks.
- Ness faces the foreground at an angle, instead of facing directly forward. In addition, he always faces the screen regardless of which direction he turns, causing all of his animations to be mirrored while altering some, such as his dash animation.
- Ness' idle animation has been altered: he keeps his arms to his side rather than swinging them around.
- Ness, like many other characters, has been made much more expressive. He is much angrier when attacking, such as using his tilts. His eyes bulge and grow more circular when he is hit or frozen. His eyebrows are much more prominent when attacking or stunned.
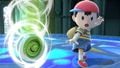
- Ness' PSI graphic effects have been changed: both rings are thinner and are colored magenta instead of just the smaller circle, closely resembling the appearance of Hypnosis in Mother 3.
- Air dodging animation has changed.
- Ness' victory poses have been slightly altered:
- His left-inputted victory pose now shows Ness with a more astonished expression.
- His up-inputted victory pose now shows Ness skipping into the victory area instead of hopping in place.
- His right-inputted victory pose now has Ness swing his bat only once instead of multiple times, in a similar manner to his forward smash.
- Ness has a new victory theme; it is an arrangement of the last two out of the Eight Melodies from EarthBound Beginnings.
Attributes
 Like all characters, Ness' jumpsquat animation takes 3 frames to complete (down from 5).
- Ness runs faster (1.46265 → 1.609).
- Ness' initial dash is significantly faster (1.3 → 1.826).
- Ness walks slightly faster (0.8635 → 0.907).
- Ness' air speed is faster (0.9588 → 1.007).
- Ness' traction has been significantly increased (0.0546 → 0.131), going from average to being tied for the fifth-highest traction in the game.
- Ness' jumping height has been increased (34.47 → 34.48 (full hop), 34.47 → 45.65 (double hop), 68.95 → 80.13 (maximum)).
- Forward roll has less ending lag (FAF 31 → 30).
 Forward roll grants less intangibility (frames 4-17 → 4-15).
- Back roll has more startup with less intangibility (frames 4-17 → 5-16), and more ending lag (FAF 31 → 35).
- Spot dodge has less ending lag (FAF 28 → 26).
- Spot dodge grants less intangibility (frames 3-18 → 3-17).
- Air dodge has significantly more ending lag (FAF 34 → 60), being one of the slowest.
- Air dodge grants more intangibility (frames 3-28 → 3-30).
- The reintroduction of directional air dodges benefits Ness more than the rest of the cast, as his directional air dodge grants more distance compared to other characters' (a trait he shares with Lucas), and it provides him with a reliable recovery mixup to avoid leaving himself vulnerable by using PK Thunder.
Ground attacks
- Neutral attack:
- The first hit drags opponents towards Ness with the farthest hitboxes (361° → 180°), and the second hit uses a different angle throughout (70° → 361°). Both hits also have altered knockback (8 base/50 scaling → 30/20 base/25/15 scaling (hit 1), 30/20/25/20 (hit 2)). This allows for the full neutral attack to connect more reliably.
- Consecutive uses of the first hit are faster (9 frames → 7).
- The first hit transitions faster into the second hit (frame 7 → 5), which transitions faster into the third hit (frame 7 → 6).
- All hits have a higher hitlag multiplier (1× → 1.7× (hit 1), 1.2× (hit 2), 2× (hit 3)), giving opponents more time to SDI each hit and DI the last hit.
- The second hit deals less damage (2% → 1.5%).
- The third hit has a shorter hitbox-duration (frames 6-9 → 6-7).
- Forward tilt:
- Forward tilt has drastically increased base knockback (12 → 35), turning it into a viable KO option starting at around 155% from the center of Final Destination.
- It deals more damage when not angled (9% → 10%), no longer dealing less damage than the angled versions, and thus making its KO ability consistent.
- The hitboxes have been moved slightly inwards (X offset: 0.7u/2.9u → 0.6u/2.7u), marginally reducing its range.
- Up tilt:
- Up tilt has less startup, with the sweetspot having a longer duration (frames 7-8 → 5-6 (sourspot)/5-8 (sweetspot)), and less ending lag (FAF 32 → 29). This improves its combo potential and allows it to function more effectively as an anti-air.
- It deals more damage (7% → 9% (spark), 5% → 7% (body)) with knockback not fully compensated (42 base/126 scaling → 46/113), improving its KO potential, without worsening its combo ability due to its reduced lag and Ness' faster jumpsquat.
- Down tilt:
- Down tilt deals more damage (4%/2% → 4.5%/3%).
- It can be interrupted earlier by actions besides another down tilt (FAF 14 → 12).
- Its base knockback and knockback scaling have been reversed (3/6 base/20 scaling → 20/3). This increases its safety on hit at low percents so that opponents in range can no longer shield in-between hits, improving its reliability for racking up damage.
- The increased shieldstun for tilts allows down tilt to repeatedly hit and keep opponents locked into their shields until they get out of the move's range or are shield stabbed, improving its offensive utility.
- It no longer has a bonus trip chance, removing its guaranteed setups.
- Dash attack:
- Dash attack's second hit extends backwards (Z offset: 16u → 13u-16u), improving its ability to hit opponents next to Ness.
- The last hit deals more damage (4% → 6%) and knockback (80 base/104 scaling → 85/113), significantly improving its KO potential, despite launching at a lower angle (80° → 70°).
- Yo-yo (up smash and down smash):
- Up smash and down smash once again have their charging hitboxes from Melee and Brawl, hitting opponents repeatedly for 1% damage per hit. Unlike in those games, however, charging these moves still increases their damage, making the charging hitboxes far more useful. The yo-yo can also hang below the ledge, improving Ness' edgeguarding abilities significantly.
- They have a lower maximum damage multiplier (1.4× → 1.2×) and cannot be held as long as most other smash attacks.
- The text on the yo-yo reads "SUPER NINTENDO 2018 MOTHER".
- Up smash:
- Up smash has less ending lag (FAF 56 → 53).
- It no longer possesses an early hit that deals 9%, allowing it to KO more consistently.
- It has considerably more knockback scaling (60 → 79), significantly improving its KO potential.
- It has more startup (frame 6 → 10), no longer hitting behind Ness during its first active frames.
- Down smash:
- Down smash deals one hit less at both sides, increasing its startup (frame 10 → 12) and reducing its total damage (12% → 11%).
Aerial attacks
- All aerials have much less landing lag (18 frames → 8 (neutral), 20 → 12 (forward), 17 → 10 (back), 14 → 8 (up), 28 → 12 (down)).
- Neutral aerial:
- Ness emits PSI from his hands when using the move. It also uses a magic effect and SFX, rather than a neutral effect and a punch SFX.
- Forward aerial:
- Forward aerial deals more damage (1% → 1.5% (hits 1-3), 4% → 5.5% (hit 4); 7% → 10% (total)), with knockback scaling adjusted on the final hit (150 → 128), resulting in more knockback at high percents, improving its KO potential.
- Back aerial:
- Back aerial's outer-hitbox has been moved outward and down (X offset: 2.7u → 3.7u, Y offset: 0u → 2u), improving its horizontal range and better matching the inner-hitbox in height.
- Up aerial:
- Ness has a new up aerial: he waves his hand in an overhead arc while emitting PSI from his index finger. It is a multi-hit move, dealing up to five hits.
- Up aerial has a longer hitbox duration (frames 8-11 → 8-14 (hits 1-4), 15-16 (hit 5)), and more disjointed vertical range above Ness.
- It has less ending lag (FAF 42 → 34). Coupled with its longer duration and multi-hit nature (guaranteeing opponents are launched during the latest active frames), this allows it to combo into itself in the air from low to mid percents.
- The first four hits use the autolink angle (366°). This allows Ness to drag opponents down to the ground with the move and combo into several others, which is further complemented by its lower landing lag.
- It deals more total damage (13% → 2.5% (hits 1-4), 5% (hit 5); 15% total), with knockback adjusted on the last hit (13 base/109 scaling → 40/180). The move deals more knockback at low to mid percents, but deals less knockback at very high percents (≈110+%), overall KOing earlier.
- If not all hits connect, the move may do less damage than it used to.
- Up aerial has drastically decreased horizontal range, hindering its use for landing and approaching directly.
- It auto-cancels later (frame 27 → 34), matching its interruptibility.
- The last hit launches at a more horizontal angle (85° → 73°). While this allows it to combo better into other moves at low percents, such as neutral and forward aerial, it greatly hinders its KO potential, as it is vulnerable to LSI.
- Down aerial:
- Down aerial has less startup (frame 20 → 18) and ending lag (FAF 60 → 53).
- It deals more damage (12% → 14% (clean), 10% → 12% (late)) and knockback (20 base/70 scaling → 37/74 (clean), 70 scaling → 74 (late)), making it a significantly stronger meteor smash and no longer one of the weakest.
- It has a longer duration (frames 20-21 (clean)/22-25 (late) → 18-20/21-24).
- It auto-cancels earlier (frame 50 → 39), allowing Ness to auto-cancel it in a short hop like in earlier Smash titles.
- The clean hit has a much larger hitbox (3.9u → 6u), making it easier to land.
- The removal of teching for grounded meteor smashes, coupled with down aerial's immensely decreased landing lag and better auto-cancel window, significantly improve its combo potential onstage.
- Down aerial uses a kick SFX instead of a magic SFX on hit.
- Its animation was reversed to make Ness face the screen. The landing animation was also tweaked.
Throws and other attacks
- Ness grabs and pummels his opponents using PSI, with accompanying sound effects.
- Forward, back and up throws are no longer weight-dependent.
- Grabs:
- Standing grab has increased ending lag (FAF 35 → 38).
- Dash grab has more startup (frame 8 → 9) and ending lag (FAF 43 → 46), and slightly less horizontal range (Z2 offset: 10u → 9.8u).
- Pummel:
- Pummel deals slightly more damage (1.2% → 1.3%).
- It has less startup (frame 3 → 1) and ending lag (FAF 10 → 7), but deals much more hitlag (4 frames → 14), drastically increasing its effective duration. This hinders its damage-racking ability, no longer being one of the fastest pummels in the game.
- It uses a magic effect, rather than a neutral effect.
- Back throw:
- Back throw has an altered animation. Due to this new animation, Ness releases the opponent closer to himself, slightly reducing its KO potential.
- Up throw:
- Up throw deals more damage (10% → 12%) with no compensation on knockback, allowing it to KO middleweights at around 180%, though this is rarely practical.
- Down throw:
- Down throw's first three hits have a lower hitlag multiplier (1× → 0.5×), allowing it to execute faster.
- Ness launches the opponent from it earlier (frame 30 → 27), and it has slightly increased ending lag (FAF 50 → 51), reducing its combo potential.
- While the move's total damage is unchanged, it deals four hits before the throw instead of five, which have redistributed timings (frames 10/14/18/22/26 → 6/10/14/27) and damage values (0.6% (hits 1-5) → 0.5% (hits 1-3), 1.5% (hit 4)).
- Edge attack:
- Edge attack deals more damage (7% → 9%).
Special moves
- PK Flash:
- PK Flash has less startup (frame 44 → 40), travels faster, and reaches its full charge much quicker (frame 150 → 117).
- It has less ending lag (uncharged: FAF 70 → 62).
- It can travel through soft and semisoft platforms. It also no longer dissipates immediately upon making contact with hard platforms, allowing its full charge to be unleashed on the ground by simply holding the button, much like in Melee.
- The explosion has a longer hitbox duration (1 → 5 frames) and is larger (size multiplier: 0.9× uncharged/1.43× fully charged → 1.05×/1.8×).
- It no longer causes helplessness when performed in the air, allowing Ness to hit opponents near edges from offstage without self-destructing.
- It has much more base knockback (10 → 50), with knockback scaling barely compensated (70 → 65), strengthening it at lower charge levels. Combined with its lower ending lag, and the increased hitlag in Ultimate, which effectively lengthens the move's frame advantage on hit due to its projectile properties, it can also start combos at low to mid percents if the opponent is hit close enough to Ness.
- It deals significantly less damage when fully charged (37% → 27%), hindering its KO potential despite its increased knockback values.
- PK Flash has a more aquamarine color and emits its respective EarthBound graphic (specifically the "α" form) upon detonating.
- PK Fire:
- PK Fire has less startup (frame 21 → 18), with its total duration reduced as well (FAF 59 → 56).
- It has significantly less landing lag (30 frames → 12), improving the aerial version's zoning ability.
- The spark is bigger and deals more damage on its initial hit (4% → 6%).
- Due to the universal nerfs to roll-intangibility frames, PK Fire can catch rolls more effectively.
- The flame pillar has a faster rehit rate (11 → 7), but no longer has a hitbox that deals more damage (2%/1% → 1%). As a result, it cannot deal as much damage, but it is more consistent overall.
- PK Fire pushes Ness back slightly, similar to Lucas's PK Fire.
- Ness uses one hand to fire the projectile while emitting a red spark from his index finger. Diamond-shaped PSI energy also rises up within the fire pillar, resembling PK Fire γ's graphics from EarthBound.
- PK Thunder:
- PK Thunder deals more damage (8% → 11%) and has increased knockback scaling (50 → 55), allowing it to KO near the top blast line at high percents.
- The new air dodging mechanics significantly improve its edgeguarding ability, allowing Ness to pressure opponents more reliably and force them to spend their air dodge, leaving them open to punishes.
- PK Thunder emits yellow hexagon-shaped PSI energy, which more closely resembles its appearance in EarthBound.
- It has an angle indicator when the ball of lighting moves close to Ness. While this allows for the player to more accurately determine the trajectory Ness will travel during PK Thunder 2, it also makes it more predictable to opponents.
- PK Thunder 2:
- PK Thunder 2 travels further.
- In addition to its full intangibility during frames 1-9, it grants intangibility on Ness' head during frames 10-32, improving its safety for recovery.
- The window for using PK Thunder again after bouncing off a wall is much bigger. In addition, Ness enters the rebound animation when bouncing against the ground, instead of being knocked down, allowing him to use PK Thunder a second time.
- When hit by PK Thunder 2, the opponent is always launched in the horizontal direction Ness is facing. This makes KOing at very low percents much less likely if the opponent gets hit behind Ness.
- The clean hit triggers Special Zoom upon hitting an opponent.
- PSI Magnet:
- PSI Magnet begins absorbing projectiles faster (frame 10 → 7), and has less ending lag (FAF 30 → 25).
- It no longer halts Ness' horizontal momentum in the air, functioning as it did in Brawl, improving Ness' movement options.
- It has gained a hitbox close to Ness from frame 7 onward, which deals 4% damage with weak set knockback, and can rehit opponents every 10 frames. This grants the move offensive utility, and alongside the changes above, allows it to be used in combos. The lingering hitbox can also destroy weak projectiles, improving its safety when used for absorption.
- PSI Magnet emits pink diamond-shaped PSI from the center, more closely resembles its appearance in EarthBound. It also features a visible suction effect around the magnet.
- PK Starstorm:
- PK Starstorm summons slower meteors that spread out over the stage, similar to its Brawl iteration, but can still be aimed horizontally like the Smash 4 iteration. Paula and Poo accompany Ness during the move. PK Starstorm particle effects from EarthBound accompany each meteor, and the Sound Stone's background pattern appears in the stage's background.
- Ness no longer sinks downward while channeling PK Starstorm while airborne. In addition, if this Final Smash was initiated while in the air, Ness is propelled upward a moderate amount at the conclusion. This can assist in recovery.
Update History
Ness has recieved a mix of buffs and nerfs. Update 2.0.0, increased autocancel frames for up aerial matching the ending lag of the move and his down aerial deals more damage while keeping the knockback the same. Update 3.0.0, nerfed yo-yo charging smash attacks which was infamous for breaking shields easily. He also received buffs such as PK Flash having a larger hitbox, and physics changes to the yo-yo that improved its potential as an edge guarding tool. Update 3.1.0 reverted the yo-yo physics back to its pre-patch state, and his neutral attack connects more reliably.
- Up aerial autocancels earlier (frame 45 → 34), matching the move's interruptibility.
- Down aerial deals more damage (12%/10% → 14%/12%) with its knockback scaling compensated (84/86 (clean/late) → 74).
- Up smash and down smash are automatically unleashed from charging state earlier (charge hold: 60 frames → 30) and hit less often while charging (rehit rate: 3 → 4).
- PK Flash has more range ( Size multiplier: 0.9×-1.7× → 1.05×-1.8×).
- The physics of Ness' yo-yo string are stiffer. This improves the consistency of up smash and down smash at the ledge.
- Neutral attack 2 has more range and the hitbox is moved forward, causing it to connect into neutral attack 3 more reliably.
- The physics of Ness' yo-yo string have been reverted back to their pre-3.0.0 properties.
Moveset
- Ness possesses a special jump. When jumping in midair, Ness will ascend in a floatier, curved trajectory. The upward momentum of Ness' double jump can be affected through various actions if timed correctly, such as aerial attacks, air dodges or special moves. This trait is shared with Mewtwo and Lucas.
For a gallery of Ness' hitboxes, see here.
Note: All numbers are listed as base damage, without the 1v1 multiplier.
| Name | Damage | Description | ||
|---|---|---|---|---|
| Neutral attack | 2% | Two punches followed by a front kick. The first and second hits can lock. | ||
| 1.5% | ||||
| 4% | ||||
| Forward tilt | 10% | A roundhouse kick that can be angled. Surprisingly good power, KOing at around 120% at the ledge. | ||
| Up tilt | 7% (spark), 5% (body) | Jumps and attacks with an upward double palm thrust that produces a PSI spark from his hands. Has a sourspot located on his body that deals 5%. A decent anti-air and juggling tool. | ||
| Down tilt | 4.5% (foot), 3% (toes) | A swift shin kick. Extremely spammable and can be used to lock. Has a sourspot located on the tip of his foot. | ||
| Dash attack | 4% (hit 1), 7% (hit 1 aerial), 2% (hit 2), 4% (hit 3) | A double palm thrust that sends three PSI sparks out in front of him with the third spark knocking the opponent up into the air. The first spark deals more damage to aerial targets. Good to set up juggles and pressuring from afar. Difficult to punish on shield if only the last hit connects. The disjointed hitboxes go very far, giving it impressive range for a dash attack. The first hit is more damaging on opponents in the air. | ||
| Forward smash | Batter Up! | 18% (low), 20% (mid), 22% (tip), 2× damage (reflected projectiles) | Swings his bat. It can reflect incoming projectiles with a high multiplier and is one of the strongest forward smashes in the game, killing most characters around 50% by the ledge. However, its lag is considerable and makes it easy to punish up close. | |
| Up smash | Around the World | 1% (charge), 13% | Sends his yo-yo forward and performs an "around-the-world", hitting first in front then above and behind. It has a hitbox while charging and can hang from the ledge, but can only be held for an additional half of a second instead of two, and has a max charge damage multiplier of 1.2×. | |
| Down smash | Walk the Dog | 1% (charge), 10% | Sends his yo-yo backward and performs the "walk-the-dog" with it, hitting first behind then in front. It has a hitbox while charging and can hang from the ledge, but can only be held for an additional half of a second instead of two, and has a max charge damage multiplier of 1.2×. Might have troubles linking correctly if the opponent is at the furthest point of the back hit. | |
| Neutral aerial | 11% (clean), 7% (late) | Spins diagonally in the air with his arms outstretched, emitting PSI from his hands. Quick, coming out on frame 5 and acts like a sex kick. Rather useful to break combos and as an out-of-shield option. Autocancels from a short hop. It has decent knockback, making it a good edgeguarding and KOing option. | ||
| Forward aerial | 1.5% (hit 1-3), 5.5% (hit 4) | A double palm thrust that generates a stream of PSI sparks from his hands. Comes out on frame 8, making it tied with up aerial for the second fastest out of Ness' aerials. Decently safe on shield if Ness backs away during the attack, and it's useful to start and continue combos. Autocancels from a short hop. Can chain into itself multiple times at low percentages, making it a useful wall-of-pain tool. | ||
| Back aerial | 15% (clean), 8% (late) | A dropkick that produces a PSI spark. Comes out on frame 10. The clean hit is very strong, being his strongest aerial overall. Autocancels from a short hop. | ||
| Up aerial | 2.5% (hits 1-4), 5% (hit 5) | Waves his finger in an arc above his head while generating PSI sparkles, hitting up to 5 times. Autocancels from a short hop. A great combo tool, as its linking hits and last hit's vertical angle combine to make it a great combo extender. It can also KO well near the upper blast line at high percentages since the final hit has extremely high knockback scaling. Overall great power. | ||
| Down aerial | 14% (clean), 12% (late) | Twirls before kicking down into the air, producing a PSI spark. The clean hit can meteor smash, and can be used to start combos on-stage fairly reliably if landed against grounded opponents. Autocancels from a short hop. Ness' slowest aerial, coming out on frame 20. | ||
| Grab | — | Grabs with both hands. A fast grab with a slight amount of ending lag. | ||
| Pummel | 1.3% | Attacks the opponent with a discharge of PSI energy. | ||
| Forward throw | PK Throw | 11% | Psychokinetically swings his opponent in a small circle in front of himself before sending them off forward. Very high base knockback, but incredibly low knockback scaling, which gives it little to no KO potential even after Sudden Death percentages. It is useful for setting up an edgeguard, however, or KO'ing an opponent early on if near the blastzone. | |
| Back throw | Reverse PK Throw | 11% | Psychokinetically swings the opponent over his head before sending them off backward, in a diagonally upwards motion. It is the opposite of his forward throw, possessing very low base knockback but incredibly high knockback scaling, making it one of the strongest back throws in the game, and considered the most versatile KO throw overall, as it can KO much more reliably anywhere onstage at higher percentages than most other back throws at its level of strength like Incineroar's or Dr. Mario's, due to its much higher knockback scaling. | |
| Up throw | 10% | Psychokinetically spins the opponent above his head before sending them up. It leaves the opponent in an unfavorable position where they can be juggled, most commonly by PK Thunder. | ||
| Down throw | 0.5% (hits 1-3), 1.5% (hit 4), 4% (throw) | Throws the opponent onto the ground and scorches them with PK Fire. A strong combo starter, having guaranteed follow-ups into neutral aerial, forward aerial and up aerial. | ||
| Floor attack (front) | 7% | Sweep kicks in front of and behind himself. | ||
| Floor attack (back) | 7% | With one hand planted on the ground, sweeps his leg behind and in front of himself. | ||
| Floor attack (trip) | 5% | Kicks behind and in front of himself with both legs. | ||
| Edge attack | 9% | Flips onto the stage and does a sweep kick. | ||
| Neutral special | PK Flash | 11%-27% | A light blue sphere of light appears above Ness and flies forward in an arc if charged. The arc it travels can be controlled, and the projectile is able to go through soft and semisoft platforms and will not dissipate upon contact with hard platforms.
The longer the special button is held, the stronger the explosion will be. | |
| Side special | PK Fire | 6% (bolt), 1% (fire) | Fires a yellow lightning-bolt shaped projectile, pushing back Ness slightly.
If used on the ground, it travels in a slight downward angle until it vanishes by itself or touches the ground (disappearing into a puff of smoke) or an enemy, making it explode into a quick-hitting pillar of flames. If used in the air, it fires at a downward 45° angle. | |
| Up special | PK Thunder | 11% (PK Thunder), 1% (Thunder's tail), 25% (PK Thunder 2 initial hitbox), 21% (PK Thunder 2 late hitbox) | Creates a fast-moving ball of thunder that can be aimed into opponents to deal damage and launch them in the direction they got hit from, or into Ness to turn him into a very powerful human projectile.
This is referred to as PK Thunder 2. The Rocket portion of the attack has invulnerability from frame 1 to 32 and is constituted of an early and late hit. Making contact with something during PKT2 will shorten the distance traveled, and slamming into a wall allows Ness to perform another PK Thunder if the player is sufficiently quick enough. The tail of the thunder projectile can be used to disrupt opponents recovering. | |
| Down special | PSI Magnet | 4% per hit | Surrounds Ness with a purple energy field, allowing him to absorb energy-based projectiles (such as Mario's Fireball, Fox's Blaster or Samus's Charge Shot) or explosions (including all of Snake's explosives) and heal for 1.6× the damage he would have taken, but only at a maximum of 30% damage per projectile.
It possesses a hitbox on startup and if held, and will also slightly push back opponents on release. Upon absorption, the magnet can be canceled with a jump, roll or spot dodge. Can also be used to stall Ness' vertical momentum slightly in the air. | |
| Final Smash | PK Starstorm | 8% per hit | Paula and Poo join Ness, assisting him in summoning a shower of falling stars to attack his enemies. The comets will rain down over the stage and can be slightly aimed left and right. | |
On-screen appearance
Ness teleports onto the stage with PSI Teleport, ending in an explosion leaving him covered in soot which he then shakes off his body.
Taunts
- Up taunt: Turns toward the screen and nods while saying "Okay." The pose is similar to that of his clay model from EarthBound.
- Side taunt: Swings his bat out in front of him and strikes a pose, similar to how baseball players use it to indicate they are hitting a home run.
- Down taunt: Waves his hand in an S motion while emitting a stream of PSI from his finger.
Ness' up taunt.

Ness' side taunt.
Ness' down taunt.


Idle poses
- Look to his right, then to his left.
- Places his finger to his forehead before pointing it forward.

Ness' first idle pose
Ness' second idle pose


Victory poses
- Left: Walks in then looks around with a surprised expression, before rubbing the back of his head while smiling (his "character chosen" animation in Super Smash Bros., albeit much more subtle).
- Up: Skips into the victory screen, then nods slightly, holding a pose similar to his official clay model, up taunt, and official Brawl render.
- Right: Swings his bat once, then strikes a pose similar to his side taunt.


In competitive play
Upon the release of Ultimate, Ness was considered a low-high or upper-mid tier character at best, roughly on par with his Smash 4 counterpart. Despite his improved recovery and various buffs, Ness was still somewhat hindered by the popularity of swordfighters, who have posed difficult matchups for Ness throughout the Smash series. Furthermore, the loss of the ability to airdodge multiple times before landing and the smaller hitbox of Ness' up air led players to believe that landing would be more challenging for Ness than in Smash 4.
However, Ness' results in the early metagame of Ultimate have been stronger than in Smash 4. The overall mechanics of Ultimate and the changes to Ness' aerials and specials have greatly bolstered Ness' neutral, advantage, recovery, and movement options. In addition, many of Ness' hardest matchups from Smash 4 (most notably Rosalina & Luma, Cloud, and Corrin) were nerfed and are considered far less troublesome.
Top players' viewpoints of Ness remain mixed. Although players such as VoiD and Dabuz still regard Ness merely as an upper-mid tier character, he appears to enjoy even or slightly favorable matchups against some of Ultimate's best characters; ESAM considers Ness the most difficult matchup in the game for Pikachu, and MkLeo has expressed reluctance to play against Ness as Joker. Overall, Ness is a dangerous but somewhat inconsistent character at high level, with his overwhelming offensive kit and edgeguarding prowess offset by his limited recovery and landing options. Ness has achieved results on par with a modest high-tier character, largely thanks to players such as BestNess, Gackt, and Awestin.
Notable players
Numbers in parentheses denote a smasher's placement on the Fall 2019 PGRU, which recognizes the top 50 players in the world in Super Smash Bros. Ultimate from July 13th, 2019 to December 15th, 2019.
Active
 ATATA - A very strong Ness player from the Midwest. Placed 1st at Midwest Arena 2: Doubles Masters, 2nd at Second City Smash 3, and 5th at Midwest Arena. He has defeated MuteAce, 8BitMan, Daybreak, and Ned. Ranked 1st on the Chicago Ultimate Power Rankings.
- Awestin - One of the best Ultimate players in Texas, as well as one of the best Ness players in the world. Consistently places 1st in large tournaments in his region, especially the Shockwave series. Placed 1st at No Fun Allowed 3 and 4th at Ultimatum and has wins over top players such as BestNess, Dakpo, ESAM, Fatality, Lima, MVD, SDX, CaptainZack, tamim, Trela, and Magister.
- BestNess (#43) - The best Ness player in the United States as well as one of the best Ness players in the world. Placed 5th at Super Splat Bros (in conjunction with Wii Fit Trainer), 9th at Low Tier City 7, 17th at both Shine 2019 and Super Smash Con 2019, and 25th at GENESIS 7. Has wins over Abadango, Dark Wizzy, Elegant, Goblin, Larry Lurr, LeoN, Light, Pandarian, Raito, and WaDi.
- FOW - One of the best Ness players in the world. Consistently places 1st in Las Vegas tournaments, placed 2nd at LVL Up Expo 2019 and 25th at GENESIS 6. Ranked 1st on the Las Vegas Power Rankings. Has taken sets off of Mr.R, Tsu, yeti, BestNess, Dakpo, and K9sbruce.
 Fsann - One of the best Ness players in Japan. Placed 25th at Umebura SP 6 with wins over Logix, MASA, and Kuroitsu.
- Gackt (#29) - Currently the best Ness player in the world. Placed 3rd at Sumabato SP 2, 5th at both Umebura SP 2 and Umebura SP 4, 13th at 2GG: Kongo Saga, and 9th at EVO Japan 2020. Has wins over Abadango, Cosmos, Etsuji, kameme, KEN, Kome, Lea, ProtoBanham, Raito, T, Tea, Tsu, VoiD, and Umeki.
- Lumbre - The best Ness player in SoCal. Placed 49th at both 2GG: SwitchFest 2019 and 2GG: Prime Saga. Has wins over VoiD, Lui$, Nitro, Eim, Charliedaking, KiraFlax, falln, and MrConCon. Ranked 15th on the SoCal Power Rankings.
- MASA - Co-mains Ness with Falco and is one of the best Ness player in Japan. Placed 33rd at Umebura SP 7 and 49th at Umebura SP 6. Has wins over ZAKI, FILIP, and Ke-ya.
 Luco - One of the best Ness players in Australia, along with Poppt1. Placed 1st at Phantom 2019.
 PEW - One of the best Ness players in Europe. Placed 5th at both Elysium: Yggdrasil and Ultimate WANTED 1.
- PkChris - The best Ness player in the tri-state area. Placed 17th at Smash at The Paramount and 33rd at both Pound 2019 and Super Smash Con 2019. He has defeated players such as Dabuz, Suarez, Mr E, ZD, Wizzrobe, Ralphie, Phantom, and Stocktaker69.
 PSI Force - The best Ness player in the Philippines. Placed 1st at Smash That Ash, 2nd at Gamebookr's Mid-Year Smash Tournament, 3rd at REV Major 2019, and 4th at SEA Major 2019. Ranked 1st on the Filipino Power Rankings.
 S1 - One of the best Ness players in Europe. Placed 5th at Elysium: Yggdrasil, 7th at Albion 4, and 9th at Tech Republic IV.
- taranito - Placed 17th at both Umebura SP 2 and Sumabato SP 5. Has wins over Songn, Gackt and akasa.
Inactive
- Jtails - Placed 5th at Don't Park on the Grass 2018 and 49th at MomoCon 2019. Retired from competitive smash.
- Poppt1 - Placed 1st at BigWinSmash Ultimate Showdown 2 and 9th at Battle Arena Melbourne 11 before dropping Ness for Lucina.
Classic Mode: Home to Onett!

Ness fights opponents largely based on his journey in EarthBound in reverse from Magicant to Onett.
| Round | Opponent | Stage | Music | Notes |
|---|---|---|---|---|
| 1 | Ness |
Magicant | Magicant (for 3DS / Wii U) | The opponent has his 5th alternate costume equipped, referencing Ness' younger self that he encounters in Magicant. If the player is using the 5th alternate costume, default Ness |
| 2 | Lucas |
New Pork City | You Call This a Utopia?! | |
| 3 | R.O.B. |
Fourside | Fourside | A reference to the robots fought in the Monotoli Building. |
| 4 | Sheik |
Gerudo Valley | Bein' Friends | A reference to Dusty Dunes Desert. |
| 5 | Toon Link |
Luigi's Mansion | Unfounded Revenge / Smashing Song of Praise | A reference to the zombies fought in Threed. When used, the only Assist Trophy summoned will be Jeff. |
| 6 | Villager |
Onett | Onett Theme / Winters Theme | A reference to the Sharks and the dogs fought in Onett. When used, the only Assist Trophy summoned will be Starman. |
| Bonus Stage | ||||
| Final | Master Hand | Final Destination | Master Hand (Less than 7.0 intensity) Master Hand / Crazy Hand (7.0 or higher intensity) |
Crazy Hand teams up with Master Hand on Intensity 7.0 or higher. |
Note: Every stage plays a track from the EarthBound universe, no matter what universe the stage originates from.
Credits roll after completing Classic Mode. Completing it as Ness has Smiles and Tears accompany the credits.
Role in World of Light

Although Ness does not appear in the World of Light opening cutscene, he was vaporized and later imprisoned alongside the rest of the fighters (sans Kirby) when Galeem unleashed his beams of light.
Ness can be found in a pink cloud area reminiscent of Magicant.
Fighter Battle
| No. | Image | Name | Type | Power | Stage | Music |
|---|---|---|---|---|---|---|
| 10 | |
Ness | 7,500 | Magicant (Ω form) | Magicant (for 3DS / Wii U) |
Spirits
Ness' Fighter Spirit can be obtained by completing Classic Mode. It is also available periodically for purchase in the shop for 500 coins. Unlocking Ness in World of Light allows the player to preview the spirit below in the Spirit List under the name "???". As a Fighter Spirit, it cannot be used in Spirit Battles and is purely aesthetic. Each Fighter Spirit has an alternate version that replaces them with their artwork in Ultimate.

563. Ness

In Spirit battles
As the main opponent
| Spirit | Battle parameters | |||||||||
|---|---|---|---|---|---|---|---|---|---|---|
| No. | Image | Name | Series | Enemy Fighter(s) | Type | Power | Stage | Rules | Conditions | Music |
| 307 |  |
Slugger & Green Glove | Yoshi series | •Ness •Lucas |
1,500 | Yoshi's Island | •Item: Beastball | •The enemy starts the battle with a Home-Run Bat | Obstacle Course - Yoshi's Island | |
| 565 | Ninten | Earthbound series | •Ness Team (×4) ( |
13,700 | Magicant | N/A | •The enemy's PSI attacks have increased power •Stamina battle •The enemy's FS Meter charges quickly |
Bein' Friends | ||
| 571 | Starman | Earthbound series | •Metal Ness |
4,200 | Lylat Cruise | •Assist Trophy Enemies (Starman) •Item: Stars |
•Stamina battle •Hostile assist trophies will appear •The enemy is metal |
Unfounded Revenge / Smashing Song of Praise | ||
| 579 |  |
Ramblin' Evil Mushroom | Earthbound series | •Ness |
1,600 | Distant Planet | •Item: Ramblin' Evil Mushroom | •The enemy starts the battle with a Ramblin' Evil Mushroom | Humoresque of a Little Dog | |
| 1,087 |  |
Nico Fire | StreetPass Mii Plaza series | •Ness •Fox •Sonic |
1,500 | Big Blue | •Uncontrollable Speed | •All fighters move faster and can't stop quickly | Wii Sports Resort | |
| 1,116 | Pitcher & Batter | Baseball | •Ness •Lucas |
1,700 | Pokémon Stadium 2 (Ω form) | •Item Tidal Wave •Item: Sports |
•The enemy favors side smash attacks •The enemy starts the battle with a Home-Run Bat •Certain items will appear in large numbers |
Baseball (Training) | ||
As a minion
| Spirit | Battle parameters | Inspiration | |||||||||
|---|---|---|---|---|---|---|---|---|---|---|---|
| No. | Image | Name | Series | Enemy Fighter(s) | Type | Power | Stage | Rules | Conditions | Music | Character |
| 566 | Ana | Earthbound series | •Villager •Ness |
9,200 | Magicant (hazards off) | N/A | •Stamina battle •The enemy heals over time |
Pollyanna (I Believe in You) | Ninten | ||
| 570 | Flying Man | Earthbound series | •Mii Brawler Team •Ness |
9,100 | Magicant | N/A | •Defeat the main fighter to win •Stamina battle |
Magicant | Ness | ||
| 572 | Paula | Earthbound series | •Villager •Ness |
13,300 | Onett | •Sudden Final Smash | •The enemy will suddenly have a Final Smash •The enemy's PSI attacks have increased power •Stamina battle |
Smiles and Tears | Ness | ||
| 576 | Ness's Father | Earthbound series | •Clear Snake •Ness |
13,500 | Onett | N/A | •Defeat the main fighter to win •The enemy is invisible |
Humoresque of a Little Dog | Ness | ||
| 1,156 | Girl from Hajimari no Mori | Hajimori no Mori | •Villager •Ness |
2,300 | Duck Hunt (Battlefield form) | •Hazard: Fog | •The stage is covered in fog •The enemy favors down specials |
Yūyūki Medley | Protagonist of Hajimari no Mori | ||
Alternate costumes

| |||||||

|

|

|

|

|

|

|

|
Gallery
- Ness SSBU Banner.png
Ness' appearance on the panoramic artwork.
Ness' fighter card.
- NessJoinsTheBattleSSBU.jpg
Ness' unlock notice.
Ness idling on the Bridge of Eldin.
Performing his up smash on Kalos Pokémon League.

Performing PK Flash on Frigate Orpheon.
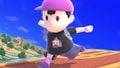
Dashing in Smashville.
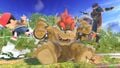
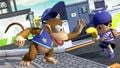
Dodging Bowser's Bowser Bomb with Ike on Gaur Plain.
Diddy Kong trying to steal Ness' banana on Moray Towers.
Ness striking Bowser Jr. with Death's Scythe on Yoshi's Story.
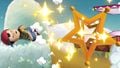
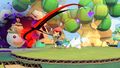
Expelled by a Super Launch Star on Yoshi's Island.
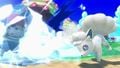
Frozen by Alolan Vulpix on Tortimer Island.
Using his side taunt in Onett.
Ness being teleported away by Abra on Arena Ferox.


Character Showcase Video
Trivia
- Ness was the only one of the four original unlockable characters from Smash 64 to be playable in the E3 demo.
- Ness is also the only one to appear on the box art. However, Captain Falcon is featured in the full group artwork.
- Ness is the only one of the four to face Master Hand as his final boss.
- Although most characters from the original Super Smash Bros. are numbered by their debut game's original release date, Captain Falcon and Ness can be considered an exception; F-Zero was originally released in 1990, four years before EarthBound. Additionally, in Super Smash Bros., Captain Falcon will always be fought first if the unlock conditions for both him and Ness are met simultaneously. However, it is also possible that Ness is numbered per the 1989 release date of EarthBound Beginnings, which is also how he is ordered in Brawl's All-Star Mode.
- Ultimate is the first Smash game where Ness does not receive any new voice clips.
- Ultimate is the first Smash game in which Ness has a greater number of aerials which use PSI than Lucas, being 5 to 4 as opposed to 2 and 3 to 3 in Brawl and Smash 4 respectively.
- Ness being unlocked by clearing Classic Mode as Kirby could be a reference to Ness being unlocked on Dream Land in the original Super Smash Bros., that both are voiced by Makiko Ōmoto, or that both are from games developed by HAL Laboratory, Inc.
- As of Ultimate's release, Ness has had more different victory themes than any other character, receiving new ones in Brawl and Ultimate, in addition to his original one from the first two games.
- Ness' official artwork resembles a hoax that claimed he would appear in Super Smash Bros. 4 before he was actually revealed.
- Ness is the only character to travel to all EarthBound universe stages in Classic Mode.
- Ness is one of the only two unlockable characters in Ultimate who can be the first character unlocked in more than one way. These being through VS. Matches and through Kirby's Classic Mode. The other character who shares this distinction is Villager.
|
| |
|---|---|
| Fighters | Ness (SSB · SSBM · SSBB · SSB4 · SSBU) · Lucas (SSBB · SSB4 · SSBU) |
| Assist Trophies | Jeff · Starman |
| Bosses | Porky Statue · Porky |
| Stages | Onett · Fourside · New Pork City · Magicant |
| Items | Mr. Saturn · Franklin Badge · Ramblin' Evil Mushroom |
| Enemies | Devil Car · Starman |
| Other | Boney · Flying Man · Kumatora · Paula · Poo · Rope Snake · Ultimate Chimera |
| Trophies, Stickers and Spirits | Trophies (SSBM · SSBB · SSB4) · Stickers · Spirits |
| Music | Brawl · SSB4 · Ultimate |
| Masterpiece | EarthBound |