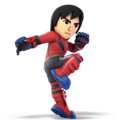
Mii Brawler (SSBU)
| Mii Brawler in Super Smash Bros. Ultimate | |
|---|---|
 
| |
| Universe | Super Smash Bros. |
| Other playable appearance | in SSB4 |
| Availability | Custom (Unlockable in World of Light) |
| Final Smash | Omega Blitz |
| “ | An expert in physical combat, capable of delivering powerful blows. | ” |
| —The Brawler's Ultimate description | ||
The Mii Brawler (Mii格闘タイプ, Mii Hand-to-Hand Fighting Type) is a playable character in Super Smash Bros. Ultimate. They were confirmed as a playable character on June 12th, 2018 along with the other Mii Fighter types, the Swordfighter, and the Gunner. The Mii Brawler is classified as fighter #51.
As with the other Mii Fighter types, the Mii Brawler has 12 voice options, provided by Yuji Kishi, Takashi Ohara, Ryotaro Okiayu, Michihiko Hagi, Hideo Ishikawa, Kiyoyuki Yanada, Umeka Shoji, Ayumi Fujimura, Makiko Ohmoto, Minami Takayama, and Kimiko Saito.
Changes from Super Smash Bros. 4
The Mii Brawler has been the most extensively modified of the Mii Fighters, especially in terms of custom moves. With height and weight now being fixed, the Mii Brawler now has set attributes, now being a light middleweight fast faller with high mobility and effective close combat abilities, making their playstyle along the lines of other high-risk, combo-oriented "footsies" fighters like Little Mac or Squirtle.
In terms of move changes, the Mii Brawler's standard moveset has not been altered significantly, apart from some quality-of-life changes like forward tilt losing its sourspot, and forward aerial connecting better. However, the Brawler's special moves have been buffed in many ways: like the other Mii Fighters, many of the Brawler's special moves now have increased KO potential, giving them an abundance of powerful moveset choices and fixing one of the Brawler's former weaknesses. Additionally, the Brawler's default special moves, previously notorious for their extremely situational use, have been given significantly more utility, allowing the Brawler to function just as effectively without altered special moves.
Finally, the Brawler is the only Mii Fighter to have access to entirely new special moves: each directional input (neutral, side, up, down) has a single new addition that replaces one previous special move: Ultimate Uppercut was replaced by Flashing Mach Punch, a powerful multi-hit move; Headache Maker was replaced by Suplex, a damaging command grab; Piston Punch was replaced by Thrust Uppercut, a variant with more recovery potential and combo ability but less KO power; and Foot Flurry was replaced by Counter Throw, a unique counterattack with low cooldown, short counter frames, and a retaliating hit in the form of a grab. Each give the Brawler a new option to handle different situations.
However, the Mii Brawler has many newfound weaknesses. The Brawler's set attributes are a double-edged sword, as they are now lighter than the lightest possible Mii Fighter in Smash 4, and their falling speed is now the fourth highest in the game. This makes them easier to both combo and KO, but not to the same extent as other fighters such as Fox or Pichu due to the Brawler's heavier weight. Additionally, some of the Brawler's best moves have been nerfed regardless, vastly reducing the KO power of their combo strings and preventing the Brawler from KOing as early as 85% through throw combos: the Brawler's down throw's higher knockback growth limits followups after mid percents, and the Brawler's best followup options from down throw have much weaker KO potential, since Helicopter Kick and Thrust Uppercut have lowered knockback. As a result, the Brawler's KO setups have actually been reduced, since they now serve only to rack up damage instead of KOing.
Changes to other special moves make the Brawler's recovery choices even less reliable than before: Burning Dropkick's utility has significantly reduced due to its fixed lower distance, and Feint Jump now travels less distance. Finally, the Brawler's approach options have been reduced due to the removal of Ultimate Uppercut and Foot Flurry, the former removing a super armor option in exchange for invincibility when Flashing Mach Punch connects, and the latter removing one of their only approaching attacks in exchange for a counterattack in Counter Throw. As a result, the Brawler's neutral game has not improved, due to their range and moveset still being very inconsistent for combos, KOs or approaching, and the Brawler retains their former weaknesses from Smash 4, such as poor range, slightly below-average frame data for a fighter of their playstyle, and passable recovery.
Overall, the changes to the Mii Brawler's moveset allow more of their special moves to shine while granting them better utility, but at the cost of their strongest tools being streamlined. As a result, the Brawler's actual buffs are a mixed bag in comparison to the extreme changes their special moves have gained, and they have to take advantage of their buffed special moves to counteract the nerfs to their potent down throw combos. Due to these factors, the Brawler's viability compared to the cast and, more significantly, the legality of custom moves in tournaments, are still yet to be seen.
Aesthetics
 Players can customize the Mii Brawler's voice clips from 12 different voices, with 3 different pitches.
- Mii Brawlers have had their body proportions adjusted.
- While still based off the "Guest C" Mii, the default Mii Brawler has an altered appearance. His hair is longer, and he now sports a stern expression instead of a neutral one as he did in Smash 4.
- The default outfit for the Mii Brawler has significantly more detail, featuring a stylized shirt with extra rubber padding on their forearms and shins.
Attributes
 Like all characters, the Mii Brawler's jumpsquat animation now takes three frames to complete (down from 5).
- As with the other Mii Fighter types, the Mii Brawler now has fixed attributes:
- The Mii Brawler now has a set weight of 94, down from 100 in Smash 4. This makes their weight on par with Ness, Lucas and Inkling, and makes them the lightest Mii Fighter.
- The Mii Brawler has a significantly higher falling speed (1.7 → 1.92) and fast fall speed (2.72 → 3.072), going from the 12th fastest to the 4th fastest and categorizing them as a fast faller. This makes it easier for the Brawler to land, but much easier to combo.
 The Mii Brawler is now lighter than the smallest possible Mii Fighter in Smash 4. With the inclusion of their extremely high falling speed, this hinders the Brawler's survivability, since they are still easy to combo.
- Mii Brawler walks much faster (1.15 → 1.26).
- Mii Brawler dashes much faster (1.72 → 1.92).
- Mii Brawler has a slower air speed (1.2 → 1.15).
Ground attacks
- Neutral attack:
- Neutral infinite connects significantly better due to the changes to neutral infinites dragging opponents to the ground.
- Apart from the final hit, neutral attack's hits deal less damage (hit 1: 3% → 1.7%, hit 2: 2% → 1%, looping hits: 1% → 0.5%).
- Forward tilt:
- All angles of forward tilt no longer have a sourspot on the Mii Brawler's leg.
- Forward smash:
- Forward smash now leaves an electrical trail on the Mii Brawler's fist, and the Mii Brawler no longer flexes during their ending animation; instead, the Brawler pumps their arms downwards.
- The Mii Brawler now steps forward when using their forward smash, giving it more range.
Aerial attacks
- All aerials except back and down aerial have less landing lag (Neutral: 10 → 9, Forward: 14 → 12, Up: 14 → 11).
- Neutral aerial:
- Neutral aerial no longer autocancels from a short hop.
- Forward aerial:
- Forward aerial has a new animation: the Mii Brawler now does two alternating kicks inwards, instead of a spin kick.
- Forward aerial deals more damage (hit 1: 4% → 5%, hit 2: 5% → 6%).
- Forward aerial has less of a delay between each hit, making it connect better in some circumstances.
- However, the first hit no longer has the autolink angle, and thus connects less reliably when moving backwards or downwards. Forward aerial's faster hits also mean it is now more difficult to use the first hit to initiate combos by landing.
- Back aerial:
- Back aerial deals more damage (10% → 12%).
- Down aerial:
- Down aerial now autocancels from a full hop and double jump fast fall, instead of only at the peak of a full hop.
Throws/other attacks
- Pummel deals less damage (3.25% → 1.2%) but is much faster.
- Forward throw KOs earlier, though it is still weak (190% → 160% at the edge of Final Destination).
- Back throw deals more damage (hit 1: 2% → 4%).
- Back throw has a more fluid animation.
- Up throw deals more damage (8% → 11%).
- Down throw has more knockback growth, making followups more difficult at mid percents. The reduced knockback of Helicopter Kick and the removal of Piston Punch also remove the Brawler's infamous down throw KO setups, now making them damage racking strings instead.
Special Moves
- Shot Put:
- Shot Put has less endlag.
- Shot Put's bounces deal slightly more damage (first bounce: 11% → 11.2/11.4%, second bounce: 8 → 8.4%).
- Exploding Side Kick:
- Exploding Side Kick now causes Special Zoom when it lands.
- Reversed Exploding Side Kick deals more damage (Sweetspot: 27% → 28%, Sourspot: 25% → 26%).
- Aerial reversed Exploding Side Kick deals more damage (Sweetspot: 22.95% → 23.8%, Sourspot: 21.25% → 22.1%).
- The kick can be reversed much later, just before the kick comes out. Coupled with the new dodge mechanics, this makes the move better for punishing a dodge.
- Onslaught:
- Onslaught has a different animation, with the Brawler also attacking the opponent with his fists, before finishing with a upward kick.
- Grounded Onslaught's second to last hit is now a meteor smash that drags opponents to the ground. This allows the entire move to connect more consistently at higher percents.
- Onslaught deals more total damage (10% → 16%) and deals much more knockback, now being capable of KOing at around 100%.
- Onslaught has a new mechanic: each time Onslaught is consecutively used, it will deal less damage. It takes time until Onslaught goes back to dealing its base damage. This prevents abuse of the move.
- A purple sparkle briefly appears on the Mii Brawler's shoes when Onslaught's power returns to normal.
- Onslaught's grounded meteor smash will cause opponents to drop out of the move if they are near an edge, and the meteor smash is unable to KO due to its fixed knockback.
- Burning Dropkick:
- Burning Dropkick can no longer be charged. The Mii Brawler now leaps forward and launches a fixed distance diagonally downwards after a brief pause. It has vastly reduced distance and can now miss entirely if started right next to an opponent, significantly reducing its recovery range, reliability, and utility for mindgames.
- Burning Dropkick deals more damage compared to the previous uncharged version (10% → 13%).
- Burning Dropkick's landing lag can be reduced by using it at the peak of a full hop.
- Soaring Axe Kick:
- Soaring Axe Kick's animation has been sped up significantly.
- Soaring Axe Kick's first hit is now highlighted by a large blue trail that significantly increases its range.
- Soaring Axe Kick's descending hit is much stronger, now being a capable KO option. It also has more base knockback, making sacrificial KOs more effective, though it still KOs the Brawler first at 0%.
- Soaring Axe Kick gains slightly more height and can now sweetspot the ledge halfway through the ascending hit; previously it could only do so right before the Brawler descended. This significantly improves its safety, as it was notoriously easy to intercept in Smash 4.
- The descending part of the move now has to be initiated manually, similar to Cloud's Climhazzard. This eliminates the descending portion when recovering, which previously caused self destructs.
- Helicopter Kick:
- The trajectory of Helicopter Kick's final hit can now be altered. Holding forward will make its knockback diagonal, while holding back will make its knockback more vertical.
- Helicopter Kick travels significantly higher when used on the ground.
- Helicopter Kick has significantly lower knockback, making it less effective for KOing.
- Head-On Assault:
- Head-On Assault has an altered startup animation, with the Brawler doing a half-backflip instead of a headbutt while rising. It also has a different ending animation; the Brawler simply stands back up again.
- The descending hit no longer buries opponents. Instead, it deals diagonal knockback that can KO at 112%. This removes bury followups, but significantly improves its utility as an attack.
- Head-On Assault's headbutt is now a corkscrewing attack that deals multiple hits very quickly. Each hit deals 1%, and a ground-starting attack can hit at least 3 times.
- The descending hits deal less overall damage if started on the ground (8% → 4%).
- Due to the multiple hits, Head-On Assault deals more damage if it lands on an aerial opponent, and it will always KO the opponent first if it the grounded version leads to a sacrificial KO. However, whoever is KO'd first is still inconsistent if the aerial version is used.
- Feint Jump:
- Feint Jump's kick now surrounds itself in a blue aura instead of purple.
- The kick attack used during Feint Jump sends the Brawler flying at a more downward angle. While this reduces its recovery potential, it allows the Brawler to hit ground enemies more consistently.
- When landing on an opponent during the descent of the flip, the Brawler will now automatically perform a meteor smashing kick that deals 7%.
- Omega Blitz now has the Brawler stay in one place while throwing a barrage of punches and kicks after dragging the opponent upward, the initial attack is now an upwards-arcing heel kick, and the Final Smash finishes with a downward punch rather than a chop.
New special moves:
The Mii Brawler has received four new special moves, each replacing one former special move from each category.
- Flashing Mach Punch:
- This neutral special move replaces Ultimate Uppercut. It is a multi-hitting series of five fast punches from a single hand, that extends to a total of 22 consecutive punches if any initial hits connect. The final hit deals good vertical knockback and can KO at around 115%.
- Flashing Mach Punch deals less total damage than a fully-charged grounded Ultimate Uppercut (22% → 15.8%), but more than an uncharged version (8% → 15.8%).
- Flashing Mach Punch doesn't leave the Mii Brawler helpless, and the first midair use causes him to stall.
- Flashing Mach Punch has KO potential anytime it lands and has the same power on the ground and in the air, whereas Ultimate Uppercut needs to be fully charged and grounded to have KO potential.
- Flashing Mach Punch offers invincibility for the duration of the move if it connects with an opponent, making it harder to interrupt than Ultimate Uppercut.
- Flashing Mach Punch has punishable startup and ending lag. It also cannot start the looping portion if it hits a shield.
- This neutral special move replaces Ultimate Uppercut. It is a multi-hitting series of five fast punches from a single hand, that extends to a total of 22 consecutive punches if any initial hits connect. The final hit deals good vertical knockback and can KO at around 115%.
- Suplex:
- This side special command grab replaces Headache Maker. The Mii Brawler will dash forward a short distance: if it connects, the Brawler will lift the opponent into the air and do a backwards suplex, slamming the opponent headfirst into the ground.
- Suplex goes through shields, due to it being a grab.
- Suplex deals heavy damage for a grab, and does more total damage than the strongest hit of Headache Maker (13% → 18%).
- Suplex covers slightly more horizontal distance than Headache Maker, though it still travels less than Onslaught.
- Suplex has very low knockback scaling, making it ineffective for KOing but effective for damage racking.
- If used in the air, Suplex causes helplessness. It can also be used as a sacrificial KO like Headache Maker, although this always KOs the Mii Brawler first.
- This side special command grab replaces Headache Maker. The Mii Brawler will dash forward a short distance: if it connects, the Brawler will lift the opponent into the air and do a backwards suplex, slamming the opponent headfirst into the ground.
- Thrust Uppercut:
- This up special move replaces Piston Punch. Unlike the other new moves, it is similar in function to the attack it replaced. It consists of a multi-hitting uppercut, dealing five hits in total. The Mii Brawler switches their hands for the final hit.
- Thrust Uppercut travels upward with a slight diagonal trajectory, making it better for recovering than Piston Punch. It can also be angled to travel further horizontally. Coupled with its fast startup, it can easily act as a combo finisher out of an aerial.
- Thrust Uppercut deals more damage than Piston Punch (10% → 13%).
- Thrust Uppercut is much worse for KOing, only doing so at ground level after 180%.
- This up special move replaces Piston Punch. Unlike the other new moves, it is similar in function to the attack it replaced. It consists of a multi-hitting uppercut, dealing five hits in total. The Mii Brawler switches their hands for the final hit.
- Counter Throw:
- This down special counterattack replaces Foot Flurry. After being hit, the Mii Brawler will grab the opponent before throwing the victim on the ground behind them.
- Counter Throw removes an approach and aerial stalling option, but grants the Brawler a counterattack.
- Unlike other counterattacks, Counter Throw has a very short duration, but very low ending lag, allowing it to be used more flexibly.
- Counter Throw has the highest damage multiplier of any counterattack by default (1.5×), tied with King K. Rool's Gut Check.
- Counter Throw completely fails against projectiles and attacks that hit the Brawler's legs, while any sufficiently disjointed move will cause the retaliating grab to miss.
- This down special counterattack replaces Foot Flurry. After being hit, the Mii Brawler will grab the opponent before throwing the victim on the ground behind them.
Update history
The Mii Brawler has been significantly buffed from game updates, and was one of the characters who gained the most direct buffs from game updates so far, alongside Rosalina and Luma. Update 2.0.0 improved the Brawler's offense by improving his neutral infinite, increasing the damage of up aerial and some special moves, extending up smash's sweetspot duration, and granting neutral and back aerials less landing lag. The landing lag decreases now make back aerial safer on shield, while giving late neutral aerial more followups, some into KO moves. Finally, some of the Brawler's specials were improved: Flashing Mach Punch's increased damage is more rewarding on hit, Exploding Side Kick's reduced ending lag makes it harder to punish, Onslaught's increased speed makes it easier to connect, Soaring Axe Kick is now the Brawler's safest recovery move, Feint Jump's kick has more knockback, and Head-On Assault can now break full shields if all hits connect. As a result, the Mii Brawler is significantly better than he was during Ultimate's release.
![]() 2.0.0
2.0.0
- Neutral infinite has increased range and is harder to SDI.
- Up smash's sweetspot has a longer duration, with its sourspot having a shorter duration.
- Neutral aerial has less landing lag.
- Back aerial has less landing lag.
- Up aerial deals more damage (8% → 9%).
- Flashing Mach Punch deals more damage (15.8% total → 17.9% total).
- Exploding Side Kick has less ending lag.
- Onslaught travels farther and faster.
- Soaring Axe Kick can grab onto ledges more easily.
- Head-On Assault deals far more shield damage, with it breaking full shields if all hits connect.
- Feint Jump's kick deals more knockback.
Moveset
- The Mii Brawler can wall jump.
Note: All numbers are listed as base damage, without the 1v1 multiplier.
| Name | Damage | Description | ||
|---|---|---|---|---|
| Neutral attack | 1.7% | Two quick punches, followed by a series of rapid punches, ending with a side kick. It is a useful close-range interceptor on the ground, but as it will only transition into the neutral infinite after the first two hits, it is punishable if shielded since it gives the opponent time to react. | ||
| 1% | ||||
| 0.5% (loop), 2% (final hit) | ||||
| Forward tilt | ↗ | 8.5% | A roundhouse kick. Can be angled, which deals more damage when angled up and less when angled down, and is the Brawler's longest ranged tilt. Unlike the version in Smash 4, it no longer has a sourspot. As a result, it is useful for creating space. | |
| → | 8% | |||
| ↘ | 8.3% | |||
| Up tilt | 6% | Punches with an uppercut. Sends the opponent upwards and slightly behind the Brawler, which is most noticeable at mid percents. As a result, it can juggle into itself at low percentages, drag the opponent closer for a grounded followup like a tilt, grab or up special, and set up aerial combos at mid percents, including back aerial. The move's hitbox can reach through the lower platforms of Battlefield and can hit prone opponents, but it cannot hit opponents behind the Brawler. Additionally, it has low horizontal range, and usually sends too far to combo after 120%. | ||
| Down tilt | 8% | An inverted sweep kick along the ground. Knocks opponents upward, allowing it to combo into tilts or forward aerial at low percents, and aerials or any up special move at medium percents. | ||
| Dash attack | 11% (clean), 6% (late) | A flying kick. A risky but useful approach option. | ||
| Forward smash | 18% | A strong straight punch. The move moves the Brawler forwards slightly. Although an electric trail appears at the Brawler's fist, it does not deal electric damage. It deals immense knockback and easily KOs from 75% at the center of Final Destination. However, it has high startup overall (hits on frame 17 and ends on frame 67), and its hitbox only lasts for one frame. | ||
| Up smash | Cartwheel Kick | 14% (clean), 10% (late) | A flip kick. It has high speed (frame 8), which makes it a good anti-air and grounded combo finisher at low percents, and it can KO at around 120%. However, the late hit (after the Brawler completes 3/4 of the backflip) has significantly lower knockback growth and only KOs at around 170%. Like up tilt, its hitbox can reach through the lower platforms of Battlefield. | |
| Down smash | 13% | Punches forwards and kicks backwards simultaneously. Very fast like up smash (frame 9), with the lowest ending lag of all the Brawler's smash attacks (FAF 43). Both sides deal the same damage and knockback. However, both hits have very poor range. | ||
| Neutral aerial | 10% (clean), 5% (late) | A sex kick, similar to Mario's neutral aerial. Its extremely high ending lag has been reduced from Smash 4. Due to its startup (frame 3) and low landing lag (frame 8), it is a useful combo breaker, and the clean hit can act as a niche KO option at the sides of the stage at around 130%. As of the 2.0.0 patch, neutral aerial's landing lag is low enough for the weak hit to true combo into a multitude of moves, including neutral attack, Thrust Uppercut and Head-On Assault at low percents, or down tilt or Helicopter Kick at mid percents. Autocancels from a full hop. | ||
| Forward aerial | 5% (hit 1), 6% (hit 2) | Two alternating inward kicks. The first kick can be used to initiate combos on grounded opponents, but as the kicks transition much faster than in Smash 4, it is much more difficult to drag opponents to the ground with the first hit. Additionally, the move's hitboxes are on the Brawler's legs, which can cause it to whiff. Autocancels from a full hop. | ||
| Back aerial | 12% | A swinging back kick. Very fast (frame 7) and is the Brawler's most reliable KO option in midair. Has a small chance of tripping grounded opponents at low percents. However, its hitbox is very brief. Autocancels from a short hop, which allows it to wall out opponents. | ||
| Up aerial | 9% | Swipes their foot above their head in an arc. Autocancels from a short hop, has the second lowest ending lag of all the Brawler's aerials (frame 10), and has a wide hitbox; the front hitbox is capable of hitting tall characters out of a short hop (such as Marth). As a result, it is an excellent combo initiator or extender, as a falling up aerial can start grounded combos at low percents, or juggle into itself or any up special move at mid percents. | ||
| Down aerial | 13% (clean), 12% (late) | Swings both fists beneath themself in a double axe handle. The clean hit is a powerful meteor smash, and sends grounded opponents diagonally upwards. However, it is the Brawler's slowest aerial in terms of startup lag, ending lag and landing lag. Autocancels from a full hop and double jump fast fall. | ||
| Grab | — | The Brawler reaches in front of themself. | ||
| Pummel | 1.2% | Headbutts the opponent. | ||
| Forward throw | 9% | Launches the opponent away with a backhand. It is the Brawler's KO throw, though it does so poorly as it KOs at around 144% at the edge of Final Destination. | ||
| Back throw | 4% (kick), 5% (throw) | Kicks the opponent behind themself. | ||
| Up throw | 11% | Knocks the enemy up with a palm strike. It is the Brawler's most damaging throw and can initiate aerial juggles, though it has no true followup potential due to its ending lag. | ||
| Down throw | 2% (chop), 4% (throw) | Karate chops the opponent into the ground. This is the Brawler's combo throw, though it has been significantly nerfed from Smash 4 due to it having higher knockback growth. As a result, it is still a reliable combo throw that can be extended into aerials, up special moves, or up aerial chains, though it has lost its potent KO setups at a wide percent range and quickly loses combo potential at high percents. | ||
| Floor attack (front) | 7% | Gets up while kicking both sides. | ||
| Floor attack (back) | 7% | Same as their frontal floor attack. | ||
| Floor attack (trip) | 5% | Gets up while kicking both sides. | ||
| Edge attack | 9% | A low backhanded karate chop. | ||
| Neutral special | Default | Shot Put | 15% (no bounce), 11.2% (first bounce), 8.2% (second bounce) | A shot put is thrown into the air as an arcing projectile. Bounces twice upon landing, which deals lower damage; if it misses, the shot travels a set distance before disappearing. Very damaging and strong for an unchargeable projectile, which makes for a useful edgeguarding tool. |
| Custom 1 | Flashing Mach Punch | 17.9% (if all hits connect) | The Brawler performs five fast punches with a single hand. If any of these punches land, the move will extend into a flurry of consecutive punches, the maximum total being 22. The last hit deals good vertical knockback, KOing at around 115%. The move doesn't lose power if used in the air, and the first use will stall the Brawler's decent. If the move lands on an opponent, the Brawler gains invincibility for the duration of the move, making the move hard to interrupt. However, the move has punishable startup and ending lag (starts on frame 15 and ends on frame 59 if missed). If the first hits are shielded or hits an opponents under the effects of armor, it will not transition to the looping portion of the move. | |
| Custom 2 | Exploding Side Kick | 23% (leg), 25% (foot), 26% (reversed, leg), 28% (reversed, foot), 19.5% (aerial, leg), 21.2% (aerial, foot), 22.1% (reversed aerial, leg), 23.8% (reversed aerial, foot) | Stands on one leg and charges their leg in flame, before unleashing a powerful burning kick. Functions like Falcon Punch. The move can be reversed once anytime during the move. The Brawler gains armor just before the kick, even if started in midair, allowing it to function as a hard punish. | |
| Side special | Default | Onslaught | 16% (highest base damage) 9.8% (lowest base damage) |
Charges forward with their knee out. If the knee connects against an opponent, the Brawler will perform a series of blows (a knee strike, a kick with the opposite leg, a backhanded punch, a swinging fist punch with the opposite arm, a double-hitting axe kick, and a double-fisted axe handle swing) concluded by a backflip kick. If whiffed, there is noticeable endlag. In the air, even after attacking, Onslaught leaves the Brawler helpless. It has excellent KO potential, as it can KO grounded opponents as early as 110%. However, whenever the move is successful, each consecutive use of the move will cause its power to decrease. Onslaught will go back to full power after some time, indicated by a brief flash of purple sparkles on the Brawler's shoes. Despite in-game descriptions, accumulated damage doesn't affect the strength of the move, nor does it hasten the reset speed. |
| Custom 1 | Burning Dropkick | 13% | Extends both legs in front of themself, charging forward to deliver a dropkick while covered with flames. Unlike the previous iteration of this move, it is no longer chargable, so it deals set damage. Furthermore, it now covers a set, albeit vastly reduced distance, and can now miss entirely if started right next to an opponent. As a result, it has lost majority of its utility from Smash 4, though it is still an effective approach move due to its quick startup, and can also KO at high percents. | |
| Custom 2 | Suplex | 18%, 3% (collateral grab), 4.5% (collateral descent), 15% (collateral slam) | A command grab in which the Brawler dashes forward a short distance with their arms out in a grabbing motion. If it connects, the Brawler will lift the opponent into the air and do a backwards suplex, slamming the opponent headfirst into the ground. The Brawler gains super armor while throwing an opponent. Any opponents nearby for the grab and slam will take collateral damage. The move has extremely low knockback scaling, but can be used to effectively rack up damage. If used in midair, the move causes helplessness; it can grab foes near an edge and drag them off as a Sacrificial KO, though it will always KO the Brawler first. Suplex makes for a poor horizontal recovery option, as it travels less distance than Onslaught. | |
| Up special | Default | Soaring Axe Kick | 4% (hits 1 and 3), 3% (hit 2) | Performs an upward flip kick. Similar to Cloud's Climhazzard, a second press of the special move button will have the flip kick followed up by a meteor-smashing axe kick. The move will snap to ledges during the rising portion, and can also snap during the downward kick after a bit of travel time. Both hits transition quickly, and the landing hit has enough knockback to KO at around 120% near the edge of Final Destination. |
| Custom 1 | Helicopter Kick | 3% (hit 1, ground), 1.5% (hit 1, air), 1.5% (hits 2 - 5), 6% (hit 6) | Performs a flurry of spinning kicks while traveling diagonally upward, similar to Fox's forward aerial. Travels much higher if initiated from the ground. The trajectory of Helicopter Kick's final hit can be altered: holding forward will make its knockback diagonal, while holding back will make its knockback more vertical. This allows the Brawler to choose how to launch the opponent. Allows for long horizontal recovery, but lacks vertical lift. While it is still an excellent combo finisher out of aerials or a throw throw, its knockback has been heavily reduced from Smash 4, making it unable to KO extremely early near the sides of the stage. | |
| Custom 2 | Thrust Uppercut | 13% | The Brawler rises upwards with a multi-hitting uppercut, at a slight diagonal trajectory. The uppercut is followed by a second uppercut with the opposite fist. By angling during the ascent, it is possible to travel further horizontally, though the move has deceptively low recovery distance due to the move's animation. Like Helicopter Kick, Thrust Uppercut is a reliable combo finisher due to its speed, though its trajectory is more suitable for ending vertical combos. However, it is much weaker than the previous version (Piston Punch), which was capable of KOing out of a down throw from 65%. As a result, Thrust Uppercut's combos are more suited for damage racking, though it can KO near the top blast line at around 140%. | |
| Down special | Default | Head-On Assault | 6% (flip kick), 1% (multi-hits), 14% (landing) | The Brawler leaps up, performing a backflip kick with both of their legs, and plummets downward with a corkscrewing headbutt. If performed in the air, the Brawler will just perform the headbutt. On the ground, the initial leap sends the opponent into the main headbutt. In both versions of the move, the descending headbutt hits multiple times, and acts as a meteor smash. If the grounded version is used as a sacrificial KO, the opponent will be KO'd first. The grounded hit is very powerful and can KO consistently at 120%, though it is extremely risky due to its overall lag. If performed in midair while facing a ledge, the Brawler will be able to sweetspot said ledge, allowing it to be used as an edgeguard. |
| Custom 1 | Feint Jump | 10% (diving kick), 7% (meteor smashing kick) | Flips off the ground and, when the special button is pressed again, performs a divekick while surrounded by a blue aura. The startup offers brief intangibility. Similarly to Zero Suit Samus's Flip Jump, by landing on an opponent midair during the jump, the Brawler will automatically perform a kick which meteor smashes foes. The angle they are launched, however, is more diagonal, similar to that of Ryu's down air. The direction they are sent is opposite of the direction of the flip (i.e flipping to the right will diagonally meteor smash the opponent to the left, and vice versa). Both the jump and the kick can be reversed if the player taps in the other direction upon startup. | |
| Custom 2 | Counter Throw | 1.5× (minimum 14%), 9% (collateral hit) | The Brawler enters a defensive stance, bringing their arms close to their face. Upon being hit, the Brawler will counterattack by grabbing the opponent and slamming them on the ground behind themself. The slam will lightly damage nearby opponents. Unlike other counters, Counter Throw has a short duration, but low ending lag, allowing it to be used more flexibly. However, unlike other counters, Counter Throw completely fails against projectiles and attacks that hit their legs (i.e. attacks from underneath the Brawler), and moves with sufficiently disjointed hitboxes will cause the retaliating grab to miss. As a result, the counterattack can be rather inconsistent. | |
| Final Smash | Omega Blitz | 56.4% | Knocks the target into the air with an upwards-arching heel kick, and then proceeds to strike them with a maelstrom of punches and kicks before smashing them back downwards with a downward straight punch. | |
On-screen appearance
- Lands with an explosion, does a flip kick, and makes a pose similar to their side taunt.
Taunts
- Up taunt: Flips, then performs a crane pose.
- Side taunt: Moves their fists in front of them in an "X" motion, before punching downwards and swinging an open hand towards their own face.
- Down taunt: Punches twice toward the screen.
- BrawlerUpTauntUltimate.jpg
- BrawlerSideTauntUltimate.jpg
- BrawlerDownTauntSuzakuCastleUltimate.jpg
Victory poses
- Does a punch and kick combo, then poses.
- Punches many times toward the screen, then poses.
- Cartwheels into the foreground, does a roundhouse kick, and poses.


Idle poses
- Performs four quick fighting stances.
- Unclenches their fists and hops on the spot, as if prepared for a fight.
Role in World of Light
Although the Mii Brawler does not appear in the World of Light opening cutscene, they were vaporized and later imprisoned alongside the rest of the fighters (excluding Kirby) when Galeem unleashed his beams of light.
The Mii Brawler was one of the many fighters that fell under Dharkon's control upon Galeem's first defeat. The Mii Brawler can be fought in the Sacred Land sub-area after completing an optional time puzzle on the Triforce of Wisdom section to then join the other fighters.
Defeating the Mii Brawler automatically adds the default Mii Brawler under the name "Mii" with a default 1111 moveset to the list of Mii Fighters for all modes where Mii Fighters are usable. This Mii cannot be restored if deleted.
Spirits
The Mii Brawler's Fighter Spirit is available periodically for purchase in the shop for 500 Gold. Unlocking thd Mii Brawler in World of Light allows the player to preview the first spirit below in the Spirit List under the name "???". As a Fighter Spirit, it cannot be used in Spirit Battles and is purely aesthetic. Unlike most fighters, the spirit for Mii Brawler only uses the official artwork from Ultimate.
1,090. Mii Brawler
Gallery
Mii Brawler in Mii Fighters' fighter card.
Mii Brawler taunting on Battlefield.

Striking Kirby mid-Stone with his Head-On Assault on Skyworld.
Mii Brawler shielding on Mario Circuit.
- BrawlerOmegaBlitzSSBU.jpg
Using Omega Blitz against King K. Rool.
- MiiBrawlerKingDededeFinalDestinationUltimateBattleStart.jpg
Fighting against King Dedede on Final Destination.
- MiiBrawlerAkiraYukiGamer.jpg
With Akira Yuki on Gamer.
- BrawlerUltimateVictory.jpg
Punching in one of the victory poses.


Character Showcase Video
Trivia
- The Brawler is the only type of Mii Fighter to have a non-special move named in one of its tips; namely, its up smash, which is called "Cartwheel Kick".