Zelda (SSBU): Difference between revisions
Aliks-Odev (talk | contribs) (→Special Moves: both the sweetspot and sourspot are stronger. the latter tumbles around 13% earlier than in ssb4) |
Aliks-Odev (talk | contribs) (→Moveset: filled out moveset table) |
||
| Line 154: | Line 154: | ||
==Moveset== | ==Moveset== | ||
{{MovesetTable | {{MovesetTable | ||
|game=SSBU | |||
|neutralcount=1 | |neutralcount=1 | ||
|neutralinf= | |neutralinf=y | ||
|neutralname= | |neutralname= | ||
|neutral1dmg= | |neutral1dmg= 2.5% (hits 1-2) | ||
|neutralinfdmg= | |neutralinfdmg= 0.2% (loop), 3% (end) | ||
|neutraldesc= | |neutraldesc=Emits a magic burst, follows up with a series of several magical bursts, and finishes with a final blast. | ||
|ftiltname= | |ftiltname= | ||
|ftiltdmg= | |ftiltdmg= 12% (blade), 10% (arm) | ||
|ftiltdesc= | |ftiltdesc=A magically-infused, outward fanning knifehand strike. It can be angled and its sweetspot, which is located on the magically produced blade, possesses respectable power. Its sweetspot KOs middleweights at around 93% while near the edge of {{SSBU|Final Destination}}. Its sourspot, which is located at Zelda's arm, is also reliable for KOing in spite of it being noticeably weaker. Its sourspot KOs middleweights at around 109% while near the edge of Final Destination. However, it has noticeable overall lag and a narrow hitbox. | ||
|utiltname= | |utiltname= | ||
|utiltdmg= | |utiltdmg=7.2% | ||
|utiltdesc= | |utiltdesc=Waves her arm in an overhead arcing motion while her hand is infused with magical energy. Due to it hitting on frame 7 and having minimal ending lag, it is a reliable combo starter. It can combo into itself, neutral attack, forward smash, [[Nayru's Love]], and [[Farore's Wind]] at low percentages; into neutral aerial from low to medium percentages; and up aerial at medium percentages. It is also decent as an anti-air attack. | ||
|dtiltname= | |dtiltname= | ||
|dtiltdmg= | |dtiltdmg=5.5% | ||
|dtiltdesc= | |dtiltdesc=A kneeling shin kick. Due to it hitting on frame 5, it is Zelda's fastest tilt attack. However, unlike in ''SSB4'', it has minimal combo potential, mostly serving as a fast safe poke. | ||
|dashname= | |dashname= | ||
|dashdmg= | |dashdmg= 12% (clean sweetspot), 9% (clean sourspot), 6% (late) | ||
|dashdesc= | |dashdesc=A double palm thrust that emits a blast of magical energy from her hands, similarly to {{SSB4|Peach}}'s dash attack. Due to it hitting on frame 6, it is one of the fastest dash attacks in the game. To compliment this, its sweetspot's base is strong enough to KO middleweights at around 99% while near the edge of Final Destination. However, it has noticeable ending lag, while its other hitboxes lack KO potential. | ||
|fsmashname= | |fsmashname= | ||
|fsmashdmg= | |fsmashdmg={{ChargedSmashDmgSSBU|1}} (hits 1-4), {{ChargedSmashDmgSSBU|13}} (hit 5) | ||
|fsmashdesc= | |fsmashdesc=A palm thrust that emits a multiple-hitting blast of magical energy. Its last hit's respectable damage output and very high knockback growth make it strong enough to KO middleweights at around 65% while near the edge of Final Destination. Its multiple hits also make it useful for pressuring shields, especially when it is charged. Due to it hitting on frame 16, however, it has the highest start-up lag out Zelda's smash attacks. It also has a punishable amount of ending lag. | ||
|usmashname= | |usmashname= | ||
|usmashdmg= | |usmashdmg={{ChargedSmashDmgSSBU|2}} (hits 1-4), {{ChargedSmashDmgSSBU|0.8}} (hits 5-6), {{ChargedSmashDmgSSBU|5}} (hit 7) | ||
|usmashdesc= | |usmashdesc=Waves her arm twice in an overhead fanning motion while her hand is infused with magical energy. It hits on frame 9, which is fairly fast for a smash attack. When coupled with its multiple hits and its last hit's extremely high knockback growth, it is useful for both KOing and pressuring shields. Its last hit KOs aerial middleweights at around 104% from anywhere on Final Destination. However, it has minimal horizontal range and a punishable amount of ending lag. | ||
|dsmashname= | |dsmashname= | ||
|dsmashdmg= | |dsmashdmg={{ChargedSmashDmgSSBU|12}} (front), {{ChargedSmashDmgSSBU|10}} (back) | ||
|dsmashdesc= | |dsmashdesc=A spinning shin kick. Due to it hitting on frame 5, it is tied with {{SSBU|Mario}}'s, {{SSBU|Dr. Mario}}'s, {{SSBU|Ryu}}'s, and {{SSBU|Ken}}'s down smashes for the second fastest smash attack of any kind in the game, being surpassed only by {{SSB4|Meta Knight}}'s [[buffer]]ed down smash. It is also a [[semi-spike]] that hits on both sides, which make it very useful for punishing rolls or setting up an edge-guard. Although it is Zelda's weakest smash attack, it is still quite powerful, and has rather low ending lag. Its front hit KOs middleweights at around 117% while near the edge of Final Destination. In comparison, its back hit KOs them at around 122% while near the edge of Final Destination. | ||
|nairname= | |nairname= | ||
|nairdmg= | |nairdmg={{ShortHopDmgSSBU|2.5}} (hits 1-4, front), {{ShortHopDmgSSBU|1.5}} (hits 1-4, back), {{ShortHopDmgSSBU|5}} (hit 5) | ||
|nairdesc= | |nairdesc=Spins with her arms outstretched and infused with magical energy. Due to it hitting on frame 6, it is tied with forward and back aerials for the lowest amount of start-up lag out of Zelda's aerials. It has a decent amount of utility: it can be used as a follow-up from down throw; as a combo starter when [[SHFF]]'d; or as an edge-guarding option. However, at higher percents, opponents are liable to being launched out of the multi hit portion, reducing its consistency and reliability. | ||
|fairname= | |fairname=[[Lightning Kick]] | ||
|fairdmg= | |fairdmg={{ShortHopDmgSSBU|20}} (clean foot), {{ShortHopDmgSSBU|4}} (clean leg, late) | ||
|fairdesc= | |fairdesc=A magically-infused flying kick. Its sweetspot is at the tip of her foot, and has both an outstanding damage output and high knockback growth. Its sweetspot KOs middleweights at around 59% while near the edge of Final Destination. Its sweetspot is easier to land if it hits the opponent at the beginning of the move. However, its sourspots lack KO potential and are very unsafe because of their extremely low damage outputs and average knockback growth. Its considerable ending lag also makes it punishable at low percentages, even if it is sweetspotted. | ||
|bairname= | |bairname=Lightning Kick | ||
|bairdmg= | |bairdmg={{ShortHopDmgSSBU|20}} (clean foot), {{ShortHopDmgSSBU|4}} (clean leg, late) | ||
|bairdesc= | |bairdesc=A magically-infused flying kick. It functions almost identically to forward aerial, with the only differences being that its sweetspot has slightly more base knockback and knockback growth. Its sweetspot KOs middleweights at around 54% while near the edge of Final Destination. However, it has the highest amount of landing lag out of Zelda's aerials. | ||
|uairname= | |uairname= | ||
|uairdmg= | |uairdmg={{ShortHopDmgSSBU|17}} | ||
|uairdesc= | |uairdesc=Leans back and turns slightly to extend her arm in order to emit a magical explosion from her index and middle fingers. It is the most damaging up aerial in the game, and when coupled with its consistent hitbox, it is Zelda's most reliable aerial KOing option, KOing middleweights at around 100% from a full hop. It can also clip through the bottom of a stage's edge. However, it hits on frame 14, which makes it tied with down aerial for the highest amount of start-up lag out of Zelda's aerials. It also has punishable ending lag, a short duration, and fairly minimal horizontal range. | ||
|dairname= | |dairname= | ||
|dairdmg= | |dairdmg={{ShortHopDmgSSBU|16}} (clean), {{ShortHopDmgSSBU|5}} (late, leg), {{ShortHopDmgSSBU|4}} (late, foot) | ||
|dairdesc= | |dairdesc=A magically-infused [[Stomp (archetype)|stomp]]. All of its hitboxes are [[meteor smash]]es, with its sweetspot being the most powerful among them. Its sourspot, though significantly weaker, lasts deceptively long, allowing it to potentially gimp fighters with poor recoveries. It also has the lowest landing lag out of Zelda's aerials, which enables its sweetspot to start combos on grounded opponents quite reliably. However, it hits on frame 14, which ties it with up aerial for the highest amount of start-up lag out of Zelda's aerials. | ||
|grabname= | |grabname= | ||
|grabdesc= | |grabdesc=Restrains the opponent with magic. Zelda's grabs have long ranges, but noticeable start-up lag. | ||
|pummelname= | |pummelname= | ||
|pummeldmg= | |pummeldmg=1.3% | ||
|pummeldesc= | |pummeldesc=A blast of magical energy. | ||
|fthrowname= | |fthrowname= | ||
|fthrowdmg= | |fthrowdmg=10% | ||
|fthrowdesc= | |fthrowdesc=Magically spins the opponent in front of herself and then throws them away. It is also useful for setting up edge-guards, but lacks KO potential because of its low knockback growth. | ||
|bthrowname= | |bthrowname= | ||
|bthrowdmg= | |bthrowdmg=12% | ||
|bthrowdesc= | |bthrowdesc=Magically spins the opponent and turns around with them in tow before throwing them away. In addition to being good for setting up edgeguards, it is one of two throws in Zelda's arsenal that has KO potential, KOing middleweights at around 105% while near the edge of Final Destination. | ||
|uthrowname= | |uthrowname= | ||
|uthrowdmg= | |uthrowdmg=11% | ||
|uthrowdesc= | |uthrowdesc=Magically spins the opponent overhead and then throws them upward. It is one of the most damaging up throws in the game, and has both excellent KO potential and decent combo potential, the latter especially being apparent against heavyweights and fast-fallers. It can combo into neutral aerial at low percentages; up aerial at medium percentages; and Farore's Wind at high percentages. However, each of these combos are heavily dependent on the opponent's DI. It can KO middleweights at around 146% from anywhere on Final Destination. | ||
|dthrowname= | |dthrowname= | ||
|dthrowdmg= | |dthrowdmg=1.5% (hits 1-4), 2% (throw) | ||
|dthrowdesc= | |dthrowdesc=Magically shoves the opponent underneath herself and then blasts them with fiery, magical energy from her hands. It launches up and behind Zelda, which allows it to combo into neutral aerial, up aerial and, if timed precisely, back aerial. Its neutral and back aerial combos are easily avoidable with DI, especially past low percentages. In comparison, its up aerial combo is more consistent, especially if Zelda utilizes it with proper timing. Its up aerial combo also boasts the ability to KO any character at high percentages. However, this combo will lose its effectiveness while Zelda has a high level of [[rage]]. | ||
|floorfname= | |floorfname= | ||
|floorfdmg= | |floorfdmg=7% | ||
|floorfdesc= | |floorfdesc=Kicks in front of herself and then behind herself. | ||
|floorbname= | |floorbname= | ||
|floorbdmg= | |floorbdmg=7% | ||
|floorbdesc= | |floorbdesc=Kicks in front of herself and then behind herself. | ||
|floortname= | |floortname= | ||
|floortdmg= | |floortdmg=5% | ||
|floortdesc= | |floortdesc=Kicks around herself. | ||
|edgename= | |edgename= | ||
|edgedmg= | |edgedmg=9% | ||
|edgedesc= | |edgedesc=Performs a kick while climbing up. | ||
|nsname=Nayru's Love | |nsname=Nayru's Love | ||
|nsdmg= | |nsdmg=2% (hits 1-3), 5% (hit 4, close), 4% (hit 4, tip) 1.25× (reflected projectiles) | ||
|nsdesc= | |nsdesc=[[zeldawiki:Nayru's Love|Creates a crystalline barrier around herself]]. The barrier deals damage and [[Reflection|reflects]] projectiles with 25% more power and speed than they originally had. It also grants [[intangibility]] on frames 4-15. However, it has moderate start-up and considerable ending lag. | ||
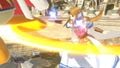
|ssname=Din's Fire | |ssname=Din's Fire | ||
|ssdmg= | |ssdmg=7%-14% (sweetspot), 3.5%-7% (sourspot) | ||
|ssdesc= | |ssdesc=[[zeldawiki:Din's Fire|Launches a magical fireball]]. It can be aimed up or down, and releasing the button causes it to explode. The longer the button is held down, the farther the fireball will travel, and it will automatically detonate when it reaches its maximum distance. Its sweetspot is quite powerful, especially when fully charged. Fully charged sweetspotted Din's Fire KOs middleweights at around 87% while near the edge of Final Destination. However, it is very predictable, and its sourspot is very weak regardless of its charge. | ||
|usname=Farore's Wind | |usname=Farore's Wind | ||
|usdmg= | |usdmg=6% (hit 1), 10% (grounded hit 2 near), 7% (grounded hit 2 far), 12% (aerial hit 2 near), 8% (aerial hit 2 far) | ||
|usdesc= | |usdesc=[[zeldawiki:Farore's Wind|Warps to a given direction]]. It deals damage upon contact while disappearing and while reappearing, and grants intangibility on frames 21-39. When combined with a jump, its travel distance is greatly increased. Its grounded disappearance has very high base knockback, very low knockback growth and launches at 91°, all of which enable it to combo easily into its reappearance when it is aimed upward. In comparison, its reappearance has a sweetspot near Zelda that has a decent damage output, high base knockback and high knockback growth, all of which make it very reliable at KOing, especially near the upper blast line. Its sweetspotted reappearance KOs middleweights at around 68% while near the upper blast line of Final Destination and in conjunction with the initial grounded hit, while the grounded reappearance can KO middleweights at around 71% from the edge of Final Destination. However, its reappearance has a sourspot that, although safe, lacks KO potential because of its lower damage output and average base knockback, and due to it incuring [[helpless]]ness, it is highly punishable if whiffed. | ||
|dsname=Phantom Slash | |dsname=Phantom Slash | ||
|dsdmg= | |dsdmg=4.7% (level 1), 6.6% (level 2), 9.4% (level 3) 12.2% (level 4), 14.1% (level 5) | ||
|dsdesc= | |dsdesc=Conjures a {{s|zeldawiki|Phantom}} piece by piece and propels it forward with another button press. Serves as a projectile with varying attacks reaching various levels of damage and distance depending on charge. When fully charged, the phantom will delay its attack for around a second, giving Zelda time to add pressure or to retreat for protection. When fully charged, the phantom can KO middleweights at around 84% from the edge of Final Destination. | ||
|fsname=Triforce of Wisdom | |fsname=Triforce of Wisdom | ||
|fsdmg= | |fsdmg=7% (initial vacuum), 3% (subsequent vacuum), 60% total (main) | ||
|fsdesc= | |fsdesc=Zelda generates a triangular portal that sucks in opponents using massive periodic shockwaves. Upon catching an opponent, they will either be launched with poor knockback, or if they reach at or above 100%, they are instantly KOed. Very difficult to avoid on smaller stages due to its long length and large vacuum hitboxes. | ||
}} | }} | ||
Revision as of 15:22, February 9, 2019

| Zelda in Super Smash Bros. Ultimate | |
|---|---|
 
| |
| Universe | The Legend of Zelda |
| Other playable appearances | in Melee in Brawl in SSB4 |
| Availability | Unlockable |
| Final Smash | Triforce of Wisdom |
| “ | You might recognize Zelda's look from The Legend of Zelda: A Link Between Worlds game. In battle she uses magical moves to reflect and teleport, and for her Final Smash, she seals her opponents away in the Triforce of Wisdom. If an opponent has 100% damage or more, they will be instantly KO'd! | ” |
| —Super Smash Blog, Super Smash Bros. Ultimate Official Site | ||
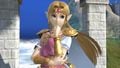
Zelda (ゼルダ, Zelda) is a playable character in Super Smash Bros. Ultimate. She was confirmed as a playable character on June 12, 2018. Zelda is classified as fighter #17.
Zelda is voiced in-game by Ayumi Fujimura, who previously voiced the character in The Legend of Zelda: A Link Between Worlds. She speaks a single line in the Adventure Mode: World of Light opening, voiced by Fujimura in Japanese and dubbed in English by Brandy Kopp.
How to unlock
Complete one of the following:
- Play VS. matches, with Zelda being the 2nd character to be unlocked.
- Clear Classic Mode with Kirby or any character in his unlock tree, being the fourth character unlocked after Pac-Man.
- Have Zelda join the player's party in World of Light.
With the exception of the third method, Zelda must then be defeated on Temple.
Changes from Super Smash Bros. 4
In addition to a visual redesign, Zelda has been significantly buffed in Ultimate. Many of her moves have reduced startup and endlag and improved KO potential. Previously the slowest jab in the game, Zelda's jab comes out quicker and can KO at higher percents. Dash attack and up throw have enhanced knockback power, allowing Zelda to more easily secure KOs. Her special moves have seen the most improvements. Nayru's Love has one more frame of invulnerability and allows her to move in the air while during use. Din's Fire no longer puts her in freefall, travels in a tighter arc, and has better use offstage due to the new airdodge nerfs. Farore's Wind is faster, preserves more momentum, and allows Zelda to drift sooner upon reappearing. The biggest change she receives is the reworking of Phantom. Phantom Slash now assembles in six stages, with the final stage being able to use for trap setups, edgeguarding, and approaching. Zelda can also summon a new Phantom quicker than before. Her new Final Smash, Triforce of Wisdom, is better at trapping opponents and will secure a KO for anyone over 100% at the end of the move.
Nevertheless, she has some noticeable nerfs. Forward tilt has more startup and endlag. Her grabs have more endlag, making them more risky to use in neutral to start combos. Farore's Wind travels a shorter distance, hindering her recovery and edgeguarding ability. Since Phantom is formed behind Zelda, and when sent forward has to make up the distance to where it would have appeared from the portal in Smash 4, this makes her more vulnerable when using the move. If Zelda gets grabbed or takes any damage before the Phantom attacks, the Phantom will collapse. This makes Phantom Slash a move better used in the advantage state. Furthermore, although now they are less significantly hindering, she still retains her previous Smash iterations' weaknesses, those being poor range, terrible sourspots, lackluster neutral, and slow movement.
Despite these nerfs and weaknesses, people consider this to be the best Zelda has ever been in a Super Smash Bros. game.
Aesthetics
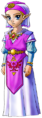
 Zelda's appearance is based on her design from The Legend of Zelda: A Link to the Past [1][2][3] and A Link Between Worlds.[4].
- Zelda always faces the screen regardless of which direction she turns, causing all of her animations to be mirrored.
- Zelda hangs onto the ledge with one hand.
- Zelda is more positively expressive, boasting a cheery smile during several animations.
- Many of Zelda's attacks produce brighter, flashier magical effects.
- Zelda's standing pose, idle poses, walking animation, up taunt, and down taunt have been changed.
- All of Zelda's victory poses have been changed:
- For the first, she conjures a small flame out of her finger and swirls it around playfully.
- For the second, she summons the Phantom armor and proudly poses in front of it.
- For the third, she emits magic out of two fingers and points at the screen.
Attributes
 Like all characters, Zelda's jumpsquat is now 3 frames (down from 6 frames).
- Zelda's initial dash speed (1.6 → 1.958) and running speed (1.3 → 1.43) are faster.
- Zelda walks slightly faster (0.87 → 0.914).
- Zelda's air speed is slightly faster (1.04 → 1.092).
- Zelda jumps higher.
- Zelda's spotdodge has one less frame of endlag (FAF 28→27) and one less frame of intangibility (3-18→3-17).
 Forward roll has less intangibility (4-17→4-15).
- Back roll has less intangibility (4-17→5-16) and more endlag (31→36).
- As with all fighters, Zelda's directionless airdodge has significantly more endlag (34-57), and she can now only air dodge once before needing to touch the ground, grab the ledge, or receive hitstun from a move.
- Zelda's directionless airdodge has more intangibility (3-28→3-30) and less landing lag (21 → 11).
- With the addition of directional airdodges, Zelda has has intangibility on frames 3-21, her FAF is 130, and it has more landing lag than her directionless air dodge (FAF 20).
- Zelda's full hop has less air time. This makes her faster for movement purposes but means she has less time to hit opponents with aerials (frames of air time 62 → 57)
Ground Attacks
- Neutral attack:
- Neutral attack is now a rapid jab with a finishing hit.
- Neutral attack has less startup (frame 11 → 4). Previously the slowest jab in the game, its speed is now on par with many other characters’ neutral attacks.
- Neutral attack's final hit deals much more knockback.
- Neutral attack has more endlag, is less safe on shield, and no longer reliably combos into dash attack or dash grab at low percents.
- The first hit of neutral attack has less hitstun, making it unsafe when used on its own.
- Dash attack:
- Dash attack deals more knockback, allowing it to KO much sooner.
- Dash attack has less endlag (FAF 40 → 36).
- Forward tilt:
- Forward tilt deals more knockback.
- Forward tilt no longer has a blindspot directly in front of Zelda. Instead, if she is close to another character, her lunge animation will push her backwards to allow the hitbox to connect.
- Forward tilt has more startup (10 → 12), and slightly more endlag (FAF 36 → 37), hindering its combo potential and making it riskier in neutral.
- Up tilt:
- Up tilt has a longer hitbox duration (7-18 → 7-19).
- Down tilt:
- Down tilt has slightly less endlag (25 → 22).
- Down tilt sends at a worse angle for comboing (80 degrees → 60 degrees).
- Forward smash:
- Forward smash deals more knockback.
- Up smash:
- Up smash has more horizontal range.
- Up smash deals more damage (10.4%→14.8% when uncharged).
- Up smash no longer pulls opponents standing on either side of her into the looping hitboxes as easily.
Aerial Attacks
- All aerials have less landing lag (19 → 16 (neutral aerial), 23 → 14 (forward aerial), 25 → 17 (back aerial), 19 → 13 (up aerial), 18 → 13 (down aerial).
- Neutral air now can launch opponents that touch the outer edges the first hitbox in its upper part, meaning opponents will not be pulled into the subsequent hits, making combos slightly more difficult.
- Neutral air's hits deals less damage (Front hits 1-4 2.5→2.1% Back hits 1-4 1.5→1.2% last hit 5→4.2%).
- Forward air is faster (frame 9 → 6), now being as fast as back aerial.
- Both lighting kicks deals more knockback
- Both lighting kicks now have less endlag (FAF 53 → 50).
- Lightning Kicks and down air have unique sound effects, even if the sweetspot misses.
Grabs and Throws
- Standing grab has more endlag (FAF 38 → 40).
- Pummel is faster.
- Pummel deals significantly less damage (3%→1.3%).
- Zelda grabs and pummels opponents with one hand instead of two.
- Forward throw, back throw, and up throw have altered animations, and Zelda's hands emit brighter trails of magic.
- Dash grab has slightly more startup and endlag (first frame of grab hitbox 11 → 13) (FAF 47 → 48). This means it is still one of the slowest non-tether dash grabs.
- Pivot grab has more startup (first frame of grab hitbox 11 → 14).
- Pivot grab has less endlag (FAF 45 → 43).
- Forward throw:
- Forward throw deals less damage (12% → 10%), and much less knockback growth, diminishing its KO potential despite receiving a base knockback increase.
- Up throw:
- Up throw has much more knockback growth, now having the ability to combo to low at mid percents and KO at high percents.
- Back throw:
- Back throw deals more damage (11% → 12%) and significantly more knockback, improving its KO potential.
- Down throw:
- Down throw's looping hits deal more damage (1% → 1.5%) bringing the total damage from 6% to 8%
- Down throw deals more knockback, weakening its combo potential at very high percents.
- Down throw can no longer connect with up aerial at low-mid percents, but can lead to a sweetspot back air.
Special Moves
- Nayru's Love:
- Nayru's Love's intangibility starts at least 1 frame earlier (5 → 4).
- Nayru's Love no longer halts vertical momentum, allowing Zelda to move in the air while using the move. As well, during the move, horizontal momentum is slightly controllable
- Nayru's Love has less endlag (60→58).
- Nayru's Love hitbox appears earlier (13→11).
- Din's Fire:
- Din's Fire no longer leaves Zelda helpless in the air.
- Din's Fire can travel slightly farther and its trajectory can be more controlled.
- The changes to airdodge mechanics indirectly improve Din's Fire's edgeguarding utility. Since airdodges are riskier to use offstage, recovering opponents are left in a more vulnerable position if they try to avoid Din's Fire.
- Din's Fire deals more knockback, and the sweetspot appears to be larger than it was previously.
- Din's Fire's flame has a more stylized appearance.
- Farore's Wind:
- Farore's Wind has less startup and endlag. (Active frame 8 → 6).
- Farore's Wind travels faster after disappearing and preserves more momentum when used right after a jump.
- Zelda can drift in the air much sooner after reappearing.
- Farore Wind's first hitbox is slightly bigger and the second hitbox is much bigger, especially in the air.
- Farore Wind's sweetspot is bigger.
- Farore Wind has less endlag (81→77).
- Farore's Wind travels a shorter distance.
- Farore's Wind now shows small green orbs that move in the direction Zelda is moving while before reappearing.
- Farore's Wind produces a more intense green/yellow vortex at the start and end of the move.
- Phantom Slash:
- Phantom Slash has been heavily reworked. The Phantom armor now assembles itself behind Zelda rather than appearing fully formed out of a portal in front of her. It is now a single-press chargeable move; Pressing B again will cause the incomplete armor to attack at its current charge level. The move has six charge levels, each resulting in a different attack:
- 1. Kick (Frame 16)
- 2. Punch (Frame 21)
- 3. Outward slash (Frame 28)
- 4. Downward slash (Frame 38)
- 5. Upward slash (Frame 50)
- 6. Delayed upward slash (Frame 67)
- Phantom Slash's fully charged attack is now momentarily delayed, allowing Zelda to move around before the Phantom rushes forward. Zelda can set it as a trap and attack the opponent in tandem with the Phantom, or she can retreat behind it for protection. This also discourages the opponent from reflecting the Phantom since she now has enough time to respond with Nayru's Love.
- There is no longer a cooldown if the Phantom is destroyed. Once the armor disappears, the move can be used again.
- Fully charged Phantom deals more knockback.
- Phantom Slash's fully charged attack deals less damage since it no longer hits twice.
- The Phantom charges behind Zelda now, leaving her more vulnerable since it has to travel a short distance before it can hit in front of her.
- Triforce of Wisdom:
- Zelda has a new Final Smash called Triforce of Wisdom. She magically opens a glowing, triangular portal that sucks in the opponent and immobilizes them while dealing damage. If the opponent is at or above 100% damage before the portal closes, they are "sealed away" and instantly KO'd; otherwise, they receive mediocre knockback. Other opponents above 100% damage can be launched significantly if they are within a certain radius of the portal when it closes. As well, before an opponent gets sucked into the portal, it deals very large, periodic shock-waves of damage that launch opponents slightly and help to pull them into the portal itself.
Moveset
Note: All numbers are listed as base damage, without the 1v1 multiplier.
| Name | Damage | Description | ||
|---|---|---|---|---|
| Neutral attack | 2.5% (hits 1-2) | Emits a magic burst, follows up with a series of several magical bursts, and finishes with a final blast. | ||
| 0.2% (loop), 3% (end) | ||||
| Forward tilt | 12% (blade), 10% (arm) | A magically-infused, outward fanning knifehand strike. It can be angled and its sweetspot, which is located on the magically produced blade, possesses respectable power. Its sweetspot KOs middleweights at around 93% while near the edge of Final Destination. Its sourspot, which is located at Zelda's arm, is also reliable for KOing in spite of it being noticeably weaker. Its sourspot KOs middleweights at around 109% while near the edge of Final Destination. However, it has noticeable overall lag and a narrow hitbox. | ||
| Up tilt | 7.2% | Waves her arm in an overhead arcing motion while her hand is infused with magical energy. Due to it hitting on frame 7 and having minimal ending lag, it is a reliable combo starter. It can combo into itself, neutral attack, forward smash, Nayru's Love, and Farore's Wind at low percentages; into neutral aerial from low to medium percentages; and up aerial at medium percentages. It is also decent as an anti-air attack. | ||
| Down tilt | 5.5% | A kneeling shin kick. Due to it hitting on frame 5, it is Zelda's fastest tilt attack. However, unlike in SSB4, it has minimal combo potential, mostly serving as a fast safe poke. | ||
| Dash attack | 12% (clean sweetspot), 9% (clean sourspot), 6% (late) | A double palm thrust that emits a blast of magical energy from her hands, similarly to Peach's dash attack. Due to it hitting on frame 6, it is one of the fastest dash attacks in the game. To compliment this, its sweetspot's base is strong enough to KO middleweights at around 99% while near the edge of Final Destination. However, it has noticeable ending lag, while its other hitboxes lack KO potential. | ||
| Forward smash | 1% (hits 1-4), 13% (hit 5) | A palm thrust that emits a multiple-hitting blast of magical energy. Its last hit's respectable damage output and very high knockback growth make it strong enough to KO middleweights at around 65% while near the edge of Final Destination. Its multiple hits also make it useful for pressuring shields, especially when it is charged. Due to it hitting on frame 16, however, it has the highest start-up lag out Zelda's smash attacks. It also has a punishable amount of ending lag. | ||
| Up smash | 2% (hits 1-4), 0.8% (hits 5-6), 5% (hit 7) | Waves her arm twice in an overhead fanning motion while her hand is infused with magical energy. It hits on frame 9, which is fairly fast for a smash attack. When coupled with its multiple hits and its last hit's extremely high knockback growth, it is useful for both KOing and pressuring shields. Its last hit KOs aerial middleweights at around 104% from anywhere on Final Destination. However, it has minimal horizontal range and a punishable amount of ending lag. | ||
| Down smash | 12% (front), 10% (back) | A spinning shin kick. Due to it hitting on frame 5, it is tied with Mario's, Dr. Mario's, Ryu's, and Ken's down smashes for the second fastest smash attack of any kind in the game, being surpassed only by Meta Knight's buffered down smash. It is also a semi-spike that hits on both sides, which make it very useful for punishing rolls or setting up an edge-guard. Although it is Zelda's weakest smash attack, it is still quite powerful, and has rather low ending lag. Its front hit KOs middleweights at around 117% while near the edge of Final Destination. In comparison, its back hit KOs them at around 122% while near the edge of Final Destination. | ||
| Neutral aerial | 2.5% (hits 1-4, front), 1.5% (hits 1-4, back), 5% (hit 5) | Spins with her arms outstretched and infused with magical energy. Due to it hitting on frame 6, it is tied with forward and back aerials for the lowest amount of start-up lag out of Zelda's aerials. It has a decent amount of utility: it can be used as a follow-up from down throw; as a combo starter when SHFF'd; or as an edge-guarding option. However, at higher percents, opponents are liable to being launched out of the multi hit portion, reducing its consistency and reliability. | ||
| Forward aerial | Lightning Kick | 20% (clean foot), 4% (clean leg, late) | A magically-infused flying kick. Its sweetspot is at the tip of her foot, and has both an outstanding damage output and high knockback growth. Its sweetspot KOs middleweights at around 59% while near the edge of Final Destination. Its sweetspot is easier to land if it hits the opponent at the beginning of the move. However, its sourspots lack KO potential and are very unsafe because of their extremely low damage outputs and average knockback growth. Its considerable ending lag also makes it punishable at low percentages, even if it is sweetspotted. | |
| Back aerial | Lightning Kick | 20% (clean foot), 4% (clean leg, late) | A magically-infused flying kick. It functions almost identically to forward aerial, with the only differences being that its sweetspot has slightly more base knockback and knockback growth. Its sweetspot KOs middleweights at around 54% while near the edge of Final Destination. However, it has the highest amount of landing lag out of Zelda's aerials. | |
| Up aerial | 17% | Leans back and turns slightly to extend her arm in order to emit a magical explosion from her index and middle fingers. It is the most damaging up aerial in the game, and when coupled with its consistent hitbox, it is Zelda's most reliable aerial KOing option, KOing middleweights at around 100% from a full hop. It can also clip through the bottom of a stage's edge. However, it hits on frame 14, which makes it tied with down aerial for the highest amount of start-up lag out of Zelda's aerials. It also has punishable ending lag, a short duration, and fairly minimal horizontal range. | ||
| Down aerial | 16% (clean), 5% (late, leg), 4% (late, foot) | A magically-infused stomp. All of its hitboxes are meteor smashes, with its sweetspot being the most powerful among them. Its sourspot, though significantly weaker, lasts deceptively long, allowing it to potentially gimp fighters with poor recoveries. It also has the lowest landing lag out of Zelda's aerials, which enables its sweetspot to start combos on grounded opponents quite reliably. However, it hits on frame 14, which ties it with up aerial for the highest amount of start-up lag out of Zelda's aerials. | ||
| Grab | — | Restrains the opponent with magic. Zelda's grabs have long ranges, but noticeable start-up lag. | ||
| Pummel | 1.3% | A blast of magical energy. | ||
| Forward throw | 10% | Magically spins the opponent in front of herself and then throws them away. It is also useful for setting up edge-guards, but lacks KO potential because of its low knockback growth. | ||
| Back throw | 12% | Magically spins the opponent and turns around with them in tow before throwing them away. In addition to being good for setting up edgeguards, it is one of two throws in Zelda's arsenal that has KO potential, KOing middleweights at around 105% while near the edge of Final Destination. | ||
| Up throw | 11% | Magically spins the opponent overhead and then throws them upward. It is one of the most damaging up throws in the game, and has both excellent KO potential and decent combo potential, the latter especially being apparent against heavyweights and fast-fallers. It can combo into neutral aerial at low percentages; up aerial at medium percentages; and Farore's Wind at high percentages. However, each of these combos are heavily dependent on the opponent's DI. It can KO middleweights at around 146% from anywhere on Final Destination. | ||
| Down throw | 1.5% (hits 1-4), 2% (throw) | Magically shoves the opponent underneath herself and then blasts them with fiery, magical energy from her hands. It launches up and behind Zelda, which allows it to combo into neutral aerial, up aerial and, if timed precisely, back aerial. Its neutral and back aerial combos are easily avoidable with DI, especially past low percentages. In comparison, its up aerial combo is more consistent, especially if Zelda utilizes it with proper timing. Its up aerial combo also boasts the ability to KO any character at high percentages. However, this combo will lose its effectiveness while Zelda has a high level of rage. | ||
| Floor attack (front) | 7% | Kicks in front of herself and then behind herself. | ||
| Floor attack (back) | 7% | Kicks in front of herself and then behind herself. | ||
| Floor attack (trip) | 5% | Kicks around herself. | ||
| Edge attack | 9% | Performs a kick while climbing up. | ||
| Neutral special | Nayru's Love | 2% (hits 1-3), 5% (hit 4, close), 4% (hit 4, tip) 1.25× (reflected projectiles) | Creates a crystalline barrier around herself. The barrier deals damage and reflects projectiles with 25% more power and speed than they originally had. It also grants intangibility on frames 4-15. However, it has moderate start-up and considerable ending lag. | |
| Side special | Din's Fire | 7%-14% (sweetspot), 3.5%-7% (sourspot) | Launches a magical fireball. It can be aimed up or down, and releasing the button causes it to explode. The longer the button is held down, the farther the fireball will travel, and it will automatically detonate when it reaches its maximum distance. Its sweetspot is quite powerful, especially when fully charged. Fully charged sweetspotted Din's Fire KOs middleweights at around 87% while near the edge of Final Destination. However, it is very predictable, and its sourspot is very weak regardless of its charge. | |
| Up special | Farore's Wind | 6% (hit 1), 10% (grounded hit 2 near), 7% (grounded hit 2 far), 12% (aerial hit 2 near), 8% (aerial hit 2 far) | Warps to a given direction. It deals damage upon contact while disappearing and while reappearing, and grants intangibility on frames 21-39. When combined with a jump, its travel distance is greatly increased. Its grounded disappearance has very high base knockback, very low knockback growth and launches at 91°, all of which enable it to combo easily into its reappearance when it is aimed upward. In comparison, its reappearance has a sweetspot near Zelda that has a decent damage output, high base knockback and high knockback growth, all of which make it very reliable at KOing, especially near the upper blast line. Its sweetspotted reappearance KOs middleweights at around 68% while near the upper blast line of Final Destination and in conjunction with the initial grounded hit, while the grounded reappearance can KO middleweights at around 71% from the edge of Final Destination. However, its reappearance has a sourspot that, although safe, lacks KO potential because of its lower damage output and average base knockback, and due to it incuring helplessness, it is highly punishable if whiffed. | |
| Down special | Phantom Slash | 4.7% (level 1), 6.6% (level 2), 9.4% (level 3) 12.2% (level 4), 14.1% (level 5) | Conjures a Phantom piece by piece and propels it forward with another button press. Serves as a projectile with varying attacks reaching various levels of damage and distance depending on charge. When fully charged, the phantom will delay its attack for around a second, giving Zelda time to add pressure or to retreat for protection. When fully charged, the phantom can KO middleweights at around 84% from the edge of Final Destination. | |
| Final Smash | Triforce of Wisdom | 7% (initial vacuum), 3% (subsequent vacuum), 60% total (main) | Zelda generates a triangular portal that sucks in opponents using massive periodic shockwaves. Upon catching an opponent, they will either be launched with poor knockback, or if they reach at or above 100%, they are instantly KOed. Very difficult to avoid on smaller stages due to its long length and large vacuum hitboxes. | |
Victory poses
- Creates magic with her fingertips and waves it around.
- Creates fire from her fingertip and waves it around while giggling.
- Summons a Phantom and poses with it.


Classic Mode: Wisdom Prevails
All of Zelda's battles are on The Legend of Zelda themed stages, and her opponents are all villains.
| Round | Opponent | Stage | Music | Notes |
|---|---|---|---|---|
| 1 | Wario | Great Plateau Tower | Main Theme - The Legend of Zelda: Breath of the Wild | |
| 2 | Bowser | Skyloft | Ballad of the Goddess | |
| 3 | 5 Mii Swordfighters | Temple | Temple Theme | Mii Swordfighters are dressed in Yiga Clan costumes. |
| 4 | King K. Rool | Bridge of Eldin | Dark World (for 3DS / Wii U) | CPU is Giant |
| 5 | Dark Samus | Gerudo Valley | Hidden Mountain & Forest | |
| 6 | 4 Dark Links | Hyrule Castle | Great Temple / Temple | |
| Bonus Stage | ||||
| Final | Ganondorf/Ganon | ? | Calamity Ganon Battle - Second Form (Ganondorf) Death Mountain (Ganon) |
Ganondorf transforms into Ganon upon defeat. |
Role in World of Light
Zelda was among the fighters that were summoned to fight the army of Master Hands.
During the opening cutscene, Zelda tried to rally the other fighters to fight the army of Master Hands by saying, "Stow your fear; it's now or never!", and was present when Galeem unleashed his beams of light. She and Mewtwo attempted to reflect the beams using Nayru's Love and Confusion, respectively, but this attempt failed, and both of them were vaporized and placed under Galeem's imprisonment along with the rest of the fighters (excluding Kirby).
Zelda was one of the many fighters that fell under Dharkon's control upon Galeem's first defeat. She is unlocked in the Sacred Realm of the World of Dark on the bottom left corner of the land which makes up the Triforce of Wisdom. The player must defeat the Spirit of Impa (which is revealed by solving a clock-based puzzle) to clear a boulder that's blocking the path to her unlock battle and then the Spirit of Uxie, Mesprit & Azelf. Unlocking her reveals the Triforce of Wisdom in the center of the map. If Young Link is unlocked, the boulders leading to Cloud's unlock battle and the Master Sword clear out.
Zelda is later seen among several other fighters, making their last stand against Galeem and Dharkon. She is also seen in the bad ending where Galeem emerges victorious against Dharkon, witnessing Galeem engulf the world in light.
Spirits
Zelda's Fighter Spirit can be obtained by completing Classic Mode. It is also available periodically for purchase in the shop for 500 coins. Unlocking Zelda in World of Light allows the player to preview the first spirit below in the Spirit List under the name "???". As a Fighter Spirit, it cannot be used in Spirit Battles and is purely aesthetic. Each Fighter Spirit has an alternate version that replaces them with their artwork in Ultimate.
Additionally, Zelda makes an appearance in various Primary and Support Spirits.

173. Zelda
189. Young Zelda
190. Zelda (Ocarina of Time)
- Botwzelda.png
238. Zelda (Breath of the Wild)
247. Zelda (The Wind Waker)

259. Zelda (Spirit Tracks)

.png)
.png)
Alternate costumes

| |||||||

|

|

|

|

|

|

|

|
Gallery
Artwork of all The Legend of Zelda characters, as posted on the official Legend of Zelda Twitter account.
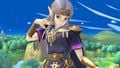
Zelda's fighter card.
Zelda on Temple.

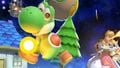
Using her neutral aerial in her red costume on Tortimer Island.
Zelda using her forward tilt on King Dedede on Coliseum.
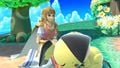
Kneeling next to a sleeping Pichu on Tortimer Island.
Using Farore's Wind on Luigi's Mansion.
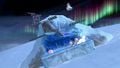
Posing in her dark costume on Spirit Train.
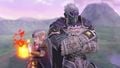
Zelda taunting next to Ganondorf on Hyrule Castle.
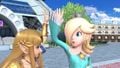
Zelda giving Rosalina a high-five on Prism Tower.
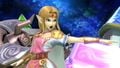
Firing a Super Scope at Yoshi on Mario Galaxy.
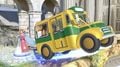
Taunting near Donkey Kong on Kapp'n's bus on Temple.
Zelda, Ridley, Jigglypuff, and the Ice Climbers on Summit.
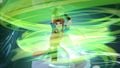
Using Phantom Slash on Mario Galaxy.
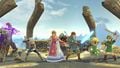
With all playable The Legend of Zelda veterans on the Great Plateau Tower.
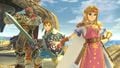
With Link and Ganondorf on the Great Plateau Tower.


Character Showcase Video
Trivia
- Masahiro Sakurai chose to base Zelda's design in Ultimate off of her A Link to the Past and A Link Between Worlds incarnation instead of her more recent Breath of the Wild incarnation because that version of Zelda, according to him, "is more into research than fighting."[1][2][3][4]
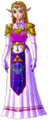
- Zelda's current default design was previously an alternate costume in terms of coloration of her model, while her previous default design based on Twilight Princess has now become an alternate costume in that same regard.
- Coincidentally, Zelda was revealed in Smash 4 at the same time A Link Between Worlds was released, which inspired her current design.
- Zelda is currently the only playable Legend of Zelda character in Smash whose design originates from a handheld game rather than a home console game.
- Additionally, seeing as she is based on A Link to the Past, this also makes her the only playable Zelda character whose design originates from a non-3D game.
- The World of Light trailer marks the first time Zelda has spoken with dialogue in the Smash series.
- Zelda speaks English in all Western language versions of Ultimate, unlike her Breath of the Wild incarnation who was dubbed into multiple languages. She is also the first character since Fox and Falco in Melee to have her cutscene dialogue dubbed in English, but to keep her Japanese voice actress' battle grunts in Western versions.
References
- ^ a b Masahiro Sakurai (translated by Brando) (2018-06-20). "Smash is Special – Part 1" Sakurai's Famitsu Column Vol. 557. SourceGaming.info (original Japanese publication in Famitsu). Retrieved on 2018-06-20. “Zelda's new design is based on "The Legend of Zelda: A Link to the Past"”
- ^ a b Dairantou Smash Bros. SPECIAL (E3 2018). Nintendo (2018-06-12). Retrieved on 2018-07-08. “Breath of the Wild Zelda isn't interested in combat, so her design is from A Link to the Past.”
- ^ a b Super Smash Bros. Ultimate (North America) - Palutena's Guidance: "Yes, that's Zelda from A Link to the Past. She's a descendant of the Seven Sages. When she was captured, she used telepathy to ask Link for help."
- ^ a b Super Smash Bros. Ultimate - E3 2018. Nintendo (2018-06-12). Retrieved on 2018-07-08. “In The Legend of Zelda: Breath of the Wild, Zelda's more into research than fighting, so her design is from The Legend of Zelda: A Link Between Worlds”