Ken (SSBU): Difference between revisions
m (→Update history) |
m (Wikipedia links) |
||
| (266 intermediate revisions by 91 users not shown) | |||
| Line 1: | Line 1: | ||
{{ArticleIcons|ultimate=y}} | {{ArticleIcons|ultimate=y}} | ||
{{ | {{Disambig2|Ken's appearance in ''Super Smash Bros. Ultimate''|the character in other contexts|Ken Masters}} | ||
{{Infobox Character | {{Infobox Character | ||
|name = Ken | |name = Ken | ||
| Line 6: | Line 6: | ||
|game = SSBU | |game = SSBU | ||
|availability = [[Unlockable character|Unlockable]] | |availability = [[Unlockable character|Unlockable]] | ||
|tier = B- | |||
|ranking = 45 | |||
}} | }} | ||
:{{cquote|Ken Turns Up the Heat! | :{{cquote|''Ken Turns Up the Heat!''|cite=Introduction tagline}} | ||
'''Ken''' ({{ja|ケン|Ken}}, ''Ken'') is a playable character in ''[[Super Smash Bros. Ultimate]]''. He is the third fighter from [[Capcom]] after {{SSBU|Mega Man}} and {{SSBU|Ryu}}. He was announced as a newcomer during the November 1st, 2018 [[Nintendo Direct|Super Smash Bros. Ultimate Direct]], alongside {{SSBU|Incineroar}} and {{SSBU|Piranha Plant}}. Despite being a semi-clone, Ken is Ryu's [[Echo Fighter]] (and was the final Echo Fighter to be revealed), thus being classified as [[Fighter number|Fighter #60<sup>ε</sup>]]. | |||
'''Ken''' ({{ja|ケン|Ken}}, ''Ken'') is a playable character in ''[[Super Smash Bros. Ultimate]]''. He was announced as a newcomer during the November 1st, 2018 [[Nintendo Direct|Super Smash Bros. Ultimate Direct]], alongside {{SSBU|Incineroar}} and {{SSBU|Piranha Plant}}. | |||
Reuben Langdon, | {{iw|wikipedia|Reuben Langdon}}, Ken's English voice actor from ''Street Fighter IV'' and ''Street Fighter V'', reprises his role in the overseas versions, including the Chinese and Korean versions. His Japanese voice actor since ''Street Fighter III: Third Strike'', {{iw|wikipedia|Yuji Kishi}}, reprises his role exclusively in the Japanese version. ''Ultimate'' is the last game where {{iw|wikipedia|Reuben Langdon}} voices Ken in English, as {{iw|wikipedia|David Matranga}} is his current English voice actor in ''Street Fighter 6''. | ||
Ken is ranked 45th out of 82 on the current tier list, placing him in the B- tier. Ken is known as the more aggressive shoto, being able to dish out huge amounts of damage from his multitude of combos and strings, finishing off his opponents with strong KO confirms into his [[Shoryuken]]. Like his fellow ''Street Fighter'' friend, Ken has a lot of good frame data on his moves and the distinction of having the auto-turnaround mechanic which allows him to perform his combos easier and more reliably. His Shoryuken in particular is great as an anti-air with high knockback growth when the last hit connects or when all hits on the ground connect with each other. | |||
However, Ken shares nearly the same amount of weaknesses as Ryu, being fairly easy to combo reliably and easily edgeguarded if one reads his linear recovery route. In addition, unlike Ryu, Ken is vulnerable to some of his moves being able to be escaped via SDI, such as his Shoryuken and Tatsumaki Senpukyaku, allowing his opponent to punish him for landing those moves. Finally, Ken is forced to approach in a lot of matchups with his limited amount of approach options, making him linear overall. | |||
Overall, Ken is seen as a capable and viable fighter in the right hands with his strong advantage state and combo ability, and players can choose to play either Ken or Ryu, depending on the matchup or mood. For example, if the matchup requires an aggressive game plan, then Ken is the optimal choice, and vice versa. Ken has seen solid results and decent representation from players, such as {{Sm|Takera}} and {{Sm|Jahzz0}}, to name a few. | |||
==How to unlock== | ==How to unlock== | ||
Complete one of the following: | Complete one of the following: | ||
*Play [[VS. match]]es, with Ken being the 57th character to be unlocked. | *Play [[VS. match]]es, with Ken being the 57th character to be unlocked. | ||
*Clear {{SSBU|Classic Mode}} with {{SSBU|Yoshi}} or | *Clear {{SSBU|Classic Mode}} with {{SSBU|Yoshi}} or any character in his unlock tree, being the last character unlocked after {{SSBU|Chrom}}. | ||
*Have Ken join the player's party in [[World of Light]]. | *Have Ken join the player's party in [[World of Light]]. | ||
Ken must then be defeated on [[Boxing Ring]] (the [[Ω form]] is used in World of Light). | |||
==Attributes== | ==Attributes== | ||
As the more aggressive "shoto" compared to {{SSBU|Ryu}}, Ken shares most of his attributes with some slight tweaks. As a [[weight|heavyweight]] with average mobility, Ken has decent frame data and damage output, as well as a dependable ground game due to his decent [[traction]] and above-average [[dash]]ing speed. However, other attributes are polarized in an attempt to replicate the physics of ''Street Fighter''; Ken's [[walk]]ing speed is extremely slow, and while his [[air speed]] is above average, this is counteracted by his moderately high [[falling speed]] and short jumps. Additionally, he has very low [[air acceleration]], and his [[air friction]] is uniquely locked at 0 while jumping, causing his jumps to follow a fixed "arc" unless the player steers them manually. Finally, Ken's fast fall increases his falling speed by 40% instead of the usual 60%. Overall, this grants Ken effective burst movement through dashing and jumping, but forces him to commit when approaching through the air and makes it difficult to land or move short distances. | |||
Despite his average attributes, Ken is one of the most unique fighters in ''Ultimate'', as he has access to many variations of both his standard and special attacks (a trait only shared with his base fighter, {{SSBU|Ryu}}). His jab and tilts can either be held or tapped; tapped attacks are faster and usually combo well into themselves, while held attacks have greater KO potential and can serve as combo finishers. This also applies to his special moves (other than [[Focus Attack]]), which gain different effects like increased power or altered hitboxes when the button is held; they also see an increase in power when used with the original ''Street Fighter'' inputs. This effectively gives Ken two movesets—one for starting combos and racking up damage, and the other for scoring KOs. This versatility gives him access to potent [[true combo]]s and mix-ups, leading to a strong punish game overall. | Despite his average attributes, Ken is one of the most unique fighters in ''Ultimate'', as he has access to many variations of both his standard and special attacks (a trait only shared with his base fighter, {{SSBU|Ryu}}). His jab and tilts can either be held or tapped; tapped attacks are faster and usually combo well into themselves, while held attacks have greater KO potential and can serve as combo finishers. This also applies to his special moves (other than [[Focus Attack]]), which gain different effects like increased power or altered hitboxes when the button is held; they also see an increase in power when used with the original ''Street Fighter'' inputs. This effectively gives Ken two movesets—one for starting combos and racking up damage, and the other for scoring KOs. This versatility gives him access to potent [[true combo]]s and mix-ups, leading to a strong punish game overall. | ||
Ken's standard attacks are also unique in that most of them (even his tapped tilts) have | Ken's standard attacks are also unique in that most of them (even his tapped tilts) have an increased [[hitlag]] multiplier, often of at least 1.5x, mimicking the impact of hits connecting in traditional fighter games. Consequently, this results in several of his attacks being easier to [[SDI]], especially up tilt due to it also having an increased SDI multiplier, but it also grants the player more time to perform [[Command Input Special Moves|command inputs]] when [[Kara Canceling]] attacks on hit. | ||
Ken's grounded moveset boasts considerable utility. His tapped jab and down tilt both hit on frame 3, making the former useful for relieving pressure, and the latter excellent for extending combos due to its launch trajectory being useful for followups, such as grabs. Tapped up tilt's low knockback, high speed and active frames make it effective for combos, either into itself, [[Shoryuken]], or even down aerial at high percents near the ledge. Held down tilt can be canceled on hit into a special move, making it effective for shield pressure and damage-racking even at high percents. Down smash is | Ken's grounded moveset boasts considerable utility. His tapped jab and down tilt both hit on frame 3, making the former useful for relieving pressure, and the latter excellent for extending combos due to its launch trajectory being useful for followups, such as grabs. Tapped up tilt's low knockback, high speed and active frames make it effective for combos, either into itself, [[Shoryuken]], or even down aerial at high percents near the ledge. Held down tilt can be canceled on hit into a special move, making it effective for shield pressure and damage-racking even at high percents. Down smash is very fast and can cancel into his special moves, and up smash lowers Ken's hurtbox while charging and is quite powerful for its speed. Both tapped forward tilt and held jab are altered at close range, both becoming very potent at starting combos into his special moves. Tapped distant forward tilt is an extremely useful combo starter, leading into a number of options, most notably down aerial and neutral air. Additionally, Ken will automatically face his opponent when there is only one foe left (while standing on the ground), making it considerably easier to land his effective ground attacks. | ||
Ken's aerial moveset is effective as well. Neutral aerial is a [[sex kick]] with low knockback and has only five frames of [[landing lag]], making it useful for combos and kill confirms even at high percents. Forward aerial is quick, highly damaging and has good range; it can be chained into itself through repeated jumps, and its sourspot deals high shield damage. Up aerial has fast startup, a fairly active hitbox and decently high reach, making it useful for juggling. It is also reliably follows up into Shoryuken. Both up and down aerial are also able to auto-cancel from a short hop. | Ken's aerial moveset is effective as well. Neutral aerial is a [[sex kick]] with low knockback and has only five frames of [[landing lag]], making it useful for combos and kill confirms even at high percents. Forward aerial is quick, highly damaging and has good range; it can be chained into itself through repeated jumps, and its sourspot deals high shield damage. Up aerial has fast startup, a fairly active hitbox and decently high reach, making it useful for juggling. It is also reliably follows up into Shoryuken. Both up and down aerial are also able to auto-cancel from a short hop. | ||
| Line 33: | Line 40: | ||
Complementing Ken's moveset and combo potential is his wide array of powerful finishers; some of his held tilts, smash attacks and aerials are very capable KO moves due to their high speed. Held up tilt grants upper body [[intangibility]] on frames 4-10 while hitting on frame 7, making it deceptively safe for KOs when combined with its speed and tapped up tilt setups. Up smash makes an effective substitute for held up tilt as a finisher, and its wide hitbox can catch aerial approaches. Ken's forward smash has long range, fast startup and is his strongest standard ground attack, making it useful for hard punishes. Back aerial is Ken's strongest aerial, and is fast and has good range despite its small hitbox. Forward aerial also serves as a decent KO move, enhancing its already impressive utility. Finally, down aerial is a powerful [[meteor smash]] with fast start-up and long duration, making it a deadly edgeguarding tool. Combined with his excellent combo ability, Ken's punish game is incredibly effective and versatile, being able to rack up damage or KO very easily after connecting with almost any attack. | Complementing Ken's moveset and combo potential is his wide array of powerful finishers; some of his held tilts, smash attacks and aerials are very capable KO moves due to their high speed. Held up tilt grants upper body [[intangibility]] on frames 4-10 while hitting on frame 7, making it deceptively safe for KOs when combined with its speed and tapped up tilt setups. Up smash makes an effective substitute for held up tilt as a finisher, and its wide hitbox can catch aerial approaches. Ken's forward smash has long range, fast startup and is his strongest standard ground attack, making it useful for hard punishes. Back aerial is Ken's strongest aerial, and is fast and has good range despite its small hitbox. Forward aerial also serves as a decent KO move, enhancing its already impressive utility. Finally, down aerial is a powerful [[meteor smash]] with fast start-up and long duration, making it a deadly edgeguarding tool. Combined with his excellent combo ability, Ken's punish game is incredibly effective and versatile, being able to rack up damage or KO very easily after connecting with almost any attack. | ||
Ken's signature special moves are also effective in their own ways. [[Hadoken]] is a large | Ken's signature special moves are also effective in their own ways. [[Hadoken]] is a large ki projectile, with three travel speeds based on input method; the standard version is capable of [[lock]]ing, while the input variation deals more damage. [[Tatsumaki Senpukyaku]] propels Ken forward, hitting multiple times throughout the attack, and potentially leading to followups, but the non-input version is unsafe on hit. While Ken's signature [[Shoryuken]] serves as his main vertical recovery move, it is most well-known for its offensive utility, due to its sweetspot's high knockback, multiple powerful hitboxes, and brief intangibility (frame 5), making it both a powerful KO option and a potent anti-air. The input version of Shoryuken has increased KO power, even longer intangibility (frames 4-6, with arm intangibility frames 1-14), and lower landing lag, and can easily be chained into from Ken's other moves. [[Focus Attack]] grants Ken [[armor|heavy armor]] against a single hit, and incapacitates opponents when at least half charged, allowing for followups. It can also be canceled on hit, after tanking a blow, or even while charging, allowing Ken to fake out with a shuffle that also provides horizontal recovery distance. His close held neutral attack, first two hits of tapped neutral attack, close tapped forward tilt, distant taped forward tilt, down smash, held down tilt, and all aerials can be canceled into special moves, allowing Ken to combo into Shoryuken for KOs, Tatsumaki Senpukyaku for extending combos, and Focus Attack for mixups and safety. | ||
Outside of the standard special moves, Ken also has access to the Oosoto Mawashi Geri roundhouse kick and the Nata Otoshi Geri crescent kick using inputs only. The former is a powerful KO option at the edge with much more safety than his other special moves, while the latter is a combo extender that leads into either a forward smash, a down smash, or even a Shoryuken with proper reading. Furthermore, both attacks can be cancelled into Inazuma Kick, which deals heavy shield damage, further complementing his ability to pressure and deplete shields with his lengthy blockstrings. | Outside of the standard special moves, Ken also has access to the Oosoto Mawashi Geri roundhouse kick and the Nata Otoshi Geri crescent kick using inputs only. The former is a powerful KO option at the edge with much more safety than his other special moves, while the latter is a combo extender that leads into either a forward smash, a down smash, or even a Shoryuken with proper reading. Furthermore, both attacks can be cancelled into Inazuma Kick, which deals heavy shield damage, further complementing his ability to pressure and deplete shields with his lengthy blockstrings. | ||
| Line 39: | Line 46: | ||
Lastly, Ken has a long-distanced recovery and is surprisingly difficult to combo, traits not shared with most heavyweights. Tatsumaki Senpukyaku has large hitboxes and doesn't cause helplessness; this combined with canceled Focus Attack's armor and momentum boost grants surprisingly effective horizontal distance and protection. Shoryuken travels a good vertical distance, reaches above [[edge]]s, and can [[stage spike]] reckless edgeguarders. Focus Attack also serves as an effective combo breaker, and neutral aerial and input Shoryuken both grant high speed and intangibility, and can even lead into combo or KO opportunities respectively. These traits allow Ken to survive to very high percents when used effectively, which also allows him to take full advantage of [[rage]]. | Lastly, Ken has a long-distanced recovery and is surprisingly difficult to combo, traits not shared with most heavyweights. Tatsumaki Senpukyaku has large hitboxes and doesn't cause helplessness; this combined with canceled Focus Attack's armor and momentum boost grants surprisingly effective horizontal distance and protection. Shoryuken travels a good vertical distance, reaches above [[edge]]s, and can [[stage spike]] reckless edgeguarders. Focus Attack also serves as an effective combo breaker, and neutral aerial and input Shoryuken both grant high speed and intangibility, and can even lead into combo or KO opportunities respectively. These traits allow Ken to survive to very high percents when used effectively, which also allows him to take full advantage of [[rage]]. | ||
Despite his abundant strengths, Ken has his weaknesses as well, most of them shared with Ryu. Though his recovery travels a long distance, it becomes very short if extendable elements, such | Despite his abundant strengths, Ken has his weaknesses as well, most of them shared with Ryu. Though his recovery travels a long distance, it becomes very short if extendable elements, such as Tatsumaki Senpukyaku, cannot be utilized. Focus Attack requires a brief charge before it can be canceled. Tatsumaki Senpukyaku's long duration and low damage makes it vulnerable to being interrupted by long-ranged attacks, and he can only use it once without landing or being dealt hitstun. Ken's falling speed, low jumps and poor air acceleration make it difficult to recover from below the stage, as Shoryuken's recovery is almost strictly vertical and has high endlag, making Ken's vertical recovery easy to predict and interrupt. While Ken excels at shield pressure, his [[grab]] game is sorely lacking; his throws have high damage, but none of them have effective follow-up or KO potential. Down throw is his only combo throw at very low percents, and the extra utility of his throws (down throw instantly breaking shields, and up throw's kick KOing bystanders) does not apply in a 1-on-1 setting, making them situational. | ||
Ken | Although Ken has an overall good [[neutral game]], it does suffer from noticeable flaws. Despite his good frame data (especially for his tapped tilts and neutral aerial) and decent running speed, his slow walking speed and short range hinders the otherwise great utility of his tilt attacks, which gives him trouble against characters who possess [[Hitbox|disjointed hitboxes]], especially when combined with his tall stature. Ken's only projectile, [[Hadoken]], is punishable if used carelessly due to its long endlag, weak damage and low [[priority]]. Aside from the advantages granted his neutral aerial and Focus Attack, Ken's fixed arc jumps make his aerial approach highly committal and thus very predictable. These issues force Ken to play patiently and take advantage of any opening, as he has trouble against opposing [[camping]]. Focus Attack's utility is also match-up dependent, as it becomes much less effective against fast or multi-hitting moves (such as Roy's forward aerial or Cloud's [[Cross Slash]], respectively). Because Focus Attack is also Ken's main method of escaping combos, this makes him susceptible to certain combos and juggles due to his high weight and quick falling speed, and his slower fast-fall compared to most other characters occasionally makes it difficult to land safely. | ||
Finally, Ken struggles to "force" early KOs, as his KO potential relies heavily on executing combos. While Ken does possess some powerful moves, like back aerial and sweetspotted forward smash, these usually require hard reads to land, and most of his other moves have low knockback scaling due to being tailored for combos. Ken's superb combo ability does largely compensate for this, but without accounting for opposing [[ | Finally, Ken struggles to "force" early KOs, as his KO potential relies heavily on executing combos. While Ken does possess some powerful moves, like back aerial and sweetspotted forward smash, these usually require hard reads to land, and most of his other moves have low knockback scaling due to being tailored for combos. Ken's superb combo ability does largely compensate for this, but without accounting for opposing [[smash directional influence]], or without full knowledge of Ken's moveset, setups and combos, he can have a difficult time taking stocks. Ken's multihit special moves can be fallen out of if not used properly, leading to him being unsafe, or even punishable if he is not careful. Finally, the emphasis on Ken's unique inputs means that his non-input special moves have lower power, and a mere slip of the hand can be more detrimental than usual, at worst even causing a [[self-destruct]] while recovering. | ||
Overall, Ken is a combo-oriented fighter with a fearsome offensive | Overall, Ken is a combo-oriented fighter with a fearsome offensive potential, as his unique mechanics deliberately give him access to powerful true combos essential to the competitive success of most characters; his ability to trap opponents in hitstun or shield pressure, multiple options for escaping or negating combos, and dependable recovery all make Ken very rewarding and unpredictable. However, his polarized movement, mediocre vertical recovery, and lacking approach make him difficult to play optimally. His high learning curve in particular is perhaps his biggest issue; much practice is generally required for his input specials to use them reliably and consistently, rather than accidentally inputting the wrong move. | ||
In spite of his weaknesses and high learning curve, Ken's results and representation are more notable than Ryu's. Some players choose to utilize both accordingly to play to | In spite of his weaknesses and high learning curve, Ken's results and representation are more notable than Ryu's. Some players choose to utilize both accordingly to play to the other's strengths, whether it be reliable damage and zoning or massive combo opportunities and options. | ||
==Differences from Ryu== | ==Differences from {{SSBU|Ryu}}== | ||
Ken is considered the original "Echo Fighter" in fighting game history, but unlike other Echo Fighters in the game, Ken's differences extend beyond visual changes and damage distribution, using the gameplay differences from ''Super Street Fighter II Turbo'' onward to distinguish him from his mirror character, {{SSBU|Ryu}}. He primarily trades Ryu's stronger knockback from single hits and zoning capabilities in exchange for more combo routes and damage-racking capabilities, similar to their differences in their home series. His grounded movement is slightly faster than that of Ryu's, and a handful of his attacks have entirely different properties as well. | Ken is considered the original "Echo Fighter" in fighting game history, but unlike other Echo Fighters in the game, Ken's differences extend beyond visual changes and damage distribution, using the gameplay differences from ''Super Street Fighter II Turbo'' onward to distinguish him from his mirror character, {{SSBU|Ryu}}. He primarily trades Ryu's stronger knockback from single hits and zoning capabilities in exchange for more combo routes and damage-racking capabilities, similar to their differences in their home series. His grounded movement is slightly faster than that of Ryu's, and a handful of his attacks have entirely different properties as well. | ||
Since Ken has multiple entirely different moves from Ryu, he is near-universally accepted to be the most unique Echo Fighter, being the only Echo Fighter that is a semi-clone. As such, he, much like fellow Echo Fighters {{SSBU|Chrom}} and {{SSBU|Lucina}}, is | Since Ken has multiple entirely different moves from Ryu, he is near-universally accepted to be the most unique Echo Fighter, being the only Echo Fighter that is a semi-clone. As such, he, much like fellow Echo Fighters {{SSBU|Chrom}} and {{SSBU|Lucina}}, is ranked separately from his base fighter on [[tier list]]s, and is allowed to be used with his base fighter in [[Squad Strike]]. | ||
===Aesthetics=== | ===Aesthetics=== | ||
*{{change|As with all other Echo Fighters, Ken has unique taunts and victory animations.}} | *{{change|As with all other Echo Fighters, Ken has unique taunts and victory animations.}} | ||
*{{change|Unlike Ryu, Ken faces forward with a neutral expression instead of looking dejected or annoyed during his clapping animation.}} | *{{change|Unlike Ryu, Ken faces forward with a neutral expression instead of looking dejected or annoyed during his clapping animation.}} | ||
*{{change|Ken is more vocal than Ryu.}} | |||
**{{change|Ken says "I'm ready for ya! Bring it on!" during his [[on-screen appearance]] rather than being silent like Ryu. His dialogue is the same as his fight entrance in ''Street Fighter IV.''}} | |||
**{{change|Ken has more voice clips for taking light and middle knockback, similar to (and even more so than) {{SSBU|Bayonetta}}.}} | |||
===Attributes=== | ===Attributes=== | ||
*{{buff|Ken's walking (0.75 → 0.825), dashing (1.6 → 1.76) and initial dash (1.76 → 1.936) speeds are faster than those of Ryu, with his initial dash and run speeds being identical to those of {{SSBU|Mario}}.}} | *{{buff|Ken's walking (0.75 → 0.825), dashing (1.6 → 1.76) and initial dash (1.76 → 1.936) speeds are 1.1× faster than those of Ryu, with his initial dash and run speeds being identical to those of {{SSBU|Mario}}.}} | ||
**{{buff|Ken's shield jump height is marginally lower than Ryu's (45.5 → 44.1), resulting in him landing 1 frame sooner.}} | |||
===Ground Attacks=== | ===Ground Attacks=== | ||
*{{change|Held neutral attack is Inazuma Kick, a double-hitting axe kick resembling up throw. It is somewhat hard to land by itself, as its effective range tends to overlap with his close variant | *[[Neutral attack]] | ||
* | **{{change|The third neutral attack has altered hitboxes and reduced hitlag (2 → 1.5).}} | ||
*{{change|Ken's held [[forward tilt]] is his far standing medium punch, a straight with his right arm, as opposed to Ryu's Collarbone Breaker.}} | **{{change|Held neutral attack is Inazuma Kick, a double-hitting axe kick resembling up throw.}} | ||
**{{buff| | ***{{change|It hits twice instead of once.}} | ||
**{{nerf| | ***{{buff|It has a longer duration (9-10 → 9-12 (hit 1)/16 (hit 2)).}} | ||
****{{buff|Its total duration remains unchanged (FAF 33), giving it less ending lag.}} | |||
***{{buff|It deals significantly more damage (10% → 16% (total)).}} | |||
***{{nerf|The first hit has significantly less range than Ryu's held neutral attack. It is somewhat hard to land by itself, as its effective range tends to overlap with his close variant.}} | |||
*[[Forward tilt]] | |||
**{{change|Ken's held [[forward tilt]] is his far standing medium punch, a straight with his right arm, as opposed to Ryu's Collarbone Breaker.}} | |||
***{{change|It only hits once instead of twice.}} | |||
***{{buff|It has less start-up (frame 14 → 10) and uninterrupted duration (14 (hit 1)/16-17 (hit 2) → 10-13).}} | |||
****{{nerf|However, its total duration is only one frame shorter (FAF 36 → 35), giving it more ending lag.}} | |||
***{{change|It does not deal consistent damage (9% (total) → 10% (fist)/5% (arm)).}} | |||
***{{buff|It deals more knockback (60 base/90 scaling → 47/104) at a lower angle (46° → 34°).}} | |||
***{{nerf|It has less range and far less shield damage (20 → 0).}} | |||
*[[Forward smash]]: | *[[Forward smash]]: | ||
**{{change|Ken's [[forward smash]] is based off of his standing heavy kick introduced in ''Super Street Fighter II Turbo''.}} | **{{change|Ken's [[forward smash]] is based off of his standing heavy kick introduced in ''Super Street Fighter II Turbo''.}} | ||
**{{buff|It has less start-up (frame 15 → 13).}} | **{{buff|It has less start-up (frame 15 → 13).}} | ||
***{{nerf|However, its total duration remains unchanged (FAF 46), giving it more ending lag.}} | |||
**{{nerf|It has less range and does not make Ken travel forwards.}} | **{{nerf|It has less range and does not make Ken travel forwards.}} | ||
**{{nerf|It deals less damage ( | **{{nerf|It deals less damage (17.5% (foot)/16% (leg) → 16%/12%), making it slightly weaker despite its higher knockback growth (98 → 102).}} | ||
===Aerial Attacks=== | ===Aerial Attacks=== | ||
*[[Neutral aerial]]: | *[[Neutral aerial]]: | ||
**{{change|Ken's [[neutral aerial]] is based off of his diagonal jumping medium kick in '' | **{{change|Ken's [[neutral aerial]] is based off of his diagonal jumping medium kick in ''Super Street Fighter II Turbo'', as opposed to Ryu's diagonal jumping light kick.}} | ||
**{{buff|Due to it being a kick rather than a knee, the range of the move is increased compared to that of Ryu's neutral aerial.}} | **{{buff|Due to it being a kick rather than a knee, the range of the move is increased compared to that of Ryu's neutral aerial.}} | ||
**{{nerf|It has more startup lag (frame 4 → 6).}} | **{{nerf|It has more startup lag (frame 4 → 6).}} | ||
**{{nerf|Its duration is | **{{nerf|Its duration is less than half (4-31 → 6-17), which also causes it to have significantly more ending lag despite the shorter total duration (FAF 36 → 28).}} | ||
**{{nerf|It has a sourspot on its clean hit that deals less damage (8% → 6.5%).}} | **{{nerf|It has a sourspot on its clean hit that deals less damage (8% → 6.5%).}} | ||
**{{change|The late hit deals more damage on its sweetspot, but less on the sourspot (4.5% → 4% (sourspot)/6.5% (sweetspot).}} | **{{change|The late hit deals more damage on its sweetspot, but less on the sourspot (4.5% → 4% (sourspot)/6.5% (sweetspot).}} | ||
| Line 86: | Line 107: | ||
*[[Up aerial]]: | *[[Up aerial]]: | ||
**{{change|Up aerial is based off of his neutral jumping light kick, a kick straight upwards.}} | **{{change|Up aerial is based off of his neutral jumping light kick, a kick straight upwards.}} | ||
**{{change|It | **{{change|It only hits once instead of twice.}} | ||
**{{buff|It has less startup (frame 6 → 5 | **{{buff|It has less startup (frame 6 → 5).}} | ||
**{{nerf|It deals less damage (11% (total) → 6.5%) | **{{nerf|It deals significantly less damage (11% (total) → 6.5%).}} | ||
**{{change|It deals considerably less knockback (0 base/172 scaling → 20/100), which hinders its KO potential, but makes it much better for combos.}} | |||
**{{nerf|It does not grant partial intangibility.}} | **{{nerf|It does not grant partial intangibility.}} | ||
| Line 98: | Line 120: | ||
===Special moves=== | ===Special moves=== | ||
*{{buff|Ken has more input command moves than Ryu, which can only be used with the attack button.}} | *{{buff|Ken has more input command moves than Ryu, which can only be used with the attack button.}} | ||
**{{buff|He has Oosoto Mawashi Geri, an outward roundhouse kick from ''Super Street Fighter II Turbo'' similar to Ryu's standing held neutral attack that can be canceled into Inazuma Kick by holding the attack button, letting him use his special cancels without committing to the potential endlag of [[Shoryuken]] and [[Tatsumaki Senpukyaku]] and mix up his attacks. Inazuma Kick also deals a fair amount of [[shield damage]], making it much riskier to block Ken during his blockstrings. At the edge, Oosoto Mawashi Geri makes for a reliable KO option from his special cancel normals.}} | **{{buff|He has [[Oosoto Mawashi Geri]], an outward roundhouse kick from ''Super Street Fighter II Turbo'' similar to Ryu's standing held neutral attack that can be canceled into Inazuma Kick by holding the attack button, letting him use his special cancels without committing to the potential endlag of [[Shoryuken]] and [[Tatsumaki Senpukyaku]] and mix up his attacks. Inazuma Kick also deals a fair amount of [[shield damage]], making it much riskier to block Ken during his blockstrings. At the edge, Oosoto Mawashi Geri makes for a reliable KO option from his special cancel normals.}} | ||
**{{buff|Ken also has his Nata Otoshi Geri, a swiping roundhouse kick from ''Super Street Fighter II Turbo'' with a unique input ( | **{{buff|Ken also has his [[Nata Otoshi Geri]], a swiping roundhouse kick from ''Super Street Fighter II Turbo'' with a unique input (→ ↘ ↓ + Attack) that Ryu does not have. He can cancel after the first hit and change it into his Inazuma Kick by holding the attack button. Its low knockback and angle make it useful for combos, leading into down smash, forward smash or a Shoryuken.}} | ||
*[[Hadoken]]: | *[[Hadoken]]: | ||
**{{change|Hadoken contains an image of Ken's hands, as it does in the original ''Street Fighter II''.}} | **{{change|Hadoken contains an image of Ken's hands, as it does in the original ''Street Fighter II''.}} | ||
**{{nerf|Hadoken deals less ( | **{{nerf|Hadoken deals significantly less damage (9%/9.5%/10% → 4.5%/5%/5.5% (standard), 10.8%/11.4%/12% → 5.625%/6.25%/6.875% (input)), with even his strongest input Hadoken dealing less damage than Ryu's weakest standard Hadoken, despite higher input multiplier (1.2× → 1.25×).}} | ||
**{{nerf|Hadoken has slightly more startup lag (frame 12 → 13).}} | **{{nerf|Hadoken has slightly more startup lag (frame 12 → 13).}} | ||
**{{nerf|Ken does not have access to Ryu's [[Shakunetsu Hadoken]], meaning that he lacks a multi-hit projectile.}} | **{{nerf|Ken does not have access to Ryu's [[Shakunetsu Hadoken]], meaning that he lacks a multi-hit projectile.}} | ||
**{{nerf|Ken's Hadokens do not vary in speed as significantly as Ryu's do depending on how long the button is held. This reduces his space control and approaching options.}} | **{{nerf|Ken's Hadokens do not vary in speed as significantly as Ryu's do depending on how long the button is held (Light: 0.8 → 0.9, Medium: 1.3 → 1.2, Heavy: 1.8 → 1.5). This reduces his space control and approaching options.}} | ||
*[[Tatsumaki Senpukyaku]]: | *[[Tatsumaki Senpukyaku]]: | ||
**{{change|Tatsumaki Senpukyaku hits multiple times, as opposed to Ryu's single hit.}} | **{{change|Tatsumaki Senpukyaku hits multiple times, as opposed to Ryu's single hit.}} | ||
**{{change|Aesthetically, Ken slowly spins faster during Tatsumaki Senpukyaku.}} | **{{change|Aesthetically, Ken slowly spins faster during Tatsumaki Senpukyaku.}} | ||
**{{buff|Compared to Ryu's, Ken's Tatsumaki Senpukyaku does not lose its hitbox on hit due to its multi-hit nature. | **{{buff|Compared to Ryu's, Ken's Tatsumaki Senpukyaku does not lose its hitbox on hit due to its multi-hit nature. Ken can also reliably cross up shields with his version, making it safer on shield.}} | ||
**{{ | **{{nerf|Tatsumaki Senpukyaku deals less damage than the late hit of Ryu's version, even if all hits connect.}} | ||
**{{buff|Due to its multihit property and distance, Tatsumaki Senpukyaku can be used to drag opponents offstage far away at low percentages, being effective against opponents with poor recoveries.}} | **{{buff|Due to its multihit property and distance, Tatsumaki Senpukyaku can be used to drag opponents offstage far away at low percentages, being effective against opponents with poor recoveries.}} | ||
**{{nerf|Due to its weak knockback, Tatsumaki Senpukyaku is less safe on hit than Ryu's and Ken can be punished during the animation if all hits fail to connect.}} | |||
**{{buff|Tatsumaki Senpukyaku has less endlag, allowing for followups after the move is complete.}} | **{{buff|Tatsumaki Senpukyaku has less endlag, allowing for followups after the move is complete.}} | ||
**{{nerf|Tatsumaki Senpukyaku | **{{nerf|Tatsumaki Senpukyaku deals significantly less knockback compared to Ryu's, removing its KO potential.}} | ||
**{{nerf|The grounded version does not grant intangibility to Ken's leg.}} | **{{nerf|The grounded version does not grant intangibility to Ken's attacking leg.}} | ||
*[[Shoryuken]]: | *[[Shoryuken]]: | ||
**{{nerf|Shoryuken deals less knockback than Ryu's equivalent and hits at a slightly more horizontal angle.}} | **{{nerf|Shoryuken deals less knockback than Ryu's equivalent and hits at a slightly more horizontal angle, making it more susceptible to [[DI]].}} | ||
**{{change|Ken's medium Shoryuken hits two times, as opposed to only once.}} | **{{change|Ken's medium Shoryuken hits two times, as opposed to only once.}} | ||
**{{ | **{{change|Ken's heavy Shoryuken hits three times and has a [[flame]] effect.}} | ||
**{{buff| | **{{nerf|Due to its multihit property, Ken's heavy Shoryuken is somewhat susceptible to [[SDI]] and can occasionally be escaped from.}} | ||
**{{buff|Ken can travel more horizontally during his | **{{buff|Ken's heavy Shoryuken deals more damage and has powerful hitboxes throughout the move, in contrast to Ryu's Shoryuken losing strength the longer it is out. Heavy Shoryuken can also drag enemies upwards, letting it KO earlier when close to the top and KO earlier overall despite its weakened knockback.}} | ||
**{{buff|Ken can travel more horizontally during his heavy Shoryuken. This makes certain combos possible and horizontal recoveries easier.}} | |||
**{{buff|Ken's Shoryuken has less landing lag (frame 22 frames (standard)/15 (input) → 12/8/18/12), making it significantly more safe when combined with its multihit property.}} | |||
*[[Focus Attack]]: | *[[Focus Attack]]: | ||
**{{change|Ken performs a spinning kick in his Focus Attack instead of a straight punch. The hitbox comes out 1 frame later for all variants, albeit with its total duration unchanged, allowing Ken to act 1 frame earlier on hit.}} | **{{change|Ken performs a spinning kick in his Focus Attack instead of a straight punch, much like in the various iterations of ''Street Fighter IV''. The hitbox comes out 1 frame later for all variants, albeit with its total duration unchanged, allowing Ken to act 1 frame earlier on hit.}} | ||
**{{change|Focus Attack launches at a lower angle (60 → 45), and the uncharged version has slightly more base knockback (100 → 110), hindering its followup potential but aiding its ability to set up edgeguards.}} | **{{change|Focus Attack launches at a lower angle (60 → 45), and the uncharged version has slightly more base knockback (100 → 110), hindering its followup potential but aiding its ability to set up edgeguards.}} | ||
***{{buff|The lowered angle improves the fully-charged version's KO potential on aerial opponents.}} | ***{{buff|The lowered angle improves the fully-charged version's KO potential on aerial opponents.}} | ||
**{{nerf|Ken does not lunge forward as far in his Focus Attack, slightly hindering its range.}} | **{{nerf|Ken does not lunge forward as far in his Focus Attack, slightly hindering its range.}} | ||
**{{buff|Ken's Focus Attack has him kicking at a lower elevation than Ryu's punch, which makes him capable of hitting certain downed opponents that Ryu cannot (such as {{SSBU|Zelda}}).}} | **{{buff|Ken's Focus Attack has him kicking at a lower elevation than Ryu's punch, which makes him capable of hitting certain downed opponents that Ryu cannot (such as {{SSBU|Zelda}}).}} | ||
===Misc.=== | |||
*{{change|{{SSBU|Palutena}}'s [[Autoreticle]] aims lower when targeting Ken than Ryu (y offset: 1 → 0).}} | |||
*{{buff|Ken jumps slightly higher when escaping from {{SSBU|Steve}}'s [[Minecart]] (initial velocity: 2.5 → 2.55), slightly helping him to recover if sent off stage.}} | |||
*{{change|Like Ryu, Ken has two unique Final Smashes, [[Shinryuken]] and [[Shippu Jinraikyaku]], with the Final Smash activated depending on how far Ken is from his opponent(s). '''Shinryuken''' produces a giant pillar of fire with immense vertical range, which is similar to its appearance in the ''Marvel vs. Capcom'' series, which reused ''Street Fighter Alpha'' sprites in its 2D-era games. Meanwhile, '''Shippu Jinryaikyaku''' has Ken furiously kicking opponents before ending in a devastating series of hurricane kicks, much like his Guren Senpukyaku Ultra Combo II from ''Super Street Fighter IV'' and the ending of his Guren Enjinkyaku Critical Art from ''Street Fighter V'', but is ultimately based on his Shippu Jinraikyaku Super Art from ''Street Fighter III''. Shippu Jinraikyaku occurs when Ken initiates his Final Smash near an opponent. Otherwise, he will perform Shinryuken.}} | *{{change|Like Ryu, Ken has two unique Final Smashes, [[Shinryuken]] and [[Shippu Jinraikyaku]], with the Final Smash activated depending on how far Ken is from his opponent(s). '''Shinryuken''' produces a giant pillar of fire with immense vertical range, which is similar to its appearance in the ''Marvel vs. Capcom'' series, which reused ''Street Fighter Alpha'' sprites in its 2D-era games. Meanwhile, '''Shippu Jinryaikyaku''' has Ken furiously kicking opponents before ending in a devastating series of hurricane kicks, much like his Guren Senpukyaku Ultra Combo II from ''Super Street Fighter IV'' and the ending of his Guren Enjinkyaku Critical Art from ''Street Fighter V'', but is ultimately based on his Shippu Jinraikyaku Super Art from ''Street Fighter III''. Shippu Jinraikyaku occurs when Ken initiates his Final Smash near an opponent. Otherwise, he will perform Shinryuken.}} | ||
| Line 136: | Line 165: | ||
==Update history== | ==Update history== | ||
Like {{SSBU|Ryu}} but to a much greater extent, Ken has been buffed overall in game updates so far, with most of his significant buffs coming in the 3.1.0 update. Many of his multi-hit moves connect more reliably and have a lower SDI multiplier, and more importantly, his moves that can be special-canceled have a longer window to do so, making his combos more consistent. His held, close neutral attack has completely changed for the better, now functioning as a reliable combo starter at a much wider percent range. | Like {{SSBU|Ryu}} but to a much greater extent, Ken has been buffed overall in game updates so far, with most of his significant buffs coming in the 3.1.0 update. Many of his multi-hit moves connect more reliably and have a lower SDI multiplier, and more importantly, his moves that can be special-canceled have a longer window to do so, making his combos more consistent. His held, close neutral attack has completely changed for the better, now functioning as a reliable combo starter at a much wider percent range. | ||
Update 7.0.0 buffed Ken even further. His overall shield is bigger, making it harder to shield poke him. His down tilt angle change was a mixed bag; it is now easier to combo into his Tatsumaki Senpukyaku, but it is now harder to combo into his Shoryuken. His pivoting leg is now invincible during his Tatsumaki Senpukyaku, making moves like {{SSBU|Ness}}'s [[PK Fire]] no longer work. The Tatsumaki is also stronger overall. The biggest change however, was to his down smash. It is now possible to cancel his down smash with a special move (at the expense of less shield damage), vastly improving his offense game. Another, albeit undocumented, buff to his down smash is that it is now possible to Kara Cancel the down smash charging animation. Kara Cancel was already possible but it could only be down during the first four frames of the down smash. Because of this, Ken's combo game has been greatly improved. And finally, Update 9.0.0 made Shippu Jinraikyaku connect much more reliably by making it deal more knockback and having more horizontal hitboxes. | |||
Overall, much like Ryu, Ken fares much better than he did at ''Ultimate's'' launch. | |||
'''{{GameIcon|ssbu}} {{SSBU|2.0.0}}''' | '''{{GameIcon|ssbu}} {{SSBU|2.0.0}}''' | ||
| Line 148: | Line 181: | ||
'''{{GameIcon|ssbu}} {{SSBU|4.0.0}}''' | '''{{GameIcon|ssbu}} {{SSBU|4.0.0}}''' | ||
{{UpdateList (SSBU)/4.0.0|char=Ken}} | {{UpdateList (SSBU)/4.0.0|char=Ken}} | ||
'''{{GameIcon|ssbu}} {{SSBU|7.0.0}}''' | |||
{{UpdateList (SSBU)/7.0.0|char=Ken}} | |||
'''{{GameIcon|ssbu}} {{SSBU|9.0.0}}''' | |||
{{UpdateList (SSBU)/9.0.0|char=Ken}} | |||
==Moveset== | ==Moveset== | ||
*[[ | *Ken always turns around to face his opponent when one is left standing, counting teammates as opponents if [[Team Attack]] is on. | ||
*A small flash will appear whenever Ken does the input command version of one of his Special Moves instead of the standard B input. | |||
*Sound effects from the ''Street Fighter II'' series, albeit heavily modified, are used when Ken hit an opponent instead of the standard knockback sound effects. The intensity of the sound depends on the power of the move. Ken also uses a unique sound effect when he performs a parry, which is based on the parry sound effect from the ''Street Fighter III'' series. Ken shares this trait with {{SSBU|Ryu}}. | |||
''For a gallery of Ken's hitboxes, see [[Ken (SSBU)/Hitboxes|here]].'' | ''For a gallery of Ken's hitboxes, see [[Ken (SSBU)/Hitboxes|here]].'' | ||
{{MovesetTable | {{MovesetTable | ||
|game=SSBU | |game=SSBU | ||
|neutralcount=3 | |neutralcount=3 | ||
|neutralinf=y | |neutralinf=y | ||
|neutralname=Inazuma Kick{{ref| | |neutralname=Jab ({{ja|ジャブ|Jabu }}) / Body Blow ({{ja|ボディーブロー|Bodī Burō}}) / Hook ({{ja|フック|Fukku}})<br/> Inazuma Kick{{ref|a}} (Held-Far)<br/> Upper ({{ja|アッパー|Appā}}) (Held-Close) | ||
|neutral1dmg=1.5% (hits 1 and 2) | |neutral1dmg=1.5% (hits 1 and 2) | ||
|neutral2dmg=5% | |neutral2dmg=5% | ||
|neutral3dmg=6% ( | |neutral3dmg=6% (hit 1), 10% (hit 2) (held-far) | ||
|neutralinfdmg=12% (held | |neutralinfdmg=12% (held-close) | ||
|neutraldesc= ''Tapped'': A jab, followed by a {{s|wikipedia|short straight-punch}}, followed by a hook. The second hit is based on Ken's ''Street Fighter III'' close medium punch. The first and second hits can be special-canceled, and are also able to jab lock. | |neutraldesc= ''Tapped'': A jab, followed by a {{s|wikipedia|short straight-punch}}, followed by a hook. The second hit is based on Ken's ''Street Fighter III'' close medium punch. The first and second hits can be special-canceled, and are also able to jab lock. | ||
''Held (far)'': Ken performs his Inazuma Kick: a double-hitting axe kick. It is somewhat hard to land both hits, as the range tends to overlap with his close variant. This move causes Ken to slightly move forward, and deals a good amount of shield damage, making it useful for shield pressure. Cannot be special-canceled. | ''Held (far)'': Ken performs his Inazuma Kick: a double-hitting axe kick. It is somewhat hard to land both hits, as the range tends to overlap with his close variant. This move causes Ken to slightly move forward, and deals a good amount of shield damage, making it useful for shield pressure. Cannot be special-canceled. | ||
''Held (close)'': An uppercut similar to his held up tilt, but with significantly different properties, doing virtually no knockback and being special-cancelable. This makes it extremely potent for combos, reliably canceling into Shoryuken even at higher percents. Like his held up tilt, it renders his entire upper body intangible, giving it anti-air properties. | ''Held (close)'': An uppercut similar to his held up tilt, but with significantly different properties, doing virtually no knockback and being special-cancelable. This makes it extremely potent for combos, reliably canceling into Shoryuken even at higher percents. Like his held up tilt, it renders his entire upper body intangible, giving it anti-air properties. | ||
|ftiltname= | |ftiltname=Side Kick ({{ja|横蹴り|Yoko Geri}}) (Tapped-Far)<br/> Hook ({{ja|フック|Fukku}}) (Tapped-Close)<br/> Fist Thrust ({{ja|正拳突き|Seikentsuki}}) (Held) | ||
|ftiltdmg=6.8% (tapped, far), 6% (tapped, close), 5% (arm), 10% (fist) | |ftiltdmg=6.8% (tapped, far), 6% (tapped, close), 5% (arm), 10% (fist) | ||
|ftiltdesc=''Tapped (far)'': The | |ftiltdesc=''Tapped (far)'': The yoko geri, a kick used in traditional karate. It launches the opponent diagonally upward. It is good for following up with a dash attack or forward aerial at low percents, and grants intangibility on his entire leg from frames 7-12. Cannot be special-cancelled. | ||
''Tapped (close)'': An inward hook. The move causes the opponent to slightly shift towards Ken. It can lock, and can also be special-canceled. | |||
''Tapped (close)'': An inward hook. The move causes the opponent to slightly shift towards Ken. It can lock, and can also be special-canceled. | |||
''Held'': A straight with his left or right arm. While it is faster and deals more damage that Ryu's Collarbone Breaker, it has less range and far less shield damage. It is based on his far standing medium punch. Cannot be special-canceled. | ''Held'': A straight with his left or right arm. While it is faster and deals more damage that Ryu's Collarbone Breaker, it has less range and far less shield damage. It is based on his far standing medium punch. Cannot be special-canceled. | ||
|utiltname= | |utiltname=Elbow Strike ({{ja|肘打ち|Hiji Uchi}}) (Tapped)<br/> Upper ({{ja|アッパー|Appā}}) (Held) | ||
|utiltdmg=2% (tapped), 12% (held) | |utiltdmg=2% (tapped), 12% (held) | ||
|utiltdesc=Tapped: The sok ngat{{ref| | |utiltdesc=''Tapped'': The sok ngat{{ref|c}}, an uppercut-style elbow strike used in Muay Thai. An extremely fast and highly spammable move that can combo into itself. | ||
Held: An uppercut. It grants his entire upper body intangibility from frames 4-10, making it a surprisingly effective anti-air attack and KO move. | |||
|dtiltname=Light Ankle Kick ( | ''Held'': An uppercut. It grants his entire upper body intangibility from frames 4-10, making it a surprisingly effective anti-air attack and KO move. | ||
|dtiltname=Light Ankle Kick ({{ja|キック|Kikku}}, ''Kick'')(Tapped)<br/> Heavy Ankle Kick ({{ja|くるぶしキック|Kurubushi Kikku}}, Ankle Kick) (Held) | |||
|dtiltdmg=1.6% (tapped); 7% (leg, held), 5.5% (foot, held) | |dtiltdmg=1.6% (tapped); 7% (leg, held), 5.5% (foot, held) | ||
|dtiltdesc=Tapped: A crouching, Hapkido-style shin kick. It is extremely fast and highly spammable, much like his tapped up tilt. Any prone opponents will be lightly launched back onto their feet, allowing for longer combo strings. | |dtiltdesc=''Tapped'': A crouching, Hapkido-style shin kick. It is extremely fast and highly spammable, much like his tapped up tilt. Any prone opponents will be lightly launched back onto their feet, allowing for longer combo strings. | ||
Held: A lunging, Hapkido-style shin kick. | |||
|dashname= | ''Held'': A lunging, Hapkido-style shin kick. | ||
|dashname=Tobisokuto{{ref|d}} ({{ja|跳び足刀|Tobisokuto}}) | |||
|dashdmg=12% (clean), 8% (late) | |dashdmg=12% (clean), 8% (late) | ||
|dashdesc=A flying kick. The clean hit launches opponents away, and can KO near the ledge. By contrast, the late hit is much weaker and launches opponents vertically, making it a potential combo starter. | |dashdesc=A flying kick. The clean hit launches opponents away, and can KO near the ledge. By contrast, the late hit is much weaker and launches opponents vertically, making it a potential combo starter. | ||
|fsmashname= | |fsmashname=Ichimonji Geri{{ref|e}} ({{ja|一文字蹴り|Ichimonji Geri}}) | ||
|fsmashdmg={{ChargedSmashDmgSSBU|16}} (foot), {{ChargedSmashDmgSSBU|12}} (leg) | |fsmashdmg={{ChargedSmashDmgSSBU|16}} (foot), {{ChargedSmashDmgSSBU|12}} (leg) | ||
|fsmashdesc=A roundhouse kick. Ken's strongest horizontal KOing move, with the sweetspot on his foot being stronger than the sourspot on his leg. Unlike Ryu's forward smash, it has less range, and does not move him forward as much; it also has slightly less base knockback. Based on his standing heavy kick introduced in ''Super Street Fighter II Turbo''. | |fsmashdesc=A roundhouse kick. Ken's strongest horizontal KOing move, with the sweetspot on his foot being stronger than the sourspot on his leg. Unlike Ryu's forward smash, it has less range, and does not move him forward as much; it also has slightly less base knockback. It is faster than Ryu's forward smash, however. Based on his standing heavy kick introduced in ''Super Street Fighter II Turbo''. | ||
|usmashname= | |usmashname=Thrust Upper ({{ja|突き上げアッパー|Tsukiage Appā}}) | ||
|usmashdmg={{ChargedSmashDmgSSBU|17}} (clean), {{ChargedSmashDmgSSBU|13.5}} (late) | |usmashdmg={{ChargedSmashDmgSSBU|17}} (clean), {{ChargedSmashDmgSSBU|13.5}} (late) | ||
|usmashdesc=Squats and then rises up to throw an uppercut. A decent vertical finisher, the move makes his hurtbox smaller while attacking, making this a good anti-air attack. Grants intangibility to his arm on frames 3-6. | |usmashdesc=Squats and then rises up to throw an uppercut. A decent vertical finisher, the move makes his hurtbox smaller while attacking, making this a good anti-air attack. Grants intangibility to his arm on frames 3-6. | ||
|dsmashname= | |dsmashname=Kaiten Ashibarai{{ref|f}} ({{ja|回転足払い|Kaiten Ashibarai}}) | ||
|dsmashdmg={{ChargedSmashDmgSSBU|16}} | |dsmashdmg={{ChargedSmashDmgSSBU|16}} | ||
|dsmashdesc=A legsweep. It is Ken's fastest smash attack, deals an impressive amount of damage for an attack of its kind, and launches opponents at a semi-spike angle. However, it is rather weak for a down smash, and only hits directly in front of Ken. | |dsmashdesc=A legsweep. It is Ken's fastest smash attack, deals an impressive amount of damage for an attack of its kind, and launches opponents at a semi-spike angle. However, it is rather weak for a down smash, and only hits directly in front of Ken. It can be special-canceled. | ||
|nairname= | |nairname=Knee Drop ({{ja|ひざ落とし|Hiza Otoshi}}) | ||
|nairdmg={{ShortHopDmgSSBU|8}} (clean, bent leg), {{ShortHopDmgSSBU|6.5}} (clean, leg/ late, bent leg), {{ShortHopDmgSSBU|4}} (late) | |nairdmg={{ShortHopDmgSSBU|8}} (clean, bent leg), {{ShortHopDmgSSBU|6.5}} (clean, leg/ late, bent leg), {{ShortHopDmgSSBU|4}} (late) | ||
|nairdesc=A downward angled kick. While weaker than Ryu's neutral aerial, the move has increased range. The strongest hitbox is at Ken's bent leg. Hitting with it will also cause the opponent to slightly shift towards Ken, much like his close, tapped forward tilt. At mid percents, hitting clean with his bent leg will cause anyone behind Ken to move in front of him, allowing for combos into his special moves. It | |nairdesc=A downward angled kick. While weaker than Ryu's neutral aerial, the move has increased range. The strongest hitbox is at Ken's bent leg. Hitting with it will also cause the opponent to slightly shift towards Ken, much like his close, tapped forward tilt. At mid percents, hitting clean with his bent leg will cause anyone behind Ken to move in front of him, allowing for combos into his special moves. It can be special-canceled. Based on his diagonal jumping medium kick in ''SFII''. | ||
|fairname= | |fairname=Tobigeri{{ref|d}} ({{ja|飛び蹴り|Tobigeri}}) | ||
|fairdmg={{ShortHopDmgSSBU|14}} (clean sweetspot), {{ShortHopDmgSSBU|12}} (late sweetspot), {{ShortHopDmgSSBU|9}} (clean sourspot), {{ShortHopDmgSSBU|8}} (late sourspot) | |fairdmg={{ShortHopDmgSSBU|14}} (clean sweetspot), {{ShortHopDmgSSBU|12}} (late sweetspot), {{ShortHopDmgSSBU|9}} (clean sourspot), {{ShortHopDmgSSBU|8}} (late sourspot) | ||
|fairdesc=A flying kick. It has a sweetspot on Ken's outstretched leg, and a sourspot on his bent leg. The sweetspot launches opponents diagonally, while the sourspot launches them toward Ken. It can be special-canceled. | |fairdesc=A flying kick. It has a sweetspot on Ken's outstretched leg, and a sourspot on his bent leg. The sweetspot launches opponents diagonally, while the sourspot launches them toward Ken. It can be special-canceled. | ||
|bairname= | |bairname=Senpukyaku ({{ja|旋風脚|Senpūkyaku}}) | ||
|bairdmg={{ShortHopDmgSSBU|16}} (leg), {{ShortHopDmgSSBU|13}} (foot) | |bairdmg={{ShortHopDmgSSBU|16}} (leg), {{ShortHopDmgSSBU|13}} (foot) | ||
|bairdesc=An outside crescent kick. Since Ken always faces his opponent in one-on-one matches, one must perform a reverse aerial rush in order to use it for edgeguarding. It can be special-canceled. | |bairdesc=An outside crescent kick. Since Ken always faces his opponent in one-on-one matches, one must perform a reverse aerial rush in order to use it for edgeguarding. It can be special-canceled. | ||
|uairname= | |uairname=Front Kick ({{ja|前蹴り|Maegeri}}) | ||
|uairdmg={{ShortHopDmgSSBU|6.5}} | |uairdmg={{ShortHopDmgSSBU|6.5}} | ||
|uairdesc=A kick straight upwards. Unlike Ryu's up aerial, it only hits once, and his leg is not intangible. Can cancel into any of his special moves upon hit. Based off of his neutral jumping light kick. | |uairdesc=A kick straight upwards. Unlike Ryu's up aerial, it only hits once, and his leg is not intangible. Can cancel into any of his special moves upon hit. Based off of his neutral jumping light kick. | ||
|dairname= | |dairname=Straight Punch ({{ja|ストレート|Sutorēto}}, ''Straight'') | ||
|dairdmg={{ShortHopDmgSSBU|12}} (grounded opponent), {{ShortHopDmgSSBU|15}} (aerial opponent sweetspot), {{ShortHopDmgSSBU|11}} (aerial opponent sourspot) | |dairdmg={{ShortHopDmgSSBU|12}} (grounded opponent), {{ShortHopDmgSSBU|15}} (aerial opponent sweetspot), {{ShortHopDmgSSBU|11}} (aerial opponent sourspot) | ||
|dairdesc=A downward-angled cross. Against aerial opponents, the sweetspot on Ken's fist is a [[meteor smash]] that launches opponents at a rather diagonal angle, akin to a [[spike]]. It can be special-canceled. | |dairdesc=A downward-angled cross. Against aerial opponents, the sweetspot on Ken's fist is a [[meteor smash]] that launches opponents at a rather diagonal angle, akin to a [[spike]]. It can be special-canceled. | ||
|grabname= | |grabname=Grab ({{ja|つかみ|Tsukami}}) | ||
|grabdesc=Reaches out with his hand. | |grabdesc=Reaches out with his hand. | ||
|pummelname= | |pummelname=Hizageri{{ref|h}} ({{ja|ひざ蹴り|Hizageri}}) | ||
|pummeldmg=1.3% | |pummeldmg=1.3% | ||
|pummeldesc=A knee strike while holding the opponent in the {{s|wikipedia|collar-and-elbow}} position. It is based on his Tsukami Hizageri ({{ja|つかみ膝蹴り|Tsukami Hizageri}}, "Grasping Knee Kick") throw in the ''Street Fighter Alpha/Zero'' games. | |pummeldesc=A knee strike while holding the opponent in the {{s|wikipedia|collar-and-elbow}} position. It is based on his Tsukami Hizageri ({{ja|つかみ膝蹴り|Tsukami Hizageri}}, "Grasping Knee Kick") throw in the ''Street Fighter Alpha/Zero'' games. | ||
|fthrowname= | |fthrowname=Seoi Throw ({{ja|背負い投げ|Seoi Nage}}) | ||
|fthrowdmg=9% | |fthrowdmg=9% | ||
|fthrowdesc=The {{s|wikipedia|seoi nage}}{{ref| | |fthrowdesc=The {{s|wikipedia|seoi nage}}{{ref|g}}, a Judo throw. | ||
|bthrowname=Hell Wheel | |bthrowname=Hell Wheel ({{ja|地獄車|Jigoku Kuruma}}) | ||
|bthrowdmg=12% | |bthrowdmg=12% | ||
|bthrowdesc=Rolls backward twice before performing the {{s|wikipedia|tomoe nage}}{{ref| | |bthrowdesc=Rolls backward twice before performing the {{s|wikipedia|tomoe nage}}{{ref|i}}, akin to {{SSBU|Pikachu}}'s back throw. | ||
|uthrowname= | |uthrowname=Heel Drop ({{ja|かかと落とし|Kakato Otoshi}}) | ||
|uthrowdmg=8% (throw), 15% (kick) | |uthrowdmg=8% (throw), 15% (kick) | ||
|uthrowdesc=A stretch kick transitioned into an axe kick. The axe kick has a collateral hitbox that possesses impressive KO power against bystanders. | |uthrowdesc=A stretch kick transitioned into an axe kick. The axe kick has a collateral hitbox that possesses impressive KO power against bystanders. | ||
|dthrowname= | |dthrowname=Tile Breaker ({{ja|瓦割り|Kawara Wari}}) | ||
|dthrowdmg=3% (hit; throw) | |dthrowdmg=3% (hit; throw) | ||
|dthrowdesc=Pins the opponent to the ground and performs a {{s|wikipedia|knifehand strike}}. Ken's only throw with combo potential, albeit a rather lackluster one. However, the actual throw's collateral hitbox deals enough shield damage to break even a full shield, though it is difficult to land due to it requiring bystanders to be directly in front of Ken. | |dthrowdesc=Pins the opponent to the ground and performs a {{s|wikipedia|knifehand strike}}. Ken's only throw with combo potential, albeit a rather lackluster one. However, the actual throw's collateral hitbox deals enough shield damage to break even a full shield, though it is difficult to land due to it requiring bystanders to be directly in front of Ken. Its shield-breaking properties and animation are based on the brick breaking bonus game in ''Street Fighter'', though it also resembles Akuma's Shurettō (朱裂刀, "Vermilion Rending Blade") throw in ''Street Fighter IV''. | ||
|floorfname= | |floorfname= | ||
|floorfdmg=7% | |floorfdmg=7% | ||
|floorfdesc=Kicks behind himself and then in front of himself before getting up. | |floorfdesc=Kicks behind himself and then in front of himself before getting up. The front hit is based on his crouching heavy kick in ''Street Fighter III''. | ||
|floorbname= | |floorbname= | ||
|floorbdmg=7% | |floorbdmg=7% | ||
| Line 238: | Line 282: | ||
|edgedesc=Performs a crouching shin kick while climbing up. | |edgedesc=Performs a crouching shin kick while climbing up. | ||
|nsname=Hadoken | |nsname=Hadoken | ||
|nsdmg=4.5%, 5%, 5.5% (Standard), 5. | |nsdmg=4.5%, 5%, 5.5% (Standard), 5.625%, 6.25%, 6.875% (Input) | ||
|nsdesc=Quickly cups his hands to his side and then thrusts them forward to launch a blue ''ki'' blast from his cupped hands that deals low damage and knockback, and may cause tripping at low percents. As in the original games, Ken's Hadoken is weaker than Ryu's version. Since Ken does not have access to Shakunetsu Hadoken, he can only do two versions of the move: a small blue Hadoken (special button only), and a minutely stronger and larger inputted Hadoken (↓ ↘ → + attack/special). Combos well out of his tapped tilt attacks and aerials, and is mainly used to rack up damage due to its low damage outputs, knockback and slow speed. Both variants can cancel into his Final Smash. Like in the original ''Street Fighter II'', Ken's Hadoken contains an image of his hands. | |nsdesc=Quickly cups his hands to his side and then thrusts them forward to launch a blue ''ki'' blast from his cupped hands that deals low damage and knockback, and may cause tripping at low percents. As in the original games, Ken's Hadoken is weaker than Ryu's version. Since Ken does not have access to Shakunetsu Hadoken, he can only do two versions of the move: a small blue Hadoken (special button only), and a minutely stronger (1.25× damage) and larger inputted Hadoken (↓ ↘ → + attack/special/side taunt). Combos well out of his tapped tilt attacks and aerials, and is mainly used to rack up damage due to its low damage outputs, knockback and slow speed. Both variants can cancel into his Final Smash. Like in the original ''Street Fighter II'', Ken's Hadoken contains an image of his hands. | ||
|ssname=Tatsumaki Senpukyaku | |ssname=Tatsumaki Senpukyaku | ||
|ssdmg=3% (Standard, ground, hits 1 - 4), 3. | |ssdmg=3% (Standard, ground, hits 1 - 4), 3.48% (Input, ground, hits 1 - 4), 3% (Standard, midair, hit 1), 2% (Standard, midair, hits 2 - 4), 3.48% (Input, midair, hit 1), 2.32% (Input, midair, hits 2 - 4) | ||
|ssdesc=A jumping, spinning crescent kick. Unlike Ryu's version of the move, Ken's version hits multiple times, has less endlag, and the grounded version does not grant intangibility on his leg. Also, Ken will announce the move by name whether he uses the input or not (Ryu only announces the move if it was performed via input). | |ssdesc=A jumping, spinning crescent kick. Unlike Ryu's version of the move, Ken's version hits multiple times, has less endlag, and the grounded version does not grant intangibility on his leg. Also, Ken will announce the move by name whether he uses the input or not (Ryu only announces the move if it was performed via input). The command-input version (↓ ↙ ← + attack/special/side taunt) deals 1.16× damage. Even if all hits connect, the move deals less damage than the late hit of Ryu's version. The multi-hits can also drag opponents offstage at low percents, making it effective against characters with poor recoveries. However, Ken's Tatsumaki Senpukyaku deals significantly less knockback than Ryu's, repurposing the move from a KOing option into a combo starter and combo extender. Any of the hits can be canceled into his Final Smash. | ||
|usname=Shoryuken | |usname=Shoryuken | ||
|usdmg=13% (Standard | |usdmg=13% (Standard, fast tap), 8%/6% (Standard, mid-fast tap; hits 1/2), 15.6% (Input, fast tap), 9.6%/7.2% (Input, mid-fast tap; hits 1/2), 2.2%/8%/6.5% (Heavy, Standard; hits 1/2/3), 2.64%/9.6%/7.8% (Heavy, Input; hits 1/2/3) | ||
|usdesc=A leaping uppercut. Ken's Shoryuken deals less knockback than Ryu's equivalent and hits at a slightly more horizontal angle. However, it deals more damage and has powerful hitboxes throughout the move (in contrast to Ryu's Shoryuken, which loses strength the longer it is out). Shoryuken can also drag enemies upwards, letting it kill earlier when close to the top. Depending on how long the button is pressed, Ken's Shoryuken will hit a different amount of times: tapping the button fast causes it to hit once, tapping the button at a mid-fast speed causes it to hit twice, and holding the button performs Heavy Shoryuken: a flaming Shoryuken that hits 3 times. It grants him intangibility on frame 5. The command-input variant (→ ↓ ↘ + attack/special) deals more damage | |usdesc=A leaping uppercut. Ken's Shoryuken deals less knockback than Ryu's equivalent and hits at a slightly more horizontal angle. However, it deals more damage and has powerful hitboxes throughout the move (in contrast to Ryu's Shoryuken, which loses strength the longer it is out). Shoryuken can also drag enemies upwards, letting it kill earlier when close to the top. Depending on how long the button is pressed, Ken's Shoryuken will hit a different amount of times: tapping the button fast causes it to hit once, tapping the button at a mid-fast speed causes it to hit twice, and holding the button performs Heavy Shoryuken: a flaming Shoryuken that hits 3 times. It grants him intangibility on frame 5. The command-input variant (→ ↓ ↘ + attack/special/side taunt) deals 1.2× more damage, has 2/3rds the landing lag, and grants intangibility to his arm from frames 1 to 14. Can cancel into his Final Smash. | ||
|dsname=Focus Attack | |dsname=Focus Attack | ||
|dsdmg=12% (Level 1), 10% (Level 2), 17% (Level 3) | |dsdmg=12% (Level 1), 10% (Level 2), 17% (Level 3) | ||
|dsdesc=Similar to Ryu's version, but with a spinning kick instead of a punch. Additionally, the uncharged version on grounded and aerial opponents, as well as the semi-charged and fully-charged versions on aerial opponents, launch opponents at a lower angle. | |dsdesc=Similar to Ryu's version, but with a spinning kick instead of a punch. Ken gains [[damage-based armor]] that can withstand a single hit below 7%-14% (scaling linearly based on number of frames charged) while charging. Ken takes 0.5× damage during the move, effectively doubling his damage-based armor to 14%-28%. Additionally, the uncharged version on grounded and aerial opponents, as well as the semi-charged and fully-charged versions on aerial opponents, launch opponents at a lower angle. | ||
|ci1name=[[Nata Otoshi Geri]]{{ref|j}} | |||
|ci1dmg=5% (both hits), 12% (canceled Inazuma Kick) | |||
|ci1desc=A swiping crescent kick that hits twice, launching them into the air. This move uses a unique input, a reversed forward quarter-circle (→ ↘ ↓ + attack), that Ryu does not possess. While not always guaranteed, the attack leads into various followups and resets, including a forward smash. Much like Oosoto Mawashi Geri, holding the attack button will cancel into Inazuma Kick (cancels after the first hit only). As with his Oosoto Mawashi Geri, the Inazuma Kick cancel deals fair shield damage. Both hits can cancel into his Final Smash. | |||
|ci2name=[[Oosoto Mawashi Geri]]{{ref|k}} | |||
|ci2dmg=12% (move), 12% (canceled Inazuma Kick) | |||
|ci2desc=An outward roundhouse kick, which resembles Ryu's far, held neutral attack. The input is the same as Ryu's Shakunetsu Hadoken: a half-circle input (← ↙ ↓ ↘ → + attack). By holding the attack button, he will cancel it into Inazuma Kick. The Inazuma Kick deals a fair amount of shield damage, making it much riskier to block Ken during his blockstrings. He also gains intangibility on his leg for frames 7 and 8. Works well as a safe combo ender, particularly at the edge where it becomes a powerful KO option. Can cancel into his Final Smash upon hit. | |||
|fsname=Shippu Jinraikyaku / Shinryuken | |fsname=Shippu Jinraikyaku / Shinryuken | ||
|fsdmg=1.2% (hits 1 - 13), 13% (hit 14), 1% (initial hit), 3.2% (hits 1 - 4), 4% (hit 5), 4.3% (hits 6 - 10), 7% (hit 11) | |fsdmg=1.2% (hits 1 - 13), 13% (hit 14), 1% (initial hit), 3.2% (hits 1 - 4), 4% (hit 5), 4.3% (hits 6 - 10), 7% (hit 11) | ||
|fsdesc=Ken's Final Smash varies depending on range. At point-blank range, Ken traps the opponent with | |fsdesc=Ken's Final Smash varies depending on range. At point-blank range, Ken traps the opponent with Shippu Jinraikyaku a furious series of kicks, followed by devastating series of hurricane kicks. If the initial hit some how misses, Ken will only do the first few hits, however, if he hit another opponent during those hits, the Final Smash will continue as normal. At any other range, Ken performs the Shinryuken an uppercut which produces a giant pillar of fire with immense vertical range. If the attack or special button is mashed during Shinryuken the Final Smash will deal extra damage. Ken can cancel most of his moves directly into his Final Smash as well. | ||
}} | |||
===Canceling=== | |||
Ken can perform a special move out of certain normal attacks, a mechanic known in his home series as special-cancelling. By pressing the special button or doing the command input after connecting with a normal attack on hit or on shield, Ken will cancel the endlag of the normal attack and perform the move. The normal attacks that can be canceled include the first two hits of neutral attack, tapped and held down-tilt, tapped up-tilt, and proximity forward-tilt, held neutral attack and down smash. He is also capable of doing so with his aerials. Special-cancelling allows Ken to perform blockstrings and hit confirms into Shoryuken for a kill, Tatsumaki for a combo, Hadoken for safety and pressure, and his roundhouse kicks for mixups and KOs at the edge. He can also bait the opponent out with a special cancel into a Focus Attack, further increasing mixup potential. | |||
=== | ===Stats=== | ||
{| | {{Attributes | ||
| cast=89 | |||
| weight=103 | rweight=27-28 | |||
| dash=1.936 | rdash=38-43 | |||
| run=1.76 | rrun=37-41 | |||
|- | | walk=0.825 | rwalk=79 | ||
| | | trac=0.11 | rtrac=39-47 | ||
|- | | airfric=0.015 | rairfric=9-30 | ||
| | | air=1.12 | rair=31-32 | ||
| baseaccel=0.01 | rbaseaccel=15-87 | |||
| addaccel=0.025 | raddaccel=85-86 | |||
| gravity=0.12 | rgravity=15-20 | |||
| fall=1.6 | rfall=43-47 | |||
| ff=2.24 | rff=66-67 | |||
| jumpsquat=3 | rjumpsquat=1-88 | |||
| jumpheight=26 | rjumpheight=81-83 | |||
| shorthop=15 | rshorthop=60-61 | |||
| djump=29.5 | rdjump=71-72 | |||
}} | |||
===[[Announcer]] call=== | |||
{{audio|Needs announcer calls from other languages.}} | |||
<gallery> | <gallery> | ||
Ken SSBU | Ken English Announcer SSBU.wav|English/Japanese/Chinese | ||
Ken SSBU | Ken French Announcer SSBU.wav|French | ||
</gallery> | </gallery> | ||
===[[On-screen appearance]]=== | ===[[On-screen appearance]]=== | ||
*Walks onto the stage from some mist in the background, then gets into a fighting stance while saying "I'm ready for ya! Bring it on!". Nearly identical to Ryu's on-screen appearance. | *Walks onto the stage from some mist in the background, then gets into a fighting stance while saying "I'm ready for ya! Bring it on!" ({{ja|いつでもいいぜ! かかってきな!|Itsudemo iize! Kakatte kina!}}). Nearly identical to Ryu's on-screen appearance. | ||
<gallery> | |||
KenOnScreenAppearanceSSBU.gif|Ken's on-screen appearance | |||
</gallery> | |||
===[[ | ===[[Taunt]]s=== | ||
*'''Up Taunt''': Gives a thumbs up, saying "Yeah!" Based | *'''Up Taunt''': Gives a thumbs up, saying "Yeah!". Based on his ''Street Fighter Alpha'' winpose. | ||
*'''Side Taunt''': Bumps his fists together, holds his fist out, and says "Get serious!" ({{ja|本気出しなよ。|Honki dashi na yo.}}, ''Give it your all.'') Based off of one of his Personal Actions in ''Street Fighter IV''. | *'''Side Taunt''': Bumps his fists together, holds his fist out, and says "Get serious!" ({{ja|本気出しなよ。|Honki dashi na yo.}}, ''Give it your all.'') Based off of one of his Personal Actions in ''Street Fighter IV''. Nearly identical to {{SSBU|Ryu}}'s side taunt. | ||
*'''Down Taunt''': Does a beckoning gesture with his hand, saying "Bring it on!" ({{ja|かかってきな!|Kakatte ki na!}}, ''Bring it on!'') Based | *'''Down Taunt''': Does a beckoning gesture with his hand, saying "Bring it on!" ({{ja|かかってきな!|Kakatte ki na!}}, ''Bring it on!'') Based on his introduction in ''Street Fighter IV''. | ||
<gallery> | <gallery> | ||
SSBUKenTaunt1.gif|Ken's up taunt. | SSBUKenTaunt1.gif|Ken's up taunt. | ||
| Line 292: | Line 356: | ||
*Wriggles the fingers on both hands, then crosses his arms and pumps them. | *Wriggles the fingers on both hands, then crosses his arms and pumps them. | ||
<gallery> | <gallery> | ||
SSBUKenIdle1.gif|Ken's first idle pose | SSBUKenIdle1.gif|Ken's first idle pose. | ||
SSBUKenIdle2.gif|Ken's second idle pose | SSBUKenIdle2.gif|Ken's second idle pose. | ||
</gallery> | </gallery> | ||
===[[Crowd cheer]]=== | |||
<div class="tabber"> | |||
<div class="tabbertab" title="English, Japanese/Chinese, Italian, Dutch, French"> | |||
{| class="wikitable" border="1" cellpadding="4" cellspacing="1" | |||
|- | |||
! | |||
!Cheer (English) | |||
!Cheer (Japanese/Chinese) | |||
!Cheer (Italian) | |||
!Cheer (Dutch) | |||
!Cheer (French) | |||
|- | |||
! scope="row"|Cheer | |||
|[[File:Ken Cheer English SSBU.ogg|center]]||[[File:Ken Cheer Japanese SSBU.ogg|center]]||[[File:Ken Cheer Italian SSBU.ogg|center]]||[[File:Ken Cheer Dutch SSBU.ogg|center]]||[[File:Ken Cheer French SSBU.ogg|center]] | |||
|- | |||
! scope="row"|Description | |||
|Ken Ken Ken-Ken-Ken! || Ken Ken Ken! || Vai Keeen! || Ken Ken! *claps 2 times* Ken Ken! || Allez Ken! | |||
|} | |||
</div> | |||
<div class="tabbertab" title="German, Spanish, Russian, Korean"> | |||
{| class="wikitable" border="1" cellpadding="4" cellspacing="1" | |||
|- | |||
! | |||
!Cheer (German) | |||
!Cheer (Spanish) | |||
!Cheer (Russian) | |||
!Cheer (Korean) | |||
|- | |||
! scope="row"|Cheer | |||
|[[File:Ken Cheer German SSBU.ogg|center]]||[[File:Ken Cheer Spanish SSBU.ogg|center]]||[[File:Ken Cheer Russian SSBU.ogg|center]]||[[File:Ken Cheer Korean SSBU.ogg|center]] | |||
|- | |||
! scope="row"|Description | |||
|Keeeen || Ken! Ken! Ken - Ken - Ken! || Ken! Ken! Ken! || Ken! Ken! *claps 2 times* | |||
|} | |||
</div> | |||
</div> | |||
===[[Victory pose]]s=== | ===[[Victory pose]]s=== | ||
*'''Left:''' Brushes his hair before giving a thumbs-up to the camera, saying "I did it!" ("{{ja|やったぜ!|Yatta ze!}}", ''I did it!''). Based off of his ''Street Fighter Alpha'' victory pose, which recurs throughout the series. | *'''Left:''' Brushes his hair before giving a thumbs-up to the camera, saying "I did it!" ("{{ja|やったぜ!|Yatta ze!}}", ''I did it!''). Based off of his ''Street Fighter Alpha'' victory pose, which recurs throughout the series. | ||
*'''Up:''' Punches twice, does a roundhouse kick, and raises his fist (similar to Ryu), while saying "Challenge me after some practice." In Japanese, he says "{{ja|いくらでもかかってこい!|Ikurademo kakatte koi!}}" (''Come at me as much as you like!''), his win quote from ''{{s|wikipedia|Street Fighter II}}''. | *'''Up:''' Punches twice, does a roundhouse kick, and raises his fist (similar to Ryu), while saying "Challenge me after some practice." In Japanese, he says "{{ja|いくらでもかかってこい!|Ikurademo kakatte koi!}}" (''Come at me as much as you like!''), his win quote from ''{{s|wikipedia|Street Fighter II}}''. Based off of his victory pose throughout the series, specifically his ''Street Fighter V'' variant. | ||
*'''Right:''' Kicks twice (the first being the Nata Otoshi Geri, and the second being the Oosoto Mawashi Geri) and performs a beckoning gesture, saying "I knew I'd win! Hah!" In Japanese, he says "{{ja|スパッと勝つと気持ちいいな!|Supatto katsuto kimochi ī na!}}" (''It feels good to win a spat!''), one of his generic win quotes from ''{{s|wikipedia|Street Fighter V}}''. | *'''Right:''' Kicks twice (the first being the Nata Otoshi Geri, and the second being the Oosoto Mawashi Geri) and performs a beckoning gesture, saying "I knew I'd win! Hah!" In Japanese, he says "{{ja|スパッと勝つと気持ちいいな!|Supatto katsuto kimochi ī na!}}" (''It feels good to win a spat!''), one of his generic win quotes from ''{{s|wikipedia|Street Fighter V}}''. | ||
[[File:Victory! (Street Fighter).ogg|thumb|A remix of the victory theme from ''Street Fighter II''.]] | [[File:Victory! (Street Fighter).ogg|thumb|A remix of the victory theme from ''Street Fighter II''.]] | ||
| Line 307: | Line 408: | ||
</gallery> | </gallery> | ||
==In competitive play== | ==In [[competitive play]]== | ||
=== | ===Tier placement and history=== | ||
In the early stages of ''Ultimate'', Ken and his original fighter {{SSBU|Ryu}} barely had any representation. This was due to their high technical learning curve thanks to their fighting style inputs, and problems with approaching due to their mobilities and issues against projectiles. Due to the perception of Ryu at the time being lackluster from the nerfs he received from ''Smash 4'', Ken was viewed more positively as he had access to his input kicks and slightly better mobility, though he was nonetheless perceived as a mid-tier at the time. | |||
Patches slowly improved the perceptions of both Ryu and Ken, with most of their current buffs being shared between them. Patch 3.1.0. granted Ken some noteworthy buffs to encourage his close-quarters fighting style, with his held jab being retooled into an excellent combo starter, and giving more leeway for him to input special moves from many of his attacks. Ken's buffs widened the gap between his counterpart Ryu and significantly improved his perception in the metagame in comparison to him, as they granted Ken a newfound, formidable combo/damage racking ability that could end stocks from a single string of attacks. As a result, Ken gained more representation and was seen as a high tier character. | |||
*{{Sm| | |||
Following that, patch 7.0.0. gave Ken even more buffs, with Tatsumaki Senpukyaku having intangibility on the legs and being able to cancel down smash into any special. Considering Ken's already high perception, this further improved him in the eyes of professionals, and he is often considered a dark horse candidate for a top tier or upper high tier. As with previous patches, Ken was commonly considered significantly better than Ryu due to his access to better mobility, a wider array of combos, a useful Tatsumaki Senpukyaku (which could initiate combos) and a feared KO tool in Shoryuken, which could KO as early as 90% and was easy to combo into. As a result of this, Ken has consistently been granted widespread representation from professionals especially when compared to Ryu, with players such as {{Sm|Riddles}}, {{Sm|Nito}}, {{Sm|Venom}}, {{Sm|Sandstorm}}, and {{Sm|takera}} earning good results with the character. More recently, however, his standing relative to Ryu has become more debatable, following metagame developments and buffs exclusive to Ryu coming in update 13.0.1; many Ken players have since picked up Ryu as a co-main and rank both fighters very close. Regardless, Ken remains a solid high-tier character in the eyes of most professionals, ranked 34th on the first and tier list and later dropped to 45th on the second and current tier list. | |||
*{{Sm| | |||
===Most historically significant players=== | |||
*{{Sm| | <!--This character has a ten player limit for this section. Before adding and/or removing a player, read these guidelines: https://www.ssbwiki.com/SmashWiki:Notability#%22Most_historically_significant_players%22_guidelines --> | ||
*{{Sm| | |||
''See also: [[:Category:Ken players (SSBU)]]'' | |||
*{{Sm| | |||
*{{Sm|AndresFn|Spain}} - The best Ken player in Europe. Placed 1st at {{Trn|Glory 2.0}}, 5th at {{Trn|Temple: Hermès Edition}}, and 13th at {{Trn|VCA 2021}}, {{Trn|Ultimate WANTED 4}}, and {{Trn|Tech Republic VI}}. Ranked 14th on the [[PGRU v3 EU]]. | |||
*{{Sm|Jahzz0|USA}} - The best Ken player in the United States. Placed 5th at {{Trn|DreamHack Atlanta 2022}}, 17th at both {{Trn|CEO 2022}} and {{Trn|Double Down 2022}}, 25th at {{Trn|MomoCon 2022}}, and 33rd at {{Trn|Super Smash Con 2022}} with wins over players such as {{Sm|Glutonny}}, {{Sm|Riddles}} and {{Sm|Zomba}}. | |||
*{{Sm|Maeda|France}} - The best Ken player in France. Placed 1st at {{Trn|Salty Arena Cup Ultimate 5}}, 2nd at {{Trn|4 Seasons Tournament: Winter 2020}}, 4th at {{Trn|European SEL Clash}}, and 33rd at {{Trn|Syndicate 2019}} with wins over {{Sm|Glutonny}}, {{Sm|Jeda}}, and, {{Sm|Otakuni}}. Ranked 45th on the [[European Smash Rankings]]. | |||
*{{Sm| | *{{Sm|takera|Japan}} - The best Ken player in the world. Placed 5th at {{Trn|EGS Cup 3}}, 7th at both {{Trn|Sumabato SP 11}} and {{Trn|Maesuma TOP 1}}, 13th at {{Trn|Sumabato SP 10}}, and 25th at {{Trn|EVO Japan 2020}}. Ranked 60th on the [[Japan Player Rankings]]. | ||
*{{Sm|Vendetta|USA}} - One of the best Ken players in the United States. Placed 4th at {{Trn|Clash Of The Carolinas III}}, 5th at {{Trn|Dare 2 Dair}}, 7th at {{Trn|Glitch - Infinite}}, and 17th at both {{Trn|MomoCon 2022}} and {{Trn|DreamHack Atlanta 2022}} with wins over players such as {{Sm|Light|p=Connecticut}}, {{Sm|Kola}}, and {{Sm|Anathema}}. Online, placed 1st at {{Trn|SWT: NA Southeast Ultimate Online Qualifier}} while defeating {{Sm|ESAM}}. Ranked as high as 5th on the [[Georgia Power Rankings]]. | |||
*{{Sm|Venom|Canada}} - The best Ken player in Canada. Placed 1st at {{Trn|LAN ETS 2020}}, 9th at both {{Trn|Rising Stars at EGLX 2019}} and {{Trn|DreamHack Montreal 2019}}, 17th at {{Trn|Defend the North 2019}}, and 25th at {{Trn|Get On My Level 2022}} with wins over players such as {{Sm|Armadillo}}, {{Sm|SuperGirlKels}}, and {{Sm|JW}}. | |||
=={{SSBU|Classic Mode}}: Red-Hot Rivalry== | =={{SSBU|Classic Mode}}: Red-Hot Rivalry== | ||
[[File:SSBU Congratulations Ken.png|thumb|Ken's congratulations screen.]] | [[File:SSBU Congratulations Ken.png|thumb|Ken's congratulations screen.]] | ||
All of Ken's opponents are rivals to the main character of their franchise of origin. Because [[Crazy Hand]] represents the destruction of [[Master Hand]] | All of Ken's opponents are rivals to the main character of their franchise of origin. Because [[Crazy Hand]] represents the destruction of [[Master Hand]]'s creations, Crazy Hand is encountered in Master Hand's place on lower difficulties. | ||
{|class="wikitable | {|class="wikitable" style="text-align:center" | ||
!Round!!Opponent!!Stage!!Music!!Notes | !Round!!Opponent!!Stage!!Music!!Notes | ||
|- | |- | ||
|1||{{ | |1||{{CharHead|Dark Pit|SSBU|hsize=20px}}||[[Palutena's Temple]] ([[Battlefield form]])||''{{SSBUMusicLink|Kid Icarus|Dark Pit's Theme}}''|| | ||
|- | |- | ||
|2||{{ | |2||{{CharHead|Wolf|SSBU|hsize=20px}}||[[Venom]]||''{{SSBUMusicLink|Star Fox|Star Wolf's Theme / Sector Z (for 3DS / Wii U)}}''||References Wolf's rivalry with Fox. | ||
|- | |- | ||
|3||{{ | |3||{{CharHead|Dark Samus|SSBU|hsize=20px}}||[[Frigate Orpheon]]||''{{SSBUMusicLink|Metroid|Multiplayer - Metroid Prime 2: Echoes}}''|| | ||
|- | |- | ||
|4||{{ | |4||{{CharHead|Link|SSBU|hsize=20px|color=Black}}||[[Temple]]||''{{SSBUMusicLink|The Legend of Zelda|Great Temple / Temple}}''||Represents [[Dark Link]]. | ||
|- | |- | ||
|5||{{ | |5||{{CharHead|Luigi|SSBU|hsize=20px}}||[[Mario Bros.]]||''{{SSBUMusicLink|Super Mario Bros.|Underground Theme - Super Mario Bros.}}''||References how players can compete with each other in ''{{iw|mariowiki|Mario Bros.|game}}'' It also aligns with [[Sakurai]]'s statement that Luigi could be considered the "original Echo Fighter".<ref>https://www.youtube.com/watch?v=fccgHnBQ0YM&t=225</ref> | ||
|- | |- | ||
|6||{{ | |6||{{CharHead|Ryu|SSBU|hsize=20px}}||[[Suzaku Castle]] ([[Ω form]])||''{{SSBUMusicLink|Street Fighter|Ryu Stage}}''||References Ken's rivalry with Ryu. | ||
|- | |- | ||
|colspan="5"|[[Bonus Stage]] | |colspan="5"|[[Bonus Stage]] | ||
| Line 355: | Line 458: | ||
==Role in [[World of Light]]== | ==Role in [[World of Light]]== | ||
[[File:WoL-60eKen.jpg|thumb|Finding Ken in World of Light|left]] | [[File:WoL-60eKen.jpg|thumb|Finding Ken in World of Light|left]] | ||
Although Ken does not appear in the World of Light opening cutscene, he was vaporized and later imprisoned alongside the rest of the fighters (sans {{SSBU|Kirby}}) when Galeem unleashed his beams of light. | Although Ken does not appear in the World of Light opening cutscene, he was vaporized and later imprisoned alongside the rest of the fighters (sans {{SSBU|Kirby}}) when [[Galeem]] unleashed his beams of light. | ||
Ken was one of the many fighters that fell under [[Dharkon]]'s control upon Galeem's first defeat. He can be found in | Ken was one of the many fighters that fell under [[Dharkon]]'s control upon Galeem's first defeat. He can be found in {{b|Dracula's Castle|World of Light}} behind an evil ghost; {{h2|List of spirits (Street Fighter series)|Akuma}} must be defeated in order to reach him. | ||
{{clrl}} | {{clrl}} | ||
===Fighter Battle=== | ===Fighter Battle=== | ||
{|class="wikitable | {|class="wikitable" style="width:100%;" | ||
|- | |- | ||
! style="width:5%;"|No. | !style="width:5%;"|No. | ||
! style="width:5%;"|Image | !style="width:5%;"|Image | ||
! Name | !Name | ||
! Type | !Type | ||
! Power | !Power | ||
! Stage | !Stage | ||
! Music | !Music | ||
|- | |- | ||
| | |60<sup>ε</sup> | ||
| [[File:Ken SSBU.png|center| | |[[File:Ken SSBU.png|center|64x64px]] | ||
| {{ | |Ken | ||
|{{SpiritType|Neutral}} <center>{{color|#796581|Neutral}}</center> | |||
| 10,600 | |10,600 | ||
| [[Boxing Ring]] ([[Ω form]]) | |[[Boxing Ring]] ([[Ω form]]) | ||
| ''{{SSBUMusicLink|Street Fighter|Ken Stage}}'' | |''{{SSBUMusicLink|Street Fighter|Ken Stage}}'' | ||
|} | |} | ||
{{ | {{clr}} | ||
==[[Spirit]] | ==[[Spirit]]== | ||
Ken's | Ken's fighter spirit can be obtained by completing {{SSBU|Classic Mode}}. It is also available periodically for purchase in the shop for 300 Gold, but only after Ken has been unlocked. Unlocking Ken in World of Light allows the player to preview the spirit below in the Spirit List under the name "???". As a fighter spirit, it cannot be used in Spirit Battles and is purely aesthetic. His fighter spirit has an alternate version that replaces it with his artwork in ''Ultimate''. | ||
<center> | <center> | ||
<gallery> | <gallery> | ||
Ken | SSBU spirit Ken.png|978. '''''Ken''''' | ||
</gallery> | </gallery> | ||
</center> | </center> | ||
==In Spirit | ==In Spirit Battles== | ||
===As the main opponent=== | ===As the main opponent=== | ||
{|class="wikitable sortable" style="width:100%;" | {|class="wikitable sortable" style="width:100%;" | ||
! colspan=4|Spirit | ! colspan=4|Spirit | ||
! colspan=7|Battle parameters | ! colspan=7|Battle parameters | ||
| Line 410: | Line 512: | ||
|- | |- | ||
|602 | |602 | ||
|{{SpiritTableName|Jack Levin|iw=fzerowiki|size=64}} | |||
|{{ | |''F-Zero'' Series | ||
|''F-Zero | |•{{SSBU|Ken}} {{Head|Ken|g=SSBU|s=20px|cl=Blue}}<br>•{{SSBU|Wii Fit Trainer}} {{Head|Wii Fit Trainer|g=SSBU|s=20px|cl=Green}}×3 | ||
|•{{SSBU|Ken}} {{Head|Ken|g=SSBU|s=20px|cl=Blue}}<br>•{{SSBU|Wii Fit Trainer}} {{Head|Wii Fit Trainer|g=SSBU|s=20px|cl=Green}} | |{{SpiritType|Neutral}} | ||
| | |||
|8,800 | |8,800 | ||
|[[Big Blue]] ([[Battlefield form]]) | |[[Big Blue]] ([[Battlefield form]]) | ||
| Line 422: | Line 523: | ||
|- | |- | ||
|766 | |766 | ||
|{{ | |{{SpiritTableName|Kazuhira Miller|size=64}} | ||
|''Metal Gear Solid'' Series | |||
|''Metal Gear Solid | |•{{SSBU|Ken}} {{Head|Ken|g=SSBU|s=20px|cl=Yellow}}<br>•{{SSBU|Snake}} {{Head|Snake|g=SSBU|s=20px|cl=Green}}×3 | ||
|•{{SSBU|Ken}} {{Head|Ken|g=SSBU|s=20px|cl=Yellow}}<br>•{{SSBU|Snake}} {{Head|Snake|g=SSBU|s=20px|cl=Green}} | |{{SpiritType|Shield}} | ||
| | |||
|9,600 | |9,600 | ||
|[[Midgar]] ( | |[[Midgar]] (hazards off) | ||
|•Attack Power ↑ | |•Attack Power ↑ | ||
|•Defeat the main fighter to win<br>•Timed battle<br>•The enemy has increased attack power when the enemy's at high damage | |•Defeat the main fighter to win<br>•Timed battle (1:30)<br>•The enemy has increased attack power when the enemy's at high damage | ||
|{{SSBUMusicLink|Metal Gear|Encounter}} | |{{SSBUMusicLink|Metal Gear|Encounter}} | ||
|- | |- | ||
|942 | |942 | ||
| | |{{SpiritTableName|Don Flamenco|size=64}} | ||
|''Punch-Out!!'' Series | |||
|''Punch-Out!! | |•{{SSBU|Ken}} {{Head|Ken|g=SSBU|s=20px|cl=Yellow}} (140 HP) | ||
|•{{SSBU|Ken}} {{Head|Ken|g=SSBU|s=20px|cl=Yellow}} | |{{SpiritType|Attack}} | ||
| | |||
|3,600 | |3,600 | ||
|[[Boxing Ring]] | |[[Boxing Ring]] | ||
| Line 446: | Line 545: | ||
|- | |- | ||
|996 | |996 | ||
| | |{{SpiritTableName|Dan|size=64}} | ||
|''Street Fighter'' Series | |||
|''Street Fighter | |•{{SSBU|Ken}} {{Head|Ken|g=SSBU|s=20px|cl=Blue}} (120 HP) | ||
|•{{SSBU|Ken}} {{Head|Ken|g=SSBU|s=20px|cl=Blue}} | |{{SpiritType|Neutral}} | ||
| | |||
|1,600 | |1,600 | ||
|[[Suzaku Castle]] ([[Ω form]]) | |[[Suzaku Castle]] ([[Ω form]]) | ||
| Line 458: | Line 556: | ||
|- | |- | ||
|1,197 | |1,197 | ||
|{{ | |{{SpiritTableName|Munchy Monk|size=64}} | ||
| | |''Rhythm Heaven'' Series {{Flag|North America}}<br>''Rhythm Paradise'' Series {{Flag|PAL}} | ||
|'' | |•{{SSBU|Ken}} {{Head|Ken|g=SSBU|s=20px|cl=Blue}}<br>•Tiny {{SSBU|Kirby}} {{Head|Kirby|g=SSBU|s=20px|cl=White}}×3 | ||
|•{{SSBU|Ken}} {{Head|Ken|g=SSBU|s=20px|cl=Blue}}<br>•Tiny {{SSBU|Kirby}} {{Head|Kirby|g=SSBU|s=20px|cl=White}} | |{{SpiritType|Shield}} | ||
| | |||
|1,500 | |1,500 | ||
|[[Spirit Train]] | |[[Spirit Train]] | ||
| | |•Item: [[Food]] | ||
|•Defeat the main fighter to win<br>•The enemy favors up specials<br>•The enemy is easily distracted by items | |•Defeat the main fighter to win<br>•The enemy favors up specials<br>•The enemy is easily distracted by items | ||
|{{SSBUMusicLink| | |{{SSBUMusicLink|Other|Fruit Basket}} | ||
|- | |- | ||
|1,359 | |1,359 | ||
| | |{{SpiritTableName|Kim Kaphwan|size=64}} | ||
| | |''Fatal Fury'' Series | ||
|''Fatal Fury'' | |||
|•{{SSBU|Ken}} {{Head|Ken|g=SSBU|s=20px|cl=White}}<br>•Giant {{SSBU|King Dedede}} {{Head|King Dedede|g=SSBU|s=20px|cl=Black}}<br>•Tiny {{SSBU|Ridley}} {{Head|Ridley|g=SSBU|s=20px|cl=Green}} | |•{{SSBU|Ken}} {{Head|Ken|g=SSBU|s=20px|cl=White}}<br>•Giant {{SSBU|King Dedede}} {{Head|King Dedede|g=SSBU|s=20px|cl=Black}}<br>•Tiny {{SSBU|Ridley}} {{Head|Ridley|g=SSBU|s=20px|cl=Green}} | ||
| | |{{SpiritType|Attack}} | ||
|1,800 | |1,800 | ||
|[[King of Fighters Stadium]] | |[[King of Fighters Stadium]] | ||
| | |•Jump Power ↓ | ||
|•The enemy's kicks and knee strikes have increased power<br> | |•The enemy's kicks and knee strikes have increased power<br>•Reinforcements will appear after an enemy is KO'd<br>•All fighters have reduced jump power | ||
|{{SSBUMusicLink|Fatal Fury|Let's Go to Seoul! - FATAL FURY 2}} | |{{SSBUMusicLink|Fatal Fury|Let's Go to Seoul! - FATAL FURY 2}} | ||
|- | |||
|1,483 | |||
|{{SpiritTableName|Paul Phoenix & Marshall Law|size=64}} | |||
|''Tekken'' Series | |||
|•{{SSBU|Ken}} {{Head|Ken|g=SSBU|s=20px}} (130 HP)<br>•{{SSBU|Fox}} {{Head|Fox|g=SSBU|s=20px|cl=Yellow}} (130 HP) | |||
|{{SpiritType|Attack}} | |||
|3,800 | |||
|[[New Donk City Hall]] ([[Battlefield form]]) | |||
|N/A | |||
|•[[Stamina battle]] | |||
|{{SSBUMusicLink|Tekken|Chicago, U.S.A.}} | |||
|} | |} | ||
| Line 505: | Line 612: | ||
Ken amiibo.png|Ken's [[amiibo]]. | Ken amiibo.png|Ken's [[amiibo]]. | ||
SSBU Ken Number.png|Ken's fighter card. | SSBU Ken Number.png|Ken's fighter card. | ||
Ken unlock notice SSBU.jpg|Ken's unlock notice. | |||
SSBUWebsiteKen1.jpg|Ken on [[Coliseum]]. | SSBUWebsiteKen1.jpg|Ken on [[Coliseum]]. | ||
SSBUWebsiteKen2.jpg|With {{SSBU|King K. Rool}}, {{SSBU|Diddy Kong}}, and {{SSBU|Donkey Kong}} on [[Tortimer Island]]. | SSBUWebsiteKen2.jpg|With {{SSBU|King K. Rool}}, {{SSBU|Diddy Kong}}, and {{SSBU|Donkey Kong}} on [[Tortimer Island]]. | ||
| Line 511: | Line 619: | ||
SSBUWebsiteKen5.jpg|Using [[Hadoken]] on {{SSBU|Luigi}} on [[Mario Galaxy]]. | SSBUWebsiteKen5.jpg|Using [[Hadoken]] on {{SSBU|Luigi}} on [[Mario Galaxy]]. | ||
SSBUWebsiteKen6.jpg|Unleashing [[Shinryuken]] on {{SSBU|Final Destination}}. | SSBUWebsiteKen6.jpg|Unleashing [[Shinryuken]] on {{SSBU|Final Destination}}. | ||
SSBUWebsiteKazuya4.jpg|Fighting alongside [[Ryu]], [[Terry]] and [[Kazuya]] on Mishima Dojo. | |||
</gallery> | </gallery> | ||
=== | ===Fighter Showcase Video=== | ||
{{#widget:YouTube|id=9_tQRugeXik}} | {{#widget:YouTube|id=9_tQRugeXik}} | ||
| Line 520: | Line 629: | ||
**It also resembles {{SSB4|Ryu}}'s pose in his ''Smash 4'' artwork, only mirrored. | **It also resembles {{SSB4|Ryu}}'s pose in his ''Smash 4'' artwork, only mirrored. | ||
*Ken's attack on Wario's motorcycle in the character showcase video is a reference to the car smashing mini-game from the ''Street Fighter II'' games. | *Ken's attack on Wario's motorcycle in the character showcase video is a reference to the car smashing mini-game from the ''Street Fighter II'' games. | ||
*Ken's | *Ken's Classic Mode route is vaguely similar to {{SSBU|Falco}}'s, as both of their routes fight "dark" forms/rivals of main characters as opponents, and both of their routes have the same opponents in some rounds. | ||
**Ken and Falco are the only two fighters who fight a solo {{SSBU|Crazy Hand}} as their final boss in Classic Mode under Intensity 7.0. | |||
** | |||
*Ken is the first character revealed for ''Ultimate'' to share a reveal trailer with a character not from the same franchise, having been revealed in the same trailer as {{SSBU|Incineroar}}. | *Ken is the first character revealed for ''Ultimate'' to share a reveal trailer with a character not from the same franchise, having been revealed in the same trailer as {{SSBU|Incineroar}}. | ||
*Ken's showcase of Shippu Jinraikyaku after a successful parry in his reveal trailer is a reference to "{{s|wikipedia|Evo Moment 37}}" (sometimes referred to as the "Daigo Parry"), a famous portion of an EVO 2004 match between top ''Street Fighter III'' players Justin Wong and Daigo Umehara.<ref>[https://www.youtube.com/watch?v=JzS96auqau0]</ref> | *Ken's showcase of Shippu Jinraikyaku after a successful parry in his reveal trailer is a reference to "{{s|wikipedia|Evo Moment 37}}" (sometimes referred to as the "Daigo Parry"), a famous portion of an EVO 2004 match between top ''Street Fighter III'' players Justin Wong and Daigo Umehara, where Umehara's Ken successively parried each hit of Wong's Houyoku-sen as Chun-Li before following with the Shippu Jinraikyaku to win the match.<ref>[https://www.youtube.com/watch?v=JzS96auqau0]</ref> | ||
*Ken and {{SSBU|Richter}} are the only Echo Fighter newcomers with a CGI trailer as well as the only | **The moment is more directly referenced in a development image posted on [[Masahiro Sakurai]]'s Twitter account, which features Ken parrying {{SSBU|Zero Suit Samus}}'s forward tilt.<ref>https://twitter.com/Sora_Sakurai/status/1221266927147839489</ref> Within ''Ultimate'', Zero Suit Samus is used to represent Chun-Li in her Spirit Battle. This picture was also posted during the timeframe of {{Trn|EVO Japan 2020}}, which Sakurai attended. | ||
**Unlike Richter, | *One of the gameplay showcases in Ken's reveal trailer depicts him taunting {{SSBU|Zelda}} at [[New Donk City Hall]] before being attacked by {{SSBU|Link}}; ironically, in Ken's home series, he has a girlfriend (who later becomes his wife) named [https://streetfighter.fandom.com/wiki/Eliza_Masters Eliza]. | ||
*Ken and {{SSBU|Richter}} are the only Echo Fighter newcomers with a CGI trailer as well as the only ones with CGI footage for their splash art. {{SSBU|Daisy}} did not have either, while {{SSBU|Chrom}} and {{SSBU|Dark Samus}} had only gameplay footage for their trailers and their official artwork for their splash arts. | |||
**Unlike Richter, Ken's trailer can be played on his fighter page on the [[Super Smash Bros. Ultimate Official Site]]. | |||
*Interestingly, Ken's appearance in ''Ultimate'' marks the fourth time in any game where his eye color is blue opposing to the usual brown after ''Street Fighter X Tekken'' and ''Street Fighter IV''. | *Interestingly, Ken's appearance in ''Ultimate'' marks the fourth time in any game where his eye color is blue opposing to the usual brown after ''Street Fighter X Tekken'' and ''Street Fighter IV''. | ||
*Ken is one of the few characters who | *Ken is one of the few characters who has a unique line while [[teetering]]: he voices a surprised "Uh oh!". | ||
*Ken is the only character who speaks when he [[grab release]]s an opponent, voicing a quick "Whoops!" | *Ken is the only character who speaks when he [[grab release]]s an opponent, voicing a quick "Whoops!" ({{ja|やるな...!|Yaru na...!}}, ''You're good...!''). | ||
**Strangely, his [[Star KO]] clip is missing in his sound library, making him the only fighter with this distinction. | |||
**Strangely, his Star KO clip is | |||
*Ken and {{SSBU|Mario}} are the only characters that possess the Neutral typing when unlocking them in World of Light. | *Ken and {{SSBU|Mario}} are the only characters that possess the Neutral typing when unlocking them in World of Light. | ||
*If Ken is set as a CPU-opponent in [[Training Mode]], all three CPUs will always face the player, much like on 1-on-1 matches. He shares this distinction with {{SSBU|Ryu}}, {{SSBU|Terry}}, and {{SSBU|Kazuya}}. | |||
**This also happens if Ken faces a single opponent in a team consisting of two or more characters in [[Team Battle]]s with [[Team Attack]] off, and in [[All-Star Mode]] when he appears. | |||
*If Ken is set as a CPU-opponent in [[Training Mode]], all three CPUs will always face the player, much like on 1-on-1 matches. He shares this distinction with {{SSBU|Ryu}} and {{SSBU| | *A few of Ken's attacks where he uses his legs or feet to attack, such as Focus Attack, are coded as arm or fist [[type]] attacks. This is likely a result of his attacks being copied from Ryu, as many of Ken's leg/foot attacks that are wrongly coded as arm/fist attacks are arm/fist attacks for Ryu. | ||
**This also happens if Ken faces a single opponent in a team consisting of two or more characters in [[Team Battle]]s, and in [[All-Star Mode]] when he appears. | *In the [[results screen]] after a [[team battle]], if the winning team consists of {{SSBU|Villager}} in the front and Ken behind him to the left, Villager's net will clip through Ken's arm. | ||
* | |||
==Notes== | ==Notes== | ||
: | :1.{{note|a}} "Inazuma" translates into "Lightning" | ||
: | :2.{{note|b}} translates into "Toe Kick" | ||
: | :3.{{note|c}} translates into "Uppercut Elbow" | ||
:5.{{note|e}} translates into "Shoulder Throw" | :4.{{note|d}} translates to "Flying Foot Edge Kick'' | ||
: | :5.{{note|e}} translates to "Straight Line Kick'' | ||
: | :6.{{note|f}}translates to "Rotating Leg Sweep" | ||
: | :7.{{note|g}} translates into "Shoulder Throw" | ||
:8.{{note|h}}translates to "Knee Kick" | |||
:9.{{note|i}} translates into "Circle Throw" | |||
:10.{{note|j}} translates into "Hatchet Dropping Kick" | |||
:11.{{note|k}} translates into "Big Outer Roundhouse Kick" | |||
==References== | ==References== | ||
| Line 557: | Line 666: | ||
{{Street Fighter universe}} | {{Street Fighter universe}} | ||
[[Category:Ken (SSBU)| ]] | [[Category:Ken (SSBU)| ]] | ||
[[Category:Third party characters]] | [[Category:Third-party characters]] | ||
[[Category:Capcom]] | [[Category:Capcom]] | ||
[[Category:Spirits]] | [[Category:Spirits]] | ||
[[es:Ken (SSBU)]] | [[es:Ken (SSBU)]] | ||
Latest revision as of 23:01, February 25, 2024
| Ken in Super Smash Bros. Ultimate | |
|---|---|
 
| |
| Universe | Street Fighter |
| Availability | Unlockable |
| Final Smash | Shippu Jinraikyaku / Shinryuken |
| Tier | B- (45) |
| “ | Ken Turns Up the Heat! | ” |
| —Introduction tagline | ||
Ken (ケン, Ken) is a playable character in Super Smash Bros. Ultimate. He is the third fighter from Capcom after Mega Man and Ryu. He was announced as a newcomer during the November 1st, 2018 Super Smash Bros. Ultimate Direct, alongside Incineroar and Piranha Plant. Despite being a semi-clone, Ken is Ryu's Echo Fighter (and was the final Echo Fighter to be revealed), thus being classified as Fighter #60ε.
Reuben Langdon, Ken's English voice actor from Street Fighter IV and Street Fighter V, reprises his role in the overseas versions, including the Chinese and Korean versions. His Japanese voice actor since Street Fighter III: Third Strike, Yuji Kishi, reprises his role exclusively in the Japanese version. Ultimate is the last game where Reuben Langdon voices Ken in English, as David Matranga is his current English voice actor in Street Fighter 6.
Ken is ranked 45th out of 82 on the current tier list, placing him in the B- tier. Ken is known as the more aggressive shoto, being able to dish out huge amounts of damage from his multitude of combos and strings, finishing off his opponents with strong KO confirms into his Shoryuken. Like his fellow Street Fighter friend, Ken has a lot of good frame data on his moves and the distinction of having the auto-turnaround mechanic which allows him to perform his combos easier and more reliably. His Shoryuken in particular is great as an anti-air with high knockback growth when the last hit connects or when all hits on the ground connect with each other.
However, Ken shares nearly the same amount of weaknesses as Ryu, being fairly easy to combo reliably and easily edgeguarded if one reads his linear recovery route. In addition, unlike Ryu, Ken is vulnerable to some of his moves being able to be escaped via SDI, such as his Shoryuken and Tatsumaki Senpukyaku, allowing his opponent to punish him for landing those moves. Finally, Ken is forced to approach in a lot of matchups with his limited amount of approach options, making him linear overall.
Overall, Ken is seen as a capable and viable fighter in the right hands with his strong advantage state and combo ability, and players can choose to play either Ken or Ryu, depending on the matchup or mood. For example, if the matchup requires an aggressive game plan, then Ken is the optimal choice, and vice versa. Ken has seen solid results and decent representation from players, such as Takera and Jahzz0, to name a few.
How to unlock[edit]
Complete one of the following:
- Play VS. matches, with Ken being the 57th character to be unlocked.
- Clear Classic Mode with Yoshi or any character in his unlock tree, being the last character unlocked after Chrom.
- Have Ken join the player's party in World of Light.
Ken must then be defeated on Boxing Ring (the Ω form is used in World of Light).
Attributes[edit]
As the more aggressive "shoto" compared to Ryu, Ken shares most of his attributes with some slight tweaks. As a heavyweight with average mobility, Ken has decent frame data and damage output, as well as a dependable ground game due to his decent traction and above-average dashing speed. However, other attributes are polarized in an attempt to replicate the physics of Street Fighter; Ken's walking speed is extremely slow, and while his air speed is above average, this is counteracted by his moderately high falling speed and short jumps. Additionally, he has very low air acceleration, and his air friction is uniquely locked at 0 while jumping, causing his jumps to follow a fixed "arc" unless the player steers them manually. Finally, Ken's fast fall increases his falling speed by 40% instead of the usual 60%. Overall, this grants Ken effective burst movement through dashing and jumping, but forces him to commit when approaching through the air and makes it difficult to land or move short distances.
Despite his average attributes, Ken is one of the most unique fighters in Ultimate, as he has access to many variations of both his standard and special attacks (a trait only shared with his base fighter, Ryu). His jab and tilts can either be held or tapped; tapped attacks are faster and usually combo well into themselves, while held attacks have greater KO potential and can serve as combo finishers. This also applies to his special moves (other than Focus Attack), which gain different effects like increased power or altered hitboxes when the button is held; they also see an increase in power when used with the original Street Fighter inputs. This effectively gives Ken two movesets—one for starting combos and racking up damage, and the other for scoring KOs. This versatility gives him access to potent true combos and mix-ups, leading to a strong punish game overall.
Ken's standard attacks are also unique in that most of them (even his tapped tilts) have an increased hitlag multiplier, often of at least 1.5x, mimicking the impact of hits connecting in traditional fighter games. Consequently, this results in several of his attacks being easier to SDI, especially up tilt due to it also having an increased SDI multiplier, but it also grants the player more time to perform command inputs when Kara Canceling attacks on hit.
Ken's grounded moveset boasts considerable utility. His tapped jab and down tilt both hit on frame 3, making the former useful for relieving pressure, and the latter excellent for extending combos due to its launch trajectory being useful for followups, such as grabs. Tapped up tilt's low knockback, high speed and active frames make it effective for combos, either into itself, Shoryuken, or even down aerial at high percents near the ledge. Held down tilt can be canceled on hit into a special move, making it effective for shield pressure and damage-racking even at high percents. Down smash is very fast and can cancel into his special moves, and up smash lowers Ken's hurtbox while charging and is quite powerful for its speed. Both tapped forward tilt and held jab are altered at close range, both becoming very potent at starting combos into his special moves. Tapped distant forward tilt is an extremely useful combo starter, leading into a number of options, most notably down aerial and neutral air. Additionally, Ken will automatically face his opponent when there is only one foe left (while standing on the ground), making it considerably easier to land his effective ground attacks.
Ken's aerial moveset is effective as well. Neutral aerial is a sex kick with low knockback and has only five frames of landing lag, making it useful for combos and kill confirms even at high percents. Forward aerial is quick, highly damaging and has good range; it can be chained into itself through repeated jumps, and its sourspot deals high shield damage. Up aerial has fast startup, a fairly active hitbox and decently high reach, making it useful for juggling. It is also reliably follows up into Shoryuken. Both up and down aerial are also able to auto-cancel from a short hop.
Complementing Ken's moveset and combo potential is his wide array of powerful finishers; some of his held tilts, smash attacks and aerials are very capable KO moves due to their high speed. Held up tilt grants upper body intangibility on frames 4-10 while hitting on frame 7, making it deceptively safe for KOs when combined with its speed and tapped up tilt setups. Up smash makes an effective substitute for held up tilt as a finisher, and its wide hitbox can catch aerial approaches. Ken's forward smash has long range, fast startup and is his strongest standard ground attack, making it useful for hard punishes. Back aerial is Ken's strongest aerial, and is fast and has good range despite its small hitbox. Forward aerial also serves as a decent KO move, enhancing its already impressive utility. Finally, down aerial is a powerful meteor smash with fast start-up and long duration, making it a deadly edgeguarding tool. Combined with his excellent combo ability, Ken's punish game is incredibly effective and versatile, being able to rack up damage or KO very easily after connecting with almost any attack.
Ken's signature special moves are also effective in their own ways. Hadoken is a large ki projectile, with three travel speeds based on input method; the standard version is capable of locking, while the input variation deals more damage. Tatsumaki Senpukyaku propels Ken forward, hitting multiple times throughout the attack, and potentially leading to followups, but the non-input version is unsafe on hit. While Ken's signature Shoryuken serves as his main vertical recovery move, it is most well-known for its offensive utility, due to its sweetspot's high knockback, multiple powerful hitboxes, and brief intangibility (frame 5), making it both a powerful KO option and a potent anti-air. The input version of Shoryuken has increased KO power, even longer intangibility (frames 4-6, with arm intangibility frames 1-14), and lower landing lag, and can easily be chained into from Ken's other moves. Focus Attack grants Ken heavy armor against a single hit, and incapacitates opponents when at least half charged, allowing for followups. It can also be canceled on hit, after tanking a blow, or even while charging, allowing Ken to fake out with a shuffle that also provides horizontal recovery distance. His close held neutral attack, first two hits of tapped neutral attack, close tapped forward tilt, distant taped forward tilt, down smash, held down tilt, and all aerials can be canceled into special moves, allowing Ken to combo into Shoryuken for KOs, Tatsumaki Senpukyaku for extending combos, and Focus Attack for mixups and safety.
Outside of the standard special moves, Ken also has access to the Oosoto Mawashi Geri roundhouse kick and the Nata Otoshi Geri crescent kick using inputs only. The former is a powerful KO option at the edge with much more safety than his other special moves, while the latter is a combo extender that leads into either a forward smash, a down smash, or even a Shoryuken with proper reading. Furthermore, both attacks can be cancelled into Inazuma Kick, which deals heavy shield damage, further complementing his ability to pressure and deplete shields with his lengthy blockstrings.
Lastly, Ken has a long-distanced recovery and is surprisingly difficult to combo, traits not shared with most heavyweights. Tatsumaki Senpukyaku has large hitboxes and doesn't cause helplessness; this combined with canceled Focus Attack's armor and momentum boost grants surprisingly effective horizontal distance and protection. Shoryuken travels a good vertical distance, reaches above edges, and can stage spike reckless edgeguarders. Focus Attack also serves as an effective combo breaker, and neutral aerial and input Shoryuken both grant high speed and intangibility, and can even lead into combo or KO opportunities respectively. These traits allow Ken to survive to very high percents when used effectively, which also allows him to take full advantage of rage.
Despite his abundant strengths, Ken has his weaknesses as well, most of them shared with Ryu. Though his recovery travels a long distance, it becomes very short if extendable elements, such as Tatsumaki Senpukyaku, cannot be utilized. Focus Attack requires a brief charge before it can be canceled. Tatsumaki Senpukyaku's long duration and low damage makes it vulnerable to being interrupted by long-ranged attacks, and he can only use it once without landing or being dealt hitstun. Ken's falling speed, low jumps and poor air acceleration make it difficult to recover from below the stage, as Shoryuken's recovery is almost strictly vertical and has high endlag, making Ken's vertical recovery easy to predict and interrupt. While Ken excels at shield pressure, his grab game is sorely lacking; his throws have high damage, but none of them have effective follow-up or KO potential. Down throw is his only combo throw at very low percents, and the extra utility of his throws (down throw instantly breaking shields, and up throw's kick KOing bystanders) does not apply in a 1-on-1 setting, making them situational.
Although Ken has an overall good neutral game, it does suffer from noticeable flaws. Despite his good frame data (especially for his tapped tilts and neutral aerial) and decent running speed, his slow walking speed and short range hinders the otherwise great utility of his tilt attacks, which gives him trouble against characters who possess disjointed hitboxes, especially when combined with his tall stature. Ken's only projectile, Hadoken, is punishable if used carelessly due to its long endlag, weak damage and low priority. Aside from the advantages granted his neutral aerial and Focus Attack, Ken's fixed arc jumps make his aerial approach highly committal and thus very predictable. These issues force Ken to play patiently and take advantage of any opening, as he has trouble against opposing camping. Focus Attack's utility is also match-up dependent, as it becomes much less effective against fast or multi-hitting moves (such as Roy's forward aerial or Cloud's Cross Slash, respectively). Because Focus Attack is also Ken's main method of escaping combos, this makes him susceptible to certain combos and juggles due to his high weight and quick falling speed, and his slower fast-fall compared to most other characters occasionally makes it difficult to land safely.
Finally, Ken struggles to "force" early KOs, as his KO potential relies heavily on executing combos. While Ken does possess some powerful moves, like back aerial and sweetspotted forward smash, these usually require hard reads to land, and most of his other moves have low knockback scaling due to being tailored for combos. Ken's superb combo ability does largely compensate for this, but without accounting for opposing smash directional influence, or without full knowledge of Ken's moveset, setups and combos, he can have a difficult time taking stocks. Ken's multihit special moves can be fallen out of if not used properly, leading to him being unsafe, or even punishable if he is not careful. Finally, the emphasis on Ken's unique inputs means that his non-input special moves have lower power, and a mere slip of the hand can be more detrimental than usual, at worst even causing a self-destruct while recovering.
Overall, Ken is a combo-oriented fighter with a fearsome offensive potential, as his unique mechanics deliberately give him access to powerful true combos essential to the competitive success of most characters; his ability to trap opponents in hitstun or shield pressure, multiple options for escaping or negating combos, and dependable recovery all make Ken very rewarding and unpredictable. However, his polarized movement, mediocre vertical recovery, and lacking approach make him difficult to play optimally. His high learning curve in particular is perhaps his biggest issue; much practice is generally required for his input specials to use them reliably and consistently, rather than accidentally inputting the wrong move.
In spite of his weaknesses and high learning curve, Ken's results and representation are more notable than Ryu's. Some players choose to utilize both accordingly to play to the other's strengths, whether it be reliable damage and zoning or massive combo opportunities and options.
Differences from Ryu[edit]
Ken is considered the original "Echo Fighter" in fighting game history, but unlike other Echo Fighters in the game, Ken's differences extend beyond visual changes and damage distribution, using the gameplay differences from Super Street Fighter II Turbo onward to distinguish him from his mirror character, Ryu. He primarily trades Ryu's stronger knockback from single hits and zoning capabilities in exchange for more combo routes and damage-racking capabilities, similar to their differences in their home series. His grounded movement is slightly faster than that of Ryu's, and a handful of his attacks have entirely different properties as well.
Since Ken has multiple entirely different moves from Ryu, he is near-universally accepted to be the most unique Echo Fighter, being the only Echo Fighter that is a semi-clone. As such, he, much like fellow Echo Fighters Chrom and Lucina, is ranked separately from his base fighter on tier lists, and is allowed to be used with his base fighter in Squad Strike.
Aesthetics[edit]
 As with all other Echo Fighters, Ken has unique taunts and victory animations.
- Unlike Ryu, Ken faces forward with a neutral expression instead of looking dejected or annoyed during his clapping animation.
- Ken is more vocal than Ryu.
- Ken says "I'm ready for ya! Bring it on!" during his on-screen appearance rather than being silent like Ryu. His dialogue is the same as his fight entrance in Street Fighter IV.
- Ken has more voice clips for taking light and middle knockback, similar to (and even more so than) Bayonetta.
Attributes[edit]
 Ken's walking (0.75 → 0.825), dashing (1.6 → 1.76) and initial dash (1.76 → 1.936) speeds are 1.1× faster than those of Ryu, with his initial dash and run speeds being identical to those of Mario.
- Ken's shield jump height is marginally lower than Ryu's (45.5 → 44.1), resulting in him landing 1 frame sooner.
Ground Attacks[edit]
- Neutral attack
- The third neutral attack has altered hitboxes and reduced hitlag (2 → 1.5).
- Held neutral attack is Inazuma Kick, a double-hitting axe kick resembling up throw.
- It hits twice instead of once.
- It has a longer duration (9-10 → 9-12 (hit 1)/16 (hit 2)).
- Its total duration remains unchanged (FAF 33), giving it less ending lag.
- It deals significantly more damage (10% → 16% (total)).
 The first hit has significantly less range than Ryu's held neutral attack. It is somewhat hard to land by itself, as its effective range tends to overlap with his close variant.
- Forward tilt
- Ken's held forward tilt is his far standing medium punch, a straight with his right arm, as opposed to Ryu's Collarbone Breaker.
- It only hits once instead of twice.
- It has less start-up (frame 14 → 10) and uninterrupted duration (14 (hit 1)/16-17 (hit 2) → 10-13).
- However, its total duration is only one frame shorter (FAF 36 → 35), giving it more ending lag.
- It does not deal consistent damage (9% (total) → 10% (fist)/5% (arm)).
- It deals more knockback (60 base/90 scaling → 47/104) at a lower angle (46° → 34°).
- It has less range and far less shield damage (20 → 0).
- Forward smash:
- Ken's forward smash is based off of his standing heavy kick introduced in Super Street Fighter II Turbo.
- It has less start-up (frame 15 → 13).
- However, its total duration remains unchanged (FAF 46), giving it more ending lag.
- It has less range and does not make Ken travel forwards.
- It deals less damage (17.5% (foot)/16% (leg) → 16%/12%), making it slightly weaker despite its higher knockback growth (98 → 102).
Aerial Attacks[edit]
- Neutral aerial:
- Ken's neutral aerial is based off of his diagonal jumping medium kick in Super Street Fighter II Turbo, as opposed to Ryu's diagonal jumping light kick.
- Due to it being a kick rather than a knee, the range of the move is increased compared to that of Ryu's neutral aerial.
- It has more startup lag (frame 4 → 6).
- Its duration is less than half (4-31 → 6-17), which also causes it to have significantly more ending lag despite the shorter total duration (FAF 36 → 28).
- It has a sourspot on its clean hit that deals less damage (8% → 6.5%).
- The late hit deals more damage on its sweetspot, but less on the sourspot (4.5% → 4% (sourspot)/6.5% (sweetspot).
- The late hit has more base knockback (13 → 20).
- Up aerial:
- Up aerial is based off of his neutral jumping light kick, a kick straight upwards.
- It only hits once instead of twice.
- It has less startup (frame 6 → 5).
- It deals significantly less damage (11% (total) → 6.5%).
- It deals considerably less knockback (0 base/172 scaling → 20/100), which hinders its KO potential, but makes it much better for combos.
- It does not grant partial intangibility.
Throws[edit]
- Ken's back throw, Hell Wheel, has him roll backwards twice, allowing him to cover more distance and move closer to the edge of stages from farther away.
- Ken's back throw takes a longer time to release opponents compared to Ryu's back throw.
- Up throw's kick hitbox comes out 2 frames later, without the animation being altered, reducing its vertical range, and making it less likely to hit Nana.
Special moves[edit]
- Ken has more input command moves than Ryu, which can only be used with the attack button.
- He has Oosoto Mawashi Geri, an outward roundhouse kick from Super Street Fighter II Turbo similar to Ryu's standing held neutral attack that can be canceled into Inazuma Kick by holding the attack button, letting him use his special cancels without committing to the potential endlag of Shoryuken and Tatsumaki Senpukyaku and mix up his attacks. Inazuma Kick also deals a fair amount of shield damage, making it much riskier to block Ken during his blockstrings. At the edge, Oosoto Mawashi Geri makes for a reliable KO option from his special cancel normals.
- Ken also has his Nata Otoshi Geri, a swiping roundhouse kick from Super Street Fighter II Turbo with a unique input (→ ↘ ↓ + Attack) that Ryu does not have. He can cancel after the first hit and change it into his Inazuma Kick by holding the attack button. Its low knockback and angle make it useful for combos, leading into down smash, forward smash or a Shoryuken.
- Hadoken:
- Hadoken contains an image of Ken's hands, as it does in the original Street Fighter II.
- Hadoken deals significantly less damage (9%/9.5%/10% → 4.5%/5%/5.5% (standard), 10.8%/11.4%/12% → 5.625%/6.25%/6.875% (input)), with even his strongest input Hadoken dealing less damage than Ryu's weakest standard Hadoken, despite higher input multiplier (1.2× → 1.25×).
- Hadoken has slightly more startup lag (frame 12 → 13).
- Ken does not have access to Ryu's Shakunetsu Hadoken, meaning that he lacks a multi-hit projectile.
- Ken's Hadokens do not vary in speed as significantly as Ryu's do depending on how long the button is held (Light: 0.8 → 0.9, Medium: 1.3 → 1.2, Heavy: 1.8 → 1.5). This reduces his space control and approaching options.
- Tatsumaki Senpukyaku:
- Tatsumaki Senpukyaku hits multiple times, as opposed to Ryu's single hit.
- Aesthetically, Ken slowly spins faster during Tatsumaki Senpukyaku.
- Compared to Ryu's, Ken's Tatsumaki Senpukyaku does not lose its hitbox on hit due to its multi-hit nature. Ken can also reliably cross up shields with his version, making it safer on shield.
- Tatsumaki Senpukyaku deals less damage than the late hit of Ryu's version, even if all hits connect.
- Due to its multihit property and distance, Tatsumaki Senpukyaku can be used to drag opponents offstage far away at low percentages, being effective against opponents with poor recoveries.
- Due to its weak knockback, Tatsumaki Senpukyaku is less safe on hit than Ryu's and Ken can be punished during the animation if all hits fail to connect.
- Tatsumaki Senpukyaku has less endlag, allowing for followups after the move is complete.
- Tatsumaki Senpukyaku deals significantly less knockback compared to Ryu's, removing its KO potential.
- The grounded version does not grant intangibility to Ken's attacking leg.
- Shoryuken:
- Shoryuken deals less knockback than Ryu's equivalent and hits at a slightly more horizontal angle, making it more susceptible to DI.
- Ken's medium Shoryuken hits two times, as opposed to only once.
- Ken's heavy Shoryuken hits three times and has a flame effect.
- Due to its multihit property, Ken's heavy Shoryuken is somewhat susceptible to SDI and can occasionally be escaped from.
- Ken's heavy Shoryuken deals more damage and has powerful hitboxes throughout the move, in contrast to Ryu's Shoryuken losing strength the longer it is out. Heavy Shoryuken can also drag enemies upwards, letting it KO earlier when close to the top and KO earlier overall despite its weakened knockback.
- Ken can travel more horizontally during his heavy Shoryuken. This makes certain combos possible and horizontal recoveries easier.
- Ken's Shoryuken has less landing lag (frame 22 frames (standard)/15 (input) → 12/8/18/12), making it significantly more safe when combined with its multihit property.
- Focus Attack:
- Ken performs a spinning kick in his Focus Attack instead of a straight punch, much like in the various iterations of Street Fighter IV. The hitbox comes out 1 frame later for all variants, albeit with its total duration unchanged, allowing Ken to act 1 frame earlier on hit.
- Focus Attack launches at a lower angle (60 → 45), and the uncharged version has slightly more base knockback (100 → 110), hindering its followup potential but aiding its ability to set up edgeguards.
- The lowered angle improves the fully-charged version's KO potential on aerial opponents.
- Ken does not lunge forward as far in his Focus Attack, slightly hindering its range.
- Ken's Focus Attack has him kicking at a lower elevation than Ryu's punch, which makes him capable of hitting certain downed opponents that Ryu cannot (such as Zelda).
Misc.[edit]
- Palutena's Autoreticle aims lower when targeting Ken than Ryu (y offset: 1 → 0).
- Ken jumps slightly higher when escaping from Steve's Minecart (initial velocity: 2.5 → 2.55), slightly helping him to recover if sent off stage.
- Like Ryu, Ken has two unique Final Smashes, Shinryuken and Shippu Jinraikyaku, with the Final Smash activated depending on how far Ken is from his opponent(s). Shinryuken produces a giant pillar of fire with immense vertical range, which is similar to its appearance in the Marvel vs. Capcom series, which reused Street Fighter Alpha sprites in its 2D-era games. Meanwhile, Shippu Jinryaikyaku has Ken furiously kicking opponents before ending in a devastating series of hurricane kicks, much like his Guren Senpukyaku Ultra Combo II from Super Street Fighter IV and the ending of his Guren Enjinkyaku Critical Art from Street Fighter V, but is ultimately based on his Shippu Jinraikyaku Super Art from Street Fighter III. Shippu Jinraikyaku occurs when Ken initiates his Final Smash near an opponent. Otherwise, he will perform Shinryuken.
Update history[edit]
Like Ryu but to a much greater extent, Ken has been buffed overall in game updates so far, with most of his significant buffs coming in the 3.1.0 update. Many of his multi-hit moves connect more reliably and have a lower SDI multiplier, and more importantly, his moves that can be special-canceled have a longer window to do so, making his combos more consistent. His held, close neutral attack has completely changed for the better, now functioning as a reliable combo starter at a much wider percent range.
Update 7.0.0 buffed Ken even further. His overall shield is bigger, making it harder to shield poke him. His down tilt angle change was a mixed bag; it is now easier to combo into his Tatsumaki Senpukyaku, but it is now harder to combo into his Shoryuken. His pivoting leg is now invincible during his Tatsumaki Senpukyaku, making moves like Ness's PK Fire no longer work. The Tatsumaki is also stronger overall. The biggest change however, was to his down smash. It is now possible to cancel his down smash with a special move (at the expense of less shield damage), vastly improving his offense game. Another, albeit undocumented, buff to his down smash is that it is now possible to Kara Cancel the down smash charging animation. Kara Cancel was already possible but it could only be down during the first four frames of the down smash. Because of this, Ken's combo game has been greatly improved. And finally, Update 9.0.0 made Shippu Jinraikyaku connect much more reliably by making it deal more knockback and having more horizontal hitboxes.
Overall, much like Ryu, Ken fares much better than he did at Ultimate's launch.
- Neutral attack launches opponents, making them easier to be hit.
- Neutral aerial auto-cancels earlier (frame 34 → 28), matching the move's interruptibility. This allows it to autocancel from a short hop.
- Forward aerial auto-cancels earlier (frame 41 → 38), matching the move's interruptibility. This allows it to autocancel from a rising full hop.
- Can no longer jump immediately after using down tilt.
- Edge attack deals less hitlag (1.5× → 1.1×).
- Shoryuken's animation has been slightly altered.
 Focus Attack sliding has been removed.
- Neutral attack 1 and 2 (light) can be canceled into a special move for a longer amount of time (1-7 → 1-11(jab 1)/1-12(jab 2)).
- Neutral attack (heavy, close) deals drastically less knockback (70 base/70 scaling → 25/15) and sends at a slightly more horizontal angle (85° → 80°), making it a much better combo starter even at high percents.
- Neutral attack (heavy, far)'s second hit deals more damage (6% → 10%) with knockback scaling not fully compensated (130 → 92).
- Forward tilt (light, close) can be canceled into a special move for a longer amount of time (8-14 → 8-24).
- Forward tilt (light, far)'s sourspot has less range (Z offset: 9u-5u → 6.5u-5u), effectively increasing the range of its sweetspot.
- Forward tilt (heavy) sends at a slightly more horizontal angle (38° → 34°).
- Up tilt (light) sends at more vertical angle when hitting airborne opponents, making it a better combo starter (66° → 75°).
- Down tilt (light) deals more hitstun (0 → 1).
- Down tilt (heavy) deals less knockback (70 base/23 scaling → 73/16), allowing it to combo at a wider percent range.
- Forward smash deals more knockback (26 base/100 scaling → 28/103-102).
- Down aerial can be canceled into a special move for a longer amount of time (1-12 → 1-17), making it identical to Ryu's variant.
- The first hit of Tatsumaki Senpukyaku has a larger hitbox when used on the ground (3.5u → 4.5u).
- Tatsumaki Senpukyaku has a lower SDI multiplier (1× → 0.5×).
- Shoryuken:
- Shoryuken's hits connects more reliably and it has a lower SDI multiplier (1× → 0.5×).
- Shoryuken's first hit no longer negates other attacks.
- Shoryuken's grounded heavy version has more knockback growth (120(normal)/121(input) → 126).
- Shoryuken's light and heavy aerial versions have more knockback growth (49 → 55 (light), 100 → 107 (heavy)).
- Shoryuken's medium aerial version has less knockback growth (121 → 112).
- Command-input moves:
- Nata Otoshi Geri has a lower SDI multiplier (1× → 0.5×).
- Oosoto Mawashi Geri deals more damage (10% → 12% (both hits)) with knockback compensated (40 base/120 scaling → 41/103).
- Inazuma Kick deals more damage (10% → 12%) with shield damage compensated (7 → 5).
- Ken now turns to face opponents after perfect shielding.
- Overall shield size has been increased by 1.125x.
- Held down tilt launches at a lower angle (64° → 55°) and has less base knockback (73 → 66). This makes it easier to combo into Tatsumaki Senpukyaku, but harder to combo into Shoryuken.
- Down smash can be canceled into special moves.
- Kara Cancelling works even after charging down smash.
- Down smash has received negative shield damage (0 → -8/-6), preventing Ken from easily breaking shields by chaining it into special moves.
- Ken's pivoting leg is intangible during grounded Tatsumaki Senpukyaku. This prevents attacks that hit low to the ground from invalidating the move.
- Tatsumaki Senpukyaku has altered angles (35° → 55°/31° (grounded), 55° (aerial)) and knockback (62 base/30 scaling → 45/59 base/20/25 scaling (grounded), 45 base/20 scaling (aerial)), allowing its hits to link more reliably.
- Shippu Jinraikyaku's trapping hit deals more knockback (40 set/0 base → 48/17), and the first two kicks upon successfully hitting an opponent have more horizontally extended hitboxes (Z offset: 8u—10u → 5u—10u), allowing them to connect more reliably.
Moveset[edit]
- Ken always turns around to face his opponent when one is left standing, counting teammates as opponents if Team Attack is on.
- A small flash will appear whenever Ken does the input command version of one of his Special Moves instead of the standard B input.
- Sound effects from the Street Fighter II series, albeit heavily modified, are used when Ken hit an opponent instead of the standard knockback sound effects. The intensity of the sound depends on the power of the move. Ken also uses a unique sound effect when he performs a parry, which is based on the parry sound effect from the Street Fighter III series. Ken shares this trait with Ryu.
For a gallery of Ken's hitboxes, see here.
Note: All numbers are listed as base damage, without the 1v1 multiplier.
| Name | Damage | Description | ||
|---|---|---|---|---|
| Neutral attack | Jab (ジャブ) / Body Blow (ボディーブロー) / Hook (フック) Inazuma Kick (Held-Far) Upper (アッパー) (Held-Close) |
1.5% (hits 1 and 2) | Tapped: A jab, followed by a short straight-punch, followed by a hook. The second hit is based on Ken's Street Fighter III close medium punch. The first and second hits can be special-canceled, and are also able to jab lock.
Held (far): Ken performs his Inazuma Kick: a double-hitting axe kick. It is somewhat hard to land both hits, as the range tends to overlap with his close variant. This move causes Ken to slightly move forward, and deals a good amount of shield damage, making it useful for shield pressure. Cannot be special-canceled. Held (close): An uppercut similar to his held up tilt, but with significantly different properties, doing virtually no knockback and being special-cancelable. This makes it extremely potent for combos, reliably canceling into Shoryuken even at higher percents. Like his held up tilt, it renders his entire upper body intangible, giving it anti-air properties. | |
| 5% | ||||
| 6% (hit 1), 10% (hit 2) (held-far) | ||||
| 12% (held-close) | ||||
| Forward tilt | Side Kick (横蹴り) (Tapped-Far) Hook (フック) (Tapped-Close) Fist Thrust (正拳突き) (Held) |
6.8% (tapped, far), 6% (tapped, close), 5% (arm), 10% (fist) | Tapped (far): The yoko geri, a kick used in traditional karate. It launches the opponent diagonally upward. It is good for following up with a dash attack or forward aerial at low percents, and grants intangibility on his entire leg from frames 7-12. Cannot be special-cancelled.
Tapped (close): An inward hook. The move causes the opponent to slightly shift towards Ken. It can lock, and can also be special-canceled. Held: A straight with his left or right arm. While it is faster and deals more damage that Ryu's Collarbone Breaker, it has less range and far less shield damage. It is based on his far standing medium punch. Cannot be special-canceled. | |
| Up tilt | Elbow Strike (肘打ち) (Tapped) Upper (アッパー) (Held) |
2% (tapped), 12% (held) | Tapped: The sok ngat, an uppercut-style elbow strike used in Muay Thai. An extremely fast and highly spammable move that can combo into itself.
Held: An uppercut. It grants his entire upper body intangibility from frames 4-10, making it a surprisingly effective anti-air attack and KO move. | |
| Down tilt | Light Ankle Kick (キック, Kick)(Tapped) Heavy Ankle Kick (くるぶしキック, Ankle Kick) (Held) |
1.6% (tapped); 7% (leg, held), 5.5% (foot, held) | Tapped: A crouching, Hapkido-style shin kick. It is extremely fast and highly spammable, much like his tapped up tilt. Any prone opponents will be lightly launched back onto their feet, allowing for longer combo strings.
Held: A lunging, Hapkido-style shin kick. | |
| Dash attack | Tobisokuto (跳び足刀) | 12% (clean), 8% (late) | A flying kick. The clean hit launches opponents away, and can KO near the ledge. By contrast, the late hit is much weaker and launches opponents vertically, making it a potential combo starter. | |
| Forward smash | Ichimonji Geri (一文字蹴り) | 16% (foot), 12% (leg) | A roundhouse kick. Ken's strongest horizontal KOing move, with the sweetspot on his foot being stronger than the sourspot on his leg. Unlike Ryu's forward smash, it has less range, and does not move him forward as much; it also has slightly less base knockback. It is faster than Ryu's forward smash, however. Based on his standing heavy kick introduced in Super Street Fighter II Turbo. | |
| Up smash | Thrust Upper (突き上げアッパー) | 17% (clean), 13.5% (late) | Squats and then rises up to throw an uppercut. A decent vertical finisher, the move makes his hurtbox smaller while attacking, making this a good anti-air attack. Grants intangibility to his arm on frames 3-6. | |
| Down smash | Kaiten Ashibarai (回転足払い) | 16% | A legsweep. It is Ken's fastest smash attack, deals an impressive amount of damage for an attack of its kind, and launches opponents at a semi-spike angle. However, it is rather weak for a down smash, and only hits directly in front of Ken. It can be special-canceled. | |
| Neutral aerial | Knee Drop (ひざ落とし) | 8% (clean, bent leg), 6.5% (clean, leg/ late, bent leg), 4% (late) | A downward angled kick. While weaker than Ryu's neutral aerial, the move has increased range. The strongest hitbox is at Ken's bent leg. Hitting with it will also cause the opponent to slightly shift towards Ken, much like his close, tapped forward tilt. At mid percents, hitting clean with his bent leg will cause anyone behind Ken to move in front of him, allowing for combos into his special moves. It can be special-canceled. Based on his diagonal jumping medium kick in SFII. | |
| Forward aerial | Tobigeri (飛び蹴り) | 14% (clean sweetspot), 12% (late sweetspot), 9% (clean sourspot), 8% (late sourspot) | A flying kick. It has a sweetspot on Ken's outstretched leg, and a sourspot on his bent leg. The sweetspot launches opponents diagonally, while the sourspot launches them toward Ken. It can be special-canceled. | |
| Back aerial | Senpukyaku (旋風脚) | 16% (leg), 13% (foot) | An outside crescent kick. Since Ken always faces his opponent in one-on-one matches, one must perform a reverse aerial rush in order to use it for edgeguarding. It can be special-canceled. | |
| Up aerial | Front Kick (前蹴り) | 6.5% | A kick straight upwards. Unlike Ryu's up aerial, it only hits once, and his leg is not intangible. Can cancel into any of his special moves upon hit. Based off of his neutral jumping light kick. | |
| Down aerial | Straight Punch (ストレート, Straight) | 12% (grounded opponent), 15% (aerial opponent sweetspot), 11% (aerial opponent sourspot) | A downward-angled cross. Against aerial opponents, the sweetspot on Ken's fist is a meteor smash that launches opponents at a rather diagonal angle, akin to a spike. It can be special-canceled. | |
| Grab | Grab (つかみ) | — | Reaches out with his hand. | |
| Pummel | Hizageri (ひざ蹴り) | 1.3% | A knee strike while holding the opponent in the collar-and-elbow position. It is based on his Tsukami Hizageri (つかみ膝蹴り, "Grasping Knee Kick") throw in the Street Fighter Alpha/Zero games. | |
| Forward throw | Seoi Throw (背負い投げ) | 9% | The seoi nage, a Judo throw. | |
| Back throw | Hell Wheel (地獄車) | 12% | Rolls backward twice before performing the tomoe nage, akin to Pikachu's back throw. | |
| Up throw | Heel Drop (かかと落とし) | 8% (throw), 15% (kick) | A stretch kick transitioned into an axe kick. The axe kick has a collateral hitbox that possesses impressive KO power against bystanders. | |
| Down throw | Tile Breaker (瓦割り) | 3% (hit; throw) | Pins the opponent to the ground and performs a knifehand strike. Ken's only throw with combo potential, albeit a rather lackluster one. However, the actual throw's collateral hitbox deals enough shield damage to break even a full shield, though it is difficult to land due to it requiring bystanders to be directly in front of Ken. Its shield-breaking properties and animation are based on the brick breaking bonus game in Street Fighter, though it also resembles Akuma's Shurettō (朱裂刀, "Vermilion Rending Blade") throw in Street Fighter IV. | |
| Floor attack (front) | 7% | Kicks behind himself and then in front of himself before getting up. The front hit is based on his crouching heavy kick in Street Fighter III. | ||
| Floor attack (back) | 7% | Kicks around himself before getting up. | ||
| Floor attack (trip) | 5% | Kicks behind himself and then in front of himself before getting up. | ||
| Edge attack | 10% | Performs a crouching shin kick while climbing up. | ||
| Neutral special | Hadoken | 4.5%, 5%, 5.5% (Standard), 5.625%, 6.25%, 6.875% (Input) | Quickly cups his hands to his side and then thrusts them forward to launch a blue ki blast from his cupped hands that deals low damage and knockback, and may cause tripping at low percents. As in the original games, Ken's Hadoken is weaker than Ryu's version. Since Ken does not have access to Shakunetsu Hadoken, he can only do two versions of the move: a small blue Hadoken (special button only), and a minutely stronger (1.25× damage) and larger inputted Hadoken (↓ ↘ → + attack/special/side taunt). Combos well out of his tapped tilt attacks and aerials, and is mainly used to rack up damage due to its low damage outputs, knockback and slow speed. Both variants can cancel into his Final Smash. Like in the original Street Fighter II, Ken's Hadoken contains an image of his hands. | |
| Side special | Tatsumaki Senpukyaku | 3% (Standard, ground, hits 1 - 4), 3.48% (Input, ground, hits 1 - 4), 3% (Standard, midair, hit 1), 2% (Standard, midair, hits 2 - 4), 3.48% (Input, midair, hit 1), 2.32% (Input, midair, hits 2 - 4) | A jumping, spinning crescent kick. Unlike Ryu's version of the move, Ken's version hits multiple times, has less endlag, and the grounded version does not grant intangibility on his leg. Also, Ken will announce the move by name whether he uses the input or not (Ryu only announces the move if it was performed via input). The command-input version (↓ ↙ ← + attack/special/side taunt) deals 1.16× damage. Even if all hits connect, the move deals less damage than the late hit of Ryu's version. The multi-hits can also drag opponents offstage at low percents, making it effective against characters with poor recoveries. However, Ken's Tatsumaki Senpukyaku deals significantly less knockback than Ryu's, repurposing the move from a KOing option into a combo starter and combo extender. Any of the hits can be canceled into his Final Smash. | |
| Up special | Shoryuken | 13% (Standard, fast tap), 8%/6% (Standard, mid-fast tap; hits 1/2), 15.6% (Input, fast tap), 9.6%/7.2% (Input, mid-fast tap; hits 1/2), 2.2%/8%/6.5% (Heavy, Standard; hits 1/2/3), 2.64%/9.6%/7.8% (Heavy, Input; hits 1/2/3) | A leaping uppercut. Ken's Shoryuken deals less knockback than Ryu's equivalent and hits at a slightly more horizontal angle. However, it deals more damage and has powerful hitboxes throughout the move (in contrast to Ryu's Shoryuken, which loses strength the longer it is out). Shoryuken can also drag enemies upwards, letting it kill earlier when close to the top. Depending on how long the button is pressed, Ken's Shoryuken will hit a different amount of times: tapping the button fast causes it to hit once, tapping the button at a mid-fast speed causes it to hit twice, and holding the button performs Heavy Shoryuken: a flaming Shoryuken that hits 3 times. It grants him intangibility on frame 5. The command-input variant (→ ↓ ↘ + attack/special/side taunt) deals 1.2× more damage, has 2/3rds the landing lag, and grants intangibility to his arm from frames 1 to 14. Can cancel into his Final Smash. | |
| Down special | Focus Attack | 12% (Level 1), 10% (Level 2), 17% (Level 3) | Similar to Ryu's version, but with a spinning kick instead of a punch. Ken gains damage-based armor that can withstand a single hit below 7%-14% (scaling linearly based on number of frames charged) while charging. Ken takes 0.5× damage during the move, effectively doubling his damage-based armor to 14%-28%. Additionally, the uncharged version on grounded and aerial opponents, as well as the semi-charged and fully-charged versions on aerial opponents, launch opponents at a lower angle. | |
| Command input 1 | Nata Otoshi Geri | 5% (both hits), 12% (canceled Inazuma Kick) | A swiping crescent kick that hits twice, launching them into the air. This move uses a unique input, a reversed forward quarter-circle (→ ↘ ↓ + attack), that Ryu does not possess. While not always guaranteed, the attack leads into various followups and resets, including a forward smash. Much like Oosoto Mawashi Geri, holding the attack button will cancel into Inazuma Kick (cancels after the first hit only). As with his Oosoto Mawashi Geri, the Inazuma Kick cancel deals fair shield damage. Both hits can cancel into his Final Smash. | |
| Command input 2 | Oosoto Mawashi Geri | 12% (move), 12% (canceled Inazuma Kick) | An outward roundhouse kick, which resembles Ryu's far, held neutral attack. The input is the same as Ryu's Shakunetsu Hadoken: a half-circle input (← ↙ ↓ ↘ → + attack). By holding the attack button, he will cancel it into Inazuma Kick. The Inazuma Kick deals a fair amount of shield damage, making it much riskier to block Ken during his blockstrings. He also gains intangibility on his leg for frames 7 and 8. Works well as a safe combo ender, particularly at the edge where it becomes a powerful KO option. Can cancel into his Final Smash upon hit. | |
| Final Smash | Shippu Jinraikyaku / Shinryuken | 1.2% (hits 1 - 13), 13% (hit 14), 1% (initial hit), 3.2% (hits 1 - 4), 4% (hit 5), 4.3% (hits 6 - 10), 7% (hit 11) | Ken's Final Smash varies depending on range. At point-blank range, Ken traps the opponent with Shippu Jinraikyaku a furious series of kicks, followed by devastating series of hurricane kicks. If the initial hit some how misses, Ken will only do the first few hits, however, if he hit another opponent during those hits, the Final Smash will continue as normal. At any other range, Ken performs the Shinryuken an uppercut which produces a giant pillar of fire with immense vertical range. If the attack or special button is mashed during Shinryuken the Final Smash will deal extra damage. Ken can cancel most of his moves directly into his Final Smash as well. | |
Canceling[edit]
Ken can perform a special move out of certain normal attacks, a mechanic known in his home series as special-cancelling. By pressing the special button or doing the command input after connecting with a normal attack on hit or on shield, Ken will cancel the endlag of the normal attack and perform the move. The normal attacks that can be canceled include the first two hits of neutral attack, tapped and held down-tilt, tapped up-tilt, and proximity forward-tilt, held neutral attack and down smash. He is also capable of doing so with his aerials. Special-cancelling allows Ken to perform blockstrings and hit confirms into Shoryuken for a kill, Tatsumaki for a combo, Hadoken for safety and pressure, and his roundhouse kicks for mixups and KOs at the edge. He can also bait the opponent out with a special cancel into a Focus Attack, further increasing mixup potential.
Stats[edit]
| Stats | Weight | Dash speed | Walk speed | Traction | Air friction | Air speed | Air acceleration | Gravity | Falling speed | Jumpsquat | Jump Height | Double jump Height |
|---|---|---|---|---|---|---|---|---|---|---|---|---|
| Value | 103 | 1.936 – Initial dash 1.76 – Run |
0.825 | 0.11 | 0.015 | 1.12 | 0.01 – Base 0.025 – Additional |
0.12 | 1.6 – Base 2.24 – Fast-fall |
3 | 26 - Base 15 - Short hop |
29.5 |
Announcer call[edit]

English/Japanese/Chinese
French
On-screen appearance[edit]
- Walks onto the stage from some mist in the background, then gets into a fighting stance while saying "I'm ready for ya! Bring it on!" (いつでもいいぜ! かかってきな!). Nearly identical to Ryu's on-screen appearance.
Ken's on-screen appearance

Taunts[edit]
- Up Taunt: Gives a thumbs up, saying "Yeah!". Based on his Street Fighter Alpha winpose.
- Side Taunt: Bumps his fists together, holds his fist out, and says "Get serious!" (本気出しなよ。, Give it your all.) Based off of one of his Personal Actions in Street Fighter IV. Nearly identical to Ryu's side taunt.
- Down Taunt: Does a beckoning gesture with his hand, saying "Bring it on!" (かかってきな!, Bring it on!) Based on his introduction in Street Fighter IV.
Ken's up taunt.
Ken's side taunt.
Ken's down taunt.


Idle poses[edit]
- Adjusts his gloves.
- Wriggles the fingers on both hands, then crosses his arms and pumps them.
Ken's first idle pose.
Ken's second idle pose.


Crowd cheer[edit]
| Cheer (English) | Cheer (Japanese/Chinese) | Cheer (Italian) | Cheer (Dutch) | Cheer (French) | |
|---|---|---|---|---|---|
| Cheer | |||||
| Description | Ken Ken Ken-Ken-Ken! | Ken Ken Ken! | Vai Keeen! | Ken Ken! *claps 2 times* Ken Ken! | Allez Ken! |
| Cheer (German) | Cheer (Spanish) | Cheer (Russian) | Cheer (Korean) | |
|---|---|---|---|---|
| Cheer | ||||
| Description | Keeeen | Ken! Ken! Ken - Ken - Ken! | Ken! Ken! Ken! | Ken! Ken! *claps 2 times* |
Victory poses[edit]
- Left: Brushes his hair before giving a thumbs-up to the camera, saying "I did it!" ("やったぜ!", I did it!). Based off of his Street Fighter Alpha victory pose, which recurs throughout the series.
- Up: Punches twice, does a roundhouse kick, and raises his fist (similar to Ryu), while saying "Challenge me after some practice." In Japanese, he says "いくらでもかかってこい!" (Come at me as much as you like!), his win quote from Street Fighter II. Based off of his victory pose throughout the series, specifically his Street Fighter V variant.
- Right: Kicks twice (the first being the Nata Otoshi Geri, and the second being the Oosoto Mawashi Geri) and performs a beckoning gesture, saying "I knew I'd win! Hah!" In Japanese, he says "スパッと勝つと気持ちいいな!" (It feels good to win a spat!), one of his generic win quotes from Street Fighter V.


In competitive play[edit]
Tier placement and history[edit]
In the early stages of Ultimate, Ken and his original fighter Ryu barely had any representation. This was due to their high technical learning curve thanks to their fighting style inputs, and problems with approaching due to their mobilities and issues against projectiles. Due to the perception of Ryu at the time being lackluster from the nerfs he received from Smash 4, Ken was viewed more positively as he had access to his input kicks and slightly better mobility, though he was nonetheless perceived as a mid-tier at the time.
Patches slowly improved the perceptions of both Ryu and Ken, with most of their current buffs being shared between them. Patch 3.1.0. granted Ken some noteworthy buffs to encourage his close-quarters fighting style, with his held jab being retooled into an excellent combo starter, and giving more leeway for him to input special moves from many of his attacks. Ken's buffs widened the gap between his counterpart Ryu and significantly improved his perception in the metagame in comparison to him, as they granted Ken a newfound, formidable combo/damage racking ability that could end stocks from a single string of attacks. As a result, Ken gained more representation and was seen as a high tier character.
Following that, patch 7.0.0. gave Ken even more buffs, with Tatsumaki Senpukyaku having intangibility on the legs and being able to cancel down smash into any special. Considering Ken's already high perception, this further improved him in the eyes of professionals, and he is often considered a dark horse candidate for a top tier or upper high tier. As with previous patches, Ken was commonly considered significantly better than Ryu due to his access to better mobility, a wider array of combos, a useful Tatsumaki Senpukyaku (which could initiate combos) and a feared KO tool in Shoryuken, which could KO as early as 90% and was easy to combo into. As a result of this, Ken has consistently been granted widespread representation from professionals especially when compared to Ryu, with players such as Riddles, Nito, Venom, Sandstorm, and takera earning good results with the character. More recently, however, his standing relative to Ryu has become more debatable, following metagame developments and buffs exclusive to Ryu coming in update 13.0.1; many Ken players have since picked up Ryu as a co-main and rank both fighters very close. Regardless, Ken remains a solid high-tier character in the eyes of most professionals, ranked 34th on the first and tier list and later dropped to 45th on the second and current tier list.
Most historically significant players[edit]
See also: Category:Ken players (SSBU)
 AndresFn - The best Ken player in Europe. Placed 1st at Glory 2.0, 5th at Temple: Hermès Edition, and 13th at VCA 2021, Ultimate WANTED 4, and Tech Republic VI. Ranked 14th on the PGRU v3 EU.
 Jahzz0 - The best Ken player in the United States. Placed 5th at DreamHack Atlanta 2022, 17th at both CEO 2022 and Double Down 2022, 25th at MomoCon 2022, and 33rd at Super Smash Con 2022 with wins over players such as Glutonny, Riddles and Zomba.
 Maeda - The best Ken player in France. Placed 1st at Salty Arena Cup Ultimate 5, 2nd at 4 Seasons Tournament: Winter 2020, 4th at European SEL Clash, and 33rd at Syndicate 2019 with wins over Glutonny, Jeda, and, Otakuni. Ranked 45th on the European Smash Rankings.
 takera - The best Ken player in the world. Placed 5th at EGS Cup 3, 7th at both Sumabato SP 11 and Maesuma TOP 1, 13th at Sumabato SP 10, and 25th at EVO Japan 2020. Ranked 60th on the Japan Player Rankings.
- Vendetta - One of the best Ken players in the United States. Placed 4th at Clash Of The Carolinas III, 5th at Dare 2 Dair, 7th at Glitch - Infinite, and 17th at both MomoCon 2022 and DreamHack Atlanta 2022 with wins over players such as Light, Kola, and Anathema. Online, placed 1st at SWT: NA Southeast Ultimate Online Qualifier while defeating ESAM. Ranked as high as 5th on the Georgia Power Rankings.
 Venom - The best Ken player in Canada. Placed 1st at LAN ETS 2020, 9th at both Rising Stars at EGLX 2019 and DreamHack Montreal 2019, 17th at Defend the North 2019, and 25th at Get On My Level 2022 with wins over players such as Armadillo, SuperGirlKels, and JW.
Classic Mode: Red-Hot Rivalry[edit]

All of Ken's opponents are rivals to the main character of their franchise of origin. Because Crazy Hand represents the destruction of Master Hand's creations, Crazy Hand is encountered in Master Hand's place on lower difficulties.
| Round | Opponent | Stage | Music | Notes |
|---|---|---|---|---|
| 1 | Palutena's Temple (Battlefield form) | Dark Pit's Theme | ||
| 2 | Venom | Star Wolf's Theme / Sector Z (for 3DS / Wii U) | References Wolf's rivalry with Fox. | |
| 3 | Frigate Orpheon | Multiplayer - Metroid Prime 2: Echoes | ||
| 4 | Temple | Great Temple / Temple | Represents Dark Link. | |
| 5 | Mario Bros. | Underground Theme - Super Mario Bros. | References how players can compete with each other in Mario Bros. It also aligns with Sakurai's statement that Luigi could be considered the "original Echo Fighter".[1] | |
| 6 | Suzaku Castle (Ω form) | Ryu Stage | References Ken's rivalry with Ryu. | |
| Bonus Stage | ||||
| Final | Crazy Hand | Final Destination | Crazy Hand (Less than 7.0 intensity) Master Hand / Crazy Hand (Intensity 7.0 or higher) |
On intensity 7.0 and higher, Master Hand fights alongside Crazy Hand. |
Credits roll after completing Classic Mode. Completing it as Ken has Ken Stage accompany the credits.
Role in World of Light[edit]

Although Ken does not appear in the World of Light opening cutscene, he was vaporized and later imprisoned alongside the rest of the fighters (sans Kirby) when Galeem unleashed his beams of light.
Ken was one of the many fighters that fell under Dharkon's control upon Galeem's first defeat. He can be found in Dracula's Castle behind an evil ghost; Akuma must be defeated in order to reach him.
Fighter Battle[edit]
| No. | Image | Name | Type | Power | Stage | Music |
|---|---|---|---|---|---|---|
| 60ε | |
Ken | 10,600 | Boxing Ring (Ω form) | Ken Stage |
Spirit[edit]
Ken's fighter spirit can be obtained by completing Classic Mode. It is also available periodically for purchase in the shop for 300 Gold, but only after Ken has been unlocked. Unlocking Ken in World of Light allows the player to preview the spirit below in the Spirit List under the name "???". As a fighter spirit, it cannot be used in Spirit Battles and is purely aesthetic. His fighter spirit has an alternate version that replaces it with his artwork in Ultimate.
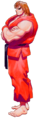
978. Ken
In Spirit Battles[edit]
As the main opponent[edit]
| Spirit | Battle parameters | |||||||||
|---|---|---|---|---|---|---|---|---|---|---|
| No. | Image | Name | Series | Enemy Fighter(s) | Type | Power | Stage | Rules | Conditions | Music |
| 602 |  |
Jack Levin | F-Zero Series | •Ken •Wii Fit Trainer |
8,800 | Big Blue (Battlefield form) | •Sudden Final Smash | •The enemy will suddenly have a Final Smash •Reinforcements will appear during the battle |
Dream Chaser | |
| 766 | Kazuhira Miller | Metal Gear Solid Series | •Ken •Snake |
9,600 | Midgar (hazards off) | •Attack Power ↑ | •Defeat the main fighter to win •Timed battle (1:30) •The enemy has increased attack power when the enemy's at high damage |
Encounter | ||
| 942 | Don Flamenco | Punch-Out!! Series | •Ken |
3,600 | Boxing Ring | N/A | •The enemy's up special has increased power •Stamina battle •The enemy favors up specials |
Vega Stage | ||
| 996 | Dan | Street Fighter Series | •Ken |
1,600 | Suzaku Castle (Ω form) | •Jump Power ↓ | •Stamina battle •The enemy loves to taunt •All fighters have reduced jump power |
E. Honda Stage Type A | ||
| 1,197 | Munchy Monk | Rhythm Heaven Series Rhythm Paradise Series |
•Ken •Tiny Kirby |
1,500 | Spirit Train | •Item: Food | •Defeat the main fighter to win •The enemy favors up specials •The enemy is easily distracted by items |
Fruit Basket | ||
| 1,359 | Kim Kaphwan | Fatal Fury Series | •Ken •Giant King Dedede •Tiny Ridley |
1,800 | King of Fighters Stadium | •Jump Power ↓ | •The enemy's kicks and knee strikes have increased power •Reinforcements will appear after an enemy is KO'd •All fighters have reduced jump power |
Let's Go to Seoul! - FATAL FURY 2 | ||
| 1,483 | Paul Phoenix & Marshall Law | Tekken Series | •Ken •Fox |
3,800 | New Donk City Hall (Battlefield form) | N/A | •Stamina battle | Chicago, U.S.A. | ||
Alternate costumes[edit]

| |||||||

|

|

|

|

|

|

|

|
Reveal trailer[edit]
Gallery[edit]
Ken's splash art.
Ken's amiibo.
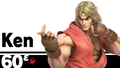
Ken's fighter card.
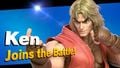
Ken's unlock notice.
Ken on Coliseum.
With King K. Rool, Diddy Kong, and Donkey Kong on Tortimer Island.
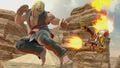
Alongside Koume on Gerudo Valley.
Using Focus Attack on Wario on Onett.
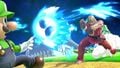
Using Hadoken on Luigi on Mario Galaxy.
Unleashing Shinryuken on Final Destination.


Fighter Showcase Video[edit]
Trivia[edit]
- Ken's pose in his official artwork is much like the pose in his Street Fighter III artwork.
- It also resembles Ryu's pose in his Smash 4 artwork, only mirrored.
- Ken's attack on Wario's motorcycle in the character showcase video is a reference to the car smashing mini-game from the Street Fighter II games.
- Ken's Classic Mode route is vaguely similar to Falco's, as both of their routes fight "dark" forms/rivals of main characters as opponents, and both of their routes have the same opponents in some rounds.
- Ken and Falco are the only two fighters who fight a solo Crazy Hand as their final boss in Classic Mode under Intensity 7.0.
- Ken is the first character revealed for Ultimate to share a reveal trailer with a character not from the same franchise, having been revealed in the same trailer as Incineroar.
- Ken's showcase of Shippu Jinraikyaku after a successful parry in his reveal trailer is a reference to "Evo Moment 37" (sometimes referred to as the "Daigo Parry"), a famous portion of an EVO 2004 match between top Street Fighter III players Justin Wong and Daigo Umehara, where Umehara's Ken successively parried each hit of Wong's Houyoku-sen as Chun-Li before following with the Shippu Jinraikyaku to win the match.[2]
- The moment is more directly referenced in a development image posted on Masahiro Sakurai's Twitter account, which features Ken parrying Zero Suit Samus's forward tilt.[3] Within Ultimate, Zero Suit Samus is used to represent Chun-Li in her Spirit Battle. This picture was also posted during the timeframe of EVO Japan 2020, which Sakurai attended.
- One of the gameplay showcases in Ken's reveal trailer depicts him taunting Zelda at New Donk City Hall before being attacked by Link; ironically, in Ken's home series, he has a girlfriend (who later becomes his wife) named Eliza.
- Ken and Richter are the only Echo Fighter newcomers with a CGI trailer as well as the only ones with CGI footage for their splash art. Daisy did not have either, while Chrom and Dark Samus had only gameplay footage for their trailers and their official artwork for their splash arts.
- Unlike Richter, Ken's trailer can be played on his fighter page on the Super Smash Bros. Ultimate Official Site.
- Interestingly, Ken's appearance in Ultimate marks the fourth time in any game where his eye color is blue opposing to the usual brown after Street Fighter X Tekken and Street Fighter IV.
- Ken is one of the few characters who has a unique line while teetering: he voices a surprised "Uh oh!".
- Ken is the only character who speaks when he grab releases an opponent, voicing a quick "Whoops!" (やるな...!, You're good...!).
- Strangely, his Star KO clip is missing in his sound library, making him the only fighter with this distinction.
- Ken and Mario are the only characters that possess the Neutral typing when unlocking them in World of Light.
- If Ken is set as a CPU-opponent in Training Mode, all three CPUs will always face the player, much like on 1-on-1 matches. He shares this distinction with Ryu, Terry, and Kazuya.
- This also happens if Ken faces a single opponent in a team consisting of two or more characters in Team Battles with Team Attack off, and in All-Star Mode when he appears.
- A few of Ken's attacks where he uses his legs or feet to attack, such as Focus Attack, are coded as arm or fist type attacks. This is likely a result of his attacks being copied from Ryu, as many of Ken's leg/foot attacks that are wrongly coded as arm/fist attacks are arm/fist attacks for Ryu.
- In the results screen after a team battle, if the winning team consists of Villager in the front and Ken behind him to the left, Villager's net will clip through Ken's arm.
Notes[edit]
- 1.^ "Inazuma" translates into "Lightning"
- 2.^ translates into "Toe Kick"
- 3.^ translates into "Uppercut Elbow"
- 4.^ translates to "Flying Foot Edge Kick
- 5.^ translates to "Straight Line Kick
- 6.^ translates to "Rotating Leg Sweep"
- 7.^ translates into "Shoulder Throw"
- 8.^ translates to "Knee Kick"
- 9.^ translates into "Circle Throw"
- 10.^ translates into "Hatchet Dropping Kick"
- 11.^ translates into "Big Outer Roundhouse Kick"
References[edit]
|
| |
|---|---|
| Fighters | Ryu (SSB4 · SSBU) · Ken (SSBU) |
| Assist Trophy | Guile |
| Stage | Suzaku Castle |
| Trophies and Spirits | Trophies · Spirits |
| Music | SSB4 · Ultimate |
| Other | World Tour |