Down aerial

The down aerial (下空中攻撃, Down/lower/under midair attack; commonly abbreviated as down air, dair or D-Air and referred to as AttackAirLw in Melee's Debug Menu and internal Brawl files) is an aerial attack that is performed in midair by pressing the attack button and tilting the Control Stick downwards. Its official term varies between titles, where it is known as a down midair attack in Super Smash Bros. Melee, and a down air attack in Super Smash Bros. Brawl. Many of these moves are meteor smashes and some of these moves can be either stall-then-falls or multi-hit attacks.
List of down aerials in Super Smash Bros.
All down aerials in Super Smash Bros. are spikes, with the exception of Pikachu's and Link's. Many of the spikes are multi-hit attacks, and SSB is notable for allowing characters to DI out of them fairly easily.
| Character | Description | Damage |
|---|---|---|
| Captain Falcon | Thrusts both feet below him. A powerful spike. Can also combine a down aerial into Falcon Punch at mid or high percents depending on character. | 14% |
| Donkey Kong | Thrusts both feet below him. High power spike. Poor range. Combos well into both up smash, aerials, and Giant Punch at varying percentages. | 13% |
| Fox | Does a very fast drill kick. Easy to DI out of. Combos into up smash, shine, and tap a combos. A very weak spike. Can do 7 kicks in total. | 2% per hit; 14% if all hits connect. |
| Jigglypuff | Does a drill kick similar to Kirby's. Similar to the other drill based characters, combos into up tilts and up B. Like Kirby's, it is a spike, but it is much weaker. Does 10 kicks total. | 3% damage per hit; 30% damage if all hits connect. |
| Kirby | A drill kick that is very difficult to DI out of, very useful in both combos and gimping. Considered by many the best gimping move in all of SSB. Down aerial on the ground combos into up tilts and forward smashes. It is also strong against shields. Does 10 kicks in total. | 3% per hit; 30% if all hits connect. |
| Link | Thrusts his sword below him. Very useful move to short hop. Has the most ending lag of any aerial and is overall the best way of showing the difference between not Z-cancelling and Z-cancelling. Great power and great vs shields if Z-cancelled. Can bounce off of opponents. | 16% |
| Luigi | A drill kick spike. It's easy to DI out of. A good combo move and good vs shields. Can combo a down aerial into Super Jump Punch; or down aerial into up aerial into Super Jump Punch. Does 8 separate kicks in total. | 3% per hit; 24% if all hits connect. |
| Mario | Similar to Luigi, has quicker hits and is harder to DI out of. Combos into up aerial. Useful against shields and for edgeguarding. Does 8 kicks in total. | 3% per hit; 24% if all hits connect. |
| Ness | Thrusts one foot down. A good spike or meteor smash if it connects. | 15% |
| Pikachu | Thrusts its head down, surrounds itself in electricity, and zaps the opponent. A disjointed move like some of Pikachu's other aerials, but has high landing lag if its head gets slammed to the ground. Great shield stun. Can be used for KOing conditions. | 13% |
| Samus | Thrusts her arm cannon below her. A high power spike. Usually considered Samus's best move. Main KO combo is down aerial into back aerial or charge shot. Can also repeatedly down aerial opponents and anticipate techs. Short hop down aerials can lead to shield break if the opponent is careless. | 14% |
| Yoshi | Rapidly moves feet to damage the opponent. The most damaging move in SSB if all hits connect. A shield breaker, but also a drill and is easy to DI out of. Weakest DJC aerial, but good to combo into forward smash. One of the weakest spikes in the game. Does 14 kicks in total. | 4% per hit; 56% if all hits connect. |
List of down aerials in Super Smash Bros. Melee
| Character | Description | Damage |
|---|---|---|
| Bowser | Spins upside-down in his shell. Can be used in a somewhat similar fashion to Mario's due to the multiple quick hits, though the landing lag is comparatively larger. The landing hit can semi-spike. Can also meteor smash if sweetspotted. | 1%-15%, depending on number of connecting hits |
| Captain Falcon | Thrusts his legs below him. A very powerful and fast meteor smash. If the attack connects in the upper hitbox, the attack becomes a spike and therefore it cannot be meteor canceled. | 16% |
| Donkey Kong | Stomps the air below him with one foot. Will always meteor smash his foe with powerful knockback, but is rather slow. | 16% |
| Dr. Mario | Similar to Mario's, but dealing seven hits with more damage and a different sound effect. | 12% if all hits connect. |
| Falco | Similar to Fox's down aerial, but will instead strike once and powerfully spike his opponent. While very easy to perform and combo into, especially on-stage, the move is one of the riskiest in all the game to use off-stage, due to its long duration, Falco's high falling speed, and his poor recovery. In PAL regions, only the first half of the attack can spike. | 9-12% |
| Fox | Performs a drill kick. Another Mario-esque Down Midair Attack, useful for generally the same purposes. However, this attack is a spike, albeit an extremely weak one. It produces noticeable knockback against only lower handicapped opponents. | 19% if all hits connect. |
| Ganondorf | Similar to Captain Falcon's, but is much more powerful. It is by far the strongest meteor in the game and is also the strongest aerial in the game when landed on airborne opponents. It is so powerful, it reliably KOs almost every character while grounded under 100%. Widely considered to be the best meteor in the game due to its power, speed, very large hitbox (almost up to his head), and surprisingly low aerial ending lag, making it a low risk meteor that is easy to land and recover from; Ganondorf's average falling speed and above average recovery also aid this. However, unlike Falcon's down aerial, the top hitbox does not nipple spike, and it cannot cancel out projectiles, due to having transcendent priority. | 22% |
| Ice Climbers | Place their hammers below them, and drop down. Knocks the enemy a significant distance upwards. This attack has extremely low set knockback. | 7-9% per climber; total 17% |
| Jigglypuff | Performs a drill kick identical to Kirby's, but only meteor smashes with the first hitbox rather weakly. The meteor is very difficult to perform, and Jigglypuff has other, better, safer edgeguarding tactics, notably its Wall of Pain. | 14% if all hits connect |
| Kirby | Performs a drill kick. It is a weak but effective meteor. It is effective, as Kirby can drag the opponent down with him and recover easily, compensating for its weak knockback. | 16% if all hits connect. |
| Link | Thrusts his sword below him. It is a very powerful attack, among aerial attacks and Link's variety of attacks; it deals 22% on the outset, and it can KO reliably as low as 80% to 90%. Additionally, Link can "bounce" on opponents with the attack, hitting them up to three times. Despite its great power, this attack has notorious landing lag (the longest of all aerials in the game). This is also Link's most powerful attack and one of the strongest down aerials in the game. | 22% |
| Luigi | Spins around, performing a downwards kick. Appears identical to Mario's, but instead of multiple, low-knockback hits, he performs one quick spin that can knock the enemy in diverse directions. If Luigi hits his foe with his spinning fists or hip during the start of the attack, they will be powerfully meteor smashed. If sourspotted, this aerial still produces very powerful horizontal knockback, making it a very effective edgeguard. This is Luigi's most powerful aerial. | 8-16% |
| Mario | Performs a drill kick. Is somewhat functionally identical to his Mario Tornado (in fact dealing the same amount of damage), but strikes faster, is harder to escape from, and has no finishing punch, making it a good damage-racker and having good combo potential. | 10% |
| Marth | Slashes his sword downward. Very fast and spikes the opponent when tipped. It is utilized in conjunction with his forward aerial for the Ken Combo. While it has almost no start-up lag, it has moderate ending and landing lag, making it risky if performed off stage, though its angled trajectory makes it useful on-stage. In the PAL versions of the game, it is a meteor smash instead, though it still sends opponents at an angle. | 9% (base), 10% (middle), 13% (tip) |
| Mewtwo | Backflips and kicks downwards. It has three hitboxes varying from being weak to moderate in strength. All three hitboxes meteor smash. The meteor is slow and has small sweetspots, but Mewtwo's floaty falling speed and great recovery make it a low risk meteor. | 16% when sweetspotted |
| Mr. Game & Watch | Pulls a key out and plunges downward. If it hits immediately at the start of the attack, Mr. Game & Watch will meteor smash his foe with good power. | 19-20% |
| Ness | Stomps the air below him with his foot. It will always meteor smash his opponent. It has high base knockback, being the only meteor other than Ganondorf's down aerial to be able to pop up all characters at 0%. However, it has very low knockback scaling, and it cannot KO reliably until 200%. It also has long starting and ending lag, making it a moderately high risk meteor to use. | 12% |
| Peach | Kicks below herself. A good combo starter, but deals low damage and produces barely any knockback. | 11% if all hits connect |
| Pichu | Identical to Pikachu's, but Pichu will receive 1% damage upon using it, and another 1% when landed. It is also a multi-hit move, unlike Pikachu's (but extra recoil damage is only incurred once). | 14% if all hits connect. |
| Pikachu | Turns upside down and spins around, emitting electricity from its cheeks. Another simple drill move that strikes once with decent power, but it suffers from high landing lag. | 12% |
| Roy | Identical to Marth's, but the sweet spot required to meteor smash is located a bit higher and significantly more difficult to land. The meteor is very weak, and its long ending lag, coupled with Roy's high falling speed, makes it among the highest-risk aerials in the game. | 9% at the base, 6% near the tip |
| Samus | Swings her arm below her. It is a powerful meteor smash with a wide hitbox, but it has rather slow start-up lag. Due to Samus' floaty air speed and long, varied recovery, it is a low risk meteor that is easy to perform. | 16% |
| Sheik | Points her leg out and falls at a downwards angle. Knocks her foe very slightly horizontally with mostly vertical knockback. | 9-11% |
| Yoshi | Kicks his legs very rapidly below him. It weakly meteor smashes, but it is inferior to his forward aerial for meteor smashing. Its main use is not in KOing, but damage racking, and it is very potent at it, being the most damaging aerial in the game by far if all hits connect. | Can deal an absolute maximum of 53%. |
| Young Link | Identical to Link's, but it meteor smashes opponents very powerfully (or sends grounded opponents at the soft platform upward) if he lands his down aerial with the hilt. Also, it meteor smashes opponents at a different angle if they are to the side and above Young Link, making it useful for edgeguarding opponents from above if timed correctly. The meteor is strong enough to be capable of star KOing any grounded opponents (if the character is at the soft platform) around 75%. Though weaker than Link's down aerial, this is still a very powerful down aerial and is also Young Link's most powerful attack. | 14% when the move comes out and deals 17% damage afterward. The meteor smash sets the foe on fire and inflicts 17-21%. |
| Zelda | Sticks her leg out below her. This is a meteor smash, but an extremely weak one. It is the weakest meteor smash in the game. Curiously, it does have a very weak spike hitbox, but only if the opponent is above her waist. | 8% |
List of down aerials in Super Smash Bros. Brawl
| Character | Description | Damage |
|---|---|---|
| Bowser | Turns upside down while retracting inside his shell and spins himself into the ground. Creates a small shockwave that damages nearby enemies if he hits the ground. The last hit can meteor smash, but it's weak and overall not recommended. Often used for SHFFs due to its high damage output and extra hit upon landing. | 3% (hits 1-9), 2% (landing) |
| Captain Falcon | Stomps downward with both his feet. The hitbox on Captain Falcon's legs produces a powerful meteor smash. If he connects with his body, the opponent is powerfully semi-spiked. | 14% |
| Charizard | Stomps downward with both feet. It will always meteor smashes aerial opponents with above average power, but sends grounded opponents on an upwards diagonal trajectory. It's the second strongest meteor on grounded opponents. Very effective due to Charizard's multiple jumps and the move's short duration. | 14% |
| Diddy Kong | Swings both arms downward in a double axe-handed punch. A strong meteor smash that's fast, but a little difficult to land due to its small hitbox. | 12% |
| Donkey Kong | Stomps his foot below him while performing a strong-man pose in midair. Always treated as a meteor smash when it hits. | 16% (foot), 13% (body) |
| Falco | Turns diagonally and spins with his foot extended. A strong spike if the attack lands at the first half of the move, otherwise the second half of the move produces weak horizontal knockback. | 13% (clean), 8% (late) |
| Fox | A spinning drill kick that hits multiple times in succession. It can meteor smash, but it's hardly noticeable at lower percentages due to its very weak power, being the weakest meteor smash in the game. It is useful when shorthopped for combos and is his primary combo starter, especially in conjunction with his up tilt. | 3% (hits 1-7) |
| Ganondorf | Stomps both his legs downward, dealing strong electric damage. The move is an extremely powerful meteor smash, being the most powerful meteor smash in the game at percentages higher than 20% and the 3rd strongest at 0%. It is the only meteor in the game that can reliably KO grounded opponents under 100%. Like in Melee, this attack has transcendent priority, and therefore cannot cancel out projectiles. | 22% (legs), 17% (body) |
| Ice Climbers | Hold their hammers below themselves and fall downwards. A stall-then-fall move, with the stall being almost unnoticeable. Overall deals low damage and knockback and has some noticeable landing lag. | 8% (leader), 5% (partner) |
| Ike | Thrusts Ragnell below him between his legs. If it hits during the initial frames, it meteor smashes very powerfully, and after the initial swing, it deals weaker upwards knockback. Considered the third strongest meteor smash in the game. It has great vertical reach but lacks horizontal reach. | 16% (clean), 12% (late) |
| Ivysaur | Turns upside-down and shoots a burst of gas out of its bulb that's similar to its up aerial but deals slightly less knockback. There is a small sweetspot at the bulb that meteor smashes opponents. Using the move halts Ivysaur's aerial momentum entirely. | 10% (sourspot), 8% (sweetspot) |
| Jigglypuff | Spins and drills downwards, hitting multiple times. Similar to Kirby's, but faster, much weaker, and does not meteor smash. Can lead to a Rest, though difficult. | 2% (hits 1-8) |
| King Dedede | Spins hammer around under him for multiple hits, with the final hit delivering low vertical knockback. Works well in the ascent of a ground jump. | 2% (hits 1-6), 5% (hit 7) |
| Kirby | Spins while kicking downward. The hitboxes itself are weak meteor smashes, which is useful for edgeguarding opponents recovering from below. | 2% (hits 1-6), 2% (landing) |
| Link | Thrusts his sword downward, based on the "Downthrust" from Zelda II: The Adventure of Link. Link will bounce when the attack lands, which makes it possible for him to land an additional hit, but goes through opponents if he fast falls during the move. Has long landing lag if the move is not autocancelled. | 22% (clean), 18% (late), 8% (after bounce) |
| Lucario | Stomps downwards twice powered by aura. Halts Lucario's vertical momentum, which can be used to stall in the air. It is very powerful when Lucario is at high percentages and it has almost no start-up or ending lag. With its power, speed, and versatility, it is one of the best aerials in the game. | 8% (both hits) |
| Lucas | Thrusts his feet downwards four times, leaving a trail of PSI energy. The fourth hit hit can weakly meteor smash, which is useful for hitting an edge-hogging opponent. | 5% (hits 1-4) |
| Luigi | Does a quick down spin kick. Though the move usually has average horizontal knockback if the arms connect, it becomes a strong meteor smash, but is often difficult to land. | 11% |
| Mario | Mario Tornado: Stretches out both arms and spins horizontally, dealing multiple hits. The outer hitboxes tend to draw the opponent into the center. Very fast start-up and it produces decent knockback on the final hit. This move was previously Mario's down special move in Melee. | 1% (hits 1-5), 7% (hit 6), 2% (landing) |
| Marth | Swings his sword in a arc below himself. The base of the sword launches opponents horizontally while the tip meteor smashes opponents. | 12% (base), 14% (tip) |
| Meta Knight | Quickly slashes in an arc below himself. Launches opponents in a semi-spike trajectory, which is useful to attacking opponents with poor horizontal recovery. | 7 (center), 9% (sides) |
| Mr. Game & Watch | Pulls out a key and thrusts it towards the ground. A stall-then-fall move that can be slowed down if the player taps down on the control stick before Mr. Game & Watch falls towards the ground. The tip of the key can meteor smash opponents but is very short, lasting for a split second. Can be cancelled partway with a midair jump or by Fire, making the move a bit safer compared to the other stall-then-fall moves. | 14% (sweetspot), 13% (sourspot), 6% (landing) |
| Ness | Pulls his legs to his body before stomping down into the air. The attack meteor smashes opponents if it connects the moment Ness thrusts his foot downward otherwise, it deals weak diagonal-horizontal knockback. | 12% (clean), 9% (late) |
| Olimar | Arcs a Pikmin below his knees. Hitting at the sweetspot meteor smashes opponents in the air, its powers varying depending on which Pikmin is used in the attack. | R: 16% (clean), 7% (late) Y: 12% (clean), 9% (late) B&P: 13% (clean), 10% (late) W: 5% (clean), 4% (late) |
| Peach | Thrusts legs rapidly below herself at a slight angle, hitting four times. Useful for catching opponents who are trying to return to the stage at a low angle, which is nearly impossible to evade all four hits if timed right. The fourth kick deals weak vertical knockback. | 3% (hits 1-3), 5% (hit 4) |
| Pikachu | Twirls downwards emitting sparks for one hit. Decent power, but has high landing lag if Pikachu lands on its head. The landing animation also has a hitbox dealing weak knockback. | 12% (attack), 4% (landing) |
| Pit | Swipes a blade below him, launching foes upwards if the hit connects. | 12% |
| R.O.B. | Pauses momentarily, then blasts his boosters powerfully downwards. The attack pushes R.O.B. upward slightly, but not enough so that R.O.B. can infinitely recover vertically (unless tiny). Will meteor smash opponents if damage is dealt at base of the burner otherwise, deals weak knockback at the tip. | 12% (base), 13% (booster base), 11% (booster mid), 6% (booster tip) |
| Samus | Swinging her arm cannon in a 180 degree arc below her. Can meteor smash opponents. | 15% |
| Sheik | Briefly rises in the air before dropping down with her foot extended. A stall-then-fall move that comes down fast, but has high landing lag. | 10% |
| Snake | Launches four subsequent kicks below himself. Has high lag and the last hit deals high horizontal knockback. Does up to 28% if all hits connect, which is often difficult to land due to Snake's falling speed. | 6% (hit 1), 5% (hits 2-3), 12% (hit 4) |
| Sonic | Stalls for a brief moment in midair and then shoots downwards, foot first. A stall-then-fall that lasts a long duration, but can be cancelled partway with his Spring Jump or any other aerial attacks. Has some landing lag. | 8% (clean), 7% (late) |
| Squirtle | Thrusts its tail downward, spinning around in a multi-hit attack. The last hit has moderate horizontal knockback. | 1% (hits 1-5), 5% (hit 6) |
| Toon Link | Pauses for a brief moment before thrusting his sword straight down at high speed. A stall-then-fall move that can meteor smash during the first few frames of his descent. Just like Link's, it bounces off the opponent, allowing for a second hit. | 16% (clean), 13% (late), 8% (after bounce), 5% (landing) |
| Wario | Flips upside down and spins, drilling with his head. The move works very well for racking up damage due to its speed and Wario's air speed. | 2% (hits 1-6), 4% (hit 7) |
| Wolf | Slams his hands below him in a fist. Acts as a meteor smash but it's one of the weakest meteors in the game due to having very low knockback scaling. | 15% (arms), 13% (body) |
| Yoshi | Flutter kicks very fast below him. Can deal up to 35% on large opponents, the most damaging down aerial in the game. | 2-3% (hits 1-7), 1-2% (hits 8-14) |
| Zelda | Thrusts one leg below her vertically. Similar to her Lightning Kick, it is a very powerful meteor smash when sweetspotted, and an extremely weak meteor smash when sourspotted. | 16% (clean), 5% (late leg), 4% (late foot) |
| Zero Suit Samus | Stalls momentarily in midair, and then shoots down diagonally. If the opponent is hit in the air, they will be meteor smashed, which often leads onto the landing hit if there is ground below them. A stall-then-fall move. | 5% (aerial), 4% (grounded), 5% (landing) |
List of down aerials in Super Smash Bros. 4
| Character | Description | Damage |
|---|---|---|
| Bayonetta | A stall-then-fall kick that meteor smashes at Bayonetta's heel. Has a surprisingly low duration, allowing Bayonetta to safely recover after spiking an opponent. The resulting shockwave from the landing also deals a large amount of knockback, making it a very powerful KO move, albeit a highly punishable one . | 7% (leg), 8% (heel), 5% (landing) |
| Bowser | Boosts upwards a little before drilling downwards while suspended in his shell. Now a stall-then-fall move that meteor smashes during the first few frames of the move. Cannot be used to grab the ledge, so it will almost certainly cause Bowser to SD if he uses it off-stage. | 16% (attack), 2% (landing) |
| Bowser Jr. | A drill comes out of the bottom of the Junior Clown Car that hits opponents multiple times. | 1.3% (hits 1-6), 2% (hit 7 & landing hit) |
| Captain Falcon | Stomps downward with both his feet. Initiates a meteor smash when sweetspotted, though its slow start-up means it can be easily interrupted. | 14% |
| Charizard | Stomps downward with one foot. A powerful meteor smash when sweetspotted. | 14% (clean), 8% (late) |
| Cloud | A downwards stab similar in appearance to Link's down air. Striking with the Buster Sword as it comes down powerfully meteor smashes aerial opponents and deals more damage. Stays out for a while, allowing the move to hit opponents after the initial thrust. | 13% (clean), 15% (sweetspot), 8% (late) |
| Corrin | A stall-then-fall meteor smash where both legs transform into multi-hit spears. | 2% (1-5 hits), 3% (final hit) |
| Dark Pit | Identical to Pit's. | 10% |
| Diddy Kong | Swings both fists downward in a double axe-handed punch. A strong meteor smash. | 13% (clean), 10% (late) |
| Donkey Kong | Performs a downward stomp with one foot extended. The sweetspot is on Donkey Kong's extended foot, which is a powerful meteor smash while the sourspot is close to his chest. | 16% (sweetspot), 13% (sourspot) |
| Dr. Mario | Drill kicks downwards, hitting multiple times. | 1.904% (hits 1-4), 3.36% (hit 5), 2.24% (landing) |
| Duck Hunt | The dog headbutts downwards and then flips over, with the duck delivering a follow-up attack. The duck can meteor smash airborne opponents. | 5% (hit 1), 10% (hit 2) |
| Falco | Drills downward with one foot extended. Can meteor smash opponents at the beginning of the move. Significantly nerfed from Brawl, although it now benefits from frame cancelling. | 13% (clean), 8% (late) |
| Fox | Performs a spinning drill kick that hits multiple times in succession. | 1.4% (hits 1-6), 3% (hit 7), 1% (landing hit) |
| Ganondorf | Stomps both his feet downward, dealing strong electric damage. The move is an extremely powerful meteor smash if hit with the lower half of Ganondorf's body, being able to KO grounded opponents under 100%. Like in Melee and Brawl, this attack possesses transcendent priority, meaning it cannot cancel out projectiles and it cannot be teched by a grounded target. | 19% (legs), 17% (body) |
| Greninja | Spins once in the air and then dives downward to stomp on the opponent. A stall-then-fall move. If Greninja hits an opponent, it will leap in the air, allowing it to use another move (such as another down aerial). Bouncing off opponents prevents Greninja from performing a double jump if it hasn't perfomed one yet, making it risky to use offstage. Can meteor smash opponents at the beginning of the move. | 8% |
| Ike | Raises Ragnell in the air before swinging it downwards. Capable of meteor smashing opponents with good power if they hit the blade. | 15% |
| Jigglypuff | Spins and drill kicks downwards, hitting multiple times. | 1.5% (hits 1-8), 2% (hit 9) |
| King Dedede | Raises his hammer over his head and then swings it downwards. Can meteor smash opponents if they hit the head of the hammer, though due to Dedede's fast falling speed, it can be difficult to land, especially on grounded opponents. | 15% (hammer head), 8% (handle) |
| Kirby | Does a downwards drill kick. The final hit has a weak meteor effect. This is Kirby's best move for initiating combos on opponents on or near the ground, as, even at high percents, it can be followed immediately with up-tilt or another move if the situation presents itself. | 1% (hits 1-5), 2% (hit 6), 2% (landing) |
| Link | Thrusts his sword downward, based on the "Down Thrust" from Zelda II: The Adventure of Link. Connecting with this move will make Link bounce in the air, which makes it possible for him to land another hit. However, if he fast falls during the move, he will go right through opponents. Hitting opponents at the beginning of the move will meteor smash them. Has high landing lag. | 15% (early, late, & after bounce), 18% (mid) |
| Little Mac | Punches downwards. A very weak meteor smash at the tip of his extended hand. Can be used to jab lock, which can set up for plenty of KO options, such as forward smash and KO Punch. | 5% (hand), 4% (arm) |
| Lucario | Stomps downwards twice powered by aura. Unlike in Brawl, the attack does not halt downward momentum. | 5% (hit 1), 6% (hit 2) |
| Lucas | Thrusts his feet downwards four times and creates a quick-flashing PSI energy with each kick. The fourth hit is capable of meteor smashing opponents. | 3.5% (rapid hits 1-3), 5% (hit 4) |
| Lucina | Identical to Marth's but has a sweetspot at the middle of the swinging arc that meteor smashes opponents. | 11.4% (non-meteor), 13.3% (meteor) |
| Luigi | Performs a quick drill kick downwards. The move now has a sweetspot at the beginning of the animation that meteor smashes opponents, making it easier to control. | 10% (clean), 8% (late) |
| Mario | Mario Tornado: Quickly spins around horizontally with both arms extended, hitting multiple times. Was previously Mario's down special move from Melee. | 1% (hits 1-5), 5% (hit 6), 2% (landing) |
| Marth | Swings his sword in an arc below himself. The tip of the blade when it's in the center of Marth's swing is capable of meteor smashing. Of note is how the animation is now flipped, where the attack starts from behind Marth instead of in front, making approaches with it harder. | 11% (blade), 13% (non-meteor tip), 14% (meteor tip) |
| Mega Man | Hard Knuckle: Points his fist straight downwards and fires it downwards as a short-ranged projectile. The fist deals the most damage in the first few frames, but afterwards, it turns into an aerial-only meteor smash. Mega Man will hover in the air for a brief period if used right after a jump. Based on Hard Man's weapon from Mega Man 3. | 14% (clean), 12% (late) |
| Meta Knight | Quickly swipes his sword downward in an arc. Sends the opponent on a semi-spike trajectory, making it a useful move against opponents with poor horizontal recovery. | 6% |
| Mewtwo | Backflips and kicks downwards, emitting shadow energy at the tip of its foot. The move's sweetspot meteor smashes airborne opponents while the sourspot launches them upwards. | 14% (grounded opponents and aerial sourspot), 15% (aerial sweetspot) |
| Mii Brawler | Swings both fists downward in a double axe handle. A strong and reliable meteor smash. | 13% (clean), 12% (late)* |
| Mii Gunner | Pauses, then fires a single energy burst below. Capable of meteor smashing if sweetspotted at the tip of the blast. | 10% (base), 15% (tip)* |
| Mii Swordfighter | Spins downwards. Capable of weakly meteor smashing with set knockback. Its main offensive ability comes from its landing hit, which will occur all throughout the attack and knock the opponent away with decent diagonal knockback. | 1% (hits 1-5), 5% (landing hit)* |
| Mr. Game & Watch | Takes out a key and thrusts down into the ground. It is a stall-then-fall move that can be directed left or right during the descent. The key can meteor smash opponents during the first few frames of the move. The move can be cancelled partway with a midair jump or by using Fire, making this move a bit safer compared to the other stall-then-fall moves. | 11% (attack), 3.5% (landing) |
| Ness | Kicks downward with one leg, producing a PSI spark at the tip of his foot. The tip of the spark meteor smashes opponents. The move now has longer startup and lasts for a shorter duration. | 12% (sweetspot), 10% (sourspot) |
| Olimar | Thrusts a Pikmin downwards. The Pikmin can meteor smash opponents, its power depending on which Pikmin is used. | R:10.8% Y&B: 9% W:7.2% P: 12.6% |
| Pac-Man | Stomps downwards four times, similar to Snake's down aerial. | 1.5% (hits 1-3), 6% (hit 4) |
| Palutena | Kicks in an arc below herself, meteor smashing anyone below her. Although it's always treated as a meteor smash in the air, the hitbox only lasts for one frame and has limited range. | 9% |
| Peach | Rapidly kicks downwards four times. The fourth kick deals vertical knockback. | 1-2% (hits 1-3), 5% (hit 4) |
| Pikachu | Spirals downwards toward the ground with electricity shooting out of its cheeks. The move hits once in the air and can deal an additional hit from the shockwave upon landing. | 12% (attack), 4% (landing) |
| Pit | Swipes a blade in an arc below him. Can meteor smash if sweetspotted at the start of the move. | 10% |
| R.O.B. | Blasts his burners directly downward. Capable of meteor smashing, but no longer stalls him in midair. | 12% (clean base), 11% (clean mid), 6% (clean tip), 8% (late) |
| Robin | Quickly thrusts either the Levin Sword or the Bronze Sword downwards. Using the Levin Sword can cause the opponent to be meteor smashed. | Bronze: 7.2% Levin: 10% (early), 12% (clean), 5% (late) |
| Rosalina & Luma | Rosalina: Creates a Saturnian ring from the bottom of her dress. Connecting with the attack midway is a weak meteor smash. Luma: Kicks straight down. |
Rosalina: 8% (clean), 7% (mid), 6% (mid-late), 2% (late) Luma: 5% |
| Roy | Spreads both his legs in the air before coming down with a overhead two-handed downward vertical slash. Meteor smashes opponents powerfully when connected properly. Closely resembles Ike's down aerial. | 15% (base), 10% (tip) |
| Ryu | Quickly punches downwards, similar to his neutral aerial except the attack has more range. Hitting with the attack's sweetspot meteor smashes opponents diagonally downwards. Based off of Ryu's jumping heavy punch from Street Fighter IV. | 12% (grounded opponents), 15% (aerial opponent sweetspot), 11% (aerial opponent sourspot) |
| Samus | Swings her cannon in an arc downwards. Capable of meteor smashing opponents if the attack connects midway through her swing. | 10% (early), 14% (clean), 11% (late) |
| Sheik | Briefly rises in the air before dropping down with her foot extended. A stall-then-fall move that meteor smashes opponents during the beginning of the move, but it's hard to recover from because of its fast descent. | 8% (attack), 2% (landing) |
| Shulk | Holds the Monado below him and extends the beam downwards. The first hit of the move does little knockback, but can easily connect to the second hit, which meteor smashes if sweetspotted, being at the middle of the blade during the second hit. | 7% (hit 1 grounded), 5% (hit 1 aerial), 11% (hit 2 blade), 10% (hit 2 beam) |
| Sonic | Pauses momentarily in the air and then divekicks diagonally downwards. A stall-then-fall move that's capable of meteor smashing opponents if timed right. Often used off-stage, as Sonic can quickly recover afterward using his spring. | 8% (clean), 7% (late) |
| Toon Link | Pauses for a brief moment before thrusting his sword straight down at high speed. A stall-then-fall move that meteor smashes opponents at the beginning of the move but goes straight through opponents instead of bouncing off them, making it a risky move to use offstage. | 16% (clean), 12% (late), 5% (landing) |
| Villager | Pulls out between one to three turnips and swings them downwards. Three turnips can meteor smash opponents. | One: 8% (clean), 4% (late) Two: 10% (clean), 5% (late) Three: 13% (clean), 6% (late) |
| Wario | Flips upside down and drills into his opponent using his head. The move hits multiple times with the last hit dealing diagonal knockback. | 1.3% (hits 1-6), 4% (hit 7) |
| Wii Fit Trainer | Performs the Chair pose and stomp down onto enemies in midair. Can meteor smash if sweetspotted, but only in the air. | 14% (clean grounded), 13% (clean aerial), 8% (late) |
| Yoshi | Flutter kicks very quickly below himself. The first 13 hits can meteor smash but is not noticeable at low percentages, and the last hit sends opponents upwards. Can deal up to 34.4% if all hits connect. | 3% (hits 1-6 center), 2% (hits 1-6 sides), 2.2% (hits 7-13 center), 1.5% (hits 7-13 sides), 1% (hit 14), 1% (landing) |
| Zelda | Stomps downwards with one foot. A powerful meteor smash when sweetspotted, otherwise an extremely weak meteor smash when sourspotted. | 16% (clean), 5% (late leg), 4% (late foot) |
| Zero Suit Samus | Briefly pauses in the air and then shots down diagonally with one foot extended. It is a stall-then-fall move that meteor smashes airborne opponents, but its high speed makes it risky to use. | 6% (aerial), 5% (grounded), 5.5% (landing) |
* This assumes the Mii is default height and weight.
List of down aerials in Super Smash Bros. Ultimate
Note: All damage values are at no rage, with the 1v1 multiplier OFF.
| Character | Description | Damage |
|---|---|---|
| Bayonetta | Bayonetta flips forward in the air, extends her leg, and falls downwards. A stall-then-fall. Somewhat powerful spike, with the sweetspot at Bayonetta’s heel. A sourspot exists on the leg, knocking opponents more horizontally. Has a landing hitbox with high knockback, making it a KO option. High landing lag, making it unsafe on whiff or shield if spaced improperly. | 8.6% (sweetspot), 7.7% (sourspot 1), 6.7% (sourspot 2), 4.8% (landing hit) |
| Bowser | Bowser flips over, tucks his limbs into his shell, and spins while falling downward. A stall-then-fall that can spike at the start of the move. Has a landing hitbox, which sends the opponent up and away. | 15.4% (on the way down), 1.9% (landing hit) |
| Bowser Jr. | Bowser Jr. produces a drill from the bottom of his Clown Car and drills opponents, hitting multiple times. Deals good damage, and can set up for combos. | 1.4% (looping hits), 2.4% (final hit), 1.9% (landing hit) |
| Captain Falcon | Captain Falcon unleashes a stomp with both feet. A powerful spike, able to KO opponents at mid percents offstage. Has a sourspot at Captain Falcon’s chest, which sends opponents horizontally. Onstage it can be used as a setup into several of Captain Falcon’s other moves. | 14% (sweetspot), 11.9% (sourspot) |
| Charizard | Charizard turns and thrusts a foot downward, spiking opponents. Somewhat powerful meteor, but has slightly slow startup. Has a late hit that sends opponents up and away. | 14% (clean hit), 8% (late hit) |
| Chrom | Similar to Roy’s down air, but does not have a flame effect. | 14.2% (sweetspot), 11.8% (sourspot) |
| Cloud | Cloud thrusts his sword under him, spiking opponents at the start of the move. Has a long-lasting hitbox that knocks opponents upwards. Can be used as a walling tool. | 15% (clean), 13% (sourspot), 8% (late hit) |
| Corrin | Corrin transforms their legs into their dragon form, and drills downward. A stall-then-fall. Can be used to drag down opponents offstage, leaving them in a tough spot for recovery. | 2% (looping hits), 3% (landing hit) |
| Daisy | Similar to Peach’s down air. | 2% (first three hits), 5% (final hit) |
| Dark Pit | Similar to Pit’s down air. | 10% (sweetspot), 10% (sourspot) |
| Dark Samus | Similar to Samus’ down air. | 14% |
| Diddy Kong | Swings downwards in a two-handed axe chop. Spikes opponents. Possesses a sourspot that sends at the same angle as the sweetspot, but deals less damage. | 13% (sweetspot), 10% (sourspot) |
| Donkey Kong | Donkey Kong swings his foot downward, spiking opponents. A powerful meteor smash. Has a sourspot that sends the opponent away. | 16% |
| Dr. Mario | Dr. Mario tucks in, then performs a stomp downward with both feet. New to Dr. Mario, this move is a spike, giving him a good option for punishing predictable recoveries. Has a sourspot that sends the opponent away. | 14.1% (sweetspot), 14.1% (sourspot) |
| Duck Hunt | Duck Hunt swings over and Duck delivers a beak swing downward that spikes opponents. Average knockback. Possesses a sourspot that sends opponents away. | 5% (hit 1), 10% (hit 2) |
| Falco | Falco performs a spin-kick under him, spiking opponents at the start of the move. A good zoning tool onstage due to its ability to autocancel from a short hop, and a good finisher to most combos. Has a sourspot towards the end of the move that weakly sends opponents horizontally. | 13% (clean), 9.6% (late) |
| Fox | Perform’s a drill kick downward, dragging opponents down. Can be used to start combos. The final hit sends opponents out. Has a landing hit that sends opponents away from Fox. Lower landing lag than some other down airs, however still punishable. | 1.3% (hits 1 - 6), 3% (hit 7); 1% (landing) |
| Ganondorf | Ganondorf rears back and stomps downward, spiking opponents. An extremely powerful spike, with the capability of killing opponents under the ledge at close to 0%. Has somewhat higher ending lag, making it semi-unsafe in neutral. | 19% (legs), 17% (body) |
| Greninja | Greninja rises up slightly and falls downwards with his feet out. A stall-then-fall. Knocks opponents up, unlike many other down airs. Can be used to rack up damage. | 8% |
| Ice Climbers | Popo and Nana drop with their hammers underneath them. A stall-then-fall. Pops the opponents up with good damage. | 8% (leader), 6% (partner) |
| Ike | Ike swings his sword downward, spiking opponents. The sweetspot is at the end of the sword, being a strong spike, while the sourspot at the hilt sends opponents away. | 15% |
| Incineroar | Incineroar stomps downward with both feet, spiking opponents. A decent spike with good knockback and damage. Has a sourspot at the chest which sends opponents out. | 15% (feet), 14% (body), 9% (late) |
| Inkling | Inkling spins and swings their Splattershot downwards, spiking opponents. A decent spike, but has somewhat small knockback. Has a sourspot that sends the opponent away. | 12% (sweetspot), 10% (sourspot) |
| Isabelle | Almost identical in function to Villager’s down air. | 10% (clean), 5% (late) |
| Ivysaur | Turns its body upside down while creating an explosion of spores from its bulb. The move slightly stalls Ivysaur's descent, and all hitboxes meteor smash opponents. | 10% |
| Jigglypuff | Jigglypuff drills downward with both feet, hitting multiple times. Can be used to set up into combos. The final hit sends opponents out. | 1.5% (hits 1-8), 2% (hit 9) |
| Joker | Joker Swings his knife below him in a wide ark. He gains a powerful meteor smash when Arsene is present. | 8%/8% |
| Ken | Similar to Ryu’s down air. | 12% (grounded opponent), 15% (aerial opponent sweetspot), 11% (aerial opponent sourspot) |
| King Dedede | King Dedede swings his hammer downward, spiking opponents. Can be used to punish recoveries. | 15% (middle of head), 8 (edge of head) |
| King K. Rool | King K. Rool stomps downward, spiking opponents. Can be used offstage to punish recoveries. Somewhat higher endlag, making it unsafe if used predictably. | 12% (sweetspot), 9% (sourspot) |
| Kirby | Kirby drills downward, spiking opponents on the final hit. A weak spike, but has low endlag, giving it the ability to be used multiple times. Can be used to rack up damage quickly. | 1.3% (hits 1-5), 2% (hit 6), 2% (landing) |
| Link | Link thrusts his sword downward. Spikes at the start of the move, then knocks opponents up after a short time. Can hit twice, and deals good damage. | 18% (clean), 15% (late), 11% (bounce) |
| Little Mac | Little Mac swings his fist downward. A very weak spike, with low damage and high landing lag, making it a very situational move for Little Mac. | 4% |
| Lucario | Lucario does a double kick underneath him. Stalls in the air when used. Both hits can connect on opponents. | 5% (hit 1), 6 (hit 2) |
| Lucas | Lucas does four kicks downward with PSI effects. The first three hits autolink into the final hit, which is a spike. A good tool for disrupting opponents. | 3.5% (hits 1-3), 5% (hit 4) |
| Lucina | Similar to Marth’s down air. | 12.35% (non-meteor), 14.25% (meteor) |
| Luigi | Luigi kicks his legs out and spins once. The start of the move has a small spike hitbox, and the late hit sends outwards. Can be used in combos for racking up damage. | 10% (clean), 8% (late) |
| Mario | Mario spins around, dealing multiple hits to opponents before launching them with a final hit. This move can be used in neutral to start combos and disrupt opponents. | 1.4% (hits 1-5), 5.5% (hit 6), 2% (landing) |
| Marth | Marth swings his sword downward, starting from behind. At the bottom of his swing, the move can spike. If early or late, the move pops the opponent up. Typically used in combo finishers, or for edgeguarding. | 12% (blade), 14% (non-meteor tip), 15% (meteor) |
| Mega Man | Mega Man uses Hard Knuckle and launches a fist downward, which spikes opponents. This is one of the only spikes that is a projectile. Can be used for punishing recoveries and disrupting anti-air attempts. | 14% (clean), 12% (late) |
| Meta Knight | Meta Knight does a low startup, quick slash underneath him. A semi-spike with low endlag which can combo into itself. A powerful move in Meta Knights arsenal, coming out on frame 4, the fastest down air in the game. It can setup tech chases and combo effectively, however, the hitbox is only out for 1 frame, making accuracy a vital part of using this move. | 6% |
| Mewtwo | Mewtwo flips and swings his foot downward with a dark energy that spikes opponents. A good spike with decent knockback. Has a sourspot that pops opponents up. | 14% (grounded opponents, aerial sourspot), 15% (aerial sweetspot) |
| Mii Brawler | Mii Brawler swings their fists downwards, spiking opponents. A good spike with average knockback, however it has slightly high endlag. | 13% (clean), 12% (late) |
| Mii Gunner | Mii Gunner shoots a blast below them that spikes opponents. The sweetspot resides at the top of the flame, while the sourspot is at the base. Decent knockback, and good disjointed range. | 10% (cannon), 15% (burst), 12% (late) |
| Mii Swordfighter | Mii Swordfighter spins around with their sword held underneath them, hitting opponents multiple times. Good damage rack up tool, but has higher than average landing lag. | 1.5% (hits 1-5), 5% (hit 6) |
| Mr. Game & Watch | Mr Game & Watch takes out a key and plunges downwards with it held underneath him. A stall-then-fall. Spikes at the start of the move, and sends away with the late hit. Good for landing due to its long disjointed range, and good knockback. | 11% (key), 3.5
(landing) |
| Ness | Ness spins and does a kick underneath him with PSI effects that spikes opponents. A powerful spike overall, with better than average knockback and good damage. Has some landing lag, making it unsafe if spaced improperly. | 14% (clean), 12% (late) |
| Olimar | Olimar swings a Pikmin underneath him, spiking opponents and dealing different effects depending on the Pikmin. A decent range spike with good knockback. | |
| Pac-Man | Pac-Man kicks four times underneath him that send opponents away. Hard to connect all hits, but deals good damage. Sends opponents away from Pac-Man. | 2% (hits 1-3), 7% (hit 4) |
| Palutena | Palutena swings her foot downwards, spiking opponents at the bottom of the swing. Decent power and good knockback. Has a sourspot that knocks opponents away horizontally. | 11% |
| Peach | Kicks four times underneath her. A very strong combo tool, having low landing lag and dealing good damage with favorable knockback angles. Good for landing as well. | 2% (first three hits), 5% (final hit) |
| Pichu | Similar to Pikachu’s down air, however Pichu inflicts self damage. | 13%, 4% (landing), 1% recoil after startup, 0.5% recoil landing (can land before startup) |
| Pikachu | Pikachu spins and thrusts his head downwards with electicity. In Smash Ultimate, this move was changed to be a spike. Having a landing hit and decent damage, it is a strong tool in Pikachu’s moveset. | 13% (clean), 12% (late), 4% (landing) |
| Pit | Pit swings a part of the bow underneath him, with the sweetspot spiking opponents. The sourspot can be used to combo, as it knocks opponents upwards. It can be used multiple times while in the air, making it a good tool for combos and damage output. | 10% (sweetspot), 10% (sourspot) |
| Piranha Plant | Piranha Plant swings their pot downwards, spiking opponents. A very quick spike, coming out on frame 9. Decent knockback for its speed. | 11% (clean), 9% (late) |
| Richter | Identical to Simon’s down air. | 12%, 7% (late) |
| Ridley | Ridley stomps downwards, falling with both feet out. A stall-then-fall. Decends rapidly, making it semi-useful for landing. | 14% (clean, feet), 12% (clean, legs; late) |
| R.O.B. | R.O.B. curls, then extends while producing a large flame burst from his burners. Can stall in the air for a short time. A powerful spike with good disjointed range. | 12% (base), 11% (middle), 6% (tip) |
| Robin | Robin swings their sword downward, spiking opponents. The spike only occurs if Robin has the Levin Sword. Decent power and good knockback. | 7.8% (bronze), 13% (leevin, clean), 5% (levin, late) |
| Rosalina & Luma | Rosalina shoots a ring downwards from underneath her that can spike opponents, while Luma does a kick downward. Good for landing due to its slightly long length and range. | 8% (legs), 7% (ring, clean), 6% (ring, late), 7.5% (Luma) |
| Roy | Roy swings his sword downward, spiking opponents. The hilt of the sword is the sweetspot, like Roy’s other attacks. A powerful spike. Has a sourspot that leaves Roy vulnerable due to the low hitstun. | 10% (blade), 15% (hilt) |
| Ryu | Ryu punches at an angle downwards. The fist spikes opponents at an angle down and away from Ryu. Has a sourspot that sends opponents away from Ryu. A good combo finisher, and can be used to put opponents in a tough spot for recovery. | 12% (grounded opponent), 15% (aerial opponent sweetspot), 11% (aerial opponent sourspot) |
| Samus | Samus swings her arm cannon underneath her, which spikes opponents. A decent spike with good knockback and use as a regular aerial. Has slow startup. | 14% |
| Sheik | Sheik rises up in the air, then drops downward with a kick. A stall-then-fall. Spikes at the start of the move, and sends opponents away later in the move. Good way to land after a mixup due to its sheer speed, but has high landing lag, making it slightly punishable. | 10% (descent), 2% (landing) |
| Shulk | Shulk thrusts his sword underneath him, then activates the beam. A two hit move. The beam spikes opponents with good power and range. Has slightly high landing lag. | 7.5% (hit 1 blade), 6% (hit 1 beam), 11.5% (hit 2 blade), 10.5% (hit 2 beam) |
| Simon | Simon stops, then falls with a kick at an angle. This move spikes early in the move, and pops the opponent up for a combo opportunity later in the move. A fairly decent multipurpose tool for Simon. | 12%, 7% (late) |
| Snake | Snake does four kicks downwards, knocking opponents up. Snake stalls in the air slightly when using this move. Good for racking up damage quickly. | 4% (hit 1), 3% (hits 2 and 3), 10% (hit 4) |
| Sonic | Sonic rises slightly, then drops with a kick downward. A stall-then-fall. Meteor smashes opponents at the start of the move while the later hit sends opponents away and upward. | 8% (clean), 7% (late) |
| Squirtle | Spins vertically with its tail pointing downwards. A fast, multi-hitting attack. | 1.5% (rapid hits, up to 5), 4% (final hit) |
| Toon Link | Toon Link rises slightly, then drops with his sword underneath him. A stall-then-fall. Spikes at the start of the move, and sends away later in the move. Passes through opponents, making it somewhat risky to use while over the edge. | 15% (clean), 12% |
| Villager | Villager swings one, two, or three turnips underneath them. All variants spike, unlike Smash 4. It can be used multiple times and has decent knockback. | 8% (one, clean), 4% (one, late), 10% (two, clean), 5% (two, late), 13% (three, clean), 6% (three, late) |
| Wario | Wario flips over and spins, hitting opponents multiple times with his head. Sends opponents away on the final hit. Decent drag down capabilities, as well as damage output. | 1.3% (hits 1-6), 4% (hit 7) |
| Wii Fit Trainer | Wii Fit Trainer does a stomp with both feet, spiking opponents. A quick, powerful spike that does good knockback. Can be used to punish predictable recoveries. | 13% (clean grounded), 14% (clean aerial), 10% (late) |
| Wolf | Slashes downwards with his claws, spiking opponents. A good spike for its speed, with decent knockback and good damage. Has decent range as well. | 13% (body), 15% (arms) |
| Yoshi | Yoshi rapidly flutter kicks underneath him, dealing multiple hits and good damage. A good tool for shield pressure. Slightly high end lag and landing lag. | 2.3% (hits 1-6), 1.9% (hits 7-12), 2.8% (last hit) |
| Young Link | Similar to Link’s down air, though can not meteor smash. | 18% (clean), 15% (late) |
| Zelda | Performs a Lightning Kick downwards, spiking opponents. One of the longest lasting spikes in the game. The sweetspot deals great knockback, while the sourspot deals much less knockback. Good for closing out a stock. | 16% (clean), 5% (late, leg), 4% (late, foot) |
| Zero Suit Samus | Zero Suit Samus pauses, then drops rapidly with a kick. Spikes opponents. Decent knockback. Has a landing hit, making it harder to punish. | 6%, 5.5% (landing) |
Notable down aerials
- Captain Falcon's down aerial, notorious for the nipple spike in Melee.
- Falco's down aerial, a fast spike in Melee and Brawl with high range vital to Falco's pillar.
- Fox's down aerial in Melee, notorious for its use in his infinite combo.
- Ganondorf's down aerial in Brawl can be auto canceled in short hops and KO below 100% who connects on the ground while in an aerial opponent making it a great approach move and as a spike it always spikes if connects with enough power to OHKO an opponent in most cases. It is the strongest aerial in Melee, Brawl, and Smash 4. In Smash 4, the ability to tech grounded meteor smashes was introduced. Ganondorf's dair is one of the two meteor smashes that can't be teched to cancel knockback.
- Lucario, Ivysaur, and R.O.B.'s down aerials stop their movement in the aerial. However, it doesn't stop momentum while in the knockback from an enemy's attack.
- Mario's down aerial was replaced with the Mario Tornado in Brawl. Previously, Mario Tornado had been his down special move.
- Marth's down aerial, specifically in Melee, is possibly the most feared with its speed, range, and ability to spike. Its effectiveness has been reduced in Brawl, though it can still be used well with practice. Super Smash Bros. 4 severely nerfed its effectiveness through a reduced range, weaker sourspots, increased lag, meteoring in the middle of the swing when hit with the tipper, and having a reversed animation (starting from behind Marth rather than in front of him).
- Yoshi's down aerial, the most damaging aerial in all four games, dealing a maximum of 56% in SSB, 53% in Melee, 35% in Brawl and 32% in Smash 4. It can deal huge damage very quickly, which is especially easy against characters with large hurtboxes. In SSB and Melee, two down aerials along with some other attacks can bring an opponent to KO percentages. It is also notorious for being a very simple way to win the Paper Mario trophy in Melee, for people who are unable to bat drop.
- The Ice Climbers', Mr. Game & Watch's, Sheik's, Sonic's, Toon Link's, Zero Suit Samus's, Bowser's, Greninja's, Corrin's, and Bayonetta's down aerials are all stall-then-fall aerials in all games they appear in except Melee (and Brawl for Bowser). When Link's and Greninja's down aerials connect with a foe or a shield they will bounce up, allowing them to hit another enemy for minor damage and knockback (although Greninja jumps into the air and can go into any other air action afterward). Bowser's down air grants him some small additional height when used and meteors at the start of the move. Corrin's down air is also a drill and meteors at the end of the move rather than at the start (similar to Kirby's down air which is a drill and meteor).
- Mega Man's down aerial is the only down aerial that is also a projectile.
- Joker's down aerial without Arsene is the only down aerial that is not a meteor smash, multi-hit, or stall-then-fall.
Gallery
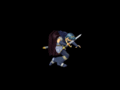
Animation of Marth's down aerial in Melee.
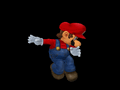
Mario's down aerial in Melee.

Lucario's down aerial in Brawl, which negates momentum.
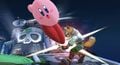
Kirby's down aerial in Super Smash Bros. For Wii U., which is a drill kick.


| Attacks in the Super Smash Bros. series | |
|---|---|
| Standard ground attacks | Neutral attack · Dash attack |
| Tilt attacks | Forward tilt · Up tilt · Down tilt · Crouching attack |
| Smash attacks | Forward smash · Up smash · Down smash |
| Aerial attacks | Neutral aerial · Forward aerial · Back aerial · Up aerial · Down aerial · Grab aerial · Glide attack |
| Throws | Grab · Pummel · Forward throw · Back throw · Up throw · Down throw |
| Get-up attacks | Floor attack · Edge attack |
| Special moves | Neutral special move · Side special move · Up special move · Down special move · Command-input move · Final Smash |