Jump: Difference between revisions
Tag: Mobile edit |
|||
| (91 intermediate revisions by 43 users not shown) | |||
| Line 1: | Line 1: | ||
{{ArticleIcons|series=y}} | {{ArticleIcons|series=y}} | ||
{{ | [[File:Jump.gif|thumb|188px|{{SSBB|Captain Falcon}} jumping in ''[[Super Smash Bros. Brawl]]'']] | ||
[[File:SSBUSoraJump.jpg|thumb|{{SSBU|Sora}} jumping in ''[[Super Smash Bros. Ultimate]]'']] | |||
A '''jump''' is an action that moves a character from the ground into the air. All characters can also [[midair jump|jump a second time in midair]], providing they are not [[attack]]ing, [[air dodging]], [[helpless]], in [[hitstun]], or have used it already. It is performed by pressing up on the [[control stick]] ([[D-pad]] on a horizontal Wii Remote), or by pressing a certain button, which is by default: | |||
*the [[C button]]s on the [[Nintendo 64 controller]] or [[Wii Remote]] with [[Nunchuk]] | |||
*the [[X button|X]] or [[Y button]] with the [[GameCube controller]], [[Classic Controller]], [[3DS]], [[Wii U Pro Controller]]/[[Wii U GamePad|GamePad]], [[Switch Pro Controller]], and dual [[Joy-Con]]s | |||
A '''jump''' is an action that moves a character from the ground into the air. It is performed by pressing up on the [[ | *the top and left buttons on a horizontal Joy-Con, which are the positions of Y and [[B button|B]] on the right Joy-Con. | ||
A few characters can jump more than once in the air: | A few characters can jump more than once in the air: | ||
* [[Kirby]], [[Meta Knight]], and [[Jigglypuff]] can do a | *[[Kirby]], [[Meta Knight]], and [[Jigglypuff]] can do a midair jump five times. | ||
* [[King Dedede]] can do a | *[[King Dedede]] can do a midair jump four times. | ||
* [[Pit]] and [[Dark Pit]] can do a | *[[Pit]] and [[Dark Pit]] can do a midair jump three times. | ||
* [[Charizard]], [[Ridley]], and [[Banjo & Kazooie]] can do a mid air jump | *[[Charizard]], [[Ridley]], and [[Banjo]] & [[Kazooie]] can do a mid air jump twice. | ||
*[[Sephiroth]] can do a midair jump twice when [[Winged Form]] is active. | |||
*In ''[[Super Smash Bros. Ultimate]]'', equipping a [[spirit]] with the "Additional Midair Jump" effect allows any character to do a midair jump an additional time. | |||
There is a short delay between the jump button being pressed and the on-screen character actually jumping, during which the onscreen character will enter a crouching portion of their jumping animation. If the control stick or jump button is released during this time, then the character [[short hop]]s. If the control stick is tilted backwards during this time, the character will jump backwards with a different animation than a regular jump. If the standard attack button is pressed during this time, then the character uses their [[up smash]] (but only if the jump was executed with the Control Stick). Because characters can jump while [[shield]]ing (excluding [[Yoshi]] in ''[[Super Smash Bros. Melee]]'' and ''[[Super Smash Bros. Brawl]]'', due to his unique shield), this allows usage of up smashes (and [[up special move]]s as well) without having to drop the shield. This also makes it difficult for a player using the Wii Remote-only control scheme to perform [[up tilt]]s. Inputting an aerial on the first frame that a character is airborne will cause the jump to be slightly lower, because gravity applies to the first frame of an aerial but not to the first frame of a jump. | There is a short delay between the jump button being pressed and the on-screen character actually jumping, during which the onscreen character will enter a crouching portion of their jumping animation. If the control stick or jump button is released during this time, then the character [[short hop]]s. If the control stick is tilted backwards during this time, the character will jump backwards with a different animation than a regular jump. If the standard attack button is pressed during this time, then the character uses their [[up smash]] (but only if the jump was executed with the Control Stick). Because characters can jump while [[shield]]ing (excluding [[Yoshi]] in ''[[Super Smash Bros. Melee]]'' and ''[[Super Smash Bros. Brawl]]'', due to his unique shield), this allows usage of up smashes (and [[up special move]]s as well) without having to drop the shield. This also makes it difficult for a player using the Wii Remote-only control scheme to perform [[up tilt]]s. Inputting an aerial on the first frame that a character is airborne will cause the jump to be slightly lower, because gravity applies to the first frame of an aerial but not to the first frame of a jump. | ||
| Line 17: | Line 20: | ||
''Brawl'' added a jumping mechanic known as [[footstool]]s. This allows characters to jump off the heads of other characters. This can be done even when all midair jumps have already been used. | ''Brawl'' added a jumping mechanic known as [[footstool]]s. This allows characters to jump off the heads of other characters. This can be done even when all midair jumps have already been used. | ||
In '' | In ''Ultimate'', a character will emit a subtle wispy trail if they have no extra jumps available. | ||
== | ==Types of jumps== | ||
All characters can perform several different types of jumps. The most basic type is a standing jump, which is a jump without any other inputs. There are also more complicated jumps that involve other inputs. One of these is the walk jump, which involves jumping while [[walking]] or [[dashing]]. Another one is the backward jump, which involves the player turning around, but jumping before the fighter can. All jumps have 2 performable variants. The first and most common type is the full hop, which involves the player holding the jump command so the fighter can jump to maximum height. The second type is the [[short hop]], which involves the player quickly [[tapping]] the jump command so the fighter will only perform a slight jump. There are also 2 different methods of performing these jumps. The first way is by pressing the jump button. The second way is to press up on the [[control stick]]/[[D-pad]]. This totals to 12 different ways to jump, with all possible combinations of each having different heights. | |||
===''[[Super Smash Bros.]]''=== | ===Softhop=== | ||
Softhopping is a technique introduced in ''Brawl'' in which a character can perform their grounded full hop within a few frames of running off any platform's edges. With this, the initial jump squat frames of a jump can be bypassed by inputting a jump within 4 frames of running off of an edge. | |||
In ''Brawl'' and ''Smash 4'', aside from removing the additional lag from a jump squat, softhops have no special properties when compared to full hops, however they allow the player to initiate the jump from slightly beyond the platform. The potential benefits of performing the technique depends on the fighter, as prior to ''Ultimate'' the duration of jump squats vary depending on the fighter. | |||
In ''Ultimate'', softhopping has an additional effect on full hops. ''Ultimate'' introduced a mechanic in which the first few frames of a fighter's full hop are sped up, causing them to reach their maximum jump height sooner. Performing a softhop disables this mechanic, causing full hops to behave the same way as midair jumps and full hops prior to ''Ultimate''. This results in fighters taking longer to reach their maximum jump height, but allows them to cover more horizontal distance before beginning to fall, and potentially allows aerials to hit which the user would have otherwise been too high up to connect with by the time the first hitbox comes out, similarly to [[instant double jump]]ing. Forcing the user to perform a full hop when performing the technique also removes the risk of accidentally performing a short hop, guaranteeing the full damage output of aerials rather than the reduced 0.85× damage from short hops. | |||
==Jump squat== | |||
A '''jump squat''' or '''windup''' refers to the length of time between the input of the jump and the moment the character leaves the ground. Each character has a different window of time where they crouch before they jump. Characters with faster jump squats will leave the ground earlier, and can transition between their air and ground games easier; however, depending on the control scheme, the player may find it more technically demanding to perform short hops or up smashes. In ''Melee,'' characters with faster jump squats can also perform faster [[wavedash]]es, but the window of timing is also reduced, requiring more precise inputs from the player. | |||
===Jump squats in ''[[Super Smash Bros.]]''=== | |||
{|class="wikitable sortable" style="margin:1em auto 1em auto; text-align:center" | {|class="wikitable sortable" style="margin:1em auto 1em auto; text-align:center" | ||
|- | |- | ||
! | !Rank!!Character!!Frames | ||
|- | |||
{{ | |rowspan=7|'''1-7'''||{{CharHead|Fox|SSB|hsize=15px}}||rowspan=7|3 | ||
{{ | |- | ||
{{ | |{{CharHead|Kirby|SSB|hsize=15px}} | ||
{{ | |- | ||
{{ | |{{CharHead|Luigi|SSB|hsize=15px}} | ||
{{ | |- | ||
{{ | |{{CharHead|Mario|SSB|hsize=15px}} | ||
{{ | |- | ||
|{{CharHead|Ness|SSB|hsize=15px}} | |||
{{ | |- | ||
{{ | |{{CharHead|Pikachu|SSB|hsize=15px}} | ||
{{ | |- | ||
{{ | |{{CharHead|Samus|SSB|hsize=15px}} | ||
|- | |||
|'''8'''||{{CharHead|Captain Falcon|SSB|hsize=15px}}||4 | |||
|- | |||
|'''9'''||{{CharHead|Yoshi|SSB|hsize=15px}}||5 | |||
|- | |||
|rowspan=2|'''10-11'''||{{CharHead|Donkey Kong|SSB|hsize=15px}}||rowspan=2|6 | |||
|- | |||
|{{CharHead|Jigglypuff|SSB|hsize=15px}} | |||
|- | |||
|'''12'''||{{CharHead|Link|SSB|hsize=15px}}||7 | |||
|- | |||
|rowspan=2|'''N/A'''||{{Head|Donkey Kong|g=SSB|s=15px|l=Giant Donkey Kong}} [[Giant Donkey Kong]]||rowspan=2|8 | |||
|- | |||
|{{CharHead|Metal Mario|SSB|hsize=15px}} | |||
|} | |} | ||
===''[[Super Smash Bros. Melee]]''=== | ===Jump squats in ''[[Super Smash Bros. Melee]]''=== | ||
{|class="wikitable sortable" style="margin:1em auto 1em auto; text-align:center" | {|class="wikitable sortable" style="margin:1em auto 1em auto; text-align:center" | ||
|- | |- | ||
! | !Rank!!Character!!Frames | ||
|- | |||
{{ | |rowspan=7|'''1-7'''||{{CharHead|Fox|SSBM|hsize=20px}}||rowspan=7|3 | ||
{{ | |- | ||
{{ | |{{CharHead|Ice Climbers|SSBM|hsize=20px}} | ||
{{ | |- | ||
{{ | |{{CharHead|Kirby|SSBM|hsize=20px}} | ||
{{ | |- | ||
|{{CharHead|Pichu|SSBM|hsize=20px}} | |||
|- | |||
{{ | |{{CharHead|Pikachu|SSBM|hsize=20px}} | ||
{{ | |- | ||
{{ | |{{CharHead|Samus|SSBM|hsize=20px}} | ||
{{ | |- | ||
{{ | |{{CharHead|Sheik|SSBM|hsize=20px}} | ||
{{ | |- | ||
|rowspan=8|'''8-15'''||{{CharHead|Captain Falcon|SSBM|hsize=20px}}||rowspan=8|4 | |||
{{ | |- | ||
{{ | |{{CharHead|Dr. Mario|SSBM|hsize=20px}} | ||
{{ | |- | ||
{{ | |{{CharHead|Luigi|SSBM|hsize=20px}} | ||
{{ | |- | ||
{{ | |{{CharHead|Mario|SSBM|hsize=20px}} | ||
|- | |||
{{ | |{{CharHead|Marth|SSBM|hsize=20px}} | ||
{{ | |- | ||
{{ | |{{CharHead|Mr. Game & Watch|SSBM|hsize=20px}} | ||
{{ | |- | ||
{{ | |{{CharHead|Ness|SSBM|hsize=20px}} | ||
|- | |||
|{{CharHead|Young Link|SSBM|hsize=20px}} | |||
|- | |||
|rowspan=7|'''16-22'''||{{CharHead|Donkey Kong|SSBM|hsize=20px}}||rowspan=7|5 | |||
|- | |||
|{{CharHead|Falco|SSBM|hsize=20px}} | |||
|- | |||
|{{CharHead|Jigglypuff|SSBM|hsize=20px}} | |||
|- | |||
|{{CharHead|Mewtwo|SSBM|hsize=20px}} | |||
|- | |||
|{{CharHead|Peach|SSBM|hsize=20px}} | |||
|- | |||
|{{CharHead|Roy|SSBM|hsize=20px}} | |||
|- | |||
|{{CharHead|Yoshi|SSBM|hsize=20px}} | |||
|- | |||
|rowspan=3|'''23-25'''||{{CharHead|Ganondorf|SSBM|hsize=20px}}||rowspan=3|6 | |||
|- | |||
|{{CharHead|Link|SSBM|hsize=20px}} | |||
|- | |||
|{{CharHead|Zelda|SSBM|hsize=20px}} | |||
|- | |||
|rowspan=2|'''N/A'''||{{CharHead|Giga Bowser|SSBM|hsize=20px}}||6 | |||
|- | |||
|{{CharHead|Fighting Wire Frames|SSBM|hsize=20px}}||7 | |||
|- | |||
|'''26'''||{{CharHead|Bowser|SSBM|hsize=20px}}||8 | |||
|} | |} | ||
===''[[Super Smash Bros. Brawl]]''=== | ===Jump squats in ''[[Super Smash Bros. Brawl]]''=== | ||
The below values apply only to regular brawls; in [[The Subspace Emissary]], all characters jump two frames faster. | The below values apply only to regular brawls; in [[The Subspace Emissary]], all characters jump two frames faster. | ||
{|class="wikitable sortable" style="margin:1em auto 1em auto; text-align:center" | {|class="wikitable sortable" style="margin:1em auto 1em auto; text-align:center" | ||
|- | |- | ||
! | !Rank!!Character!!Frames | ||
|- | |||
{{ | |rowspan=10|'''1-10'''||{{CharHead|Diddy Kong|SSBB|hsize=20px}}||rowspan=10|4 | ||
{{ | |- | ||
{{ | |{{CharHead|Fox|SSBB|hsize=20px}} | ||
{{ | |- | ||
{{ | |{{CharHead|Ice Climbers|SSBB|hsize=20px}} | ||
{{ | |- | ||
{{ | |{{CharHead|Kirby|SSBB|hsize=20px}} | ||
{{ | |- | ||
{{ | |{{CharHead|Meta Knight|SSBB|hsize=20px}} | ||
|- | |||
{{ | |{{CharHead|Pikachu|SSBB|hsize=20px}} | ||
{{ | |- | ||
{{ | |{{CharHead|Samus|SSBB|hsize=20px}} | ||
{{ | |- | ||
{{ | |{{CharHead|Sheik|SSBB|hsize=20px}} | ||
{{ | |- | ||
{{ | |{{CharHead|Squirtle|SSBB|hsize=20px}} | ||
{{ | |- | ||
{{ | |{{CharHead|Zero Suit Samus|SSBB|hsize=20px}} | ||
{{ | |- | ||
{{ | |rowspan=16|'''11-26'''||{{CharHead|Captain Falcon|SSBB|hsize=20px}}||rowspan=16|5 | ||
{{ | |- | ||
{{ | |{{CharHead|Ivysaur|SSBB|hsize=20px}} | ||
{{ | |- | ||
{{ | |{{CharHead|Lucario|SSBB|hsize=20px}} | ||
|- | |||
|{{CharHead|Lucas|SSBB|hsize=20px}} | |||
{{ | |- | ||
{{ | |{{CharHead|Luigi|SSBB|hsize=20px}} | ||
{{ | |- | ||
{{ | |{{CharHead|Mario|SSBB|hsize=20px}} | ||
{{ | |- | ||
{{ | |{{CharHead|Marth|SSBB|hsize=20px}} | ||
{{ | |- | ||
{{ | |{{CharHead|Mr. Game & Watch|SSBB|hsize=20px}} | ||
|- | |||
{{ | |{{CharHead|Ness|SSBB|hsize=20px}} | ||
{{ | |- | ||
{{ | |{{CharHead|Olimar|SSBB|hsize=20px}} | ||
{{ | |- | ||
|{{CharHead|Peach|SSBB|hsize=20px}} | |||
|- | |||
|{{CharHead|Pit|SSBB|hsize=20px}} | |||
|- | |||
|{{CharHead|R.O.B.|SSBB|hsize=20px}} | |||
|- | |||
|{{CharHead|Sonic|SSBB|hsize=20px}} | |||
|- | |||
|{{CharHead|Toon Link|SSBB|hsize=20px}} | |||
|- | |||
|{{CharHead|Wolf|SSBB|hsize=20px}} | |||
|- | |||
|'''N/A'''||[[Fighting Alloys]]|||5 | |||
|- | |||
|rowspan=9|'''27-35'''||{{CharHead|Charizard|SSBB|hsize=20px}}||rowspan=9|6 | |||
|- | |||
|{{CharHead|Donkey Kong|SSBB|hsize=20px}} | |||
|- | |||
|{{CharHead|Falco|SSBB|hsize=20px}} | |||
|- | |||
|{{CharHead|Ike|SSBB|hsize=20px}} | |||
|- | |||
|{{CharHead|Jigglypuff|SSBB|hsize=20px}} | |||
|- | |||
|{{CharHead|King Dedede|SSBB|hsize=20px}} | |||
|- | |||
|{{CharHead|Wario|SSBB|hsize=20px}} | |||
|- | |||
|{{CharHead|Yoshi|SSBB|hsize=20px}} | |||
|- | |||
|{{CharHead|Zelda|SSBB|hsize=20px}} | |||
|- | |||
|'''N/A'''||[[Wario-Man]]||6 | |||
|- | |||
|rowspan=2|'''36-37'''||{{CharHead|Ganondorf|SSBB|hsize=20px}}||rowspan=2|7 | |||
|- | |||
|{{CharHead|Link|SSBB|hsize=20px}} | |||
|- | |||
|'''N/A'''||{{b|Giga Bowser|Final Smash}}||7 | |||
|- | |||
|'''38'''||{{CharHead|Bowser|SSBB|hsize=20px}}||8 | |||
|- | |||
|'''39'''||{{CharHead|Snake|SSBB|hsize=20px}}||9 | |||
|} | |} | ||
===''[[Super Smash Bros. 4]]''=== | ===Jump squats in ''[[Super Smash Bros. 4]]''=== | ||
{|class="wikitable sortable" style="margin:1em auto 1em auto; text-align:center" | {|class="wikitable sortable" style="margin:1em auto 1em auto; text-align:center" | ||
|- | |- | ||
! | !Rank!!Character!!Frames | ||
|- | |||
{{ | |rowspan=13|'''1-13'''||{{CharHead|Bayonetta|SSB4|hsize=20px}}||rowspan=13|4 | ||
{{ | |- | ||
{{ | |{{CharHead|Cloud|SSB4|hsize=20px}} | ||
{{ | |- | ||
{{ | |{{CharHead|Diddy Kong|SSB4|hsize=20px}} | ||
{{ | |- | ||
{{ | |{{CharHead|Duck Hunt|SSB4|hsize=20px}} | ||
{{ | |- | ||
{{ | |{{CharHead|Fox|SSB4|hsize=20px}} | ||
{{ | |- | ||
{{ | |{{CharHead|Greninja|SSB4|hsize=20px}} | ||
{{ | |- | ||
|{{CharHead|Kirby|SSB4|hsize=20px}} | |||
{{ | |- | ||
{{ | |{{CharHead|Mega Man|SSB4|hsize=20px}} | ||
{{ | |- | ||
{{ | |{{CharHead|Meta Knight|SSB4|hsize=20px}} | ||
{{ | |- | ||
{{ | |{{CharHead|Pikachu|SSB4|hsize=20px}} | ||
{{ | |- | ||
{{ | |{{CharHead|Samus|SSB4|hsize=20px}} | ||
{{ | |- | ||
{{ | |{{CharHead|Sheik|SSB4|hsize=20px}} | ||
{{ | |- | ||
{{ | |{{CharHead|Zero Suit Samus|SSB4|hsize=20px}} | ||
{{ | |- | ||
{{ | |rowspan=28|'''14-41'''||{{CharHead|Captain Falcon|SSB4|hsize=20px}}||rowspan=28|5 | ||
{{ | |- | ||
{{ | |{{CharHead|Dark Pit|SSB4|hsize=20px}} | ||
{{ | |- | ||
{{ | |{{CharHead|Dr. Mario|SSB4|hsize=20px}} | ||
{{ | |- | ||
{{ | |{{CharHead|Little Mac|SSB4|hsize=20px}} | ||
{{ | |- | ||
{{ | |{{CharHead|Lucario|SSB4|hsize=20px}} | ||
{{ | |- | ||
{{ | |{{CharHead|Lucas|SSB4|hsize=20px}} | ||
{{ | |- | ||
{{ | |{{CharHead|Lucina|SSB4|hsize=20px}} | ||
{{ | |- | ||
|{{CharHead|Luigi|SSB4|hsize=20px}} | |||
|- | |||
|{{CharHead|Mario|SSB4|hsize=20px}} | |||
{{ | |- | ||
{{ | |{{CharHead|Marth|SSB4|hsize=20px}} | ||
{{ | |- | ||
{{ | |{{CharHead|Mewtwo|SSB4|hsize=20px}} | ||
{{ | |- | ||
{{ | |{{CharHead|Mii Brawler|SSB4|hsize=20px}} | ||
{{ | |- | ||
{{ | |{{CharHead|Mr. Game & Watch|SSB4|hsize=20px}} | ||
{{ | |- | ||
|{{CharHead|Ness|SSB4|hsize=20px}} | |||
|- | |||
{{ | |{{CharHead|Olimar|SSB4|hsize=20px}} | ||
{{ | |- | ||
{{ | |{{CharHead|Pac-Man|SSB4|hsize=20px}} | ||
{{ | |- | ||
{{ | |{{CharHead|Palutena|SSB4|hsize=20px}} | ||
{{ | |- | ||
{{ | |{{CharHead|Peach|SSB4|hsize=20px}} | ||
|- | |||
|{{CharHead|Pit|SSB4|hsize=20px}} | |||
|- | |||
|{{CharHead|R.O.B.|SSB4|hsize=20px|color=Grey}} | |||
|- | |||
|{{CharHead|Rosalina & Luma|SSB4|hsize=20px}} | |||
|- | |||
|{{CharHead|Roy|SSB4|hsize=20px}} | |||
|- | |||
|{{CharHead|Ryu|SSB4|hsize=20px}} | |||
|- | |||
|{{CharHead|Shulk|SSB4|hsize=20px}} | |||
|- | |||
|{{CharHead|Sonic|SSB4|hsize=20px}} | |||
|- | |||
|{{CharHead|Toon Link|SSB4|hsize=20px}} | |||
|- | |||
|{{CharHead|Villager|SSB4|hsize=20px}} | |||
|- | |||
|{{CharHead|Wii Fit Trainer|SSB4|hsize=20px}} | |||
|- | |||
|rowspan=2|'''N/A'''||[[Giga Mac]]||rowspan=2|5 | |||
|- | |||
|[[Mega Lucario]] | |||
|- | |||
|rowspan=10|'''42-51'''||{{CharHead|Bowser Jr.|SSB4|hsize=20px}}||rowspan=10|6 | |||
|- | |||
|{{CharHead|Corrin|SSB4|hsize=20px}} | |||
|- | |||
|{{CharHead|Donkey Kong|SSB4|hsize=20px}} | |||
|- | |||
|{{CharHead|Falco|SSB4|hsize=20px}} | |||
|- | |||
|{{CharHead|Jigglypuff|SSB4|hsize=20px}} | |||
|- | |||
|{{CharHead|King Dedede|SSB4|hsize=20px}} | |||
|- | |||
|{{CharHead|Mii Gunner|SSB4|hsize=20px}} | |||
|- | |||
|{{CharHead|Wario|SSB4|hsize=20px}} | |||
|- | |||
|{{CharHead|Yoshi|SSB4|hsize=20px}} | |||
|- | |||
|{{CharHead|Zelda|SSB4|hsize=20px}} | |||
|- | |||
|'''N/A'''||[[Wario-Man]]||6 | |||
|- | |||
|rowspan=6|'''52-57'''||{{CharHead|Charizard|SSB4|hsize=20px}}||rowspan=2|7* | |||
|- | |||
|{{CharHead|Robin|SSB4|hsize=20px}} | |||
|- | |||
|{{CharHead|Ganondorf|SSB4|hsize=20px}}||rowspan=4|7 | |||
|- | |||
|{{CharHead|Ike|SSB4|hsize=20px}} | |||
|- | |||
|{{CharHead|Link|SSB4|hsize=20px}} | |||
|- | |||
|{{CharHead|Mii Swordfighter|SSB4|hsize=20px}} | |||
|- | |||
|'''N/A'''||{{b|Giga Bowser|Final Smash}}||7 | |||
|- | |||
|'''58'''||{{CharHead|Bowser|SSB4|hsize=20px}}||8 | |||
|} | |} | ||
<nowiki>*</nowiki>These characters' jumpsquat values are defined as 6 in fighter_param.bin, though they actually end up being 7. | <nowiki>*</nowiki>These characters' jumpsquat values are defined as 6 in fighter_param.bin, though they actually end up being 7. | ||
===''[[Super Smash Bros. Ultimate]]''=== | ===Jump squats in ''[[Super Smash Bros. Ultimate]]''=== | ||
Every character has a 3 frame | Every character has a 3-frame jump squat, with the exception of {{SSBU|Kazuya}} (who has a 7-frame jump squat, though the value is defined as 6 in fighter_param.prc) and [[Giga Bowser]] (who has a 15-frame jump squat). | ||
==Jump height ranking== | ==Jump height ranking== | ||
Below are characters ranked by the height of their first jump. Jump force is measured in [[unit]]s per [[frame]]. | |||
Note that there are two methods to determine jump height, depending on the game. | |||
*In ''Smash 64'', ''Melee'', and ''Brawl'', the game uses jump ''force'', or the speed at which the character leaves the ground. In ''Smash 64'', jump ''force'' is calculated at the time of the jump. In ''Melee'' and ''Brawl'' it is encoded. The resulting jump height is dependent on the character's [[gravity]].<!--Formula: ?:h=((2f-g)^2)/(8g), Melee:h=(f/2)+((f^2)/(2g))--> | |||
Note that there are two methods to | *In ''Smash 4'' and ''Ultimate'', the game encodes jump ''height'', and works backwards using gravity to figure out the correct force to use. This allows more natural behaviour to modifications of jump height from [[equipment]] or special moves such as [[Monado Arts]].<!--Formula: f=sqrt(2g*h)+g/2--> | ||
*In ''Smash 64'', ''Melee'', and ''Brawl'', the game | **However, for multiple aerial jumps, the game encodes jump ''force'' (except for [[Charizard]] and [[Sephiroth]]). | ||
*In ''Smash 4'', the game encodes jump ''height'', and works backwards using gravity to figure out the correct force to use. This allows more natural behaviour to modifications of jump height from [[equipment]] or special moves such as [[Monado Arts]].<!--Formula: f=sqrt(2g*h)+g/2--> | *In ''Ultimate'', the game also encodes jump ''initial height'', or the height that a character will reach in the first 4 frames of a full hop. After the first 4 frames, the normal method for ''Smash 4'' will be used with the height being reduced by the initial height.<!--Formula: f=sqrt(2g*(h-i))+g/2--> This results in characters moving significantly faster during the beginning of their jump and reaching their peak a few frames sooner. This has no affect on short hops or aerial jumps. | ||
===''Super Smash Bros.''=== | ===''Super Smash Bros.''=== | ||
The jump physics of ''Smash 64'' are significantly | The jump physics of ''Smash 64'' are significantly different compared to later games. A jump depends on 3 values: the [[control stick]]'s vertical position ('''v'''), the jump multiplier ('''m'''), and the jump base ('''b'''). The control stick's vertical position is a value between 53-80 (53 is the minimum amount required for a jump and the stick can reach 127, though it is capped at 80). Unlike later games, a character's gravity ('''g''') is also applied on the same frame as a grounded jump. The resulting jump force formula is <code>(v×m)+b-g</code>. | ||
The | When using the [[C button]]s to jump, the control stick's horizontal position '''h''' is used instead of the vertical position. The equivalent vertical position follows the formula <code>v = floor(sqrt(80^2 - h^2))</code> and "v" has a minimum value 63 and a maximum of 77. The resulting value takes priority over the control stick's actual vertical position. | ||
<center> | |||
{|class="wikitable sortable" style="text-align:center; display:inline-table;" | |||
{|class="wikitable sortable | |||
|+JPN | |+JPN | ||
|- | |- | ||
!Rank!!Character!!Jump | !Rank!!Character!!Jump multiplier!!Jump base!!Min height!!Max height | ||
{{ | |- | ||
{{ | |'''1'''||{{CharHead|Luigi|SSB|hsize=15px}}||0.7||30||1038.5||1718 | ||
{{ | |- | ||
{{ | |'''2'''||{{CharHead|Captain Falcon|SSB|hsize=15px}}||1||25||855.8||1569 | ||
{{ | |- | ||
{{ | |'''3'''||{{CharHead|Samus|SSB|hsize=15px}}||0.5||36||996.8||1482 | ||
{{ | |- | ||
{{ | |'''4'''||{{CharHead|Jigglypuff|SSB|hsize=15px}}||0.7||20||786.8||1406 | ||
{{ | |- | ||
{{ | |'''5'''||{{CharHead|Donkey Kong|SSB|hsize=15px}}||0.47||55||1024.66||1383 | ||
{{ | |- | ||
{{ | |'''6'''||{{CharHead|Mario|SSB|hsize=15px}}||0.7||26||798.2||1360 | ||
|- | |||
|'''7'''||{{CharHead|Pikachu|SSB|hsize=15px}}||0.67||37||840.24||1323 | |||
|- | |||
|'''8'''||{{CharHead|Link|SSB|hsize=15px}}||0.7||36||798.6||1276.8 | |||
|- | |||
|'''9'''||{{CharHead|Fox|SSB|hsize=15px}}||1||23||684||1275 | |||
|- | |||
|'''10'''||{{CharHead|Yoshi|SSB|hsize=15px}}||0.7||27.5||740.6||1249.5 | |||
|- | |||
|'''11'''||{{CharHead|Kirby|SSB|hsize=15px}}||0.6||30||765||1228.8 | |||
|- | |||
|'''12'''||{{CharHead|Ness|SSB|hsize=15px}}||0.7||26||706.1||1204.5 | |||
|} | |} | ||
{|class="wikitable sortable | {|class="wikitable sortable" style="text-align:center; display:inline-table;" | ||
|+NA | |+NA/PAL/AUS | ||
|- | |||
!Rank!!Character!!Jump multiplier!!Jump base!!Min height!!Max height | |||
|- | |||
|'''1'''||{{CharHead|Luigi|SSB|hsize=15px}}||0.7||30||1038.5||1718 | |||
|- | |||
|'''2'''||{{CharHead|Captain Falcon|SSB|hsize=15px}}||1||24||833.8||1539 | |||
|- | |||
|'''3'''||{{CharHead|Samus|SSB|hsize=15px}}||0.5||36||996.8||1482 | |||
|- | |- | ||
|'''4'''||{{CharHead|Jigglypuff|SSB|hsize=15px}}||0.7||20||786.8||1406 | |||
{{ | |- | ||
|'''5'''||{{CharHead|Donkey Kong|SSB|hsize=15px}}||0.47||55||1024.66||1383 | |||
{{ | |- | ||
|'''6'''||{{CharHead|Mario|SSB|hsize=15px}}||0.7||26||798.2||1360 | |||
{{ | |- | ||
{{ | |'''7'''||{{CharHead|Pikachu|SSB|hsize=15px}}||0.67||37||840.24||1323 | ||
|- | |||
{{ | |'''8'''||{{CharHead|Fox|SSB|hsize=15px}}||1||23||684||1275 | ||
{{ | |- | ||
{{ | |'''9'''||{{CharHead|Kirby|SSB|hsize=15px}}||0.6||30||765||1228.8 | ||
{{ | |- | ||
{{ | |'''10'''||{{CharHead|Ness|SSB|hsize=15px}}||0.7||26||706.1||1204.5 | ||
| | |- | ||
|'''11'''||{{CharHead|Yoshi|SSB|hsize=15px}}||0.7||27.5||713||1203.5 | |||
|- | |||
|'''12'''||{{CharHead|Link|SSB|hsize=15px}}||0.7||36||749.7||1198.8 | |||
|} | |} | ||
</center> | |||
===''Super Smash Bros. Melee''=== | ===''Super Smash Bros. Melee''=== | ||
In ''Melee'', jump height has been drastically decreased across the cast, with even the third highest full hop height value being lower than the lowest full hop height value in ''Smash 64''. | |||
<center> | |||
{|class="wikitable sortable" style="text-align:center; display:inline-table;" | |||
{|class="wikitable sortable | |||
|+Jump | |+Jump | ||
|- | |- | ||
! | !Rank!!Character!!Jump force!!Jump height | ||
{{ | |- | ||
{{ | |'''1'''||{{CharHead|Falco|SSBM|hsize=20px}}||4.1||51.5 | ||
{{ | |- | ||
{{ | |'''2'''||{{CharHead|Luigi|SSBM|hsize=20px}}||2.4||46.546 | ||
{{ | |- | ||
{{ | |'''3'''||{{CharHead|Captain Falcon|SSBM|hsize=20px}}||3.1||38.52 | ||
{{ | |- | ||
{{ | |'''4'''||{{CharHead|Donkey Kong|SSBM|hsize=20px}}||2.7||37.8 | ||
{{ | |- | ||
{{ | |'''N/A'''||{{CharHead|Giga Bowser|SSBM|hsize=20px}}||4.2||37.4 | ||
{{ | |- | ||
{{ | |'''5'''||{{CharHead|Ness|SSBM|hsize=20px}}||2.5||35.98 | ||
{{ | |- | ||
{{ | |'''N/A'''||{{Head|Fighting Wire Frames|g=SSBM|s=20px}} [[Male Wire Frame]]||2.5||35.98 | ||
|- | |||
{{ | |'''6'''||{{CharHead|Ice Climbers|SSBM|hsize=20px}}||2.6||35.1 | ||
{{ | |- | ||
{{ | |'''7'''||{{CharHead|Marth|SSBM|hsize=20px}}||2.4||35.09 | ||
{{ | |- | ||
{{ | |'''8'''||{{CharHead|Yoshi|SSBM|hsize=20px}}||2.5||34.857 | ||
{{ | |- | ||
{{ | |'''9'''||{{CharHead|Samus|SSBM|hsize=20px}}||2.1||34.464 | ||
{{ | |- | ||
|'''10'''||{{CharHead|Sheik|SSBM|hsize=20px}}||2.8||34.08 | |||
{{ | |- | ||
{{ | |'''11'''||{{CharHead|Mewtwo|SSBM|hsize=20px}}||2.3||33.408 | ||
{{ | |- | ||
{{ | |'''12'''||{{CharHead|Young Link|SSBM|hsize=20px}}||2.62||32.52 | ||
{{ | |- | ||
|rowspan=2|'''13-14'''||{{CharHead|Pichu|SSBM|hsize=20px}}||rowspan=2|2.6||rowspan=2|32.04 | |||
|- | |||
|{{CharHead|Pikachu|SSBM|hsize=20px}} | |||
|- | |||
|'''15'''||{{CharHead|Bowser|SSBM|hsize=20px}}||2.8||31.57 | |||
|- | |||
|'''16'''||{{CharHead|Peach|SSBM|hsize=20px}}||2.2||31.36 | |||
|- | |||
|'''17'''||{{CharHead|Fox|SSBM|hsize=20px}}||3.68||31.28 | |||
|- | |||
|'''18'''||{{CharHead|Zelda|SSBM|hsize=20px}}||2.1||31.262 | |||
|- | |||
|'''N/A'''||{{Head|Fighting Wire Frames|g=SSBM|s=20px}} [[Female Wire Frame]]||2.1||31.262 | |||
|- | |||
|'''19'''||{{CharHead|Roy|SSBM|hsize=20px}}||2.6||30.958 | |||
|- | |||
|'''20'''||{{CharHead|Link|SSBM|hsize=20px}}||2.5||29.67 | |||
|- | |||
|rowspan=3|'''21-23'''||{{CharHead|Dr. Mario|SSBM|hsize=20px}}||rowspan=3|2.3||rowspan=3|29 | |||
|- | |||
|{{CharHead|Mario|SSBM|hsize=20px}} | |||
|- | |||
|{{CharHead|Mr. Game & Watch|SSBM|hsize=20px}} | |||
|- | |||
|'''24'''||{{CharHead|Ganondorf|SSBM|hsize=20px}}||2.6||27.3 | |||
|- | |||
|'''25'''||{{CharHead|Kirby|SSBM|hsize=20px}}||2.0||26 | |||
|- | |||
|'''26'''||{{CharHead|Jigglypuff|SSBM|hsize=20px}}||1.6||20.8 | |||
|} | |} | ||
{|class="wikitable sortable | {|class="wikitable sortable" style="text-align:center; display:inline-table;" | ||
|+Shorthop | |+Shorthop | ||
|- | |- | ||
! | !Rank!!Character!!Jump force!!Jump height!!{{rollover|Difference|Compared to normal jump height|y}} | ||
|- | |- | ||
|'''1'''||{{CharHead|Samus|SSBM|hsize=20px}}||1.7||22.75||66.01% | |||
|- | |- | ||
| | |'''2'''||{{CharHead|Sheik|SSBM|hsize=20px}}||2.14||20.16||59.15% | ||
|- | |- | ||
| | |'''N/A'''||{{Head|Fighting Wire Frames|g=SSBM|s=20px}} [[Male Wire Frame]]||1.8||18.9||52.53% | ||
|- | |- | ||
|3||{{ | |'''3'''||{{CharHead|Zelda|SSBM|hsize=20px}}||1.6||18.337||58.66% | ||
|- | |- | ||
| | |'''N/A'''||{{Head|Fighting Wire Frames|g=SSBM|s=20px}} [[Female Wire Frame]]||1.6||18.337||58.66% | ||
|- | |- | ||
| | |'''4'''||{{CharHead|Yoshi|SSBM|hsize=20px}}||1.8||18.33||52.59% | ||
|- | |- | ||
| | |'''5'''||{{CharHead|Peach|SSBM|hsize=20px}}||1.6||16.8||53.57% | ||
|- | |- | ||
| | |'''6'''||{{CharHead|Ganondorf|SSBM|hsize=20px}}||2.0||16.4||60.07% | ||
|- | |- | ||
| | |'''7'''||{{CharHead|Luigi|SSBM|hsize=20px}}||1.4||14.91||32.03% | ||
|- | |- | ||
| | |'''8'''||{{CharHead|Captain Falcon|SSBM|hsize=20px}}||1.9||14.85||38.55% | ||
|- | |- | ||
| | |'''9'''||{{CharHead|Kirby|SSBM|hsize=20px}}||1.5||14.82||57.00% | ||
|- | |- | ||
| | |rowspan=2|'''10-11'''||{{CharHead|Pichu|SSBM|hsize=20px}}||rowspan=2|1.7||rowspan=2|14||rowspan=2|43.70% | ||
|- | |- | ||
|{{CharHead|Pikachu|SSBM|hsize=20px}} | |||
|- | |- | ||
| | |'''12'''||{{CharHead|Marth|SSBM|hsize=20px}}||1.5||13.995||39.88% | ||
|- | |- | ||
| | |'''13'''||{{CharHead|Donkey Kong|SSBM|hsize=20px}}||1.6||13.6||35.98% | ||
|- | |- | ||
| | |'''14'''||{{CharHead|Ness|SSBM|hsize=20px}}||1.5||13.26||36.85% | ||
|- | |- | ||
| | |'''15'''||{{CharHead|Mewtwo|SSBM|hsize=20px}}||1.4||12.654||37.88% | ||
|- | |- | ||
| | |'''16'''||{{CharHead|Falco|SSBM|hsize=20px}}||1.9||11.58||22.49% | ||
|- | |- | ||
| | |rowspan=3|'''17-19'''||{{CharHead|Dr. Mario|SSBM|hsize=20px}}||rowspan=3|1.4||rowspan=3|11.025||rowspan=3|38.02% | ||
|- | |- | ||
| | |{{CharHead|Mario|SSBM|hsize=20px}} | ||
|- | |- | ||
|{{CharHead|Mr. Game & Watch|SSBM|hsize=20px}} | |||
|- | |- | ||
| | |rowspan=2|'''20-21'''||{{CharHead|Young Link|SSBM|hsize=20px}}||rowspan=2|1.5||rowspan=2|10.99||33.79% | ||
|- | |- | ||
| | |{{CharHead|Link|SSBM|hsize=20px}}||37.04% | ||
|- | |- | ||
| | |'''22'''||{{CharHead|Bowser|SSBM|hsize=20px}}||1.6||10.66||33.77% | ||
|- | |- | ||
| | |'''23'''||{{CharHead|Fox|SSBM|hsize=20px}}||2.1||10.65||34.05% | ||
|- | |- | ||
| | |'''24'''||{{CharHead|Roy|SSBM|hsize=20px}}||1.5||10.626||34.32% | ||
|- | |- | ||
| | |'''25'''||{{CharHead|Ice Climbers|SSBM|hsize=20px}}||1.4||10.5||29.91% | ||
|- | |- | ||
| | |'''26'''||{{CharHead|Jigglypuff|SSBM|hsize=20px}}||1.05||9.146||43.97% | ||
|- | |- | ||
| | |'''N/A'''||{{CharHead|Giga Bowser|SSBM|hsize=20px}}||1.6||5.95||15.91% | ||
|} | |} | ||
</center> | |||
===''Super Smash Bros. Brawl''=== | |||
{|class="wikitable sortable" style="margin:1em auto 1em auto; text-align:center" | {|class="wikitable sortable" style="margin:1em auto 1em auto; text-align:center" | ||
|- | |- | ||
!Rank!!Character | !Rank!!Character!!Jump force!!Jump height | ||
|- | |||
|'''N/A'''||[[Giga Bowser]]||5.5||73.85696598 | |||
|- | |||
|'''N/A'''||[[Wario Man]]||3.5||66.31680556 | |||
|- | |||
|'''1'''||{{CharHead|Falco|SSBB|hsize=20px}}||3.42||50.52007143 | |||
|- | |||
|'''2'''||{{CharHead|Zero Suit Samus|SSBB|hsize=20px}}||2.84||44.2109595 | |||
|- | |||
|'''3'''||{{CharHead|Luigi|SSBB|hsize=20px}}||2.35||41.31389423 | |||
|- | |||
|'''4'''||{{CharHead|Diddy Kong|SSBB|hsize=20px}}||2.8||41.22019565 | |||
|- | |||
|'''5'''||{{CharHead|Sheik|SSBB|hsize=20px}}||3.37||38.63389 | |||
|- | |||
|'''6'''||{{CharHead|R.O.B.|SSBB|hsize=20px}}||2.25||37.82543269 | |||
|- | |||
|'''7'''||{{CharHead|Lucario|SSBB|hsize=20px}}||2.2||37.6278125 | |||
|- | |||
|'''8'''||{{CharHead|Captain Falcon|SSBB|hsize=20px}}||2.82||37.31948794 | |||
|- | |||
|'''9'''||{{CharHead|Yoshi|SSBB|hsize=20px}}||2.34||36.10337322 | |||
|- | |||
|'''10'''||{{CharHead|Donkey Kong|SSBB|hsize=20px}}||2.45||35.83759414 | |||
|- | |||
|'''11'''||{{CharHead|Squirtle|SSBB|hsize=20px}}||2.8||35.35185671 | |||
|- | |- | ||
| | |'''12'''||{{CharHead|Samus|SSBB|hsize=20px}}||2.05||35.21069828 | ||
|- | |- | ||
| | |'''13'''||{{CharHead|Ice Climbers|SSBB|hsize=20px}}||2.35||34.69501461 | ||
|- | |- | ||
| | |'''14'''||{{CharHead|Ness|SSBB|hsize=20px}}||2.25||34.48515332 | ||
|- | |- | ||
| | |'''15'''||{{CharHead|Fox|SSBB|hsize=20px}}||3.55||34.25401786 | ||
|- | |- | ||
| | |'''16'''||{{CharHead|Pikachu|SSBB|hsize=20px}}||2.48||34.11800144 | ||
|- | |- | ||
| | |'''17'''||{{CharHead|Sonic|SSBB|hsize=20px}}||2.45||34.09444853 | ||
|- | |- | ||
| | |'''18'''||{{CharHead|Marth|SSBB|hsize=20px}}||2.16||33.66852778 | ||
|- | |- | ||
| | |'''19'''||{{CharHead|Olimar|SSBB|hsize=20px}}||2.04||33.6675 | ||
|- | |- | ||
| | |'''20'''||{{CharHead|Toon Link|SSBB|hsize=20px}}||2.2||33.48017857 | ||
|- | |- | ||
| | |'''21'''||{{CharHead|King Dedede|SSBB|hsize=20px}}||2.4||33.21906465 | ||
|- | |- | ||
| | |'''22'''||{{CharHead|Bowser|SSBB|hsize=20px}}||2.65||32.87722406 | ||
|- | |- | ||
| | |'''23'''||{{CharHead|Ivysaur|SSBB|hsize=20px}}||2.16||32.25446429 | ||
|- | |- | ||
| | |'''24'''||{{CharHead|Wolf|SSBB|hsize=20px}}||2.95||32.01240385 | ||
|- | |- | ||
| | |'''25'''||{{CharHead|Mario|SSBB|hsize=20px}}||2.22||31.755375 | ||
|- | |- | ||
| | |'''26'''||{{CharHead|Zelda|SSBB|hsize=20px}}||2.09||31.56113619 | ||
|- | |- | ||
| | |'''27'''||{{CharHead|Pit|SSBB|hsize=20px}}||2.17||30.31704167 | ||
|- | |- | ||
| | |'''28'''||{{CharHead|Wario|SSBB|hsize=20px}}||2.3||30.27382666 | ||
|- | |- | ||
| | |'''29'''||{{CharHead|Peach|SSBB|hsize=20px}}||1.98||30.03372278 | ||
|- | |- | ||
| | |'''30'''||{{CharHead|Lucas|SSBB|hsize=20px}}||2.35||29.51680556 | ||
|- | |- | ||
| | |'''31'''||{{CharHead|Ike|SSBB|hsize=20px}}||2.26||29.39181256 | ||
|- | |- | ||
| | |'''32'''||{{CharHead|Meta Knight|SSBB|hsize=20px}}||2.4||28.93747301 | ||
|- | |- | ||
| | |'''33'''||{{CharHead|Charizard|SSBB|hsize=20px}}||2.22||27.89121324 | ||
|- | |- | ||
| | |'''34'''||{{CharHead|Link|SSBB|hsize=20px}}||2.26||27.57550702 | ||
|- | |- | ||
| | |'''35'''||{{CharHead|Mr. Game & Watch|SSBB|hsize=20px}}||2.07||27.52134994 | ||
|- | |- | ||
|36||{{SSBB| | |'''36'''||{{CharHead|Ganondorf|SSBB|hsize=20px}}||2.34||25.50106535 | ||
|- | |- | ||
|37||{{SSBB| | |'''37'''||{{CharHead|Kirby|SSBB|hsize=20px}}||1.79||25.37573975 | ||
|- | |- | ||
|38||{{SSBB| | |'''38'''||{{CharHead|Snake|SSBB|hsize=20px}}||1.9||21.6225 | ||
|- | |- | ||
|39||{{SSBB| | |'''39'''||{{CharHead|Jigglypuff|SSBB|hsize=20px}}||1.44||19.79264911 | ||
|} | |} | ||
====Notes==== | |||
*The [[Fighting Alloys]] all share Mario's jump force value of 2.22, just as they share his gravity and jump height. | |||
===''Super Smash Bros. 4''=== | ===''Super Smash Bros. 4''=== | ||
{|class="wikitable sortable" style="margin:1em auto 1em auto; text-align:center" | {|class="wikitable sortable" style="margin:1em auto 1em auto; text-align:center" | ||
!Rank!!Character!!Full Hop!!Short Hop!!Air Jump | !Rank!!Character!!Full Hop!!Short Hop!!Air Jump!!Combined Jump Height | ||
|- | |||
|'''1'''||{{CharHead|Falco|SSB4|hsize=20px}}||50.506073||17.34||50.506073||101.012146 | |||
|- | |||
|'''2'''||{{CharHead|Greninja|SSB4|hsize=20px}}||46||22.114738||46||92 | |||
|- | |- | ||
| | |'''3'''||{{CharHead|Zero Suit Samus|SSB4|hsize=20px}}||44.5||21.354742||44.199909||88.699909 | ||
|- | |- | ||
| | |'''4'''||{{CharHead|Luigi|SSB4|hsize=20px}}||44||19.984556||41.305771||85.305771 | ||
|- | |- | ||
| | |'''5'''||{{CharHead|Diddy Kong|SSB4|hsize=20px}}||41.208694||19.897078||41.208694||82.417388 | ||
|- | |- | ||
| | |'''6'''||{{CharHead|Rosalina & Luma|SSB4|hsize=20px}}||40||19.370632||40||80 | ||
|- | |- | ||
| | |rowspan=2|'''7-8'''||{{CharHead|Bayonetta|SSB4|hsize=20px}}||rowspan=2|39||21.354742||42||{{rollover|81|Bayonetta can cancel the first 3 frames of her air jump up to 2 times with Witch Twist, allowing her to save her air jump while still gaining height.|?}} | ||
|- | |- | ||
| | |{{CharHead|Sheik|SSB4|hsize=20px}}||18.752533||40||79 | ||
|- | |- | ||
| | |'''9'''||{{CharHead|R.O.B.|SSB4|hsize=20px|color=Grey}}||38||18.378603||38||76 | ||
|- | |- | ||
| | |'''10'''||{{CharHead|Lucario|SSB4|hsize=20px}}||37.619999||18.193617||37.619999||75.239998 | ||
|- | |- | ||
| | |'''11'''||{{CharHead|Captain Falcon|SSB4|hsize=20px}}||37.306652||17.980684||37.306652||74.613304 | ||
|- | |- | ||
| | |'''12'''||{{CharHead|Samus|SSB4|hsize=20px}}||37||18||37||74 | ||
|- | |- | ||
| | |'''13'''||{{CharHead|Mario|SSB4|hsize=20px}}||36.331814||17.539339||36.331814||72.663628 | ||
|- | |- | ||
| | |'''14'''||{{CharHead|Yoshi|SSB4|hsize=20px}}||36.094189||17.434723||51.560001||87.65419 | ||
|- | |- | ||
| | |'''15'''||{{CharHead|Palutena|SSB4|hsize=20px}}||35.900002||17.303881||35.900002||71.800004 | ||
|- | |- | ||
| | |'''16'''||{{CharHead|Wii Fit Trainer|SSB4|hsize=20px}}||35.599998||17.179214||35.599998||71.199996 | ||
|- | |- | ||
| | |'''17'''||{{CharHead|Pikachu|SSB4|hsize=20px}}||35.5||17.123371||35.5||71 | ||
|- | |- | ||
| | |rowspan=3|'''18-20'''||{{CharHead|Fox|SSB4|hsize=20px}}||rowspan=3|35||16.403395||37||72 | ||
|- | |- | ||
| | |{{CharHead|Mii Brawler|SSB4|hsize=20px}}||17||35.5||70.5 | ||
|- | |- | ||
| | |{{CharHead|Sonic|SSB4|hsize=20px}}||16.887465||35||{{rollover|70|Spring Jump can send Sonic higher than his full hop.|?}} | ||
|- | |- | ||
| | |'''21'''||{{CharHead|Shulk|SSB4|hsize=20px}}||34.799999||16.887465||34.799999||69.599998 | ||
|- | |- | ||
| | |'''22'''||{{CharHead|Ness|SSB4|hsize=20px}}||34.476265||16.652296||34.476265||68.95253 | ||
|- | |- | ||
| | |'''23'''||{{CharHead|Bowser Jr.|SSB4|hsize=20px}}||34.400002||16.592869||34.400002||68.800004 | ||
|- | |- | ||
| | |'''24'''||{{CharHead|Pac-Man|SSB4|hsize=20px}}||34.099998||16.477137||34.099998||68.199996 | ||
|- | |- | ||
| | |rowspan=2|'''25-26'''||{{CharHead|Donkey Kong|SSB4|hsize=20px}}||rowspan=2|34||17.297209||35.5||69.5 | ||
|- | |- | ||
| | |{{CharHead|Duck Hunt|SSB4|hsize=20px}}||16.477137||33.799999||67.799999 | ||
|- | |- | ||
| | |'''27'''||{{CharHead|Toon Link|SSB4|hsize=20px}}||33.799999||16.320242||33.799999||67.599998 | ||
|- | |- | ||
| | |rowspan=2|'''28-29'''||{{CharHead|Lucina|SSB4|hsize=20px}}||rowspan=2|33.660133||rowspan=2|16.263107||rowspan=2|33.660133||rowspan=2|67.320266 | ||
|- | |- | ||
| | |{{CharHead|Marth|SSB4|hsize=20px}} | ||
|- | |- | ||
| | |'''30'''||{{CharHead|Olimar|SSB4|hsize=20px}}||33.5||16.191645||33.5||67 | ||
|- | |- | ||
| | |'''31'''||{{CharHead|Robin|SSB4|hsize=20px}}||33.208813||16.018034||33.208813||66.417626 | ||
|- | |- | ||
| | |rowspan=2|'''32-33'''||{{CharHead|Bowser|SSB4|hsize=20px}}||rowspan=2|33||15.699792||32.611839||65.611839 | ||
|- | |- | ||
| | |{{CharHead|Corrin|SSB4|hsize=20px}}||16||31||64 | ||
|- | |- | ||
| | |'''34'''||{{CharHead|King Dedede|SSB4|hsize=20px}}||32.849998||16.019524||{{rollover|21.76799763|21.76799763, 21.76799763, 16.17335093, 13.07635173 for each air jump.|?}}||{{rollover|105.6356959|4 air jumps|?}} | ||
|- | |- | ||
| | |'''35'''||{{CharHead|Mega Man|SSB4|hsize=20px}}||32.799999||11.492068||32.799999||{{rollover|65.599998|Can be propelled higher with Rush Coil.|?}} | ||
|- | |- | ||
| | |rowspan=2|'''36-37'''||{{CharHead|Cloud|SSB4|hsize=20px}}||rowspan=2|32.5||17||rowspan=2|32||rowspan=2|64.5 | ||
|- | |- | ||
| | |{{CharHead|Villager|SSB4|hsize=20px}}||15.689452 | ||
|- | |- | ||
| | |rowspan=3|'''38-40'''||{{CharHead|Meta Knight|SSB4|hsize=20px}}||rowspan=3|32||13.915902||{{rollover|20.91375|20.91375, 19.00920455, 17.19556818, 15.13920455, 13.05920455 for each air jump.|?}}||{{rollover|117.3169318|5 air jumps|?}} | ||
|- | |- | ||
| | |{{CharHead|Charizard|SSB4|hsize=20px}}||15.42625||{{rollover|28|18 for the second air jump.|?}}||{{rollover|78|2 air jumps|?}} | ||
|- | |- | ||
| | |{{CharHead|Mii Gunner|SSB4|hsize=20px}}||17.539339||33.500343||65.500343 | ||
|- | |- | ||
| | |'''41'''||{{CharHead|Zelda|SSB4|hsize=20px}}||31.552761||15.239396||31.552761||63.105522 | ||
|- | |- | ||
| | |'''42'''||{{CharHead|Mewtwo|SSB4|hsize=20px}}||31.110001||17.5||58.542999||89.653 | ||
|- | |- | ||
| | |rowspan=2|'''43-44'''||{{CharHead|Dark Pit|SSB4|hsize=20px}}||rowspan=2|31||rowspan=2|14.955608||rowspan=2|{{rollover|23.70148302|23.70148302, 19.110125, 15.01259414 for each air jump.|?}}||rowspan=2|{{rollover|88.82420216|3 air jumps|?}} | ||
|- | |- | ||
|{{CharHead|Pit|SSB4|hsize=20px}} | |||
|- | |- | ||
|45||{{SSB4| | |'''45'''||{{CharHead|Roy|SSB4|hsize=20px}}||30.969999||13||28||58.969999 | ||
|- | |- | ||
|46||{{SSB4| | |'''46'''||{{CharHead|Wario|SSB4|hsize=20px}}||30.5||14.699989||30.5||61 | ||
|- | |- | ||
|47||{{SSB4| | |'''47'''||{{CharHead|Peach|SSB4|hsize=20px}}||30.025824||14.501237||30.025824||60.051648 | ||
|- | |- | ||
|48||{{SSB4| | |'''48'''||{{CharHead|Ike|SSB4|hsize=20px}}||29.9||16||31||60.9 | ||
|- | |- | ||
|49||{{SSB4| | |'''49'''||{{CharHead|Lucas|SSB4|hsize=20px}}||29.41||13||34.48||63.89 | ||
|- | |- | ||
|50||{{ | |'''50'''||{{CharHead|Dr. Mario|SSB4|hsize=20px}}||{{rollover|29.356105712|Value is stored in-game as the same as Mario, then multiplied by 0.808.|y}}||{{rollover|14.171785912|Value is stored in-game as the same as Mario, then multiplied by 0.808.|y}}||{{rollover|29.356105712|Value is stored in-game as the same as Mario, then multiplied by 0.808.|y}}||58.712211424 | ||
|- | |- | ||
|51||{{ | |'''51'''||{{CharHead|Mii Swordfighter|SSB4|hsize=20px}}||28.299999||15||28.299999||56.599998 | ||
|- | |- | ||
|52||{{SSB4| | |'''52'''||{{CharHead|Link|SSB4|hsize=20px}}||27.799999||13.380496||29||56.799999 | ||
|- | |- | ||
|53||{{ | |'''53'''||{{CharHead|Mr. Game & Watch|SSB4|hsize=20px}}||27.511969||13.261467||27.511969||55.023938 | ||
|- | |- | ||
|54||{{ | |'''54'''||{{CharHead|Little Mac|SSB4|hsize=20px}}||26||12.526741||26||52 | ||
|- | |- | ||
|55||{{SSB4| | |'''55'''||{{CharHead|Ryu|SSB4|hsize=20px}}||26||15||29.5||55.5 | ||
|- | |- | ||
|56||{{SSB4| | |'''56'''||{{CharHead|Ganondorf|SSB4|hsize=20px}}||25.488228||12.244264||26||51.488228 | ||
|- | |- | ||
|57||{{SSB4| | |'''57'''||{{CharHead|Kirby|SSB4|hsize=20px}}||25.368114||12.241816||{{rollover|21.04669712|21.04669712, 18.50584782, 15.9203607, 13.3388484, 10.81397463 for each air jump.|?}}||{{rollover|104.9938427|5 air jumps|?}} | ||
|- | |- | ||
|58||{{SSB4| | |'''58'''||{{CharHead|Jigglypuff|SSB4|hsize=20px}}||19.786329||11.260982||{{rollover|24.82302388|24.82302388, 23.02210164, 19.62369296, 16.74676861, 14.09776771 for each air jump.|?}}||{{rollover|118.0996838|5 air jumps|?}} | ||
|} | |} | ||
===''Super Smash Bros. Ultimate''=== | ===''Super Smash Bros. Ultimate''=== | ||
{{ | The mechanic of "jump initial height" was introduced in ''Ultimate''. This value is the height that a character will reach within the first 4 frames of their full hop (doesn't affect short hops or air jumps). It results in characters being able gain more height in less time compared to ''Smash 4'', often having 1.5-3× the starting speed and reaching the same heights a few frames faster. For most characters the initial height is 0.55× their full hop height, the exceptions being the {{SSBU|Ice Climbers}} at 0.35×, {{SSBU|Simon}} and {{SSBU|Richter}} at 0.4×, and {{SSBU|Pyra}} and {{SSBU|Mythra}} at 0.56×. | ||
{|class="wikitable sortable" style="margin:1em auto 1em auto; text-align:center" | {|class="wikitable sortable" style="margin:1em auto 1em auto; text-align:center" | ||
!Rank!!Character!!Full Hop!!Short Hop!!Air Jump | !Rank!!Character!!Full Hop!!Initial Height!!Short Hop!!Air Jump!!Combined Jump Height | ||
|- | |||
|'''1'''||{{CharHead|Falco|SSBU|hsize=20px}}||50.51||27.7805||17.34||50.51||101.02 | |||
|- | |||
|'''2'''||{{CharHead|Greninja|SSBU|hsize=20px}}||46||25.3||22.11||46||92 | |||
|- | |- | ||
| | |'''3'''||{{CharHead|Zero Suit Samus|SSBU|hsize=20px}}||44.5||24.475||21.35||44.2||88.7 | ||
|- | |- | ||
| | |'''4'''||{{CharHead|Luigi|SSBU|hsize=20px}}||44||24.2||19.98||41.31||85.31 | ||
|- | |- | ||
| | |'''5'''||{{CharHead|Diddy Kong|SSBU|hsize=20px}}||41.21||22.6655||19.9||41.21||82.42 | ||
|- | |- | ||
| | |'''6'''||{{CharHead|Rosalina & Luma|SSBU|hsize=20px}}||40||22||19.37||40||80 | ||
|- | |- | ||
| | |rowspan=2|'''7-8'''||{{CharHead|Bayonetta|SSBU|hsize=20px}}||rowspan=2|39||rowspan=2|21.45||21.35||42||{{rollover|81|Bayonetta can cancel the first 3 frames of her air jump up to 2 times with Witch Twist, allowing her to save her air jump while still gaining height.|?}} | ||
|- | |- | ||
|{{CharHead|Sheik|SSBU|hsize=20px}}||18.75||40||79 | |||
|- | |- | ||
| | |'''9'''||{{CharHead|R.O.B.|SSBU|hsize=20px|color=Grey}}||38||20.9||18.38||38||76 | ||
|- | |- | ||
| | |'''10'''||{{CharHead|Lucario|SSBU|hsize=20px}}||37.62||20.691||18.19||37.62||75.24 | ||
|- | |- | ||
| | |'''11'''||{{CharHead|Piranha Plant|SSBU|hsize=20px}}||37.4||20.57||17.5||38.52||75.92 | ||
|- | |- | ||
| | |'''12'''||{{CharHead|Captain Falcon|SSBU|hsize=20px}}||37.31||20.5205||17.98||37.31||74.62 | ||
|- | |- | ||
| | |rowspan=2|'''13-14'''||{{CharHead|Samus|SSBU|hsize=20px}}||rowspan=2|37||rowspan=2|20.35||rowspan=2|18||rowspan=2|37||rowspan=2|74 | ||
|- | |- | ||
|{{CharHead|Dark Samus|SSBU|hsize=20px}} | |||
|- | |- | ||
| | |'''15'''||{{CharHead|Pichu|SSBU|hsize=20px}}||36.75||20.2125||17.43||36.02||72.77 | ||
|- | |- | ||
| | |'''16'''||{{CharHead|Mario|SSBU|hsize=20px}}||36.33||19.9815||17.54||36.33||72.66 | ||
|- | |- | ||
| | |'''17'''||{{CharHead|Yoshi|SSBU|hsize=20px}}||36.09||19.8495||14.43||51.56||87.65 | ||
|- | |- | ||
| | |'''18'''||{{CharHead|Palutena|SSBU|hsize=20px}}||35.9||19.745||17.3||35.9||71.8 | ||
|- | |- | ||
| | |'''19'''||{{CharHead|Wii Fit Trainer|SSBU|hsize=20px}}||35.6||19.58||17.18||35.6||71.2 | ||
|- | |- | ||
| | |'''20'''||{{CharHead|Pikachu|SSBU|hsize=20px}}||35.5||19.525||17.12||35.5||71 | ||
|- | |- | ||
| | |'''21'''||{{CharHead|Squirtle|SSBU|hsize=20px}}||35.35||19.4425||17.03||35.35||70.7 | ||
|- | |- | ||
| | |rowspan=3|'''22-24'''||{{CharHead|Fox|SSBU|hsize=20px}}||rowspan=3|35||rowspan=3|19.25||16.4||37||72 | ||
|- | |- | ||
|{{CharHead|Mii Brawler|SSBU|hsize=20px}}||17||35.5||70.5 | |||
|- | |- | ||
|{{CharHead|Sonic|SSBU|hsize=20px}}||16.89||35||{{rollover|70|Spring Jump can send Sonic higher than his full hop.|?}} | |||
|- | |- | ||
| | |'''25'''||{{CharHead|Ice Climbers|SSBU|hsize=20px}}||34.69||12.1415||16.75||34.69||69.38 | ||
|- | |- | ||
| | |'''26'''||{{CharHead|Ness|SSBU|hsize=20px}}||34.48||18.964||16.65||45.65||80.13 | ||
|- | |- | ||
| | |'''27'''||{{CharHead|Bowser Jr.|SSBU|hsize=20px}}||34.4||18.92||16.59||34.4||68.8 | ||
|- | |- | ||
| | |'''28'''||{{CharHead|Pac-Man|SSBU|hsize=20px}}||34.1||18.755||16.48||34.1||68.2 | ||
|- | |- | ||
| | |rowspan=3|'''29-31'''||{{CharHead|Ridley|SSBU|hsize=20px}}||rowspan=3|34||rowspan=3|18.7||14.2||{{rollover|25.80013889|19.11680556 for the second air jump.|?}}||{{rollover|78.91694444|2 air jumps|?}} | ||
|- | |- | ||
|{{CharHead|Donkey Kong|SSBU|hsize=20px}}||17.3||35.5||69.5 | |||
|- | |- | ||
|{{CharHead|Duck Hunt|SSBU|hsize=20px}}||16.48||33.8||67.8 | |||
|- | |- | ||
| | |'''32'''||{{CharHead|Toon Link|SSBU|hsize=20px}}||33.8||18.59||16.32||33.8||67.6 | ||
|- | |- | ||
| | |rowspan=3|'''33-35'''||{{CharHead|Marth|SSBU|hsize=20px}}||rowspan=3|33.66||rowspan=3|18.513||rowspan=3|16.26||rowspan=3|33.66||rowspan=3|67.32 | ||
|- | |- | ||
|{{CharHead|Lucina|SSBU|hsize=20px}} | |||
|- | |- | ||
|{{CharHead|Young Link|SSBU|hsize=20px}} | |||
|- | |- | ||
| | |rowspan=2|'''36-37'''||{{CharHead|Shulk|SSBU|hsize=20px}}||rowspan=2|33.5||rowspan=2|18.425||16.8||rowspan=2|33.5||rowspan=2|67 | ||
|- | |- | ||
|{{CharHead|Olimar|SSBU|hsize=20px}}||16.19 | |||
|- | |- | ||
| | |'''38'''||{{CharHead|Robin|SSBU|hsize=20px}}||33.21||18.2655||16.02||33.21||66.42 | ||
|- | |- | ||
| | |rowspan=4|'''39-42'''||{{CharHead|Inkling|SSBU|hsize=20px}}||rowspan=4|33||rowspan=4|18.15||17.54||36.33||69.33 | ||
|- | |- | ||
|{{CharHead|Bowser|SSBU|hsize=20px}}||15.7||rowspan=2|32.61||rowspan=2|65.61 | |||
|- | |- | ||
|{{CharHead|King K. Rool|SSBU|hsize=20px}}||13.5 | |||
|- | |- | ||
|{{CharHead|Corrin|SSBU|hsize=20px}}||16||31||64 | |||
|- | |- | ||
| | |'''43'''||{{CharHead|King Dedede|SSBU|hsize=20px}}||32.85||18.0675||16.02||{{rollover|28.50284665|28.50284665, 19.83238273, 14.74831057, 11.31361985 for each air jump.|?}}||{{rollover|107.2471598|4 air jumps|?}} | ||
|- | |- | ||
| | |'''44'''||{{CharHead|Mega Man|SSBU|hsize=20px}}||32.8||18.04||11.49||32.8||{{rollover|65.6|Can be propelled higher with Rush Coil.|?}} | ||
|- | |- | ||
| | |rowspan=4|'''45-48'''||{{CharHead|Joker|SSBU|hsize=20px}}||rowspan=4|32.5||rowspan=4|17.875||14.2||34||66.5 | ||
|- | |- | ||
|{{CharHead|Cloud|SSBU|hsize=20px}}||17||rowspan=3|32.5||rowspan=3|65 | |||
|- | |- | ||
|{{CharHead|Villager|SSBU|hsize=20px}}||rowspan=2|15.69 | |||
|- | |- | ||
|{{CharHead|Isabelle|SSBU|hsize=20px}} | |||
|- | |- | ||
| | |'''49'''||{{CharHead|Ivysaur|SSBU|hsize=20px}}||32.25||17.7375||15.58||32.25||64.5 | ||
|- | |- | ||
| | |'''50'''||{{CharHead|Wolf|SSBU|hsize=20px}}||32.02||17.611||15.38||30.71||62.73 | ||
|- | |- | ||
| | |rowspan=2|'''51-52'''||{{CharHead|Meta Knight|SSBU|hsize=20px}}||rowspan=2|32||rowspan=2|17.6||13.92||{{rollover|20.91375|20.91375, 19.00920455, 17.19556818, 15.13920455, 13.05920455 for each air jump.|?}}||{{rollover|117.3169318|5 air jumps|?}} | ||
|- | |- | ||
|{{CharHead|Charizard|SSBU|hsize=20px}}||15.43||{{rollover|28|18 for the second air jump.|?}}||{{rollover|78|2 air jumps|?}} | |||
|- | |- | ||
| | |'''53'''||{{CharHead|Incineroar|SSBU|hsize=20px}}||31.6||17.38||14.4||32.8||64.4 | ||
|- | |- | ||
| | |'''54'''||{{CharHead|Zelda|SSBU|hsize=20px}}||31.55||17.3525||15.24||31.55||63.1 | ||
|- | |- | ||
| | |'''55'''||{{CharHead|Mewtwo|SSBU|hsize=20px}}||31.11||17.1105||17.5||57.35||88.46 | ||
|- | |- | ||
| | |rowspan=2|'''56-57'''||{{CharHead|Pit|SSBU|hsize=20px}}||rowspan=2|31||rowspan=2|17.05||rowspan=2|14.96||rowspan=2|{{rollover|23.70148302|23.70148302, 19.110125, 15.01259414 for each air jump.|?}}||rowspan=2|{{rollover|88.82420216|3 air jumps|?}} | ||
|- | |- | ||
|{{CharHead|Dark Pit|SSBU|hsize=20px}} | |||
|- | |- | ||
| | |rowspan=2|'''58-59'''||{{CharHead|Roy|SSBU|hsize=20px}}||rowspan=2|30.97||rowspan=2|17.0335||rowspan=2|13||rowspan=2|28||rowspan=2|58.97 | ||
|- | |- | ||
|{{CharHead|Chrom|SSBU|hsize=20px}} | |||
|- | |- | ||
| | |'''60'''||{{CharHead|Mii Gunner|SSBU|hsize=20px}}||30.9||16.995||14.6||32.3||63.2 | ||
|- | |- | ||
| | |'''61'''||{{CharHead|Dr. Mario|SSBU|hsize=20px}}||{{rollover|30.8805|23.6174064 when using shooting items.|y}}||16.9843||{{rollover|13.414592|Value is stored in-game as the same as Mario, then multiplied by 0.7648.|y}}||{{rollover|27.785184|Value is stored in-game as the same as Mario, then multiplied by 0.7648.|y}}||58.665684 | ||
|- | |- | ||
| | |'''62'''||{{CharHead|Mythra|SSBU|hsize=20px}}||30.8||17.248||15.6||33||63.8 | ||
|- | |- | ||
| | |'''63'''||{{CharHead|Min Min|SSBU|hsize=20px}}||30.7||16.885||16||29||{{rollover|59.7|Min Min can use ARMS Jump when grounded, propelling her higher than her full hop.|?}} | ||
|- | |- | ||
| | |rowspan=2|'''64-65'''||{{CharHead|Sephiroth|SSBU|hsize=20px}}||rowspan=2|30.5||rowspan=2|16.775||10||{{rollover|34|28.9 for the second air jump with one-wing.|?}}||{{rollover|64.5|2 air jumps with one-wing, 93.4|?}} | ||
|- | |- | ||
|{{CharHead|Wario|SSBU|hsize=20px}}||14.7||30.5||61 | |||
|- | |- | ||
| | |rowspan=2|'''66-67'''||{{CharHead|Peach|SSBU|hsize=20px}}||rowspan=2|30.03||rowspan=2|16.5165||rowspan=2|14.5||rowspan=2|30.03||rowspan=2|60.06 | ||
|- | |- | ||
|{{CharHead|Daisy|SSBU|hsize=20px}} | |||
|- | |- | ||
| | |rowspan=3|'''68-70'''||{{CharHead|Sora|SSBU|hsize=20px}}||rowspan=3|30||16.5||17.2||50.4||80.4 | ||
|- | |- | ||
|{{CharHead|Simon|SSBU|hsize=20px}}||rowspan=2|12||rowspan=2|18||rowspan=2|29||rowspan=2|59 | |||
|- | |- | ||
|{{CharHead|Richter|SSBU|hsize=20px}} | |||
|- | |- | ||
| | |'''71'''||{{CharHead|Ike|SSBU|hsize=20px}}||29.9||16.445||16||31||60.9 | ||
|- | |- | ||
| | |'''72'''||{{CharHead|Banjo & Kazooie|SSBU|hsize=20px}}||29.8||16.39||17.8||{{rollover|20.52556818|19.38284091 for the second air jump.|?}}||{{rollover|69.70840909|2 air jumps. Shock Spring Jump can be used to send the duo higher.|?}} | ||
|- | |- | ||
| | |'''73'''||{{CharHead|Lucas|SSBU|hsize=20px}}||29.41||16.1755||13||44.13||73.54 | ||
|- | |- | ||
| | |'''74'''||{{CharHead|Hero|SSBU|hsize=20px}}||29||15.95||15.5||31||60 | ||
|- | |- | ||
| | |'''75'''||{{CharHead|Mii Swordfighter|SSBU|hsize=20px}}||28.3||15.565||12.3||28.3||56.6 | ||
|- | |- | ||
| | |'''76'''||{{CharHead|Link|SSBU|hsize=20px}}||27.8||15.29||13.38||29||56.8 | ||
|- | |- | ||
| | |'''77'''||{{CharHead|Mr. Game & Watch|SSBU|hsize=20px}}||27.51||15.1305||13.26||27.51||55.02 | ||
|- | |- | ||
| | |'''78'''||{{CharHead|Terry|SSBU|hsize=20px}}||27||14.85||15.2||29||56 | ||
|- | |- | ||
| | |'''79'''||{{CharHead|Byleth|SSBU|hsize=20px}}||26.5||14.575||14||28.5||55 | ||
|- | |- | ||
| | |'''80'''||{{CharHead|Pyra|SSBU|hsize=20px}}||26.3||14.728||15.2||29||55.3 | ||
|- | |- | ||
| | |rowspan=3|'''81-83'''||{{CharHead|Ryu|SSBU|hsize=20px}}||rowspan=3|26||rowspan=3|14.3||rowspan=2|15||rowspan=2|29.5||rowspan=2|55.5 | ||
|- | |- | ||
|{{CharHead|Ken|SSBU|hsize=20px}} | |||
|- | |- | ||
|{{CharHead|Little Mac|SSBU|hsize=20px}}||12.53||26||52 | |||
|- | |- | ||
| | |'''84'''||{{CharHead|Ganondorf|SSBU|hsize=20px}}||25.49||14.0195||12.24||26||51.49 | ||
|- | |||
|'''85'''||{{CharHead|Kirby|SSBU|hsize=20px}}||25.37||13.9535||12.24||{{rollover|21.06378125|21.06378125, 18.528125, 15.931125, 13.34569531, 10.82288281 for each air jump.|?}}||{{rollover|105.0616094|5 air jumps|?}} | |||
|- | |||
|'''86'''||{{CharHead|Snake|SSBU|hsize=20px}}||21.62||11.891||13.69||34.07||55.69 | |||
|- | |||
|'''87'''||{{CharHead|Jigglypuff|SSBU|hsize=20px}}||19.79||10.8845||11.26||{{rollover|24.865587|24.865587, 23.061625, 19.657474, 16.77568, 14.122191 for each air jump.|?}}||{{rollover|118.232559|5 air jumps|?}} | |||
|- | |||
|'''88'''||{{CharHead|Kazuya|SSBU|hsize=20px}}||18||9.9||12||49||67 | |||
|- | |||
|'''89'''||{{CharHead|Steve|SSBU|hsize=20px}}||16.5||9.075||10||22.5||39 | |||
|} | |} | ||
==''Super Smash Bros. for Wii U'' digital manual description== | ==''Super Smash Bros. for Wii U'' digital manual description== | ||
''"Jump by tapping {{Button|Wii U|Control Stick|s=25px}} up or by pressing {{Button|Wii U|X|s=25px}} or {{Button|Wii U|Y|s=25px}}. You can then jump while in midair by tapping {{Button|Wii U|Control Stick|s=25px}} up or tapping {{Button|Wii U|X|s=25px}} or {{Button|Wii U|Y|s=25px}} again."'' | ''"Jump by tapping {{Button|Wii U|Control Stick|s=25px}} up or by pressing {{Button|Wii U|X|s=25px}} or {{Button|Wii U|Y|s=25px}}. You can then jump while in midair by tapping {{Button|Wii U|Control Stick|s=25px}} up or tapping {{Button|Wii U|X|s=25px}} or {{Button|Wii U|Y|s=25px}} again."'' | ||
==Gallery== | |||
<gallery> | |||
Mario Jumping and Landing SSBM.gif|{{SSBM|Mario}} jumping in ''[[Super Smash Bros. Melee]]''. | |||
Mario Backwards jump SSBM.gif|{{SSBM|Mario}} jumping backwards in ''Melee''. | |||
</gallery> | |||
==References== | ==References== | ||
{{reflist}} | |||
*{{Sm|Mew2King}}'s [https://web.archive.org/web/20071012052116/http://hometown.aol.com/oovideogamegodoo/myhomepage/profile.html page of statistics] (archived) | *{{Sm|Mew2King}}'s [https://web.archive.org/web/20071012052116/http://hometown.aol.com/oovideogamegodoo/myhomepage/profile.html page of statistics] (archived) | ||
*[http://www.smashboards.com/showthread.php?t=317385 Aerials reduce jump height] | *[http://www.smashboards.com/showthread.php?t=317385 Aerials reduce jump height] | ||
*[https://docs.google.com/spreadsheets/d/1rwDPL1jhE-KuEbbcBkkTb44z1smJp9rYme_xb4BIJTk vl param (Ultimate)] | |||
==See also== | ==See also== | ||
| Line 753: | Line 982: | ||
*[[Double jump]] | *[[Double jump]] | ||
*[[Triple jump]] | *[[Triple jump]] | ||
[[Category:Game controls]] | [[Category:Game controls]] | ||
[[Category: Character attributes]] | [[Category:Character attributes]] | ||
Latest revision as of 17:18, May 5, 2024


A jump is an action that moves a character from the ground into the air. All characters can also jump a second time in midair, providing they are not attacking, air dodging, helpless, in hitstun, or have used it already. It is performed by pressing up on the control stick (D-pad on a horizontal Wii Remote), or by pressing a certain button, which is by default:
- the C buttons on the Nintendo 64 controller or Wii Remote with Nunchuk
- the X or Y button with the GameCube controller, Classic Controller, 3DS, Wii U Pro Controller/GamePad, Switch Pro Controller, and dual Joy-Cons
- the top and left buttons on a horizontal Joy-Con, which are the positions of Y and B on the right Joy-Con.
A few characters can jump more than once in the air:
- Kirby, Meta Knight, and Jigglypuff can do a midair jump five times.
- King Dedede can do a midair jump four times.
- Pit and Dark Pit can do a midair jump three times.
- Charizard, Ridley, and Banjo & Kazooie can do a mid air jump twice.
- Sephiroth can do a midair jump twice when Winged Form is active.
- In Super Smash Bros. Ultimate, equipping a spirit with the "Additional Midair Jump" effect allows any character to do a midair jump an additional time.
There is a short delay between the jump button being pressed and the on-screen character actually jumping, during which the onscreen character will enter a crouching portion of their jumping animation. If the control stick or jump button is released during this time, then the character short hops. If the control stick is tilted backwards during this time, the character will jump backwards with a different animation than a regular jump. If the standard attack button is pressed during this time, then the character uses their up smash (but only if the jump was executed with the Control Stick). Because characters can jump while shielding (excluding Yoshi in Super Smash Bros. Melee and Super Smash Bros. Brawl, due to his unique shield), this allows usage of up smashes (and up special moves as well) without having to drop the shield. This also makes it difficult for a player using the Wii Remote-only control scheme to perform up tilts. Inputting an aerial on the first frame that a character is airborne will cause the jump to be slightly lower, because gravity applies to the first frame of an aerial but not to the first frame of a jump.
Brawl added a jumping mechanic known as footstools. This allows characters to jump off the heads of other characters. This can be done even when all midair jumps have already been used.
In Ultimate, a character will emit a subtle wispy trail if they have no extra jumps available.
Types of jumpsEdit
All characters can perform several different types of jumps. The most basic type is a standing jump, which is a jump without any other inputs. There are also more complicated jumps that involve other inputs. One of these is the walk jump, which involves jumping while walking or dashing. Another one is the backward jump, which involves the player turning around, but jumping before the fighter can. All jumps have 2 performable variants. The first and most common type is the full hop, which involves the player holding the jump command so the fighter can jump to maximum height. The second type is the short hop, which involves the player quickly tapping the jump command so the fighter will only perform a slight jump. There are also 2 different methods of performing these jumps. The first way is by pressing the jump button. The second way is to press up on the control stick/D-pad. This totals to 12 different ways to jump, with all possible combinations of each having different heights.
SofthopEdit
Softhopping is a technique introduced in Brawl in which a character can perform their grounded full hop within a few frames of running off any platform's edges. With this, the initial jump squat frames of a jump can be bypassed by inputting a jump within 4 frames of running off of an edge.
In Brawl and Smash 4, aside from removing the additional lag from a jump squat, softhops have no special properties when compared to full hops, however they allow the player to initiate the jump from slightly beyond the platform. The potential benefits of performing the technique depends on the fighter, as prior to Ultimate the duration of jump squats vary depending on the fighter.
In Ultimate, softhopping has an additional effect on full hops. Ultimate introduced a mechanic in which the first few frames of a fighter's full hop are sped up, causing them to reach their maximum jump height sooner. Performing a softhop disables this mechanic, causing full hops to behave the same way as midair jumps and full hops prior to Ultimate. This results in fighters taking longer to reach their maximum jump height, but allows them to cover more horizontal distance before beginning to fall, and potentially allows aerials to hit which the user would have otherwise been too high up to connect with by the time the first hitbox comes out, similarly to instant double jumping. Forcing the user to perform a full hop when performing the technique also removes the risk of accidentally performing a short hop, guaranteeing the full damage output of aerials rather than the reduced 0.85× damage from short hops.
Jump squatEdit
A jump squat or windup refers to the length of time between the input of the jump and the moment the character leaves the ground. Each character has a different window of time where they crouch before they jump. Characters with faster jump squats will leave the ground earlier, and can transition between their air and ground games easier; however, depending on the control scheme, the player may find it more technically demanding to perform short hops or up smashes. In Melee, characters with faster jump squats can also perform faster wavedashes, but the window of timing is also reduced, requiring more precise inputs from the player.
Jump squats in Super Smash Bros.Edit
| Rank | Character | Frames |
|---|---|---|
| 1-7 | 3 | |
| 8 | 4 | |
| 9 | 5 | |
| 10-11 | 6 | |
| 12 | 7 | |
| N/A | 8 | |
Jump squats in Super Smash Bros. MeleeEdit
| Rank | Character | Frames |
|---|---|---|
| 1-7 | 3 | |
| 8-15 | 4 | |
| 16-22 | 5 | |
| 23-25 | 6 | |
| N/A | 6 | |
| 7 | ||
| 26 | 8 |
Jump squats in Super Smash Bros. BrawlEdit
The below values apply only to regular brawls; in The Subspace Emissary, all characters jump two frames faster.
| Rank | Character | Frames |
|---|---|---|
| 1-10 | 4 | |
| 11-26 | 5 | |
| N/A | Fighting Alloys | 5 |
| 27-35 | 6 | |
| N/A | Wario-Man | 6 |
| 36-37 | 7 | |
| N/A | Giga Bowser | 7 |
| 38 | 8 | |
| 39 | 9 |
Jump squats in Super Smash Bros. 4Edit
| Rank | Character | Frames |
|---|---|---|
| 1-13 | 4 | |
| 14-41 | 5 | |
| N/A | Giga Mac | 5 |
| Mega Lucario | ||
| 42-51 | 6 | |
| N/A | Wario-Man | 6 |
| 52-57 | 7* | |
| 7 | ||
| N/A | Giga Bowser | 7 |
| 58 | 8 |
*These characters' jumpsquat values are defined as 6 in fighter_param.bin, though they actually end up being 7.
Jump squats in Super Smash Bros. UltimateEdit
Every character has a 3-frame jump squat, with the exception of Kazuya (who has a 7-frame jump squat, though the value is defined as 6 in fighter_param.prc) and Giga Bowser (who has a 15-frame jump squat).
Jump height rankingEdit
Below are characters ranked by the height of their first jump. Jump force is measured in units per frame.
Note that there are two methods to determine jump height, depending on the game.
- In Smash 64, Melee, and Brawl, the game uses jump force, or the speed at which the character leaves the ground. In Smash 64, jump force is calculated at the time of the jump. In Melee and Brawl it is encoded. The resulting jump height is dependent on the character's gravity.
- In Smash 4 and Ultimate, the game encodes jump height, and works backwards using gravity to figure out the correct force to use. This allows more natural behaviour to modifications of jump height from equipment or special moves such as Monado Arts.
- In Ultimate, the game also encodes jump initial height, or the height that a character will reach in the first 4 frames of a full hop. After the first 4 frames, the normal method for Smash 4 will be used with the height being reduced by the initial height. This results in characters moving significantly faster during the beginning of their jump and reaching their peak a few frames sooner. This has no affect on short hops or aerial jumps.
Super Smash Bros.Edit
The jump physics of Smash 64 are significantly different compared to later games. A jump depends on 3 values: the control stick's vertical position (v), the jump multiplier (m), and the jump base (b). The control stick's vertical position is a value between 53-80 (53 is the minimum amount required for a jump and the stick can reach 127, though it is capped at 80). Unlike later games, a character's gravity (g) is also applied on the same frame as a grounded jump. The resulting jump force formula is (v×m)+b-g.
When using the C buttons to jump, the control stick's horizontal position h is used instead of the vertical position. The equivalent vertical position follows the formula v = floor(sqrt(80^2 - h^2)) and "v" has a minimum value 63 and a maximum of 77. The resulting value takes priority over the control stick's actual vertical position.
| Rank | Character | Jump multiplier | Jump base | Min height | Max height |
|---|---|---|---|---|---|
| 1 | 0.7 | 30 | 1038.5 | 1718 | |
| 2 | 1 | 25 | 855.8 | 1569 | |
| 3 | 0.5 | 36 | 996.8 | 1482 | |
| 4 | 0.7 | 20 | 786.8 | 1406 | |
| 5 | 0.47 | 55 | 1024.66 | 1383 | |
| 6 | 0.7 | 26 | 798.2 | 1360 | |
| 7 | 0.67 | 37 | 840.24 | 1323 | |
| 8 | 0.7 | 36 | 798.6 | 1276.8 | |
| 9 | 1 | 23 | 684 | 1275 | |
| 10 | 0.7 | 27.5 | 740.6 | 1249.5 | |
| 11 | 0.6 | 30 | 765 | 1228.8 | |
| 12 | 0.7 | 26 | 706.1 | 1204.5 |
| Rank | Character | Jump multiplier | Jump base | Min height | Max height |
|---|---|---|---|---|---|
| 1 | 0.7 | 30 | 1038.5 | 1718 | |
| 2 | 1 | 24 | 833.8 | 1539 | |
| 3 | 0.5 | 36 | 996.8 | 1482 | |
| 4 | 0.7 | 20 | 786.8 | 1406 | |
| 5 | 0.47 | 55 | 1024.66 | 1383 | |
| 6 | 0.7 | 26 | 798.2 | 1360 | |
| 7 | 0.67 | 37 | 840.24 | 1323 | |
| 8 | 1 | 23 | 684 | 1275 | |
| 9 | 0.6 | 30 | 765 | 1228.8 | |
| 10 | 0.7 | 26 | 706.1 | 1204.5 | |
| 11 | 0.7 | 27.5 | 713 | 1203.5 | |
| 12 | 0.7 | 36 | 749.7 | 1198.8 |
Super Smash Bros. MeleeEdit
In Melee, jump height has been drastically decreased across the cast, with even the third highest full hop height value being lower than the lowest full hop height value in Smash 64.
| Rank | Character | Jump force | Jump height |
|---|---|---|---|
| 1 | 4.1 | 51.5 | |
| 2 | 2.4 | 46.546 | |
| 3 | 3.1 | 38.52 | |
| 4 | 2.7 | 37.8 | |
| N/A | 4.2 | 37.4 | |
| 5 | 2.5 | 35.98 | |
| N/A | 2.5 | 35.98 | |
| 6 | 2.6 | 35.1 | |
| 7 | 2.4 | 35.09 | |
| 8 | 2.5 | 34.857 | |
| 9 | 2.1 | 34.464 | |
| 10 | 2.8 | 34.08 | |
| 11 | 2.3 | 33.408 | |
| 12 | 2.62 | 32.52 | |
| 13-14 | 2.6 | 32.04 | |
| 15 | 2.8 | 31.57 | |
| 16 | 2.2 | 31.36 | |
| 17 | 3.68 | 31.28 | |
| 18 | 2.1 | 31.262 | |
| N/A | 2.1 | 31.262 | |
| 19 | 2.6 | 30.958 | |
| 20 | 2.5 | 29.67 | |
| 21-23 | 2.3 | 29 | |
| 24 | 2.6 | 27.3 | |
| 25 | 2.0 | 26 | |
| 26 | 1.6 | 20.8 |
| Rank | Character | Jump force | Jump height | Difference |
|---|---|---|---|---|
| 1 | 1.7 | 22.75 | 66.01% | |
| 2 | 2.14 | 20.16 | 59.15% | |
| N/A | 1.8 | 18.9 | 52.53% | |
| 3 | 1.6 | 18.337 | 58.66% | |
| N/A | 1.6 | 18.337 | 58.66% | |
| 4 | 1.8 | 18.33 | 52.59% | |
| 5 | 1.6 | 16.8 | 53.57% | |
| 6 | 2.0 | 16.4 | 60.07% | |
| 7 | 1.4 | 14.91 | 32.03% | |
| 8 | 1.9 | 14.85 | 38.55% | |
| 9 | 1.5 | 14.82 | 57.00% | |
| 10-11 | 1.7 | 14 | 43.70% | |
| 12 | 1.5 | 13.995 | 39.88% | |
| 13 | 1.6 | 13.6 | 35.98% | |
| 14 | 1.5 | 13.26 | 36.85% | |
| 15 | 1.4 | 12.654 | 37.88% | |
| 16 | 1.9 | 11.58 | 22.49% | |
| 17-19 | 1.4 | 11.025 | 38.02% | |
| 20-21 | 1.5 | 10.99 | 33.79% | |
| 37.04% | ||||
| 22 | 1.6 | 10.66 | 33.77% | |
| 23 | 2.1 | 10.65 | 34.05% | |
| 24 | 1.5 | 10.626 | 34.32% | |
| 25 | 1.4 | 10.5 | 29.91% | |
| 26 | 1.05 | 9.146 | 43.97% | |
| N/A | 1.6 | 5.95 | 15.91% |
Super Smash Bros. BrawlEdit
| Rank | Character | Jump force | Jump height |
|---|---|---|---|
| N/A | Giga Bowser | 5.5 | 73.85696598 |
| N/A | Wario Man | 3.5 | 66.31680556 |
| 1 | 3.42 | 50.52007143 | |
| 2 | 2.84 | 44.2109595 | |
| 3 | 2.35 | 41.31389423 | |
| 4 | 2.8 | 41.22019565 | |
| 5 | 3.37 | 38.63389 | |
| 6 | 2.25 | 37.82543269 | |
| 7 | 2.2 | 37.6278125 | |
| 8 | 2.82 | 37.31948794 | |
| 9 | 2.34 | 36.10337322 | |
| 10 | 2.45 | 35.83759414 | |
| 11 | 2.8 | 35.35185671 | |
| 12 | 2.05 | 35.21069828 | |
| 13 | 2.35 | 34.69501461 | |
| 14 | 2.25 | 34.48515332 | |
| 15 | 3.55 | 34.25401786 | |
| 16 | 2.48 | 34.11800144 | |
| 17 | 2.45 | 34.09444853 | |
| 18 | 2.16 | 33.66852778 | |
| 19 | 2.04 | 33.6675 | |
| 20 | 2.2 | 33.48017857 | |
| 21 | 2.4 | 33.21906465 | |
| 22 | 2.65 | 32.87722406 | |
| 23 | 2.16 | 32.25446429 | |
| 24 | 2.95 | 32.01240385 | |
| 25 | 2.22 | 31.755375 | |
| 26 | 2.09 | 31.56113619 | |
| 27 | 2.17 | 30.31704167 | |
| 28 | 2.3 | 30.27382666 | |
| 29 | 1.98 | 30.03372278 | |
| 30 | 2.35 | 29.51680556 | |
| 31 | 2.26 | 29.39181256 | |
| 32 | 2.4 | 28.93747301 | |
| 33 | 2.22 | 27.89121324 | |
| 34 | 2.26 | 27.57550702 | |
| 35 | 2.07 | 27.52134994 | |
| 36 | 2.34 | 25.50106535 | |
| 37 | 1.79 | 25.37573975 | |
| 38 | 1.9 | 21.6225 | |
| 39 | 1.44 | 19.79264911 |
NotesEdit
- The Fighting Alloys all share Mario's jump force value of 2.22, just as they share his gravity and jump height.
Super Smash Bros. 4Edit
| Rank | Character | Full Hop | Short Hop | Air Jump | Combined Jump Height |
|---|---|---|---|---|---|
| 1 | 50.506073 | 17.34 | 50.506073 | 101.012146 | |
| 2 | 46 | 22.114738 | 46 | 92 | |
| 3 | 44.5 | 21.354742 | 44.199909 | 88.699909 | |
| 4 | 44 | 19.984556 | 41.305771 | 85.305771 | |
| 5 | 41.208694 | 19.897078 | 41.208694 | 82.417388 | |
| 6 | 40 | 19.370632 | 40 | 80 | |
| 7-8 | 39 | 21.354742 | 42 | 81 | |
| 18.752533 | 40 | 79 | |||
| 9 | 38 | 18.378603 | 38 | 76 | |
| 10 | 37.619999 | 18.193617 | 37.619999 | 75.239998 | |
| 11 | 37.306652 | 17.980684 | 37.306652 | 74.613304 | |
| 12 | 37 | 18 | 37 | 74 | |
| 13 | 36.331814 | 17.539339 | 36.331814 | 72.663628 | |
| 14 | 36.094189 | 17.434723 | 51.560001 | 87.65419 | |
| 15 | 35.900002 | 17.303881 | 35.900002 | 71.800004 | |
| 16 | 35.599998 | 17.179214 | 35.599998 | 71.199996 | |
| 17 | 35.5 | 17.123371 | 35.5 | 71 | |
| 18-20 | 35 | 16.403395 | 37 | 72 | |
| 17 | 35.5 | 70.5 | |||
| 16.887465 | 35 | 70 | |||
| 21 | 34.799999 | 16.887465 | 34.799999 | 69.599998 | |
| 22 | 34.476265 | 16.652296 | 34.476265 | 68.95253 | |
| 23 | 34.400002 | 16.592869 | 34.400002 | 68.800004 | |
| 24 | 34.099998 | 16.477137 | 34.099998 | 68.199996 | |
| 25-26 | 34 | 17.297209 | 35.5 | 69.5 | |
| 16.477137 | 33.799999 | 67.799999 | |||
| 27 | 33.799999 | 16.320242 | 33.799999 | 67.599998 | |
| 28-29 | 33.660133 | 16.263107 | 33.660133 | 67.320266 | |
| 30 | 33.5 | 16.191645 | 33.5 | 67 | |
| 31 | 33.208813 | 16.018034 | 33.208813 | 66.417626 | |
| 32-33 | 33 | 15.699792 | 32.611839 | 65.611839 | |
| 16 | 31 | 64 | |||
| 34 | 32.849998 | 16.019524 | 21.76799763 | 105.6356959 | |
| 35 | 32.799999 | 11.492068 | 32.799999 | 65.599998 | |
| 36-37 | 32.5 | 17 | 32 | 64.5 | |
| 15.689452 | |||||
| 38-40 | 32 | 13.915902 | 20.91375 | 117.3169318 | |
| 15.42625 | 28 | 78 | |||
| 17.539339 | 33.500343 | 65.500343 | |||
| 41 | 31.552761 | 15.239396 | 31.552761 | 63.105522 | |
| 42 | 31.110001 | 17.5 | 58.542999 | 89.653 | |
| 43-44 | 31 | 14.955608 | 23.70148302 | 88.82420216 | |
| 45 | 30.969999 | 13 | 28 | 58.969999 | |
| 46 | 30.5 | 14.699989 | 30.5 | 61 | |
| 47 | 30.025824 | 14.501237 | 30.025824 | 60.051648 | |
| 48 | 29.9 | 16 | 31 | 60.9 | |
| 49 | 29.41 | 13 | 34.48 | 63.89 | |
| 50 | 29.356105712 | 14.171785912 | 29.356105712 | 58.712211424 | |
| 51 | 28.299999 | 15 | 28.299999 | 56.599998 | |
| 52 | 27.799999 | 13.380496 | 29 | 56.799999 | |
| 53 | 27.511969 | 13.261467 | 27.511969 | 55.023938 | |
| 54 | 26 | 12.526741 | 26 | 52 | |
| 55 | 26 | 15 | 29.5 | 55.5 | |
| 56 | 25.488228 | 12.244264 | 26 | 51.488228 | |
| 57 | 25.368114 | 12.241816 | 21.04669712 | 104.9938427 | |
| 58 | 19.786329 | 11.260982 | 24.82302388 | 118.0996838 |
Super Smash Bros. UltimateEdit
The mechanic of "jump initial height" was introduced in Ultimate. This value is the height that a character will reach within the first 4 frames of their full hop (doesn't affect short hops or air jumps). It results in characters being able gain more height in less time compared to Smash 4, often having 1.5-3× the starting speed and reaching the same heights a few frames faster. For most characters the initial height is 0.55× their full hop height, the exceptions being the Ice Climbers at 0.35×, Simon and Richter at 0.4×, and Pyra and Mythra at 0.56×.
| Rank | Character | Full Hop | Initial Height | Short Hop | Air Jump | Combined Jump Height |
|---|---|---|---|---|---|---|
| 1 | 50.51 | 27.7805 | 17.34 | 50.51 | 101.02 | |
| 2 | 46 | 25.3 | 22.11 | 46 | 92 | |
| 3 | 44.5 | 24.475 | 21.35 | 44.2 | 88.7 | |
| 4 | 44 | 24.2 | 19.98 | 41.31 | 85.31 | |
| 5 | 41.21 | 22.6655 | 19.9 | 41.21 | 82.42 | |
| 6 | 40 | 22 | 19.37 | 40 | 80 | |
| 7-8 | 39 | 21.45 | 21.35 | 42 | 81 | |
| 18.75 | 40 | 79 | ||||
| 9 | 38 | 20.9 | 18.38 | 38 | 76 | |
| 10 | 37.62 | 20.691 | 18.19 | 37.62 | 75.24 | |
| 11 | 37.4 | 20.57 | 17.5 | 38.52 | 75.92 | |
| 12 | 37.31 | 20.5205 | 17.98 | 37.31 | 74.62 | |
| 13-14 | 37 | 20.35 | 18 | 37 | 74 | |
| 15 | 36.75 | 20.2125 | 17.43 | 36.02 | 72.77 | |
| 16 | 36.33 | 19.9815 | 17.54 | 36.33 | 72.66 | |
| 17 | 36.09 | 19.8495 | 14.43 | 51.56 | 87.65 | |
| 18 | 35.9 | 19.745 | 17.3 | 35.9 | 71.8 | |
| 19 | 35.6 | 19.58 | 17.18 | 35.6 | 71.2 | |
| 20 | 35.5 | 19.525 | 17.12 | 35.5 | 71 | |
| 21 | 35.35 | 19.4425 | 17.03 | 35.35 | 70.7 | |
| 22-24 | 35 | 19.25 | 16.4 | 37 | 72 | |
| 17 | 35.5 | 70.5 | ||||
| 16.89 | 35 | 70 | ||||
| 25 | 34.69 | 12.1415 | 16.75 | 34.69 | 69.38 | |
| 26 | 34.48 | 18.964 | 16.65 | 45.65 | 80.13 | |
| 27 | 34.4 | 18.92 | 16.59 | 34.4 | 68.8 | |
| 28 | 34.1 | 18.755 | 16.48 | 34.1 | 68.2 | |
| 29-31 | 34 | 18.7 | 14.2 | 25.80013889 | 78.91694444 | |
| 17.3 | 35.5 | 69.5 | ||||
| 16.48 | 33.8 | 67.8 | ||||
| 32 | 33.8 | 18.59 | 16.32 | 33.8 | 67.6 | |
| 33-35 | 33.66 | 18.513 | 16.26 | 33.66 | 67.32 | |
| 36-37 | 33.5 | 18.425 | 16.8 | 33.5 | 67 | |
| 16.19 | ||||||
| 38 | 33.21 | 18.2655 | 16.02 | 33.21 | 66.42 | |
| 39-42 | 33 | 18.15 | 17.54 | 36.33 | 69.33 | |
| 15.7 | 32.61 | 65.61 | ||||
| 13.5 | ||||||
| 16 | 31 | 64 | ||||
| 43 | 32.85 | 18.0675 | 16.02 | 28.50284665 | 107.2471598 | |
| 44 | 32.8 | 18.04 | 11.49 | 32.8 | 65.6 | |
| 45-48 | 32.5 | 17.875 | 14.2 | 34 | 66.5 | |
| 17 | 32.5 | 65 | ||||
| 15.69 | ||||||
| 49 | 32.25 | 17.7375 | 15.58 | 32.25 | 64.5 | |
| 50 | 32.02 | 17.611 | 15.38 | 30.71 | 62.73 | |
| 51-52 | 32 | 17.6 | 13.92 | 20.91375 | 117.3169318 | |
| 15.43 | 28 | 78 | ||||
| 53 | 31.6 | 17.38 | 14.4 | 32.8 | 64.4 | |
| 54 | 31.55 | 17.3525 | 15.24 | 31.55 | 63.1 | |
| 55 | 31.11 | 17.1105 | 17.5 | 57.35 | 88.46 | |
| 56-57 | 31 | 17.05 | 14.96 | 23.70148302 | 88.82420216 | |
| 58-59 | 30.97 | 17.0335 | 13 | 28 | 58.97 | |
| 60 | 30.9 | 16.995 | 14.6 | 32.3 | 63.2 | |
| 61 | 30.8805 | 16.9843 | 13.414592 | 27.785184 | 58.665684 | |
| 62 | 30.8 | 17.248 | 15.6 | 33 | 63.8 | |
| 63 | 30.7 | 16.885 | 16 | 29 | 59.7 | |
| 64-65 | 30.5 | 16.775 | 10 | 34 | 64.5 | |
| 14.7 | 30.5 | 61 | ||||
| 66-67 | 30.03 | 16.5165 | 14.5 | 30.03 | 60.06 | |
| 68-70 | 30 | 16.5 | 17.2 | 50.4 | 80.4 | |
| 12 | 18 | 29 | 59 | |||
| 71 | 29.9 | 16.445 | 16 | 31 | 60.9 | |
| 72 | 29.8 | 16.39 | 17.8 | 20.52556818 | 69.70840909 | |
| 73 | 29.41 | 16.1755 | 13 | 44.13 | 73.54 | |
| 74 | 29 | 15.95 | 15.5 | 31 | 60 | |
| 75 | 28.3 | 15.565 | 12.3 | 28.3 | 56.6 | |
| 76 | 27.8 | 15.29 | 13.38 | 29 | 56.8 | |
| 77 | 27.51 | 15.1305 | 13.26 | 27.51 | 55.02 | |
| 78 | 27 | 14.85 | 15.2 | 29 | 56 | |
| 79 | 26.5 | 14.575 | 14 | 28.5 | 55 | |
| 80 | 26.3 | 14.728 | 15.2 | 29 | 55.3 | |
| 81-83 | 26 | 14.3 | 15 | 29.5 | 55.5 | |
| 12.53 | 26 | 52 | ||||
| 84 | 25.49 | 14.0195 | 12.24 | 26 | 51.49 | |
| 85 | 25.37 | 13.9535 | 12.24 | 21.06378125 | 105.0616094 | |
| 86 | 21.62 | 11.891 | 13.69 | 34.07 | 55.69 | |
| 87 | 19.79 | 10.8845 | 11.26 | 24.865587 | 118.232559 | |
| 88 | 18 | 9.9 | 12 | 49 | 67 | |
| 89 | 16.5 | 9.075 | 10 | 22.5 | 39 |
Super Smash Bros. for Wii U digital manual descriptionEdit
"Jump by tapping ![]() up or by pressing
up or by pressing ![]() or
or ![]() . You can then jump while in midair by tapping
. You can then jump while in midair by tapping ![]() up or tapping
up or tapping ![]() or
or ![]() again."
again."
GalleryEdit
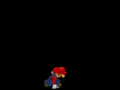
Mario jumping in Super Smash Bros. Melee.
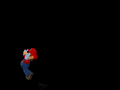
Mario jumping backwards in Melee.

