| “ | The king of Koopas is a destructive heavyweight. | ” |
| Bowser in Super Smash Bros. Brawl | |
|---|---|
 
| |
| Universe | Mario |
| Alternate form | Giga Bowser |
| Other playable appearance | in Melee |
| Availability | Starter |
| Final Smash | Giga Bowser |
| Tier | G (33) |
Bowser (クッパ, Kuppa) is the primary antagonist of the Super Mario series. His Super Smash Bros. series debut was in Super Smash Bros. Melee and he returns in Super Smash Bros. Brawl.
Currently, Bowser is 33rd on the tier list in the low tier, a slight improvement from his bottom tier position in Melee. Compared to his Melee self, Bowser is a faster and much more mobile character, at the expense of slightly less power. Despite the slight power nerf, Bowser is still one of the most powerful characters in Brawl, possessing a moveset full of potential finishers, several of which can even reliably KO under 100%. Along with his trademark power, Bowser is still the heaviest character, with strong momentum cancelling to compliment it, giving Bowser one of the best endurance potentials in Brawl. Additionally, Bowser has a great aerial grab in Flying Slam, that also gives him access to the Koopa hopping technique to improve his mobility and approach, along with great reach throughout his moveset, a 10 frame advantage on grab releases that gives him grab release options on nearly every character, and a powerful, five frame move in Whirling Fortress that can be immediately used out of shield to escape pressure. Despite his speed buffs, Bowser is still one of the slowest characters in Brawl, and he can have a difficult time keeping up with several characters. He is also still one of the largest characters, which combines with his massive weight to make him very vulnerable to combos and chain throws, some of which are infinite or a zero-death. Additionally, Bowser possesses an easily gimpable recovery that gains barely any vertical height, and he lacks an effective projectile, which along with his very large size and not so great movement speed, makes it difficult for Bowser to break opposing camping. His flaws overpower his strengths, resulting in mostly terrible matchups, and when combined with his lack of representation in tournaments, the worst tournament results of any character.
Attributes
In addition to being the largest character model in the game, Bowser is the heaviest playable character in Super Smash Bros. Brawl. This makes him difficult to KO, yet an easier target to hit. Because of his heavy weight, Bowser's recovery has significant horizontal range but marginal vertical movement. He has very poor ground shield game, second slowest roll and slowest spot dodge. He also has the ability to crawl, but due to his large size, it is very inefficient in avoiding incoming projectiles or other attacks. As with other large characters, Bowser's strengths lie in his KO ability and not his speed. He sports a wide variety of powerful attacks both in the air and on the ground. For example, Bowser's forward smash is one of the strongest smash attacks with a high-priority KO move that has such high knockback that it is able to eat through almost any launch resistance frames save for Wario's forward smash, Pikmin Order or Donkey Kong's fully-charged Giant Punch. However, this KO ability comes at the price of high lag, both on startup and ending. Due to his average speed and reliance on power KOs, Bowser can struggle somewhat in the low damage game as he lacks diverse ways of racking up damage on the opponent. This can be remedied with his neutral special, Fire Breath and his advantage of 10 frames when ground releasing and 30 frames when air releasing makes him able to do great chain grabs or combos into his strongest attacks. He can also regrab anyone by ground releasing except Donkey Kong (because of Donkey Kong's unusual short ground release animation). The Fire Breath serves the multiple roles for Bowser such as racking up damage on the opponent as well as preventing an opponent's approach and a functional edge guard. Bowser also has a potent Sacrificial KO, the Flying Slam. This move allows Bowser to grab an opponent, then leap into the air and fall back to the ground with Bowser on top of them. Thus, the opponent will always be KOed first. If this move is used through a Blast Line, both Bowser and the opponent will be KOed. It's also useful in the Classic and All-Star Modes, making for an easy KO when only one opponent is left. Given Bowser's difficulty racking up damage, this can be a useful move when the opponent is far ahead of Bowser in the damage count. However, opponents can control Flying Slam when Bowser is at higher or even equal damage, preventing "Bowsercide", or forcing it. Bowser's standard attack can even cancel out incoming projectiles, including Samus' and Lucario's standard specials. This is effective as it allows the player to conserve Bowser's shield as well as provide quicker reaction times after blocking enemy projectiles.
However, given Bowser's extreme heavy weight and decent falling speed it makes him open for infinite chain grabs like Wario's and King Dedede's. Also, his horizontal recovery, Whirling Fortress, is worse than Donkey Kong's Spinning Kong and gives poor vertical distance, although is a very good Out-of-shield move.
Changes from Melee to Brawl
Bowser has been buffed from Melee to Brawl. He is about the same in speed and slightly stronger. His up aerial is faster, but shorter ranged. His side tilt and up smash both have more range. His side smash now hits twice as well as doing 14% more damage. On the downside, its knockback has decreased slightly, and it does very little damage or knockback if hit from very close or from very far. Bowser's air speed and jump height have both increased. His down smash is much easier to trap with. As for specials, Bowser Bomb hits while leaping upwards and has faster falling speed. Whirling Fortress goes higher in midair, and Fire Breath can be aimed up and down. Lastly (in terms of special moves), Bowser has a new side special move, the Flying Slam. Finally, he now only has 20 frames of lag when he grab releases opponents, giving Bowser the ability to perform grab-release combos.
Bowser's purely cosmetic changes are a new voice actor (Eric Newsome) rather than having recycled voice clips from Super Mario 64, different sounds in his tilts and jab, and more realistic roars (as opposed to his usual cartoonish roars). He also has two new palette swaps: brown and a combination of black and white.
Moveset
- For a visual representation of Bowser's attack hitboxes, see this page.
| Move | Description | Segment | Damage | Angle | Hit Frames | BKB | KBG | WBKB | Type | ||||
| Neutral attack | Double Claw | Two quick claw swipes. Relatively safe move, as the arm Bowser is swiping with is intangible while the hitboxes are out. | Hit 1 | Hand | 5% | 6 | 8 | 0 | 100 | 45 | |||
| Arm | 30 | ||||||||||||
| Shoulder | 18 | ||||||||||||
| Hit 2 | 5% | 18 | 20 | 50 | 100 | 0 | |||||||
| Forward tilt | Backhand Knuckle | Bowser gives a backhanded punch while leaning his body forward. Can be aimed up or down. Has decent KO potential at later percentages. If angled down, has a decent chance of tripping (40%). Bowser's lower arm is intangible while the hitboxes are out. | 11% | 10 | 14 | 45 | 83 | 0 | |||||
| Up tilt | Vertical Claw | Swats the air above him. A decent juggling move. This is also a very powerful KO move and can KO lightweights very early given its surprising speed. Like his forward tilt, Bowser's lower arm cannot be injured while the hitboxes are out. | 12% | 8 | 13 | 55 | 97 | 0 | |||||
| Down tilt | Claw Trip | Claw swipes while crouched. Does two hits; unlike most multi-hit moves, the first hit is the stronger one. High knockback for its kind with speed make this another speedy KO move. Like his neutral combo, the active arm cannot be injured. | Hit 1 | 14% | 10 | 12 | 20 | 100 | 0 | ||||
| Hit 2 | 11% | 20 | 22 | 12 | |||||||||
| Dash attack | Dashing Headbutt | Running headbutt. Has good vertical knockback. Horrid ending lag makes this move easily punishable. | Clean | 11% | 10 | 13 | 120 | 30 | 0 | ||||
| Late | 8% | 14 | 19 | 80 | |||||||||
| Up smash | Shell Slam | Bowser hunkers down on all fours and jumps straight up, hitting with his shell. Hitting with the sides of the attack does less damage. Opponents who only shield his jump may be hit by his landing (this only applies to grounded opponents). Very high knockback. | Hit 1 | Shell | Template:DamageWhenCharged | 16 | 21 | 23 | 80 | 0 | |||
| Head | Template:DamageWhenCharged | 90 | |||||||||||
| Tail | |||||||||||||
| Hit 2 | Shell | Template:DamageWhenCharged | 31 | 60 | 100 | ||||||||
| Head/Tail | Template:DamageWhenCharged | ||||||||||||
| Down smash | Shell Blender | Bowser retracts into his shell and spins around. Multi-hit attack that does up to seven hits. Very high knockback. | Hits 1-6 | Edge | Template:DamageWhenCharged | 14-15, 17-18, 20-21, 23-24, 26-27, 29-30 | 40 | 50 | 0 | ||||
| Near | |||||||||||||
| Hit 7 | Template:DamageWhenCharged | 31 | 140 | ||||||||||
| Forward smash | Horn Lunge | Bowser rears back and then performs a very strong headbutt. This is the most damaging forward smash in the game. If used correctly, the second hit can prevent shield grabbing, as it has 20% extra hitstun. | Hit 1 | Template:DamageWhenCharged | 26 | 30 | 130 | 0 | |||||
| Hit 2 | Body | Template:DamageWhenCharged | 28 | 31 | 25 | 81 | |||||||
| Head | Template:DamageWhenCharged | ||||||||||||
| Neutral aerial | Shell Spin | Bowser spins around inside his shell. Low knockback and very low KO potential. | Clean | 13% | 8 | 13 | 20 | 80 | 0 | ||||
| Late | 9% | 14 | 23 | ||||||||||
| Forward aerial | Air Claw | A rather quick slash forwards. Decent knockback with surprising speed. | Hand | 13% | 8 | 11 | 40 | 80 | 0 | ||||
| Arm | 12% | ||||||||||||
| Shoulder | 11% | ||||||||||||
| Back aerial | Shell Bulge | Bowser thrusts out his shell behind him. High knockback. High ending lag if not auto-cancelled. | Clean | 15% | 9 | 11 | 25 | 83 | 0 | ||||
| Late | 7% | 12 | 15 | 35 | 100 | ||||||||
| Up aerial | Upper Headbutt | Bowser swings his head upward with a little but noticeable startup lag but little ending lag in the air. Very high damage and knockback make it one of the best up aerials in the game power-wise (2nd strongest up air in the game). | Head | 17% | 16 | 20 | 35 | 93 | 0 | ||||
| Down aerial | Inverted Spin | Bowser retracts into his shell and spins himself into the ground. Limited shockwave if hits the ground. The last hit can Meteor Smash, but it's weak and overall not recommended. | Hits 1-8 | 3% | 14-15, 17-18, 20-21, 23-24, 26-27, 29-30, 32-33, 35-36 | 0 | 100 | 10 | |||||
| Hit 9 | 38 | 10 | 100 | 0 | |||||||||
| Landing | 2% | 1 | 3 | 60 | 30 | ||||||||
| Pummel | Headbutt | Hits foe with his head. Very slow pummel. | 3% | 9 | 10 | 0 | 100 | 30 | |||||
| Forward throw | Big Heave | Launches foe forward using his head. Decent knockback, but will rarely KO. | 10% | 36 | 60 | 50 | 0 | ||||||
| Back throw | Big Hurl | Exactly identical to Bowser's forward throw, but has a faster execution. | 10% | 19 | 60 | 50 | 0 | ||||||
| Up throw | Spike Slice | Bowser tosses foe upwards, retreats into his shell, and spins, damaging the foe with his spikes. Decent but set knockback. | Hits 1-8 | 1% | 21-24, 25-28, 29-32, 33-36, 37-40, 41-44, 45-48, 49-53 |
0 | 100 | 0 | |||||
| Throw | 2% | 53 | 0 | 100 | 120 | ||||||||
| Down throw | Flatten | Sets opponent on floor, then flings himself forward, performing a body slam on his opponent. Low knockback even with scaling. The full damage of the attack is also applied to bystanders; the throw itself does no damage. | Hit 1 | 12% | 45 | 0 | 100 | 0 | |||||
| Throw | 0% | 56 | 75 | 30 | |||||||||
| Floor (back) | Claw Spin | Bowser gets up while swinging his hand around. | Hit 1 | 6% | 18 | 19 | 80 | 50 | 0 | ||||
| Hit 2 | 23 | 24 | |||||||||||
| Floor (front) | Worm | Bowser leaps forward to strike with his head, then back to kick behind, and finally up into a standing position. | Hit 1 | 6% | 10 | 11 | 80 | 50 | 0 | ||||
| Hit 2 | 26 | 27 | |||||||||||
| Floor (trip) | Floor Spin | Bowser gets up while facing backwards, and does a claw swipe that brings him facing forward. | Hit 1 | 5% | 19 | 20 | 60 | 50 | 0 | ||||
| Hit 2 | 23 | 24 | |||||||||||
| Edge (<100%) | Quick Spin | Quickly spins onto the stage, then retreats back a bit. | 8% | 8 | 17 | 0 | 100 | 110 | |||||
| Edge (100%+) | Slow Swipe | Slowly climbs onto stage, and does a quick claw jab. | 10% | 46 | 50 | 0 | 100 | 110 | |||||
| Neutral special | Fire Breath | Bowser takes a short breath and lets loose with a stream of fire. | Near | 2% | 1 | 7 | 9 | 30 | 0 | ||||
| Far | 1% | 8 | 5 | 20 | |||||||||
| Side special | Flying Slam | Bowser snatches the opponent and does a massive flying suplex. Enemies in the Subspace Emissary get slashed. Can be used to commit Bowsercide. | Slam (after grabbing) | 18% | 80 | 50 | 0 | ||||||
| SSE slash (ground) | 13% | 8 | 10 | 60 | 80 | ||||||||
| SSE slash (air) | 17 | 19 | |||||||||||
| Up special | Whirling Fortress | Bowser gets into his shell and helicopters around. One of the best out-of-shield moves in the game. | Hit 1 (ground) | 11% | 6 | 7 | 70 | 80 | 0 | ||||
| Hit 2 (ground) | 5% | 8, 12, 16, 20 |
39 | 80 | 50 | ||||||||
| Hit 3 (ground) | 3% | 24, 28, 32, 36 |
50 | ||||||||||
| Hit 1 (air) | 10% | 6 | 7 | 80 | 60 | 0 | |||||||
| Hit 2 (air) | 3% | 8-11, 12-15, 16-19, 20-23, 24-27 | 50 | 20 | |||||||||
| Hit 3 (air) | 2% | 28-31, 32-35, 36-39, 40-43, 44-47 | |||||||||||
| Down special | Bowser Bomb | Bowser leaps into the air and plummets downwards. | Ground hop | 4% | 11 | 0 | 100 | 110 | |||||
| Drop (from ground) | 20% | 38 | 45 | 75 | 0 | ||||||||
| Drop (from air) | 32 | ||||||||||||
| Landing | 11% | 1 | 2 | 60 | 72 | ||||||||
| Final Smash | Giga Bowser | Bowser turns into Giga Bowser. | 60 | ||||||||||
On-screen appearance
- Emerges from a wall of flames.
Taunts
- Up: Throws his head back and roars.
- Side: Snaps furiously forward five times.
- Down: Balances precariously on one leg.
Victory poses
- Steps forward, builds up a little and roars.
- Spins around in his shell and comes out laughing.
- Takes two steps forward while swiping with his claws twice
In Competitive play
Matchups
Trophy

Bowser
"The king of the koopas and Mario's eternal rival. He breathes fire, hurls hammers, attacks from vehicles like the Koopa Clown Car, and uses all sorts of weapons in hopes of destroying Mario. As his size suggests, he's immensely powerful. His son Bowser Jr. is a chip off the old block who spends his time creating trouble for Mario."
 : Super Mario Bros.
 : Super Mario Sunshine
Role in The Subspace Emissary

Bowser first appears after Donkey Kong and Diddy Kong chase down his troops, who had stolen their bananas in order to lure them to him as a trap. Bowser confronts the two and transforms DK into a trophy with a Dark Cannon, but not before DK punches Diddy away. Bowser chases him down, and has a Shadow Bug clone of himself fight Diddy and Fox. After defeating the clone, the real Bowser attempts to turn them into trophies, but they manage to dodge the shot. Although Diddy is eager to fight Bowser, Fox knows that they're no match, so he grabs Diddy and makes their escape. While continuing his chase, he is told by Ganondorf to hunt down King Dedede, who had stolen Wario's trophies. He also transforms Zelda/Peach into a trophy, and after having another Shadowbug clone of him copy her, orders her Shadowbug clone to attack Mario and Pit/Link and Yoshi. Bowser and his troops attack King Dedede's castle, where Dedede is hiding but when they broke the roof a stone fell on Dedede's head, knocking him out. Bowser steals Peach/Zelda's trophy and evades Mario and Pit's attacks, but when he dodges Pit's arrow he falls off a cliff, but is shown to be unharmed after he landed in his Clown Car. After this, he returns to the jungle and transforms Diddy into a trophy and sends his Shadowbug clone to clone the trophy. He flees after Falco Lombardi attacks him and destroys his Dark Cannon. He is next seen with Ganondorf on the Subspace Gunship. They destroy the Halberd, but fail to stop Kirby from destroying the Gunship with a Dragoon. Fleeing into Subspace, Bowser is betrayed by Ganondorf and turned into a trophy by a surprise blast by a Dark Cannon. He is eventually brought back to life, and after being defeated by King Dedede, beats up Ganondorf's trophy for revenge. Bowser then notices the downed Master Hand and decides to help the heroes take down Tabuu. The sight of Master Hand lying on the ground seems to trouble Bowser, probably because Bowser was really the only smasher accomplice who was loyal to Master Hand, unlike Ganondorf (who planned to betray him to take control of the Subspace Army) and Wario (who did it just to enjoy himself).
Exclusive Stickers
These stickers may be used by only Bowser or a select few including Bowser:
- 1-Up Mushroom: [Leg] attack +4
- Bowser (DDR:Mario Mix): [Throwing] attack +20
- Bowser (Mario Kart 64): [Weapon] attack +13
- Bowser (Super Paper Mario): [Arm] attack +23
- Coin: [Specials: Indirect] attack +4
- Dice Block: [Arm] attack +8
- Dr. Mario: [Head] attack +18
- Koopa: [Body, Spin] attack +10
- Lakitu (Mario Kart Super Circuit): [Leg] attack +13
- Luigi & Baby Luigi: Launch power +5
- Luigi (Mario & Luigi: Superstar Saga): Launch power +23
- Mario & Luigi: [Flame] resistance +19
- Mario & Yoshi: [Specials: Indirect] attack +13
- Mario (Mario Kart DS): [Leg] attack +22
- Mega Rush Badge: [Specials: Direct] attack +8
- Mushroom: [Arm, Leg] attack +5
- Peach (Mario Superstars Baseball): [Slash] attack +5
- Peach (Super Mario Bros. 2): Launch resistance +29
- Peach (Super Princess Peach): [Weapon] attack +23
- Rawk Hawk: [Arm] attack +5
- Red Fire: [Flame] attack +26
- Super Mario Bros.: [Arm, Leg] attack +15
- Waluigi (Mario Superstar Baseball): [Specials: Indirect] attack +8
- Waluigi (Super Mario Strikers): [Slash] attack +15
- Yoshi (Mario Party 2): [Launch] resistance +35
- Yoshi (Paper Mario: The Thousand Year Door): [Throwing] attack +5
- Yoshi (Yoshi Touch & Go): [Arm, Leg] attack +8
Costumes
.png)
Trophy gallery
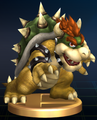
Main (Classic Mode) trophy
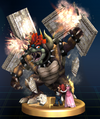
Giga Bowser (Final Smash; All-Star Mode) trophy
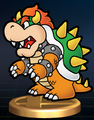
Paper Bowser trophy
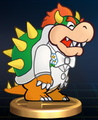
Wedding Bowser trophy


Cheer
- Several deep male voices chanting "Bowww-serrr..."
Trivia
- When Bowser lands, due to his weight, the screen shakes slightly.
- Bowser's voice clip for his Wii Remote selection is a roar taken from the end of a cut scene in Super Mario Sunshine.
- Bowser's animations for being grabbed can cause specific characters' pummels to miss in certain situations, such as when Bowser is on the higher side of a slope. A similar, more common case happens with Samus and Wolf whenever the player controlling them pummels Bowser rapidly.
- Bowser, Link, Luigi, Toon Link, and Yoshi are the only characters to wear their default costumes in team battles when they are on the green team.
- Bowser is currently the lowest ranked Mario character in Brawl. This was also the case in Melee.
- Bowser, Mario, and Ganondorf are the only returning characters in Brawl to have at least one completely different special move. In this case, Bowser's side special is changed.
External links
- Bowser's page at Smash Bros. DOJO!!.
- Bowser character guide at SWF
- Bowser's hitbox size of each of his moves
| Fighters in Super Smash Bros. Brawl | |
|---|---|
| Veterans | Bowser · Captain Falcon · Donkey Kong · Falco · Fox · Ganondorf · Ice Climbers · Jigglypuff · Kirby · Link · Luigi · Mario · Marth · Mr. Game & Watch · Ness · Peach · Pikachu · Samus · Yoshi · Zelda / Sheik |
| Newcomers | Diddy Kong · Ike · King Dedede · Lucario · Lucas · Meta Knight · Olimar · Pit · Pokémon Trainer (Charizard · Ivysaur · Squirtle) · R.O.B. · Snake · Sonic · Toon Link · Wario · Wolf · (Zero Suit Samus) |