Bridge of Eldin
- "Eldin" redirects here. For the South Carolina player, see Smasher:Eldin.
| The Legend of Zelda: Twilight Princess Bridge of Eldin | |
|---|---|
    Bridge of Eldin across the Smash series. | |
| Universe | The Legend of Zelda |
| Appears in | Brawl SSB4 (Wii U) Ultimate |
| Availability | Starter |
| Crate type | Normal |
| Maximum players | 8 |
| Article on Zelda Wiki | Bridge of Eldin |
Bridge of Eldin (オルディン大橋, Oldin Great Bridge) is a stage in Super Smash Bros. Brawl, Super Smash Bros. for Wii U, and Super Smash Bros. Ultimate. It is based off the bridge of the same name. In Ultimate, Ganondorf is fought here for his unlocking battle.
Overview[edit]
Bridge of Eldin is normally completely flat, reaching both side blast lines.
Occasionally, a horn is heard: King Bulblin & Lord Bullbo then ride across the stage, dealing 15% damage and moderate knockback to any fighters with which they collide. They can be attacked, and doing so temporarily removes their hitbox. King Bulblin usually drops a bomb in the middle of the bridge. The bomb explodes shortly thereafter, dealing 30% damage and heavy knockback to nearby fighters, at a deadly semi-spike angle in Brawl, radially away in Smash 4, and diagonally upwards in Ultimate. The bomb also destroys the middle part of the bridge, creating a pit with grabbable edges. After a short while, a Twilight Portal appears in the sky and restores the bridge to its complete state. Fighters trapped inside the bridge upon completion are launched upwards and those under the bridge will be stuck beneath it, with nothing stopping them from falling into the bottom blast line.
A Bulblin may also appear, following behind King Bulblin as he rides through. Unlike King Bulbin, it cannot damage fighters and can actually be stunned if attacked - if damaged enough or caught in the blast of the bomb, it will be knocked off the bridge. In Ultimate, the Bulblin is able to push fighters, potentially pushing them into the bomb.
Starting in Super Smash Bros. 4, the stage's side blast lines and camera limits where moved inwards by 10 units. In Smash 4's 8-Player Smash, King Bulblin does not appear and the bridge is never blown up.
In Ultimate the bomb flashes red while on the bridge, however there is no indication of how long it will take to explode.
Technical details[edit]
For the first 900 frames of a match, no hazards are active. Afterwards, a 600-1200 frame timer is started. There is a 33.33% for King Bulblin to cross the bridge once the timer ends, with the horns playing in the final 180 frames if he is going to cross—if he does not cross, the timer resets. There is a 75% chance for King Bulblin to drop a bomb. If he did not drop a bomb the last two times he crossed, he is guaranteed to drop one. If the bridge is blown up, and both King Bulblin and the regular Bulblin have left the stage, a Twilight Portal will rebuild it after 900-1200 frames.
The hitbox on Lord Bullbo deals 15%, has a radius of 6 units, a launch angle of 35° (
 ) / 65° (
 ), a base knockback (BKB) of 80 () / 60 (), and knockback growth (KBG) of 40 () / 75 (). In for Wii U, the hitbox always launches towards the right regardless of which direction Lord Bullbo is moving unlike the other games. In Ultimate if King Bulblin/Lord Bullbo take damage, the hitbox is briefly swapped with a "windbox" (a non-damaging or flinching hitbox) with a fixed knockback of 30 and radius of 7 units.
The regular Bulblin that crosses has 20 HP. It doesn't have any damaging hitboxes but does have a windbox in Ultimate with a fixed knockback of 20 and radius of 5 units.
The bomb hitbox deals 30%, has a radius of 40 units, a launch angle of 362° () / 65° (), a BKB of 80 () / 60 (), and a KBG of 50. An angle of 362 is intended to launch fighters away radially (e.g. sideways if to the side of it, upwards if above) however in Brawl it always launches at 0°.
The bridge has a hitbox that deals no damage but launches fighters at 90° with a fixed knockback of 100.
Ω form and Battlefield form[edit]
In Super Smash Bros. for Wii U, the Ω form is set on a portion of the bridge that has two columns supporting it that extend below the blast line. Walk-offs and King Bulbin are absent.
In Super Smash Bros. Ultimate, the main platform of the Ω form and Battlefield form are similar to SSB4's Ω form; however, it no longer has two columns supporting it, and it is resized and reshaped to match Final Destination and Battlefield, respectively. The three soft platforms are made of stone and are unique to the Battlefield form.
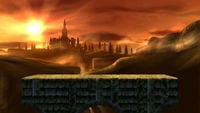 Ω form in Super Smash Bros. for Wii U.
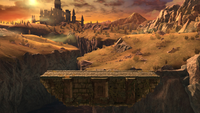 Ω form in Super Smash Bros. Ultimate.
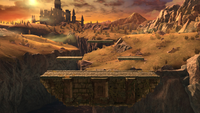 Battlefield form in Super Smash Bros. Ultimate.


Hazards Off[edit]
With stage hazards disabled in Ultimate, King Bulblin does not appear and the bridge is never blown up.
Origin[edit]

This stage is based on the Bridge of Eldin that appears in The Legend of Zelda: Twilight Princess. It is situated over a large canyon with Zora's River running through it, and it connects the northern part of the Eldin Province to the large field in the southern part. After Link traverses the bridge for the first time, a large section of it is teleported away by Twilit Messengers. Later in the game, Link and Midna find the missing piece in the Gerudo Mesa and teleport it back via a Twilight Portal.
Bulblins, a race of goblin-like creatures, are a common enemy in Twilight Princess. Their leader, King Bulblin, is fought several times throughout the game, one of which takes place on the Bridge of Eldin. This stage's sunset setting is a reference to this battle with King Bulbin, which ignores the normal day/night cycle and is always set at sunset; however, the bridge's destruction has nothing to do with King Bulblin in Twilight Princess.
Bomb Barrels appear in several Zelda games, including Twilight Princess, in which they are marked with a large white X. They usually act as damaging hazards, but they are not used by King Bulbin. They also do not generate a large explosion, though The Legend of Zelda: Majora's Mask features a usable version, the Powder Keg, whose powerful explosion can destroy large rocks or walls that block the path.
Tournament legality[edit]
The stage is almost always banned in competitive settings because it is possible to walk off into the blast line, which allows for camping and easy KOs, especially via chain grabs. Because of this, King Dedede and Ice Climbers had disproportionate advantages on this stage. In addition, when the center of the stage is destroyed, players - especially those with great recoveries - can camp by moving from one end to the other.
Glitches[edit]
The Bridge of Eldin is known for various glitches that involve using Final Smashes in the destroyed bridge area as the bridge reforms: these are specific cases of the regenerating terrain glitch, which was fixed in Super Smash Bros. for Wii U.
If a character uses a Final Smash that suspends them in midair - such as Donkey Kong's Konga Beat - while the bridge reforms around them, they'll be able to move inside the bridge until they jump out of it or fall through the bottom. The player can also use Jigglypuff's Final Smash to remain giant - even after the Final Smash is over - by inflating in the broken bridge segment while it is being regenerated. If Yoshi then uses Egg Lay on the giant Jigglypuff, the Pokémon will grow to a size that doesn't fit on the screen. Jigglypuff's hitbox remains its size, making it easy to get KO'd especially after Yoshi's Egg Lay.
Gallery[edit]
Super Smash Bros. Brawl[edit]
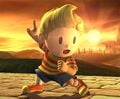 Lucas on the bridge.
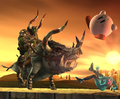 King Bulblin and Lord Bullbo appear on the bridge.
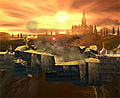 The bridge breaks from a bomb explosion planted by them.
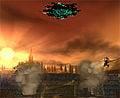 The bridge rebuilds itself.
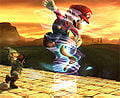 Link throwing the Gale Boomerang at Mario.


Super Smash Bros. Ultimate[edit]
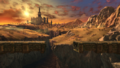 The Bridge of Eldin broken.
 A Twilight Portal repairing the bridge.
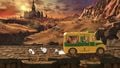 Donkey Kong being taken away by Kapp'n on the stage.


Names in other languages[edit]
| Language | Name | Meaning |
|---|---|---|
 Japanese Japanese |
オルディン大橋 | Oldin Great Bridge |
 English English |
Bridge of Eldin | — |
 French French |
Pont d'Ordinn | Bridge of Ordinn |
 German German |
Brücke von Eldin | Bridge of Eldin |
 Spanish Spanish |
Gran Puente de Eldin | Great Bridge of Eldin |
 Italian Italian |
Il ponte di Oldin | Bridge of Oldin |
 Chinese (Simplified) Chinese (Simplified) |
奥尔汀大桥 | Great Bridge of Oldin |
 Chinese (Traditional) Chinese (Traditional) |
奧爾汀大橋 | Great Bridge of Oldin |
 Korean Korean |
올딘대교 | Oldin Bridge |
 Dutch Dutch |
Eldinbrug | Eldin Bridge |
 Russian Russian |
Мост Элдина | Bridge of Eldin |
 Portuguese Portuguese |
Ponte do Eldin | Eldin's Bridge |
Trivia[edit]
- In the stage's files for Brawl, a model of Colin tied up to a spear, referencing his kidnapping in Twilight Princess, can be seen, but goes unused. The model also has an animated flag, and Colin himself is hidden by other models.[1]
- In Ultimate, Metroids and Devil can only be summoned from an Assist Trophy on the Battlefield and Omega forms of this stage. Additionally, due to being a walk-off stage, Abra can only be summoned from Poké Balls on the stage's Battlefield and Omega forms.
References[edit]
External links[edit]