From SmashWiki, the Super Smash Bros. wiki
Jump to navigationJump to search
Convenient list of all Smash 4 custom moves with their in-game descriptions.
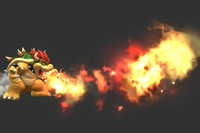
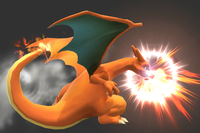
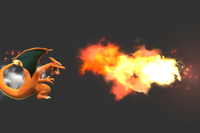
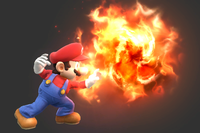
| 1. Fire Breath
|
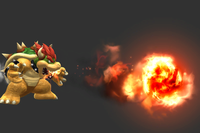
2. Fire Shot
|
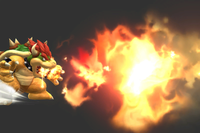
3. Fire Roar
|
|
|
|
|
| "Breathes fire. Power decreases if used too much. You can control the angle a little bit."
|
"Spit out a fireball. Power won't change even if used in rapid succession."
|
"More powerful than Fire Breath, but it runs out quickly and takes longer to recharge."
|
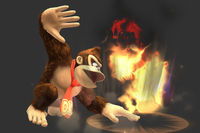
| 1. Flying Slam
|
2. Dash Slam
|
3. Dash Slash
|
|
|
|
|
| "Grab an opponent, jump into the air, and slam them to the ground."
|
"Dash and grab an opponent. The jump isn't high, but there's more sideways movement."
|
"Charge and slash opponents with your claws. Low damage, but high launch power."
|
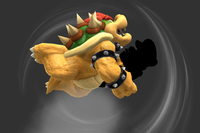
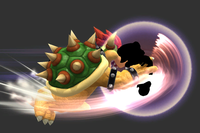
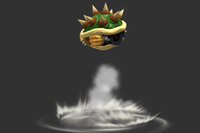
| 1. Whirling Fortress
|
2. Flying Fortress
|
3. Sliding Fortress
|
|
|
|
|
| "Duck inside your shell and spin. You can move sideways while spinning."
|
"Spins high into the air but doesn't deal damage."
|
"Spin while sliding quickly to send opponents flying. Less vertical range."
|
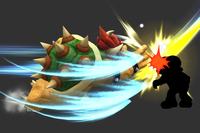
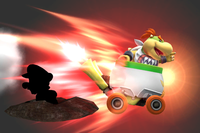
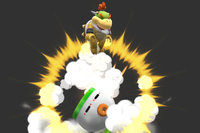
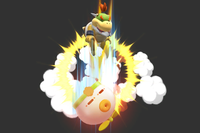
| 1. Bowser Bomb
|
2. Turbulent Bomb
|
3. Slip Bomb
|
|
|
|
|
| "Butt-stomp your enemies. On the ground, you can lift opponents with your horns."
|
"Jump up diagonally, and push opponents with a gust of wind when you land."
|
"Drop down and shake the ground, causing nearby opponents to fall over."
|
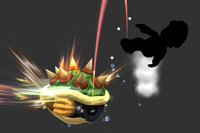
| 1. Clown Cannon
|
2. Piercing Cannon
|
3. Air Cannon
|
|
|
|
|
| "Fire a slow, heavy cannonball. Charge it to boost the cannonball's speed and power."
|
"Fire a smaller, less-powerful cannonball that can bash through multiple fighters."
|
"Blast opponents with wind. In the air, you can also use it to move backward quickly."
|
| 1. Clown Kart Dash
|
2. Koopa Drift
|
3. Grounding Dash
|
|
|
|
|
| "Transform the Junior Clown Car into a kart that speeds forward. Change direction to spin."
|
"While spinning, the kart careens forward, hitting opponents multiple times."
|
"A Clown Kart Dash that buries foes. Doesn't go far, and ends in an auto spin."
|
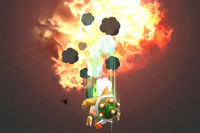
| 1. Abandon Ship!
|
2. Meteor Ejection
|
3. Koopa Meteor
|
|
|
|
|
| "Eject from the Junior Clown Car just before it explodes. You can attack while you fall."
|
"Jump out of the Junior Clown Car, and send it crashing to the ground."
|
"Launch high into the air before the Junior Clown Car explodes, firing you downwards."
|
| 1. Mechakoopa
|
2. Impatient Mechakoopa
|
3. Big Mechakoopa
|
|
|
|
|
| "Deploy a Mechakoopa that will explode if thrown, attacked, or just left alone."
|
"Launch a Mechakoopa a fair distance. It explodes shortly after landing."
|
"A large, powerful Mechakoopa. Walks past enemies, so throw it to make it go boom!"
|
| 1. Falcon Punch
|
2. Falcon Dash Punch
|
3. Mighty Falcon Punch
|
|
|
|
|
| "Charge up for a moment, then strike. The direction can be changed while charging."
|
"Dash forward and punch. Slightly weaker, and you're vulnerable before striking."
|
"A bigger, more powerful Falcon Punch, but the buildup leaves you more open than ever."
|
| 1. Raptor Boost
|
2. Heavy Raptor Boost
|
3. Wind-up Raptor Boost
|
|
|
|
|
| "Dash forward, and uppercut when you reach an opponent."
|
"A dashing punch that's slow but is difficult to interrupt."
|
"Step back before dashing forward. Charges up faster than other moves."
|
| 1. Falcon Dive
|
2. Falcon Strike
|
3. Explosive Falcon Dive
|
|
|
|
|
| "Jump and grab a foe. If you connect with your prey, you'll explode off of them."
|
"Jump higher than the Falcon Dive, but doesn't grab opponents."
|
"Doesn't jump as high as the Falcon Dive, but it's more explosive."
|
| 1. Falcon Kick
|
2. Falcon Kick Fury
|
3. Lightning Falcon Kick
|
|
|
|
|
| "On the ground, does a flying sideways kick. In the air, kicks diagonally downwards."
|
"A Falcon Kick that hits multiple times and can launch opponents at the end."
|
"A quick, electrical flying kick that goes straight through enemies."
|
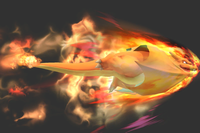
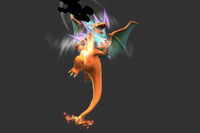
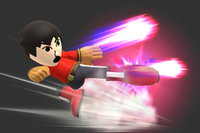
| 1. Flamethrower
|
2. Fire Fang
|
3. Fireball Cannon
|
|
|
|
|
| "Breathe fire on your opponents. Can be aimed slightly. The longer you use it, the weaker it gets."
|
"A short-range fire-breathing attack. Hits quickly and continuously to rack up damage."
|
"Fires distinct balls of fire that travel far but do less damage than Flamethrower."
|
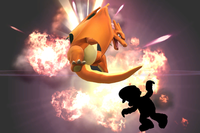
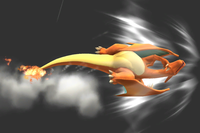
| 1. Flare Blitz
|
2. Blast Burn
|
3. Dragon Rush
|
|
|
|
|
| "Hurtle sideways in an explosive assault. Damages both you and your foes."
|
"Slower but more explosive than Flare Blitz. Deals more damage to you and your foes."
|
"Less powerful than Flare Blitz, but you don't take damage when using it."
|
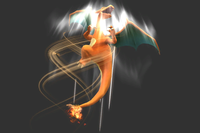
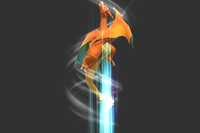
| 1. Fly
|
2. Rising Cyclone
|
3. Fly High
|
|
|
|
|
| "Spiral to the sky. Can hit opponents multiple times while soaring upwards."
|
"The movement distance is reduced, but it sucks in enemies and launches them."
|
"Your flight distance is increased, but you don't deal any damage."
|
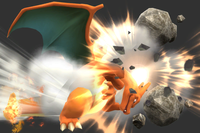
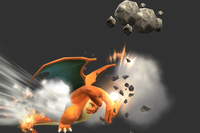
| 1. Rock Smash
|
2. Sinking Skull
|
3. Rock Hurl
|
|
|
|
|
| "Headbutt a rock to send fragments flying. Both the headbutt and the fragments can hurt rivals."
|
"Pound your opponent into the ground, where they will be stuck for a little while."
|
"Similar to Rock Smash. The rocks fly higher, but they cause less damage."
|
| 1. Silver Bow
|
2. Piercing Bow
|
3. Guiding Bow
|
|
|
|
|
| "Fire an arrow of darkness. Stronger than Pit's arrows, but they don't curve as much."
|
"Fire a giant arrow that travels through foes. A powerful shot, but leaves you quite open."
|
"Fire a mystical arrow that can be easily controlled but is slower and less powerful."
|
| 1. Electroshock Arm
|
2. Electrocut Arm
|
3. Quickshock Arm
|
|
|
|
|
| "A steadfast forward charge with a weapon that launches foes diagonally upward."
|
"Ready your weapon, and strike if an enemy comes in range. You won't flinch while readied."
|
"Charge forward with such speed, you won't stop even after delivering an uppercut."
|
| 1. Power of Flight
|
2. Striking Flight
|
3. Breezy Flight
|
|
|
|
|
| "Soar on shining black wings in any upward direction of your choosing."
|
"A takeoff that launches opponents. More restricted in direction than the Power of Flight."
|
"A speedy ascent that causes a gale, pushing back opponents in the vicinity."
|
| 1. Guardian Orbitars
|
2. Impact Orbitars
|
3. Amplifying Orbitars
|
|
|
|
|
| "Summon shields that block attacks and reflect projectiles, but only from the sides."
|
"Summon shields that launch enemies but don't reflect projectiles or block attacks."
|
"Summon shields that are easily broken but boost the power of reflected projectiles."
|
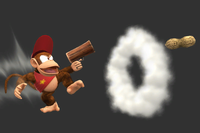
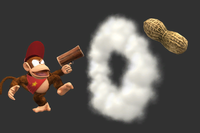
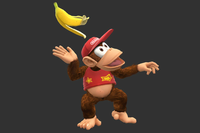
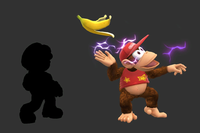
| 1. Peanut Popgun
|
2. Exploding Popgun
|
3. Jumbo Peanuts
|
|
|
|
|
| "Diddy's trusty peanut shooter. Don't charge it for too long, or it'll blow up in your face!"
|
"Charges quickly and explodes, damaging nearby enemies. Doesn't actually fire any peanuts."
|
"Shoot giant peanuts that don't travel as far but pack a real punch."
|
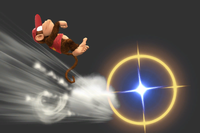
| 1. Monkey Flip
|
2. Back Flip
|
3. Flying Monkey Flip
|
|
|
|
|
| "Leap forward to grab whoever you contact, or press the button again to kick."
|
"A backward leap that switches to a flying forward kick if you press the button again."
|
"A higher jump with a weaker kick, but the grab attack is stronger."
|
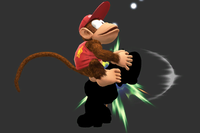
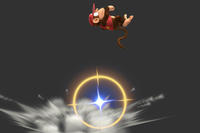
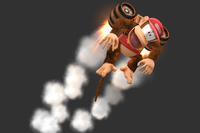
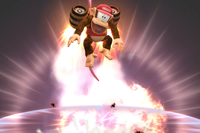
| 1. Rocketbarrel Boost
|
2. Rocketbarrel Attack
|
3. Rocketbarrel Kaboom
|
|
|
|
|
| "Rocket through the air and tackle opponents. Can be charged for extra distance."
|
"Hits harder than Rocketbarrel Boost, but doesn't fly quite as well."
|
"Charges faster and steers better, but you'll explode if you hit terrain."
|
| 1. Banana Peel
|
2. Shocking Banana Peel
|
3. Battering Banana Peel
|
|
|
|
|
| "Throw a banana peel behind you to trip foes. Only one peel can exist at a time."
|
"A banana peel that paralyzes foes. More effective if stepped on."
|
"Throw a banana peel straight up. The peel launches foes straight up, as well."
|
| 1. Giant Punch
|
2. Lightning Punch
|
3. Storm Punch
|
|
|
|
|
| "A mighty punch. Press the button once to charge it, then again to release it."
|
"Charges up much faster, but isn't quite as mighty. Deals electrical damage."
|
"A punch that's not very strong, but it pushes opponents away with a gust of wind."
|
| 1. Headbutt
|
2. Jumping Headbutt
|
3. Stubborn Headbutt
|
|
|
|
|
| "Headbutt opponents in front of you, and bury them if they're on the ground."
|
"Jump up before headbutting. Buries opponents for a shorter time."
|
"A slow but powerful headbutt. Being attacked won't interrupt this move."
|
| 1. Spinning Kong
|
2. Chopper Kong
|
3. Kong Cyclone
|
|
|
|
|
| "A whirlwind of punches. You can move left and right while spinning."
|
"Spin high into the air like a helicopter. Doesn't deal any damage to opponents."
|
"Suck opponents in as you spin, and then launch them with a single punch."
|
| 1. Hand Slap
|
2. Focused Slap
|
3. Hot Slap
|
|
|
|
|
| "Slap the ground to cause shock waves that send opponents into the air."
|
"Smaller shock waves, but opponents will be stunned and sent flying."
|
"Creates flame pillars that can hit airborne fighters."
|
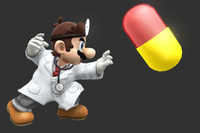
| 1. Megavitamins
|
2. Fast Capsule
|
3. Mega Capsule
|
|
|
|
|
| "Throw a vitamin capsule that bounces off the ground."
|
"Throw a capsule that flies swift and true. Not strong, but easy to use repeatedly."
|
"Throws a large, slow-moving capsule. Short ranged, but hits multiple times."
|
| 1. Super Sheet
|
2. Shocking Sheet
|
3. Breezy Sheet
|
|
|
|
|
| "A sheet that rejects projectiles. Has a short reach but a wide vertical range."
|
"Launch foes with an electrically charged sheet. Can't reflect projectiles, though."
|
"Use your sheet to whip up a gale that damages foes while pushing them back."
|
| 1. Super Jump Punch
|
2. Super Jump
|
3. Ol' One-Two
|
|
|
|
|
| "This rising punch may have no coins involved, but it's extra powerful at the start of the jump."
|
"A slow jump that travels higher. No attack power, but you can move horizontally."
|
"A burning uppercut. Not much height, but causes a powerful explosion at its peak."
|
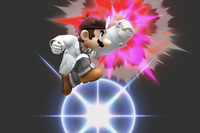
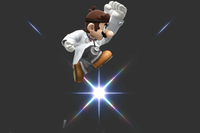
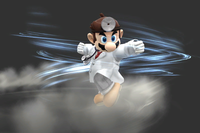
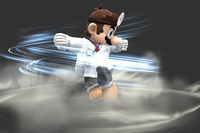
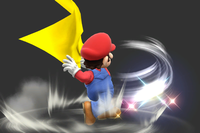
| 1. Dr. Tornado
|
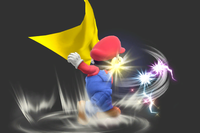
2. Soaring Tornado
|
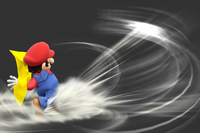
3. Clothesline Tornado
|
|
|
|
|
| "Spins repeatedly. You can move sideways while spinning and press the button repeatedly to rise."
|
"A rapid spin that creates wind and launches foes. Rises high, but can't move very far horizontally."
|
"A spin that launches opponents you collide with. Slow, but has high launching power."
|
| 1. Trick Shot
|
2. High-Explosive Shot
|
3. Zigzag Shot
|
|
|
|
|
| "Kick an explosive can. Press the button to shoot it, bouncing it and boosting its power."
|
"Kick a can into the air more quickly. Explodes as soon as you shoot it."
|
"Kick a can that moves back and forth as you shoot it. The hits knock foes into the air."
|
| 1. Clay Shooting
|
2. Rising Clay
|
3. Clay Break
|
|
|
|
|
| "Toss a clay pigeon. Press the button again to fire a volley of three shots at its position."
|
"Toss a clay pigeon that can't be shot. The farther it goes, the more it hurts."
|
"Toss a clay pigeon that's harder to shoot, but the shots deal more damage."
|
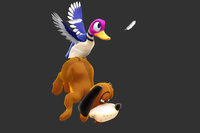
| 1. Duck Jump
|
2. Duck Jump Snag
|
3. Super Duck Jump
|
|
|
|
|
| "Use the duck's wings to fly. You can control which direction you fly in."
|
"The duck flies and the dog bites nearby fighters. You can't fly for long, though."
|
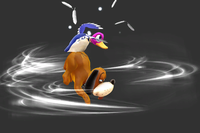
"Fly high into the air, causing a gust of wind that pushes opponents aside."
|
| 1. Wild Gunman
|
2. Quick Draw Aces
|
3. Mega Gunman
|
|
|
|
|
| "Call one of five gunmen who each shoot at different speeds. They can be defeated."
|
"Call one of five gunmen. They fire more quickly, but their shots don't travel very far."
|
"Call a bigger but slower gunman with high defense to aid you."
|
| 1. Blaster
|
2. Explosive Blaster
|
3. Burst Blaster
|
|
|
|
|
| "A blaster shot that can't be fired very rapidly but makes enemies flinch."
|
"Fires a shot that slows down as it travels and explodes just before it stops."
|
"Fires faster shots, but the power and range are decreased."
|
| 1. Falco Phantasm
|
2. Falco Phase
|
3. Falco Charge
|
|
|
|
|
| "Dash forward with incredible speed, knocking opponents into the air."
|
"You can't be hit while dashing, but the move doesn't hit opponents, either."
|
"A shorter dash that hits much harder at the beginning of the move."
|
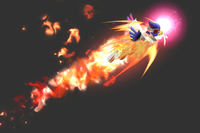
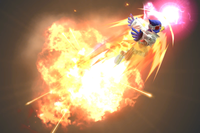
| 1. Fire Bird
|
2. Fast Fire Bird
|
3. Distant Fire Bird
|
|
|
|
|
| "Wrap yourself in flame, and dash through the air in the direction of your choosing."
|
"Same as Fire Bird, but you can dash instantly. You don't go as far, though."
|
"Takes longer to charge, but flies farther and hits enemies harder."
|
| 1. Reflector
|
2. Accele-Reflector
|
3. Reflector Void
|
|
|
|
|
| "Kick out an energy shield that reflects projectiles and deals damage."
|
"Only reflects when moving forward, but sends them back stronger than normal."
|
"Destroys shots rather than reflecting them. The reflector itself does more damage."
|
| 1. Blaster
|
2. Impact Blaster
|
3. Charge Blaster
|
|
|
|
|
| "Rapid-fire lasers that deal damage but don't knock opponents back."
|
"Slower lasers that deal damage and knock opponents back."
|
"Charge up and fire a single, powerful laser. It's slow but deals a lot of damage."
|
| 1. Fox Illusion
|
2. Fox Burst
|
3. Wolf Flash
|
|
|
|
|
| "Dash through opponents at great speed to knock them into the air."
|
"The dash itself deals no damage, but an explosion occurs where you stop."
|
"Dash into the air at an angle. When it hits, it sends opponents crashing downward."
|
| 1. Fire Fox
|
2. Flying Fox
|
3. Twisting Fox
|
|
|
|
|
| "Engulf yourself in flames and rocket skyward. You can change the direction while you're charging."
|
"Sends you high into the air at high speed, but deals no damage."
|
"Spin to pull opponents in, then rise into the air, hitting multiple times on the way."
|
| 1. Reflector
|
2. Big Reflector
|
3. Amplifying Reflector
|
|
|
|
|
| "A shield that reflects projectiles, upping their speed and power."
|
"A larger reflective shield that doesn't power up reflected projectiles."
|
"Sends projectiles back with twice the speed and power, but takes longer to activate."
|
| 1. Warlock Punch
|
2. Warlock Blade
|
3. Warlock Thrust
|
|
|
|
|
| "Channel dark energy into a devastating punch, difficult to interrupt."
|
"Draw a sword and thrust it forward. The blade's tip deals the most damage."
|
"A faster, explosive Warlock Punch. Make sure your fist hits home for max damage."
|
| 1. Flame Choke
|
2. Flame Wave
|
3. Flame Chain
|
|
|
|
|
| "Rush forward to grab an enemy. Grabbed enemies will be thrown straight down."
|
"Dash forward to grab an enemy and blast them into the air into other enemies."
|
"Dash forward and strike enemies repeatedly rather than grab them."
|
| 1. Dark Dive
|
2. Dark Fists
|
3. Dark Vault
|
|
|
|
|
| "Jump up and grab an enemy,and then shock and launch them."
|
"Punch opponents into the air, and then hit them in midair to send them higher."
|
"Jump extra high, but you can only grab at the beginning or end of the attack."
|
| 1. Wizard's Foot
|
2. Wizard's Dropkick
|
3. Wizard's Assault
|
|
|
|
|
| "A magic kick that flies straight when on the ground and diagonally when airborne."
|
"Jump low into the air before doing the flying kick."
|
"A faster flying kick that goes straight through foes. In the air, the kick goes straight down."
|
| 1. Water Shuriken
|
2. Stagnant Shuriken
|
3. Shifting Shuriken
|
|
|
|
|
| "Fire a shuriken of water straight ahead. Charge it up to make the shuriken grow!"
|
"Fires a water shuriken that hovers in place wherever it is created."
|
"Fires two different types of shuriken depending on whether you tap the button or hold it."
|
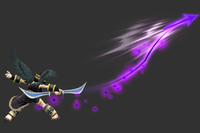
| 1. Shadow Sneak
|
2. Shadow Strike
|
3. Shadow Dash
|
|
|
|
|
| "Send a shadow along the ground. Release the button to warp to that point and strike!"
|
"A slower, more powerful form of Shadow Sneak that delivers a truly decisive blow."
|
"Instantly warp a set distance. Less flexible than the standard Shadow Sneak, but more speedy."
|
| 1. Hydro Pump
|
2. High-Capacity Pump
|
3. Single-Shot Pump
|
|
|
|
|
| "Fire a powerful water jet, propelling you in whichever direction you have pressed."
|
"Fire two jets for a bigger boost. Slower than Hydro Pump, but easier to control."
|
"Rocket skyward with a single short blast. Travels high, but you can't change direction."
|
| 1. Substitute
|
2. Exploding Attack
|
3. Substitute Ambush
|
|
|
|
|
| "Evade an incoming enemy attack by summoning a substitute, and then counterattack."
|
"Vanish momentarily, and then reappear with a powerful explosion. Not a counterattack."
|
"Evade an enemy attack with a substitute, and then launch a slow but extra-powerful counter."
|
| 1. Eruption
|
2. Tempest
|
3. Furious Eruption
|
|
|
|
|
| "Plunge your sword into the ground, triggering a fiery burst. Hurts you when fully charged."
|
"Plunging the sword into the ground creates a wind gust that pushes opponents away."
|
"The eruption covers a wider area the more you charge it, but it also harms you."
|
| 1. Quick Draw
|
2. Close Combat
|
3. Unyielding Blade
|
|
|
|
|
| "Lunge forward and slash at any foe in your path. Can be charged."
|
"A faster forward lunge that ends with a body blow that launches foes."
|
"Grants super armor during the charge and lunge, but the lunge is slower and shorter."
|
| 1. Aether
|
2. Aether Drive
|
3. Aether Wave
|
|
|
|
|
| "Throw your sword up, jump to grab it, and then swing it on the way down."
|
"Throw your sword diagonally up, jump to grab it, and then swing it on the way down."
|
"Creates a shock wave when hitting the ground, but it's less powerful than normal."
|
| 1. Counter
|
2. Paralyzing Counter
|
3. Smash Counter
|
|
|
|
|
| "Block and counter an enemy attack. The strength of your strike depends on their attack."
|
"A counter that paralyzes enemies instead of dealing damage."
|
"Deliver a slower, more powerful attack when countering."
|
| 1. Rollout
|
2. Relentless Rollout
|
3. Raging Rollout
|
|
|
|
|
| "A rolling attack that can be charged to achieve incredible speeds."
|
"An unstoppable rolling attack that keeps going even after bumping into enemies."
|
"A rolling attack that cannot be turned around. When fully charged, it has serious power."
|
| 1. Pound
|
2. Sideways Pound
|
3. Pound Blitz
|
|
|
|
|
| "Step forward and slap your opponent so hard they fly straight into the air."
|
"Slap opponents, and launch them sideways."
|
"A lunging strike that sends you sliding across the ground. Can hit multiple times."
|
| 1. Sing
|
2. Hyper Voice
|
3. Spinphony
|
|
|
|
|
| "A soothing song that causes extreme drowsiness in nearby opponents."
|
"A funky tune that sends opponents reeling backward if they get too close."
|
"A thrilling melody that somehow spins enemies around where they stand."
|
| 1. Rest
|
2. Leaping Rest
|
3. Wakie Wakie
|
|
|
|
|
| "A well-earned nap. Use it while touching a foe to unleash its hidden power."
|
"A well-earned nap… with added altitude. No one will disturb you all the way up there."
|
"A short yet peaceful nap. Oh, and you explode when you wake up. Not so peaceful, I guess."
|
| 1. Inhale
|
2. Dedede Storm
|
3. Taste Test
|
|
|
|
|
| "Inhale opponents and spit them out as stars."
|
"A cyclone from King Dedede's mouth that pulls foes in, hits repeatedly, and launches upward."
|
"Inhale opponents quickly, and spit them out as stars immediately."
|
| 1. Gordo Throw
|
2. Topspin Gordo
|
3. Bouncing Gordo
|
|
|
|
|
| "Throw a Gordo. If opponents attack it with the right timing, they can hit it back."
|
"Throw a Gordo that moves slowly at first, then kicks into high gear after it bounces."
|
"Throw a Gordo that bounces back and forth. Lasts awhile, but each hit doesn't hurt much."
|
| 1. Super Dedede Jump
|
2. Rising Dedede
|
3. Quick Dedede Jump
|
|
|
|
|
| "A big jump, and then a downward crash. Press up to cancel it."
|
"A big jump that attacks on the way up instead of the way down."
|
"A jump and crash that's extra fast but doesn't go as high or hit as hard."
|
| 1. Jet Hammer
|
2. Armored Jet Hammer
|
3. Dash Jet Hammer
|
|
|
|
|
| "You charge it while walking around, but charge it for too long and you'll take damage."
|
"Charging gives you super armor, but charging fully hurts you more. Also deals less damage."
|
"Pushes you backward while charging, and sends you dashing forward when you attack."
|
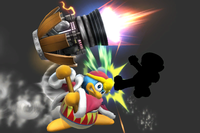
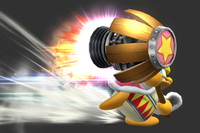
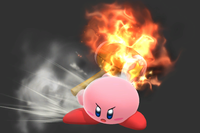
| 1. Inhale
|
2. Ice Breath
|
3. Jumping Inhale
|
|
|
|
|
| "Inhale an opponent. You can then copy one of their abilities or spit them out as a star."
|
"Breathe cold air to freeze nearby opponents."
|
"Leap forward and inhale an opponent. The star you can spit out won't do damage, though."
|
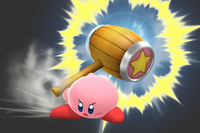
| 1. Hammer Flip
|
2. Hammer Bash
|
3. Giant Hammer
|
|
|
|
|
| "A powerful hammer attack that can launch foes. Dangerous when fully charged."
|
"A hammer swing that sends victims flying skyward. Powerful, but can't be charged."
|
"Swing an enormous hammer. It's slow but deals a lot of damage."
|
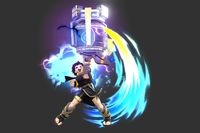
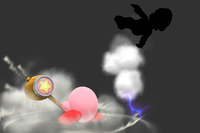
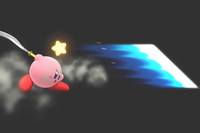
| 1. Final Cutter
|
2. Wave Cutter
|
3. Upper Cutter
|
|
|
|
|
| "Jump high into the air, striking on the way up and down. Creates a shock wave when landing."
|
"Jump high into the air, and then slam down to the ground, sending rocks flying."
|
"Strike powerfully as you rise through the air. You can't attack on the way down."
|
| 1. Stone
|
2. Grounding Stone
|
3. Meteor Stone
|
|
|
|
|
| "Turn into a heavy object and plummet. You'll take no damage while transformed."
|
"Takes longer to transform, but can bury opponents."
|
"Has a meteor effect on foes you hit while falling, but it takes longer to transform back."
|
| 1. Hero's Bow
|
2. Power Bow
|
3. Quickfire Bow
|
|
|
|
|
| "Fires an arrow. The longer you hold the button, the stronger the shot."
|
"Shorter-range arrows, but if you draw the bow fully, they'll deal a hefty blow."
|
"Rapid-fire arrows that can pass through enemies to hit others."
|
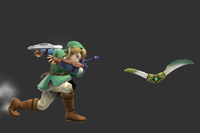
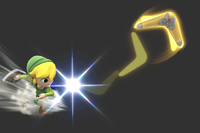
| 1. Gale Boomerang
|
2. Boomerang
|
3. Ripping Boomerang
|
|
|
|
|
| "Deals damage on its way out, and can pull opponents towards you on its way back."
|
"A normal boomerang with good attack power, but it won't pull opponents."
|
"A short-ranged boomerang that passes through opponents, dealing multiple hits."
|
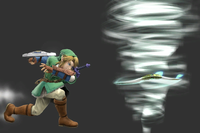
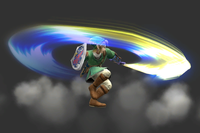
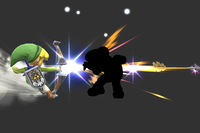
| 1. Spin Attack
|
2. Shocking Spin
|
3. Whirling Leap
|
|
|
|
|
| "Strike opponents while spinning. Acts as a jump if used in midair."
|
"Strong and electrical, but sideways motion is reduced and it leaves you vulnerable."
|
"Sends you soaring high into the air, but doesn't deal any damage to opponents."
|
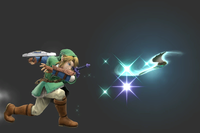
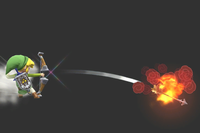
| 1. Bomb
|
2. Giant Bomb
|
3. Meteor Bomb
|
|
|
|
|
| "Pull out a throwable bomb that exploded on impact or when the fuse runs out."
|
"Pull out a huge bomb that makes a huge boom. (Where the heck does Link keep these things?!)"
|
"Pull out a short-fused bomb that has a meteor effect on airborne foes."
|
| 1. Straight Lunge
|
2. Flaming Straight Lunge
|
3. Stunning Straight Lunge
|
|
|
|
|
| "Blast forward with a powerful punch. Press once to charge and again to strike."
|
"Blast forward with a flaming punch that hits multiple times before launching opponents."
|
"Blast through opponents at high speed. Will stun and launch at full charge."
|
| 1. Jolt Haymaker
|
2. Grounding Blow
|
3. Guard Breaker
|
|
|
|
|
| "Leap forward, dodging low attacks, and deliver a punch. Press again to punch early."
|
"Jump high into the air to whack opponents downward and bury them."
|
"A slower but more powerful Jolt Haymaker that can't be blocked by shields."
|
| 1. Rising Uppercut
|
2. Tornado Uppercut
|
3. Rising Smash
|
|
|
|
|
| "Punch upward while twisting into the air. Hits opponents multiple times."
|
"A twisting uppercut that reaches greater heights. Knocks foes away, only hitting them once."
|
"Pop up foes, and then leap up to deliver an extra-powerful punch. Doesn't go very high."
|
| 1. Slip Counter
|
2. Compact Counter
|
3. Dash Counter
|
|
|
|
|
| "Wait for your opponent to attack, and then counter with an uppercut."
|
"A weaker counterattack that doesn't knock foes very far, allowing for easy follow-up combos."
|
"The counter window is shorter, but you dash forward to strike, making it useful at range."
|
| 1. Aura Sphere
|
2. Snaring Aura Sphere
|
3. Piercing Aura Sphere
|
|
|
|
|
| "Charge a ball of energy that can damage foes even while powering up. Press again to launch it."
|
"Charge a slow-moving energy ball that draws opponents in and damages them."
|
"Charge a faster, weaker energy ball that passes through foes."
|
| 1. Force Palm
|
2. Advancing Force Palm
|
3. Long-Distance Force Palm
|
|
|
|
|
| "A punch that unleashes concentrated energy. Will grab an enemy if they're close enough."
|
"Dash forward while using Force Palm. If it doesn't connect, you're left open to attack."
|
"A Force Palm with more range but less damage."
|
| 1. Extreme Speed
|
2. Ride the Wind
|
3. Extreme Speed Attack
|
|
|
|
|
| "A dash through the air that ends in an attack. You can swerve mid-flight with directional input."
|
"Fly through the air longer but slower than Extreme Speed. Doesn't do damage."
|
"Leaves you vulnerable at the start, but sends opponents flying at any point during the attack."
|
| 1. Double Team
|
2. Glancing Counter
|
3. Stunning Double Team
|
|
|
|
|
| "Prepare for an incoming attack, and counterattack with a sliding kick if struck."
|
"Dodge to avoid taking damage, and then immediately strike with a strong punch."
|
"A counter move that can paralyze your opponent if timed correctly."
|
| 1. Shield Breaker
|
2. Storm Thrust
|
3. Dashing Assault
|
|
|
|
|
| "Thrust the sword forward to pierce through shields. Can be charged."
|
"Thrust the sword forward. The tip creates a gust of wind that pushes opponents back."
|
"Thrust while dashing forward. Deals slightly less damage than normal."
|
| 1. Dancing Blade
|
2. Effortless Blade
|
3. Heavy Blade
|
|
|
|
|
| "Attack up to four times. Press up or down to change the combo type."
|
"You can't change the combo type, but you can wait longer between attacks. Lower damage."
|
"Each strike is stronger but launches foes, making it hard to pull off a combo."
|
| 1. Dolphin Slash
|
2. Crescent Slash
|
3. Dolphin Jump
|
|
|
|
|
| "Strike upward with your sword as you rise into the air. Deals most damage at the start."
|
"Rise in an arc while attacking. Deals most damage at the midpoint. Doesn't go as high."
|
"Jump really high, but you won't deal any damage."
|
| 1. Counter
|
2. Easy Counter
|
3. Iai Counter
|
|
|
|
|
| "Prepare for an attack and strike back if hit. The power depends on your enemy's attack."
|
"Your counter stance lasts longer, but the attack power is lower."
|
"A successful counter knocks back opponents behind you. Faster but does less damage."
|
| 1. Fireball
|
2. Bouncing Fireball
|
3. Ice Ball
|
|
|
|
|
| "Throw a fireball straight ahead. It will bounce if it hits a wall or the ground."
|
"Throw a fireball that bounces along the ground. Gradually loses power."
|
"Throw a slow-moving, icy ball at your foes."
|
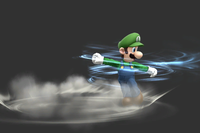
| 1. Green Missile
|
2. Floating Missile
|
3. Quick Missile
|
|
|
|
|
| "A sideways dive that can be charged. It's Luigi, so this move can backfire."
|
"Float sideways in a straight line. Charges quickly, but doesn't do a lot of damage."
|
"Fly faster and farther than normal, sliding across the ground if you miss."
|
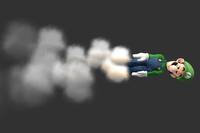
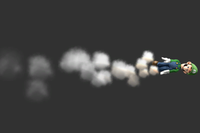
| 1. Super Jump Punch
|
2. Fiery Jump Punch
|
3. Burial Header
|
|
|
|
|
| "Punch up through the air. Stronger at the start of the move."
|
"Easier to get a critical hit at the start, but you don't jump as high."
|
"Can bury opponents on the way down, but no critical hits on the way up."
|
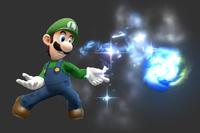
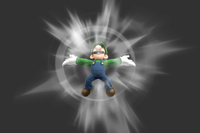
| 1. Luigi Cyclone
|
2. Mach Cyclone
|
3. Clothesline Cyclone
|
|
|
|
|
| "A spinning attack that can be moved sideways. Tap the button quickly to rise."
|
"A spin that pushes opponents. Not much sideways movement, but can rise quite far."
|
"A slow but powerful whirlwind slap that sends opponents flying sideways."
|
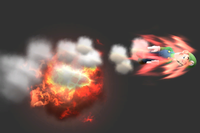
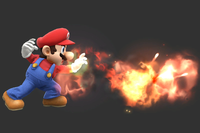
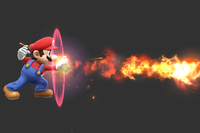
| 1. Fireball
|
2. Fast Fireball
|
3. Fire Orb
|
|
|
|
|
| "Throws a fireball that bounces on the ground."
|
"Throws a faster, slightly weaker fireball straight ahead."
|
"Throws a big ball of fire. Slow, but hits repeatedly before disappearing."
|
| 1. Cape
|
2. Shocking Cape
|
3. Gust Cape
|
|
|
|
|
| "Whips out a cape to spin opponents around and reflect projectiles."
|
"Whips out a cape that zaps opponents. Doesn't reflect projectiles."
|
"Create a gust of wind with low attack power that can push back opponents."
|
| 1. Super Jump Punch
|
2. Super Jump
|
3. Explosive Punch
|
|
|
|
|
| "A rising punch that hits repeatedly."
|
"More jump than the Super Jump Punch, but with none of the punch."
|
"Less jump than the Super Jump Punch, but with an explosive punch at the top."
|
| 1. F.L.U.D.D.
|
2. Scalding F.L.U.D.D.
|
3. High-Pressure F.L.U.D.D.
|
|
|
|
|
| "Blasts opponents with water. It can be charged and aimed at an angle."
|
"Shoots hot water a short distance. Burns opponents on contact."
|
"Takes a while to fully charge, but blasts opponents with torrents of water."
|
| 1. Shield Breaker
|
2. Storm Thrust
|
3. Dashing Assault
|
|
|
|
|
| "Thrust your sword forward. Can be charged. Great for breaking shields."
|
"Thrust your sword forward, creating a gust of wind that knocks opponents back."
|
"Thrust while dashing forward. Deals slightly less damage than normal."
|
| 1. Dancing Blade
|
2. Effortless Blade
|
3. Heavy Blade
|
|
|
|
|
| "Press repeatedly to unleash a sword combo. Press up or down to change the attacks."
|
"You can't change the combo type, but you can wait longer between attacks. Lower damage."
|
"Each strike is stronger but launches foes, making it hard to pull off a combo."
|
| 1. Dolphin Slash
|
2. Crescent Slash
|
3. Dolphin Jump
|
|
|
|
|
| "Strike upward with your sword as you rise into the air. Deals most damage at the start."
|
"Rise in an arc while attacking. Deals most damage at the midpoint. Doesn't go as high."
|
"Jump really high, but you won't deal any damage."
|
| 1. Counter
|
2. Easy Counter
|
3. Iai Counter
|
|
|
|
|
| "Prepare for an attack and strike back if hit. The power depends on your enemy's attack."
|
"Your counter stance lasts longer, but the attack power is lower."
|
"A successful counter knocks back opponents behind you. Faster but does less damage."
|
| 1. Metal Blade
|
2. Hyper Bomb
|
3. Shadow Blade
|
|
|
|
|
| "Metal Man's spinning saw. It goes through foes. The direction it travels can be chosen."
|
"Bomb Man's weapon. Throw bombs in an arc that explode on contact with an opponent."
|
"Shadow Man's spinning blade. It flies a set distance and returns to you."
|
| 1. Crash Bomber
|
2. Ice Slasher
|
3. Danger Wrap
|
|
|
|
|
| "Crash Man's weapon. Fire a bomb that will attach to any opponent in its path and explode."
|
"Ice Man's weapon. Fire an ice projectile that will freeze enemies upon contact."
|
"Burst Man's weapon. Fire an explosive projectile that arcs steeply upward."
|
| 1. Rush Coil
|
2. Tornado Hold
|
3. Beat
|
|
|
|
|
| "Summon your faithful dog, Rush, to propel you to new heights."
|
"Tengu Man's weapon. A tornado-blowing fan sends you hurtling skyward to damage enemies."
|
"Summon the bird-type robot Beat to carry you through the air."
|
| 1. Leaf Shield
|
2. Skull Barrier
|
3. Plant Barrier
|
|
|
|
|
| "Wood Man's rotating shield. It hurts foes who get close. Press again to fire the leaves."
|
"Skull Man's weapon. A rotating barrier of skulls that reflects enemy projectiles."
|
"Plant Man's weapon. The deadly petals provide great protection but don't travel far when fired."
|
| 1. Mach Tornado
|
2. Entangling Tornado
|
3. Dreadful Tornado
|
|
|
|
|
| "Twirl and hit enemies multiple times. Press repeatedly to increase spin."
|
"Pull enemies in, and then hit them straight up into the air."
|
"A more powerful Mach Tornado, but the amount of spins can't be increased."
|
| 1. Drill Rush
|
2. High-Speed Drill
|
3. Shieldbreaker Drill
|
|
|
|
|
| "Spin into opponents with your sword. You can change the angle a bit."
|
"Faster than Drill Rush, but the angle can't be changed."
|
"A Drill Rush designed to break shields. Attack power and distance are reduced."
|
| 1. Shuttle Loop
|
2. Blade Coaster
|
3. Lazy Shuttle Loop
|
|
|
|
|
| "Fly into the air and strike, and then strike again after looping."
|
"Fly forward instead of up. Enemies hit will be launched at a lower angle."
|
"Do a slow loop, and then strike hard while rising quickly."
|
| 1. Dimensional Cape
|
2. Shield Piercer
|
3. Stealth Smasher
|
|
|
|
|
| "Vanish, teleport in any direction, and then attack when reappearing."
|
"The attack penetrates shields, but the power and distance are lower."
|
"Longer travel distance, but you're left vulnerable for longer."
|
| 1. Shot Put
|
2. Ultimate Uppercut
|
3. Exploding Side Kick
|
|
|
|
|
| "This iron ball makes an impact, but it doesn't go very far."
|
"A devastating uppercut charged up with all your might."
|
"A kick so explosive, it'll set the world on fire (or at least your leg)."
|
| 1. Onslaught
|
2. Burning Dropkick
|
3. Headache Maker
|
|
|
|
|
| "Rush forward to deliver a flurry of kicks, and then finish with an uppercut."
|
"A fiery dropkick with decent range. Charge it to really turn up the heat!"
|
"Pummel your foes with a swing of your arms as you descend from a jump."
|
| 1. Soaring Axe Kick
|
2. Helicopter Kick
|
3. Piston Punch
|
|
|
|
|
| "Hit 'em on the way up while flipping, and hit 'em on the way down with an axe kick."
|
"A series of spin kicks delivered while soaring diagonally into the air."
|
"A storm of rising punches, carrying both you and your foes into the air for a high-flying combo."
|
| 1. Head-On Assault
|
2. Feint Jump
|
3. Foot Flurry
|
|
|
|
|
| "Crash headfirst into the ground, burying any foes standing nearby."
|
"An invincible leap out of danger that you can combo into a mighty kick."
|
"A flurry of kicks. On the ground you'll change forward, but in the air you'll stay in place."
|
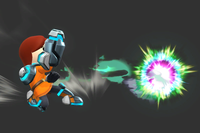
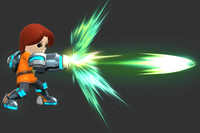
| 1. Charge Blast
|
2. Laser Blaze
|
3. Grenade Launch
|
|
|
|
|
| "A straight plasma shot. Charge it for extra firepower."
|
"A rapid-fire laser beam that will do damage but won't make foes flinch."
|
"A grenade thrown in an arc that explodes on impact."
|
| 1. Flame Pillar
|
2. Stealth Burst
|
3. Gunner Missile
|
|
|
|
|
| "Fire a blast diagonally toward the ground, creating a miniature inferno on impact."
|
"A stealthy shot that explodes when you release the button."
|
"Fires a guided missile. Alternatively, enter the move like a smash attack for a super missile!"
|
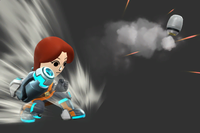
| 1. Lunar Launch
|
2. Cannon Uppercut
|
3. Arm Rocket
|
|
|
|
|
| "Shoot downward, and the recoil will rocket you into the air."
|
"An uppercut powered by a downward blast that can dunk airborne foes."
|
"Take to the sky using jet propulsion. The direction of flight can be adjusted left or right."
|
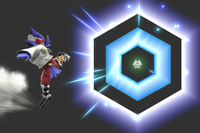
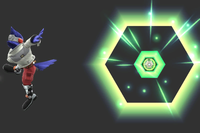
| 1. Echo Reflector
|
2. Bomb Drop
|
3. Absorbing Vortex
|
|
|
|
|
| "Reflects enemy projectiles, sending them back even stronger than they were before."
|
"A thrown bomb that rolls a short distance on the ground."
|
"Sucks in enemy projectiles, forming a barrier that also heals your damage."
|
| 1. Gale Strike
|
2. Shuriken of Light
|
3. Blurring Blade
|
|
|
|
|
| "A blade technique that sends a tornado hurtling forth."
|
"A small throwing weapon made of light that flies straight forward."
|
"A flurry of sword slashes. Charge it longer for extra power."
|
| 1. Airborne Assault
|
2. Slash Launcher
|
3. Chakram
|
|
|
|
|
| "Flip forward to strike a foe, and then rebound off of them."
|
"Rush through anyone in your path, and launch them upward."
|
"A throwing weapon that you can guide with directional inputs."
|
| 1. Stone Scabbard
|
2. Skyward Slash Dash
|
3. Hero's Spin
|
|
|
|
|
| "A high jump followed by a firm downward strike with your sword."
|
"A flurry of slashes that sends you in the direction of your choice."
|
"A spinning sword attack that sends you upward if used in the air."
|
| 1. Blade Counter
|
2. Reversal Slash
|
3. Power Thrust
|
|
|
|
|
| "Counter an enemy attack. The strength of your strike depends on their attack."
|
"Creates a rainbow that reflects projectiles. Can also flip foes around if it hits them."
|
"A high-speed strike that goes forward on the ground and diagonally down in the air."
|
| 1. Chef
|
2. XXL Chef
|
3. Short-Order Chef
|
|
|
|
|
| "Fling inedible food from a frying pan. Hold down the button to fling five foods in a row."
|
"Fling massive food (still inedible). Lower range and slower, but more powerful."
|
"Quickly flings mini bits of food from a frying pan. Lower attack power, but longer range."
|
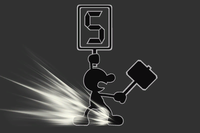
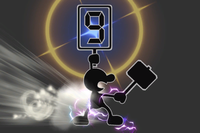
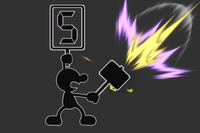
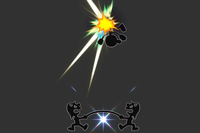
| 1. Judge
|
2. Extreme Judge
|
3. Chain Judge
|
|
|
|
|
| "Swing your hammer. The power changes depending on the number displayed."
|
"Only "1" or "9" will appear, but the latter isn't quite as devastating as usual."
|
"The number shown on the card equals the number of continuous hits dealt."
|
| 1. Fire
|
2. Heavy Trampoline
|
3. Trampoline Launch
|
|
|
|
|
| "Launch into the air and open a parachute, allowing you to glide down."
|
"Lower vertical distance, but you do more damage on the way up."
|
"Launches you and any foes next to you in the air. No parachute included."
|
| 1. Oil Panic
|
2. Efficient Panic
|
3. Panic Overload
|
|
|
|
|
| "Collect energy-based projectiles in a bucket. Once it's full, do the move again to throw oil."
|
"The bucket fills more quickly, but it deals less damage."
|
"The bucket has a smaller absorption area, but the attack area is larger."
|
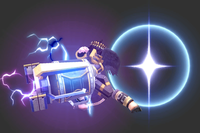
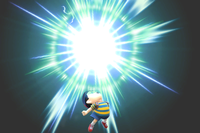
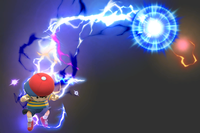
| 1. PK Flash
|
2. Rising PK Flash
|
3. PK Freeze
|
|
|
|
|
| "An electrical blast that explodes after a while or when you release the button."
|
"A PK Flash that just keeps rising. Lower on power and sideways motion."
|
"Like PK Flash, but freezes opponents when it hits."
|
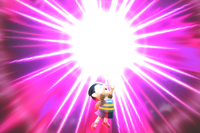
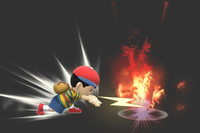
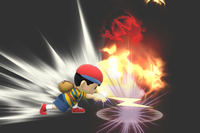
| 1. PK Fire
|
2. PK Bonfire
|
3. PK Fire Burst
|
|
|
|
|
| "A lightning bolt that erupts into a flame pillar when it hits an opponent."
|
"The lightning bolt doesn't travel as far, but the flame pillars stick around longer."
|
"The lightning bolt releases a single flame when it hits. Knocks opponents farther."
|
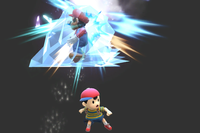
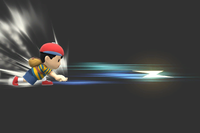
| 1. PK Thunder
|
2. Lasting PK Thunder
|
3. Rolling PK Thunder
|
|
|
|
|
| "Fires a steerable ball of lightning. Hit yourself with it to go flying."
|
"Doesn't disappear when it hits an opponent, but deals less damage."
|
"A more powerful PK Thunder, but the lightning ball moves more slowly."
|
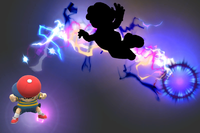
| 1. PSI Magnet
|
2. PSI Vacuum
|
3. Forward PSI Magnet
|
|
|
|
|
| "Create a psychic field that absorbs energy-based projectiles to heal damage."
|
"Pull opponents in, and then deal damage at the end of the move. Does not pull projectiles in."
|
"The field appears in front of you. It can launch foes when vanishing, as well as absorbing projectiles."
|
| 1. Pikmin Pluck
|
2. Hardy Pikmin Pluck
|
3. Explosive Pluck
|
|
|
|
|
| "Pluck a maximum of three Pikmin in this order: red, yellow, blue, white, purple."
|
"Pluck Pikmin that have more durability. It takes longer to pluck them, though."
|
"Trigger an explosive effect when you pluck a Pikmin, but Pikmin are less resilient."
|
| 1. Pikmin Throw
|
2. Sticky Pikmin Throw
|
3. Tackle Pikmin Throw
|
|
|
|
|
| "Throw your Pikmin. Most colors will stick to opponents, but purple Pikmin will slam them."
|
"Throw Pikmin that are harder to shake off, but their attacks do less damage."
|
"All Pikmin will behave like Purple Pikmin: they'll slam into opponents instead of sticking."
|
| 1. Winged Pikmin
|
2. Winged Pikmin Jump
|
3. Mighty Winged Pikmin
|
|
|
|
|
| "Summon winged Pikmin to fly you around. Less effective if you have more Pikmin."
|
"Winged Pikmin pull you straight up very quickly, pushing opponents aside."
|
"You can fly just as far with Pikmin in tow as without, but you can't fly as far to begin with."
|
| 1. Pikmin Order
|
2. Order Tackle
|
3. Dizzy Whistle
|
|
|
|
|
| "Blow your whistle to recall your Pikmin and change their order."
|
"Recalled Pikmin will deal damage when returning, but you're left vulnerable."
|
"Spin nearby opponents around as you recall your Pikmin, but you're left open to attack."
|
| 1. Bonus Fruit
|
2. Freaky Fruit
|
3. Lazy Fruit
|
|
|
|
|
| "Summon a variety of fruit to throw at your foes. Some of them seem a little less edible, though..."
|
"Summon fruit that move in strange and unpredictable ways, or even travel farther."
|
"Summon slow-moving fruit that tend to stick around for quite some time."
|
| 1. Power Pellet
|
2. Distant Power Pellet
|
3. Enticing Power Pellet
|
|
|
|
|
| "Summon a row of Pac-Dots ending in a Power Pellet, and send PAC-MAN on a retro dash."
|
"Summon Pac-Dots that move faster and farther, but your own movement is slower."
|
"Summon a row of Pac-Dots that pull your opponents toward them."
|
| 1. Pac-Jump
|
2. Power Pac-Jump
|
3. Meteor Trampoline
|
|
|
|
|
| "Bounce high into the air with a trampoline that sticks around for a little while."
|
"Summon a trampoline that bounces you higher than usual but doesn't stick around."
|
"Bounces you less high. When it's red, it has a meteor effect and can bury whoever jumps on it."
|
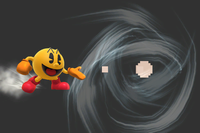
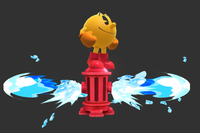
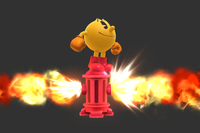
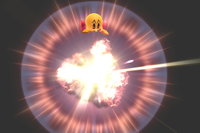
| 1. Fire Hydrant
|
2. On-Fire Hydrant
|
3. Dire Hydrant
|
|
|
|
|
| "Summon a fire hydrant that shoots powerful jets of water that push nearby fighters."
|
"Summon a fire hydrant that unleashes fire instead of water. Careful, it'll hurt you too!"
|
"Summon a fire hydrant that will explode after a while or when it hits the ground."
|
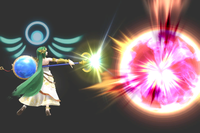
| 1. Autoreticle
|
2. Explosive Flame
|
3. Heavenly Light
|
|
|
|
|
| "Fire energy blasts from your staff directly at an opponent in front of you."
|
"Create a blast in front of you that can hit opponents multiple times."
|
"Surround yourself in rays of light that damage opponents."
|
| 1. Reflect Barrier
|
2. Angelic Missile
|
3. Super Speed
|
|
|
|
|
| "Casts a reflective wall that moves forward for a short distance. Can be used to push rivals."
|
"Hurtle forth and collide with enemies to send them flying."
|
"Dash headfirst into opponents. You can even jump and attack while dashing."
|
| 1. Warp
|
2. Jump Glide
|
3. Rocket Jump
|
|
|
|
|
| "Teleport in any direction. You can't attack or be attacked while warping."
|
"Jump into the air and glide around. Move faster by pressing left or right."
|
"Create an explosion at your feet that blasts you into the air. Also damages opponents."
|
| 1. Counter
|
2. Lightweight
|
3. Celestial Firework
|
|
|
|
|
| "Prepare for an opponent's attack, and strike back when struck."
|
"Makes you lighter and significantly faster, but you'll also be easier to launch as a result."
|
"Shoot a firework into the air. The firework explodes when hit or after a short time."
|
| 1. Toad
|
2. Sleepy Toad
|
3. Grumpy Toad
|
|
|
|
|
| "Use Toad as an unwilling shield. If he gets hit, he spreads spores."
|
"A counter that puts opponents in front of you to sleep. Launches airborne opponents."
|
"Not a counterattack. Releases spores that deal minor damage."
|
| 1. Peach Bomber
|
2. Flower Bomber
|
3. Flying Peach Bomber
|
|
|
|
|
| "Jump sideways and deliver a powerful hip bash."
|
"A hip bash that plants flowers on enemies' heads. If you miss, you're left open to attacks."
|
"Rise into the air and deliver a hip bash. Harder to land, but it's more powerful."
|
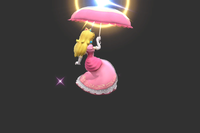
| 1. Peach Parasol
|
2. Parasol High Jump
|
3. Light Parasol
|
|
|
|
|
| "Jump high into the air and open your parasol. Keep it open to slowly float down."
|
"Jump into the air quickly, but you can't open your parasol."
|
"The jump isn't very high, but opening the parasol lifts you a little bit higher."
|
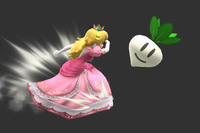
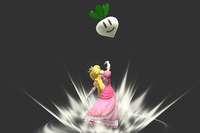
| 1. Vegetable
|
2. Light Veggie
|
3. Heavy Veggie
|
|
|
|
|
| "Pluck a veggie on the ground. The veggie's power depends on its mood."
|
"Pluck a slow-flying veggie from the ground. Can only be used so many times in a row."
|
"Pluck a heavy veggie that doesn't go far but can launch opponents."
|
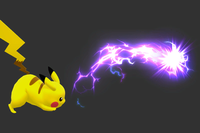
| 1. Thunder Jolt
|
2. Thunder Wave
|
3. Thunder Shock
|
|
|
|
|
| "Send a ball of electricity bouncing along the stage."
|
"The ball of electricity paralyzes foes but does less damage."
|
"Shoot a ball of electricity horizontally. Triggers a small blast as it disappears."
|
| 1. Skull Bash
|
2. Shocking Skull Bash
|
3. Heavy Skull Bash
|
|
|
|
|
| "A flying headbutt that can be charged up."
|
"A flying headbutt that deals multiple hits. The last hit has added launch power."
|
"Dives sideways. Deals more damage if it hits near the start of the attack."
|
| 1. Quick Attack
|
2. Meteor Quick Attack
|
3. Quick Feet
|
|
|
|
|
| "A fast attack in any direction. Change direction midmove to move a second time."
|
"A Quick Attack with a meteor effect. Potent at the start and when changing direction."
|
"Doesn't move twice, but moves much farther than Pikachu's other up specials."
|
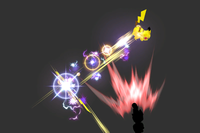
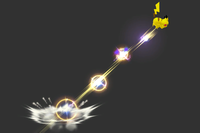
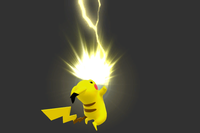
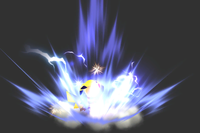
| 1. Thunder
|
2. Thunder Burst
|
3. Distant Thunder
|
|
|
|
|
| "A lightning strike that deals more damage to opponents if the bolt hits you."
|
"An electrical burst around you that sends opponents flying."
|
"The thundercloud will appear higher up. Deal more damage near the cloud."
|
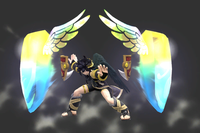
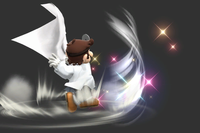
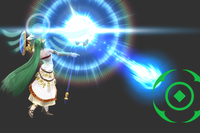
| 1. Palutena Bow
|
2. Piercing Bow
|
3. Guiding Bow
|
|
|
|
|
| "Fire a guidable arrow. While charging, you can aim the bow straight up."
|
"Fire a stronger arrow that can pierce through foes. Charging takes longer. Can't be guided."
|
"Fire an arrow that can be guided much more easily but has less power."
|
| 1. Upperdash Arm
|
2. Interception Arm
|
3. Quickdash Arm
|
|
|
|
|
| "Dash forward and uppercut opponents. Can reflect projectiles."
|
"Acts as a counter, allowing you to uppercut enemies if they try to hit you. No dash."
|
"A faster, longer dash that continues after the uppercut, making it hard to control."
|
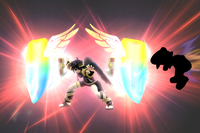
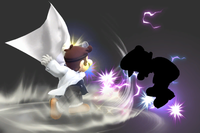
| 1. Power of Flight
|
2. Striking Flight
|
3. Breezy Flight
|
|
|
|
|
| "Fly high through the air. The flight angle can be changed while charging."
|
"The angle of flight can't be controlled as much, but you deal damage at takeoff."
|
"Doesn't fly as far, but creates a whirlwind around Pit that can push enemies away."
|
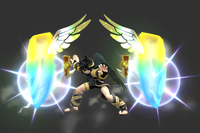
| 1. Guardian Orbitars
|
2. Impact Orbitars
|
3. Amplifying Orbitars
|
|
|
|
|
| "Shields your front and back and reflects projectiles, but you're vulnerable from above."
|
"The Orbitars damage foes and knock them back. Won't shield you or reflect projectiles."
|
"Boosts the power of projectiles it reflects, but the Orbitars can be broken more easily."
|
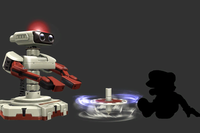
| 1. Robo Beam
|
2. Wide-Angle Beam
|
3. Infinite Robo Beam
|
|
|
|
|
| "Fire a laser beam, but only when the LED on your head is flashing. It can bounce off the floor."
|
"A Robo Beam that can be fired at a wider range of angles but doesn't do quite as much damage."
|
"Never runs out of charge, but isn't as strong as the standard Robo Beam."
|
| 1. Arm Rotor
|
2. Reflector Arm
|
3. Backward Arm Rotor
|
|
|
|
|
| "Hop forward with an arm-spinning attack. Can also be used to reflect projectiles."
|
"A longer arm spin that makes it easier to reflect projectiles. No forward movement."
|
"Spin opponents around while knocking them away. Its slow start leaves you open to attack."
|
| 1. Robo Burner
|
2. Robo Rocket
|
3. High-Speed Burner
|
|
|
|
|
| "Use your thrusters to fly or hover in the air. You can also attack while airborne."
|
"Quickly sends you high into the air. Unable to hover like Robo Burner."
|
"You can fly around faster, but it burns through your fuel more quickly."
|
| 1. Gyro
|
2. Fire Gyro
|
3. Slip Gyro
|
|
|
|
|
| "Fire a spinning top. You can only have one on the stage at a time."
|
"Fire a flaming top. Deals more damage, but doesn't travel as far."
|
"Fire a slippery top that slides across the ground instead of bouncing."
|
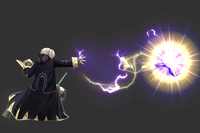
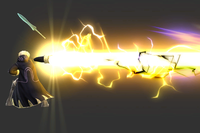
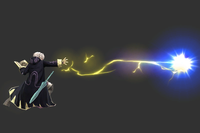
| 1. Thunder
|
2. Thunder+
|
3. Speed Thunder
|
|
|
|
|
| "Lightning magic that can be charged to cast Elthunder, Arcthunder, and Thoron."
|
"Cast stronger lightning magic. Can't be used as many times in a row as Thunder."
|
"Charges and travels faster than Thunder, but isn't quite strong."
|
| 1. Arcfire
|
2. Arcfire+
|
3. Fire Wall
|
|
|
|
|
| "Cast a spell to throw a ball of fire. When it hits, it triggers a pillar of flames."
|
"Cast a spell that causes a large explosion when it lands. Slower to cast than Arcfire."
|
"Cast a giant flame pillar in front of you that can be used to guard against attacks."
|
| 1. Elwind
|
2. Soaring Elwind
|
3. Gliding Elwind
|
|
|
|
|
| "Cast wind magic downward, dealing damage and boosting you into the air twice."
|
"The second Elwind will send you higher than the first."
|
"The first shot sends you up at a forward angle, and then the second fires straight down."
|
| 1. Nosferatu
|
2. Distant Nosferatu
|
3. Goetia
|
|
|
|
|
| "A dark curse that steals the life force of enemies."
|
"Can ensnare opponents farther away, but it's less powerful than normal."
|
"Pulls opponents in before trapping them. No healing effect, but deals more damage."
|
| 1. Luma Shot
|
2. Luma Warp
|
3. Power Luma Shot
|
|
|
|
|
| "Fling Luma forward. Press the button again to call Luma back. This attack can be charged."
|
"Warp Luma forward. What this move lacks in attacking power it makes up for in sheer speed."
|
"Send Luma spinning forward like a drill. He travels slowly but has serious power."
|
| 1. Star Bits
|
2. Floaty Star Bit
|
3. Shooting Star Bit
|
|
|
|
|
| "Command Luma to fire three Star Bits forward. Works at any range."
|
"Luma fires one slower Star Bit that doesn't go far but is good at getting in the way."
|
"Luma fires a single, high-powered Star Bit in a straight line. Travels far."
|
| 1. Launch Star
|
2. Launch Star Plus
|
3. Launch Star Attack
|
|
|
|
|
| "Fly into the air at an angle. You can adjust the angle a bit by pressing left and right."
|
"Sends you skyward quicker, but you can't control the angle of the ascent."
|
"You travel a shorter distance than normal, but hitting opponents will launch them."
|
| 1. Gravitational Pull
|
2. Catch & Release
|
3. Guardian Luma
|
|
|
|
|
| "Draw items and projectiles safely toward you. While being drawn in, they can damage foes."
|
"Pull foes in and damage them. Has no effect on items or projectiles."
|
"Causes Luma to grow bigger and protect you from attacks. Also does a bit of damage."
|
| 1. Charge Shot
|
2. Dense Charge Shot
|
3. Melee Charge Shot
|
|
|
|
|
| "An energy ball that shoots straight. Can be charged and stored for later."
|
"A Charge Shot with even more power, but at the expense of range and speed."
|
"A point-blank Charge Shot that isn't a projectile. Charging expands its range."
|
| 1. Missile
|
2. Relentless Missile
|
3. Turbo Missile
|
|
|
|
|
| "Launch a homing missile. Perform like a smash attack to launch a Super Missile."
|
"Launch a slower, more persistent missile. Also, the Super Missiles decelerate after a bit."
|
"Launch a missile that takes a second to get going. Its direction can be adjusted."
|
| 1. Screw Attack
|
2. Screw Rush
|
3. Apex Screw Attack
|
|
|
|
|
| "Spin into the air. Any opponents caught by the move get hit several times."
|
"Spin forward through the air, launching opponents sideways."
|
"Hits at the start and peak of the jump. The force at the peak can launch foes."
|
| 1. Bomb
|
2. Slip Bomb
|
3. Mega Bomb
|
|
|
|
|
| "Drop a bomb in Morph Ball form. You'll fly upward if you're hit by the explosion."
|
"Drop a bomb that can knock foes over but deals less damage."
|
"Drop a stronger bomb with a longer fuse. Only one can exist at a time."
|
| 1. Needle Storm
|
2. Penetrating Needles
|
3. Paralyzing Needle
|
|
|
|
|
| "Throw needles forward if on the ground and diagonally down if in the air. Can be charged."
|
"Throw needles that go through enemies. You can only throw up to three at a time."
|
"Throw needles that deal slightly less damage but paralyze opponents. Charges more slowly."
|
| 1. Burst Grenade
|
2. Gravity Grenade
|
3. Skimming Grenade
|
|
|
|
|
| "Throw a stealthy grenade that pulls opponents in before exploding."
|
"Has a smaller explosion radius, but foes hit by the burst will be knocked toward you."
|
"Throw a small, bouncing grenade. The longer it takes to explode, the less damage it deals."
|
| 1. Vanish
|
2. Gale
|
3. Abyss
|
|
|
|
|
| "Throw a bomb to the ground and warp in any direction. Deals some damage."
|
"An ultra-swift teleport. No attacking ability at all, but makes up for it in sheer speed."
|
"A stealthy leap that has a meteor effect on any opponents in its path."
|
| 1. Bouncing Fish
|
2. Jellyfish
|
3. Pisces
|
|
|
|
|
| "Flip through the air and strike foes with your heel. If you land the kick, you bounce back."
|
"Flip higher and slam downward with your heel. Land the kick to bounce straight up."
|
"Flip lower and press the button again to kick. Land the kick to bounce forward."
|
| 1. Monado Arts
|
2. Decisive Monado Arts
|
3. Hyper Monado Arts
|
|
|
|
|
| "Activate one of five different Arts, each of which provides a different advantage."
|
"Activate stronger Arts that last longer. However, they can't be canceled once used."
|
"Your Arts are much stronger, but the drawbacks are too. Doesn't last as long."
|
| 1. Back Slash
|
2. Back Slash Leap
|
3. Back Slash Charge
|
|
|
|
|
| "Leap forward to deliver a powerful slash. Attack from behind for massive damage!"
|
"Leap high into the air, and deliver a powerful descending slice."
|
"Leap forward, shrugging off foes' attacks, to deliver a powerful slash."
|
| 1. Air Slash
|
2. Advancing Air Slash
|
3. Mighty Air Slash
|
|
|
|
|
| "Lift enemies into the air with a rising slash. Can be followed up with a midair strike."
|
"Slash upward and launch foes diagonally. Press again to deliver a second strike."
|
"A more focused version of the standard Air Slash. Sacrifices range for sheer brute force."
|
| 1. Vision
|
2. Dash Vision
|
3. Power Vision
|
|
|
|
|
| "Evade an incoming enemy attack, and deliver a swift counterattack."
|
"Counter an enemy's incoming attack while moving swiftly past them."
|
"An extra-powerful counter that's much less effective when used repeatedly."
|
| 1. Homing Attack
|
2. Stomp
|
3. Surprise Attack
|
|
|
|
|
| "Jump into the air, and then home in on the closest fighter (if there's one in range)."
|
"Jump into the air before slamming straight down with a meteor smash."
|
"A faster Homing Attack with less range and power than normal."
|
| 1. Spin Dash
|
2. Hammer Spin Dash
|
3. Burning Spin Dash
|
|
|
|
|
| "Roll forward at high speed. You can charge it, change the direction, and link to other attacks."
|
"Starts with a huge hop that buries any foes it hits. Slightly weaker than Spin Dash."
|
"A more powerful Spin Dash with no hop at the start. Jumps during the dash are lower."
|
| 1. Spring Jump
|
2. Double Spring
|
3. Springing Headbutt
|
|
|
|
|
| "Spawns a spring. When used on the ground, it sticks around and can be used by anyone."
|
"Doesn't spring as high, but the move can be used twice in a row without landing."
|
"Spring straight up and deliver a headbutt. The spring doesn't stick around, though."
|
| 1. Spin Charge
|
2. Auto-Spin Charge
|
3. Gravitational Charge
|
|
|
|
|
| "A forward dash that can be powered up by rapidly pressing the special-move button."
|
"A Spin Charge that can be powered up simply by holding the button."
|
"Foes in front are pulled in while foes behind are pushed. Takes more button presses to power up."
|
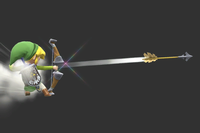
| 1. Hero's Bow
|
2. Fire Arrow
|
3. Piercing Bow
|
|
|
|
|
| "Fire an arrow with your bow. Charge it up for more power and range."
|
"Sets fire to the ground where the arrow lands, but the range is reduced."
|
"Fires a piercing bow at high speed. Does less damage than normal arrows."
|
| 1. Boomerang
|
2. Floating Boomerang
|
3. High-Speed Boomerang
|
|
|
|
|
| "Deals damage on its way out and on its way back. Can be thrown diagonally."
|
"Throw a boomerang that's slow to return. It'll vanish if it hits anything on its way back."
|
"Throw a high-speed boomerang that passes through fighters. Deals less damage than normal."
|
| 1. Spin Attack
|
2. Sliding Spin Attack
|
3. Flying Spin Attack
|
|
|
|
|
| "Spin with your sword. Can hit opponents more than once and can be charged."
|
"Slide forward while spinning. If used in the air, you'll move more sideways than up."
|
"A spin attack that ends in an upwards slash, sending both you and the slashee into the air."
|
| 1. Bomb
|
2. Time Bomb
|
3. Short-Fused Bomb
|
|
|
|
|
| "Pull out a throwable bomb. It'll explode after a while or when it hits something."
|
"The bomb only explodes when its fuse runs out. Does less damage but launches foes."
|
"A powerful bomb with a very short fuse. The explosion sends fighters flying upward."
|
| 1. Pocket
|
2. Garden
|
3. Pocket Plus
|
|
|
|
|
| "Pocket an item or projectile to use later. Press the button again to take it back out."
|
"You can only pocket items in front of you, but it can hit foes and plant flowers on their heads."
|
"Stash items and projectiles more easily, but they become slightly less effective."
|
| 1. Lloid Rocket
|
2. Liftoff Lloid
|
3. Pushy Lloid
|
|
|
|
|
| "Fire Lloid forward like a rocket. Hold the button to ride on top of Lloid."
|
"Fire Lloid forward, but he'll soon shoot up into the air, letting you ride to great heights!"
|
"Lloid will hit opponents multiple times, pushing them before exploding."
|
| 1. Balloon Trip
|
2. Extreme Balloon Trip
|
3. Balloon High Jump
|
|
|
|
|
| "Fly around at an average speed with great horizontal and vertical recovery, but the balloons can be popped."
|
"Fly using special balloons that don't rise as fast but cause an explosion when they burst."
|
"Rise quickly to an incredible height. Any foes in the way will get hit and take damage."
|
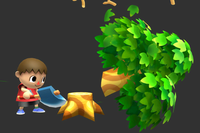
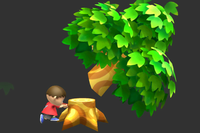
| 1. Timber
|
2. Timber Counter
|
3. Super Timber
|
|
|
|
|
| "Plant a seed, water it, and chop the tree down. Each step has a different effect on foes."
|
"A fresh sprout trips opponents, and the fully grown tree fights back if attacked!"
|
"Slower but stronger. Use lots of water to grow a huge tree. The axe has high launching power."
|
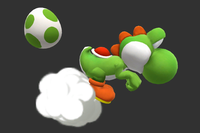
| 1. Chomp
|
2. Inhaling Chomp
|
3. Garlic Breath
|
|
|
|
|
| "A big, toothy bite that can be used to eat enemies, projectiles and items."
|
"Pull enemies in, and then bite down. Slightly less powerful than normal."
|
"Wario's breath is rancid enough to cause enemies to fall over and pass out. Ugh."
|
| 1. Wario Bike
|
2. Speeding Bike
|
3. Burying Bike
|
|
|
|
|
| "Ride around on a bike and crash into enemies. Takes some time to recharge."
|
"The bike is faster and lighter, but it does less damage and falls apart easier."
|
"The bike is slower and heavier. Run over enemies to bury them."
|
| 1. Corkscrew
|
2. Widescrew
|
3. Corkscrew Leap
|
|
|
|
|
| "Jump while spinning, hitting opponents multiple times."
|
"Less damage than Corkscrew, but you can change the angle."
|
"Takes longer to charge and doesn't deal damage, but goes much higher."
|
| 1. Wario Waft
|
2. Rose-Scented Waft
|
3. Quick Waft
|
|
|
|
|
| "Release noxious gas from your rear end. It, uh... "charges" automatically."
|
"Release noxious gas that makes flowers grow on opponents' heads."
|
"The noxious gas charges more quickly, but it's less offensive."
|
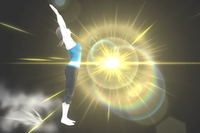
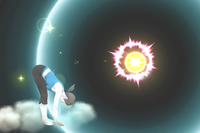
| 1. Sun Salutation
|
2. Enriched Sun Salutation
|
3. Sweeping Sun Salutation
|
|
|
|
|
| "Charge a ball of energy. Press again to launch it. Heals you slightly when fully charged."
|
"Charge a ball of energy that condenses while charging. Press again to launch it. Won't heal."
|
"The energy ball travels slowly but hits foes multiple times, pushing them away."
|
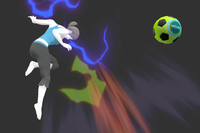
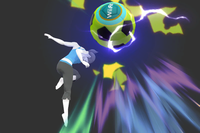
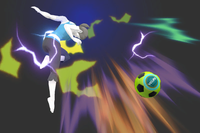
| 1. Header
|
2. Huge Header
|
3. Weighted Header
|
|
|
|
|
| "Head a soccer ball at opponents. Press the button again to head the ball early."
|
"Head a larger ball that's slightly slower and less powerful but easier to hit with."
|
"Head a heavy ball that's more powerful but quick to drop to the ground."
|
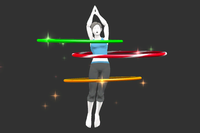
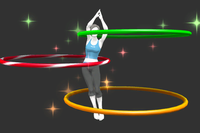
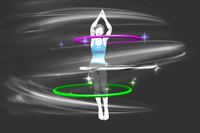
| 1. Super Hoop
|
2. Jumbo Hoop
|
3. Hoop Hurricane
|
|
|
|
|
| "Gyrate into the air, striking opponents. Press rapidly to go higher."
|
"Gyrate into the air with larger hoops that deal damage over a wider area. Can't go as high."
|
"Pull in opponents while rising, and then knock them upward with the hoops."
|
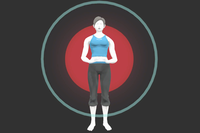
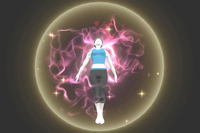
| 1. Deep Breathing
|
2. Volatile Breathing
|
3. Steady Breathing
|
|
|
|
|
| "Press the button at the right time to heal and boost your launching power."
|
"A forbidden breathing method that causes an explosion. Doesn't heal or power you up."
|
"If successful, you're briefly impossible to launch. Takes a while to use again, though."
|
| 1. Egg Lay
|
2. Lick
|
3. Egg Launch
|
|
|
|
|
| "Grab an opponent with your tongue, swallow them, and turn them into an egg."
|
"Jump forward and attack with your tongue. Surprisingly effective."
|
"Turn a foe into an egg and launch them. This egg is easier to break out of."
|
| 1. Egg Roll
|
2. Heavy Egg Roll
|
3. Light Egg Roll
|
|
|
|
|
| "Turn into an egg and roll into enemies. You can jump once while in the egg."
|
"Slow, but deals a lot of damage when you roll into opponents."
|
"A bouncing version of Egg Roll. Doesn't last very long."
|
| 1. Egg Throw
|
2. High Jump
|
3. Timed Egg Throw
|
|
|
|
|
| "Lob an egg. You can set the angle of the throw with directional inputs."
|
"Jump really high. In midair, you can use the move more than once."
|
"Lob an egg that goes right through opponents as it flies and then explodes."
|
| 1. Yoshi Bomb
|
2. Star Bomb
|
3. Crushing Bomb
|
|
|
|
|
| "Jump up quickly and slam to the ground, shooting stars out left and right."
|
"Deals less damage with the bombing motion, but the stars are powerful and fly far."
|
"A full-power slam attack. So powerful, in fact, that the stars forget to fly out."
|
| 1. Nayru's Love
|
2. Nayru's Rejection
|
3. Nayru's Passion
|
|
|
|
|
| "Envelop yourself in a crystal that deals damage and reflects projectiles."
|
"Similar to Nayru's Love, but instead of hitting the opponent, it spins them around."
|
"Spin to pull opponents in, and then deal fire damage. Won't reflect projectiles."
|
| 1. Din's Fire
|
2. Din's Flare
|
3. Din's Blaze
|
|
|
|
|
| "Fire magic that explodes after a time or when the button is released."
|
"Travels farther, but can't be aimed up or down. Damage is the same at all distances."
|
"A steady fireball that floats in the air and explodes after a bit."
|
| 1. Farore's Wind
|
2. Farore's Squall
|
3. Farore's Windfall
|
|
|
|
|
| "Teleport in any direction. Deals damage when disappearing and reappearing."
|
"Teleporting doesn't deal damage, but a gust of wind will push foes away."
|
"Will only teleport upward, but foes hit when reappearing are meteor smashed."
|
| 1. Phantom Slash
|
2. Phantom Breaker
|
3. Phantom Strike
|
|
|
|
|
| "Summon a Phantom that slashes foes in front of you. Can be charged."
|
"The Phantom travels a set distance and wears down enemy shields rapidly."
|
"The summoned Phantom strikes harder than normal but will not move forward much."
|
| 1. Paralyzer
|
2. Blast Shot
|
3. Electromagnetic Net
|
|
|
|
|
| "Fire an energy blast that stuns enemies. Can be charged."
|
"Shoot farther and faster than normal, but it's slightly less powerful and won't stun."
|
"The energy blast expands after being fired, but it has reduced range."
|
| 1. Plasma Whip
|
2. Plasma Dash
|
3. Whip Lash
|
|
|
|
|
| "Attack foes with an energy whip. Can also be used to grab on edges."
|
"A dashing strike with your gun. Doesn't use the whip, so it can't grab to edges."
|
"Knock foes toward you with the very end of the whip. The rest of the whip does nothing."
|
| 1. Boost Kick
|
2. Impact Kick
|
3. Lateral Kick
|
|
|
|
|
| "Rise into the air, striking multiple times, and then finish with a spinning kick."
|
"Kick opponents into the air, and then finish with a powerful spinning kick."
|
"Lift opponents into the air at an angle, and then dash forward with a spinning kick."
|
| 1. Flip Jump
|
2. Shooting Star Flip Kick
|
3. Low Kick
|
|
|
|
|
| "Flip through the air. If you land on an opponent, they'll be buried in the ground."
|
"The flip itself doesn't attack, but press the button again to do a descending kick."
|
"A flip that doesn't go very high but quickly covers a lot of ground."
|