Shield jump: Difference between revisions
(Not sure where these values came from, some I can see as floating point errors but some are completely wrong. Greninja goes much higher than Lucario and ZSS goes higher than Samus. Values taken from the Smash 4 param spreadsheet) |
(Ultimate values) |
||
| Line 1: | Line 1: | ||
{{ArticleIcons|series=y|unofficial=y}} | {{ArticleIcons|series=y|unofficial=y}} | ||
:''Not to be confused with [[Shield break jump]], or jump [[out of shield]].'' | :''Not to be confused with [[Shield break jump]], or jump [[out of shield]].'' | ||
{{technical data|Needs values for 64, Melee, Brawl | {{technical data|Needs values for 64, Melee, and Brawl}} | ||
[[File:King Dedede Shield Jump Brawl.png|thumb|250px|{{SSBB|King Dedede}} breaking his shield, causing a shield jump in ''Brawl''.]] | [[File:King Dedede Shield Jump Brawl.png|thumb|250px|{{SSBB|King Dedede}} breaking his shield, causing a shield jump in ''Brawl''.]] | ||
'''Shield jump''' is an aspect of every [[character]]'s [[shield]] in each ''{{b|Super Smash Bros.|series}}'' game. | '''Shield jump''' is an aspect of every [[character]]'s [[shield]] in each ''{{b|Super Smash Bros.|series}}'' game. | ||
| Line 13: | Line 12: | ||
==Shield jump height values== | ==Shield jump height values== | ||
===''Super Smash Bros. 4''=== | ===''[[Super Smash Bros. 4]]''=== | ||
{|class="wikitable sortable" style="margin:1em auto 1em auto; text-align:center" | {|class="wikitable sortable" style="margin:1em auto 1em auto; text-align:center" | ||
!data-sort-type="number"|Rank!!Character!!Shield jump height | !data-sort-type="number"|Rank!!Character!!Shield jump height | ||
| Line 146: | Line 145: | ||
|- | |- | ||
|'''58'''||{{CharHead|Kirby|SSB4|hsize=20px}}||28.716846 | |'''58'''||{{CharHead|Kirby|SSB4|hsize=20px}}||28.716846 | ||
|} | |||
===''[[Super Smash Bros. Ultimate]]''=== | |||
{|class="wikitable sortable" style="margin:1em auto 1em auto; text-align:center" | |||
!data-sort-type="number"|Rank!!Character!!Shield jump height | |||
|- | |||
|'''1'''||{{CharHead|Jigglypuff|SSBU|hsize=20px}}||936.84 | |||
|- | |||
|'''2'''||{{CharHead|Fox|SSBU|hsize=20px}}||58 | |||
|- | |||
|rowspan="2"|'''3'''||{{CharHead|Greninja|SSBU|hsize=20px}}||rowspan="2"|52 | |||
|- | |||
|{{CharHead|Mii Brawler|SSBU|hsize=20px}} | |||
|- | |||
|'''5'''||{{CharHead|Sheik|SSBU|hsize=20px}}||47.5 | |||
|- | |||
|'''6'''||{{CharHead|Pichu|SSBU|hsize=20px}}||47 | |||
|- | |||
|rowspan="3"|'''7'''||{{CharHead|Bayonetta|SSBU|hsize=20px}}||rowspan="3"|46 | |||
|- | |||
|{{CharHead|Diddy Kong|SSBU|hsize=20px}} | |||
|- | |||
|{{CharHead|Falco|SSBU|hsize=20px}} | |||
|- | |||
|'''10'''||{{CharHead|Ryu|SSBU|hsize=20px}}||45.5 | |||
|- | |||
|'''11'''||{{CharHead|Captain Falcon|SSBU|hsize=20px}}||45.3 | |||
|- | |||
|rowspan="3"|'''12'''||{{CharHead|Joker|SSBU|hsize=20px}}||rowspan="3"|45 | |||
|- | |||
|{{CharHead|Young Link|SSBU|hsize=20px}} | |||
|- | |||
|{{CharHead|Zero Suit Samus|SSBU|hsize=20px}} | |||
|- | |||
|rowspan="3"|'''15'''||{{CharHead|Inkling|SSBU|hsize=20px}}||rowspan="3"|44.1 | |||
|- | |||
|{{CharHead|Ken|SSBU|hsize=20px}} | |||
|- | |||
|{{CharHead|Mario|SSBU|hsize=20px}} | |||
|- | |||
|rowspan="2"|'''18'''||{{CharHead|Incineroar|SSBU|hsize=20px}}||rowspan="2"|44 | |||
|- | |||
|{{CharHead|Wolf|SSBU|hsize=20px}} | |||
|- | |||
|'''20'''||{{CharHead|Palutena|SSBU|hsize=20px}}||43.59 | |||
|- | |||
|rowspan="2"|'''21'''||{{CharHead|Donkey Kong|SSBU|hsize=20px}}||rowspan="2"|43.5 | |||
|- | |||
|{{CharHead|Hero|SSBU|hsize=20px}} | |||
|- | |||
|'''23'''||{{CharHead|Terry|SSBU|hsize=20px}}||42.6 | |||
|- | |||
|'''24'''||{{CharHead|Sephiroth|SSBU|hsize=20px}}||42.5 | |||
|- | |||
|'''25'''||{{CharHead|Sora|SSBU|hsize=20px}}||42.4 | |||
|- | |||
|'''26'''||{{CharHead|Shulk|SSBU|hsize=20px}}||42.24 | |||
|- | |||
|'''27'''||{{CharHead|Ice Climbers|SSBU|hsize=20px}}||42.11 | |||
|- | |||
|rowspan="5"|'''28'''||{{CharHead|Chrom|SSBU|hsize=20px}}||rowspan="5"|42 | |||
|- | |||
|{{CharHead|Kazuya|SSBU|hsize=20px}} | |||
|- | |||
|{{CharHead|Lucario|SSBU|hsize=20px}} | |||
|- | |||
|{{CharHead|Mega Man|SSBU|hsize=20px}} | |||
|- | |||
|{{CharHead|Roy|SSBU|hsize=20px}} | |||
|- | |||
|'''33'''||{{CharHead|Bowser Jr.|SSBU|hsize=20px}}||41.76 | |||
|- | |||
|'''34'''||{{CharHead|Banjo & Kazooie|SSBU|hsize=20px}}||41.2 | |||
|- | |||
|rowspan="3"|'''35'''||{{CharHead|Link|SSBU|hsize=20px}}||rowspan="3"|41 | |||
|- | |||
|{{CharHead|Piranha Plant|SSBU|hsize=20px}} | |||
|- | |||
|{{CharHead|R.O.B.|SSBU|hsize=20px}} | |||
|- | |||
|'''38'''||{{CharHead|Lucina|SSBU|hsize=20px}}||40.85 | |||
|- | |||
|'''39'''||{{CharHead|Mii Gunner|SSBU|hsize=20px}}||40.67 | |||
|- | |||
|rowspan="2"|'''40'''||{{CharHead|King Dedede|SSBU|hsize=20px}}||rowspan="2"|40.32 | |||
|- | |||
|{{CharHead|Robin|SSBU|hsize=20px}} | |||
|- | |||
|rowspan="8"|'''42'''||{{CharHead|Corrin|SSBU|hsize=20px}}||rowspan="8"|40 | |||
|- | |||
|{{CharHead|Dr. Mario|SSBU|hsize=20px}} | |||
|- | |||
|{{CharHead|Duck Hunt|SSBU|hsize=20px}} | |||
|- | |||
|{{CharHead|Ganondorf|SSBU|hsize=20px}} | |||
|- | |||
|{{CharHead|Ridley|SSBU|hsize=20px}} | |||
|- | |||
|{{CharHead|Toon Link|SSBU|hsize=20px}} | |||
|- | |||
|{{CharHead|Wario|SSBU|hsize=20px}} | |||
|- | |||
|{{CharHead|Wii Fit Trainer|SSBU|hsize=20px}} | |||
|- | |||
|rowspan="2"|'''50'''||{{CharHead|Bowser|SSBU|hsize=20px}}||rowspan="2"|39.61 | |||
|- | |||
|{{CharHead|King K. Rool|SSBU|hsize=20px}} | |||
|- | |||
|rowspan="3"|'''52'''||{{CharHead|Cloud|SSBU|hsize=20px}}||rowspan="3"|39.5 | |||
|- | |||
|{{CharHead|Richter|SSBU|hsize=20px}} | |||
|- | |||
|{{CharHead|Simon|SSBU|hsize=20px}} | |||
|- | |||
|'''55'''||{{CharHead|Lucas|SSBU|hsize=20px}}||39.15 | |||
|- | |||
|rowspan="5"|'''56'''||{{CharHead|Byleth|SSBU|hsize=20px}}||rowspan="5"|39 | |||
|- | |||
|{{CharHead|Meta Knight|SSBU|hsize=20px}} | |||
|- | |||
|{{CharHead|Mii Swordfighter|SSBU|hsize=20px}} | |||
|- | |||
|{{CharHead|Snake|SSBU|hsize=20px}} | |||
|- | |||
|{{CharHead|Sonic|SSBU|hsize=20px}} | |||
|- | |||
|'''61'''||{{CharHead|Charizard|SSBU|hsize=20px}}||38.85 | |||
|- | |||
|rowspan="4"|'''62'''||{{CharHead|Luigi|SSBU|hsize=20px}}||rowspan="4"|38 | |||
|- | |||
|{{CharHead|Marth|SSBU|hsize=20px}} | |||
|- | |||
|{{CharHead|Mythra|SSBU|hsize=20px}} | |||
|- | |||
|{{CharHead|Pyra|SSBU|hsize=20px}} | |||
|- | |||
|rowspan="2"|'''66'''||{{CharHead|Dark Pit|SSBU|hsize=20px}}||rowspan="2"|37.63 | |||
|- | |||
|{{CharHead|Pit|SSBU|hsize=20px}} | |||
|- | |||
|rowspan="6"|'''68'''||{{CharHead|Little Mac|SSBU|hsize=20px}}||rowspan="6"|37 | |||
|- | |||
|{{CharHead|Mewtwo|SSBU|hsize=20px}} | |||
|- | |||
|{{CharHead|Min Min|SSBU|hsize=20px}} | |||
|- | |||
|{{CharHead|Ness|SSBU|hsize=20px}} | |||
|- | |||
|{{CharHead|Villager|SSBU|hsize=20px}} | |||
|- | |||
|{{CharHead|Yoshi|SSBU|hsize=20px}} | |||
|- | |||
|rowspan="2"|'''74'''||{{CharHead|Daisy|SSBU|hsize=20px}}||rowspan="2"|36.44 | |||
|- | |||
|{{CharHead|Peach|SSBU|hsize=20px}} | |||
|- | |||
|'''76'''||{{CharHead|Pikachu|SSBU|hsize=20px}}||36.2 | |||
|- | |||
|rowspan="4"|'''77'''||{{CharHead|Dark Samus|SSBU|hsize=20px}}||rowspan="4"|36 | |||
|- | |||
|{{CharHead|Pac-Man|SSBU|hsize=20px}} | |||
|- | |||
|{{CharHead|Samus|SSBU|hsize=20px}} | |||
|- | |||
|{{CharHead|Zelda|SSBU|hsize=20px}} | |||
|- | |||
|rowspan="3"|'''81'''||{{CharHead|Ike|SSBU|hsize=20px}}||rowspan="3"|35.68 | |||
|- | |||
|{{CharHead|Ivysaur|SSBU|hsize=20px}} | |||
|- | |||
|{{CharHead|Squirtle|SSBU|hsize=20px}} | |||
|- | |||
|'''84'''||{{CharHead|Steve|SSBU|hsize=20px}}||35.6 | |||
|- | |||
|rowspan="3"|'''85'''||{{CharHead|Isabelle|SSBU|hsize=20px}}||rowspan="3"|35 | |||
|- | |||
|{{CharHead|Mr. Game & Watch|SSBU|hsize=20px}} | |||
|- | |||
|{{CharHead|Olimar|SSBU|hsize=20px}} | |||
|- | |||
|'''88'''||{{CharHead|Kirby|SSBU|hsize=20px}}||34 | |||
|- | |||
|'''89'''||{{CharHead|Rosalina & Luma|SSBU|hsize=20px}}||33 | |||
|} | |} | ||
Revision as of 10:44, January 16, 2022
- Not to be confused with Shield break jump, or jump out of shield.


Shield jump is an aspect of every character's shield in each Super Smash Bros. game.
Overview

Every attack in the Super Smash Bros. series can damage a shield. As the shield gets attacked, its size is gradually reduced until it eventually breaks, and a shield jump occurs afterward. The character is sent a small distance upward and then falls back to the ground. Upon getting up, the character is temporarily stunned and vulnerable to any attack. Shield break jumps cannot be cancelled in any capacity as the character shield break jumping is intangible (except in Brawl). Furthermore, if a character's shield breaks close to a ledge, they can possibly fall off the stage, which leaves them entirely helpless.
In Melee, having one's shield broken by an opponent rewards the player with Shattered Shield bonus, worth -1000 points, while breaking their own shield rewards them the Shield Stupidity bonus, worth -2000 points. Breaking another opponent's shield rewards the character the Shield Buster bonus, worth 2500 points. All three of the bonuses can stack, and performing the required tasks multiple times proportionally increases their value.
Shield jump height values
Super Smash Bros. 4
| Rank | Character | Shield jump height |
|---|---|---|
| 1 | 936.83905 | |
| 2 | 61.303986 | |
| 3 | 55.884041 | |
| 4 | 53.641396 | |
| 4 | ||
| 6 | 50.114208 | |
| 7 | 50.01783 | |
| 8 | 48.520573 | |
| 9 | 47.378315 | |
| 10 | 46.106945 | |
| 11 | 45.646511 | |
| N/A | Mega Lucario | |
| 12 | 45.298752 | |
| 13 | 44.899666 | |
| 14-17 | 44.1 | |
| N/A | ||
| 18 | 43.80624 | |
| 19 | 43.590145 | |
| 20 | 43.487122 | |
| 21 | 43.21534 | |
| 22 | 42.488163 | |
| 23 | 42.367996 | |
| 24 | 42.241882 | |
| 25 | 41.843109 | |
| 26 | 41.762489 | |
| 27 | 41.616199 | |
| 28 | 41.382965 | |
| 29 | 41.0252 | |
| 30-31 | 40.849941 | |
| N/A | 40.67 | |
| 32 | 40.668427 | |
| 33 | 40.652481 | |
| 34 | 40.316494 | |
| 35 | 40.315399 | |
| 36 | 39.83392 | |
| N/A | Giga Bowser | |
| N/A | Warioman | |
| 37 | 39.607784 | |
| 38 | 39.44894 | |
| 39 | 39.15 | |
| 40 | 38.853573 | |
| 41 | 38.295349 | |
| 42-43 | 37.633354 | |
| 44 | 37.033981 | |
| 45 | 36.442474 | |
| 46 | 36.197403 | |
| 47-49 | 35.679428 | |
| 50 | 35.135567 | |
| 51 | 33.404976 | |
| 52 | 32.5 | |
| 53 | 32 | |
| 54 | 31.572279 | |
| N/A | Giga Mac | |
| N/A | 31.06 | |
| 55-56 | 31.059187 | |
| 57 | 30.969843 | |
| 58 | 28.716846 |
Super Smash Bros. Ultimate
Jigglypuff's shield jump
Jigglypuff has the most notable shield jump out of every character. In every Smash Bros. title, breaking Jigglypuff's shield makes it shield jump extremely high, due to a large amount of knockback from the break. Under most circumstances, Jigglypuff passes the upper blast line and gets KOed. This can only be prevented by an overhead obstruction or if another character inflicts knockback on Jigglypuff as it flies.
Due to changes with the upper blast line's behaviour in Smash 4, Jigglypuff can only be Blast KO'd, unless it is tiny on a large stage like Palutena's Temple. Star KOs or Screen KOs are mostly ineffective against Jigglypuff from a shield jump because of its jumping speed. This appears to have been reverted in Ultimate.
It is never officially explained within the games why Jigglypuff has a high shield jump.
Advantages
The first noticeable advantage is in Melee's Adventure Mode, when the player has to escape the exploding Brinstar. This stage consists of a vertical climb, which can be completed a lot faster from shield jumping. However, as this technique requires shield breaking, the Shield Stupidity bonus, worth -2000 points, is awarded to the player. The shield jump enables Jigglypuff to reach areas in Brawl's Subspace Emissary that few others could, and complete stages, such as Glacial Peak, in record time.
Custom stages in Brawl
Brawl's introduction of custom stages created a new use for shield jumping: a platform high above the main battlefield can provide Jigglypuff a spot that few other characters can reach or hit with ranged attacks. Only Pit and R.O.B. can reach a similar height normally. Jigglypuff can be potentially threatened by Meta Knight and Kirby's throws, and other characters can use the bomb jump.
The Super Jiggly Jump
When Jigglypuff's shield breaks, it flies upward with its hitstun animation for a period of time. During this period, Jigglypuff can be KOed from the upper blast zone. If Jigglypuff does not reach the upper blast line until after this period, it continues to fly upwards and beyond the blast line as if it had simply jumped very high. This move is easiest to perform on a ceiling that Jigglypuff only gets stuck on for a short period of time, or with accurate timing as it is pushed away from the ceiling.
One easy way of doing this is on the Brawl stage New Pork City. For this to be executed, Jigglypuff must stand along the right side of the floating structure closest to the middle and shield until it jumps. If Jigglypuff is close enough to the right wall, it skims the wall and continues to be KOed. If a character uses either the Mushroom or the Poison Mushroom, it may possibly escape the stun as it reverts to normal size. This enables the player to move freely during the fall.
It can also be performed underneath certain blocks in the Mushroomy Kingdom stage.
Gallery
Mario shield jumps before he gets stunned in Melee.
Captain Falcon breaks Jigglypuff's shield in Smash 64, causing it to do an extremely high jump and get Star KO'd.
Jigglypuff can be seen in the top-right corner, high above the other fighters.
Jigglypuff's shield jump's usefulness in the Brinstar Escape Shaft in Melee's Adventure Mode.
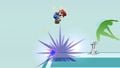
Mario in SSB4, having just broken his shield.


