Link (SSB4): Difference between revisions
Dragon NJMB (talk | contribs) |
SuperSqank (talk | contribs) |
||
| (931 intermediate revisions by more than 100 users not shown) | |||
| Line 1: | Line 1: | ||
{{ArticleIcons|ssb4=y | {{ArticleIcons|ssb4=y}} | ||
{{ | {{Disambig2|Link's appearance in ''Super Smash Bros. 4''|the character in other contexts|Link}} | ||
{{Infobox Character | {{Infobox Character | ||
|name | |name = Link | ||
|image | |image = [[File:Link SSB4.png|250px]] | ||
|game | |game = SSB4 | ||
|ssbgame1 | |ssbgame1 = SSB | ||
|ssbgame2 | |ssbgame2 = SSBM | ||
|ssbgame3 | |ssbgame3 = SSBB | ||
|ssbgame4 = SSBU | |||
|availability = [[Starter character|Starter]] | |availability = [[Starter character|Starter]] | ||
|tier = D | |||
|ranking = 31 | |||
}} | }} | ||
'''Link''' (リンク, '' | '''Link''' ({{ja|リンク|Rinku}}, ''Link'') is a playable character in ''[[Super Smash Bros. 4]]''. His return to the series was announced during the [[Electronic Entertainment Expo|E3]] [[Nintendo Direct]] on June 11th, 2013.<ref>[https://www.youtube.com/watch?v=13D1I5s236o Nintendo Direct@E3 2013]</ref> He was also among the first wave of [[amiibo]] that are compatible with ''SSB4''. | ||
As in ''[[Super Smash Bros. Brawl]]'', Akira Sasanuma's portrayal of Link from ''{{s|zeldawiki|The Legend of Zelda: Twilight Princess}}'' was repurposed for ''Smash 4'', with mostly returning voice clips from ''Brawl'', and in addition to some new ones sourced from the game. | |||
Link is ranked 31st out of 54 on the [[tier list]], placing him in the D tier. In addition to rendering Link as the second-highest-ranking mid-tier character, this is a significant improvement over his bottom-tier placement in ''Brawl'', where he was ranked 35th out of 38 and his best placement to date. Link possesses multiple [[projectile]]s in the form of his [[Hero's Bow]], [[Gale Boomerang]] and [[Bomb (Link)|Bomb]], each of which serve as great tools for combos, [[camp]]ing, [[gimp]]ing, and disrupting [[approach]]es. Aside from his projectiles, Link's {{s|zeldawiki|Master Sword}} grants him [[disjoint]]ed range and above-average power. | |||
While Link has | |||
In addition to his retained strengths, his recovery has been greatly buffed from ''Brawl'', thanks to [[Spin Attack]] and [[Clawshot]] covering noticeably more distance, and Bomb's shorter fuse improving its [[Bomb (Link)#Bomb recovery|recovery potential]]. As a heavyweight, his respectable durability allows him to take advantage of the [[rage]] mechanic introduced in ''SSB4'', which further bolsters his already powerful attacks. | |||
However, Link remains held back by his relatively sluggish frame data. He has moves that are quite easily [[punish]]able if they are whiffed, while his heavyweight and slow mobility without [[Glide toss#Dash item throw cancel item throw (DITCIT)|Bomb Sliding]] render him vulnerable to combos, especially from the fast, rushdown-oriented characters that are prevalent in the metagame. Despite Link's new assets, several of his fellow [[veteran]]s gained more significant buffs, which downplays the effects that his own buffs grant him in competitive play. | |||
While Link's early tournament results were mediocre at best, he has managed to attain a dedicated player base that consists of professionals such as {{Sm|Izaw}}, {{Sm|Scizor}}, {{Sm|Sova Unknown}} and {{Sm|T}}, who have managed to achieve top 8 and 16 placements more frequently, even at the national level. T, in particular, has demonstrated Link's viability, placing 3rd at [[2GGC: Civil War]], one of the most competitive ''SSB4'' tournaments in the world, and being ranked 46th on the [[PGR 100]], the all-time ranking for ''Smash 4''. | |||
==Attributes== | |||
Link is a [[Weight|heavyweight]] and the majority of his attributes are largely reflective of his weight class. His only attribute that is atypical of a heavyweight is his [[walk]]ing speed, which is above average. His most unique attribute is his [[fast fall]]; while his regular falling speed is tied with that of {{SSB4|R.O.B.}}, {{SSB4|Ryu}}, and standard {{SSB4|Mii Swordfighter}} as the 24th fastest in the game, his fast fall is actually the third fastest in the game, behind {{SSB4|Fox}} and {{SSB4|King Dedede}}. This is because Link uniquely increases his falling speed by 90% when fast-falling, as opposed to the standard 60% that all other characters (bar Ryu) adhere to. | |||
Like his [[Toon Link (SSB4)|alternate timeline counterpart]], Link possesses two [[shield]]s instead of just one. In Link's case, he wields the [[Shield (Link)|Hylian Shield]], which blocks opposing [[projectile]]s if he is standing still or walking. Like Toon Link, Link also wields his respective version of the {{s|zeldawiki|Master Sword}}, which grants him disjointed range and above average strength, the latter of which is most evident in his forward tilt, smash attacks, dash attack and [[Spin Attack]]. However, his forward, up and down aerials also boast impressive power while possessing certain traits: his forward and back aerials can hit twice, his up and down aerials have long-lasting hitboxes, and his down aerial can [[meteor smash]]. | |||
Link is one of the handful of characters in ''SSB4'' with a [[Grab#Tether grab|tether grab]], with his [[Clawshot]] being a useful supplement to not just his recovery, but also his zoning and combo games. Although its damage output has been lowered since ''Brawl'', Clawshot still boasts impressive range, has minimal landing lag, and comes out even faster than before as an attack. It also assists his combo game, due to his down throw's impressive combo potential, while his up throw possesses KO potential. Lastly and most importantly, Clawshot is a pivotal part of Link's recovery, especially due to his sluggish mobility. | |||
Link's special moves all have their uses. [[Hero's Bow]] is a strong option against characters who struggle at [[approach]]ing and is good for providing long-ranged pressure. [[Gale Boomerang]] is a decent spacing option and has follow-up potential upon contact or via its [[Pulling|vacuum]] effect. Gale Boomerang's drag effect also grants it [[gimp]]ing potential in the form of [[Gale Guarding]]. [[Spin Attack]]'s overall recovery distance has noticeably improved since ''Brawl'', while its already impressive power has been further increased, which in turn improves its KO potential or as a way to punish rolls. However, Link's [[Bomb (Link)|Bomb]] is perhaps the most versatile weapon within his arsenal thanks to its utility. Throwing a Bomb at an opponent can cause enough [[hitstun]] to help Link's approach and/or set up combos. Conversely, if the opponent shields it, the Bomb simply bounces off, allowing it to be used for spacing. Even holding a Bomb long enough for it to explode can be useful; while doing so damages Link, it gives him a small vertical boost and removes him from being [[helpless]], aiding his recovery and/or allowing him to break out of combos. Like in ''Brawl'', his bombs can also be used for a technique called [[Glide toss#Dash item throw cancel item throw (DITCIT)|Bomb Sliding]], which noticeably supplements his ground mobility. When combined with the overall fastest [[item throw]] animations in the game, Link's Bomb allows him to pressure opponents at a deceptively fast speed. | |||
Despite his benefits, Link retains some of his flaws from his previous appearances. Even though his recovery has been noticeably improved after formerly being one of his most significant flaws in ''[[Link (SSBB)|Brawl]]'', it still limits how far he can go offstage safely. Link is also still susceptible to combos from faster characters, such as {{SSB4|Sheik}}. As a result, he must make good use of reads, spacing, and camping to avoid giving the advantage to such characters. His neutral aerial also allows him to break out of many combos, although its start-up lag is merely average for a [[sex kick]]. As a tether, his grab is quite slow and punishable when whiffed. In addition, Link's KO potential is hindered by lag, particularly in regard to his forward tilt, dash attack, forward aerial and down aerial. | |||
In terms of [[customization]], Link's custom moves benefit him. Power Bow grants Link's arrows incredible power, being able to KO significantly easier. However, this comes at the cost of heavily decreased range and increased charge time, with uncharged arrows lacking any utility. Quickfire Bow fires {{b|magic|effect}}al arrows at an extremely quick rate that are also unaffected by gravity, granting them spammability. However, they are much weaker and have shorter range. Boomerang removes the [[windbox]] from the Gale Boomerang and makes it act like the Boomerang from ''Smash 64'' and ''Melee''; it can now be angled easier, has four hitboxes instead of two and deals damage when returning to Link. However, most of Link's setups are now removed since the Boomerang can no longer pull opponents in. Ripping Boomerang possesses no windboxes, deals less damage and has shorter range, but it hits multiple times, goes through opponents, has four hitboxes similar to Boomerang, and stuns victims, making it good for setups. Shocking Spin is an [[electric]]ally charged Spin Attack with significantly stronger damage and KO potential, and the aerial version semi-spikes. However, the grounded version has increased ending lag, while the aerial version lacks back hitboxes and worsens Link's already sub-par recovery by decreasing its horizontal momentum and vertical distance; additionally, while the aerial version can semi-spike, it only works if the opponent is in front. Whirling Leap drastically improves Link's recovery, granting him significantly improved vertical and horizontal distance, alongside very high aerial control during its duration. However, it is solely limited to being a recovery option due to its lack of any hitboxes. Giant Bomb has Link pull out a massive bomb that has a greater explosion radius and damage. However, it has slightly more startup lag and does not explode upon impact, limiting its tactical use compared to the standard Bomb. Meteor Bomb is a much smaller Bomb with a shorter fuse that meteor smashes anyone it hits with moderate knockback. This gives it unique edgeguarding potential and can set up for interesting combos, but as it also affects Link, this prevents him from extending his recovery unless the bomb is used to interrupt potentially deadly vertical KOs. | |||
Overall, Link is very capable at both spacing and [[camping]], yet also possesses impressive power and a deceptively useful combo game. However, Link's sub-par mobility and reliance on both camping and his combo game can result in his playstyle being difficult to utilize at higher levels of play, largely because of the speedy and combo-oriented characters that are prevalent in the metagame. | |||
==Changes from ''[[Super Smash Bros. Brawl]]''== | |||
Link has been buffed significantly in the transition from ''Brawl'' to ''SSB4''. Both his ground and aerial games have been improved. His overall mobility has slightly improved and his attacks have seen adjustments to either make them more reliable or to improve their utility. An example of this is with dash attack as while it is much slower and has no followup potential, it is much stronger now being the second strongest dash attack in the game. His air speed has been increased and a few of his aerials have seen some useful adjustments; forward aerial's first hit is much stronger, up aerial is stronger and down aerial's clean hit now [[meteor smash]]es granting it edgeguarding potential as well as the later two aerials having less landing lag. His grab game has also considerably improved as his grabs have less ending lag and his down throw is weaker giving it greater followup potential especially when combined with the changes to [[hitstun canceling]]. He also is a potent [[edgeguard]]er, with his down aerial now being capable of [[meteor smash]]ing to go alongside his other offensive options against opponents on the edge. Additionally, [[Spin Attack]] covers much more distance and is less reliant on momentum while Clawshot has increased range as a tether significantly improving his recovery, removing one of Link's most detrimental flaws in ''Brawl''. Lastly, his camping game has seen some improvements due to his projectiles, most notably Bomb, being buffed in certain ways. | |||
Link also benefits from the general physics changes brought about by ''SSB4''. The [[Edge-guarding#Ledge Trump|edge trump]] mechanic combined with the increased speed to [[air dodge]]s immensely improves his recovery allowing him to make much greater use of his new and improved recovery options. The [[rage]] mechanic further boosts his power and can be utilized well, due to his excellent endurance. The changes of [[hitstun canceling]] has also improved his combo potential especially out of back aerial and down throw. | |||
However, Link has also seen some nerfs. While the removal of hitstun canceling improves his own combo potential, it makes him more susceptible to combos himself and it removes [[momentum canceling]] hindering his endurance especially vertically (although Link does notably benefit from the removal of [[chain grab]]bing). Link also lost access to the advanced techniques he had in ''Brawl'' most notably [[DACUS]] which significantly hinders his approach potential combined with his up smash having more ending lag. He also no longer has access to {{b|Quickdraw|technique}}ing and the removal of [[edge momentum shifting]] has hindered [[Gale Boomerang]]'s utility. As for his more direct nerfs, his overall damage output is lower (although it is higher relative to the cast) with his forward and down smash seeing significant nerfs to their damage and some of his moves have worse overall KO potential due to their alterations such as with down tilt and down aerial. His grab aerial is also worse on stage as while it connects with the strong hit more reliably, it is weaker, launches opponents at a less favorable angle and has more landing lag hindering its use as a spacing tool. Lastly, while his out of shield game has improved due to his faster Spin Attack and the general changes to shields, his [[spot dodge]] is drastically worse going from being one of the best to a very mediocre spot dodge. | |||
Ultimately, Link is considerably better than how he was in ''Brawl'' as his buffs are of greater quantity than his nerfs and while most of his direct changes do not greatly benefit him, the changes to the game's mechanics greatly benefit him overall as they improve his combo and KO potential and most importantly, they make his recovery far better fixing one of his main issues in ''Brawl''. Despite this, his other issues including his poor mobility and frame data were not properly addressed and in some cases, worsened and he did see a few notable hindrances from the changes to the game's mechanics. Nevertheless, he is a significantly more effective character relative to the cast and has seen greater tournament results although he still struggles against the higher tiered characters. | |||
===Aesthetics=== | |||
*{{change|Due to the aesthetic used in ''SSB4'', Link's overall color scheme is significantly more vibrant, and his hair is of a significantly higher visual quality than in ''Brawl''. Link's hair is also sandy blond instead of blond.}} As a result, other than his hairstyle, his hair color, and the starched appearance of his clothing, his coloration closely resembles his ''Skyward Sword'' incarnation, whom despite being unused in ''Smash'', sports a similar design to his ''Twilight Princess'' incarnation. | |||
*{{change|Link's blue and {{s|zeldawiki|Dark Link}} [[alternate costume]]s have been slightly updated. The former's {{s|zeldawiki|Hylian Shield}} is now blue instead of black, while the latter now has black sclera and red pupils, and its Hylian Shield is now colored black instead of silver. Link has also received three new alternate costumes, two of which are based on the [[zeldawiki:The Legend of Zelda: Skyward Sword|Hero of the Skies]]' civilian clothes and {{s|zeldawiki|Fierce Deity Link}}.}} | |||
*{{change|Link has a new [[idle pose]]. He now readies his sword-wielding arm by slightly rearing it back while keeping his [[Shield (Link)|Hylian Shield]] in front of himself, instead of twirling the {{s|zeldawiki|Master Sword}} by his side and bringing his shield-wielding arm to his side. Link also always holds his Hylian Shield in front of himself during his other idle poses. However, he will revert to his idle poses from ''Brawl'' while holding a small [[item]].}} | |||
*{{change|Backward roll's animation has changed. It is now based on the backflip used by the {{s|zeldawiki|Hero of Time}}.}} | |||
*{{change|The Master Sword's trail is now sky blue with white accents and produces afterimages, instead of being a sky blue blur.}} | |||
*{{change|The Hylian Shield's metal decals and rim are now silver and polished, instead of gray and tarnished.}} | |||
===Attributes=== | ===Attributes=== | ||
*{{buff|Link | *{{nerf|Link [[walk]]s slower (1.2 → 1.188).}} | ||
*{{buff| | *{{buff|Link [[dash]]es faster (1.328 → 1.3944).}} | ||
*{{ | *{{buff|Link's [[air speed]] is faster (0.8084 → 0.88).}} | ||
*{{buff|Link's [[fast fall]]ing speed is faster (2.666 → 3.04).}} | |||
*{{change|Link's [[gravity]] is higher (0.089 → 0.096). This slightly improves his aerial mobility, but slightly hinders his endurance, makes him more susceptible to combos and reduces the height of his jumps.}} | |||
**{{buff|Despite this, his [[double jump]] is higher.}} | |||
*{{buff|[[Roll]]s have decreased ending lag (FAF 38 → 31).}} | |||
*{{nerf|Rolls have a shorter duration (frames 4-19 → 4-17).}} | |||
*{{buff|[[Air dodge]] has decreased startup lag (frame 4 → 3) and ending lag (FAF 50 → 34).}} | |||
*{{nerf|[[Spot dodge]] has more startup lag with a shorter duration (frame 2-20 → 3-18) and has increased ending lag (FAF 23 → 28), no longer being one of the best in the game.}} | |||
*{{buff|Dashing [[item throw]] has significantly less ending lag (FAF 42 → 19), making it the fastest in the game. This slightly improves Link's [[item]]-based zoning potential although he is still usually better off using his [[Glide Toss|DITCIT]].}} | |||
*{{buff|The Hylian Shield now blocks projectiles even while Link is walking. Additionally, it now always protects his front while he is idle, due to his idle poses' updated animations. Lastly, Link now raises the Hylian Shield when a projectile or an explosion hits it. Altogether, these changes significantly improve its reliability.}} | |||
===Ground attacks=== | ===Ground attacks=== | ||
*{{buff|[[Forward tilt]] has less ending lag.}} | *[[Neutral attack]]: | ||
*{{ | **{{buff|Neutral attack's first hit has higher base knockback (16 → 35/30). Along with the changes to its angles and the lower knockback on the second hit, this enables the move to connect all its hits more reliably.}} | ||
*{{ | **{{nerf|Neutral attack's first and second hits deal less damage (4% (hit 1)/3% (hit 2) → 2.5% (both)), and the latter also has lower knockback (40 (base), 20 (scaling) → 38/10), hindering its [[jab cancel]]ing ability. The first hit also has more ending lag (FAF 20 → 28) and different angles across its hitboxes ([[Sakurai angle|361°]] → 95°/80°/361°), making [[jab lock]]ing with it much harder combined with its higher base knockback, as only the hitboxes closest to Link and with the lowest ID can do so rather than all of them. While this would improve its jab canceling potential, this is negated by its higher ending lag.}} | ||
*{{ | *{{buff|The increased [[shieldstun]] benefits forward tilt and down tilt, as due to their long range, average damage and reduced lag, they are now safe on shield if properly spaced.}} | ||
*{{buff|Forward smash | *[[Forward tilt]]: | ||
*{{nerf| | **{{buff|Forward tilt has a longer duration (frames 15-18 → 15-19), decreased ending lag (FAF 40 → 38) and higher knockback (20 (base), 98 (scaling) → 55/82), improving its KO potential near the horizontal blastzone.}} | ||
*{{buff| | *[[Down tilt]]: | ||
*{{ | **{{buff|Down tilt has less startup (frame 13 → 11) and ending lag (FAF 32 → 29). Combined with its lower knockback and the changes to [[hitstun canceling]], this grants it combo potential from low to mid percents.}} | ||
**{{nerf|Down tilt deals less damage (12% → 11%) and its extended hitbox has lower knockback scaling (50 → 30), while its meteor hitbox has a significantly smaller radius (4u/3.5u → 1.5u) and lower knockback (90 (base), 50 (scaling) → 0/62). This worsens the move's KO potential, and renders it nearly useless for edgeguarding even with the removal of [[meteor canceling]], as the meteor hitbox is survivable offstage even at high percents and can no longer hit any character hanging on an edge except for {{SSB4|Charizard}}.}} | |||
**{{change|Down tilt's hitboxes are distributed differently; instead of having two normal hitboxes that launch targets upward and other two closer to Link that [[meteor smash]], the move has one extended hitbox covering the entire Master Sword that launches upward, and a normal hitbox close to the tip that meteor smashes and only affects aerial targets.}} | |||
*[[Dash attack]]: | |||
**{{buff|Link has a new dash attack, the {{s|zeldawiki|Jump Attack}} from ''The Legend of Zelda'' series. Compared to the previous dash attack, it deals more damage (10%/12%/11% → 14%/13%/12%) and has significantly more knockback (30 (base), 80 (scaling) → (70/85/85)/(85/85/77), greatly improving its KO potential.}} | |||
**{{nerf|Dash attack has much more startup (frame 8 → 20) and ending lag (FAF 40 → 57) compared to the previous dash attack.}} | |||
**{{change|Dash attack has different angles (90°/80°/70°/60° → 45°/50°/55°) compared to the previous dash attack. This improves its spacing potential but hinders its followup potential.}} | |||
*[[Forward smash]]: | |||
**{{buff|Forward smash's first hit has been noticeably altered: the hitbox at the tip of the Master Sword has higher knockback (25 (base), 90 (scaling) → 30/100), while the rest of the hitboxes deal lower damage (15% → 7%) and knockback (25 (base), 90 (scaling) → 47/15), and can no longer send opponents behind Link, enabling them to connect into the second hit beyond low percents. This overall benefits the move, as the setup hitboxes in conjunction with the second hit still deal more damage and can KO earlier than the previous first hit alone, while the tipper hitbox still allows the first hit to KO on its own should opponents potentially be hit too far away for the second hit to connect.}} | |||
**{{buff|Forward smash's second hit has drastically more base knockback (20/25/30 (base), 90 (scaling) → 85/89), allowing it to KO earlier near edges and with [[rage]], despite its much lower damage.}} | |||
**{{nerf|Forward smash has increased ending lag (FAF 50 (both hits) → 52 (hit 1)/68 (hit 2)), and the second hit deals much less damage (17%/20%/19% → 13%/12%).}} | |||
**{{change|The window of time that the attack button can be pressed after forward smash's first hit has been significantly tightened. This decreases the possibility of accidentally using its second hit, but makes it so that the delay between the first and second hits cannot be abused before using the second hit.}} | |||
*[[Up smash]]: | |||
**{{buff|Up smash's last hit deals more damage (10%/9%/8% → 11%/10%/9%) and has more knockback (70 (base), 80 (scaling) → 60/96), improving its KO potential. Its first and second hits have also received several adjustments to their knockback and angles, which alongside the weakening of [[SDI]] enables the move to connect all hits better.}} | |||
**{{nerf|Up smash has more ending lag (FAF 70 → 78), now being the up smash with the slowest interruptibility in the game.}} | |||
**{{nerf|The removal of [[DACUS]] significantly hinders up smash's approach potential.}} | |||
*[[Down smash]]: | |||
**{{buff|Down smash's first hit launches at a higher angle (75° → 78°) and has more knockback (26 (base), 90 (scaling) → 40/88), improving its KO potential.}} | |||
**{{nerf|Down smash's second hit deals less damage (16%/17%/16% → 12%/11%/10%).}} | |||
**{{change|Down smash's second hit is a [[semi-spike]] (75° → 30°) and has higher base knockback, but lower knockback scaling (20 (base), 90 (scaling) → 80/63). Coupled with its lower damage, this hinders its KO potential from center stage, but improves its edgeguarding potential.}} | |||
===Aerial attacks=== | ===Aerial attacks=== | ||
*{{ | *{{buff|The increased shieldstun benefits neutral aerial and forward aerial, as due to their low landing lag and higher damage (sweetspotted in the case of neutral aerial), they are now safe on shield with properly timed landings.}} | ||
*{{ | *[[Neutral aerial]]: | ||
*{{ | **{{change|Clean neutral aerial no longer has a consistent damage output (10% → 11%/9%). This improves the sweetspot's KO potential, but reduces its combo and [[lock]]ing potential, and vice versa for the sourspot.}} | ||
*{{ | **{{buff|Neutral aerial has a longer duration (frames 7-27 → 7-31).}} | ||
*{{nerf|Back aerial | **{{nerf|Neutral aerial's initial [[auto-cancel]] window is shorter (frames 1-6 → 1-3) and auto-cancels later (frames 32 → 36), no longer auto-canceling in a [[short hop]].}} | ||
*{{ | **{{nerf|Neutral aerial has slightly increased landing lag (9 frames → 10).}} | ||
*{{buff|[[Down aerial]] has an | *[[Forward aerial]]: | ||
*{{nerf| | **{{buff|Forward aerial deals more damage (9% (hit 1)/12% (hit 2) → 11%/13%), with knockback noticeably increased on the first hit (5 (base), 100 (scaling) → 20/130) and compensated on the second hit (20 (base), 110 (scaling) → 30/100), improving the former's KO potential.}} | ||
*{{buff| | **{{nerf|Forward aerial has slightly increased landing lag (10 frames → 12). Link's higher gravity also prevents it from auto-canceling in a full hop.}} | ||
*{{nerf|Grab aerial | *[[Back aerial]]: | ||
**{{nerf|Back aerial deals less damage (4% (hit 1)/7% (hit 2) → 3%/5%) hindering its edgeguarding potential and each hit has a shorter duration (frames 6-9 → 6-8 (hit 1), frames 18-23 → 18-22 (hit 2)).}} | |||
***{{buff|The second hit's lower damage and the changes to hitstun canceling turn it into a reliable combo starter, allowing Link to follow up with more back aerials and a reverse [[Spin Attack]].}} | |||
*[[Up aerial]]: | |||
**{{buff|Up aerial launches at a higher angle (80° → 85°) with more knockback scaling (85 → 88), improving its KO potential, and has decreased landing lag (30 → 23 frames). It also has an altered animation where Link leans farther backward while performing the {{s|zeldawiki|Up Thrust}}, improving its range and narrowing his hurtbox while performing the move.}} | |||
*[[Down aerial]]: | |||
**{{buff|Down aerial has received an early hit in addition to its clean and late hits, the former two which take up a longer portion of the move (frame 14 (clean)/frames 15-64 (late) → frames 14-19 (early)/20-22 (clean)/23-64 (late)). The new early hit meteor smashes aerial targets (65°/90° → 270°), significantly improving its edgeguarding ability, while having a different angle (65°/90° → 55°) and much lower knockback (30 (base), 80 (scling) → 25/40) against grounded targets, allowing it to combo into the bouncing hit at a wide range of percents, which also deals more damage (8% → 11%). Lastly, the move has significantly decreased landing lag (50 → 32 frames) and increased range below Link (4.2u → 5.5u (early)/6u (clean, late)).}} | |||
**{{nerf|Down aerial deals less damage (22% (clean)/18% (late) → 15% (early, late)/18% (clean)) and has reduced base knockback (40/30 → 30 (clean), 40/50 → 30 (late)). Combined with the aerial early hit meteor smashing and the grounded early hit having much lower knockback and making the clean hit harder to land, this immensely hinders the move's onstage KO potential. The hitbox at the hilt of the Master Sword has also been removed, reducing its range above Link.}} | |||
*[[Grab aerial]]: | |||
**{{buff|Grab aerial has increased range as a [[tether recovery]], significantly improving its recovery potential when combined with the changes to ledges. It also transitions faster as an attack (frames 11-16 (hit 1)/23-24 (hit 2) → frames 12-21/22-23), has less base knockback (60 → 50) and the first hit launches at a lower angle (45° → 35°), which along with its lower damage allows both hits to connect better.}} | |||
**{{nerf|Grab aerial has more startup (frame 11 → 12), deals less damage (4% (hit 1)/6% (hit 2) → 2.5%/4%) and now has 8 frames of landing lag rather than auto-canceling. These changes significantly hinder its safety, spacing and followup potential combined with the first hit's lower angle.}} | |||
===Throws/other attacks=== | ===Throws/other attacks=== | ||
*{{buff|[[ | *{{buff|All grabs have decreased ending lag (FAF 86 (standing)/96 (dash, pivot) → 62 (standing)/66 (dash)/67 (pivot)).}} | ||
*{{change| | *{{change|{{GameIcon|ssb4-u}}Prior to update 1.0.8, [[Clawshot]] came out earlier and went limp when fully extended, but also ended faster. However, this was merely aesthetic.}} | ||
*{{change|Link has a new edge attack | *{{change|{{GameIcon|ssb4-3ds}}Clawshot flies and retracts in a straight line like the Hookshot in ''SSB''. However, this is merely aesthetic.}} | ||
*[[Pummel]]: | |||
**{{buff|Pummel deals slightly more damage (2% → 2.1%).}} | |||
*[[Forward throw]]: | |||
**{{buff|Forward throw has less ending lag (FAF 41 → 36).}} | |||
*[[Down throw]]: | |||
**{{nerf|Down throw deals less damage (4% (throw)/7% (total) → 3%/6%).}} | |||
**{{change|Link releases opponents from down throw one frame later (frame 23 → 24).}} | |||
**{{buff|The hitbox has a longer duration (frame 22 → 22-23). This prevents the hitbox from whiffing against certain characters with certain [[weight]] values.}} | |||
**{{buff|Down throw has decreased knockback scaling (90 → 85) and it launches opponents at a higher angle (110° → 83°). When combined with its lower damage and the changes to hitstun canceling/DI, this significantly improves its combo potential.}} | |||
*[[Edge attack]]: | |||
**{{change|Link has a new edge attack, a crouching thrust that resembles the Crouch Stab used by the Hero of Time.}} | |||
**{{buff|New edge attack has less startup lag compared to the previous fast edge attack (frame 27 → 20).}} | |||
**{{nerf|New edge attack deals less damage compared to the previous edge attacks (8% (fast)/10% (slow) → 7%).}} | |||
===Special moves=== | ===Special moves=== | ||
*{{buff| | *[[Hero's Bow]]: | ||
*{{buff|[[Gale Boomerang]] has increased knockback.}} | **{{buff|Hero's Bow charges faster and has increased knockback (7 (base), 50 (scaling) → 10/66), improving its camping potential.}} | ||
*{{buff|Link's recovery | **{{nerf|{{b|Quickdraw|technique}}ing has been removed, hindering Hero's Bow's utility. Their higher knockback also hinders their locking potential.}} | ||
*{{ | *[[Gale Boomerang]]: | ||
*{{buff| | **{{buff|Gale Boomerang has slightly improved setup potential at close range and at low percentages.}} | ||
*{{buff| | **{{nerf|The removal of [[edge momentum shifting]] (in version [[1.0.8]]) has hindered Gale Boomerang's approach and edgeguarding potential.}} | ||
*{{buff| | *[[Spin Attack]]: | ||
*{{ | **{{buff|Uncharged Spin Attack deals 2% more damage (12% → 14%) and its front hit has increased knockback scaling (72 (early), 80 (clean/late) → 86 (early/clean)/82 (late)), improving its KO potential. It also has decreased startup lag (frame 11 → 8). Due to consisting of nine hits instead of five, aerial Spin Attack deals 8% more damage (14% → 22%) and its last hit has increased knockback scaling (160 → 200), significantly improving its KO potential. It can now also hit opponents behind Link. Lastly, aerial Spin Attack covers much more distance and Link retains much more momentum upon performing it. This significantly improves its recovery potential.}} | ||
**{{buff|The weakening of SDI makes aerial Spin Attack significantly more difficult to escape from.}} | |||
**{{nerf|Spin Attack's back hit has decreased knockback. The early and clean hits also have reduced base knockback (68 (early)/55 (clean) → 60/48).}} | |||
**{{change|Spin Attack's animation has slightly changed. Link now spins while swinging the Master Sword in a slight undulating motion. This slightly re-positions its hitboxes.}} | |||
*{{b|Bomb|Link}}: | |||
**{{change|Bomb deals 1% more damage at Link's feet or an opponent's feet when thrown from the ground (7% → 8%). It also deals consistent damage at Link's feet or an opponent's feet when smash thrown in the air (5%-9% → 9%).}} | |||
**{{buff|Bomb no longer damages Link if it explodes by hitting an opponent or another projectile. It also has increased durability. These changes improve its combo potential and safety.}} | |||
**{{nerf|Bomb's explosion is now [[absorb]]able.}} | |||
**{{change|Bomb has a shorter fuse, improving its [[Bomb (Link)#Bomb recovery|recovery]] potential, but hindering its [[mindgame]] potential.}} | |||
**{{change|{{GameIcon|ssb4-u}}Bomb is slightly larger. However, this is merely aesthetic.}} | |||
*[[Triforce Slash]]: | |||
**{{nerf|Triforce Slash deals much less damage (83% → 60%).}} | |||
==Update history== | |||
Link has been heavily buffed via game updates. In update [[1.0.4]], the knockback of the first hit of his forward smash was lowered, allowing it to connect better into the second hit. In update [[1.0.6]] though, he received a mix of buffs and nerfs, which hindered his KO and damage racking potentials, but improved his range and combo game. However, update 1.0.8 brought Link significant buffs in the form of a much more effective grab game and better KOing options, the latter of which helped mitigate the nerfs to his KOing potential that update 1.0.6 brought. In update [[1.1.0]], his grab game was buffed by slightly decreasing the start-up lag of his dash and pivot grabs. | |||
Updates [[1.1.3]] and [[1.1.5]] also brought several buffs, which further increased his already high KO potential. Lastly, he was indirectly buffed due to the changes on the shield mechanics in updates 1.1.0 and [[1.1.1]], as the increased [[shieldstun]] and the fact that [[hitlag]] modifiers now apply on shielding opponents improve Link's close-range game by making his moves safer on shield. Altogether, these buffs have resulted in Link being viewed as a better character than how he was in ''Brawl'' and even better than during the initial release of ''SSB4'', much like {{SSB4|Samus}}. | |||
'''{{GameIcon|ssb4-3ds}} [[1.0.4]]''' | |||
{{UpdateList/1.0.4|char=Link}} | |||
'''{{GameIcon|ssb4-3ds}} 1.0.5''' | |||
*{{buff|[[Shield (Link)|Hylian Shield]] now blocks [[Blaster (disambiguation)|Blasters]], improving its reliability.}} | |||
*{{change|Due to the release of {{forwiiu}}, the Quickfire Bow and Power Bow custom moves were altered in order to match the ''Wii U'' version.}} | |||
**{{nerf|As a result, Power Bow's start-up lag and endlag were dramatically increased. Before, it charged around the same speed as his normal Hero's Bow; now it is one of the slowest charging specials in the game.}} | |||
**{{buff|Conversely, Quickfire Bow's start-up lag and endlag were heavily decreased. This allows it to have better zoning potential and allows Link to more properly keep opponents in check.}} | |||
'''{{GameIcon|ssb4}} [[1.0.6]]''' | |||
*{{nerf|Neutral attack's first hit's has considerably higher ending lag (FAF 20 → 28), significantly hindering its safety and its jab canceling potential.}} | |||
*{{buff|Dash attack has less startup lag (frame 21 → 20).}} | |||
*{{nerf|Dash attack's near hit deals less damage (13% → 12%) and has lower knockback scaling (78 → 72), hindering its KO potential.}} | |||
*{{buff|Down tilt's main hitbox now always launches opponents in the direction Link is facing (Angle flipper: 0 → 3), making it a more consistent combo starter.}} | |||
*{{change|Down tilt's hitboxes are now static, rather than being attached to Link's sword/body.}} | |||
*{{change|Down tilt's main hitbox now uses one extended hitbox which covers Link's sword rather than two standard hitboxes.}} | |||
*{{change|Down tilt's meteor hitbox is positioned higher, it can no longer hit grounded opponents and it now takes priority over the main hitbox.}} | |||
*{{nerf|Down tilt's main hitbox has lower knockback scaling (50 → 30), hindering its KO potential.}} | |||
**{{buff|However, this also improves its combo potential at lower percents.}} | |||
*{{nerf|Down tilt's meteor smash hitbox is significantly smaller (4u → 1.5u) and the meteor smash hitbox inside of Link has been removed, giving the move less range inside of Link.}} | |||
*{{nerf|Down tilt's meteor smash hitbox has dramatically reduced knockback (90 (base), 50 (scaling) → 0/62), making it immensely weaker.}} | |||
*{{buff|Forward smash 1's near hit now has an extended hitbox, giving it more range inside of Link.}} | |||
*{{buff|Forward smash 1's near hit now always launches the opponent in front of Link (Angle flipper: 0 → 3), making the move connect more reliably into the second hit.}} | |||
*{{change|Forward smash 2's near hit now always launches the opponent in front of Link (Angle flipper: 0 → 3).}} | |||
*{{buff|Up smash's second hit has less startup lag (frame 26 → 25).}} | |||
*{{buff|Grounded [[Spin Attack]] has less startup (frame 11 → 8) and ending lag (FAF 86 → 82). The lower startup lag significantly improves the move's use as an Out of Shield punish.}} | |||
*{{buff|Grounded Spin Attack has a new clean hit during its first two active frames which deals more damage on its front hit (12% → 14%). Its knockback values were not compensated, considerably improving its KO potential.}} | |||
**{{buff|After the new early hit, the early mid hit deals significantly more damage on the front hit compared to the old mid hit (9% → 12%). The late mid hit starts two frames later than the old mid hit and hits equally as hard as the old mid hit.}} | |||
*{{buff|Grounded Spin Attack and Shocking Spin Attack's back hitboxes are positioned slightly further away from Link (X offset: 6.6 → 7), giving them slightly more range.}} | |||
'''{{GameIcon|ssb4}} [[1.0.8]]''' | |||
*{{buff|Down tilt has less startup lag (frame 13 → 11) with its total duration subsequently reduced (FAF 32 → 30).}} | |||
*{{buff|Down tilt's hitboxes have been moved further away from Link (Z offsets: 12.8 (main)/15.4 (meteor) → 14.1/16.6), improving its range.}} | |||
*{{nerf|Down tilt deals less damage (12% → 11%).}} | |||
**{{buff|However, its knockback values were not compensated, improving its combo potential.}} | |||
*{{buff|Up smash's hits connect together better.}} | |||
*{{buff|Link's grabs cover more distance and they have a longer duration (6 frames → 8), considerably improving their range.}} | |||
*{{buff|All grabs have less ending lag (FAF 66 (standing)/77 (dash)/79 (pivot) → 62/66/67.}} | |||
*{{buff|Forward throw has less ending lag decreased (FAF 41 → 36).}} | |||
*{{nerf|Down throw deals 1% less damage (4% (throw)/7% (total) → 3%/6%) and has lower knockback scaling (90 → 85).}} | |||
*{{buff|Down throw launches opponents at a higher angle (110° → 83°). When combined with its reduced knockback, this significantly improves its combo potential.}} | |||
*{{buff|Grounded Spin Attack has higher knockback scaling (84 (clean)/80 (early mid)/80 (late mid) → 86/86/82), improving its KO potential.}} | |||
*{{buff|Grounded Shocking Spin Attack's mid hit has higher knockback scaling (80 → 82), improving its KO potential.}} | |||
'''{{GameIcon|ssb4}} [[1.1.0]]''' | |||
*{{buff|Dash and pivot grabs' start-up lag decreased (frame 15 (dash)/frame 16 (pivot) → 14/15).}} | |||
*{{change|Spin Attack's hitbox placements adjusted.}} | |||
'''{{GameIcon|ssb4}} [[1.1.1]]''' | |||
*{{buff|Shocking Spin deals more damage (14%/9%/7%/5% → 16%/11%/8%/6%) and it received an additional hitbox that deals 14%.}} | |||
'''{{GameIcon|ssb4}} [[1.1.3]]''' | |||
{{UpdateList/1.1.3|char=Link}} | |||
'''{{GameIcon|ssb4}} [[1.1.5]]''' | |||
{{UpdateList/1.1.5|char=Link}} | |||
==Moveset== | ==Moveset== | ||
''For a gallery of Link's hitboxes, see [[/Hitboxes|here]].'' | |||
{{MovesetTable | {{MovesetTable | ||
|game=SSB4 | |game=SSB4 | ||
|neutralcount=3 | |neutralcount=3 | ||
|neutralname= | |neutralname= | ||
|neutral1dmg=2.5% | |neutral1dmg=2.5% | ||
|neutral2dmg=2.5% | |neutral2dmg=2.5% | ||
|neutral3dmg=5% | |neutral3dmg=5% | ||
|neutraldesc=A | |neutraldesc=A downward slash, followed by an outward slash, followed by a thrust. Has slow startup for a jab, but its second hit can be [[jab cancel]]ed, with notable followups including down tilt, a grab, or [[Spin Attack]], and its third hit is a [[semi-spike]] with high base knockback, making it useful for [[tech-chasing]] and forcing opponents near edges offstage. It is based on the final series of strikes that the {{s|zeldawiki|Hero of Time}} deals to [[Ganondorf|Ganon]] in ''The Legend of Zelda: Ocarina of Time''. | ||
|ftiltname= | |ftiltname= | ||
|ftiltdmg=13% | |ftiltdmg=13% | ||
|ftiltdesc= | |ftiltdesc=A lunging downward slash. It is tied with {{SSB4|Olimar}} for the second slowest startup of any forward tilt in the game (at frame 15), but has long range, can hit opponents above Link, and deals high knockback for a tilt attack, while having only average ending lag that makes it safe on shield if spaced properly. This attack resembles the [[zeldawiki:Targeting|Z-Targeting]] slash used by Link from ''The Legend of Zelda: Ocarina of Time''. | ||
|utiltname= | |utiltname= | ||
|utiltdmg=9% | |utiltdmg=9% | ||
|utiltdesc= | |utiltdesc=An overhead arcing slash. Has good juggling potential from low to mid percents, comboing into itself depending on the victim's weight and falling speed, and decent KO potential at high percentages. | ||
|dtiltname= | |dtiltname= | ||
|dtiltdmg= | |dtiltdmg=11% | ||
|dtiltdesc=A low | |dtiltdesc=A kneeling inward slash. Has slow startup for a tilt, but low ending lag with vertical knockback, granting it combo potential into aerials (most notably forward aerial, dealing 35% if both hits connect) and making it safe on shield with proper spacing. It also has a hitbox close to the tip of the Master Sword that [[meteor smash]]es aerial opponents, but deals weak knockback. It is also very difficult to land due to its small size and lower priority than the other hitboxes, leaving it unable to hit characters hanging on an edge except for {{SSB4|Charizard}}. | ||
|dashname= | |dashname=Jump Slash ({{ja|ジャンプ斬り|Janpu Giri}}) | ||
|dashdmg=14% (tip), 13% ( | |dashdmg=14% (tip), 13% (middle), 12% (base) | ||
|dashdesc= | |dashdesc=The {{s|zeldawiki|Jump Attack}}. It is the second strongest dash attack in the game without knockback modifications, only behind {{SSB4|King Dedede}}'s, KOing at around 110% from center stage when sweetspotted. However, it also has the second slowest startup of them (at frame 20) alongside high ending lag, making it very punishable if whiffed or used recklessly. | ||
|fsmashcount=2 | |fsmashcount=2 | ||
|fsmashname= | |fsmashname=Sword Slice ({{ja|スマッシュ斬り|Sumasshu Giri}}, ''Smash Slice'') / Double Sword Slice ({{ja|二段スマッシュ斬り|Nidan Sumasshu Giri}}, ''Double Smash Slice'') | ||
|fsmashdmg={{ChargedSmashDmgSSB4|14}} (tip), {{ChargedSmashDmgSSB4|7}} (non-tip) | |fsmashdmg={{ChargedSmashDmgSSB4|14}} (tip), {{ChargedSmashDmgSSB4|7}} (non-tip) | ||
|fsmash2dmg={{ChargedSmashDmgSSB4|13}} (tip), {{ChargedSmashDmgSSB4|12}} (non-tip) | |fsmash2dmg={{ChargedSmashDmgSSB4|13}} (tip), {{ChargedSmashDmgSSB4|12}} (non-tip) | ||
|fsmashdesc=Link | |fsmashdesc=A two-handed, lunging downward slash. If the attack button is pressed again, Link will perform a single-handed outward slash. The first hit deals respectable damage and knockback at the blade's tip, but only deals half as much damage with much lower knockback when not tipped; however, the non-tipped hit is a [[natural combo]] into the second slash. Conversely, the second hit deals more consistent damage overall and is relatively powerful, but has heavy ending lag. | ||
|usmashname= | |usmashname= | ||
|usmashdmg={{ChargedSmashDmgSSB4|4}} (hit 1), {{ChargedSmashDmgSSB4|3}} (hit 2), {{ChargedSmashDmgSSB4|11}}/{{ChargedSmashDmgSSB4|10}}/{{ChargedSmashDmgSSB4|9}} (hit 3) | |usmashdmg={{ChargedSmashDmgSSB4|4}} (hit 1), {{ChargedSmashDmgSSB4|3}} (hit 2), {{ChargedSmashDmgSSB4|11}}/{{ChargedSmashDmgSSB4|10}}/{{ChargedSmashDmgSSB4|9}} (hit 3) | ||
|usmashdesc= | |usmashdesc=A series of three overhead arcing slashes, the last one which launches opponents away. Has average startup, covers a wide range, deals high damage and can KO under 100%, but has high ending lag. The third hit deals more damage the closer opponents are to the tip of the Master Sword. | ||
|dsmashname= | |dsmashname= | ||
|dsmashdmg={{ChargedSmashDmgSSB4|17}}/{{ChargedSmashDmgSSB4|16}}/{{ChargedSmashDmgSSB4|14}} (hit 1), {{ChargedSmashDmgSSB4|12}}/{{ChargedSmashDmgSSB4|11}}/{{ChargedSmashDmgSSB4|10}} (hit 2) | |dsmashdmg={{ChargedSmashDmgSSB4|17}}/{{ChargedSmashDmgSSB4|16}}/{{ChargedSmashDmgSSB4|14}} (hit 1), {{ChargedSmashDmgSSB4|12}}/{{ChargedSmashDmgSSB4|11}}/{{ChargedSmashDmgSSB4|10}} (hit 2) | ||
|dsmashdesc=A | |dsmashdesc=A kneeling inward slash in front of himself, followed by a kneeling outward slash behind himself. The first hit launches opponents at a vertical trajectory while dealing more damage the closer the opponent is to Link, and can KO at around 100% uncharged with the strongest hitbox. Conversely, the second hit is a semi-spike with high base knockback that deals more damage at farther range, but is weaker than the first hit. | ||
|nairname= | |nairname= | ||
|nairdmg=11% | |nairdmg=11% (clean, foot), 9% (clean, leg), 6% (late) | ||
|nairdesc= | |nairdesc=A flying kick. It is a [[sex kick]] with relatively fast startup and low ending and [[landing lag]]. One of Link's most useful moves overall, as it lets him escape pressure, is safe on shield with proper timing, and can even [[lock]] and combo into other moves on landing especially with the late hit, a notable followup being dash attack as a KO setup at high percents. | ||
|fairname= | |fairname= | ||
|fairdmg= | |fairdmg=11% (hit 1), 13% (hit 2) | ||
|fairdesc= | |fairdesc=Two alternating, spinning outward slashes. The first hit has more knockback, while the second deals more damage but can only connect from the first hit at low percents. The most damaging forward aerial in the game if both hits connect. Due to its low landing lag and long range, it is also a reliable safe on shield move with proper timing, but its slow startup, moderate ending lag and inability to [[autocancel]] before it can be interrupted still leave it easy to punish if overused. | ||
|bairname= | |bairname= | ||
|bairdmg=3% (hit 1), 5% (hit 2) | |bairdmg=3% (hit 1), 5% (hit 2) | ||
|bairdesc=A | |bairdesc=A hook kick followed by a mid-level roundhouse kick. Link's fastest aerial and has very low ending and landing lag, allowing it to combo into itself at low percents, which can be further followed up by a reverse Spin Attack. However, it is one of his least damaging attacks, and the weakest back aerial in the game, as it is unable to KO from center stage even during [[Sudden Death]]. | ||
|uairname= | |uairname= | ||
|uairdmg=15% (clean), 13% (late) | |uairdmg=15% (clean), 13% (late) | ||
|uairdesc= | |uairdesc=The {{s|zeldawiki|Up Thrust}}. It is quite powerful when clean and has a long lasting hitbox that is difficult to dodge, making it a good KOing and juggling option. However, it has high landing lag, can only autocancel in a full hop if done near the start, and leaves Link highly vulnerable from other positions due to its long duration. | ||
|dairname= | |dairname= | ||
|dairdmg=15% (early), 18% (clean), 15% (late) | |dairdmg=15% (early), 18% (clean), 15% (late), 11% (bounce) | ||
|dairdesc= | |dairdesc=The {{s|zeldawiki|Down Thrust}}. Upon hitting a target without [[fast falling]], Link bounces off them and can then hit them a second time, albeit dealing less damage. The early hit is unique from the rest of attack: against grounded targets, it has weak vertical knockback allowing it to combo into the bounce hit for a large amount of damage (26%), but giving it poor KO potential, while against aerial targets, it is a meteor smash with higher knockback. On the other hand, the clean and late hit send both grounded and aerial targets vertically with high knockback; the clean hit in particular can KO at around 120%, making it one of the strongest down aerials in the game, but it is hard to land due to its much shorter duration than both the early and late hits. Like up aerial, the move has very long lasting hitboxes, but high landing lag and mostly vertical range. | ||
|zairname=Clawshot | |zairname=[[Clawshot]] ({{ja|クローショット|Kurōshotto}}) | ||
|zairdmg=2.5% (hit 1), 4% (hit 2) | |zairdmg=2.5% (hit 1), 4% (hit 2) | ||
|zairdesc=Fires his Clawshot forward | |zairdesc=Fires his {{s|zeldawiki|Clawshot}} forward. Has great range and very low landing lag making it a useful spacing tool, and its low knockback also allows it to combo into most ground attacks. The Clawshot also serves as a [[tether recovery]]. | ||
|grabname=Clawshot | |grabname=Clawshot ({{ja|クローショット|Kurōshotto}}) | ||
|grabdesc= | |grabdesc=Fires his Clawshot forward. In {{for3ds}}, the chain snaps straight back once fully extended, like the Hookshot from ''SSB''. In {{forwiiu}}, the chain drags on the ground like his Hookshot did in ''Melee'' and ''Brawl''. The Clawshot grants each of Link's grabs very long ranges, but they also have high startup and ending lag. | ||
|pummelname= | |pummelname= | ||
|pummeldmg=2.1% | |pummeldmg=2.1% | ||
|pummeldesc=Hits opponent with | |pummeldesc=Hits the opponent with the Master Sword's pommel. A fairly fast pummel. | ||
|fthrowname= | |fthrowname= | ||
|fthrowdmg=3% (hit 1), 4% (throw) | |fthrowdmg=3% (hit 1), 4% (throw) | ||
|fthrowdesc= | |fthrowdesc=A front kick. Has little utility beyond launching opponents offstage, due to its weak power. | ||
|bthrowname= | |bthrowname= | ||
|bthrowdmg=3% (hit 1), 4% ( | |bthrowdmg=3% (hit 1), 4% (throw) | ||
|bthrowdesc=Link | |bthrowdesc=A back kick. Launches the victim facing away from Link and has lower knockback growth, but it is otherwise identical to forward throw. | ||
|uthrowname= | |uthrowname= | ||
|uthrowdmg=5%/4% (hit 1), 2% (throw) | |uthrowdmg=5%/4% (hit 1), 2% (throw) | ||
|uthrowdesc= | |uthrowdesc=Raises the opponent overhead and slashes them upward. Has relatively high knockback growth, which allows it to KO around 170% without [[rage]]. Against bystanders, it is a weak semi-spike with a sourspot at the base of the Master Sword; the thrown opponent is always hit by the sweetspot. | ||
|dthrowname= | |dthrowname= | ||
|dthrowdmg=3% (hit 1), | |dthrowdmg=3% (hit 1), 3% (throw) | ||
|dthrowdesc= | |dthrowdesc=Pins the opponent to the ground and then performs an [[wikipedia:Professional wrestling attacks#Elbow drop|elbow drop]]. It can combo into his up tilt, up smash, neutral aerial and up aerial, most notably having a semi-guaranteed KO setup into the latter against most characters at high percents. Due to being weight-dependent, its combos work better against lightweight characters, with {{SSB4|Mewtwo}} and {{SSB4|Rosalina}} being the most vulnerable to the up aerial setup due to their large hurtboxes. | ||
|floorfname= | |floorfname= | ||
|floorfdmg=7% | |floorfdmg=7% | ||
|floorfdesc= | |floorfdesc=Slashes in front of himself and then behind himself. | ||
|floorbname= | |floorbname= | ||
|floorbdmg=7% | |floorbdmg=7% | ||
|floorbdesc= | |floorbdesc=Slashes in front of himself and then behind himself. | ||
|floortname= | |floortname= | ||
|floortdmg=5% | |floortdmg=5% | ||
|floortdesc= | |floortdesc=Slashes in front of himself and then behind himself. | ||
|edgename= | |edgename= | ||
|edgedmg=7% | |edgedmg=7% | ||
|edgedesc= | |edgedesc=The Crouch Stab from ''The Legend of Zelda: Ocarina of Time''. | ||
|nsdefname=Hero's Bow | |nsdefname=Hero's Bow | ||
|nsdefdmg=4% | |nsdefdmg=4% (uncharged), 12% (fully charged) | ||
|nsdefdesc= | |nsdefdesc=Wields his [[zeldawiki:Bow|Hero's Bow]] and fires an {{s|zeldawiki|arrow}} forward. Charging increases the arrow's speed, distance and damage output; at full charge, the arrow flies almost completely straight and covers a very long distance. Good for [[gimp]]ing recoveries and pressuring opponents from afar. | ||
|nsc1name=Power Bow | |nsc1name=Power Bow | ||
|nsc1dmg=4% | |nsc1dmg=4% (uncharged), 20% (fully charged) | ||
|nsc1desc= | |nsc1desc=The arrow has considerable knockback when fully charged, to the point of KOing at medium to high percentages. However, this comes at the cost of heavily increasing the charge time of the move. Additionally, uncharged or partially charged arrows have extremely short ranges and low power, as they drop near Link's feet. | ||
|nsc2name=Quickfire Bow | |nsc2name=Quickfire Bow | ||
|nsc2dmg=4% | |nsc2dmg=4% (uncharged), 8% (fully charged) | ||
|nsc2desc= | |nsc2desc=Fires {{b|magic|effect}}al arrows that charge quickly and travel in a straight line. Uncharged arrows are decently [[spam]]mable due to being fired faster, but charged arrows have a lower maximum damage output. The arrows also have shorter range. | ||
|ssdefname=Gale Boomerang | |ssdefname=Gale Boomerang | ||
|ssdefdmg=7% (near), 5% (middle), | |ssdefdmg=7% (near), 5% (middle), — (far/return) | ||
|ssdefdesc= | |ssdefdesc=Throws the {{s|zeldawiki|Gale Boomerang}}, which flies forward and then returns to Link. It damages opponents as it flies away and [[Windbox#Pulling attacks|pulls]] opponents toward him during its return. It can be angled up or down, while a [[Item throw#Directions and strength|smash throw]] (which is similar to when performing the input for a smash attack) increases the distance it can travel. Unlike [[Boomerang]], a [[reflection|reflected]] Gale Boomerang is not threatening to Link, as it will only fly past him with its non-damaging windbox. It has set-up potential, albeit only at close range and at low percentages. | ||
|ssc1name=Boomerang | |ssc1name=Boomerang | ||
|ssc1dmg=9% (near), 7% (middle), 5% (far), 3% (return) | |ssc1dmg=9% (near), 7% (middle), 5% (far), 3% (return) | ||
|ssc1desc= | |ssc1desc=Functions [[Boomerang|like his ancestor's Boomerang in ''SSB'' and ''Melee'']], dealing more damage and damaging opponents upon returning. It can also be aimed easier, but deals less knockback. | ||
|ssc2name=Ripping Boomerang | |ssc2name=Ripping Boomerang | ||
|ssc2dmg=4% (near), 2% (middle), 1.5% (far), 0.7% (return) | |ssc2dmg=4% (near), 2% (middle), 1.5% (far), 0.7% (return) | ||
|ssc2desc= | |ssc2desc=Has much shorter range and deals less damage, but hits multiple times and [[stun]]s the opponent, which makes it ideal for set-ups. | ||
|usdefname=Spin Attack | |usdefname=Spin Attack | ||
|usdefdmg=12%/9%/7%/5% ( | |usdefdmg=14%/12%/9%/7% (grounded, blade), 11.2%/9.6%/7.2%/5.6% (grounded, tip), 4% (aerial hit 1), 2% (aerial hits 2-8), 4% (aerial hit 9) | ||
|usdefdesc= | |usdefdesc=[[zeldawiki:Spin Attack|A spinning, outward slash]]. Much like in the ''The Legend of Zelda'' series, it is a powerful attack, and can be charged on the ground for even higher damage and knockback. Conversely, an aerial Spin Attack is a series of spinning, inward slashes and is Link's primary recovery move, covering respectable vertical distance, but minimal horizontal distance. The grounded version is a fast [[out of shield]] option and decays on damage over time, KOing at around 120% uncharged with the strongest hit, while the aerial version deals up to 9 hits, but usually only connects 5 hits against opponents in front of Link. | ||
|usc1name=Shocking Spin | |usc1name=Shocking Spin | ||
|usc1dmg= | |usc1dmg=16%/11%/12%/8%/6% (grounded), 4% (aerial hit 1), 1% (aerial hits 2-4), 6% (aerial hit 5), 14% (additional hitbox) | ||
|usc1desc= | |usc1desc=An [[electric]]al version that deals more damage and knockback. However, it grants much less distance and has poor horizontal momentum, making it function very similarly to how Spin Attack functioned in ''SSB'' and ''Brawl''. The aerial version can semi-spike, but cannot hit backwards. | ||
|usc2name=Whirling Leap | |usc2name=Whirling Leap | ||
|usc2dmg= | |usc2dmg=— | ||
|usc2desc= | |usc2desc=Deals no damage, but grants even greater vertical and horizontal distance, to the point that Link can perform multiple left and right movements without relying on momentum. The grounded version also makes Link leap into the air. | ||
|dsdefname=Bomb | |dsdefname=Bomb | ||
|dspage=Bomb (Link) | |dspage=Bomb (Link) | ||
|dsdefdmg=5% ( | |dsdefdmg=5% (explosion center), 9% (explosion outlines) | ||
|dsdefdesc= | |dsdefdesc=Pulls out a {{s|zeldawiki|Bomb}}. It explodes 3.66 seconds (220 frames) after being pulled out, or upon contact with a surface, an attack, or an opponent. The explosion can hurt Link unless it hits an opponent first. When used skillfully, [[Bomb (Link)#Bomb recovery|the explosion can remove Link from helplessness]] and thus allow him to perform an extra Spin Attack, improving his recovery. | ||
|dsc1name=Giant Bomb | |dsc1name=Giant Bomb | ||
|dsc1dmg=8%- | |dsc1dmg=7%-8% (center), 10%-11% (outlines) | ||
|dsc1desc=A | |dsc1desc=A massive Bomb with a large explosion hitbox, which deals more damage and knockback. However, it cannot explode via physical contact, instead bouncing around harmlessly until time is up or another nearby explosion triggers it. Deals damage based on range. | ||
|dsc2name=Meteor Bomb | |dsc2name=Meteor Bomb | ||
|dsc2dmg=5% | |dsc2dmg=5% | ||
|dsc2desc= | |dsc2desc=A smaller and weaker Bomb with a smaller explosion radius (virtually needs to make contact) and a much shorter fuse (roughly 2 seconds). However, it meteor smashes anyone hit with moderate knockback. As a result, it is not practical for recoveries in any way, as it will simply meteor smash Link, though it allows him to survive vertical KOs longer with good timing. At high percents (120% for Mario) ground targets will be stopped in their tracks due to its considerable hitstun. Otherwise, the bomb has virtually no knockback on ground targets. | ||
|fsname=Triforce Slash | |fsname=Triforce Slash | ||
|fsdmg=1% ( | |fsdmg=1% (trapping), 3% (hits 1-14), 2% (hit 15), 15% (final) | ||
|fsdesc= | |fsdesc=Uses the [[zeldawiki:Triforce|Triforce of Courage]] to emit a thin beam of light from his left hand to stun an opponent in front of himself. If the beam comes in contact with an opponent, Link dashes forward and performs a barrage of slashes while they are trapped in a Triforce-shaped energy field before concluding with an outward slash that shatters the energy field and launches them. Although its damage output has lowered since ''Brawl'', it is still among the most powerful [[Final Smash]]es in the game. It can hit multiple opponents, but all non-trapped opponents are launched out the energy field after the penultimate hit. | ||
}} | }} | ||
=== | ===Stats=== | ||
{{Attributes | |||
|cast = 58 | |||
|weight = 104 | |||
|rweight = 11-13 | |||
|dash = 1.3 | |||
|rdash = 49-55 | |||
|run = 1.3944 | |||
|rrun = 50 | |||
|walk = 1.188 | |||
|rwalk = 19-20 | |||
|trac = 0.064 | |||
|rtrac = 12-13 | |||
|airfric = 0.0038 | |||
|rairfric = 55-56 | |||
|air = 0.88 | |||
|rair = 52-53 | |||
|baseaccel = 0.01 | |||
|rbaseaccel = 10-54 | |||
|addaccel = 0.04 | |||
|raddaccel = 46-53 | |||
|gravity = 0.096 | |||
|rgravity = 19-20 | |||
|fall = 1.6 | |||
|rfall = 24-27 | |||
|ff = 3.04 | |||
|rff = 3 | |||
|jumpsquat = 7 | |||
|rjumpsquat = 52-57 | |||
|jumpheight = 27.799999 | |||
|rjumpheight = 52 | |||
|shorthop = 13.380496 | |||
|rshorthop = 50 | |||
|djump = 29 | |||
|rdjump = 46 | |||
}} | |||
====On- | ===[[Announcer]] call=== | ||
{{audio|Needs announcer calls from other languages.}} | |||
<gallery> | |||
Link English Announcer SSB4-SSBU.wav|English/Japanese/Chinese | |||
</gallery> | |||
===[[On-screen appearance]]=== | |||
{{appearance | |||
|desc=Appears from within a whirlwind and equips the Master Sword and Hylian Shield. It may be based on the {{s|zeldawiki|warping}} animation seen upon using the {{s|zeldawiki|Recorder}}. | |||
|char=Link | |||
|game=SSB4}} | |||
===[[Taunt]]s=== | |||
{{Taunt/SSB4 | |||
|char=Link | |||
|desc-up=Swings the Master Sword twice and twirls it behind him before sheathing it. It is very similar to his victory pose in ''Twilight Princess'', which he performs after learning a {{s|zeldawiki|Hidden Skill}} or defeating a boss/particularly difficult enemies. | |||
|desc-side=Link takes out a {{s|zeldawiki|fairy}} from his pocket, which proceeds to fly around him as he watches it until it returns to his pocket. While the fairy's design is based on the fairy cursor seen in the Wii version of ''Twilight Princess'', it could also be a reference to {{s|zeldawiki|Navi}}, the fairy companion of the Link from ''Ocarina of Time''. | |||
|desc-down=Assumes a {{s|wikipedia|Fujian White Crane}}-like stance while rearing the Master Sword behind his head. Originates from ''SSB'' and may be loosely based on the attacking pose used by the Link from ''[[zeldawiki:Zelda ll: The Adventure of Link|Zelda II: The Adventure of Link]]''.}} | |||
===[[Idle pose]]s=== | |||
{{Idle | |||
|desc-1=Assumes a battle ready stance. | |||
|desc-2=Looks behind himself. | |||
|image-1=LinkIdlePose1WiiU.jpg | |||
|image-2=LinkIdlePose2WiiU.jpg}} | |||
===[[Crowd cheer]]=== | |||
{{Crowd | |||
|char=Link | |||
|game=SSB4 | |||
|desc-us=Link! Link! Link! | |||
|desc-jp=Rin-ku! | |||
|pitch-us=Group chant | |||
|pitch-jp=Group chant}} | |||
===[[Victory pose]]s=== | |||
{{Victory/SSB4 | |||
|victory-theme=ZeldaUniverseTheme.ogg | |||
|victory-desc=An orchestral remix of the theme that plays when [[Link]] obtains a [[zeldawiki:Triforce|Triforce Piece]] in ''[[zeldawiki:The Legend of Zelda (Game)|The Legend of Zelda]]'' and has since become the main theme of ''The Legend of Zelda'' series. | |||
|desc-1=Swings the Master Sword three times and then looks to the right. It is based on his "character chosen" animation in ''SSB'', albeit ending with him facing a different direction. | |||
|desc-2=Swings the Master Sword once, twirls it behind his head, then sheathes it while looking at the camera. Like his up taunt, it is based on his victory pose from ''Twilight Princess''. | |||
|desc-3=Thrusts the Master Sword forward, holds it up to his face, then thrusts it upward while emitting a {{s|wikipedia|kiai}}. | |||
|char=Link}} | |||
==In [[competitive play]]== | |||
===Tier placement and history=== | |||
Since ''SSB4''{{'}}s release, Link's nimbler mobility, stronger projectile game, higher power and improved range saw him perceived as noticeably better than his appearance in ''Brawl'' and, according to some players, a mid-tier character like [[Link (SSBM)|his ancestor was in ''Melee'']]. However, opinions on Link started to decline in light of more developed metagames and higher popularity of certain other characters, whereas Link's representation in competitive play remained rather poor. This culminated in him being ranked 42nd on the first [[tier list]]. | |||
Opinions on Link, however, started to improve after certain respectable placings by dedicated mains, such as {{Sm|Izaw}} and {{Sm|Scizor}}. This resulted in him being ranked 43rd on the second tier list, after the inclusion of {{SSB4|Corrin}} and {{SSB4|Bayonetta}}. Thanks to {{Sm|T}} notably achieving strong results with Link after the second tier list, Link was ranked 39th on the third tier list. This resulted in him being reassessed as a mid-tier character, while his placement itself was also very similar to his ancestor's in ''Melee''. | |||
After T placed 3rd at [[2GGC: Civil War]], one of the most competitive tournaments in ''SSB4''{{'}}s lifespan, Link's perception has further improved, to the point that he is viewed as deserving to be in the upper portion of the mid-tier. This has been reflected in the fourth and current tier list, in which Link is ranked 31st. | |||
===[[Official Custom Moveset Project]]=== | |||
{{OfficialCustomMoves | |||
|char=Link | |||
|set1=1211 | |||
|set2=1213 | |||
|set3=2211 | |||
|set4=2213 | |||
|set5=1311 | |||
|set6=1313 | |||
|set7=2311 | |||
|set8=2313 | |||
|set9=1231 | |||
|set10=3211 | |||
}} | |||
===Most historically significant players=== | |||
<!--This character has a ten player limit for this section. Before adding and/or removing a player, read these guidelines: https://www.ssbwiki.com/SmashWiki:Notability#%22Most_historically_significant_players%22_guidelines --> | |||
==== | ''Any number following the Smasher name indicates placement on the [[PGR 100]], which recognizes the official top 100 players in [[Super Smash Bros. 4]] of all time.'' | ||
''See also: [[:Category:Link players (SSB4)]]'' | |||
*{{Sm|Izaw|Sweden}} - One of the best Link players in Europe. Placed 4th at [https://smashboards.com/threads/avalon-u-ii-february-6th-2016-the-netherlands-europe.430332/ Avalon U-II] defeating {{Sm|Meru}} and 9th at two superregionals with {{Trn|BEAST 6}} and {{Trn|Eclipse 2}}. He was formerly ranked 2nd on the [[Swedish Power Rankings]] during 2017. | |||
*{{Sm|Nicorin|Japan}} - The second-best Link player in Japan behind T. While he never reached the same peaks as T, he made some respectable placements at many different events such as 9th at {{Trn|Hirosuma 13}}, 13th at {{Trn|Rikabura 6}}, and 25th at {{Trn|Umebura 27}} with victories over {{Sm|Some}} and {{Sm|Brood}}. | |||
*{{Sm|Scizor|USA}} - One of the best Link players in the United States and one of the first to perform well in North America. Besides T, he was the closest Link player to top 8 at a major tournament with 9th at {{Trn|2GGC: West Side Saga}} and also placed 33rd at {{Trn|2GGC: GENESIS Saga}}. He holds the best major result seen by Link in the ''post-Ultimate'' era with 13th at {{Trn|Super Smash Con 2022}}. | |||
*{{Sm|Sova Unknown|USA}} - One of the best Link players in the United States. Residing in the MD/VA region, he mainly competed at local tournaments such as 5th at {{Trn|Glitch}} and 17th at {{Trn|Glitch 2}} with a win over {{Sm|Umeki}}. He has also given some of Link's best results seen in the ''post-Ultimate'' era, placing 3rd at {{Trn|Apex 2022}} and 17th at {{Trn|Super Smash Con 2019}}. | |||
*{{Sm|T|Japan}} - The best Link player of all-time. His 3rd place finish at {{Trn|2GGC: Civil War}} is iconic for being the best Link result seen in ''Smash 4'', marking the character's peak at a supermajor and some of his best wins in players such as {{Sm|Abadango}} and {{Sm|Fatality}}. T's ability to perform at top level with Link became a main source for Link's rise on later tier lists in ''Smash 4'' and solidified him as the 46th best player on the [[PGR 100]]. | |||
*{{Sm|Tsage|USA}} - One of the best Link players in the United States. Alongside Scizor, he was considered one of the first North American Link players to perform well at notable tournaments, placing 7th at {{Trn|GUMS 15}}, 9th at {{Trn|Shift}}, and 49th at {{Trn|Shine 2016}}. Ranked 24th on the last major [[New England Power Rankings|New England]] Power Ranking of ''Smash 4''. | |||
==[[Trophies]]== | |||
{{Trophy/Fighter | |||
|name=Link | |||
|image-3ds=LinkTrophy3DS.png | |||
|image-wiiu=LinkTrophyWiiU.png | |||
|mode=Classic | |||
|desc-3ds-ntsc=Green clothes? Pointy hat? Yep, it's Link, all right! In this game, his sword and shield make for effective attacking and blocking, and his bow, bombs, and boomerang will spice up any battle. He's even brought his Clawshot for grabbing enemies and edges. Jeez, just how much stuff can Link carry? | |||
|desc-wiiu-ntsc=Green tunic? Pointy hat? Yep, it's Link, all right! In this game, his sword and shield make for effective attacking and blocking, and his bow, bombs, and boomerang will spice up any battle. He's even brought his Clawshot for grabbing enemies and edges. Jeez, just how much stuff can Link carry? | |||
|desc-pal=Green clothes? Pointy hat? Yep, it's Link all right! In this game, his sword and shield make for effective attacking and blocking, and his bow, bombs and boomerang will spice up any battle. He's even brought his Clawshot to make light work of grabbing enemies and hanging from edges. The hero of Hyrule is really kitted out for a brawl! | |||
|gamelist-ntsc={{Trophy games|console1=NES|game1=The Legend of Zelda|release1=08/1987|console2=SNES|game2=The Legend of Zelda: A Link to the Past|release2=04/1992}} | |||
|gamelist-pal={{Trophy games|console1=NES|game1=The Legend of Zelda|release1=11/1987|console2=SNES|game2=The Legend of Zelda: A Link to the Past|release2=09/1992}} | |||
}} | |||
{{clrl}} | |||
{{Trophy/Fighter | |||
|name=Link (Alt.) | |||
|image-3ds=LinkAltTrophy3DS.png | |||
|image-wiiu=LinkAltTrophyWiiU.png | |||
|mode=Alt | |||
|desc-3ds-ntsc=If Link was on a desert island and could only pick one item, it'd be his powerful sword. This weapon is key to his down-air attack, a move with great launching potential and the ability to strike twice. He can also strike twice with his side smash—the second blow deals more damage and launches harder. | |||
|desc-wiiu-ntsc=If Link was on a desert island and could take only one item, it'd be the Master Sword. This weapon is key to his down air attack, a move with great launching potential and the ability to strike twice. He can also strike twice with his side smash—the second blow deals more damage and launches farther. | |||
|desc-pal=Of all of his weapons, Link's sword may be the most lethal. His down air attack has incredible launching power. What's more, he'll bounce up afterwards, allowing for a follow-up strike. His side smash can also be followed up with a more powerful second blow that sends foes flying – just press the button again straight away. | |||
|gamelist-ntsc={{Trophy games|console1=NES|game1=The Legend of Zelda|release1=08/1987|console2=SNES|game2=The Legend of Zelda: A Link to the Past|release2=04/1992}} | |||
|gamelist-pal={{Trophy games|console1=NES|game1=The Legend of Zelda|release1=11/1987|console2=SNES|game2=The Legend of Zelda: A Link to the Past|release2=09/1992}} | |||
}} | |||
{{clrl}} | |||
{{Trophy/Fighter | |||
|name=Triforce Slash (Link) | |||
|image=TriforceSlashLinkTrophyWiiU.png | |||
|desc-ntsc=Link makes use of the Triforce of Courage to trap foes, and then he launches a 16-blow combo. The final, mighty blow has the power to launch opponents off the stage. When Link prepares the attack, the ray of light he emits must strike a rival, or the attack will fail. Shielding will do nothing to stop this powerful attack. | |||
|desc-pal=Link traps a foe in mid-air with the power of the Triforce of Courage, then delivers a 16-strike sword combo. The final strike has formidable launching power. If the ray of light at the start of the attack doesn't hit, the whole thing ends there. Helpfully, though, the ray of light's range and speed are incredible, and shields won't block it. | |||
|game=ssb4-wiiu | |||
}} | |||
{{clrl}} | |||
==In [[Event Match]]es== | ==In [[Event Match]]es== | ||
===Solo Events=== | ===Solo Events=== | ||
*'''[[A Fated Battle]]''': Link must | *'''[[A Fated Battle]]''': Link must defeat {{SSB4|Ganondorf}} in a two stock battle. If the battle lasts through the third transition phase on [[Castle Siege]], two [[Dark Link]]s will appear. | ||
*'''[[All-Star Battle: Regulars]]''': Link is one of the opponents fought in this event. All opponents are starter characters from | *'''[[All-Star Battle: Regulars]]''': Link is one of the opponents fought in this event. All of the opponents are the eight starter characters of the [[List of Super Smash Bros. series characters#"Perfect-attendance crew"|"perfect-attendance crew"]] from ''[[Super Smash Bros.]]'' | ||
*'''[[Princess Punch-Up!]]''': Link | *'''[[Princess Punch-Up!]]''': As {{SSB4|Zelda}}, the player is allied with Link and must defeat against {{SSB4|Peach}} and {{SSB4|Mario}}. | ||
*'''[[The Demon King and the Goddess]]''': | *'''[[The Demon King and the Goddess]]''': As Ganondorf, the player must initially defeat Link and Zelda. After the two are defeated or some time has passed, a giant {{SSB4|Palutena}} appears and the player must defeat her as well. | ||
*'''[[The Ultimate Swordsman]]''': | *'''[[The Ultimate Swordsman]]''': As {{SSB4|Ike}}, the player must defeat Link, {{SSB4|Marth}}, {{SSB4|Meta Knight}}, {{SSB4|Toon Link}}, male {{SSB4|Robin}}, female Robin and {{SSB4|Shulk}}. All of the opponents wield swords. | ||
===Co-op Events=== | ===Co-op Events=== | ||
*'''[[A Fairy Nice Trip]]''': Link and {{SSB4|Pac-Man}} must survive | *'''[[A Fairy Nice Trip]]''': Link and {{SSB4|Pac-Man}} must survive on [[Pac-Land]] until the stage reaches Fairy Land as four [[Kirby (SSB4)|Kirbys]] try to hinder the players' progress. | ||
*'''[[Final Battle Team-Up]]''': Link | *'''[[Final Battle Team-Up]]''': Link, using his [[Dark Link]] [[alternate costume]], is one of the opponents two players must defeat. | ||
*'''[[The Ultimate Battle]]''': Two players choose a character and must defeat the entire roster. | *'''[[The Ultimate Battle]]''': Two players choose a character and must defeat the entire roster. | ||
| Line 209: | Line 515: | ||
|colspan=8|[[File:Link Palette (SSB4).png]] | |colspan=8|[[File:Link Palette (SSB4).png]] | ||
|- | |- | ||
|{{Head|Link|g=SSB4 | |{{Head|Link|g=SSB4|s=50px}} | ||
|{{Head|Link|g=SSB4 | |{{Head|Link|g=SSB4|s=50px|cl=Red}} | ||
|{{Head|Link|g=SSB4 | |{{Head|Link|g=SSB4|s=50px|cl=Blue}} | ||
|{{Head|Link|g=SSB4 | |{{Head|Link|g=SSB4|s=50px|cl=Purple}} | ||
|{{Head|Link|g=SSB4 | |{{Head|Link|g=SSB4|s=50px|cl=Yellow}} | ||
|{{Head|Link|g=SSB4 | |{{Head|Link|g=SSB4|s=50px|cl=Black}} | ||
|{{Head|Link|g=SSB4 | |{{Head|Link|g=SSB4|s=50px|cl=White}} | ||
|{{Head|Link|g=SSB4 | |{{Head|Link|g=SSB4|s=50px|cl=Grey}} | ||
|} | |} | ||
==Gallery== | ==Gallery== | ||
<gallery> | <gallery> | ||
Link Direct.png|Link in the Nintendo Direct from April 8th, 2014. | Link Direct.png|Link in the Nintendo Direct from April 8th, 2014. | ||
LinkWiiUVersionE32013.png|Link's appearance in | Link amiibo.png|Link's [[amiibo]]. | ||
Link3DS.jpg|Link's appearance in | LinkWiiUVersionE32013.png|Link's appearance in {{forwiiu}}. | ||
LinkUpSpecialWiiU.png| | Link3DS.jpg|Link's appearance in {{for3ds}}. | ||
Link&PitSSB4.png| | LinkUpSpecialWiiU.png|Using [[Spin Attack]] on {{SSB4|Mario}} in ''Super Smash Bros. for Wii U''. | ||
Link on Pyrosphere.jpg| | Link&PitSSB4.png|Using [[Hero's Bow]] alongside {{SSB4|Pit}}'s [[Palutena Bow]]. | ||
SSB4-DoubleSpinAttack.jpg|Link's | Link on Pyrosphere.jpg|Using his forward tilt with {{SSB4|Kirby}} in the background. | ||
Toon Link Throws Bomb At Link.jpg|Toon Link | SSB4-DoubleSpinAttack.jpg|Link's Spin Attack colliding with {{SSB4|Toon Link}}'s Spin Attack against {{SSB4|Donkey Kong}}. | ||
SpinAttack-SSB4.jpg|Toon Link and Link | Toon Link Throws Bomb At Link.jpg|Toon Link throwing a [[Bomb (Link)|Bomb]] at Link. | ||
Link - Down Stab - SSB4.jpg| | SpinAttack-SSB4.jpg|Toon Link and Link using their Spin Attacks on the ground. | ||
Marth and Link dash attack SSB4.jpg| | Link - Down Stab - SSB4.jpg|Using down aerial and displaying its new [[meteor smash]] effect on {{SSB4|Samus}}. | ||
Clawshot_SSB4.png| | Marth and Link dash attack SSB4.jpg|Using neutral attack's first hit against {{SSB4|Marth}}'s forward tilt. | ||
SSB4 - Zelda Screen-3.jpg| | Clawshot_SSB4.png|Using his [[Clawshot]]. | ||
Link and Peach.jpg|Link and {{SSB4|Peach}} on {{SSB4|Battlefield}}. | SSB4 - Zelda Screen-3.jpg|Using his side taunt alongside {{SSB4|Zelda}}. | ||
SSB4 Toon Link Screen-10.jpg|His appearance in | Link and Peach.jpg|Link and {{SSB4|Peach}} on {{SSB4|Battlefield}}. | ||
Edge grab SSB4.jpg|Link | SSB4 Toon Link Screen-10.jpg|His appearance in ''Super Smash Bros. for Nintendo 3DS'' alongside Toon Link. | ||
Smash.4 - Colliding Projectiles.jpg| | Edge grab SSB4.jpg|Link [[Edge-guarding#Ledge Trump|edge trumping]] Mario. | ||
SSB4 Link aerial.jpg| | Smash.4 - Colliding Projectiles.jpg|Hero's Bow and Palutena Bow colliding in the air. | ||
LinkBoomerangSSB4 NintendoDirect.gif| | SSB4 Link aerial.jpg|Using his forward aerial. | ||
SSB4 - Tether Recovery.jpg|Link and | LinkBoomerangSSB4 NintendoDirect.gif|Using [[Gale Boomerang]]. | ||
Link Skyward Sword Clothes.jpg|Link's clothes | SSB4 - Tether Recovery.jpg|Link and Samus simultaneously grabbing an edge with their [[Tether recovery|tether recoveries]]. | ||
Link Skyward Sword Clothes.jpg|Link's new alternate costume based on the civilian clothes worn by the Link in ''The Legend of Zelda: Skyward Sword''. | |||
SSB4 - Shulk Screen-6.jpg|{{SSB4|Shulk}} using his forward aerial on [[Dark Link]]. | |||
Link_Cover.png|Link's appearance on the cover of ''Super Smash Bros. for Nintendo 3DS''. | |||
</gallery> | </gallery> | ||
==Trivia== | ==Trivia== | ||
*Link | [[File:LinkT-PoseSSBU.png|thumb|Link's bind pose in {{forwiiu}}.]] | ||
*During Link's first victory animation, his eyebrows appear lighter than usual, only to revert to their original shade of color once the animation ends. | |||
*In {{forwiiu}}, a glitch prior to update 1.1.0 enabled the player to see characters' [[bind pose]]s. In Link's case, it could be seen that his bind pose was modeled in an unusual way, without forming a "T" shape like other bind poses. | |||
**This pose can still be seen even post-update 1.1.0, albeit only during the [[Master Core]] battle. If one looks close enough when Master Shadow begins to form, Link's bind pose is used instead of a normal falling pose. | |||
*Link's alt. trophies in ''Super Smash Bros. for Wii U'' and {{for3ds}} appear very similar to his ancestor's [[All-Star Mode|All-Star]] and [[Adventure Mode]] trophies, respectively, in ''Super Smash Bros. Melee''. | |||
*Not counting ''Melee'', this is the only game where Link simply reuses his onscreen appearance from the previous game instead of having a new animation of him appearing onto the stage. | |||
*Despite being relegated to being a trophy in ''3DS'', ''Wii U'' is the only game where Link's adult form from ''Ocarina of Time'' (which inspired his appearance in the first two ''Smash'' games) does not make any appearance at all. | |||
*Of all the veterans that retain their voice clips from ''Brawl'', Link, {{SSB4|Ganondorf}}, and {{SSB4|Captain Falcon}} are the only ones to not make use of knockback voice clips that weren't used in-game in ''Brawl'' despite having them. | |||
==References== | ==References== | ||
{{reflist | {{reflist}} | ||
{{SSB4Characters}} | {{SSB4Characters}} | ||
{{Zelda universe}} | {{Zelda universe}} | ||
[[Category:Link (SSB4)]] | [[Category:Link (SSB4)| ]] | ||
[[Category:Trophies (SSB4-3DS)]] | [[Category:Trophies (SSB4-3DS)]] | ||
[[Category:Trophies (SSB4-Wii U)]] | |||
[[es:Link (SSB4)]] | |||
Latest revision as of 08:20, May 5, 2024
| Link in Super Smash Bros. 4 | |
|---|---|
 
| |
| Universe | The Legend of Zelda |
| Other playable appearances | in SSB in Melee in Brawl in Ultimate |
| Availability | Starter |
| Final Smash | Triforce Slash |
| Tier | D (31) |
Link (リンク, Link) is a playable character in Super Smash Bros. 4. His return to the series was announced during the E3 Nintendo Direct on June 11th, 2013.[1] He was also among the first wave of amiibo that are compatible with SSB4.
As in Super Smash Bros. Brawl, Akira Sasanuma's portrayal of Link from The Legend of Zelda: Twilight Princess was repurposed for Smash 4, with mostly returning voice clips from Brawl, and in addition to some new ones sourced from the game.
Link is ranked 31st out of 54 on the tier list, placing him in the D tier. In addition to rendering Link as the second-highest-ranking mid-tier character, this is a significant improvement over his bottom-tier placement in Brawl, where he was ranked 35th out of 38 and his best placement to date. Link possesses multiple projectiles in the form of his Hero's Bow, Gale Boomerang and Bomb, each of which serve as great tools for combos, camping, gimping, and disrupting approaches. Aside from his projectiles, Link's Master Sword grants him disjointed range and above-average power.
In addition to his retained strengths, his recovery has been greatly buffed from Brawl, thanks to Spin Attack and Clawshot covering noticeably more distance, and Bomb's shorter fuse improving its recovery potential. As a heavyweight, his respectable durability allows him to take advantage of the rage mechanic introduced in SSB4, which further bolsters his already powerful attacks.
However, Link remains held back by his relatively sluggish frame data. He has moves that are quite easily punishable if they are whiffed, while his heavyweight and slow mobility without Bomb Sliding render him vulnerable to combos, especially from the fast, rushdown-oriented characters that are prevalent in the metagame. Despite Link's new assets, several of his fellow veterans gained more significant buffs, which downplays the effects that his own buffs grant him in competitive play.
While Link's early tournament results were mediocre at best, he has managed to attain a dedicated player base that consists of professionals such as Izaw, Scizor, Sova Unknown and T, who have managed to achieve top 8 and 16 placements more frequently, even at the national level. T, in particular, has demonstrated Link's viability, placing 3rd at 2GGC: Civil War, one of the most competitive SSB4 tournaments in the world, and being ranked 46th on the PGR 100, the all-time ranking for Smash 4.
Attributes[edit]
Link is a heavyweight and the majority of his attributes are largely reflective of his weight class. His only attribute that is atypical of a heavyweight is his walking speed, which is above average. His most unique attribute is his fast fall; while his regular falling speed is tied with that of R.O.B., Ryu, and standard Mii Swordfighter as the 24th fastest in the game, his fast fall is actually the third fastest in the game, behind Fox and King Dedede. This is because Link uniquely increases his falling speed by 90% when fast-falling, as opposed to the standard 60% that all other characters (bar Ryu) adhere to.
Like his alternate timeline counterpart, Link possesses two shields instead of just one. In Link's case, he wields the Hylian Shield, which blocks opposing projectiles if he is standing still or walking. Like Toon Link, Link also wields his respective version of the Master Sword, which grants him disjointed range and above average strength, the latter of which is most evident in his forward tilt, smash attacks, dash attack and Spin Attack. However, his forward, up and down aerials also boast impressive power while possessing certain traits: his forward and back aerials can hit twice, his up and down aerials have long-lasting hitboxes, and his down aerial can meteor smash.
Link is one of the handful of characters in SSB4 with a tether grab, with his Clawshot being a useful supplement to not just his recovery, but also his zoning and combo games. Although its damage output has been lowered since Brawl, Clawshot still boasts impressive range, has minimal landing lag, and comes out even faster than before as an attack. It also assists his combo game, due to his down throw's impressive combo potential, while his up throw possesses KO potential. Lastly and most importantly, Clawshot is a pivotal part of Link's recovery, especially due to his sluggish mobility.
Link's special moves all have their uses. Hero's Bow is a strong option against characters who struggle at approaching and is good for providing long-ranged pressure. Gale Boomerang is a decent spacing option and has follow-up potential upon contact or via its vacuum effect. Gale Boomerang's drag effect also grants it gimping potential in the form of Gale Guarding. Spin Attack's overall recovery distance has noticeably improved since Brawl, while its already impressive power has been further increased, which in turn improves its KO potential or as a way to punish rolls. However, Link's Bomb is perhaps the most versatile weapon within his arsenal thanks to its utility. Throwing a Bomb at an opponent can cause enough hitstun to help Link's approach and/or set up combos. Conversely, if the opponent shields it, the Bomb simply bounces off, allowing it to be used for spacing. Even holding a Bomb long enough for it to explode can be useful; while doing so damages Link, it gives him a small vertical boost and removes him from being helpless, aiding his recovery and/or allowing him to break out of combos. Like in Brawl, his bombs can also be used for a technique called Bomb Sliding, which noticeably supplements his ground mobility. When combined with the overall fastest item throw animations in the game, Link's Bomb allows him to pressure opponents at a deceptively fast speed.
Despite his benefits, Link retains some of his flaws from his previous appearances. Even though his recovery has been noticeably improved after formerly being one of his most significant flaws in Brawl, it still limits how far he can go offstage safely. Link is also still susceptible to combos from faster characters, such as Sheik. As a result, he must make good use of reads, spacing, and camping to avoid giving the advantage to such characters. His neutral aerial also allows him to break out of many combos, although its start-up lag is merely average for a sex kick. As a tether, his grab is quite slow and punishable when whiffed. In addition, Link's KO potential is hindered by lag, particularly in regard to his forward tilt, dash attack, forward aerial and down aerial.
In terms of customization, Link's custom moves benefit him. Power Bow grants Link's arrows incredible power, being able to KO significantly easier. However, this comes at the cost of heavily decreased range and increased charge time, with uncharged arrows lacking any utility. Quickfire Bow fires magical arrows at an extremely quick rate that are also unaffected by gravity, granting them spammability. However, they are much weaker and have shorter range. Boomerang removes the windbox from the Gale Boomerang and makes it act like the Boomerang from Smash 64 and Melee; it can now be angled easier, has four hitboxes instead of two and deals damage when returning to Link. However, most of Link's setups are now removed since the Boomerang can no longer pull opponents in. Ripping Boomerang possesses no windboxes, deals less damage and has shorter range, but it hits multiple times, goes through opponents, has four hitboxes similar to Boomerang, and stuns victims, making it good for setups. Shocking Spin is an electrically charged Spin Attack with significantly stronger damage and KO potential, and the aerial version semi-spikes. However, the grounded version has increased ending lag, while the aerial version lacks back hitboxes and worsens Link's already sub-par recovery by decreasing its horizontal momentum and vertical distance; additionally, while the aerial version can semi-spike, it only works if the opponent is in front. Whirling Leap drastically improves Link's recovery, granting him significantly improved vertical and horizontal distance, alongside very high aerial control during its duration. However, it is solely limited to being a recovery option due to its lack of any hitboxes. Giant Bomb has Link pull out a massive bomb that has a greater explosion radius and damage. However, it has slightly more startup lag and does not explode upon impact, limiting its tactical use compared to the standard Bomb. Meteor Bomb is a much smaller Bomb with a shorter fuse that meteor smashes anyone it hits with moderate knockback. This gives it unique edgeguarding potential and can set up for interesting combos, but as it also affects Link, this prevents him from extending his recovery unless the bomb is used to interrupt potentially deadly vertical KOs.
Overall, Link is very capable at both spacing and camping, yet also possesses impressive power and a deceptively useful combo game. However, Link's sub-par mobility and reliance on both camping and his combo game can result in his playstyle being difficult to utilize at higher levels of play, largely because of the speedy and combo-oriented characters that are prevalent in the metagame.
Changes from Super Smash Bros. Brawl[edit]
Link has been buffed significantly in the transition from Brawl to SSB4. Both his ground and aerial games have been improved. His overall mobility has slightly improved and his attacks have seen adjustments to either make them more reliable or to improve their utility. An example of this is with dash attack as while it is much slower and has no followup potential, it is much stronger now being the second strongest dash attack in the game. His air speed has been increased and a few of his aerials have seen some useful adjustments; forward aerial's first hit is much stronger, up aerial is stronger and down aerial's clean hit now meteor smashes granting it edgeguarding potential as well as the later two aerials having less landing lag. His grab game has also considerably improved as his grabs have less ending lag and his down throw is weaker giving it greater followup potential especially when combined with the changes to hitstun canceling. He also is a potent edgeguarder, with his down aerial now being capable of meteor smashing to go alongside his other offensive options against opponents on the edge. Additionally, Spin Attack covers much more distance and is less reliant on momentum while Clawshot has increased range as a tether significantly improving his recovery, removing one of Link's most detrimental flaws in Brawl. Lastly, his camping game has seen some improvements due to his projectiles, most notably Bomb, being buffed in certain ways.
Link also benefits from the general physics changes brought about by SSB4. The edge trump mechanic combined with the increased speed to air dodges immensely improves his recovery allowing him to make much greater use of his new and improved recovery options. The rage mechanic further boosts his power and can be utilized well, due to his excellent endurance. The changes of hitstun canceling has also improved his combo potential especially out of back aerial and down throw.
However, Link has also seen some nerfs. While the removal of hitstun canceling improves his own combo potential, it makes him more susceptible to combos himself and it removes momentum canceling hindering his endurance especially vertically (although Link does notably benefit from the removal of chain grabbing). Link also lost access to the advanced techniques he had in Brawl most notably DACUS which significantly hinders his approach potential combined with his up smash having more ending lag. He also no longer has access to Quickdrawing and the removal of edge momentum shifting has hindered Gale Boomerang's utility. As for his more direct nerfs, his overall damage output is lower (although it is higher relative to the cast) with his forward and down smash seeing significant nerfs to their damage and some of his moves have worse overall KO potential due to their alterations such as with down tilt and down aerial. His grab aerial is also worse on stage as while it connects with the strong hit more reliably, it is weaker, launches opponents at a less favorable angle and has more landing lag hindering its use as a spacing tool. Lastly, while his out of shield game has improved due to his faster Spin Attack and the general changes to shields, his spot dodge is drastically worse going from being one of the best to a very mediocre spot dodge.
Ultimately, Link is considerably better than how he was in Brawl as his buffs are of greater quantity than his nerfs and while most of his direct changes do not greatly benefit him, the changes to the game's mechanics greatly benefit him overall as they improve his combo and KO potential and most importantly, they make his recovery far better fixing one of his main issues in Brawl. Despite this, his other issues including his poor mobility and frame data were not properly addressed and in some cases, worsened and he did see a few notable hindrances from the changes to the game's mechanics. Nevertheless, he is a significantly more effective character relative to the cast and has seen greater tournament results although he still struggles against the higher tiered characters.
Aesthetics[edit]
 Due to the aesthetic used in SSB4, Link's overall color scheme is significantly more vibrant, and his hair is of a significantly higher visual quality than in Brawl. Link's hair is also sandy blond instead of blond. As a result, other than his hairstyle, his hair color, and the starched appearance of his clothing, his coloration closely resembles his Skyward Sword incarnation, whom despite being unused in Smash, sports a similar design to his Twilight Princess incarnation.
- Link's blue and Dark Link alternate costumes have been slightly updated. The former's Hylian Shield is now blue instead of black, while the latter now has black sclera and red pupils, and its Hylian Shield is now colored black instead of silver. Link has also received three new alternate costumes, two of which are based on the Hero of the Skies' civilian clothes and Fierce Deity Link.
- Link has a new idle pose. He now readies his sword-wielding arm by slightly rearing it back while keeping his Hylian Shield in front of himself, instead of twirling the Master Sword by his side and bringing his shield-wielding arm to his side. Link also always holds his Hylian Shield in front of himself during his other idle poses. However, he will revert to his idle poses from Brawl while holding a small item.
- Backward roll's animation has changed. It is now based on the backflip used by the Hero of Time.
- The Master Sword's trail is now sky blue with white accents and produces afterimages, instead of being a sky blue blur.
- The Hylian Shield's metal decals and rim are now silver and polished, instead of gray and tarnished.
Attributes[edit]
 Link walks slower (1.2 → 1.188).
 Link dashes faster (1.328 → 1.3944).
- Link's air speed is faster (0.8084 → 0.88).
- Link's fast falling speed is faster (2.666 → 3.04).
- Link's gravity is higher (0.089 → 0.096). This slightly improves his aerial mobility, but slightly hinders his endurance, makes him more susceptible to combos and reduces the height of his jumps.
- Despite this, his double jump is higher.
- Rolls have decreased ending lag (FAF 38 → 31).
- Rolls have a shorter duration (frames 4-19 → 4-17).
- Air dodge has decreased startup lag (frame 4 → 3) and ending lag (FAF 50 → 34).
- Spot dodge has more startup lag with a shorter duration (frame 2-20 → 3-18) and has increased ending lag (FAF 23 → 28), no longer being one of the best in the game.
- Dashing item throw has significantly less ending lag (FAF 42 → 19), making it the fastest in the game. This slightly improves Link's item-based zoning potential although he is still usually better off using his DITCIT.
- The Hylian Shield now blocks projectiles even while Link is walking. Additionally, it now always protects his front while he is idle, due to his idle poses' updated animations. Lastly, Link now raises the Hylian Shield when a projectile or an explosion hits it. Altogether, these changes significantly improve its reliability.
Ground attacks[edit]
- Neutral attack:
- Neutral attack's first hit has higher base knockback (16 → 35/30). Along with the changes to its angles and the lower knockback on the second hit, this enables the move to connect all its hits more reliably.
- Neutral attack's first and second hits deal less damage (4% (hit 1)/3% (hit 2) → 2.5% (both)), and the latter also has lower knockback (40 (base), 20 (scaling) → 38/10), hindering its jab canceling ability. The first hit also has more ending lag (FAF 20 → 28) and different angles across its hitboxes (361° → 95°/80°/361°), making jab locking with it much harder combined with its higher base knockback, as only the hitboxes closest to Link and with the lowest ID can do so rather than all of them. While this would improve its jab canceling potential, this is negated by its higher ending lag.
- The increased shieldstun benefits forward tilt and down tilt, as due to their long range, average damage and reduced lag, they are now safe on shield if properly spaced.
- Forward tilt:
- Forward tilt has a longer duration (frames 15-18 → 15-19), decreased ending lag (FAF 40 → 38) and higher knockback (20 (base), 98 (scaling) → 55/82), improving its KO potential near the horizontal blastzone.
- Down tilt:
- Down tilt has less startup (frame 13 → 11) and ending lag (FAF 32 → 29). Combined with its lower knockback and the changes to hitstun canceling, this grants it combo potential from low to mid percents.
- Down tilt deals less damage (12% → 11%) and its extended hitbox has lower knockback scaling (50 → 30), while its meteor hitbox has a significantly smaller radius (4u/3.5u → 1.5u) and lower knockback (90 (base), 50 (scaling) → 0/62). This worsens the move's KO potential, and renders it nearly useless for edgeguarding even with the removal of meteor canceling, as the meteor hitbox is survivable offstage even at high percents and can no longer hit any character hanging on an edge except for Charizard.
- Down tilt's hitboxes are distributed differently; instead of having two normal hitboxes that launch targets upward and other two closer to Link that meteor smash, the move has one extended hitbox covering the entire Master Sword that launches upward, and a normal hitbox close to the tip that meteor smashes and only affects aerial targets.
- Dash attack:
- Link has a new dash attack, the Jump Attack from The Legend of Zelda series. Compared to the previous dash attack, it deals more damage (10%/12%/11% → 14%/13%/12%) and has significantly more knockback (30 (base), 80 (scaling) → (70/85/85)/(85/85/77), greatly improving its KO potential.
- Dash attack has much more startup (frame 8 → 20) and ending lag (FAF 40 → 57) compared to the previous dash attack.
- Dash attack has different angles (90°/80°/70°/60° → 45°/50°/55°) compared to the previous dash attack. This improves its spacing potential but hinders its followup potential.
- Forward smash:
- Forward smash's first hit has been noticeably altered: the hitbox at the tip of the Master Sword has higher knockback (25 (base), 90 (scaling) → 30/100), while the rest of the hitboxes deal lower damage (15% → 7%) and knockback (25 (base), 90 (scaling) → 47/15), and can no longer send opponents behind Link, enabling them to connect into the second hit beyond low percents. This overall benefits the move, as the setup hitboxes in conjunction with the second hit still deal more damage and can KO earlier than the previous first hit alone, while the tipper hitbox still allows the first hit to KO on its own should opponents potentially be hit too far away for the second hit to connect.
- Forward smash's second hit has drastically more base knockback (20/25/30 (base), 90 (scaling) → 85/89), allowing it to KO earlier near edges and with rage, despite its much lower damage.
- Forward smash has increased ending lag (FAF 50 (both hits) → 52 (hit 1)/68 (hit 2)), and the second hit deals much less damage (17%/20%/19% → 13%/12%).
- The window of time that the attack button can be pressed after forward smash's first hit has been significantly tightened. This decreases the possibility of accidentally using its second hit, but makes it so that the delay between the first and second hits cannot be abused before using the second hit.
- Up smash:
- Up smash's last hit deals more damage (10%/9%/8% → 11%/10%/9%) and has more knockback (70 (base), 80 (scaling) → 60/96), improving its KO potential. Its first and second hits have also received several adjustments to their knockback and angles, which alongside the weakening of SDI enables the move to connect all hits better.
- Up smash has more ending lag (FAF 70 → 78), now being the up smash with the slowest interruptibility in the game.
- The removal of DACUS significantly hinders up smash's approach potential.
- Down smash:
- Down smash's first hit launches at a higher angle (75° → 78°) and has more knockback (26 (base), 90 (scaling) → 40/88), improving its KO potential.
- Down smash's second hit deals less damage (16%/17%/16% → 12%/11%/10%).
- Down smash's second hit is a semi-spike (75° → 30°) and has higher base knockback, but lower knockback scaling (20 (base), 90 (scaling) → 80/63). Coupled with its lower damage, this hinders its KO potential from center stage, but improves its edgeguarding potential.
Aerial attacks[edit]
- The increased shieldstun benefits neutral aerial and forward aerial, as due to their low landing lag and higher damage (sweetspotted in the case of neutral aerial), they are now safe on shield with properly timed landings.
- Neutral aerial:
- Clean neutral aerial no longer has a consistent damage output (10% → 11%/9%). This improves the sweetspot's KO potential, but reduces its combo and locking potential, and vice versa for the sourspot.
- Neutral aerial has a longer duration (frames 7-27 → 7-31).
- Neutral aerial's initial auto-cancel window is shorter (frames 1-6 → 1-3) and auto-cancels later (frames 32 → 36), no longer auto-canceling in a short hop.
- Neutral aerial has slightly increased landing lag (9 frames → 10).
- Forward aerial:
- Forward aerial deals more damage (9% (hit 1)/12% (hit 2) → 11%/13%), with knockback noticeably increased on the first hit (5 (base), 100 (scaling) → 20/130) and compensated on the second hit (20 (base), 110 (scaling) → 30/100), improving the former's KO potential.
- Forward aerial has slightly increased landing lag (10 frames → 12). Link's higher gravity also prevents it from auto-canceling in a full hop.
- Back aerial:
- Back aerial deals less damage (4% (hit 1)/7% (hit 2) → 3%/5%) hindering its edgeguarding potential and each hit has a shorter duration (frames 6-9 → 6-8 (hit 1), frames 18-23 → 18-22 (hit 2)).
- The second hit's lower damage and the changes to hitstun canceling turn it into a reliable combo starter, allowing Link to follow up with more back aerials and a reverse Spin Attack.
- Up aerial:
- Up aerial launches at a higher angle (80° → 85°) with more knockback scaling (85 → 88), improving its KO potential, and has decreased landing lag (30 → 23 frames). It also has an altered animation where Link leans farther backward while performing the Up Thrust, improving its range and narrowing his hurtbox while performing the move.
- Down aerial:
- Down aerial has received an early hit in addition to its clean and late hits, the former two which take up a longer portion of the move (frame 14 (clean)/frames 15-64 (late) → frames 14-19 (early)/20-22 (clean)/23-64 (late)). The new early hit meteor smashes aerial targets (65°/90° → 270°), significantly improving its edgeguarding ability, while having a different angle (65°/90° → 55°) and much lower knockback (30 (base), 80 (scling) → 25/40) against grounded targets, allowing it to combo into the bouncing hit at a wide range of percents, which also deals more damage (8% → 11%). Lastly, the move has significantly decreased landing lag (50 → 32 frames) and increased range below Link (4.2u → 5.5u (early)/6u (clean, late)).
- Down aerial deals less damage (22% (clean)/18% (late) → 15% (early, late)/18% (clean)) and has reduced base knockback (40/30 → 30 (clean), 40/50 → 30 (late)). Combined with the aerial early hit meteor smashing and the grounded early hit having much lower knockback and making the clean hit harder to land, this immensely hinders the move's onstage KO potential. The hitbox at the hilt of the Master Sword has also been removed, reducing its range above Link.
- Grab aerial:
- Grab aerial has increased range as a tether recovery, significantly improving its recovery potential when combined with the changes to ledges. It also transitions faster as an attack (frames 11-16 (hit 1)/23-24 (hit 2) → frames 12-21/22-23), has less base knockback (60 → 50) and the first hit launches at a lower angle (45° → 35°), which along with its lower damage allows both hits to connect better.
- Grab aerial has more startup (frame 11 → 12), deals less damage (4% (hit 1)/6% (hit 2) → 2.5%/4%) and now has 8 frames of landing lag rather than auto-canceling. These changes significantly hinder its safety, spacing and followup potential combined with the first hit's lower angle.
Throws/other attacks[edit]
- All grabs have decreased ending lag (FAF 86 (standing)/96 (dash, pivot) → 62 (standing)/66 (dash)/67 (pivot)).
-
 Prior to update 1.0.8, Clawshot came out earlier and went limp when fully extended, but also ended faster. However, this was merely aesthetic.
 -
 Clawshot flies and retracts in a straight line like the Hookshot in SSB. However, this is merely aesthetic.
 - Pummel:
- Pummel deals slightly more damage (2% → 2.1%).
- Forward throw:
- Forward throw has less ending lag (FAF 41 → 36).
- Down throw:
- Down throw deals less damage (4% (throw)/7% (total) → 3%/6%).
- Link releases opponents from down throw one frame later (frame 23 → 24).
- The hitbox has a longer duration (frame 22 → 22-23). This prevents the hitbox from whiffing against certain characters with certain weight values.
- Down throw has decreased knockback scaling (90 → 85) and it launches opponents at a higher angle (110° → 83°). When combined with its lower damage and the changes to hitstun canceling/DI, this significantly improves its combo potential.
- Edge attack:
- Link has a new edge attack, a crouching thrust that resembles the Crouch Stab used by the Hero of Time.
- New edge attack has less startup lag compared to the previous fast edge attack (frame 27 → 20).
- New edge attack deals less damage compared to the previous edge attacks (8% (fast)/10% (slow) → 7%).
Special moves[edit]
- Hero's Bow:
- Hero's Bow charges faster and has increased knockback (7 (base), 50 (scaling) → 10/66), improving its camping potential.
- Quickdrawing has been removed, hindering Hero's Bow's utility. Their higher knockback also hinders their locking potential.
- Gale Boomerang:
- Gale Boomerang has slightly improved setup potential at close range and at low percentages.
- The removal of edge momentum shifting (in version 1.0.8) has hindered Gale Boomerang's approach and edgeguarding potential.
- Spin Attack:
- Uncharged Spin Attack deals 2% more damage (12% → 14%) and its front hit has increased knockback scaling (72 (early), 80 (clean/late) → 86 (early/clean)/82 (late)), improving its KO potential. It also has decreased startup lag (frame 11 → 8). Due to consisting of nine hits instead of five, aerial Spin Attack deals 8% more damage (14% → 22%) and its last hit has increased knockback scaling (160 → 200), significantly improving its KO potential. It can now also hit opponents behind Link. Lastly, aerial Spin Attack covers much more distance and Link retains much more momentum upon performing it. This significantly improves its recovery potential.
- The weakening of SDI makes aerial Spin Attack significantly more difficult to escape from.
- Spin Attack's back hit has decreased knockback. The early and clean hits also have reduced base knockback (68 (early)/55 (clean) → 60/48).
- Spin Attack's animation has slightly changed. Link now spins while swinging the Master Sword in a slight undulating motion. This slightly re-positions its hitboxes.
- Bomb:
- Bomb deals 1% more damage at Link's feet or an opponent's feet when thrown from the ground (7% → 8%). It also deals consistent damage at Link's feet or an opponent's feet when smash thrown in the air (5%-9% → 9%).
- Bomb no longer damages Link if it explodes by hitting an opponent or another projectile. It also has increased durability. These changes improve its combo potential and safety.
- Bomb's explosion is now absorbable.
- Bomb has a shorter fuse, improving its recovery potential, but hindering its mindgame potential.
- Bomb is slightly larger. However, this is merely aesthetic.
- Triforce Slash:
- Triforce Slash deals much less damage (83% → 60%).
Update history[edit]
Link has been heavily buffed via game updates. In update 1.0.4, the knockback of the first hit of his forward smash was lowered, allowing it to connect better into the second hit. In update 1.0.6 though, he received a mix of buffs and nerfs, which hindered his KO and damage racking potentials, but improved his range and combo game. However, update 1.0.8 brought Link significant buffs in the form of a much more effective grab game and better KOing options, the latter of which helped mitigate the nerfs to his KOing potential that update 1.0.6 brought. In update 1.1.0, his grab game was buffed by slightly decreasing the start-up lag of his dash and pivot grabs.
Updates 1.1.3 and 1.1.5 also brought several buffs, which further increased his already high KO potential. Lastly, he was indirectly buffed due to the changes on the shield mechanics in updates 1.1.0 and 1.1.1, as the increased shieldstun and the fact that hitlag modifiers now apply on shielding opponents improve Link's close-range game by making his moves safer on shield. Altogether, these buffs have resulted in Link being viewed as a better character than how he was in Brawl and even better than during the initial release of SSB4, much like Samus.
- Non-tipped forward smash's first hit's has lower base knockback (60 → 47), allowing it to more reliably lead into the second hit.
 Link can no longer throw a bomb with down special to cancel landing lag (outside of special moves which already could not be canceled).
- This hinders the safety of his aerials and air dodge, hinders the combo potential of his aerials and it prevents Link from canceling hitstun if he lands while in non-tumble hitstun.
- Link can no longer throw a bomb with down special to cancel tumble hitstun.
- This not only makes Link considerably more susceptible to combos, since he can no longer throw a bomb to cancel the hitstun and act sooner but this also considerably hinders his endurance, since he can no longer throw a bomb and then utilise momentum canceling to survive longer.
![]() 1.0.5
1.0.5
- Hylian Shield now blocks Blasters, improving its reliability.
- Due to the release of Super Smash Bros. for Wii U, the Quickfire Bow and Power Bow custom moves were altered in order to match the Wii U version.
- As a result, Power Bow's start-up lag and endlag were dramatically increased. Before, it charged around the same speed as his normal Hero's Bow; now it is one of the slowest charging specials in the game.
- Conversely, Quickfire Bow's start-up lag and endlag were heavily decreased. This allows it to have better zoning potential and allows Link to more properly keep opponents in check.
- Neutral attack's first hit's has considerably higher ending lag (FAF 20 → 28), significantly hindering its safety and its jab canceling potential.
- Dash attack has less startup lag (frame 21 → 20).
- Dash attack's near hit deals less damage (13% → 12%) and has lower knockback scaling (78 → 72), hindering its KO potential.
- Down tilt's main hitbox now always launches opponents in the direction Link is facing (Angle flipper: 0 → 3), making it a more consistent combo starter.
- Down tilt's hitboxes are now static, rather than being attached to Link's sword/body.
- Down tilt's main hitbox now uses one extended hitbox which covers Link's sword rather than two standard hitboxes.
- Down tilt's meteor hitbox is positioned higher, it can no longer hit grounded opponents and it now takes priority over the main hitbox.
- Down tilt's main hitbox has lower knockback scaling (50 → 30), hindering its KO potential.
- However, this also improves its combo potential at lower percents.
- Down tilt's meteor smash hitbox is significantly smaller (4u → 1.5u) and the meteor smash hitbox inside of Link has been removed, giving the move less range inside of Link.
- Down tilt's meteor smash hitbox has dramatically reduced knockback (90 (base), 50 (scaling) → 0/62), making it immensely weaker.
- Forward smash 1's near hit now has an extended hitbox, giving it more range inside of Link.
- Forward smash 1's near hit now always launches the opponent in front of Link (Angle flipper: 0 → 3), making the move connect more reliably into the second hit.
- Forward smash 2's near hit now always launches the opponent in front of Link (Angle flipper: 0 → 3).
- Up smash's second hit has less startup lag (frame 26 → 25).
- Grounded Spin Attack has less startup (frame 11 → 8) and ending lag (FAF 86 → 82). The lower startup lag significantly improves the move's use as an Out of Shield punish.
- Grounded Spin Attack has a new clean hit during its first two active frames which deals more damage on its front hit (12% → 14%). Its knockback values were not compensated, considerably improving its KO potential.
- After the new early hit, the early mid hit deals significantly more damage on the front hit compared to the old mid hit (9% → 12%). The late mid hit starts two frames later than the old mid hit and hits equally as hard as the old mid hit.
- Grounded Spin Attack and Shocking Spin Attack's back hitboxes are positioned slightly further away from Link (X offset: 6.6 → 7), giving them slightly more range.
- Down tilt has less startup lag (frame 13 → 11) with its total duration subsequently reduced (FAF 32 → 30).
- Down tilt's hitboxes have been moved further away from Link (Z offsets: 12.8 (main)/15.4 (meteor) → 14.1/16.6), improving its range.
- Down tilt deals less damage (12% → 11%).
- However, its knockback values were not compensated, improving its combo potential.
- Up smash's hits connect together better.
- Link's grabs cover more distance and they have a longer duration (6 frames → 8), considerably improving their range.
- All grabs have less ending lag (FAF 66 (standing)/77 (dash)/79 (pivot) → 62/66/67.
- Forward throw has less ending lag decreased (FAF 41 → 36).
- Down throw deals 1% less damage (4% (throw)/7% (total) → 3%/6%) and has lower knockback scaling (90 → 85).
- Down throw launches opponents at a higher angle (110° → 83°). When combined with its reduced knockback, this significantly improves its combo potential.
- Grounded Spin Attack has higher knockback scaling (84 (clean)/80 (early mid)/80 (late mid) → 86/86/82), improving its KO potential.
- Grounded Shocking Spin Attack's mid hit has higher knockback scaling (80 → 82), improving its KO potential.
- Dash and pivot grabs' start-up lag decreased (frame 15 (dash)/frame 16 (pivot) → 14/15).
- Spin Attack's hitbox placements adjusted.
- Shocking Spin deals more damage (14%/9%/7%/5% → 16%/11%/8%/6%) and it received an additional hitbox that deals 14%.
- Forward smash second hit knockback growth: 85 → 89.
- Down smash first hit angle: 75° → 78°.
- Down smash's first hit's knockback altered: 26 (base)/90 (growth) → 40/88. This allows it to KO slightly earlier.
- Forward aerial first hit damage: 8% → 11%.
- Forward aerial first hit base knockback: 10 → 20.
- Forward aerial first hit knockback growth: 132 → 130.
- Forward aerial second damage: 10% → 13%.
- Forward aerial second hit knockback growth: 105 → 100.
- Down aerial no longer meteor smashes grounded opponents.
- Down aerial has a new early hitbox designed to hit only grounded opponents; it deals less knockback (25 base/40 growth) and launches at an angle of 55° instead of meteor smashing. This allows Link to hit foes a second time with the attack right after bouncing off them, dealing a massive amount of damage (26% if both hits connect), which works until they reach about 60% damage.
- Down aerial's second bounce deals more damage: 8% → 11%.
- Spin Attack and Shocking Spin are slightly faster.
- Down smash hit 2 KBG: 57 → 63
- Dash attack KBG: 78/72 → 85/77
- Dash attack angles: 45/60/70° → 45/50/55°
Moveset[edit]
For a gallery of Link's hitboxes, see here.
| Name | Damage | Description | ||
|---|---|---|---|---|
| Neutral attack | 2.5% | A downward slash, followed by an outward slash, followed by a thrust. Has slow startup for a jab, but its second hit can be jab canceled, with notable followups including down tilt, a grab, or Spin Attack, and its third hit is a semi-spike with high base knockback, making it useful for tech-chasing and forcing opponents near edges offstage. It is based on the final series of strikes that the Hero of Time deals to Ganon in The Legend of Zelda: Ocarina of Time. | ||
| 2.5% | ||||
| 5% | ||||
| Forward tilt | 13% | A lunging downward slash. It is tied with Olimar for the second slowest startup of any forward tilt in the game (at frame 15), but has long range, can hit opponents above Link, and deals high knockback for a tilt attack, while having only average ending lag that makes it safe on shield if spaced properly. This attack resembles the Z-Targeting slash used by Link from The Legend of Zelda: Ocarina of Time. | ||
| Up tilt | 9% | An overhead arcing slash. Has good juggling potential from low to mid percents, comboing into itself depending on the victim's weight and falling speed, and decent KO potential at high percentages. | ||
| Down tilt | 11% | A kneeling inward slash. Has slow startup for a tilt, but low ending lag with vertical knockback, granting it combo potential into aerials (most notably forward aerial, dealing 35% if both hits connect) and making it safe on shield with proper spacing. It also has a hitbox close to the tip of the Master Sword that meteor smashes aerial opponents, but deals weak knockback. It is also very difficult to land due to its small size and lower priority than the other hitboxes, leaving it unable to hit characters hanging on an edge except for Charizard. | ||
| Dash attack | Jump Slash (ジャンプ斬り) | 14% (tip), 13% (middle), 12% (base) | The Jump Attack. It is the second strongest dash attack in the game without knockback modifications, only behind King Dedede's, KOing at around 110% from center stage when sweetspotted. However, it also has the second slowest startup of them (at frame 20) alongside high ending lag, making it very punishable if whiffed or used recklessly. | |
| Forward smash | Sword Slice (スマッシュ斬り, Smash Slice) / Double Sword Slice (二段スマッシュ斬り, Double Smash Slice) | 14% (tip), 7% (non-tip) | A two-handed, lunging downward slash. If the attack button is pressed again, Link will perform a single-handed outward slash. The first hit deals respectable damage and knockback at the blade's tip, but only deals half as much damage with much lower knockback when not tipped; however, the non-tipped hit is a natural combo into the second slash. Conversely, the second hit deals more consistent damage overall and is relatively powerful, but has heavy ending lag. | |
| 13% (tip), 12% (non-tip) | ||||
| Up smash | 4% (hit 1), 3% (hit 2), 11%/10%/9% (hit 3) | A series of three overhead arcing slashes, the last one which launches opponents away. Has average startup, covers a wide range, deals high damage and can KO under 100%, but has high ending lag. The third hit deals more damage the closer opponents are to the tip of the Master Sword. | ||
| Down smash | 17%/16%/14% (hit 1), 12%/11%/10% (hit 2) | A kneeling inward slash in front of himself, followed by a kneeling outward slash behind himself. The first hit launches opponents at a vertical trajectory while dealing more damage the closer the opponent is to Link, and can KO at around 100% uncharged with the strongest hitbox. Conversely, the second hit is a semi-spike with high base knockback that deals more damage at farther range, but is weaker than the first hit. | ||
| Neutral aerial | 11% (clean, foot), 9% (clean, leg), 6% (late) | A flying kick. It is a sex kick with relatively fast startup and low ending and landing lag. One of Link's most useful moves overall, as it lets him escape pressure, is safe on shield with proper timing, and can even lock and combo into other moves on landing especially with the late hit, a notable followup being dash attack as a KO setup at high percents. | ||
| Forward aerial | 11% (hit 1), 13% (hit 2) | Two alternating, spinning outward slashes. The first hit has more knockback, while the second deals more damage but can only connect from the first hit at low percents. The most damaging forward aerial in the game if both hits connect. Due to its low landing lag and long range, it is also a reliable safe on shield move with proper timing, but its slow startup, moderate ending lag and inability to autocancel before it can be interrupted still leave it easy to punish if overused. | ||
| Back aerial | 3% (hit 1), 5% (hit 2) | A hook kick followed by a mid-level roundhouse kick. Link's fastest aerial and has very low ending and landing lag, allowing it to combo into itself at low percents, which can be further followed up by a reverse Spin Attack. However, it is one of his least damaging attacks, and the weakest back aerial in the game, as it is unable to KO from center stage even during Sudden Death. | ||
| Up aerial | 15% (clean), 13% (late) | The Up Thrust. It is quite powerful when clean and has a long lasting hitbox that is difficult to dodge, making it a good KOing and juggling option. However, it has high landing lag, can only autocancel in a full hop if done near the start, and leaves Link highly vulnerable from other positions due to its long duration. | ||
| Down aerial | 15% (early), 18% (clean), 15% (late), 11% (bounce) | The Down Thrust. Upon hitting a target without fast falling, Link bounces off them and can then hit them a second time, albeit dealing less damage. The early hit is unique from the rest of attack: against grounded targets, it has weak vertical knockback allowing it to combo into the bounce hit for a large amount of damage (26%), but giving it poor KO potential, while against aerial targets, it is a meteor smash with higher knockback. On the other hand, the clean and late hit send both grounded and aerial targets vertically with high knockback; the clean hit in particular can KO at around 120%, making it one of the strongest down aerials in the game, but it is hard to land due to its much shorter duration than both the early and late hits. Like up aerial, the move has very long lasting hitboxes, but high landing lag and mostly vertical range. | ||
| Grab aerial | Clawshot (クローショット) | 2.5% (hit 1), 4% (hit 2) | Fires his Clawshot forward. Has great range and very low landing lag making it a useful spacing tool, and its low knockback also allows it to combo into most ground attacks. The Clawshot also serves as a tether recovery. | |
| Grab | Clawshot (クローショット) | — | Fires his Clawshot forward. In Super Smash Bros. for Nintendo 3DS, the chain snaps straight back once fully extended, like the Hookshot from SSB. In Super Smash Bros. for Wii U, the chain drags on the ground like his Hookshot did in Melee and Brawl. The Clawshot grants each of Link's grabs very long ranges, but they also have high startup and ending lag. | |
| Pummel | 2.1% | Hits the opponent with the Master Sword's pommel. A fairly fast pummel. | ||
| Forward throw | 3% (hit 1), 4% (throw) | A front kick. Has little utility beyond launching opponents offstage, due to its weak power. | ||
| Back throw | 3% (hit 1), 4% (throw) | A back kick. Launches the victim facing away from Link and has lower knockback growth, but it is otherwise identical to forward throw. | ||
| Up throw | 5%/4% (hit 1), 2% (throw) | Raises the opponent overhead and slashes them upward. Has relatively high knockback growth, which allows it to KO around 170% without rage. Against bystanders, it is a weak semi-spike with a sourspot at the base of the Master Sword; the thrown opponent is always hit by the sweetspot. | ||
| Down throw | 3% (hit 1), 3% (throw) | Pins the opponent to the ground and then performs an elbow drop. It can combo into his up tilt, up smash, neutral aerial and up aerial, most notably having a semi-guaranteed KO setup into the latter against most characters at high percents. Due to being weight-dependent, its combos work better against lightweight characters, with Mewtwo and Rosalina being the most vulnerable to the up aerial setup due to their large hurtboxes. | ||
| Floor attack (front) | 7% | Slashes in front of himself and then behind himself. | ||
| Floor attack (back) | 7% | Slashes in front of himself and then behind himself. | ||
| Floor attack (trip) | 5% | Slashes in front of himself and then behind himself. | ||
| Edge attack | 7% | The Crouch Stab from The Legend of Zelda: Ocarina of Time. | ||
| Neutral special | Default | Hero's Bow | 4% (uncharged), 12% (fully charged) | Wields his Hero's Bow and fires an arrow forward. Charging increases the arrow's speed, distance and damage output; at full charge, the arrow flies almost completely straight and covers a very long distance. Good for gimping recoveries and pressuring opponents from afar. |
| Custom 1 | Power Bow | 4% (uncharged), 20% (fully charged) | The arrow has considerable knockback when fully charged, to the point of KOing at medium to high percentages. However, this comes at the cost of heavily increasing the charge time of the move. Additionally, uncharged or partially charged arrows have extremely short ranges and low power, as they drop near Link's feet. | |
| Custom 2 | Quickfire Bow | 4% (uncharged), 8% (fully charged) | Fires magical arrows that charge quickly and travel in a straight line. Uncharged arrows are decently spammable due to being fired faster, but charged arrows have a lower maximum damage output. The arrows also have shorter range. | |
| Side special | Default | Gale Boomerang | 7% (near), 5% (middle), — (far/return) | Throws the Gale Boomerang, which flies forward and then returns to Link. It damages opponents as it flies away and pulls opponents toward him during its return. It can be angled up or down, while a smash throw (which is similar to when performing the input for a smash attack) increases the distance it can travel. Unlike Boomerang, a reflected Gale Boomerang is not threatening to Link, as it will only fly past him with its non-damaging windbox. It has set-up potential, albeit only at close range and at low percentages. |
| Custom 1 | Boomerang | 9% (near), 7% (middle), 5% (far), 3% (return) | Functions like his ancestor's Boomerang in SSB and Melee, dealing more damage and damaging opponents upon returning. It can also be aimed easier, but deals less knockback. | |
| Custom 2 | Ripping Boomerang | 4% (near), 2% (middle), 1.5% (far), 0.7% (return) | Has much shorter range and deals less damage, but hits multiple times and stuns the opponent, which makes it ideal for set-ups. | |
| Up special | Default | Spin Attack | 14%/12%/9%/7% (grounded, blade), 11.2%/9.6%/7.2%/5.6% (grounded, tip), 4% (aerial hit 1), 2% (aerial hits 2-8), 4% (aerial hit 9) | A spinning, outward slash. Much like in the The Legend of Zelda series, it is a powerful attack, and can be charged on the ground for even higher damage and knockback. Conversely, an aerial Spin Attack is a series of spinning, inward slashes and is Link's primary recovery move, covering respectable vertical distance, but minimal horizontal distance. The grounded version is a fast out of shield option and decays on damage over time, KOing at around 120% uncharged with the strongest hit, while the aerial version deals up to 9 hits, but usually only connects 5 hits against opponents in front of Link. |
| Custom 1 | Shocking Spin | 16%/11%/12%/8%/6% (grounded), 4% (aerial hit 1), 1% (aerial hits 2-4), 6% (aerial hit 5), 14% (additional hitbox) | An electrical version that deals more damage and knockback. However, it grants much less distance and has poor horizontal momentum, making it function very similarly to how Spin Attack functioned in SSB and Brawl. The aerial version can semi-spike, but cannot hit backwards. | |
| Custom 2 | Whirling Leap | — | Deals no damage, but grants even greater vertical and horizontal distance, to the point that Link can perform multiple left and right movements without relying on momentum. The grounded version also makes Link leap into the air. | |
| Down special | Default | Bomb | 5% (explosion center), 9% (explosion outlines) | Pulls out a Bomb. It explodes 3.66 seconds (220 frames) after being pulled out, or upon contact with a surface, an attack, or an opponent. The explosion can hurt Link unless it hits an opponent first. When used skillfully, the explosion can remove Link from helplessness and thus allow him to perform an extra Spin Attack, improving his recovery. |
| Custom 1 | Giant Bomb | 7%-8% (center), 10%-11% (outlines) | A massive Bomb with a large explosion hitbox, which deals more damage and knockback. However, it cannot explode via physical contact, instead bouncing around harmlessly until time is up or another nearby explosion triggers it. Deals damage based on range. | |
| Custom 2 | Meteor Bomb | 5% | A smaller and weaker Bomb with a smaller explosion radius (virtually needs to make contact) and a much shorter fuse (roughly 2 seconds). However, it meteor smashes anyone hit with moderate knockback. As a result, it is not practical for recoveries in any way, as it will simply meteor smash Link, though it allows him to survive vertical KOs longer with good timing. At high percents (120% for Mario) ground targets will be stopped in their tracks due to its considerable hitstun. Otherwise, the bomb has virtually no knockback on ground targets. | |
| Final Smash | Triforce Slash | 1% (trapping), 3% (hits 1-14), 2% (hit 15), 15% (final) | Uses the Triforce of Courage to emit a thin beam of light from his left hand to stun an opponent in front of himself. If the beam comes in contact with an opponent, Link dashes forward and performs a barrage of slashes while they are trapped in a Triforce-shaped energy field before concluding with an outward slash that shatters the energy field and launches them. Although its damage output has lowered since Brawl, it is still among the most powerful Final Smashes in the game. It can hit multiple opponents, but all non-trapped opponents are launched out the energy field after the penultimate hit. | |
Stats[edit]
| Stats | Weight | Dash speed | Walk speed | Traction | Air friction | Air speed | Air acceleration | Gravity | Falling speed | Jumpsquat | Jump Height | Double jump Height |
|---|---|---|---|---|---|---|---|---|---|---|---|---|
| Value | 104 | 1.3 – Initial dash 1.3944 – Run |
1.188 | 0.064 | 0.0038 | 0.88 | 0.01 – Base 0.04 – Additional |
0.096 | 1.6 – Base 3.04 – Fast-fall |
7 | 27.799999 - Base 13.380496 - Short hop |
29 |
Announcer call[edit]

English/Japanese/Chinese
On-screen appearance[edit]
- Appears from within a whirlwind and equips the Master Sword and Hylian Shield. It may be based on the warping animation seen upon using the Recorder.

|
|---|
Taunts[edit]
- Up taunt: Swings the Master Sword twice and twirls it behind him before sheathing it. It is very similar to his victory pose in Twilight Princess, which he performs after learning a Hidden Skill or defeating a boss/particularly difficult enemies.
- Side taunt: Link takes out a fairy from his pocket, which proceeds to fly around him as he watches it until it returns to his pocket. While the fairy's design is based on the fairy cursor seen in the Wii version of Twilight Princess, it could also be a reference to Navi, the fairy companion of the Link from Ocarina of Time.
- Down taunt: Assumes a Fujian White Crane-like stance while rearing the Master Sword behind his head. Originates from SSB and may be loosely based on the attacking pose used by the Link from Zelda II: The Adventure of Link.
| Up taunt | Side taunt | Down taunt |
|---|---|---|

|

|

|
Idle poses[edit]
- Assumes a battle ready stance.
- Looks behind himself.
 |

|
|---|
Crowd cheer[edit]
| English | Japanese | |
|---|---|---|
| Cheer | ||
| Description | Link! Link! Link! | Rin-ku! |
| Pitch | Group chant | Group chant |
Victory poses[edit]
- Swings the Master Sword three times and then looks to the right. It is based on his "character chosen" animation in SSB, albeit ending with him facing a different direction.
- Swings the Master Sword once, twirls it behind his head, then sheathes it while looking at the camera. Like his up taunt, it is based on his victory pose from Twilight Princess.
- Thrusts the Master Sword forward, holds it up to his face, then thrusts it upward while emitting a kiai.
 |
 |

|
|---|
In competitive play[edit]
Tier placement and history[edit]
Since SSB4's release, Link's nimbler mobility, stronger projectile game, higher power and improved range saw him perceived as noticeably better than his appearance in Brawl and, according to some players, a mid-tier character like his ancestor was in Melee. However, opinions on Link started to decline in light of more developed metagames and higher popularity of certain other characters, whereas Link's representation in competitive play remained rather poor. This culminated in him being ranked 42nd on the first tier list.
Opinions on Link, however, started to improve after certain respectable placings by dedicated mains, such as Izaw and Scizor. This resulted in him being ranked 43rd on the second tier list, after the inclusion of Corrin and Bayonetta. Thanks to T notably achieving strong results with Link after the second tier list, Link was ranked 39th on the third tier list. This resulted in him being reassessed as a mid-tier character, while his placement itself was also very similar to his ancestor's in Melee.
After T placed 3rd at 2GGC: Civil War, one of the most competitive tournaments in SSB4's lifespan, Link's perception has further improved, to the point that he is viewed as deserving to be in the upper portion of the mid-tier. This has been reflected in the fourth and current tier list, in which Link is ranked 31st.
Official Custom Moveset Project[edit]
| Character | Custom sets available | ||||
|---|---|---|---|---|---|
| 1211 | 1213 | 2211 | 2213 | 1311 | |
| 1313 | 2311 | 2313 | 1231 | 3211 | |
Most historically significant players[edit]
Any number following the Smasher name indicates placement on the PGR 100, which recognizes the official top 100 players in Super Smash Bros. 4 of all time.
See also: Category:Link players (SSB4)
 Izaw - One of the best Link players in Europe. Placed 4th at Avalon U-II defeating Meru and 9th at two superregionals with BEAST 6 and Eclipse 2. He was formerly ranked 2nd on the Swedish Power Rankings during 2017.
 Nicorin - The second-best Link player in Japan behind T. While he never reached the same peaks as T, he made some respectable placements at many different events such as 9th at Hirosuma 13, 13th at Rikabura 6, and 25th at Umebura 27 with victories over Some and Brood.
 Scizor - One of the best Link players in the United States and one of the first to perform well in North America. Besides T, he was the closest Link player to top 8 at a major tournament with 9th at 2GGC: West Side Saga and also placed 33rd at 2GGC: GENESIS Saga. He holds the best major result seen by Link in the post-Ultimate era with 13th at Super Smash Con 2022.
- Sova Unknown - One of the best Link players in the United States. Residing in the MD/VA region, he mainly competed at local tournaments such as 5th at Glitch and 17th at Glitch 2 with a win over Umeki. He has also given some of Link's best results seen in the post-Ultimate era, placing 3rd at Apex 2022 and 17th at Super Smash Con 2019.
- T - The best Link player of all-time. His 3rd place finish at 2GGC: Civil War is iconic for being the best Link result seen in Smash 4, marking the character's peak at a supermajor and some of his best wins in players such as Abadango and Fatality. T's ability to perform at top level with Link became a main source for Link's rise on later tier lists in Smash 4 and solidified him as the 46th best player on the PGR 100.
- Tsage - One of the best Link players in the United States. Alongside Scizor, he was considered one of the first North American Link players to perform well at notable tournaments, placing 7th at GUMS 15, 9th at Shift, and 49th at Shine 2016. Ranked 24th on the last major New England Power Ranking of Smash 4.
Trophies[edit]


- Link
 Green clothes? Pointy hat? Yep, it's Link, all right! In this game, his sword and shield make for effective attacking and blocking, and his bow, bombs, and boomerang will spice up any battle. He's even brought his Clawshot for grabbing enemies and edges. Jeez, just how much stuff can Link carry?
- Green tunic? Pointy hat? Yep, it's Link, all right! In this game, his sword and shield make for effective attacking and blocking, and his bow, bombs, and boomerang will spice up any battle. He's even brought his Clawshot for grabbing enemies and edges. Jeez, just how much stuff can Link carry?
 : The Legend of Zelda (08/1987)
 : The Legend of Zelda: A Link to the Past (04/1992)
 Green clothes? Pointy hat? Yep, it's Link all right! In this game, his sword and shield make for effective attacking and blocking, and his bow, bombs and boomerang will spice up any battle. He's even brought his Clawshot to make light work of grabbing enemies and hanging from edges. The hero of Hyrule is really kitted out for a brawl!
- : The Legend of Zelda (11/1987)
- : The Legend of Zelda: A Link to the Past (09/1992)


- Link (Alt.)
- If Link was on a desert island and could only pick one item, it'd be his powerful sword. This weapon is key to his down-air attack, a move with great launching potential and the ability to strike twice. He can also strike twice with his side smash—the second blow deals more damage and launches harder.
- If Link was on a desert island and could take only one item, it'd be the Master Sword. This weapon is key to his down air attack, a move with great launching potential and the ability to strike twice. He can also strike twice with his side smash—the second blow deals more damage and launches farther.
- : The Legend of Zelda (08/1987)
- : The Legend of Zelda: A Link to the Past (04/1992)
- Of all of his weapons, Link's sword may be the most lethal. His down air attack has incredible launching power. What's more, he'll bounce up afterwards, allowing for a follow-up strike. His side smash can also be followed up with a more powerful second blow that sends foes flying – just press the button again straight away.
- : The Legend of Zelda (11/1987)
- : The Legend of Zelda: A Link to the Past (09/1992)

- Triforce Slash (Link)
- Link makes use of the Triforce of Courage to trap foes, and then he launches a 16-blow combo. The final, mighty blow has the power to launch opponents off the stage. When Link prepares the attack, the ray of light he emits must strike a rival, or the attack will fail. Shielding will do nothing to stop this powerful attack.
- Link traps a foe in mid-air with the power of the Triforce of Courage, then delivers a 16-strike sword combo. The final strike has formidable launching power. If the ray of light at the start of the attack doesn't hit, the whole thing ends there. Helpfully, though, the ray of light's range and speed are incredible, and shields won't block it.
In Event Matches[edit]
Solo Events[edit]
- A Fated Battle: Link must defeat Ganondorf in a two stock battle. If the battle lasts through the third transition phase on Castle Siege, two Dark Links will appear.
- All-Star Battle: Regulars: Link is one of the opponents fought in this event. All of the opponents are the eight starter characters of the "perfect-attendance crew" from Super Smash Bros.
- Princess Punch-Up!: As Zelda, the player is allied with Link and must defeat against Peach and Mario.
- The Demon King and the Goddess: As Ganondorf, the player must initially defeat Link and Zelda. After the two are defeated or some time has passed, a giant Palutena appears and the player must defeat her as well.
- The Ultimate Swordsman: As Ike, the player must defeat Link, Marth, Meta Knight, Toon Link, male Robin, female Robin and Shulk. All of the opponents wield swords.
Co-op Events[edit]
- A Fairy Nice Trip: Link and Pac-Man must survive on Pac-Land until the stage reaches Fairy Land as four Kirbys try to hinder the players' progress.
- Final Battle Team-Up: Link, using his Dark Link alternate costume, is one of the opponents two players must defeat.
- The Ultimate Battle: Two players choose a character and must defeat the entire roster.
Alternate costumes[edit]
.png)
| |||||||

|

|

|

|

|

|

|

|
Gallery[edit]

Link in the Nintendo Direct from April 8th, 2014.
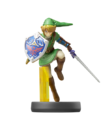
Link's amiibo.
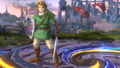
Link's appearance in Super Smash Bros. for Wii U.
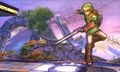
Link's appearance in Super Smash Bros. for Nintendo 3DS.
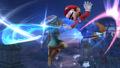
Using Spin Attack on Mario in Super Smash Bros. for Wii U.

Using Hero's Bow alongside Pit's Palutena Bow.
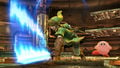
Using his forward tilt with Kirby in the background.
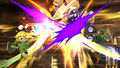
Link's Spin Attack colliding with Toon Link's Spin Attack against Donkey Kong.
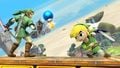
Toon Link throwing a Bomb at Link.
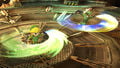
Toon Link and Link using their Spin Attacks on the ground.

Using down aerial and displaying its new meteor smash effect on Samus.
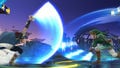
Using neutral attack's first hit against Marth's forward tilt.

Using his Clawshot.
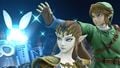
Using his side taunt alongside Zelda.
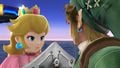
Link and Peach on Battlefield.
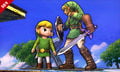
His appearance in Super Smash Bros. for Nintendo 3DS alongside Toon Link.
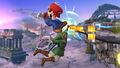
Link edge trumping Mario.
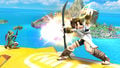
Hero's Bow and Palutena Bow colliding in the air.
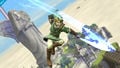
Using his forward aerial.
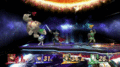
Using Gale Boomerang.
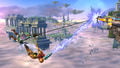
Link and Samus simultaneously grabbing an edge with their tether recoveries.
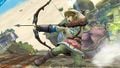
Link's new alternate costume based on the civilian clothes worn by the Link in The Legend of Zelda: Skyward Sword.
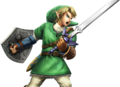
Link's appearance on the cover of Super Smash Bros. for Nintendo 3DS.


Trivia[edit]

- During Link's first victory animation, his eyebrows appear lighter than usual, only to revert to their original shade of color once the animation ends.
- In Super Smash Bros. for Wii U, a glitch prior to update 1.1.0 enabled the player to see characters' bind poses. In Link's case, it could be seen that his bind pose was modeled in an unusual way, without forming a "T" shape like other bind poses.
- This pose can still be seen even post-update 1.1.0, albeit only during the Master Core battle. If one looks close enough when Master Shadow begins to form, Link's bind pose is used instead of a normal falling pose.
- Link's alt. trophies in Super Smash Bros. for Wii U and Super Smash Bros. for Nintendo 3DS appear very similar to his ancestor's All-Star and Adventure Mode trophies, respectively, in Super Smash Bros. Melee.
- Not counting Melee, this is the only game where Link simply reuses his onscreen appearance from the previous game instead of having a new animation of him appearing onto the stage.
- Despite being relegated to being a trophy in 3DS, Wii U is the only game where Link's adult form from Ocarina of Time (which inspired his appearance in the first two Smash games) does not make any appearance at all.
- Of all the veterans that retain their voice clips from Brawl, Link, Ganondorf, and Captain Falcon are the only ones to not make use of knockback voice clips that weren't used in-game in Brawl despite having them.
References[edit]
| Fighters in Super Smash Bros. 4 | |
|---|---|
| Veterans | Bowser · Captain Falcon · Charizard · Diddy Kong · Donkey Kong · Dr. Mario · Falco · Fox · Ganondorf · Ike · Jigglypuff · King Dedede · Kirby · Link · Lucario · Lucas · Luigi · Mario · Marth · Meta Knight · Mewtwo · Mr. Game & Watch · Ness · Olimar · Peach · Pikachu · Pit · R.O.B. · Roy · Samus · Sheik · Sonic · Toon Link · Wario · Yoshi · Zelda · Zero Suit Samus |
| Newcomers | Bayonetta · Bowser Jr. · Cloud · Corrin · Dark Pit · Duck Hunt · Greninja · Little Mac · Lucina · Mega Man · Mii Fighter (Mii Brawler · Mii Gunner · Mii Swordfighter) · Pac-Man · Palutena · Robin · Rosalina & Luma · Ryu · Shulk · Villager · Wii Fit Trainer |