Diddy Kong (SSBB)
| Diddy Kong in Super Smash Bros. Brawl | |
|---|---|
 
| |
| Universe | Donkey Kong |
| Other playable appearances | in SSB4 in Ultimate |
| Availability | Starter |
| Final Smash | Rocketbarrel Barrage |
| Tier | A+ (4) |
Diddy Kong (ディディーコング, Diddy Kong) is a playable character in Super Smash Bros. Brawl, confirmed on August 22, 2007. He is unique, distinct among the cast for his charm and gaiety. Brawl has him using a realistic high-pitched chimpanzee voice (sampled from the commonly used "Chimpanzee Screeche PE026201" stock sound effect by The Hollywood Edge) rather than being voiced by Chris Sutherland or Katsumi Suzuki, the latter of whom first voiced Diddy in Mario Power Tennis.
Diddy Kong ranks 4th out of 38 on the tier list, in the A tier. Diddy Kong's ability to spawn Banana Peels single-handedly gives him incredible stage control, neutral game, edgeguarding, combos, and out of shield options. Additionally, a thrown banana peel offers a slew of easy kill confirms, movement techniques, and even an infinite, and is widely considered to be the best projectile in the game. On top of that, Diddy Kong's mobility and frame data are better than most, and his attacks have good range relative to his size.
Diddy Kong's primary weakness lies in his recovery. Rocketbarrel Boost, travels far, but requires a long startup to do so, and is easily edgehogged and gimped by stage geometry. Additionally, his few KO moves, while fast and reliable when fresh, are used often and thus stale quickly.
Overall, Diddy Kong has excellent matchups, representation, and tournament results, thanks in no small part to players such as ADHD and Gnes.
Attributes[edit]
Diddy Kong is a quick, middleweight character who is capable of wall clinging and crawling. Many of his attacks have good speed and have decent power to back them. His KO power is low due to his few KO moves and a general weakness in his smashes, which stale very quickly if he uses them too much for racking damage, which forces a reliance on meteor smashes for early KOs.
Diddy also has two projectiles: his Peanut Popgun and Banana Peels. Peanut Popgun, while not particularly strong, is a decent mid-range move for racking up easy damage. In comparison, his Banana Peels, which have the property of tripping opponents, form a much more integral part of his metagame, as they combo well with his other moves and allow him to set up KOs. The glide toss option provided by the Banana Peels is invaluable, as it allows Diddy to rapidly approach and retreat. If an opponent is tripped by a thrown Banana Peel, Diddy can follow up with another glide tossed Banana to continue the combo, and end with a down or forward smash for a KO. In conjunction with his quick dash attack, large grab range, and powerful throws, Bananas provide Diddy with excellent ground options and stage control. Banana Peels can also help him escape certain chaingrabs, such as King Dedede's, and certain grab releases. However, as Banana Peels are items, they can be used against Diddy even by opponents without reflectors.
Diddy's other special moves Monkey Flip and Rocketbarrel Boost contribute to his above-average recovery. Besides being a useful move to rack up damage, Monkey Flip can be used as a meteor smash if Diddy uses its grab option in midair (it can also be used as a sacrificial KO, but this is not useful because the meteor smash is much more reliable and safer); it also can be used to gain horizontal distance in tandem with Rocketbarrel Boost to make up for Diddy's poor air speed. Diddy will not be able to use Rocketbarrel Boost if he uses Monkey Flip's attack option in midair, but he will retain his midair jump. The former move provides great vertical distance if sufficiently charged, but it leaves Diddy vulnerable while charging, and he needs to charge to move left or right at all. Potential edgeguarders will still have to watch out for the meteor hitbox on the bottom of Rocketbarrel Boost, as well as the rocketbarrels themselves, which function as powerful explosive projectiles if the attack is interrupted after releasing the charge. Diddy's barrel jump can also improve his recovery, acting like a second midair jump while Rocketbarrel Boost can still be used.
Diddy possesses a decent aerial game. His forward aerial has above-average knockback and surprising range, making it a viable KO move and useful for edgeguarding, though it has the most landing lag out of all of his aerials. His back aerial, up aerial, and neutral aerial are all relatively fast, with the former being another decent option for edgeguarding and a very quick way to grab bananas in midair, though the latter is rarely used in competitive play. His down aerial is a solid meteor smash (similar to Wolf's down aerial) with some startup lag.
In summary, Diddy Kong is a character who heavily relies on a single, exceedingly powerful move, creating a relatively simple but highly effective gameplan.
Moveset[edit]
For a gallery of Diddy Kong's hitboxes, see here.
For a more detailed information regarding Diddy Kong's moveset and attack hitboxes, see this page.
| Name | Damage | Description | ||
|---|---|---|---|---|
| Neutral attack | 3% | Diddy Kong slaps forward twice, turns around to quickly kick the foe, and proceeds to repeatedly whip them with his tail. The first hit can set-up a grab if jab-cancelled or even a buffered down smash. | ||
| 2% | ||||
| 2% | ||||
| 1-2% | ||||
| Forward tilt | 11% (fists), 9% (arms), 8% (body) | Diddy Kong leans to the side and thrusts both of his arms forward in a double punch. This attack can be angled upwards or downwards. It can KO at 161% from the center of Final Destination. | ||
| Up tilt | 7% | Diddy Kong swats in the air above him with a slap. This move can be used to juggle at low percents and can KO at 159%. | ||
| Down tilt | 7% | Diddy Kong, claps forward while crouching. Extremely useful for racking up damage at low percentages. | ||
| Dash attack | 3% (hit 1), 2% (hit 2), 4% (hit 3) | Diddy Kong performs a cartwheel from Donkey Kong Country. The first hit of the move spikes opponents, making it easier to land all three hits. | ||
| Forward smash | 5% (hit 1), 13% (hit 2) | Diddy Kong spins and punches forward, followed by a second punch. The first hit deals no knockback, which makes it easier to land the second hit. The second hit deals shield damage. KOs at 122% when uncharged and 79% when fully charged. | ||
| Up smash | 5% (hits 1-2), 6% (hit 3) | Diddy Kong hops a little and does a sort of cartwheel, hitting three times with extremely low knockback (weakest up smash in the game in terms of knockback). Fills in combos, can rack up damage easily. | ||
| Down smash | 16% (front), 12% (back) | Diddy Kong performs a sweeping kick. It has less knockback than his forward smash, but it's still his most reliable smash attack. KOs at 126% when uncharged and 85% when fully charged. | ||
| Neutral aerial | 6% | Diddy Kong does an aerial cartwheel similar to his dash attack. Can KO at around 170% if used near the upper blast line. | ||
| Forward aerial | 14% (clean), 11% (late) | Diddy Kong kicks both feet forward while spinning, similar to Mario and Luigi's old forward aerial in Super Smash Bros. KOs Mario at 142% from the center of Final Destination. | ||
| Back aerial | 9% | Diddy Kong thrusts his leg backward and spins it behind him. Good knockback, though it won't gain KO power until past 170%. | ||
| Up aerial | 11% | Diddy Kong does an overhead flip kick. Fairly fast with decent knockback, and it can KO at 162%. | ||
| Down aerial | 12% | Diddy Kong swings both arms downward in a double axe-handle punch. A strong meteor smash. | ||
| Grab | — | Diddy Kong grabs his opponent with both of his hands. | ||
| Pummel | 2% | Diddy Kong headbutts his target, angled from the side of his body. | ||
| Forward throw | 11% | Diddy Kong tosses his opponent forwards. The throw is based on Diddy Kong's barrel toss animation from Donkey Kong Country. | ||
| Back throw | 10% | Diddy Kong tosses his opponent backward, very similar to his f-throw in that it is useful for getting opponents offstage. | ||
| Up throw | 4% (hit 1), 5% (throw) | Diddy Kong throws his opponent up and handstand kicks them. | ||
| Down throw | 9% | Diddy Kong performs a leapfrog-like manoeuvre and throws the opponent underneath him. Has fair backwards knockback. Has little utility and almost no follow-ups available. | ||
| Forward roll Back roll Spot dodge Air dodge |
— | — | ||
| Techs | — | — | ||
| Floor attack (front) Floor getups (front) |
6% | Diddy Kong gets up and slaps both sides. | ||
| Floor attack (back) Floor getups (back) |
6% | Diddy Kong gets up and kicks both sides. | ||
| Floor attack (trip) Floor getups (trip) |
5% | Diddy Kong gets up and kicks both sides. | ||
| Edge attack (fast) Edge getups (fast) |
8% (tail base), 6% (tail tip) | Diddy Kong quickly gets up and does a spinning tail slap. | ||
| Edge attack (slow) Edge getups (slow) |
10% | Diddy Kong slowly gets up and sticks his left foot out. | ||
| Neutral special | Peanut Popgun | 3-18% | Diddy Kong pulls out his peanut popgun and fires a peanut. Can be charged, but if charged for too long, the popgun will explode, and will stun Diddy Kong for a second. If the peanuts don't hit anyone, they fall on the floor, breaking open, revealing a small peanut shell inside. The shell can be eaten to heal a small percent of damage. | |
| Side special | Monkey Flip | 14% (kick hip), 12% (kick knee), 10% (kick foot), 5% (grab attack hit 1), 5% (grab attack hit 2), 5% (jump attack hit 1), 5% (jump attack hit 2), 2% (release) | Diddy Kong performs a sideways hop that has the potential to launch Diddy onto an opponent's face if timed correctly. Can perform a flying kick with another button press. Can also be used to gain some extra recovery distance. | |
| Up special | Rocketbarrel Boost | 10% (launch clean), 8% (launch late), 1-3% (rocketbarrels), 18% (rocketbarrels explosion) | Diddy Kong charges his rocketbarrels from Donkey Kong 64 in a powerful attack. Can potentially fly very far and very fast, but hitting a surface will make Diddy Kong lose his rocketbarrels and will fall helplessly. Diddy Kong will take 5% damage for hitting a surface. | |
| Down special | Banana Peel | 4-6% (banana) | Diddy Kong tosses a Banana Peel into the air to have it fall onto the ground. Opponents who touch the peel will slip and trip. Up to two banana peels can be thrown at a time and work amazingly in tandem with Diddy Kong's glide toss. They are considered one of the best projectiles in the game due to their incredible utility both offensively and defensively. | |
| Final Smash | Rocketbarrel Barrage | 8% (peanuts), 15% (peanuts explosion), 18% (contact), 20% (ending explosion) | Diddy Kong flies around on his rocketbarrels, shooting peanuts everywhere. Puts Diddy Kong into a helpless state when ended in the air. | |
Stats[edit]

| Stats | Weight | Dash speed | Walk speed | Traction | Air friction | Air speed | Air acceleration | Gravity | Falling speed | Jumpsquat | Jump height | Double jump height | Empty landing lag |
|---|---|---|---|---|---|---|---|---|---|---|---|---|---|
| Value | 93 | 1.7 – Initial dash 1.721 – Run |
1.25 | 0.0484 | 0.01 | 0.8272 | 0.0 – Base 0.05 – Additional |
0.092 | 1.43 – Base 2.002 – Fast fall |
4 | 41.22019565 - Base ? - Short hop |
? | 3 |
Announcer call[edit]

English/Japanese
Wii Remote selection sound[edit]
- Taps the ground and makes a short giggle.
On-screen appearance[edit]
- Breaks out of a DK Barrel and claps his hands above him.

|
|---|
Taunts[edit]
- Up taunt: Throws his hat into the air, which lands on his head. This is a reference to his victory animation from Donkey Kong Country after he defeats a boss or wins in a Bonus Level.
- Side taunt: Does a playful fighter's stance and cackles threateningly showing his teeth.
- Down taunt: Claps his hands four times, changing feet as he does so.
| Up taunt | Side taunt | Down taunt |
|---|---|---|

|

|

|
Idle pose[edit]
- Jumps in place.
- Scratches his rump and shakes his fur.
 |

|
|---|
Crowd cheer[edit]
| Cheer (English) | Cheer (Japanese) | Cheer (German) | Cheer (Korean) | |
|---|---|---|---|---|
| Cheer | ||||
| Description | Di - ddy - kong! | Di - ddy - kong! | Diddy Kong! | |
| Cheer (French) | Cheer (Italian) | Cheer (Spanish) | ||
| Cheer | ||||
| Description | Di - ddy Kong ! | Di - ddy - Kong! | Diddy Kong! | Diddyyy - Kong! |
Victory poses[edit]
- Up: Spins with his Rocket Barrels, then faces the screen, dancing with his hands on his head and chin.
- Left: Shoots the air with his Peanut Popguns, rolls towards the camera, and shoots at the camera.
- Right: Does a small dance, then holds still in a breakdance-like pose, clapping his feet together.
| Up | Left | Right |
|---|---|---|

|

|

|
In competitive play[edit]
Most historically significant players[edit]
- See also: Category:Diddy Kong players (SSBB)
 ADHD - One of the most nationally dominant players since Brawl's inception, famed as one of Mew2King and ZeRo's most difficult opponents.
 cyve - The best Diddy main and one of the best players in Europe.
- Felix - Although he rarely traveled, he became known for his 3rd place finish at MLG Raleigh 2010.
- Gnes - A nationally dominant player in his prime, won the largest-ever Brawl prize check and the largest in the entire Smash series at the time at MLG Dallas 2010 ($12,500).
 Luigi player - A top Diddy player in Europe.
 Nagahari - One of the best Diddy players in Japan.
- NinjaLink - Famed for being the first player to defeat Mew2King in a tournament set.
- Suinoko - One of the best Diddy players in Japan.
- Zinoto - A top Midwestern Diddy player with a 5th place finish at SKTAR 2, famed for his usage of banana infinites.
Tier placement and history[edit]
Diddy Kong was initially a high tier character, ranked 11th on the first tier list (September 2008). However, Diddy Kong players such as NinjaLink and ADHD showed how powerful his Banana Peels were, utilizing them to create damage-racking combos, defense, and stage control, bringing Diddy Kong into the top tiers, with him rising to 7th on the second tier list (January 2009), 5th on the third (June 2009), then 3rd on the fourth and fifth lists before surpassing long-time #2 character Snake by the sixth tier list (July 2011). Though Olimar and the Ice Climbers have since surpassed him, he still remains at 4th place on the eighth (current) tier list, as of April 2013.
In Solo Modes[edit]
Classic Mode[edit]
In Classic Mode, Diddy Kong can appear as an opponent or ally in Stage 2 along with Yoshi and Donkey Kong on Yoshi's Island, Rumble Falls, or 75m (with the latter available if it has been unlocked). Diddy Kong can also appear as an opponent in Stage 11, but only if he hasn't appeared in Stage 2.
All-Star Mode[edit]
In All-Star Mode, Diddy Kong is fought in Stage 3 alongside Donkey Kong on Rumble Falls or 75m (with the latter only available if it has been unlocked).
Event Matches[edit]
Solo Events[edit]
- Event 7: Diddy Kong Panic: The player controls Donkey Kong and must defeat 15 tiny Diddy Kongs on Mario Circuit.
- Event 9: The Monster Beneath the Earth: Ike must defeat two Diddy Kongs before the reaching the underground section of Castle Siege. Failing to do so makes the player also face a giant Donkey Kong.
- Event 20: All-Star Battle x1: Diddy Kong is one of the eight opponents fought in this event along with Wario, Meta Knight, Pit, Zero Suit Samus, Olimar, Lucas, and the Pokémon Trainer.
- Event 22: Monkeys Unite: The player controls Diddy Kong, who is aided by a giant Donkey Kong, and must defeat Sheik and Lucario on Rumble Falls.
Co-Op Events[edit]
- Co-Op Event 4: The DK Tag Calamity: Both Donkey Kong and Diddy Kong are tiny and must defeat one Donkey Kong and four Diddy Kongs on Mario Circuit.
- Co-Op Event 21: The True All-Star Battle: Two players select a character and take on the entire roster on Battlefield.
Congratulations Screens[edit]
Classic Mode
All-Star Mode


Role in The Subspace Emissary[edit]

When Donkey Kong has three Bullet Bills fired at him by the vehicle escaping with his banana hoard, Diddy Kong leaps from behind Donkey Kong and shoots his Peanut Popguns at the Bullet Bills, destroying them. He then joins Donkey Kong in pursuit of their stolen bananas. At one point, after getting their bananas, they encounter Bowser, who aims his Dark Cannon at the two. Donkey Kong, realizing what is about to happen, Giant Punches Diddy Kong, sending him flying away and he is star KO'd (but he doesn't turn into a trophy as Mario and Luigi did). Donkey Kong is shot instead and captured.
Diddy Kong soon comes out of the jungle and finds himself at a lake. When he goes to investigate a crashed Arwing, Rayquaza comes out of the water and grabs Diddy Kong. At that moment, Fox jumps out of the Arwing, which is now on fire due to an attack from Rayquaza. Fox uses his Fox Illusion to save Diddy Kong and Reflector to reflect another attack from Rayquaza, sending the legendary Pokémon tumbling back into the water. Fox then makes a hand signal for Diddy to come with him to fight Rayquaza until it faints. After Rayquaza's defeat, Fox begins to leave, but Diddy drags him along to help rescue DK. They battle a Shadow Bugs clone of Bowser, but upon defeating it, the real Bowser attacks them and Fox flees, dragging Diddy to safety.
Later, Fox and Diddy make their way to the Swamp, where they are ambushed by Bowser again, Diddy is hit by Bowser's Dark Cannon and cloned by Shadow bugs, while Fox dodges the shot. Falco arrives just in time and destroys the Dark Cannon, but Bowser gets away in his Koopa Clown Car while the Shadow bug Diddy grows several times its normal size. Fox revives the real Diddy, who is shocked at seeing the gigantic clone. Diddy Kong and the two Star Fox pilots then fight the giant Shadow bug Diddy Kong clone. After the fight, Diddy drags Falco along with him and Fox as they continue through the jungle. Eventually, they see Donkey Kong's trophy on a ship in chains, heading towards the floating Isle of the Ancients. Diddy is mad at this. However, Falco has a plan as the Great Fox appears.
Afterwards, Diddy Kong is ejected out of Falco's Arwing and shoots peanuts at the Primids on the skiff that has DK's trophy on it. He lands on the skiff while Captain Falcon and Olimar (who witnessed this from the island's surface) jump to the aid of the little chimp. Diddy revives Donkey Kong, after which the Kongs and Captains fight a horde of Primids and other Subspace enemies on the platform. After they have defeated them, Diddy and Donkey Kong do a little dance to celebrate as Captain Falcon and Olimar watch. As Falco flies by and gives a thumbs-up to Diddy to signify success, Diddy waves "thank-you". Diddy, DK, Captain Falcon, and Olimar then head into the Subspace Bomb Factory, where they fight their way through various armies of Primids, R.O.B. units, and other enemies. They eventually reach a storage room where all the bombs are and where the Ancient Minister is standing in melancholy. Coincidentally, the group also meets Samus and Pikachu there, who earlier entered the Bomb Factory another way.
After meeting up with Samus and Pikachu, Diddy Kong tries to stop the R.O.B. Squad members who are setting off Subspace Bombs by the orders of Ganondorf, who also orders the R.O.B.s to attack the Ancient Minister. The Ancient Minister reveals himself to be a R.O.B. as well, as he helps the other fighters defeat the wave of Subspace enemies sent by Ganondorf. However, Diddy and the other fighters soon realize they cannot stop the Subspace Bombs from exploding. He shrieks at R.O.B. to do something, but R.O.B. just slumps in sadness over the inevitable loss of his fellow robots. Captain Falcon calls his Falcon Flyer for the group to escape the doomed factory, with DK carrying R.O.B. with him. They all pile into the ship when Meta Ridley appears. Diddy can be chosen to fight the boss. After Meta Ridley is defeated, Diddy helps the heroes as they regroup and continue their journey into Subspace.
At the entrance to Subspace, all the characters (except Wario, King Dedede, Bowser, Luigi, Ness, Ganondorf, Sonic and, to a lesser extent, Wolf, Toon Link and Jigglypuff) are preparing to end the Subspace invasion. After Ganondorf and Master Hand are defeated by Tabuu, Diddy Kong and the rest of the heroes catch a glimpse of the evil power among them. In a single blow, Tabuu defeats all of the characters and turns them into trophies. Diddy and the others are later revived by Kirby, Ness, King Dedede and Luigi and joins them to defeat Tabuu, with help from Sonic. After Tabuu's defeat, the pieces of the World of Trophies return to their original places, except for The Isle of the Ancients, due to the huge number of Subspace Bombs going off simultaneously taking it beyond repair.
Playable appearances[edit]
- The Jungle
- The Lake
- The Swamp
- Outside the Ancient Ruins
- The Subspace Bomb Factory (Part II)
- Entrance to Subspace
- The Great Maze (if rescued in Subspace (Part I)
Exclusive stickers[edit]
These stickers can only be used by Diddy Kong or by a select few including him.
- Barkle: [Tail] Attack +32
- Blathers: [Tail] Attack +7
- Bowser Jr. (Super Mario Sunshine): [Tail] Attack +25
- Chihuahua: [Tail] Attack +12
- Chunky Kong: [Throwing] Power +31
- Diddy Kong (Donkey Kong 64): Launch Power +20
- Diddy Kong (Donkey Kong Country): [Tail] Attack +28
- Diddy Kong (Mario Hoops 3-on-3): [Leg] Attack +28
- Diddy Kong (Mario Superstar Baseball): [Leg] Attack +12
- Dixie Kong: Launch Resistance +39
- DK: [Head] Attack +27
- DK Barrel: Launch Power +53
- Donkey Kong (Donkey Kong Jungle Beat): [Arm] Attack +22
- Donkey Kong (Donkey Kong Country): [Electric] Resistance +10
- Donkey Kong Jr.: [Arm] Attack +14
- Enguarde: [Body, Spin] Attack +15
- Fairy: [Tail] Attack +7
- Funky Kong: [Leg] Attack +13
- Karate Kong: [Battering] Resistance +25
- Lanky Kong: [Throwing] Power +6
- Manky Kong: [Arm] Attack +10
- Party Monkey: [Head] Attack +6
- Pauline & Donkey Kong: [Arm] Attack +18
- Rouge The Bat: [Tail] Attack +10
- Spitz: [Tail] Attack +12
- Stafy (Densetsu no Stafy): [Tail] Attack +7
- Tiny Kong: [Arm] Attack +4
- Wrinkly Kong: [Battering] Resistance +4
Trophies[edit]
Diddy Kong's main and Final Smash trophies can be obtained by clearing Classic Mode and All-Star mode respectively with him.

- Diddy Kong
- Donkey Kong's little buddy. He's famous for his quickness and his long tail. He usually plays second banana to DK, but he teamed up with his girlfriend, Dixie, to rescue DK when he got captured. He's spent some time playing music and competing in races, and he's also an expert at using barrels.
 : Donkey Kong Country
 : Donkey Kong 64

- Rocketbarrel Barrage
- Diddy Kong's Final Smash. Equipping his rocketbarrels and dual peanut popguns, Diddy can fly around attacking opponents in rapid-fire fashion. He can tilt the barrel jets left or right to control his flight and shoot peanuts straight down, too. This is a technique that tests one's ability to control both movement and attack direction.
 : Super Smash Bros. Brawl
Alternate costumes[edit]
.png)
| |||||
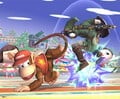
Gallery[edit]
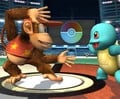
Taunting next to Squirtle on Pokémon Stadium 2.
Posing on Rumble Falls.
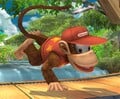
Using his neutral attack on Link on Smashville.


Trivia[edit]
- Diddy Kong, Captain Falcon, Ike, King Dedede and Olimar are the only characters who use a Final Smash in The Subspace Emissary (Diddy Kong does so when he attacks the skiff carrying Donkey Kong's trophy after ejecting from Falco's Arwing).
- He is one of the few characters (the others being Pokémon Trainer, Ice Climbers and Jigglypuff) to have a "Defeated/No Contest" pose different from the traditional hand clapping. Instead, in a reference to his defeated pose from Donkey Kong Country, he removes his cap and shakes his head while scratching the back of his scalp. However, he has a "Defeated/No Contest" pose that has him clap for the winner starting with the next game.
- In The Subspace Emissary, the giant False Diddy Kong uses his third costume (which resembles Dixie Kong), unlike the other false characters which have their neutral colors.
- In The Subspace Emissary, the peanut shells fired from the Peanut Popgun do not release edible peanuts upon breaking open unless the player shoots the peanuts at jet bursts of flame.
- Diddy Kong's voice borrows some sound clips from Ukikis in Super Mario 64.
- Going frame-by-frame on Diddy Kong's up-inputted victory pose, one can see that the Rocketbarrel Pack simply shrinks down to nothing, rather than flying away.
External links[edit]
- Diddy Kong's page at Smash Bros DOJO!!
- Diddy Kong Character Guide on SmashBoards
- Diddy Kong's hitbox size of each of his moves
- Diddy Kong's Moves - History Behind Super Smash Bros. Brawl, by CrappyCaptureDevice (main video) (addendum)
| Fighters in Super Smash Bros. Brawl | |
|---|---|
| Veterans | Bowser · Captain Falcon · Donkey Kong · Falco · Fox · Ganondorf · Ice Climbers · Jigglypuff · Kirby · Link · Luigi · Mario · Marth · Mr. Game & Watch · Ness · Peach · Pikachu · Samus · Yoshi · Zelda / Sheik |
| Newcomers | Diddy Kong · Ike · King Dedede · Lucario · Lucas · Meta Knight · Olimar · Pit · Pokémon Trainer (Charizard · Ivysaur · Squirtle) · R.O.B. · Snake · Sonic · Toon Link · Wario · Wolf · (Zero Suit Samus) |
|
| |
|---|---|
| Fighters | Donkey Kong (SSB · SSBM · SSBB · SSB4 · SSBU) · Diddy Kong (SSBB · SSB4 · SSBU) · King K. Rool (SSBU) |
| Assist Trophy | Klaptrap |
| Boss | Giant Donkey Kong |
| Stages | Kongo Jungle · Kongo Falls · Jungle Japes · Rumble Falls · 75m · Jungle Hijinxs |
| Items | Hammer · Barrel Cannon · Peanut · Spring |
| Enemies | Kritter · Tiki Buzz |
| Other | Dixie Kong · DK Barrel · DK Island · Pauline · Stanley · Zinger |
| Trophies, Stickers and Spirits | Trophies (SSBM · SSBB · SSB4) · Stickers · Spirits |
| Music | Brawl · SSB4 · Ultimate |
| Masterpiece | Donkey Kong |
| Related content | Mario (universe) · Banjo · Barrel |