Recovery: Difference between revisions
Guybrush20X6 (talk | contribs) |
|||
| Line 165: | Line 165: | ||
||Kirby's recovery appears largely unchanged from Brawl. | ||Kirby's recovery appears largely unchanged from Brawl. | ||
Through [[Inhale]], he may use [[Mach | Through [[Inhale]], he may use [[Mach Tornado]], [[Rollout]], [[Toad]], [[Straight Lunge]], [[Monado Arts]] (jump mode), and could potentially [[Pocket]] an recovery-boosting item. | ||
Alternate specials: Jumping Inhale causes Kirby to jump up and forwards, although the move's lag will cause his net vertical height to be around the same after the move finishes. | Alternate specials: Jumping Inhale causes Kirby to jump up and forwards, although the move's lag will cause his net vertical height to be around the same after the move finishes. | ||
Revision as of 15:21, October 8, 2014

- "Recovery" may also refer to reducing one's damage percentage. See recovery items.

A recovery is the attempt to return onstage after being knocked or falling off. Some tools to achieve this end are the midair jump and the "third jump" (usually an up special move). Some recovery moves only go nearly straight up, while others are for long horizontal differences.
For many characters, recovery can be augmented or replaced by moves other than the standard second jump plus up special. This page documents the maximum recovery potential of each character. In the case that a character has multiple recovery options for horizontal or vertical movement, both are listed.
List of recoveries
It is notable that in Super Smash Bros. Melee, an air dodge while tilting the control stick would allow some vertical and/or horizontal recovery, though it puts users in a helpless state. Note that if the recovery is the same in each game, it will not be mentioned. Due to increased floatiness and the fact that it's easier to grab a ledge, recoveries as a whole appear to be greater in Brawl than those in Melee and Super Smash Bros.
| Character | Smash 64 | Melee | Brawl | Smash 4 |
|---|---|---|---|---|
| Bowser | N/A | Whirling Fortress is his primary recovery. It provides some vertical distance and decent horizontal distance. | He can use Flying Slam to augment his recovery if he hasn't used Whirling Fortress. Usually, Whirling Fortress gives more distance in mid-air. If Bowser lands after using Whirling Fortress, there will be an extra animation with increased landing lag, but it can be avoided if Bowser recovers low enough. | Flying Slam no longer gives Bowser any forward momentum.
Alternate specials: |
| Bowser Jr. | N/A | N/A | N/A | Bowser Jr. has both a poor air jump and fast falling speed, which both hinder his recovery. However, Abandon Ship! sends him a great vertical distance, and tilting the control stick can send him a decent distance horizontally at the apex of his launch. In addition, Abandon Ship! doesn't leave Bowser Jr. helpless (although he can only perform a basic hammer swing after ejecting) and has a large ledge sweetspot from below ledges.
Alternate specials: Koopa Meteor hinders his recovery compared to Abandon Ship!; it gains less height, is a purely vertical jump, and send Bowser Jr. flying downwards at high speed. |
| Captain Falcon | Falcon Dive does not give much distance and is used for vertical recoveries, but it cannot grab foes hanging onto the ledge. If it makes contact in mid-air, it will give the opponent his or her midair jump(s), and Captain Falcon can use the move again. Falcon Punch can be used for some horizontal distance. | Falcon Kick allows Captain Falcon to regain his 2nd jump in midair. Raptor Boost is also a decent horizontal recovery move, but it cannot auto sweet-spot a ledge and missing will put him into a helpless state. Falcon Dive gives more distance and can now grab ledges backwards and has a larger ledge sweetspot than it does normally while moving forwards. Unfortunately, it has a small ledge sweetspot (one of the smallest in the game along with Ganondorf) while moving forwards. | Raptor Boost now makes Captain Falcon bounce if it hits the opponent in mid air, but using Falcon Dive is still a better and safer option because Raptor Boost has a slow start-up and almost any move can hit through it. Falcon Kick no longer lets him recover his midair jump. Falcon Dive, like all types of grabs, no longer grants the opponent their midair jump again. It gives slightly more vertical distance but slightly less horizontal distance. It also has a large ledge sweetspot (one of the largest in the game). It can be used against edge-hoggers to stage spike them, though they can tech it. | Captain Falcon's recovery appears largely unchanged from Brawl.
Alternate specials: |
| Charizard | N/A | N/A | Fly provides the most vertical distance out of all of its moves. Charizard has two extra midair jumps and can glide. | Charizard's new Flare Blitz provides excellent horizontal distance, although it bounces backwards slightly and takes some damage if Flare Blitz hits an enemy. It somewhat compensates for the lack of gliding.
Alternate specials: Dragon Rush isn't interrupted by hitting an ememy, and doesn't cause recoil damage. |
| Dark Pit | N/A | N/A | N/A | As a clone of Pit, Dark Pit has almost identical recovery: three aerial jumps, each smaller than the last, and Power of Flight allowing him to fly straight a great distance in any direction. Electroshock Arm provides some forward movement, but will cause him to Tumbling briefly and is thus a poor choice for recovery.
Alternate specials: |
| Diddy Kong | N/A | N/A | Rocketbarrel Boost provides the most vertical distance out of all of his moves. Monkey Flip can be used as a recovery as well and can be used in conjunction with his third jump and Rocketbarrel Boost; however, if one presses the attack or special attack button during the move Diddy Kong can only use his third jump afterwards. The blast from his charged Peanut Popgun can help him recover if the control stick or D-Pad is tilted opposite the ledge. [1] | Diddy Kong can no longer use Rocketbarrel Boost if he attacks during Monkey Flip.
Alternate specials: |
| Donkey Kong | Spinning Kong is his primary recovery. It provides a short vertical distance but a long horizontal distance. It also provides invincibility frames at the tip of his hands. | Spinning Kong no longer has invincibility frames but gives slightly more distance. Headbutt slows down horizontal and vertical momentum and can meteor smash. | Spinning Kong gains slightly more vertical distance. Like Bowser, there will be an extra animation if Donkey Kong lands from too high up after using Spinning Kong, but again, it can be avoided by recovering low. | Donkey Kong's recovery appears largely unchanged from Brawl.
Alternate specials: |
| Dr. Mario | N/A | Dr. Mario can use the Super Sheet to propel himself forward a bit and slow his fall speed. Also, if the player rapidly presses the special button during the Dr. Tornado, he rises up in the air. Super Jump Punch provides the best vertical distance and can be used following either or both of these moves, and it has a large ledge sweetspot (one of the largest in the game), helping Dr. Mario's recovery even more. | N/A | Super Sheet no longer gives Dr. Mario any momentum. Dr. Mario can now walljump.
Alternate specials: |
| Duck Hunt | N/A | N/A | N/A | Duck Jump is Duck Hunt's primary recovery move, providing a good amount of vertical distance. Duck Hunt can be steered to the side as they rise, and Duck Jump can actually cover more horizontal distance than vertical when steered to one side for the duration.
Alternate specials: |
| Falco | N/A | Fire Bird is Falco's primary vertical recovery move. It has high start up lag however and does not provide a great amount of distance. Falco Phantasm provides the most horizontal distance. His Reflector can be used to slow down his fall speed. | Fire Bird provides less distance now. Falco Phantasm provides greater horizontal distance. The Reflector can no longer be used to slow down fall speed. | Falco Phantasm no longer leaves Falco helpless.
Alternate specials: |
| Fox | Fire Fox is his primary recovery. It can be used in any direction but pulls him down a little. His Reflector slows down his fall speed. | Fire Fox now charges with a flame hitbox and travels farther. Fox Illusion provides great horizontal distance. Also, his forward aerial can slow down his momentum and propel him diagonally. | His forward aerial can also be used to "foxcopter". Hitting the jump button while sliding into his forward aerial will cause Fox to jump and perform a forward aerial at the same time, adding height to his jump while moving forward. He can also "shine stall" by spamming his shield - done by holding down tilt and mashing the special button. This will greatly reduce his fall speed. | Fox Illusion no longer leaves Fox helpless.
Alternate specials: |
| Ganondorf | N/A | Dark Dive is Ganondorf's primary recovery move. He may use Wizard's Foot to get his midair jump back, allowing for large horizontal recoveries. Gerudo Dragon may be used for some horizontal distance, although it's not very useful since it doesn't sweetspot the ledge, and leaves him helpless afterwards. | Dark Dive is one of the worst recoveries in the game, providing very limited horizontal and vertical movement. Additionally, in Brawl the Landing lag glitch makes it hard for him to get-up from the ledge after recovering. He is forced to use either the Flame Choke for horizontal movement or the Dark Dive for vertical recovery, but they can't be used in the same jump. Dark Dive can also stage spike opponents, though it can be punished by teching. The lack of hitstun also makes many characters able to hit him out of the Dark Dive. He has also lost the ability to restore the midair jump after using Wizard's Foot. | Ganondorf's recovery appears largely unchanged from Brawl.
Alternate specials: Flame Wave provides a shorter dash than Flame Choke. Dark Vault provides a two-stage jump with higher vertical recovery than Dark Dive, and the first jump has more horizontal reach. |
| Greninja | N/A | N/A | N/A | Greninja's overall recovery is formidable; an addition to its high aerial jump, both Shadow Sneak and Hydro Pump give it great distance in almost any directon. The former is a teleport, which can bypass enemies if charged enough, and Hydro Pumo can be angled to perform two dashes in any combination of the eight directions.
Alternate specials: |
| Ice Climbers | N/A | Belay is an incredible recovery move when both Ice Climbers are present. Squall Hammer can also be used to recover, and with a solo Ice Climber it becomes the only viable move. Rapidly pressing the special button during Squall Hammer allows the Climber to gain some height. | Popo and Nana can now grab the ledge, and even if one climber uses Belay, it will provide a small boost in the air, quite similar to Yoshi's Egg Toss. | N/A |
| Ike | N/A | N/A | Ike is limited to either vertical recovery with Aether or horizontal recovery with Quick Draw. Both give good distances in their respective directions, but cannot be combined, limiting Ike's total recovery, which is generally poor and extremely predictable. | Ike's recovery appears largely unchanged from Brawl.
Alternate specials: Close Combat provides a slightly longer dash than Quick Draw, and passes through enemies. |
| Ivysaur | N/A | N/A | Ivysaur's up aerial and down aerial either propel it downward or upward respectively. However, its up aerial can be used to assist recovery via Down Air Stall. Due to the small size of the upward boost, it is actually more helpful in getting more horizontal distance to set up its Vine Whip tether recovery; however, it is extremely vulnerable to edge-hoggers. | N/A |
| Jigglypuff | Jigglypuff recovery in this game is poor, being easily edgeguarded and having arguably the shortest vertical recovery in the game. While gifted with 5 midair jumps, each jump is half the size of the last, with the final two not giving Jigglypuff any vertical distance. Jigglypuff's horizontal recovery is better however, due to its great air speed and the fact that it can use Rising Pound to increase the recovery. | Jigglypuff's recovery is now vastly superior. All jumps give height now, giving Jigglypuff among the greatest recoveries in the game. Having great aerial mobility and multiple recovery options, Jigglypuff is among the most difficult characters to edgeguard. In addition, Jigglypuff's new neutral special, Rollout, gives it better horizontal recovery. However, this move puts it into helpless state, making its usefulness questionable. | Jigglypuff's Rollout no longer puts it into a helpless state. | Pound grants less momentum than previous games.
Alternate specials: |
| King Dedede | N/A | N/A | While his four midair jumps are the smallest of any character and he has the worst lateral air movement, he is still capable of huge recoveries due to the Super Dedede Jump. | King Dedede's recovery appears largely unchanged from Brawl.
Alternate specials: Dash Jet Hammer will cause King Dedede to fly forward a small distance when released. |
| Kirby | His recovery consists of five midair jumps and the Final Cutter for good vertical movement. However, if the player misses the ledge with Final Cutter, Kirby will plummet downwards with no chance of recovery. | Final Cutter gives less vertical distance and is much weaker. Kirby has lower air speed.
Through Swallow, he may use Rollout, Shadow Ball and Toad to aid his recovery. |
His recovery is improved from Melee, as he has improved air speed (though it is still slow), and gains more horizontal distance in Final Cutter.
Through Inhale, he may use Mach Tornado, Rollout and Toad to aid his recovery. |
Kirby's recovery appears largely unchanged from Brawl.
Through Inhale, he may use Mach Tornado, Rollout, Toad, Straight Lunge, Monado Arts (jump mode), and could potentially Pocket an recovery-boosting item. Alternate specials: Jumping Inhale causes Kirby to jump up and forwards, although the move's lag will cause his net vertical height to be around the same after the move finishes. |
| Link | Link has a variety of techniques to augment Spin Attack. Link's bomb, if it explodes while he is holding it, can aid his recovery by giving him back his Spin Attack (see bomb recovery). However, his Spin Attack is arguably the worst recovery in SSB due to its short vertical and horizontal distance and poor range. This leaves Link vulnerable to spikes. | In Melee, the Hookshot grabs onto walls. This can be combined with an air dodge to increase the grabbing range. Link's Spin Attack covers more distance and now covers him from above. He can also throw a bomb upwards and Spin Attack into it to perform bomb recovery, rather than waiting for the bomb to explode. | Link's recovery is rather poor due to the limited range of Spin Attack, fast falling speed, poor midair jump, and slow air speed. The Clawshot now functions as a tether. | Spin Attack appears to have slightly buffed horizontal and vertical distance.
Alternate specials: |
| Little Mac | N/A | N/A | N/A | Little Mac's fast falling speed and poor aerial jump work against him, and Rising Uppercut is a vertical jump with low height, giving Little Mac overall weak recovery. Jolt Haymaker can aid his horizontal recovery. While Straight Lunge does send Mac forward a good distance when charged sufficiently, it is generally too slow to be of much use recovering.
Alternate specials: |
| Lucario | N/A | N/A | ExtremeSpeed is bendable, making it a versatile recovery move. Lucario also possesses a unique trait: the ability to wall cling after using its third jump. This only takes effect if Lucario reaches the wall before ExtremeSpeed ends and is very useful on stages with space to wall jump under the ledge, such as Final Destination. However, because ExtremeSpeed doesn't make opponents flinch, Lucario is extremely vulnerable to edge-hoggers. Lucario is able to wall-jump repeatedly up a single wall, unlike many other characters with wall-jumps. | Extreme Speed now scales with Lucario's Aura power; at maximum power its range is nearly double its base range, so much that Lucario can actually risk a Self-destruct if not careful. In addition, Lucario will perform a weak attack if he hits an opponent at the end of the dash.
Alternate specials: |
| Lucas | N/A | N/A | Lucas has multiple recovery options: the standard PK Thunder, his Rope Snake (which functions as a tether recovery), Zapjump, Magnet Pull, and Wave Zap. He can also use his PSI Magnet to stall in the air. Additionally, if holding an item, he can gain a large vertical distance equal to a Zap Jump by throwing the item up and midair jumping at the same time. Using any aerial attack right after his midair jump will also propel him in the air. | N/A |
| Lucina | N/A | N/A | N/A | Being a clone of Marth, Lucina's recovery is nearly identical. Shield Breaker and Dancing Blade, like Marth's versions, give Lucina minimal horizontal distance, forcing her to rely on Dolphin Slash for recovery, which gives low horizontal distance.
Alternate specials: |
| Luigi | In this game, Luigi's recovery is technically greater than Mario's, as he has a greater double jump. However, Luigi Cyclone is very hard to use (compared to the Mario Tornado) because it requires very quick button-tapping, so this is hard to utilize. | Luigi has a very gimpable recovery that is difficult to master. He has the lowest air speed in the whole game. Super Jump Punch provides only vertical recovery (and its distance was shortened), and Green Missile provides only horizontal movement. The height gained from Luigi Cyclone was lowered, and the move requires more button-mashing for Luigi to gain height. Furthermore, Green Missile can misfire, propelling Luigi a great distance horizontally; this makes the move unpredictable and can either help or harm Luigi. | Green Missile and Luigi Cyclone can be combined for large horizontal recovery, and Luigi Cyclone requires less button mashing to be effective. These can also be used in combination with Super Jump Punch since neither puts Luigi into a helpless state, giving Luigi one of the greatest recoveries in the game, though he still may suffer from gimping. | Luigi Cyclone will no longer give Luigi height, although it can still allow him to maintain his current height. It also will only allow him to do so once and them become ineffective as a recovery aid. Green Missile also gives him slightly less horizontal distance.
Alternate specials: Quick Missile greatly improves horizontal distance over Green Missile, although its has very long landing lag and will cause him to slide a short distance if he hits the ground while in the animation. |
| Mario | If the player rapidly presses the special button during the Mario Tornado, he rises up in the air. Super Jump Punch is the primary recovery move. | Mario can use the Cape to propel himself forward a bit. Super Jump Punch and Mario Tornado are still viable recovery moves, but Super Jump Punch travels less distance. Super Jump Punch can be cancelled with a wall jump if it is used while hugging a wall and the Control Stick is tilted backwards at the apex of the jump. | Mario Tornado is no longer in Mario's special moves moveset, restricting his recovery moves to Cape and Super Jump Punch. He has also lost the ability to cancel Super Jump Punch into a wall jump. | Mario's recovery appears largely unchanged from Brawl. |
| Marth | N/A | Marth's side special, Dancing Blade, slows his fall speed and propels him forward if only the first attack of the combo is used. This does not put him in a helpless state. Dolphin Slash provides large vertical recovery, but makes him helpless. | Shield Breaker can be used to propel Marth forward, but it leaves him open to attacks. His Dolphin Slash can be used for quick vertical recovery, but self stage spikes if hits lips under ledges. Dancing Blade is less useful for recovering and gives much less horizontal recovery. Dolphin Slash gives him the landing lag glitch and covers more horizontal distance. | Shield Breaker and Dancing Blade now give Marth minimal horizontal distance, limiting their use as recovery tools.
Alternate specials: Crescent Slash does not rise as high as Dolphin Slash, but gives Marth considerable horizontal distance. |
| Mega Man | N/A | N/A | N/A | Rush Coil is Mega Man's primary recovery move. If he bounces off of Rush a second time, the second jump will be higher; opponents can "steal" this second jump from him if they bounce off of Rush. Rush Coil does not leave Mega Man helpless. |
| Meta Knight | N/A | N/A | Meta Knight is gifted with multiple mid air jumps and the ability to glide. In addition, all of his special moves can be used as recovery moves, although all of them put him in helpless animation. The Shuttle Loop is notable in that it allows him to perform a second glide after using it (helpless animation begins after the glide is terminated). Meta Knight's huge recovery distance, both horizontally and vertically, resistance to being edge-guarded, and variety of available recovery moves make Meta Knight's recovery arguably the best in the game. | Meta Knight can no longer glide. In addition, both Mach Tornado and Dimensional Cape have low vertical distance.
Alternate specials: High-Speed Drill has greater horizontal distance than Drill Rush. |
| Mewtwo | N/A | Mewtwo's large second jump, slow fall speed, and high air speed allow for long recoveries even before its up special, Teleport. The massive recoil of Shadow Ball can also help in recovery. Confusion can also help Mewtwo gain some distance once in the air. | N/A | N/A |
| Mii Brawler | N/A | N/A | N/A | |
| Mii Gunner | N/A | N/A | N/A | |
| Mii Swordfighter | N/A | N/A | N/A | |
| Mr. Game & Watch | N/A | Mr. Game & Watch's recovery is limited to his jumps and Fire, though Fire does provide large vertical recovery. | Oil Panic can be used to stop downward momentum, and Fire does not put Mr. Game & Watch into a helpless state and instead lets him use a parachute, allowing him to travel long distances. | Mr. Game and Watch's recovery appears largely unchanged from Brawl.
Alternate specials: |
| Ness | Ness' recovery is very easily edge-guarded, since he is limited to his jumps and the very slow PK Thunder. The lightning must be curved into Ness' body at an angle that will push him toward the stage. Simply moving the control stick in a circle is not enough; doing this will launch Ness directly upwards or even backwards in some cases. Because of this, it is often considered the worst recovery in the game. Nonetheless, his second jump is the second longest in the game, perhaps to make up for this. | The move is significantly more reliable than in the previous game because the circle that it has to move in is much smaller, although it does not push Ness as far as it did previously. The tail of the PK thunder head has been made slightly longer, giving Ness more protection during the attack. | PK Thunder has been buffed even more. Now, if the player simply curves the control stick in a complete circle, the move will launch him at an upward diagonal angle, fit for recovering. | Ness's recovery appears largely unchanged from Brawl.
Alternate specials: |
| Olimar | N/A | N/A | Olimar is limited to his jumps and Pikmin Chain. Pikmin Chain is a diagonal tether with range that varies with the number of Pikmin Olimar has with him, making it easily edge-hogged and almost useless if he has no Pikmin with him. Strangely, Pikmin Chain gives more vertical distance if Olimar has no Pikmin that if he has one or two Pikmin. | Pikmin Chain has been replaced with Winged Pikmin, which becomes more effective the fewer Pikmin Olimar is commanding. Even with a full three, the move still gives Olimar respectable horizontal distance and moderate vertical distance. With zero Pikmin, Winged Pikmin gives Olimar one of the best (in terms of distance) recoveries in the game, both horizontally and vertically.
Alternate specials: |
| Pac-Man | N/A | N/A | N/A | Pac-Man's main main recovery tool is Pac-Jump, which must be landed on repeatedly to maximize its effects. This means his recovery can be gimped if one bounce isn't enough to get him back on stage safely. Power Pellet can augment his horizontal recovery, although has long ending lag. Fire Hydrant will also give Pac-Man a small vertical hop if he doesn't already have a hydrant out.
Alternate specials: |
| Palutena | N/A | N/A | N/A | Palutena's main recovery tool is Warp, which can be angled in the eight directions. Because it is a teleport, it can bypass enemies or hazards if aimed correctly.
Alternate specials: Angelic Missile launches Palutena forward similar to Luigi's Green Missile. Jump Glide gives less vertical distance than Warp but allows Palutena to glide for a few seconds. Lightweight increases her jump height and aerial speed, making her recovery more effective in general, although she becomes easier to launch. Rocket Jump provides less height than Warp and cannot be angled. |
| Peach | N/A | Peach has the ability to float, allowing her to maintain the same vertical position while moving horizontally. She can stall by using Toad, as it allows her to hover for a brief time. In addition, her side special, Peach Bomber, can be used repeatedly to climb up walls. Both of these techniques can be followed by Peach Parasol. However, Peach Parasol does not give much distance. | Peach's vertical recovery has been partially nerfed, as her midair jump now provides almost no vertical gain (the shortest in the game), but her Parasol provides more vertical recovery and more horizontal recovery. Her float is unchanged. | Peach's vertical recovery has been buffed, as her midair jump now provides greater vertical height. Peach Bomber's speed has been increased. Her Parasol is faster and covers more vertical height.
Alternate specials: Flying Peach Bomber sends Peach diagonally upward, but it causes her to descend when the animation is over with very high ending lag in the midair. It does not sweet spot the ledge. Flower Bomber travels much shorter distance than her regular Peach Bomber. Parasol High Jump gives more vertical distance than her regular Parasol. However, she never opens her parasol, leaving herself helpless afterwards. Light Parasol gives less initial jump. However, she gains additional vertical recovery every time she opens her parasol. This can be used up to four times while airborne. |
| Pichu | N/A | Pichu can use its Skull Bash to travel great horizontal distances, and then follow it with Agility. Unfortunately, both these moves deal damage to it, putting Pichu in an even worse condition than before. Pichu can also wall jump, which can aid its recovery in some stages like Fountain of Dreams. | N/A | N/A |
| Pikachu | Pikachu's main recovery lies in its jumps and Quick Attack, but Quick Attack provides huge recovery and is hard to counter. If Thunder is timed properly, it will give Pikachu a small jump upwards, though this is difficult to utilize. | Skull Bash is now available as a recovery move. | Pikachu is now able to wall jump, and Pikachu can quick attack cancel to prevent ending lag. | Pikachu's recovery appears largely unchanged from Brawl. |
| Pit | N/A | N/A | Pit has multiple mid-air jumps, the ability to glide, and his Wings of Icarus which give him the second largest vertical recovery in the game. However, if Pit is attacked while using Wings of Icarus, he cannot use the move again until he lands on solid ground. | Pit can no longer glide, and Wings of Icarus has been replaced with Power of Flight, which is a single long dash in any direction. Overall, his recovery is considerably worse than in Brawl. Upperdash Arm provides some forward movement, but will cause him to Tumbling briefly and is thus a poor choice for recovery.
Alternate specials: |
| R.O.B. | N/A | N/A | R.O.B. can use his up special, Robo Burner, multiple times in the air; though the total time of the move is the same, using it multiple times increases vertical recovery distance. Robo Burner provides the largest vertical recovery in the game. His back aerial propels him forward, and his down aerial stops momentum. | ...
Alternate specials: |
| Robin | N/A | N/A | N/A | Robin's main recovery tool is Elwind, which gives Robin great vertical height but poor horizontal movement. Interestingly, Robin can gain more forward movement than backwards movement from Elwind. If Robin's Elwind tome breaks, his/her recovery becomes almost nonexistent.
Alternate specials: |
| Rosalina | N/A | N/A | N/A | Rosalina's high jumps and slow falling speed are already a boon to her recovery. Launch Star is a simple long dash that be angled in a roughly 90-degree arc between forward-slightly up and upwards-slightly behind.
Alternate specials: |
| Roy | N/A | Roy's recovery is very similar to Marth's, but due to his faster falling speed, slower air speed, lowered forward motion on side special, and greater lag after side special, Roy's recovery is generally inferior. Blazer, however, unlike Marth's Dolphin Slash, can be aimed to go anywhere from diagonally upward to directly vertical to nearly completely horizontal, depending on where the control stick is tilted after the initial up special. | N/A | N/A |
| Samus | Samus's Bombs can be used to perform a bomb recovery and she can utilize her Screw Attack to gain vertical height. | She can now use her grab as a wall grapple and her bomb recovery is more useful. Screw Attack gives more distance. | Samus's recovery techniques have not changed from Melee, and her grab air is now a tether recovery, but her bomb recovery isn't as effective. | Samus's recovery is largely unchanged from Brawl. |
| Sheik | N/A | Sheik's recovery is generally limited to her jumps and Vanish (although both travel decent distances), but if a longer recovery is needed she can Transform into Zelda and use Farore's Wind. | Due to increased Transformation time, it is usually no longer viable to transform into Zelda to recover. However, Sheik's chain can now be used as a tether. | Bouncing Fish sends Sheik forwards a good distance, but its animation time means she will lose height, making its use as a recovery tool dubious. |
| Shulk | N/A | N/A | N/A | Shulk's main recovery tool is Air Slash, which gives him fair vertical distance but minimal horizontal distance. The move's second slash will push him forward slightly, though, and the slash can help protect him. Back Slash also gives him some horizontal distance, although he will be stuck in the move until he hits something, making it a poor recovery option. He can also use Monado Arts to dramatically boost his jump height temporarily at the cost of defense. Overall, his recovery is predictable.
Alternate specials: |
| Snake | N/A | N/A | If his up special, Cypher, fails to recover, Snake can use his C4 on himself in midair so he can use his up special again (see bomb recovery). Cypher covers a lot of distance, but if Snake is interrupted out of Cypher, he cannot use it again. The move is very easily edge-guarded as well, but the move does provide launch resistance. | N/A |
| Sonic | N/A | N/A | Sonic's greatest vertical recovery is provided by his Spring Jump. His other special moves can provide more horizontal distance, but they cannot be used after his up special. Many players use his Spin Dash move for horizontal recovery and jump out of it for a bit of vertical recovery, use his Homing Attack for close-range recovery, and Spring Jump for desperate vertical recovery. Due to the ability to be used repeatedly, Homing Attack has the potential of being infinite. However, this is reliant on the position of Sonic's opponent, so it is not always the best option. | Sonic's recovery is largely unchanged from Brawl.
Alternate specials: |
| Squirtle | N/A | N/A | Squirtle can use Withdraw to aid its horizontal recovery, although it continues to fall during this move. Waterfall can be used for vertical/diagonal recovery. | N/A |
| Toon Link | N/A | N/A | Like Link, Toon Link can use a bomb recovery, a tether recovery, a Down Air Stall, or a Spin Attack. Toon Link's Spin Attack gives much greater distance than Link's. | Toon Link's recovery is largely unchanged from Brawl.
Alternate specials: |
| Villager | N/A | N/A | N/A | Villager has the choice between Lloid Rocket and Balloon Trip for recovery. The former will give him no vertical height but excellent horizontal distance, and will not leave him helpless if he hits an opponent. The latter is an all-around solid recovery move, although it can easily be gimped if opponents pop one or both balloons.
Alternate specials: Liftoff Lloid can be used for a damage-capable vertical recovery, but won't go as high as Balloon Trip could. |
| Wario | N/A | N/A | Wario can use his bike to gain a third midair jump. Wario Waft can also send Wario rocketing upwards if it is charged. Since his Corkscrew leaves him helpless, it should only be used as a last resort. | Wario's recovery is largely unchanged from Brawl.
Alternate specials: |
| Wii Fit Trainer | N/A | N/A | N/A | Wii Fit Trainer's overall recovery is solid thanks to high normal jumps and moderate fall speed. Super Hoop provides only moderate distance in either direction, but Header can be used to provide a small extra hop. |
| Wolf | N/A | N/A | Wolf is more limited in recovery options than Fox and Falco. His side special, Wolf Flash, covers much less ground than Fox's but more than Falco's, though it gives a fair amount of vertical recovery. His up special provides him fast directional recovery, but he falls almost straight down after using it, and it has the worst accuracy and smallest ledge sweetspot of the three, though it has less start-up lag and is therefore harder to edge-guard. | N/A |
| Yoshi | Yoshi's recovery is hampered by the fact that he really only has his one mid air jump to use. However, his second jump is the highest in the game and gives him launch resistance, and Yoshi has the fastest air speed. | Yoshi's Egg Roll can sometimes be used to recover, but this is uncommon and not particularly useful. The newly-added air dodge gives Yoshi a small boost to his recovery after his midair jump. | Yoshi's Egg Throw in Brawl gives him a slight hop in midair, but his air dodge recovery is no longer useful. Egg Roll now renders him helpless, hindering his recovery if he goes too far. | Yoshi's recovery is largely unchanged from Brawl. |
| Young Link | N/A | Like Link, Young Link can use a bomb recovery, wall grapple, or a Spin Attack. The bomb recovery will help after the Spin Attack. However, he can't throw the bomb straight up and Spin Attack into it, unlike Link. Young Link can also wall jump, and his wall grapple is shorter than Link's grapple. His Spin Attack gives slightly more distance than Link's, but it is overall poor for a character of his weight class. | N/A | N/A |
| Zelda | N/A | Zelda's recovery comes mainly in the form of her long-ranged up special, Farore's Wind. Additionally, she can use Din's Fire to glide horizontally short distances, much like Peach's float. However, these moves cannot be combined as they each put Zelda into helpless animation. However, Farore's Wind is limited in direction because the number of different angles at which the move travels is low, making the move predictable. | Despite the far distance Farore's Wind gains, her recovery is considered one of the worst in Brawl; Zelda lacks any real alternate recovery move, and the angles at which Farore's Wind travels are very limited, while completely killing all of Zelda's momentum upon completion (she'll fall straight down after completion for a fair distance). As such, the move is very predictable, while requiring precision to grab the ledge with. The move also has very long start-up lag, making it easily edge-guarded. If Zelda lands directly on the stage after using Farore's Wind, she suffers from long ending lag, making the move easily punishable. | Zelda's recovery is largely unchanged from Brawl. |
| Zero Suit Samus | N/A | N/A | Zero Suit Samus has two tether recoveries. Plasma Whip can be used for horizontal recovery, and Plasma Wire can be used for vertical recovery. Flip Jump can also provide her with an extra boost to recover with. Flip Jump can help in offensive recovery in the sense that she can Meteor Smash an opponent by attacking during it and is useful if one is in a situation where a tether recovery will not work. However, if she uses tether recovery 3 times without touching the ground, the tether recovery will not work on a fourth time. | The new Boost Kick is an upward recovery move with good height, plus Zero Suit Samus protects herself with a kick at the end. |
Gallery
- SuperJumpPunchSsbb.jpg
Mario's Super Jump Punch recovery in Brawl.
Olimar's Pikmin Chain recovery in Brawl.
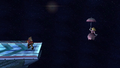
Peach's Peach Parasol recovery in Brawl.
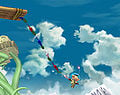
Kirby recovering on Dream Land in Smash 64.
Mario using his various recovery options to recover onto the stage in Melee.


