Samus (SSBM): Difference between revisions
No edit summary |
Gligar2007 (talk | contribs) m (→Event Matches) Tag: Mobile edit |
||
| (170 intermediate revisions by 72 users not shown) | |||
| Line 1: | Line 1: | ||
{{ArticleIcons|ssbm=y}} | {{ArticleIcons|ssbm=y}} | ||
{{disambig2|Samus' appearance in ''Super Smash Bros. Melee''|the character in other contexts|Samus Aran}} | {{disambig2|Samus' appearance in ''Super Smash Bros. Melee''|the character in other contexts|Samus Aran}} | ||
{{Infobox Character | {{Infobox Character | ||
| Line 11: | Line 11: | ||
|ssbgame4 = Ultimate | |ssbgame4 = Ultimate | ||
|availability = [[Starter character|Starter]] | |availability = [[Starter character|Starter]] | ||
|tier = | |tier = B+ | ||
|tierPAL = D | |tierPAL = D | ||
|ranking = | |ranking = 11 | ||
|rankingPAL = 9 | |rankingPAL = 9 | ||
}} | }} | ||
'''Samus''' ({{ja|サムス|Samusu}}, ''Samus'') is a [[starter]] character in ''[[Super Smash Bros. Melee]]''. Returning as a veteran from the previous game, Samus, similarly to {{SSBM|Link}}, reprises her role as a short-ranged fighter with numerous ranged options. | |||
'''Samus | |||
Samus is | Samus is ranked 11th on the current tier list, placing her in the B+ tier, a significant improvement from her 8th (out of 12) position in ''[[Super Smash Bros.]]'' This is mainly due to her effective projectiles, supplementing her KOing power and her approaches. She also has a good air game that is complemented by a versatile back aerial. Samus' recovery is among the best in the game; her bomb jumps, ability to wall jump, grappling beam, and heavy weight all contribute to making her among the toughest characters to KO horizontally. She also possesses techniques exclusive to her, such as the [[Super Wavedash]] and [[Samus's extended grapple|Extended Grapple]], that aid her approach on opponents. However, she is floaty, allowing her to be easily juggled and KO'd vertically. She is also highly susceptible to combos in general, due to being floaty, heavy, and tall in stature. Her primary combo starter, her grab, is also very laggy if it misses, though it can be extended in the NTSC version. Regardless, Samus has decent matchups all-around in the current metagame. | ||
==Attributes== | ==Attributes== | ||
Samus is a unique character. Although a tall heavyweight, she is unusually floaty, uncharacteristic of characters in her weight class. Her slow falling speed (the second slowest in the game, tied with {{SSBM|Zelda}}) allows her recovery to travel more distance and gives her better potential combo game. However, it also makes her more susceptible to vertical KOs, even with her high weight, and it also gives her a poor SHFFL. | Samus is a unique character. Although a tall heavyweight, she is unusually floaty, uncharacteristic of characters in her weight class. Her high weight (only being lighter than {{SSBM|Bowser}} and {{SSBM|Donkey Kong}}) lets her have amazing horizontal survivability. Her slow falling speed (the second slowest in the game, tied with {{SSBM|Zelda}}) allows her recovery to travel more distance and gives her better potential combo game. However, it also makes her more susceptible to vertical KOs, even with her high weight, and it also gives her a poor SHFFL. | ||
Arguably Samus's most valuable asset is her high range. While lacking a disjointed hitbox, Samus has a variety of long-reaching attacks and long-ranged projectiles that can assist with her ground-based approach. [[Charge Shot]] can quickly become one of her most powerful attacks, while her Missiles can act as both an approach option when non-tapped and as a powerful finisher when tapped. Samus's average traction and low falling speed also grant her a long wavedash that can mesh well with her long-ranged smash attacks, as well as her modestly-ranged tilts; assuming the player has particularly good timing, Samus also has access to the longest wavedash in the game, the [[Super Wavedash]], which can also potentially surprise enemies due to its speed. While laggy, Samus | Arguably Samus's most valuable asset is her high range. While lacking a disjointed hitbox, Samus has a variety of long-reaching attacks and long-ranged projectiles that can assist with her ground-based approach. [[Charge Shot]] can quickly become one of her most powerful attacks, while her Missiles can act as both an approach option when non-tapped and as a powerful finisher when tapped. Samus's average traction and low falling speed also grant her a long wavedash that can mesh well with her long-ranged smash attacks, as well as her modestly-ranged tilts; assuming the player has particularly good timing, Samus also has access to the longest wavedash in the game, the [[Super Wavedash]], which can also potentially surprise enemies due to its speed. While laggy, Samus sports one of the longest [[grab]]s in the game, and a technique that is unique to the [[NTSC]] release of the game can allow her to extend its reach by three, in addition to allowing it to home in on enemies. | ||
Samus's recovery is also among the longest and most flexible in all the game. While [[Screw Attack]] grants relatively little horizontal and vertical distance, its multiple hitboxes can potentially frustrate edgeguarders | Samus's recovery is also among the longest and most flexible in all the game. While [[Screw Attack]] grants relatively little horizontal and vertical distance, its multiple hitboxes can potentially frustrate edgeguarders. Samus, however, owns arguably more options for her recovery than any other character in the game. Her average air speed and low falling speed aid her approach toward ledges, while her natural ability to [[wall-jump]] can aid her recovery on stages with walls underneath the ledge, such as [[Fountain of Dreams]] or {{SSB|Dream Land}}. Samus's down special, her [[Bomb (Samus)|bombs]], can allow her to bomb-jump onto the stage without the loss of jumps, and her grab air can allow her to enter "safe zones" underneath the stage, as well as acting another long recovery technique. Owing to these variety of options, edgeguarding against Samus can be extremely difficult, especially for characters with poor recoveries. For Samus herself, this long recovery also grants her a powerful edgeguarding game of her own, aided by her fast and powerful neutral and back aerial attacks. | ||
Samus also has a very good defensive game; despite her shield leaving her legs exposed, which can leave her vulnerable to [[shield stab]]bing, and having a poor roll due to its low speed, she still has very strong defensive options. For one, she has one of the best [[Crouch cancel]]s in the game, due to her high weight, and having very good options out of it, such has her down smash and down tilt. Her screw attack also offers a quick and difficult-to-punish out of shield option, due to being invincible for the first couple frames of the move which helps her when getting pressured. It can also work as a combo breaker, but this can be risky if missed. Her nair is also a good combo breaking tool, due to being decently quick (frame 5) and being powerful. Her defensive game is also complimented by her amazing horizontal survivability and great recovery, which allow Samus to frequently live to very high percents against characters without strong vertical finishers (and sometimes characters with them). | |||
Despite having a good approach on the ground, Samus's aerial approach suffers due to her strange variety of attributes. Her below average falling speed and high jumps give her a poor SHFFL, despite the presence of low ending lag for her aerials when L-canceled. Her low falling speed also can prevent her from quickly pursuing enemies that have been knocked into the ground; as such, Samus can have particular difficulty in comboing fast-fallers, even with her variety of throws. Tying into this, Samus's grab is extremely laggy and can easily be punished if she fails to grab an opponent with it. | |||
{{Incomplete|Terribly short; needs heavy expansion on how power/speed/frame data have improved}} | |||
==Changes from ''Smash | ==Changes from ''[[Super Smash Bros.]]''.== | ||
Samus has been significantly [[buff]]ed from ''Smash 64'' to ''Melee''. She is often considered the most buffed character from ''Smash 64'' to ''Melee'' along with {{SSBM|Jigglypuff}}, | Samus has been significantly [[buff]]ed from ''Smash 64'' to ''Melee'', as she was considered to fare poorly in Smash 64 due to her poor approach and lack of reliable combos. She is often considered the most buffed character from ''Smash 64'' to ''Melee'' along with {{SSBM|Jigglypuff}}. Most of her attacks have received significantly better frame data, such as a faster neutral attack and forward tilt. | ||
===Aesthetics=== | |||
*{{change|The graphical upgrades of the Nintendo GameCube give Samus a more proportionate build. Her power suit is more detailed and she has a more glossy visor.}} | |||
*{{change|Samus has a new taunt. While Samus still lifts her arm cannon up, she performs a more elaborate pose and she no longer shakes her arm cannon while it is up.}} | |||
*{{change|Samus's blue team costume is now available for selection in regular gameplay instead of being locked to team battles.}} | |||
*{{change|Samus has a new [[teeter]]ing animation where she balances on her left foot.}} | |||
===Attributes=== | ===Attributes=== | ||
*{{buff|Samus | *{{buff|Samus [[walk]]s faster (0.9067 (27.2) → 1).}} | ||
*{{nerf|Samus [[ | *{{nerf|Samus [[dash]]es much slower (1.8 (54) → 1.4), going from the 4th fastest out of 12 characters to the 11th slowest out of 26.}} | ||
*{{ | *{{nerf|Samus' [[traction]] is slightly lower (0.0667 (2) → 0.06). Compared with the returning veterans, however, her traction is significantly lower, making it harder for her to punish [[out of shield]].}} | ||
*{{change|Samus is | *{{change|Samus' [[air speed]] is slightly slower than her Japanese and North American ''Smash 64'' counterparts, but slightly faster than her Australian and European ''Smash 64'' counterparts (0.933 (28, JPN/NA) / 0.867 (26, AUS/EUR) → 0.89).}} | ||
*{{change|Samus is [[ | *{{nerf|Samus' [[air acceleration]] is significantly lower (0.1 (3) → 0.0325), making it the slowest.}} | ||
*{{nerf|Samus [[jump]]s extremely lower (49.4 (1482) → 34.464), hindering her vertical recovery and ability to chase opponents above her.}} | |||
**{{change|Samus's [[short hop]] is drastically lower (33.2267 (996.8) → 22.75). Compared with the returning veterans, however, her short hop is much higher, going from the 3rd highest out of 12 characters to the highest out of 26.}} | |||
*{{change|Samus' [[gravity]] is slightly higher (0.0633 (1.9) → 0.066), going from the lowest to the second lowest.}} | |||
*{{buff|Samus' [[fast fall]]ing speed is faster (2.233 (67) → 2.3). The difference between her falling speed and fast falling speed is higher (increase: 59.5% → 64.3%).}} | |||
*{{nerf|Samus is significantly [[weight|lighter]] (117.391304 (0.92) → 110), hindering her endurance.}} | |||
*{{change|Samus is smaller (model size multiplier: 1x → 0.88x). This makes her harder to hit but reduces the range of her attacks.}} | |||
*{{buff|[[Roll]]s have a longer duration (frames 4-23 → 4-30).}} | |||
*{{buff|Rolls have less ending lag (FAF 46 → 45) although they are still the slowest rolls.}} | |||
*{{nerf|The removal of [[Teleport (SSB)|teleporting]] slightly hinders Samus' grounded approach.}} | |||
*{{buff|The introduction of [[air dodging]] greatly benefits Samus as it improves her recovery and it allows her to [[wavedash]] improving her grounded mobility and making up for her slower ground speed.}} | |||
*{{buff|Samus can now [[wall jump]].}} | |||
===Ground Attacks=== | ===Ground Attacks=== | ||
*{{buff|Up tilt now [[meteor smash]]es grounded opponents, | *[[Neutral attack]]: | ||
*{{buff|Samus has a new down tilt: a quick downwards cannon strike | **{{buff|Neutral attack has less startup lag (frame 4 (hit 1)/7 (hit 2) → 3/5).}} | ||
*{{ | **{{buff|The first hit has less ending lag (FAF 22 → 18).}} | ||
*{{change|Down tilt launches opponents vertically instead of horizontally.}} | **{{buff|The first hit has larger hitboxes (3u/3u/3u → 3.5152u/3.5152u/3.5152u).}} | ||
*{{ | **{{change|The first hit now has static hitboxes.}} | ||
*{{buff|Dash attack has | **{{nerf|The first hit has a new animation where Samus does not stretch her arm nearly as far. This noticeably reduces its range.}} | ||
*{{nerf|Dash attack no longer deals extra shield damage.}} | **{{buff|The second hit has higher base knockback (10 → 15).}} | ||
*{{nerf|Up smash has | **{{buff|The second hit's far hitbox is larger (3.66u → 4.3u) and it is moved further away from Samus (x offset: 4 → 4.3).}} | ||
*{{buff|Down smash has less startup and ending lag | **{{change|The second hit has a new animation where Samus swings her arm cannon downwards much sooner. The hitboxes do not become active until Samus is already moving her cannon downwards.}} | ||
***{{buff|This allows the move to hit in front of Samus much sooner which makes the first hit connect more reliably into the second hit in theory (although this is compensated by the universal decrease to hitstun).}} | |||
***{{nerf|However, this also noticeably reduces the move's range above and behind Samus.}} | |||
**{{nerf|The second hit has a shorter duration (frames 7-11 → 5-7).}} | |||
**{{nerf|The second hit has slightly more ending lag (FAF 30 → 31).}} | |||
*[[Forward tilt]]: | |||
**{{buff|Forward tilt has less startup (frame 7 → 6) and ending lag (FAF 32 → 30).}} | |||
**{{buff|Forward tilt has a new animation where Samus takes a step forward, increasing its range.}} | |||
**{{buff|Forward tilt has larger hitboxes (3.33u/3.33u/1.82u → 3.91u/3.33u/2.3456u) and the foot hitbox has been moved further away from Samus (x offset: 6 → 7.03).}} | |||
**{{buff|Forward tilt now has a hitbox on Samus' back leg.}} | |||
**{{nerf|Forward tilt has a shorter duration (frames 7-11 → 6-8).}} | |||
**{{nerf|Up-angled forward tilt deals less damage (12% → 11%).}} | |||
**{{nerf|Forward tilt can no longer be angled slightly up or down.}} | |||
*[[Up tilt]]: | |||
**{{nerf|Up tilt now only hits opponents when Samus drops her leg, increasing its startup lag and shortening its duration (frames 8-23 (early)/24-28 (late) → 14-17).}} | |||
***{{nerf|This also means that the move can no longer hit opponents behind or directly above Samus.}} | |||
***{{buff|However, the removal of the rising hit greatly improves the move's safety, with the move no longer being easily punishable on hit.}} | |||
***{{buff|Additionally, the move has much less startup lag compared to the previous second hit (frame 25 → 14).}} | |||
**{{buff|Up tilt has a shorter total duration (FAF 44 → 35).}} | |||
***{{nerf|However, its total duration does not fully compensate for the move's lower startup lag compared to the previous second hit, giving it slightly more ending lag.}} | |||
**{{buff|Up tilt has higher base knockback (5 → 40).}} | |||
**{{buff|Up tilt now [[meteor smash]]es grounded opponents (361° → 270°), significantly improving its [[combo]] potential.}} | |||
***{{nerf|However, this also hinders its KO and edgeguarding potential against grounded opponents.}} | |||
**{{buff|Up tilt has slightly larger hitboxes (5u/5u → 5.0778u/5.0778u) and the foot hitbox has been moved further away from Samus (x offset: 6 → 6.2496).}} | |||
**{{nerf|Up tilt deals less damage against aerial opponents (13% → 12%).}} | |||
*[[Down tilt]]: | |||
**{{change|Samus has a new down tilt: a quick downwards cannon strike that fires a small explosion as opposed to a simple low sweep.}} | |||
**{{buff|Down tilt has less startup lag (frame 8 → 6).}} | |||
***{{nerf|However its total duration was unchanged, giving it more ending lag.}} | |||
**{{buff|Down tilt deals more damage (13% → 14%).}} | |||
**{{change|Down tilt has more base knockback but less knockback scaling (10 (base), 100 (scaling) → 80/60).}} | |||
***{{buff|This makes the move much safer at lower percents and improves its KO potential near the blast zone.}} | |||
***{{nerf|However, this hinders its overall KO potential.}} | |||
**{{change|Down tilt launches opponents vertically instead of horizontally (40° → 100°).}} | |||
***{{buff|This grants it combo potential; especially with its altered knockback.}} | |||
***{{nerf|However, this significantly hinders its edgeguarding potential.}} | |||
**{{buff|Down tilt has larger hitboxes (3.33u/3.33u → 3.1248u/3.5154u/5.859u), with the move having a similar amount of horizontal range despite its new animation.}} | |||
**{{nerf|Down tilt has a shorter duration (frames 8-12 → 6-8).}} | |||
*[[Dash attack]]: | |||
**{{buff|Dash attack has less ending lag (FAF 41 → 38).}} | |||
**{{buff|Dash attack deals more knockback (0 (base), 100 (scaling) → 22/105).}} | |||
**{{buff|The clean hit deals more damage (12% → 13%) which along with the previous change, significantly improves its KO potential.}} | |||
**{{buff|Dash attack has larger hitboxes (3.66u → 5.0778u (clean)/4.3u (late)), which overall gives the move more range relative to Samus despite the hitbox being positioned closer to Samus (x offset: 0.533 → 0).}} | |||
**{{change|Dash attack launches opponents at a higher angle (361° → 60°). This grants it vertical KO potential but hinders its horizontal KO potential as well as its edgeguarding potential.}} | |||
**{{nerf|Dash attack has a shorter duration (frames 7-10 (clean)/11-26 (late) → 7-9/10-16).}} | |||
**{{nerf|The late hit deals less damage (10% → 9%).}} | |||
**{{nerf|Dash attack no longer deals extra shield damage (1 → 0).}} | |||
*[[Forward smash]]: | |||
**{{buff|Forward smash has less startup lag (frame 12 → 10).}} | |||
**{{buff|The cannon hitbox is larger (4u → 4.3u) and is positioned further away from Samus (x offset: 4 → 5.859).}} | |||
**{{change|The arm hitbox is positioned closer to Samus (x offset: -2.66 → -1.953) and it has lower priority (ID# 1 → 2).}} | |||
**{{nerf|Forward Smash deals much less damage (20%/18%/16% → 15%/14%/13%) without full compensation on its knockback (15 (base), 100 (scaling) → 30/104). This hinders its KO potential; especially the up angled version.}} | |||
**{{nerf|Forward smash has more ending lag (FAF 42 → 44).}} | |||
***{{nerf|When combined with the changes to [[shieldstun]], these changes drastically hinder the move's safety on shield; going from leaving Samus at a frame advantage on shield to leaving her at a rather significant disadvantage.}} | |||
**{{nerf|The arm hitbox launches opponents at a higher angle (40° → 361°), now matching the other hitboxes.}} | |||
**{{nerf|Forward smash has a new animation where Samus does not stretch her arm as far forward. This reduces the move's horizontal range despite its altered cannon hitbox; especially for the up angled version.}} | |||
**{{nerf|Forward smash can no longer be angled slightly up or down.}} | |||
*[[Up smash]]: | |||
**{{buff|Up smash has less startup (frame 17 → 12) and ending lag (FAF 60 → 58).}} | |||
**{{change|The angles for the first four hits have been altered (80° → 130° (hit 1)/120° (hit 2)/90° (hit 3)/85° (hit 4)).}} | |||
**{{change|The first four hits deal less knockback (22 (base), 100 (scaling) → 50/50 (hit 1), 35/50 (hit 2), 25/50 (hit 3), 30/50 (hit 4)).}} | |||
***{{buff|When combined with its lower damage, these changes allow up smash to connect more reliably.}} | |||
***{{nerf|However, this greatly hinders the already poor KO potential of the first four hits.}} | |||
***{{nerf|Additionally, the move still does not connect reliably against aerial opponents and it can still be easily [[SDI]]ed out of.}} | |||
**{{nerf|Up smash deals much less damage (10% (hits 1-5)/50% (total) → 4% (hits 1-3)/5% (hit 4)/6% (hit 5)/23% (total)). The final hit's knockback was not fully compensated (22 (base), 100 (scaling) → 50/120), hindering its KO potential unless used near the upper blast zone.}} | |||
**{{nerf|Up smash no longer deals extra shield damage (1 → 0).}} | |||
***{{nerf|When combined with its much lower damage output and the changes to shields, this drastically hinders the move's shield pressuring potential; no longer leading to a guaranteed shield break if all hits connect.}} | |||
*[[Down smash]]: | |||
**{{buff|Down smash has less startup (frame 8 → 6) and ending lag (FAF 50 → 45).}} | |||
**{{buff|The front hit has much more base knockback but less knockback scaling (35 (base), 80 (scaling) → 110/50). This improves its KO potential unless used from a very long distance away from the upper blast zone.}} | |||
**{{buff|The back hit deals more damage (14% → 15%).}} | |||
**{{change|Down smash now launches opponents towards Samus (60° → 120°).}} | |||
**{{nerf|Down smash has a shorter duration (frames 8-12 (front)/19-22 (back) → 6-8/14-16).}} | |||
**{{nerf|The back hit deals less knockback (35 (base), 80 (scaling) → 90/40).}} | |||
===Aerial Attacks=== | ===Aerial Attacks=== | ||
*{{buff| | *{{buff|All aerials except for up aerial have less landing lag (16 frames (neutral), 40 frames (forward/down), 31 frames (back) → 15 (all)).}} | ||
*{{nerf|Back aerial has more startup | *{{nerf|All aerials [[auto-cancel]] later (frame 28 → 35 (neutral), frame 28 → 47 (forward), frame 17 → 31 (back), frame 20 → 34 (up), frame 13 → 34 (down)), although despite this, she is, along with Ness and Luigi, one of the few returning veterans who can still auto-cancel all of her aerials in a [[short hop]].}} | ||
*{{buff|Down aerial deals | **{{nerf|When combined with the weakening of [[L-canceling]] and the changes to shields, this hinders the combo potential and safety of her aerials, as well as removing the guaranteed [[shield break combo]]s Samus previously had with her aerials.}} | ||
*{{nerf|As with almost every meteor smash from ''Smash 64'' to ''Melee'', down aerial has drastically | *[[Neutral aerial]]: | ||
*{{buff|Samus | **{{change|Neutral aerial has a new animation where Samus stretches her leg straight forward.}} | ||
**{{nerf|Neutral aerial has more startup lag (frame 4 → 5).}} | |||
**{{nerf|Neutral aerial deals less damage (16% (clean)/13% (late) → 14%/10%), hindering its KO potential.}} | |||
**{{buff|Neutral aerial has less ending lag (FAF 50 → 40).}} | |||
**{{buff|Neutral aerial has a longer duration (frames 4-27 → 5-29).}} | |||
*[[Forward aerial]]: | |||
**{{buff|Forward aerial has less startup (frame 5 → 4) and ending lag (FAF 52 → 50).}} | |||
***{{nerf|However, Samus can no longer perform two forward aerials in a short hop due to her lower short hop.}} | |||
**{{buff|Due to forward aerial hitting five times instead of four:}} | |||
***{{buff|It deal more damage (20% → ≈23.2%).}} | |||
***{{buff|It has a longer duration (frames 5-6/12-13/19-20/26-27 → 4-5/11-12/18-19/25-26/30-31).}} | |||
**{{buff|The final hit has increased base knockback (0 → 20), improving its KO potential.}} | |||
**{{change|The first four hits of forward aerial have increased base knockback (0 → 20) and they now launch opponents vertically (361° → 85°).}} | |||
**{{nerf|Forward aerial has a new animation which is slightly longer than the previous animation (51 frames → 55).}} | |||
*[[Back aerial]]: | |||
**{{change|Samus's has a new back aerial with a new animation where she performs a reversed back kick and looks in front of her instead of behind her.}} | |||
**{{nerf|Back aerial has more startup lag with a shorter duration due to no longer possessing a late hit (frames 5-8 (clean)/9-17 (late) → 9-12).}} | |||
**{{nerf|Back aerial has less vertical [[range]].}} | |||
**{{nerf|Back aerial now consists of a sweetspot and a sourspot. The sourspots cover Samus' leg and deal 10% (like the previous late hit) while the sweetspot deals 14% and is positioned on Samus' foot with the lowest hitbox ID.}} | |||
**{{nerf|Back aerial deals less knockback (0 (base), 145 (scaling) → (30/42)/100). This hinders its KO potential, no longer being the strongest back aerial.}} | |||
**{{buff|Back aerial has less ending lag (FAF 40 → 37).}} | |||
*[[Up aerial]]: | |||
**{{buff|Up aerial has less startup (frame 6 → 5) and ending lag (FAF 40 → 39).}} | |||
**{{buff|The first hit deals more damage (2% → 3%).}} | |||
**{{change|The first hit's angle has been altered (80° → 90°).}} | |||
**{{nerf|Hits 2-5 deal less damage (2% → 1%).}} | |||
**{{buff|Up aerial now has a proper final hit (which existed in ''Smash 64'' but it never spawned due to its hitboxes ending the same frame they should have come out), greatly improving it safety and utility.}} | |||
***{{buff|Because of this, the move deals marginally more damage overall when [[Stale-move negation|fresh]], despite the 2-5th hits dealing less damage (10% → ≈10.28%).}} | |||
***{{buff|This also gives the move a longer duration (frames 6-7/9-10/12-13/15-16/18-19 → 5-6/8-9/11-12/14-15/17-18/20-21).}} | |||
**{{change|The final hit has altered knockback (0 (base), 150 (scaling) → 40/120) and an altered angle (80° → 361°) compared to the previous unused final hit.}} | |||
*[[Down aerial]]: | |||
**{{buff|Down aerial deals more damage (14% → 16%) and has higher base knockback (0 → 30), being the fifth strongest meteor smash in ''Melee''.}} | |||
**{{nerf|As with almost every meteor smash from ''Smash 64'' to ''Melee'', down aerial has drastically increased startup lag with a shorter duration (frames 4-12 → 18-22).}} | |||
***{{buff|However, its total duration was not fully compensated, giving it less ending lag.}} | |||
**{{nerf|Down aerial has a longer total duration (FAF 40 → 49) and a longer animation (39 frames → 54).}} | |||
***{{nerf|Altogether, these changes prevent Samus from performing two down aerials in a short hop (which also means that she can't auto-cancel a second down-aerial in a short hop or even a full hop).}} | |||
**{{nerf|Down aerial has less range which along with its increased startup lag, greatly hinders its use as a landing option.}} | |||
**{{nerf|Down aerial's angle has been slightly altered (-90° → 270°), which along with the introduction of [[meteor cancel]]ling, significantly hinders its reliability.}} | |||
*{{buff|Samus now has a [[grab aerial]], giving her an extra attack and recovery option.}} | |||
=== | ===Throws/other attacks=== | ||
*{{buff|Samus has been given an [[ | *[[Grab]]s: | ||
*{{buff|Samus | **{{buff|Samus has been given an [[pummel]], [[up throw|up]], and [[down throw]], giving her more options out of a grab. Her down throw in particular has strong combo potential.}} | ||
**{{buff|Grabs have less startup lag (frame 20 → 18) and ending lag (FAF 100 → 95 (standing), 75 (dash)).}} | |||
**{{buff|Standing grab has a longer duration (frames 20-38 → 18-20/21-37).}} | |||
***{{nerf|However, Samus' new dash grab has a shorter duration (frames 20-38 → 18-20/21-33).}} | |||
**{{buff|Standing grab overall covers slightly more distance than it did previously.}} | |||
**{{buff|Samus now has an exploit known as the [[Extended grapple]] technique, which allows her to greatly increase the range of her Grapple Beam, as well as allowing her grab to home into opponents.}} | |||
**{{buff|Samus' grabs have larger grabboxes during their first three active frames (3.5u/2.82u → 4.69u/4.69u).}} | |||
***{{nerf|However, these grabboxes are no longer attached to the grapple beam, giving the grab deceptively short range during its first three active frames.}} | |||
**{{nerf|The back grabbox is no longer present after the first three active frames.}} | |||
**{{nerf|Samus can no longer grab aerial opponents after the grab's first three active frames.}} | |||
*{{change|Samus' throws are now weight dependent.}} | |||
*{{change|Samus' throws no longer have an electric effect.}} | |||
*[[Forward throw]]: | |||
**{{change|Samus releases opponents later from forward throw (frame 9 → 15).}} | |||
***{{nerf|This gives the opponent more time to DI the throw.}} | |||
***{{buff|However, this also gives the throw less ending lag as its total duration was unchanged.}} | |||
**{{nerf|Forward throw deals much less damage (16% → 9%) and knockback (90 (base), 60 (scaling) → 50/45), drastically hindering its KO potential to the point where it is no longer a viable KO option.}} | |||
**{{nerf|Forward throw launches opponents at a higher angle (40° → 42°).}} | |||
*[[Back throw]]: | |||
**{{change|Samus releases opponents later from back throw (frame 9 → 11).}} | |||
***{{nerf|This gives the opponent more time to DI the throw.}} | |||
***{{buff|However, this also gives the throw less ending lag as its total duration was unchanged.}} | |||
**{{change|Back throw's angle has been slightly altered (40° → 140°).}} | |||
**{{nerf|Back throw deals much less damage (18% → 8%) and knockback (90 (base), 60 (scaling) → 50/42), immensely hindering its KO potential to the point where it is no longer a viable KO option.}} | |||
===Special Moves=== | ===Special Moves=== | ||
*{{buff|Fully charged | *[[Charge Shot]]: | ||
*{{nerf|Charge Shot | **{{buff|Charge Shot has less startup lag, with its startup lag no longer scaling depending on the level of charge (frame 17 (uncharged)/21 (fully charged) → 15 (both)).}} | ||
*{{buff|Like all characters, Samus now has a side special. In her case, | ***{{buff|Because of this, Charge Shot's total duration has been subsequently reduced (FAF 46 (uncharged)/50 (fully charged) → 44 (both)).}} | ||
*{{buff|[[Screw Attack | **{{buff|Charge Shot takes less time to fully charge (155 frames → 125).}} | ||
*{{nerf|Screw Attack | **{{buff|Fully charged Charge Shot deals more shield damage (1 → 3).}} | ||
*{{ | **{{change|Samus no longer performs a small jump after using aerial Charge Shot. This makes it riskier to use off stage but safer to use on stage.}} | ||
**{{nerf|Charge Shot's projectile now only lasts 70 frames as opposed to having an infinite duration until it hits something or goes off screen.}} | |||
**{{nerf|Charge Shot deals less damage from levels 1-4 and when it is fully charged (6% (level 1)/9% (level 2)/12% (level 3)/15% (level 4)/26% (fully charged) → 5%/8%/11%/14%/25%).}} | |||
**{{nerf|Charge Shot deals less knockback at all levels:}} | |||
***{{nerf|0 (base), 100 (scaling) → 14/42 (uncharged).}} | |||
***{{nerf|0 (base), 100 (scaling) → 16/46 (level 1).}} | |||
***{{nerf|0 (base), 100 (scaling) → 20/50 (level 2).}} | |||
***{{nerf|0 (base), 100 (scaling) → 24/54 (level 3).}} | |||
***{{nerf|0 (base), 100 (scaling) → 28/58 (level 4).}} | |||
***{{nerf|0 (base), 100 (scaling) → 32/62 (level 5).}} | |||
***{{nerf|0 (base), 100 (scaling) → 36/66 (level 6).}} | |||
***{{nerf|0 (base), 100 (scaling) → 50/72 (fully charged).}} | |||
**{{nerf|All charge levels except for a fully charged Charge Shot no longer deal extra shield damage (1 → 0).}} | |||
***{{nerf|In general, the changes to shields have significantly hindered Charge Shot's shield pressuring potential; with a fully charged Charge Shot going from giving Samus a huge frame advantage (enough to give her a guaranteed grab or easy shield pressure) to leaving her at a frame disadvantage (although it is still safe on shield).}} | |||
**{{nerf|Charge Shot's charge cancel animation is much longer (1 frame → 8), making it riskier to cancel charge shot.}} | |||
***{{buff|However, this also makes it much easier for Samus to cancel her charge shot without going into shield.}} | |||
*[[Missile]]: | |||
**{{change|Like all characters, Samus now has a side special. In her case, Missile. Holding the button releases a Homing Missile, which slowly follows the opponent for a short while and then explodes when it either makes contact or when it reaches it maximum duration. Tapping the button releases a Super Missile, which flies in a straight line and is much faster and stronger than the Homing Missile. The move auto-cancels on landing. As a result, Samus has an additional projectile, improving her camping potential.}} | |||
*[[Screw Attack]]: | |||
**{{buff|Aerial [[Screw Attack]] grants much more height, improving its recovery potential.}} | |||
**{{buff|Screw Attack can now be reversed meaning that if Samus is facing away from the ledge, she can reverse the Screw Attack to grab the ledge.}} | |||
**{{buff|The first hit of grounded Screw Attack has altered knockback (120/110 (base), 1 (set), 0 (scaling) → (130/100)/0/100), allowing it to KO at higher percents, while still being to link into the rest of the move.}} | |||
**{{change|Screw Attack now grants [[intangibility]] rather than [[invincibility]].}} | |||
**{{change|The final hit of Screw Attack now launches opponents vertically (361° → 70°).}} | |||
**{{change|Screw Attack now relies on momentum for how much horizontal distance it covers.}} | |||
***{{buff|This allows to grounded version to cover more horizontal distance in the direction Samus is facing.}} | |||
***{{nerf|However, this makes the aerial version cover less horizontal distance, as well as making it much harder to travel backwards.}} | |||
**{{nerf|Due to Screw Attack only consisting of 13/12 hits instead of 15/14:}} | |||
***{{nerf|It deals less damage (16% (grounded)/14% (aerial) → 12.01%/11.01%).}} | |||
***{{nerf|It has a shorter duration (frames 4-33 (grounded)/4-31 (aerial) → 4-29/4-27).}} | |||
**{{nerf|Along with retaining their high base knockback, hits 2-4 of grounded Screw Attack now have high knockback scaling rather than low set knockback (1 (set), 0 (scaling) → 0/100). This makes them connect less reliably.}} | |||
**{{nerf|Hits 5-12 of grounded Screw Attack deal more knockback (20/50 (base), 1 (set), 0 (scaling) → (70/40)/0/100), making them connect less reliably.}} | |||
**{{nerf|The first three hits of aerial Screw Attack have altered knockback (20/50 (base), 1 (set) → (25/100)/0), making them connect less reliably.}} | |||
**{{nerf|Hits 4-11 of aerial Screw Attack have altered knockback (20/50 (base), 1 (set) → (25/80)/0), making them connect less reliably.}} | |||
**{{nerf|The upper hitboxes of aerial Screw Attack have an altered angle (200° → 140°), making them connect less reliably with the rest of the move.}} | |||
***{{nerf|Altogether, these changes hinder Screw Attack's reliability and make it easier to escape.}} | |||
**{{nerf|Grounded Screw Attack grants less height.}} | |||
**{{nerf|Screw Attack has more landing lag (20 frames → 24).}} | |||
**{{nerf|The changes to shields combined with Screw Attack's reduced number of hits has hindered Screw Attack's shield pressuring potential; with the move no longer being able to lead into a guaranteed shield break.}} | |||
**{{nerf|If Samus is hit out of Screw Attack, she will now lose the charge for her Charge Shot.}} | |||
*[[Bomb (Samus)|Bomb]]: | |||
**{{buff|Bomb has less ending lag (FAF 57 → 54/46 (crouch)).}} | |||
**{{buff|Crouching before using Bomb will now reduce its startup lag by 2 frames (frame 10 → 8).}} | |||
**{{buff|Bombs now consist of a contact hit and an explosion hit rather than just an explosion; giving the move two hitboxes.}} | |||
**{{buff|The explosion has a longer duration (6 frames → 11).}} | |||
**{{buff|Bomb deals more shield damage (1 → 3+3).}} | |||
**{{buff|Bomb no longer disables Samus' midair jump.}} | |||
**{{buff|Bomb travels more horizontal distance when used on the ground.}} | |||
**{{buff|If Samus hits the explosion of her bombs, she will now bounce up while she's still in her morph ball (known as a bomb jump). Samus can immediately act out of a bomb jump, significantly improving Bomb's utility. Because of bomb jumping, Bomb is an even greater recovery option (especially when combined with Samus' new air dodge and grab aerial) and it has more utility as a pressuring tool.}} | |||
***{{buff|Bomb jumping also gives Samus access to [[Super wavedash]]ing, allowing Bomb to now be used as a movement option.}} | |||
**{{nerf|Bombs deal less damage (9% → 4% (contact)/4% (explosion)/7% (total)) and have decreased knockback scaling (65 → 45).}} | |||
**{{nerf|Bomb grants less intangibility (frames 3-48 → 10-42).}} | |||
**{{nerf|Bombs have a shorter duration before they explode (frames 10-114 → 10-82).}} | |||
**{{nerf|Bomb travels less horizontal distance when used in the air.}} | |||
**{{nerf|Samus descends faster after using Bomb.}} | |||
***{{nerf|Altogether, these changes hinder Bomb's recovery potential without Bomb Jumping.}} | |||
***{{buff|However, the latter point improves Bomb's utility on stage.}} | |||
== | ==Version history== | ||
Like some other characters, Samus has received some changes in the [[PAL]] version of ''Melee'', which nerfed her overall, as she can no longer use the [[Extended grapple]] or bomb out of a grapple | Like some other characters, Samus has received some changes in the [[PAL]] version of ''Melee'', which nerfed her overall, as she can no longer use the [[Extended grapple]] or bomb out of a grapple. | ||
*{{nerf| | '''PAL''' | ||
*{{nerf|Extended grapple is no longer possible.}} | |||
*{{nerf|Can no longer bomb out of a grapple.}} | *{{nerf|Can no longer bomb out of a grapple.}} | ||
==Moveset== | ==Moveset== | ||
| Line 85: | Line 292: | ||
|game=SSBM | |game=SSBM | ||
|neutralcount=2 | |neutralcount=2 | ||
|neutralname= | |neutralname=Straight ({{ja|ストレート|Sutorēto}}) / Cannon Hammer ({{ja|アームキャノンハンマー|Āmu Kyanon Hanmā}}, ''Arm Cannon Hammer'') | ||
|neutral1dmg=3% | |neutral1dmg=3% | ||
|neutral2dmg=7% | |neutral2dmg=7% | ||
|neutraldesc=A quick jab followed by an axe-like jab with her arm cannon. The second hit can be easily [[ | |neutraldesc=A quick jab followed by an axe-like jab with her arm cannon. The second hit can be easily [[shield]]ed or [[shield grab]]bed, making it difficult to connect both hits. | ||
|ftiltangles=3 | |ftiltangles=3 | ||
|ftiltname= | |ftiltname=Spin Kick ({{ja|スピンキック|Supin Kikku}}) | ||
|ftiltupdmg=11% | |ftiltupdmg=11% | ||
|ftiltsidedmg=10% | |ftiltsidedmg=10% | ||
|ftiltdowndmg=9% | |ftiltdowndmg=9% | ||
|ftiltdesc=Does a spinning horizontal kick forward. Excellent in stopping close-up foes, useful [[spacing]] move. | |ftiltdesc=Does a spinning horizontal kick forward. Excellent in stopping close-up foes, useful [[spacing]] move. | ||
|utiltname= | |utiltname=Heel Kick ({{ja|ヒールキック|Hīru Kikku}}) | ||
|utiltdmg=13% (grounded), 12% (aerial) | |utiltdmg=13% (grounded), 12% (aerial) | ||
|utiltdesc=Raises her leg and brings it down. Very similar animation to {{SSBM|Captain Falcon}}'s up tilt. It is a [[meteor smash]] according to the game, but it only works on grounded opponents, making it an [[unconventional meteor smash]]. The meteor can KO grounded opponents at high percentages, and can combo into a back aerial at moderate percentages. Hits aerial opponents horizontally. | |utiltdesc=Raises her leg and brings it down. Very similar animation to {{SSBM|Captain Falcon}}'s up tilt. It is a [[meteor smash]] according to the game, but it only works on grounded opponents, making it an [[unconventional meteor smash]]. The meteor can KO grounded opponents at high percentages, and can combo into a back aerial at moderate percentages. Hits aerial opponents horizontally. | ||
|dtiltname= | |dtiltname=Earth Blaster ({{ja|アースブラスター|Āsu Burasutā}}) | ||
|dtiltdmg=14% | |dtiltdmg=14% | ||
|dtiltdesc=Brings her arm cannon down and fires a small explosion. Powerful, excellent option out of a [[crouch cancel]]. Can KO under 150%. | |dtiltdesc=Brings her arm cannon down and fires a small explosion. Powerful, excellent option out of a [[crouch cancel]]. Can KO under 150%. | ||
|dashname= | |dashname=Shoulder Tackle ({{ja|ショルダータックル|Shorudā Takkuru}}) | ||
|dashdmg=13% (clean), 9% (late) | |dashdmg=13% (clean), 9% (late) | ||
|dashdesc=Does a shoulder tackle. This is the most powerful dash attack in ''Melee'', being able to KO under 150%. It is also suitable for combos at low percentages, especially if the sourspot connects. | |dashdesc=Does a shoulder tackle. This is the most powerful dash attack in ''Melee'', being able to KO under 150%. It is also suitable for combos at low percentages, especially if the sourspot connects. | ||
|fsmashname= | |fsmashname=Cannon Lunge ({{ja|キャノンランジ|Kyanon Ranji}}) | ||
|fsmashangles=3 | |fsmashangles=3 | ||
|fsmashupdmg={{ChargedSmashDmgSSBM|15}} | |fsmashupdmg={{ChargedSmashDmgSSBM|15}} | ||
| Line 110: | Line 317: | ||
|fsmashdowndmg={{ChargedSmashDmgSSBM|13}} | |fsmashdowndmg={{ChargedSmashDmgSSBM|13}} | ||
|fsmashdesc=Thrusts her arm cannon in forward. Somewhat fast (fastest forward smash in ''Melee'', hitting on frame 10, along with {{SSBM|Marth}}, but Samus's f-smash has much lower ending lag), great knockback for a low damaging attack (30 base knockback, 108 knockback growth). | |fsmashdesc=Thrusts her arm cannon in forward. Somewhat fast (fastest forward smash in ''Melee'', hitting on frame 10, along with {{SSBM|Marth}}, but Samus's f-smash has much lower ending lag), great knockback for a low damaging attack (30 base knockback, 108 knockback growth). | ||
|usmashname=Cover Fire | |usmashname=Cover Fire ({{ja|ヘルファイア|Herufaia}}, ''Hellfire'') | ||
|usmashdmg={{ChargedSmashDmgSSBM|4}} (hits 1-3), {{ChargedSmashDmgSSBM|5}} (hit 4), {{ChargedSmashDmgSSBM|6}} (hit 5) (≈{{ChargedSmashDmgSSBM|21.29}} total) | |usmashdmg={{ChargedSmashDmgSSBM|4}} (hits 1-3), {{ChargedSmashDmgSSBM|5}} (hit 4), {{ChargedSmashDmgSSBM|6}} (hit 5) (≈{{ChargedSmashDmgSSBM|21.29}} total) | ||
|usmashdesc=Fires five bursts in an arc above herself | |usmashdesc=Fires five bursts in an arc above herself, with the final hit dealing below-average knockback. Beginning hits often don't combo into the final hit. | ||
|dsmashname= | |dsmashname=Spinning Leg Sweep ({{ja|スピニングレッグスイープ|Supiningu Reggu Suīpu}}) | ||
|dsmashdmg={{ChargedSmashDmgSSBM|16}} (front), {{ChargedSmashDmgSSBM|15}} (back) | |dsmashdmg={{ChargedSmashDmgSSBM|16}} (front), {{ChargedSmashDmgSSBM|15}} (back) | ||
|dsmashdesc=Does a low 360° sweep kick. Fast and has good knockback, hitting opponents up and behind Samus (110 base knockback, 50 knockback growth). | |dsmashdesc=Does a low 360° sweep kick. Fast and has good knockback, hitting opponents up and behind Samus (110 base knockback, 50 knockback growth). | ||
|nairname= | |nairname=Chozo Kick ({{ja|鳥人族キック|Chōjinzoku Kikku}}) | ||
|nairdmg=14% (clean), 10% (late) | |nairdmg=14% (clean), 10% (late) | ||
|nairdesc=Does a [[sex kick]]. Good horizontal knockback and useful for [[edgeguarding]]. | |nairdesc=Does a [[sex kick]]. Good horizontal knockback and useful for [[edgeguarding]]. | ||
|fairname= | |fairname=Aerial Fire ({{ja|エアリアルヘルファイア|Eariaru Herufaia}}, ''Aerial Hellfire'') | ||
|fairdmg=5% (hits 1-5) (≈23.2% total) | |fairdmg=5% (hits 1-5) (≈23.2% total) | ||
|fairdesc=Fires several explosions in front of her with her arm cannon. | |fairdesc=Fires several explosions in front of her with her arm cannon. | ||
|bairname= | |bairname=Flying Back Kick ({{ja|フライングバックキック|Furaingu Bakku Kikku}}) | ||
|bairdmg=14% (foot), 10% (leg) | |bairdmg=14% (foot), 10% (leg) | ||
|bairdesc=Kicks her foot behind her. The [[sweetspot]] is at her foot, which deals more damage and knockback. A useful move for edgeguarding. This is the third most powerful back aerial in the game, beaten by {{SSBM|Zelda}} and {{SSBM|Ganondorf}}. | |bairdesc=Kicks her foot behind her. The [[sweetspot]] is at her foot, which deals more damage and knockback. A useful move for edgeguarding. This is the third most powerful back aerial in the game, beaten by {{SSBM|Zelda}} and {{SSBM|Ganondorf}}. | ||
|uairname= | |uairname=Drill Kick ({{ja|ドリルキック|Doriru Kikku}}) | ||
|uairdmg=3% (hit 1), 1% (hits 2-5), 4% (hit 6) (≈10.28% total) | |uairdmg=3% (hit 1), 1% (hits 2-5), 4% (hit 6) (≈10.28% total) | ||
|uairdesc=Brings her legs above her body and | |uairdesc=Brings her legs above her body and does a drill kick spin. Leads into a [[Missile]] well. | ||
|dairname= | |dairname=Meteor Cannon ({{ja|メテオールキャノン|Meteōru Kyanon}}) | ||
|dairdmg=16% | |dairdmg=16% | ||
|dairdesc=Swings her arm cannon in an arc below her. It is the fifth most powerful [[meteor smash]] in ''Melee'' and has a wide [[hitbox]]. A commonly used attack due to its strong power, ease of landing, and low risk. The meteor can KO grounded opponents at 115%. | |dairdesc=Swings her arm cannon in an arc below her. It is the fifth most powerful [[meteor smash]] in ''Melee'' and has a wide [[hitbox]]. A commonly used attack due to its strong power, ease of landing, and low risk. The meteor can KO grounded opponents at 115%. | ||
|zairname=[[ | |zairname=[[Grappling Beam]] ({{ja|グラップリングビーム|Gurappuringu Bīmu}}) | ||
|zairdmg=4% | |zairdmg=4% | ||
|zairdesc=Shoots out a long energy beam. This attack has [[Priority#Transcendent_priority|transcendent priority]]. | |zairdesc=Shoots out a long energy beam. This attack has [[Priority#Transcendent_priority|transcendent priority]]. | ||
|grabname= | |grabname=Grappling Beam ({{ja|グラップリングビーム|Gurappuringu Bīmu}}) | ||
|grabdesc=Sends out her Grapple Beam to catch the opponent. It is the longest grab in the game. | |grabdesc=Sends out her Grapple Beam to catch the opponent. It is the longest grab in the game. | ||
|pummelname= | |pummelname=Chozo Chop ({{ja|鳥人チョップ|Chōjinzoku Choppu}}) | ||
|pummeldmg=3% | |pummeldmg=3% | ||
|pummeldesc=Chops the opponent with her free hand. Somewhat fast. | |pummeldesc=Chops the opponent with her free hand. Somewhat fast. | ||
|fthrowname= | |fthrowname=Beam Throw ({{ja|ビームスロー|Bīmu Surō}}) | ||
|fthrowdmg=9% | |fthrowdmg=9% | ||
|fthrowdesc=Brings her opponent up with her Grapple Beam and launches them forward. | |fthrowdesc=Brings her opponent up with her Grapple Beam and launches them forward. | ||
|bthrowname= | |bthrowname=Reverse Beam Throw ({{ja|リバースビームスロー|Ribāsu Bīmu Surō}}) | ||
|bthrowdmg=8% | |bthrowdmg=8% | ||
|bthrowdesc=Launches opponent behind herself. | |bthrowdesc=Launches opponent behind herself. | ||
|uthrowname= | |uthrowname=Beam Launch ({{ja|ビーム打ち上げ|Bīmu Uchiage}}) | ||
|uthrowdmg=7% | |uthrowdmg=7% | ||
|uthrowdesc=Holds opponent above herself with her Grapple Beam, then launches them upward. | |uthrowdesc=Holds opponent above herself with her Grapple Beam, then launches them upward. | ||
|dthrowname= | |dthrowname=Beam Slam ({{ja|ビームスラム|Bīmu Suramu}}) | ||
|dthrowdmg=6% | |dthrowdmg=6% | ||
|dthrowdesc=Violently picks the foe up with her Grapple Beam and slams them to the ground. With its very low knockback scaling, it can combo into a [[jab reset]], up tilt, dash attack, or [[Charge Shot]] at virtually any percentage (though the latter doesn't work against {{SSBM|Young Link}}, due to his high rebound height after being thrown down). This makes it a useful combo setup move at low percentages and KO setup at high percentages. | |dthrowdesc=Violently picks the foe up with her Grapple Beam and slams them to the ground. With its very low knockback scaling, it can combo into a [[jab reset]], up tilt, dash attack, or [[Charge Shot]] at virtually any percentage (though the latter doesn't work against {{SSBM|Young Link}}, due to his high rebound height after being thrown down). This makes it a useful combo setup move at low percentages and KO setup at high percentages. | ||
| Line 165: | Line 372: | ||
|nsname=Charge Shot | |nsname=Charge Shot | ||
|nsdmg=3-25% | |nsdmg=3-25% | ||
|nsdesc=When the [[B button]] is pressed, Samus will start charging a ball of energy that gets larger, stronger, and faster the more charged it is. Pressing the | |nsdesc=When the [[B button]] is pressed, Samus will start charging a ball of energy that gets larger, stronger, and faster the more charged it is. Pressing the B button during the charge will cancel the charge and fire the shot, while pressing the [[L]] or [[R button]] will cancel the charge and allow Samus to store her current charge. This can be resumed by pressing B again. When fully charged, it has KO potential. If used in the air, Samus will immediately fire the shot, regardless of its charge level and how long B is held for. | ||
|ssname=Missile | |ssname=Missile | ||
|ssdmg=5% (homing missile), 12% (Super Missile) | |ssdmg=5% (homing missile), 12% (Super Missile) | ||
| Line 171: | Line 378: | ||
|usname=Screw Attack | |usname=Screw Attack | ||
|usdmg=Ground: 2% (hit 1), 1% (hits 2-12) (≈12.01% total)<br/>Air: 1% (hits 1-12) (≈11.01% total) | |usdmg=Ground: 2% (hit 1), 1% (hits 2-12) (≈12.01% total)<br/>Air: 1% (hits 1-12) (≈11.01% total) | ||
|usdesc=Shoots up into the air while spinning around rapidly via the "Screw Attack" ability from the ''Metroid'' series. It consists of multiple hits, though it does very little knockback, with its primary use being a [[recovery]] move, giving decent vertical distance. As with most multi-hit moves that operate similarly, it can be [[SDI]]'d out of rather easily. | |usdesc=Shoots up into the air while spinning around rapidly via the "Screw Attack" ability from the ''Metroid'' series. It consists of multiple hits, though it does very little knockback, with its primary use being a [[recovery]] move, giving decent vertical distance. As with most multi-hit moves that operate similarly, it can be [[SDI]]'d out of rather easily. If Samus is hit during Screw Attack's animation, Her charge shot will be lost. | ||
|dsname=Bomb | |dsname=Bomb | ||
|dspage=Bomb (Samus) | |dspage=Bomb (Samus) | ||
| Line 177: | Line 384: | ||
|dsdesc=Goes into Morph Ball mode and drops a timed bomb that explodes in a few seconds. It produces little damage and knockback, though it can be used as a [[bomb jump]] to improve Samus's [[recovery]] distance horizontally. It also produces a weak [[semi-spike]], though the [[hitstun]] allows it to [[gimp]] characters with poor recoveries. | |dsdesc=Goes into Morph Ball mode and drops a timed bomb that explodes in a few seconds. It produces little damage and knockback, though it can be used as a [[bomb jump]] to improve Samus's [[recovery]] distance horizontally. It also produces a weak [[semi-spike]], though the [[hitstun]] allows it to [[gimp]] characters with poor recoveries. | ||
}} | }} | ||
===Stats=== | |||
'''NTSC''' | |||
{{Attributes | |||
|cast = 26 | |||
|weight = 110 | |||
|rweight = 3 | |||
|dash = 1.86 | |||
|rdash = 4 | |||
|run = 1.4 | |||
|rrun = 16-20 | |||
|walk = 1.0 | |||
|rwalk = 16-17 | |||
|trac = 0.06 | |||
|rtrac = 15-23 | |||
|airfric = 0.01 | |||
|rairfric = 15-20 | |||
|air = 0.89 | |||
|rair = 15 | |||
|baseaccel = 0.02 | |||
|rbaseaccel = 2-23 | |||
|addaccel = 0.0125 | |||
|raddaccel = 26 | |||
|gravity = 0.066 | |||
|rgravity = 25 | |||
|fall = 1.4 | |||
|rfall = 24-25 | |||
|ff = 2.3 | |||
|rff = 14-18 | |||
|jumpsquat = 3 | |||
|rjumpsquat = 1-7 | |||
|jumpheight = 34.464 | |||
|rjumpheight = 9 | |||
|shorthop = 22.75 | |||
|rshorthop = 1 | |||
|djump = 26.124 | |||
|rdjump = 14 | |||
}} | |||
'''PAL''' | |||
{{Attributes | |||
|cast = 26 | |||
|weight = 110 | |||
|rweight = 4 | |||
|dash = 1.86 | |||
|rdash = 4 | |||
|run = 1.4 | |||
|rrun = 16-20 | |||
|walk = 1.0 | |||
|rwalk = 16-17 | |||
|trac = 0.06 | |||
|rtrac = 15-23 | |||
|airfric = 0.01 | |||
|rairfric = 15-20 | |||
|air = 0.89 | |||
|rair = 14 | |||
|baseaccel = 0.02 | |||
|rbaseaccel = 2-23 | |||
|addaccel = 0.0125 | |||
|raddaccel = 26 | |||
|gravity = 0.066 | |||
|rgravity = 25 | |||
|fall = 1.4 | |||
|rfall = 24-25 | |||
|ff = 2.3 | |||
|rff = 14-18 | |||
|jumpsquat = 3 | |||
|rjumpsquat = 1-7 | |||
|jumpheight = 34.464 | |||
|rjumpheight = 9 | |||
|shorthop = 22.75 | |||
|rshorthop = 1 | |||
|djump = 26.124 | |||
|rdjump = 14 | |||
}} | |||
===[[Announcer]] call=== | |||
[[File: Samus Announcer SSBM.wav]] | |||
===[[Taunt]]=== | ===[[Taunt]]=== | ||
| Line 198: | Line 483: | ||
|victory-desc=An orchestrated flourish originating from ''Metroid'' that played whenever Samus got a new power-up, obtained a {{s|metroidwiki|Power Suit}} upgrade, or defeated [[Ridley]] and [[Kraid]]. | |victory-desc=An orchestrated flourish originating from ''Metroid'' that played whenever Samus got a new power-up, obtained a {{s|metroidwiki|Power Suit}} upgrade, or defeated [[Ridley]] and [[Kraid]]. | ||
|desc-1=Side kick flexes and readies her Arm Cannon. | |desc-1=Side kick flexes and readies her Arm Cannon. | ||
|desc-2 | |desc-2=Shoots multiple shots while kneeling, and finishes with a pose. | ||
|desc-3=Punches twice, then fires from her Arm Cannon. | |||
|char=Samus}} | |char=Samus}} | ||
==In [[ | ==In [[competitive play]]== | ||
=== | ===Most historically significant players=== | ||
<!--This character has a ten player limit for this section. Before adding and/or removing a player, read these guidelines: https://www.ssbwiki.com/SmashWiki:Notability#%22Most_historically_significant_players%22_guidelines --> | |||
<!--If you are planning to add a player you consider to be notable, please provide tournament results in some shape or form in the edit summary (be it a link to a results thread or bracket of placing high in a tournament of other notable players or a video of them beating a notable player). Winning tournaments without notable players present is generally not enough to warrant a spot.--> | |||
:''Any number following the Smasher name indicates placement on the [[2019 MPGR]], which recognizes the official top 100 players in the world in [[Super Smash Bros. Melee]]. "HM" indicates an honorable mention on the 2019 MPGR.'' | |||
:''See also: [[:Category:Samus players (SSBM)]]'' | |||
*{{Sm| | *{{Sm|Cyr|France}} - One of the best players in France and known as the best Samus in Europe before becoming inactive, placing 3rd at {{Trn|Avalon IV}}, 5th at {{Trn|Epita Smash Arena 5}}, and 17th at {{Trn|Heir 3}}. He notably took {{Sm|Armada}}'s Peach to last stock. | ||
*{{Sm| | *{{Sm|Darrell|USA}} - One of the best Samus players in the early 2010s. Placed top 64 at a multitude of majors/supermajors in his local area of NorCal and around the West Coast such as 9th at {{Trn|Kings of Cali}}, 25th at {{Trn|EVO 2013}}, and 33rd at {{Trn|GENESIS 7}}. He notably defeated {{Sm|Hax$}} at {{Trn|Revival of Melee 7}}. | ||
*{{Sm| | *{{Sm|Daydee|Sweden}} - The current best Samus in Europe. He continued to hold results at a similar caliber to Cyr, placing 5th at {{Trn|Heir 5}} defeating {{Sm|Professor Pro}}, 13th at {{Trn|Syndicate 2017}}, and 17th at {{Trn|B.E.A.S.T 7}} defeating {{Sm|dizzkidboogie}}. Placed 8th on the [[European Melee Power Rankings]]. | ||
*{{Sm| | *{{Sm|Duck|USA}} - One of the best Samus players of all time. Arguably was one of the most consistent Samus players at top level, placing multiple top 12 placements at majors/supermajors such as 9th at {{Trn|EVO 2018}} and {{Trn|GENESIS 6}}. Has multiple wins over top 10 players such as {{Sm|Hungrybox}} and {{Sm|Leffen}}. Placed 14th on the [[2018 MPGR]] before dropping Samus in favor of {{SSBM|Sheik}}. | ||
*{{Sm| | *{{Sm|HugS|USA}} - Known as one of the best Samus players of all time before becoming inactive. He was usually the highest placing Samus player at MLG events and made 2nd place at {{Trn|EVO World 2007}}, the closest a Samus player has come to winning a supermajor. He remained one of the best Samus players past the Golden Age and era of the [[Five Gods]], placing 7th at {{Trn|GENESIS 5}}, 9th at {{Trn|EVO 2015}}, and placing 46th on the [[2019 MPGR]]. | ||
*{{Sm|Morsecode762|USA}} - Better known for his [[Project M]] {{PM|Samus}} and is currently the best active Samus player despite rarely competing. During 2023, he defeated {{Sm|Cody Schwab}} at {{Trn|The Big House 11}}, one of the biggest bracket upsets of the year. Outside of this, he also defeated {{Sm|Jmook}} at {{Trn|Get On My Level 2023}} and placed 9th, the best Samus supermajor of that year. He is currently ranked 18th on the [[SSBMRank 2023]]. | |||
*{{Sm|Nanashi|Japan}} - The best Samus in Japan prior to his inactivity, perviously ranked 8th on the [[Japan SSBM Rank 2018]]. In his country, he notably has taken sets over {{Sm|aMSa}}, won multiple locals, and placed 3rd at {{Trn|KSB 2016}}. Internationally, he has made top 32 at a few notable majors such as 17th at {{Trn|Kings of Cali 4}} and 25th at {{Trn|CEO 2014}}. | |||
*{{Sm|Plup|USA}} - Reached 6th on the [[2016 SSBMRank]] with Samus, and was formerly regarded as the world's best Samus player by many before he switched to {{SSBM|Sheik}} in early 2015. He has since switched mains to {{SSBM|Sheik}} and {{SSBM|Fox}}, but did return to the character on a few occasions, notably placing 5th at {{Trn|Shine 2017}} going solo Samus and 4th at {{Trn|Shine 2018}} going mostly Samus. Plup's Samus is also known for his set against {{Sm|Leffen}} at {{Trn|EVO 2015}} which is considered one of the most iconic Samus sets in ''Melee'' history. | |||
*{{Sm|TheSWOOPER|USA}} - The best Samus player in 2022. He peaked at 33rd on the [[SSBMRank 2023]]. He holds some of the best wins with Samus in the post-Slippi era with Cody Schwab, {{Sm|SluG}}, and {{Sm|Aklo}} and had the best supermajor performance since Duck's 9th at {{Trn|GENESIS 6}} with {{Trn|Pound 2022}} where he also placed 9th. | |||
*{{Sm|Wes|USA}} - Considered the "Father of Samus", becoming the first notable Samus player and innovating her metagame. He was formerly the best Samus with HugS in the Golden Age of Melee; he still competes occasionally in New York. Some of his best results during his peak were 5th at {{Trn|Tournament Go 5}} and 7th at {{Trn|MLG DC 2005}}. | |||
===Tier placement and history=== | ===Tier placement and history=== | ||
Samus’s large number of buffs from her transition from ''64'' to ''Melee'' was immediately noticed by players, and was reflected by her high rankings in initial tier lists, hovering around 6th and 9th. This was primarily due to her improved projectile game, additional combo options, and improved recovery. Although she has a smaller playerbase than most high-tier mains, her representation and performances from dedicated mains such as {{Sm|HugS}} allowed her to remain in the higher tiers for many years. Unfortunately, innovations in other characters's metagames have been discovered, and professionals have adapted to Samus's defensive fighting style that rendered her zoning game less effective. This has resulted Samus dropping in placements through recent Melee tier lists. In the current metagame, {{Sm|Plup}} rarely uses her in high-level tournaments, and {{sm|Duck}} has recently dropped her in favor of Sheik. As it stands, while her zoning game remains effective against the meta, her declining presence in tournaments and increasing competitive prospects towards other top-tiers has made her fare worse against the rest of the cast compared to the early metagame, and as a result she currently sits at 11th place at the bottom of B+ tier. | |||
==In | ==In 1-P Mode== | ||
==={{SSBM|Classic Mode}}=== | ==={{SSBM|Classic Mode}}=== | ||
In Classic Mode, Samus can appear as an ordinary opponent, as an ally or opponent in the team battles, alongside either {{SSBM|Captain Falcon}} or {{SSBM|Fox}}, as a giant opponent, or as a metal opponent. When alone she appears either on [[Brinstar]] or [[Brinstar Depths]], while when on a team with Captain Falcon she appears on [[Big Blue]]. | In Classic Mode, Samus can appear as an ordinary opponent, as an ally or opponent in the team battles, alongside either {{SSBM|Captain Falcon}} or {{SSBM|Fox}}, as a giant opponent, or as a metal opponent. When alone she appears either on [[Brinstar]] or [[Brinstar Depths]], while when on a team with Captain Falcon she appears on [[Big Blue]]. | ||
===[[Adventure Mode]]=== | ===[[Adventure Mode]]=== | ||
Samus is once again fought on the Brinstar stage, after Samus is beaten, the planet will start to explode and the player must evacuate to Samus's ship before the planet explodes, if not they will lose a life. | Samus is once again fought on the Brinstar stage, after Samus is beaten, the planet will start to explode and the player must evacuate to Samus's ship before the planet explodes, if not they will lose a life. | ||
| Line 248: | Line 524: | ||
*'''[[Event 8: Hot Date on Brinstar]]''': The player chooses any character and must defeat Samus in a three-stock match on the [[Brinstar]]. The player starts and respawns with 102% damage, while Samus starts and respawns with 130%. | *'''[[Event 8: Hot Date on Brinstar]]''': The player chooses any character and must defeat Samus in a three-stock match on the [[Brinstar]]. The player starts and respawns with 102% damage, while Samus starts and respawns with 130%. | ||
*'''[[Event 15: Girl Power]]''': The player chooses any character and must defeat Samus, {{SSBM|Peach}}, and {{SSBM|Zelda}} in a two-stock match on [[Fountain of Dreams]]. The character the player chooses is tiny, while the female combatants are normal sized. | *'''[[Event 15: Girl Power]]''': The player chooses any character and must defeat Samus, {{SSBM|Peach}}, and {{SSBM|Zelda}} in a two-stock match on [[Fountain of Dreams]]. The character the player chooses is tiny, while the female combatants are normal sized. | ||
*'''[[Event 17: Bounty Hunters]]''': The player plays as Samus, | *'''[[Event 17: Bounty Hunters]]''': The player plays as Samus, “allied” with Captain Falcon and must defeat {{SSBM|Bowser}} before Captain Falcon does on [[Jungle Japes]]. The event results in failure if Captain Falcon delivers the finishing blow, if Bowser [[Self-destruct|self-destructs]], or if Samus dies. | ||
*'''[[Event 20: All-Star Match 2]]''': Samus is the first opponent the player must fight in this series of staged battles. The player battles her on [[Brinstar]], which will transition to the next stage if Samus gets defeated. With a timer of four minutes, the player must defeat her along with Link, Zelda, Captain Falcon, and {{SSBM|Fox}}. | *'''[[Event 20: All-Star Match 2]]''': Samus is the first opponent the player must fight in this series of staged battles. The player battles her on [[Brinstar]], which will transition to the next stage if Samus gets defeated. With a timer of four minutes, the player must defeat her along with Link, Zelda, Captain Falcon, and {{SSBM|Fox}}. | ||
*'''[[Event 27: Cold Armor]]''': The player uses Samus must defeat three metal Samuses on the [[Brinstar Depths]]. The player-controlled Samus has one stock, while each metal Samus have two. | *'''[[Event 27: Cold Armor]]''': The player uses Samus must defeat three metal Samuses on the [[Brinstar Depths]]. The player-controlled Samus has one stock, while each metal Samus have two. | ||
*'''[[Event 36: Space Travelers]]''': The player uses {{SSBM|Ness}} must defeat Samus, {{SSBM|Kirby}}, Fox, Captain Falcon and {{SSBM|Falco}}. The player battles the first three characters on [[Fourside]] and battles the last two on {{SSBM|Battlefield}}. | *'''[[Event 36: Space Travelers]]''': The player uses {{SSBM|Ness}} must defeat Samus, {{SSBM|Kirby}}, Fox, Captain Falcon and {{SSBM|Falco}}. The player battles the first three characters on [[Fourside]] and battles the last two on {{SSBM|Battlefield}}. | ||
===[[ | ===[[Congratulations screen#Super Smash Bros. Melee|Ending images]]=== | ||
<center><gallery> | <center><gallery> | ||
File:SamusClassicMode.jpg|Classic Mode | File:SamusClassicMode.jpg|Classic Mode | ||
| Line 260: | Line 536: | ||
</gallery></center> | </gallery></center> | ||
== | ==[[Trophies]]== | ||
In addition to the normal trophy about Samus as a character, there are two trophies about her as a fighter, unlocked by completing both [[Adventure Mode|Adventure]] and [[All-Star]] modes respectively with Samus on any difficulty: | In addition to the normal trophy about Samus as a character, there are two trophies about her as a fighter, unlocked by completing both [[Adventure Mode|Adventure]] and [[All-Star]] modes respectively with Samus on any difficulty: | ||
{{Trophy/Fighter | |||
|name=Samus Aran | |||
|image=Samus Trophy Melee.png | |||
|mode=Classic | |||
|desc=This intergalactic bounty hunter's full name is Samus Aran. Clad in a Power Suit made by the Chozo race and infused with their enhanced blood, she cleared the planet Zebes of a Metroid infestation. Samus is an orphan, the sole survivor of a Space Pirate raid that destroyed an Earth colony named K-2L. | |||
|gamelist={{Trophy games|game1=Metroid|release1=8/89}} | |||
|game=Melee | |||
}} | |||
{{clrl}} | |||
{{Trophy/Fighter | |||
|name=Samus Aran | |||
: | |image=Samus Trophy (Smash).png | ||
: | |mode=Adventure | ||
|desc=Samus has an abundance of projectile weapons, making her a long-distance attack specialist. The most powerful weapon in her arsenal is her Charge Shot, but be warned: it can be reflected. Her Missiles have homing capabilities, but when fired as Smash Attacks, they fly on a straight trajectory and have boosted power. | |||
|gamelist=:B: Charge Shot | |||
:Smash B: Missile | |||
|game=Melee | |||
}} | |||
{{clrl}} | |||
{{Trophy/Fighter | |||
|name=Samus Aran | |||
: | |image=Samus Trophy (Smash 2).png | ||
: | |mode=All Star | ||
|desc=While Samus's arsenal of missile weapons is indeed formidable, her enemies are in for a rude awakening if they guard against nothing else. Her Grappling Beam captures foes and latches on to walls, and the Screw Attack drags foes upward in a series of spins that doubles as a recovery move. Samus can also use her Bombs to perform Bomb Jumps. | |||
|gamelist=:Up & B: Screw Attack | |||
:Down & B: Bomb | |||
|game=Melee | |||
}} | |||
{{clrl}} | |||
==[[Alternate costume (SSBM)#Samus|Alternate costumes]]== | ==[[Alternate costume (SSBM)#Samus|Alternate costumes]]== | ||
| Line 296: | Line 582: | ||
|{{Head|Samus|g=SSBM|s=25px|cl=Purple}} | |{{Head|Samus|g=SSBM|s=25px|cl=Purple}} | ||
|} | |} | ||
==Gallery== | |||
<center> | |||
<gallery> | |||
SSBM Samus HQ.jpg|Official artwork of Samus. | |||
SSBMWebsiteSamus1.jpg|[[Dash]]ing on [[Mute City]]. | |||
Samus'bforwardmove.jpg|Firing a [[missile]] on [[Princess Peach's Castle]]. | |||
Samus'bmove.jpg|Firing a fully-[[charge]]d [[Charge Shot]] on [[Pokémon Stadium]]. | |||
Melee morph ball.jpg|Dropping {{b|bomb|Samus}}s in mid-air on Princess Peach's Castle. | |||
Samus'bupmove.jpg|Using her [[Screw Attack]] on [[Fountain of Dreams]]. | |||
Melee Grapple Beam.jpg|Using her [[Grapple Beam]] on [[Brinstar]]. | |||
DonkeyKongAdventureMode.jpg|Standing with three {{SSBM|Donkey Kong}}s on {{SSBM|Final Destination}} | |||
</gallery> | |||
</center> | |||
==Trivia== | ==Trivia== | ||
*In the instruction booklet, the screenshots of Samus' special moves are on [[Corneria]], as opposed to the other characters, whose special moves are shown on one of their home stages. | *In the instruction booklet, the screenshots of Samus' special moves are on [[Corneria]], as opposed to the other characters, whose special moves are shown on one of their home stages. | ||
*Samus' render pose closely resembles the official artwork for her appearance in ''Smash 64''. | |||
==External links== | |||
*[https://www.nintendo.co.jp/n01/n64/software/nus_p_nalj/smash/flash/0710/index.html Samus's page at Smabura-Ken] | |||
*[[smashwiki:26TP/Samus|Translation]] | |||
{{SSBMCharacters}} | {{SSBMCharacters}} | ||
{{EnemiesAdvSSBM}} | {{EnemiesAdvSSBM}} | ||
{{Metroid universe}} | {{Metroid universe}} | ||
[[Category:Samus (SSBM)]] | [[Category:Samus (SSBM)| ]] | ||
[[Category:Trophies (SSBM)]] | |||
[[es:Samus (SSBM)]] | |||
Latest revision as of 13:14, March 8, 2024
| Samus in Super Smash Bros. Melee | |
|---|---|
 .svg)
| |
| Universe | Metroid |
| Other playable appearances | in SSB in Brawl in SSB4 in Ultimate |
| Availability | Starter |
| Tier | B+ (11) (North America) D (9) (Europe) |
Samus (サムス, Samus) is a starter character in Super Smash Bros. Melee. Returning as a veteran from the previous game, Samus, similarly to Link, reprises her role as a short-ranged fighter with numerous ranged options.
Samus is ranked 11th on the current tier list, placing her in the B+ tier, a significant improvement from her 8th (out of 12) position in Super Smash Bros. This is mainly due to her effective projectiles, supplementing her KOing power and her approaches. She also has a good air game that is complemented by a versatile back aerial. Samus' recovery is among the best in the game; her bomb jumps, ability to wall jump, grappling beam, and heavy weight all contribute to making her among the toughest characters to KO horizontally. She also possesses techniques exclusive to her, such as the Super Wavedash and Extended Grapple, that aid her approach on opponents. However, she is floaty, allowing her to be easily juggled and KO'd vertically. She is also highly susceptible to combos in general, due to being floaty, heavy, and tall in stature. Her primary combo starter, her grab, is also very laggy if it misses, though it can be extended in the NTSC version. Regardless, Samus has decent matchups all-around in the current metagame.
Attributes[edit]
Samus is a unique character. Although a tall heavyweight, she is unusually floaty, uncharacteristic of characters in her weight class. Her high weight (only being lighter than Bowser and Donkey Kong) lets her have amazing horizontal survivability. Her slow falling speed (the second slowest in the game, tied with Zelda) allows her recovery to travel more distance and gives her better potential combo game. However, it also makes her more susceptible to vertical KOs, even with her high weight, and it also gives her a poor SHFFL.
Arguably Samus's most valuable asset is her high range. While lacking a disjointed hitbox, Samus has a variety of long-reaching attacks and long-ranged projectiles that can assist with her ground-based approach. Charge Shot can quickly become one of her most powerful attacks, while her Missiles can act as both an approach option when non-tapped and as a powerful finisher when tapped. Samus's average traction and low falling speed also grant her a long wavedash that can mesh well with her long-ranged smash attacks, as well as her modestly-ranged tilts; assuming the player has particularly good timing, Samus also has access to the longest wavedash in the game, the Super Wavedash, which can also potentially surprise enemies due to its speed. While laggy, Samus sports one of the longest grabs in the game, and a technique that is unique to the NTSC release of the game can allow her to extend its reach by three, in addition to allowing it to home in on enemies.
Samus's recovery is also among the longest and most flexible in all the game. While Screw Attack grants relatively little horizontal and vertical distance, its multiple hitboxes can potentially frustrate edgeguarders. Samus, however, owns arguably more options for her recovery than any other character in the game. Her average air speed and low falling speed aid her approach toward ledges, while her natural ability to wall-jump can aid her recovery on stages with walls underneath the ledge, such as Fountain of Dreams or Dream Land. Samus's down special, her bombs, can allow her to bomb-jump onto the stage without the loss of jumps, and her grab air can allow her to enter "safe zones" underneath the stage, as well as acting another long recovery technique. Owing to these variety of options, edgeguarding against Samus can be extremely difficult, especially for characters with poor recoveries. For Samus herself, this long recovery also grants her a powerful edgeguarding game of her own, aided by her fast and powerful neutral and back aerial attacks.
Samus also has a very good defensive game; despite her shield leaving her legs exposed, which can leave her vulnerable to shield stabbing, and having a poor roll due to its low speed, she still has very strong defensive options. For one, she has one of the best Crouch cancels in the game, due to her high weight, and having very good options out of it, such has her down smash and down tilt. Her screw attack also offers a quick and difficult-to-punish out of shield option, due to being invincible for the first couple frames of the move which helps her when getting pressured. It can also work as a combo breaker, but this can be risky if missed. Her nair is also a good combo breaking tool, due to being decently quick (frame 5) and being powerful. Her defensive game is also complimented by her amazing horizontal survivability and great recovery, which allow Samus to frequently live to very high percents against characters without strong vertical finishers (and sometimes characters with them).
Despite having a good approach on the ground, Samus's aerial approach suffers due to her strange variety of attributes. Her below average falling speed and high jumps give her a poor SHFFL, despite the presence of low ending lag for her aerials when L-canceled. Her low falling speed also can prevent her from quickly pursuing enemies that have been knocked into the ground; as such, Samus can have particular difficulty in comboing fast-fallers, even with her variety of throws. Tying into this, Samus's grab is extremely laggy and can easily be punished if she fails to grab an opponent with it.

Changes from Super Smash Bros..[edit]
Samus has been significantly buffed from Smash 64 to Melee, as she was considered to fare poorly in Smash 64 due to her poor approach and lack of reliable combos. She is often considered the most buffed character from Smash 64 to Melee along with Jigglypuff. Most of her attacks have received significantly better frame data, such as a faster neutral attack and forward tilt.
Aesthetics[edit]
 The graphical upgrades of the Nintendo GameCube give Samus a more proportionate build. Her power suit is more detailed and she has a more glossy visor.
- Samus has a new taunt. While Samus still lifts her arm cannon up, she performs a more elaborate pose and she no longer shakes her arm cannon while it is up.
- Samus's blue team costume is now available for selection in regular gameplay instead of being locked to team battles.
- Samus has a new teetering animation where she balances on her left foot.
Attributes[edit]
 Samus walks faster (0.9067 (27.2) → 1).
 Samus dashes much slower (1.8 (54) → 1.4), going from the 4th fastest out of 12 characters to the 11th slowest out of 26.
- Samus' traction is slightly lower (0.0667 (2) → 0.06). Compared with the returning veterans, however, her traction is significantly lower, making it harder for her to punish out of shield.
- Samus' air speed is slightly slower than her Japanese and North American Smash 64 counterparts, but slightly faster than her Australian and European Smash 64 counterparts (0.933 (28, JPN/NA) / 0.867 (26, AUS/EUR) → 0.89).
- Samus' air acceleration is significantly lower (0.1 (3) → 0.0325), making it the slowest.
- Samus jumps extremely lower (49.4 (1482) → 34.464), hindering her vertical recovery and ability to chase opponents above her.
- Samus's short hop is drastically lower (33.2267 (996.8) → 22.75). Compared with the returning veterans, however, her short hop is much higher, going from the 3rd highest out of 12 characters to the highest out of 26.
- Samus' gravity is slightly higher (0.0633 (1.9) → 0.066), going from the lowest to the second lowest.
- Samus' fast falling speed is faster (2.233 (67) → 2.3). The difference between her falling speed and fast falling speed is higher (increase: 59.5% → 64.3%).
- Samus is significantly lighter (117.391304 (0.92) → 110), hindering her endurance.
- Samus is smaller (model size multiplier: 1x → 0.88x). This makes her harder to hit but reduces the range of her attacks.
- Rolls have a longer duration (frames 4-23 → 4-30).
- Rolls have less ending lag (FAF 46 → 45) although they are still the slowest rolls.
- The removal of teleporting slightly hinders Samus' grounded approach.
- The introduction of air dodging greatly benefits Samus as it improves her recovery and it allows her to wavedash improving her grounded mobility and making up for her slower ground speed.
- Samus can now wall jump.
Ground Attacks[edit]
- Neutral attack:
- Neutral attack has less startup lag (frame 4 (hit 1)/7 (hit 2) → 3/5).
- The first hit has less ending lag (FAF 22 → 18).
- The first hit has larger hitboxes (3u/3u/3u → 3.5152u/3.5152u/3.5152u).
- The first hit now has static hitboxes.
- The first hit has a new animation where Samus does not stretch her arm nearly as far. This noticeably reduces its range.
- The second hit has higher base knockback (10 → 15).
- The second hit's far hitbox is larger (3.66u → 4.3u) and it is moved further away from Samus (x offset: 4 → 4.3).
- The second hit has a new animation where Samus swings her arm cannon downwards much sooner. The hitboxes do not become active until Samus is already moving her cannon downwards.
- This allows the move to hit in front of Samus much sooner which makes the first hit connect more reliably into the second hit in theory (although this is compensated by the universal decrease to hitstun).
- However, this also noticeably reduces the move's range above and behind Samus.
- The second hit has a shorter duration (frames 7-11 → 5-7).
- The second hit has slightly more ending lag (FAF 30 → 31).
- Forward tilt:
- Forward tilt has less startup (frame 7 → 6) and ending lag (FAF 32 → 30).
- Forward tilt has a new animation where Samus takes a step forward, increasing its range.
- Forward tilt has larger hitboxes (3.33u/3.33u/1.82u → 3.91u/3.33u/2.3456u) and the foot hitbox has been moved further away from Samus (x offset: 6 → 7.03).
- Forward tilt now has a hitbox on Samus' back leg.
- Forward tilt has a shorter duration (frames 7-11 → 6-8).
- Up-angled forward tilt deals less damage (12% → 11%).
- Forward tilt can no longer be angled slightly up or down.
- Up tilt:
- Up tilt now only hits opponents when Samus drops her leg, increasing its startup lag and shortening its duration (frames 8-23 (early)/24-28 (late) → 14-17).
- This also means that the move can no longer hit opponents behind or directly above Samus.
- However, the removal of the rising hit greatly improves the move's safety, with the move no longer being easily punishable on hit.
- Additionally, the move has much less startup lag compared to the previous second hit (frame 25 → 14).
- Up tilt has a shorter total duration (FAF 44 → 35).
- However, its total duration does not fully compensate for the move's lower startup lag compared to the previous second hit, giving it slightly more ending lag.
- Up tilt has higher base knockback (5 → 40).
- Up tilt now meteor smashes grounded opponents (361° → 270°), significantly improving its combo potential.
- However, this also hinders its KO and edgeguarding potential against grounded opponents.
- Up tilt has slightly larger hitboxes (5u/5u → 5.0778u/5.0778u) and the foot hitbox has been moved further away from Samus (x offset: 6 → 6.2496).
- Up tilt deals less damage against aerial opponents (13% → 12%).
- Down tilt:
- Samus has a new down tilt: a quick downwards cannon strike that fires a small explosion as opposed to a simple low sweep.
- Down tilt has less startup lag (frame 8 → 6).
- However its total duration was unchanged, giving it more ending lag.
- Down tilt deals more damage (13% → 14%).
- Down tilt has more base knockback but less knockback scaling (10 (base), 100 (scaling) → 80/60).
- This makes the move much safer at lower percents and improves its KO potential near the blast zone.
- However, this hinders its overall KO potential.
- Down tilt launches opponents vertically instead of horizontally (40° → 100°).
- This grants it combo potential; especially with its altered knockback.
- However, this significantly hinders its edgeguarding potential.
- Down tilt has larger hitboxes (3.33u/3.33u → 3.1248u/3.5154u/5.859u), with the move having a similar amount of horizontal range despite its new animation.
- Down tilt has a shorter duration (frames 8-12 → 6-8).
- Dash attack:
- Dash attack has less ending lag (FAF 41 → 38).
- Dash attack deals more knockback (0 (base), 100 (scaling) → 22/105).
- The clean hit deals more damage (12% → 13%) which along with the previous change, significantly improves its KO potential.
- Dash attack has larger hitboxes (3.66u → 5.0778u (clean)/4.3u (late)), which overall gives the move more range relative to Samus despite the hitbox being positioned closer to Samus (x offset: 0.533 → 0).
- Dash attack launches opponents at a higher angle (361° → 60°). This grants it vertical KO potential but hinders its horizontal KO potential as well as its edgeguarding potential.
- Dash attack has a shorter duration (frames 7-10 (clean)/11-26 (late) → 7-9/10-16).
- The late hit deals less damage (10% → 9%).
- Dash attack no longer deals extra shield damage (1 → 0).
- Forward smash:
- Forward smash has less startup lag (frame 12 → 10).
- The cannon hitbox is larger (4u → 4.3u) and is positioned further away from Samus (x offset: 4 → 5.859).
- The arm hitbox is positioned closer to Samus (x offset: -2.66 → -1.953) and it has lower priority (ID# 1 → 2).
- Forward Smash deals much less damage (20%/18%/16% → 15%/14%/13%) without full compensation on its knockback (15 (base), 100 (scaling) → 30/104). This hinders its KO potential; especially the up angled version.
- Forward smash has more ending lag (FAF 42 → 44).
- When combined with the changes to shieldstun, these changes drastically hinder the move's safety on shield; going from leaving Samus at a frame advantage on shield to leaving her at a rather significant disadvantage.
- The arm hitbox launches opponents at a higher angle (40° → 361°), now matching the other hitboxes.
- Forward smash has a new animation where Samus does not stretch her arm as far forward. This reduces the move's horizontal range despite its altered cannon hitbox; especially for the up angled version.
- Forward smash can no longer be angled slightly up or down.
- Up smash:
- Up smash has less startup (frame 17 → 12) and ending lag (FAF 60 → 58).
- The angles for the first four hits have been altered (80° → 130° (hit 1)/120° (hit 2)/90° (hit 3)/85° (hit 4)).
- The first four hits deal less knockback (22 (base), 100 (scaling) → 50/50 (hit 1), 35/50 (hit 2), 25/50 (hit 3), 30/50 (hit 4)).
- When combined with its lower damage, these changes allow up smash to connect more reliably.
- However, this greatly hinders the already poor KO potential of the first four hits.
- Additionally, the move still does not connect reliably against aerial opponents and it can still be easily SDIed out of.
- Up smash deals much less damage (10% (hits 1-5)/50% (total) → 4% (hits 1-3)/5% (hit 4)/6% (hit 5)/23% (total)). The final hit's knockback was not fully compensated (22 (base), 100 (scaling) → 50/120), hindering its KO potential unless used near the upper blast zone.
- Up smash no longer deals extra shield damage (1 → 0).
- When combined with its much lower damage output and the changes to shields, this drastically hinders the move's shield pressuring potential; no longer leading to a guaranteed shield break if all hits connect.
- Down smash:
- Down smash has less startup (frame 8 → 6) and ending lag (FAF 50 → 45).
- The front hit has much more base knockback but less knockback scaling (35 (base), 80 (scaling) → 110/50). This improves its KO potential unless used from a very long distance away from the upper blast zone.
- The back hit deals more damage (14% → 15%).
- Down smash now launches opponents towards Samus (60° → 120°).
- Down smash has a shorter duration (frames 8-12 (front)/19-22 (back) → 6-8/14-16).
- The back hit deals less knockback (35 (base), 80 (scaling) → 90/40).
Aerial Attacks[edit]
- All aerials except for up aerial have less landing lag (16 frames (neutral), 40 frames (forward/down), 31 frames (back) → 15 (all)).
- All aerials auto-cancel later (frame 28 → 35 (neutral), frame 28 → 47 (forward), frame 17 → 31 (back), frame 20 → 34 (up), frame 13 → 34 (down)), although despite this, she is, along with Ness and Luigi, one of the few returning veterans who can still auto-cancel all of her aerials in a short hop.
- When combined with the weakening of L-canceling and the changes to shields, this hinders the combo potential and safety of her aerials, as well as removing the guaranteed shield break combos Samus previously had with her aerials.
- Neutral aerial:
- Neutral aerial has a new animation where Samus stretches her leg straight forward.
- Neutral aerial has more startup lag (frame 4 → 5).
- Neutral aerial deals less damage (16% (clean)/13% (late) → 14%/10%), hindering its KO potential.
- Neutral aerial has less ending lag (FAF 50 → 40).
- Neutral aerial has a longer duration (frames 4-27 → 5-29).
- Forward aerial:
- Forward aerial has less startup (frame 5 → 4) and ending lag (FAF 52 → 50).
- However, Samus can no longer perform two forward aerials in a short hop due to her lower short hop.
- Due to forward aerial hitting five times instead of four:
- It deal more damage (20% → ≈23.2%).
- It has a longer duration (frames 5-6/12-13/19-20/26-27 → 4-5/11-12/18-19/25-26/30-31).
- The final hit has increased base knockback (0 → 20), improving its KO potential.
- The first four hits of forward aerial have increased base knockback (0 → 20) and they now launch opponents vertically (361° → 85°).
- Forward aerial has a new animation which is slightly longer than the previous animation (51 frames → 55).
- Back aerial:
- Samus's has a new back aerial with a new animation where she performs a reversed back kick and looks in front of her instead of behind her.
- Back aerial has more startup lag with a shorter duration due to no longer possessing a late hit (frames 5-8 (clean)/9-17 (late) → 9-12).
- Back aerial has less vertical range.
- Back aerial now consists of a sweetspot and a sourspot. The sourspots cover Samus' leg and deal 10% (like the previous late hit) while the sweetspot deals 14% and is positioned on Samus' foot with the lowest hitbox ID.
- Back aerial deals less knockback (0 (base), 145 (scaling) → (30/42)/100). This hinders its KO potential, no longer being the strongest back aerial.
- Back aerial has less ending lag (FAF 40 → 37).
- Up aerial:
- Up aerial has less startup (frame 6 → 5) and ending lag (FAF 40 → 39).
- The first hit deals more damage (2% → 3%).
- The first hit's angle has been altered (80° → 90°).
- Hits 2-5 deal less damage (2% → 1%).
- Up aerial now has a proper final hit (which existed in Smash 64 but it never spawned due to its hitboxes ending the same frame they should have come out), greatly improving it safety and utility.
- Because of this, the move deals marginally more damage overall when fresh, despite the 2-5th hits dealing less damage (10% → ≈10.28%).
- This also gives the move a longer duration (frames 6-7/9-10/12-13/15-16/18-19 → 5-6/8-9/11-12/14-15/17-18/20-21).
- The final hit has altered knockback (0 (base), 150 (scaling) → 40/120) and an altered angle (80° → 361°) compared to the previous unused final hit.
- Down aerial:
- Down aerial deals more damage (14% → 16%) and has higher base knockback (0 → 30), being the fifth strongest meteor smash in Melee.
- As with almost every meteor smash from Smash 64 to Melee, down aerial has drastically increased startup lag with a shorter duration (frames 4-12 → 18-22).
- However, its total duration was not fully compensated, giving it less ending lag.
- Down aerial has a longer total duration (FAF 40 → 49) and a longer animation (39 frames → 54).
- Altogether, these changes prevent Samus from performing two down aerials in a short hop (which also means that she can't auto-cancel a second down-aerial in a short hop or even a full hop).
- Down aerial has less range which along with its increased startup lag, greatly hinders its use as a landing option.
- Down aerial's angle has been slightly altered (-90° → 270°), which along with the introduction of meteor cancelling, significantly hinders its reliability.
- Samus now has a grab aerial, giving her an extra attack and recovery option.
Throws/other attacks[edit]
- Grabs:
- Samus has been given an pummel, up, and down throw, giving her more options out of a grab. Her down throw in particular has strong combo potential.
- Grabs have less startup lag (frame 20 → 18) and ending lag (FAF 100 → 95 (standing), 75 (dash)).
- Standing grab has a longer duration (frames 20-38 → 18-20/21-37).
- However, Samus' new dash grab has a shorter duration (frames 20-38 → 18-20/21-33).
- Standing grab overall covers slightly more distance than it did previously.
- Samus now has an exploit known as the Extended grapple technique, which allows her to greatly increase the range of her Grapple Beam, as well as allowing her grab to home into opponents.
- Samus' grabs have larger grabboxes during their first three active frames (3.5u/2.82u → 4.69u/4.69u).
- However, these grabboxes are no longer attached to the grapple beam, giving the grab deceptively short range during its first three active frames.
- The back grabbox is no longer present after the first three active frames.
- Samus can no longer grab aerial opponents after the grab's first three active frames.
- Samus' throws are now weight dependent.
- Samus' throws no longer have an electric effect.
- Forward throw:
- Samus releases opponents later from forward throw (frame 9 → 15).
- This gives the opponent more time to DI the throw.
- However, this also gives the throw less ending lag as its total duration was unchanged.
- Forward throw deals much less damage (16% → 9%) and knockback (90 (base), 60 (scaling) → 50/45), drastically hindering its KO potential to the point where it is no longer a viable KO option.
- Forward throw launches opponents at a higher angle (40° → 42°).
- Back throw:
- Samus releases opponents later from back throw (frame 9 → 11).
- This gives the opponent more time to DI the throw.
- However, this also gives the throw less ending lag as its total duration was unchanged.
- Back throw's angle has been slightly altered (40° → 140°).
- Back throw deals much less damage (18% → 8%) and knockback (90 (base), 60 (scaling) → 50/42), immensely hindering its KO potential to the point where it is no longer a viable KO option.
Special Moves[edit]
- Charge Shot:
- Charge Shot has less startup lag, with its startup lag no longer scaling depending on the level of charge (frame 17 (uncharged)/21 (fully charged) → 15 (both)).
- Because of this, Charge Shot's total duration has been subsequently reduced (FAF 46 (uncharged)/50 (fully charged) → 44 (both)).
- Charge Shot takes less time to fully charge (155 frames → 125).
- Fully charged Charge Shot deals more shield damage (1 → 3).
- Samus no longer performs a small jump after using aerial Charge Shot. This makes it riskier to use off stage but safer to use on stage.
- Charge Shot's projectile now only lasts 70 frames as opposed to having an infinite duration until it hits something or goes off screen.
- Charge Shot deals less damage from levels 1-4 and when it is fully charged (6% (level 1)/9% (level 2)/12% (level 3)/15% (level 4)/26% (fully charged) → 5%/8%/11%/14%/25%).
- Charge Shot deals less knockback at all levels:
- 0 (base), 100 (scaling) → 14/42 (uncharged).
- 0 (base), 100 (scaling) → 16/46 (level 1).
- 0 (base), 100 (scaling) → 20/50 (level 2).
- 0 (base), 100 (scaling) → 24/54 (level 3).
- 0 (base), 100 (scaling) → 28/58 (level 4).
- 0 (base), 100 (scaling) → 32/62 (level 5).
- 0 (base), 100 (scaling) → 36/66 (level 6).
- 0 (base), 100 (scaling) → 50/72 (fully charged).
- All charge levels except for a fully charged Charge Shot no longer deal extra shield damage (1 → 0).
- In general, the changes to shields have significantly hindered Charge Shot's shield pressuring potential; with a fully charged Charge Shot going from giving Samus a huge frame advantage (enough to give her a guaranteed grab or easy shield pressure) to leaving her at a frame disadvantage (although it is still safe on shield).
- Charge Shot's charge cancel animation is much longer (1 frame → 8), making it riskier to cancel charge shot.
- However, this also makes it much easier for Samus to cancel her charge shot without going into shield.
- Missile:
- Like all characters, Samus now has a side special. In her case, Missile. Holding the button releases a Homing Missile, which slowly follows the opponent for a short while and then explodes when it either makes contact or when it reaches it maximum duration. Tapping the button releases a Super Missile, which flies in a straight line and is much faster and stronger than the Homing Missile. The move auto-cancels on landing. As a result, Samus has an additional projectile, improving her camping potential.
- Screw Attack:
- Aerial Screw Attack grants much more height, improving its recovery potential.
- Screw Attack can now be reversed meaning that if Samus is facing away from the ledge, she can reverse the Screw Attack to grab the ledge.
- The first hit of grounded Screw Attack has altered knockback (120/110 (base), 1 (set), 0 (scaling) → (130/100)/0/100), allowing it to KO at higher percents, while still being to link into the rest of the move.
- Screw Attack now grants intangibility rather than invincibility.
- The final hit of Screw Attack now launches opponents vertically (361° → 70°).
- Screw Attack now relies on momentum for how much horizontal distance it covers.
- This allows to grounded version to cover more horizontal distance in the direction Samus is facing.
- However, this makes the aerial version cover less horizontal distance, as well as making it much harder to travel backwards.
- Due to Screw Attack only consisting of 13/12 hits instead of 15/14:
- It deals less damage (16% (grounded)/14% (aerial) → 12.01%/11.01%).
- It has a shorter duration (frames 4-33 (grounded)/4-31 (aerial) → 4-29/4-27).
- Along with retaining their high base knockback, hits 2-4 of grounded Screw Attack now have high knockback scaling rather than low set knockback (1 (set), 0 (scaling) → 0/100). This makes them connect less reliably.
- Hits 5-12 of grounded Screw Attack deal more knockback (20/50 (base), 1 (set), 0 (scaling) → (70/40)/0/100), making them connect less reliably.
- The first three hits of aerial Screw Attack have altered knockback (20/50 (base), 1 (set) → (25/100)/0), making them connect less reliably.
- Hits 4-11 of aerial Screw Attack have altered knockback (20/50 (base), 1 (set) → (25/80)/0), making them connect less reliably.
- The upper hitboxes of aerial Screw Attack have an altered angle (200° → 140°), making them connect less reliably with the rest of the move.
- Altogether, these changes hinder Screw Attack's reliability and make it easier to escape.
- Grounded Screw Attack grants less height.
- Screw Attack has more landing lag (20 frames → 24).
- The changes to shields combined with Screw Attack's reduced number of hits has hindered Screw Attack's shield pressuring potential; with the move no longer being able to lead into a guaranteed shield break.
- If Samus is hit out of Screw Attack, she will now lose the charge for her Charge Shot.
- Bomb:
- Bomb has less ending lag (FAF 57 → 54/46 (crouch)).
- Crouching before using Bomb will now reduce its startup lag by 2 frames (frame 10 → 8).
- Bombs now consist of a contact hit and an explosion hit rather than just an explosion; giving the move two hitboxes.
- The explosion has a longer duration (6 frames → 11).
- Bomb deals more shield damage (1 → 3+3).
- Bomb no longer disables Samus' midair jump.
- Bomb travels more horizontal distance when used on the ground.
- If Samus hits the explosion of her bombs, she will now bounce up while she's still in her morph ball (known as a bomb jump). Samus can immediately act out of a bomb jump, significantly improving Bomb's utility. Because of bomb jumping, Bomb is an even greater recovery option (especially when combined with Samus' new air dodge and grab aerial) and it has more utility as a pressuring tool.
- Bomb jumping also gives Samus access to Super wavedashing, allowing Bomb to now be used as a movement option.
- Bombs deal less damage (9% → 4% (contact)/4% (explosion)/7% (total)) and have decreased knockback scaling (65 → 45).
- Bomb grants less intangibility (frames 3-48 → 10-42).
- Bombs have a shorter duration before they explode (frames 10-114 → 10-82).
- Bomb travels less horizontal distance when used in the air.
- Samus descends faster after using Bomb.
- Altogether, these changes hinder Bomb's recovery potential without Bomb Jumping.
- However, the latter point improves Bomb's utility on stage.
Version history[edit]
Like some other characters, Samus has received some changes in the PAL version of Melee, which nerfed her overall, as she can no longer use the Extended grapple or bomb out of a grapple.
PAL
- Extended grapple is no longer possible.
- Can no longer bomb out of a grapple.
Moveset[edit]
For a gallery of Samus's hitboxes, see here.

| Name | Damage | Description | ||
|---|---|---|---|---|
| Neutral attack | Straight (ストレート) / Cannon Hammer (アームキャノンハンマー, Arm Cannon Hammer) | 3% | A quick jab followed by an axe-like jab with her arm cannon. The second hit can be easily shielded or shield grabbed, making it difficult to connect both hits. | |
| 7% | ||||
| Forward tilt | ↗ | Spin Kick (スピンキック) | 11% | Does a spinning horizontal kick forward. Excellent in stopping close-up foes, useful spacing move. |
| → | 10% | |||
| ↘ | 9% | |||
| Up tilt | Heel Kick (ヒールキック) | 13% (grounded), 12% (aerial) | Raises her leg and brings it down. Very similar animation to Captain Falcon's up tilt. It is a meteor smash according to the game, but it only works on grounded opponents, making it an unconventional meteor smash. The meteor can KO grounded opponents at high percentages, and can combo into a back aerial at moderate percentages. Hits aerial opponents horizontally. | |
| Down tilt | Earth Blaster (アースブラスター) | 14% | Brings her arm cannon down and fires a small explosion. Powerful, excellent option out of a crouch cancel. Can KO under 150%. | |
| Dash attack | Shoulder Tackle (ショルダータックル) | 13% (clean), 9% (late) | Does a shoulder tackle. This is the most powerful dash attack in Melee, being able to KO under 150%. It is also suitable for combos at low percentages, especially if the sourspot connects. | |
| Forward smash | ↗ | Cannon Lunge (キャノンランジ) | 15% | Thrusts her arm cannon in forward. Somewhat fast (fastest forward smash in Melee, hitting on frame 10, along with Marth, but Samus's f-smash has much lower ending lag), great knockback for a low damaging attack (30 base knockback, 108 knockback growth). |
| → | 14% | |||
| ↘ | 13% | |||
| Up smash | Cover Fire (ヘルファイア, Hellfire) | 4% (hits 1-3), 5% (hit 4), 6% (hit 5) (≈21.29% total) | Fires five bursts in an arc above herself, with the final hit dealing below-average knockback. Beginning hits often don't combo into the final hit. | |
| Down smash | Spinning Leg Sweep (スピニングレッグスイープ) | 16% (front), 15% (back) | Does a low 360° sweep kick. Fast and has good knockback, hitting opponents up and behind Samus (110 base knockback, 50 knockback growth). | |
| Neutral aerial | Chozo Kick (鳥人族キック) | 14% (clean), 10% (late) | Does a sex kick. Good horizontal knockback and useful for edgeguarding. | |
| Forward aerial | Aerial Fire (エアリアルヘルファイア, Aerial Hellfire) | 5% (hits 1-5) (≈23.2% total) | Fires several explosions in front of her with her arm cannon. | |
| Back aerial | Flying Back Kick (フライングバックキック) | 14% (foot), 10% (leg) | Kicks her foot behind her. The sweetspot is at her foot, which deals more damage and knockback. A useful move for edgeguarding. This is the third most powerful back aerial in the game, beaten by Zelda and Ganondorf. | |
| Up aerial | Drill Kick (ドリルキック) | 3% (hit 1), 1% (hits 2-5), 4% (hit 6) (≈10.28% total) | Brings her legs above her body and does a drill kick spin. Leads into a Missile well. | |
| Down aerial | Meteor Cannon (メテオールキャノン) | 16% | Swings her arm cannon in an arc below her. It is the fifth most powerful meteor smash in Melee and has a wide hitbox. A commonly used attack due to its strong power, ease of landing, and low risk. The meteor can KO grounded opponents at 115%. | |
| Grab aerial | Grappling Beam (グラップリングビーム) | 4% | Shoots out a long energy beam. This attack has transcendent priority. | |
| Grab | Grappling Beam (グラップリングビーム) | — | Sends out her Grapple Beam to catch the opponent. It is the longest grab in the game. | |
| Pummel | Chozo Chop (鳥人チョップ) | 3% | Chops the opponent with her free hand. Somewhat fast. | |
| Forward throw | Beam Throw (ビームスロー) | 9% | Brings her opponent up with her Grapple Beam and launches them forward. | |
| Back throw | Reverse Beam Throw (リバースビームスロー) | 8% | Launches opponent behind herself. | |
| Up throw | Beam Launch (ビーム打ち上げ) | 7% | Holds opponent above herself with her Grapple Beam, then launches them upward. | |
| Down throw | Beam Slam (ビームスラム) | 6% | Violently picks the foe up with her Grapple Beam and slams them to the ground. With its very low knockback scaling, it can combo into a jab reset, up tilt, dash attack, or Charge Shot at virtually any percentage (though the latter doesn't work against Young Link, due to his high rebound height after being thrown down). This makes it a useful combo setup move at low percentages and KO setup at high percentages. | |
| Floor attack (front) | 6% | Gets up and kicks on both sides. | ||
| Floor attack (back) | 6% | Gets up and kicks on both sides. | ||
| Edge attack (fast) | 10% | Climbs onto the stage and kicks. | ||
| Edge attack (slow) | 10% | Climbs onto the stage and punches with her arm cannon. | ||
| Neutral special | Charge Shot | 3-25% | When the B button is pressed, Samus will start charging a ball of energy that gets larger, stronger, and faster the more charged it is. Pressing the B button during the charge will cancel the charge and fire the shot, while pressing the L or R button will cancel the charge and allow Samus to store her current charge. This can be resumed by pressing B again. When fully charged, it has KO potential. If used in the air, Samus will immediately fire the shot, regardless of its charge level and how long B is held for. | |
| Side special | Missile | 5% (homing missile), 12% (Super Missile) | Fires a missile that travels forward. The missile can either be a homing missile (when B is pressed while tilting the control stick) or a Super Missile (when B is pressed while smashing the control stick forward). Super Missiles travel straight forward instead of homing in the opponent, and are faster and stronger than homing missiles. Super Missiles produce decent knockback. | |
| Up special | Screw Attack | Ground: 2% (hit 1), 1% (hits 2-12) (≈12.01% total) Air: 1% (hits 1-12) (≈11.01% total) |
Shoots up into the air while spinning around rapidly via the "Screw Attack" ability from the Metroid series. It consists of multiple hits, though it does very little knockback, with its primary use being a recovery move, giving decent vertical distance. As with most multi-hit moves that operate similarly, it can be SDI'd out of rather easily. If Samus is hit during Screw Attack's animation, Her charge shot will be lost. | |
| Down special | Bomb | 4% (contact & explosion) | Goes into Morph Ball mode and drops a timed bomb that explodes in a few seconds. It produces little damage and knockback, though it can be used as a bomb jump to improve Samus's recovery distance horizontally. It also produces a weak semi-spike, though the hitstun allows it to gimp characters with poor recoveries. | |
Stats[edit]
NTSC
| Stats | Weight | Dash speed | Walk speed | Traction | Air friction | Air speed | Air acceleration | Gravity | Falling speed | Jumpsquat | Jump Height | Double jump Height |
|---|---|---|---|---|---|---|---|---|---|---|---|---|
| Value | 110 | 1.86 – Initial dash 1.4 – Run |
1.0 | 0.06 | 0.01 | 0.89 | 0.02 – Base 0.0125 – Additional |
0.066 | 1.4 – Base 2.3 – Fast-fall |
3 | 34.464 - Base 22.75 - Short hop |
26.124 |
PAL
| Stats | Weight | Dash speed | Walk speed | Traction | Air friction | Air speed | Air acceleration | Gravity | Falling speed | Jumpsquat | Jump Height | Double jump Height |
|---|---|---|---|---|---|---|---|---|---|---|---|---|
| Value | 110 | 1.86 – Initial dash 1.4 – Run |
1.0 | 0.06 | 0.01 | 0.89 | 0.02 – Base 0.0125 – Additional |
0.066 | 1.4 – Base 2.3 – Fast-fall |
3 | 34.464 - Base 22.75 - Short hop |
26.124 |
Announcer call[edit]
Taunt[edit]
- Holds her arm cannon upright.

|
Idle pose[edit]
- Puts up arm cannon.

|
|---|
Crowd cheer[edit]
| English | Japanese | |
|---|---|---|
| Cheer | ||
| Description | Sa-mus Sa-mus! | Sa-mu-s! |
| Pitch | Group chant | Group chant |
Victory poses[edit]
- Side kick flexes and readies her Arm Cannon.
- Shoots multiple shots while kneeling, and finishes with a pose.
- Punches twice, then fires from her Arm Cannon.
 |
 |

|
|---|
In competitive play[edit]
Most historically significant players[edit]
- Any number following the Smasher name indicates placement on the 2019 MPGR, which recognizes the official top 100 players in the world in Super Smash Bros. Melee. "HM" indicates an honorable mention on the 2019 MPGR.
- See also: Category:Samus players (SSBM)
 Cyr - One of the best players in France and known as the best Samus in Europe before becoming inactive, placing 3rd at Avalon IV, 5th at Epita Smash Arena 5, and 17th at Heir 3. He notably took Armada's Peach to last stock.
 Darrell - One of the best Samus players in the early 2010s. Placed top 64 at a multitude of majors/supermajors in his local area of NorCal and around the West Coast such as 9th at Kings of Cali, 25th at EVO 2013, and 33rd at GENESIS 7. He notably defeated Hax$ at Revival of Melee 7.
 Daydee - The current best Samus in Europe. He continued to hold results at a similar caliber to Cyr, placing 5th at Heir 5 defeating Professor Pro, 13th at Syndicate 2017, and 17th at B.E.A.S.T 7 defeating dizzkidboogie. Placed 8th on the European Melee Power Rankings.
- Duck - One of the best Samus players of all time. Arguably was one of the most consistent Samus players at top level, placing multiple top 12 placements at majors/supermajors such as 9th at EVO 2018 and GENESIS 6. Has multiple wins over top 10 players such as Hungrybox and Leffen. Placed 14th on the 2018 MPGR before dropping Samus in favor of Sheik.
- HugS - Known as one of the best Samus players of all time before becoming inactive. He was usually the highest placing Samus player at MLG events and made 2nd place at EVO World 2007, the closest a Samus player has come to winning a supermajor. He remained one of the best Samus players past the Golden Age and era of the Five Gods, placing 7th at GENESIS 5, 9th at EVO 2015, and placing 46th on the 2019 MPGR.
- Morsecode762 - Better known for his Project M Samus and is currently the best active Samus player despite rarely competing. During 2023, he defeated Cody Schwab at The Big House 11, one of the biggest bracket upsets of the year. Outside of this, he also defeated Jmook at Get On My Level 2023 and placed 9th, the best Samus supermajor of that year. He is currently ranked 18th on the SSBMRank 2023.
 Nanashi - The best Samus in Japan prior to his inactivity, perviously ranked 8th on the Japan SSBM Rank 2018. In his country, he notably has taken sets over aMSa, won multiple locals, and placed 3rd at KSB 2016. Internationally, he has made top 32 at a few notable majors such as 17th at Kings of Cali 4 and 25th at CEO 2014.
- Plup - Reached 6th on the 2016 SSBMRank with Samus, and was formerly regarded as the world's best Samus player by many before he switched to Sheik in early 2015. He has since switched mains to Sheik and Fox, but did return to the character on a few occasions, notably placing 5th at Shine 2017 going solo Samus and 4th at Shine 2018 going mostly Samus. Plup's Samus is also known for his set against Leffen at EVO 2015 which is considered one of the most iconic Samus sets in Melee history.
- TheSWOOPER - The best Samus player in 2022. He peaked at 33rd on the SSBMRank 2023. He holds some of the best wins with Samus in the post-Slippi era with Cody Schwab, SluG, and Aklo and had the best supermajor performance since Duck's 9th at GENESIS 6 with Pound 2022 where he also placed 9th.
- Wes - Considered the "Father of Samus", becoming the first notable Samus player and innovating her metagame. He was formerly the best Samus with HugS in the Golden Age of Melee; he still competes occasionally in New York. Some of his best results during his peak were 5th at Tournament Go 5 and 7th at MLG DC 2005.
Tier placement and history[edit]
Samus’s large number of buffs from her transition from 64 to Melee was immediately noticed by players, and was reflected by her high rankings in initial tier lists, hovering around 6th and 9th. This was primarily due to her improved projectile game, additional combo options, and improved recovery. Although she has a smaller playerbase than most high-tier mains, her representation and performances from dedicated mains such as HugS allowed her to remain in the higher tiers for many years. Unfortunately, innovations in other characters's metagames have been discovered, and professionals have adapted to Samus's defensive fighting style that rendered her zoning game less effective. This has resulted Samus dropping in placements through recent Melee tier lists. In the current metagame, Plup rarely uses her in high-level tournaments, and Duck has recently dropped her in favor of Sheik. As it stands, while her zoning game remains effective against the meta, her declining presence in tournaments and increasing competitive prospects towards other top-tiers has made her fare worse against the rest of the cast compared to the early metagame, and as a result she currently sits at 11th place at the bottom of B+ tier.
In 1-P Mode[edit]
Classic Mode[edit]
In Classic Mode, Samus can appear as an ordinary opponent, as an ally or opponent in the team battles, alongside either Captain Falcon or Fox, as a giant opponent, or as a metal opponent. When alone she appears either on Brinstar or Brinstar Depths, while when on a team with Captain Falcon she appears on Big Blue.
Adventure Mode[edit]
Samus is once again fought on the Brinstar stage, after Samus is beaten, the planet will start to explode and the player must evacuate to Samus's ship before the planet explodes, if not they will lose a life.
All-Star Mode[edit]
Samus and her allies are fought on Brinstar.
Event Matches[edit]
Samus is featured in the following event matches:
- Event 3: Bomb-fest: The player chooses any character and must defeat Link and Samus on Princess Peach's Castle. Link and Samus will only use their bomb special moves, and only items that create explosions (such as the Motion-Sensor Bomb and the Bob-omb) will spawn on the stage.
- Event 8: Hot Date on Brinstar: The player chooses any character and must defeat Samus in a three-stock match on the Brinstar. The player starts and respawns with 102% damage, while Samus starts and respawns with 130%.
- Event 15: Girl Power: The player chooses any character and must defeat Samus, Peach, and Zelda in a two-stock match on Fountain of Dreams. The character the player chooses is tiny, while the female combatants are normal sized.
- Event 17: Bounty Hunters: The player plays as Samus, “allied” with Captain Falcon and must defeat Bowser before Captain Falcon does on Jungle Japes. The event results in failure if Captain Falcon delivers the finishing blow, if Bowser self-destructs, or if Samus dies.
- Event 20: All-Star Match 2: Samus is the first opponent the player must fight in this series of staged battles. The player battles her on Brinstar, which will transition to the next stage if Samus gets defeated. With a timer of four minutes, the player must defeat her along with Link, Zelda, Captain Falcon, and Fox.
- Event 27: Cold Armor: The player uses Samus must defeat three metal Samuses on the Brinstar Depths. The player-controlled Samus has one stock, while each metal Samus have two.
- Event 36: Space Travelers: The player uses Ness must defeat Samus, Kirby, Fox, Captain Falcon and Falco. The player battles the first three characters on Fourside and battles the last two on Battlefield.
Ending images[edit]
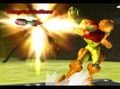
Classic Mode
Adventure Mode
All-Star Mode


Trophies[edit]
In addition to the normal trophy about Samus as a character, there are two trophies about her as a fighter, unlocked by completing both Adventure and All-Star modes respectively with Samus on any difficulty:

- Samus Aran
- This intergalactic bounty hunter's full name is Samus Aran. Clad in a Power Suit made by the Chozo race and infused with their enhanced blood, she cleared the planet Zebes of a Metroid infestation. Samus is an orphan, the sole survivor of a Space Pirate raid that destroyed an Earth colony named K-2L.
- Metroid (8/89)
.png)
- Samus Aran [Smash]
- Samus has an abundance of projectile weapons, making her a long-distance attack specialist. The most powerful weapon in her arsenal is her Charge Shot, but be warned: it can be reflected. Her Missiles have homing capabilities, but when fired as Smash Attacks, they fly on a straight trajectory and have boosted power.
- B: Charge Shot
- Smash B: Missile
.png)
- Samus Aran [Smash]
- While Samus's arsenal of missile weapons is indeed formidable, her enemies are in for a rude awakening if they guard against nothing else. Her Grappling Beam captures foes and latches on to walls, and the Screw Attack drags foes upward in a series of spins that doubles as a recovery move. Samus can also use her Bombs to perform Bomb Jumps.
- Up & B: Screw Attack
- Down & B: Bomb
Alternate costumes[edit]
.png)
| ||||
Gallery[edit]
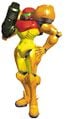
Official artwork of Samus.
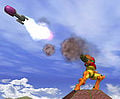
Firing a missile on Princess Peach's Castle.
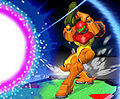
Firing a fully-charged Charge Shot on Pokémon Stadium.
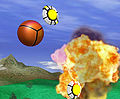
Dropping bombs in mid-air on Princess Peach's Castle.
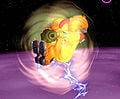
Using her Screw Attack on Fountain of Dreams.
Using her Grapple Beam on Brinstar.
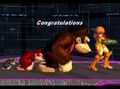
Standing with three Donkey Kongs on Final Destination


Trivia[edit]
- In the instruction booklet, the screenshots of Samus' special moves are on Corneria, as opposed to the other characters, whose special moves are shown on one of their home stages.
- Samus' render pose closely resembles the official artwork for her appearance in Smash 64.
External links[edit]
| Fighters in Super Smash Bros. Melee | |
|---|---|
| Veterans | Captain Falcon · Donkey Kong · Fox · Jigglypuff · Kirby · Link · Luigi · Mario · Ness · Pikachu · Samus · Yoshi |
| Newcomers | Bowser · Dr. Mario · Falco · Ganondorf · Ice Climbers · Marth · Mewtwo · Mr. Game & Watch · Peach · Pichu · Roy · Young Link · Zelda (Sheik) |
|
| |
|---|---|
| Fighters | Samus (SSB · SSBM · SSBB · SSB4 · SSBU) · Zero Suit Samus (SSBB · SSB4 · SSBU) · Ridley (SSBU) · Dark Samus (SSBU) |
| Assist Trophies | Metroid · Dark Samus · Mother Brain |
| Bosses | Ridley · Meta Ridley |
| Stages | Planet Zebes · Brinstar · Brinstar Depths · Frigate Orpheon · Norfair · Pyrosphere Brinstar Escape Shaft (Adventure Mode) |
| Item | Screw Attack · Power Suit Piece |
| Enemies | Geemer · Kihunter · Metroid · Reo · FG II-Graham · Joulion · Zero |
| Other | Gunship · Kraid |
| Trophies, Stickers and Spirits | Trophies (SSBM · SSBB · SSB4) · Stickers · Spirits |
| Music | Brawl · SSB4 · Ultimate |
| Masterpieces | Metroid · Super Metroid |