VR: Difference between revisions
(replaced the list with a table, hope this makes it look more presentable) |
m (→Overview) Tag: Mobile edit |
||
| (66 intermediate revisions by 31 users not shown) | |||
| Line 1: | Line 1: | ||
{{ArticleIcons|ssbu=y}} | {{ArticleIcons|ssbu=y}} | ||
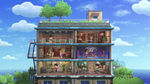
[[File:SmashPokeLCVr.jpg|thumb|300px|VR being used on Lumiose City.]] | [[File:SmashPokeLCVr.jpg|thumb|300px|VR being used on Lumiose City.]] | ||
'''VR''' is a feature in ''[[Super Smash Bros. Ultimate]]'' that allows players to spectate and play single-player matches using the [[wikipedia:Nintendo Labo#VR Kit|Nintendo Labo VR Goggles]]. VR functionality was introduced as part of the [[List of updates (SSBU)#3.1.0|3.1.0 update]]. | '''VR''' is a feature in ''[[Super Smash Bros. Ultimate]]'' that allows players to spectate and play single-player matches using the [[wikipedia:Nintendo Labo#VR Kit|Nintendo Labo VR Goggles]]. VR functionality was introduced as part of the [[List of updates (SSBU)#3.1.0|3.1.0 update]]. | ||
A | ==Overview== | ||
{ | The VR icon is located in the upper-righthand corner of the [[Games & More]] section, which depicts the Labo headset with "VR" underneath. While initially a blue-gray color, it turns into diagonal cyan, yellow and magenta stripes. A ''Help'' option is availble by pressing the [[Y button]], which will take the player to a series of instructions on how to use the VR mode. | ||
Upon selecting the icon, a warning label will appear. It states that an adult should read it before proceeding. The VR goggles should only be used when seated, the player must be mindful of their surroundings at all times, and frequent breaks should be taken to avoid eye strain, fatigue and motion sickness. The mode should also be restricted for players age six and under. After clicking the OK button, the game instructs to insert the switch into the headset, though the remaining steps can technically be done without the headset. The screen then switches to two smaller screens, each with a fish eye lens effect. After making sure the goggles work and pressing the OK button, the goggles must be held still, preferably on a flat surface for calibration. When the process is complete and the OK button is pressed, the setup is finished and the camera now follows the head movements of the player. If the goggles are put down or become uncalibrated for any reason, a special screen that says to reset the direction appears. It goes away by either returning to the original positon or pressing the right control stick. | |||
The first screen is a special rules page, where elements like time limit, CPU level, stage selection, launch rate, score display, and show damage can be adjusted. Only offline timed matches (can be set from 1:00 to 10:00) can be played in this mode. Items and Final Smashes are disabled. After making the rules, the stage selection screen is next. 59 stages are currently selectable in this mode, with 12 of them having support for full 360° camera movement. The other 47 stage will pop up a message to recalibrate the goggles when taken outside the camera parameters. The next screen is character selection, where the player decides who plays as what fighter. Every player slot is automatically assigned a CPU. However, the player can join the battle themselves by changing the first CPU to Player 1. | |||
During a match where the player is fighting, they can access camera controls in the pause menu. They can zoom in with the [[ZL button]] and zoom out with the [[ZR button]]. The in game effects disappear after zooming in enough. The player can pan around the stage with the left control stick, reset the camera by pressing the right control stick, and hide the display by clicking both the [[X button]] and down on the d-pad. The ability to rotate the camera with the right analog stick is removed, as the function is now tied to the switch gyroscope, and the movement of the player's head by extension. All other camera controls and features are disabled. If the player is spectating, the features are always available and the camera controls option in the pause menu is removed. The ''Move List'' and ''Connect Controller'' options in the pause menu are also removed in this mode. | |||
After a while, a notice that mentions how the player should take a break will pop up. To exit VR mode, either go all the way back through the menus or hit the [[Home button]], then remove the switch from the headset and hit the close button. | |||
{{clr}} | |||
==Playable Stages== | |||
{|class="wikitable" style="text-align:center;margin:1em auto 1em auto" | {|class="wikitable" style="text-align:center;margin:1em auto 1em auto" | ||
!width=60px style="padding:0px;"| | !width=60px style="padding:0px;"| | ||
| Line 20: | Line 30: | ||
!width=60px style="padding:0px;"| | !width=60px style="padding:0px;"| | ||
|- | |- | ||
!colspan=12|Available stages | !colspan=12|Available stages in VR | ||
|- | |- | ||
|colspan=2|[[File:SSBU-Battlefield.png|150x90px|link=Battlefield (SSBU)]]<br>{{SSBU|Battlefield}}<br>{{symbol|smash|20px}} | |colspan=2|[[File:SSBU-Battlefield.png|150x90px|link=Battlefield (SSBU)]]<br>{{SSBU|Battlefield}}<br>{{symbol|smash|20px}} | ||
|colspan=2|[[File:SSBU-Small-Battlefield.jpg|150x90px|link=Small Battlefield]]<br>[[Small Battlefield]]<br>{{symbol|smash|20px}} | |||
|colspan=2|[[File:SSBU-Big-Battlefield.png|150x90px|link=Big Battlefield (SSBU)]]<br>{{SSBU|Big Battlefield}}<br>{{symbol|smash|20px}} | |colspan=2|[[File:SSBU-Big-Battlefield.png|150x90px|link=Big Battlefield (SSBU)]]<br>{{SSBU|Big Battlefield}}<br>{{symbol|smash|20px}} | ||
|colspan=2|[[File:SSBU-Final Destination.jpg|150x90px|link=Final Destination (SSBU)]]<br>{{SSBU|Final Destination}}<br>{{symbol|smash|20px}} | |colspan=2|[[File:SSBU-Final Destination.jpg|150x90px|link=Final Destination (SSBU)]]<br>{{SSBU|Final Destination}}<br>{{symbol|smash|20px}} | ||
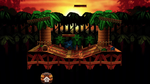
|colspan= | |colspan=2|[[File:SSBU-Kongo Jungle.png|150x90px|link=Kongo Jungle (SSB)]]<br>{{gameIcon|SSB}} [[Kongo Jungle (SSB)|Kongo Jungle]]<br>{{symbol|dk|20px}} | ||
| | |||
| | |||
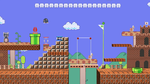
|colspan=2|[[File:SSBU-Mushroom Kingdom (SSB).png|150x90px|link=Mushroom Kingdom (SSB)]]<br>{{gameIcon|SSB}} [[Mushroom Kingdom (SSB)|Mushroom Kingdom]]<br>{{symbol|mario|20px}} | |colspan=2|[[File:SSBU-Mushroom Kingdom (SSB).png|150x90px|link=Mushroom Kingdom (SSB)]]<br>{{gameIcon|SSB}} [[Mushroom Kingdom (SSB)|Mushroom Kingdom]]<br>{{symbol|mario|20px}} | ||
|- | |- | ||
|colspan=2|[[File:SSBU- | |colspan=2|[[File:SSBU-Rainbow Cruise.png|150x90px|link=Rainbow Cruise]]<br>{{gameIcon|SSBM}} [[Rainbow Cruise]]*<br>{{symbol|mario|20px}} | ||
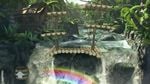
|colspan=2|[[File:SSBU-Kongo Falls.jpg|150x90px|link=Kongo Falls]]<br>{{gameIcon|SSBM}} [[Kongo Jungle (SSBM)|Kongo Falls]]<br>{{symbol|dk|20px}} | |colspan=2|[[File:SSBU-Kongo Falls.jpg|150x90px|link=Kongo Falls]]<br>{{gameIcon|SSBM}} [[Kongo Jungle (SSBM)|Kongo Falls]]<br>{{symbol|dk|20px}} | ||
|colspan=2|[[File:SSBU-Jungle Japes.png|150x90px|link=Jungle Japes]]<br>{{gameIcon|SSBM}} [[Jungle Japes]]<br>{{symbol|dk|20px}} | |colspan=2|[[File:SSBU-Jungle Japes.png|150x90px|link=Jungle Japes]]<br>{{gameIcon|SSBM}} [[Jungle Japes]]<br>{{symbol|dk|20px}} | ||
|colspan=2|[[File:SSBU-Great Bay.jpg|150x90px|link=Great Bay]]<br>{{gameIcon|SSBM}} [[Great Bay]]<br>{{symbol|zelda|20px}} | |||
|colspan=2|[[File:SSBU-Brinstar.png|150x90px|link=Brinstar]]<br>{{gameIcon|SSBM}} [[Brinstar]]<br>{{symbol|metroid|20px}} | |||
|colspan=2|[[File:SSBU-Yoshi's Story.png|150x90px|link=Yoshi's Story]]<br>{{gameIcon|SSBM}} [[Yoshi's Story]]<br>{{symbol|yoshi|20px}} | |colspan=2|[[File:SSBU-Yoshi's Story.png|150x90px|link=Yoshi's Story]]<br>{{gameIcon|SSBM}} [[Yoshi's Story]]<br>{{symbol|yoshi|20px}} | ||
|- | |- | ||
|colspan=2|[[File:SSBU-Green Greens.png|150x90px|link=Green Greens]]<br>{{gameIcon|SSBM}} [[Green Greens]]<br>{{symbol|kirby|20px}} | |colspan=2|[[File:SSBU-Green Greens.png|150x90px|link=Green Greens]]<br>{{gameIcon|SSBM}} [[Green Greens]]<br>{{symbol|kirby|20px}} | ||
|colspan=2|[[File:SSBU-Corneria.png|150x90px|link=Corneria]]<br>{{gameIcon|SSBM}} [[Corneria]]*<br>{{symbol|starfox|20px}} | |colspan=2|[[File:SSBU-Corneria.png|150x90px|link=Corneria]]<br>{{gameIcon|SSBM}} [[Corneria]]*<br>{{symbol|starfox|20px}} | ||
|colspan=2|[[File:SSBU-Onett.png|150x90px|link=Onett]]<br>{{gameIcon|SSBM}} [[Onett]]<br>{{symbol|mother|20px}} | |||
|colspan=2|[[File:SSBU- | |||
|colspan=2|[[File:SSBU-Big Blue.png|150x90px|link=Big Blue]]<br>{{gameIcon|SSBM}} [[Big Blue]]*<br>{{symbol|f-zero|20px}} | |colspan=2|[[File:SSBU-Big Blue.png|150x90px|link=Big Blue]]<br>{{gameIcon|SSBM}} [[Big Blue]]*<br>{{symbol|f-zero|20px}} | ||
|colspan=2|[[File:SSBU-Fourside.jpg|150x90px|link=Fourside]]<br>{{gameIcon|SSBM}} [[Fourside]]<br>{{symbol|earthbound|20px}} | |colspan=2|[[File:SSBU-Fourside.jpg|150x90px|link=Fourside]]<br>{{gameIcon|SSBM}} [[Fourside]]<br>{{symbol|earthbound|20px}} | ||
|colspan=2|[[File:SSBU-Delfino Plaza.jpg|150x90px|link=Delfino Plaza]]<br>{{gameIcon|SSBB}} [[Delfino Plaza]]*<br>{{symbol|mario|20px}} | |||
|- | |- | ||
|colspan=2|[[File:SSBU-Mario Circuit (SSBB).png|150x90px|link=Mario Circuit (SSBB)]]<br>{{gameIcon|SSBB}} [[Mario Circuit (SSBB)|Figure-8 Circuit]]<br>{{symbol|mario|20px}} | |||
|colspan=2|[[File:SSBU-WarioWare, Inc..png|150x90px|link=WarioWare, Inc.]]<br>{{gameIcon|SSBB}} [[WarioWare, Inc.]]<br>{{symbol|wario|20px}} | |||
|colspan=2|[[File:SSBU-Port Town Aero Dive.png|150x90px|link=Port Town Aero Dive]]<br>{{gameIcon|SSBB}} [[Port Town Aero Dive]]*<br>{{symbol|f-zero|20px}} | |||
|colspan=2|[[File:SSBU-Castle Siege.png|150x90px|link=Castle Siege]]<br>{{gameIcon|SSBB}} [[Castle Siege]]<br>{{symbol|fe|20px}} | |||
|colspan=2|[[File:SSBU-Smashville.png|150x90px|link=Smashville]]<br>{{gameIcon|SSBB}} [[Smashville]]<br>{{symbol|ac|20px}} | |||
|colspan=2|[[File:SSBU-Summit.png|150x90px|link=Summit]]<br>{{gameIcon|SSBB}} [[Summit]]<br>{{symbol|ic|20px}} | |||
|- | |||
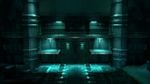
|colspan=2|[[File:SSBU-Shadow Moses Island 2.jpg|150x90px|link=Shadow Moses Island]]<br>{{gameIcon|SSBB}} [[Shadow Moses Island]]<br>{{symbol|mg|20px}} | |||
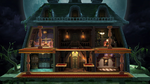
|colspan=2|[[File:SSBU-Luigi's_Mansion.png|150x90px|link=Luigi's Mansion]]<br>{{gameIcon|SSBB}} [[Luigi's Mansion]]<br>{{symbol|mario|20px}} | |||
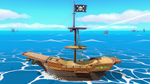
|colspan=2|[[File:SSBU-Pirate Ship.png|150x90px|link=Pirate Ship]]<br>{{gameIcon|SSBB}} [[Pirate Ship]]*<br>{{symbol|zelda|20px}} | |||
|colspan=2|[[File:SSBU-Paper_Mario.png|150x90px|link=Paper Mario]]<br>{{gameIcon|SSB4-3DS}} [[Paper Mario]]<br>{{symbol|mario|20px}} | |||
|colspan=2|[[File:SSBU-Spirit Train.png|150x90px|link=Spirit Train]]<br>{{gameIcon|SSB4-3DS}} [[Spirit Train]]<br>{{symbol|zelda|20px}} | |||
|colspan=2|[[File:SSBU-Prism Tower.png|150x90px|link=Prism Tower]]<br>{{gameIcon|SSB4-3DS}} [[Prism Tower]]*<br>{{symbol|pokémon|20px}} | |||
|- | |||
|colspan=2|[[File:SSBU-Mute City (3DS).png|150x90px|link=Mute City (SSB4)]]<br>{{gameIcon|SSB4-3DS}} [[Mute City (SSB4)|Mute City SNES]]*<br>{{symbol|f-zero|20px}} | |||
|colspan=2|[[File:SSBU-Magicant.png|150x90px|link=Magicant]]<br>{{gameIcon|SSB4-3DS}} [[Magicant]]<br>{{symbol|earthbound|20px}} | |colspan=2|[[File:SSBU-Magicant.png|150x90px|link=Magicant]]<br>{{gameIcon|SSB4-3DS}} [[Magicant]]<br>{{symbol|earthbound|20px}} | ||
|colspan=2|[[File:SSBU-Arena Ferox.png|150x90px|link=Arena Ferox]]<br>{{gameIcon|SSB4-3DS}} [[Arena Ferox]]<br>{{symbol|fe|20px}} | |colspan=2|[[File:SSBU-Arena Ferox.png|150x90px|link=Arena Ferox]]<br>{{gameIcon|SSB4-3DS}} [[Arena Ferox]]<br>{{symbol|fe|20px}} | ||
|colspan=2|[[File:SSBU- | |colspan=2|[[File:SSBU-Tortimer Island.png|150x90px|link=Tortimer Island]]<br>{{gameIcon|SSB4-3DS}} [[Tortimer Island]]<br>{{symbol|ac|20px}} | ||
|colspan=2|[[File:SSBU- | |colspan=2|[[File:SSBU-Living Room.png|150x90px|link=Living Room]]<br>{{gameIcon|SSB4-3DS}} [[Living Room]]<br>{{symbol|nintendogs|20px}} | ||
|colspan=2|[[File:SSBU-Find Mii.png|150x90px|link=Find Mii]]<br>{{gameIcon|SSB4-3DS}} [[Find Mii]]<br>{{symbol|streetpass|20px}} | |||
|- | |- | ||
|colspan=2|[[File:SSBU- | |colspan=2|[[File:SSBU-Tomodachi Life.png|150x90px|link=Tomodachi Life]]<br>{{gameIcon|SSB4-3DS}} [[Tomodachi Life]]<br>{{symbol|tomodachi|20px}} | ||
|colspan=2|[[File:SSBU- | |colspan=2|[[File:SSBU-PictoChat 2.png|150x90px|link=PictoChat 2]]<br>{{gameIcon|SSB4-3DS}}[[PictoChat 2]]<br>{{symbol|ds|20px}} | ||
|colspan=2|[[File:SSBU-Mario Circuit (SSB4).png|150x90px|link=Mario Circuit (SSB4)]]<br>{{gameIcon|SSB4-U}} {{SSB4|Mario Circuit}}*<br>{{symbol|mario|20px}} | |||
|colspan=2|[[File:SSBU-Skyloft.png|150x90px|link=Skyloft]]<br>{{gameIcon|SSB4-U}} [[Skyloft]]<br>{{symbol|zelda|20px}} | |||
|colspan=2|[[File:SSBU-Garden of Hope.png|150x90px|link=Garden of Hope]]<br>{{gameIcon|SSB4-U}} [[Garden of Hope]]<br>{{symbol|pikmin|20px}} | |colspan=2|[[File:SSBU-Garden of Hope.png|150x90px|link=Garden of Hope]]<br>{{gameIcon|SSB4-U}} [[Garden of Hope]]<br>{{symbol|pikmin|20px}} | ||
|colspan=2|[[File:SSBU-Town and City.png|150x90px|link=Town and City]]<br>{{gameIcon|SSB4-U}} [[Town and City]]<br>{{symbol|ac|20px}} | |colspan=2|[[File:SSBU-Town and City.png|150x90px|link=Town and City]]<br>{{gameIcon|SSB4-U}} [[Town and City]]<br>{{symbol|ac|20px}} | ||
|- | |- | ||
|colspan=2|[[File:SSBU-Gaur Plain.png|150x90px|link=Gaur Plain]]<br>{{gameIcon|SSB4}} [[Gaur Plain]]<br>{{symbol|xenoblade|20px}} | |colspan=2|[[File:SSBU-Gaur Plain.png|150x90px|link=Gaur Plain]]<br>{{gameIcon|SSB4}} [[Gaur Plain]]<br>{{symbol|xenoblade|20px}} | ||
|colspan=2|[[File:SSBU-Duck Hunt.png|150x90px|link=Duck Hunt (stage)]]<br>{{gameIcon|SSB4}} [[Duck Hunt (stage)|Duck Hunt]]<br>{{symbol|dh|20px}} | |colspan=2|[[File:SSBU-Duck Hunt.png|150x90px|link=Duck Hunt (stage)]]<br>{{gameIcon|SSB4}} [[Duck Hunt (stage)|Duck Hunt]]<br>{{symbol|dh|20px}} | ||
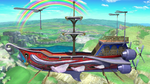
|colspan=2|[[File:SSBU- | |colspan=2|[[File:SSBU-Pilotwings.png|150x90px|link=Pilotwings]]<br>{{gameIcon|SSB4-U}} [[Pilotwings]]*<br>{{symbol|pw|20px}} | ||
|colspan=2|[[File:SSBU-Wuhu Island.png|150x90px|link=Wuhu Island]]<br>{{gameIcon|SSB4-U}} [[Wuhu Island]]*<br>{{symbol|wiisports|20px}} | |||
|colspan=2|[[File:SSBU-Suzaku Castle.png|150x90px|link=Suzaku Castle]]<br>{{gameIcon|SSB4}} [[Suzaku Castle]]<br>{{symbol|streetfighter|20px}} | |colspan=2|[[File:SSBU-Suzaku Castle.png|150x90px|link=Suzaku Castle]]<br>{{gameIcon|SSB4}} [[Suzaku Castle]]<br>{{symbol|streetfighter|20px}} | ||
|colspan=2|[[File:SSBU- | |colspan=2|[[File:SSBU-New Donk City Hall.jpg|150x90px|link=New Donk City Hall]]<br>[[New Donk City Hall]]*<br>{{symbol|mario|20px}} | ||
|- | |- | ||
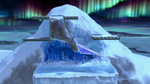
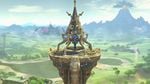
|colspan=2|[[File:SSBU-Great Plateau Tower.jpg|150x90px|link=Great Plateau Tower]]<br>[[Great Plateau Tower]]<br>{{symbol|zelda|20px}} | |colspan=2|[[File:SSBU-Great Plateau Tower.jpg|150x90px|link=Great Plateau Tower]]<br>[[Great Plateau Tower]]<br>{{symbol|zelda|20px}} | ||
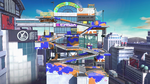
|colspan=2|[[File:SSBU-Moray Towers.png|150x90px|link=Moray Towers]]<br>[[Moray Towers]]<br>{{symbol|splatoon|20px}} | |colspan=2|[[File:SSBU-Moray Towers.png|150x90px|link=Moray Towers]]<br>[[Moray Towers]]<br>{{symbol|splatoon|20px}} | ||
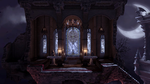
|colspan=2|[[File:SSBU-Dracula's Castle.png|150x90px|link=Dracula's Castle]]<br>[[Dracula's Castle]]<br>{{symbol|castlevania|20px}} | |colspan=2|[[File:SSBU-Dracula's Castle.png|150x90px|link=Dracula's Castle]]<br>[[Dracula's Castle]]<br>{{symbol|castlevania|20px}} | ||
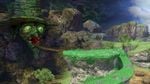
|colspan=2| | |colspan=2|[[File:SSBU-Spiral Mountain.jpg|150x90px|link=Spiral Mountain]]<br>[[Spiral Mountain]]*<br>{{symbol|banjokazooie|20px}} | ||
|colspan=2|[[File:SSBU-King of Fighters Stadium.jpg|150x90px|link=King of Fighters Stadium]]<br>[[King of Fighters Stadium]]<br>{{symbol|fatalfury|20px}} | |||
|colspan=2|[[File:SSBU-Garreg_Mach_Monastery.jpg|150x90px|link=Garreg Mach Monastery]]<br><small>[[Garreg Mach Monastery]]<br>{{symbol|fe|20px}} | |||
|- | |||
|colspan=2|[[File:SSBU-Spring Stadium.jpg|150x90px|link=Spring Stadium]]<br>[[Spring Stadium]]<br>{{symbol|arms|20px}} | |||
|colspan=2|[[File:SSBU_Northern_Cave.png|150x90px|link=Northern Cave]]<br>[[Northern Cave]]<br>{{symbol|finalfantasy|20px}} | |||
|colspan=2|[[File:SSBU-Cloud Sea of Alrest.jpg|150x90px|link=Cloud Sea of Alrest]]<br>[[Cloud Sea of Alrest]]<br>{{symbol|xenoblade|20px}} | |||
|colspan=2|[[File:SSBU-Mishima Dojo.png|150x90px|link=Mishima Dojo]]<br>[[Mishima Dojo]]<br>{{symbol|tekken|20px}} | |||
|colspan=2|[[File:SSBU-Hollow Bastion.jpg|150x90px|link=Hollow Bastion]]<br>[[Hollow Bastion]]<br>{{symbol|kingdomhearts|20px}} | |||
|} | |} | ||
"*" indicates that the stage can be viewed in | "*" indicates that the stage can be viewed in 360°. | ||
==Trivia== | |||
*Moving the camera so that it faces behind the stage is impossible on stages that do not support 360° view; the screen simply fades to black, with a message telling the player to reset the camera's direction. Though, it is possible to see the void behind where the camera normally is if the player turns the camera just enough to see it where the message does not pop up. | |||
*The Mii Fighters cannot be selected in this mode; the reason for this is currently unknown. | |||
*The Stage Select screen, the Fighter Select screen and the Victory/Results screen are bordered 16:9. The gameplay HUD and Pause Menu are open matte 16:9. | |||
**The screen cut to black and transitions are used in a black background instead of white after each battle. | |||
***If Joker wins however, his screen transition is used instead. | |||
**However, the Versus screen is not shown when the game is loading. | |||
*While they cannot be normally selected in VR, 75 m, Midgar, and Mementos have [https://tcrf.net/Super_Smash_Bros._Ultimate#Labo_VR_Unused_Stage_Data properly defined camera parameters] that allow the stages to be moved around. | |||
*Masahiro Sakurai revealed in a [[YouTube]] video that VR support was in his initial project pitch for ''Ultimate'', years before Nintendo Labo officially released.<ref>[https://www.youtube.com/watch?v=RDrNWAHaKfI=198s Super Smash Bros. Ultimate [Game Concepts]]</ref> | |||
<!--Do not put the fact that it is possible to play this mode without the VR Goggles. This is quite obvious, given how it's a fully selectable mode. The game does not check whether one has the goggles or not.--> | |||
== | ==References== | ||
{{reflist}} | |||
{{SSBUMenus}} | {{SSBUMenus}} | ||
[[Category:Modes (SSBU)]] | |||
[[Category:Free downloadable content]] | |||
Latest revision as of 19:45, August 19, 2024

VR is a feature in Super Smash Bros. Ultimate that allows players to spectate and play single-player matches using the Nintendo Labo VR Goggles. VR functionality was introduced as part of the 3.1.0 update.
OverviewEdit
The VR icon is located in the upper-righthand corner of the Games & More section, which depicts the Labo headset with "VR" underneath. While initially a blue-gray color, it turns into diagonal cyan, yellow and magenta stripes. A Help option is availble by pressing the Y button, which will take the player to a series of instructions on how to use the VR mode.
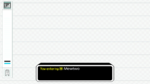
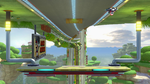
Upon selecting the icon, a warning label will appear. It states that an adult should read it before proceeding. The VR goggles should only be used when seated, the player must be mindful of their surroundings at all times, and frequent breaks should be taken to avoid eye strain, fatigue and motion sickness. The mode should also be restricted for players age six and under. After clicking the OK button, the game instructs to insert the switch into the headset, though the remaining steps can technically be done without the headset. The screen then switches to two smaller screens, each with a fish eye lens effect. After making sure the goggles work and pressing the OK button, the goggles must be held still, preferably on a flat surface for calibration. When the process is complete and the OK button is pressed, the setup is finished and the camera now follows the head movements of the player. If the goggles are put down or become uncalibrated for any reason, a special screen that says to reset the direction appears. It goes away by either returning to the original positon or pressing the right control stick.
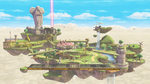
The first screen is a special rules page, where elements like time limit, CPU level, stage selection, launch rate, score display, and show damage can be adjusted. Only offline timed matches (can be set from 1:00 to 10:00) can be played in this mode. Items and Final Smashes are disabled. After making the rules, the stage selection screen is next. 59 stages are currently selectable in this mode, with 12 of them having support for full 360° camera movement. The other 47 stage will pop up a message to recalibrate the goggles when taken outside the camera parameters. The next screen is character selection, where the player decides who plays as what fighter. Every player slot is automatically assigned a CPU. However, the player can join the battle themselves by changing the first CPU to Player 1.
During a match where the player is fighting, they can access camera controls in the pause menu. They can zoom in with the ZL button and zoom out with the ZR button. The in game effects disappear after zooming in enough. The player can pan around the stage with the left control stick, reset the camera by pressing the right control stick, and hide the display by clicking both the X button and down on the d-pad. The ability to rotate the camera with the right analog stick is removed, as the function is now tied to the switch gyroscope, and the movement of the player's head by extension. All other camera controls and features are disabled. If the player is spectating, the features are always available and the camera controls option in the pause menu is removed. The Move List and Connect Controller options in the pause menu are also removed in this mode.
After a while, a notice that mentions how the player should take a break will pop up. To exit VR mode, either go all the way back through the menus or hit the Home button, then remove the switch from the headset and hit the close button.
Playable StagesEdit


"*" indicates that the stage can be viewed in 360°.
TriviaEdit
- Moving the camera so that it faces behind the stage is impossible on stages that do not support 360° view; the screen simply fades to black, with a message telling the player to reset the camera's direction. Though, it is possible to see the void behind where the camera normally is if the player turns the camera just enough to see it where the message does not pop up.
- The Mii Fighters cannot be selected in this mode; the reason for this is currently unknown.
- The Stage Select screen, the Fighter Select screen and the Victory/Results screen are bordered 16:9. The gameplay HUD and Pause Menu are open matte 16:9.
- The screen cut to black and transitions are used in a black background instead of white after each battle.
- If Joker wins however, his screen transition is used instead.
- However, the Versus screen is not shown when the game is loading.
- The screen cut to black and transitions are used in a black background instead of white after each battle.
- While they cannot be normally selected in VR, 75 m, Midgar, and Mementos have properly defined camera parameters that allow the stages to be moved around.
- Masahiro Sakurai revealed in a YouTube video that VR support was in his initial project pitch for Ultimate, years before Nintendo Labo officially released.[1]
ReferencesEdit